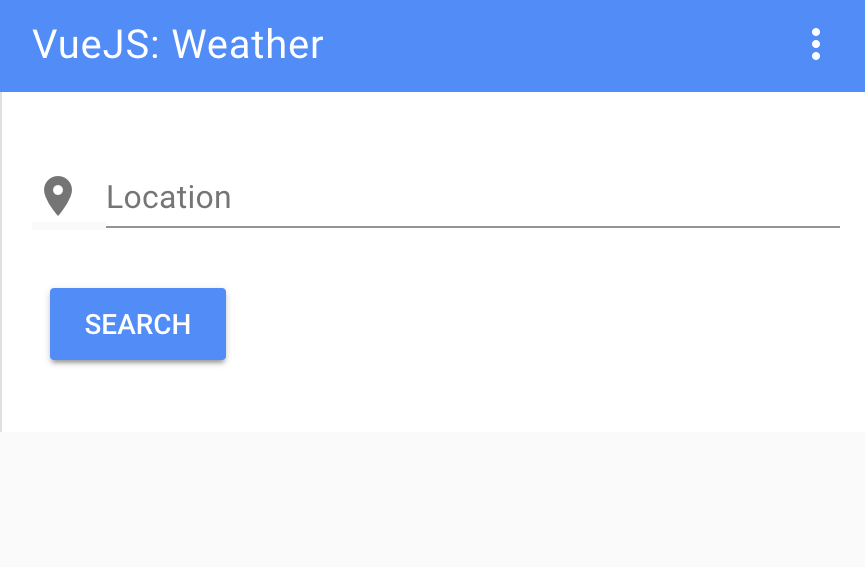
First, we will need to create the HTML tag that will hold everything.
Let's create in our app an HTML tag <weather>:
<md-app-content>
            <!-- OUR APP HERE -->
            <weather></weather>
          </md-app-content>
In the script section, let's create our first Vue function:
Vue.component('weather', {

});
As we said earlier, we will need the data, the method, and the template to display the content. Let's start with the data:
Vue.component('weather', {

    data: function(){
            return {
                weatherLocation: '',
                weatherApi: '05911854df7aa0be884df72549a75fd9',
                weather: [],
                displayWeather: false
            }
        },

});
The function will store the following things:
- The location set by the user
- Our API Key
- The data pulled out from the API
- A boolean set to display or not display the information
Next, we will need to add the method, as follows:
methods: {
            getWeather: function()
            {
                return this.$http.get('http://api.openweathermap.org/data/2.5/weather?q='+ this.weatherLocation +'&appid=' + this.weatherApi).then((response) => {
                    this.weather = response.body;
                    this.displayWeather = true
                }, (response) => {
                    this.weather = [];
                    this.displayWeather = false
                });
            }
        },
We will set the getWeather function, which will do the following things:
- Call the API with our API key and the location set by the user by the preceding data
- Store the data pulled from the API and set the display information to true
- If there is no answer or content from the API, the display information will be set to false
Finally, the template will be the following:
template: '<div id="weatherApp">' +
                  '<form v-on:submit.prevent="getWeather"><md-field> <md-icon>place</md-icon> <label>Location</label> <md-input type="text" name="weatherLocation" v-model="weatherLocation"></md-input></md-field>' +
                    '<md-button class="md-primary md-raised" type="submit">Search</md-button> '+
                    '</p>' +
                '</form>' +
                '<div v-if="displayWeather" class="container display-weather-section"><md-card><md-card-header><h1>{{ weather.name }}</h1></md-card-header>' +
                '<md-card-content><weather-display v-bind:weatherDisplay="weather.weather[0]"></weather-display>' +
                '<temperature v-bind:temperature="weather.main"></temperature>' +
                '<clouds v-bind:cloud="weather.clouds"></clouds>' +
                '<sun v-bind:sun="weather.sys"></sun>' +
                '</md-card-content></md-card>' +
                '</div></div>'

      });
Then, we will pass these pieces of information to a template we create for each. For the weather name and description, we have the following template:
Vue.component('weather-display', {
        props: ['weatherDisplay'],

        template: '<div id="weatherDisplay">' +
                    '<h2>{{ weatherDisplay.main }}</h2>' +
                    '<p>{{ weatherDisplay.description }}</p>' +
                    '</div>'
      });
We use the props property to pass the data and the template property to create the HTML with the value.
Then, we have the temperature. We will display the average temperature, maximum temperature, and minimum temperature. The data we get from OpenWeather API is in the format of Kelvin, so we need to create a function to convert the temperature.
To convert Kelvin to Celsius, you simply need to subtract 273.15 from the number:
Vue.component('temperature', {
        props: ['temperature'],

        methods: {
            displayTemp: function( temp )
            {
                return parseFloat(temp - 273.15).toFixed(2);
            }
        },

        template: '<div id="temp">' +
                    '<h2>Temperature</h2>' +
                    '<p>Avg Temp - {{ displayTemp(temperature.temp) }}c</p>' +
                    '<p>Min Temp - {{ displayTemp(temperature.temp_min) }}c</p>' +
                    '<p>Max Temp - {{ displayTemp(temperature.temp_max) }}c</p>' +
                    '</div>'
      });
For the cloud, we simply need to display the text:
Vue.component('clouds', {
        props: ['cloud'],

        template: '<div id="cloud">' +
                    '<h2>Clouds</h2>' +
                    '<p>Coverage - {{ cloud.all }}%</p>' +
                    '</div>'
      });
Finally, we have the sunrise and sunset. The format we get from OpenWeather is in timestamp though, so we will need to convert it to date time:
Vue.component('sun', {
        props: ['sun'],

        methods: {
            timestampToDate: function( timestamp ){
                var date = new Date(timestamp*1000);
                return date.toString();
            }
        },

        template: '<div id="sun">' +
                    '<h2>Sun</h2>' +
                    '<p>Sunrise - {{ timestampToDate(sun.sunrise) }}</p>' +
                    '<p>Sunset - {{ timestampToDate(sun.sunset) }}</p>' +
                '</div>'
      });
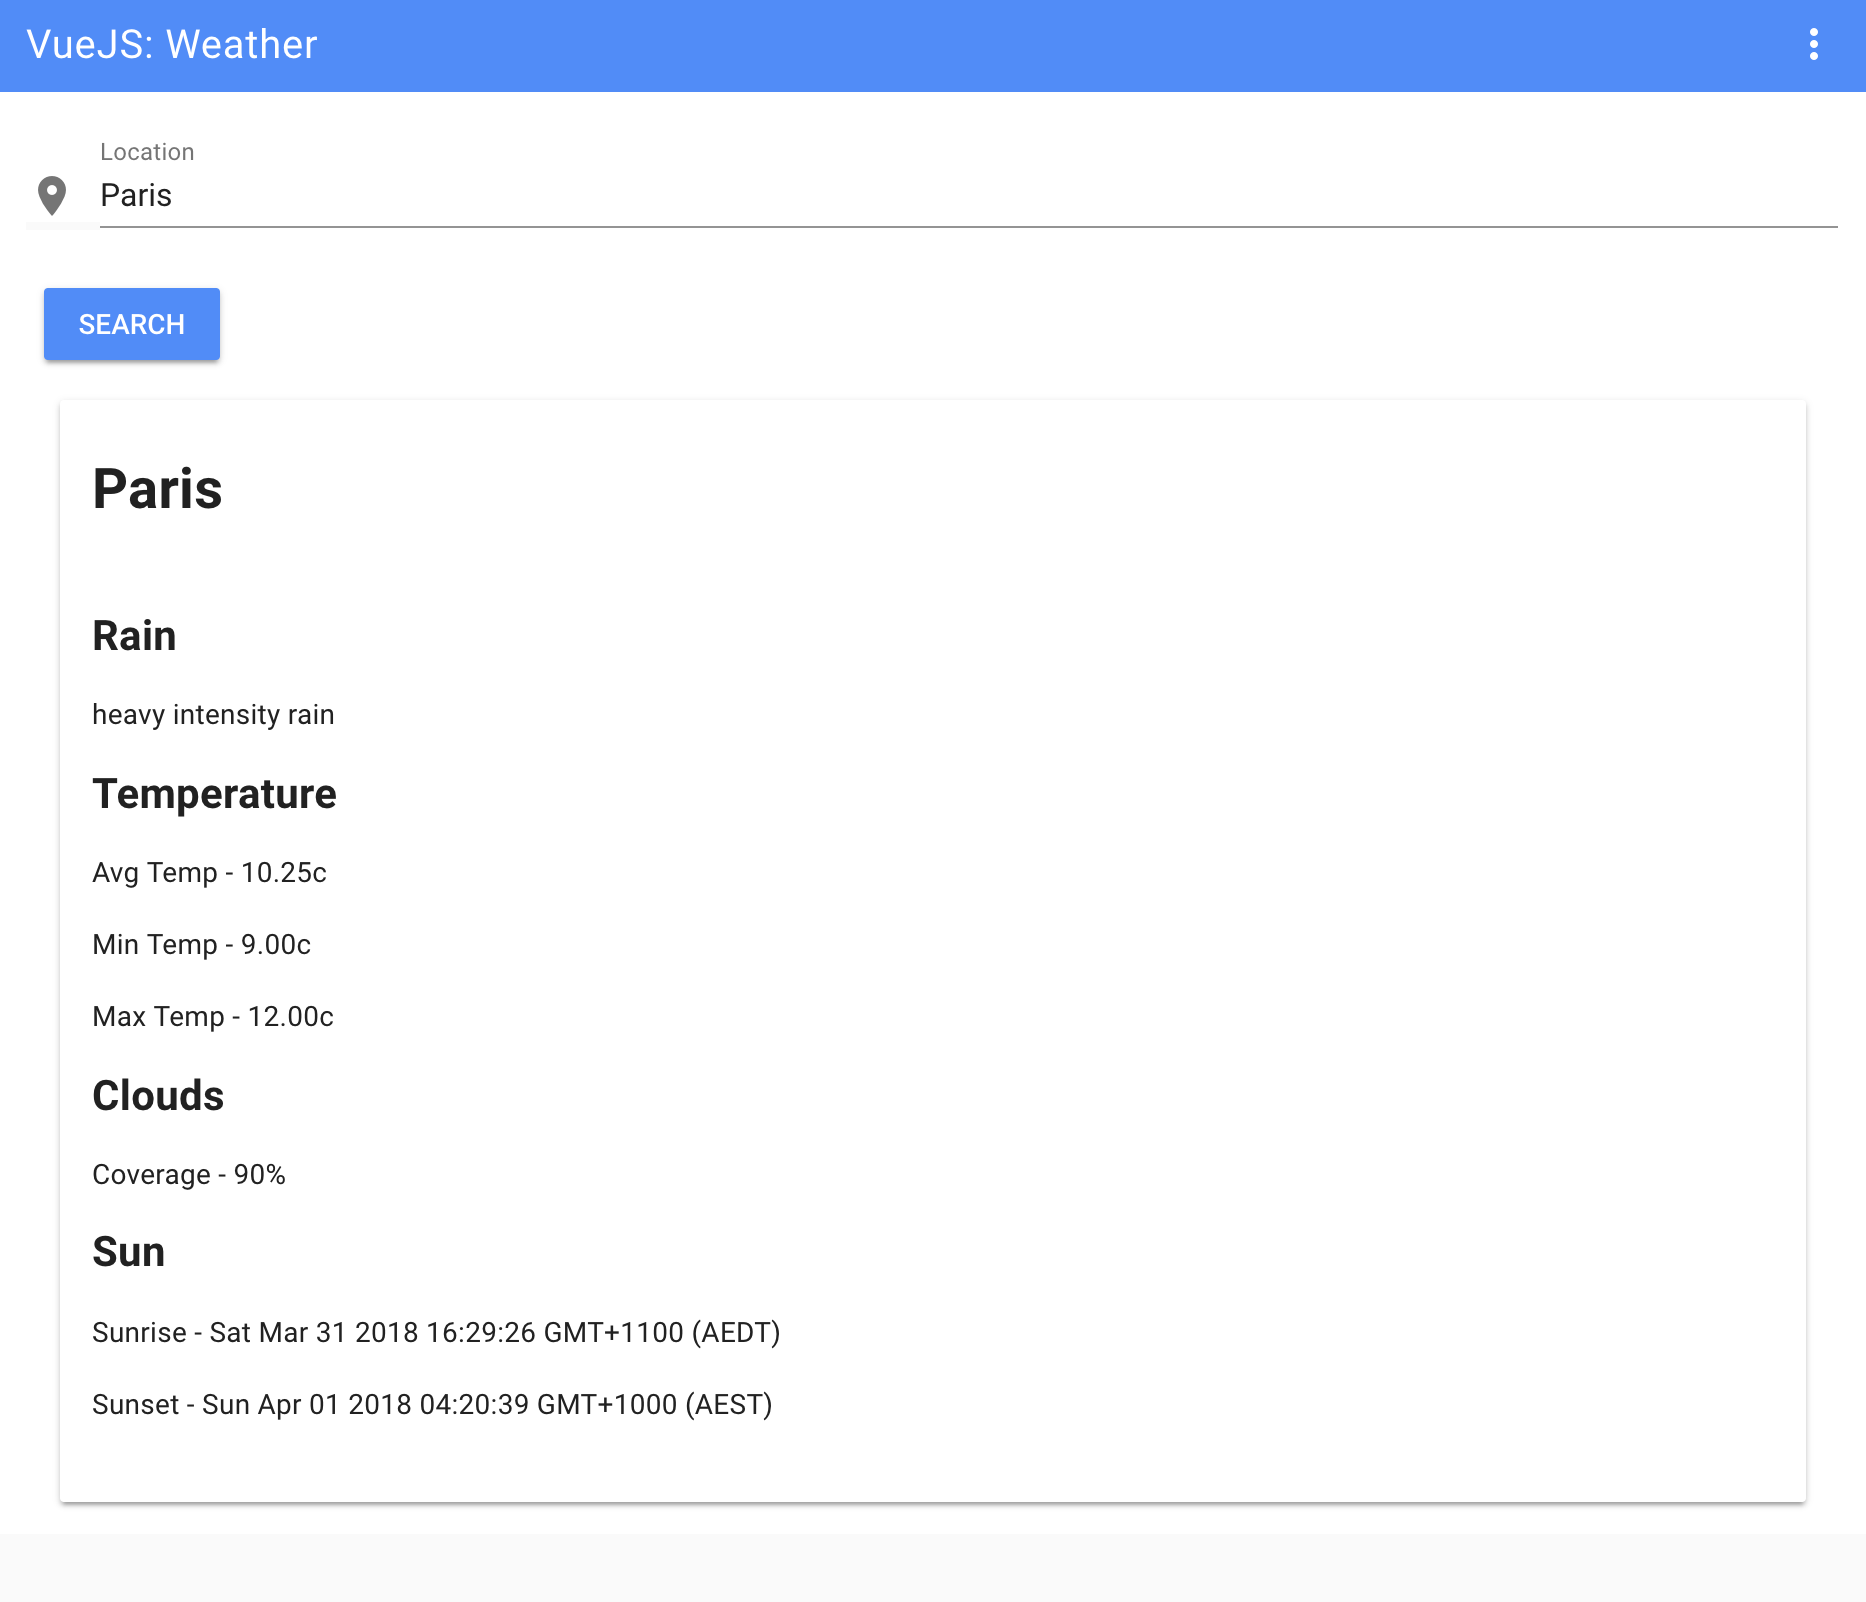
Our app is now finalized. Let's check out how it looks:
Then, we have our result page: