
To get started, let's create a folder called Racing Club Bootstrap. In Atom, we will open a new window, click on Add Project Folder..., and locate the Racing Club Bootstrap.
Inside, let's create our index.html file. Click on Create New (Ctrl + N or Cmd + N), and save it so that we can name the file index.html.
Once done, let's head to the Bootstrap website (http://getbootstrap.com/docs/4.0/getting-started/introduction/), specifically, the Introduction section.
In this section, Bootstrap provides you with a template to kick-start your project:
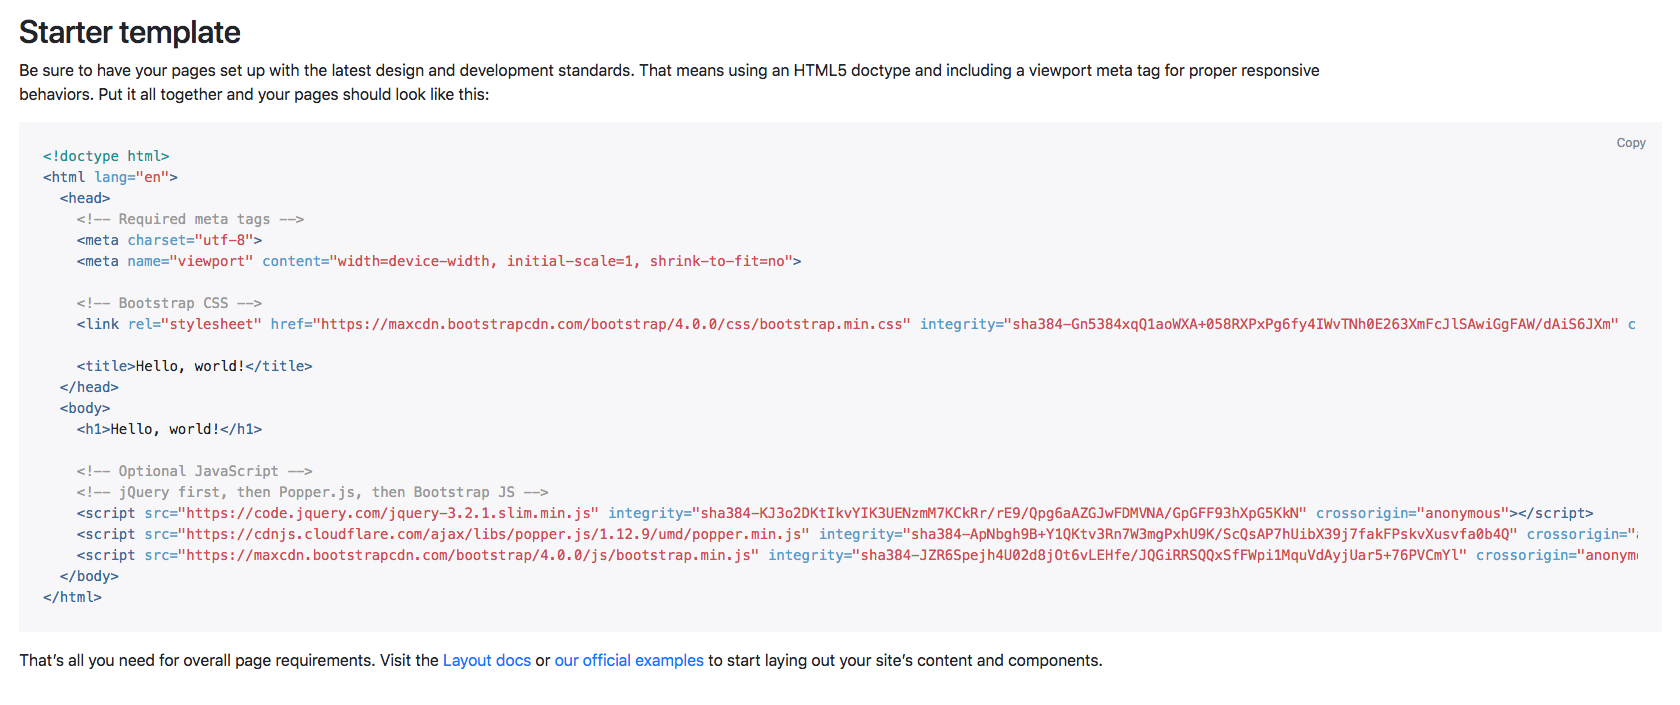
Copy the code provided and paste it into your index.html file. We can remove <h1>Hello, world!</h1> from the template.
We're ready to start, but we also want to write our own CSS. For that, let's create a folder called css and a CSS file called styles.css.
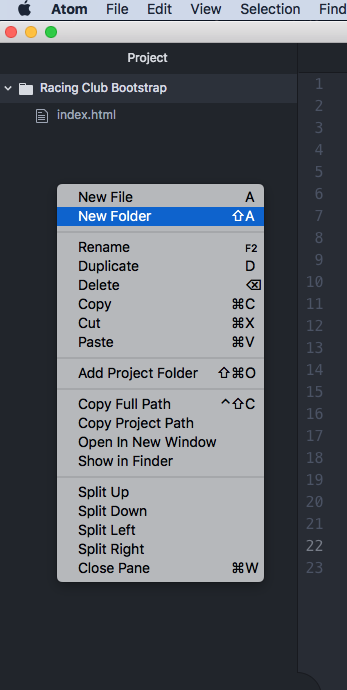
To do that quickly, you can right-click on the left-hand bar in Atom and click on New Folder, as shown in the following screenshot:
When you create a CSS file, you will always need to link it to your HTML file, otherwise it doesn't work. If you remember to link it, you'll have to add the following code:
<link rel="stylesheet" href="css/styles.css">
Now that we have created our CSS file and linked it to our HTML file, the last thing we need to do is to duplicate the img and fonts folders we created in our last project. This is easier, as we will recreate the same page. Just copy and paste those folders to our new project.
Don't forget to link the font CSS to your HTML. Add it before your styles.css:
<link rel="stylesheet" href="fonts/font.css">
Install the Google Font Roboto:
<link href="https://fonts.googleapis.com/css?family=Roboto:400,700" rel="stylesheet">
Now that we're all set, let's get started.