With the earlier website that we built, we had our own grid system. However, now, we can simply use Bootstrap grid, which is way better and more practical than the one we created.
Let's start with the HTML:
<div class="blog py-5">
      <div class="container">
        <div class="row">
          <div class="col-md-4">
            <div class="card mb-4">
              <img class="card-img-top" alt="Thumbnail Blog" src="img/blog-img/blog1.jpg">
              <div class="card-body">
                <small class="text-muted">09th January 2016</small>
                <h4 class="font-weight-bold">Racing Club Advan Neova Challenge Round 3 Update</h4>
                <p class="card-text">FINAL ROUND: Labour Day Trackday Wakefield Park. Last chance to compete in the Circuit Club Advan Neova Challenge 2016!
There was much anticipation with Jason's big power Evo competing at Round 3, however some suspected engi... </p>
                <a href="#" class="btn btn-outline-primary">Read more</a>
              </div>
            </div>
          </div>
      </div>
    </div>
In the preceding code, you can note that there are a lot of .py-5 .my-5 classes. Those classes are spacing classes; they've been added to the last version of Bootstrap, so you can add spacing just with a simple class. To understand how you can use them, navigate to the Spacing section in the Utilities section of the documentation:

Also, you would have noticed we used the grid for each card. The grid is a bit tricky to understand at first, but, once you get it, it's very powerful and useful. The best thing to do is to play around with it. You can play around with the grid by checking the given examples at https://getbootstrap.com/docs/4.0/layout/grid/.
Here, we added the .col-md-4 class because we want three same blocks with the same width, as Bootstrap works with a 12-column system—12 divided by 3 equals 4. Furthermore, we used the md property so that it only applies when the browser resolution is bigger than 768px.
Let's now duplicate the card six times for our six blog posts:
<!-- BLOG SECTION -->

    <div class="blog py-5">
      <div class="container">
        <div class="row">
          <div class="col-md-4">
            <div class="card mb-4">
              <img class="card-img-top" alt="Thumbnail Blog" src="img/blog-img/blog1.jpg">
              <div class="card-body">
                <small class="text-muted">09th January 2016</small>
                <h4 class="font-weight-bold">Racing Club Advan Neova Challenge Round 3 Update</h4>
                <p class="card-text">FINAL ROUND: Labour Day Trackday Wakefield Park. Last chance to compete in the Circuit Club Advan Neova Challenge 2016!
There was much anticipation with Jason's big power Evo competing at Round 3, however some suspected engi... </p>
                <a href="#" class="btn btn-outline-primary">Read more</a>
              </div>
            </div>
          </div>
          <div class="col-md-4">
            <div class="card mb-4">
              <img class="card-img-top" alt="Thumbnail Blog" src="img/blog-img/blog2.jpg">
              <div class="card-body">
                <small class="text-muted">09th January 2016</small>
                <h4 class="font-weight-bold">Hidden Behind the Scenes</h4>
                <p class="card-text">Originally posted by Narada Kudinar, 23.08.11.
At our Trackdays, we get a variety - owners with their girlfriends, owners with their mates, owners and their mechanics - but there is one combination I am truly at envy with. It's the owners and their Dads. </p>
                <a href="#" class="btn btn-outline-primary">Read more</a>
              </div>
            </div>
          </div>
          <div class="col-md-4">
            <div class="card mb-4">
              <img class="card-img-top" alt="Thumbnail Blog" src="img/blog-img/blog3.jpg">
              <div class="card-body">
                <small class="text-muted">04th July 2013</small>
                <h4 class="font-weight-bold">Introducing Advan Trackdays!</h4>
                <p class="card-text">For the first time, Yokohama Advan Tyres are hosting their very own Trackdays, hosted by your's truly! The aim? To thank their loyal customers by providing a bargain event as well as introduce new Advan tyres to those who don't use them yet.. </p>
                <a href="#" class="btn btn-outline-primary">Read more</a>
              </div>
            </div>
          </div>
          <div class="col-md-4">
            <div class="card mb-4">
              <img class="card-img-top" alt="Thumbnail Blog" src="img/blog-img/blog4.jpg">
              <div class="card-body">
                <small class="text-muted">03th January 2016</small>
                <h4 class="font-weight-bold">ANZAC Day Spots Running Out!</h4>
                <p class="card-text">FINAL ROUND: Labour Day Trackday Wakefield Park. Last chance to compete in the Circuit Club Advan Neova Challenge 2016!
There was much anticipation with Jason's big power Evo competing at Round 3, however some suspected engi… </p>
                <a href="#" class="btn btn-outline-primary">Read more</a>
              </div>
            </div>
          </div>
          <div class="col-md-4">
            <div class="card mb-4">
              <img class="card-img-top" alt="Thumbnail Blog" src="img/blog-img/blog5.jpg">
              <div class="card-body">
                <small class="text-muted">02th January 2016</small>
                <h4 class="font-weight-bold">10 Year Anniversary Details Now Available!</h4>
                <p class="card-text">Originally posted by Narada Kudinar, 23.08.11.
At our Trackdays, we get a variety - owners with their girlfriends, owners with their mates, owners and their mechanics - but there is one combination I am truly at envy with. It's the owners and their Dads.</p>
                <a href="#" class="btn btn-outline-primary">Read more</a>
              </div>
            </div>
          </div>
          <div class="col-md-4">
            <div class="card mb-4">
              <img class="card-img-top" alt="Thumbnail Blog" src="img/blog-img/blog6.jpg">
              <div class="card-body">
                <small class="text-muted">01th January 2016</small>
                <h4 class="font-weight-bold">Prepare for EPICNESS</h4>
                <p class="card-text">For the first time, Yokohama Advan Tyres are hosting their very own Trackdays, hosted by your's truly! The aim? To thank their loyal customers by providing a bargain event as well as introduce new Advan tyres to those who don't use them yet... </p>
                <a href="#" class="btn btn-outline-primary">Read more</a>
              </div>
            </div>
          </div>
      </div>
    </div>

    <!-- END BLOG SECTION -->
The last thing is to add the Show more button. We also need to center the button horizontally. For that, we'll use the .d-flex flexbox Bootstrap class paired with the .align-items-center class:
<div class="row d-flex align-items-center py-5">
    <div class="mx-auto">
        <a href="#" class="btn btn-primary">Show more</a>
    </div>
</div>
Finally, to make it centered, we just need to add the .mx-auto class, so the left and right margins are in auto.
Let's check what we have now:
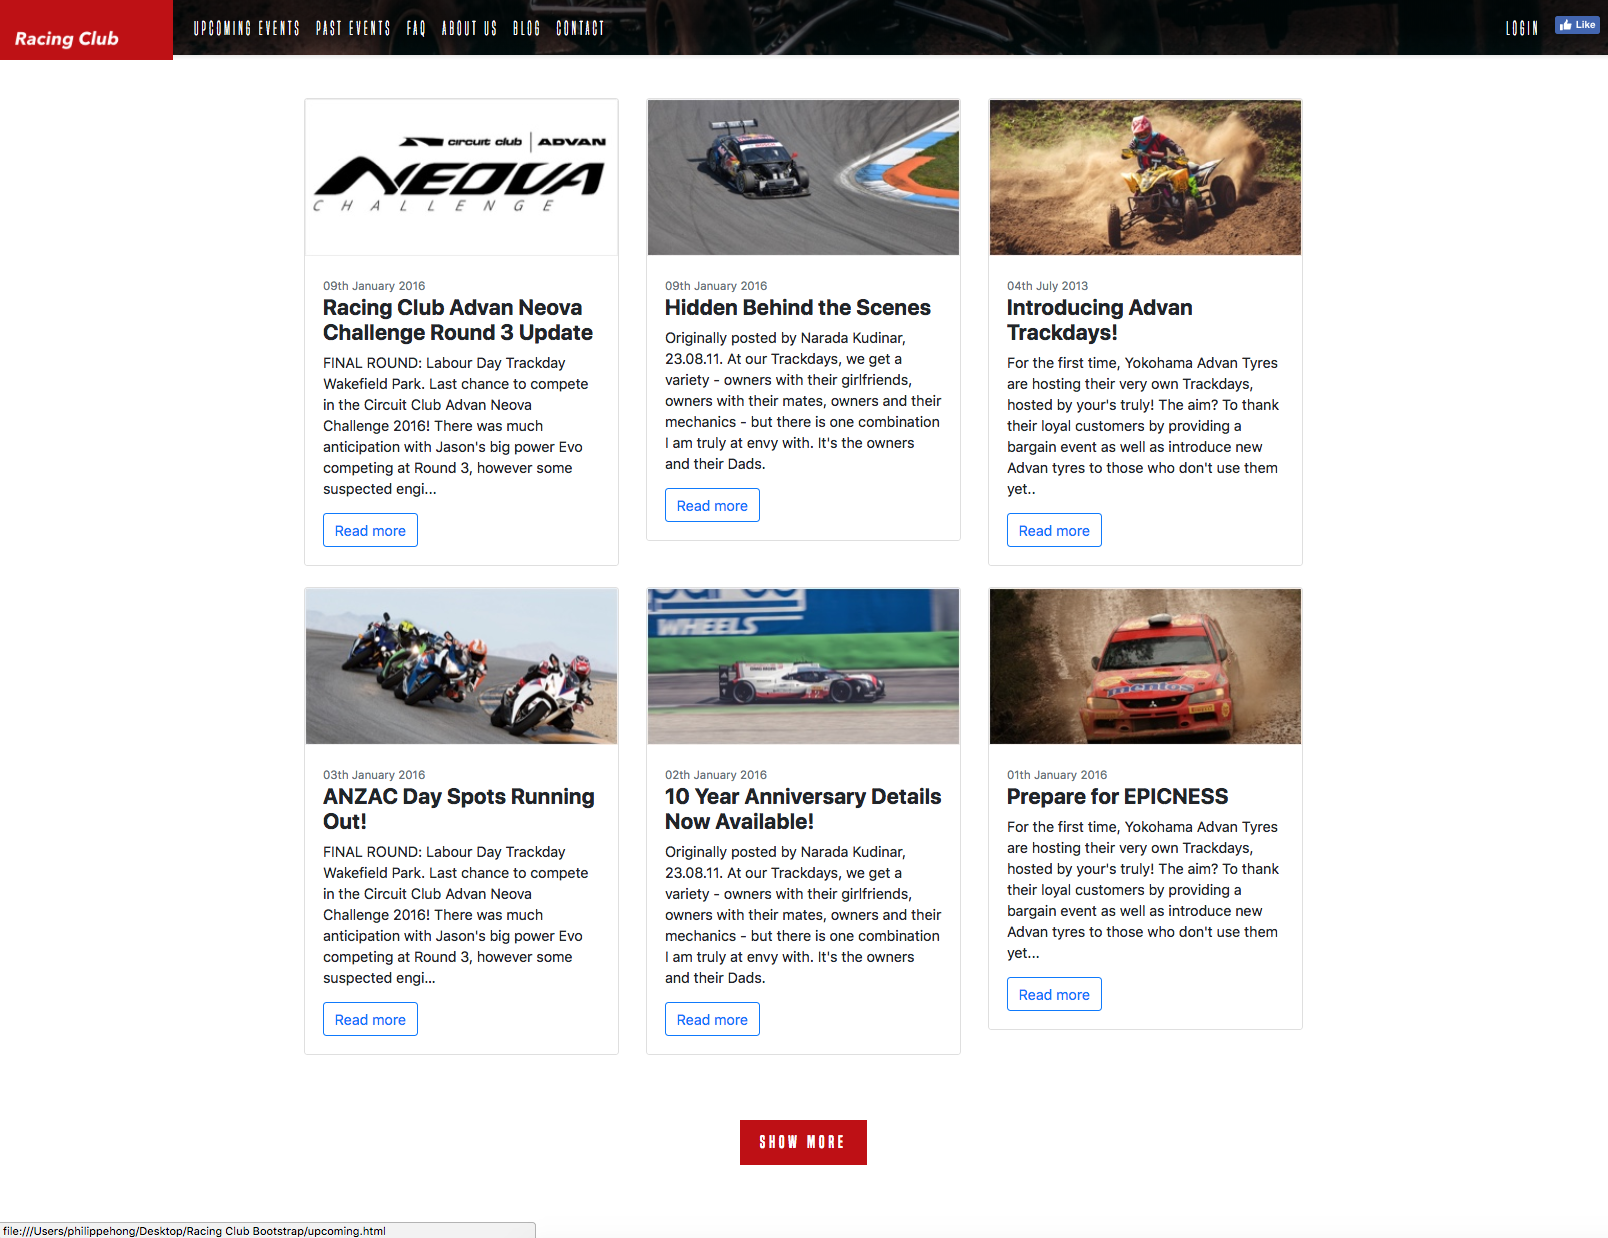
We have something pretty neat, without any styling at all. The only thing left is to customize the cards and the outline button, and we're good to go:
body {
    font-family: 'Roboto', sans-serif;
}

.btn-outline-primary {
  color: #BF0000;
  background-color: transparent;
  background-image: none;
  border-color: #BF0000;
}

.btn-outline-primary:hover {
  background: #A3171B;
  border-color: #A3171B;
}

.btn-outline-primary:active {
  box-shadow: inset 0px 8px 4px rgba(0, 0, 0, 0.25);
  background: #A3171B!important;
  box-shadow: none!important;
  outline: none;
  border-color: #A3171B!important;

}

.btn-outline-primary:focus {
  box-shadow: inset 0px 8px 4px rgba(0, 0, 0, 0.25);
  background: #A3171B;
  box-shadow: none;
  outline: none;
}

.card {
  border: none;
}
The following is the final stage of the design:
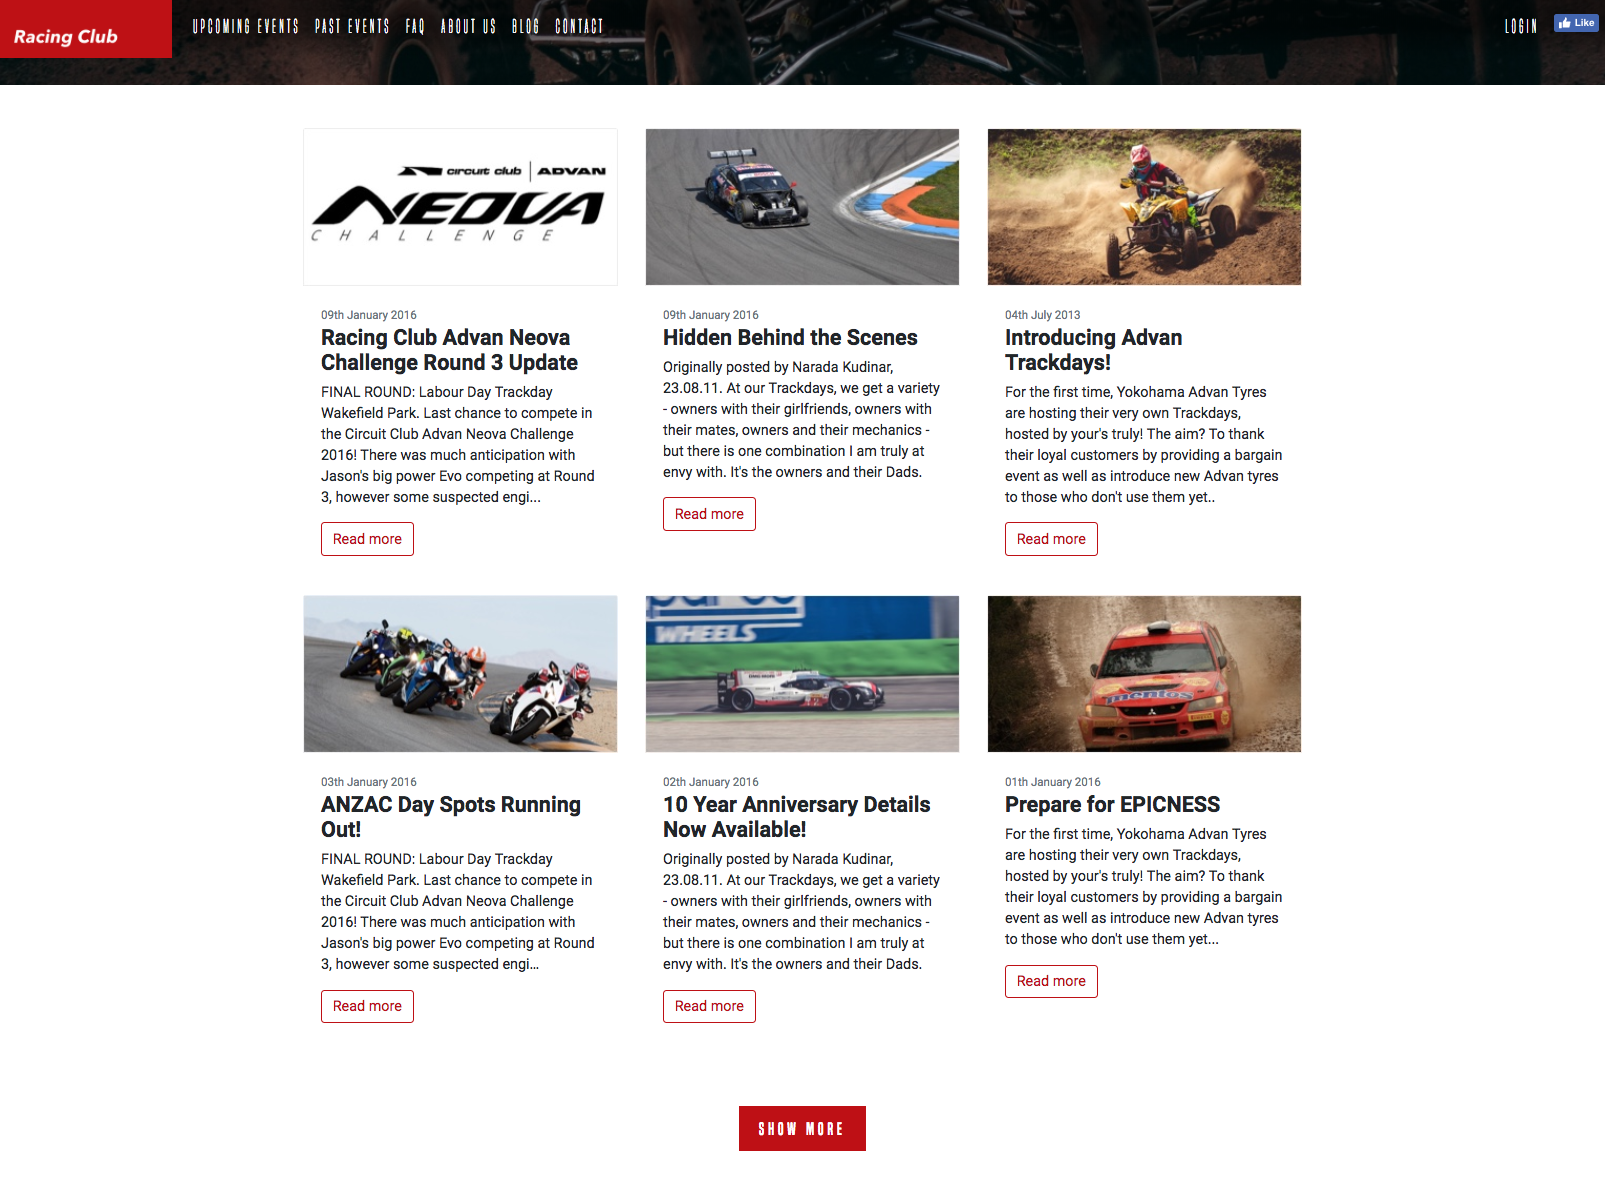
That's it; we're all done with the Blog section. Let's start the ABOUT US section.