Table of Contents for
Kali Linux 2018: Assuring Security by Penetration Testing - Fourth Edition

Version ebook / Retour

Cover image for bash Cookbook, 2nd Edition Kali Linux 2018: Assuring Security by Penetration Testing - Fourth Edition by Shakeel Ali Published by Packt Publishing, 2018
  1. Kali Linux Assuring Security by Penetration Testing, Fourth Edition
  2. Title Page
  3. Copyright and Credits
  4. Kali Linux 2018: Assuring Security by Penetration Testing Fourth Edition
  5. Dedication
  6. Packt Upsell
  7. Why subscribe?
  8. Packt.com
  9. Contributors
  10. About the authors
  11. About the reviewers
  12. Packt is searching for authors like you
  13. Table of Contents
  14. Preface
  15. Who this book is for
  16. What this book covers
  17. To get the most out of this book
  18. Conventions used
  19. Get in touch
  20. Reviews
  21. Installing and Configuring Kali Linux
  22. Technical requirements
  23. Kali Linux tool categories
  24. Downloading Kali Linux
  25. Using Kali Linux
  26. Running Kali using a Live DVD
  27. Installing on a hard disk
  28. Installing Kali on a physical machine
  29. Installing Kali on a virtual machine
  30. Installing Kali on a virtual machine from the ISO image
  31. Installing Kali Linux on a virtual machine using the Kali Linux VM image provided
  32. Saving or moving the virtual machine
  33. Installing Kali on a USB disk
  34. Configuring the virtual machine
  35. VirtualBox guest additions
  36. Setting up networking
  37. Setting up a wired connection
  38. Setting up a wireless connection
  39. Updating Kali Linux
  40. Setting up Kali Linux AMI on Amazon AWS Cloud
  41. Summary
  42. Questions
  43. Further reading
  44. Setting Up Your Test Lab
  45. Technical requirements
  46. Physical or virtual?
  47. Setting up a Windows environment in a VM
  48. Installing vulnerable servers
  49. Setting up Metasploitable 2 in a VM
  50. Setting up Metasploitable 3 in a VM
  51. Installing Packer
  52. Installing Vagrant
  53. Pre-built Metasploit 3
  54. Setting up BadStore in a VM
  55. Installing additional tools in Kali Linux
  56. Network services in Kali Linux
  57. HTTP
  58. MySQL
  59. SSH
  60. Additional labs and resources
  61. Summary
  62. Questions
  63. Further reading
  64. Penetration Testing Methodology
  65. Technical requirements
  66. Penetration testing methodology
  67. OWASP testing guide
  68. PCI penetration testing guide
  69. Penetration Testing Execution Standard
  70. NIST 800-115
  71. Open Source Security Testing Methodology Manual 
  72. General penetration testing framework
  73. Reconnaissance
  74. Scanning and enumeration
  75. Scanning
  76. ARP scanning
  77. The network mapper (Nmap)
  78. Nmap port scanner/TCP scan
  79. Nmap half-open/stealth scan
  80. Nmap OS-detection
  81. Nmap service-detection
  82. Nmap ping sweeps
  83. Enumeration
  84. SMB shares
  85. DNS zone transfer
  86. DNSRecon
  87. SNMP devices
  88. Packet captures
  89. tcpdump
  90. Wireshark
  91. Gaining access
  92. Exploits
  93. Exploits for Linux
  94. Exploits for Windows
  95. Escalating privileges
  96. Maintaining access
  97. Covering your tracks
  98. Reporting
  99. Summary
  100. Footprinting and Information Gathering
  101. Open Source Intelligence
  102. Using public resources
  103. Querying the domain registration information
  104. Analyzing the DNS records
  105. Host
  106. dig
  107. DMitry
  108. Maltego
  109. Getting network routing information
  110. tcptraceroute
  111. tctrace
  112. Utilizing the search engine
  113. SimplyEmail
  114. Google Hacking Database (GHDB)
  115. Metagoofil
  116. Automated footprinting and information gathering tools
  117. Devploit
  118. Red Hawk v2
  119. Using Shodan to find internet connected devices
  120. Search queries in Shodan
  121. Blue-Thunder-IP-Locator
  122. Summary
  123. Questions
  124. Further reading
  125. Scanning and Evasion Techniques
  126. Technical requirements
  127. Starting off with target discovery
  128. Identifying the target machine
  129. ping
  130. fping
  131. hping3
  132. OS fingerprinting
  133. p0f
  134. Introducing port scanning
  135. Understanding TCP/IP protocol
  136. Understanding TCP and UDP message formats
  137. The network scanner
  138. Nmap
  139. Nmap target specification
  140. Nmap TCP scan options
  141. Nmap UDP scan options
  142. Nmap port specification
  143. Nmap output options
  144. Nmap timing options
  145. Useful Nmap options
  146. Service version detection
  147. Operating system detection
  148. Disabling host discovery
  149. Aggressive scan
  150. Nmap for scanning the IPv6 target
  151. The Nmap scripting engine
  152. Nmap options for firewall/IDS evasion
  153. Scanning with Netdiscover
  154. Automated scanning with Striker
  155. Anonymity using Nipe
  156. Summary
  157. Questions
  158. Further Reading
  159. Vulnerability Scanning
  160. Technical requirements
  161. Types of vulnerabilities
  162. Local vulnerability
  163. Remote vulnerability
  164. Vulnerability taxonomy
  165. Automated vulnerability scanning
  166. Vulnerability scanning with Nessus 7
  167. Installing the Nessus vulnerability scanner
  168. Vulnerability scanning with OpenVAS
  169. Linux vulnerability scanning with Lynis
  170. Vulnerability scanning and enumeration using SPARTA
  171. Summary
  172. Questions
  173. Further reading
  174. Social Engineering
  175. Technical requirements
  176. Modeling human psychology
  177. Attack process
  178. Attack methods
  179. Impersonation
  180. Reciprocation
  181. Influential authority
  182. Scarcity
  183. Social relationships
  184. Curiosity
  185. Social Engineering Toolkit
  186. Anonymous USB attack
  187. Credential-harvesting
  188. Malicious Java applet
  189. Summary
  190. Target Exploitation
  191. Vulnerability research
  192. Vulnerability and exploit repositories
  193. Advanced exploitation toolkit
  194. MSFConsole
  195. MSFCLI
  196. Ninja 101 drills
  197. Scenario 1
  198. Scenario 2
  199. SMB usernames
  200. VNC blank authentication scanners
  201. PostGRESQL logins
  202. Scenario 3
  203. Bind shells
  204. Reverse shells
  205. Meterpreters
  206. Writing exploit modules
  207. Summary
  208. Privilege Escalation and Maintaining Access
  209. Technical requirements
  210. Privilege-escalation
  211. Local escalation
  212. Password-attack tools
  213. Offline attack tools
  214. John the Ripper
  215. Ophcrack
  216. samdump2
  217. Online attack tools
  218. CeWL
  219. Hydra
  220. Mimikatz
  221. Maintaining access
  222. Operating-system backdoors
  223. Cymothoa
  224. The Meterpreter backdoor
  225. Summary
  226. Web Application Testing
  227. Technical requirements
  228. Web analysis
  229. Nikto
  230. OWASP ZAP
  231. Burp Suite
  232. Paros proxy
  233. W3AF
  234. WebScarab
  235. Cross-Site Scripting
  236. Testing for XSS
  237. SQL injection
  238. Manual SQL injection
  239. Automated SQL injection
  240. sqlmap
  241. Command-execution, directory-traversal, and file-inclusion
  242. Directory-traversal and file-inclusion
  243. Command execution
  244. Summary
  245. Further reading
  246. Wireless Penetration Testing
  247. Technical requirements
  248. Wireless networking
  249. Overview of 802.11
  250. The Wired Equivalent Privacy standard
  251. Wi-Fi Protected Access (WPA)
  252. Wireless network reconnaissance
  253. Antennas
  254. Iwlist
  255. Kismet
  256. WAIDPS
  257. Wireless testing tools
  258. Aircrack-ng
  259. WPA pre-shared key-cracking
  260. WEP-cracking
  261. PixieWPS
  262. Wifite
  263. Fern Wifi-Cracker
  264. Evil Twin attack
  265. Post cracking
  266. MAC-spoofing
  267. Persistence
  268. Sniffing wireless traffic
  269. Sniffing WLAN traffic
  270. Passive sniffing
  271. Summary
  272. Mobile Penetration Testing with Kali NetHunter
  273. Technical requirements
  274. Kali NetHunter
  275. Deployment
  276. Network deployment
  277. Wireless deployment
  278. Host deployment
  279. Installing Kali NetHunter
  280. NetHunter icons
  281. NetHunter tools
  282. Nmap
  283. Metasploit
  284. MAC changer
  285. Third-party Android applications
  286. The NetHunter Terminal Application
  287. DriveDroid
  288. USB Keyboard
  289. Shodan
  290. Router Keygen
  291. cSploit
  292. Wireless attacks
  293. Wireless scanning
  294. WPA/WPA2 cracking
  295. WPS cracking
  296. Evil AP attack
  297. Mana evil AP
  298. HID attacks
  299. DuckHunter HID attacks
  300. Summary
  301. Questions
  302. Further reading
  303. PCI DSS Scanning and Penetration Testing
  304. PCI DSS v3.2.1 requirement 11.3
  305. Scoping the PCI DSS penetration test
  306. Gathering client requirements
  307. Creating the customer requirements form
  308. Preparing the test plan
  309. The test plan checklist
  310. Profiling test boundaries
  311. Defining business objectives
  312. Project management and scheduling
  313. Tools for executing the PCI DSS penetration test
  314. Summary
  315. Questions
  316. Further reading
  317. Tools for Penetration Testing Reporting
  318. Technical requirements
  319. Documentation and results verification
  320. Types of reports
  321. The executive report
  322. The management report
  323. The technical report
  324. Network penetration testing report
  325. Preparing your presentation
  326. Post-testing procedures
  327. Using the Dradis framework for penetration testing reporting
  328. Penetration testing reporting tools
  329. Faraday IDE
  330. MagicTree
  331. Summary
  332. Questions
  333. Further reading
  334. Assessments
  335. Chapter 1 – Assessment answers
  336. Chapter 2 – Assessment answers
  337. Chapter 4 – Assessment answers
  338. Chapter 5 – Assessment answers
  339. Chapter 6 – Assessment answers
  340. Chapter 12 – Assessment answers
  341. Chapter 13 – Assessment answers
  342. Chapter 14 – Assessment answers
  343. Other Books You May Enjoy
  344. Leave a review - let other readers know what you think

Setting up BadStore in a VM

The BadStore ISO is ancient compared to today's technology; however, unlike Metasploitable 3, it is incredibly easy to install and use. Readers with very limited knowledge and resources can use this ISO image as a starting point as it contains well-known exploits and is also under 15 MB in size.

The BadStore ISO image is no longer available in the official store as of writing this book, but there are several reputable links that can be used. As stated in a GitHub article at https://github.com/jivoi/junk/blob/master/coursera_software-security/w3/project-2/info, the BadStore ISO can be downloaded from here: https://d396qusza40orc.cloudfront.net/softwaresec/virtual_machine/BadStore_212.iso.

The manual for the BadStore ISO should also be downloaded as it contains essential information about IP connectivity and vulnerabilities in the OS.

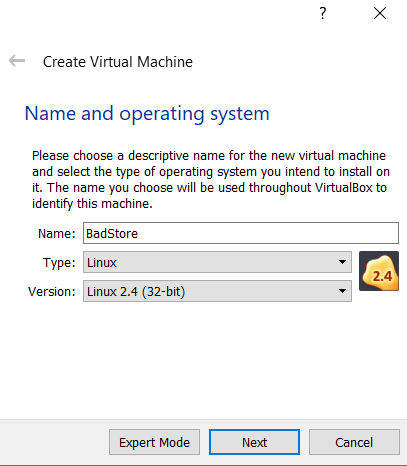
Once the file has been downloaded from the preceding link, open VirtualBox and click on File and New. Enter the details shown in the screenshot. Click on Next when finished:

BadStore uses very little RAM. The default allocation can be used, but I've allocated 640 MB of RAM. Click Next to continue:

Complete the following steps:

  • Click on Create a virtual hard disk now and then click on the Create button
  • Select VirtualBox Disk Image (VDIas the hard disk file type and click on Next
  • Select Dynamically Allocated when prompted to choose the physical storage option and click on Next
  • For the File Location and Size, leave the default file size of 4 GB as BadStore also requires very little disk space

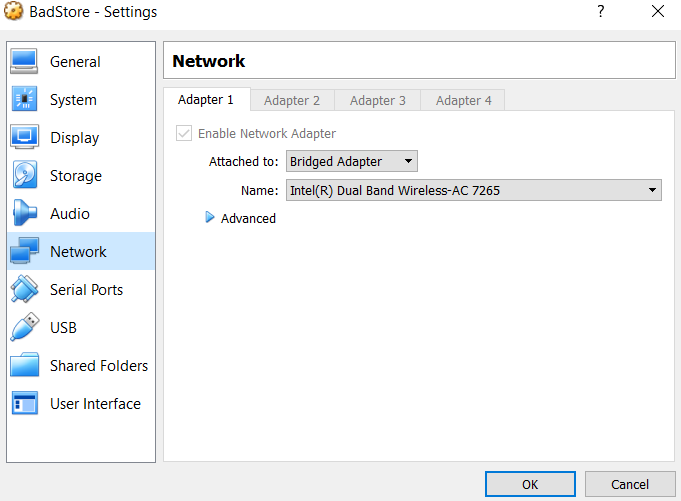
Before starting your BadStore VM, click on the Settings button in the Oracle VM VirtualBox Manager. Click on the Network category in the left pane and change your adapter setting to Bridged Adapter and click OK. This will enable the VM to receive an IP address via DHCP (if it is enabled on your network) thereby simplifying the connectivity process in later steps:

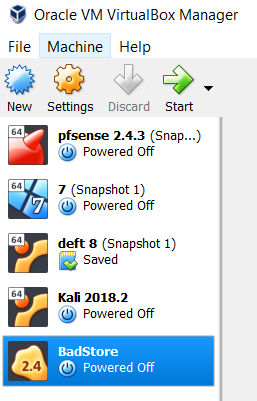
In the Oracle VM VirtualBox Manager, click on the BadStore entry and click on the Start button:

When prompted to select a startup disk, click on the Open Folder icon and browse to the BadStore.iso file, which you previously downloaded. Click Start to run the VM.

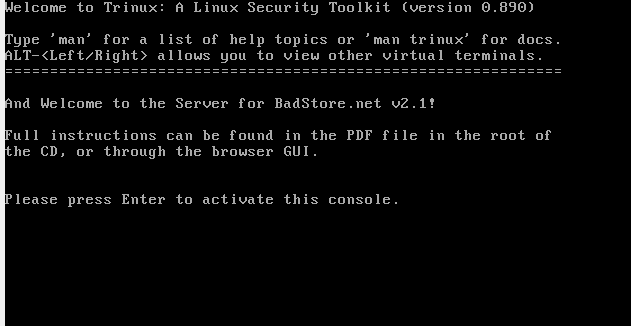
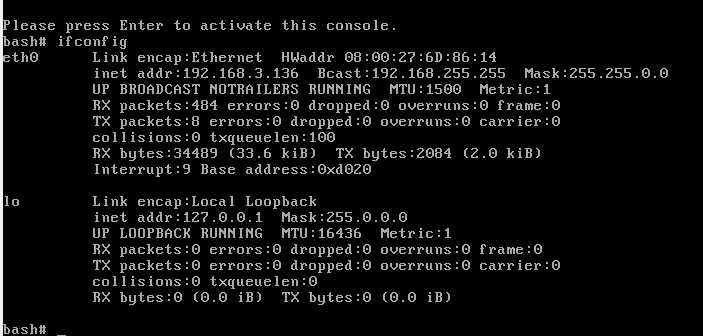
Once BadStore is loaded, press Enter to activate the console:

After pressing Enter, enter the ifconfig command and press Enter to view your interface configurations. Note that in the following screenshot, in the eth0 interface, the IP address (inet addr) is set to 192.168.3.136. On your machine, it should be different, according to the IP scheme you are using. Take note of this IP as it will be required to connect to the BadStore VM via a browser:

Open a browser of your choice and in the address bar, enter the IP address of the BadStore VM followed by this syntax: cgi-bin/badstore.cgi.

In this instance, I have entered the following URL in the address bar of my browser to access the BadStore VM: http://192.168.3.136/cgi-bin/badstore.cgi.

Once you have entered the IP of your BadStore VM and appended the preceding path, press enter and you will be presented with the BadStore frontend, as seen in this screenshot:

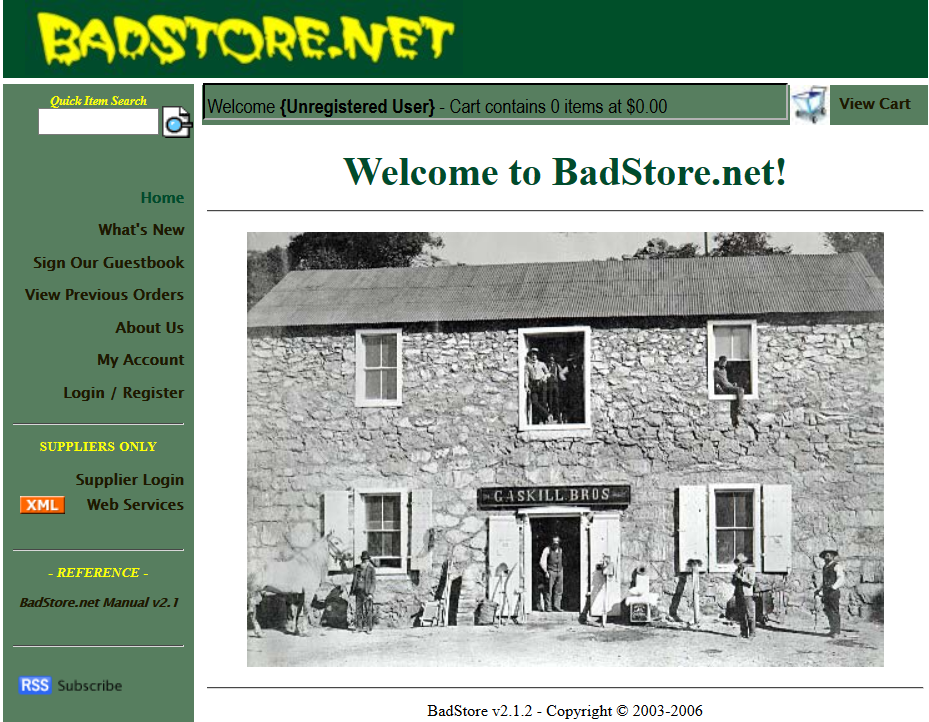
As mentioned earlier, the BadStore VM is nothing short of ancient, as reflected by the design of the interface; however, for beginners it contains a variety of common vulnerabilities that can be easily found and exploited with tools from Kali Linux covered in the following chapters.

Another similar and easy to set up VM that you can try is the Damn Vulnerable Linux (DVL) ISO. It can be downloaded from: https://sourceforge.net/projects/virtualhacking/files/os/dvl/DVL_1.5_Infectious_Disease.iso/download.