Table of Contents for
Magento 2 - Build World-Class online stores
 Magento 2 - Build World-Class online stores
Published by
Packt Publishing, 2017
Magento 2 - Build World-Class online stores
Published by
Packt Publishing, 2017
- Cover
- Table of Contents
- Magento 2 - Build World-Class online stores
- Magento 2 - Build World-Class online stores
- Credits
- Preface
- 1. Module 1
- 1. Magento Fundamentals
- XAMPP installation
- Magento
- Summary
- 2. Magento 2.0 Features
- An introduction to the Magento order management system
- Magento 2.0 command-line configuration
- The command-line utility
- Summary
- 3. Working with Search Engine Optimization
- Store configuration
- SEO and searching
- SEO catalog configuration
- Google Analytics tracking code
- Optimizing Magento pages
- Summary
- 4. Magento 2.0 Theme Development – the Developers' Holy Grail
- Magento 2.0 theme structure
- The Magento Luma theme
- Magento theme inheritance
- CMS blocks and pages
- Custom variables
- Creating a basic Magento 2.0 theme
- Summary
- 5. Creating a Responsive Magento 2.0 Theme
- Composer – the PHP dependency manager
- Building the CompStore theme
- CSS preprocessing with LESS
- Applying new CSS to the CompStore theme
- Creating the CompStore logo
- Applying the theme
- Creating CompStore content
- Customizing Magento 2.0 templates
- Summary
- 6. Write Magento 2.0 Extensions – a Great Place to Go
- Using the Zend framework
- Magento 2.0 extension structure
- Developing your first Magento extension
- The Twitter REST API
- The TweetsAbout module structure
- Using TwitterOAuth to authenticate our extension
- Developing the module
- Summary
- 7. Go Mobile with Magento 2.0!
- Adjusting the CompStore theme for mobile devices
- The Magento 2.0 responsive design
- The Magento UI
- Implementing a new CSS mixin media query
- Adjusting tweets about extensions for mobile devices
- Summary
- 8. Speeding up Your Magento 2.0
- Indexing and caching Magento
- Indexing and re-indexing data
- The Magento cron job
- Caching
- Fine-tuning the Magento hosting server
- Selecting the right Magento hosting service
- Apache web server deflation
- Enabling the expires header
- Minifying scripts
- Summary
- 9. Improving Your Magento Skills
- Magento knowledge center
- Improving your Magento skills
- Summary
- 2. Module 2
- 1. Magento 2 System Tools
- Installing Magento 2 sample data via GUI
- Installing Magento 2 sample data via the command line
- Managing Magento 2 indexes via the command line
- Managing Magento 2 cache via the command line
- Managing Magento 2 backup via the command line
- Managing Magento 2 set mode (MAGE_MODE)
- Transferring your Magento 1 database to Magento 2
- 2. Enabling Performance in Magento 2
- Configuring Redis for backend cache
- Configuring Memcached for session caching
- Configuring Varnish as the Full Page Cache
- Configuring Magento 2 with CloudFlare
- Configuring optimized images in Magento 2
- Configuring Magento 2 with HTTP/2
- Configuring Magento 2 performance testing
- 3. Creating Catalogs and Categories
- Create a Root Catalog
- Create subcategories
- Manage attribute sets
- Create products
- Manage products in a catalog grid
- 4. Managing Your Store
- Creating shipping and tax rules
- Managing customer groups
- Configuring inventories
- Configuring currency rates
- Managing advanced pricing
- 5. Creating Magento 2 Extensions – the Basics
- Initializing extension basics
- Working with database models
- Creating tables using setup scripts
- Creating a web route and controller to display data
- Creating system configuration fields
- Creating a backend data grid
- Creating a backend form to add/edit data
- 6. Creating Magento 2 Extensions – Advanced
- Using dependency injection to pass classes to your own class
- Modifying functions with the use of plugins – Interception
- Creating your own XML module configuration file
- Creating your own product type
- Working with service layers/contracts
- Creating a Magento CLI command option
- 3. Module 3
- 1. Planning for Magento
- Technical considerations
- Global-Website-Store methodology
- Planning for multiple stores
- Summary
- 2. Managing Products
- Managing products the customer focused way
- Creating products
- Managing inventory
- Pricing tools
- Autosettings
- Related products, up-sells, and cross-sells
- Importing products
- Summary
- 3. Designs and Themes
- The concept of theme inheritance
- Default installation of design packages and themes
- Installing third-party themes
- Inline translations
- Working with theme variants
- Customizing themes
- Customizing layouts
- Summary
- 4. Configuring to Sell
- Payment methods
- Shipping methods
- Managing taxes
- Transactional e-mails
- Summary
- 5. Managing Non-Product Content
- Summary
- 6. Marketing Tools
- Promotions
- Newsletters
- Using sitemaps
- Optimizing for search engines
- Summary
- 7. Extending Magento
- The new Magento module architecture
- Extending Magento functionality with Magento plugins
- Building your own extensions
- Summary
- 8. Optimizing Magento
- Indexing and caching
- Caching in Magento 2 – not just FPC
- Tuning your server for speed
- Summary
- 9. Advanced Techniques
- Version control
- Magento cron
- Backing up your database
- Upgrading Magento
- Summary
- 10. Pre-Launch Checklist
- System configurations
- Design configurations
- Search engine optimization
- Sales configurations
- Product configurations
- Maintenance configurations
- Summary
- Index
As important as products and product information are to e-commerce, successful online stores need more in order to attract customers and fortify the store's brand. Even printed catalogs often contain information about the seller, including hours of operation, return policies, company history, and more. This non-product content is essential.
To gain an understanding of how to create and manipulate non-product content, we will cover the following topics:
- Review how Magento incorporates content
- Learn how to create content pages in your Magento store
- Create and use static blocks
- Utilize built-in content widgets
Once you know how to interweave non-product content throughout your online store, you will no doubt discover innovative ways to increase customer engagement.
As with most e-commerce platforms, Magento's management of non-product content lacks some of the more robust features of a dedicated content management system (CMS) – such as WordPress, Business Catalyst, or Joomla. However, to its credit, Magento does provide a versatile system that takes into account the possible need for unique content for each of your stores.
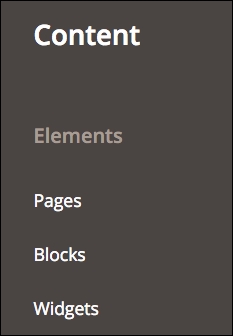
As you would expect, the area of the backend for managing the CMS functions of Magento is under the Content menu. This area includes sections for managing Pages, Blocks, and Widgets, as shown in the following screenshot:
Before we dig into each of these items, it's important to recall our discussion about blocks in Chapter 3, Designs and Themes. Whether configuring a page, or placing a static block or widget, Magento builds the final results by assembling blocks of information.
The pages we will use in the CMS are not actually complete pages, as they lack controls for the overall template items of header, navigation, and footer. These pages actually refer to the central content of a page – that which lies within the overall page template. Within this page, we can add text, images, static blocks, and widgets to give the page its core content. As we will examine in this section, you can add some of the same code as you did in the default.xml file to even manipulate elements outside the core content area, including blocks within the header, navigation, and footer.
To begin, let's look at and alter a default page provided by the sample data installed into a new Magento store.
Go to CMS | Pages in the Magento backend. With the sample data installed, you should see a list of pages, much like those shown in the following screenshot:
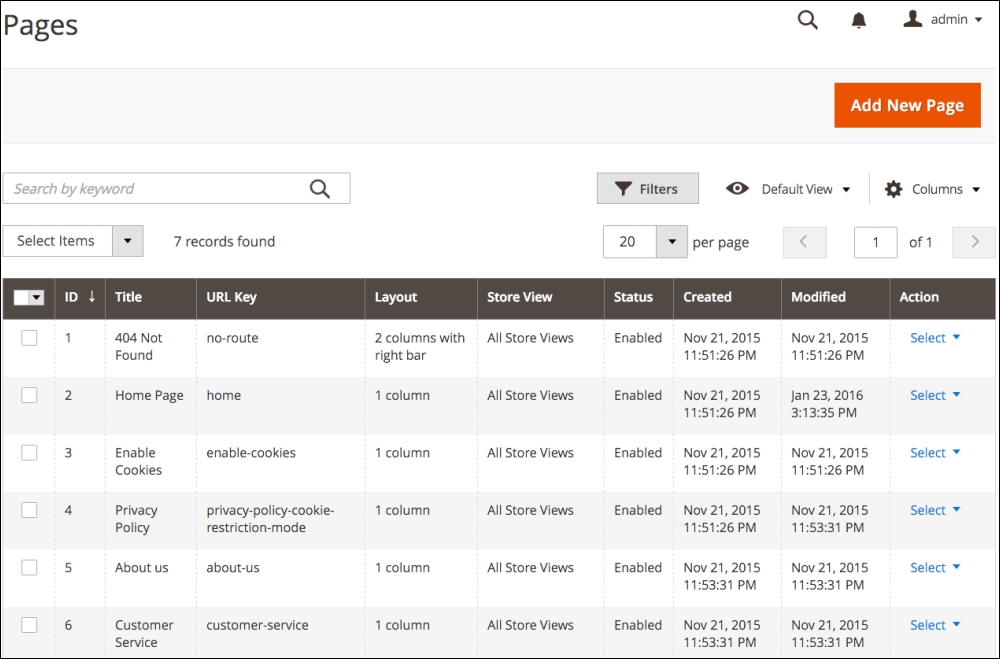
While it's not absolutely necessary that you keep these pages enabled, for e-commerce best practices, it's generally a good idea to retain these core pages.
- 404 Not Found: This page is displayed to visitors who land on a non-existing page in your site. For example, you might have a product that is discontinued and you no longer wish to have it visible to your customers. However, a search engine, blog, or other websites may have a link to that product. If a customer clicks that link and comes to your site, since the item is no longer visible, they would be shown this page. A 404 error is webspeak for a missing page. You can provide branded content to visitors who try to access a missing page. Without this page, such a visitor would simply see a stark 404 error page provided by your web server, and it's neither appealing nor branded.
- Home Page: Obviously, this is the home page for your site. The content and design elements that appear in the core of your home page are managed on this page.
- Enable Cookies: In order for your store's shopping cart, login, and other features to work properly, a customer's web browser must allow cookies to be used. If Magento detects that cookies cannot be used on a customer's browser, they will see the content of this page. You can use this page to help customers understand cookies and how to activate them on their browser.
- Privacy Policy: Online privacy and the sharing of information is increasingly important to consumers. Furthermore, Google will favorably consider sites that have a comprehensive privacy policy on their site. It's just good business sense! The default Magento privacy policy content is a great boilerplate with which to construct your own policy.
- About Us: Would you hand over your hard-earned money to someone you didn't trust? There are lots of ways to demonstrate your good faith and reputation on your site, and the About Us page is one ideal place to start. Give your shoppers a sense of your mission, leadership team, and history.
- Customer Service: You can create other service-related pages (for example, Returns Policy, FAQs). In the least case, you should have a page that discusses your customer service policies. Magento provides this page with the initial installation because any reputable online store should make their service policies available to online shoppers.
No doubt, you will find other pages to insert in your Magento store. Creating and managing CMS pages is really quite straightforward.
The first place most designers want to begin modifying a store's design is with the Home Page.
First, we need to understand that pages created in the Magento CMS primarily dictate what appears in the content section of the page. This is the area, highlighted below, apart from the header, top navigation, and footer regions.
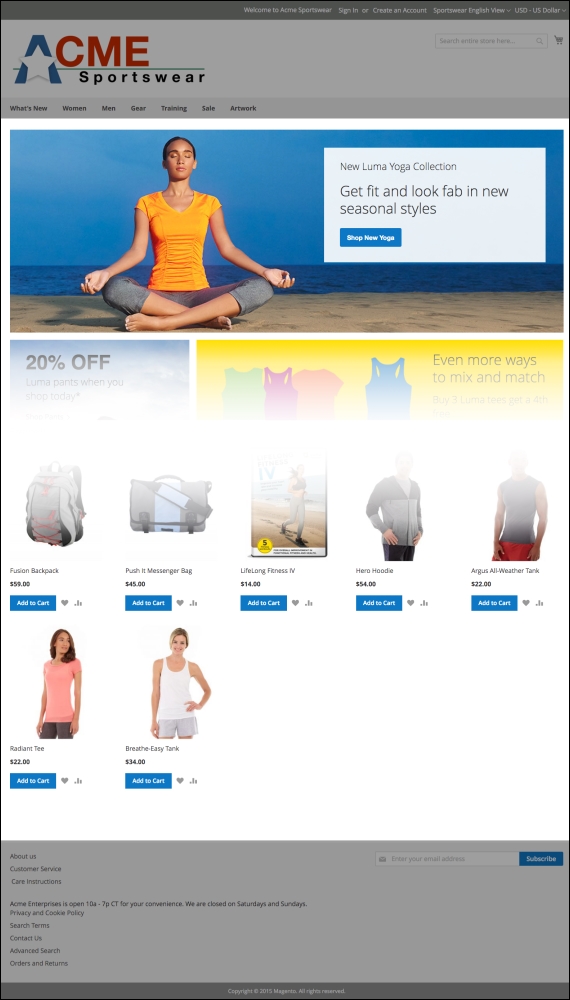
The content section of the Home Page
On the Page Information panel of the Edit Page screen, you should see the following:
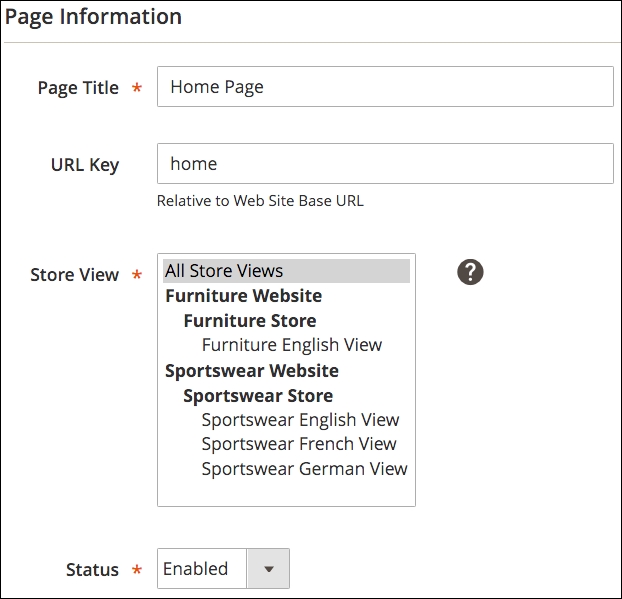
Let us go through the various fields:
- Page Title: This is the title that will appear in the top of your browser, as well as the default name of any link you create to this page.
- URL Key: This field shows how the page is accessed in a URL path. For example, this page is accessible by going to http://www.storedomain.com/home.html. Magento assumes that your Home Page will have a URL Key of home. You should not change this unless you know what you're doing.
- Store View: This field allows you to select for which stores your page is applicable. When you save your page, Magento does check to make sure another page with the same URL Key has not already been assigned to the same stores.
- Status: Of course, means whether the page is active or not.
In the left tabs, click Content. This is the screen where you can add text, images, or dynamic content that will display in the center content area of your page.
Notice that in the following screenshot, this sample data home page contains a widget.
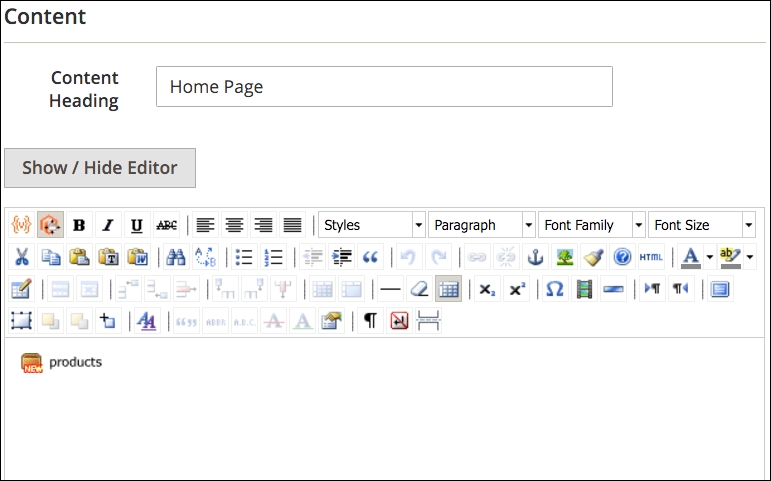
This widget displays products according to the parameters of the widget (we'll discuss widgets later in this chapter). What you don't see — and we're sure you've realized this — are the instructions that control the other graphics and "Hotsellers" shown on the home page.
The other parts of the home page are inserted by using blocks. We will explore the use of blocks a bit later in this chapter. What is important here is that you can create tremendous versatility in your CMS pages by using tools beyond hardcoding layout changes within the theme modules.
For our exercise, let's add some copy to our home page so that it precedes the featured product display.
In the editor field, enter the following before the widget:
Welcome to our store. We hope you enjoy shopping with us. Our goal is to provide you with the best products at the best value.
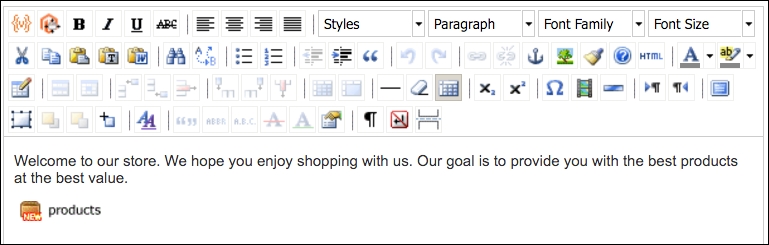
Click on Save and Continue Edit (this will let you remain on this screen) and open your home page in another browser window or tab. It should display your new content:

You've now added content to your default home page. As you go through the remainder of this chapter, you'll discover additional ways to add or affect the content of your home page. We will now create a new CMS page to use on our site. This exercise will also give you additional insights into how to use Magento's CMS feature.
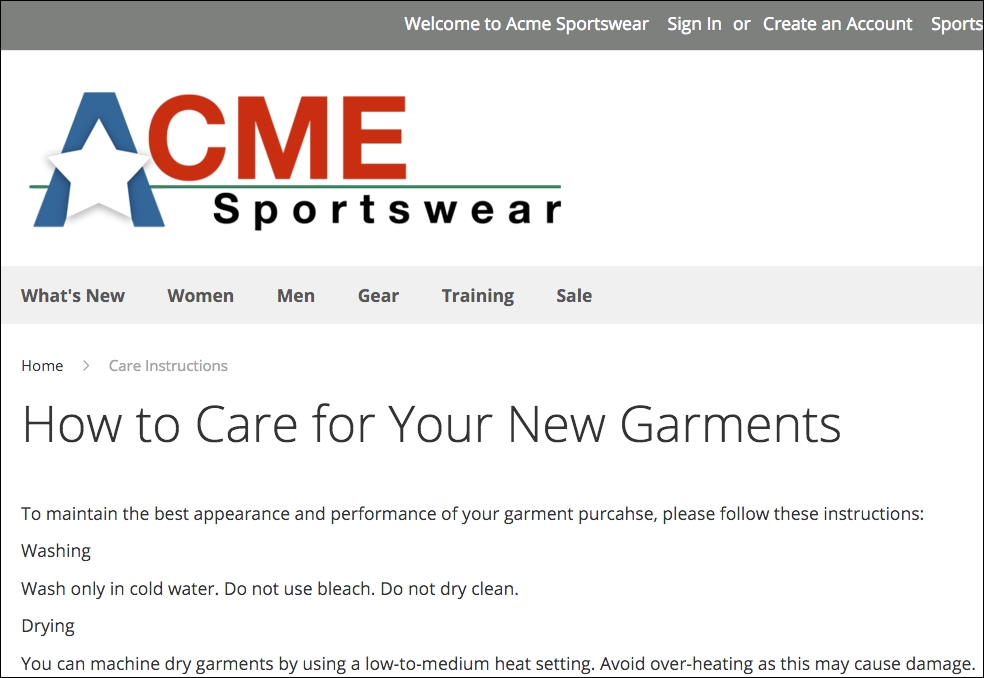
Let's add a new page to our site called Care Instructions. We want to provide information to our apparel site customers on proper techniques for washing the clothing items they purchase from Acme Sportwear:
- Go to Content | Pages in the Magento 2 backend.
- Click on Add New Page.
The first panel is titled Page Information, as shown in the following screenshot:
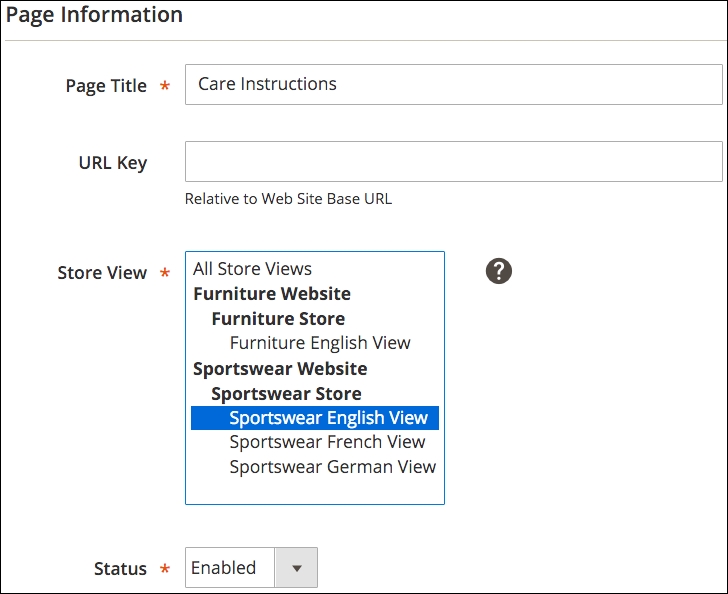
As shown, we have entered the initial information for our new page. Magento will create the URL Key once the new page is saved. However, you can enter a URL Key here. The URL Key will be the actual name used in the URL to access your page: http://www.acmesportswear.com/care-instructions.html. If you want another URL Key value, you can enter it here.
The next panel in the new product screen is Content. It is in this panel that you can create the words, images, and so on that will appear in the main content portion of your new page.
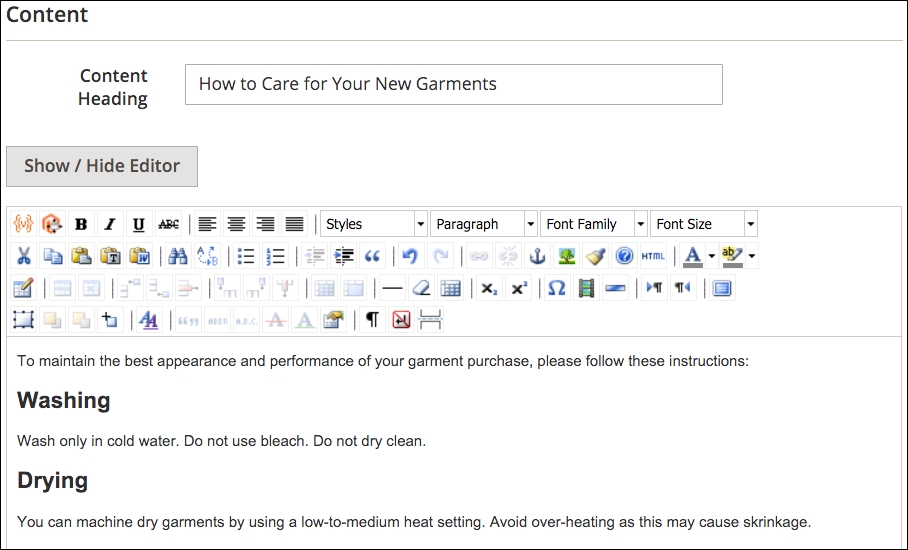
The WYSIWYG editor gives you a lot of great tools to help you build your page content. You can easily insert images, videos, tables, and other styled content.
The Content Heading will appear at the top of your page. It will be displayed within a <h1> tag.
The third panel in the menu on the left side is labeled Design. Based on your theme, you can change the layout of the page to a one-, two-, or three-column display. You can also specify a special theme design. There are additional XML statements that can be inserted that will affect your display. See Chapter 3, Designs and Themes, for guidance on various XML statements that can be used to control layout.
The last panel is Meta Data. Keep this in mind for when we discuss meta information later in this chapter.
Once saved, we can view our new page by going to the URL path we created for this page.
The next step is to add a link to your new page from your site navigation. One easy way is to edit a block that contains links to pages within your site.
Blocks are sections of content that are specified by your theme to appear in various places throughout your site. Blocks can be placed on all pages, some pages, product pages, category pages, or in special, designated spots.
In addition to block locations that are configured within your theme, blocks can be inserted into various areas and pages within your site by using widgets, which we will explore just a bit later in this section.
To view all the blocks in your site, go to Content | Blocks. If you have installed the Magento 2 sample data, you'll see as many as 18 blocks. By their names, you can probably figure out where they appear on your site.
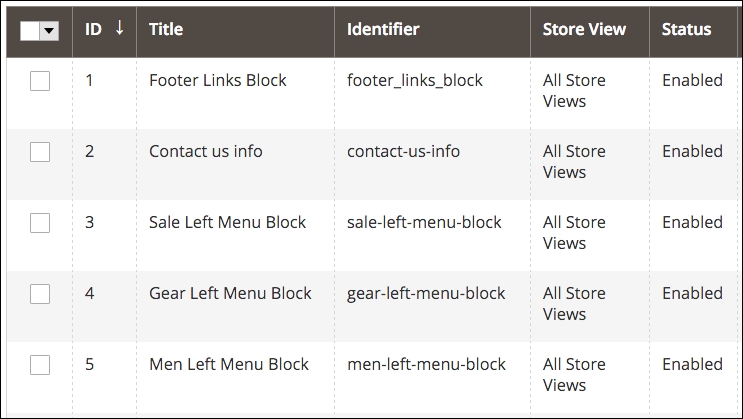
To understand how CMS blocks work — and to add our Care Instructions page link — click on the Select drop-down menu to the far right of the first block, Footer Links Block, and click on Edit.
This block contains the information that appears in the bottom footer of all our sites.
We want to add our Care Instructions link to this block. Now, this is where things get just a bit complex, so read through this process carefully, as it applies anytime you wish to add a link to a page in your site to a block. We are going to explain three different methods of accomplishing the same result.
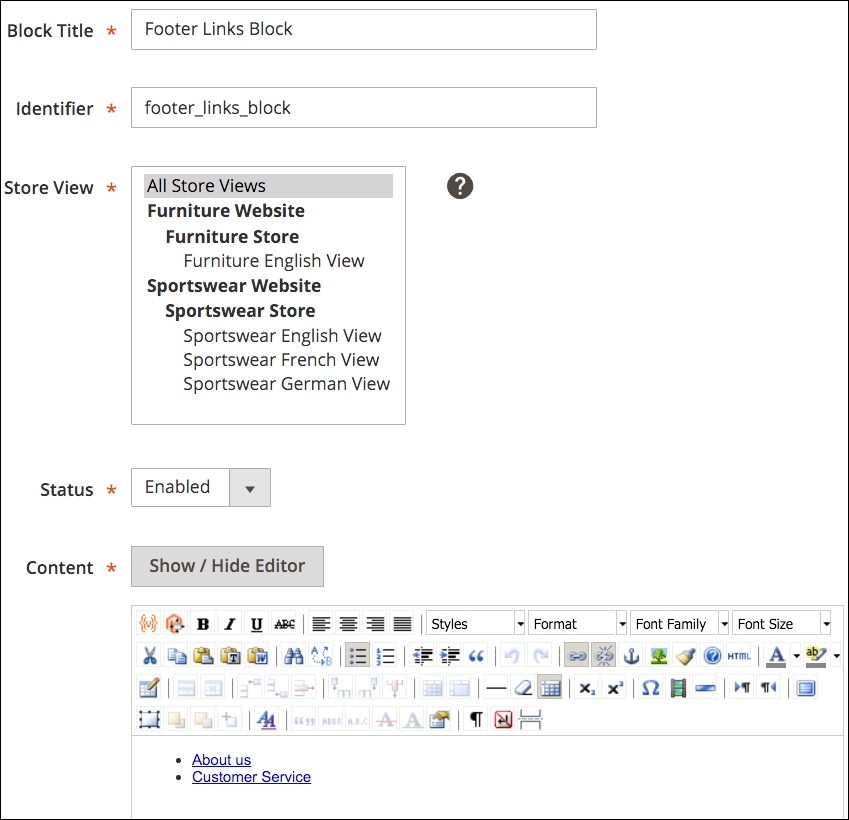
We can add a link using the WYSIWIG editor, or we could change the view to HTML mode and edit the actual HTML code. Let's do it using the WYSIWYG editor, first.
In the editor space, add the link name as you wish for it to appear on the frontend by adding another bullet row below the Customer Service label. You can, of course, insert your new link anywhere in the list.
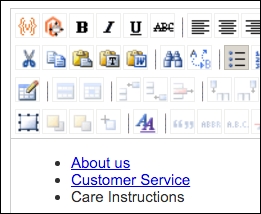
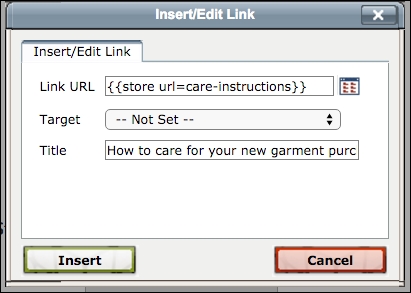
To create the link, select the title you just entered and click the link icon in the menu toolbar. A modal dialogue will appear for entering your link URL.
Magento provides a library of variables which can be used to dynamically insert values and content where appropriate. In this case, the use of a system variable for inserting the store URL is worth learning for our purposes.
The store URL variable is inserted when used in the following format: {{store url=URL_Key}}, where URL_Key is the URL Key for the page, category, or product you wish to access.
Therefore, for our new page, we will insert the following into Link URL: {{store url=care-instructions}}. Add a Title for your link so that it will appear when your customer mouses over the link, and to help describe the link to search engines.
Note
In most Magento help guides, the format for entering a store URL variable is {{store url="URL_Key"}}, with quotes (") around the URL Key. However, we must leave out the quotes when using this variable within the link dialogue box. It's quite possible to use the store URL variable without quotes elsewhere, too. This behavior does not apply when adding links using HTML (see the next section).
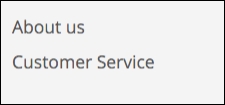
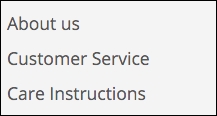
Once you click on Import, the text will be linked. If you look on the frontend of your website, you will now see a new link in the footer.
Note
If you select a link in WYSIWYG and click the link icon, the URL that shows in the dialogue field is a very long, encrypted string. This is due to the way Magento stores link references. You can edit the link by replacing it with what you prefer as the link, but you may find building and managing links much easier using HTML rather than the WYSIWYG view.
The method of adding a link using the store URL variable is the same if you work in the HTML view. The key, of course, knows how to properly code an HTML link.
In the block screen, click on Show/Hide Editor to reveal the underlying HTML for this block.
<ul class="footer links">
<li class="nav item"><a href="{{store url="about-us"}}">About us</a></li>
<li class="nav item"><a href="{{store url="customer-service"}}">Customer Service</a></li>
<li class="nav item"><a title="How to care for your new garment purchases." href="{{store%20url=care-instructions}}">Care Instructions</a></li>
</ul>
You'll notice that the link you created for the Care Instructions page is slightly different from the other links in the block. This is due to the manner in which the link dialogue saves your entry.
You could also use {{store url="care-instructions"}} for the link code — in HTML view only — and achieve the same results.
If you're hesitant about using the store URL variable or coding HTML, you can use one additional technique for inserting a link: the CMS widget. In fact, as you explore this method, you'll find it can be used to insert the following:
- A CMS page link
- A CMS block
- A link to a category listing
- A link to a product page
- A list of new products
- A list of products belonging to a specific category
- A form for customers to use to look up orders and/or request a return
- A list of recently compared products
- A list of recently viewed products
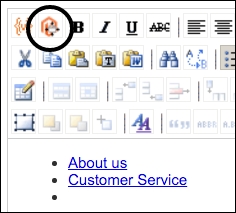
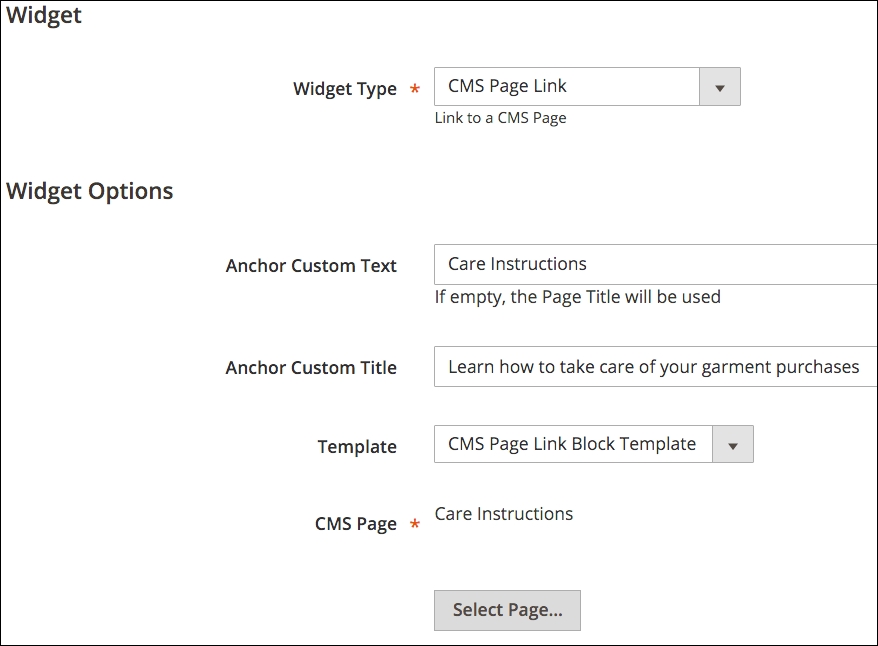
For our example, we want to insert a link to a CMS page. In the WYSIWYG view (you can also use the HTML view), click the widget icon in the top menu bar.
A panel will open from the right side of your screen. For Widget Type, select CMS Page Link. Additional fields will appear:
- Anchor Custom Text: Enter how you wish the link to show to your customer. In our case, we would enter Care Instructions.
- Anchor Custom Title: Enter the hidden title that you wish to use to describe the link to search engines and have displayed to customers if they hover over the link with their mouse.
- Template: If you wish to insert the link on a line by itself, select CMS Page Link Block Template. If the link is to appear within a paragraph of text, choose CMS Page Link Inline Template.
- CMS Page: Click Select Page… to choose the page that you want to link.
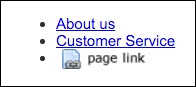
After you insert the widget, it will appear in your WYSIWYG editor as an icon labeled page link. If you want to edit the link, simply double-click on the icon to open the Widget panel.
The store URL variable is only one of many available for use in Magento 2. Within the CMS page and block editors, you do have access to a list of standard variables that will dynamically insert information into your content.
- Base Unsecure URL
- Base Secure URL
- General Contact Name
- General Contact Email
- Sales Representative Contact Name
- Sales Representative Contact Email
- Custom1 Contact Name
- Custom1 Contact Email
- Custom2 Contact Name
- Custom2 Contact Email
- Store Name
- Store Phone Number
- Store Hours
- Country
- Region/State
- Zip/Postal Code
- City
- Street Address 1
- Street Address 2
Let's say we wanted to include the name and store hours of our business in the same footer block we have been editing:
- Click in the WYSIWYG where you wish to insert your new text and variables.
- Insert any text you wish.
- Place your cursor where you wish to insert a variable.
- Click the variable icon in the WYSIWYG editor menu.
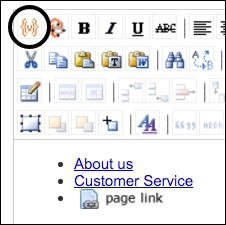
- Click on the variable you wish to insert. In our case, we will be clicking on Store Name and Store Hours. Magento will insert the proper variable code into your text.
After saving the block, you will see on your site that the actual saved information for store name and store hours) is inserted into its proper places.
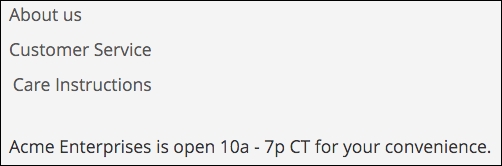
This is one of the least known features of Magento, and yet it can be powerful for reducing the need to edit changes in multiple places in your site. In fact, custom variables can be used not only in pages and blocks, but also in e-mail templates.
As an example, let's say you'd like to add the days on which you are closed to your footer message, but you'd like to use a variable just in case you decide later to change the days on which you are not open:
- Go to System | Custom Variables in your store backend.
- Click on Add New Variable.
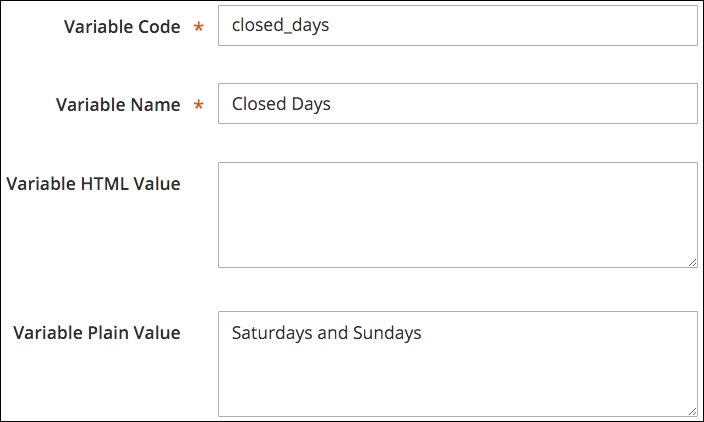
Let's go through the various fields you will encounter here:
- Variable Code: Enter a code for your variable, using only lowercase letters, numbers and underscore (
_). This code is used by Magento's programming to reference your variable. - Variable Name: Enter a name that will appear in the list of variables.
- Variable HTML Value: If you wish to insert HTML code as part of the variable value, enter it in this space.
- Variable Plain Value: If you do not need any HTML code, enter the value of the variable in this field.
The various fields are shown in the following screenshot:
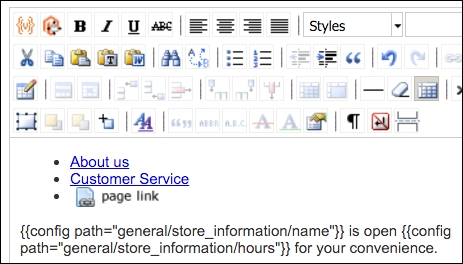
Now, you can return to your footer block and insert your new variable just as you inserted the variables for Store Name and Store Hours.
{{config path="general/store_information/name"}} is open {{config path="general/store_information/hours"}} for your convenience. We are closed on {{customVar code=closed_days}}.With these variables inserted, your site footer now shows the added variable value.

Custom variables could be handy for managing content that you may wish to edit from time to time, yet needs to be displayed in multiple places such as the following:
- Estimated shipping time
- Credit cards and payment methods accepted
- Store pick-up hours
- Alternate phone numbers
- Customer service hours and/or phone number
If any of these need updating on your site, you simply have to change the value of the custom variable.
The widgets we used in editing blocks allowed us to insert dynamic links to blocks and pages. However, widgets can also be used to insert dynamic content into multiple pages and theme locations, such as products, categories, footers, and so on. In fact, the footer links block we have been editing is inserted into the theme's footer content area using a widget.
Let's take a look at this particular widget to see how that is configured. Go to Content | Widgets. Click on the Footer Links widget shown in the list.
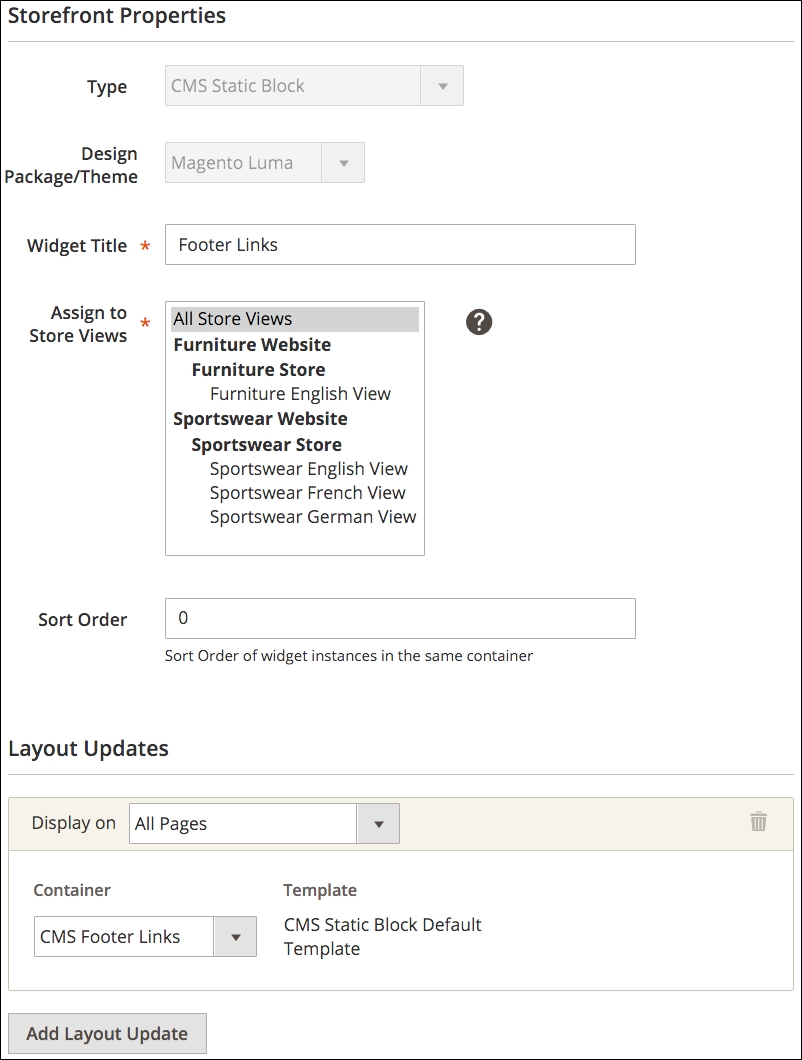
The first panel, Storefront Properties, configures where the widget will display its contents. The Type and Design Package/Theme are set when the widget is created and cannot be changed later (although the widget can be deleted and re-created).
You can assign the widget to appear in only certain store views, as well, and control the order in which it may appear if other widgets are also assigned to the same layout section.
The Layout Updates section is where so much of the magic of widgets comes in. You can assign a widget to appear on all pages, certain pages, or certain types of page (or any combination thereof!).
For categories and products, you can also specify specific categories and products. For instance, you could create a widget that would insert a block of content to appear only on the Furniture category page.
In this particular example, this widget inserts a CMS block (our footer links) into a container called CMS Footer Links. Depending on your theme, you can have many different containers to choose from, such as in the Luma theme used in our demo store.
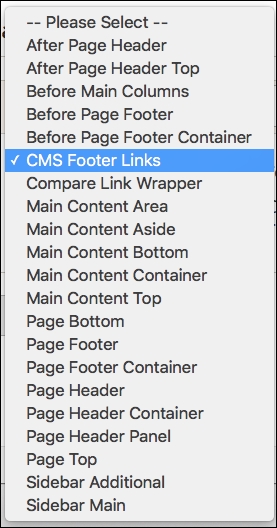
By clicking Add Layout Update, you can also insert the widget content into other containers in your site.
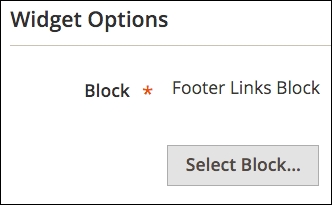
Finally, the Widget Options panel allows you to select the block, link, and so on. Your widget will be inserted. This depends on the type of widget you are creating.
Tip
Widgets can be very powerful tools, especially when combined with blocks. We've seen many situations where even experienced developers have programmed block insertions instead of using the simple widget tools in Magento. Get to know blocks and widgets, and we're certain you'll come up with some very creative ways of adding true value to your brand and customer experience.