Table of Contents for
Magento 2 - Build World-Class online stores
 Magento 2 - Build World-Class online stores
Published by
Packt Publishing, 2017
Magento 2 - Build World-Class online stores
Published by
Packt Publishing, 2017
- Cover
- Table of Contents
- Magento 2 - Build World-Class online stores
- Magento 2 - Build World-Class online stores
- Credits
- Preface
- 1. Module 1
- 1. Magento Fundamentals
- XAMPP installation
- Magento
- Summary
- 2. Magento 2.0 Features
- An introduction to the Magento order management system
- Magento 2.0 command-line configuration
- The command-line utility
- Summary
- 3. Working with Search Engine Optimization
- Store configuration
- SEO and searching
- SEO catalog configuration
- Google Analytics tracking code
- Optimizing Magento pages
- Summary
- 4. Magento 2.0 Theme Development – the Developers' Holy Grail
- Magento 2.0 theme structure
- The Magento Luma theme
- Magento theme inheritance
- CMS blocks and pages
- Custom variables
- Creating a basic Magento 2.0 theme
- Summary
- 5. Creating a Responsive Magento 2.0 Theme
- Composer – the PHP dependency manager
- Building the CompStore theme
- CSS preprocessing with LESS
- Applying new CSS to the CompStore theme
- Creating the CompStore logo
- Applying the theme
- Creating CompStore content
- Customizing Magento 2.0 templates
- Summary
- 6. Write Magento 2.0 Extensions – a Great Place to Go
- Using the Zend framework
- Magento 2.0 extension structure
- Developing your first Magento extension
- The Twitter REST API
- The TweetsAbout module structure
- Using TwitterOAuth to authenticate our extension
- Developing the module
- Summary
- 7. Go Mobile with Magento 2.0!
- Adjusting the CompStore theme for mobile devices
- The Magento 2.0 responsive design
- The Magento UI
- Implementing a new CSS mixin media query
- Adjusting tweets about extensions for mobile devices
- Summary
- 8. Speeding up Your Magento 2.0
- Indexing and caching Magento
- Indexing and re-indexing data
- The Magento cron job
- Caching
- Fine-tuning the Magento hosting server
- Selecting the right Magento hosting service
- Apache web server deflation
- Enabling the expires header
- Minifying scripts
- Summary
- 9. Improving Your Magento Skills
- Magento knowledge center
- Improving your Magento skills
- Summary
- 2. Module 2
- 1. Magento 2 System Tools
- Installing Magento 2 sample data via GUI
- Installing Magento 2 sample data via the command line
- Managing Magento 2 indexes via the command line
- Managing Magento 2 cache via the command line
- Managing Magento 2 backup via the command line
- Managing Magento 2 set mode (MAGE_MODE)
- Transferring your Magento 1 database to Magento 2
- 2. Enabling Performance in Magento 2
- Configuring Redis for backend cache
- Configuring Memcached for session caching
- Configuring Varnish as the Full Page Cache
- Configuring Magento 2 with CloudFlare
- Configuring optimized images in Magento 2
- Configuring Magento 2 with HTTP/2
- Configuring Magento 2 performance testing
- 3. Creating Catalogs and Categories
- Create a Root Catalog
- Create subcategories
- Manage attribute sets
- Create products
- Manage products in a catalog grid
- 4. Managing Your Store
- Creating shipping and tax rules
- Managing customer groups
- Configuring inventories
- Configuring currency rates
- Managing advanced pricing
- 5. Creating Magento 2 Extensions – the Basics
- Initializing extension basics
- Working with database models
- Creating tables using setup scripts
- Creating a web route and controller to display data
- Creating system configuration fields
- Creating a backend data grid
- Creating a backend form to add/edit data
- 6. Creating Magento 2 Extensions – Advanced
- Using dependency injection to pass classes to your own class
- Modifying functions with the use of plugins – Interception
- Creating your own XML module configuration file
- Creating your own product type
- Working with service layers/contracts
- Creating a Magento CLI command option
- 3. Module 3
- 1. Planning for Magento
- Technical considerations
- Global-Website-Store methodology
- Planning for multiple stores
- Summary
- 2. Managing Products
- Managing products the customer focused way
- Creating products
- Managing inventory
- Pricing tools
- Autosettings
- Related products, up-sells, and cross-sells
- Importing products
- Summary
- 3. Designs and Themes
- The concept of theme inheritance
- Default installation of design packages and themes
- Installing third-party themes
- Inline translations
- Working with theme variants
- Customizing themes
- Customizing layouts
- Summary
- 4. Configuring to Sell
- Payment methods
- Shipping methods
- Managing taxes
- Transactional e-mails
- Summary
- 5. Managing Non-Product Content
- Summary
- 6. Marketing Tools
- Promotions
- Newsletters
- Using sitemaps
- Optimizing for search engines
- Summary
- 7. Extending Magento
- The new Magento module architecture
- Extending Magento functionality with Magento plugins
- Building your own extensions
- Summary
- 8. Optimizing Magento
- Indexing and caching
- Caching in Magento 2 – not just FPC
- Tuning your server for speed
- Summary
- 9. Advanced Techniques
- Version control
- Magento cron
- Backing up your database
- Upgrading Magento
- Summary
- 10. Pre-Launch Checklist
- System configurations
- Design configurations
- Search engine optimization
- Sales configurations
- Product configurations
- Maintenance configurations
- Summary
- Index
Are you managing an international-based brand-serving customer all over the globe? Then, using a Content Delivery Network (CDN) is the best idea. CDNs are a well-known technique to manage high-traffic websites. It is commonly used to distribute static assets such as images, CSS, and JavaScript as quickly as possible to the nearest location of the customers, which decreases the download times of the website.
The modern CDNs have much more to offer than just serving the assets to the customer. Currently, they improve the user experience with optimized HTML output, merging and deferring JavaScript, TCP optimization, and much more. Basic or advanced security is also top-of-mind, such as (D)DoS protection, SSL, Web Application Firewall (WAF), and much more.
For this recipe, we will use a Droplet created in Chapter 1, Magento 2 System Tools, at DigitalOcean, https://www.digitalocean.com/. We will be using NGINX, PHP-FPM, and a Composer-based setup including sample data connected to the CloudFlare CDN. No other prerequisites are required.
For the purpose of this recipe, let's assume that we need to create a Magento 2 Varnish setup. The following steps will guide you through this:
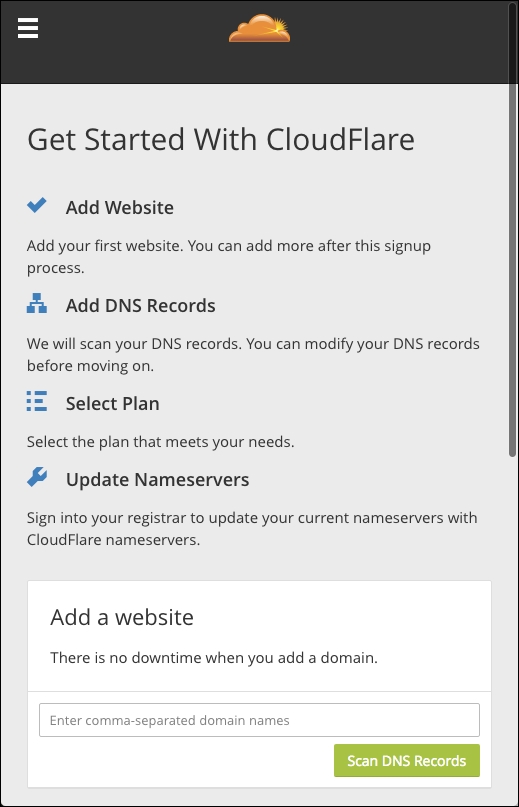
- First, we need to create an account at CloudFlare. Go to https://www.cloudflare.com/a/sign-up and complete the supplied form.
- Now add a website URL. Choose the default URL of your Magento website, (We can add more URLs under the same CloudFlare account later.) and press Scan DNS Records:
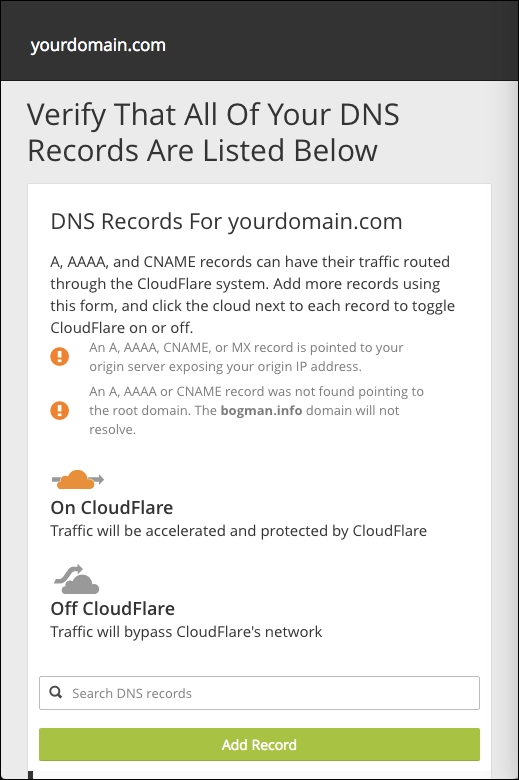
- Once completed, we need to verify that all of our DNS records are listed. This step is really important so make sure to check your current DNS settings and compare or add them to your CloudFlare DNS setup. By default, CloudFlare cannot match all the DNS records automatically.
Changing your records in this screen will not change anything in production yet. We still need to adjust the primary and secondary Nameservers before everything works. We will do this as shown in the following screenshot:
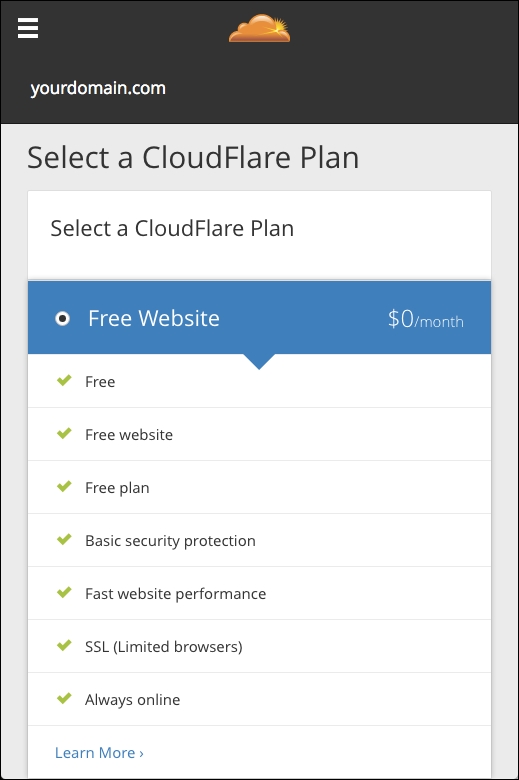
- Choose your CloudFlare plan. Let's start with the Free Website plan. In a production environment, upgrading to a Pro or Business account is simple; just complete the billing form and you are all set. All new features will be available on the fly and ready to use:
- Now we need to update our Nameservers. CloudFlare will list the Nameservers that we need to complete the last step.
Depending on your current DNS provider, this could be a simple or hard step. Changing the Nameservers is not always allowed by your provider.
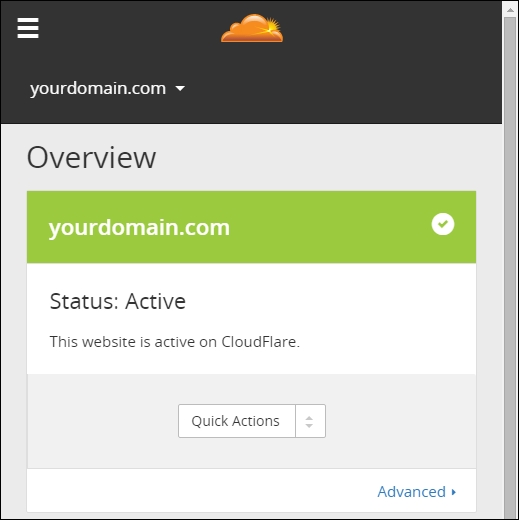
- After changing the Nameservers, we need to wait a maximum of 24 hours. The time depends on how quickly your current DNS provider updates them.
You can check your e-mail or refresh the CloudFlare dashboard to check whether your domain is Active:
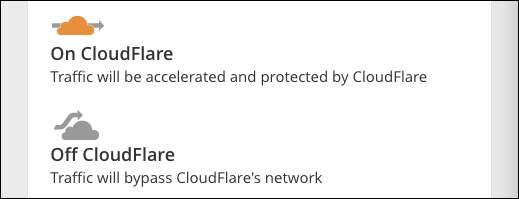
- Let's go to the DNS dashboard and check whether our domain name is served using the CloudFlare accelerated and protection technique.
Once the cloud is orange, including an arrow passing through, then you are connected. Click on the cloud icon to change it:
- Let's check whether the DNS server is serving the correct records and CloudFlare is working. Run the following command on the shell of your current server:
dig yourdomain.com NS +shortThe output looks as follows:
root@mage2cookbook:~# dig mage2cookbook.com NS +short
rocky.ns.cloudflare.com.
kate.ns.cloudflare.com.
You can also use the following command to check the IPs:
dig yourdomain.com +shortroot@mage2cookbook:~# dig mage2cookbook.com +short 104.18.56.216 104.18.57.216
- Congratulations, you just finished configuring a CloudFlare CDN server with Magento 2.
Let's recap and find out what we did throughout this recipe. In steps 1 through 9, we installed CloudFlare as a CDN to optimize our worldwide performance.
In steps 1 through 8, we created an account and moved our domain to the CloudFlare DNS. In step 7, we activated the orange cloud in DNS to start using the CDN optimization.
If you are interested in how to test the performance of the CloudFlare setup, stay put. Here are some basic commands that you can use:
time curl --I http://yourdomain.com
The output looks as follows:
time curl -I http://mage2cookbook.com
HTTP/1.1 200 OK
X-Magento-Cache-Debug: HIT
Server: cloudflare-nginx
CF-RAY: 257330a8444d2bd6-AMS

real    0m0.198s
user    0m0.006s
sys     0m0.005s
Without CloudFlare, it looks as follows:
time curl -I http://mage2cookbook.com
HTTP/1.1 200 OK
X-Magento-Cache-Debug: HIT

real    0m0.253s
user    0m0.011s
sys     0m0.010s
Keep in mind that this current website is using Varnish. Our Magento 2 server is located in New York while our test server is located in Amsterdam. As you can see, in this test, we save 0.055s. This test is done from server to server. Doing a test from server to real browser clients on a desktop, or mobile device, will result in larger numbers. Larger numbers result in slower connections, which will result in lesser user experience.
Another great load testing tool is Siege. Using Siege helps you to understand how many concurrent clients can visit your website during high loads. We will just cover the basics of Siege here. Install Siege on another Droplet somewhere else in the world. Use the following command to install Siege:
apt-get install siege
Now let's run the following command. We will simulate 50 concurrent users for a period of three minutes. The –d option is the internal delay, in seconds, for which the users sleeps:
siege -c50 -d10 -t3M http://yourdomain.com
Without CloudFlare, the output looks as follows:
siege -c50 -d10 -t3M http://mage2cookbook.com

Transactions:                   1732 hits
Availability:                 100.00 %
Elapsed time:                 179.79 secs
Data transferred:              15.47 MB
Response time:                  0.18 secs
Transaction rate:               9.63 trans/sec
Throughput:                     0.09 MB/sec
Concurrency:                    1.71
Successful transactions:        1732
Failed transactions:               0
Longest transaction:            0.34
Shortest transaction:           0.15
With CloudFlare, the output looks as follows:
siege -c50 -d10 -t3M http://mage2cookbook.com

Transactions:                   1716 hits
Availability:                 100.00 %
Elapsed time:                 179.74 secs
Data transferred:              14.05 MB
Response time:                  0.10 secs
Transaction rate:               9.55 trans/sec
Throughput:                     0.08 MB/sec
Concurrency:                    0.96
Successful transactions:        1716
Failed transactions:               0
Longest transaction:            0.62
Shortest transaction:           0.08
In the last test, we can see that the Response time is 0.10 seconds compared to 0.18 seconds.
The test Droplet that we used was located in Amsterdam using two CPUs and 4 GB memory. For a real browser test, it is best to use tools such as Chrome developer tools. Those timings are more accurate and give you a better idea of the real user experience. Testing on a mobile device is a totally different ball game and is out of the scope of this book.