Table of Contents for
Magento 2 - Build World-Class online stores
 Magento 2 - Build World-Class online stores
Published by
Packt Publishing, 2017
Magento 2 - Build World-Class online stores
Published by
Packt Publishing, 2017
- Cover
- Table of Contents
- Magento 2 - Build World-Class online stores
- Magento 2 - Build World-Class online stores
- Credits
- Preface
- 1. Module 1
- 1. Magento Fundamentals
- XAMPP installation
- Magento
- Summary
- 2. Magento 2.0 Features
- An introduction to the Magento order management system
- Magento 2.0 command-line configuration
- The command-line utility
- Summary
- 3. Working with Search Engine Optimization
- Store configuration
- SEO and searching
- SEO catalog configuration
- Google Analytics tracking code
- Optimizing Magento pages
- Summary
- 4. Magento 2.0 Theme Development – the Developers' Holy Grail
- Magento 2.0 theme structure
- The Magento Luma theme
- Magento theme inheritance
- CMS blocks and pages
- Custom variables
- Creating a basic Magento 2.0 theme
- Summary
- 5. Creating a Responsive Magento 2.0 Theme
- Composer – the PHP dependency manager
- Building the CompStore theme
- CSS preprocessing with LESS
- Applying new CSS to the CompStore theme
- Creating the CompStore logo
- Applying the theme
- Creating CompStore content
- Customizing Magento 2.0 templates
- Summary
- 6. Write Magento 2.0 Extensions – a Great Place to Go
- Using the Zend framework
- Magento 2.0 extension structure
- Developing your first Magento extension
- The Twitter REST API
- The TweetsAbout module structure
- Using TwitterOAuth to authenticate our extension
- Developing the module
- Summary
- 7. Go Mobile with Magento 2.0!
- Adjusting the CompStore theme for mobile devices
- The Magento 2.0 responsive design
- The Magento UI
- Implementing a new CSS mixin media query
- Adjusting tweets about extensions for mobile devices
- Summary
- 8. Speeding up Your Magento 2.0
- Indexing and caching Magento
- Indexing and re-indexing data
- The Magento cron job
- Caching
- Fine-tuning the Magento hosting server
- Selecting the right Magento hosting service
- Apache web server deflation
- Enabling the expires header
- Minifying scripts
- Summary
- 9. Improving Your Magento Skills
- Magento knowledge center
- Improving your Magento skills
- Summary
- 2. Module 2
- 1. Magento 2 System Tools
- Installing Magento 2 sample data via GUI
- Installing Magento 2 sample data via the command line
- Managing Magento 2 indexes via the command line
- Managing Magento 2 cache via the command line
- Managing Magento 2 backup via the command line
- Managing Magento 2 set mode (MAGE_MODE)
- Transferring your Magento 1 database to Magento 2
- 2. Enabling Performance in Magento 2
- Configuring Redis for backend cache
- Configuring Memcached for session caching
- Configuring Varnish as the Full Page Cache
- Configuring Magento 2 with CloudFlare
- Configuring optimized images in Magento 2
- Configuring Magento 2 with HTTP/2
- Configuring Magento 2 performance testing
- 3. Creating Catalogs and Categories
- Create a Root Catalog
- Create subcategories
- Manage attribute sets
- Create products
- Manage products in a catalog grid
- 4. Managing Your Store
- Creating shipping and tax rules
- Managing customer groups
- Configuring inventories
- Configuring currency rates
- Managing advanced pricing
- 5. Creating Magento 2 Extensions – the Basics
- Initializing extension basics
- Working with database models
- Creating tables using setup scripts
- Creating a web route and controller to display data
- Creating system configuration fields
- Creating a backend data grid
- Creating a backend form to add/edit data
- 6. Creating Magento 2 Extensions – Advanced
- Using dependency injection to pass classes to your own class
- Modifying functions with the use of plugins – Interception
- Creating your own XML module configuration file
- Creating your own product type
- Working with service layers/contracts
- Creating a Magento CLI command option
- 3. Module 3
- 1. Planning for Magento
- Technical considerations
- Global-Website-Store methodology
- Planning for multiple stores
- Summary
- 2. Managing Products
- Managing products the customer focused way
- Creating products
- Managing inventory
- Pricing tools
- Autosettings
- Related products, up-sells, and cross-sells
- Importing products
- Summary
- 3. Designs and Themes
- The concept of theme inheritance
- Default installation of design packages and themes
- Installing third-party themes
- Inline translations
- Working with theme variants
- Customizing themes
- Customizing layouts
- Summary
- 4. Configuring to Sell
- Payment methods
- Shipping methods
- Managing taxes
- Transactional e-mails
- Summary
- 5. Managing Non-Product Content
- Summary
- 6. Marketing Tools
- Promotions
- Newsletters
- Using sitemaps
- Optimizing for search engines
- Summary
- 7. Extending Magento
- The new Magento module architecture
- Extending Magento functionality with Magento plugins
- Building your own extensions
- Summary
- 8. Optimizing Magento
- Indexing and caching
- Caching in Magento 2 – not just FPC
- Tuning your server for speed
- Summary
- 9. Advanced Techniques
- Version control
- Magento cron
- Backing up your database
- Upgrading Magento
- Summary
- 10. Pre-Launch Checklist
- System configurations
- Design configurations
- Search engine optimization
- Sales configurations
- Product configurations
- Maintenance configurations
- Summary
- Index
The topic of shipping is so huge that you could write a book about it. The options related, for example, to width, length and height, breakable, edible, and so on, are endless.
After configuring these attributes for a product, we can start relating them to our shipping setup and shipping vendor. Magento has a huge selection of shipping vendors to choose from. It's important to choose the right vendor and the correct Magento extension. This could be challenging. Do not immediately pick the cheapest shipping vendor. Check the quality of their service, their specialty when it comes to shipping your products, and their Magento extension.
Creating the correct tax rules is not for the fainthearted. Are you in the USA, Europe, Asia, or somewhere else? Every country has its own tax rules. Always check with the local authorities to find out which rules to apply.
To step through this recipe, you will use a Droplet created in Chapter 1, Magento 2 System Tools at DigitalOcean https://www.digitalocean.com/. We will be using an NGINX, PHP-FPM, Composer-based setup including sample data. No other prerequisites are required.
For the purpose of this recipe, let's assume that we need to create shipping and tax rules for the European Union. The shipping rules apply to a Table Rates setup using a local shipping vendor. The following steps will guide you through them.
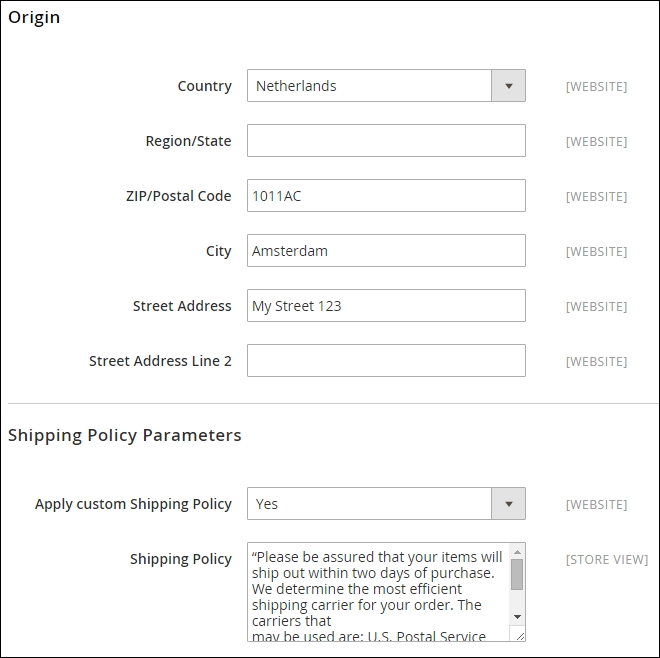
- First we start setting up the shipping rates. Go to Stores | Configuration | Sales. We have three menus to choose from. Let's start with the Shipping Settings first. Click on the Menu tab. You see two drop-down menus called Origin and Shipping Policy Parameters.
Now complete the entire field set related to your company. This is the starting point. When using the Shipping Policy, just mark it Yes and commit your policy. Here is an example of how a policy could look:
- Now continue to the Multishipping Settings menu. By default, we stay with the Allow Shipping to Multiple Addresses option.
- Next, we click Shipping Methods. The default shipping options in Magento 2 are: Free Shipping, Flat Rate, Table Rates, UPS, USPS, FedEx, and DHL.
Since the scope of this recipe is Table Rates, using Free Shipping and Flat Rate is pretty straightforward.
Now click on the Table Rates drop-down arrow, and commit the following information:
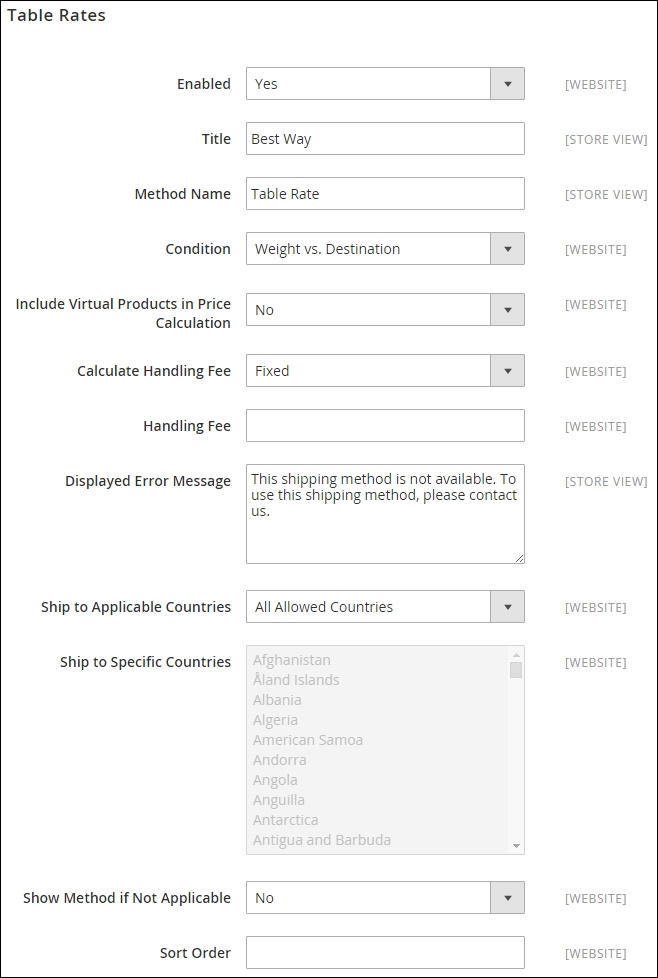
In the Condition drop-down menu we use the Weight vs. Destination option. Beside this option we also can choose from Price vs. Destination or # (number) of items vs. Destination. Depending on your needs, pick one of them. Since we are using the Weight option, we need to make sure that our entire product set has the correct weight configured.
- For the purpose of this recipe, disable the Flat Rate option in the menu.
- Now click Save Config and update your cache.
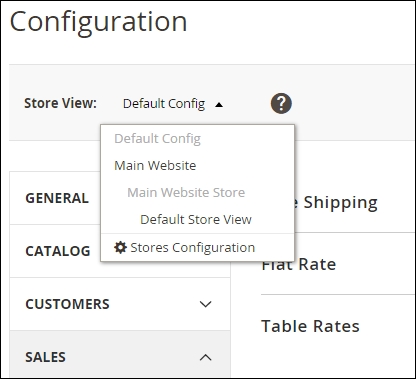
- Next we need to switch to the correct website using the Store View switcher in the Stores | Configuration menu. Click the drop-down arrow in the top-left menu, and select Main Website (or the name of your website):
- Confirm the pop-up window to continue and check the Table Rates options. Now we have two new options visible. The Export CSV gives us a comma-separated file called
tablesrates.csvthat we need to complete. Download the file and open up a spreadsheet editor, such as MS Excel, OpenOffice Calc, or Google Docs Spreadsheet.Since we are using the Weight vs. Destination option, the CSV schema looks as follows:
Country
Region/State
Zip/Postal Code
Weight (and above)
Shipping Price
NLD
*
*
0
6.95
NLD
*
*
50
9.95
NLD
*
*
100
14.50
DEU
*
*
0
10.50
DEU
*
*
50
17.50
DEU
*
*
100
22.50
FRA
*
*
0
10.50
FRA
*
*
50
17.50
FRA
*
*
100
22.50
In this example, we use a wildcard for the Region/State and Zip/Postal Code. You can replace this wildcard with the appropriate value. Upload your saved
tablesrates.csvfile in the Import section and click Save Config, and clean the cache: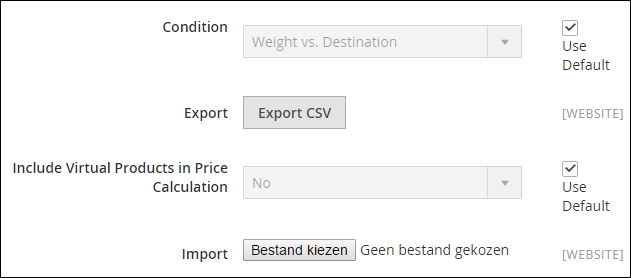
- Before we can verify it is working, we need to update the weight of the product we want to sell. Go to Products | Catalog and update your grid using the weight attribute. Check out the Manage products in a catalog grid recipe of Chapter 3, Creating Catalogs and Categories for how to do this.
- Now let's edit Joust Duffle Bag from the sample data. Set the Weight to
50and click Save & Close. Do the same for Strive Shoulder Pack (49) and Crown Summit Backpack (51). Your product grid should now look as follows: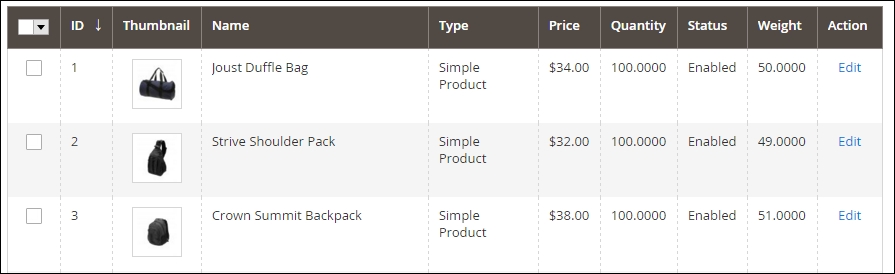
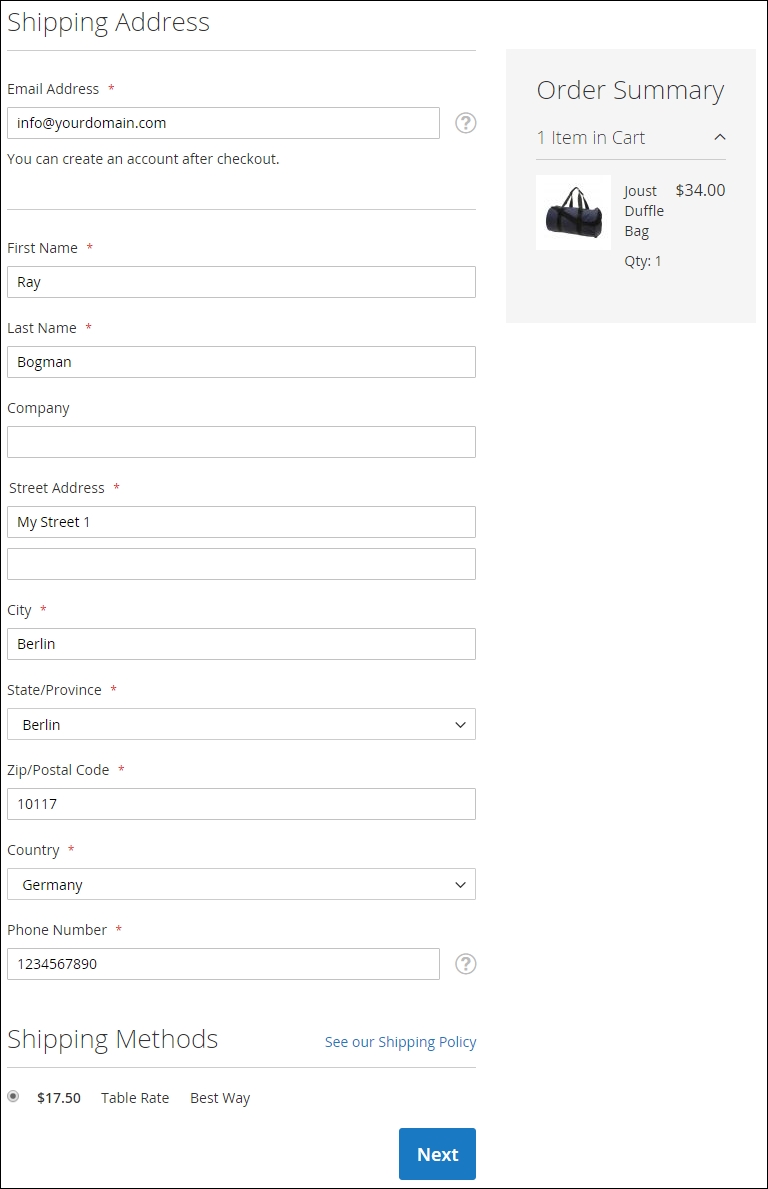
- Finally, we can test if the checkout and shipping fee are configured correctly. Open up a browser, add the Joust Duffle Bag to you basket, and check it out. Complete your personal data and check the shipping Table Rate at the bottom.
We only used German, French, and Dutch codes in this example. If you want to have your country shipping fees in the Table Rate CSV file, update them accordingly:
- Congratulations, you just finished configuring shipping rules in Magento 2.
- Next we continue to configure the appropriate tax rules. Since we cannot cover all the different tax rules worldwide, we will stick for now with the European Union. Import to the following tax_rates.csv file to System | Import/Export Tax Rates. The file can be downloaded from https://github.com/mage2cookbook/chapter5.
- To check if all tax rates are created, go to Stores | Tax Zone and Rates. You see a large list of all rates and countries.
- Now go to Stores | Tax Rules and click on Rule 1. For this example we change the Name to
EU Customers. Now let's select all the EU countries with the (standard) tax Rate and click Save Rule: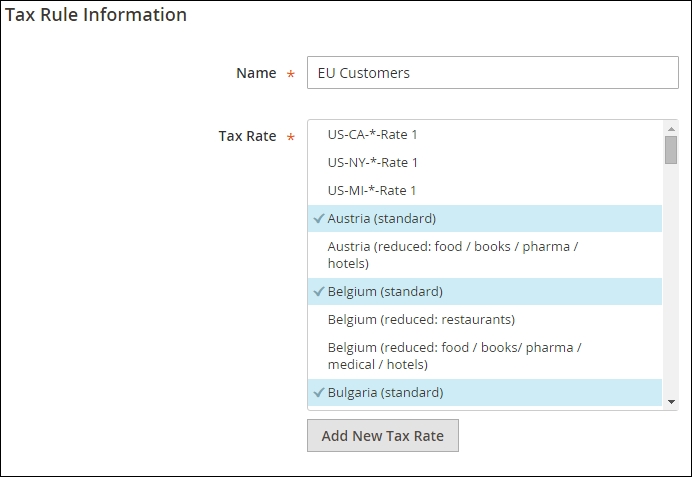
In this example we set the default rule to the high tax rate. Create a new rule when you are selling services or products that have a lower tax rate. But don't forget to create a new Product Tax Class in the Additional Settings. This class can then be used in every product type where it applies.
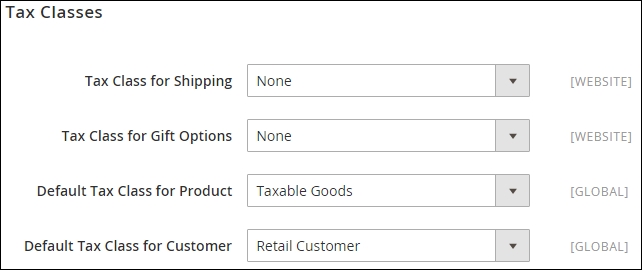
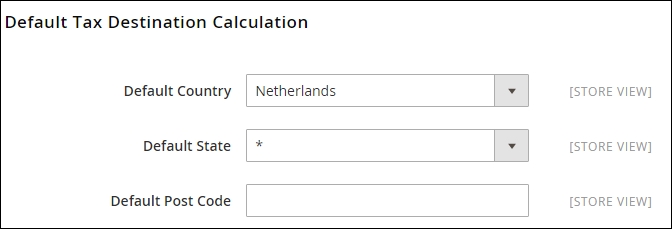
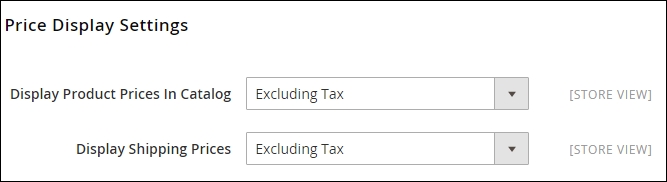
- Next we need to configure the tax system setup. Go to Stores | Configuration | Sales | Tax. Depending on your production setup, using a multi domain with different shipping vendors and warehouse configuration may change. Always use the Store View switcher on the top to change the settings according to the domain or country you are selling in. The following examples will give you an overview of a basic setup created in Magento 2 Enterprise Edition. In the Magento 2 Community Edition some features, such as Gift Wrapping and Printed Card Prices, will not be shown:
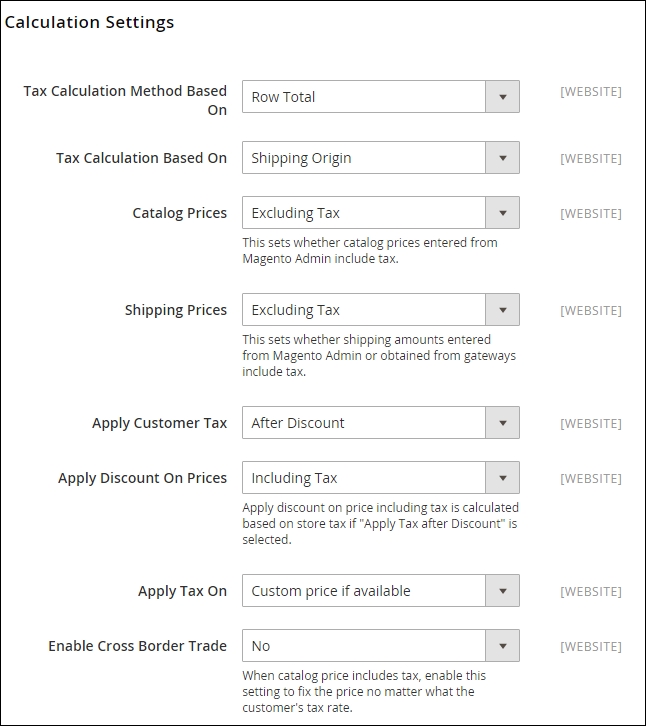
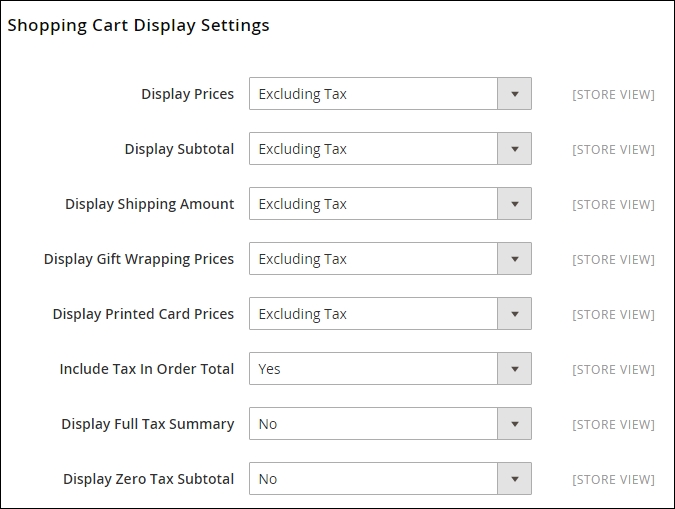
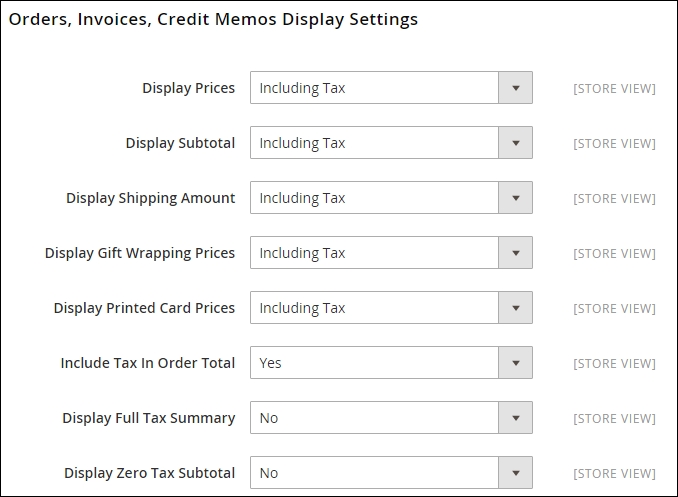
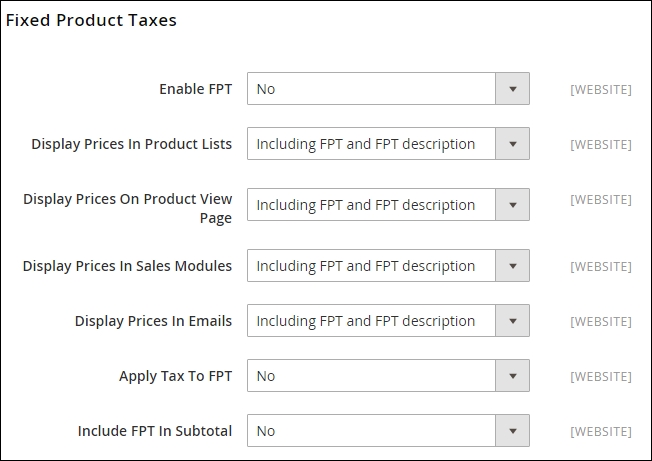
- Change the setting and click Save Config.
- Since we are using the Magento 2 sample data, we are ready to perform the test. Every product is configured with the Taxable Goods Tax Class.
- Finally, we can test if the checkout and tax rates are configured correctly. Open up a browser and add the Joust Duffle Bag to your basket and check it out. Complete your personal data and check the Review & Payments step on the right in the checkout. The Order Summary should now look like this:

- Congratulations, you just finished configuring tax rules in Magento 2.
Let's recap and find out what we did throughout the preceding recipe. In Steps 1 through 10, we configured a shipping method called Table Rates to handle all the shipping. We used the Weight vs. Destination option. Using this option we needed to update all our products with the correct weight attribute value.
In Steps 12 through 18, we configured tax rules for the European Union using a tax_rates.csv file from GitHub. By using this file, it was easy to configure the appropriate tax rule. In Step 15, we gave an example of how a system configuration for a store view could look.
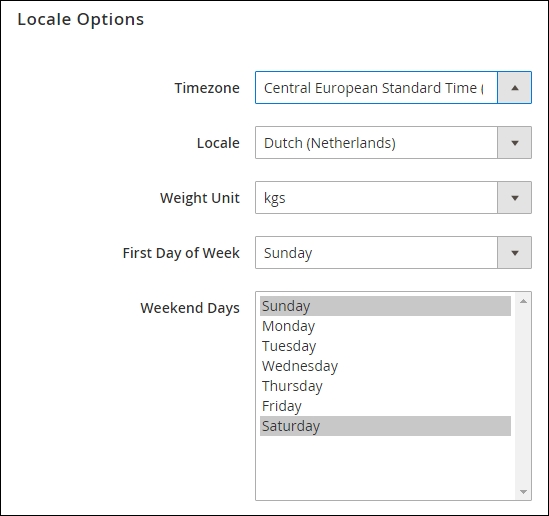
Depending on where you live or are sending products to, using the correct measuring units in Magento 2 is important. This new feature helps us to configure whether we calculate the weight in lbs (pounds) or kgs (kilograms). We can find this new option in Stores | Configuration | General | Locale Options. Here is an example showing the Weight Unit field: