Table of Contents for
Magento 2 - Build World-Class online stores
 Magento 2 - Build World-Class online stores
Published by
Packt Publishing, 2017
Magento 2 - Build World-Class online stores
Published by
Packt Publishing, 2017
- Cover
- Table of Contents
- Magento 2 - Build World-Class online stores
- Magento 2 - Build World-Class online stores
- Credits
- Preface
- 1. Module 1
- 1. Magento Fundamentals
- XAMPP installation
- Magento
- Summary
- 2. Magento 2.0 Features
- An introduction to the Magento order management system
- Magento 2.0 command-line configuration
- The command-line utility
- Summary
- 3. Working with Search Engine Optimization
- Store configuration
- SEO and searching
- SEO catalog configuration
- Google Analytics tracking code
- Optimizing Magento pages
- Summary
- 4. Magento 2.0 Theme Development – the Developers' Holy Grail
- Magento 2.0 theme structure
- The Magento Luma theme
- Magento theme inheritance
- CMS blocks and pages
- Custom variables
- Creating a basic Magento 2.0 theme
- Summary
- 5. Creating a Responsive Magento 2.0 Theme
- Composer – the PHP dependency manager
- Building the CompStore theme
- CSS preprocessing with LESS
- Applying new CSS to the CompStore theme
- Creating the CompStore logo
- Applying the theme
- Creating CompStore content
- Customizing Magento 2.0 templates
- Summary
- 6. Write Magento 2.0 Extensions – a Great Place to Go
- Using the Zend framework
- Magento 2.0 extension structure
- Developing your first Magento extension
- The Twitter REST API
- The TweetsAbout module structure
- Using TwitterOAuth to authenticate our extension
- Developing the module
- Summary
- 7. Go Mobile with Magento 2.0!
- Adjusting the CompStore theme for mobile devices
- The Magento 2.0 responsive design
- The Magento UI
- Implementing a new CSS mixin media query
- Adjusting tweets about extensions for mobile devices
- Summary
- 8. Speeding up Your Magento 2.0
- Indexing and caching Magento
- Indexing and re-indexing data
- The Magento cron job
- Caching
- Fine-tuning the Magento hosting server
- Selecting the right Magento hosting service
- Apache web server deflation
- Enabling the expires header
- Minifying scripts
- Summary
- 9. Improving Your Magento Skills
- Magento knowledge center
- Improving your Magento skills
- Summary
- 2. Module 2
- 1. Magento 2 System Tools
- Installing Magento 2 sample data via GUI
- Installing Magento 2 sample data via the command line
- Managing Magento 2 indexes via the command line
- Managing Magento 2 cache via the command line
- Managing Magento 2 backup via the command line
- Managing Magento 2 set mode (MAGE_MODE)
- Transferring your Magento 1 database to Magento 2
- 2. Enabling Performance in Magento 2
- Configuring Redis for backend cache
- Configuring Memcached for session caching
- Configuring Varnish as the Full Page Cache
- Configuring Magento 2 with CloudFlare
- Configuring optimized images in Magento 2
- Configuring Magento 2 with HTTP/2
- Configuring Magento 2 performance testing
- 3. Creating Catalogs and Categories
- Create a Root Catalog
- Create subcategories
- Manage attribute sets
- Create products
- Manage products in a catalog grid
- 4. Managing Your Store
- Creating shipping and tax rules
- Managing customer groups
- Configuring inventories
- Configuring currency rates
- Managing advanced pricing
- 5. Creating Magento 2 Extensions – the Basics
- Initializing extension basics
- Working with database models
- Creating tables using setup scripts
- Creating a web route and controller to display data
- Creating system configuration fields
- Creating a backend data grid
- Creating a backend form to add/edit data
- 6. Creating Magento 2 Extensions – Advanced
- Using dependency injection to pass classes to your own class
- Modifying functions with the use of plugins – Interception
- Creating your own XML module configuration file
- Creating your own product type
- Working with service layers/contracts
- Creating a Magento CLI command option
- 3. Module 3
- 1. Planning for Magento
- Technical considerations
- Global-Website-Store methodology
- Planning for multiple stores
- Summary
- 2. Managing Products
- Managing products the customer focused way
- Creating products
- Managing inventory
- Pricing tools
- Autosettings
- Related products, up-sells, and cross-sells
- Importing products
- Summary
- 3. Designs and Themes
- The concept of theme inheritance
- Default installation of design packages and themes
- Installing third-party themes
- Inline translations
- Working with theme variants
- Customizing themes
- Customizing layouts
- Summary
- 4. Configuring to Sell
- Payment methods
- Shipping methods
- Managing taxes
- Transactional e-mails
- Summary
- 5. Managing Non-Product Content
- Summary
- 6. Marketing Tools
- Promotions
- Newsletters
- Using sitemaps
- Optimizing for search engines
- Summary
- 7. Extending Magento
- The new Magento module architecture
- Extending Magento functionality with Magento plugins
- Building your own extensions
- Summary
- 8. Optimizing Magento
- Indexing and caching
- Caching in Magento 2 – not just FPC
- Tuning your server for speed
- Summary
- 9. Advanced Techniques
- Version control
- Magento cron
- Backing up your database
- Upgrading Magento
- Summary
- 10. Pre-Launch Checklist
- System configurations
- Design configurations
- Search engine optimization
- Sales configurations
- Product configurations
- Maintenance configurations
- Summary
- Index
If you've been following along, chapter by chapter, you've created a working, accessible online store front by now. Are you ready to take orders now?
Not just yet. There's still more to do before you can swing open the virtual doors to your new Magento store. Specifically, we need to:
- Understand the Magento sales process
- Configure the payment gateways to allow you to take online credit card payments
- Set up how your products will be shipped
- Configure sales tax rules
- Create customized outgoing e-mails
If you're the developer or designer of a Magento powered site, this is usually the time when you consult with your client – the store owner – to learn how they want to take payments, charge for shipping, and offer promotional discounts. Once you understand the concepts in this chapter, you'll be well prepared to ask the right questions.
For store owners and administrators, this chapter will give you insights into what can be managed with Magento. Fortunately, there are few limitations to Magento; however, we are consistently amazed at the various ways retailers price and vend their products. Hopefully, whatever unique selling programs you currently employ can be replicated online with your Magento store. We're betting they can.
If you've shopped online before, you no doubt have some understanding of the usual online sales process:
- You browse and find a product you want to purchase.
- You "add" the product to your virtual shopping cart.
- When you're finished shopping, you go to a checkout page.
- In most online stores, you will first enter your billing and shipping addresses.
- From this information, various shipping alternatives are presented, from which you choose the most appropriate for your needs and budget.
- Next, you choose a payment method – usually a credit card – and enter your payment information.
- After reviewing your order details, you commit to the purchase and moments later, you receive confirmation that your order has been processed. You usually receive an e-mail receipt of your purchase.
- After a day or so, you receive another e-mail announcing that your order has been shipped. This e-mail may also include package tracking numbers so you can follow the progress of your package from distribution to doorstep.
Magento duplicates this sales process in pretty much the same way. For our purposes, though, we need to understand what happens after the customer commits to the order, for that is when the store administrator's participation is required.
The following chart illustrates both the frontend and backend steps of the Magento sales process:
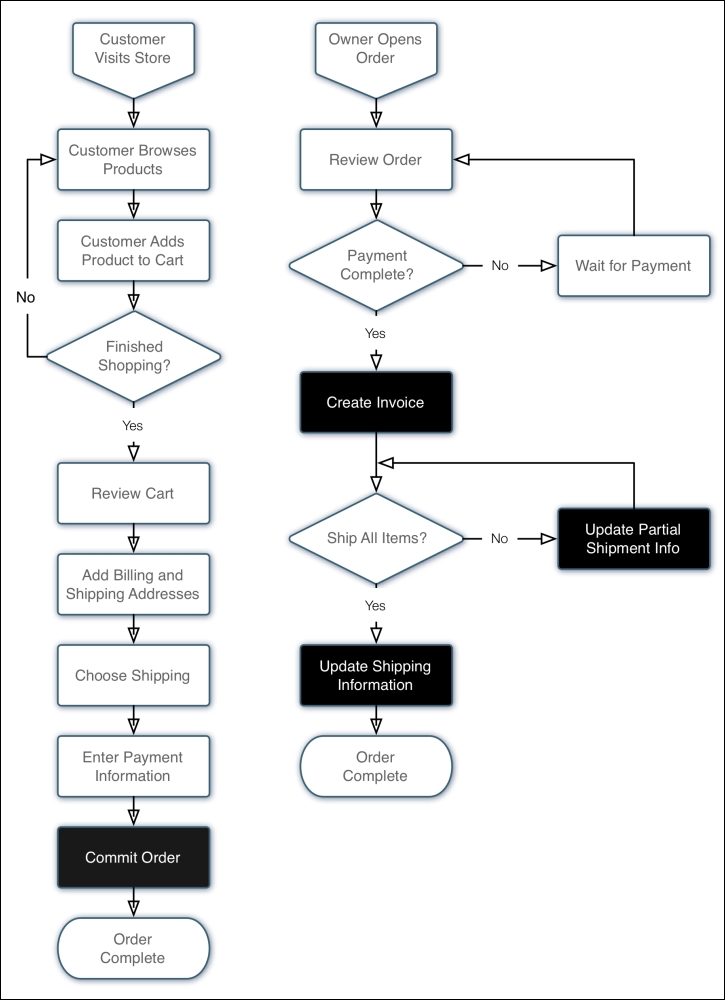
The black boxes with white type are steps that generally create an e-mail to the customer.
As we'll see in this chapter, there are occasional variations to this process, but in general, the Magento sales process is pretty straightforward. What you'll find impressive is the scope of Magento's ability to give you a wider latitude on adjusting the sales process to meet your particular needs. For instance, if you're selling downloadable products, such as e-books, music or software, you don't need the shipping process steps. Yet, if you sell proprietary digital media, you will need to manage the distribution of the products to your customers. For instance, to prevent unlimited downloads.
Before mapping out the business rules that you will use to configure Magento, it's helpful to see and understand how orders are processed in the Magento backend. Many times, developers and administrators new to Magento rush to configure the myriad of settings (which we will be covering in this chapter) without fully realizing how those choices might impact on the overall sales process. It's understandable because most will want to test the ordering system with all the settings in place. It's a bit of a catch-22: you have no orders to use to understand the configurations, yet without the configurations, you can't test the ordering process.
Fortunately, a basic Magento 2 install with the sample data (again with the sample data? Yes!) gives you the basic configurations to allow you to place some sample orders and review the order process.
Tip
Give it a whirl!
If you've installed the sample data, or you have a store already configured to accept some type of test payments, you should spend time placing and processing orders. Try any number of different combinations. Ask your colleagues to place dummy orders, imagining that they are actual shoppers. You'll soon get a real handle on the process, and if you're a developer, your client will certainly appreciate the added insight you have to the Magento ordering process. This is incredibly important to your client, so it should be important to you!
Logging into the Magento backend, we can see our latest orders listed in the left sidebar of the dashboard:
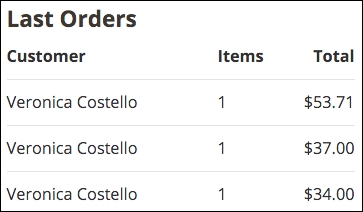
From here we can click on the order we wish to process, or we can go to Sales | Orders in the top navigation bar and then select the order from the list of all orders. Either way, we end up with a detailed view of the order.
Let's take each section of this screen separately and explain what each contributes to the ordering process.
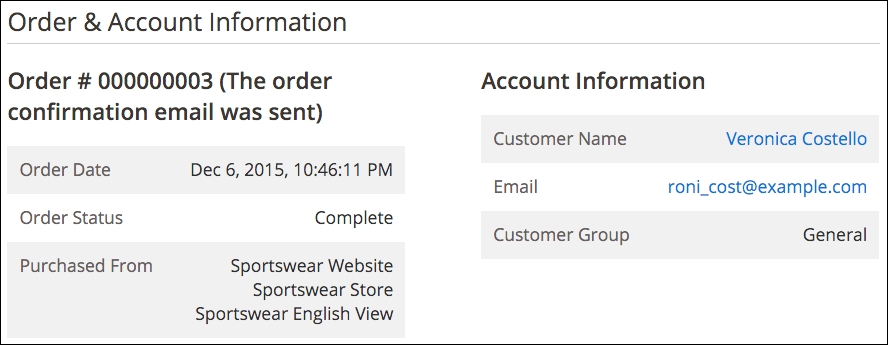
The first section, shown in the preceding image on the left, summarizes key order information, including the timestamp of the order (date and time), the current status (which by default is pending), and from which Magento store the purchase was made.
New orders, by default, are marked as pending. This means the order is awaiting your attention. The customer has already been charged and has received an e-mail confirmation of their order, but it's now up to you to complete the order, eventually taking it to a stage of complete.
The box on the right tells us the name of the customer, their e-mail address, and the fact that they checked out without registering (more on customer groups later in this chapter).

The next row of boxes shows the billing and shipping addresses for the purchaser. Notice that these are editable. Sometimes a customer, upon receiving their e-mail receipt, will see that they made an error in either or both of these. If the customer contacts you with corrected information, you can easily make the changes here.
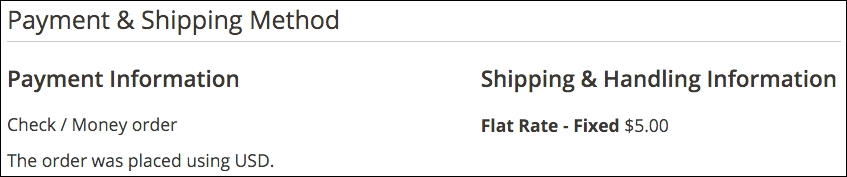
The third row of boxes give you information about the payment method and the buyer's choice of shipping for the order.

On row four, you'll find the list of products ordered by the customer, the amount charged and the amount of sales tax applicable for each line item.
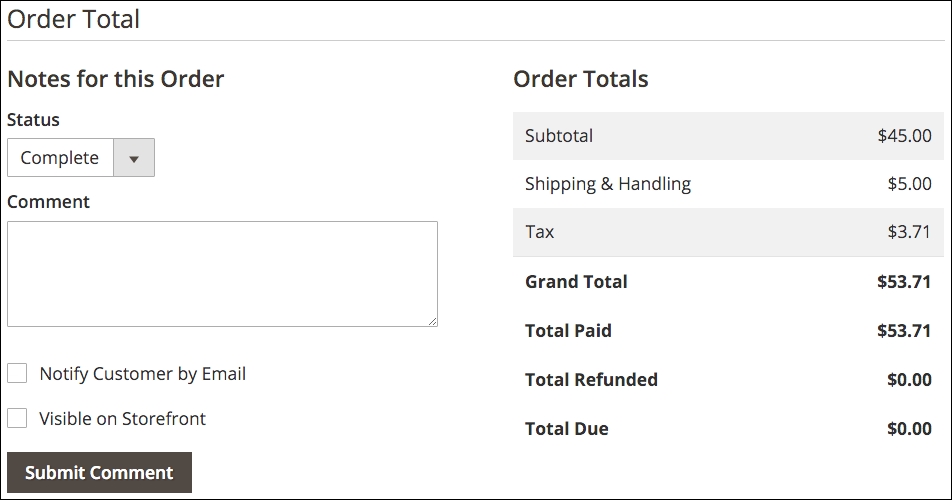
The final row of boxes are quite interesting and important. First, on the left in the preceding image, is how you can keep notes on an order and update the customer. Let's say, as in this case, that you have discovered that you only have one remaining chair and that more chairs won't arrive for another two weeks. By filling in this information here, and checking the Notify Customer by Email box, you can update the customer ("Would you like us to hold your order, or cancel it?") and have the update sent automatically to the buyer. Furthermore, by checking the Visible on Storefront box, the customer – if they are registered – can view the update in the Account Information section of your store.
All comments entered will be appended to the list at the bottom of the box.
The box to the right is the transaction summary of the order.
The next step for you, as the person who is processing orders, is to invoice this order. In Magento, this means that you are confirming the order, and proceeding with processing.
To convert an order into an invoice, click the button at the top of the page labeled Invoice. The resulting page is similar to the order page, except that it allows you to perform certain additional functions:
- Create Shipment: In the box titled Shipping Information, you can check the box labeled Create Shipment and add any tracking numbers to the invoice.
- Change the Quantity of Products to Invoice: As in our first example, if you have less products in stock than actually on hand, you may want to alter the number of products you are invoicing. Any remaining products will cause the order to remain open for future invoicing.
- Add Comments: As on the Order page, you can add a comment to the invoice and select whether the comment should be appended to the Invoice. Otherwise, the comment will be added to the order history.
Once you have made any of the preceding changes, you can click on Submit Invoice, which will convert the order to an invoice, and record the order as an actual sale. This is key, as your analysis of sales for your store rely on the analysis of invoices, not orders. If you have not shipped the items yet, the status of the order is now shown as Processing.
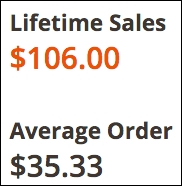
Now that we have converted an order into an invoice, the box on the Dashboard screen, titled Lifetime Sales, is now updated showing the total sales for the chosen period, less shipping and sales taxes, as shown in the following screenshot.
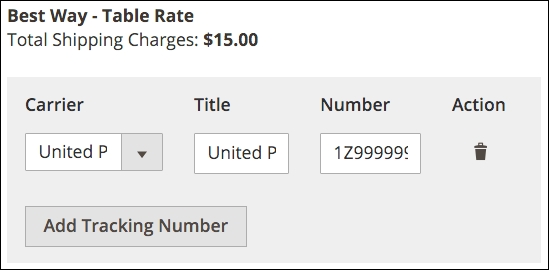
Now that we have created our invoice, and once we have shipped the purchased products, we can create one or more shipments. To do this, open the order as before and click the Ship button near the top of the screen.
On this screen, you can add tracking numbers for your shipments, as well as indicate the quantity of each product shipped. In the following image, I have added a sample UPS tracking number. You can add as many as required (you may need to ship an order in more than one box, for instance).
Lower on the page, you will find each line item of the order, with a field allowing you to change the number of products shipped, as shown in the following screenshot:
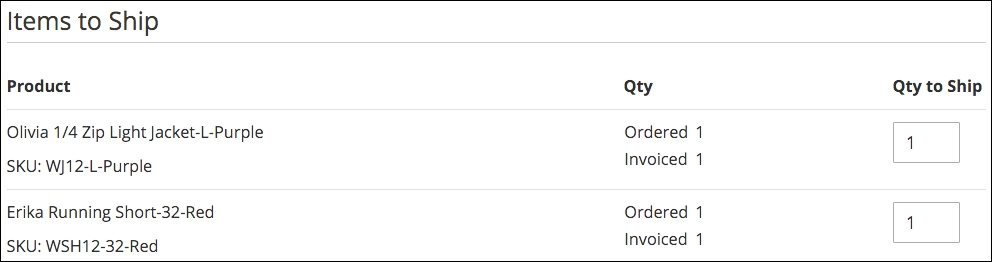
Once you have made any changes, including adding any comments, you can click Submit Shipment. If you ship all ordered items, the status of the order will change to Complete; otherwise, the order will remain Processing.
Once you become familiar with the sales process, you'll have a much better understanding of how various system configurations affect how orders are moved through Magento.