Table of Contents for
Magento 2 - Build World-Class online stores
 Magento 2 - Build World-Class online stores
Published by
Packt Publishing, 2017
Magento 2 - Build World-Class online stores
Published by
Packt Publishing, 2017
- Cover
- Table of Contents
- Magento 2 - Build World-Class online stores
- Magento 2 - Build World-Class online stores
- Credits
- Preface
- 1. Module 1
- 1. Magento Fundamentals
- XAMPP installation
- Magento
- Summary
- 2. Magento 2.0 Features
- An introduction to the Magento order management system
- Magento 2.0 command-line configuration
- The command-line utility
- Summary
- 3. Working with Search Engine Optimization
- Store configuration
- SEO and searching
- SEO catalog configuration
- Google Analytics tracking code
- Optimizing Magento pages
- Summary
- 4. Magento 2.0 Theme Development – the Developers' Holy Grail
- Magento 2.0 theme structure
- The Magento Luma theme
- Magento theme inheritance
- CMS blocks and pages
- Custom variables
- Creating a basic Magento 2.0 theme
- Summary
- 5. Creating a Responsive Magento 2.0 Theme
- Composer – the PHP dependency manager
- Building the CompStore theme
- CSS preprocessing with LESS
- Applying new CSS to the CompStore theme
- Creating the CompStore logo
- Applying the theme
- Creating CompStore content
- Customizing Magento 2.0 templates
- Summary
- 6. Write Magento 2.0 Extensions – a Great Place to Go
- Using the Zend framework
- Magento 2.0 extension structure
- Developing your first Magento extension
- The Twitter REST API
- The TweetsAbout module structure
- Using TwitterOAuth to authenticate our extension
- Developing the module
- Summary
- 7. Go Mobile with Magento 2.0!
- Adjusting the CompStore theme for mobile devices
- The Magento 2.0 responsive design
- The Magento UI
- Implementing a new CSS mixin media query
- Adjusting tweets about extensions for mobile devices
- Summary
- 8. Speeding up Your Magento 2.0
- Indexing and caching Magento
- Indexing and re-indexing data
- The Magento cron job
- Caching
- Fine-tuning the Magento hosting server
- Selecting the right Magento hosting service
- Apache web server deflation
- Enabling the expires header
- Minifying scripts
- Summary
- 9. Improving Your Magento Skills
- Magento knowledge center
- Improving your Magento skills
- Summary
- 2. Module 2
- 1. Magento 2 System Tools
- Installing Magento 2 sample data via GUI
- Installing Magento 2 sample data via the command line
- Managing Magento 2 indexes via the command line
- Managing Magento 2 cache via the command line
- Managing Magento 2 backup via the command line
- Managing Magento 2 set mode (MAGE_MODE)
- Transferring your Magento 1 database to Magento 2
- 2. Enabling Performance in Magento 2
- Configuring Redis for backend cache
- Configuring Memcached for session caching
- Configuring Varnish as the Full Page Cache
- Configuring Magento 2 with CloudFlare
- Configuring optimized images in Magento 2
- Configuring Magento 2 with HTTP/2
- Configuring Magento 2 performance testing
- 3. Creating Catalogs and Categories
- Create a Root Catalog
- Create subcategories
- Manage attribute sets
- Create products
- Manage products in a catalog grid
- 4. Managing Your Store
- Creating shipping and tax rules
- Managing customer groups
- Configuring inventories
- Configuring currency rates
- Managing advanced pricing
- 5. Creating Magento 2 Extensions – the Basics
- Initializing extension basics
- Working with database models
- Creating tables using setup scripts
- Creating a web route and controller to display data
- Creating system configuration fields
- Creating a backend data grid
- Creating a backend form to add/edit data
- 6. Creating Magento 2 Extensions – Advanced
- Using dependency injection to pass classes to your own class
- Modifying functions with the use of plugins – Interception
- Creating your own XML module configuration file
- Creating your own product type
- Working with service layers/contracts
- Creating a Magento CLI command option
- 3. Module 3
- 1. Planning for Magento
- Technical considerations
- Global-Website-Store methodology
- Planning for multiple stores
- Summary
- 2. Managing Products
- Managing products the customer focused way
- Creating products
- Managing inventory
- Pricing tools
- Autosettings
- Related products, up-sells, and cross-sells
- Importing products
- Summary
- 3. Designs and Themes
- The concept of theme inheritance
- Default installation of design packages and themes
- Installing third-party themes
- Inline translations
- Working with theme variants
- Customizing themes
- Customizing layouts
- Summary
- 4. Configuring to Sell
- Payment methods
- Shipping methods
- Managing taxes
- Transactional e-mails
- Summary
- 5. Managing Non-Product Content
- Summary
- 6. Marketing Tools
- Promotions
- Newsletters
- Using sitemaps
- Optimizing for search engines
- Summary
- 7. Extending Magento
- The new Magento module architecture
- Extending Magento functionality with Magento plugins
- Building your own extensions
- Summary
- 8. Optimizing Magento
- Indexing and caching
- Caching in Magento 2 – not just FPC
- Tuning your server for speed
- Summary
- 9. Advanced Techniques
- Version control
- Magento cron
- Backing up your database
- Upgrading Magento
- Summary
- 10. Pre-Launch Checklist
- System configurations
- Design configurations
- Search engine optimization
- Sales configurations
- Product configurations
- Maintenance configurations
- Summary
- Index
After understanding the basic Magento 2.0 theme structure, you have the right credentials to go to the next level: creating your own theme. In this chapter, we will develop a simple theme and activate it on the Magento Admin panel. The basic idea is to give you the right directions to Magento theme development and provide you with the tools to let your imagination fly around the creation of various Magento themes!
Before starting the creation, let's disable Magento cache management. It is important when you work with Magento development to get updates in real time. You learned about cache management in Chapter 2, Magento 2.0 Features:
- Open the terminal (Linux, OS X) or command prompt (Windows) and access the
<your Magento install dir>/bindirectory. - Then, run the
php magento cache:disablecommand to disable all the cache systems.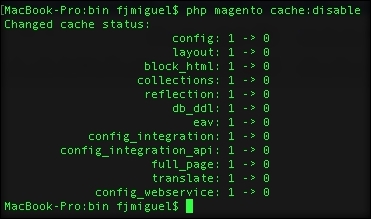
To create a basic theme structure, follow these steps:
The next step is to declare the theme information for Magento to recognize it as a new theme. Perform the following:
- Open your preferred code editor (Sublime Text2, TextMate, Atom.io).
- Create a new file named
theme.xmlunder your theme directory (app/design/frontend/Packt/basic/theme.xml). - Use the following code in the
theme.xmlfile and save the file:<theme xmlns:xsi="http://www.w3.org/2001/XMLSchema-instance" xsi:noNamespaceSchemaLocation="urn:magento:framework:Config/etc/theme.xsd"> <title>Basic theme</title> <parent>Magento/blank</parent> <!-- <media> <preview_image>media/preview.jpg</preview_image> </media>--> </theme>
This is a basic declaration for the Magento system to recognize our theme as an official theme. This code configures the theme name, parent, and preview image. The preview image is a preview for basic visualization purposes. We don't have a preview image right now, which is the why the code is commented; avoid unnecessary errors.
Once we have the basic configurations, we need to register the theme in the Magento system:
- Open your preferred code editor (Sublime Text2, TextMate, or Atom.io).
- Create new file named
registration.phpunder your theme directory (app/design/frontend/Packt/basic/registration.php). - Use the following code in registration.php and save the file:
<?php
/**
 * Copyright © 2016 Magento. All rights reserved.
 * See COPYING.txt for license details.
 */
\Magento\Framework\Component\ComponentRegistrar::register(
    \Magento\Framework\Component\ComponentRegistrar::THEME,
    'frontend/Packt/basic',
    __DIR__
);
This code simply registers our theme in the Magento system by passing a parameter of your new theme's structure directory.
In your theme, you can configure the image properties of the products in the Magento Catalog module by creating the view.xml file. You can control this specific configuration using the id attribute of every product's HTML5 element:
- Open your preferred code editor (Sublime Text2, TextMate, or Atom.io).
- Create a new directory named
etcunder your theme directory (app/design/frontend/Packt/basic/etc). - Create a new file named
view.xmlunder youretcdirectory (app/design/frontend/Packt/basic/etc/view.xml). - Then, use the following code in
view.xmland save the file:<image id="category_page_grid" type="small_image"> <width>250</width> <height>250</height> </image>
In the view.xml file, we declared the values of the width and height of the product image. The id and type attributes specified the kind of image that this rule will be applied to.
Note
For further information, visit http://goo.gl/73IQSz.
The static files (images, .js files, .css files, and fonts) will be stored in the web directory. Inside the web directory, we will organize our static files according to its scope. Create a new directory named web under your directory app/design/frontend/Packt/basic/web theme and create the following directory structure:
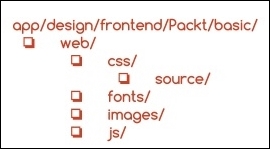
With this simple structure, you can manage all the static files of your custom theme.
By default in Magento 2.0, the theme logo is always recognized by the system by the name logo.svg. Magento 2.0 also recognizes the logo's default directory as <theme_dir>/web/images/logo.svg. So, if you have a logo.svg file, you can simply put the file in the right directory.
However, if you want to work with a different logo's name with a different format, you have to declare it in the Magento system. We will make a declaration with this new logo in the Magento_Theme directory because the new logo is a customization of the Magento_Theme module. We will override this module by taking advantage of the fallback system. As you may note, Magento has a specific pattern of declaring elements. This is the way in which Magento organizes its life cycle.
Let's declare a new theme logo by performing the following steps:
- Choose one logo for the example and save the file as
logo.pngin theapp/design/frontend/Packt/basic/Magento_Theme/web/imagesdirectory. - Open your preferred code editor (Sublime Text2, TextMate, or Atom.io).
- Create new file named
default.xmlunder yourlayoutdirectory (app/design/frontend/Packt/basic/Magento_Theme/layout). - Use the following code in
default.xmland save the file:<page xmlns:xsi="http://www.w3.org/2001/XMLSchema-instance" xsi:noNamespaceSchemaLocation="urn:magento:framework:View/Layout/etc/page_configuration.xsd"> <body> <referenceBlock name="logo"> <arguments> <argument name="logo_file" xsi:type="string"> Magento_Theme/images/logo.png </argument> <argument name="logo_img_width" xsi:type="number"> your_logo_width </argument> <argument name="logo_img_height" xsi:type="number"> your_logo_height </argument> </arguments> </referenceBlock> </body> </page>
This declaration has three different arguments to manage three attributes of your new logo: filename, width, and height. Don't forget to replace the your_logo_width and your_logo_height attributes with the correct size of the logo that you choose.
The logo_file argument seems to be wrong because we created our image in the Magento_Theme/web/images directory; however, thank God this is not true. I'll explain: when we activate the new theme, Magento processes the static files and copies them to the pub/static directory. This occurs because static files can be cached by Magento, and the correct directory for this is pub. So, we need to create the web directory for Magento to recognize the files as static files.
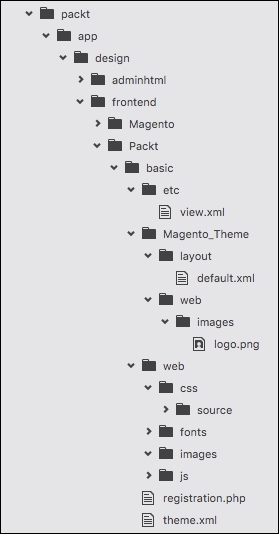
The final theme directory structure is illustrated as follows:
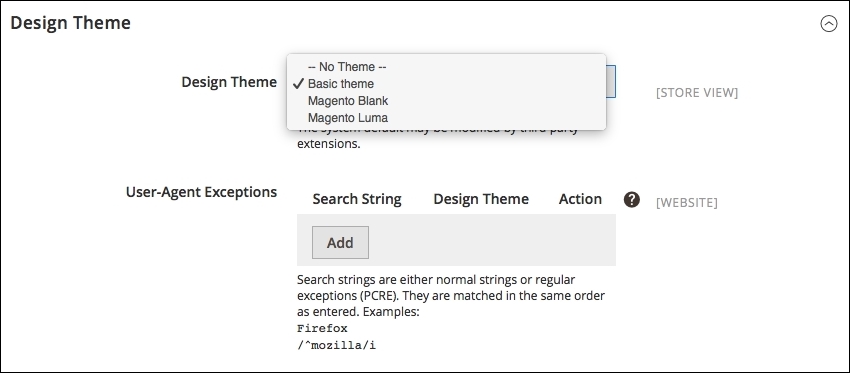
Once we have the theme ready to launch, we need to activate it in the Magento admin dashboard:
- First, access the Magento admin area URL (
http://localhost/packt/admin_packt) in your favorite browser. - Navigate to Stores | Configuration | Design.
- Then, select the Basic theme option as your Design Theme value and save the configuration.
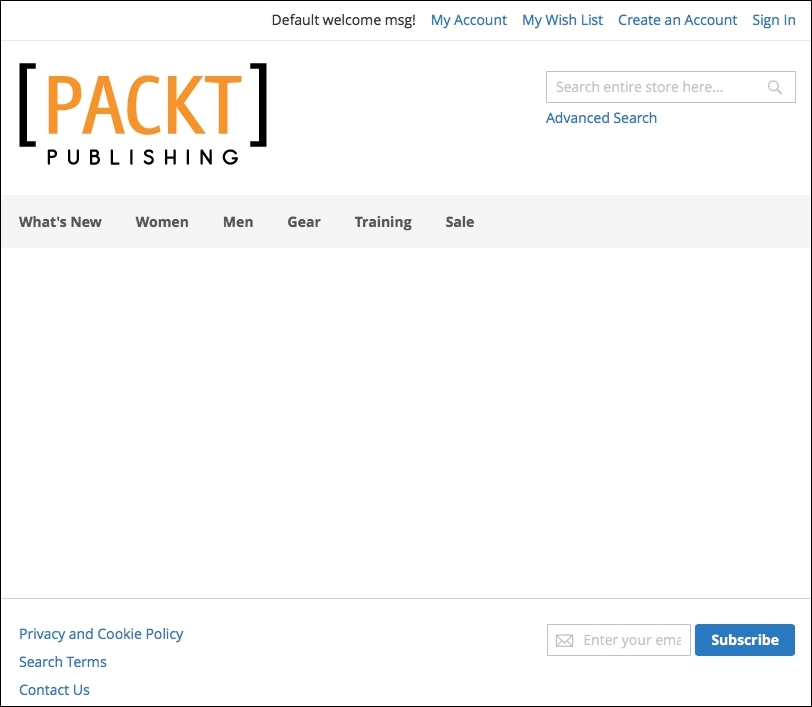
Navigate to the home page of your site by accessing the http://localhost/packt URL to see the final result: