Table of Contents for
Magento 2 - Build World-Class online stores
 Magento 2 - Build World-Class online stores
Published by
Packt Publishing, 2017
Magento 2 - Build World-Class online stores
Published by
Packt Publishing, 2017
- Cover
- Table of Contents
- Magento 2 - Build World-Class online stores
- Magento 2 - Build World-Class online stores
- Credits
- Preface
- 1. Module 1
- 1. Magento Fundamentals
- XAMPP installation
- Magento
- Summary
- 2. Magento 2.0 Features
- An introduction to the Magento order management system
- Magento 2.0 command-line configuration
- The command-line utility
- Summary
- 3. Working with Search Engine Optimization
- Store configuration
- SEO and searching
- SEO catalog configuration
- Google Analytics tracking code
- Optimizing Magento pages
- Summary
- 4. Magento 2.0 Theme Development – the Developers' Holy Grail
- Magento 2.0 theme structure
- The Magento Luma theme
- Magento theme inheritance
- CMS blocks and pages
- Custom variables
- Creating a basic Magento 2.0 theme
- Summary
- 5. Creating a Responsive Magento 2.0 Theme
- Composer – the PHP dependency manager
- Building the CompStore theme
- CSS preprocessing with LESS
- Applying new CSS to the CompStore theme
- Creating the CompStore logo
- Applying the theme
- Creating CompStore content
- Customizing Magento 2.0 templates
- Summary
- 6. Write Magento 2.0 Extensions – a Great Place to Go
- Using the Zend framework
- Magento 2.0 extension structure
- Developing your first Magento extension
- The Twitter REST API
- The TweetsAbout module structure
- Using TwitterOAuth to authenticate our extension
- Developing the module
- Summary
- 7. Go Mobile with Magento 2.0!
- Adjusting the CompStore theme for mobile devices
- The Magento 2.0 responsive design
- The Magento UI
- Implementing a new CSS mixin media query
- Adjusting tweets about extensions for mobile devices
- Summary
- 8. Speeding up Your Magento 2.0
- Indexing and caching Magento
- Indexing and re-indexing data
- The Magento cron job
- Caching
- Fine-tuning the Magento hosting server
- Selecting the right Magento hosting service
- Apache web server deflation
- Enabling the expires header
- Minifying scripts
- Summary
- 9. Improving Your Magento Skills
- Magento knowledge center
- Improving your Magento skills
- Summary
- 2. Module 2
- 1. Magento 2 System Tools
- Installing Magento 2 sample data via GUI
- Installing Magento 2 sample data via the command line
- Managing Magento 2 indexes via the command line
- Managing Magento 2 cache via the command line
- Managing Magento 2 backup via the command line
- Managing Magento 2 set mode (MAGE_MODE)
- Transferring your Magento 1 database to Magento 2
- 2. Enabling Performance in Magento 2
- Configuring Redis for backend cache
- Configuring Memcached for session caching
- Configuring Varnish as the Full Page Cache
- Configuring Magento 2 with CloudFlare
- Configuring optimized images in Magento 2
- Configuring Magento 2 with HTTP/2
- Configuring Magento 2 performance testing
- 3. Creating Catalogs and Categories
- Create a Root Catalog
- Create subcategories
- Manage attribute sets
- Create products
- Manage products in a catalog grid
- 4. Managing Your Store
- Creating shipping and tax rules
- Managing customer groups
- Configuring inventories
- Configuring currency rates
- Managing advanced pricing
- 5. Creating Magento 2 Extensions – the Basics
- Initializing extension basics
- Working with database models
- Creating tables using setup scripts
- Creating a web route and controller to display data
- Creating system configuration fields
- Creating a backend data grid
- Creating a backend form to add/edit data
- 6. Creating Magento 2 Extensions – Advanced
- Using dependency injection to pass classes to your own class
- Modifying functions with the use of plugins – Interception
- Creating your own XML module configuration file
- Creating your own product type
- Working with service layers/contracts
- Creating a Magento CLI command option
- 3. Module 3
- 1. Planning for Magento
- Technical considerations
- Global-Website-Store methodology
- Planning for multiple stores
- Summary
- 2. Managing Products
- Managing products the customer focused way
- Creating products
- Managing inventory
- Pricing tools
- Autosettings
- Related products, up-sells, and cross-sells
- Importing products
- Summary
- 3. Designs and Themes
- The concept of theme inheritance
- Default installation of design packages and themes
- Installing third-party themes
- Inline translations
- Working with theme variants
- Customizing themes
- Customizing layouts
- Summary
- 4. Configuring to Sell
- Payment methods
- Shipping methods
- Managing taxes
- Transactional e-mails
- Summary
- 5. Managing Non-Product Content
- Summary
- 6. Marketing Tools
- Promotions
- Newsletters
- Using sitemaps
- Optimizing for search engines
- Summary
- 7. Extending Magento
- The new Magento module architecture
- Extending Magento functionality with Magento plugins
- Building your own extensions
- Summary
- 8. Optimizing Magento
- Indexing and caching
- Caching in Magento 2 – not just FPC
- Tuning your server for speed
- Summary
- 9. Advanced Techniques
- Version control
- Magento cron
- Backing up your database
- Upgrading Magento
- Summary
- 10. Pre-Launch Checklist
- System configurations
- Design configurations
- Search engine optimization
- Sales configurations
- Product configurations
- Maintenance configurations
- Summary
- Index
Now that we've discussed the various Magento product types, let's go over the process of creating a new product in the Magento 2 backend. While there are some differences based on product type, the overall process and options are very similar.
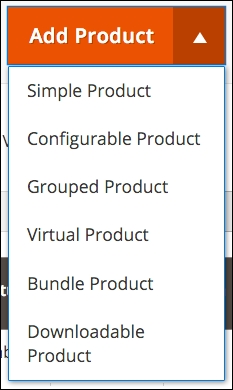
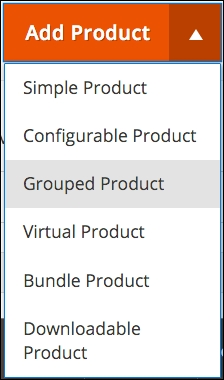
After you go to Products | Catalog in the backend, you will see a list of the products in your catalog. In the upper right-hand corner is an orange button, titled Add Product. If you click on Add Product, you can create a simple, configurable, virtual, or downloadable product. For all types — including the bundled and grouped product types — you can also click the button menu (the down arrow on the right side of the button) and choose a specific product type.
The configurable, virtual, and downloadable product types can be created simply by changing settings within the simple product detail panel. For example, you can start with a simple product, add configurations, and the product type will automatically change to a configurable product type.
Tip
As we go through the product creation process, you'll learn that Magento has really upped their game in Magento 2, making it much easier for you to manage your products. For instance, you can start out adding all the various t-shirt styles you sell as simple products, and then go back and create the various size and color variants within those products. In Magento 1.x, you could not change the type of an existing product without first deleting the product, then re-adding it.
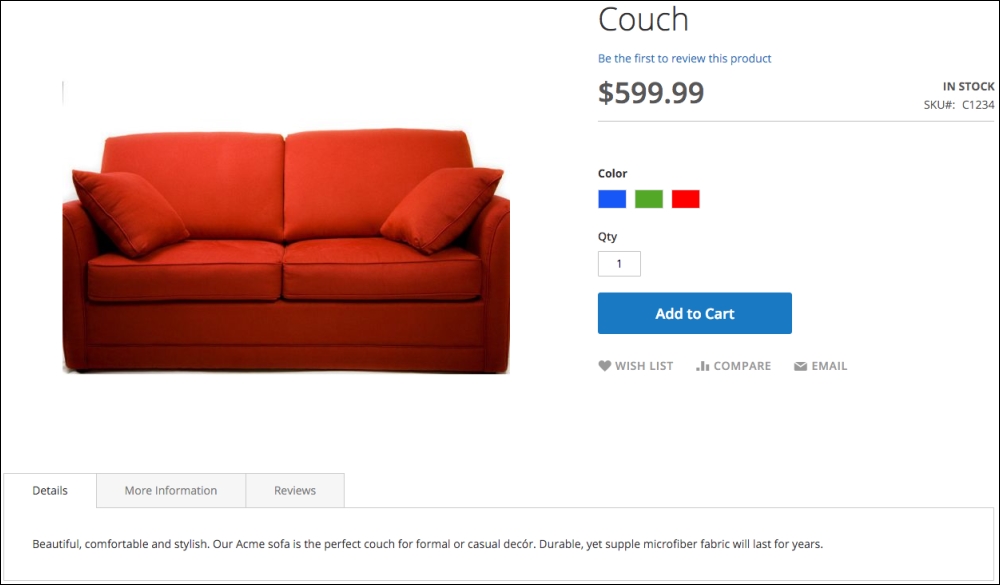
So, let's begin by building a simple product and then exploring how to create the other complex product types. For our example, we'll start with a red couch.
To begin, click on Add Product button on the Products | Catalog screen.
We're going to fill in the fields in the Product Details section as follows:
- Name: Couch
- SKU: C1234
- Price: 599.99
- Tax Class: Taxable Goods
- Quantity: 100, In Stock
- Weight: Yes, 200 lbs
- Categories: Sofas
- Description: Beautiful, comfortable and stylish. Our Acme sofa is the perfect couch for formal or casual decór. Durable, yet supple microfiber fabric will last for years.
- For the Images and Videos section, we're going to upload an image of a red sofa we have taken from sample data provided in earlier Magento versions.
Save your product now before proceeding.
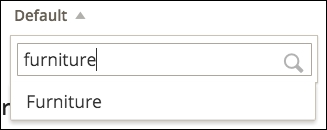
Next, we want to click the small down arrow to the right of Default at the top of the screen and type Furniture to select the Furniture Attribute Set we created earlier.
After the screen refreshes, you'll see an additional attribute group you created in the left sidebar, and any attributes you added to the attribute set will be available to you.
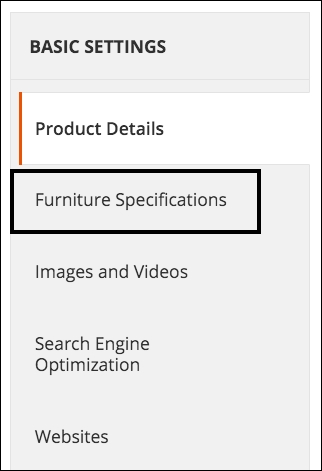
In the Furniture Specifications panel, we will enter the following values:
- Fabric: microfiber
- Color: Red
- Room: Living Room
- Country of Manufacture: United States
Under the Websites panel, we need to select Furniture Website so that the new product will appear in the stores within the furniture website.
We're going to leave all the other settings as they are for now and click on Save.
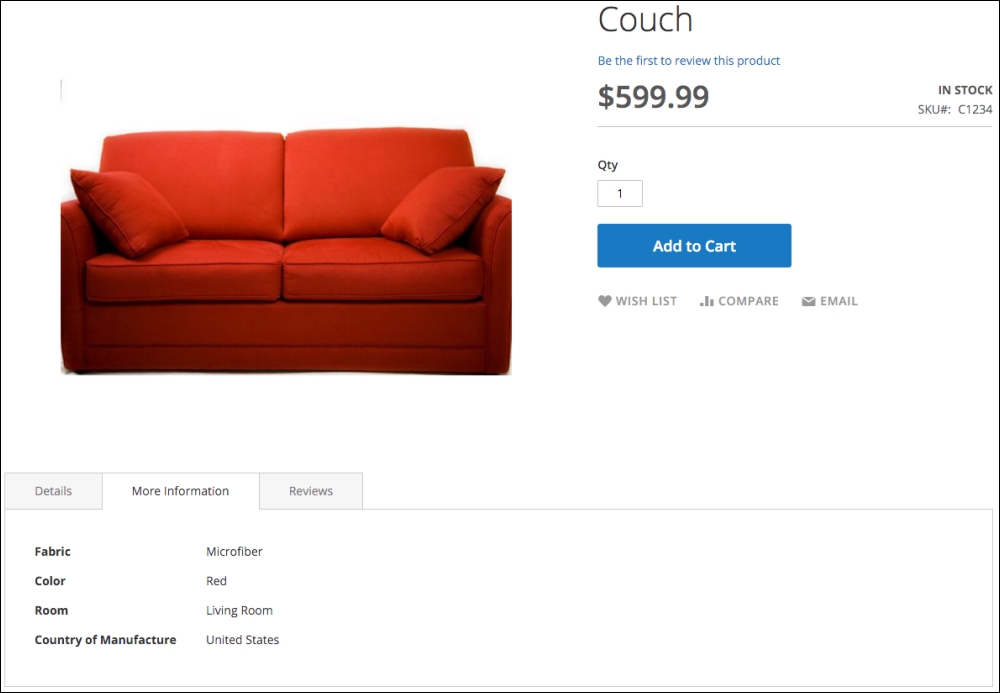
When we view the product on the website and click on the More Information tab, we can see the values of the attributes we have selected.
Let's say we have our couch available in three colors: red, blue, and green. How would we present all three choices as a single product yet allow the customer to select their desired color?
The simplest way would be to add colors as an option in our simple product. However, if we manage inventory separately for each color (let's say we have 100 red, 50 blue, and 30 green sofas in the warehouse), we have to, in essence, create three simple products and associate them to a single configurable product.
To do that, we have two options: auto-create the associated products from the configurable product or create the three individual simple products then associate them to a new, configurable product.
First, let's try method one using the couch simple product we just created:
- Open the Product Edit screen in the backend and scroll down to the bottom panel titled Configurations. Expand this panel.
- Click on Create Configurations. A new screen will appear from the right side of your browser window. A step-by-step navigation will appear at the top to note your progress in creating the associated products.
- The next step is to select one or more attributes that will determine the product variants. In our case, we have different sofas based on color. If we have sofas of different colors and fabrics (three colors and two fabrics would produce six possible combinations), we could select both attributes. For now, we will only select Color and click on Next.
- Now, we get to select all the different colors we wish to use. We will select Blue, Green, and Red for our example. Click on Next to proceed.
- In Step 3, we have some choices to make regarding our images, prices, and quantities. As per our example, we will select Apply unique images by attribute to each SKU for Images; Apply single price to all SKUs for Price (all sofas are the same price); and Apply unique quantity by attribute to each SKU for Quantity. As we make our choices, we have the opportunity to add images and note quantities, since we elected to manage these uniquely for each variant. We will also be able to enter the price common to all sofas (in our case, $599.99). Click on Next when you have completed this step.
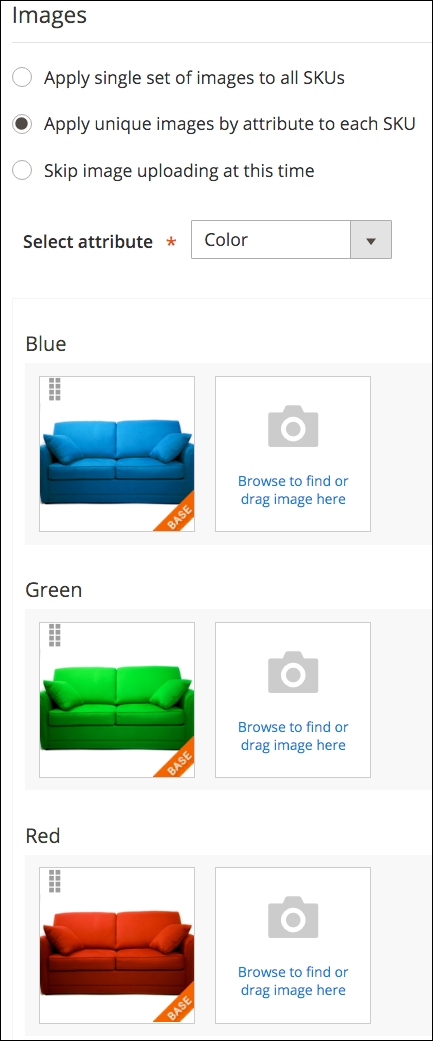
First, you are allowed to choose whether to use the same images for all variants, or assign unique images to each. As with any of these choices, you can also opt to skip this for later.
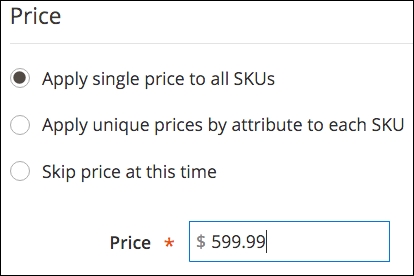
Alternatively, within the Price box, you can assign the same or unique prices to all variations.
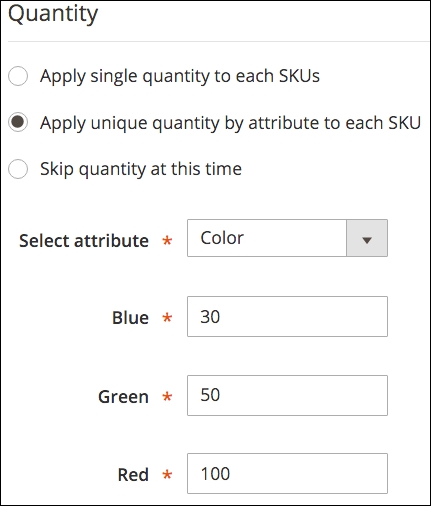
Finally, if you wish, you can assign inventory quantities for the associated products.
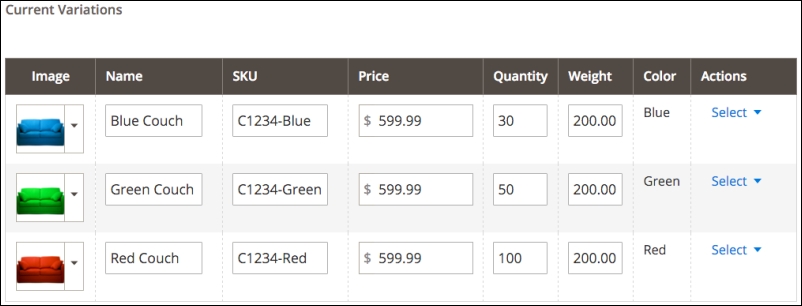
- On the final step, you will be able to review your variants to make sure you have them as you wish. When you're satisfied, click Generate Products.
- The overlay will disappear and you will see your new variants listed in the Configurations panel. Here, you can modify the Name and SKU fields for each variant to meet your needs. Once you have completed this, click on Save to complete creating your configurable product.
Having completed creating the configurable product, the product on the frontend now displays the color swatches for each variant (and removes the Color field from the More Information tab contents). As you click on each swatch, the main image will also change to reflect the image you uploaded for the particular variant.
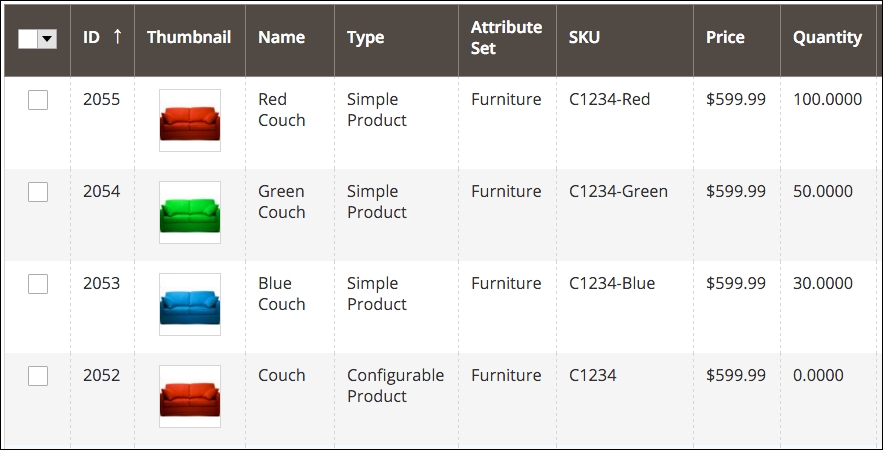
In the backend, under Products | Catalog, you'll find four products now: the Configurable Product and the three new associated Simple Products.
Alternatively, if you already have the Simple Products added to your store, you can create the configurable product and add the associated products manually instead of creating them automatically, as we just did.
If you have a collection of related products, such as yoga straps (included in the Magento 2 Sample Data set), you can present them as a group. Customers can then select which individual items they want by entering a quantity for each associated product.
To create a grouped product, choose Grouped Product in the Add Product dropdown menu, as shown in the following screenshot:
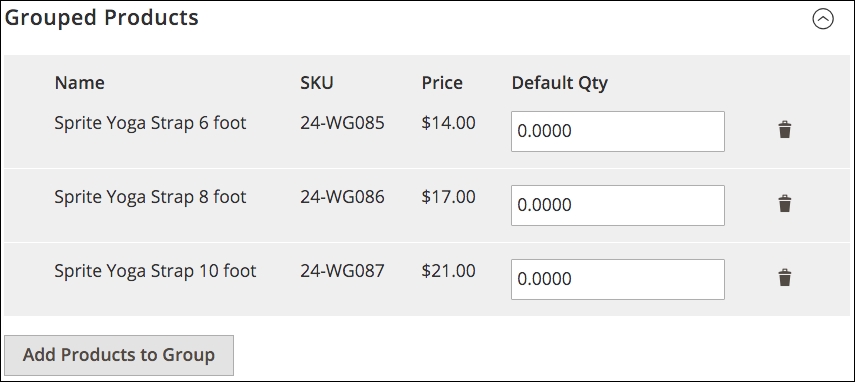
At the bottom of the Product Details screen, under Grouped Products, you add products to the group and any default quantity you wish to set (customers can always override any default).
Grouped products are not really products at all but simply a virtual grouping of products you wish to present together.
Bundled products are similar to grouped products but with some differences. The biggest difference is that you are creating a bundle of products presented to the customer as one "set" or "bundle." Furthermore, you can configure the product so that the customer can select options of each product, if they wish.
Let's look at the Sprite Yoga Companion Kit product provided in the Magento 2 Sample Data. This is a bundle of yoga equipment that has been configured to include four required products: a Stasis Ball, a Foam Yoga Brick, a Yoga Strap, and a Foam Roller. Customers can select larger balls and longer straps. The price of the bundle is automatically calculated based on their selections.
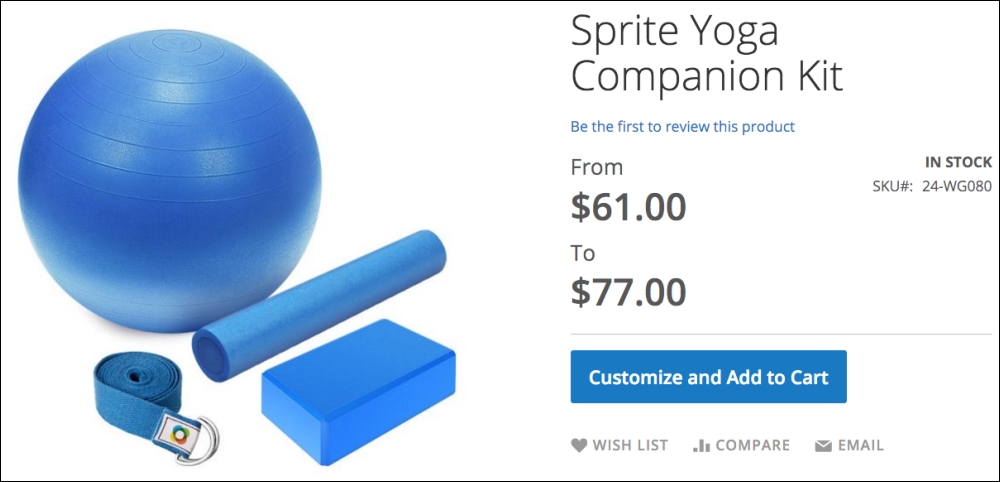
When the customer clicks on Customize and Add to Cart, the choices available for the bundle are revealed.
First are the choices for the Stasis Ball:
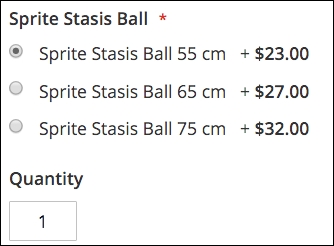
As customers select alternative sizes, the total cost of the bundle will adjust accordingly.
Bundled products are created in two steps: creating the options for each bundle component, then attaching simple products to those options.
Let's build the Sprite Stasis Ball bundle option, as shown, in the Product Detail screen to illustrate this two-step process.
- Under the Bundle panel, click on Create New Option.
- For Option Title, we'll enter Sprite Stasis Ball.
- We can allow the customer to make their selection using a drop-down menu, radio buttons, or a checkbox. You should use whatever you feel best communicates the choices to your customers. For our example, we're going to select Radio Buttons.
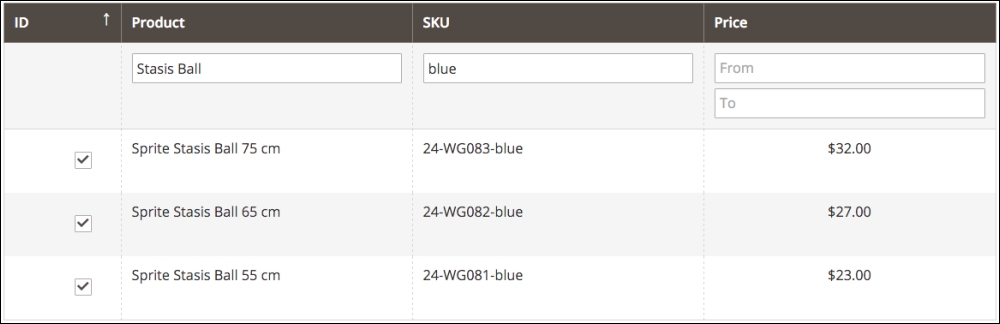
- Our next step is to click on Add Products to Option. We can then use the search tools to find the products we want to add to this option. In our case, we're going to search for products with "Stasis Ball" in the title and "blue" in the SKU. We will check each product we want to attach to our option and click on Add Selected Products.
Once you have created your options and attached the associated products, you can save your product.
In today's digital world, many online retailers offer files that can be purchased and downloaded, such as books, music, and software. Creating a downloadable product is achieved by attaching the files to the product. Once purchased, the customer will receive a link they can click to download their purchase to their computer.
Note
Note that many downloadable products cannot be redeemed on mobile devices. Music, for example, may not always be able to be downloaded and played on a mobile device by clicking the redemption link. Please experiment and test your offerings so you know how to communicate any restrictions to your customers.
A downloadable product is created by making two initial selections:
- Weight: For the question "Does this have a weight?" you should select No.
- Is this a downloadable Product?: This box is checked to reveal the fields necessary to attach files that define your product.
In the Downloadable Information panel, there are two sections: Links and Samples. The Links section allows you to attach files that will be provided to customers once they purchase your products. The Samples section will provide linked files for shoppers to download as examples of what they will get when they buy the product. You can also use this section to attach files to promote the product.
When creating a downloadable product, you have controls over how easily it is for the customer to share their download link and how many times they can download their purchase. While these are not foolproof, they can help restrict the distribution of your digital products.
A virtual product is just as it sounds: a product that doesn't actually exist, but can be purchased by the customer. Basically, a virtual product is one that has no weight and therefore cannot be shipped.
What kinds of product fall into this type? We've used the virtual product type for extended warranties, training courses, and hosting packages.