
In this section, we'll take a look at how ARP works, resolve addresses from IP to MAC, and also see what ARP issues look like in Wireshark. So what ARP does is resolve the IP addresses, which are layer 3 addresses, to MAC addresses, which are layer 2 addresses—these are addresses that are used on our local Ethernet bus. We need this information in order to construct a frame which encapsulates a packet, so we can send it on to the wire. When a user or an application requests data from a specific IP address on layer 3, our system has to figure out what that MAC address is, if it doesn't already have it in its cache. We can check what MAC addresses our system already knows about in its ARP cache. Just like DNS had a cache of locally known information, ARP is also locally cached.
So what we can do is type the following in a Windows machine:
arp -a
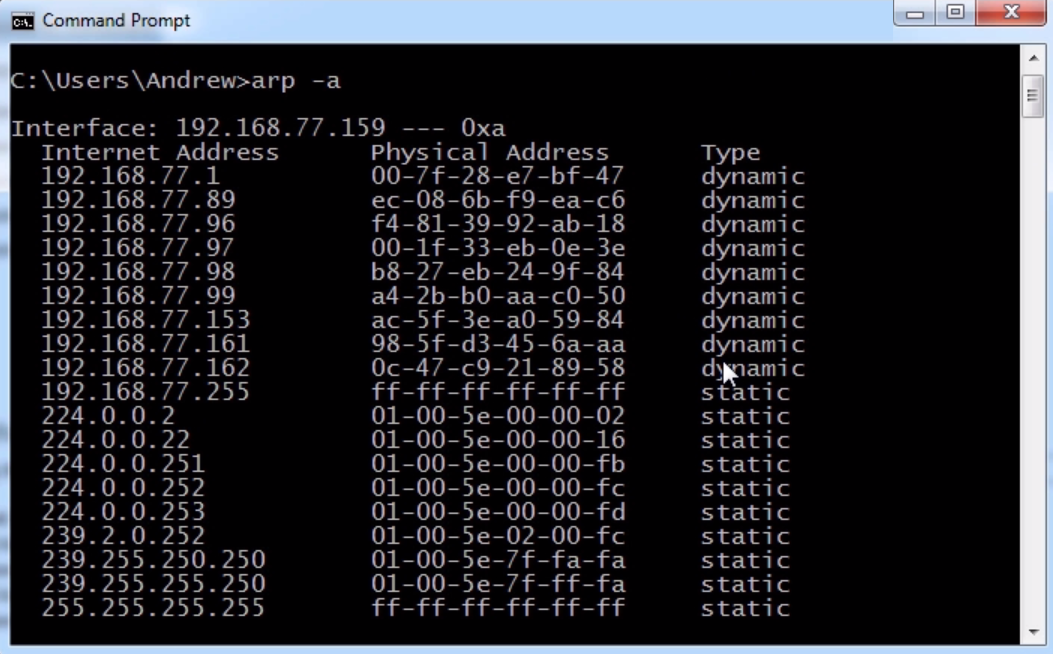
If you press Enter, you'll get a list of all the known IP addresses in layer 3 matched up with the physical addresses, which are the MAC addresses on layer 2:
In the preceding screenshot, what you see in the third column is, as it says, Type static.
All of these addresses are the ones that my system knows about because they are coded into the operating system at this moment. So, these addresses are multicast addresses that the system knows about by default. It also knows some VMware interface, IP and MAC addresses, and a number of things that already exist.
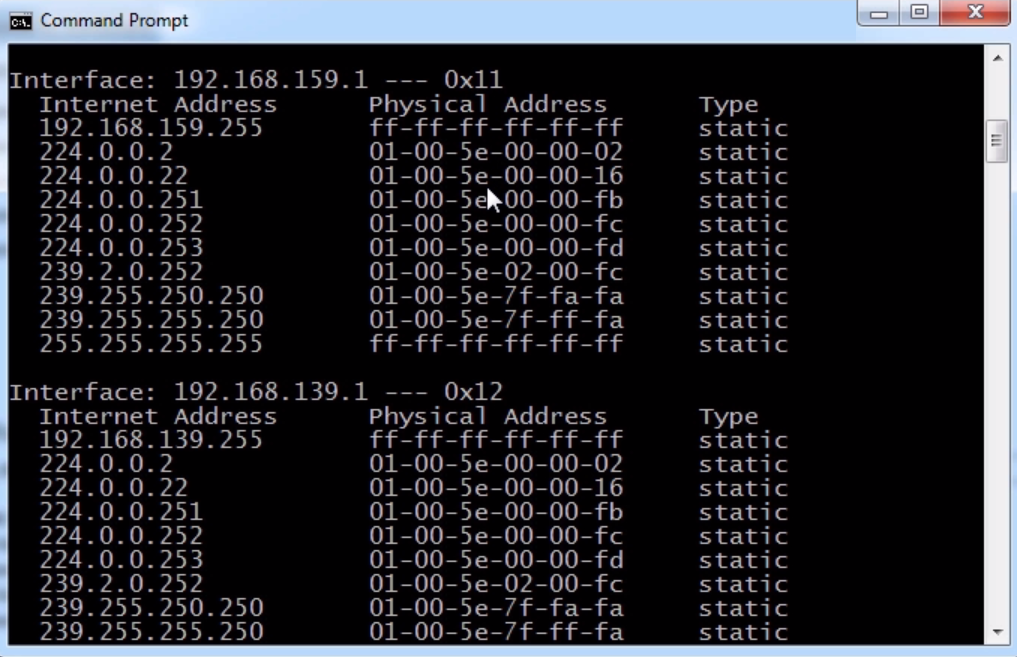
If we scroll up, we can see that there are some dynamically learned addresses:
Next, you can see some statically known information—some multicast for the interface 192.168.77.159.
You can see the primary interface, where we have the static information that's known for that interface, and we have dynamically learned addresses. The addresses under Physical Address are all MAC addresses that have been discovered for specific IPs and are cached for a specific period of time. Then, if I need to access that device again on layer 2, it will do an ARP request again.
Now, what we'll do is take a packet capture of a normal, good ARP request.
We'll start the capture and ping a known good address on IPv4:
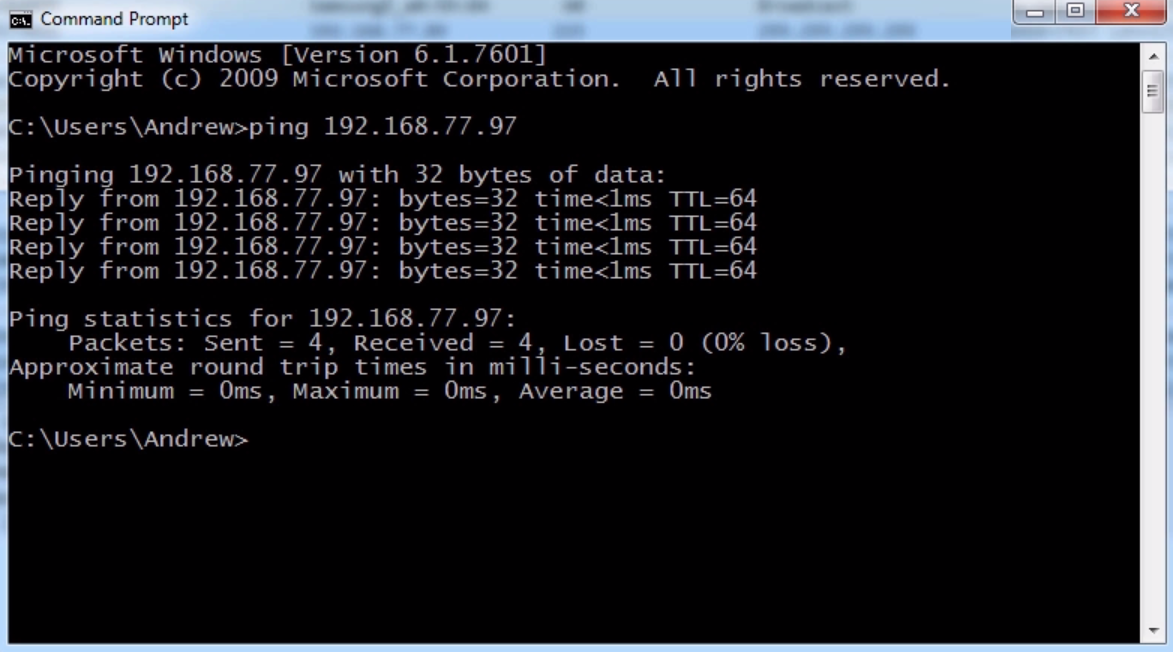
As we can see, we received a number of replies. The system has sent four pings using Internet Control Message Protocol (ICMP) to this device, and received a response to all four of them. Before it was able to do this, it had to figure out what the local physical address is of that device, what the MAC address was, before it could even do the first response, or first request.
Next, we'll stop our capture and do a filter for arp:
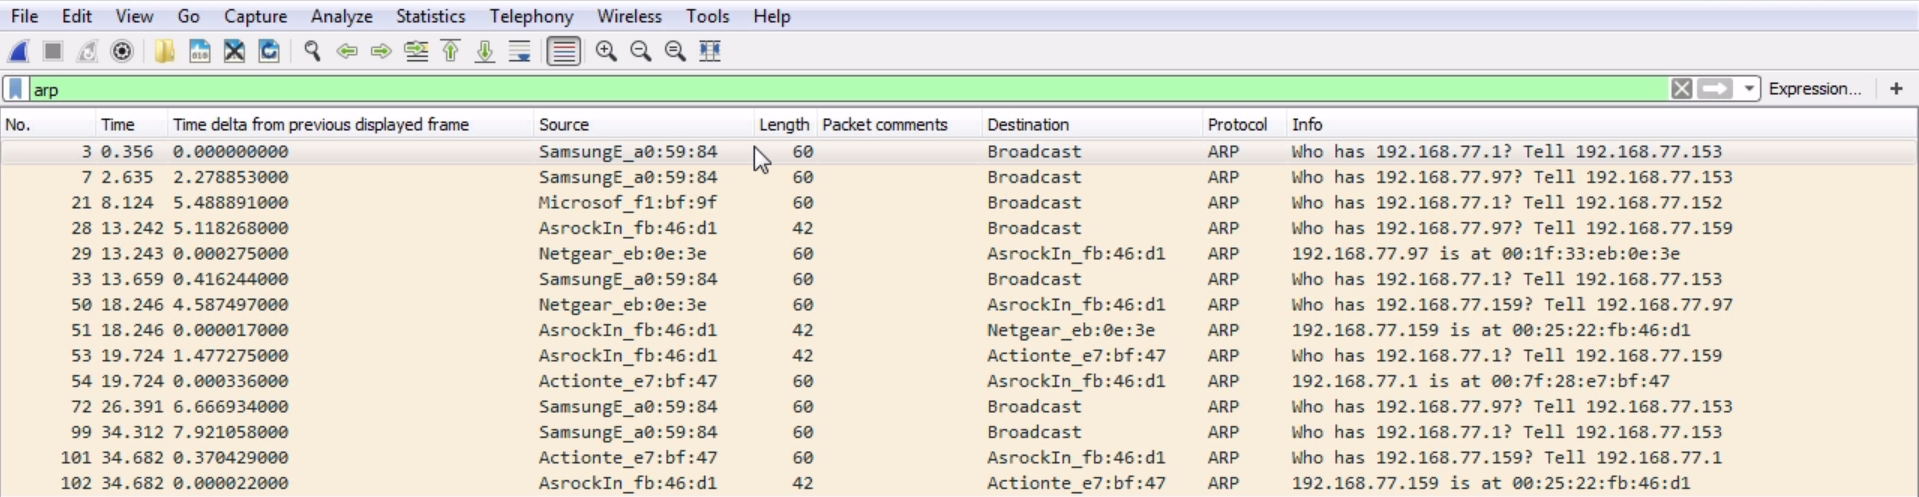
That way, we only see our ARP traffic and we'll skip some of the information. There are some other devices on the network that are also trying to do ARP requests, but if we check the preceding screenshot, we have the AsrockIn interface, which is the motherboard of the computer we are using.
In the Info column, you can see Who has 192.168.77.97? Tell 192.168.77.159. That's the IP address of the system we are using right now. We get a response saying, 192.168.77.97 is at 00:1f:33:eb:0e:3e MAC address:

The preceding screenshot shows a Netgear NAS device that we have on our network.
If we go into the ARP information in the packet details pane, we can see the same information as shown in the preceding screenshot, but in summary form:
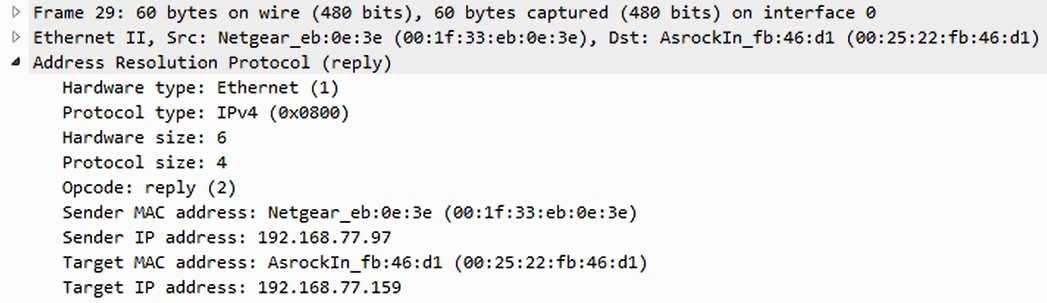
It's an Ethernet response. The sender MAC in the frame is from Netgear. It's being sent from Netgear's IPv4 address to the initial requester and then to our system with the IP 192.168.77.159.
However, there is one thing to be careful with. I we look at where we did the ARP request, you can see that it was sent from our system with the MAC address 00:25:22:fb:46:d1 and IP address 192.168.77.159, but it was sent to 00.00.00_00:00:00 because it didn't know who it was going to, but it did know the IP. In the initial request, the ARP request, the sender is the device that is requesting. Then, in the response, the sender is the device that's responding. Note these kinds of flip-flops. You'll also notice that in the ARP request, it is a broadcast, and we can see that from where it says Destination: Broadcast on Ethernet II, as shown in the following screenshot:

It's going to a broadcast address. So when our system is trying to find on the local Ethernet bus, the MAC address of the device that has the IP shown on layer 3, it doesn't know who to talk to for that so it sends out a broadcast to everyone. Then, the device that happens to know that information receives it (because everybody has a copy) and responds. Similarly, with DNS, if you see a bunch of repeats here, especially response frames, that are looping over and over again—they just keep showing up in your capture constantly—that could again point to a loop in your network. You shouldn't be seeing these over and over and over again.