
In this section, we'll take a look at the basics of TCP/IP, how packets are built, and the resolution processes that are in place, such as DNS and ARP.
In networking, we have two models that we commonly use: OSI and TCP/IP. As shown in the following diagram, on the left side we have the OSI model and on the right side we have TCP/IP model, and I've tried to match them up so that you can see how the different layers of each model line up with each other:
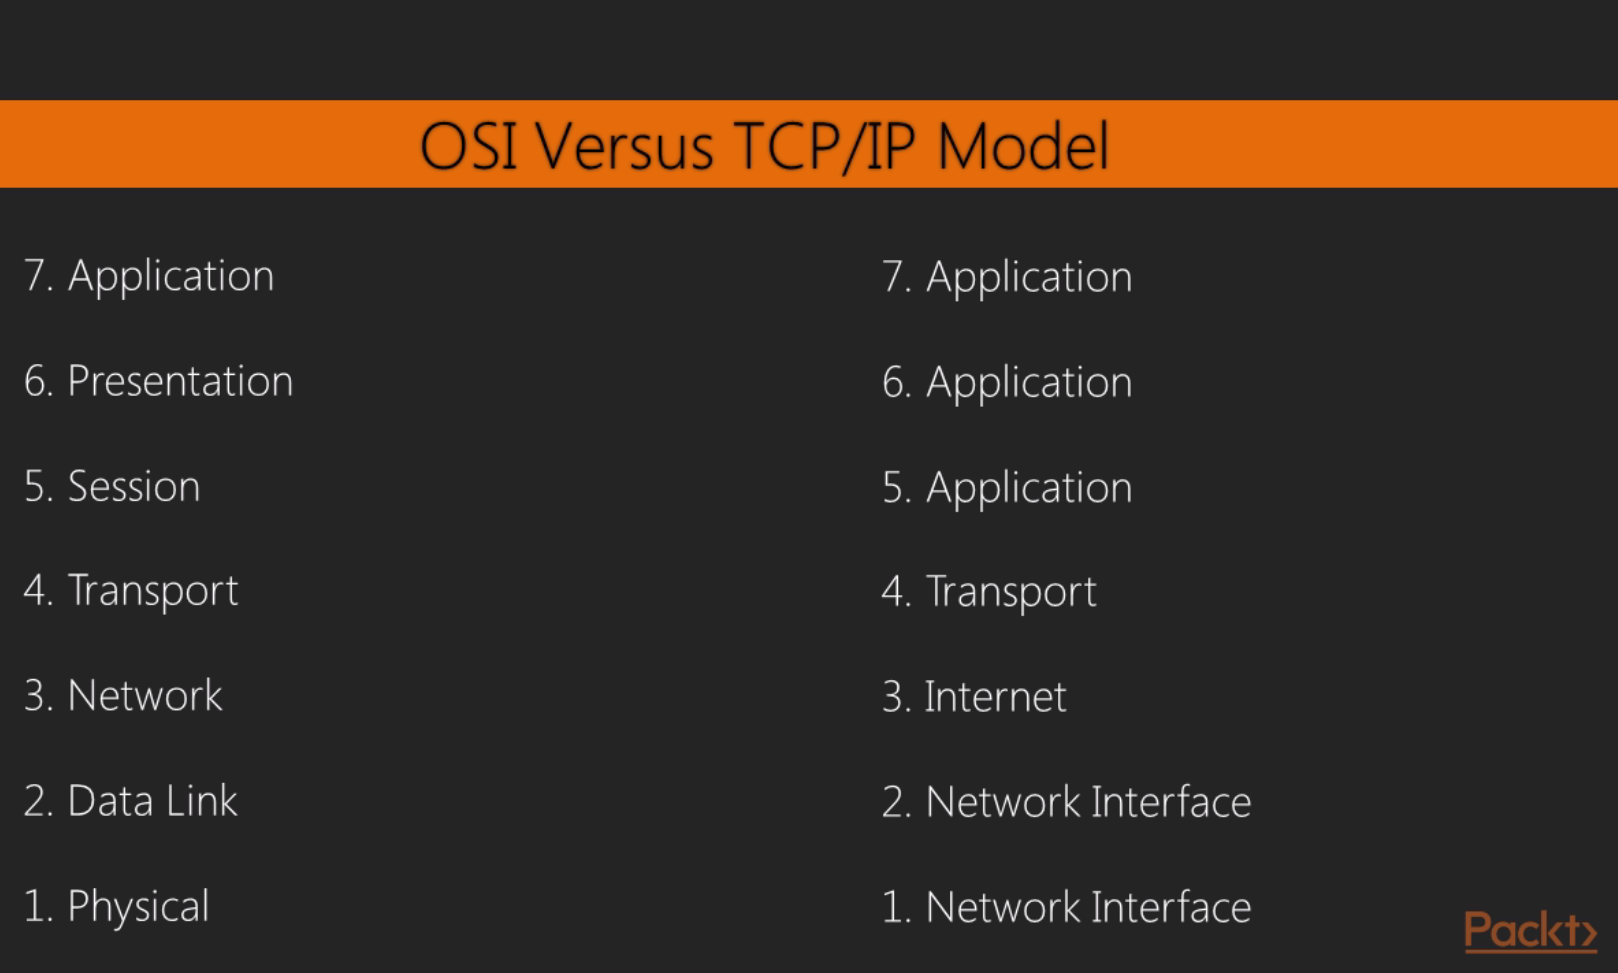
When we use Wireshark, we're commonly concerned with layers 2 through 7 of the OSI model. And most commonly when you use Wireshark, it's probably because something that's often application-related is going on or the system is running an application. Most commonly, you'll find yourself using Wireshark to diagnose problems that are in the upper layers, especially layer 7. But you can certainly use it to troubleshoot connectivity issues between devices on layer 3 or layer 2. While there are a number of TCP/IP services and protocols that we use to help us communicate over a network, note that we reference the layer where that protocol resides based on the OSI model, not the actual TCP/IP model's layer.
What I'd like to do is run through the building of a packet, which will give you an idea as to how the values are entered into a packet for the different fields. And since we're looking at these fields in Wireshark, it's certainly a good thing to know. So what I've done is, in a browser, I've opened up a connection to http://www.pbs.org/. What we'll do is follow through that connection and show how it found the resource and then send the first data packets to it.
The first thing that your system needs to figure out is what port number to use. When you open up your web browser and go to http://www.pbs.org/, depending on how you enter the address into the address bar of the browser, the application of the browser will know whether or not you want to use port 80; it would know by default for HTTP, or port 443 for SSL, or maybe some other custom port. So right away, your computer knows what port number it needs to start communicating on. Since I went to http://www.pbs.org/ without any sort of SSL connection, it by default knew that it will have to use port 80. The next thing it has to do is figure out where that service is. So I went to http://www.pbs.org/, but my system didn't know where http://www.pbs.org/ resides.
DNS deals with the resolution of a name to an address. So my system had a look at the DNS cache on my local system, which is a rolling cache of addresses that it has already resolved, and it looked for http://www.pbs.org/. It saw that http://www.pbs.org/ didn't exist in the cache, so it said that it needs to go send that out to my DNS server to hopefully get a response as to where this resource is located. My DNS server happens to be on my gateway, which is 0.6; this is common for standard home networks. It may not be there; it could have been a remote resource as well, such as a Google DNS server or open DNS, or some other. If this is a remote DNS server that I'm trying to connect to, then my system will take a look at my route table and figure out where it needs to go in order to access that DNS server. So, if it's remote, outside of my network, it's going to take a look at my route table and realize that it has to go out through my gateway in order to go talk to the DNS server.
And when it does, it'll check my ARP cache to see if there's a layer 2 address for my gateway so that it can send a frame to the gateway. If my system didn't have an ARP cache entry for my gateway, then my system would have sent an ARP packet out, looking for the physical address for 192.168.0.6. My system happened to have it in its ARP cache since I commonly accessed that IP address, and so we don't see an ARP packet here. What we can see here is that the first packet is a DNS packet, so my system saw that 0.6 was my DNS server, and it knew that it was a local resource. It checked my route table and realized that it's on my physical interface there and we're already connected to the 0 network, and also that I already have an ARP cache entry for 0.6. So it didn't need any of that information, and it automatically built the DNS packet. We can see in here in IPv4 that my destination is 0.6:
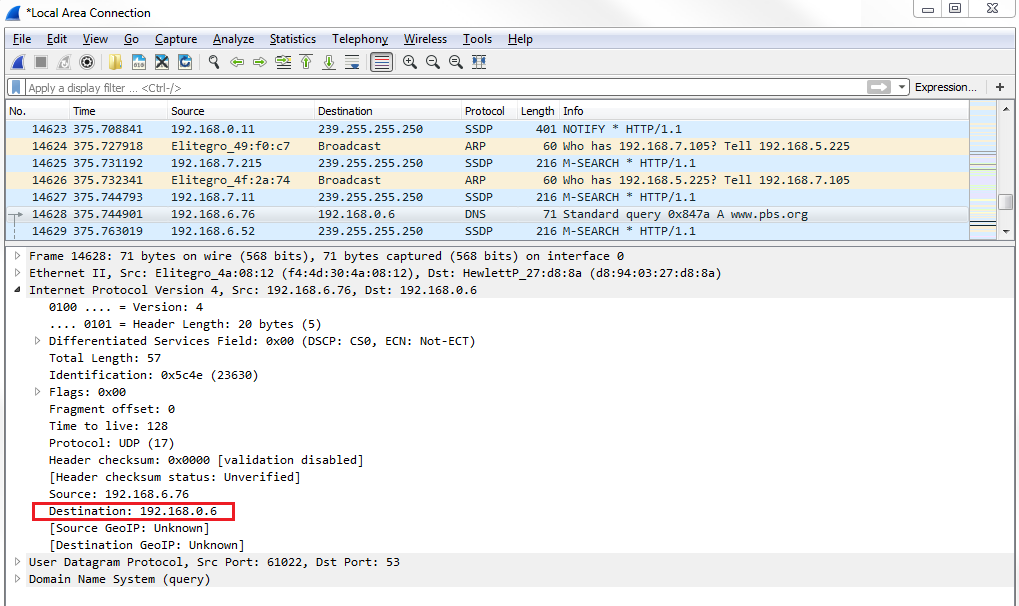
It built all that without having to produce any other packets to find this information. So my system then sent out its DNS request asking for http://www.pbs.org/. Now, if we go down and take a look at the UDP section, you can see that we're using port 53, which is for DNS:
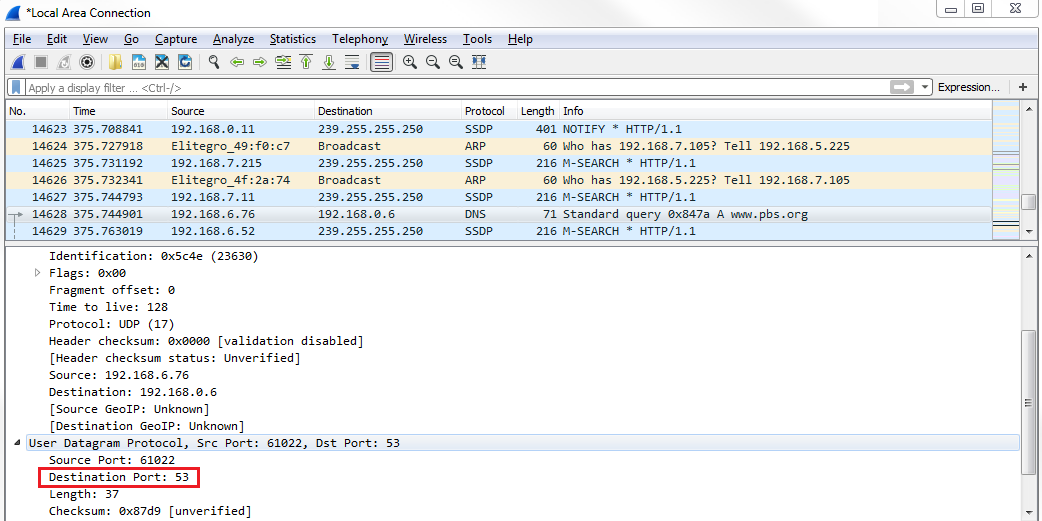
And if we expand DNS, we can look at the Queries and see that we're asking for http://www.pbs.org/:
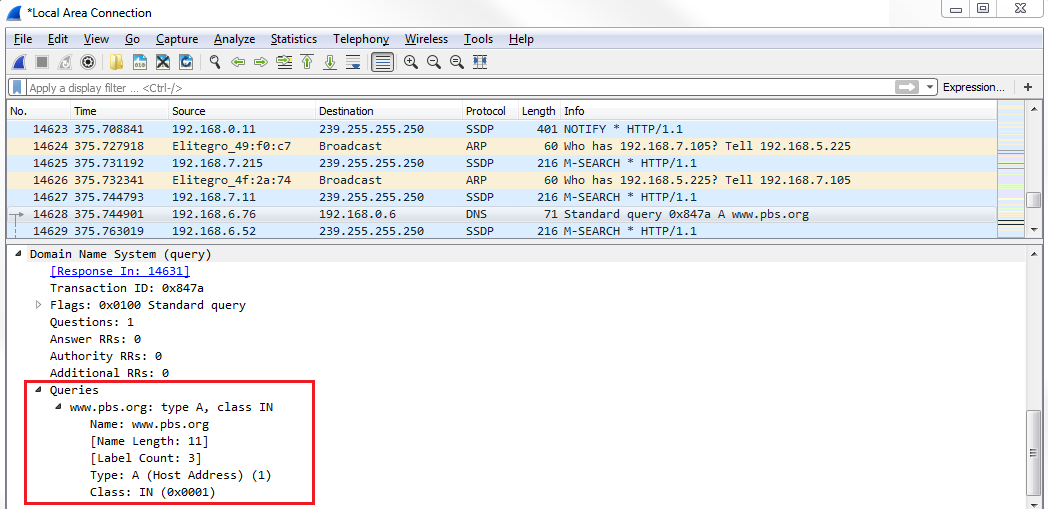
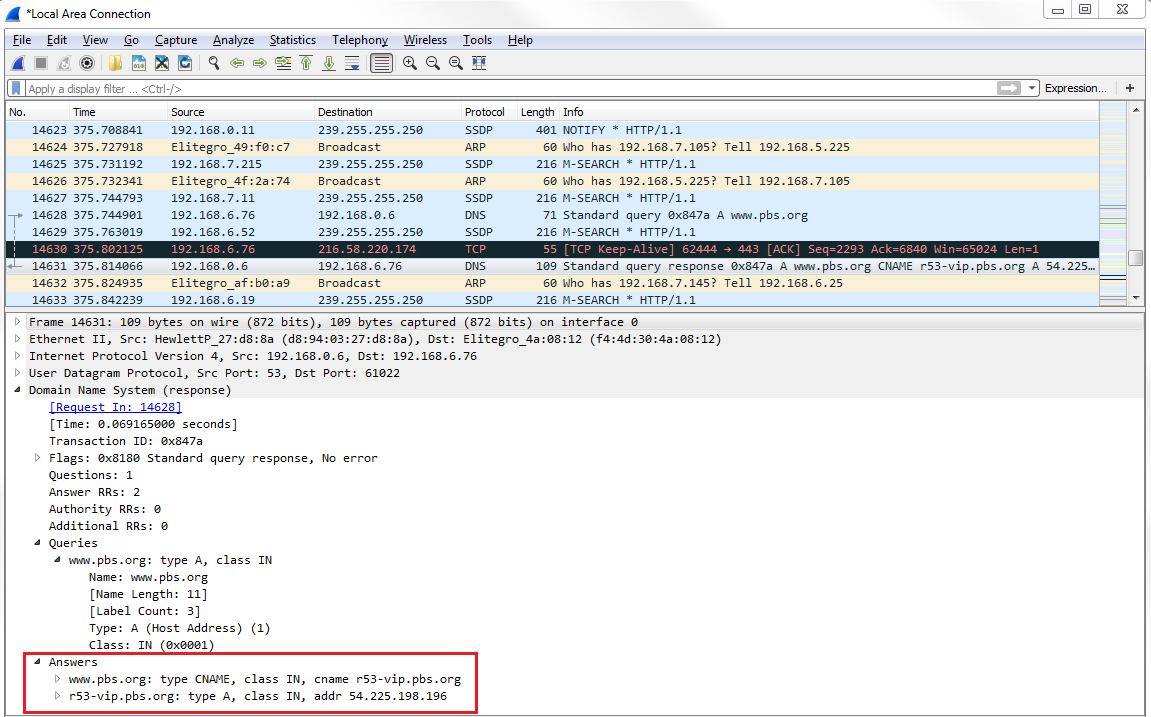
We then have to wait for the DNS response. Then, we see the next packet for DNS. We receive a standard query response for http://www.pbs.org/. If we look at DNS in the packet details pane, we can take a look at the Answers in this packet. And you'll see that http://www.pbs.org/ has a CNAME entry for address r53-vip.pbs.org, and then there's an A record entry at IP 54.225.198.196:
The A record entry is what we care about. So now my system has an IP address for http://www.pbs.org/ so that I can build a TCP handshake to http://www.pbs.org/ and to the web server so that it can then begin flowing HTTP data back and forth. So if we look at the next packet in line, we have our SYNs:
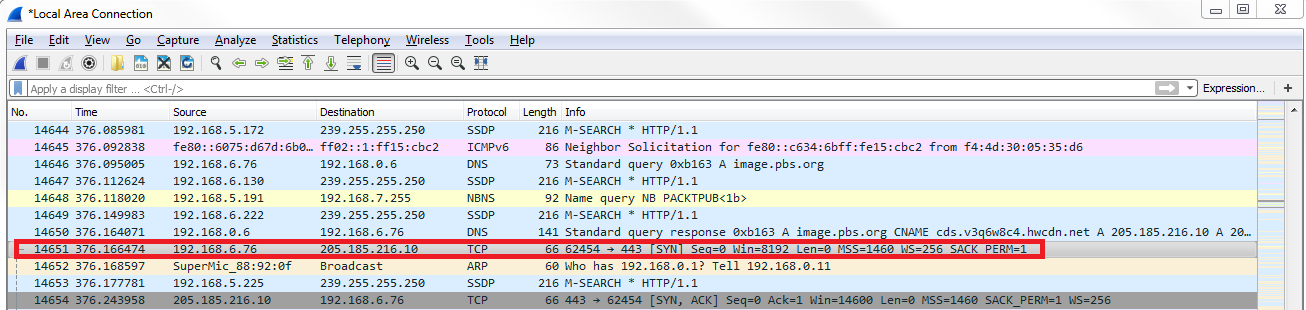
So, the highlighted packet in the preceding screenshot is the first packet in our three-way handshake for TCP. If you're familiar with TCP at all, it goes SYN, SYN, ACK, and ACK; that's your three-way handshake to open up a connection. So my first packet has a destination address of 205.185.216.10. If we look at that response that came back in DNS, the address that was provided for the A record is 205.185.216.10. So now my system knows what IP address to craft its TCP packet for. We now have a source of my local system and a destination to the server for http://www.pbs.org/ that it received, and then it sends out its handshake request. It then gets a SYN, ACK in response saying yes, I see your connection requests; let's create a connection. Then my system responds, saying yeah, that sounds great; I acknowledge. And then, finally, we begin our first HTTP packet. My system sends an HTTP packet out to that same server and says GET / HTTP, so it's saying please send me your beginning index.html and any other data for the HTTP resource. And again, it knew that it needed to use port 2869 HTTP unencrypted because when we entered that into the browser, the browser application let the stack know that it was using port 2869. And so that's the basics on how a TCP packet is built, and your system requests a resource from some sort of server or other device out there.