Table of Contents for
Kali Linux 2 – Assuring Security by Penetration Testing - Third Edition
 Kali Linux 2 – Assuring Security by Penetration Testing - Third Edition
Published by
Packt Publishing, 2016
Kali Linux 2 – Assuring Security by Penetration Testing - Third Edition
Published by
Packt Publishing, 2016
- Cover
- Table of Contents
- Kali Linux 2 – Assuring Security by Penetration Testing Third Edition
- Kali Linux 2 – Assuring Security by Penetration Testing Third Edition
- Credits
- Disclaimer
- About the Authors
- About the Reviewer
- www.PacktPub.com
- Preface
- What you need for this book
- Who this book is for
- Conventions
- Reader feedback
- Customer support
- 1. Beginning with Kali Linux
- Kali Linux tool categories
- Downloading Kali Linux
- Using Kali Linux
- Configuring the virtual machine
- Updating Kali Linux
- Network services in Kali Linux
- Installing a vulnerable server
- Installing additional weapons
- Summary
- 2. Penetration Testing Methodology
- Vulnerability assessment versus penetration testing
- Security testing methodologies
- General penetration testing framework
- Information gathering
- The ethics
- Summary
- 3. Target Scoping
- Preparing the test plan
- Profiling test boundaries
- Defining business objectives
- Project management and scheduling
- Summary
- 4. Information Gathering
- Using public resources
- Querying the domain registration information
- Analyzing the DNS records
- Getting network routing information
- Utilizing the search engine
- Metagoofil
- Accessing leaked information
- Summary
- 5. Target Discovery
- Identifying the target machine
- OS fingerprinting
- Summary
- 6. Enumerating Target
- Understanding the TCP/IP protocol
- Understanding the TCP and UDP message format
- The network scanner
- Unicornscan
- Zenmap
- Amap
- SMB enumeration
- SNMP enumeration
- VPN enumeration
- Summary
- 7. Vulnerability Mapping
- Vulnerability taxonomy
- Automated vulnerability scanning
- Network vulnerability scanning
- Web application analysis
- Fuzz analysis
- Database assessment tools
- Summary
- 8. Social Engineering
- Attack process
- Attack methods
- Social Engineering Toolkit
- Summary
- 9. Target Exploitation
- Vulnerability and exploit repositories
- Advanced exploitation toolkit
- MSFConsole
- MSFCLI
- Ninja 101 drills
- Writing exploit modules
- Summary
- 10. Privilege Escalation
- Password attack tools
- Network spoofing tools
- Network sniffers
- Summary
- 11. Maintaining Access
- Working with tunneling tools
- Creating web backdoors
- Summary
- 12. Wireless Penetration Testing
- Wireless network recon
- Wireless testing tools
- Post cracking
- Sniffing wireless traffic
- Summary
- 13. Kali Nethunter
- Installing Kali Nethunter
- Nethunter icons
- Nethunter tools
- Third-party applications
- Wireless attacks
- HID attacks
- Summary
- 14. Documentation and Reporting
- Types of reports
- The executive report
- The management report
- The technical report
- Network penetration testing report (sample contents)
- Preparing your presentation
- Post-testing procedures
- Summary
- A. Supplementary Tools
- Web application tools
- Network tool
- Summary
- B. Key Resources
- Paid incentive programs
- Reverse engineering resources
- Penetration testing learning resources
- Exploit development learning resources
- Penetration testing on a vulnerable environment
- Online web application challenges
- Virtual machines and ISO images
- Network ports
- Index
Often, during the information gathering phase, you may want to access potentially confidential information about the client that has been compromised by other parties. This search for potentially compromised information often has to be done on what is known as the Dark Web or Dark Net. This is an area of the Internet that is not indexed by search engines such as Google or Bing. The Dark Web is one of the areas where professional hackers trade information about exploits and malware and trade in stolen information. Often, this information can be credentials to your client or employer's systems.
The Dark Web does not have the same infrastructure as the indexed Internet. For example, there is no DNS structure, so Dark Web sites have to be navigated to using their URL. Even the URLs are different, as each site's URL is usually a string of random characters followed by the top level domain .onion. In addition, each site generally requires a username and password to enter, and some go as far as to require a referral before someone new is allowed to access the site.
Intelligence gathering in the Dark Web can produce results that you would not normally get through regular searches, but a word of caution: the Dark Web is populated by cyber-criminals and hackers. Be wary of scams. In the following section, we will go over the special tools necessary to navigate to this dark area of the web.
Accessing the Dark Web is accomplished through the use of the TOR browser and a type of routing call The Onion Router, hence the acronym, TOR. This browser, built on the Mozilla Firefox browser structure, is configured to navigate to the .onion sites and can also be used to navigate to indexed sites. The following the sequence of events connects your machine via the TOR Browser to a server containing a site with the .onion top level domain:
- At the startup of the TOR browser, the browser then communicates with a TOR nodes directory server.
- The Directory Server then provides the user's browser with a list of TOR Nodes.
- The user enters in the URL for the desired .onion site and the TOR browser routes the traffic through a series of nodes.
- The last node connects to the .onion server. From that point on, all the traffic is re-routed back through nodes to the user's browser:

This routing does two key actions. First, each hop from node to node is encrypted. It isn't until the connection with the server does that encryption end. Second, the .onion site is only given the IP address of the last node. The TOR browser also has the ability to anonymize regular traffic to indexed sites, as the browser will be given an anonymized IP address.
The TOR browser is very handy for OSINT and Information Gathering, as its anonymized nature does not leave a trace on the target's network. When examining the Dark Web sites, you may be able to find dumps of confidential data from your clients that they may not be aware of. These can include such things as credentials, social security numbers, credit card numbers, or other products of a breach.
Installing the TOR browser does require a little work to get it up and running.
The first step is to configure TOR on Kali Linux by entering the following command:
# apt-get install tor
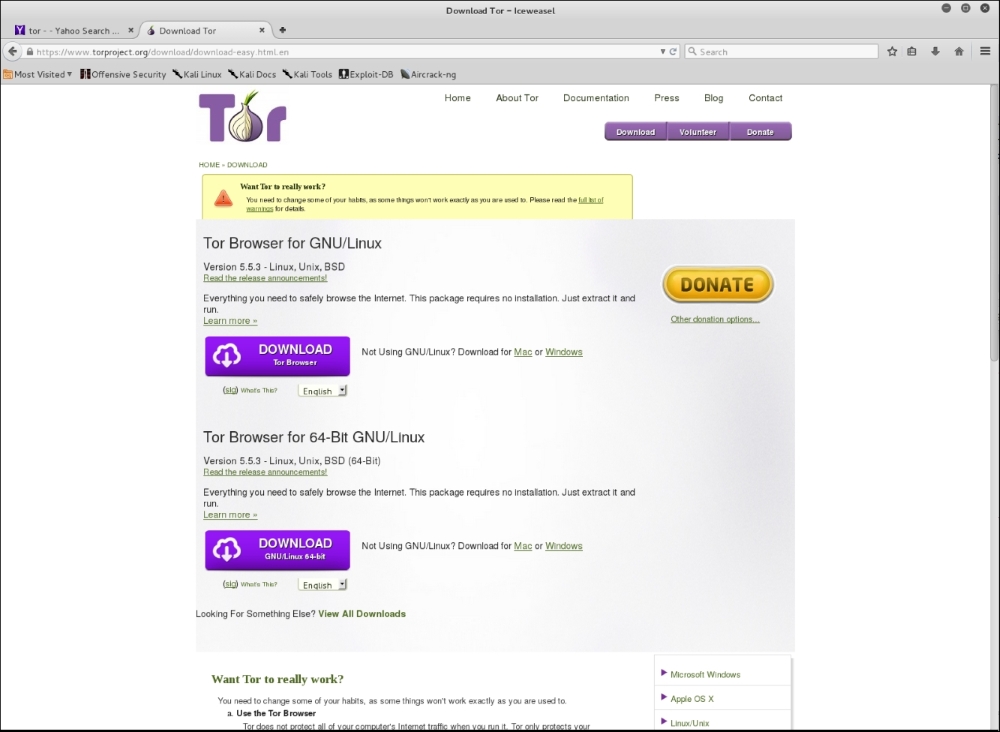
Let that run, and once it's completed, navigate using the IceWeasel browser to torproject. org. On the top page you will see a link to download the TOR browser. Click on it and you will see the packages for download:
- Once you have downloaded the package, go ahead and unpack it by entering the following command:
# tar –xvzf tor-browser-linux64-5.0.2_en-US.tar.xz - Once the package has been unpacked, you will have to configure TOR to run on Kali Linux. Navigate to the folder browser:
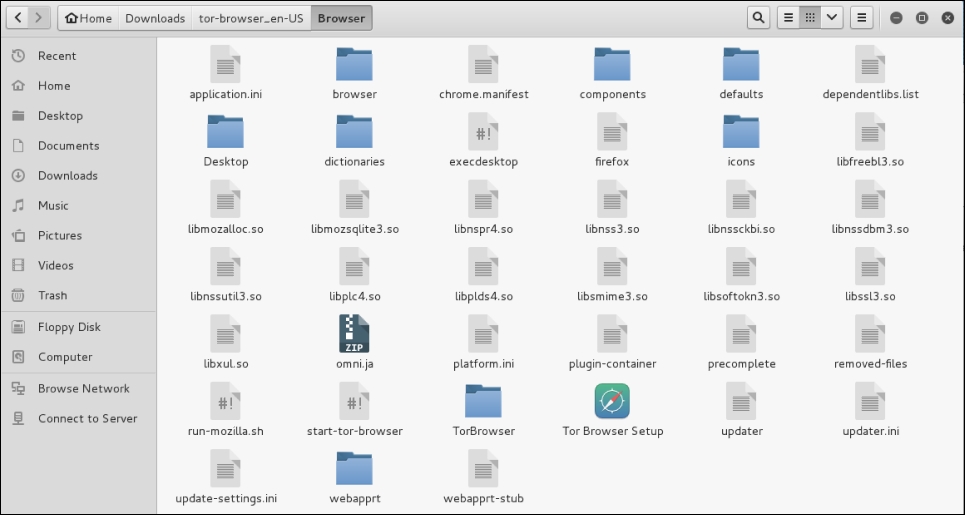
- Open the
start-tor-browserfile with gedit. Search for the wordroot. You will then see lines of code. To allow the TOR browser to function, you will need to change the number in the line indicated with the red arrow from–eq 0to–eq 1: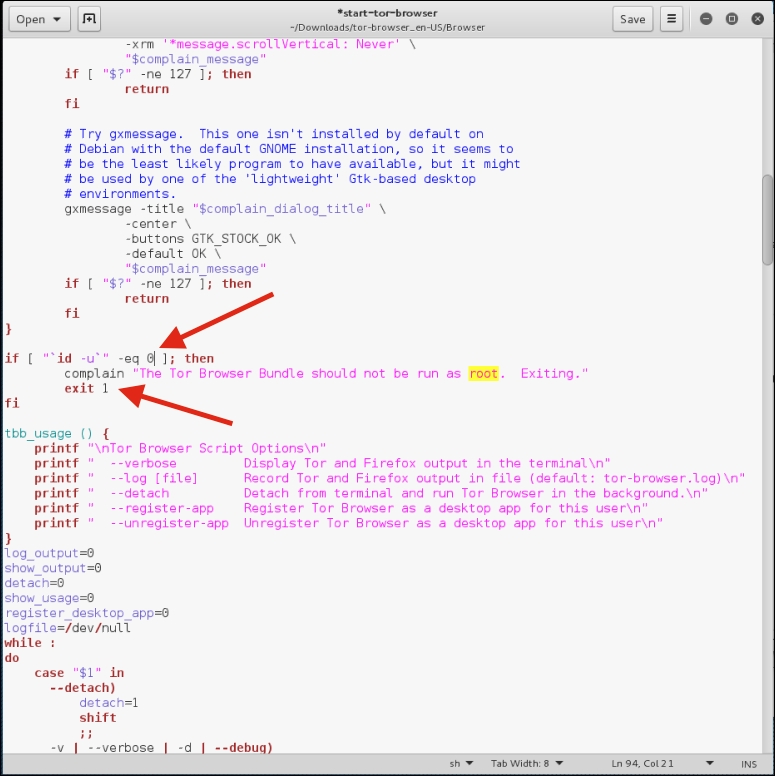
- Next, remove the text
exit 1: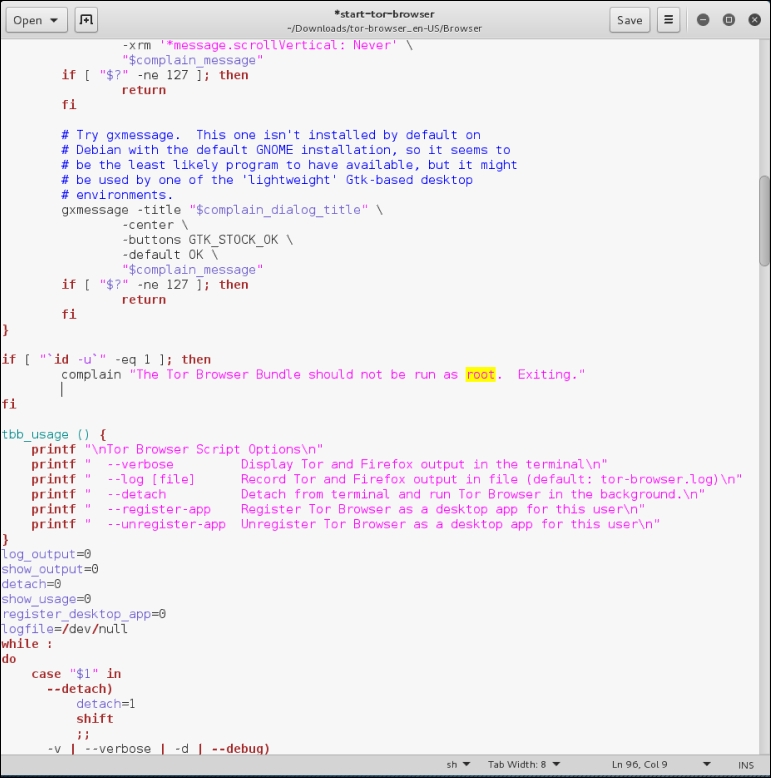
- Save the file.
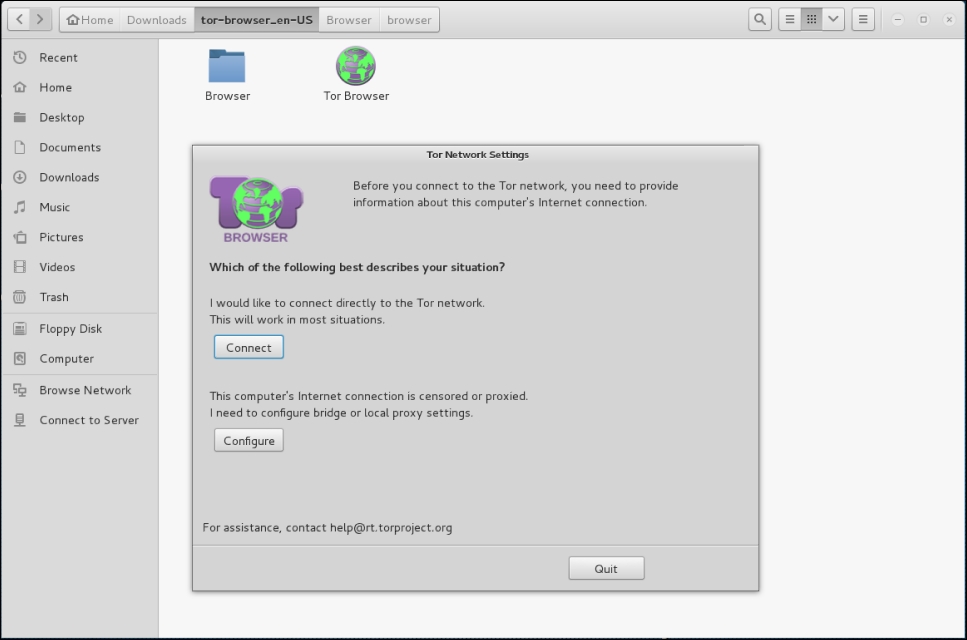
- Next, navigate to the folder containing the browser and click on the TOR browser icon. You will then be guided through setting up the browser. It is recommended that you choose the Connect option:
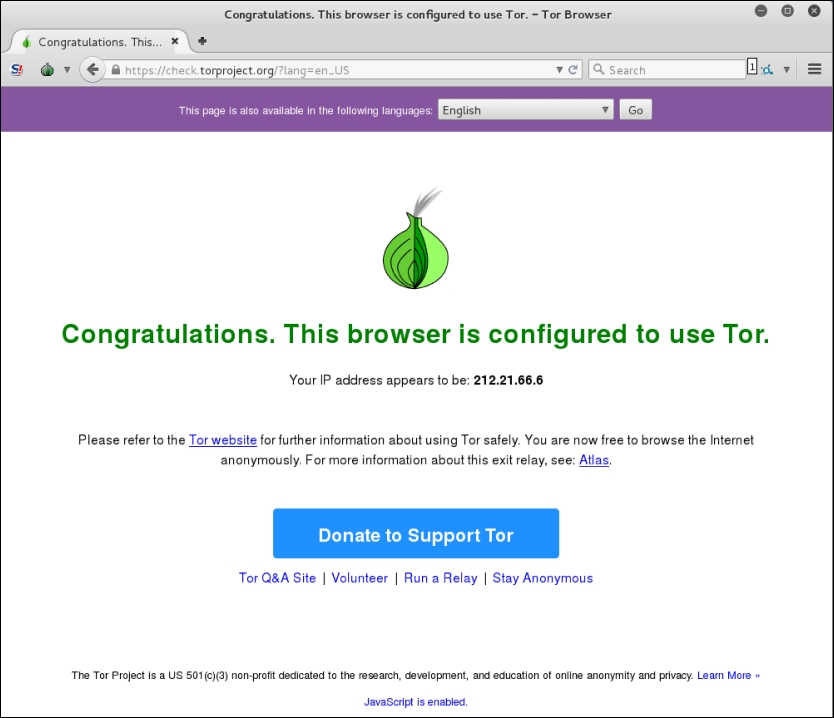
It may take a few seconds longer than a normal browser, but once it's configured you will receive this message:

- If you need to update your browser, you can follow the onscreen directions to update.
- Finally, if you want to check your anonymized IP address, click on the Test TOR Network Settings link and you will be provided your IP address:
To access TOR sites, you will need to know their URL, as there is no Domain Name System in use. For a list of Dark Web sites, you can use sites such as https://dnstats.net/, deepdotweb.com, or darknetmarkets.org. From there, you can find listings for various sites. As was stated previously, be very cautious, as the Dark Web is used by hackers and criminals, but having said this, as you progress in penetration testing and security, it is a good place to gather information, not only on clients, but on how hackers are attacking systems.