Table of Contents for
Kali Linux 2 – Assuring Security by Penetration Testing - Third Edition
 Kali Linux 2 – Assuring Security by Penetration Testing - Third Edition
Published by
Packt Publishing, 2016
Kali Linux 2 – Assuring Security by Penetration Testing - Third Edition
Published by
Packt Publishing, 2016
- Cover
- Table of Contents
- Kali Linux 2 – Assuring Security by Penetration Testing Third Edition
- Kali Linux 2 – Assuring Security by Penetration Testing Third Edition
- Credits
- Disclaimer
- About the Authors
- About the Reviewer
- www.PacktPub.com
- Preface
- What you need for this book
- Who this book is for
- Conventions
- Reader feedback
- Customer support
- 1. Beginning with Kali Linux
- Kali Linux tool categories
- Downloading Kali Linux
- Using Kali Linux
- Configuring the virtual machine
- Updating Kali Linux
- Network services in Kali Linux
- Installing a vulnerable server
- Installing additional weapons
- Summary
- 2. Penetration Testing Methodology
- Vulnerability assessment versus penetration testing
- Security testing methodologies
- General penetration testing framework
- Information gathering
- The ethics
- Summary
- 3. Target Scoping
- Preparing the test plan
- Profiling test boundaries
- Defining business objectives
- Project management and scheduling
- Summary
- 4. Information Gathering
- Using public resources
- Querying the domain registration information
- Analyzing the DNS records
- Getting network routing information
- Utilizing the search engine
- Metagoofil
- Accessing leaked information
- Summary
- 5. Target Discovery
- Identifying the target machine
- OS fingerprinting
- Summary
- 6. Enumerating Target
- Understanding the TCP/IP protocol
- Understanding the TCP and UDP message format
- The network scanner
- Unicornscan
- Zenmap
- Amap
- SMB enumeration
- SNMP enumeration
- VPN enumeration
- Summary
- 7. Vulnerability Mapping
- Vulnerability taxonomy
- Automated vulnerability scanning
- Network vulnerability scanning
- Web application analysis
- Fuzz analysis
- Database assessment tools
- Summary
- 8. Social Engineering
- Attack process
- Attack methods
- Social Engineering Toolkit
- Summary
- 9. Target Exploitation
- Vulnerability and exploit repositories
- Advanced exploitation toolkit
- MSFConsole
- MSFCLI
- Ninja 101 drills
- Writing exploit modules
- Summary
- 10. Privilege Escalation
- Password attack tools
- Network spoofing tools
- Network sniffers
- Summary
- 11. Maintaining Access
- Working with tunneling tools
- Creating web backdoors
- Summary
- 12. Wireless Penetration Testing
- Wireless network recon
- Wireless testing tools
- Post cracking
- Sniffing wireless traffic
- Summary
- 13. Kali Nethunter
- Installing Kali Nethunter
- Nethunter icons
- Nethunter tools
- Third-party applications
- Wireless attacks
- HID attacks
- Summary
- 14. Documentation and Reporting
- Types of reports
- The executive report
- The management report
- The technical report
- Network penetration testing report (sample contents)
- Preparing your presentation
- Post-testing procedures
- Summary
- A. Supplementary Tools
- Web application tools
- Network tool
- Summary
- B. Key Resources
- Paid incentive programs
- Reverse engineering resources
- Penetration testing learning resources
- Exploit development learning resources
- Penetration testing on a vulnerable environment
- Online web application challenges
- Virtual machines and ISO images
- Network ports
- Index
As with penetration testing LANs or over the public Internet, we need to perform reconnaissance to identify our target wireless network. As opposed to having a network connection, we also have to take care and ensure that we do not target a network that we are not authorized to test. This becomes a significant issue when discussing wireless penetration testing, as you will often find a number of wireless networks comingled with a target network. This is especially true in cases where our target organization and their associated networks are located in an office building or park.
One key consideration when beginning wireless penetration testing is the selection of antennas. Virtual machines and laptops often do not have the proper wireless cards and antennas to support wireless penetration testing. As a result, you will have to acquire an external antenna that is supported. Most of these antennas, though, can be easily purchased online for a moderate price.
Note
For the examples in this chapter, two different USB antennas were used. The first was a TP-LINK TL-WN722N Wireless N150 High Gain USB Adapter and the other was an Alfa AWUSO36NH High Gain USB Wireless G / N Long-Rang Wi-Fi Network Adapter. Both of these are readily available on the commercial market. For more information, consult the following website for supported wireless antennas and chipsets:
Kali Linux has several tools that can be used to identify wireless networks; one basic tool is the Linux command iwlist. This command lists the available wireless networks within range of the wireless card. Open a command prompt and type the following:
# iwlist wlan0 scan
The following screenshot shows the output:
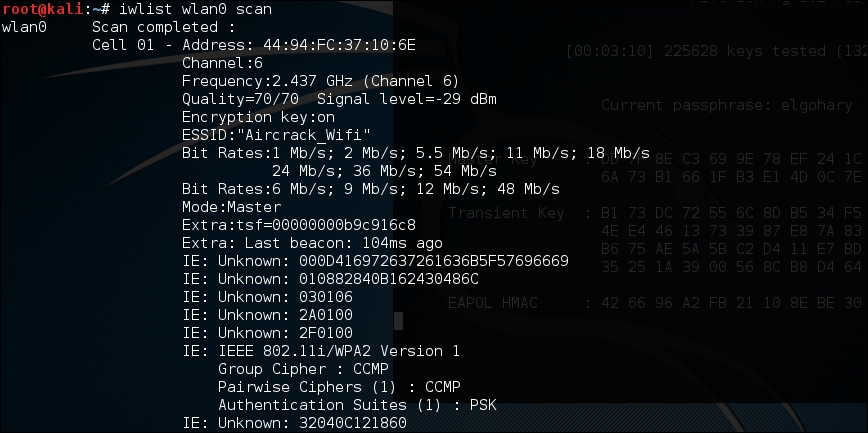
While a simple tool, this gives us some good information. This includes the BSSID or MAC address of the wireless access point (which becomes important later), the type of authentication and encryption, and other information.
Kismet is a combination wireless scanner, IDS/IPS, and packet sniffer that comes installed on Kali Linux 2.0. Written in C++, Kismet offers some additional functionality that is not normally found in purely command-line tools. To start Kismet, you can navigate to Applications | Wireless Attacks | Kismet or type the following into a command prompt:
# kismet
When the command executes, you will be brought to a window. There are different color schemes available, and the initial message will verify that you are able to see Kismet in the terminal:
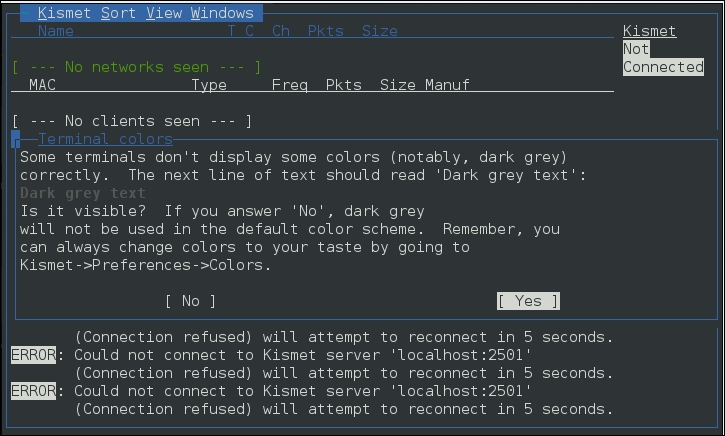
Click Yes if you have no issue seeing the terminal.
Kismet needs to have a source for analysis. This will be the wireless interface on your Kali Linux installation. If you are unsure, type ifconfig into a command prompt; the interface that begins with WLAN is your wireless interface:
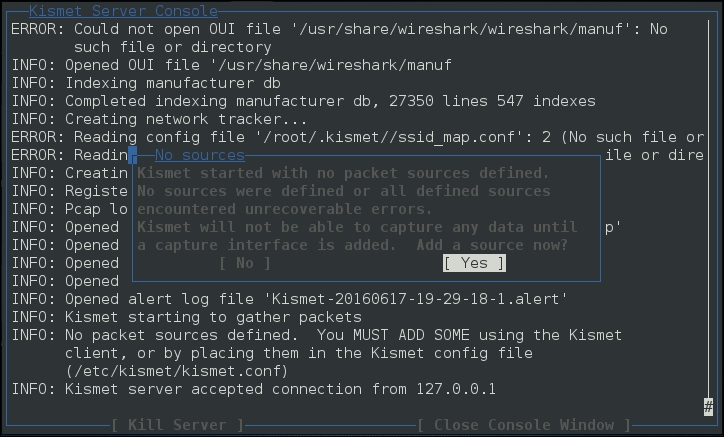
Press the Enter key to indicate Yes.
The next screen allows you to enter an interface for Kismet to use for scanning. In the following screenshot, we enter wlan0, as that is the interface we are working with:
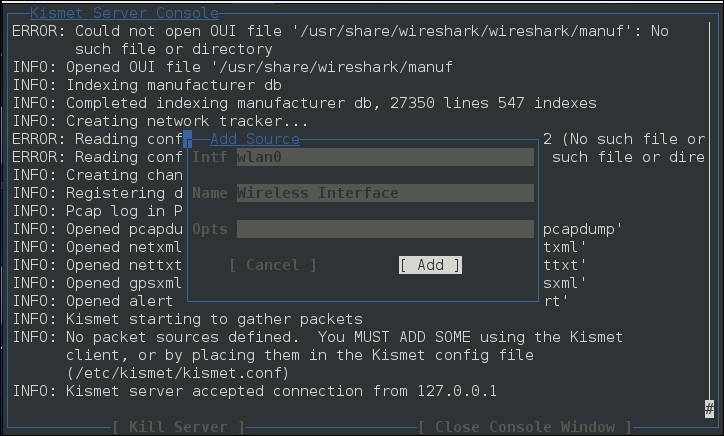
Hit Enter to add the interface. At this point, Kismet will start to collect wireless access points. This includes the BSSID and channels that each access point is using:
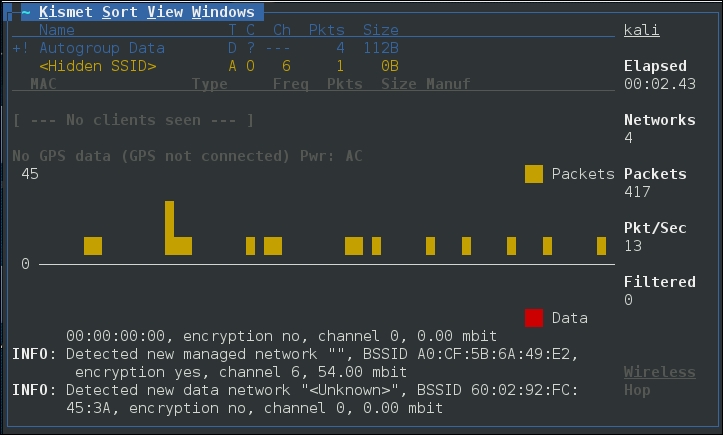
From the output of Kismet, you can start to gain an understanding of what wireless networks are visible to your system. From here, attempt to identify those wireless access points or networks that are part of your penetration test.
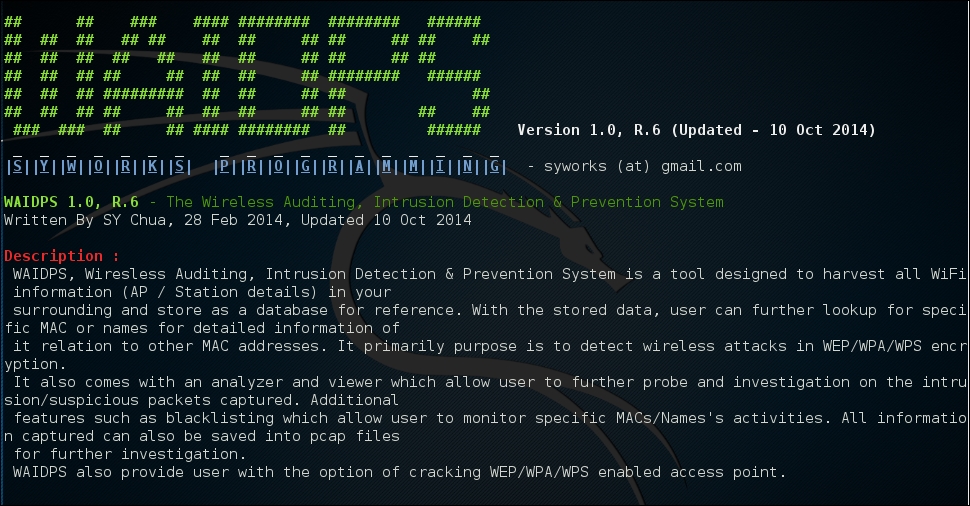
Another command-line tool that is useful for wireless penetration testing is the tool WAIDPS. While billed as an Intrusion Detection platform for wireless networks, this Python script is handy for gathering information about wireless networks and clients. To use WAIDPS, simply download the Python script WAIDPS.py from the website at https://github.com/SYWorks/waidps.
Once downloaded, place the script into any directory and then run using the following command:
# python waidps.py
Once the command executes, you will be brought to a screen while the script runs through the configuration:
WAIDPS has an optional feature that compares the MAC address of wireless access points to a list of known manufacturers. This feature is useful if you know that a particular target utilizes a specific manufacturer for their access points:

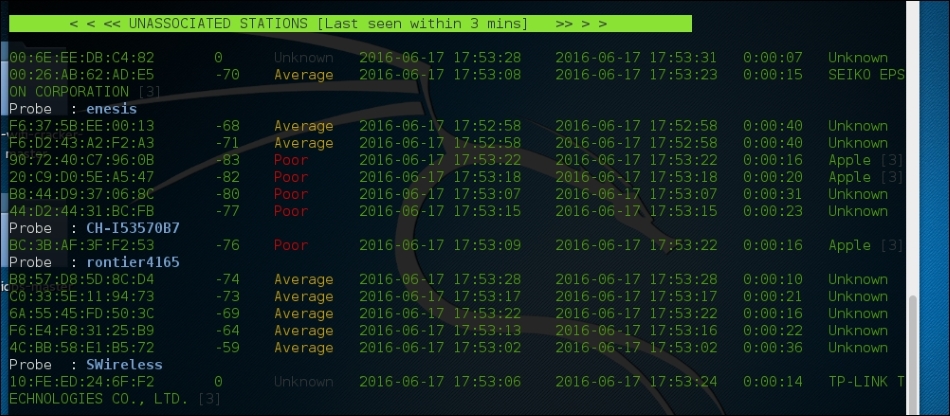
Once the initial configuration has run, WAIDPS will supply a list of access points and wireless networks that are in range. In addition, there is information on the type of encryption in use, as well as the authentication mechanism. Another good piece of information is the PWR, or power indicator. This indicates the strength of the specific access point's signal. The lower the number indicated, the stronger the signal. This is helpful if you are targeting a specific access point. If the signal is weaker than you would like, it indicates you may have to get closer to the actual access point:
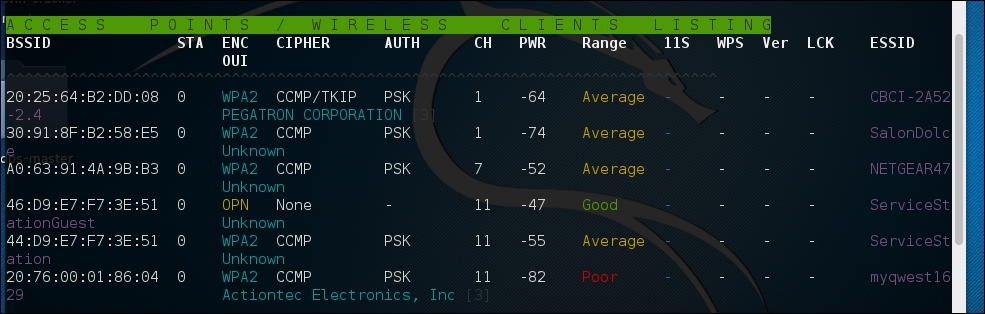
In addition to identifying wireless access points, WAIDPS has the ability to scan for clients that may have wireless enabled but are not associated with an access point. This information can become useful if you need to spoof a MAC address that appears to come from a legitimate client: