Table of Contents for
Kali Linux 2 – Assuring Security by Penetration Testing - Third Edition
 Kali Linux 2 – Assuring Security by Penetration Testing - Third Edition
Published by
Packt Publishing, 2016
Kali Linux 2 – Assuring Security by Penetration Testing - Third Edition
Published by
Packt Publishing, 2016
- Cover
- Table of Contents
- Kali Linux 2 – Assuring Security by Penetration Testing Third Edition
- Kali Linux 2 – Assuring Security by Penetration Testing Third Edition
- Credits
- Disclaimer
- About the Authors
- About the Reviewer
- www.PacktPub.com
- Preface
- What you need for this book
- Who this book is for
- Conventions
- Reader feedback
- Customer support
- 1. Beginning with Kali Linux
- Kali Linux tool categories
- Downloading Kali Linux
- Using Kali Linux
- Configuring the virtual machine
- Updating Kali Linux
- Network services in Kali Linux
- Installing a vulnerable server
- Installing additional weapons
- Summary
- 2. Penetration Testing Methodology
- Vulnerability assessment versus penetration testing
- Security testing methodologies
- General penetration testing framework
- Information gathering
- The ethics
- Summary
- 3. Target Scoping
- Preparing the test plan
- Profiling test boundaries
- Defining business objectives
- Project management and scheduling
- Summary
- 4. Information Gathering
- Using public resources
- Querying the domain registration information
- Analyzing the DNS records
- Getting network routing information
- Utilizing the search engine
- Metagoofil
- Accessing leaked information
- Summary
- 5. Target Discovery
- Identifying the target machine
- OS fingerprinting
- Summary
- 6. Enumerating Target
- Understanding the TCP/IP protocol
- Understanding the TCP and UDP message format
- The network scanner
- Unicornscan
- Zenmap
- Amap
- SMB enumeration
- SNMP enumeration
- VPN enumeration
- Summary
- 7. Vulnerability Mapping
- Vulnerability taxonomy
- Automated vulnerability scanning
- Network vulnerability scanning
- Web application analysis
- Fuzz analysis
- Database assessment tools
- Summary
- 8. Social Engineering
- Attack process
- Attack methods
- Social Engineering Toolkit
- Summary
- 9. Target Exploitation
- Vulnerability and exploit repositories
- Advanced exploitation toolkit
- MSFConsole
- MSFCLI
- Ninja 101 drills
- Writing exploit modules
- Summary
- 10. Privilege Escalation
- Password attack tools
- Network spoofing tools
- Network sniffers
- Summary
- 11. Maintaining Access
- Working with tunneling tools
- Creating web backdoors
- Summary
- 12. Wireless Penetration Testing
- Wireless network recon
- Wireless testing tools
- Post cracking
- Sniffing wireless traffic
- Summary
- 13. Kali Nethunter
- Installing Kali Nethunter
- Nethunter icons
- Nethunter tools
- Third-party applications
- Wireless attacks
- HID attacks
- Summary
- 14. Documentation and Reporting
- Types of reports
- The executive report
- The management report
- The technical report
- Network penetration testing report (sample contents)
- Preparing your presentation
- Post-testing procedures
- Summary
- A. Supplementary Tools
- Web application tools
- Network tool
- Summary
- B. Key Resources
- Paid incentive programs
- Reverse engineering resources
- Penetration testing learning resources
- Exploit development learning resources
- Penetration testing on a vulnerable environment
- Online web application challenges
- Virtual machines and ISO images
- Network ports
- Index
Once installed, there are several configuration steps necessary for the Kali Linux virtual machine. These steps allow for greater functionality and usability.
It is recommended that after you have successfully created the Kali Linux virtual machine using VirtualBox, you install VirtualBox guest additions. This add-on will provide you with the following additional features:
- It will enable the virtual machine to be viewed in full screen
- It will make the mouse move faster in the virtual machine
- It will enable you to copy and paste the text between the host and guest machine
- It will enable the guest and host machines to share folders
To install the guest additions, you can perform the following steps:
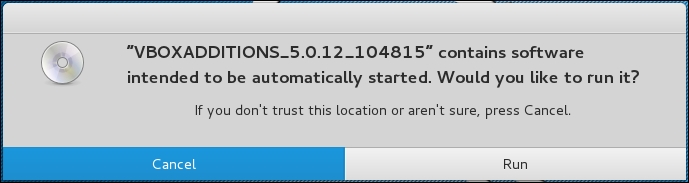
- From the VirtualBox menu, navigate to Devices | Install Guest Additions. You will then see that the VirtualBox guest addition file is mounted as a disk.
- The VirtualBox will then display the following message. Click on Cancel to close the window:
- Open the terminal console and change the VirtualBox guest additions CDROM mount point (
/media/cdrom0):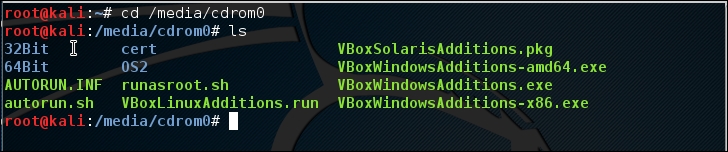
- Execute
VBoxLinuxAdditions.runto run the VirtualBox guest additions installer:sh ./VBoxLinuxAdditions.run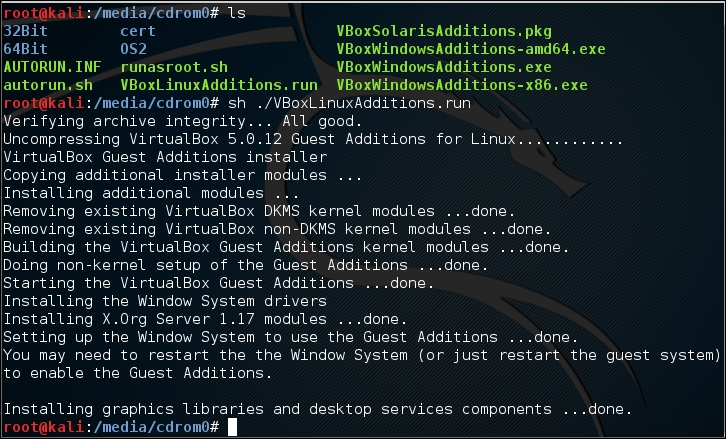
You may need to wait for several minutes until all of the required modules are successfully built and installed:
- Change to the root home directory.
- Eject the VBoxAdditions CD Image by right-clicking on the icon and selecting Eject from the menu. If successful, the VBoxAdditions icon will disappear from the desktop.
- Reboot the virtual machine by typing the
rebootcommand in the terminal console. - After the reboot, you can switch to full screen (View | Switch to fullscreen) from the VirtualBox menu.
In the following section, we will discuss how to set up networking in Kali Linux for a wired and wireless network.
In the default Kali Linux VMware image or ISO configuration, Kali Linux uses NAT (Network Address Translation) as the network's connection type. In this connection mode, the Kali Linux machine will be able to connect to the outside world through the host operating system, whereas the outside world, including the host operating system, will not be able to connect to the Kali Linux virtual machine.
For the penetration testing task, you might need to change this networking method to Bridged Adapter. The following are the steps to change it:
- First, make sure you have already powered off the virtual machine.
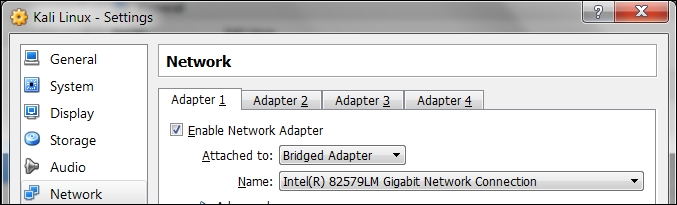
- Then, open up the VirtualBox Manager, select the appropriate virtual machine—in this case we are using the Kali Linux virtual machine—and then click on the Network icon on the right-hand side and change the Attached to drop-down box from NAT to Bridged Adapter in Adapter 1. In the Name field, you can select the network interface that is connected to the network you want to test, as shown in the following screenshot:
To be able to use the bridge network connection, the host machine needs to connect to a network device that can give you an IP address via DHCP, such as a router or a switch.
As you may be aware, a DHCP IP address is not a permanent IP address; it's just a lease IP address. After several times (as defined in the DHCP lease time), the Kali Linux virtual machine will need to get a lease IP address again. This IP address might be the same as the previous one or might be a different one.
If you want to make the IP address permanent, you can do so by saving the IP address in the /etc/network/interfaces file.
The following is the default content of this file in Kali Linux:
auto loiface lo inet loopback
In the default configuration, all of the network cards are set to use DHCP to get the IP address. To make a network card bind to an IP address permanently, we have to edit that file and change the content to the following:
auto eth0
iface eth0 inet static
address 10.0.2.15
netmask 255.255.255.0
network 10.0.2.0
broadcast 10.0.2.255
gateway 10.0.2.2
Here, we set the first network card (eth0) to bind to the IP address of 10.0.2.15. You may need to adjust this configuration according to the network environment you want to test.
By running Kali Linux as a virtual machine, you cannot use the wireless card that is embedded in your host OS. Fortunately, you can use an external USB-based wireless card. For this demonstration, we are using the USB Ralink wireless card/external antenna (there will be an in-depth discussion of wireless antenna selection later on in the section concerning wireless penetration testing):
- To activate your USB-based wireless card in the Kali virtual machine, plug in the wireless card to a USB port, navigate to Devices | USB Devices, and select your wireless card from the VirtualBox menu:
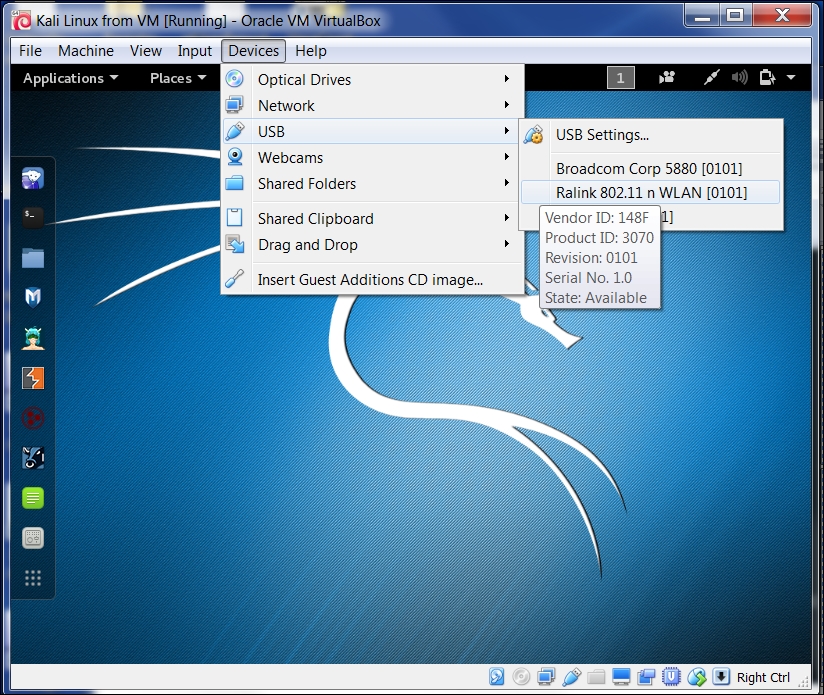
In this screenshot, we can see the USB device listed.
- If your USB wireless card has been successfully recognized by Kali, you can use the
dmesgprogram to see the wireless card's information. Another option to determine if your wireless device is properly connected is to open a terminal and run the command:Ifconfig If the wireless connection is properly configured, you should see a listing under the output with WLAN0 or WLAN1 listed.
- The output should include a listing for a WLAN. This is the wireless network connection.
- In the top-right section of the Kali menu, you will see the Network Connections icon. You can click on it to display your network information.
You will see several network names, wired or wireless, available for your machine:
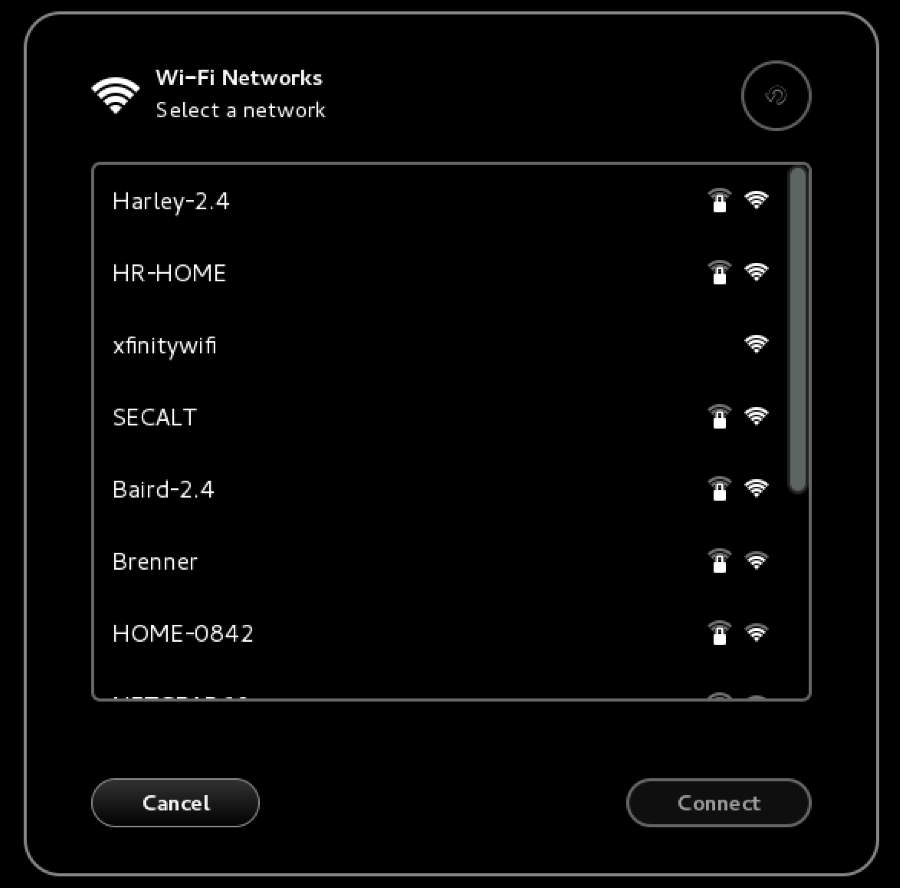
- To connect to the wireless network, just select the particular SSID you want by double-clicking on its name. If the wireless network requires authentication, you will be prompted to enter the password. Only after you give the correct password will you be allowed to connect to that wireless network.