Table of Contents for
Kali Linux 2 – Assuring Security by Penetration Testing - Third Edition
 Kali Linux 2 – Assuring Security by Penetration Testing - Third Edition
Published by
Packt Publishing, 2016
Kali Linux 2 – Assuring Security by Penetration Testing - Third Edition
Published by
Packt Publishing, 2016
- Cover
- Table of Contents
- Kali Linux 2 – Assuring Security by Penetration Testing Third Edition
- Kali Linux 2 – Assuring Security by Penetration Testing Third Edition
- Credits
- Disclaimer
- About the Authors
- About the Reviewer
- www.PacktPub.com
- Preface
- What you need for this book
- Who this book is for
- Conventions
- Reader feedback
- Customer support
- 1. Beginning with Kali Linux
- Kali Linux tool categories
- Downloading Kali Linux
- Using Kali Linux
- Configuring the virtual machine
- Updating Kali Linux
- Network services in Kali Linux
- Installing a vulnerable server
- Installing additional weapons
- Summary
- 2. Penetration Testing Methodology
- Vulnerability assessment versus penetration testing
- Security testing methodologies
- General penetration testing framework
- Information gathering
- The ethics
- Summary
- 3. Target Scoping
- Preparing the test plan
- Profiling test boundaries
- Defining business objectives
- Project management and scheduling
- Summary
- 4. Information Gathering
- Using public resources
- Querying the domain registration information
- Analyzing the DNS records
- Getting network routing information
- Utilizing the search engine
- Metagoofil
- Accessing leaked information
- Summary
- 5. Target Discovery
- Identifying the target machine
- OS fingerprinting
- Summary
- 6. Enumerating Target
- Understanding the TCP/IP protocol
- Understanding the TCP and UDP message format
- The network scanner
- Unicornscan
- Zenmap
- Amap
- SMB enumeration
- SNMP enumeration
- VPN enumeration
- Summary
- 7. Vulnerability Mapping
- Vulnerability taxonomy
- Automated vulnerability scanning
- Network vulnerability scanning
- Web application analysis
- Fuzz analysis
- Database assessment tools
- Summary
- 8. Social Engineering
- Attack process
- Attack methods
- Social Engineering Toolkit
- Summary
- 9. Target Exploitation
- Vulnerability and exploit repositories
- Advanced exploitation toolkit
- MSFConsole
- MSFCLI
- Ninja 101 drills
- Writing exploit modules
- Summary
- 10. Privilege Escalation
- Password attack tools
- Network spoofing tools
- Network sniffers
- Summary
- 11. Maintaining Access
- Working with tunneling tools
- Creating web backdoors
- Summary
- 12. Wireless Penetration Testing
- Wireless network recon
- Wireless testing tools
- Post cracking
- Sniffing wireless traffic
- Summary
- 13. Kali Nethunter
- Installing Kali Nethunter
- Nethunter icons
- Nethunter tools
- Third-party applications
- Wireless attacks
- HID attacks
- Summary
- 14. Documentation and Reporting
- Types of reports
- The executive report
- The management report
- The technical report
- Network penetration testing report (sample contents)
- Preparing your presentation
- Post-testing procedures
- Summary
- A. Supplementary Tools
- Web application tools
- Network tool
- Summary
- B. Key Resources
- Paid incentive programs
- Reverse engineering resources
- Penetration testing learning resources
- Exploit development learning resources
- Penetration testing on a vulnerable environment
- Online web application challenges
- Virtual machines and ISO images
- Network ports
- Index
When examining techniques for sniffing wireless traffic, there are two types of techniques available. The first is sniffing WLAN traffic while authenticated and connected to the target WLAN. In this instance, there is the ability to utilize a Man in the Middle attack in conjunction with tools such as Ettercap, which forces network traffic through our testing machine.
A second technique is sniffing all the wireless traffic that we can get from a specific wireless network and decrypting it with the WPA or WEP passcode. This may become necessary if we are attempting to limit our footprint by not connecting to the WLAN. By passively sniffing traffic and decrypting it later, we lessen the chance that we will be detected.
Just as in a wired LAN, on WLAN, we have the ability to sniff network traffic. The following sniffing technique requires that you have been properly authenticated to the wireless network you are testing and have received a valid IP address from the router. This type of sniffing will make use of the tool Ettercap to conduct an ARP poisoning attack and sniff out credentials.
- Start EtterCap by going to Applications | Sniffing and Spoofing | Ettercap-gui or by entering
ettercap-guiinto a command prompt. Navigate to Sniff and click on Unified Sniffing. Once there, you will be given a drop-down list of network interfaces. Choose your wireless interface, in our case, WLAN0:
- Next, click on Hosts and click Scan for Hosts. After the scanning is complete, hit Hosts List. If it is an active wireless network, you should see a few hosts on there.
- Next, click on MiTM and then ARP Poisoning. On the next screen, choose one IP address and click on Target 1, and then a second IP address and click on Target 2:

- Then click on the Sniff Remote Connections radio button and click OK:
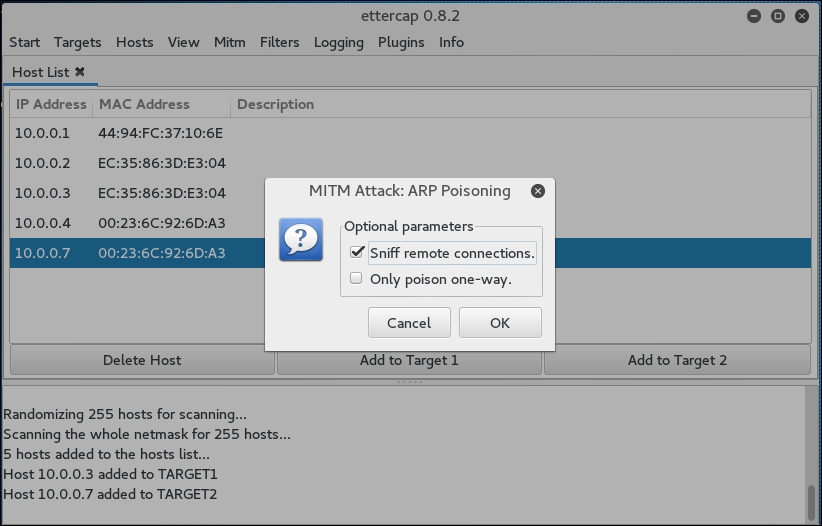
This will start the ARP Poisoning attack whereby we will be able to see all the traffic between the two hosts that we have chosen.
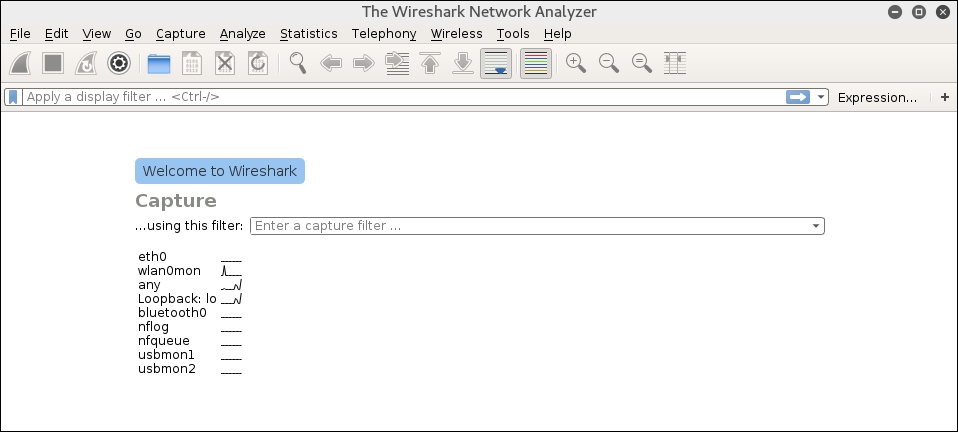
- Next, start a Wireshark capture. When you are brought to the first screen, make sure you choose the wireless interface, in this case, WLAN0:
- When you examine the traffic, we can see a number of types of traffic being captured. Most notable is a Telnet session that has been opened between our two hosts:
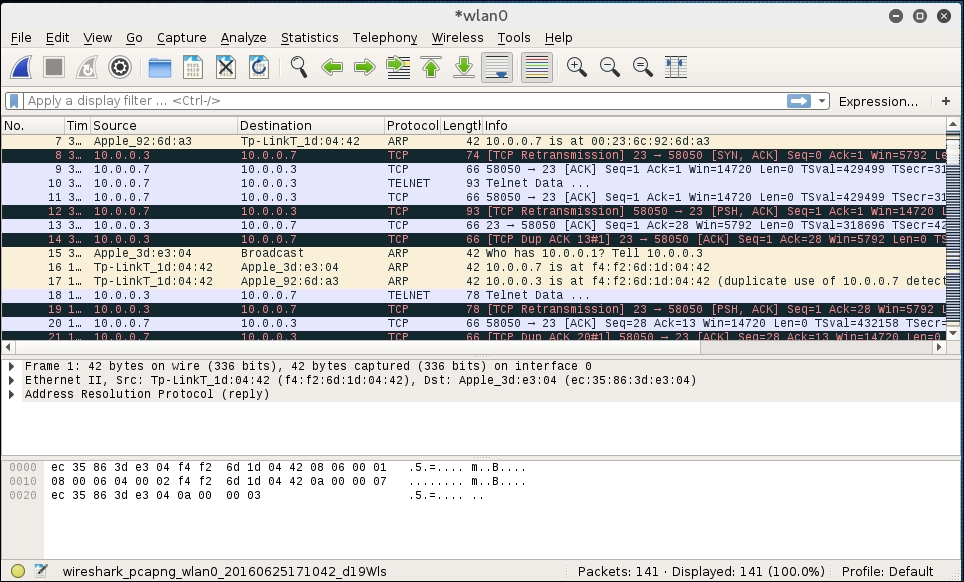
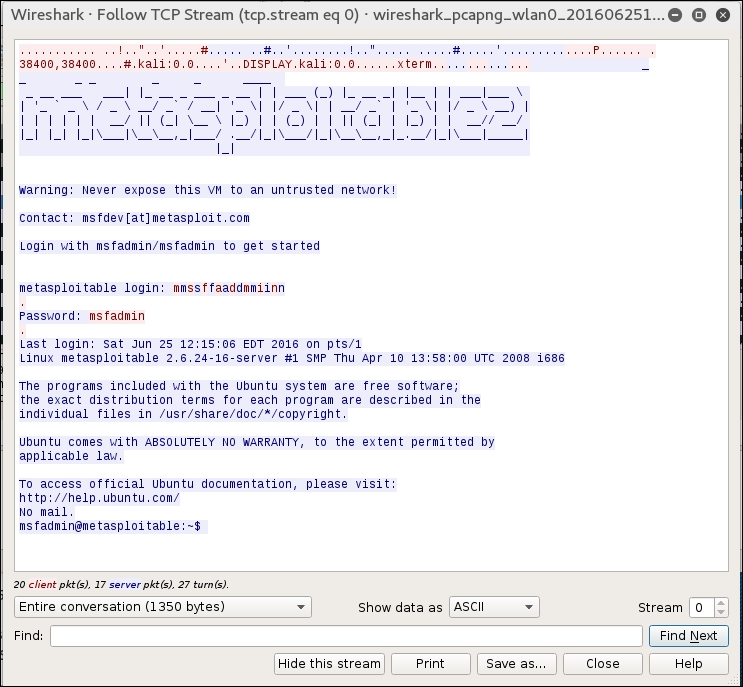
If we right-click on the Telnet session and choose Follow TCP Stream, we are able to see the credentials for a Metasploitable instance with the Telnet credentials past in cleartext:
In passive sniffing, we are not authenticated to the network. If we suspect that there is the possibility of alerting such intrusion prevention controls as rogue host detection, this is a good way to avoid those controls while still gaining potentially confidential information:
- The first stage is to passively scan for wireless traffic on a target network. We first start by ensuring we have our wireless card in monitor mode:
# airmon-ng start wlan0 - We then use the Airodump-ng tool to sniff the network traffic, the same way that we did during the WPA cracking section:
# airodump-ng wlan0mon -c 6 --bssid 44:94:FC:37:10:6E -w wificrack - Run the tool as long as you want. To ensure that we can decrypt the traffic, we will need to ensure we capture the full four-way handshake, if it is a WPA network. Once we have captured enough traffic, hit Ctrl - C.
- Navigate to the folder with the capture file and double-click. This should automatically open the capture in Wireshark:
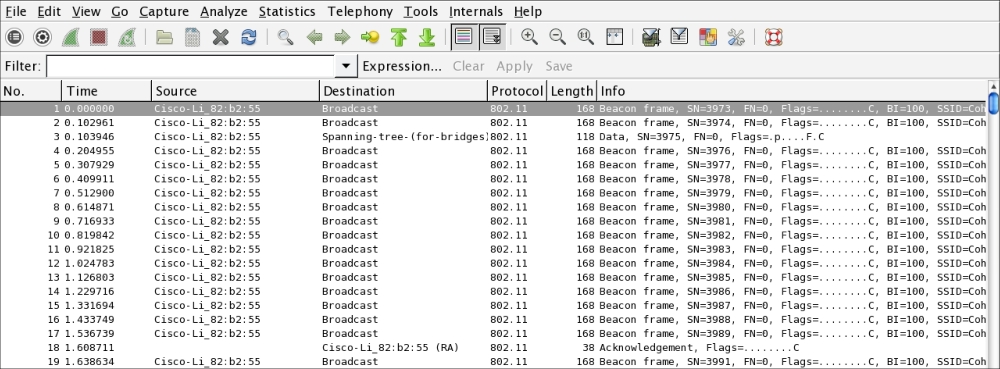
The capture is encrypted and all that is visible are a number of
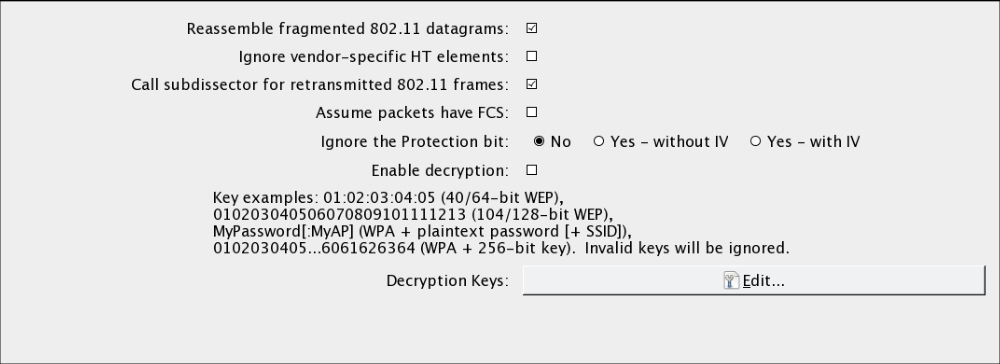
802.11packets. - In Wireshark, navigate to Edit and then to Preferences. A new bow will open up; click on the triangle next to Protocols and then click on 802.11. The following should open, as shown in this screenshot:
- Click on Edit. This sill brings you to a screen to enter WEP or WPA decryption keys. Click on New. Under Key Type, enter
WPAand then the passcode and SSID. In this case, it will beInduction:Coherer. Click on Apply and OK: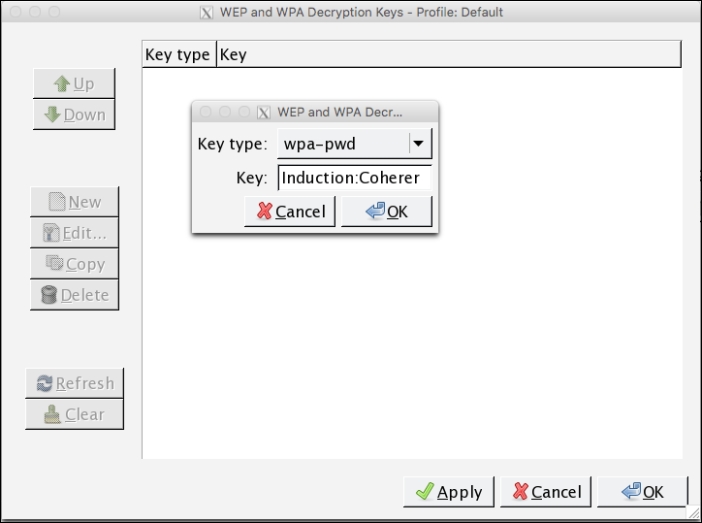
- To apply this decryption key to our capture, navigate to View and then down to Wireless Toolbar. Enable the wireless tool bar. In the main screen, you will see the following:

- On the wireless toolbar, click on Decryption Keys. A box will appear. In the drop-down menu in the upper left, chose Wireshark for the decryption mode. Make sure the applicable key is selected. Click on Apply and OK:

- Wireshark then applies the decryption key to the capture and, where applicable, is able to decrypt the traffic:
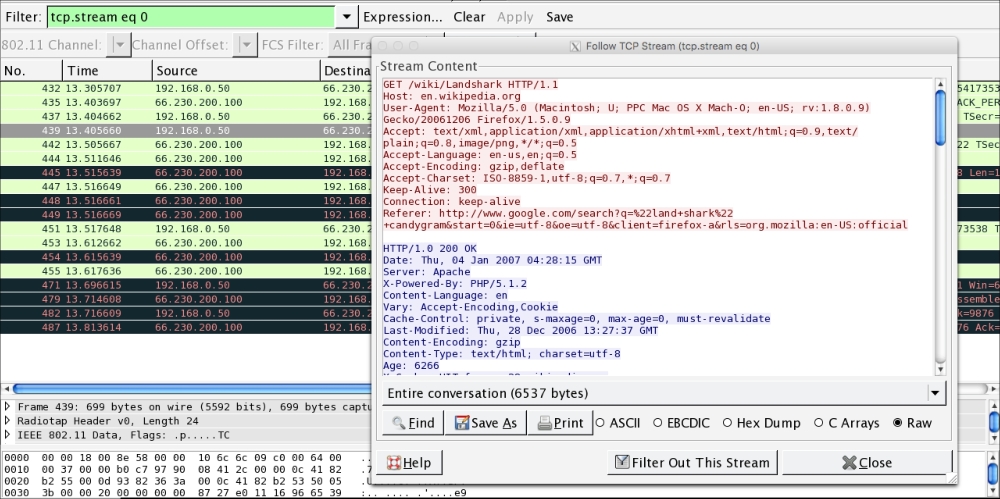
As the preceding screenshot demonstrates, it is possible to decrypt traffic that we have captured without having to join the network. It is important to reiterate that this technique requires a full four-way handshake for each session captured.