Therefore, to configure our domain name to resolve to our server's IP address, we need to update the zone file of the domain nameserver. At the moment, our domain is using Namecheap's domain nameserver, and we can update the zone file using Namecheap's administrative UI.
However, this approach means we'd have to manage our servers using DigitalOcean, and our domain using Namecheap. It'd be easier if we can carry out all the everyday administrative tasks using the same platform. Fortunately, DigitalOcean also has its own domain nameservers, which we can use.
Now, all we have to do is go on Namecheap's administrative UI and update the TLD server to use DigitalOcean's domain nameserver, and use DO's administrative UI to update the zone file.
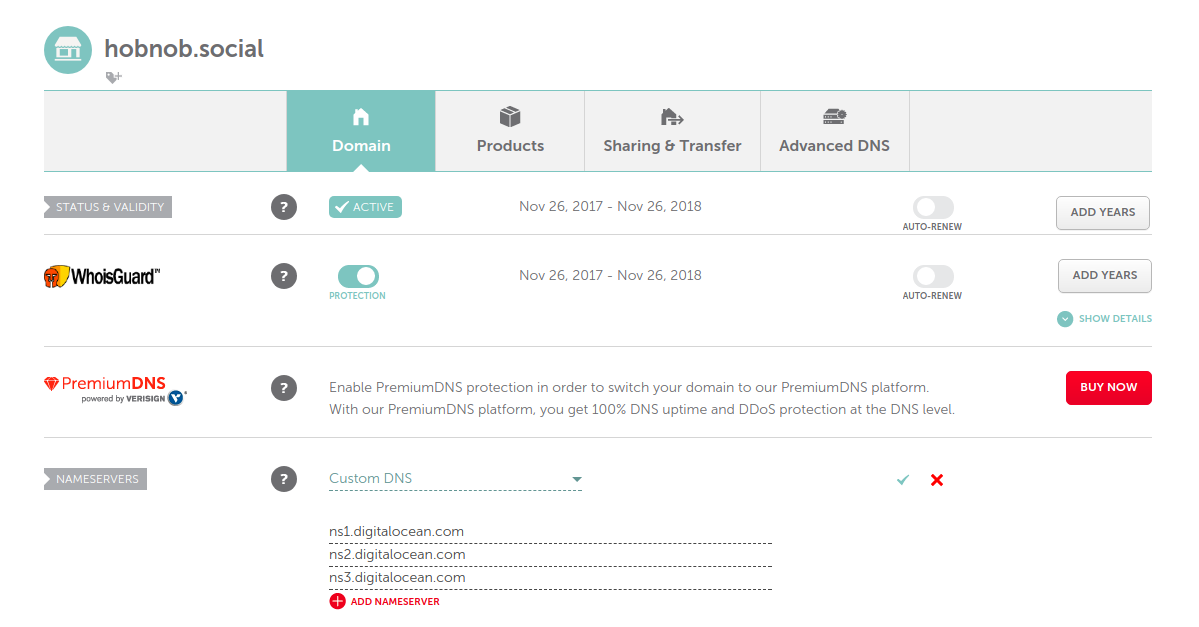
Go to your Namecheap Dashboard (ap.www.namecheap.com) and select your domain. On the Domain tab, there should be a section named Nameservers. Select the Custom DNS section and add in DigitalOcean's domain nameservers, which are ns1.digitalocean.com, ns2.digitalocean.com, and ns3.digitalocean.com. Then, make sure you press the green tick to save your changes:
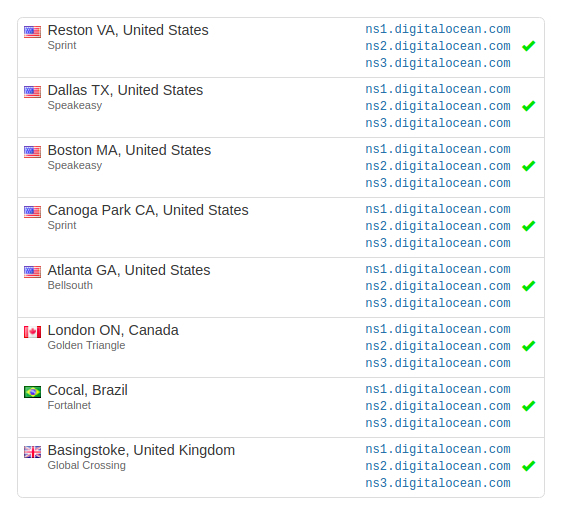
Because resolving nameservers caches results, it may take up to 48 hours for our changes to be propagated to all nameservers. You can use services such as whatsmydns.net to check the propagation progress for different nameservers around the world. Initially, you'll see that they all point to the original nameservers (dns1.registrar-servers.com), but after a few minutes, many of them have changed to use DigitalOcean servers (nsx.digitalocean.com):
While we wait for our DNS changes to propagate, we can go to DigitalOcean and build our zone file using DigitalOcean's UI.