Table of Contents for
Python Geospatial Development - Third Edition
 Python Geospatial Development - Third Edition
Published by
Packt Publishing, 2016
Python Geospatial Development - Third Edition
Published by
Packt Publishing, 2016
- Cover
- Table of Contents
- Python Geospatial Development Third Edition
- Python Geospatial Development Third Edition
- Credits
- About the Author
- About the Reviewer
- www.PacktPub.com
- Preface
- What you need for this book
- Who this book is for
- Conventions
- Reader feedback
- Customer support
- 1. Geospatial Development Using Python
- Geospatial development
- Applications of geospatial development
- Recent developments
- Summary
- 2. GIS
- GIS data formats
- Working with GIS data manually
- Summary
- 3. Python Libraries for Geospatial Development
- Dealing with projections
- Analyzing and manipulating Geospatial data
- Visualizing geospatial data
- Summary
- 4. Sources of Geospatial Data
- Sources of geospatial data in raster format
- Sources of other types of geospatial data
- Choosing your geospatial data source
- Summary
- 5. Working with Geospatial Data in Python
- Working with geospatial data
- Changing datums and projections
- Performing geospatial calculations
- Converting and standardizing units of geometry and distance
- Exercises
- Summary
- 6. Spatial Databases
- Spatial indexes
- Introducing PostGIS
- Setting up a database
- Using PostGIS
- Recommended best practices
- Summary
- 7. Using Python and Mapnik to Generate Maps
- Creating an example map
- Mapnik concepts
- Summary
- 8. Working with Spatial Data
- Designing and building the database
- Downloading and importing the data
- Implementing the DISTAL application
- Using DISTAL
- Summary
- 9. Improving the DISTAL Application
- Dealing with the scale problem
- Performance
- Summary
- 10. Tools for Web-based Geospatial Development
- A closer look at three specific tools and techniques
- Summary
- 11. Putting It All Together – a Complete Mapping System
- Designing the ShapeEditor
- Prerequisites
- Setting up the database
- Setting up the ShapeEditor project
- Defining the ShapeEditor's applications
- Creating the shared application
- Defining the data models
- Playing with the admin system
- Summary
- 12. ShapeEditor – Importing and Exporting Shapefiles
- Importing shapefiles
- Exporting shapefiles
- Summary
- 13. ShapeEditor – Selecting and Editing Features
- Editing features
- Adding features
- Deleting features
- Deleting shapefiles
- Using the ShapeEditor
- Further improvements and enhancements
- Summary
- Index
We next need to implement the ability to export a shapefile. The process of exporting a shapefile is basically the reverse of the importing logic, and involves the following steps:
- Create an OGR shapefile to receive the exported data.
- Save the features and their attributes into the shapefile.
- Compress the shapefile into a ZIP archive.
- Delete our temporary files.
- Send the ZIP file back to the user's web browser.
All this work will take place in the shapefileIO.py module, with help from some utils.py functions. Before we begin, let's define the export_data() function so that we have somewhere to place our code. Edit shapefileIO.py, and add the following new function:
def export_data(shapefile):
    return "More to come..."
While we're at it, let's create the "Export Shapefile" view function. This will call the export_data() function to do all the work. Edit the shapefiles/views.py file and add the following new function:
def export_shapefile(request, shapefile_id):
  try:
    shapefile = Shapefile.objects.get(id=shapefile_id)
  except Shapefile.DoesNotExist:
    raise Http404("No such shapefile")

  return shapefileIO.export_data(shapefile)
This is all pretty straightforward: we load the Shapefile object with the given ID from the database and pass it to our export_data() function. While you are editing this file, add the following import statement to the top:
from django.http import Http404
We next need to tell Django to call this view function in response to the /export URL. Edit the urls.py file (in the main shapeEditor directory), and add the following entry to the URL pattern list:
    url(r'^export/(?P<shapefile_id>\d+)$',
            shapeEditor.shapefiles.views.export_shapefile),
The "List Shapefiles" view will call this URL when the user clicks on the Export hyperlink. This in turn will call our view function, which will call shapefileIO.export_data() to export the shapefile.
Let's now start implementing that export_data() function.
We'll use OGR to create a new shapefile to hold the exported features. Let's start by creating a temporary directory to hold the shapefile's contents; replace your placeholder version of export_data() with the following:
def export_data(shapefile):
    dst_dir = tempfile.mkdtemp()
    dst_file = os.path.join(dst_dir, shapefile.filename)
Now that we've got somewhere to store the shapefile (and a file name for it), we'll create a spatial reference for the shapefile to use, and set up the shapefile's data source and layer:
    dst_spatial_ref = osr.SpatialReference()
    dst_spatial_ref.ImportFromWkt(shapefile.srs_wkt)

    driver = ogr.GetDriverByName("ESRI Shapefile")
    datasource = driver.CreateDataSource(dst_file)
    layer = datasource.CreateLayer(shapefile.filename,
                                   dst_spatial_ref)
Now that we've created the shapefile itself, we next need to define the various fields that will hold the shapefile's attributes:
    for attr in shapefile.attribute_set.all():
        field = ogr.FieldDefn(attr.name, attr.type)
        field.SetWidth(attr.width)
        field.SetPrecision(attr.precision)
        layer.CreateField(field)
Notice how the information needed to define the field is taken directly from the Attribute object: Django makes iterating over the shapefile's attributes easy.
That completes the definition of the shapefile itself. We're now ready to start saving the shapefile's features.
Because the shapefile can use any valid spatial reference, we'll need to transform its features from the spatial reference used internally (EPSG 4326) into the shapefile's own spatial reference. To do this, we'll need to create an osr.CoordinateTransformation object to do the transformation:
    src_spatial_ref = osr.SpatialReference()
    src_spatial_ref.ImportFromEPSG(4326)

    coord_transform = osr.CoordinateTransformation(
                          src_spatial_ref, dst_spatial_ref)
We'll also need to know which geometry field in the Feature object holds the feature's geometry data:
geom_field = utils.calc_geometry_field(shapefile.geom_type)
With this information, we're ready to start exporting the shapefile's features:
    for feature in shapefile.feature_set.all():
        geometry = getattr(feature, geom_field)
Right away, however, we encounter a problem. If you remember when we imported the shapefile, we had to wrap a Polygon, a LineString, or a Point geometry into a MultiPolygon, a MultiLineString, or a MultiPoint so that the geometry types would be consistent in the database. Now that we're exporting the shapefile, we need to unwrap the geometry so that features that had only one Polygon, LineString, or Point in their geometries are saved as Polygons, LineStrings, and Points rather than MultiPolygons, MultiLineStrings, and MultiPoints. We'll use a utils.py function to do this unwrapping:
geometry = utils.unwrap_geos_geometry(geometry)
We'll implement this utils.py function shortly.
Now that we've unwrapped the feature's geometry, we can go ahead and convert it back into an OGR geometry, transform it into the shapefile's own spatial reference system, and then create an OGR feature using that geometry:
        dst_geometry = ogr.CreateGeometryFromWkt(geometry.wkt)
        dst_geometry.Transform(coord_transform)

        dst_feature = ogr.Feature(layer.GetLayerDefn())
        dst_feature.SetGeometry(dst_geometry)
We next need to add the feature to the layer so that it gets saved into the shapefile:
layer.CreateFeature(dst_feature)
Finally, we need to close the shapefile to ensure that everything is saved to disk. OGR doesn't have an explicit "close" feature; instead, we need to remove our references to the layer and data source. This will have the effect of closing the shapefile, writing the shapefile's contents to disk:
    layer      = None
    datasource = None
Before we move on, let's add our new unwrap_geos_geometry() function to utils.py. This code is quite straightforward, pulling a single Polygon, LineString, or Point object out of a MultiPolygon, MultiLineString, or MultiPoint if they contain only one geometry:
def unwrap_geos_geometry(geometry):
    if geometry.geom_type in ["MultiPolygon",
                              "MultiLineString",
                              "MultiPoint"]:
        if len(geometry) == 1:
            geometry = geometry[0]
    return geometry
So far, so good: we've created the OGR feature, unwrapped the feature's geometry, and stored everything into the shapefile. Now we're ready to save the feature's attribute values.
Our next task is to save the attribute values associated with each feature. When we imported the shapefile, we extracted the attribute values from the various OGR data types and converted them into strings so that they could be stored into the database. This was done using the utils.get_ogr_feature_attribute() function. We now have to do the opposite: store the string value back into an OGR attribute field. As before, we'll use a utils.py function to do the hard work. Add the following highlighted lines to the bottom of your export_data() function in the shapefileIO.py module:
        ...

        dst_feature = ogr.Feature(layer.GetLayerDefn())
        dst_feature.SetGeometry(dst_geometry)

        for attr_value in feature.attributevalue_set.all():
            utils.set_ogr_feature_attribute(
                    attr_value.attribute,
                    attr_value.value,
                    dst_feature)

        layer.CreateFeature(dst_feature)

    layer      = None
    datasource = None
Now, let's implement the set_ogr_feature_attribute() function within utils.py. As with the get_ogr_feature_attribute() function, set_ogr_feature_attribute() is rather tedious but straightforward: we have to deal with each OGR data type in turn, processing the string representation of the attribute value and calling the appropriate SetFieldXXX() method to set the field's value. Here is the relevant code:
def set_ogr_feature_attribute(attr, value, feature):
    attr_name = attr.name

    if value == None:
        feature.UnsetField(attr_name)
        return

    if attr.type == ogr.OFTInteger:
        feature.SetField(attr_name, int(value))
    elif attr.type == ogr.OFTIntegerList:
        integers = eval(value)
        feature.SetFieldIntegerList(attr_name, integers)
    elif attr.type == ogr.OFTReal:
        feature.SetField(attr_name, float(value))
    elif attr.type == ogr.OFTRealList:
        floats = []
        for s in eval(value):
            floats.append(eval(s))
        feature.SetFieldDoubleList(attr_name, floats)
    elif attr.type == ogr.OFTString:
        feature.SetField(attr_name, value)
    elif attr.type == ogr.OFTStringList:
        strings = []
        for s in eval(value):
            strings.append(s.encode(encoding))
        feature.SetFieldStringList(attr_name, strings)
    elif attr.type == ogr.OFTDate:
        parts = value.split(",")
        year  = int(parts[0])
        month = int(parts[1])
        day   = int(parts[2])
        tzone = int(parts[3])
        feature.SetField(attr_name, year, month, day,
                         0, 0, 0, tzone)
    elif attr.type == ogr.OFTTime:
        parts  = value.split(",")
        hour   = int(parts[0])
        minute = int(parts[1])
        second = int(parts[2])
        tzone  = int(parts[3])
        feature.SetField(attr_name, 0, 0, 0,
                         hour, minute, second, tzone)
    elif attr.type == ogr.OFTDateTime:
        parts = value.split(",")
        year   = int(parts[0])
        month  = int(parts[1])
        day    = int(parts[2])
        hour   = int(parts[3])
        minute = int(parts[4])
        second = int(parts[5])
        tzone  = int(parts[6])
        feature.SetField(attr_mame, year, month, day,
hour, minute, second, tzone)Now that we've exported the desired data into an OGR shapefile, we can compress it into a ZIP archive. Go back to the shapefileIO.py module and add the following to the end of your export_data() function:
    temp = tempfile.TemporaryFile()
    zip = zipfile.ZipFile(temp, 'w', zipfile.ZIP_DEFLATED)

    shapefile_name = os.path.splitext(shapefile.filename)[0]

    for fName in os.listdir(dst_dir):
        zip.write(os.path.join(dst_dir, fName), fName)

    zip.close()
Notice that we use a temporary file, referred to by the temp variable, to store the ZIP archive's contents. We'll be returning the contents of the temp file to the user's web browser once the export process has finished.
We next have to clean up after ourselves by deleting the shapefile that we created earlier:
shutil.rmtree(dst_dir)
Notice that we don't have to remove the temporary ZIP archive, as that's done automatically for us by the tempfile module when the file is closed.
The last step in exporting the shapefile is to send the ZIP archive to the user's web browser so that it can be downloaded onto the user's computer. To do this, we'll create a special type of HttResponse object called a FileResponse, which is used to download files. We first have to prepare the temporary file so that it can be used by the FileResponse object:
    temp.flush()
    temp.seek(0)
This ensures that the contents of the file have all been written to disk, and the current file position is set to the start of the file so the entire file's contents will be downloaded.
We can now prepare the FileResponse object so that the user's web browser will download it:
    response = FileResponse(temp)
    response['Content-type'] = "application/zip"
    response['Content-Disposition'] = \
        "attachment; filename=" + shapefile_name + ".zip"
    return response
As you can see, we set up the HTTP response header to indicate that we're returning a file attachment. This forces the user's browser to download the file rather than trying to display it. We also use the original shapefile's name as the name of the downloaded file.
This completes the definition of the export_data() function. There's only one more thing to do: add the following import statement to the top of the shapefileIO.py module:
from django.http import FileResponse
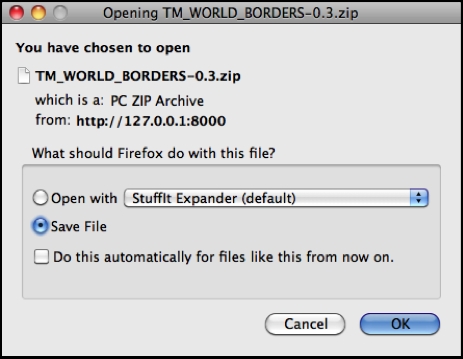
We've finally finished implementing the shapefile export feature. Test it out by running the server and clicking on the Export hyperlink beside one of your shapefiles. All going well, there'll be a slight pause and you'll be prompted to save your shapefile's ZIP archive to disk: