Table of Contents for
Linux Essentials for Cybersecurity, First Edition
 Linux Essentials for Cybersecurity, First Edition
Published by
Pearson IT Certification, 2018
Linux Essentials for Cybersecurity, First Edition
Published by
Pearson IT Certification, 2018
- Cover Page
- Title Page
- Copyright Page
- Contents at a Glance
- Table of Contents
- About the Author
- Dedication
- Acknowledgments
- About the Technical Reviewers
- We Want to Hear from You!
- Reader Services
- Introduction
- Part I: Introducing Linux
- Chapter 1: Distributions and Key Components
- Chapter 2: Working on the Command Line
- Chapter 3: Getting Help
- Chapter 4: Editing Files
- Chapter 5: When Things Go Wrong
- Part II: User and Group Accounts
- Chapter 6: Managing Group Accounts
- Chapter 7: Managing User Accounts
- Chapter 8: Develop an Account Security Policy
- Part III: File and Data Storage
- Chapter 9: File Permissions
- Chapter 10: Manage Local Storage: Essentials
- Chapter 11: Manage Local Storage: Advanced Features
- Chapter 12: Manage Network Storage
- Chapter 13: Develop a Storage Security Policy
- Part IV: Automation
- Chapter 14: Crontab and At
- Chapter 15: Scripting
- Chapter 16: Common Automation Tasks
- Chapter 17: Develop an Automation Security Policy
- Part V: Networking
- Chapter 18: Networking Basics
- Chapter 19: Network Configuration
- Chapter 20: Network Service Configuration: Essential Services
- Chapter 21: Network Service Configuration: Web Services
- Chapter 22: Connecting to Remote Systems
- Chapter 23: Develop a Network Security Policy
- Part VI: Process and Log Administration
- Chapter 24: Process Control
- Chapter 25: System Logging
- Part VII: Software Management
- Chapter 26: Red Hat–Based Software Management
- Chapter 27: Debian-Based Software Management
- Chapter 28: System Booting
- Chapter 29: Develop a Software Management Security Policy
- Part VIII: Security Tasks
- Chapter 30: Footprinting
- Chapter 31: Firewalls
- Chapter 32: Intrusion Detection
- Chapter 33: Additional Security Tasks
- Appendix A: Answers to Review Questions
- Appendix B: Resource Guide
- Glossary
Chapter 32 Intrusion Detection
You might want to consider this chapter to be an introduction to intrusion detection tools because it is a very large topic, and a complete discussion of this topic is beyond the scope of this book. Intrusion detection incorporates a collection of tools and commands that are designed to allow you to determine if your system or network has been compromised.
The goal of this chapter is to introduce some of these tools, including repurposing tools that you have learned in previous chapters. With the knowledge that you gain in this chapter, you can begin the process of creating an intrusion detection procedure that is customized to your environment.
After reading this chapter and completing the exercises, you will be able to do the following:
Use tools to determine if the network has been compromised.
Determine if key system files have been compromised.
Explore additional IDS (intrusion detection system) tools and techniques.
Introduction to Intrusion Detection Tools
In an ideal world, security measures would prevent all intruders. Unfortunately, we do not live in an ideal world, so you must plan for the possibility that intruders will breach your security. In terms of identifying intruders, the two primary areas on which you should focus are determining if a breach as occurred and what action should be taken.
Determining If a Security Breach Has Occurred
Discovering security compromises can be a challenge because hackers find holes that you are unaware of. Think about it this way: you have a problem with ants invading your house, so you plug every hole you can find. Within a week, they are back again, having found a hole that you were unaware existed.
Sometimes hackers, like ants, leave a trail so you can discover how they got into your systems or network. Unfortunately, some hackers are very clever about covering their tracks and will often escape notice for a significant period of time (like ants who find their way into the back of a food cabinet; you might not discover them for several days).
It is important to emphasize how critical it is to discover security breaches as quickly as possible. To illustrate, consider some of the major hacks that have happened within the last few years:
• The Target hack of 2013: The data of over 40 million credit cards was compromised in this hack, which was discovered several weeks after the security measures wer successfully breached.
• The eBay hack of 2013–2014: Account details of 145 million users, including passwords (in encrypted format), birth dates, names, and addresses, were compromised. The breach occurred when hackers were able to use employee credentials of three individuals. However, the breach was not discovered immediately. The hackers had access to the system for 229 days before the breach was discovered.
• The Equifax hack of 2017: Over 140 million customers’ data was compromised in this hack, including social security numbers, addresses, birth dates, and other details. Although this hack was discovered on July 29, Equifax stated that their systems were likely compromised mid-May, meaning the hackers had approximately 45 days to steal data.
Although the previous examples are some of the largest hacks, there are many smaller security compromises similar to these. Note that in all cases, the hackers had weeks, sometimes months, of unabated system access. Sometimes, a good hacker needs only a short amount of time to steal data or cause damage, so the sooner you find them, the better off you will be. If the hacker steals information slowly over a long period of time, they are less likely to be noticed because large amounts of data are not being transferred and you might become familiar with seeing the traffic and not question it.
Intrusion detection tools are used to discover security breaches. As you will discover in this chapter, there are many of these tools available for Linux distributions.
Taking Action
Although you might not want to admit it, your best security plans might be compromised. When that happens, you must have a plan within your security policy that describes what actions to take to limit the loss or damage.
This, by itself, is a huge topic, and a complete discussion of the actions to take is beyond the scope of this book. The following list provides just some of the topics you should include in a “recovery” plan:
• There should be a plan in place to bring the compromised system(s) offline (no longer connected to the network). It is important that you quickly identify every system affected by the compromise so you can effectively stop the attack and the access of the attacker.
• There should be a list of people who need to be notified, in a specific order. The list should also include what information should be provided to each person on the list.
• If it is a mission-critical system, a plan should be in place to bring a replacement server back online after the security hole that was used in the compromise has been plugged. Never bring the original server back online because there might still be undiscovered backdoors placed by the hacker.
• A full diagnostic should be performed on the server(s).
• A plan should be put in place to notify customers, clients, the board of directors, government agencies, and the public. Include specific individuals, not departments, who are responsible and empowered to make these notifications. The plan should clearly state no one else is authorized to speak to the public on behalf of the organization.
This is far from a complete list. It is simply provided as a starting point for what you should think about when putting together a “recovery” plan.
Intrusion Detection Network Tools
Several intrusion detection tools are installed by default on most Linux distributions. Consider running these tools on a regular basis to determine if you have any intruders. One way of doing this is to create scripts and then run them on a regular basis using crontab.
The netstat Command
The netstat command was introduced in Chapter 19, “Network Configuration.” Recall that you can use this command to display all active TCP connections:
[root@onecoursesource ~]# netstat -ta
Active Internet connections (servers and established)
Proto Recv-Q Send-Q Local Address           Foreign Address         State
tcp        0      0 192.168.122.1:domain    0.0.0.0:*               LISTEN
tcp        0      0 0.0.0.0:ssh             0.0.0.0:*               LISTEN
tcp        0      0 localhost:ipp           0.0.0.0:*               LISTEN
tcp        0      0 localhost:smtp          0.0.0.0:*               LISTEN
tcp6       0      0 [::]:ssh                [::]:*                  LISTEN
tcp6       0      0 localhost:ipp           [::]:*                  LISTEN
tcp6       0      0 localhost:smtp          [::]:*
A hacker who has unauthorized access to your system very likely has an established network connection. Probing your system on a regular basis can help you determine if an unauthorized user is accessing your system. Look for any unusual connections, and pay attention to where these connections originate from (the “Foreign Address” column).
Another netstat command you should consider running on a regular basis is the netstat -taupe command, as shown in Example 32-1. This command displays all open ports, which is important because hackers often will open new ports to create more backdoors into the system. You should be aware of what ports should be open on each system in your network, and routinely verify that the correct ports are open and that no additional ports are open on each system.
Example 32-1 The /etc/passwd File
root@onecoursesource:~# netstat -taupe
Active Internet connections (servers and established)
Proto Recv-Q Send-Q Local Address           Foreign Address         State       User       Inode       PID/Program name
tcp        0      0 10.8.0.1:domain         *:*                     LISTEN      bind       24592       1388/named
tcp        0      0 192.168.122.1:domain    *:*                     LISTEN      root       16122       2611/dnsmasq
tcp        0      0 10.0.2.15:domain        *:*                     LISTEN      bind       11652       1388/named
tcp        0      0 localhost:domain        *:*                     LISTEN      bind       11650       1388/named
tcp        0      0 *:ftp                   *:*                     LISTEN      root       10612       990/vsftpd
tcp        0      0 *:ssh                   *:*                     LISTEN      root       11521       1342/sshd
tcp        0      0 localhost:ipp           *:*                     LISTEN      root       15866       2527/cupsd
tcp        0      0 localhost:smtp          *:*                     LISTEN      root       13427       1938/master
udp        0      0 *:42052                 *:*                                 avahi      9597        575/avahi-daemon: r
udp        0      0 *:openvpn               *:*                                 root       12202       1576/openvpn
udp        0      0 *:mdns                  *:*                                 avahi      9595        575/avahi-daemon: r
udp        0      0 192.168.122.1:domain    *:*                                 bind       24593       1388/named
udp        0      0 10.8.0.1:domain         *:*                                 bind       24591       1388/named
udp        0      0 192.168.122.1:domain    *:*                                 root       16121       2611/dnsmasq
udp        0      0 10.0.2.15:domain        *:*                                 bind       11651       1388/named
udp        0      0 localhost:domain        *:*                                 bind       11649       1388/named
The nmap Command
The problem with the netstat command is that a skilled hacker can fool you with false information. For example, they could modify the source code for the command, recompile, and replace the netstat command with the modified version that will provide false information. Or, more simply, they could replace the netstat command will a shell script that provides false information. This is not to suggest that you should not use the netstat command—just realize that it should not be the only way you test for open network ports.
You should also consider routinely running the nmap command, which was covered in detail in Chapter 30, “Footprinting.” The nmap command is not as venerable to hackers replacing it because you run this command from a different system than the potentially hacked system (conceivably your entire system could be hacked, but that is less likely than a single system being hacked).
Because the nmap command is well covered in Chapter 30, it will not be reviewed again here. However, you should consider it part of your IDS game plan.
The tcpdump Command
Another useful intrusion detection tool covered in Chapter 30 is the tcpdump command. This tool allows you to probe network traffic, searching for any suspicious activity. As discussed in Chapter 30, this tool is used by hackers performing footprinting activities. For your purposes, you should use the command within your intrusion detection game plan to warn you of any rogue access points or other unauthorized hardware.
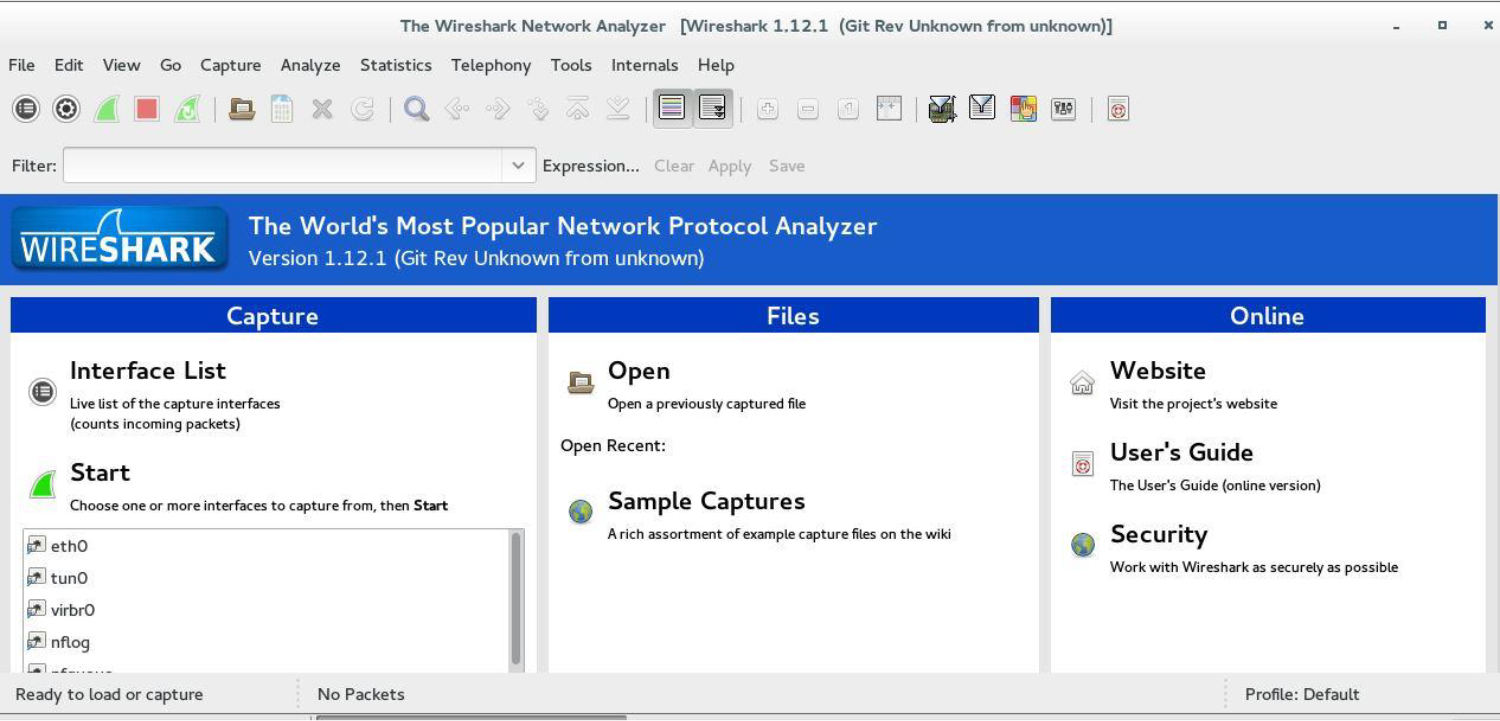
Because the tcpdump command is well covered in Chapter 30, it will not be reviewed again here. However, you should consider installing Wireshark, a tool that provides a GUI-based front end to the tcpdump command (see Figure 32-1).
Keep in mind while Wireshark is great for interactive use, you still want to use tcpdump to automate network activity. As with the netstat command, a good way of using tcpdump to monitor the network is with shell scripts and crontab entries.
Intrusion Detection File Tools
A common task for hackers who gain unauthorized access to a system is to make changes to key files in order to create backdoors. This section provides two examples of how this may be accomplished as well as discusses incorporating file-change tools in your intrusion detection plan.
Modifying the /etc/passwd and /etc/shadow Files to Create a Backdoor
Assume for a moment that a hacker gains access to the system as the root user. This individual knows that eventually this unauthorized access will be noticed. To create a backdoor, the hacker adds the following entry to the /etc/passwd file (highlighted in bold):
lp:x:7:7:lp:/var/spool/lpd:/usr/sbin/nologin
mail:x:8:8:mail:/var/mail:/usr/sbin/nologin
news:x:9:9:news:/var/spool/news:/usr/sbin/nologin
uucp:x:10:10:uucp:/var/spool/uucp:/usr/sbin/nologin
nncp:x:0:0:root:/root:/bin/bash
proxy:x:13:13:proxy:/bin:/usr/sbin/nologin
www-data:x:33:33:www-data:/var/www:/usr/sbin/nologin
backup:x:34:34:backup:/var/backups:/usr/sbin/nologin
Recall that what provides a user account the superuser privileges is not the user’s name, but rather the UID (user ID). Any account that has a UID of 0 has full administrative rights, so the “nncp” user in the previous output is a superuser. The hacker would just now need to add the following bolded line in /etc/shadow to allow logins for the nncp user account:
lp:*:16484:0:99999:7:::
mail:*:16484:0:99999:7:::
news:*:16484:0:99999:7:::
uucp:*:16484:0:99999:7:::
nncp::1745:7:0:99999:7:::
proxy:*:16484:0:99999:7:::
www-data:*:16484:0:99999:7:::
backup:*:16484:0:99999:7:::
Note that the password field for the nncp account is empty, which allows someone to log in with this username and not have to provide a password. A hacker might also assign a regular password to the account.
Why does this method work so well? To begin with, the username that was chosen and the placement with the /etc/passwd and /etc/shadow files allow the hacker to hide this account as if it were a daemon account. Many administrators are unaware of all the daemon accounts on the system, and because new software might install new daemon accounts, this new account will often escape notice.
Creating an SUID Program to Create a Backdoor
Again, assume a hacker gains access to the system as the administrator. Suppose the hacker runs the following chmod command:
root@onecoursesource:~# ls -l /usr/bin/vim
-rwxr-xr-x 1 root root 2191736 Jan  2  2020 /usr/bin/vim
root@onecoursesource:~# chmod u+s /usr/bin/vim
root@onecoursesource:~# ls -l /usr/bin/vim
-rwxr-xr-x 1 root root 2191736 Jan  2  2020 /usr/bin/vim
What this now means is that as long as the hacker can gain access to the system as a regular user, they can run the vim editor as the root user, which provides them with the ability to modify any file on the system (including removing the root password from the /etc/shadow file to gain full root access again). You might think, “Well, the hacker still needs access to a regular user account,” but consider the following:
• The hacker might already have access to a compromised regular user account that you are not aware of.
• The hacker might be an internal employee who just wants to reclaim superuser access.
• The hacker might have left a background process running that runs as a regular user and provides access without having to log in as a regular user.
Incorporating File-Change Tools in the Intrusion Detection Plan
Your IDS plan should incorporate several tools that detect changes in files, including the following:
• Package management tools that determine if a file has changed since it was installed (for example, the rpm -V command, which was discussed in Chapter 26, “Red Hat–Based Software Management”).
• Commands that compare differences in files, such as the cmp and diff commands. The cmp command is a good way to determine if two text or binary files are different, and the diff command can show how two text files are different. These commands require access to the original files, which might be available on a backup device.
• An MD5 checksum is a unique key based on a file’s attributes and contents used to create a one-way hash value. This provides a “digital fingerprint” that can be used to determine if a file has been modified. If you create an MD5 checksum of the original, untampered file, you can later verify a suspicious file. See an example of this technique following this list.
To create an MD5 checksum, use the following command:
root@onecoursesource:~# md5sum /etc/passwd > passwd.md5
root@onecoursesource:~# cat passwd.md5
7459f689813d3c422bbd71d5363ba60b  /etc/passwd
You can use this file later to verify that no changes have been made:
root@onecoursesource:~# md5sum -c passwd.md5
/etc/passwd: OK
root@onecoursesource:~# useradd test
root@onecoursesource:~# md5sum -c passwd.md5
/etc/passwd: FAILED
md5sum: WARNING: 1 computed checksum did NOT match
Here are a couple notes regarding using the techniques in this section:
• Never trust any file on a system that has been compromised. For example, the database used by rpm -V could have been compromised by the hacker to avoid providing information about changes to files. Always make sure you have a clean copy of this database from another system. For the cmp and diff commands, make sure you store original files on another system. Your MD5 checksums should also be stored on a different system. Be paranoid and never trust anything on a potentially compromised system.
Security Highlight
It is best to always assume systems and data are compromised and then work from that position. Too often security experts assume that the system hasn’t been fully compromised and use tools to attempt to fix problems, only later to discover that the tools themselves have been compromised.
• Research other tools that provide similar features. For example, instead of using the md5sum command, you may want to use the sha1sum command (or one of its varieties, like sha256sum or sha512sum).
Additional Intrusion Detection Tools
The tools discussed in this chapter just begin to scratch the surface of the large number of intrusion detection tools available for Linux. A complete discussion of these tools could fill an entire book. The following list highlights just some of the intrusion detection system (IDS) categories available:
• Passive IDS: An IDS that detects possible intrusions and then notifies administrators
• Reactive or Active IDS: An IDS that attempts to automatically react or respond to intrusions
• NIDS: Network-based IDS, designed to discover intrusions or attempts by monitoring key networks
• HIDS: Host-based IDS, which runs on a specific system to determine if an intrusion attempt has occurred
There are additional categories (research signature-based IDS, for example). IDS is a huge topic!
In terms of what additional tools you should consider researching, consider the following:
• Kali Linux has some useful tools. In particular, focus on categories 09, 10 and 11 in Figure 32-2.
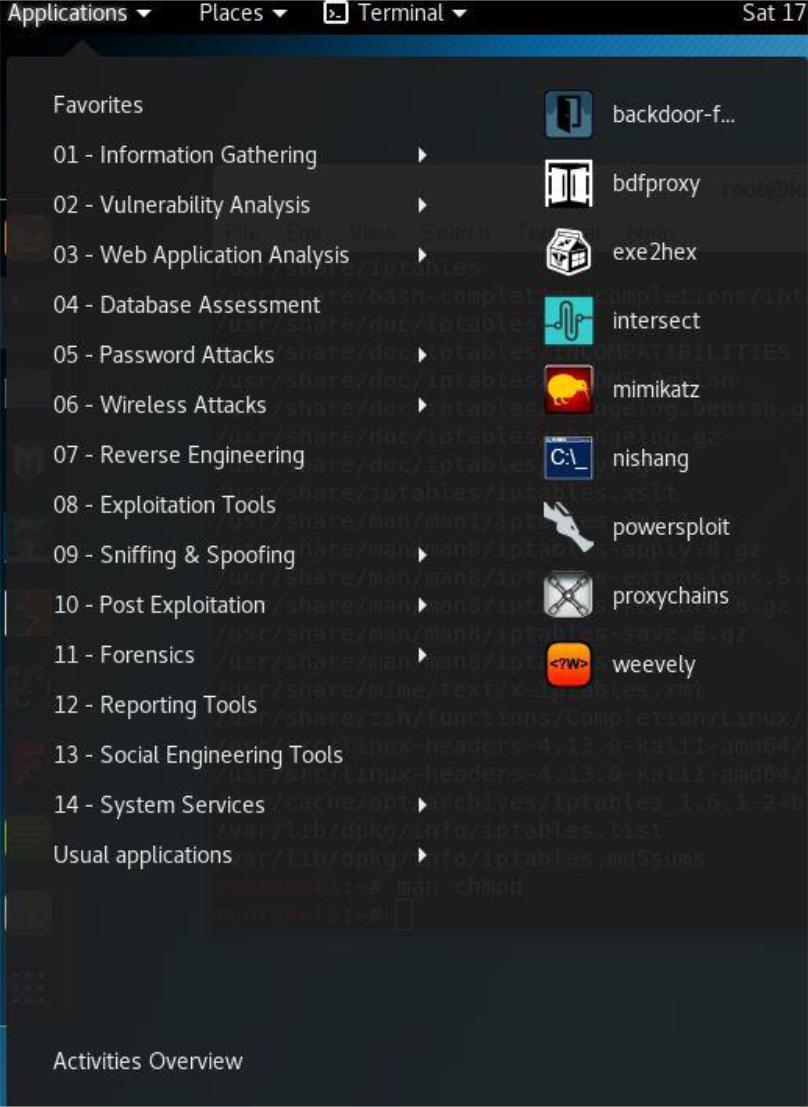
Figure 32-2 Kali Linux IDS Tools
• Security Onion is a distribution that primarily focuses on IDS tools. It includes, by default, many of the other tools in this list.
• Tripwire is a tool that is designed to report when key system files have been changed. Both a commercial version and an open source (free) version are available.
• Snort is an IDS tool that has been available for over 20 years. It is used to provide real-time analysis of traffic and can also be used to log network packets.
• AIDE (Advanced Intrusion Detection Environment), like Tripwire, is used to determine if changes have been made to the filesystem.
Keep in mind that this is nowhere close to a complete list! This list is simply designed to provide you with a starting point for further exploration.
Summary
In this chapter, you were introduced to some techniques you can use to perform intrusion detection. You discovered how to use some of the tools you learned about in previous chapters, and you were also introduced to some new commands and tools.
Key Terms
Review Questions
1. The _____ command can be used to display all active network connections on the local system.
2. Which of the following commands can be used to probe open network ports on a remote system?
a. netstat
b. tcpdump
c. nmap
d. md5sum
3. The _____ tool allows you to probe network traffic, searching for any suspicious activity.
4. Which option for the rpm command can be used to display changes in files since the file was installed?
a. --verifyfiles
b. --verify
c. -V
d. -v
5. A _____ IDS detects possible intrusions and then notifies administrators.