Table of Contents for
Linux Essentials for Cybersecurity, First Edition
 Linux Essentials for Cybersecurity, First Edition
Published by
Pearson IT Certification, 2018
Linux Essentials for Cybersecurity, First Edition
Published by
Pearson IT Certification, 2018
- Cover Page
- Title Page
- Copyright Page
- Contents at a Glance
- Table of Contents
- About the Author
- Dedication
- Acknowledgments
- About the Technical Reviewers
- We Want to Hear from You!
- Reader Services
- Introduction
- Part I: Introducing Linux
- Chapter 1: Distributions and Key Components
- Chapter 2: Working on the Command Line
- Chapter 3: Getting Help
- Chapter 4: Editing Files
- Chapter 5: When Things Go Wrong
- Part II: User and Group Accounts
- Chapter 6: Managing Group Accounts
- Chapter 7: Managing User Accounts
- Chapter 8: Develop an Account Security Policy
- Part III: File and Data Storage
- Chapter 9: File Permissions
- Chapter 10: Manage Local Storage: Essentials
- Chapter 11: Manage Local Storage: Advanced Features
- Chapter 12: Manage Network Storage
- Chapter 13: Develop a Storage Security Policy
- Part IV: Automation
- Chapter 14: Crontab and At
- Chapter 15: Scripting
- Chapter 16: Common Automation Tasks
- Chapter 17: Develop an Automation Security Policy
- Part V: Networking
- Chapter 18: Networking Basics
- Chapter 19: Network Configuration
- Chapter 20: Network Service Configuration: Essential Services
- Chapter 21: Network Service Configuration: Web Services
- Chapter 22: Connecting to Remote Systems
- Chapter 23: Develop a Network Security Policy
- Part VI: Process and Log Administration
- Chapter 24: Process Control
- Chapter 25: System Logging
- Part VII: Software Management
- Chapter 26: Red Hat–Based Software Management
- Chapter 27: Debian-Based Software Management
- Chapter 28: System Booting
- Chapter 29: Develop a Software Management Security Policy
- Part VIII: Security Tasks
- Chapter 30: Footprinting
- Chapter 31: Firewalls
- Chapter 32: Intrusion Detection
- Chapter 33: Additional Security Tasks
- Appendix A: Answers to Review Questions
- Appendix B: Resource Guide
- Glossary
Chapter 21 Network Service Configuration: Web Services
One of the most common server types is a web server. By most estimates, there are over 100 million web servers directly attached to the Internet, but there are certainly many more used internally within corporate and government organizations.
Because most of these web servers are accessible directly through the Internet, security is paramount. In this chapter, you not only learn how to configure a popular Linux web server (the Apache Hypertext Transfer Protocol Server), but you learn how to enable important security features.
This chapter also introduces you to proxy servers. Proxy servers are used for several reasons, including to speed up access to data and to provide an extra layer of security to servers (including web servers). You learn the basics of proxy servers and how to configure two of the more popular proxy servers.
After reading this chapter and completing the exercises, you will be able to do the following:
Configure an Apache Web Server.
Enable security features on Apache Web Servers.
Configure a proxy server.
Apache Web Server
Typically, when people say they installed Apache on their system, they are referring to the web server provided by the Apache Software Foundation. This organization actually provides many open source projects, but because it is most famously known for the Apache Hypertext Transfer Protocol Server, the term “Apache” in software terms has become synonymous with this web server (we typically refer to it as the Apache Web Server). It is also commonly referred to as “httpd,” as that is normally the name of the web server process.
Hypertext Transfer Protocol (HTTP, or simply hypertext) is a protocol that has been a standard for web pages since the 1990s. This protocol allows for a client program (web browser) to request data from a server program (the httpd process, for example). Often this data is formatted by a markup language called Hypertext Markup Language (HTML), which is in turn converted into a human-readable web page.
Before you start to configure the Apache Web Server, you first need to search for the location of the primary configuration file. Depending on your distribution, this file should be located in one of the following directories:
• /etc/apache
• /etc/apache2
• /etc/httpd
• /etc/httpd/conf
For example, on an Ubuntu system, the configuration file is located under the /etc/apache2 directory, while on a CentOS system it is located under the /etc/httpd/conf directory. Even the main configuration filename can vary from one distribution to another. For example, it is named httpd.conf on CentOS and apache2.conf on Ubuntu. As frustrating as this may be, the good news is that regardless of where the configuration file is located, the syntax within the file should be the same.
Basic Apache Web Server Configuration
The default Apache Web Server configuration file consists of comments and directives, which are parameters, and can therefore be assigned values. An example of a portion of an Apache configuration file follows:
# ServerRoot: The top of the directory tree under which the server's
# configuration, error, and log files are kept.
#
# Do not add a slash at the end of the directory path. If you point
# ServerRoot at a non-local disk, be sure to specify a local disk on the
# Mutex directive, if file-based mutexes are used. If you wish to share the
# same ServerRoot for multiple httpd daemons, you will need to change at
# least PidFile.
#
ServerRoot "/etc/httpd"
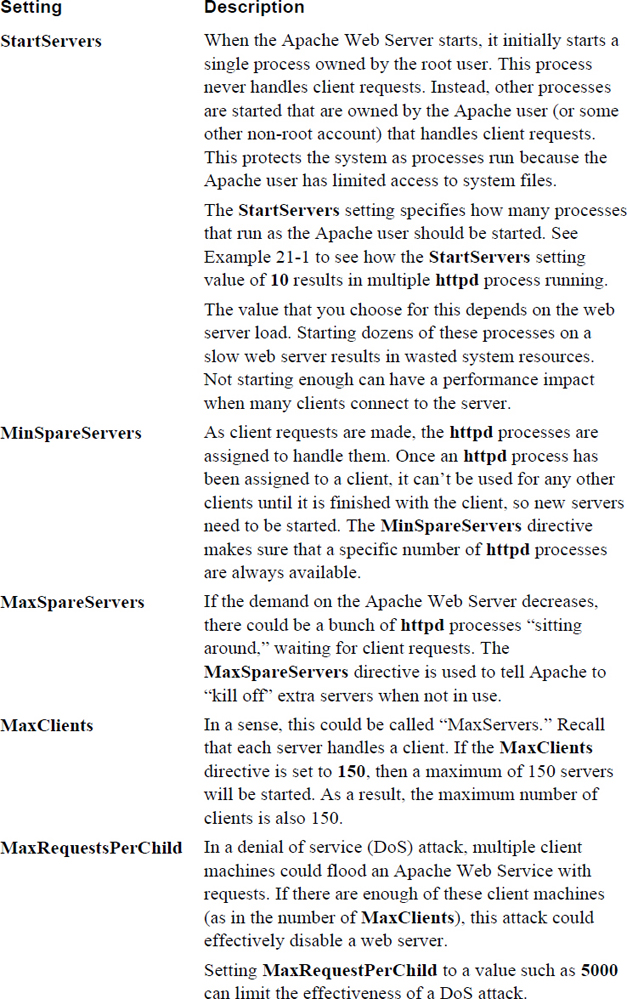
Typically, each directive (at least the default directives) is well commented (#comment), making it easier to determine the purpose of each directive. There are hundreds of possible directives, some of which are described in more detail later in this chapter. The basic directives that you should be aware of are described in Table 21-1. (Descriptions in comment format are taken directly from the configuration file.)
Table 21-1 Basic Apache Directives

In some cases, directives require multiple values. The syntax for multiple-line directives is a bit different than single-line directives:
<Directory />
    AllowOverride All
    Require all granted
</Directory>
The <Directory /> line starts the directive, and it continues until </Directory>. In the preceding example, AllowOverride and Require are also directives (you can consider these subdirectives).
Starting the Apache Web Server
After you install the Apache Web Server software package, you should be able to start the server using the default configuration file. Although it will not serve up useful content, it is good to know that the server is functioning correctly without the need for any changes to the configuration files.
The Apache Web Server process is named httpd. You can start this process using either the usual startup scripts or by using the apache2ctl (or apachectl) program.
After starting the server, you can verify it is responding to requests by opening a web browser on the same machine as the server and typing localhost in the URL. The result should be something like what’s shown in Figure 21-1.
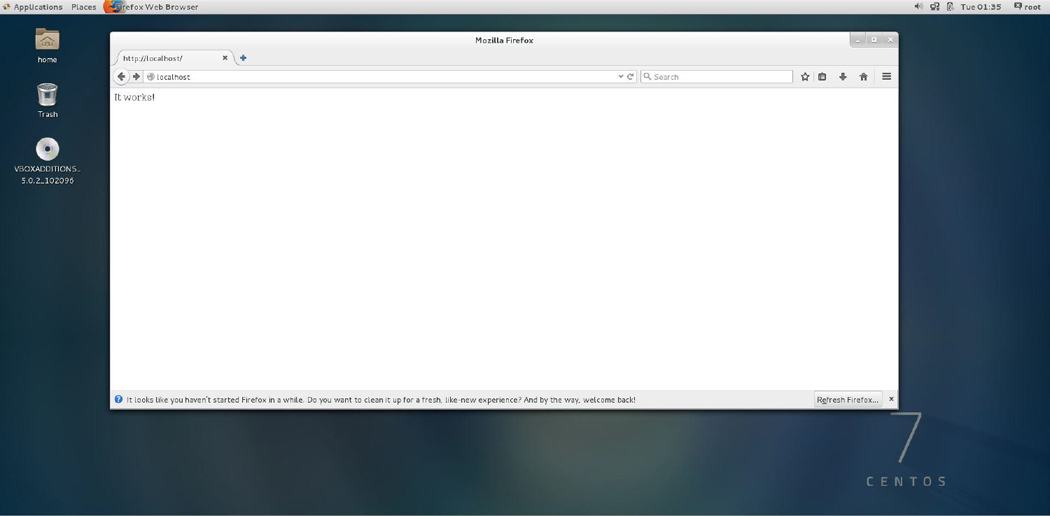
Figure 21-1 Default Apache web page
By default, the location where web pages reside is the /var/www/html directory (you can confirm or change the exact location by looking for the DocumentRoot setting in the primary configuration file). After a fresh installation of the Apache software, this directory should be empty. If you want to further test your server’s functionality, create a small text file (or HTML if you are familiar with that language) in the /var/www/html directory:
[root@localhost ~]# echo "testing, 1, 2, 3, testing" > /var/www/html/test
Apache Web Server Log Files
Two log files are useful when testing and troubleshooting the Apache Web Server: the access_log and the error_log. The access_log contains information about attempts to access content from the web server. The error_log contains messages regarding when problems arise on the web server.
The following demonstrates the last two entries in the access_log:
[root@localhost ~]# tail -2 /var/log/httpd/access_log
::1 - - [09/Dec/2018:05:02:22 -0800] "GET /tes HTTP/1.1" 404 201 "-"
"Mozilla/5.0 (X11; Linux x86_64; rv:38.0) Gecko/20100101 Firefox/38.0"
::1 - - [09/Dec/2018:05:02:28 -0800] "GET /test HTTP/1.1" 200 26 "-"
"Mozilla/5.0 (X11; Linux x86_64; rv:38.0) Gecko/20100101 Firefox/38.0"
Note that in each line, the "GET" portion of the line indicates what file was requested. The access_log does not indicate whether the file was actually sent, just that there was a request.
Security Highlight
Many random access attempts could be the result of someone trying to hack into your system or find information about your system. Monitor the access log regularly, especially for “404” errors (which indicate that someone tried to get a web page that does not exist), “403” (or Forbidden) errors, and “401” errors (where access has been denied for security reasons). These are often all examples of probe attacks.
Enable Scripting
You can add features to the Apache Web Server by enabling modules. Many modules come with the default installation of Apache, and others are available on the Internet.
At the very least, you should know how to enable the modules that permit Perl and PHP scripting. These modules allow web developers to create more dynamic web pages by using scripting.
Security Highlight
This is a brief introduction of enabling scripting on web servers. In the real world, you should be careful about implementing scripting because it can allow a hacker to gain unauthorized access to your system. Although you need to know these basics, consider this a topic that you really should explore in more detail before implementing on a live web server.
To enable PHP scripting, take the following steps:
Step 1. Make sure PHP is installed on your system. For example, the following command verifies PHP is installed on a CentOS system (see Chapter 26, “Red Hat–Based Software Management” and Chapter 27 “Debian-Based Software Management,” for instructions on how to install software, if necessary):
 [root@localhost ~]# yum list installed | grep php
php.x86_64                             7.2.3-36.el7_1                 @updates
php-cli.x86_64                         7.2.3.el7_1                 @updates
php-common.x86_64                      7.2.3.el7_1                 @updates
Step 2. Verify that the libphp7.so file is in the Apache Web Server module directory. This file should have been installed with the PHP software package. On a CentOS system, the Apache Web Server modules are in the /etc/httpd/modules directory:
 [root@localhost ~]# ls /etc/httpd/modules/*php*
/etc/httpd/modules/libphp7.so
Step 3. Configure the Apache Web Server to enable PHP. This can be accomplished by modifying the primary configuration file or by creating a file in the module’s include directory. For example, on a CentOS system, the following line appears in the primary configuration file:
 [root@localhost ~]# grep Include /etc/httpd/conf/httpd.conf
Include conf.modules.d/*.conf
    #   Indexes Includes FollowSymLinks SymLinksifOwnerMatch ExecCGI MultiViews
    # (You will also need to add "Includes" to the "Options" directive.)
IncludeOptional conf.d/*.conf
And in the /etc/httpd/conf.modules.d directory, the following file exists:
[root@localhost ~]# cat /etc/httpd/conf.modules.d/10-php.conf
#
# PHP is an HTML-embedded scripting language which attempts to make it
# easy for developers to write dynamically generated webpages.
#
<IfModule prefork.c>
  LoadModule php5_module modules/libphp5.so
</IfModule>
Step 4. Restart the Apache Web Server.
Keep in mind that the previous steps should provide basic PHP functionality. There may be additional configuration settings that you want to explore for a real-world Apache Web Server.
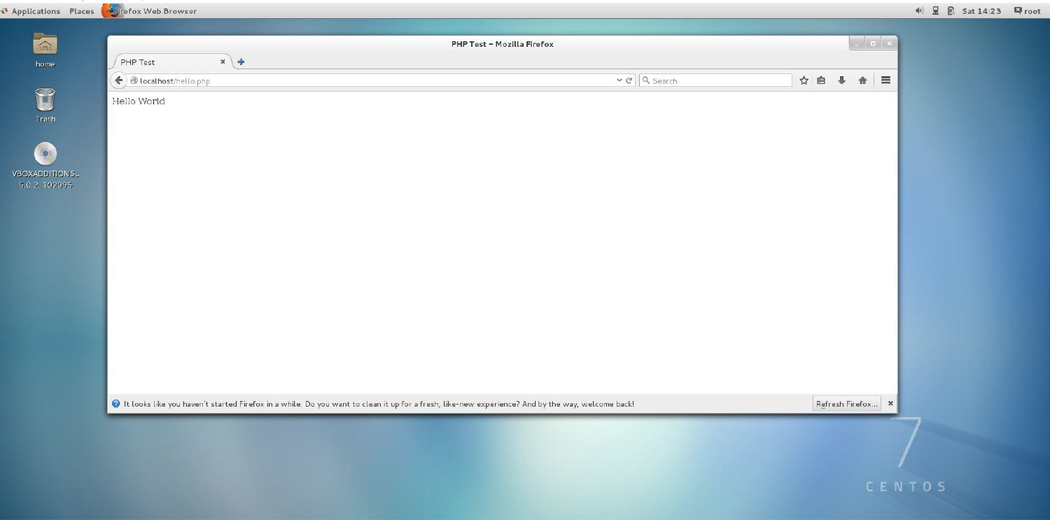
How can you tell whether it worked? First, create the following file (name it hello.php) in the DocumentRoot directory (/var/www/html for example):
<html>
<head>
<title>PHP Test</title>
</head>
<body>
<?php echo '<p>Hello World</p>'; ?>
</body>
</html>
Then test the script by pointing your web browser to the localhost/hello.php URL. The result should look like Figure 21-2.
What Could Go Wrong
The IfModule prefork.c directive is used to specify when to load the module. The critical element is the LoadModule line, so do not remove this value.
To enable Perl scripting, take the following steps:
Step 1. Make sure the Perl Apache modules are installed on your system. For example, the following command verifies PHP is installed on a CentOS system:
[root@localhost ~]# yum list installed | grep mod_perl
mod_perl.x86_64                        2.0.8-10.20140624svn1602105.el7 @epel
Step 2. Verify that the mod_perl.so file is in the Apache Web Server module directory. This file should have been installed with the mod_perl software package. On a CentOS system the Apache Web Server modules are in the /etc/httpd/modules directory:
[root@localhost ~]# ls /etc/httpd/modules/*perl*
/etc/httpd/modules/mod_perl.so
Step 3. Configure the Apache Web Server to enable Perl. This can be accomplished by modifying the primary configuration file or by creating a file in the module's include directory, as shown:
[root@localhost ~]# cat /etc/httpd/conf.modules.d/02-perl.conf
#
# Mod_perl incorporates a Perl interpreter into the Apache web server,
# so that the Apache web server can directly execute Perl code.
# Mod_perl links the Perl runtime library into the Apache web server
# and provides an object-oriented Perl interface for Apache's C
# language API. The end result is a quicker CGI script turnaround
# process, since no external Perl interpreter has to be started.
#
LoadModule perl_module modules/mod_perl.so
Step 4. Add the following to the primary Apache Web Server configuration file:
<Directory /var/www/html/perl>
AllowOverride All
SetHandler perl-script
PerlHandler ModPerl::Registry
PerlOptions +ParseHeaders
Options ExecCGI
Order allow,deny
Allow from all
</Directory>
This allows you to place Perl scripts in the /var/www/html/perl directory.
Step 5. Restart the Apache Web Server.
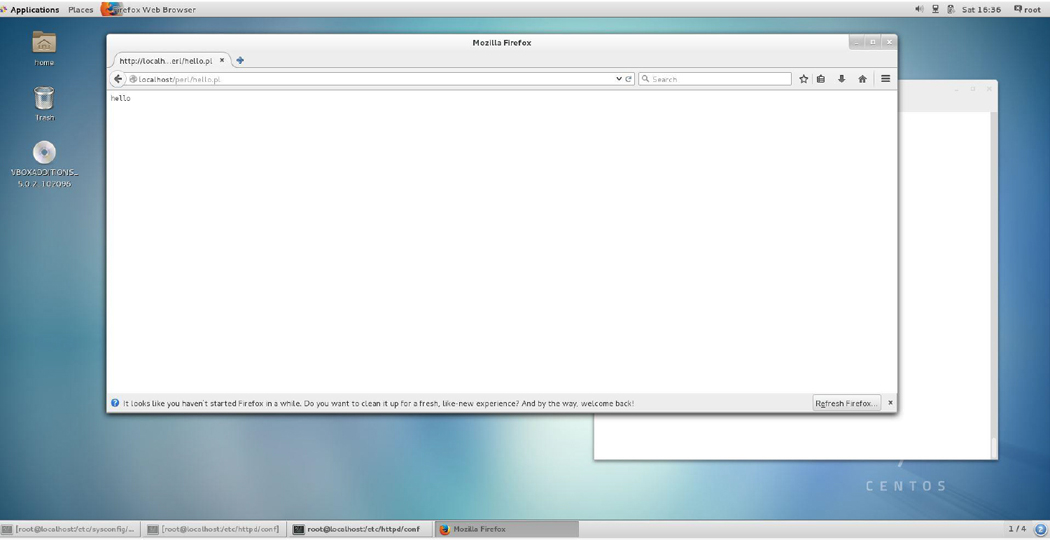
How can you tell whether it worked? First, create the following file (name it hello.pl) in the /var/www/html/perl directory:
print "Content-type: text/plain\r\n\r\n";
print "hello\n";
Then test the script by pointing your web browser to the localhost/perl/hello.pl URL. The result should look like Figure 21-3.
What Could Go Wrong
On older systems, the required package name may be different (for example, apache-mod_perl or libapache2-mod-perl2).
Security Highlight
For security purposes, you may want to use a redirect statement to store Perl scripts in another location. This can be accomplished with an Alias directive, as shown here:
Alias /perl/ /var/httpd/perl/
Now when files under the /perl directory on your web server are accessed, the Apache Web Server looks in the /var/httpd/perl directory.
Apache Web Server Security
Your company web server is going to be placed on a machine visible to the Internet and all those “bad actors” who would love to take advantage of weak spots. There are many generic ways to secure your web server, including the following:
• Limit the number of user accounts on the system.
• Install only the minimum software required for the system to function correctly.
• Limit which processes are running on the system.
• Secure critical directories and files with permissions (or, perhaps, SELinux, which was covered in Chapter 9, “File Permissions”).
• Implement a firewall (discussed in Chapter 31, “Firewalls”).
In addition to securing the system, there are settings within the Apache Web Server that help make it more secure.
Essential Settings
In the primary configuration file for the Apache Web Server, you can limit client access by the following settings:
StartServers 10
MinSpareServers 5
MaxSpareServers 15
MaxClients 150
MaxRequestsPerChild 5000
See Table 21-2 for details regarding these settings.
Table 21-2 Client Restriction Settings for the Apache Web Server
Example 21-1 Starting httpd Processes
[root@localhost perl]# ps -fe | grep httpd
root     24007     1  2 17:02 ?        00:00:00 /usr/sbin/httpd -DFOREGROUND
apache   24009 24007  0 17:02 ?        00:00:00 /usr/sbin/httpd -DFOREGROUND
apache   24010 24007  0 17:02 ?        00:00:00 /usr/sbin/httpd -DFOREGROUND
apache   24011 24007  0 17:02 ?        00:00:00 /usr/sbin/httpd -DFOREGROUND
apache   24012 24007  0 17:02 ?        00:00:00 /usr/sbin/httpd -DFOREGROUND
apache   24013 24007  0 17:02 ?        00:00:00 /usr/sbin/httpd -DFOREGROUND
apache   24014 24007  0 17:02 ?        00:00:00 /usr/sbin/httpd -DFOREGROUND
apache   24015 24007  0 17:02 ?        00:00:00 /usr/sbin/httpd -DFOREGROUND
apache   24016 24007  0 17:02 ?        00:00:00 /usr/sbin/httpd -DFOREGROUND
apache   24017 24007  0 17:02 ?        00:00:00 /usr/sbin/httpd -DFOREGROUND
apache   24018 24007  0 17:02 ?        00:00:00 /usr/sbin/httpd -DFOREGROUND
User Authentication
On a public web server, you may decide to limit access to specific directories. This can be accomplished by setting an authentication method that requires the client user to know a username and password. (Note that these are not regular usernames, but a username specifically for the Apache Web Server.)
To use this feature, you need to make sure that the mod_auth module is loaded. This can be loaded from the primary configuration file or in the module’s include directory.
To secure portions of the website, you need to create a password file. Execute the htpasswd command, as shown here:
[root@localhost ~]# htpasswd -c /etc/httpd/conf/password bob
New password:
Re-type new password:
Adding password for user bob
The -c option creates a password file. The argument after the -c option is the location of the password file. It should be in a secure location; a good place is under the /etc/httpd/conf directory (or wherever the configuration files for the Apache Web Server are stored on your system). The last argument (bob) is the username associated with the password.
You have two places where you can choose to configure security for a specific directory. In the primary configuration file you can add an entry like the following:
<Directory /var/www/html/secure>
AuthName "Secure folder"
AuthType Basic
AuthUserFile /etc/httpd/conf/password
Require valid-user
</Directory>
Or you can create a file named .htaccess within the /var/www/html/secure directory. This file would have the following directives:
AuthName "Secure folder"
AuthType Basic
AuthUserFile /etc/httpd/conf/password
Require valid-user
Virtual Hosts
In some cases, you may want to host more than one website on a single physical machine. If your organization has more than one website that you must administer, having all the servers on a single system can eliminate a lot of administrative work. Additionally, web-hosting companies often have multiple clients share a single physical machine.
To place more than one website on a single machine, you need to use virtual hosting. There are two methods that you can use:
• IP-based virtual hosts: With this technique, each web domain has a separate IP address. This means you need to know how to configure multiple IP addresses for a single network interface (a process called IP aliasing) or install multiple network interfaces. The focus of this chapter is how to configure this functionality via the Apache Web Server; however, configuring multiple IP addresses is easy.
• Name-based virtual hosts: This technique is the more common of the two. All web domains share a single IP address. When the web server receives a client request, the request itself is used to determine which website to serve up.
Configuring IP-Based Virtual Hosts
For this configuration, the assumption is that your system already has unique IP addresses for the www.example.com and the www.sample.com domains. In the primary Apache Web Server file, you would add the lines shown in Example 21-2.
Example 21-2 Sample IP-Based Virtual Hosts
<VirtualHost www.example.com>
ServerAdmin webmaster@mail.example.com
DocumentRoot /var/www/example/html
ServerName www.example.com
ErrorLog /var/log/example/error_log
</VirtualHost>

<VirtualHost www.sample.com>
ServerAdmin webmaster@mail.sample.com
DocumentRoot /var/www/sample/html
ServerName www.sample.com
ErrorLog /var/log/sample/error_log
</VirtualHost>
Configuring Name-Based Virtual Hosts
For this example, the assumption is that both the www.example.com and www.sample.com domains resolve to the 192.168.1.100 IP address. In the primary Apache Web Server file, you would add the lines shown in Example 21-3.
Example 21-3 Sample Named-Based Virtual Hosts
NameVirtualHost 192.168.1.100

<VirtualHost 192.168.1.100>
ServerName www.example.com
DocumentRoot /var/www/example/html
</VirtualHost>

<VirtualHost 192.168.1.100>
ServerName www.sample.com
DocumentRoot /var/www/sample/html
</VirtualHost>
Note
Just a reminder that as with many of the topics covered in this book, you are not expected to become an expert at this topic, but rather understand its concepts and some of the configuration options. There are many more details regarding virtual hosts that we could dive into; however, the focus of this book is to provide you with the essentials.
For example, when configuring IP-based virtual hosts, you could choose to set up multiple daemons instead of having one daemon respond to multiple IP addresses.
The point is that that if you really want to be an Apache Web Server administrator, there is a lot more to learn than what we are providing in this book!
Conversational Learning™ — IP-Based Versus Name-Based Virtual Hosts
Gary: Hey, Julia. I’m setting up some web servers and I am not sure which technique I should use.
Julia: What do you mean by “which technique”?
Gary: Well, I need to set up three web servers on one system, and I can either use the IP-based method or the name-based method.
Julia: Ah, yes, OK. Well, typically if you are going to be a web server provider and want to host several different websites on a single machine, you would use the IP-based technique.
Gary: Why is that?
Julia: Well, keep in mind that with the IP-based method, you likely only have one network card and you will assign multiple IP addresses to that one network card. This is ideal for a web-hosting organization because they don’t want to have to install a bunch of network cards, and each website should have a separate IP address.
Gary: OK, so that would be the best solution then?
Julia: That may depend. Are you planning on these being internal servers or servers available on the Internet.
Gary: Internal only.
Julia: Then you may find that the name-based technique is easier. You only need one IP address on that network card, and you just need to update the name server to have it serve up the same IP address for each domain name or URL.
Gary: OK, that does seem best for this situation. Thanks, Julia.
HTTPS
It’s payday! Time for you to log in to your bank’s online website and pay those bills. You type in the URL of your bank and notice that the letters “https://” magically appear before the website’s name. Previously in this chapter, you were introduced to HTTP (Hypertext Transfer Protocol), but now there is an “s” added to that abbreviation.
HTTPS is a newer, more secure protocol. Most people call this HTTP Secure or HTTP SSL (SSL stands for Secure Sockets Layer, a security-based protocol). HTTPS offers two primary advantages: the identity of the website is authenticated, and the data exchanged between the client (the web browser) and the server (the web server) is more secure because it is encrypted.
Note
If you look at documentation regarding HTTPS, you will discover that a newer cryptographic protocol called TLS (Transport Layer Security) is also now commonly used. TLS was designed to replace SSL, but the community often refers to TLS as SSL.
While administering the Apache Web Server, you should realize that HTTPS uses port 443, whereas HTTP uses port 80 for network communication.
SSL Essentials
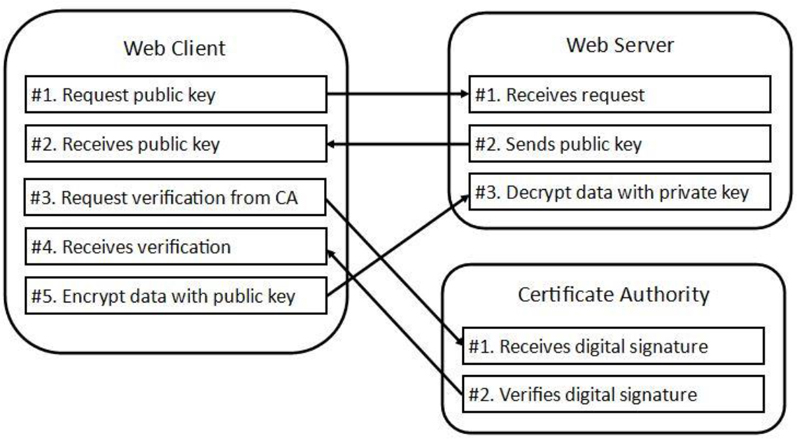
The technique used by SSL is called asymmetric cryptography (it is also referred to as PKC, or public key cryptography). With asymmetric cryptography, two keys are used: a public key and a private key. These keys are used to encrypt and decrypt data.
The public key is used to encrypt the data sent to the Apache Web Server. This key is provided to all systems upon request. For example, when a web browser first connects to an Apache Web Server that is using SSL, the web browser asks for the public key of the server. This public key is freely given to the web browser.
Any additional data sent from the web browser to the server, such as account names and passwords, is encrypted using this public key. This data can only be decrypted by the server using the private key. This is where the term asymmetric cryptography comes into play. With symmetric cryptography the same key is used to encrypt and decrypt data. Two separate keys are needed when asymmetric cryptography is used: one to encrypt data and the other to decrypt. This means that only the web server can decrypt the data sent by the web browser.
You might be wondering how the web browser really know that it reached the correct web server and not some “rogue” web server. When the web server sends its public key, it includes a digital signature (also called a message digest). This digital signature can be sent to a CA (Certificate Authority) server, a trusted third-party system used to verify the digital signature.
From the user’s perspective, all this takes place behind the scenes and is completely transparent—at least until something goes wrong and warning messages are displayed by the web browser. Because digital certificates typically have an expiration date, the most common problem is when the CA does not have an updated digital certificate—or when the user changes the date on their computer!
See Figure 21-4 for a visual example of this process.
SSL Issues
SSL is not a perfect solution. Here are a few security concerns regarding SSL use:
• Having a large number of Certificate Authority (CA) machines increases the chance that one could be compromised. Most web browsers have a large list of CAs that can be used.
• Trust is also an issue. The purpose of digital signatures is that your web browser will not blindly trust the website it is communicating with. And yet your web browser does blindly trust the CA, at least to some extent. There is a hierarchy of CAs, the topmost being the root CA. The concept is that a sub-CA is trusted because its parent CA says so, but at the top of the structure the root CA has no means to say “trust me because some other CA says so.” It basically says “trust me because I am the root CA.”
• Man-in-the-middle attacks are also possible. This would be when you connect through a router (typically an untrusted wireless router) that can exploit the connection and read the data as it is passed through.
• If you have virtual hosts, SSL is also a bit of a challenge. Each virtual host should have its own digital signature. However, when the client (web browser) first contacts the server (Apache Web Server), the client does not include the name of the website when requesting the public key. As a result, the server has no idea which digital signature to send to the client. There are workarounds for this issue, the details of which are beyond the scope of this book. You should be aware of the issues that virtual hosts pose when using SSL.
• As with any asymmetric cryptography technique, the security of the private key is critical. If this key is made available to the wrong element, the encrypted data can be compromised.
Self-Signing
It is important to note that not all websites use a third-party CA to verify the identity of the website (although hopefully your bank website does!). There is a cost involved for an organization to have a third-party CA perform verifications. As a result, it is not uncommon for smaller organizations to use a process that involves what is called a self-signed certificate.
Essentially a self-signed certificate is one that requires no third-party CA for verification. With a self-signed certificate, the web server presents its public key and the digital signature, which essentially says “trust me, I am the right website.”
SSL and Apache
You can implement SSL in several different ways. The technique in this section is to use a module named mod_ssl. Another method is to use an Apache Web Server named Apache-SSL (http://www.apache-ssl.org/). This is the combination of the core Apache Web Server plus software from the OpenSSL project. Some commercial products also provide customized SSL-based Apache Web Servers.
Implementing mod_ssl is simple. You just need to add a line like the following in your Apache configuration file:
LoadModule ssl_module /path/to/modules/mod_ssl.so
In fact, it might be even easier than that. If you install the mod_ssl software package, the configuration process might happen automatically. For example, on a typical CentOS system, the following file appears after the mod_ssl software package is installed:
[root@localhost ~]# ls /etc/httpd/conf.modules.d
00-base.conf  00-lua.conf  00-proxy.conf  00-systemd.conf  02-perl.conf
00-dav.conf   00-mpm.conf  00-ssl.conf    01-cgi.conf      10-php.conf
[root@localhost ~]# more /etc/httpd/conf.modules.d/00-ssl.conf
LoadModule ssl_module modules/mod_ssl.so
Recall from earlier in this chapter that files in the /etc/htppd/conf.modules.d directory were included in the configuration process of the Apache Web Server on this CentOS system.
If the Apache Web Server is restarted now, it accepts both regular HTTP and HTTPS requests. Most likely you only want to accept HTTPS requests; however, right now that presents a bit of a problem because if you attempt to connect to the web server via HTTPS at this point, you should get a warning message like the one shown in Figure 21-5.
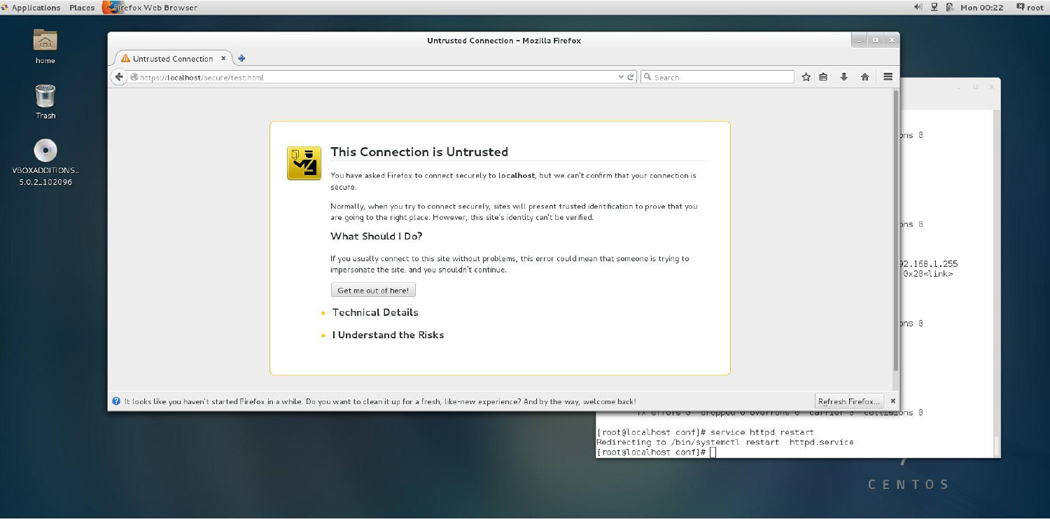
Figure 21-5 Web browser warning message
This warning is because you have not set up a digital signature and had it signed by a CA. That process is described in the next section.
SSL Server Certificate
To create the SSL certificate, you must have the openssl software package installed. Recall that you have two choices: either you can have a CA digitally sign your certificate or you can self-sign it. If you are going to use a CA, you start by executing the openssl command to generate an RSA key file. The syntax looks like the following:
[root@localhost ~]# openssl genrsa -des3 -out server.key 1024
Generating RSA private key, 1024 bit long modulus
..++++++
.......................................................................................................++++++
e is 65537 (0x10001)
Enter pass phrase for server.key:
Verifying - Enter pass phrase for server.key:
The argument genrsa tells the openssl command to create an RSA key file. Another option is to generate a DSA key file; however, RSA for this situation is typically preferred. DSA is faster in signing, but slower in verification (which is going to happen a lot more often than signing when used with web servers).
Note
What does RSA stand for? The acronym is composed of the first initial of the last names of the creators of the technology: Ron Rivest, Adi Shamir, and Leonard Adleman. What does DSA stand for? Digital Signature Algorithm.
The -des3 option specifies the algorithm used for the encryption (Triple DES), the server.key argument indicates the filename to store the key in, and the 1024 argument specifies the size in bits of the key. The passphrase is necessary if you use the data within the key file.
The next step is to execute the command found in Example 21-4 to generate a CSR (Certificate Signing Request).
[root@localhost ~]# openssl req -new -key server.key -out server.csr
Enter pass phrase for server.key:
You are about to be asked to enter information that will be incorporated
into your certificate request.
What you are about to enter is what is called a Distinguished Name or a DN.
There are quite a few fields but you can leave some blank
For some fields there will be a default value,
If you enter '.', the field will be left blank.
-----
Country Name (2 letter code) [XX]:US
State or Province Name (full name) []:CA
Locality Name (eg, city) [Default City]:San Diego
Organization Name (eg, company) [Default Company Ltd]:OCS
Organizational Unit Name (eg, section) []:
Common Name (eg, your name or your server's hostname) []:OCS
Email Address []:bo@onecoursesource.com

Please enter the following 'extra' attributes
to be sent with your certificate request
A challenge password []:linuxrocks
An optional company name []:
The req argument is used to specify that you want to make a CSR, the -new option is to create a new CSR, the -key option is used to specify the existing key that you previously created, and the -out option is used to create the file that you send to the CA.
To self-sign the key, you first need to install the openssl-perl package. Then you execute the command shown in Example 21-5. (Note: The exact location of the CA.pl file may differ on your system.)
Example 21-5 Setting Up the CA
[root@localhost ~]# mkdir /tmp/test
[root@localhost ~]# cd /tmp/test
[root@localhost test]#  /etc/pki/tls/misc/CA.pl -newca
CA certificate filename (or enter to create)

Making CA certificate ...
Generating a 2048 bit RSA private key
....................................+++
...+++
writing new private key to '/etc/pki/CA/private/cakey.pem'
Enter PEM pass phrase:
Verifying - Enter PEM pass phrase:
-----
You are about to be asked to enter information that will be incorporated
into your certificate request.
What you are about to enter is what is called a Distinguished Name or a DN.
There are quite a few fields but you can leave some blank
For some fields there will be a default value,
If you enter '.', the field will be left blank.
-----
Country Name (2 letter code) [XX]:US
State or Province Name (full name) []:CA
Locality Name (eg, city) [Default City]:San Diego
Organization Name (eg, company) [Default Company Ltd]:OCS
Organizational Unit Name (eg, section) []:
Common Name (eg, your name or your server's hostname) []:OCS
Email Address []:bo@onecoursesource.com

Please enter the following 'extra' attributes
to be sent with your certificate request
A challenge password []:linuxrocks
An optional company name []:
Using configuration from /etc/pki/tls/openssl.cnf
Enter pass phrase for /etc/pki/CA/private/cakey.pem:
Check that the request matches the signature
Signature ok
Certificate Details:
        Serial Number: 12294451229265977217 (0xaa9eaa4114c35f81)
        Validity
            Not Before: Dec 14 09:43:55 2017 GMT
            Not After : Dec 13 09:43:55 2020 GMT
        Subject:
            countryName               = US
            stateOrProvinceName       = CA
            organizationName          = OCS
            commonName                = OCS
            emailAddress              = bo@onecoursesource.com
        X509v3 extensions:
            X509v3 Subject Key Identifier:
                3F:DD:38:62:16:2A:65:12:09:B8:63:55:E5:9B:AB:2B:24:0A:C1:E0
            X509v3 Authority Key Identifier:
                keyid:3F:DD:38:62:16:2A:65:12:09:B8:63:55:E5:9B:AB:2B:24:0A:C1:E0

            X509v3 Basic Constraints:
                CA:TRUE
Certificate is to be certified until Dec 13 09:43:55 2020 GMT (1095 days)

Write out database with 1 new entries
Data Base Updated
Note that the /etc/pki/tls/misc/CA.pl script creates a file named /etc/pki/CA/private/cakey.pem. This sets up the next process so that it works correctly. The next step would be to create a signing request, as shown in Example 21-6.
Example 21-6 Creating a Signing Request
[root@localhost test]# /etc/pki/tls/misc/CA.pl -newreq
Generating a 2048 bit RSA private key
.....................................................+++
...............................................................................................+++
writing new private key to 'newkey.pem'
Enter PEM pass phrase:
Verifying - Enter PEM pass phrase:
-----
You are about to be asked to enter information that will be incorporated
into your certificate request.
What you are about to enter is what is called a Distinguished Name or a DN.
There are quite a few fields but you can leave some blank
For some fields there will be a default value,
If you enter '.', the field will be left blank.
-----
Country Name (2 letter code) [XX]:US
State or Province Name (full name) []:CA
Locality Name (eg, city) [Default City]:San Diego
Organization Name (eg, company) [Default Company Ltd]:OCS
Organizational Unit Name (eg, section) []:
Common Name (eg, your name or your server's hostname) []:OCS
Email Address []:bo@onecoursesource.com

Please enter the following 'extra' attributes
to be sent with your certificate request
A challenge password []:linuxrocks
An optional company name []:
Request is in newreq.pem, private key is in newkey.pem
The last step in this process is to sign the certificate by executing the CA.pl script with the -signreq option, as shown in Example 21-7.
Example 21-7 Signing the Request
[root@localhost test]# /etc/pki/tls/misc/CA.pl -signreq
Using configuration from /etc/pki/tls/openssl.cnf
Enter pass phrase for /etc/pki/CA/private/cakey.pem:
Check that the request matches the signature
Signature ok
Certificate Details:
        Serial Number: 12294451229265977218 (0xaa9eaa4114c35f82)
        Validity
            Not Before: Dec 15 03:00:07 2017 GMT
            Not After : Dec 14 03:00:07 2020 GMT
        Subject:
            countryName               = US
            stateOrProvinceName       = CA
            localityName              = San Diego
            organizationName          = OCS
            commonName                = OCS
            emailAddress              = bo@onecoursesource.com
        X509v3 extensions:
            X509v3 Basic Constraints:
                CA:FALSE
            Netscape Comment:
                OpenSSL Generated Certificate
            X509v3 Subject Key Identifier:
                C5:04:9F:4C:07:BE:1D:EE:0E:36:44:C7:DF:7B:68:3C:5C:B3:4D:B2
            X509v3 Authority Key Identifier:
                keyid:3F:DD:38:62:16:2A:65:12:09:B8:63:55:E5:9B:AB:2B:24:0A:C1:E0

Certificate is to be certified until Dec 14 03:00:07 2018 GMT (365 days)
Sign the certificate? [y/n]:y


1 out of 1 certificate requests certified, commit? [y/n]y
Write out database with 1 new entries
Data Base Updated
Signed certificate is in newcert.pem
You should now have three files in the current directory:
[root@localhost test]# ls
newcert.pem  newkey.pem  newreq.pem
You need newcert.pem (the signed certificate) and newkey.pem (the private key file), but you don’t need the newreq.pem file any more, as this was just to make the request for signing.
Security Highlight
These filenames are generic; it is a good practice to change the names and place the files into a different location. The two locations where certificates are typically stored are the /etc/ssl directory and the /etc/pki directory:
[root@localhost test]# mv newcert.pem /etc/ssl/example.com-cert.pem
[root@localhost test]# mv newkey.pem /etc/ssl/example.com-private.pem
[root@localhost test]# rm newreq.pem
 rm: remove regular file 'newreq.pem'? y.
Apache SSL Directives
To use the certificate file and the private key file, you need to use the SSLCertificateFile and the SSLCertificateKeyFile directives within the Apache Web Server configuration file:
SSLCertificateFile /etc/ssl/example.com-cert.pem
SSLCertificateKeyFile /etc/ssl/example.com-private.pem
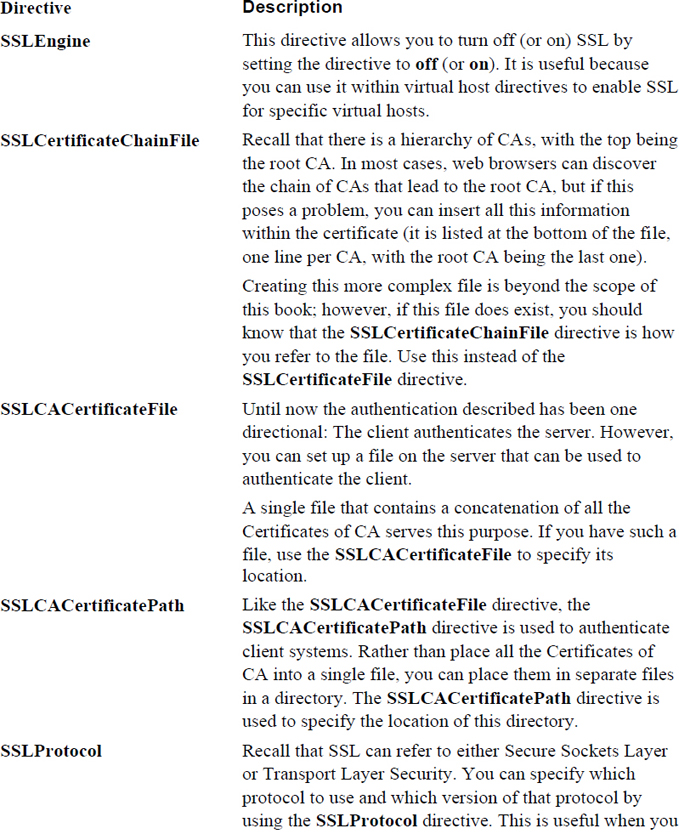
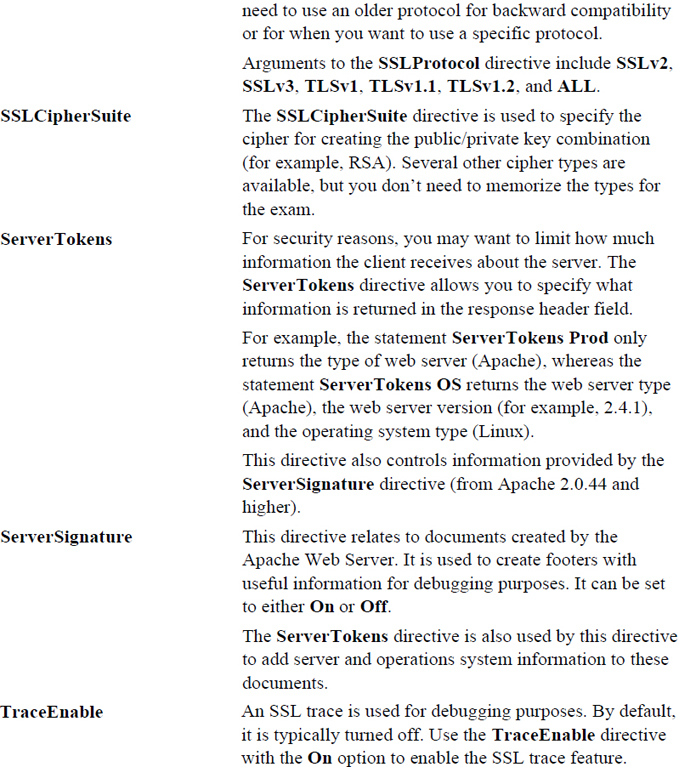
In addition to these SSL-based Apache directives, you should be aware of the ones shown in Table 21-3.
Table 21-3 Critical Apache SSL Directives
Proxy Servers
A proxy server is a system that serves to facilitate the communications between a client and a server. There are several different types of proxy servers as well as different advantages, depending on the design of the proxy server. The different types of proxy servers include tunneling proxy servers, forward proxy servers, and reverse proxy servers.
Tunneling Proxy
This type of proxy is designed to act as a gateway between two networks. An example would be when an IPv4-based network needs to communicate with an IPv6-based network. See Figure 21-6 for a visual example of a tunneling proxy.

Forward Proxy
This type of proxy is designed to work on the client side of the communication. For example, a web browser can point to a proxy server instead of communicating directly with the web server. Typically, when someone calls a system the proxy server, they are referring to a system functioning as a forward proxy. See Figure 21-7 for a visual example of a forward proxy.

A forward proxy server can provide several key functions:
• It can act as a filter by blocking access to external resources.
• It can act as a buffer between the client and the server, as the server “sees” the request coming from the proxy, not the original client. This can hide the original client data, such as its IP address or location. Some users prefer this because it allows for anonymous browsing. This is also useful to get around restrictions (for example, a website that only allows access from a geographic region). In this case, a proxy server located in the correct geographic region could permit the required access.
• Proxy servers can cache static data (for example, websites that have static web pages). When multiple proxy clients attempt to retrieve the same data, the proxy server can serve to speed up the process by returning the data directly, rather than querying the web server repeatedly.
• The proxy server can be used to log client activity.
Reverse Proxy
A reverse proxy server is one that is configured on the server side. For example, instead of having web clients directly connect to your company web server, you have them connect to the proxy server initially. The proxy server then communicates with the web server for the required data. See Figure 21-8 for a visual example of a reverse proxy.

There are several advantages to using a reverse proxy server:
• Load balancing can be provided by the proxy server because it can send queries to multiple web servers.
• The proxy server can limit the load from the server by caching static data.
• For SSL-based web servers, the proxy server can perform the SSL-based operations instead of the web server. If the proxy server is equipped with SSL accelerated hardware, this can be a tremendous advantage.
• The proxy server can effectively hide the web server from the client, making the web server more secure. Without direct access to the web server, it is more difficult to exploit the web server.
• The proxy server can optimize communication by compressing the data, increasing the speed of data transport.
Many software projects provide proxy servers. Here are two of the most common proxy servers:
• Squid: This software is used both as a forward and a reverse proxy server. It originated from the Harvest Object Cache Project, developed at the University of Colorado, Boulder. It was forked from this original project and named Squid (forked in this situation refers to a project that starts with the source code from another software project). A commercial version (NetCache), now no longer under development, was also forked from the project. This chapter focuses on how to configure Squid as a proxy server.
• Nginx (pronounced “engine x”): Nginx can function as a reverse proxy server for several protocols, including HTTP and HTTPS. Typically it is used to provide load balancing and caching functions for web servers. It can also be set up as a web server by itself.
Squid Basics
Although is it fairly common to have the Apache Web Server installed by default on a typical Linux distribution, it is not common to have Squid installed by default. So, your first task is to use your software management system (yum or apt-get, see Chapter 26, “Red Hat-based software management,” and Chapter 27, “Debian-based software management,” for details) to install Squid.
The installation should include a basic Squid configuration file (squid.conf), typically located in the /etc/squid directory. Table 21-4 describes several settings you should be familiar with.
Squid Access Rules
In most cases you want to limit access to your company Squid server to specific systems. This is accomplished by first creating groups of machines with acl statements and then using the http_access statement to allow (or deny) access.
The default Squid configuration file normally has both acl and http_access statements. These not only help you by providing a baseline of what systems should be allowed to access the Squid server, but they also help by demonstrating the syntax of the acl and http_access statements. See Example 21-8 for an example of the default squid.conf file.
Example 21-8 Default squid.conf File
[root@localhost ~]# grep -v '^#' /etc/squid/squid.conf | grep -v '^$'
acl localnet src 10.0.0.0/8     # RFC1918 possible internal network
acl localnet src 172.16.0.0/12  # RFC1918 possible internal network
acl localnet src 192.168.0.0/16 # RFC1918 possible internal network
acl localnet src fc00::/7       # RFC 4193 local private network range
acl localnet src fe80::/10      # RFC 4291 link-local (directly plugged) machines
acl SSL_ports port 443
acl Safe_ports port 80          # http
acl Safe_ports port 21          # ftp
acl Safe_ports port 443         # https
acl Safe_ports port 70          # gopher
acl Safe_ports port 210         # wais
acl Safe_ports port 1025-65535  # unregistered ports
acl Safe_ports port 280         # http-mgmt
acl Safe_ports port 488         # gss-http
acl Safe_ports port 591         # filemaker
acl Safe_ports port 777         # multiling http
acl CONNECT method CONNECT
http_access deny !Safe_ports
http_access deny CONNECT !SSL_ports
http_access allow localhost manager
http_access deny manager
http_access allow localnet
http_access allow localhost
http_access deny all
http_port 3128
coredump_dir /var/spool/squid
refresh_pattern ^ftp:           1440    20%     10080
refresh_pattern ^gopher:        1440    0%      1440
refresh_pattern -i (/cgi-bin/|\?) 0     0%      0
refresh_pattern .              0       20%     4320
The basic syntax for an acl statement is
acl name type data
The name is something that you make up. For example, in the following entries, localnet is not some special, predefined name, but rather just a name given based on what it describes (local networks):
acl localnet src 10.0.0.0/8     # RFC1918 possible internal network
acl localnet src 172.16.0.0/12  # RFC1918 possible internal network
acl localnet src 192.168.0.0/16 # RFC1918 possible internal network
acl localnet src fc00::/7       # RFC 4193 local private network range
acl localnet src fe80::/10      # RFC 4291 link-local (directly plugged) machines
There are many type values, and they are used to indicate to Squid what sort of data this acl is designed to define. Here are the ones you are most likely to use:
• src: Used to indicate that the data describes a source IP/network combination. A source would be the system that requested the connection.
• dst: Used to indicate that the data describes a destination IP/network combination. A destination would be the system that the outbound network packet is to be sent to.
• time: This can be used to describe a time; useful if you want to allow access to the proxy server for specific times or days.
• Safe_ports: The ports on which HTTP connections are permitted.
• SSL_ports: The ports on which SSL connections are permitted.
Note that in Example 21-8 there are multiple acl localnet src lines. These could have been written in a single, less readable line:
acl localnet src 10.0.0.0/8 172.16.0.0/12 192.168.0.0/16 fc00::/7 fe80::/10
Later in the configuration file when the value localnet is provided, it refers to all the IP addresses that match the values in the line that defines the localnet acl.
Built-In ACLs
The following access control lists are already defined in the Squid configuration file:
• all: Refers to all systems.
• manager: A special ACL for the management of Squid’s cache.
• localhost: Refers to the source IP address for the local machine (the server itself). Use this if you need to refer to the local machine with the src setting.
• to_localhost: Refers to the destination IP address for the local machine (the server itself). Use this if you need to refer to the local machine with the dst setting.
Understanding the Squid Rules
Note the following lines from the output of Example 21-8:
http_access deny !Safe_ports
http_access deny CONNECT !SSL_ports
http_access allow localhost manager
http_access deny manager
http_access allow localnet
http_access allow localhost
http_access deny all
Here, http_access uses the data from the configuration file to determine which ports are available and which systems can connect to the Squid proxy server. The following list describes each http_access line from the output of Example 21-8:
• http_access deny !Safe_ports: Deny access to all ports that don’t match the Safe_ports ACL. All other ports are permitted by default.
• http_access deny CONNECT !SSL_ports: Deny the ability to connect to the Squid proxy server via SSL for all ports that don’t match the SSL_ports ACL. All other ports are permitted by default.
• http_access allow localhost manager: Allow the machine that matches the localhost ACL the ability to access the cache manager.
• http_access deny manager: Deny all other machines the ability to access the cache manager. Order is important here. If this line appeared before the http_access allow localhost manager line, then this allow line would be meaningless.
• http_access allow localnet: Allow the machine that matches the localnet ACL the ability to use the Squid proxy server as a client.
• http_access allow localhost: Allow the machine that matches the localhost ACL the ability to use the Squid proxy server as a client.
• http_access deny all: Deny all other machines the ability to access the Squid proxy server as a client. Again, the order is important here, as this line should be after all http_access lines.
Nginx Configuration
If you are configuring a reverse proxy server, you could also choose to use Nginx (pronounced “engine x”), a server that can act as both a proxy server or a standalone web server.
Note
When you’re considering which web server to use for your company website, the choice often comes down to picking either the Apache Web Server or Nginx. A comparison of the two is beyond the scope of this book, but in the real world you should devote some time and effort into understanding the advantages and disadvantages of each software product.
Nginx provides several features when it is used as a reverse proxy server, including the following:
• Load balancing: Nginx can be used to balance the load between multiple back-end web servers. However, you should realize that as of 2013, this is a feature available on Nginx Plus, a commercial version of Nginx that requires the purchase of a support contract.
• Web acceleration: This is provided by a combination of features, including compression of both inbound and outbound data and caching static web server content. This feature is available on both the Nginx open source product and Nginx Plus.
• Support for multiple protocols: In addition to supporting reverse proxy operations for HTTP, Nginx supports TCP, IMAP, POP3, and SMTP reverse proxy services. The level of support varies between the open source and Plus products.
• Authentication: In addition to SSL, Nginx supports additional authentication techniques as well as provides bandwidth-management features.
Although is it common to have the Apache Web Server installed by default on a typical Linux distribution, it is not common to have Nginx installed by default. So, your first task is to use your software management system (yum or apt-get) to install Nginx.
After installation, there should be a new configuration file for Nginx: the /etc/nginx/nginx.conf file. The default configuration file is designed to have Nginx act as a web server. It should look similar to the output displayed in Example 21-9.
Example 21-9 Default nginx.conf File
[root@localhost nginx]# more nginx.conf.backup
# For more information on configuration, see:
#   * Official English Documentation: http://nginx.org/en/docs/
#   * Official Russian Documentation: http://nginx.org/ru/docs/

user nginx;
worker_processes auto;
error_log /var/log/nginx/error.log;
pid /run/nginx.pid;

events {
    worker_connections 1024;
}

http {
    log_format  main  '$remote_addr - $remote_user [$time_local] "$request" '
                      '$status $body_bytes_sent "$http_referer" '
                      '"$http_user_agent" "$http_x_forwarded_for"';

    access_log  /var/log/nginx/access.log  main;

    sendfile            on;
    tcp_nopush          on;
    tcp_nodelay         on;
    keepalive_timeout   65;
    types_hash_max_size 2048;

    include             /etc/nginx/mime.types;
    default_type        application/octet-stream;

    # Load modular configuration files from the /etc/nginx/conf.d directory.
    # See http://nginx.org/en/docs/ngx_core_module.html#include
    # for more information.
    include /etc/nginx/conf.d/*.conf;

    server {
        listen       80 default_server;
        listen       [::]:80 default_server;
        server_name  _;
        root         /usr/share/nginx/html;

        # Load configuration files for the default server block.
        include /etc/nginx/default.d/*.conf;

        location / {
        }

        error_page 404 /404.html;
            location = /40x.html {
        }

        error_page 500 502 503 504 /50x.html;
            location = /50x.html {
        }
    }
}
Unless you want to perform major customizations, the default configuration file is good for a basic web server, although a few tweaks to the server section are necessary:
• Have a single listen setting with the argument of 80.
• Specify the domain for the website after the server_name setting.
• Change the directory specified by the root setting to the location of the root of your website.
• Create the error pages indicated by the error page settings.
Note that you likely already have the Apache Web Server running on the system. To start the Nginx server, you first must stop the Apache Web Server.
Finally, if you want to configure Nginx as a basic reverse proxy server, replace the entire server section of the configuration file with the following:
server {
        listen 80;
        location / {
             proxy_pass http://10.1.1.252;
        }
}
Note that as you probably realize, there are many other configuration settings for Nginx. However, the goal of this section is to introduce you to the features of Nginx, not to make you an expert on the software.
Client Configuration
After configuring a proxy server, you may want to test it by setting up a client system to use the proxy server. The exact method that you use depends on which browser you are using. For this demonstration, Firefox ESR 38.3.0 is used, as shown in Figure 21-9.
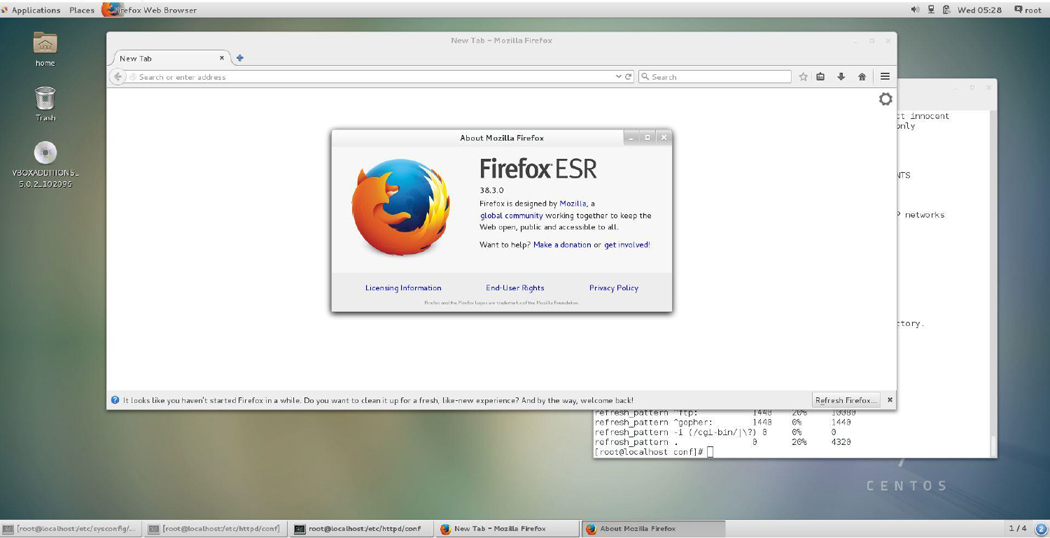
Figure 21-9 Firefox ESR 38.3.0
Step 1. Access the menu options for the browser. For this version of Firefox, the icon that looks like three horizontal bars opens the menu option, as shown in Figure 21-10.
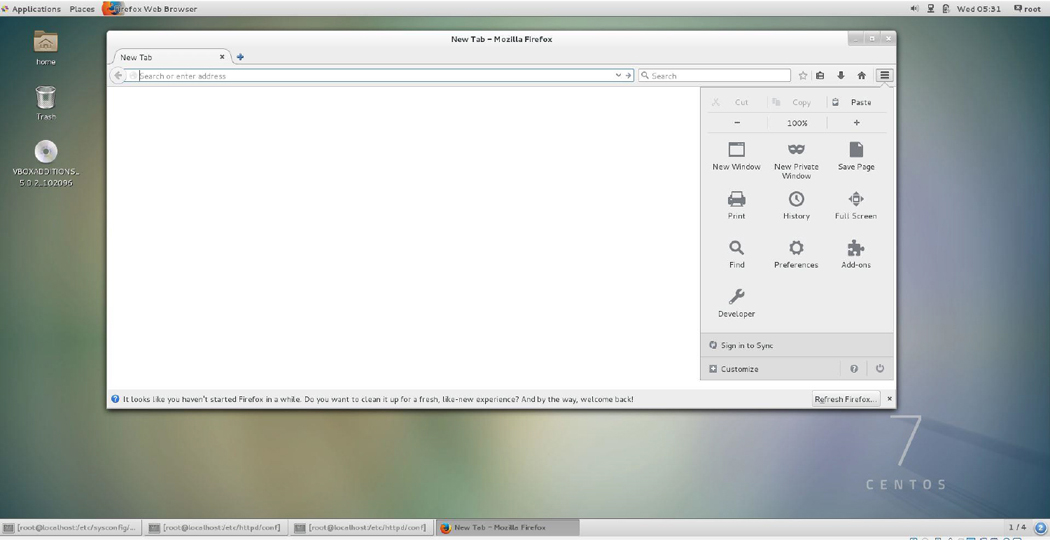
Figure 21-10 Firefox menu options
Step 2. Click the Preferences button. On some browsers this button is labeled Options. The result is similar to that shown in Figure 21-11.
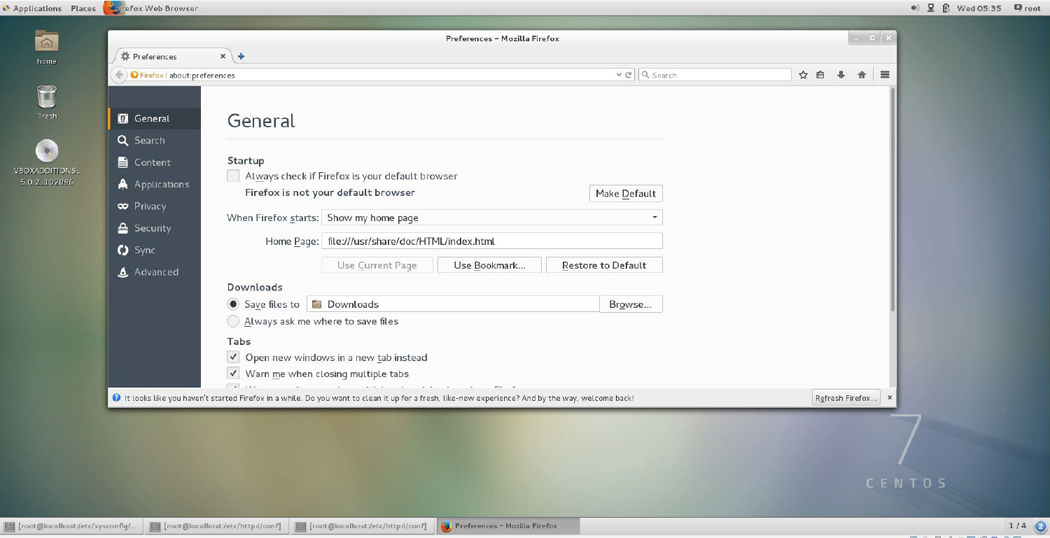
Figure 21-11 Firefox preferences
Step 3. Typically proxy settings are under the Advanced section. In this example, click Advanced in the left-hand menu and then click Network on the menu that appears (see Figure 21-12).
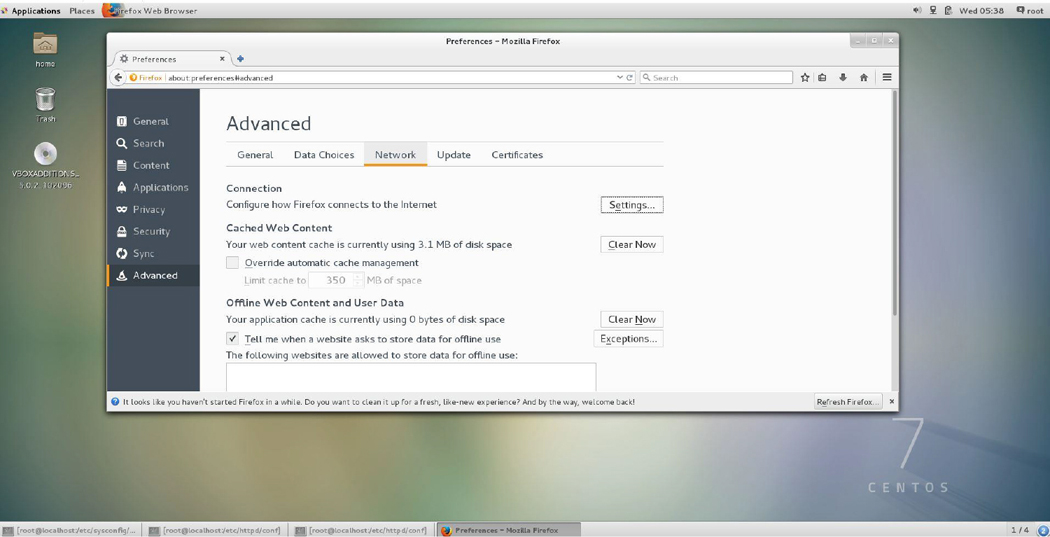
Figure 21-12 Firefox advanced network settings
Step 4. Click the Settings button next to Configure how Firefox connects to the Internet. The dialog box shown in Figure 25-13 appears.

Figure 21-13 Firefox Connection Settings dialog box
Step 5. Click the Manual proxy configuration radio button and fill in the IP address of your Squid server in the box next to HTTP Proxy. If you set the Squid server on the local machine, you can use the local machine’s IP address or 127.0.0.1.
Step 6. Click OK to finish. In some cases, you may need to restart Firefox for this new proxy setting to work properly.
Summary
In this chapter, you learned how to set up and secure an Apache Web Server. You also learned how to implement two different proxy servers: Squid and Nginx.
Key Terms
Review Questions
1. The directive used to specify the directory that contains the web files that will be served by the Apache Web Server is the _____ directive.
2. Which of the following Apache Web Server directives is used to specify what level of log messages will be logged to the error_log file?
a. Log
b. ErrorLog
c. LogLevel
d. InfoLevel
3. Fill in the blank:
<Directory />
    AllowOverride All
    Require all granted
<_____>
a. END
b. Directory/
c. Directory
d. / Directory
4. Fill in the blank to create a name-based virtual host:
_____ 192.168.1.100

<VirtualHost 192.168.1.100>
     ServerName www.example.com
     DocumentRoot /var/www/example/html
</VirtualHost>

<VirtualHost 192.168.1.100>
     ServerName www.sample.com
     DocumentRoot /var/www/sample/html
</VirtualHost>
a. VirtualHost
b. NameVirtualHost
c. NameVHost
d. NameVH
5. The ______ protocol is used when a web browser communicates with an Apache Web Server using SSL.
6. Which of the following are SSL security issues? (Choose all that apply.)
a. Man-in-the-middle attacks
b. Virtual hosts
c. The security of the public key
d. The security of the private key
7. Fill in the blank for the following command to generate an RSA key file:
_____genrsa -des3 -out server.key 1024
8. A _____ proxy server acts as a gateway between two networks.
9. The configuration file for Squid is /etc/squid/_____.
10. The _____ setting within the Squid configuration file is used to specify the location of the cache directory.
a. dir
b. c_dir
c. caching_dir
d. cache_dir