
Copyright © 2016 Packt Publishing
All rights reserved. No part of this course may be reproduced, stored in a retrieval system, or transmitted in any form or by any means, without the prior written permission of the publisher, except in the case of brief quotations embedded in critical articles or reviews.
Every effort has been made in the preparation of this course to ensure the accuracy of the information presented. However, the information contained in this course is sold without warranty, either express or implied. Neither the authors, nor Packt Publishing, and its dealers and distributors will be held liable for any damages caused or alleged to be caused directly or indirectly by this course.
Packt Publishing has endeavored to provide trademark information about all of the companies and products mentioned in this course by the appropriate use of capitals. However, Packt Publishing cannot guarantee the accuracy of this information.
Published on: Month 2011
Published by Packt Publishing Ltd.
Livery Place
35 Livery Street
Birmingham B3 2PB, UK.
ISBN 978-1-78712-900-9
PHP 7 has taken the open source community by storm, breaking records for speed, which is, metaphorically, causing heads to turn. In its most fundamental sense, the core engineering team has effected a major rewrite of the language but has still managed to maintain backward compatibility to a high degree. PHP is a great language for developing web applications. It is essentially a server-side scripting language that is also used for general-purpose programming. PHP 7 is the latest version, providing major backward-compatibility breaks and focusing on improved performance and speed. This means you can maintain high traffic on your websites with low-cost hardware and servers through a multithreading web server.
Module 1, PHP 7 Programming Cookbook, This module demonstrates intermediate to advanced PHP techniques with a focus on PHP 7. Each recipe is designed to solve practical, real-world problems faced by PHP developers like yourself every day. It also cover new ways of writing PHP code made possible only in version 7. In addition, we discuss backward-compatibility breaks and give you plenty of guidance on when and where PHP 5 code needs to be changed to produce the correct results when running under PHP 7. This module also incorporates the latest PHP 7.x features.By the end of the module, you will be equipped with the tools and skills required to deliver efficient applications for your websites and enterprises
Module 2, Learning PHP 7 High Performance, This module is fast-paced introduction to PHP 7 will improve your productivity and coding skills. The concepts covered will allow you, as a PHP programmer, to improve the performance standards of your applications. We will introduce you to the new features in PHP 7 and then will run through the concepts of object-oriented programming (OOP) in PHP 7. Next, we will shed some light on how to improve your PHP 7 applications’ performance and database performance. Through this module, you will be able to improve the performance of your programs using the various benchmarking tools discussed in the module. At the end,module discusses some best practices in PHP programming to help you improve the quality of your code
Module 3, Modernizing Legacy Applications in PHP, This module will show you how to modernize your application in terms of practice and technique, rather than in terms of using tools such as frameworks and libraries, by extracting and replacing its legacy artifacts. We will use a step-by-step approach, moving slowly and methodically, to improve your application from the ground up. We’ll show you how dependency injection can replace both the new and global dependencies. We’ll also show you how to change the presentation logic to view files and the action logic to a controller. Moreover, we’ll keep your application running the whole time. Each completed step in the process will keep your codebase fully operational with higher quality. When we are done, you will be able to breeze through your code like the wind. Your code will be autoloaded, dependency-injected, unit-tested, layer-separated, and front-controlled. Most of the very limited code we will add to your application is specific to this module. We will be improving ourselves as programmers, as well as improving the quality of our legacy application.
Module 1:
All you need, to successfully implement the recipes presented in this module will be a computer, 100MB of extra disk space, and a text or code editor (not a word processor!). The first chapter will cover how to set up a PHP 7 development environment. Having a web server is optional as PHP 7 includes a development web server. An Internet connection is not required, but it might be useful to download code (such as the set of PSR-7 interfaces), and review PHP 7.x documentation.
Module 2:
Any hardware specification that is compliant to run the latest versions of the following software should be enough to get through this module:
Apache JMeter, ApacheBench, Siege, and Git
Module 3:
You will have refer ‘Chapter 2, Prerequisites’ of this module to understand the basic hardware and software requirements needed on this module. This chapter gives a detailed description of the requirements.
Feedback from our readers is always welcome. Let us know what you think about this course—what you liked or disliked. Reader feedback is important for us as it helps us develop titles that you will really get the most out of.
To send us general feedback, simply e-mail <feedback@packtpub.com>, and mention the course’s title in the subject of your message.
If there is a topic that you have expertise in and you are interested in either writing or contributing to a course, see our author guide at www.packtpub.com/authors.
Now that you are the proud owner of a Packt course, we have a number of things to help you to get the most from your purchase.
You can download the example code files for this course from your account at http://www.packtpub.com. If you purchased this course elsewhere, you can visit http://www.packtpub.com/support and register to have the files e-mailed directly to you.
You can download the code files by following these steps:
You can also download the code files by clicking on the Code Files button on the course’s webpage at the Packt Publishing website. This page can be accessed by entering the course’s name in the Search box. Please note that you need to be logged in to your Packt account.
Once the file is downloaded, please make sure that you unzip or extract the folder using the latest version of:
The code bundle for the course is also hosted on GitHub at https://github.com/PacktPublishing/PHP-7-Be-Pro-at-Applications-Development. We also have other code bundles from our rich catalog of books and videos available at https://github.com/PacktPublishing/. Check them out!
Although we have taken every care to ensure the accuracy of our content, mistakes do happen. If you find a mistake in one of our courses—maybe a mistake in the text or the code—we would be grateful if you could report this to us. By doing so, you can save other readers from frustration and help us improve subsequent versions of this course. If you find any errata, please report them by visiting http://www.packtpub.com/submit-errata, selecting your course, clicking on the Errata Submission Form link, and entering the details of your errata. Once your errata are verified, your submission will be accepted and the errata will be uploaded to our website or added to any list of existing errata under the Errata section of that title.
To view the previously submitted errata, go to https://www.packtpub.com/books/content/support and enter the name of the course in the search field. The required information will appear under the Errata section.
Piracy of copyrighted material on the Internet is an ongoing problem across all media. At Packt, we take the protection of our copyright and licenses very seriously. If you come across any illegal copies of our works in any form on the Internet, please provide us with the location address or website name immediately so that we can pursue a remedy.
Please contact us at <copyright@packtpub.com> with a link to the suspected pirated material.
We appreciate your help in protecting our authors and our ability to bring you valuable content.
If you have a problem with any aspect of this course, you can contact us at <questions@packtpub.com>, and we will do our best to address the problem.
In this chapter, we will cover the following topics:
This chapter is designed as a quick start that will get you up and running on PHP 7 so that you can start implementing the recipes right away. The underlying assumption for this book is that you already have a good knowledge of PHP and programming. Although this book will not go into detail about the actual installation of PHP, given that PHP 7 is relatively new, we will do our best to point out the quirks and gotchas you might encounter during a PHP 7 installation.
There are three primary means of acquiring PHP 7:
The three methods are listed in order of difficulty. However, the first approach, although tedious, will give you the most finite control over extensions and options.
In order to utilize this approach, you will need to have a C compiler available. If you are running Windows, MinGW is a free compiler that has proven popular. It is based on the GNU Compiler Collection (GCC) compiler provided by the GNU project. Non-free compilers include the classic Turbo C compiler from Borland, and, of course, the compiler that is preferred by Windows developers is Visual Studio. The latter, however, is designed mainly for C++ development, so when you compile PHP, you will need to specify C mode.
When working on an Apple Mac, the best solution is to install the Apple Developer Tools. You can use the Xcode IDE to compile PHP 7, or run gcc from a terminal window. In a Linux environment, from a terminal window, run gcc.
When compiling from a terminal window or command line, the normal procedure is as follows:
configuremakemake testmake installFor information on configuration options (that is, when running configure), use the help option:
configure --help
Errors you might encounter during the configuration stage are mentioned in the following table:
|
Error |
Fix |
|---|---|
|
|
You just need to install http://superuser.com/questions/740399/how-to-fix-php-installation-when-xml2-config-is-missing |
|
|
Install |
|
|
Not a big deal. These options are defaults and don't need to be included. For more details, please refer to the following link: http://jcutrer.com/howto/linux/how-to-compile-php7-on-ubuntu-14-04 |
As the title implies, pre-compiled binaries are a set of binary files that somebody else has kindly compiled from PHP 7 source code and has made available.
In the case of Windows, go to http://windows.php.net/. You will find a good set of tips in the left column that pertain to which version to choose, thread safe versus non-read safe, and so forth. You can then click on Downloads and look for the ZIP file that applies to your environment. Once the ZIP file has been downloaded, extract the files into the folder of your choice, add php.exe to your path, and configure PHP 7 using the php.ini file.
To install the pre-compiled binaries on a Mac OS X system, it is best to involve a package management system. The ones recommended for PHP include the following:
In the case of Linux, the packaging system used depends on which Linux distribution you are using. The following table, organized by Linux distribution, summarizes where to look for the PHP 7 package.
AMP refers to Apache, MySQL, and PHP (also Perl and Python). The * refers to Linux, Windows, Mac, and so on (that is, LAMP, WAMP, and MAMP). This approach is often the easiest, but gives you less control over the initial PHP installation. On the other hand, you can always modify the php.ini file and install additional extensions to customize your installation as needed. The following table summarizes a number of popular *AMP packages:
|
Package |
Where is it found |
Free? |
Supports* |
|---|---|---|---|
|
|
Y |
WML | |
|
|
Y |
WML | |
|
|
Y |
WM | |
|
|
Y |
W | |
|
|
Y |
W | |
|
|
N |
WML |
In the preceding table, we've enlisted the *AMP packages where * is replaced by W for Windows, M for Mac OS X, and L for Linux.
When you install a pre-compiled binary from a package, only core extensions are installed. Non-core PHP extensions must be installed separately.
It's worth noting that PHP 7 installation on cloud computing platforms will often follow the installation procedure outlined for pre-compiled binaries. Find out if your cloud environment uses Linux, Mac, or Windows virtual machines, and then follow the appropriate procedure as mentioned in this recipe.
It's possible that PHP 7 hasn't yet reached your favorite repository for pre-compiled binaries. You can always install from source, or consider installing one of the *AMP packages (see the next section). An alternative for Linux-based systems is to use the Personal Package Archive (PPA) approach. Because PPAs have not undergone a rigorous screening process, however, security could be a concern. A good discussion on security considerations for PPAs is found at http://askubuntu.com/questions/35629/are-ppas-safe-to-add-to-my-system-and-what-are-some-red-flags-to-watch-out-fo.
General installation considerations, as well as instructions for each of the three major OS platforms (Windows, Mac OS X, and Linux), can be found at http://php.net/manual/en/install.general.php.
The website for MinGW is http://www.mingw.org/.
Instructions on how to compile a C program using Visual Studio can be found at https://msdn.microsoft.com/en-us/library/bb384838.
Another possible way to test PHP 7 is by using a virtual machine. Here are a couple of tools with their links, which might prove useful:
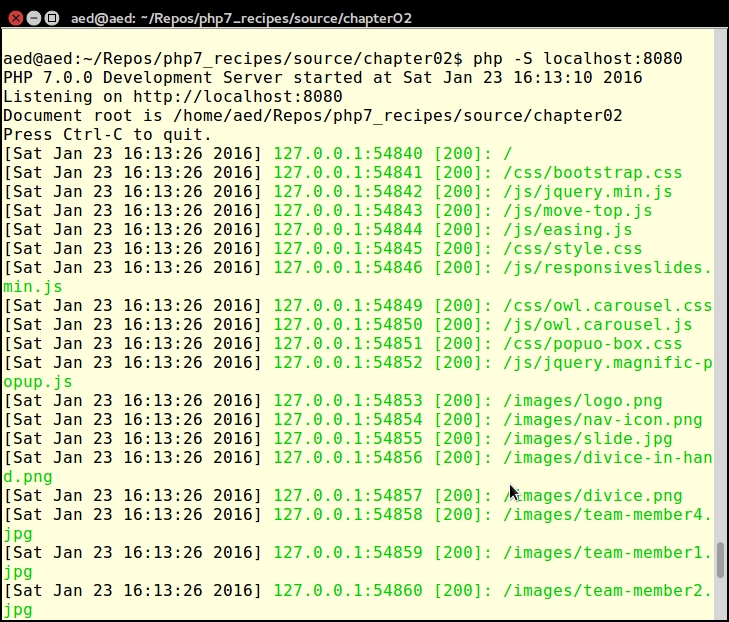
Aside from unit testing and running PHP directly from the command line, the obvious way to test your applications is to use a web server. For long-term projects, it would be beneficial to develop a virtual host definition for a web server that most closely mirrors the one used by your customer. Creating such definitions for the various web servers (that is, Apache, NGINX, and so on) is beyond the scope of this book. Another quick and easy-to-use alternative (which we have room to discuss here) is to use the built-in PHP 7 web server.
cd /path/to/recipes
php -S localhost:8080
You will see output on your screen that looks something like this:
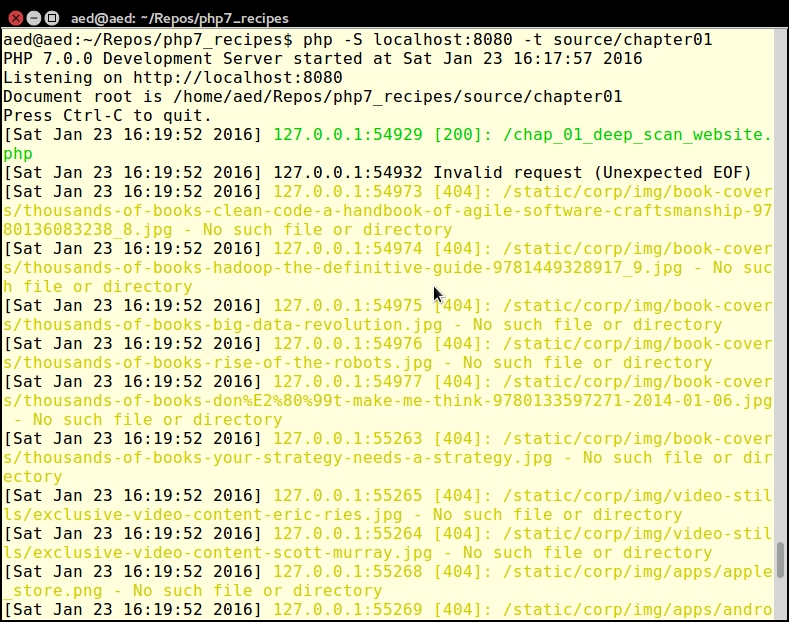
-t flag. The flag must then be followed by a valid directory path. The built-in web server will treat this directory as if it were the web document root, which is useful for security reasons. For security reasons, some frameworks, such as Zend Framework, require that the web document root is different from where your actual source code resides.Here is an example using the -t flag:
php -S localhost:8080 -t source/chapter01
Here is an example of the output:
For test purposes, along with the source code for the book, we've provided an SQL file with sample data at https://github.com/dbierer/php7cookbook. The name of the database used in the recipes for this book is php7cookbook.
php7cookbook. Also assign rights to the new database to a user called cook with the password book. The following table summarizes these settings:|
Item |
Notes |
|---|---|
|
Database name |
|
|
Database user |
|
|
Database user password |
|
CREATE DATABASE IF NOT EXISTS dbname DEFAULT CHARACTER SET utf8 COLLATE utf8_general_ci;
CREATE USER 'user'@'%' IDENTIFIED WITH mysql_native_password;
SET PASSWORD FOR 'user'@'%' = PASSWORD('userPassword');
GRANT ALL PRIVILEGES ON dbname.* to 'user'@'%';
GRANT ALL PRIVILEGES ON dbname.* to 'user'@'localhost';
FLUSH PRIVILEGES;php7cookbook.sql, is located at https://github.com/dbierer/php7cookbook/blob/master/php7cookbook.sql.Unit testing is arguably the most popular means of testing PHP code. Most developers will agree that a solid suite of tests is a requirement for any properly developed project. Few developers actually write these tests. A lucky few have an independent testing group that writes the tests for them! After months of skirmishing with the testing group, however, the remains of the lucky few tend to grumble and complain. In any event, any book on PHP would not be complete without at least a nod and a wink towards testing.
The place to find the latest version of PHPUnit is https://phpunit.de/. PHPUnit5.1 and above support PHP 7. Click on the link for the desired version, and you will download a phpunit.phar file. You can then execute commands using the archive, as follows:
php phpunit.phar <command>
When developing PHP using an object-oriented programming (OOP) approach, the recommendation is to place each class in its own file. The advantage of following this recommendation is the ease of long-term maintenance and improved readability. The disadvantage is that each class definition file must be included (that is, using include or its variants). To address this issue, there is a mechanism built into the PHP language that will autoload any class that has not already been specifically included.
The minimum requirement for PHP autoloading is to define a global __autoload() function. This is a magic function called automatically by the PHP engine when a class is requested but where said class has not been included. The name of the requested class will appear as a parameter when __autoload() is invoked (assuming that you have defined it!). If you are using PHP namespaces, the full namespaced name of the class will be passed. Because __autoload() is a function, it must be in the global namespace; however, there are limitations on its use. Accordingly, in this recipe, we will make use of the spl_autoload_register() function, which gives us more flexibility.
Application\Autoload\Loader. In order to take advantage of the relationship between PHP namespaces and autoloading, we name the file Loader.php and place it in the /path/to/cookbook/files/Application/Autoload folder.file_exists() to check before running require_once(). The reason for this is that if the file is not found, require_once() will generate a fatal error that cannot be caught using PHP 7's new error handling capabilities:protected static function loadFile($file)
{
if (file_exists($file)) {
require_once $file;
return TRUE;
}
return FALSE;
}loadFile() in the calling program and loop through a list of alternate directories before throwing an Exception if it's ultimately unable to load the file.loadFile() and actually performs the logic to locate the file based on the namespaced classname. This method derives a filename by converting the PHP namespace separator \ into the directory separator appropriate for this server and appending .php:public static function autoLoad($class)
{
$success = FALSE;
$fn = str_replace('\\', DIRECTORY_SEPARATOR, $class)
. '.php';
foreach (self::$dirs as $start) {
$file = $start . DIRECTORY_SEPARATOR . $fn;
if (self::loadFile($file)) {
$success = TRUE;
break;
}
}
if (!$success) {
if (!self::loadFile(__DIR__
. DIRECTORY_SEPARATOR . $fn)) {
throw new \Exception(
self::UNABLE_TO_LOAD . ' ' . $class);
}
}
return $success;
}self::$dirs, using each directory as a starting point for the derived filename. If not successful, as a last resort, the method attempts to load the file from the current directory. If even that is not successful, an Exception is thrown.array_merge() is used. Otherwise, we simply add the directory string to the self::$dirs array:public static function addDirs($dirs)
{
if (is_array($dirs)) {
self::$dirs = array_merge(self::$dirs, $dirs);
} else {
self::$dirs[] = $dirs;
}
} autoload() method as a Standard PHP Library (SPL) autoloader. This is accomplished using spl_autoload_register() with the init() method:public static function init($dirs = array())
{
if ($dirs) {
self::addDirs($dirs);
}
if (self::$registered == 0) {
spl_autoload_register(__CLASS__ . '::autoload');
self::$registered++;
}
}__construct(), which calls self::init($dirs). This allows us to also create an instance of Loader if desired:public function __construct($dirs = array())
{
self::init($dirs);
}In order to use the autoloader class that we just defined, you will need to require Loader.php. If your namespace files are located in a directory other than the current one, you should also run Loader::init() and supply additional directory paths.
In order to make sure the autoloader works, we'll also need a test class. Here is a definition of /path/to/cookbook/files/Application/Test/TestClass.php:
<?php
namespace Application\Test;
class TestClass
{
    public function getTest()
    {
        return __METHOD__;
    }
}
Now create a sample chap_01_autoload_test.php code file to test the autoloader:
<?php
require __DIR__ . '/../Application/Autoload/Loader.php';
Application\Autoload\Loader::init(__DIR__ . '/..');
Next, get an instance of a class that has not already been loaded:
$test = new Application\Test\TestClass();
echo $test->getTest();
Finally, try to get a fake class that does not exist. Note that this will throw an error:
$fake = new Application\Test\FakeClass();
echo $fake->getTest();
Very frequently, it is of interest to scan a website and extract information from specific tags. This basic mechanism can be used to trawl the web in search of useful bits of information. At other times you need to get a list of <IMG> tags and the SRC attribute, or <A> tags and the corresponding HREF attribute. The possibilities are endless.
file_get_contents(). The problem with these approaches is that we will end up having to do a massive amount of string manipulation, most likely having to make inordinate use of the dreaded regular expression. In order to avoid all of this, we'll simply take advantage of an already existing PHP 7 class DOMDocument. So we create a DOMDocument instance, setting it to UTF-8. We don't care about whitespace, and use the handy loadHTMLFile() method to load the contents of the website into the object:public function getContent($url)
{
if (!$this->content) {
if (stripos($url, 'http') !== 0) {
$url = 'http://' . $url;
}
$this->content = new DOMDocument('1.0', 'utf-8');
$this->content->preserveWhiteSpace = FALSE;
// @ used to suppress warnings generated from // improperly configured web pages
@$this->content->loadHTMLFile($url);
}
return $this->content;
}Note that we precede the call to the loadHTMLFile() method with an @. This is not done to obscure bad coding (!) as was often the case in PHP 5! Rather, the @ suppresses notices generated when the parser encounters poorly written HTML. Presumably, we could capture the notices and log them, possibly giving our Hoover class a diagnostic capability as well.
getElementsByTagName() method for this purpose. If we wish to extract all tags, we can supply * as an argument:public function getTags($url, $tag)
{
$count = 0;
$result = array();
$elements = $this->getContent($url)
->getElementsByTagName($tag);
foreach ($elements as $node) {
$result[$count]['value'] = trim(preg_replace('/\s+/', ' ', $node->nodeValue));
if ($node->hasAttributes()) {
foreach ($node->attributes as $name => $attr)
{
$result[$count]['attributes'][$name] =
$attr->value;
}
}
$count++;
}
return $result;
}getAttribute(). You'll notice that there is a parameter for the DNS domain. We've added this in order to keep the scan within the same domain (if you're building a web tree, for example):public function getAttribute($url, $attr, $domain = NULL)
{
$result = array();
$elements = $this->getContent($url)
->getElementsByTagName('*');
foreach ($elements as $node) {
if ($node->hasAttribute($attr)) {
$value = $node->getAttribute($attr);
if ($domain) {
if (stripos($value, $domain) !== FALSE) {
$result[] = trim($value);
}
} else {
$result[] = trim($value);
}
}
}
return $result;
}In order to use the new Hoover class, initialize the autoloader (described previously) and create an instance of the Hoover class. You can then run the Hoover::getTags() method to produce an array of tags from the URL you specify as an argument.
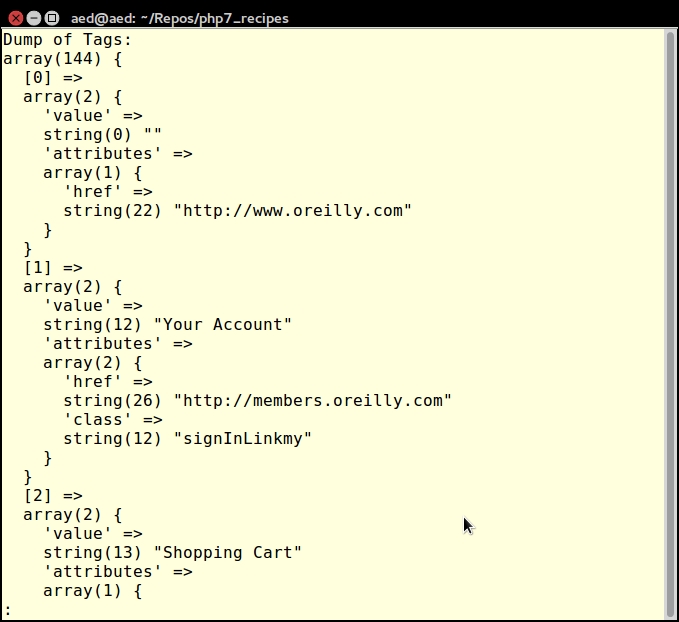
Here is a block of code from chap_01_vacuuming_website.php that uses the Hoover class to scan the O'Reilly website for <A> tags:
<?php
// modify as needed
define('DEFAULT_URL', 'http://oreilly.com/');
define('DEFAULT_TAG', 'a');

require __DIR__ . '/../Application/Autoload/Loader.php';
Application\Autoload\Loader::init(__DIR__ . '/..');

// get "vacuum" class
$vac = new Application\Web\Hoover();

// NOTE: the PHP 7 null coalesce operator is used
$url = strip_tags($_GET['url'] ?? DEFAULT_URL);
$tag = strip_tags($_GET['tag'] ?? DEFAULT_TAG);

echo 'Dump of Tags: ' . PHP_EOL;
var_dump($vac->getTags($url, $tag));
The output will look something like this:
For more information on DOM, see the PHP reference page at http://php.net/manual/en/class.domdocument.php.
Sometimes you need to scan a website, but go one level deeper. For example, you want to build a web tree diagram of a website. This can be accomplished by looking for all <A> tags and following the HREF attributes to the next web page. Once you have acquired the child pages, you can then continue scanning in order to complete the tree.
Hoover class, as described previously. The basic procedure presented in this recipe is to scan the target website and hoover up all the HREF attributes. For this purpose, we define a Application\Web\Deep class. We add a property that represents the DNS domain:namespace Application\Web;
class Deep
{
protected $domain;yield from has been added is because we need to yield the entire array produced by Hoover::getTags(). The yield from syntax allows us to treat the array as a sub-generator:public function scan($url, $tag)
{
$vac = new Hoover();
$scan = $vac->getAttribute($url, 'href',
$this->getDomain($url));
$result = array();
foreach ($scan as $subSite) {
yield from $vac->getTags($subSite, $tag);
}
return count($scan);
}The use of yield from turns the scan() method into a PHP 7 delegating generator. Normally, you would be inclined to store the results of the scan into an array. The problem, in this case, is that the amount of information retrieved could potentially be massive. Thus, it's better to immediately yield the results in order to conserve memory and to produce immediate results. Otherwise, there would be a lengthy wait, which would probably be followed by an out of memory error.
parse_url() function for this purpose:public function getDomain($url)
{
if (!$this->domain) {
$this->domain = parse_url($url, PHP_URL_HOST);
}
return $this->domain;
}First of all, go ahead and define the Application\Web\Deep class defined previously, as well as the Application\Web\Hoover class defined in the previous recipe.
Next, define a block of code from chap_01_deep_scan_website.php that sets up autoloading (as described earlier in this chapter):
<?php
// modify as needed
define('DEFAULT_URL', 'unlikelysource.com');
define('DEFAULT_TAG', 'img');

require __DIR__ . '/../../Application/Autoload/Loader.php';
Application\Autoload\Loader::init(__DIR__ . '/../..');
Next, get an instance of our new class:
$deep = new Application\Web\Deep();
At this point, you can retrieve URL and tag information from URL parameters. The PHP 7 null coalesce operator is useful for establishing fallback values:
$url = strip_tags($_GET['url'] ?? DEFAULT_URL);
$tag = strip_tags($_GET['tag'] ?? DEFAULT_TAG);
Some simple HTML will display results:
foreach ($deep->scan($url, $tag) as $item) {
    $src = $item['attributes']['src'] ?? NULL;
    if ($src && (stripos($src, 'png') || stripos($src, 'jpg'))) {
        printf('<br><img src="%s"/>', $src);
    }
}For more information on generators and yield from, please see the article at http://php.net/manual/en/language.generators.syntax.php.
For the most part, PHP 5.x code can run unchanged on PHP 7. There are a few changes, however, that are classified as backwards incompatible. What this means is that if your PHP 5 code is written in a certain way, or uses functions that have been removed, your code will break, and you'll have a nasty error on your hands.
The PHP 5 to PHP 7 Code Converter does two things:
// WARNING where changes in language usage have occurred, but where a re-write is not possibleThe core of this recipe is the new PHP 7 preg_replace_callback_array() function. What this amazing function allows you to do is to present an array of regular expressions as keys, with the value representing an independent callback. You can then pass the string through a series of transformations. Not only that, the subject of the array of callbacks can itself be an array.
Application\Parse\Convert, we begin with a scan() method, which accepts a filename as an argument. It checks to see if the file exists. If so, it calls the PHP file() function, which loads the file into an array, with each array element representing one line:public function scan($filename)
{
if (!file_exists($filename)) {
throw new Exception(
self::EXCEPTION_FILE_NOT_EXISTS);
}
$contents = file($filename);
echo 'Processing: ' . $filename . PHP_EOL;
$result = preg_replace_callback_array( [ // replace no-longer-supported opening tags
'!^\<\%(\n| )!' =>
function ($match) {
return '<?php' . $match[1];
},
// replace no-longer-supported opening tags
'!^\<\%=(\n| )!' =>
function ($match) {
return '<?php echo ' . $match[1];
},
// replace no-longer-supported closing tag
'!\%\>!' =>
function ($match) {
return '?>';
},WARNING is added: // changes in how $$xxx interpretation is handled
'!(.*?)\$\$!' =>
function ($match) {
return '// WARNING: variable interpolation
. ' now occurs left-to-right' . PHP_EOL
. '// see: http://php.net/manual/en/'
. '// migration70.incompatible.php'
. $match[0];
},
// changes in how the list() operator is handled
'!(.*?)list(\s*?)?\(!' =>
function ($match) {
return '// WARNING: changes have been made '
. 'in list() operator handling.'
. 'See: http://php.net/manual/en/'
. 'migration70.incompatible.php'
. $match[0];
},
// instances of \u{
'!(.*?)\\\u\{!' =>
function ($match) {
return '// WARNING: \\u{xxx} is now considered '
. 'unicode escape syntax' . PHP_EOL
. '// see: http://php.net/manual/en/'
. 'migration70.new-features.php'
. '#migration70.new-features.unicode-'
. 'codepoint-escape-syntax' . PHP_EOL
. $match[0];
},
// relying upon set_error_handler()
'!(.*?)set_error_handler(\s*?)?.*\(!' =>
function ($match) {
return '// WARNING: might not '
. 'catch all errors'
. '// see: http://php.net/manual/en/'
. '// language.errors.php7.php'
. $match[0];
},
// session_set_save_handler(xxx)
'!(.*?)session_set_save_handler(\s*?)?\((.*?)\)!' =>
function ($match) {
if (isset($match[3])) {
return '// WARNING: a bug introduced in'
. 'PHP 5.4 which '
. 'affects the handler assigned by '
. 'session_set_save_handler() and '
. 'where ignore_user_abort() is TRUE
. 'has been fixed in PHP 7.'
. 'This could potentially break '
. 'your code under '
. 'certain circumstances.' . PHP_EOL
. 'See: http://php.net/manual/en/'
. 'migration70.incompatible.php'
. $match[0];
} else {
return $match[0];
}
},<< or >> with a negative operator, or beyond 64, is wrapped in a try { xxx } catch() { xxx } block, looking for an ArithmeticError to be thrown: // wraps bit shift operations in try / catch
'!^(.*?)(\d+\s*(\<\<|\>\>)\s*-?\d+)(.*?)$!' =>
function ($match) {
return '// WARNING: negative and '
. 'out-of-range bitwise '
. 'shift operations will now
. 'throw an ArithmeticError' . PHP_EOL
. 'See: http://php.net/manual/en/'
. 'migration70.incompatible.php'
. 'try {' . PHP_EOL
. "\t" . $match[0] . PHP_EOL
. '} catch (\\ArithmeticError $e) {'
. "\t" . 'error_log("File:"
. $e->getFile()
. " Message:" . $e->getMessage());'
. '}' . PHP_EOL;
},call_user_method*(), which has been removed in PHP 7. These are replaced with the equivalent using call_user_func*(): // replaces "call_user_method()" with
// "call_user_func()"
'!call_user_method\((.*?),(.*?)(,.*?)\)(\b|;)!' =>
function ($match) {
$params = $match[3] ?? '';
return '// WARNING: call_user_method() has '
. 'been removed from PHP 7' . PHP_EOL
. 'call_user_func(['. trim($match[2]) . ','
. trim($match[1]) . ']' . $params . ');';
},
// replaces "call_user_method_array()"
// with "call_user_func_array()"
'!call_user_method_array\((.*?),(.*?),(.*?)\)(\b|;)!' =>
function ($match) {
return '// WARNING: call_user_method_array()'
. 'has been removed from PHP 7'
. PHP_EOL
. 'call_user_func_array(['
. trim($match[2]) . ','
. trim($match[1]) . '], '
. $match[3] . ');';
},preg_replace() with the /e modifier is rewritten using a preg_replace_callback(): '!^(.*?)preg_replace.*?/e(.*?)$!' =>
function ($match) {
$last = strrchr($match[2], ',');
$arg2 = substr($match[2], 2, -1 * (strlen($last)));
$arg1 = substr($match[0],
strlen($match[1]) + 12,
-1 * (strlen($arg2) + strlen($last)));
$arg1 = trim($arg1, '(');
$arg1 = str_replace('/e', '/', $arg1);
$arg3 = '// WARNING: preg_replace() "/e" modifier
. 'has been removed from PHP 7'
. PHP_EOL
. $match[1]
. 'preg_replace_callback('
. $arg1
. 'function ($m) { return '
. str_replace('$1','$m', $match[1])
. trim($arg2, '"\'') . '; }, '
. trim($last, ',');
return str_replace('$1', '$m', $arg3);
},
// end array
],
// this is the target of the transformations
$contents
);
// return the result as a string
return implode('', $result);
}To use the converter, run the following code from the command line. You'll need to supply the filename of the PHP 5 code to be scanned as an argument.
This block of code, chap_01_php5_to_php7_code_converter.php, run from the command line, calls the converter:
<?php
// get filename to scan from command line
$filename = $argv[1] ?? '';

if (!$filename) {
    echo 'No filename provided' . PHP_EOL;
    echo 'Usage: ' . PHP_EOL;
    echo __FILE__ . ' <filename>' . PHP_EOL;
    exit;
}

// setup class autoloading
require __DIR__ . '/../Application/Autoload/Loader.php';

// add current directory to the path
Application\Autoload\Loader::init(__DIR__ . '/..');

// get "deep scan" class
$convert = new Application\Parse\Convert();
echo $convert->scan($filename);
echo PHP_EOL;For more information on backwards incompatible changes, please refer to http://php.net/manual/en/migration70.incompatible.php.
In this chapter we will discuss and understand the syntax differences between PHP 5 and PHP 7, featuring the following recipes:
foreach() handlingIn this chapter we will move directly into PHP 7, presenting recipes that take advantage of new high performance features. First, however, we will present a series of smaller recipes that serve to illustrate the differences in how PHP 7 handles parameter parsing, syntax, a foreach() loop, and other enhancements. Before we go into depth in this chapter, let's discuss some basic differences between PHP 5 and PHP 7.
PHP 7 introduced a new layer referred to as the Abstract Syntax Tree (AST), which effectively decouples the parsing process from the pseudo-compile process. Although the new layer has little or no impact on performance, it gives the language a new uniformity of syntax, which was not possible previously.
Another benefit of AST is the process of dereferencing. Dereferencing, simply put, refers to the ability to immediately acquire a property from, or run a method of, an object, immediately access an array element, and immediately execute a callback. In PHP 5 such support was inconsistent and incomplete. To execute a callback, for example, often you would first need to assign the callback or anonymous function to a variable, and then execute it. In PHP 7 you can execute it immediately.
As a developer, it might be of interest for you to be free from certain syntax restrictions imposed in PHP 5 and earlier. Aside from the uniformity of the syntax mentioned previously, where you'll see the most improvement in syntax is the ability to call any return value, which is callable by simply appending an extra set of parentheses. Also, you'll be able to directly access any array element when the return value is an array.
() (with or without parameters). An element can be immediately dereferenced from any function or method that returns an array by simply indicating the element using square brackets [];. In the short (but trivial) example shown next, the function test() returns an array. The array contains six anonymous functions. $a has a value of $t. $$a is interpreted as $test:function test()
{
return [
1 => function () { return [
1 => function ($a) { return 'Level 1/1:' . ++$a; },
2 => function ($a) { return 'Level 1/2:' . ++$a; },
];},
2 => function () { return [
1 => function ($a) { return 'Level 2/1:' . ++$a; },
2 => function ($a) { return 'Level 2/2:' . ++$a; },
];}
];
}
$a = 't';
$t = 'test';
echo $$a()[1]()[2](100);echo $$a()[1]()[2](100) command. This is parsed left-to-right, which executes as follows:$$a() interprets as test(), which returns an array[1] dereferences array element 1, which returns a callback() executes this callback, which returns an array of two elements[2] dereferences array element 2, which returns a callback(100) executes this callback, supplying a value of 100, which returns Level 1/2:101Application\Web\Securityclass. In the constructor, we build and define two arrays. The first array consists of filter callbacks. The second array has validation callbacks:public function __construct()
{
$this->filter = [
'striptags' => function ($a) { return strip_tags($a); },
'digits' => function ($a) { return preg_replace(
'/[^0-9]/', '', $a); },
'alpha' => function ($a) { return preg_replace(
'/[^A-Z]/i', '', $a); }
];
$this->validate = [
'alnum' => function ($a) { return ctype_alnum($a); },
'digits' => function ($a) { return ctype_digit($a); },
'alpha' => function ($a) { return ctype_alpha($a); }
];
}$security->filterDigits($item));
__call(), which gives us access to non-existent methods:public function __call($method, $params)
{
preg_match('/^(filter|validate)(.*?)$/i', $method, $matches);
$prefix = $matches[1] ?? '';
$function = strtolower($matches[2] ?? '');
if ($prefix && $function) {
return $this->$prefix[$function]($params[0]);
}
return $value;
}We use preg_match() to match the $method param against filter or validate. The second sub-match will then be converted into an array key in either $this->filter or $this->validate. If both sub-patterns produce a sub-match, we assign the first sub-match to $prefix, and the second sub-match $function. These end up as variable parameters when executing the appropriate callback.
First of all, we create a sample file, chap_02_web_filtering_ast_example.php, to take advantage of the autoloading class defined in Chapter 1, Building the Foundation, to obtain an instance of Application\Web\Security:
require __DIR__ . '/../Application/Autoload/Loader.php';
Application\Autoload\Loader::init(__DIR__ . '/..');
$security = new Application\Web\Security();
Next, we define a block of test data:
$data = [
'<ul><li>Lots</li><li>of</li><li>Tags</li></ul>',
12345,
'This is a string',
'String with number 12345',
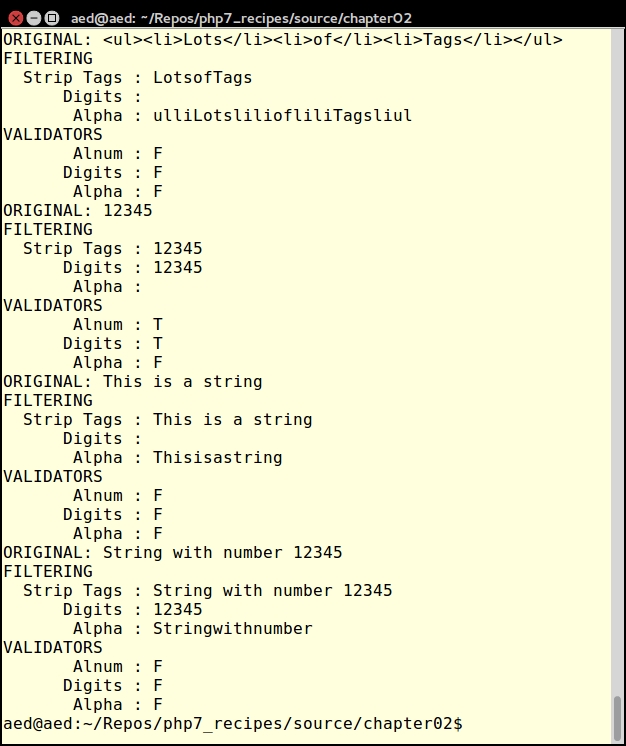
];Finally, we call each filter and validator for each item of test data:
foreach ($data as $item) {
  echo 'ORIGINAL: ' . $item . PHP_EOL;
  echo 'FILTERING' . PHP_EOL;
  printf('%12s : %s' . PHP_EOL,'Strip Tags', $security->filterStripTags($item));
  printf('%12s : %s' . PHP_EOL, 'Digits', $security->filterDigits($item));
  printf('%12s : %s' . PHP_EOL, 'Alpha', $security->filterAlpha($item));

  echo 'VALIDATORS' . PHP_EOL;
  printf('%12s : %s' . PHP_EOL, 'Alnum',
  ($security->validateAlnum($item))  ? 'T' : 'F');
  printf('%12s : %s' . PHP_EOL, 'Digits',
  ($security->validateDigits($item)) ? 'T' : 'F');
  printf('%12s : %s' . PHP_EOL, 'Alpha',
  ($security->validateAlpha($item))  ? 'T' : 'F');
}
Here is the output of some input strings:
For more information on AST, please consult the RFC that addresses the Abstract Syntax Tree, which can be viewed at https://wiki.php.net/rfc/abstract_syntax_tree.
In PHP 5, expressions on the right side of an assignment operation were parsed right-to-left. In PHP 7, parsing is consistently left-to-right.
$$foo is interpreted as ${$bar}. The final return value is thus the value of $bar instead of the direct value of $foo (which would be bar):$foo = 'bar'; $bar = 'baz'; echo $$foo; // returns 'baz';
$$foo, which references a multi-dimensional array with a bar key and a baz sub-key:$foo = 'bar'; $bar = ['bar' => ['baz' => 'bat']]; // returns 'bat' echo $$foo['bar']['baz'];
$foo array, with a bar key and a baz. sub-key The return value of the element would then be interpreted to obtain the final value ${$foo['bar']['baz']}.$foo is interpreted first ($$foo)['bar']['baz'].$foo->$bar['bada'] is interpreted quite differently in PHP 5, compared with PHP 7. In the following example, PHP 5 would first interpret $bar['bada'], and reference this return value against a $foo object instance. In PHP 7, on the other hand, parsing is consistently left-to-right, which means that $foo->$bar is interpreted first, and expects an array with a bada element. You will also note, incidentally, that this example uses the PHP 7 anonymous class feature:// PHP 5: $foo->{$bar['bada']}
// PHP 7: ($foo->$bar)['bada']
$bar = 'baz';
// $foo = new class
{
public $baz = ['bada' => 'boom'];
};
// returns 'boom'
echo $foo->$bar['bada'];// PHP 5: $foo->{$bar['bada']}()
// PHP 7: ($foo->$bar)['bada']()
$bar = 'baz';
// NOTE: this example uses the new PHP 7 anonymous class feature
$foo = new class
{
public function __construct()
{
$this->baz = ['bada' => function () { return 'boom'; }];
}
};
// returns 'boom'
echo $foo->$bar['bada']();Place the code examples illustrated in 1 and 2 into a single PHP file that you can call chap_02_understanding_diffs_in_parsing.php. Execute the script first using PHP 5, and you will notice that a series of errors will result, as follows:
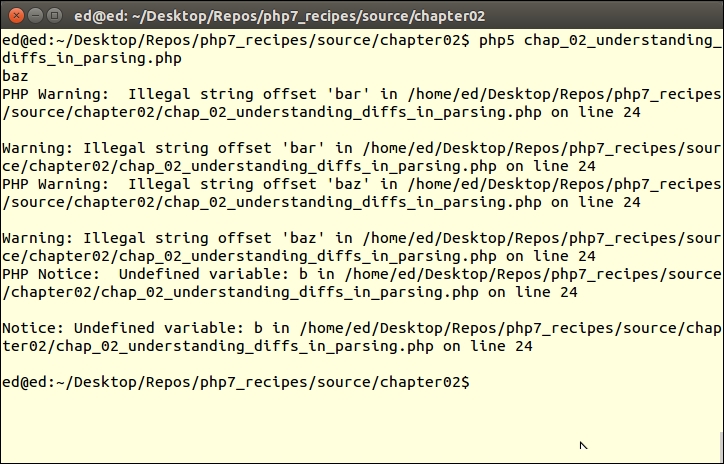
The reason for the errors is that PHP 5 parses inconsistently, and arrives at the wrong conclusion regarding the state of the variable variables requested (as previously mentioned). Now you can go ahead and add the remaining examples, as shown in steps 5 and 6. If you then run this script in PHP 7, the results described will appear, as shown here:

For more information on parsing, please consult the RFC, which addresses Uniform Variable Syntax, and can be viewed at https://wiki.php.net/rfc/uniform_variable_syntax.
In certain relatively obscure circumstances, the behavior of code inside a foreach() loop will vary between PHP 5 and PHP 7. First of all, there have been massive internal improvements, which means that in terms of sheer speed, processing inside the foreach() loop will be much faster running under PHP 7, compared with PHP 5. Problems that are noticed in PHP 5 include the use of current(), and unset() on the array inside the foreach() loop. Other problems have to do with passing values by reference while manipulating the array itself.
$a = [1, 2, 3];
foreach ($a as $v) {
  printf("%2d\n", $v);
  unset($a[1]);
}1 2 3
$a = [1, 2, 3];
$b = &$a;
foreach ($a as $v) {
printf("%2d\n", $v);
unset($a[1]);
}|
PHP 5 |
PHP 7 |
|---|---|
|
1 3 |
1 2 3 |
$a = [1,2,3];
foreach($a as &$v) {
printf("%2d - %2d\n", $v, current($a));
}|
PHP 5 |
PHP 7 |
|---|---|
|
1 - 2 2 - 3 3 - 0 |
1 - 1 2 - 1 3 - 1 |
foreach() loop, once the array iteration by reference is complete, is also problematic in PHP 5. This behavior has been made consistent in PHP 7. The following code example demonstrates this:$a = [1];
foreach($a as &$v) {
printf("%2d -\n", $v);
$a[1]=2;
}|
PHP 5 |
PHP 7 |
|---|---|
|
1 - |
1 - 2- |
array_push(), array_pop(), array_shift(), and array_unshift().Have a look at this example:
$a=[1,2,3,4];
foreach($a as &$v) {
echo "$v\n";
array_pop($a);
}|
PHP 5 |
PHP 7 |
|---|---|
|
1 2 1 1 |
1 2 |
foreach() loop, which itself iterates on the same array by reference. In PHP 5 this construct simply did not work. In PHP 7 this has been fixed. The following block of code demonstrates this behavior:$a = [0, 1, 2, 3];
foreach ($a as &$x) {
foreach ($a as &$y) {
echo "$x - $y\n";
if ($x == 0 && $y == 1) {
unset($a[1]);
unset($a[2]);
}
}
}|
PHP 5 |
PHP 7 |
|---|---|
|
0 - 0 0 - 1 0 - 3 |
0 - 0 0 - 1 0 - 3 3 - 0 3 -3 |
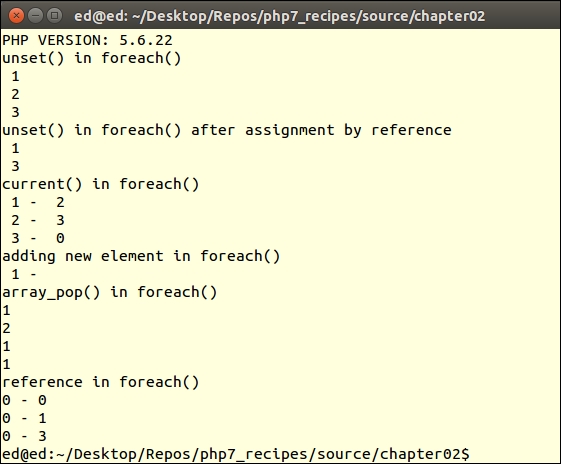
Add these code examples to a single PHP file, chap_02_foreach.php. Run the script under PHP 5 from the command line. The expected output is as follows:
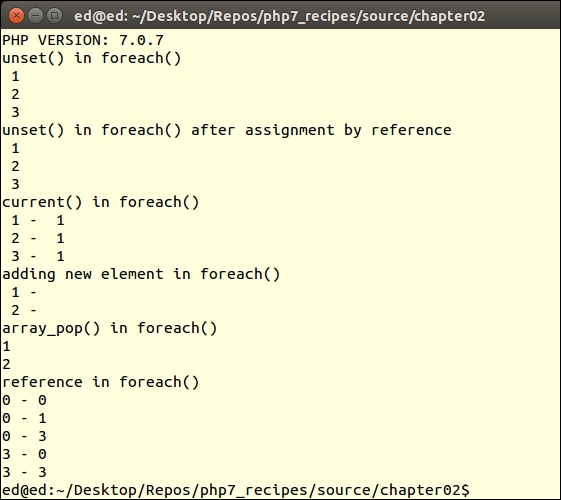
Run the same script under PHP 7 and notice the difference:
For more information, consult the RFC addressing this issue, which was accepted. A write-up on this RFC can be found at: https://wiki.php.net/rfc/php7_foreach.
One trend that developers are taking advantage of is the use of anonymous functions. One classic problem, when dealing with anonymous functions, is to write them in such a way that any object can be bound to $this and the function will still work. The approach used in PHP 5 code is to use bindTo(). In PHP 7, a new method, call(), was added, which offers similar functionality, but vastly improved performance.
To take advantage of call(), execute an anonymous function in a lengthy loop. In this example, we will demonstrate an anonymous function, that scans through a log file, identifying IP addresses sorted by how frequently they appear:
Application\Web\Access class. In the constructor, we accept a filename as an argument. The log file is opened as an SplFileObject and assigned to $this->log:Namespace Application\Web;
use Exception;
use SplFileObject;
class Access
{
const ERROR_UNABLE = 'ERROR: unable to open file';
protected $log;
public $frequency = array();
public function __construct($filename)
{
if (!file_exists($filename)) {
$message = __METHOD__ . ' : ' . self::ERROR_UNABLE . PHP_EOL;
$message .= strip_tags($filename) . PHP_EOL;
throw new Exception($message);
}
$this->log = new SplFileObject($filename, 'r');
}public function fileIteratorByLine()
{
$count = 0;
while (!$this->log->eof()) {
yield $this->log->fgets();
$count++;
}
return $count;
}public function getIp($line)
{
preg_match('/(\d{1,3}\.\d{1,3}\.\d{1,3}\.\d{1,3})/', $line, $match);
return $match[1] ?? '';
}
}First of all, we define a calling program, chap_02_performance_using_php7_enchancement_call.php, that takes advantage of the autoloading class defined in Chapter 1 , Building a Foundation, to obtain an instance of Application\Web\Access:
define('LOG_FILES', '/var/log/apache2/*access*.log');
require __DIR__ . '/../Application/Autoload/Loader.php';
Application\Autoload\Loader::init(__DIR__ . '/..');Next we define the anonymous function, which processes one line in the log file. If an IP address is detected, it becomes a key in the $frequency array, and the current value for this key is incremented:
// define functions
$freq = function ($line) {
$ip = $this->getIp($line);
if ($ip) {
echo '.';
$this->frequency[$ip] =
(isset($this->frequency[$ip])) ? $this->frequency[$ip] + 1 : 1;
}
};We then loop through the iteration of lines in each log file found, processing IP addresses:
foreach (glob(LOG_FILES) as $filename) {
echo PHP_EOL . $filename . PHP_EOL;
// access class
$access = new Application\Web\Access($filename);
foreach ($access->fileIteratorByLine() as $line) {
$freq->call($access, $line);
}
}Finally, we reverse-sort the array, but maintain the keys. The output is produced in a simple foreach() loop:
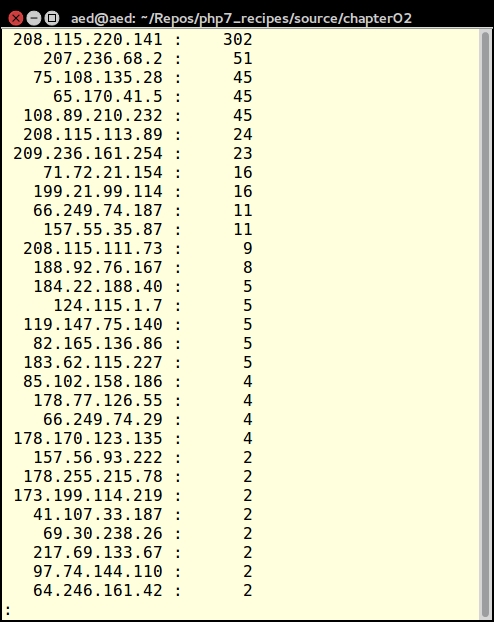
arsort($access->frequency);
foreach ($access->frequency as $key => $value) {
printf('%16s : %6d' . PHP_EOL, $key, $value);
}The output will vary depending on which access.log you process. Here is a sample:
Many of the PHP 7 performance improvements have nothing to do with new features and functions. Rather, they take the form of internal improvements, which are invisible until you start running your programs. Here is a short list of improvements that fall into this category:
Functions such as file_get_contents() and file() are quick and easy to use however, owing to memory limitations, they quickly cause problems when dealing with massive files. The default setting for the php.ini memory_limit setting is 128 megabytes. Accordingly, any file larger than this will not be loaded.
Another consideration when parsing through massive files is how quickly does your function or class method produce output? When producing user output, for example, although it might at first glance seem better to accumulate output in an array. You would then output it all at once for improved efficiency. Unfortunately, this might have an adverse impact on the user experience. It might be better to create a generator, and use the yield keyword to produce immediate results.
As mentioned before, the file* functions (that is, file_get_contents()), are not suitable for large files. The simple reason is that these functions, at one point, have the entire contents of the file represented in memory. Accordingly, the focus of this recipe will be on the f* functions (that is, fopen()).
In a slight twist, however, instead of using the f* functions directly, instead we will use the SplFileObject class, which is included in the SPL (Standard PHP Library):
Application\Iterator\LargeFile class with the appropriate properties and constants:namespace Application\Iterator;
use Exception;
use InvalidArgumentException;
use SplFileObject;
use NoRewindIterator;
class LargeFile
{
const ERROR_UNABLE = 'ERROR: Unable to open file';
const ERROR_TYPE = 'ERROR: Type must be "ByLength", "ByLine" or "Csv"';
protected $file;
protected $allowedTypes = ['ByLine', 'ByLength', 'Csv'];__construct() method that accepts a filename as an argument and populates the $file property with an SplFileObject instance. This is also a good place to throw an exception if the file does not exist:public function __construct($filename, $mode = 'r')
{
if (!file_exists($filename)) {
$message = __METHOD__ . ' : ' . self::ERROR_UNABLE . PHP_EOL;
$message .= strip_tags($filename) . PHP_EOL;
throw new Exception($message);
}
$this->file = new SplFileObject($filename, $mode);
}fileIteratorByLine()method which uses fgets() to read one line of the file at a time. It's not a bad idea to create a complimentary fileIteratorByLength()method that does the same thing but uses fread() instead. The method that uses fgets() would be suitable for text files that include linefeeds. The other method could be used if parsing a large binary file:protected function fileIteratorByLine()
{
$count = 0;
while (!$this->file->eof()) {
yield $this->file->fgets();
$count++;
}
return $count;
}
protected function fileIteratorByLength($numBytes = 1024)
{
$count = 0;
while (!$this->file->eof()) {
yield $this->file->fread($numBytes);
$count++;
}
return $count;
}getIterator()method that returns a NoRewindIterator() instance. This method accepts as arguments either ByLine or ByLength, which refer to the two methods defined in the previous step. This method also needs to accept $numBytes in case ByLength is called. The reason we need a NoRewindIterator() instance is to enforce the fact that we're reading through the file only in one direction in this example:public function getIterator($type = 'ByLine', $numBytes = NULL)
{
if(!in_array($type, $this->allowedTypes)) {
$message = __METHOD__ . ' : ' . self::ERROR_TYPE . PHP_EOL;
throw new InvalidArgumentException($message);
}
$iterator = 'fileIterator' . $type;
return new NoRewindIterator($this->$iterator($numBytes));
}First of all, we take advantage of the autoloading class defined in Chapter 1, Building a Foundation, to obtain an instance of Application\Iterator\LargeFile in a calling program, chap_02_iterating_through_a_massive_file.php:
define('MASSIVE_FILE', '/../data/files/war_and_peace.txt');
require __DIR__ . '/../Application/Autoload/Loader.php';
Application\Autoload\Loader::init(__DIR__ . '/..');Next, inside a try {...} catch () {...} block, we get an instance of a ByLine iterator:
try {
$largeFile = new Application\Iterator\LargeFile(__DIR__ . MASSIVE_FILE);
$iterator = $largeFile->getIterator('ByLine');We then provide an example of something useful to do, in this case, defining an average of words per line:
$words = 0;
foreach ($iterator as $line) {
echo $line;
$words += str_word_count($line);
}
echo str_repeat('-', 52) . PHP_EOL;
printf("%-40s : %8d\n", 'Total Words', $words);
printf("%-40s : %8d\n", 'Average Words Per Line',
($words / $iterator->getReturn()));
echo str_repeat('-', 52) . PHP_EOL;We then end the catch block:
} catch (Throwable $e) {
echo $e->getMessage();
}The expected output (too large to show here!) shows us that there are 566,095 words in the project Gutenberg version of War and Peace. Also, we find the average number of words per line is eight.
Although PHP does not have any direct capability to read a specific spreadsheet format (that is, XLSX, ODS, and so on), it does have the ability to read (CSV Comma Separated Values) files. Accordingly, in order to process customer spreadsheets, you will need to either ask them to furnish their files in CSV format, or you will need to perform the conversion yourself.
When uploading a spreadsheet (that is, a CSV file) into a database, there are three major considerations:
Massive file iteration will be handled using the preceding recipe. We will use the fgetcsv() function to convert a CSV row into a PHP array. Finally, we will use the (PDO PHP Data Objects) class to make a database connection and perform the insert.
Application\Database\Connection class that creates a PDO instance based on a set of parameters supplied to the constructor:<?php
namespace Application\Database;
use Exception;
use PDO;
class Connection
{
const ERROR_UNABLE = 'ERROR: Unable to create database connection';
public $pdo;
public function __construct(array $config)
{
if (!isset($config['driver'])) {
$message = __METHOD__ . ' : ' . self::ERROR_UNABLE . PHP_EOL;
throw new Exception($message);
}
$dsn = $config['driver']
. ':host=' . $config['host']
. ';dbname=' . $config['dbname'];
try {
$this->pdo = new PDO($dsn,
$config['user'],
$config['password'],
[PDO::ATTR_ERRMODE => $config['errmode']]);
} catch (PDOException $e) {
error_log($e->getMessage());
}
}
}Application\Iterator\LargeFile. We add a new method to this class that is designed to iterate through CSV files:protected function fileIteratorCsv()
{
$count = 0;
while (!$this->file->eof()) {
yield $this->file->fgetcsv();
$count++;
}
return $count;
} Csv to the list of allowed iterator methods: const ERROR_UNABLE = 'ERROR: Unable to open file';
const ERROR_TYPE = 'ERROR: Type must be "ByLength", "ByLine" or "Csv"';
protected $file;
protected $allowedTypes = ['ByLine', 'ByLength', 'Csv'];First we define a config file,/path/to/source/config/db.config.php, that contains database connection parameters:
<?php return [ 'driver' => 'mysql', 'host' => 'localhost', 'dbname' => 'php7cookbook', 'user' => 'cook', 'password' => 'book', 'errmode' => PDO::ERRMODE_EXCEPTION, ];
Next, we take advantage of the autoloading class defined in Chapter 1, Building a Foundation, to obtain an instance of Application\Database\Connection and Application\Iterator\LargeFile, defining a calling program, chap_02_uploading_csv_to_database.php:
define('DB_CONFIG_FILE', '/../data/config/db.config.php');
define('CSV_FILE', '/../data/files/prospects.csv');
require __DIR__ . '/../../Application/Autoload/Loader.php';
Application\Autoload\Loader::init(__DIR__ . '/..');After that, we set up a try {...} catch () {...} block, which catches Throwable. This allows us to catch both exceptions and errors:
try {
// code goes here
} catch (Throwable $e) {
echo $e->getMessage();
}Inside the try {...} catch () {...} block we get an instance of the connection and large file iterator classes:
$connection = new Application\Database\Connection(
include __DIR__ . DB_CONFIG_FILE);
$iterator = (new Application\Iterator\LargeFile(__DIR__ . CSV_FILE))
->getIterator('Csv');We then take advantage of the PDO prepare/execute functionality. The SQL for the prepared statement uses ? to represent values that are supplied in a loop:
$sql = 'INSERT INTO `prospects` ' . '(`id`,`first_name`,`last_name`,`address`,`city`,`state_province`,' . '`postal_code`,`phone`,`country`,`email`,`status`,`budget`,`last_updated`) ' . ' VALUES (?,?,?,?,?,?,?,?,?,?,?,?,?)'; $statement = $connection->pdo->prepare($sql);
We then use foreach() to loop through the file iterator. Each yield statement produces an array of values that represents a row in the database. We can then use these values with PDOStatement::execute() to execute the prepared statement, inserting the row of values into the database:
foreach ($iterator as $row) {
echo implode(',', $row) . PHP_EOL;
$statement->execute($row);
}You can then examine the database to verify that the data was successfully inserted.
Getting a list of files in a directory is extremely easy. Traditionally, developers have used the glob() function for this purpose. To recursively get a list of all files and directories from a specific point in a directory tree is more problematic. This recipe takes advantage of an (SPL Standard PHP Library) class RecursiveDirectoryIterator, which will serve this purpose admirably.
What this class does is to parse the directory tree, finding the first child, then it follows the branches, until there are no more children, and then it stops! Unfortunately this is not what we want. Somehow we need to get the RecursiveDirectoryIterator to continue parsing every tree and branch, from a given starting point, until there are no more files or directories. It so happens there is a marvelous class, RecursiveIteratorIterator, that does exactly that. By wrapping RecursiveDirectoryIterator inside RecursiveIteratorIterator, we accomplish a complete traversal of any directory tree.
Application\Iterator\Directory class that defines the appropriate properties and constants and uses external classes:namespace Application\Iterator;
use Exception;
use RecursiveDirectoryIterator;
use RecursiveIteratorIterator;
use RecursiveRegexIterator;
use RegexIterator;
class Directory
{
const ERROR_UNABLE = 'ERROR: Unable to read directory';
protected $path;
protected $rdi;
// recursive directory iteratorRecursiveDirectoryIterator instance inside RecursiveIteratorIterator based on a directory path:public function __construct($path)
{
try {
$this->rdi = new RecursiveIteratorIterator(
new RecursiveDirectoryIterator($path),
RecursiveIteratorIterator::SELF_FIRST);
} catch (\Throwable $e) {
$message = __METHOD__ . ' : ' . self::ERROR_UNABLE . PHP_EOL;
$message .= strip_tags($path) . PHP_EOL;
echo $message;
exit;
}
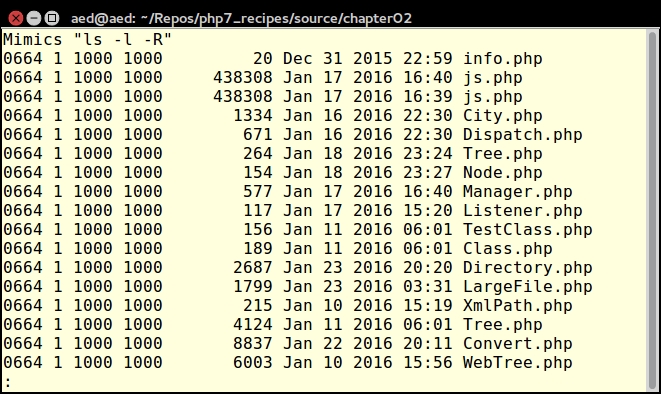
}ls -l -R command. Notice that we use the yield keyword, effectively making this method into a Generator, which can then be called from the outside. Each object produced by the directory iteration is an SPL FileInfo object, which can give us useful information on the file. Here is how this method might look:public function ls($pattern = NULL)
{
$outerIterator = ($pattern)
? $this->regex($this->rdi, $pattern)
: $this->rdi;
foreach($outerIterator as $obj){
if ($obj->isDir()) {
if ($obj->getFileName() == '..') {
continue;
}
$line = $obj->getPath() . PHP_EOL;
} else {
$line = sprintf('%4s %1d %4s %4s %10d %12s %-40s' . PHP_EOL,
substr(sprintf('%o', $obj->getPerms()), -4),
($obj->getType() == 'file') ? 1 : 2,
$obj->getOwner(),
$obj->getGroup(),
$obj->getSize(),
date('M d Y H:i', $obj->getATime()),
$obj->getFileName());
}
yield $line;
}
}RegexIterator class:protected function regex($iterator, $pattern)
{
$pattern = '!^.' . str_replace('.', '\\.', $pattern) . '$!';
return new RegexIterator($iterator, $pattern);
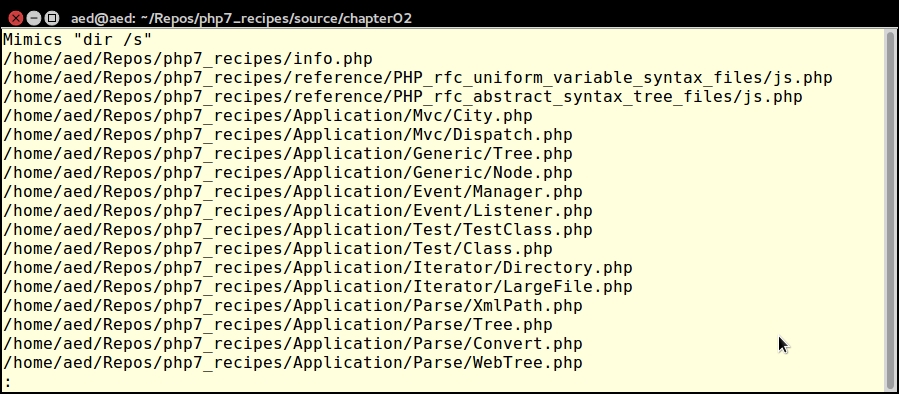
}dir /s command:public function dir($pattern = NULL)
{
$outerIterator = ($pattern)
? $this->regex($this->rdi, $pattern)
: $this->rdi;
foreach($outerIterator as $name => $obj){
yield $name . PHP_EOL;
}
}
}First of all, we take advantage of the autoloading class defined in Chapter 1, Building a Foundation, to obtain an instance of Application\Iterator\Directory, defining a calling program, chap_02_recursive_directory_iterator.php:
define('EXAMPLE_PATH', realpath(__DIR__ . '/../'));
require __DIR__ . '/../Application/Autoload/Loader.php';
Application\Autoload\Loader::init(__DIR__ . '/..');
$directory = new Application\Iterator\Directory(EXAMPLE_PATH);Then, in a try {...} catch () {...} block, we make a call to our two methods, using an example directory path:
try {
echo 'Mimics "ls -l -R" ' . PHP_EOL;
foreach ($directory->ls('*.php') as $info) {
echo $info;
}
echo 'Mimics "dir /s" ' . PHP_EOL;
foreach ($directory->dir('*.php') as $info) {
echo $info;
}
} catch (Throwable $e) {
echo $e->getMessage();
}The output for ls() will look something like this:
The output for dir() will appear as follows:
In this chapter we will cover the following topics:
In this chapter we will consider recipes that take advantage of PHP's functional programming capabilities. Functional, or procedural, programming is the traditional way PHP code was written prior to the introduction of the first implementation of object-oriented programming (OOP) in PHP version 4. Functional programming is a programming paradigm—a style of building the structure and elements of computer programs—that treats computation as the evaluation of mathematical functions and avoids changing-state and mutable data. This file can then be included in any future scripts, allowing the functions that are defined to be called at will.
The most difficult aspect is deciding how to break up programming logic into functions. The mechanics of developing a function in PHP, on the other hand, are quite easy. Just use the function keyword, give it a name, and follow it with parentheses.
function someName ($parameter)
{
$result = 'INIT';
// one or more statements which do something
// to affect $result
$result .= ' and also ' . $parameter;
return $result;
}NULL:function someOtherName ($requiredParam, $optionalParam = NULL)
{
$result = 0;
$result += $requiredParam;
$result += $optionalParam ?? 0;
return $result;
}... followed by a variable name. All parameters supplied will appear as an array in the variable:function someInfinite(...$params)
{
// any params passed go into an array $params
return var_export($params, TRUE);
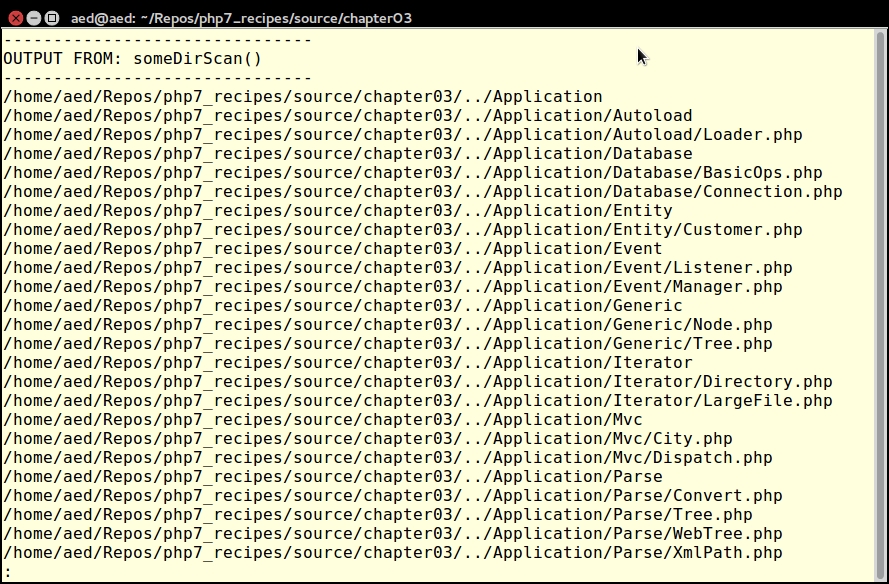
}function someDirScan($dir)
{
// uses "static" to retain value of $list
static $list = array();
// get a list of files and directories for this path
$list = glob($dir . DIRECTORY_SEPARATOR . '*');
// loop through
foreach ($list as $item) {
if (is_dir($item)) {
$list = array_merge($list, someDirScan($item));
}
}
return $list;
}Usage of the static keyword inside functions has been in the language for more than 12 years. What static does is to initialize the variable once (that is, at the time static is declared), and then retain the value between function calls within the same request.
If you need to retain the value of a variable between HTTP requests, make sure the PHP session has been started and store the value in $_SESSION.
use keyword. The following examples are placed in separate namespaces. Notice that even though the function name is the same, there is no conflict as they are not visible to each other.someFunction() in namespace Alpha. We save this to a separate PHP file, chap_03_developing_functions_namespace_alpha.php:<?php
namespace Alpha;
function someFunction()
{
echo __NAMESPACE__ . ':' . __FUNCTION__ . PHP_EOL;
}someFunction() in namespace Beta. We save this to a separate PHP file, chap_03_developing_functions_namespace_beta.php:<?php
namespace Beta;
function someFunction()
{
echo __NAMESPACE__ . ':' . __FUNCTION__ . PHP_EOL;
}someFunction() by prefixing the function name with the namespace name:include (__DIR__ . DIRECTORY_SEPARATOR
. 'chap_03_developing_functions_namespace_alpha.php');
include (__DIR__ . DIRECTORY_SEPARATOR
. 'chap_03_developing_functions_namespace_beta.php');
echo Alpha\someFunction();
echo Beta\someFunction();Best practice
It is considered best practice to place function libraries (and classes too!) into separate files: one file per namespace, and one class or function library per file.
It is possible to define many classes or function libraries in a single namespace. The only reason you would develop into a separate namespace is if you want to foster logical separation of functionality.
It is considered best practice to place all logically related functions into a separate PHP file. Create a file called chap_03_developing_functions_library.php and place these functions (described previously) inside:
someName()someOtherName()someInfinite()someDirScan()someTypeHint()This file is then included in the code that uses these functions.
include (__DIR__ . DIRECTORY_SEPARATOR . 'chap_03_developing_functions_library.php');
To call the someName() function, use the name and supply the parameter.
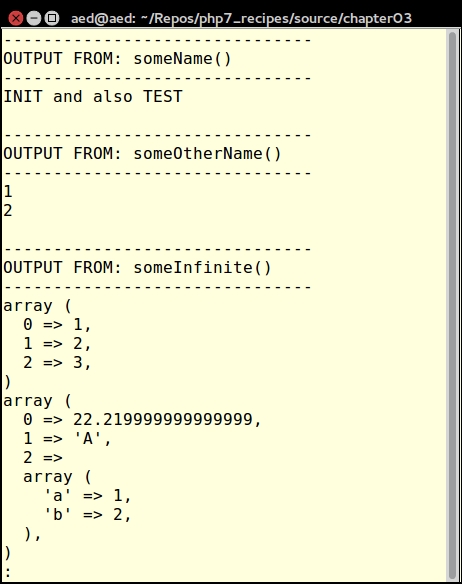
echo someName('TEST'); // returns "INIT and also TEST"You can call the someOtherName() function using one or two parameters, as shown here:
echo someOtherName(1); // returns 1 echo someOtherName(1, 1); // returns 2
The someInfinite() function accepts an infinite (or variable) number of parameters. Here are a couple of examples calling this function:
echo someInfinite(1, 2, 3); echo PHP_EOL; echo someInfinite(22.22, 'A', ['a' => 1, 'b' => 2]);
The output looks like this:
We can call someInfinite() as follows:
foreach (someDirScan(__DIR__ . DIRECTORY_SEPARATOR . '..') as $item) {
echo $item . PHP_EOL;
}
In many cases when developing functions, you might reuse the same library of functions in other projects. Also, if you work with a team, your code might be used by other developers. In order to control the use of your code, it might be appropriate to make use of a type hint. This involves specifying the data type your function expects for that particular parameter.
TypeError is thrown. The following example requires an array, an instance of DateTime, and an anonymous function:function someTypeHint(Array $a, DateTime $t, Callable $c)
{
$message = '';
$message .= 'Array Count: ' . count($a) . PHP_EOL;
$message .= 'Date: ' . $t->format('Y-m-d') . PHP_EOL;
$message .= 'Callable Return: ' . $c() . PHP_EOL;
return $message;
}You don't have to provide a type hint for every single parameter. Use this technique only where supplying a different data type would have a negative effect on the processing of your function. As an example, if your function uses a foreach() loop, if you do not supply an array, or something which implements Traversable, an error will be generated.
declare() directive is made, scalar (that is, integer, float, boolean, and string) type hints are allowed. Another function demonstrates how this is accomplished. At the top of the code library file which contains the function in which you wish to use scalar type hinting, add this declare() directive just after the opening PHP tag:declare(strict_types=1);
function someScalarHint(bool $b, int $i, float $f, string $s)
{
return sprintf("\n%20s : %5s\n%20s : %5d\n%20s " .
": %5.2f\n%20s : %20s\n\n",
'Boolean', ($b ? 'TRUE' : 'FALSE'),
'Integer', $i,
'Float', $f,
'String', $s);
}TypeError will be thrown! However, the incoming value will automatically be converted to the boolean data type once passed into the function. If you pass any data type other than scalar (that is, array or object) a TypeError will be thrown. Here is an example of a function that defines a boolean data type. Note that the return value will be automatically converted to a boolean:function someBoolHint(bool $b)
{
return $b;
}First of all, you can place the three functions, someTypeHint(), someScalarHint(), and someBoolHint(), into a separate file to be included. For this example, we will name the file chap_03_developing_functions_type_hints_library.php. Don't forget to add declare(strict_types=1) at the top!
In our calling code, you would then include the file:
include (__DIR__ . DIRECTORY_SEPARATOR . 'chap_03_developing_functions_type_hints_library.php');
To test someTypeHint(), call the function twice, once with the correct data types, and the second time with incorrect types. This will throw a TypeError, however, so you will need to wrap the function calls in a try { ... } catch () { ...} block:
try {
$callable = function () { return 'Callback Return'; };
echo someTypeHint([1,2,3], new DateTime(), $callable);
echo someTypeHint('A', 'B', 'C');
} catch (TypeError $e) {
echo $e->getMessage();
echo PHP_EOL;
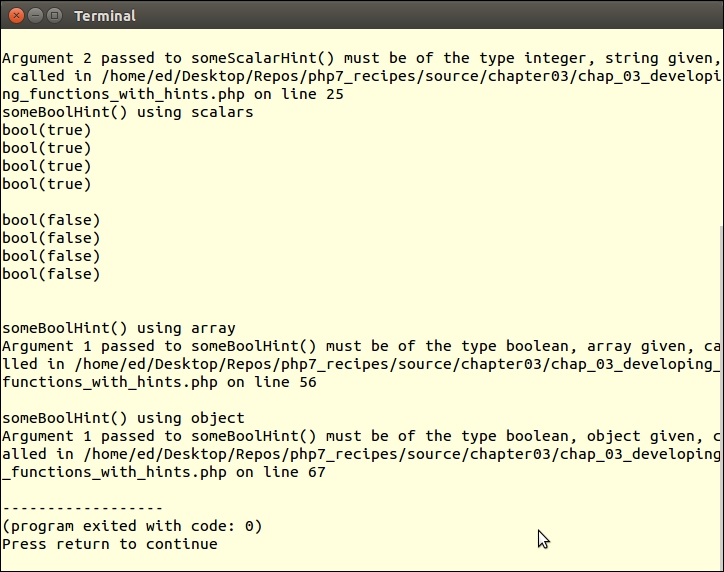
}As you can see from the output shown at the end of this sub-section, when passing the correct data types there is no problem. When passing the incorrect types, a TypeError is thrown.
In PHP 7, certain errors have been converted into an Error class, which is processed in a somewhat similar manner to an Exception. This means you can catch an Error. TypeError is a specific descendant of Error that is thrown when incorrect data types are passed to functions.
All PHP 7 Error classes implement the Throwable interface, as does the Exception class. If you are not sure if you need to catch an Error or an Exception, you can add a block which catches Throwable.
Next you can test someScalarHint(), calling it twice with correct and incorrect values, wrapping the calls in a try { ... } catch () { ...} block:
try {
echo someScalarHint(TRUE, 11, 22.22, 'This is a string');
echo someScalarHint('A', 'B', 'C', 'D');
} catch (TypeError $e) {
echo $e->getMessage();
}As expected, the first call to the function works, and the second throws a TypeError.
When type hinting for boolean values, any scalar value passed will not cause a TypeError to be thrown! Instead, the value will be interpreted into its boolean equivalent. If you subsequently return this value, the data type will be changed to boolean.
To test this, call the someBoolHint() function defined previously, and pass any scalar value in as an argument. The var_dump() method reveals that the data type is always boolean:
try {
// positive results
$b = someBooleanHint(TRUE);
$i = someBooleanHint(11);
$f = someBooleanHint(22.22);
$s = someBooleanHint('X');
var_dump($b, $i, $f, $s);
// negative results
$b = someBooleanHint(FALSE);
$i = someBooleanHint(0);
$f = someBooleanHint(0.0);
$s = someBooleanHint('');
var_dump($b, $i, $f, $s);
} catch (TypeError $e) {
echo $e->getMessage();
}If you now try the same function call, but pass in a non-scalar data type, a TypeError is thrown:
try {
$a = someBoolHint([1,2,3]);
var_dump($a);
} catch (TypeError $e) {
echo $e->getMessage();
}
try {
$o = someBoolHint(new stdClass());
var_dump($o);
} catch (TypeError $e) {
echo $e->getMessage();
}
PHP 7 allows you to specify a data type for the return value of a function. Unlike scalar type hinting, however, you don't need to add any special declarations.
function returnsString(DateTime $date, $format) : string
{
return $date->format($format);
}$a, $b, and $c are added together to produce a single sum, which is returned. Normally you would expect the return value to be a numeric data type. In this case, however, the return data type is declared as string, which overrides PHP's type-juggling process:function convertsToString($a, $b, $c) : string
return $a + $b + $c;
}DateTime, part of the PHP DateTime extension:function makesDateTime($year, $month, $day) : DateTime
{
$date = new DateTime();
$date->setDate($year, $month, $day);
return $date;
}The makesDateTime() function would be a potential candidate for scalar type hinting. If $year, $month, or $day are not integers, a Warning is generated when setDate() is called. If you use scalar type hinting, and the wrong data types are passed, a TypeError is thrown. Although it really doesn't matter whether a warning is generated or a TypeError is thrown, at least the TypeError will cause the errant developer who is misusing your code to sit up and take notice!
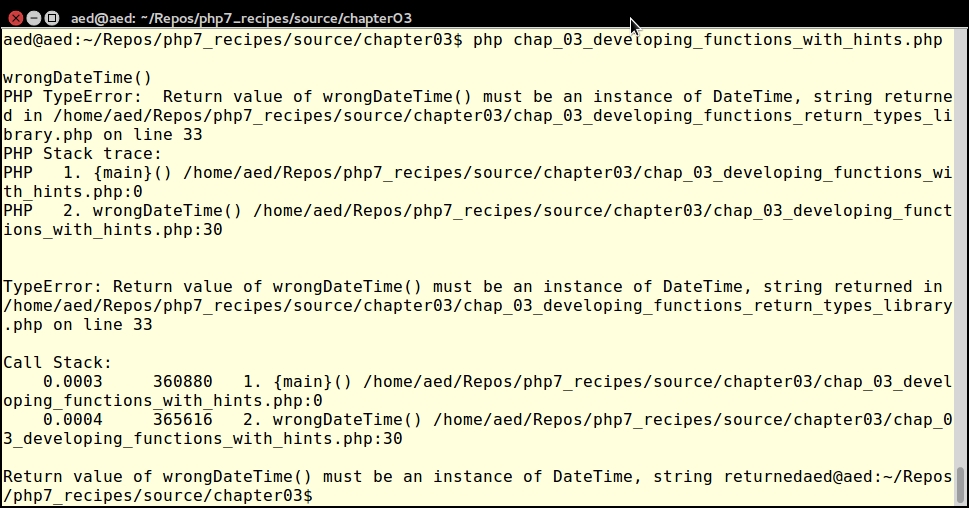
TypeError will be thrown at runtime. This function assigns a return type of DateTime, but returns a string instead. A TypeError will be thrown, but not until runtime, when the PHP engine detects the discrepancy:function wrongDateTime($year, $month, $day) : DateTime
{
return date($year . '-' . $month . '-' . $day);
}First, place the functions mentioned previously into a library file called chap_03_developing_functions_return_types_library.php. This file needs to be included in the chap_03_developing_functions_return_types.php script that calls these functions:
include (__DIR__ . '/chap_03_developing_functions_return_types_library.php');
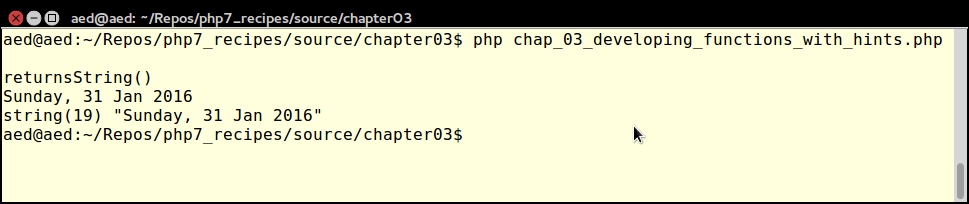
Now you can call returnsString(), supplying a DateTime instance and a format string:
$date = new DateTime(); $format = 'l, d M Y'; $now = returnsString($date, $format); echo $now . PHP_EOL; var_dump($now);
As expected, the output is a string:
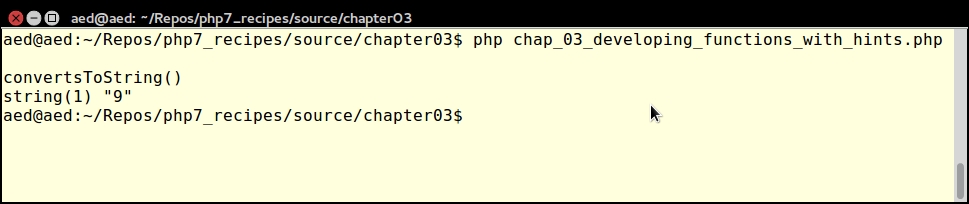
Now you can call convertsToString() and supply three integers as arguments. Notice that the return type is string:
echo "\nconvertsToString()\n"; var_dump(convertsToString(2, 3, 4));
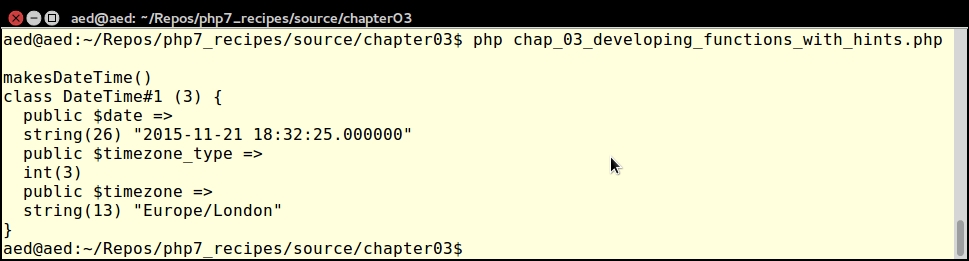
To demonstrate that, you can assign a class as a return value, call makesDateTime() with three integer parameters:
echo "\nmakesDateTime()\n"; $d = makesDateTime(2015, 11, 21); var_dump($d);
Finally, call wrongDateTime() with three integer parameters:
try {
$e = wrongDateTime(2015, 11, 21);
var_dump($e);
} catch (TypeError $e) {
echo $e->getMessage();
}Notice that a TypeError is thrown at runtime:
PHP 7.1 adds a new return value type, void. This is used when you do not wish to return any value from the function. For more information, please refer to https://wiki.php.net/rfc/void_return_type.
An iterator is a special type of class that allows you to traverse a container or list. The keyword here is traverse. What this means is that the iterator provides the means to go through a list, but it does not perform the traversal itself.
The SPL provides a rich assortment of generic and specialized iterators designed for different contexts. The ArrayIterator, for example, is designed to allow object-oriented traversal of arrays. The DirectoryIterator is designed for filesystem scanning.
Certain SPL iterators are designed to work with others, and add value. Examples include FilterIterator and LimitIterator. The former gives you the ability to remove unwanted values from the parent iterator. The latter provides a pagination capability whereby you can designate how many items to traverse along with an offset that determines where to start.
Finally, there are a series of recursive iterators, which allow you to repeatedly call the parent iterator. An example would be RecursiveDirectoryIterator which scans a directory tree all the way from a starting point to the last possible subdirectory.
ArrayIterator class. It's extremely easy to use. All you need to do is to supply an array as an argument to the constructor. After that you can use any of the methods that are standard to all SPL-based iterators, such as current(), next(), and so on.$iterator = new ArrayIterator($array);
<ul> and <li> tags:function htmlList($iterator)
{
$output = '<ul>';
while ($value = $iterator->current()) {
$output .= '<li>' . $value . '</li>';
$iterator->next();
}
$output .= '</ul>';
return $output;
}ArrayIterator instance into a simple foreach() loop:function htmlList($iterator)
{
$output = '<ul>';
foreach($iterator as $value) {
$output .= '<li>' . $value . '</li>';
}
$output .= '</ul>';
return $output;
}CallbackFilterIterator is a great way to add value to any existing iterator you might be using. It allows you to wrap any existing iterator and screen the output. In this example we'll define fetchCountryName(), which iterates through a database query which produces a list of country names. First, we define an ArrayIterator instance from a query that uses the Application\Database\Connection class defined in Chapter 1, Building a Foundation:function fetchCountryName($sql, $connection)
{
$iterator = new ArrayIterator();
$stmt = $connection->pdo->query($sql);
while($row = $stmt->fetch(PDO::FETCH_ASSOC)) {
$iterator->append($row['name']);
}
return $iterator;
}nameFilterIterator(), which accepts a partial country name as an argument along with the ArrayIterator instance:function nameFilterIterator($innerIterator, $name)
{
if (!$name) return $innerIterator;
$name = trim($name);
$iterator = new CallbackFilterIterator($innerIterator,
function($current, $key, $iterator) use ($name) {
$pattern = '/' . $name . '/i';
return (bool) preg_match($pattern, $current);
}
);
return $iterator;
}LimitIterator adds a basic pagination aspect to your applications. To use this iterator, you only need to supply the parent iterator, an offset, and a limit. LimitIterator will then only produce a subset of the entire data set starting at the offset. Taking the same example mentioned in step 2, we'll paginate the results coming from our database query. We can do this quite simply by wrapping the iterator produced by the fetchCountryName() method inside a LimitIterator instance:$pagination = new LimitIterator(fetchCountryName( $sql, $connection), $offset, $limit);
ArrayIterator is processed by a FilterIterator, which in turn is limited by a LimitIterator. First we set up an instance of ArrayIterator:$i = new ArrayIterator($a);
ArrayIterator into a FilterIterator instance. Note that we are using the new PHP 7 anonymous class feature. In this case the anonymous class extends FilterIterator and overrides the accept() method, allowing only letters with even-numbered ASCII codes:$f = new class ($i) extends FilterIterator {
public function accept()
{
$current = $this->current();
return !(ord($current) & 1);
}
};FilterIterator instance as an argument to LimitIterator, and provide an offset (2 in this example) and a limit (6 in this example):$l = new LimitIterator($f, 2, 6);
range('A', 'Z'):function showElements($iterator)
{
foreach($iterator as $item) echo $item . ' ';
echo PHP_EOL;
}
$a = range('A', 'Z');
$i = new ArrayIterator($a);
showElements($i);FilterIterator on top of an ArrayIterator:$f = new class ($i) extends FilterIterator {
public function accept()
{
$current = $this->current();
return !(ord($current) & 1);
}
};
showElements($f);F H J L N P, which demonstrates a LimitIterator that consumes a FilterIterator, which in turn consumes an ArrayIterator. The output of these three examples is as follows:$l = new LimitIterator($f, 2, 6); showElements($l);
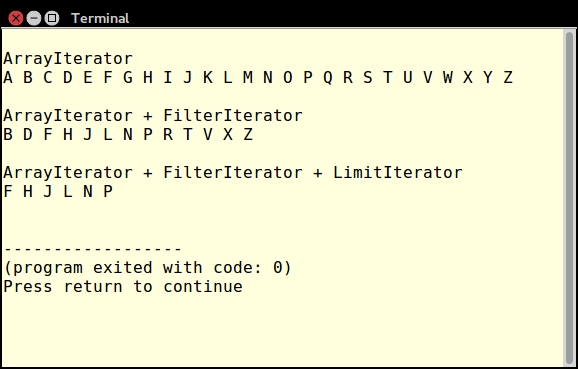
ArrayIterator instance populated with data from the query:function fetchAllAssoc($sql, $connection)
{
$iterator = new ArrayIterator();
$stmt = $connection->pdo->query($sql);
while($row = $stmt->fetch(PDO::FETCH_ASSOC)) {
$iterator->append($row);
}
return $iterator;
}ArrayIterator instance inside RecursiveArrayIterator. Unfortunately, this approach only performs a shallow iteration, and doesn't give us what we want: an iteration through all elements of the multi-dimensional array that is returned from a database query:$iterator = fetchAllAssoc($sql, $connection); $shallow = new RecursiveArrayIterator($iterator);
RecursiveIteratorIterator.RecursiveArrayIterator class to work overtime and perform a deep iteration through all levels of the array:$deep = new RecursiveIteratorIterator($shallow);
As a practical example, you can develop a test script which implements filtering and pagination using iterators. For this illustration, you could call the chap_03_developing_functions_filtered_and_paginated.php test code file.
First of all, following best practices, place the functions described above into an include file called chap_03_developing_functions_iterators_library.php. In the test script, be sure to include this file.
The data source is a table called iso_country_codes, which contains ISO2, ISO3, and country names. The database connection could be in a config/db.config.php file. You could also include the Application\Database\Connection class discussed in the previous chapter:
define('DB_CONFIG_FILE', '/../config/db.config.php');
define('ITEMS_PER_PAGE', [5, 10, 15, 20]);
include (__DIR__ . '/chap_03_developing_functions_iterators_library.php');
include (__DIR__ . '/../Application/Database/Connection.php');Next, you can process input parameters for the country name and the number of items per page. The current page number will start at 0 and can be incremented (next page) or decremented (previous page):
$name = strip_tags($_GET['name'] ?? ''); $limit = (int) ($_GET['limit'] ?? 10); $page = (int) ($_GET['page'] ?? 0); $offset = $page * $limit; $prev = ($page > 0) ? $page - 1 : 0; $next = $page + 1;
Now you're ready to fire up the database connection and run a simple SELECT query. This should be placed in a try {} catch {} block. You can then place the iterators to be stacked inside the try {} block:
try {
$connection = new Application\Database\Connection(
include __DIR__ . DB_CONFIG_FILE);
$sql = 'SELECT * FROM iso_country_codes';
$arrayIterator = fetchCountryName($sql, $connection);
$filteredIterator = nameFilterIterator($arrayIterator, $name);
$limitIterator = pagination(
$filteredIterator, $offset, $limit);
} catch (Throwable $e) {
echo $e->getMessage();
}Now we're ready for the HTML. In this simple example we present a form that lets the user select the number of items per page and the country name:
<form>
Country Name:
<input type="text" name="name"
value="<?= htmlspecialchars($name) ?>">
Items Per Page:
<select name="limit">
<?php foreach (ITEMS_PER_PAGE as $item) : ?>
<option<?= ($item == $limit) ? ' selected' : '' ?>>
<?= $item ?></option>
<?php endforeach; ?>
</select>
<input type="submit" />
</form>
<a href="?name=<?= $name ?>&limit=<?= $limit ?>
&page=<?= $prev ?>">
<< PREV</a>
<a href="?name=<?= $name ?>&limit=<?= $limit ?>
&page=<?= $next ?>">
NEXT >></a>
<?= htmlList($limitIterator); ?>The output will look something like this:
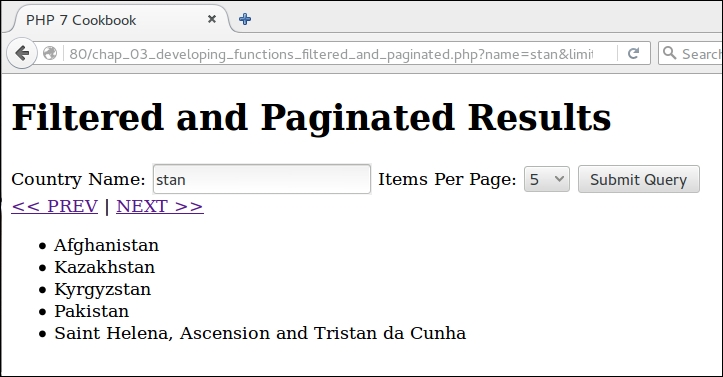
Finally, in order to test the recursive iteration of the country database lookup, you will need to include the iterator's library file, as well as the Application\Database\Connection class:
define('DB_CONFIG_FILE', '/../config/db.config.php');
include (__DIR__ . '/chap_03_developing_functions_iterators_library.php');
include (__DIR__ . '/../Application/Database/Connection.php');As before, you should wrap your database query in a try {} catch {} block. You can then place the code to test the recursive iteration inside the try {} block:
try {
$connection = new Application\Database\Connection(
include __DIR__ . DB_CONFIG_FILE);
$sql = 'SELECT * FROM iso_country_codes';
$iterator = fetchAllAssoc($sql, $connection);
$shallow = new RecursiveArrayIterator($iterator);
foreach ($shallow as $item) var_dump($item);
$deep = new RecursiveIteratorIterator($shallow);
foreach ($deep as $item) var_dump($item);
} catch (Throwable $e) {
echo $e->getMessage();
}Here is what you can expect to see in terms of output from RecursiveArrayIterator:
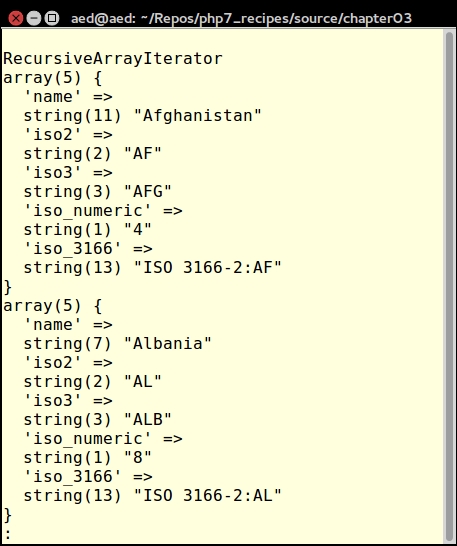
Here is the output after using RecursiveIteratorIterator:
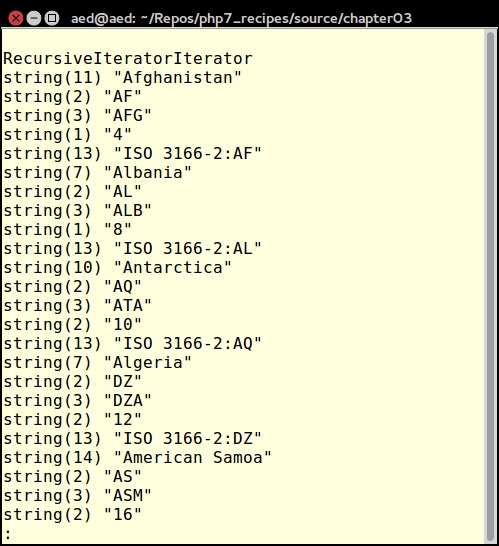
In the preceding set of recipes we demonstrated the use of iterators provided in the PHP 7 SPL. But what if this set doesn't provide you with what is needed for a given project? One solution would be to develop a function that, instead of building an array that is then returned, uses the yield keyword to return values progressively by way of iteration. Such a function is referred to as a generator. In fact, in the background, the PHP engine will automatically convert your function into a special built-in class called Generator.
There are several advantages to this approach. The main benefit is seen when you have a large container to traverse (that is, parsing a massive file). The traditional approach has been to build up an array, and then return that array. The problem with this is that you are effectively doubling the amount of memory required! Also, performance is affected in that results are only achieved once the final array has been returned.
ArrayIterator, FilterIterator, and LimitIterator.filteredResultsGenerator() function. We then calculate the offset based on the page number and limit (that is, number of items per page). Next, we loop through the array, apply the filter, and continue the loop if the offset has not yet been reached, or break if the limit has been reached:function filteredResultsGenerator(array $array, $filter, $limit = 10, $page = 0)
{
$max = count($array);
$offset = $page * $limit;
foreach ($array as $key => $value) {
if (!stripos($value, $filter) !== FALSE) continue;
if (--$offset >= 0) continue;
if (--$limit <= 0) break;
yield $value;
}
}yield keyword. The effect of this keyword is to signal the PHP engine to produce a Generator instance and encapsulate the code.To demonstrate the use of the filteredResultsGenerator() function we'll have you implement a web application that scans a web page and produces a filtered and paginated list of URLs hoovered from HREF attributes.
First you need to add the code for the filteredResultsGenerator() function to the library file used in the previous recipe, then place the functions described previously into an include file, chap_03_developing_functions_iterators_library.php.
Next, define a test script, chap_03_developing_functions_using_generator.php, that includes both the function library as well as the file that defines Application\Web\Hoover, described in Chapter 1, Building a Foundation:
include (__DIR__ . DIRECTORY_SEPARATOR . 'chap_03_developing_functions_iterators_library.php'); include (__DIR__ . '/../Application/Web/Hoover.php');
You will then need to gather input from the user regarding which URL to scan, what string to use as a filter, how many items per page, and the current page number.
$url = trim(strip_tags($_GET['url'] ?? '')); $filter = trim(strip_tags($_GET['filter'] ?? '')); $limit = (int) ($_GET['limit'] ?? 10); $page = (int) ($_GET['page'] ?? 0);
You are then in a position to define variables used in links for previous and next pages in the paginated list. Note that you could also apply a sanity check to make sure the next page doesn't go off the end of the result set. For the sake of brevity, such a sanity check was not applied in this example:
$next = $page + 1;
$prev = $page - 1;
$base = '?url=' . htmlspecialchars($url)
. '&filter=' . htmlspecialchars($filter)
. '&limit=' . $limit
. '&page=';We then need to create an Application\Web\Hoover instance and grab HREF attributes from the target URL:
$vac = new Application\Web\Hoover(); $list = $vac->getAttribute($url, 'href');
Finally, we define HTML output that renders an input form and runs our generator through the htmlList() function described previously:
<form> <table> <tr> <th>URL</th> <td> <input type="text" name="url" value="<?= htmlspecialchars($url) ?>"/> </td> </tr> <tr> <th>Filter</th> <td> <input type="text" name="filter" value="<?= htmlspecialchars($filter) ?>"/></td> </tr> <tr> <th>Limit</th> <td><input type="text" name="limit" value="<?= $limit ?>"/></td> </tr> <tr> <th> </th><td><input type="submit" /></td> </tr> <tr> <td> </td> <td> <a href="<?= $base . $prev ?>"><-- PREV | <a href="<?= $base . $next ?>">NEXT --></td> </tr> </table> </form> <hr> <?= htmlList(filteredResultsGenerator( $list, $filter, $limit, $page)); ?>
Here is an example of the output:
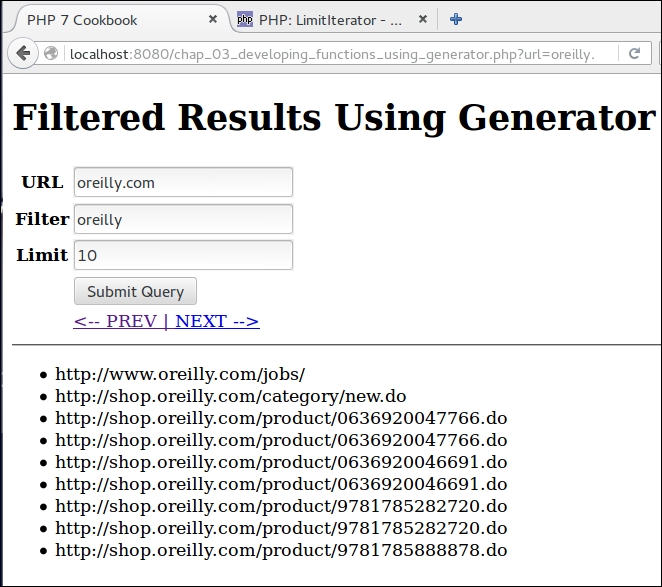
In this chapter we will cover:
In this chapter, we will consider recipes that take advantage of the object-oriented programming (OOP) capabilities available in PHP 7.0, 7.1, and above. Most of the OOP functionality available in PHP 7.x is also available in PHP 5.6. A new feature introduced in PHP 7 is support for anonymous classes. In PHP 7.1, you can modify the visibility of class constants.
Another radically new feature is the ability to catch certain types of error. This is discussed in greater detail in Chapter 13, Best Practices, Testing, and Debugging.
The traditional development approach is to place the class into its own file. Typically, classes contain logic that implements a single purpose. Classes are further broken down into self-contained functions which are referred to as methods. Variables defined inside classes are referred to as properties. It is recommended to develop a test class at the same time, a topic discussed in more detail in Chapter 13, Best Practices, Testing, and Debugging.
class, add a DocBlock. You can then define properties and methods. In this example, we define a class Test. It has a property $test, and a method getTest():<?php
declare(strict_types=1);
/**
* This is a demonstration class.
*
* The purpose of this class is to get and set
* a protected property $test
*
*/
class Test
{
protected $test = 'TEST';
/**
* This method returns the current value of $test
*
* @return string $test
*/
public function getTest() : string
{
return $this->test;
}
/**
* This method sets the value of $test
*
* @param string $test
* @return Test $this
*/
public function setTest(string $test)
{
$this->test = $test;
return $this;
}
}Best practice
It is considered best practice to name the file after the class. Although class names in PHP are not case sensitive, it is further considered best practice to use an uppercase letter for the first name of a class. You should not put executable code in a class definition file.
Each class should contain a DocBlock before the keyword class. In the DocBlock you should include a short description of the purpose of the class. Skip a line, and then include a more detailed description. You can also include @ tags such as @author, @license and so on. Each method should likewise be preceded by a DocBlock that identifies the purpose of the method, as well as its incoming parameters and return value.
NameAddress.php, which defines two classes, Name and Address:<?php
declare(strict_types=1);
class Name
{
protected $name = '';
public function getName() : string
{
return $this->name;
}
public function setName(string $name)
{
$this->name = $name;
return $this;
}
}
class Address
{
protected $address = '';
public function getAddress() : string
{
return $this->address;
}
public function setAddress(string $address)
{
$this->address = $address;
return $this;
}
}TwoClass.php, we define two classes, TwoClass and twoclass:<?php
class TwoClass
{
public function showOne()
{
return 'ONE';
}
}
// a fatal error will occur when the second class definition is parsed
class twoclass
{
public function showTwo()
{
return 'TWO';
}
}$this. Although permitted in PHP 7.0 and PHP 5.x, any of the following uses of $this will now generate an error as of PHP 7.1, if $this is used as:static variableglobal variabletry...catch blocksforeach()unset()$a = 'this'; echo $$a)stdClass which is built into PHP. stdClass allows you to define properties on the fly without having to define a discreet class that extends stdClass:$obj = new stdClass();
PDO::FETCH_OBJ. This mode returns instances of stdClass where the properties represent database table columns:$stmt = $connection->pdo->query($sql); $row = $stmt->fetch(PDO::FETCH_OBJ);
Take the example for the Test class shown in the preceding code snippet, and place the code in a file named Test.php. Create another file called chap_04_oop_defining_class_test.php. Add the following code:
require __DIR__ . '/Test.php';
$test = new Test();
echo $test->getTest();
echo PHP_EOL;
$test->setTest('ABC');
echo $test->getTest();
echo PHP_EOL;The output will show the initial value of the $test property, followed by the new value modified by calling setTest():
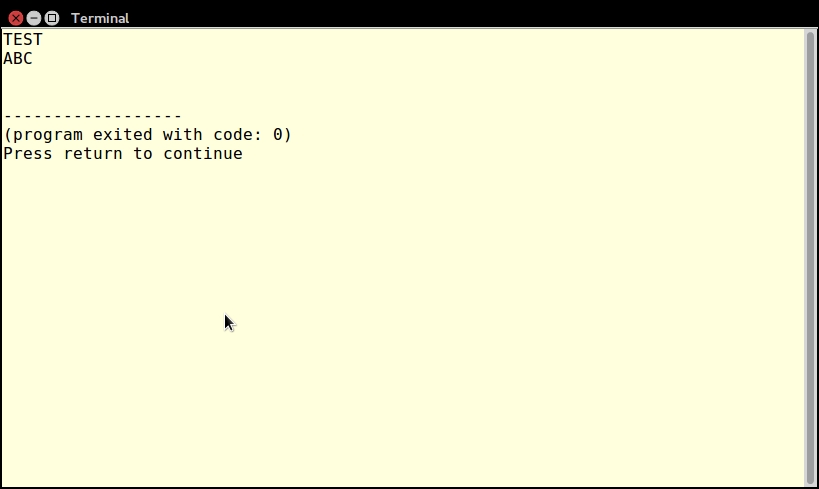
The next example has you define two classes, Name and Address in a single file NameAddress.php. You can call and use these two classes with the following code:
require __DIR__ . '/NameAddress.php';
$name = new Name();
$name->setName('TEST');
$addr = new Address();
$addr->setAddress('123 Main Street');
echo $name->getName() . ' lives at ' . $addr->getAddress();The output from this example is shown next:
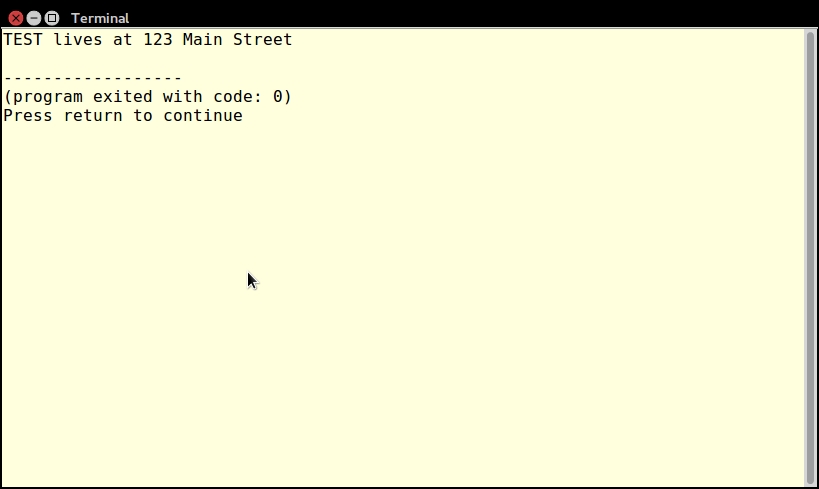
Step 3 also shows two class definitions in one file. In this case, however, the objective is to demonstrate that classnames in PHP are case-insensitive. Place the code into a file, TwoClass.php. When you try to include the file, an error is generated:
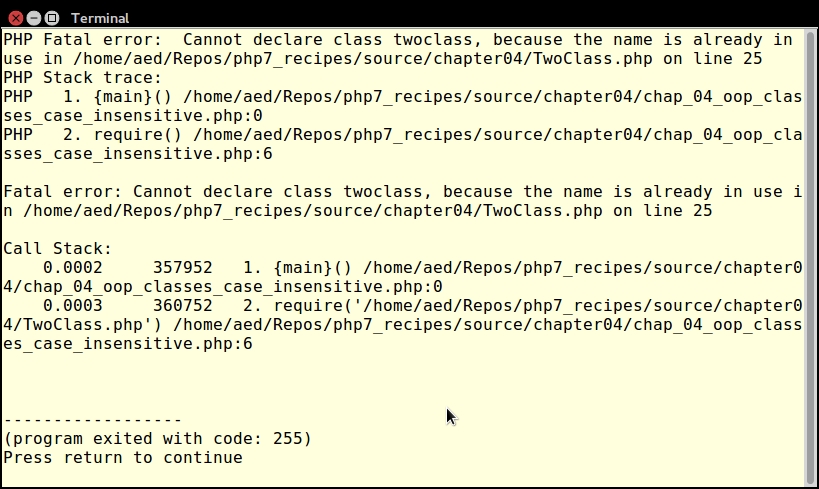
To demonstrate the direct use of stdClass, create an instance, assign a value to a property, and use var_dump()to display the results. To see how stdClass is used internally, use var_dump() to display the results of a PDO query where the fetch mode is set to FETCH_OBJ.
Enter the following code:
$obj = new stdClass(); $obj->test = 'TEST'; echo $obj->test; echo PHP_EOL; include (__DIR__ . '/../Application/Database/Connection.php'); $connection = new Application\Database\Connection( include __DIR__ . DB_CONFIG_FILE); $sql = 'SELECT * FROM iso_country_codes'; $stmt = $connection->pdo->query($sql); $row = $stmt->fetch(PDO::FETCH_OBJ); var_dump($row);
Here is the output:

For more information on refinements in PHP 7.1 on the keyword $this, please see https://wiki.php.net/rfc/this_var.
One of the primary reasons developers use OOP is because of its ability to re-use existing code, yet, at the same time, add or override functionality. In PHP, the keyword extends is used to establish a parent/child relationship between classes.
child class, use the keyword extends to set up inheritance. In the example that follows, the Customer class extends the Base class. Any instance of Customer will inherit visible methods and properties, in this case, $id, getId() and setId():class Base
{
protected $id;
public function getId()
{
return $this->id;
}
public function setId($id)
{
$this->id = $id;
}
}
class Customer extends Base
{
protected $name;
public function getName()
{
return $this->name;
}
public function setName($name)
{
$this->name = $name;
}
}abstract. In this example, the Base class defines as abstract the validate() method. The reason why it must be abstract is because it would be impossible to determine exactly how a child class would be validated from the perspective of the parent Base class:abstract class Base
{
protected $id;
public function getId()
{
return $this->id;
}
public function setId($id)
{
$this->id = $id;
}
public function validate();
}Member, which inherits from Customer. Customer, in turn, inherits from Base:class Base
{
protected $id;
public function getId()
{
return $this->id;
}
public function setId($id)
{
$this->id = $id;
}
}
class Customer extends Base
{
protected $name;
public function getName()
{
return $this->name;
}
public function setName($name)
{
$this->name = $name;
}
}
class Member extends Customer
{
protected $membership;
public function getMembership()
{
return $this->membership;
}
public function setMembership($memberId)
{
$this->membership = $memberId;
}
}test() function, shown in the following code snippet, requires an instance of the Base class as an argument. Any class within the line of inheritance can be accepted as an argument. Anything else passed to test() throws a TypeError:function test(Base $object)
{
return $object->getId();
}In the first bullet point, a Base class and a Customer class were defined. For the sake of demonstration, place these two class definitions in a single file, chap_04_oop_extends.php, and add the following code:
$customer = new Customer();
$customer->setId(100);
$customer->setName('Fred');
var_dump($customer);Note that the $id property and the getId() and setId() methods are inherited from the parent Base class into the child Customer class:
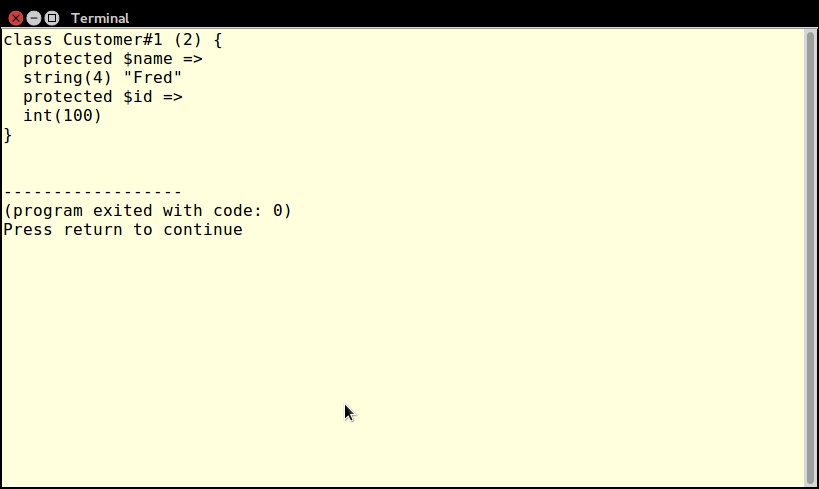
To illustrate the use of an abstract method, imagine that you wish to add some sort of validation capability to any class that extends Base. The problem is that there is no way to know what might be validated in the inherited classes. The only thing that is certain is that you must have a validation capability.
Take the same Base class mentioned in the preceding explanation and add a new method, validate(). Label the method as abstract, and do not define any code. Notice what happens when the child Customer class extends Base.
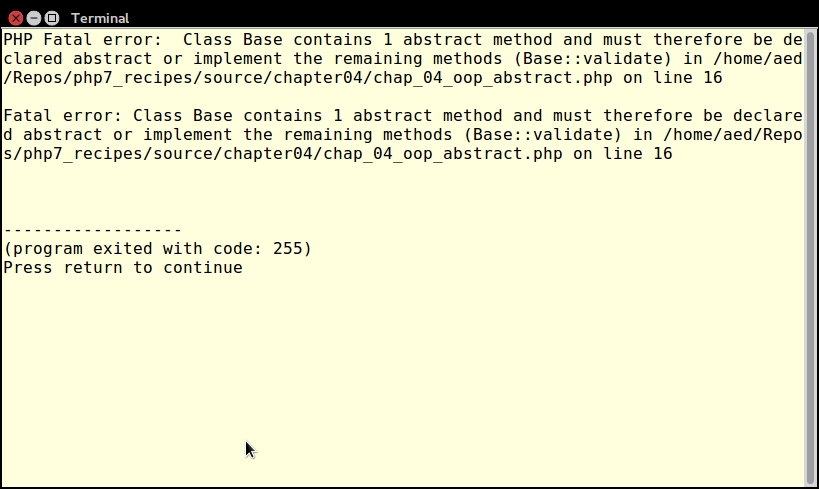
If you then label the Base class as abstract, but fail to define a validate() method in the child class, the same error will be generated. Finally, go ahead and implement the validate() method in a child Customer class:
class Customer extends Base
{
protected $name;
public function getName()
{
return $this->name;
}
public function setName($name)
{
$this->name = $name;
}
public function validate()
{
$valid = 0;
$count = count(get_object_vars($this));
if (!empty($this->id) &&is_int($this->id)) $valid++;
if (!empty($this->name)
&&preg_match('/[a-z0-9 ]/i', $this->name)) $valid++;
return ($valid == $count);
}
}You can then add the following procedural code to test the results:
$customer = new Customer();
$customer->setId(100);
$customer->setName('Fred');
echo "Customer [id]: {$customer->getName()}" .
. "[{$customer->getId()}]\n";
echo ($customer->validate()) ? 'VALID' : 'NOT VALID';
$customer->setId('XXX');
$customer->setName('$%£&*()');
echo "Customer [id]: {$customer->getName()}"
. "[{$customer->getId()}]\n";
echo ($customer->validate()) ? 'VALID' : 'NOT VALID';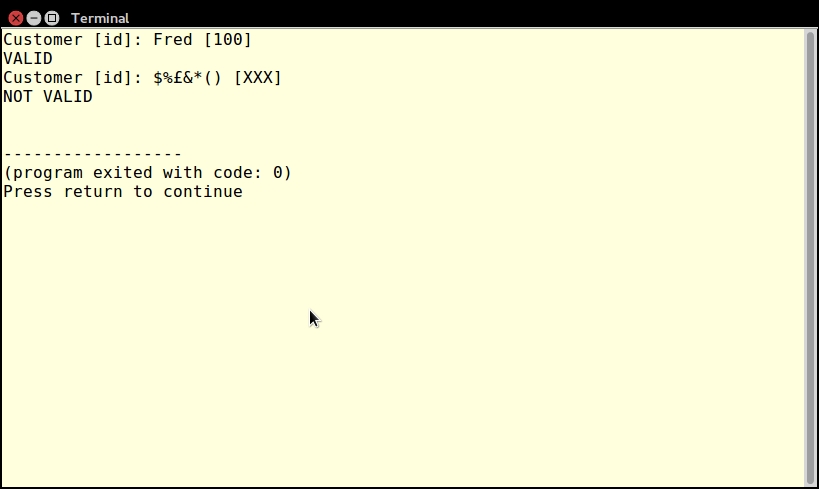
To show a single line of inheritance, add a new Member class to the first example of Base and Customer shown in the preceding step 1:
class Member extends Customer
{
protected $membership;
public function getMembership()
{
return $this->membership;
}
public function setMembership($memberId)
{
$this->membership = $memberId;
}
}Create an instance of Member, and notice, in the following code, that all properties and methods are available from every inherited class, even if not directly inherited:
$member = new Member();
$member->setId(100);
$member->setName('Fred');
$member->setMembership('A299F322');
var_dump($member);Here is the output:
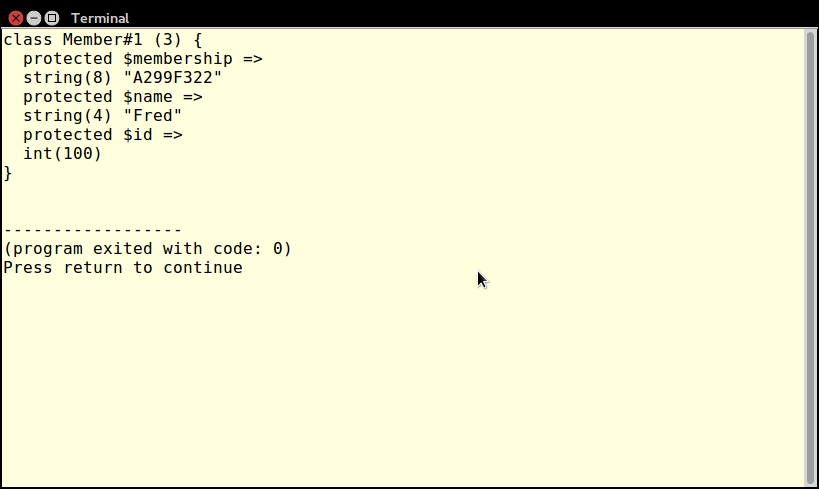
Now define a function, test(), which takes an instance of Base as an argument:
function test(Base $object)
{
return $object->getId();
}Notice that instances of Base, Customer, and Member are all acceptable as arguments:
$base = new Base(); $base->setId(100); $customer = new Customer(); $customer->setId(101); $member = new Member(); $member->setId(102); // all 3 classes work in test() echo test($base) . PHP_EOL; echo test($customer) . PHP_EOL; echo test($member) . PHP_EOL;
Here is the output:
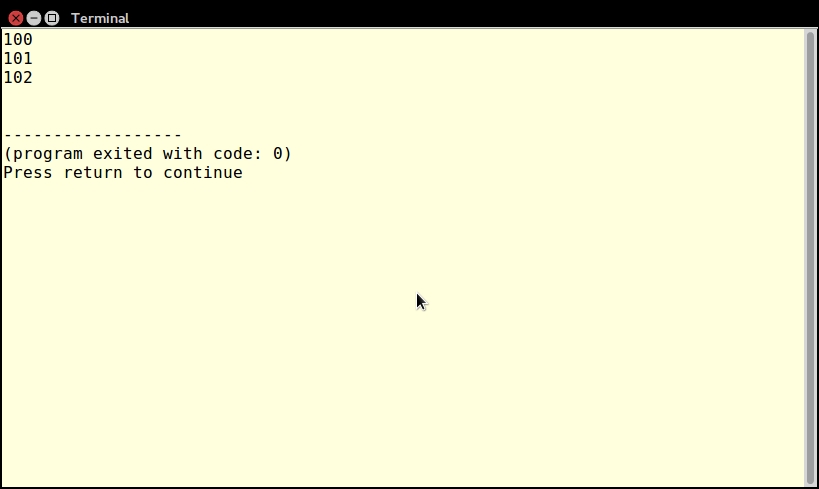
However, if you try to run test() with an object instance that is not in the line of inheritance, a TypeError is thrown:
class Orphan
{
protected $id;
public function getId()
{
return $this->id;
}
public function setId($id)
{
$this->id = $id;
}
}
try {
$orphan = new Orphan();
$orphan->setId(103);
echo test($orphan) . PHP_EOL;
} catch (TypeError $e) {
echo 'Does not work!' . PHP_EOL;
echo $e->getMessage();
}We can observe this in the following image:
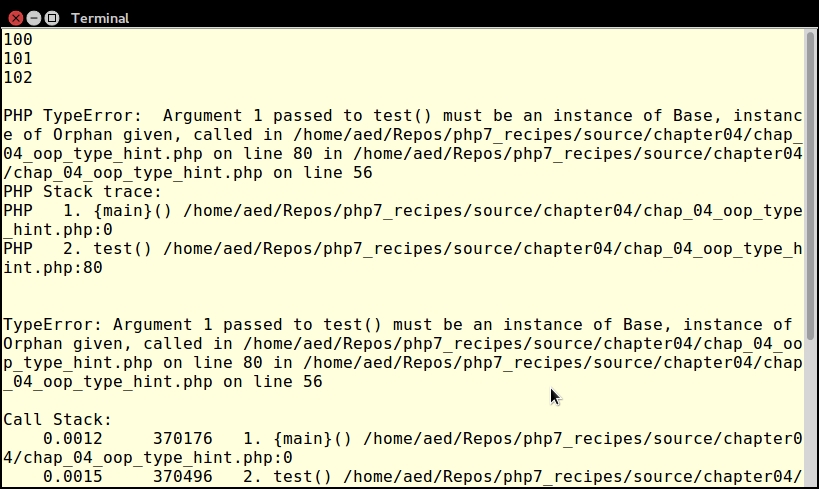
PHP lets you access properties or methods without having to create an instance of the class. The keyword used for this purpose is static.
static keyword after stating the visibility level when declaring an ordinary property or method. Use the self keyword to reference the property internally:class Test
{
public static $test = 'TEST';
public static function getTest()
{
return self::$test;
}
}self keyword will bind early, which will cause problems when accessing static information in child classes. If you absolutely need to access information from the child class, use the static keyword in place of self. This process is referred to as Late Static Binding.Child::getEarlyTest(), the output will be TEST. If, on the other hand, you run Child::getLateTest(), the output will be CHILD. The reason is that PHP will bind to the earliest definition when using self, whereas the latest binding is used for the static keyword:class Test2
{
public static $test = 'TEST2';
public static function getEarlyTest()
{
return self::$test;
}
public static function getLateTest()
{
return static::$test;
}
}
class Child extends Test2
{
public static $test = 'CHILD';
}factory() is defined which returns a PDO connection:public static function factory(
$driver,$dbname,$host,$user,$pwd,array $options = [])
{
$dsn = sprintf('%s:dbname=%s;host=%s',
$driver, $dbname, $host);
try {
return new PDO($dsn, $user, $pwd, $options);
} catch (PDOException $e) {
error_log($e->getMessage);
}
}You can reference static properties and methods using the class resolution operator "::". Given the Test class shown previously, if you run this code:
echo Test::$test; echo PHP_EOL; echo Test::getTest(); echo PHP_EOL;
You will see this output:
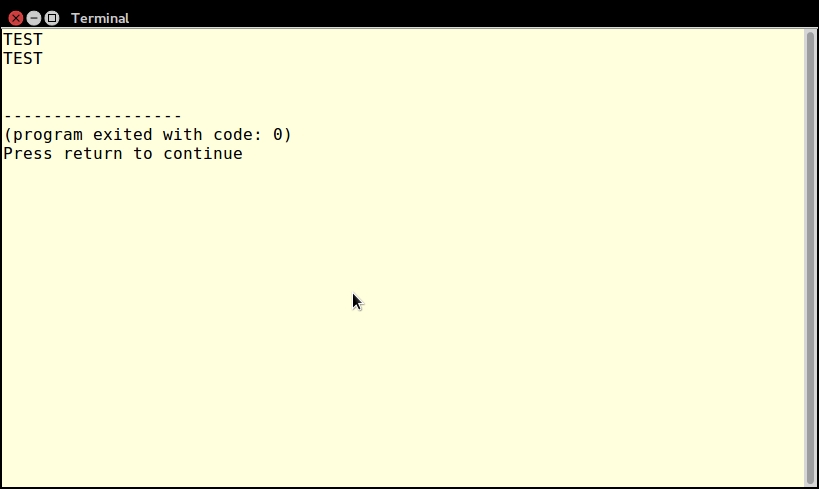
To illustrate Late Static Binding, based on the classes Test2 and Child shown previously, try this code:
echo Test2::$test; echo Child::$test; echo Child::getEarlyTest(); echo Child::getLateTest();
The output illustrates the difference between self and static:
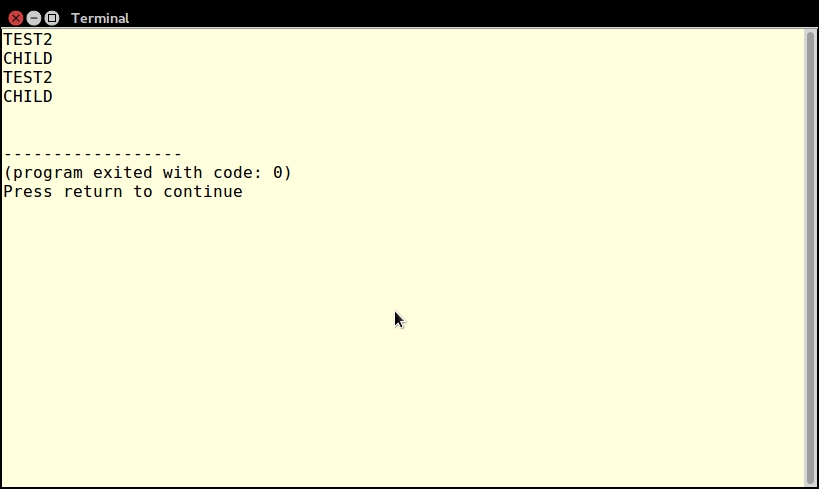
Finally, to test the factory() method shown previously, save the code into the Application\Database\Connection class in a Connection.php file in the Application\Database folder. You can then try this:
include __DIR__ . '/../Application/Database/Connection.php';
use Application\Database\Connection;
$connection = Connection::factory(
'mysql', 'php7cookbook', 'localhost', 'test', 'password');
$stmt = $connection->query('SELECT name FROM iso_country_codes');
while ($country = $stmt->fetch(PDO::FETCH_COLUMN))
echo $country . '';You will see a list of countries pulled from the sample database:
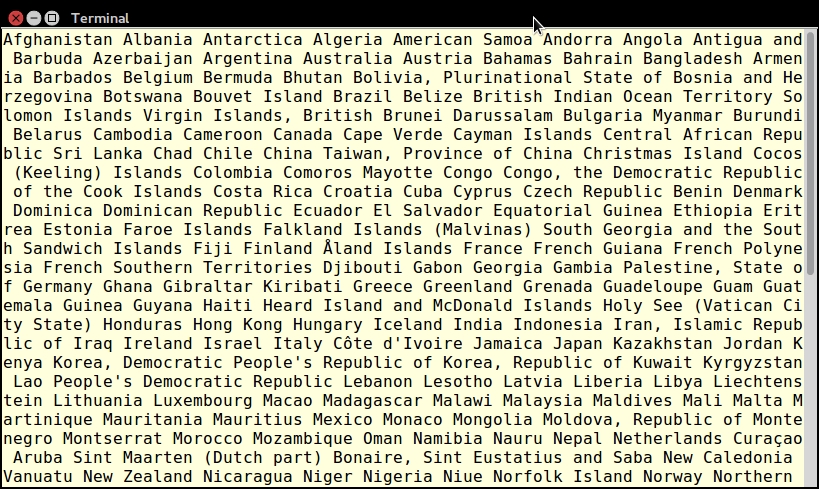
For more information on Late Static Binding, see this explanation in the PHP documentation:
http://php.net/manual/en/language.oop5.late-static-bindings.php
An aspect that is critical to advanced PHP development is the use of namespaces. The arbitrarily defined namespace becomes a prefix to the class name, thereby avoiding the problem of accidental class duplication, and allowing you extraordinary freedom of development. Another benefit to the use of a namespace, assuming it matches the directory structure, is that it facilitates autoloading, as discussed in Chapter 1, Building a Foundation.
namespace at the top of the code file:namespace Application\Entity;
namespace would be a comment and/or the keyword declare:<?php
declare(strict_types=1);
namespace Application\Entity;
/**
* Address
*
*/
class Address
{
// some code
}use statement containing only the namespace. You would need to then prefix any class reference within this namespace with the last component of the namespace:use Application\Entity; $name = new Entity\Name(); $addr = new Entity\Address(); $prof = new Entity\Profile();
use Application\Entity\Name; use Application\Entity\Address; use Application\Entity\Profile; $name = new Name(); $addr = new Address(); $prof = new Profile();
use Application\Entity\ {
Name,
Address,
Profile
};
$name = new Name();
$addr = new Address();
$prof = new Profile();function __autoload($class)
{
echo "Argument Passed to Autoloader = $class\n";
include __DIR__ . '/../' . str_replace('\\', DIRECTORY_SEPARATOR, $class) . '.php';
}For illustration purposes, define a directory structure that matches the Application\* namespace. Create a base folder Application, and a sub-folder Entity. You can also include any sub-folders as desired, such as Database and Generic, used in other chapters:
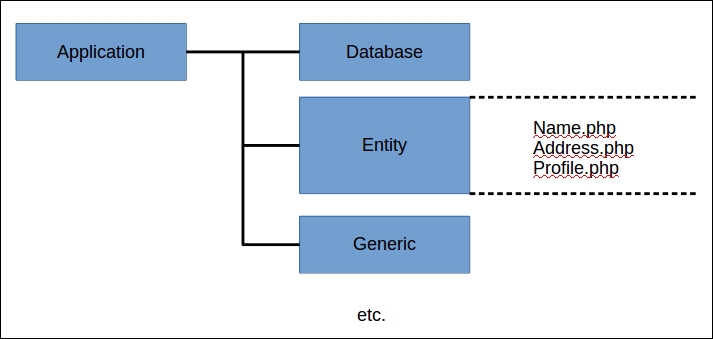
Next, create three entity classes, each in their own file, under the Application/Entity folder: Name.php, Address.php, and Profile.php. We only show Application\Entity\Name here. Application\Entity\Address and Application\Entity\Profile will be the same, except that Address has an $address property, and Profile has a $profile property, each with an appropriate get and set method:
<?php
declare(strict_types=1);
namespace Application\Entity;
/**
* Name
*
*/
class Name
{
protected $name = '';
/**
* This method returns the current value of $name
*
* @return string $name
*/
public function getName() : string
{
return $this->name;
}
/**
* This method sets the value of $name
*
* @param string $name
* @return name $this
*/
public function setName(string $name)
{
$this->name = $name;
return $this;
}
}You can then either use the autoloader defined in Chapter 1, Building a Foundation, or use the simple autoloader mentioned previously. Place the commands to set up autoloading in a file, chap_04_oop_namespace_example_1.php. In this file, you can then specify a use statement which only references the namespace, not the class names. Create instances of the three entity classes Name, Address and Profile, by prefixing the class name with the last part of the namespace, Entity:
use Application\Entity; $name = new Entity\Name(); $addr = new Entity\Address(); $prof = new Entity\Profile(); var_dump($name); var_dump($addr); var_dump($prof);
Here is the output:
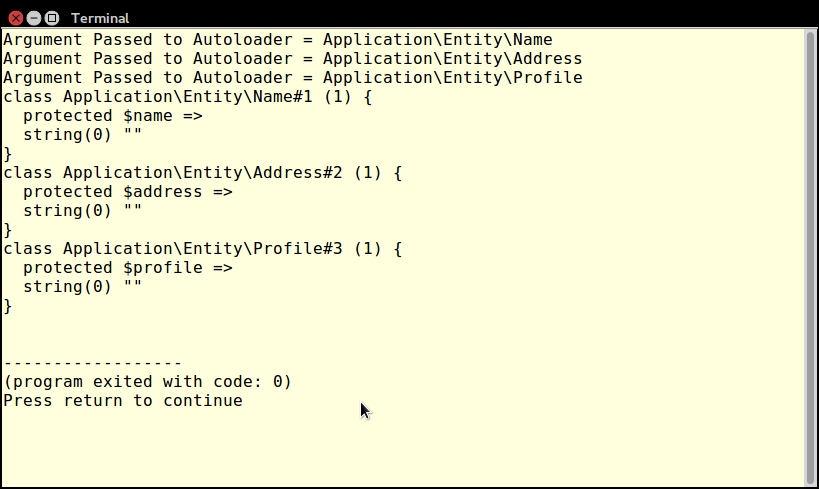
Next, use Save as to copy the file to a new one named chap_04_oop_namespace_example_2.php. Change the use statement to the following:
use Application\Entity\Name; use Application\Entity\Address; use Application\Entity\Profile;
You can now create class instances using only the class name:
$name = new Name(); $addr = new Address(); $prof = new Profile();
When you run this script, here is the output:

Finally, again run Save as and create a new file, chap_04_oop_namespace_example_3.php. You can now test the group use feature introduced in PHP 7:
use Application\Entity\ {
Name,
Address,
Profile
};
$name = new Name();
$addr = new Address();
$prof = new Profile();Again, when you run this block of code, the output will be the same as the preceding output:
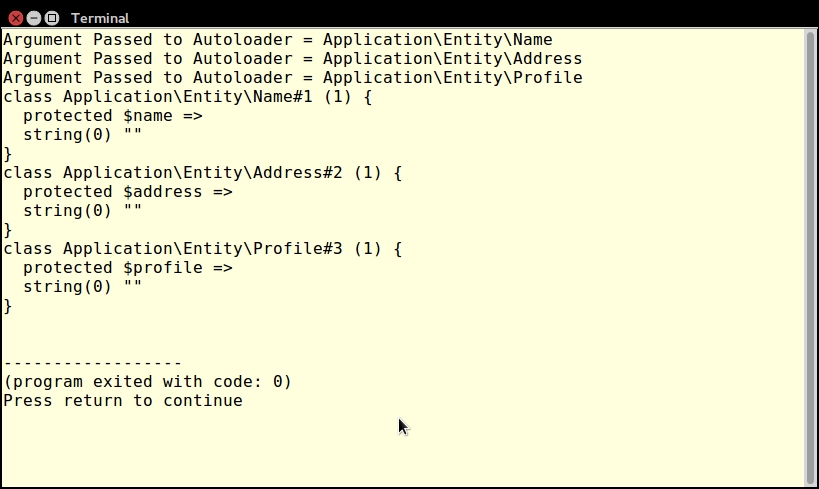
Deceptively, the word visibility has nothing to do with application security! Instead it is simply a mechanism to control the use of your code. It can be used to steer an inexperienced developer away from the public use of methods that should only be called inside the class definition.
public, protected, or private keyword in front of any property or method definition. You can label properties as protected or private to enforce access only through public getters and setters.Base class is defined with a protected property $id. In order to access this property, the getId() and setId() public methods are defined. The protected method generateRandId() can be used internally, and is inherited in the Customer child class. This method cannot be called directly outside of class definitions. Note the use of the new PHP 7 random_bytes() function to create a random ID.class Base
{
protected $id;
private $key = 12345;
public function getId()
{
return $this->id;
}
public function setId()
{
$this->id = $this->generateRandId();
}
protected function generateRandId()
{
return unpack('H*', random_bytes(8))[1];
}
}
class Customer extends Base
{
protected $name;
public function getName()
{
return $this->name;
}
public function setName($name)
{
$this->name = $name;
}
}private to prevent it from being inherited or visible from outside the class definition. This is a good way to create a class as a singleton.Registry, of which there can only be one instance. Because the constructor is marked as private, the only way an instance can be created is through the static method getInstance():class Registry
{
protected static $instance = NULL;
protected $registry = array();
private function __construct()
{
// nobody can create an instance of this class
}
public static function getInstance()
{
if (!self::$instance) {
self::$instance = new self();
}
return self::$instance;
}
public function __get($key)
{
return $this->registry[$key] ?? NULL;
}
public function __set($key, $value)
{
$this->registry[$key] = $value;
}
}public. As of PHP 7.1, you can declare class constants to be protected or private. In the following example, the TEST_WHOLE_WORLD class constant behaves exactly as in PHP 5. The next two constants, TEST_INHERITED and TEST_LOCAL, follow the same rules as any protected or private property or method:class Test
{
public const TEST_WHOLE_WORLD = 'visible.everywhere';
// NOTE: only works in PHP 7.1 and above
protected const TEST_INHERITED = 'visible.in.child.classes';
// NOTE: only works in PHP 7.1 and above
private const TEST_LOCAL= 'local.to.class.Test.only';
public static function getTestInherited()
{
return static::TEST_INHERITED;
}
public static function getTestLocal()
{
return static::TEST_LOCAL;
}
}Create a file chap_04_basic_visibility.php and define two classes: Base and Customer. Next, write code to create instances of each:
$base = new Base(); $customer = new Customer();
Notice that the following code works OK, and is in fact considered the best practice:
$customer->setId();
$customer->setName('Test');
echo 'Welcome ' . $customer->getName() . PHP_EOL;
echo 'Your new ID number is: ' . $customer->getId() . PHP_EOL;Even though $id is protected, the corresponding methods, getId() and setId(), are both public, and therefore accessible from outside the class definition. Here is the output:
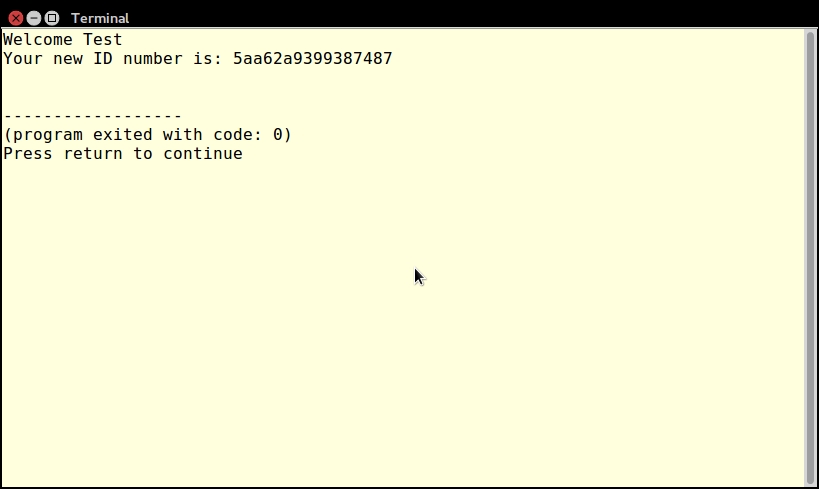
The following lines of code will not work, however, as private and protected properties are not accessible from outside the class definition:
echo 'Key (does not work): ' . $base->key; echo 'Key (does not work): ' . $customer->key; echo 'Name (does not work): ' . $customer->name; echo 'Random ID (does not work): ' . $customer->generateRandId();
The following output shows the expected errors:
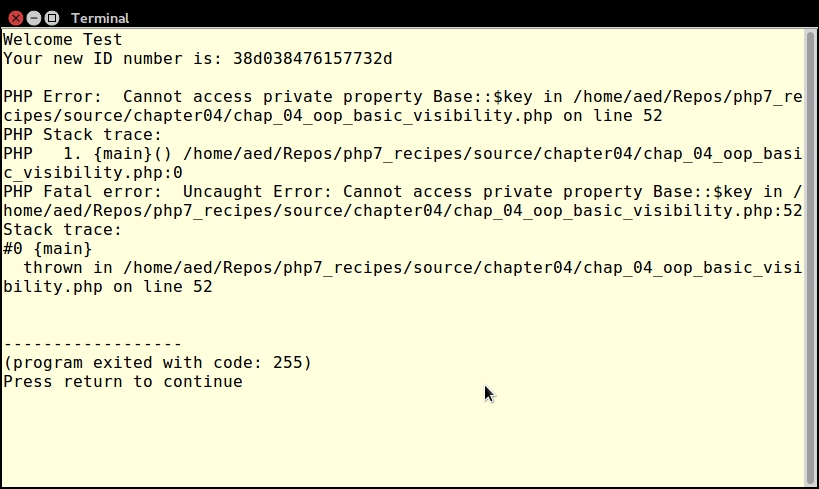
For more information on getters and setters, see the recipe in this chapter entitled Using getters and setters. For more information on PHP 7.1 class constant visibility settings, please see https://wiki.php.net/rfc/class_const_visibility.
Interfaces are useful tools for systems architects and are often used to prototype an Application Programming Interface (API). Interfaces don't contain actual code, but can contain names of methods as well as method signatures.
ConnectionAwareInterface identifies a method, setConnection(), which requires an instance of Connection as an argument:interface ConnectionAwareInterface
{
public function setConnection(Connection $connection);
}implements after the open line that defines the class. We have defined two classes, CountryList and CustomerList, both of which require access to the Connection class via a method, setConnection(). In order to identify this dependency, both classes implement ConnectionAwareInterface:class CountryList implements ConnectionAwareInterface
{
protected $connection;
public function setConnection(Connection $connection)
{
$this->connection = $connection;
}
public function list()
{
$list = [];
$stmt = $this->connection->pdo->query(
'SELECT iso3, name FROM iso_country_codes');
while ($country = $stmt->fetch(PDO::FETCH_ASSOC)) {
$list[$country['iso3']] = $country['name'];
}
return $list;
}
}
class CustomerList implements ConnectionAwareInterface
{
protected $connection;
public function setConnection(Connection $connection)
{
$this->connection = $connection;
}
public function list()
{
$list = [];
$stmt = $this->connection->pdo->query(
'SELECT id, name FROM customer');
while ($customer = $stmt->fetch(PDO::FETCH_ASSOC)) {
$list[$customer['id']] = $customer['name'];
}
return $list;
}
}ListFactory, contains a factory() method, which initializes any class that implements ConnectionAwareInterface. The interface is a guarantee that the setConnection() method is defined. Setting the type hint to the interface instead of a specific class instance makes the factory method more generically useful:namespace Application\Generic;
use PDO;
use Exception;
use Application\Database\Connection;
use Application\Database\ConnectionAwareInterface;
class ListFactory
{
const ERROR_AWARE = 'Class must be Connection Aware';
public static function factory(
ConnectionAwareInterface $class, $dbParams)
{
if ($class instanceof ConnectionAwareInterface) {
$class->setConnection(new Connection($dbParams));
return $class;
} else {
throw new Exception(self::ERROR_AWARE);
}
return FALSE;
}
}DateAware and TimeAware. In addition to defining the setDate() and setTime() methods, they both define setBoth(). Having duplicate method names is not an issue, although it is not considered best practice. The problem lies in the fact that the method signatures differ:interface DateAware
{
public function setDate($date);
public function setBoth(DateTime $dateTime);
}
interface TimeAware
{
public function setTime($time);
public function setBoth($date, $time);
}
class DateTimeHandler implements DateAware, TimeAware
{
protected $date;
protected $time;
public function setDate($date)
{
$this->date = $date;
}
public function setTime($time)
{
$this->time = $time;
}
public function setBoth(DateTime $dateTime)
{
$this->date = $date;
}
}setBoth() from one or the other interface. Alternatively, you could adjust the method signatures to match.In the Application/Database folder, create a file, ConnectionAwareInterface.php. Insert the code discussed in the preceding step 2.
Next, in the Application/Generic folder, create two files, CountryList.php and CustomerList.php. Insert the code discussed in step 3.
Next, in a directory parallel to the Application directory, create a source code file, chap_04_oop_simple_interfaces_example.php, which initializes the autoloader and includes the database parameters:
<?php
define('DB_CONFIG_FILE', '/../config/db.config.php');
require __DIR__ . '/../Application/Autoload/Loader.php';
Application\Autoload\Loader::init(__DIR__ . '/..');
$params = include __DIR__ . DB_CONFIG_FILE;The database parameters in this example are assumed to be in a database configuration file indicated by the DB_CONFIG_FILE constant.
You are now in a position to use ListFactory::factory() to generate CountryList and CustomerList objects. Note that if these classes did not implement ConnectionAwareInterface, an error would be thrown:
$list = Application\Generic\ListFactory::factory(
new Application\Generic\CountryList(), $params);
foreach ($list->list() as $item) echo $item . '';Here is the output for country list:
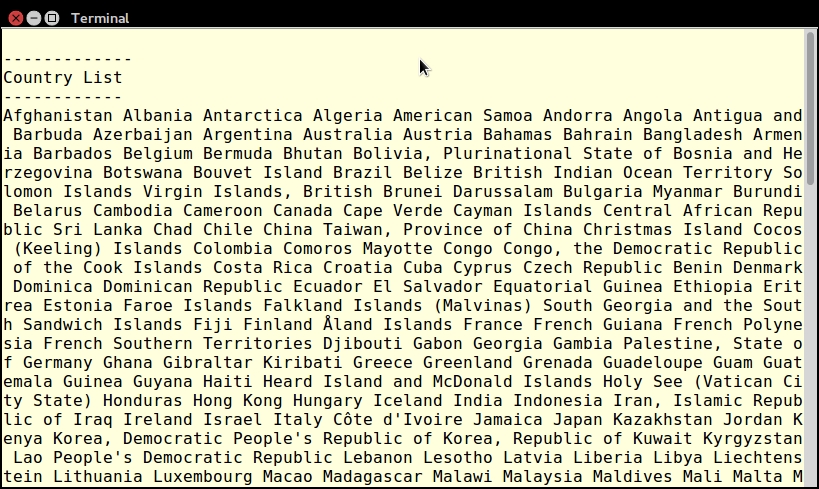
You can also use the factory method to generate a CustomerList object and use it:
$list = Application\Generic\ListFactory::factory(
new Application\Generic\CustomerList(), $params);
foreach ($list->list() as $item) echo $item . '';Here is the output for
CustomerList:
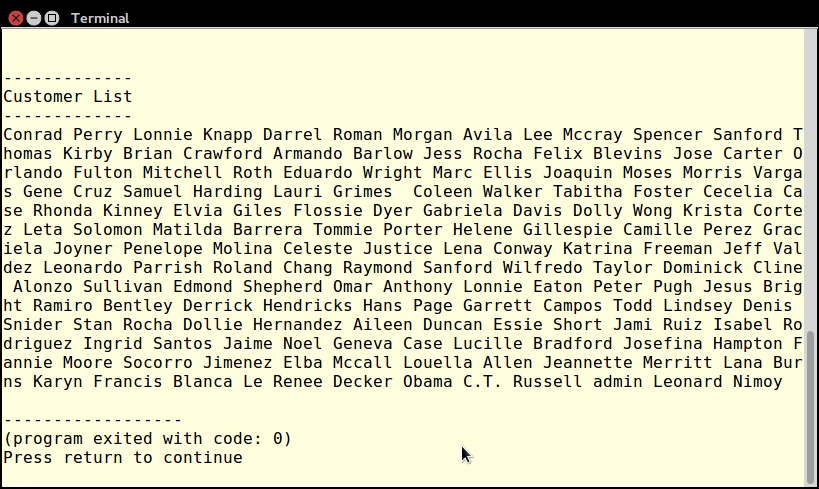
If you want to examine what happens when multiple interfaces are implemented, but where the method signature differs, enter the code shown in the preceding step 4 into a file, chap_04_oop_interfaces_collisions.php. When you try to run the file, an error is generated, as shown here:
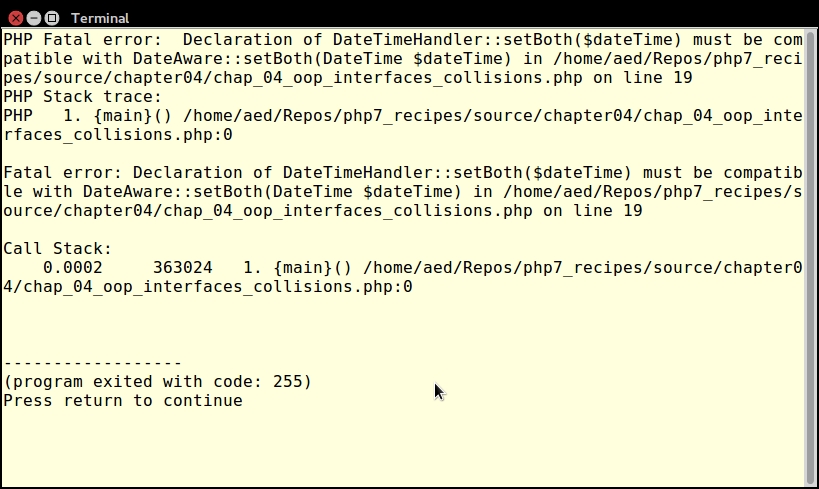
If you make the following adjustment in the TimeAware interface, no errors will result:
interface TimeAware
{
public function setTime($time);
// this will cause a problem
public function setBoth(DateTime $dateTime);
}If you have ever done any C programming, you are perhaps familiar with macros. A macro is a predefined block of code that expands at the line indicated. In a similar manner, traits can contain blocks of code that are copied and pasted into a class at the line indicated by the PHP interpreter.
trait, and can contain properties and/or methods. You may have noticed duplication of code when examining the previous recipe featuring the CountryList and CustomerList classes. In this example, we will re-factor the two classes, and move the functionality of the list() method into a Trait. Notice that the list() method is the same in both classes.list() into a trait called ListTrait:trait ListTrait
{
public function list()
{
$list = [];
$sql = sprintf('SELECT %s, %s FROM %s',
$this->key, $this->value, $this->table);
$stmt = $this->connection->pdo->query($sql);
while ($item = $stmt->fetch(PDO::FETCH_ASSOC)) {
$list[$item[$this->key]] = $item[$this->value];
}
return $list;
}
}ListTrait into a new class, CountryListUsingTrait, as shown in the following code snippet. The entire list() method can now be removed from this class:class CountryListUsingTrait implements ConnectionAwareInterface
{
use ListTrait;
protected $connection;
protected $key = 'iso3';
protected $value = 'name';
protected $table = 'iso_country_codes';
public function setConnection(Connection $connection)
{
$this->connection = $connection;
}
}Any time you have duplication of code, a potential problem arises when you need to make a change. You might find yourself having to do too many global search and replace operations, or cutting and pasting of code, often with disastrous results. Traits are a great way to avoid this maintenance nightmare.
CountryListUsingTrait class is placed into a namespace, Application\Generic, we will also need to move ListTrait into that namespace as well:namespace Application\Generic;
use PDO;
trait ListTrait
{
public function list()
{
// code as shown above
}
}setId() method differs between the Base parent class and the Test trait. The Customer class inherits from Base, but also uses Test. In this case, the method defined in the trait will override the method defined in the Base parent class:trait Test
{
public function setId($id)
{
$obj = new stdClass();
$obj->id = $id;
$this->id = $obj;
}
}
class Base
{
protected $id;
public function getId()
{
return $this->id;
}
public function setId($id)
{
$this->id = $id;
}
}
class Customer extends Base
{
use Test;
protected $name;
public function getName()
{
return $this->name;
}
public function setName($name)
{
$this->name = $name;
}
}Test trait defines a property $id along with the getId() methods and setId(). The trait also defines setName(), which conflicts with the same method defined in the Customer class. In this case, the directly defined setName() method from Customer will override the setName() defined in the trait:trait Test
{
protected $id;
public function getId()
{
return $this->id;
}
public function setId($id)
{
$this->id = $id;
}
public function setName($name)
{
$obj = new stdClass();
$obj->name = $name;
$this->name = $obj;
}
}
class Customer
{
use Test;
protected $name;
public function getName()
{
return $this->name;
}
public function setName($name)
{
$this->name = $name;
}
}insteadof keywords to resolve method name conflicts when using multiple traits. In conjunction, use the as keyword to alias method names.IdTrait and NameTrait. Both traits define a setKey() method, but express the key in different ways. The Test class uses both traits. Note the insteadof keyword, which allows us to distinguish between the conflicting methods. Thus, when setKey() is called from the Test class, the source will be drawn from NameTrait. In addition, setKey() from IdTrait will still be available, but under an alias, setKeyDate():trait IdTrait
{
protected $id;
public $key;
public function setId($id)
{
$this->id = $id;
}
public function setKey()
{
$this->key = date('YmdHis')
. sprintf('%04d', rand(0,9999));
}
}
trait NameTrait
{
protected $name;
public $key;
public function setName($name)
{
$this->name = $name;
}
public function setKey()
{
$this->key = unpack('H*', random_bytes(18))[1];
}
}
class Test
{
use IdTrait, NameTrait {
NameTrait::setKeyinsteadofIdTrait;
IdTrait::setKey as setKeyDate;
}
}From step 1, you learned that traits are used in situations where there is duplication of code. You need to gauge whether or not you could simply define a base class and extend it, or whether using a trait better serves your purposes. Traits are especially useful where the duplication of code is seen in logically unrelated classes.
To illustrate how trait methods override inherited methods, copy the block of code mentioned in step 7 into a separate file, chap_04_oop_traits_override_inherited.php. Add these lines of code:
$customer = new Customer();
$customer->setId(100);
$customer->setName('Fred');
var_dump($customer);As you can see from the output (shown next), the property $id is stored as an instance of stdClass(), which is the behavior defined in the trait:
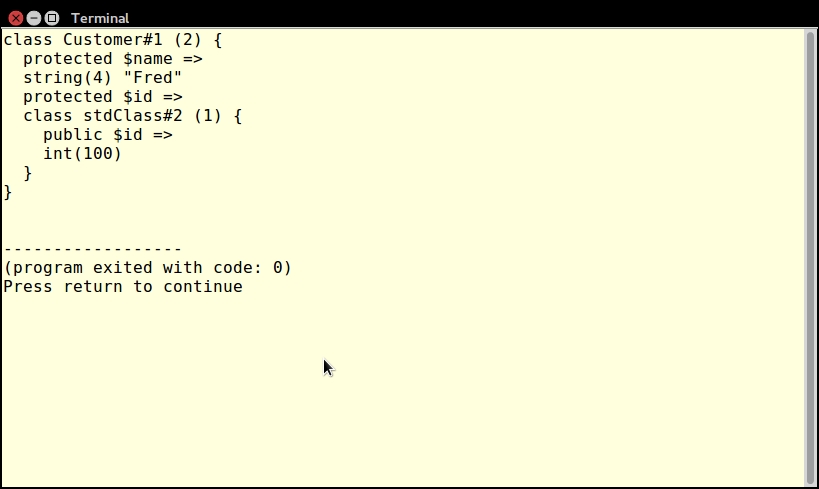
To illustrate how directly defined class methods override trait methods, copy the block of code mentioned in step 9 into a separate file, chap_04_oop_trait_methods_do_not_override_class_methods.php. Add these lines of code:
$customer = new Customer();
$customer->setId(100);
$customer->setName('Fred');
var_dump($customer);As you can see from the following output, the $id property is stored as an integer, as defined in the Customer class, whereas the trait defines $id as an instance of stdClass:
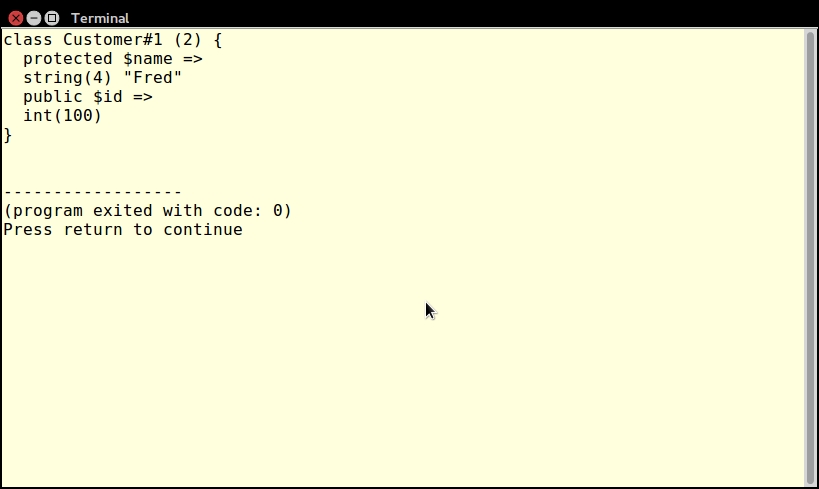
In step 10, you learned how to resolve duplicate method name conflicts when using multiple traits. Copy the block of code shown in step 11 into a separate file, chap_04_oop_trait_multiple.php. Add the following code:
$a = new Test();
$a->setId(100);
$a->setName('Fred');
$a->setKey();
var_dump($a);
$a->setKeyDate();
var_dump($a);Notice in the following output that setKey() yields the output produced from the new PHP 7 function, random_bytes() (defined in NameTrait), whereas setKeyDate() produces a key using the date() and rand() functions (defined in IdTrait):
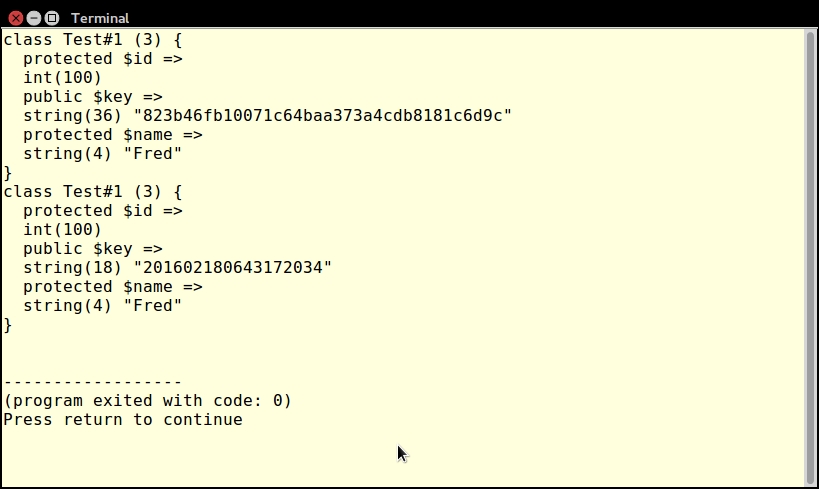
PHP 7 introduced a new feature, anonymous classes. Much like anonymous functions, anonymous classes can be defined as part of an expression, creating a class that has no name. Anonymous classes are used in situations where you need to create an object on the fly, which is used and then discarded.
stdClass is to define an anonymous class.In the definition, you can define any properties and methods (including magic methods). In this example, we define an anonymous class with two properties and a magic method, __construct():
$a = new class (123.45, 'TEST') {
public $total = 0;
public $test = '';
public function __construct($total, $test)
{
$this->total = $total;
$this->test = $test;
}
};In this example, an anonymous class extends FilterIterator, and overrides both the __construct() and accept() methods. As an argument, it accepts ArrayIterator $b, which represents an array of 10 to 100 in increments of 10. The second argument serves as a limit on the output:
$b = new ArrayIterator(range(10,100,10));
$f = new class ($b, 50) extends FilterIterator {
public $limit = 0;
public function __construct($iterator, $limit)
{
$this->limit = $limit;
parent::__construct($iterator);
}
public function accept()
{
return ($this->current() <= $this->limit);
}
};In this example, an anonymous class is used to generate an HTML color code chart. The class implements the built-in PHP Countable interface. A count() method is defined, which is called when this class is used with a method or function that requires Countable:
define('MAX_COLORS', 256 ** 3);
$d = new class () implements Countable {
public $current = 0;
public $maxRows = 16;
public $maxCols = 64;
public function cycle()
{
$row = '';
$max = $this->maxRows * $this->maxCols;
for ($x = 0; $x < $this->maxRows; $x++) {
$row .= '<tr>';
for ($y = 0; $y < $this->maxCols; $y++) {
$row .= sprintf(
'<td style="background-color: #%06X;"',
$this->current);
$row .= sprintf(
'title="#%06X"> </td>',
$this->current);
$this->current++;
$this->current = ($this->current >MAX_COLORS) ? 0
: $this->current;
}
$row .= '</tr>';
}
return $row;
}
public function count()
{
return MAX_COLORS;
}
};Test, we define an anonymous class instead:$a = new class() {
use IdTrait, NameTrait {
NameTrait::setKeyinsteadofIdTrait;
IdTrait::setKey as setKeyDate;
}
};In an anonymous class you can define any properties or methods. Using the preceding example, you could define an anonymous class that accepts constructor arguments, and where you can access properties. Place the code described in step 2 into a test script chap_04_oop_anonymous_class.php. Add these echo statements:
echo "\nAnonymous Class\n"; echo $a->total .PHP_EOL; echo $a->test . PHP_EOL;
Here is the output from the anonymous class:
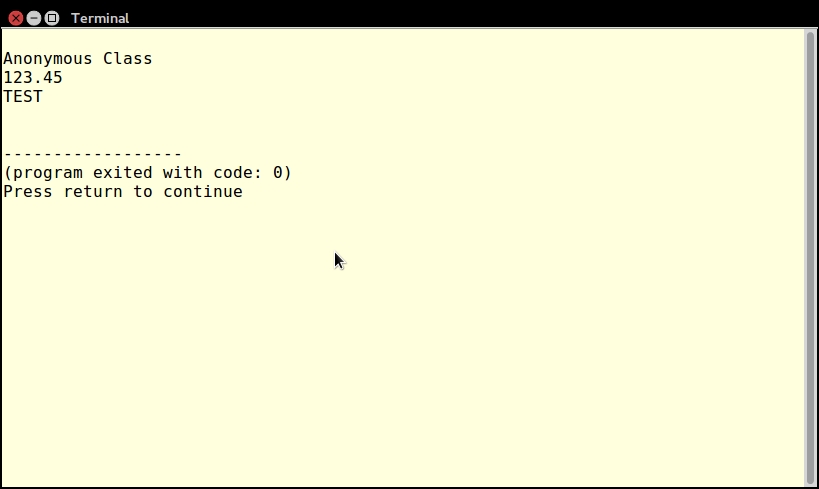
In order to use FilterIterator you must override the accept() method. In this method, you define criteria for which elements of the iteration are to be included as output. Go ahead now and add the code shown in step 4 to the test script. You can then add these echo statements to test the anonymous class:
echo "\nAnonymous Class Extends FilterIterator\n"; foreach ($f as $item) echo $item . ''; echo PHP_EOL;
In this example, a limit of 50 is established. The original ArrayIterator contains an array of values, 10 to 100, in increments of 10, as seen in the following output:
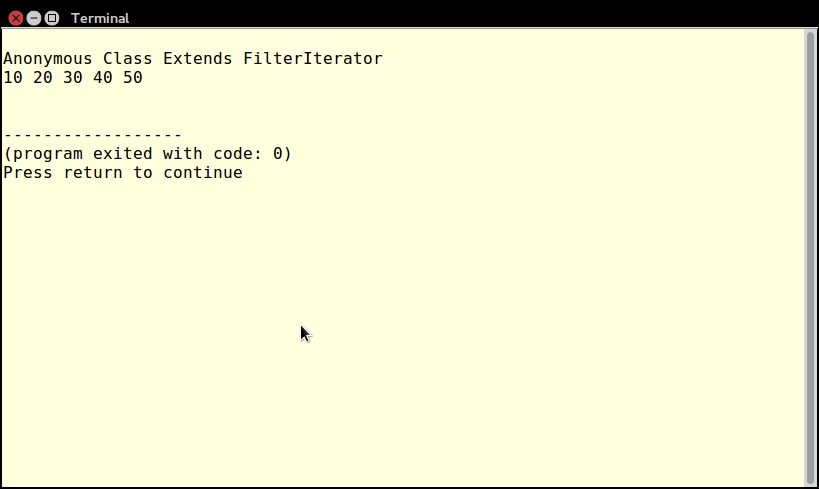
To have a look at an anonymous class that implements an interface, consider the example shown in steps 5 and 6. Place this code in a file, chap_04_oop_anonymous_class_interfaces.php.
Next, add code that lets you paginate through the HTML color chart:
$d->current = $_GET['current'] ?? 0;
$d->current = hexdec($d->current);
$factor = ($d->maxRows * $d->maxCols);
$next = $d->current + $factor;
$prev = $d->current - $factor;
$next = ($next <MAX_COLORS) ? $next : MAX_COLORS - $factor;
$prev = ($prev>= 0) ? $prev : 0;
$next = sprintf('%06X', $next);
$prev = sprintf('%06X', $prev);
?>Finally, go ahead and present the HTML color chart as a web page:
<h1>Total Possible Color Combinations: <?= count($d); ?></h1> <hr> <table> <?= $d->cycle(); ?> </table> <a href="?current=<?= $prev ?>"><<PREV</a> <a href="?current=<?= $next ?>">NEXT >></a>
Notice that you can take advantage of the Countable interface by passing the instance of the anonymous class into the count() function (shown between <H1> tags). Here is the output shown in a browser window:
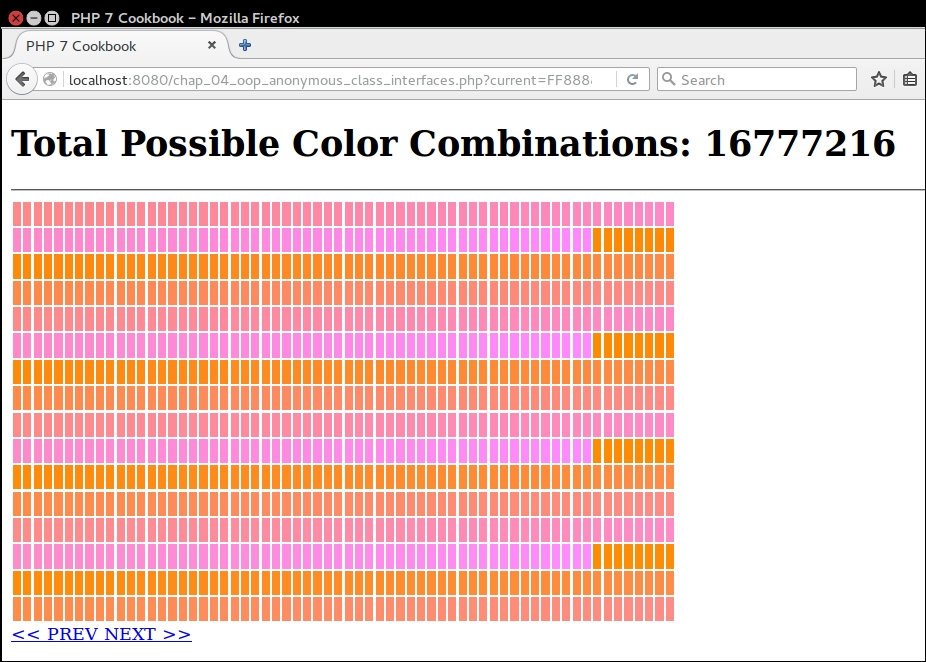
Lastly, to illustrate the use of traits in anonymous classes, copy the chap_04_oop_trait_multiple.php file mentioned in the previous recipe to a new file, chap_04_oop_trait_anonymous_class.php. Remove the definition of the Test class, and replace it with an anonymous class:
$a = new class() {
use IdTrait, NameTrait {
NameTrait::setKeyinsteadofIdTrait;
IdTrait::setKey as setKeyDate;
}
};Remove this line:
$a = new Test();
When you run the code, you will see exactly the same output as shown in the preceding screenshot, except that the class reference will be anonymous:

In this chapter, we will cover the following topics:
In this chapter, we will cover a series of database connectivity recipes that take advantage of the PHP Data Objects (PDO) extension. Common programming problems such as Structured Query Language (SQL) generation, pagination, and tying objects to database tables, will be addressed. Finally, at the end, we will present code that processes secondary lookups in the form of embedded anonymous functions, and using jQuery DataTables to make AJAX requests.
PDO is a highly performant and actively maintained database extension that has a unique advantage over vendor-specific extensions. It has a common Application Programming Interface (API) that is compatible with almost a dozen different Relational Database Management Systems (RDBMS). Learning how to use this extension will save you hours of time trying to master the command subsets of the equivalent individual vendor-specific database extensions.
PDO is subdivided into four main classes, as summarized in the following table:
|
Class |
Functionality |
|---|---|
|
|
Maintains the actual connection to the database, and also handles low-level functionality such as transaction support |
|
| |
|
| |
|
|
PDO instance.$params = [
'host' => 'localhost',
'user' => 'test',
'pwd' => 'password',
'db' => 'php7cookbook'
];
try {
$dsn = sprintf('mysql:host=%s;dbname=%s',
$params['host'], $params['db']);
$pdo = new PDO($dsn, $params['user'], $params['pwd']);
} catch (PDOException $e) {
echo $e->getMessage();
} catch (Throwable $e) {
echo $e->getMessage();
}$params = [
'db' => __DIR__ . '/../data/db/php7cookbook.db.sqlite'
];
$dsn = sprintf('sqlite:' . $params['db']);$params = [
'host' => 'localhost',
'user' => 'test',
'pwd' => 'password',
'db' => 'php7cookbook'
];
$dsn = sprintf('pgsql:host=%s;dbname=%s;user=%s;password=%s',
$params['host'],
$params['db'],
$params['user'],
$params['pwd']);unix_socket, as shown in the following example:$params = [
'host' => 'localhost',
'user' => 'test',
'pwd' => 'password',
'db' => 'php7cookbook',
'sock' => '/var/run/mysqld/mysqld.sock'
];
try {
$dsn = sprintf('mysql:host=%s;dbname=%s;unix_socket=%s',
$params['host'], $params['db'], $params['sock']);
$opts = [PDO::ATTR_ERRMODE => PDO::ERRMODE_EXCEPTION];
$pdo = new PDO($dsn, $params['user'], $params['pwd'], $opts);
} catch (PDOException $e) {
echo $e->getMessage();
} catch (Throwable $e) {
echo $e->getMessage();
}Best practice
Wrap the statement that creates the PDO instance in a try {} catch {} block. Catch a PDOException for database-specific information in case of failure. Catch Throwable for errors or any other exceptions. Set the PDO error mode to PDO::ERRMODE_EXCEPTION for best results. See step 8 for more details about error modes.
In PHP 5, if the PDO object cannot be constructed (for example, when invalid parameters are used), the instance is assigned a value of NULL. In PHP 7, an Exception is thrown. If you wrap the construction of the PDO object in a try {} catch {} block, and the PDO::ATTR_ERRMODE is set to PDO::ERRMODE_EXCEPTION, you can catch and log such errors without having to test for NULL.
PDO::query(). A PDOStatement instance is returned, against which you can fetch results. In this example, we are looking for the first 20 customers sorted by ID:$stmt = $pdo->query( 'SELECT * FROM customer ORDER BY id LIMIT 20');
PDOStatement instance to process results. Set the fetch mode to either PDO::FETCH_NUM or PDO::FETCH_ASSOC to return results in the form of a numeric or associative array. In this example we use a while() loop to process results. When the last result has been fetched, the result is a boolean FALSE, ending the loop:while ($row = $stmt->fetch(PDO::FETCH_ASSOC)) {
printf('%4d | %20s | %5s' . PHP_EOL, $row['id'],
$row['name'], $row['level']);
}PDO fetch operations involve a cursor that defines the direction (that is, forward or reverse) of the iteration. The second argument to PDOStatement::fetch() can be any of the PDO::FETCH_ORI_* constants. Cursor orientations include prior, first, last, absolute, and relative. The default cursor orientation is PDO::FETCH_ORI_NEXT.
PDO::FETCH_OBJ to return results as a stdClass instance. Here you will note that the while() loop takes advantage of the fetch mode, PDO::FETCH_OBJ. Notice that the printf() statement refers to object properties, in contrast with the preceding example, which references array elements:while ($row = $stmt->fetch(PDO::FETCH_OBJ)) {
printf('%4d | %20s | %5s' . PHP_EOL,
$row->id, $row->name, $row->level);
}PDO::FETCH_CLASS. You must also have the class definition available, and PDO::query() should set the class name. As you can see in the following code snippet, we have defined a class called Customer, with public properties $id, $name, and $level. Properties need to be public for the fetch injection to work properly:class Customer
{
public $id;
public $name;
public $level;
}
$stmt = $pdo->query($sql, PDO::FETCH_CLASS, 'Customer');PDOStatement::fetchObject():while ($row = $stmt->fetchObject('Customer')) {
printf('%4d | %20s | %5s' . PHP_EOL,
$row->id, $row->name, $row->level);
}PDO::FETCH_INTO, which is essentially the same as PDO::FETCH_CLASS, but you need an active object instance instead of a class reference. Each iteration through the loop re-populates the same object instance with the current information set. This example assumes the same class Customer as in step 5, with the same database parameters and PDO connections as defined in step 1:$cust = new Customer(); while ($stmt->fetch(PDO::FETCH_INTO)) { printf('%4d | %20s | %5s' . PHP_EOL, $cust->id, $cust->name, $cust->level); }
PDO::ERRMODE_SILENT. You can set the error mode using the PDO::ATTR_ERRMODE key, and either the PDO::ERRMODE_WARNING or the PDO::ERRMODE_EXCEPTION value. The error mode can be specified as the fourth argument to the PDO constructor in the form of an associative array. Alternatively, you can use PDO::setAttribute() on an existing instance.$params = [
'host' => 'localhost',
'user' => 'test',
'pwd' => 'password',
'db' => 'php7cookbook'
];
$dsn = sprintf('mysql:host=%s;dbname=%s', $params['host'], $params['db']);
$sql = 'THIS SQL STATEMENT WILL NOT WORK';PDOStatement instance, the PDO::query() will return a boolean FALSE:$pdo1 = new PDO($dsn, $params['user'], $params['pwd']); $stmt = $pdo1->query($sql); $row = ($stmt) ? $stmt->fetch(PDO::FETCH_ASSOC) : 'No Good';
WARNING using the constructor approach:$pdo2 = new PDO( $dsn, $params['user'], $params['pwd'], [PDO::ATTR_ERRMODE => PDO::ERRMODE_WARNING]);
PDO::prepare() and PDOStatement::execute() instead. The statement is then sent to the database server to be pre-compiled. You can then execute the statement as many times as is warranted, most likely in a loop.PDO::prepare() can be an SQL statement with placeholders in place of actual values. An array of values can then be supplied to PDOStatement::execute(). PDO automatically provides database quoting, which helps safeguard against SQL Injection.Best practice
Any application in which external input (that is, from a form posting) is combined with an SQL statement is subject to an SQL injection attack. All external input must first be properly filtered, validated, and otherwise sanitized. Do not put external input directly into the SQL statement. Instead, use placeholders, and provide the actual (sanitized) values during the execution phase.
ORDER BY from ASC to DESC. This line of code sets up a PDOStatement object requesting a scrollable cursor:$dsn = sprintf('pgsql:charset=UTF8;host=%s;dbname=%s', $params['host'], $params['db']);
$opts = [PDO::ATTR_ERRMODE => PDO::ERRMODE_EXCEPTION];
$pdo = new PDO($dsn, $params['user'], $params['pwd'], $opts);
$sql = 'SELECT * FROM customer '
. 'WHERE balance > :min AND balance < :max '
. 'ORDER BY id LIMIT 20';
$stmt = $pdo->prepare($sql, [PDO::ATTR_CURSOR => PDO::CURSOR_SCROLL]);$stmt->execute(['min' => $min, 'max' => $max]); $row = $stmt->fetch(PDO::FETCH_ASSOC, PDO::FETCH_ORI_LAST); do { printf('%4d | %20s | %5s | %8.2f' . PHP_EOL, $row['id'], $row['name'], $row['level'], $row['balance']); } while ($row = $stmt->fetch(PDO::FETCH_ASSOC, PDO::FETCH_ORI_PRIOR));
$dsn = sprintf('mysql:charset=UTF8;host=%s;dbname=%s', $params['host'], $params['db']);
$opts = [PDO::ATTR_ERRMODE => PDO::ERRMODE_EXCEPTION];
$pdo = new PDO($dsn, $params['user'], $params['pwd'], $opts);
$sql = 'SELECT * FROM customer '
. 'WHERE balance > :min AND balance < :max '
. 'ORDER BY id DESC
. 'LIMIT 20';
$stmt = $pdo->prepare($sql);
while ($row = $stmt->fetch(PDO::FETCH_ASSOC));
printf('%4d | %20s | %5s | %8.2f' . PHP_EOL,
$row['id'],
$row['name'],
$row['level'],
$row['balance']);
} INSERT series of commands into a transactional block:try {
$pdo->beginTransaction();
$sql = "INSERT INTO customer ('"
. implode("','", $fields) . "') VALUES (?,?,?,?,?,?)";
$stmt = $pdo->prepare($sql);
foreach ($data as $row) $stmt->execute($row);
$pdo->commit();
} catch (PDOException $e) {
error_log($e->getMessage());
$pdo->rollBack();
}Application\Database\Connection. Here, we build a connection through the constructor. Alternatively, there is a static factory() method that lets us generate a series of PDO instances:namespace Application\Database;
use Exception;
use PDO;
class Connection
{
const ERROR_UNABLE = 'ERROR: no database connection';
public $pdo;
public function __construct(array $config)
{
if (!isset($config['driver'])) {
$message = __METHOD__ . ' : '
. self::ERROR_UNABLE . PHP_EOL;
throw new Exception($message);
}
$dsn = $this->makeDsn($config);
try {
$this->pdo = new PDO(
$dsn,
$config['user'],
$config['password'],
[PDO::ATTR_ERRMODE => $config['errmode']]);
return TRUE;
} catch (PDOException $e) {
error_log($e->getMessage());
return FALSE;
}
}
public static function factory(
$driver, $dbname, $host, $user,
$pwd, array $options = array())
{
$dsn = $this->makeDsn($config);
try {
return new PDO($dsn, $user, $pwd, $options);
} catch (PDOException $e) {
error_log($e->getMessage);
}
}Connection class is a generic method that can be used to construct a DSN. All we need for this to work is to establish the PDODriver as a prefix, followed by ":". After that, we simply append key/value pairs from our configuration array. Each key/value pair is separated by a semi-colon. We also need to strip off the trailing semi-colon, using substr() with a negative limit for that purpose: public function makeDsn($config)
{
$dsn = $config['driver'] . ':';
unset($config['driver']);
foreach ($config as $key => $value) {
$dsn .= $key . '=' . $value . ';';
}
return substr($dsn, 0, -1);
}
}First of all, you can copy the initial connection code from step 1 into a chap_05_pdo_connect_mysql.php file. For the purposes of this illustration, we will assume you have created a MySQL database called php7cookbook, with a username of cook and a password of book. Next, we send a simple SQL statement to the database using the PDO::query() method. Finally, we use the resulting statement object to fetch results in the form of an associative array. Don't forget to wrap your code in a try {} catch {} block:
<?php
$params = [
'host' => 'localhost',
'user' => 'test',
'pwd' => 'password',
'db' => 'php7cookbook'
];
try {
$dsn = sprintf('mysql:charset=UTF8;host=%s;dbname=%s',
$params['host'], $params['db']);
$pdo = new PDO($dsn, $params['user'], $params['pwd']);
$stmt = $pdo->query(
'SELECT * FROM customer ORDER BY id LIMIT 20');
printf('%4s | %20s | %5s | %7s' . PHP_EOL,
'ID', 'NAME', 'LEVEL', 'BALANCE');
printf('%4s | %20s | %5s | %7s' . PHP_EOL,
'----', str_repeat('-', 20), '-----', '-------');
while ($row = $stmt->fetch(PDO::FETCH_ASSOC)) {
printf('%4d | %20s | %5s | %7.2f' . PHP_EOL,
$row['id'], $row['name'], $row['level'], $row['balance']);
}
} catch (PDOException $e) {
error_log($e->getMessage());
} catch (Throwable $e) {
error_log($e->getMessage());
}Here is the resulting output:
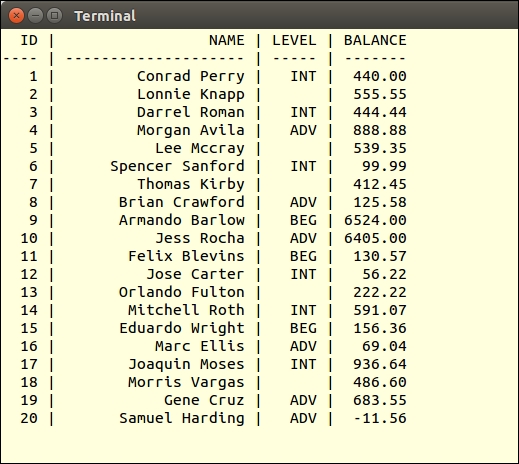
Add the option to the PDO constructor, which sets the error mode to EXCEPTION. Now alter the SQL statement and observe the resulting error message:
$opts = [PDO::ATTR_ERRMODE => PDO::ERRMODE_EXCEPTION];
$pdo = new PDO($dsn, $params['user'], $params['pwd'], $opts);
$stmt = $pdo->query('THIS SQL STATEMENT WILL NOT WORK');You will observe something like this:
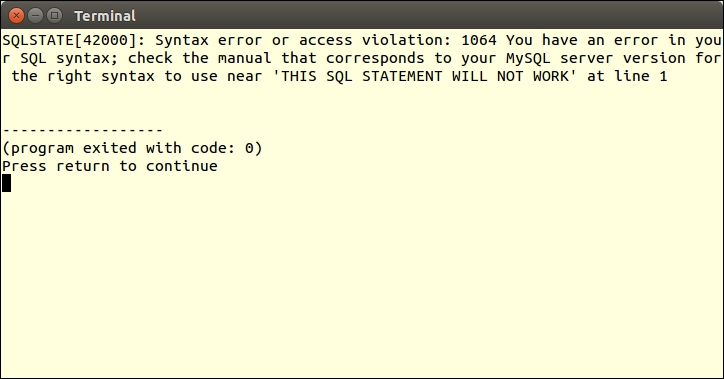
Placeholders can be named or positional. Named placeholders are preceded by a colon (:) in the prepared SQL statement, and are references as keys in an associative array provided to
execute(). Positional placeholders are represented as question marks (?) in the prepared SQL statement.
In the following example, named placeholders are used to represent values in a WHERE clause:
try {
$dsn = sprintf('mysql:host=%s;dbname=%s',
$params['host'], $params['db']);
$pdo = new PDO($dsn,
$params['user'],
$params['pwd'],
[PDO::ATTR_ERRMODE => PDO::ERRMODE_EXCEPTION]);
$sql = 'SELECT * FROM customer '
. 'WHERE balance < :val AND level = :level '
. 'ORDER BY id LIMIT 20'; echo $sql . PHP_EOL;
$stmt = $pdo->prepare($sql);
$stmt->execute(['val' => 100, 'level' => 'BEG']);
while ($row = $stmt->fetch(PDO::FETCH_ASSOC)) {
printf('%4d | %20s | %5s | %5.2f' . PHP_EOL,
$row['id'], $row['name'], $row['level'], $row['balance']);
}
} catch (PDOException $e) {
echo $e->getMessage();
} catch (Throwable $e) {
echo $e->getMessage();
}This example shows using positional placeholders in an INSERT operation. Notice that the data to be inserted as the fourth customer includes a potential SQL injection attack. You will also notice that some awareness of the SQL syntax for the database being used is required. In this case, MySQL column names are quoted using back-ticks ('):
$fields = ['name', 'balance', 'email',
'password', 'status', 'level'];
$data = [
['Saleen',0,'saleen@test.com', 'password',0,'BEG'],
['Lada',55.55,'lada@test.com', 'password',0,'INT'],
['Tonsoi',999.99,'tongsoi@test.com','password',1,'ADV'],
['SQL Injection',0.00,'bad','bad',1,
'BEG\';DELETE FROM customer;--'],
];
try {
$dsn = sprintf('mysql:host=%s;dbname=%s',
$params['host'], $params['db']);
$pdo = new PDO($dsn,
$params['user'],
$params['pwd'],
[PDO::ATTR_ERRMODE => PDO::ERRMODE_EXCEPTION]);
$sql = "INSERT INTO customer ('"
. implode("','", $fields)
. "') VALUES (?,?,?,?,?,?)";
$stmt = $pdo->prepare($sql);
foreach ($data as $row) $stmt->execute($row);
} catch (PDOException $e) {
echo $e->getMessage();
} catch (Throwable $e) {
echo $e->getMessage();
}To test the use of a prepared statement with named parameters, modify the SQL statement to add a WHERE clause that checks for customers with a balance less than a certain amount, and a level equal to either BEG, INT, or ADV (that is, beginning, intermediate, or advanced). Instead of using PDO::query(), use PDO::prepare(). Before fetching results, you must then perform PDOStatement::execute(), supplying the values for balance and level:
$sql = 'SELECT * FROM customer '
. 'WHERE balance < :val AND level = :level '
. 'ORDER BY id LIMIT 20';
$stmt = $pdo->prepare($sql);
$stmt->execute(['val' => 100, 'level' => 'BEG']);Here is the resulting output:
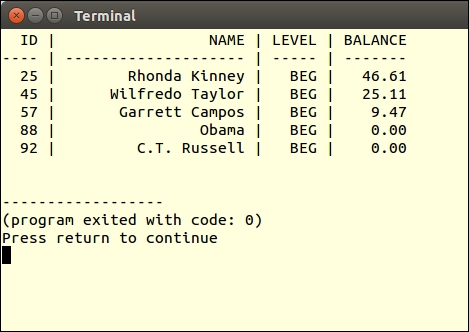
Instead of providing parameters when calling PDOStatement::execute(), you could alternatively bind parameters. This allows you to assign variables to placeholders. At the time of execution, the current value of the variable is used.
In this example, we bind the variables $min, $max, and $level to the prepared statement:
$min = 0;
$max = 0;
$level = '';
try {
$dsn = sprintf('mysql:host=%s;dbname=%s', $params['host'], $params['db']);
$opts = [PDO::ATTR_ERRMODE => PDO::ERRMODE_EXCEPTION];
$pdo = new PDO($dsn, $params['user'], $params['pwd'], $opts);
$sql = 'SELECT * FROM customer '
. 'WHERE balance > :min '
. 'AND balance < :max AND level = :level '
. 'ORDER BY id LIMIT 20';
$stmt = $pdo->prepare($sql);
$stmt->bindParam('min', $min);
$stmt->bindParam('max', $max);
$stmt->bindParam('level', $level);
$min = 5000;
$max = 10000;
$level = 'ADV';
$stmt->execute();
showResults($stmt, $min, $max, $level);
$min = 0;
$max = 100;
$level = 'BEG';
$stmt->execute();
showResults($stmt, $min, $max, $level);
} catch (PDOException $e) {
echo $e->getMessage();
} catch (Throwable $e) {
echo $e->getMessage();
}When the values of these variables change, the next execution will reflect the modified criteria.
PHP 7 implements something called a context sensitive lexer. What this means is that words that are normally reserved can be used if the context allows. Thus, when building an object-oriented SQL builder, we can get away with using methods named and, or, not, and so on.
Application\Database\Finder class. In the class, we define methods that match our favorite SQL operations:namespace Application\Database;
class Finder
{
public static $sql = '';
public static $instance = NULL;
public static $prefix = '';
public static $where = array();
public static $control = ['', ''];
// $a == name of table
// $cols = column names
public static function select($a, $cols = NULL)
{
self::$instance = new Finder();
if ($cols) {
self::$prefix = 'SELECT ' . $cols . ' FROM ' . $a;
} else {
self::$prefix = 'SELECT * FROM ' . $a;
}
return self::$instance;
}
public static function where($a = NULL)
{
self::$where[0] = ' WHERE ' . $a;
return self::$instance;
}
public static function like($a, $b)
{
self::$where[] = trim($a . ' LIKE ' . $b);
return self::$instance;
}
public static function and($a = NULL)
{
self::$where[] = trim('AND ' . $a);
return self::$instance;
}
public static function or($a = NULL)
{
self::$where[] = trim('OR ' . $a);
return self::$instance;
}
public static function in(array $a)
{
self::$where[] = 'IN ( ' . implode(',', $a) . ' )';
return self::$instance;
}
public static function not($a = NULL)
{
self::$where[] = trim('NOT ' . $a);
return self::$instance;
}
public static function limit($limit)
{
self::$control[0] = 'LIMIT ' . $limit;
return self::$instance;
}
public static function offset($offset)
{
self::$control[1] = 'OFFSET ' . $offset;
return self::$instance;
}
public static function getSql()
{
self::$sql = self::$prefix
. implode(' ', self::$where)
. ' '
. self::$control[0]
. ' '
. self::$control[1];
preg_replace('/ /', ' ', self::$sql);
return trim(self::$sql);
}
}$instance. This allows us to represent the code using a fluent interface, such as this:$sql = Finder::select('project')->where('priority > 9') ... etc.Copy the code defined precedingly into a Finder.php file in the Application\Database folder. You can then create a chap_05_oop_query_builder.php calling program, which initializes the autoloader defined in Chapter 1, Building a Foundation. You can then run Finder::select() to generate an object from which the SQL string can be rendered:
<?php
require __DIR__ . '/../Application/Autoload/Loader.php';
Application\Autoload\Loader::init(__DIR__ . '/..');
use Application\Database\Finder;
$sql = Finder::select('project')
->where()
->like('name', '%secret%')
->and('priority > 9')
->or('code')->in(['4', '5', '7'])
->and()->not('created_at')
->limit(10)
->offset(20);
echo Finder::getSql();Here is the result of the precding code:

Pagination involves providing a limited subset of the results of a database query. This is usually done for display purposes, but could easily apply to other situations. At first glance, it would seem the LimitIterator class is ideally suited for the purposes of pagination. In cases where the potential result set could be massive; however, LimitIterator is not such an ideal candidate, as you would need to supply the entire result set as an inner iterator, which would most likely exceed memory limitations. The second and third arguments to the LimitIterator class constructor are offset and count. This suggests the pagination solution we will adopt, which is native to SQL: adding LIMIT and OFFSET clauses to a given SQL statement.
Application\Database\Paginate to hold the pagination logic. We add properties to represent values associated with pagination, $sql, $page, and $linesPerPage:namespace Application\Database;
class Paginate
{
const DEFAULT_LIMIT = 20;
const DEFAULT_OFFSET = 0;
protected $sql;
protected $page;
protected $linesPerPage;
}__construct() method that accepts a base SQL statement, the current page number, and the number of lines per page as arguments. We then need to refactor the SQL string modifying or adding the LIMIT and OFFSET clauses.LIMIT and OFFSET are already present in the SQL statement. Finally, we need to revise the statement using lines per page as our LIMIT with the recalculated OFFSET:public function __construct($sql, $page, $linesPerPage)
{
$offset = $page * $linesPerPage;
switch (TRUE) {
case (stripos($sql, 'LIMIT') && strpos($sql, 'OFFSET')) :
// no action needed
break;
case (stripos($sql, 'LIMIT')) :
$sql .= ' LIMIT ' . self::DEFAULT_LIMIT;
break;
case (stripos($sql, 'OFFSET')) :
$sql .= ' OFFSET ' . self::DEFAULT_OFFSET;
break;
default :
$sql .= ' LIMIT ' . self::DEFAULT_LIMIT;
$sql .= ' OFFSET ' . self::DEFAULT_OFFSET;
break;
}
$this->sql = preg_replace('/LIMIT \d+.*OFFSET \d+/Ui',
'LIMIT ' . $linesPerPage . ' OFFSET ' . $offset,
$sql);
}Application\Database\Connection class discussed in the first recipe.paginate() method, which takes a Connection instance as an argument. We also need the PDO fetch mode, and optional prepared statement parameters:use PDOException;
public function paginate(
Connection $connection,
$fetchMode,
$params = array())
{
try {
$stmt = $connection->pdo->prepare($this->sql);
if (!$stmt) return FALSE;
if ($params) {
$stmt->execute($params);
} else {
$stmt->execute();
}
while ($result = $stmt->fetch($fetchMode)) yield $result;
} catch (PDOException $e) {
error_log($e->getMessage());
return FALSE;
} catch (Throwable $e) {
error_log($e->getMessage());
return FALSE;
}
}LIMIT and OFFSET much easier. All we need to do to provide support for Application\Database\Finder is to use the class and modify the __construct() method to check to see if the incoming SQL is an instance of this class: if ($sql instanceof Finder) {
$sql->limit($linesPerPage);
$sql->offset($offset);
$this->sql = $sql::getSql();
} elseif (is_string($sql)) {
switch (TRUE) {
case (stripos($sql, 'LIMIT')
&& strpos($sql, 'OFFSET')) :
// remaining code as shown in bullet #3 above
}
}getSql() method in case we need to confirm that the SQL statement was correctly formed:public function getSql()
{
return $this->sql;
}Copy the preceding code into a Paginate.php file in the Application/Database folder. You can then create a chap_05_pagination.php calling program, which initializes the autoloader defined in Chapter 1, Building a Foundation:
<?php
define('DB_CONFIG_FILE', '/../config/db.config.php');
define('LINES_PER_PAGE', 10);
define('DEFAULT_BALANCE', 1000);
require __DIR__ . '/../Application/Autoload/Loader.php';
Application\Autoload\Loader::init(__DIR__ . '/..');Next, use the Application\Database\Finder, Connection, and Paginate classes, create an instance of Application\Database\Connection, and use Finder to generate SQL:
use Application\Database\ { Finder, Connection, Paginate};
$conn = new Connection(include __DIR__ . DB_CONFIG_FILE);
$sql = Finder::select('customer')->where('balance < :bal');We can now get the page number and balance from $_GET parameters, and create the Paginate object, ending the PHP block:
$page = (int) ($_GET['page'] ?? 0); $bal = (float) ($_GET['balance'] ?? DEFAULT_BALANCE); $paginate = new Paginate($sql::getSql(), $page, LINES_PER_PAGE); ?>
In the output portion of the script, we simply iterate through the pagination using a simple foreach() loop:
<h3><?= $paginate->getSql(); ?></h3>
<hr>
<pre>
<?php
printf('%4s | %20s | %5s | %7s' . PHP_EOL,
'ID', 'NAME', 'LEVEL', 'BALANCE');
printf('%4s | %20s | %5s | %7s' . PHP_EOL,
'----', str_repeat('-', 20), '-----', '-------');
foreach ($paginate->paginate($conn, PDO::FETCH_ASSOC,
['bal' => $bal]) as $row) {
printf('%4d | %20s | %5s | %7.2f' . PHP_EOL,
$row['id'],$row['name'],$row['level'],$row['balance']);
}
printf('%4s | %20s | %5s | %7s' . PHP_EOL,
'----', str_repeat('-', 20), '-----', '-------');
?>
<a href="?page=<?= $page - 1; ?>&balance=<?= $bal ?>">
<< Prev </a>
<a href="?page=<?= $page + 1; ?>&balance=<?= $bal ?>">
Next >></a>
</pre>Here is page 3 of the output, where the balance is less than 1,000:
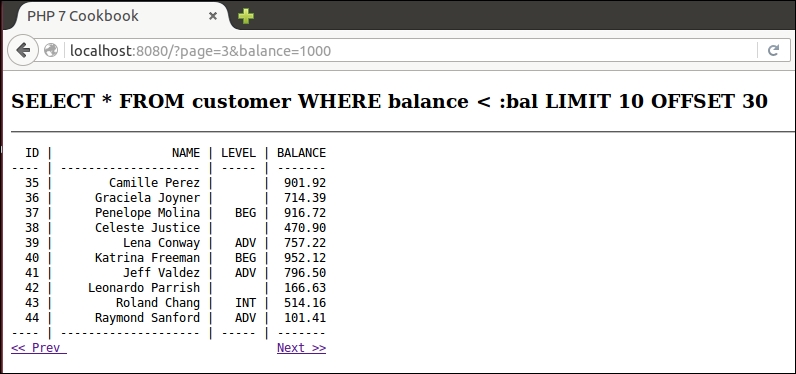
A very common practice among PHP developers is to create classes that represent database tables. Such classes are often referred to as entity classes, and form the core of the domain model software design pattern.
Application\Entity\Base class. All future entity classes will then extend Base.$mapping (discussed later), and $id (with its corresponding getter and setter):namespace Application\Entity;
class Base
{
protected $id = 0;
protected $mapping = ['id' => 'id'];
public function getId() : int
{
return $this->id;
}
public function setId($id)
{
$this->id = (int) $id;
}
}arrayToEntity() method, which converts an array to an instance of the entity class, and vice versa (entityToArray()). These methods implement a process often referred to as hydration. As these methods should be generic, they are best placed in the Base class.$mapping property is used to translate between database column names and object property names. arrayToEntity() populates values of this object instance from an array. We can define this method as static in case we need to call it outside of an active instance:public static function arrayToEntity($data, Base $instance)
{
if ($data && is_array($data)) {
foreach ($instance->mapping as $dbColumn => $propertyName) {
$method = 'set' . ucfirst($propertyName);
$instance->$method($data[$dbColumn]);
}
return $instance;
}
return FALSE;
}entityToArray() produces an array from current instance property values:public function entityToArray()
{
$data = array();
foreach ($this->mapping as $dbColumn => $propertyName) {
$method = 'get' . ucfirst($propertyName);
$data[$dbColumn] = $this->$method() ?? NULL;
}
return $data;
}customer table. Here is the CREATE statement from a MySQL data dump, which illustrates its data structure:CREATE TABLE 'customer' (
'id' int(11) NOT NULL AUTO_INCREMENT,
'name' varchar(256) CHARACTER SET latin1 COLLATE latin1_general_cs NOT NULL,
'balance' decimal(10,2) NOT NULL,
'email' varchar(250) NOT NULL,
'password' char(16) NOT NULL,
'status' int(10) unsigned NOT NULL DEFAULT '0',
'security_question' varchar(250) DEFAULT NULL,
'confirm_code' varchar(32) DEFAULT NULL,
'profile_id' int(11) DEFAULT NULL,
'level' char(3) NOT NULL,
PRIMARY KEY ('id'),
UNIQUE KEY 'UNIQ_81398E09E7927C74' ('email')
);TABLE_NAME class constant:namespace Application\Entity;
class Customer extends Base
{
const TABLE_NAME = 'customer';
protected $name = '';
protected $balance = 0.0;
protected $email = '';
protected $password = '';
protected $status = '';
protected $securityQuestion = '';
protected $confirmCode = '';
protected $profileId = 0;
protected $level = '';
}protected. In order to access these properties, you will need to design public methods that get and set the properties. Here is a good place to put to use the PHP 7 ability to data-type to the return value.$name and $balance. You can imagine how the remainder of these methods will be defined: public function getName() : string
{
return $this->name;
}
public function setName($name)
{
$this->name = $name;
}
public function getBalance() : float
{
return $this->balance;
}
public function setBalance($balance)
{
$this->balance = (float) $balance;
}
}mapping property, an array of key/value pairs where the key represents the database column name and the value the property name.$securityQuestion, $confirmCode, and $profileId, do not correspond to their equivalent column names, security_question, confirm_code, and profile_id. The $mapping property will ensure that the appropriate translation takes place:protected $mapping = [ 'id' => 'id', 'name' => 'name', 'balance' => 'balance', 'email' => 'email', 'password' => 'password', 'status' => 'status', 'security_question' => 'securityQuestion', 'confirm_code' => 'confirmCode', 'profile_id' => 'profileId', 'level' => 'level' ];
Copy the code from steps 2, 4, and 5 into a Base.php file in the Application/Entity folder. Copy the code from steps 8 through 12 into a Customer.php file, also in the Application/Entity folder. You will then need to create getters and setters for the remaining properties not shown in step 10: email, password, status, securityQuestion, confirmCode, profileId, and level.
You can then create a chap_05_matching_entity_to_table.php calling program, which initializes the autoloader defined in Chapter 1, Building a Foundation, uses the Application\Database\Connection, and the newly created Application\Entity\Customer classes:
<?php
define('DB_CONFIG_FILE', '/../config/db.config.php');
require __DIR__ . '/../Application/Autoload/Loader.php';
Application\Autoload\Loader::init(__DIR__ . '/..');
use Application\Database\Connection;
use Application\Entity\Customer;Next, get a database connection, and use the connection to acquire an associative array of data for one customer at random:
$conn = new Connection(include __DIR__ . DB_CONFIG_FILE); $id = rand(1,79); $stmt = $conn->pdo->prepare( 'SELECT * FROM customer WHERE id = :id'); $stmt->execute(['id' => $id]); $result = $stmt->fetch(PDO::FETCH_ASSOC);
Finally, you can create a new Customer entity instance from the array and use var_dump() to view the result:
$cust = Customer::arrayToEntity($result, new Customer()); var_dump($cust);
Here is the output of the preceding code:
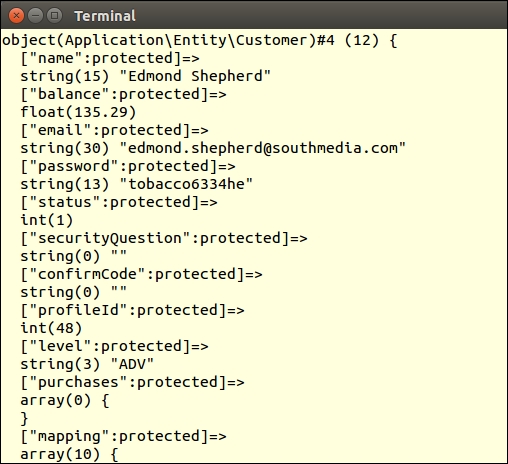
There are many good works that describe the domain model. Probably the most influential is Patterns of Enterprise Application Architecture by Martin Fowler (see http://martinfowler.com/books/eaa.html). There is also a nice study, also available as a free download, entitled Domain Driven Design Quickly by InfoQ (see http://www.infoq.com/minibooks/domain-driven-design-quickly).
Most commercially viable RDBMS systems evolved at a time when procedural programming was at the fore. Imagine the RDBMS world as two dimensional, square, and procedurally oriented. In contrast, entities could be thought of as round, three dimensional, and object oriented. This gives you a picture of what we want to accomplish by tying the results of an RDBMS query into an iteration of entity instances.
Application\Database\CustomerService. The class will accept an Application\Database\Connection instance as an argument:namespace Application\Database;
use Application\Entity\Customer;
class CustomerService
{
protected $connection;
public function __construct(Connection $connection)
{
$this->connection = $connection;
}
}fetchById() method, which takes a customer ID as an argument, and returns a single Application\Entity\Customer instance or boolean FALSE on failure. At first glance, it would seem a no-brainer to simply use PDOStatement::fetchObject() and specify the entity class as an argument:public function fetchById($id)
{
$stmt = $this->connection->pdo
->prepare(Finder::select('customer')
->where('id = :id')::getSql());
$stmt->execute(['id' => (int) $id]);
return $stmt->fetchObject('Application\Entity\Customer');
}The danger here, however, is that fetchObject() actually populates the properties (even if they are protected) before the constructor is called! Accordingly, there is a danger that the constructor could accidentally overwrite values. If you don't define a constructor, or if you can live with this danger, we're done. Otherwise, it starts to get tougher to properly implement the tie between RDBMS query and OOP results.
fetchById() method is to create the object instance first, thereby running its constructor, and setting the fetch mode to PDO::FETCH_INTO, as shown in the following example:public function fetchById($id)
{
$stmt = $this->connection->pdo
->prepare(Finder::select('customer')
->where('id = :id')::getSql());
$stmt->execute(['id' => (int) $id]);
$stmt->setFetchMode(PDO::FETCH_INTO, new Customer());
return $stmt->fetch();
}fetch(), unlike fetchObject(), is not able to overwrite protected properties; the following error message is generated if it tries. This means we will either have to define all properties as public, or consider another approach.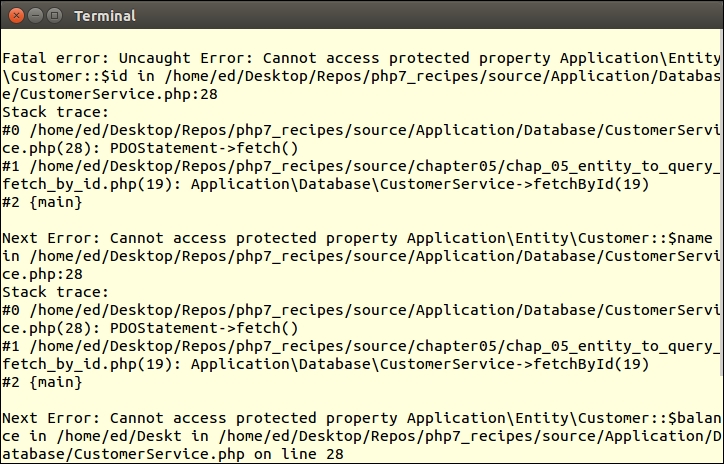
private or protected:public function fetchById($id)
{
$stmt = $this->connection->pdo
->prepare(Finder::select('customer')
->where('id = :id')::getSql());
$stmt->execute(['id' => (int) $id]);
return Customer::arrayToEntity(
$stmt->fetch(PDO::FETCH_ASSOC));
}fetchByLevel() method that returns all customers for a given level, in the form of Application\Entity\Customer instances:public function fetchByLevel($level)
{
$stmt = $this->connection->pdo->prepare(
Finder::select('customer')
->where('level = :level')::getSql());
$stmt->execute(['level' => $level]);
while ($row = $stmt->fetch(PDO::FETCH_ASSOC)) {
yield Customer::arrayToEntity($row, new Customer());
}
}save(). Before we can proceed, however, some thought must be given to what value will be returned if an INSERT takes place.INSERT. There is a convenient PDO::lastInsertId() method which, at first glance, would seem to do the trick. Further reading of the documentation reveals, however, that not all database extensions support this feature, and the ones that do are not consistent in their implementation. Accordingly, it would be a good idea to have a unique column other than $id that can be used to uniquely identify the new customer.email column, and thus need to implement a fetchByEmail() service method:public function fetchByEmail($email)
{
$stmt = $this->connection->pdo->prepare(
Finder::select('customer')
->where('email = :email')::getSql());
$stmt->execute(['email' => $email]);
return Customer::arrayToEntity(
$stmt->fetch(PDO::FETCH_ASSOC), new Customer());
}save() method. Rather than distinguish between INSERT and UPDATE, we will architect this method to update if the ID already exists, and otherwise do an insert.save() method, which accepts a Customer entity as an argument, and uses fetchById() to determine if this entry already exists. If it exists, we call an doUpdate() update method; otherwise, we call a doInsert() insert method:public function save(Customer $cust)
{
// check to see if customer ID > 0 and exists
if ($cust->getId() && $this->fetchById($cust->getId())) {
return $this->doUpdate($cust);
} else {
return $this->doInsert($cust);
}
}doUpdate(), which pulls Customer entity object properties into an array, builds an initial SQL statement, and calls a flush() method, which pushes data to the database. We do not want the ID field updated, as it's the primary key. Also we need to specify which row to update, which means appending a WHERE clause:protected function doUpdate($cust)
{
// get properties in the form of an array
$values = $cust->entityToArray();
// build the SQL statement
$update = 'UPDATE ' . $cust::TABLE_NAME;
$where = ' WHERE id = ' . $cust->getId();
// unset ID as we want do not want this to be updated
unset($values['id']);
return $this->flush($update, $values, $where);
}doInsert() method is similar, except that the initial SQL needs to start with INSERT INTO ... and the id array element needs to be unset. The reason for the latter is that we want this property to be auto-generated by the database. If this is successful, we use our newly defined fetchByEmail() method to look up the new customer and return a completed instance:protected function doInsert($cust)
{
$values = $cust->entityToArray();
$email = $cust->getEmail();
unset($values['id']);
$insert = 'INSERT INTO ' . $cust::TABLE_NAME . ' ';
if ($this->flush($insert, $values)) {
return $this->fetchByEmail($email);
} else {
return FALSE;
}
}flush(), which does the actual preparation and execution:protected function flush($sql, $values, $where = '')
{
$sql .= ' SET ';
foreach ($values as $column => $value) {
$sql .= $column . ' = :' . $column . ',';
}
// get rid of trailing ','
$sql = substr($sql, 0, -1) . $where;
$success = FALSE;
try {
$stmt = $this->connection->pdo->prepare($sql);
$stmt->execute($values);
$success = TRUE;
} catch (PDOException $e) {
error_log(__METHOD__ . ':' . __LINE__ . ':'
. $e->getMessage());
$success = FALSE;
} catch (Throwable $e) {
error_log(__METHOD__ . ':' . __LINE__ . ':'
. $e->getMessage());
$success = FALSE;
}
return $success;
}remove() method, which deletes a customer from the database. Again, as with the save() method defined previously, we use fetchById() to ensure the operation was successful:public function remove(Customer $cust)
{
$sql = 'DELETE FROM ' . $cust::TABLE_NAME . ' WHERE id = :id';
$stmt = $this->connection->pdo->prepare($sql);
$stmt->execute(['id' => $cust->getId()]);
return ($this->fetchById($cust->getId())) ? FALSE : TRUE;
}Copy the code described in steps 1 to 5 into a CustomerService.php file in the Application/Database folder. Define a chap_05_entity_to_query.php calling program. Have the calling program initialize the autoloader, using the appropriate classes:
<?php
define('DB_CONFIG_FILE', '/../config/db.config.php');
require __DIR__ . '/../Application/Autoload/Loader.php';
Application\Autoload\Loader::init(__DIR__ . '/..');
use Application\Database\Connection;
use Application\Database\CustomerService;You can now create an instance of the service, and fetch a single customer at random. The service will then return a customer entity as a result:
// get service instance $service = new CustomerService(new Connection(include __DIR__ . DB_CONFIG_FILE)); echo "\nSingle Result\n"; var_dump($service->fetchById(rand(1,79)));
Here is the output:
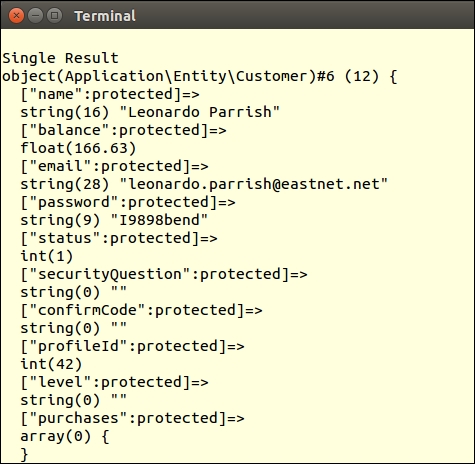
Now copy the code shown in steps 6 to 15 into the service class. Add the data to insert to the chap_05_entity_to_query.php calling program. We then generate a Customer entity instance using this data:
// sample data $data = [ 'name' => 'Doug Bierer', 'balance' => 326.33, 'email' => 'doug' . rand(0,999) . '@test.com', 'password' => 'password', 'status' => 1, 'security_question' => 'Who\'s on first?', 'confirm_code' => 12345, 'level' => 'ADV' ]; // create new Customer $cust = Customer::arrayToEntity($data, new Customer());
We can then examine the ID before and after the call to save():
echo "\nCustomer ID BEFORE Insert: {$cust->getId()}\n";
$cust = $service->save($cust);
echo "Customer ID AFTER Insert: {$cust->getId()}\n";Finally, we modify the balance, and again call save(), viewing the results:
echo "Customer Balance BEFORE Update: {$cust->getBalance()}\n";
$cust->setBalance(999.99);
$service->save($cust);
echo "Customer Balance AFTER Update: {$cust->getBalance()}\n";
var_dump($cust);Here is the output from the calling program:
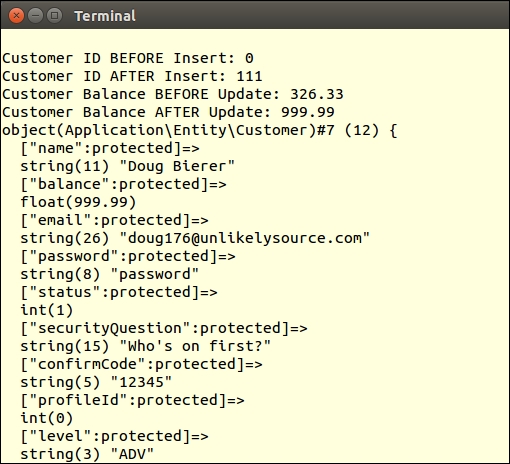
For more information on the relational model, please refer to https://en.wikipedia.org/wiki/Relational_model. For more information on RDBMS, please refer to https://en.wikipedia.org/wiki/Relational_database_management_system. For information on how PDOStatement::fetchObject() inserts property values even before the constructor, have a look at the comment by "rasmus at mindplay dot dk" in the php.net documentation reference on fetchObject() (http://php.net/manual/en/pdostatement.fetchobject.php).
On the road towards implementing relationships between entity classes, let us first take a look at how we can embed the code needed to perform a secondary lookup. An example of such a lookup is when displaying information on a customer, have the view logic perform a second lookup that gets a list of purchases for that customer.
The advantage of this approach is that processing is deferred until the actual view logic is executed. This will ultimately smooth the performance curve, with the workload distributed more evenly between the initial query for customer information, and the later query for purchase information. Another benefit is that a massive JOIN is avoided with its inherent redundant data.
PDO::FETCH_ASSOC. We will also continue to use the Application\Database\Connection class discussed in Chapter 1, Building a Foundation:function findCustomerById($id, Connection $conn)
{
$stmt = $conn->pdo->query(
'SELECT * FROM customer WHERE id = ' . (int) $id);
$results = $stmt->fetch(PDO::FETCH_ASSOC);
return $results;
}customer and product tables are linked. As you can see from the CREATE statement for this table, the customer_id and product_id foreign keys form the relationships:CREATE TABLE 'purchases' (
'id' int(11) NOT NULL AUTO_INCREMENT,
'transaction' varchar(8) NOT NULL,
'date' datetime NOT NULL,
'quantity' int(10) unsigned NOT NULL,
'sale_price' decimal(8,2) NOT NULL,
'customer_id' int(11) DEFAULT NULL,
'product_id' int(11) DEFAULT NULL,
PRIMARY KEY ('id'),
KEY 'IDX_C3F3' ('customer_id'),
KEY 'IDX_665A' ('product_id'),
CONSTRAINT 'FK_665A' FOREIGN KEY ('product_id')
REFERENCES 'products' ('id'),
CONSTRAINT 'FK_C3F3' FOREIGN KEY ('customer_id')
REFERENCES 'customer' ('id')
);findCustomerById() function, defining the secondary lookup in the form of an anonymous function, which can then be executed in a view script. The anonymous function is assigned to the $results['purchases'] element:function findCustomerById($id, Connection $conn)
{
$stmt = $conn->pdo->query(
'SELECT * FROM customer WHERE id = ' . (int) $id);
$results = $stmt->fetch(PDO::FETCH_ASSOC);
if ($results) {
$results['purchases'] =
// define secondary lookup
function ($id, $conn) {
$sql = 'SELECT * FROM purchases AS u '
. 'JOIN products AS r '
. 'ON u.product_id = r.id '
. 'WHERE u.customer_id = :id '
. 'ORDER BY u.date';
$stmt = $conn->pdo->prepare($sql);
$stmt->execute(['id' => $id]);
while ($row = $stmt->fetch(PDO::FETCH_ASSOC)) {
yield $row;
}
};
}
return $results;
}$results array, in the view logic, all we need to do is to loop through the return value of the anonymous function. In this example, we retrieve customer information at random:$result = findCustomerById(rand(1,79), $conn);
<table>
<tr>
<th>Transaction</th><th>Date</th><th>Qty</th>
<th>Price</th><th>Product</th>
</tr>
<?php
foreach ($result['purchases']($result['id'], $conn) as $purchase) : ?>
<tr>
<td><?= $purchase['transaction'] ?></td>
<td><?= $purchase['date'] ?></td>
<td><?= $purchase['quantity'] ?></td>
<td><?= $purchase['sale_price'] ?></td>
<td><?= $purchase['title'] ?></td>
</tr>
<?php endforeach; ?>
</table>Create a chap_05_secondary_lookups.php calling program and insert the code needed to create an instance of Application\Database\Connection:
<?php
define('DB_CONFIG_FILE', '/../config/db.config.php');
include __DIR__ . '/../Application/Database/Connection.php';
use Application\Database\Connection;
$conn = new Connection(include __DIR__ . DB_CONFIG_FILE);Next, add the findCustomerById()function shown in step 3. You can then pull information for a random customer, ending the PHP part of the calling program:
function findCustomerById($id, Connection $conn)
{
// code shown in bullet #3 above
}
$result = findCustomerById(rand(1,79), $conn);
?>For the view logic, you can display core customer information as shown in several of the preceding recipes:
<h1><?= $result['name'] ?></h1> <div class="row"> <div class="left">Balance</div> <div class="right"><?= $result['balance']; ?></div> </div> <!-- etc.l -->
You can display information on purchases like so:
<table>
<tr><th>Transaction</th><th>Date</th><th>Qty</th>
<th>Price</th><th>Product</th></tr>
<?php
foreach ($result['purchases']($result['id'], $conn) as $purchase) : ?>
<tr>
<td><?= $purchase['transaction'] ?></td>
<td><?= $purchase['date'] ?></td>
<td><?= $purchase['quantity'] ?></td>
<td><?= $purchase['sale_price'] ?></td>
<td><?= $purchase['title'] ?></td>
</tr>
<?php endforeach; ?>
</table>The critical piece is that the secondary lookup is performed as part of the view logic by calling the embedded anonymous function, $result['purchases']($result['id'], $conn). Here is the output:
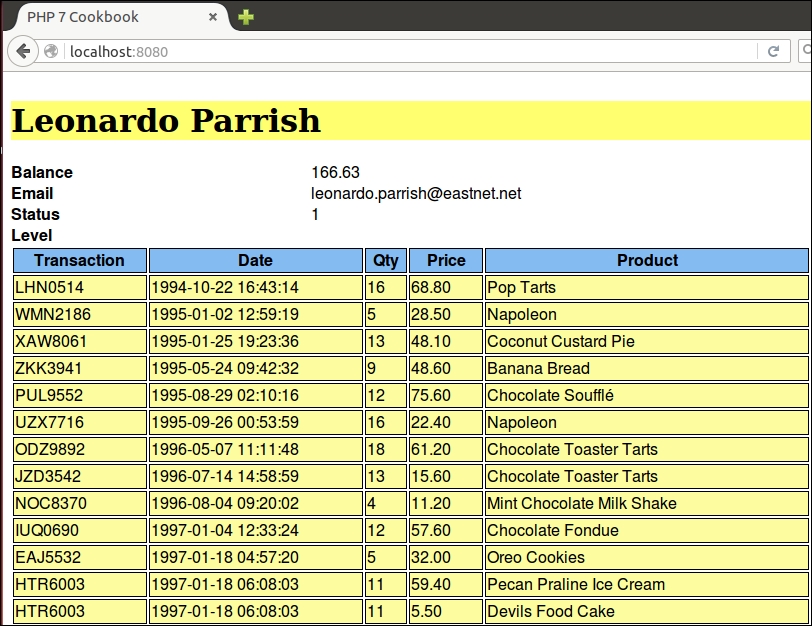
Another approach to secondary lookups is to have the frontend generate the request. In this recipe, we will make a slight modification to the secondary lookup code presented in the preceding recipe, Embedding secondary lookups into QueryResults. In the previous recipe, even though the view logic is performing the lookup, all processing is still done on the server. When using jQuery DataTables, however, the secondary lookup is actually performed directly by the client, in the form of an Asynchronous JavaScript and XML (AJAX) request issued by the browser.
chap_05_jquery_datatables_php_lookups_ajax.php. It looks for a $_GET parameter, id. Notice that the SELECT statement is very specific as to which columns are delivered. You will also note that the fetch mode has been changed to PDO::FETCH_NUM. You might also notice that the last line takes the results and assigns it to a data key in a JSON-encoded array.$id = $_GET['id'] ?? 0; sql = 'SELECT u.transaction,u.date, u.quantity,u.sale_price,r.title ' . 'FROM purchases AS u ' . 'JOIN products AS r ' . 'ON u.product_id = r.id ' . 'WHERE u.customer_id = :id'; $stmt = $conn->pdo->prepare($sql); $stmt->execute(['id' => (int) $id]); $results = array(); while ($row = $stmt->fetch(PDO::FETCH_NUM)) { $results[] = $row; } echo json_encode(['data' => $results]);
function findCustomerById($id, Connection $conn)
{
$stmt = $conn->pdo->query(
'SELECT * FROM customer WHERE id = ' . (int) $id);
$results = $stmt->fetch(PDO::FETCH_ASSOC);
return $results;
}jquery-1.12.0.min.js) and DataTables (jquery.dataTables.js). We've also added a convenient stylesheet associated with DataTables, jquery.dataTables.css:<!DOCTYPE html>
<head>
<script src="https://code.jquery.com/jquery-1.12.0.min.js">
</script>
<script type="text/javascript"
charset="utf8"
src="//cdn.datatables.net/1.10.11/js/jquery.dataTables.js">
</script>
<link rel="stylesheet"
type="text/css"
href="//cdn.datatables.net/1.10.11/css/jquery.dataTables.css">
</head>ready function, which associates a table with DataTables. In this case, we assign an id attribute of customerTable to the table element that will be assigned to DataTables. You'll also notice that we specify the AJAX data source as the script defined in step 1, chap_05_jquery_datatables_php_lookups_ajax.php. As we have the $id available, this is appended to the data source URL:<script>
$(document).ready(function() {
$('#customerTable').DataTable(
{ "ajax": '/chap_05_jquery_datatables_php_lookups_ajax.php?id=<?= $id ?>'
});
} );
</script>id attribute matches the one specified in the preceding code. We also need to define headers that will match the data presented in response to the AJAX request:<table id="customerTable" class="display" cellspacing="0" width="100%">
<thead>
<tr>
<th>Transaction</th>
<th>Date</th>
<th>Qty</th>
<th>Price</th>
<th>Product</th>
</tr>
</thead>
</table>Create a chap_05_jquery_datatables_php_lookups_ajax.php script, which will respond to an AJAX request. Inside, place the code to initialize auto-loading and create a Connection instance. You can then append the code shown in step 2 of the preceding recipe:
<?php
define('DB_CONFIG_FILE', '/../config/db.config.php');
include __DIR__ . '/../Application/Database/Connection.php';
use Application\Database\Connection;
$conn = new Connection(include __DIR__ . DB_CONFIG_FILE);Next, create a chap_05_jquery_datatables_php_lookups.php calling program that will pull information on a random customer. Add the function described in step 3 of the preceding code:
<?php
define('DB_CONFIG_FILE', '/../config/db.config.php');
include __DIR__ . '/../Application/Database/Connection.php';
use Application\Database\Connection;
$conn = new Connection(include __DIR__ . DB_CONFIG_FILE);
// add function findCustomerById() here
$id = random_int(1,79);
$result = findCustomerById($id, $conn);
?>The calling program will also contain the view logic that imports the minimum JavaScript to implement jQuery DataTables. You can add the code shown in step 3 of the preceding code. Then, add the document ready function and the display logic shown in steps 5 and 6. Here is the output:
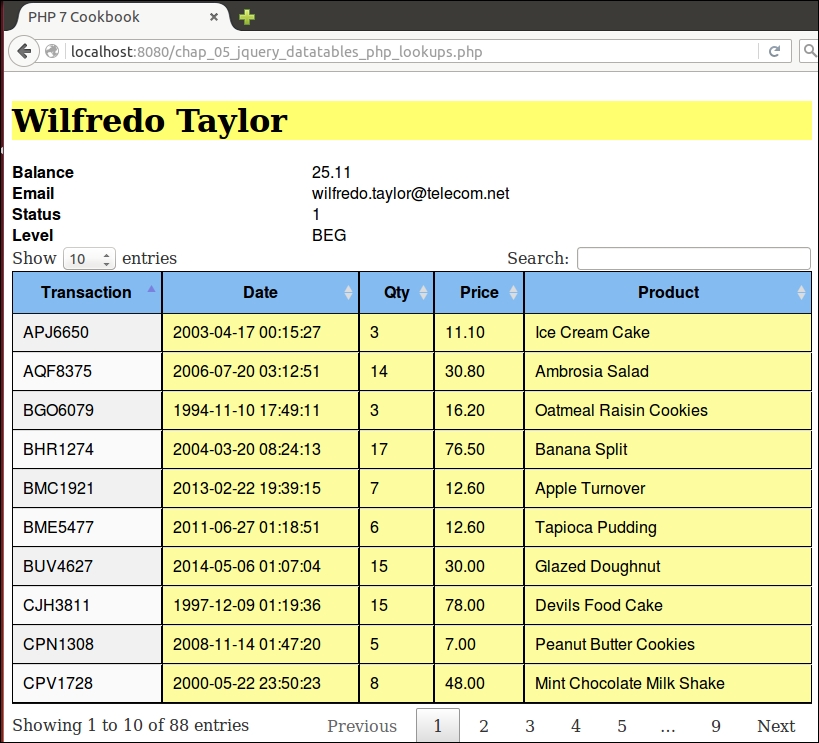
For more information on jQuery, please visit their website at https://jquery.com/. To read about the DataTables plugin to jQuery, refer to this article at https://www.datatables.net/. Zero configuration data tables are discussed at https://datatables.net/examples/basic_init/zero_configuration.html. For more information on AJAX sourced data, have a look at https://datatables.net/examples/data_sources/ajax.html.
In this chapter, we will cover the following topics:
$_POST filters$_POST validatorsIn this chapter, we will show you how to build classes that generate HTML form elements. The generic element generator can be used for text, text areas, passwords, and similar HTML input types. After that, we will show variations that allow you to pre-configure the element with an array of values. The form factory recipe will bring all these generators together, allowing you to render an entire form using a single configuration array. Finally, we introduce recipes that allow filtering and the validation of incoming $_POST data.
It's pretty easy to create a function that simply outputs a form input tag such as <input type="text" name="whatever" >. In order to make a form generator generically useful, however, we need to think about the bigger picture. Here are some other considerations over and above the basic input tag:
input tag and its associated HTML attributes<div> tag, or an HTML table <td> tagApplication\Form\Generic class. This will also later serve as a base class for specialized form elements:namespace Application\Form;
class Generic
{
// some code ...
}const ROW = 'row'; const FORM = 'form'; const INPUT = 'input'; const LABEL = 'label'; const ERRORS = 'errors'; const TYPE_FORM = 'form'; const TYPE_TEXT = 'text'; const TYPE_EMAIL = 'email'; const TYPE_RADIO = 'radio'; const TYPE_SUBMIT = 'submit'; const TYPE_SELECT = 'select'; const TYPE_PASSWORD = 'password'; const TYPE_CHECKBOX = 'checkbox'; const DEFAULT_TYPE = self::TYPE_TEXT; const DEFAULT_WRAPPER = 'div';
$name and $type, as we cannot effectively use the element without these attributes. The other constructor arguments are optional. Furthermore, in order to base one form element on another, we include a provision whereby the second argument, $type, can alternatively be an instance of Application\Form\Generic, in which case we simply run the getters (discussed later) to populate properties:protected $name;
protected $type = self::DEFAULT_TYPE;
protected $label = '';
protected $errors = array();
protected $wrappers;
protected $attributes; // HTML form attributes
protected $pattern = '<input type="%s" name="%s" %s>';
public function __construct($name,
$type,
$label = '',
array $wrappers = array(),
array $attributes = array(),
array $errors = array())
{
$this->name = $name;
if ($type instanceof Generic) {
$this->type = $type->getType();
$this->label = $type->getLabelValue();
$this->errors = $type->getErrorsArray();
$this->wrappers = $type->getWrappers();
$this->attributes = $type->getAttributes();
} else {
$this->type = $type ?? self::DEFAULT_TYPE;
$this->label = $label;
$this->errors = $errors;
$this->attributes = $attributes;
if ($wrappers) {
$this->wrappers = $wrappers;
} else {
$this->wrappers[self::INPUT]['type'] =
self::DEFAULT_WRAPPER;
$this->wrappers[self::LABEL]['type'] =
self::DEFAULT_WRAPPER;
$this->wrappers[self::ERRORS]['type'] =
self::DEFAULT_WRAPPER;
}
}
$this->attributes['id'] = $name;
}getWrapperPattern() method, which will produce the appropriate wrapping tags for the label, input, and error display.<div>, and its attributes include ['class' => 'label'], this method will return a sprintf() format pattern that looks like this: <div class="label">%s</div>. The final HTML produced for the label, for example, would then replace %s.getWrapperPattern() method might look:public function getWrapperPattern($type)
{
$pattern = '<' . $this->wrappers[$type]['type'];
foreach ($this->wrappers[$type] as $key => $value) {
if ($key != 'type') {
$pattern .= ' ' . $key . '="' . $value . '"';
}
}
$pattern .= '>%s</' . $this->wrappers[$type]['type'] . '>';
return $pattern;
}getLabel() method. All this method needs to do is to plug the label into the wrapper using sprintf():public function getLabel()
{
return sprintf($this->getWrapperPattern(self::LABEL),
$this->label);
}input tag, we need a way to assemble the attributes. Fortunately, this is easily accomplished as long as they are supplied to the constructor in the form of an associative array. All we need to do, in this case, is to define a getAttribs() method that produces a string of key-value pairs separated by a space. We return the final value using trim() to remove excess spaces.value or href attribute, for security reasons we should escape the values on the assumption that they are, or could be, user-supplied (and therefore suspect). Accordingly, we need to add an if statement that checks and then uses htmlspecialchars() or urlencode():public function getAttribs()
{
foreach ($this->attributes as $key => $value) {
$key = strtolower($key);
if ($value) {
if ($key == 'value') {
if (is_array($value)) {
foreach ($value as $k => $i)
$value[$k] = htmlspecialchars($i);
} else {
$value = htmlspecialchars($value);
}
} elseif ($key == 'href') {
$value = urlencode($value);
}
$attribs .= $key . '="' . $value . '" ';
} else {
$attribs .= $key . ' ';
}
}
return trim($attribs);
}getInputOnly(), produces only the HTML input tag. The second method, getInputWithWrapper(), produces the input embedded in a wrapper. The reason for the split is that when creating spin-off classes, such as a class to generate radio buttons, we will not need the wrapper:public function getInputOnly()
{
return sprintf($this->pattern, $this->type, $this->name,
$this->getAttribs());
}
public function getInputWithWrapper()
{
return sprintf($this->getWrapperPattern(self::INPUT),
$this->getInputOnly());
}<ul><li>error 1</li><li>error 2</li></ul> and so on:public function getErrors()
{
if (!$this->errors || count($this->errors == 0)) return '';
$html = '';
$pattern = '<li>%s</li>';
$html .= '<ul>';
foreach ($this->errors as $error)
$html .= sprintf($pattern, $error);
$html .= '</ul>';
return sprintf($this->getWrapperPattern(self::ERRORS), $html);
}public function setSingleAttribute($key, $value)
{
$this->attributes[$key] = $value;
}
public function addSingleError($error)
{
$this->errors[] = $error;
}$pattern is <input type="%s" name="%s" %s>. For certain tags (for example, select and form tags), we will need to set this property to a different value:public function setPattern($pattern)
{
$this->pattern = $pattern;
}
public function setType($type)
{
$this->type = $type;
}
public function getType()
{
return $this->type;
}
public function addSingleError($error)
{
$this->errors[] = $error;
}
// define similar get and set methods
// for name, label, wrappers, errors and attributespublic function getLabelValue()
{
return $this->label;
}
public function getErrorsArray()
{
return $this->errors;
}Be sure to copy all the preceding code into a single Application\Form\Generic class. You can then define a chap_06_form_element_generator.php calling script that sets up autoloading and anchors the new class:
<?php require __DIR__ . '/../Application/Autoload/Loader.php'; Application\Autoload\Loader::init(__DIR__ . '/..'); use Application\Form\Generic;
Next, define the wrappers. For illustration, we'll use HTML table data and header tags. Note that the label uses TH, whereas input and errors use TD:
$wrappers = [ Generic::INPUT => ['type' => 'td', 'class' => 'content'], Generic::LABEL => ['type' => 'th', 'class' => 'label'], Generic::ERRORS => ['type' => 'td', 'class' => 'error'] ];
You can now define an email element by passing parameters to the constructor:
$email = new Generic('email', Generic::TYPE_EMAIL, 'Email', $wrappers,
['id' => 'email',
'maxLength' => 128,
'title' => 'Enter address',
'required' => '']);Alternatively, define the password element using setters:
$password = new Generic('password', $email);
$password->setType(Generic::TYPE_PASSWORD);
$password->setLabel('Password');
$password->setAttributes(['id' => 'password',
'title' => 'Enter your password',
'required' => '']);Lastly, be sure to define a submit button:
$submit = new Generic('submit',
Generic::TYPE_SUBMIT,
'Login',
$wrappers,
['id' => 'submit','title' => 'Click to login','value' => 'Click Here']);The actual display logic might look like this:
<div class="container">
<!-- Login Form -->
<h1>Login</h1>
<form name="login" method="post">
<table id="login" class="display"
cellspacing="0" width="100%">
<tr><?= $email->render(); ?></tr>
<tr><?= $password->render(); ?></tr>
<tr><?= $submit->render(); ?></tr>
<tr>
<td colspan=2>
<br>
<?php var_dump($_POST); ?>
</td>
</tr>
</table>
</form>
</div>Here is the actual output:
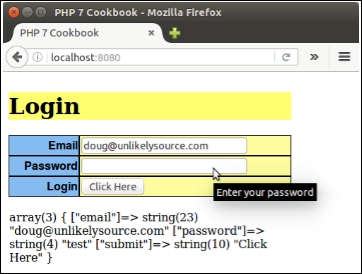
A radio button element generator will share similarities with the generic HTML form element generator. As with any generic element, a set of radio buttons needs the ability to display an overall label and errors. There are two major differences, however:
Application\Form\Element\Radio class that extends Application\Form\Generic:namespace Application\Form\Element; use Application\Form\Generic; class Radio extends Generic { // code }
spacer, which will be placed between the radio button and its label. We also need to decide whether to place the radio button label before or after the actual button, thus, we use the $after flag. If we need a default, or if we are re-displaying existing form data, we need a way of designating the selected key. Finally, we need an array of options from which we will populate the list of buttons:const DEFAULT_AFTER = TRUE;
const DEFAULT_SPACER = '&nbps;';
const DEFAULT_OPTION_KEY = 0;
const DEFAULT_OPTION_VALUE = 'Choose';
protected $after = self::DEFAULT_AFTER;
protected $spacer = self::DEFAULT_SPACER;
protected $options = array();
protected $selectedKey = DEFAULT_OPTION_KEY;Application\Form\Generic, we have the option of expanding the __construct() method, or, alternatively, simply defining a method that can be used to set specific options. For this illustration, we have chosen the latter course.$this->options is populated, the first parameter ($options) is defined as mandatory (without a default). All other parameters are optional.public function setOptions(array $options,
$selectedKey = self::DEFAULT_OPTION_KEY,
$spacer = self::DEFAULT_SPACER,
$after = TRUE)
{
$this->after = $after;
$this->spacer = $spacer;
$this->options = $options;
$this->selectedKey = $selectedKey;
} getInputOnly() method.id attribute into an independent variable, $baseId, and later combine it with $count so that each id attribute is unique. If the option associated with the selected key is defined, it is assigned as the value; otherwise, we use the default:public function getInputOnly()
{
$count = 1;
$baseId = $this->attributes['id'];foreach() loop we check to see if the key is the one selected. If so, the checked attribute is added for that radio button. We then call the parent class getInputOnly() method to return the HTML for each button. Note that the value attribute of the input element is the options array key. The button label is the options array element value:foreach ($this->options as $key => $value) {
$this->attributes['id'] = $baseId . $count++;
$this->attributes['value'] = $key;
if ($key == $this->selectedKey) {
$this->attributes['checked'] = '';
} elseif (isset($this->attributes['checked'])) {
unset($this->attributes['checked']);
}
if ($this->after) {
$html = parent::getInputOnly() . $value;
} else {
$html = $value . parent::getInputOnly();
}
$output .= $this->spacer . $html;
}
return $output;
}Copy the preceding code into a new Radio.php file in the Application/Form/Element folder. You can then define a chap_06_form_element_radio.php calling script that sets up autoloading and anchors the new class:
<?php require __DIR__ . '/../Application/Autoload/Loader.php'; Application\Autoload\Loader::init(__DIR__ . '/..'); use Application\Form\Generic; use Application\Form\Element\Radio;
Next, define the wrappers using the $wrappers array defined in the previous recipe.
Then you can define a $status array and create an element instance by passing parameters to the constructor:
$statusList = [
'U' => 'Unconfirmed',
'P' => 'Pending',
'T' => 'Temporary Approval',
'A' => 'Approved'
];
$status = new Radio('status',
Generic::TYPE_RADIO,
'Status',
$wrappers,
['id' => 'status']);Now you can see if there is any status input from $_GET and set the options. Any input will become the selected key. Otherwise, the selected key is the default:
$checked = $_GET['status'] ?? 'U'; $status->setOptions($statusList, $checked, '<br>', TRUE);
Lastly, don't forget to define a submit button:
$submit = new Generic('submit',
Generic::TYPE_SUBMIT,
'Process',
$wrappers,
['id' => 'submit','title' =>
'Click to process','value' => 'Click Here']);The display logic might look like this:
<form name="status" method="get">
<table id="status" class="display" cellspacing="0" width="100%">
<tr><?= $status->render(); ?></tr>
<tr><?= $submit->render(); ?></tr>
<tr>
<td colspan=2>
<br>
<pre><?php var_dump($_GET); ?></pre>
</td>
</tr>
</table>
</form>Here is the actual output:
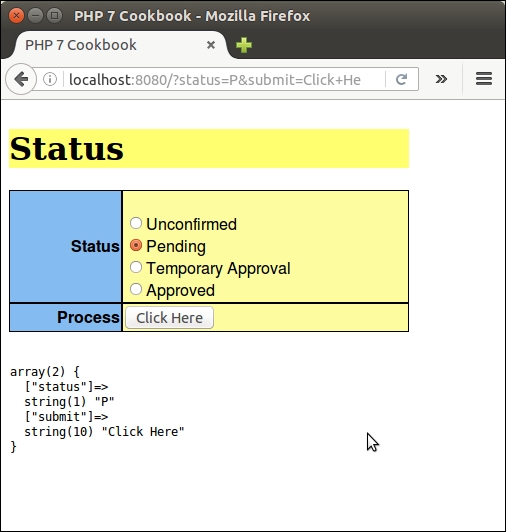
Generating an HTML single select element is similar to the process of generating radio buttons. The tags are structured differently, however, in that both a SELECT tag and a series of OPTION tags need to be generated.
Application\Form\Element\Select class that extends Application\Form\Generic.Generic rather than Radio is because the structuring of the element is entirely different:namespace Application\Form\Element;
use Application\Form\Generic;
class Select extends Generic
{
// code
}Application\Form\Generic. Unlike radio buttons or checkboxes, there is no need to account for spacers or the placement of the selected text:const DEFAULT_OPTION_KEY = 0; const DEFAULT_OPTION_VALUE = 'Choose'; protected $options; protected $selectedKey = DEFAULT_OPTION_KEY;
$selectedKey property could be either a string or an array. Accordingly, we do not add a type hint for this property. It is important, however, that we identify whether or not the multiple attribute has been set. This can be obtained from a $this->attributes property via inheritance from the parent class.multiple attribute has been set, it's important to formulate the name attribute as an array. Accordingly, we would append [] to the name if this were the case:public function setOptions(array $options, $selectedKey = self::DEFAULT_OPTION_KEY)
{
$this->options = $options;
$this->selectedKey = $selectedKey;
if (isset($this->attributes['multiple'])) {
$this->name .= '[]';
}
}getInputOnly() method, we need to define a method to generate the select tag. We then return the final HTML using sprintf(), using $pattern, $name, and the return value of getAttribs() as arguments.$pattern with <select name="%s" %s>. We then loop through the attributes, adding them as key-value pairs with spaces in between:protected function getSelect()
{
$this->pattern = '<select name="%s" %s> ' . PHP_EOL;
return sprintf($this->pattern, $this->name,
$this->getAttribs());
}option tags that will be associated with the select tag.$this->options array represents the return value, whereas the value part of the array represents the text that will appear on screen. If $this->selectedKey is in array form, we check to see if the value is in the array. Otherwise, we assume $this-> selectedKey is a string and we simply determine if it is equal to the key. If the selected key matches, we add the selected attribute:protected function getOptions()
{
$output = '';
foreach ($this->options as $key => $value) {
if (is_array($this->selectedKey)) {
$selected = (in_array($key, $this->selectedKey))
? ' selected' : '';
} else {
$selected = ($key == $this->selectedKey)
? ' selected' : '';
}
$output .= '<option value="' . $key . '"'
. $selected . '>'
. $value
. '</option>';
}
return $output;
}getInputOnly() method.getSelect() and getOptions() methods described in the preceding code. We also need to add the closing </select> tag:public function getInputOnly()
{
$output = $this->getSelect();
$output .= $this->getOptions();
$output .= '</' . $this->getType() . '>';
return $output;
}Copy the code described above into a new Select.php file in the Application/Form/Element folder. Then define a chap_06_form_element_select.php calling script that sets up autoloading and anchors the new class:
<?php require __DIR__ . '/../Application/Autoload/Loader.php'; Application\Autoload\Loader::init(__DIR__ . '/..'); use Application\Form\Generic; use Application\Form\Element\Select;
Next, define the wrappers using the array $wrappers defined in the first recipe. You can also use the $statusList array defined in the Creating an HTML radio element generator recipe. You can then create instances of SELECT elements. The first instance is single select, and the second is multiple:
$status1 = new Select('status1',
Generic::TYPE_SELECT,
'Status 1',
$wrappers,
['id' => 'status1']);
$status2 = new Select('status2',
Generic::TYPE_SELECT,
'Status 2',
$wrappers,
['id' => 'status2',
'multiple' => '',
'size' => '4']);See if there is any status input from $_GET and set the options. Any input will become the selected key. Otherwise, the selected key is the default. As you will recall, the second instance is multiple select, so the value obtained from $_GET and the default setting should both be in the form of an array:
$checked1 = $_GET['status1'] ?? 'U'; $checked2 = $_GET['status2'] ?? ['U']; $status1->setOptions($statusList, $checked1); $status2->setOptions($statusList, $checked2);
Lastly, be sure to define a submit button (as shown in the Creating a generic form element generator recipe of this chapter).
The actual display logic is identical to the radio button recipe, except that we need to render two separate HTML select instances:
<form name="status" method="get">
<table id="status" class="display" cellspacing="0" width="100%">
<tr><?= $status1->render(); ?></tr>
<tr><?= $status2->render(); ?></tr>
<tr><?= $submit->render(); ?></tr>
<tr>
<td colspan=2>
<br>
<pre>
<?php var_dump($_GET); ?>
</pre>
</td>
</tr>
</table>
</form>Here is the actual output:
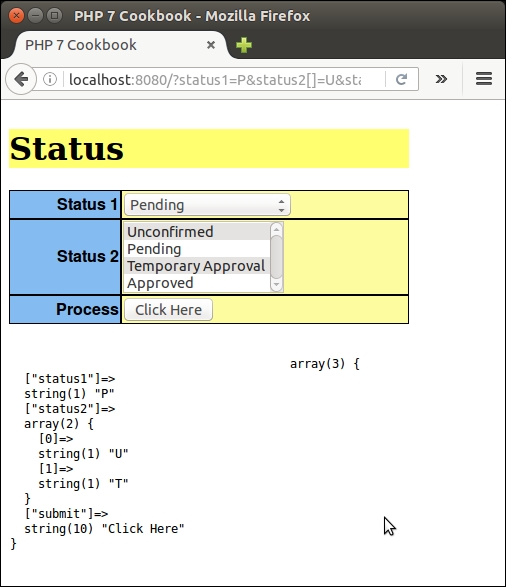
Also, you can see how the elements appear in the view source page:
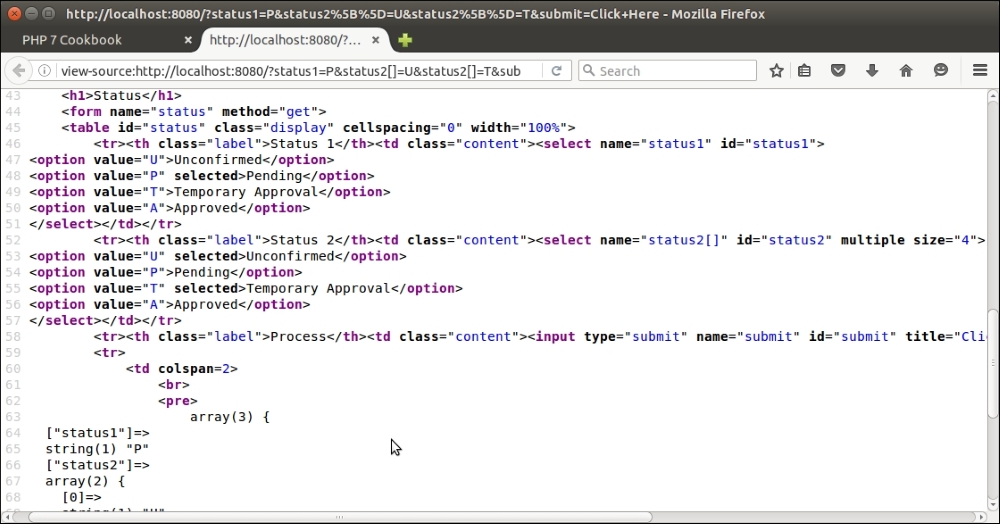
The purpose of a form factory is to generate a usable form object from a single configuration array. The form object should have the ability to retrieve the individual elements it contains so that output can be generated.
Application\Form\Factory to contain the factory code. It will have only one property, $elements, with a getter:namespace Application\Form;
class Factory
{
protected $elements;
public function getElements()
{
return $this->elements;
}
// remaining code
}Factory instance, with an $elements property. This property would be an array of Application\Form\Generic or Application\Form\Element classes.generate() method. This will cycle through the configuration array, creating the appropriate Application\Form\Generic or Application\Form\Element\* objects, which in turn will be stored in the $elements array. The new method will accept the configuration array as an argument. It is convenient to define this method as static so that we can generate as many instances as are needed using different blocks of configuration.Application\Form\Factory, and then we start looping through the configuration array:public static function generate(array $config)
{
$form = new self();
foreach ($config as $key => $p) {Application\Form\Generic class:$p['errors'] = $p['errors'] ?? array(); $p['wrappers'] = $p['wrappers'] ?? array(); $p['attributes'] = $p['attributes'] ?? array();
$elements: $form->elements[$key] = new $p['class']
(
$key,
$p['type'],
$p['label'],
$p['wrappers'],
$p['attributes'],
$p['errors']
);options parameter is set, we extract the array values into variables using list(). We then test the element type using switch() and run setOptions() with the appropriate number of parameters: if (isset($p['options'])) {
list($a,$b,$c,$d) = $p['options'];
switch ($p['type']) {
case Generic::TYPE_RADIO :
case Generic::TYPE_CHECKBOX :
$form->elements[$key]->setOptions($a,$b,$c,$d);
break;
case Generic::TYPE_SELECT :
$form->elements[$key]->setOptions($a,$b);
break;
default :
$form->elements[$key]->setOptions($a,$b);
break;
}
}
}return $form; }
render() method. The view logic might look like this:<form name="status" method="get">
<table id="status" class="display" cellspacing="0" width="100%">
<?php foreach ($form->getElements() as $element) : ?>
<?php echo $element->render(); ?>
<?php endforeach; ?>
</table>
</form>Form class under Application\Form\Element:namespace Application\Form\Element;
class Form extends Generic
{
public function getInputOnly()
{
$this->pattern = '<form name="%s" %s> ' . PHP_EOL;
return sprintf($this->pattern, $this->name,
$this->getAttribs());
}
public function closeTag()
{
return '</' . $this->type . '>';
}
}Application\Form\Factory class, we now need to define a simple method that returns a sprintf() wrapper pattern that will serve as an envelope for input. As an example, if the wrapper is div with an attribute class="test" we would produce this pattern: <div class="test">%s</div>. Our content would then be substituted in place of %s by the sprintf() function:protected function getWrapperPattern($wrapper)
{
$type = $wrapper['type'];
unset($wrapper['type']);
$pattern = '<' . $type;
foreach ($wrapper as $key => $value) {
$pattern .= ' ' . $key . '="' . $value . '"';
}
$pattern .= '>%s</' . $type . '>';
return $pattern;
}sprintf() patterns for each form row. We then loop through the elements, render each one, and wrap the output in the row pattern. Next, we generate an Application\Form\Element\Form instance. We then retrieve the form wrapper sprintf() pattern and check the form_tag_inside_wrapper flag, which tells us whether we need to place the form tag inside or outside the form wrapper:public static function render($form, $formConfig)
{
$rowPattern = $form->getWrapperPattern(
$formConfig['row_wrapper']);
$contents = '';
foreach ($form->getElements() as $element) {
$contents .= sprintf($rowPattern, $element->render());
}
$formTag = new Form($formConfig['name'],
Generic::TYPE_FORM,
'',
array(),
$formConfig['attributes']);
$formPattern = $form->getWrapperPattern(
$formConfig['form_wrapper']);
if (isset($formConfig['form_tag_inside_wrapper'])
&& !$formConfig['form_tag_inside_wrapper']) {
$formPattern = '%s' . $formPattern . '%s';
return sprintf($formPattern, $formTag->getInputOnly(),
$contents, $formTag->closeTag());
} else {
return sprintf($formPattern, $formTag->getInputOnly()
. $contents . $formTag->closeTag());
}
}Referring to the preceding code, create the Application\Form\Factory and Application\Form\Element\Form classes.
Next, you can define a chap_06_form_factor.php calling script that sets up autoloading and anchors the new class:
<?php require __DIR__ . '/../Application/Autoload/Loader.php'; Application\Autoload\Loader::init(__DIR__ . '/..'); use Application\Form\Generic; use Application\Form\Factory;
Next, define the wrappers using the $wrappers array defined in the first recipe. You can also use the $statusList array defined in the second recipe.
See if there is any status input from $_POST. Any input will become the selected key. Otherwise, the selected key is the default.
$email = $_POST['email'] ?? ''; $checked0 = $_POST['status0'] ?? 'U'; $checked1 = $_POST['status1'] ?? 'U'; $checked2 = $_POST['status2'] ?? ['U']; $checked3 = $_POST['status3'] ?? ['U'];
Now you can define the overall form configuration. The name and attributes parameters are used to configure the form tag itself. The other two parameters represent form-level and row-level wrappers. Lastly, we provide a form_tag_inside_wrapper flag to indicate that the form tag should not appear inside the wrapper (that is, <table>). If the wrapper was <div>, we would set this flag to TRUE:
$formConfig = [
'name' => 'status_form',
'attributes' => ['id'=>'statusForm','method'=>'post', 'action'=>'chap_06_form_factory.php'],
'row_wrapper' => ['type' => 'tr', 'class' => 'row'],
'form_wrapper' => ['type'=>'table','class'=>'table', 'id'=>'statusTable',
'class'=>'display','cellspacing'=>'0'],
'form_tag_inside_wrapper' => FALSE,
];Next, define an array that holds parameters for each form element to be created by the factory. The array key becomes the name of the form element, and must be unique:
$config = [
'email' => [
'class' => 'Application\Form\Generic',
'type' => Generic::TYPE_EMAIL,
'label' => 'Email',
'wrappers' => $wrappers,
'attributes'=> ['id'=>'email','maxLength'=>128, 'title'=>'Enter address',
'required'=>'','value'=>strip_tags($email)]
],
'password' => [
'class' => 'Application\Form\Generic',
'type' => Generic::TYPE_PASSWORD,
'label' => 'Password',
'wrappers' => $wrappers,
'attributes' => ['id'=>'password',
'title' => 'Enter your password',
'required' => '']
],
// etc.
];Lastly, be sure to generate the form:
$form = Factory::generate($config);
The actual display logic is extremely simple, as we simply call the form level render() method:
<?= $form->render($form, $formConfig); ?>
Here is the actual output:
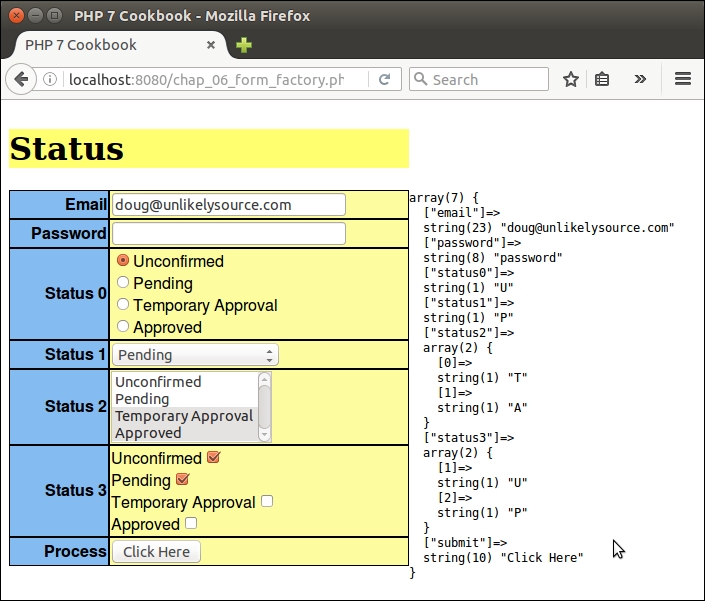
Proper filtering and validation is a common problem when processing data submitted by users from an online form. It is arguably also the number one security vulnerability for a website. Furthermore, it can be quite awkward to have the filters and validators scattered all over the application. A chaining mechanism would resolve these issues neatly, and would also allow you to exert control over the order in which the filters and validators are processed.
filter_input_array(), that, at first glance, seems well suited for this task. Looking more deeply into its functionality, however, it soon becomes apparent that this function was designed in the early days, and is not up to modern requirements for protection against attack and flexibility. Accordingly, we will instead present a much more flexible mechanism based on an array of callbacks performing filtering and validation.Application\Filter\Result.Result class will be to hold a $item value, which would be the filtered value or a boolean result of validation. Another property, $messages, will hold an array of messages populated during the filtering or validation operation. In the constructor, the value supplied for $messages is formulated as an array. You might observe that both properties are defined public. This is to facilitate ease of access:namespace Application\Filter;
class Result
{
public $item; // (mixed) filtered data | (bool) result of validation
public $messages = array(); // [(string) message, (string) message ]
public function __construct($item, $messages)
{
$this->item = $item;
if (is_array($messages)) {
$this->messages = $messages;
} else {
$this->messages = [$messages];
}
}Result instance with another. This is important as at some point we will be processing the same value through a chain of filters. In such a case, we want the newly filtered value to overwrite the existing one, but we want the messages to be merged:public function mergeResults(Result $result)
{
$this->item = $result->item;
$this->mergeMessages($result);
}
public function mergeMessages(Result $result)
{
if (isset($result->messages) && is_array($result->messages)) {
$this->messages = array_merge($this->messages, $result->messages);
}
}FALSE, up or down the validation chain, must cause the entire result to be FALSE:public function mergeValidationResults(Result $result)
{
if ($this->item === TRUE) {
$this->item = (bool) $result->item;
}
$this->mergeMessages($result);
}
}Application\Filter\CallbackInterface interface. You will note that we are taking advantage of the PHP 7 ability to data type the return value to ensure that we are getting a Result instance in return:namespace Application\Filter;
interface CallbackInterface
{
public function __invoke ($item, $params) : Result;
}Application\Filter\Messages class with a series of static properties. We provide methods to set all messages, or just one message. The $messages property has been made public for easier access:namespace Application\Filter;
class Messages
{
const MESSAGE_UNKNOWN = 'Unknown';
public static $messages;
public static function setMessages(array $messages)
{
self::$messages = $messages;
}
public static function setMessage($key, $message)
{
self::$messages[$key] = $message;
}
public static function getMessage($key)
{
return self::$messages[$key] ?? self::MESSAGE_UNKNOWN;
}
}Application\Web\AbstractFilter class that implements core functionality. As mentioned previously, this class will be relatively lightweight and we do not need to worry about specific filters or validators as they will be supplied through configuration. We use the UnexpectedValueException class, provided as part of the PHP 7 Standard PHP Library (SPL), in order to throw a descriptive exception in case one of the callbacks does not implement CallbackInterface:namespace Application\Filter;
use UnexpectedValueException;
abstract class AbstractFilter
{
// code described in the next several bulletsconst BAD_CALLBACK = 'Must implement CallbackInterface'; const DEFAULT_SEPARATOR = '<br>' . PHP_EOL; const MISSING_MESSAGE_KEY = 'item.missing'; const DEFAULT_MESSAGE_FORMAT = '%20s : %60s'; const DEFAULT_MISSING_MESSAGE = 'Item Missing';
$separator is used in conjunction with filtering and validation messages. $callbacks represents the array of callbacks that perform filtering and validation. $assignments map data fields to filters and/or validators. $missingMessage is represented as a property so that it can be overwritten (that is, for multi-language websites). Finally, $results is an array of Application\Filter\Result objects and is populated by the filtering or validation operation:protected $separator; // used for message display protected $callbacks; protected $assignments; protected $missingMessage; protected $results = array();
__construct() method. Its main function is to set the array of callbacks and assignments. It also either sets values or accepts defaults for the separator (used in message display), and the missing message:public function __construct(array $callbacks, array $assignments,
$separator = NULL, $message = NULL)
{
$this->setCallbacks($callbacks);
$this->setAssignments($assignments);
$this->setSeparator($separator ?? self::DEFAULT_SEPARATOR);
$this->setMissingMessage($message
?? self::DEFAULT_MISSING_MESSAGE);
}setOneCall() checks to see if the callback implements CallbackInterface. If it does not, an UnexpectedValueException is thrown:public function getCallbacks()
{
return $this->callbacks;
}
public function getOneCallback($key)
{
return $this->callbacks[$key] ?? NULL;
}
public function setCallbacks(array $callbacks)
{
foreach ($callbacks as $key => $item) {
$this->setOneCallback($key, $item);
}
}
public function setOneCallback($key, $item)
{
if ($item instanceof CallbackInterface) {
$this->callbacks[$key] = $item;
} else {
throw new UnexpectedValueException(self::BAD_CALLBACK);
}
}
public function removeOneCallback($key)
{
if (isset($this->callbacks[$key]))
unset($this->callbacks[$key]);
}getItemsAsArray(), otherwise getResults() will return an array of Result objects:public function getResults()
{
return $this->results;
}
public function getItemsAsArray()
{
$return = array();
if ($this->results) {
foreach ($this->results as $key => $item)
$return[$key] = $item->item;
}
return $return;
}$this ->results and extracting the $messages property. For convenience, we also added getMessageString() with some formatting options. To easily produce an array of messages, we use the PHP 7 yield from syntax. This has the effect of turning getMessages() into a delegating generator. The array of messages becomes a sub-generator:public function getMessages()
{
if ($this->results) {
foreach ($this->results as $key => $item)
if ($item->messages) yield from $item->messages;
} else {
return array();
}
}
public function getMessageString($width = 80, $format = NULL)
{
if (!$format)
$format = self::DEFAULT_MESSAGE_FORMAT . $this->separator;
$output = '';
if ($this->results) {
foreach ($this->results as $key => $value) {
if ($value->messages) {
foreach ($value->messages as $message) {
$output .= sprintf(
$format, $key, trim($message));
}
}
}
}
return $output;
} public function setMissingMessage($message)
{
$this->missingMessage = $message;
}
public function setSeparator($separator)
{
$this->separator = $separator;
}
public function getSeparator()
{
return $this->separator;
}
public function getAssignments()
{
return $this->assignments;
}
public function setAssignments(array $assignments)
{
$this->assignments = $assignments;
}
// closing bracket for class AbstractFilter
}Application\Filter\Filter. We make this class extend AbstractFilter in order to provide the core functionality described previously:namespace Application\Filter;
class Filter extends AbstractFilter
{
// code
}process() method that scans an array of data and applies filters as per the array of assignments. If there are no assigned filters for this data set, we simply return NULL:public function process(array $data)
{
if (!(isset($this->assignments)
&& count($this->assignments))) {
return NULL;
}$this->results to an array of Result objects where the $item property is the original value from $data, and the $messages property is an empty array:foreach ($data as $key => $value) {
$this->results[$key] = new Result($value, array());
}$this->assignments and check to see if there are any global filters (identified by the '*' key. If so, we run processGlobal() and then unset the '*' key:$toDo = $this->assignments;
if (isset($toDo['*'])) {
$this->processGlobalAssignment($toDo['*'], $data);
unset($toDo['*']);
}processAssignment():foreach ($toDo as $key => $assignment) {
$this->processAssignment($assignment, $key);
}processGlobalAssignment() we need to loop through the array of callbacks. In this case, however, because these assignments are global, we also need to loop through the entire data set, and apply each global filter in turn:protected function processGlobalAssignment($assignment, $data)
{
foreach ($assignment as $callback) {
if ($callback === NULL) continue;
foreach ($data as $k => $value) {
$result = $this->callbacks[$callback['key']]($this->results[$k]->item,
$callback['params']);
$this->results[$k]->mergeResults($result);
}
}
}The tricky bit is this line of code:
$result = $this->callbacks[$callback['key']]($this ->results[$k]->item, $callback['params']);
Remember, each callback is actually an anonymous class that defines the PHP magic __invoke() method. The arguments supplied are the actual data item to be filtered, and an array of parameters. By running $this->callbacks[$callback['key']]() we are in fact magically calling __invoke().
processAssignment(), in a manner akin to processGlobalAssignment(), we need to execute each remaining callback assigned to each data key: protected function processAssignment($assignment, $key)
{
foreach ($assignment as $callback) {
if ($callback === NULL) continue;
$result = $this->callbacks[$callback['key']]($this->results[$key]->item,
$callback['params']);
$this->results[$key]->mergeResults($result);
}
}
} // closing brace for Application\Filter\FilterCreate an Application\Filter folder. In this folder, create the following class files, using code from the preceding steps:
|
Application\Filter\* class file |
Code described in these steps |
|---|---|
|
|
3 - 5 |
|
|
6 |
|
|
7 |
|
|
8 - 15 |
|
|
16 - 22 |
Next, take the code discussed in step 5, and use it to configure an array of messages in a chap_06_post_data_config_messages.php file. Each callback references the Messages::$messages property. Here is a sample configuration:
<?php
use Application\Filter\Messages;
Messages::setMessages(
[
'length_too_short' => 'Length must be at least %d',
'length_too_long' => 'Length must be no more than %d',
'required' => 'Please be sure to enter a value',
'alnum' => 'Only letters and numbers allowed',
'float' => 'Only numbers or decimal point',
'email' => 'Invalid email address',
'in_array' => 'Not found in the list',
'trim' => 'Item was trimmed',
'strip_tags' => 'Tags were removed from this item',
'filter_float' => 'Converted to a decimal number',
'phone' => 'Phone number is [+n] nnn-nnn-nnnn',
'test' => 'TEST',
'filter_length' => 'Reduced to specified length',
]
);Next, create a chap_06_post_data_config_callbacks.php callback configuration file that contains configuration for filtering callbacks, as described in step 4. Each callback should follow this generic template:
'callback_key' => new class () implements CallbackInterface
{
public function __invoke($item, $params) : Result
{
$changed = array();
$filtered = /* perform filtering operation on $item */
if ($filtered !== $item) $changed = Messages::$messages['callback_key'];
return new Result($filtered, $changed);
}
}The callbacks themselves must implement the interface and return a Result instance. We can take advantage of the PHP 7
anonymous class capability by having our callbacks return an anonymous class that implements CallbackInterface. Here is how an array of filtering callbacks might look:
use Application\Filter\ { Result, Messages, CallbackInterface };
$config = [ 'filters' => [
'trim' => new class () implements CallbackInterface
{
public function __invoke($item, $params) : Result
{
$changed = array();
$filtered = trim($item);
if ($filtered !== $item)
$changed = Messages::$messages['trim'];
return new Result($filtered, $changed);
}
},
'strip_tags' => new class ()
implements CallbackInterface
{
public function __invoke($item, $params) : Result
{
$changed = array();
$filtered = strip_tags($item);
if ($filtered !== $item)
$changed = Messages::$messages['strip_tags'];
return new Result($filtered, $changed);
}
},
// etc.
]
];For test purposes, we will use the prospects table as a target. Instead of providing data from $_POST, we will construct an array of good and bad data:
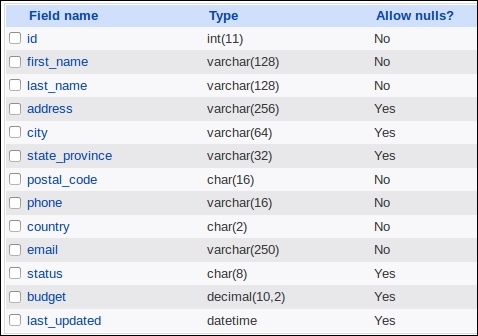
You can now create a chap_06_post_data_filtering.php script that sets up autoloading, includes the messages and callbacks configuration files:
<?php require __DIR__ . '/../Application/Autoload/Loader.php'; Application\Autoload\Loader::init(__DIR__ . '/..'); include __DIR__ . '/chap_06_post_data_config_messages.php'; include __DIR__ . '/chap_06_post_data_config_callbacks.php';
You then need to define assignments that represent a mapping between the data fields and filter callbacks. Use the * key to define a global filter that applies to all data:
$assignments = [
'*' => [ ['key' => 'trim', 'params' => []],
['key' => 'strip_tags', 'params' => []] ],
'first_name' => [ ['key' => 'length',
'params' => ['length' => 128]] ],
'last_name' => [ ['key' => 'length',
'params' => ['length' => 128]] ],
'city' => [ ['key' => 'length',
'params' => ['length' => 64]] ],
'budget' => [ ['key' => 'filter_float', 'params' => []] ],
];Next, define good and bad test data:
$goodData = [ 'first_name' => 'Your Full', 'last_name' => 'Name', 'address' => '123 Main Street', 'city' => 'San Francisco', 'state_province' => 'California', 'postal_code' => '94101', 'phone' => '+1 415-555-1212', 'country' => 'US', 'email' => 'your@email.address.com', 'budget' => '123.45', ]; $badData = [ 'first_name' => 'This+Name<script>bad tag</script>Valid!', 'last_name' => 'ThisLastNameIsWayTooLongAbcdefghijklmnopqrstuvwxyz0123456789Abcdefghijklmnopqrstuvwxyz0123456789Abcdefghijklmnopqrstuvwxyz0123456789Abcdefghijklmnopqrstuvwxyz0123456789', //'address' => '', // missing 'city' => ' ThisCityNameIsTooLong012345678901234567890123456789012345678901234567890123456789 ', //'state_province'=> '', // missing 'postal_code' => '!"£$%^Non Alpha Chars', 'phone' => ' 12345 ', 'country' => 'XX', 'email' => 'this.is@not@an.email', 'budget' => 'XXX', ];
Finally, you can create an Application\Filter\Filter instance, and test the data:
$filter = new Application\Filter\Filter( $config['filters'], $assignments); $filter->setSeparator(PHP_EOL); $filter->process($goodData); echo $filter->getMessageString(); var_dump($filter->getItemsAsArray()); $filter->process($badData); echo $filter->getMessageString(); var_dump($filter->getItemsAsArray());
Processing good data produces no messages other than one indicating that the value for the float field was converted from string to float. The bad data, on the other hand, produces the following output:
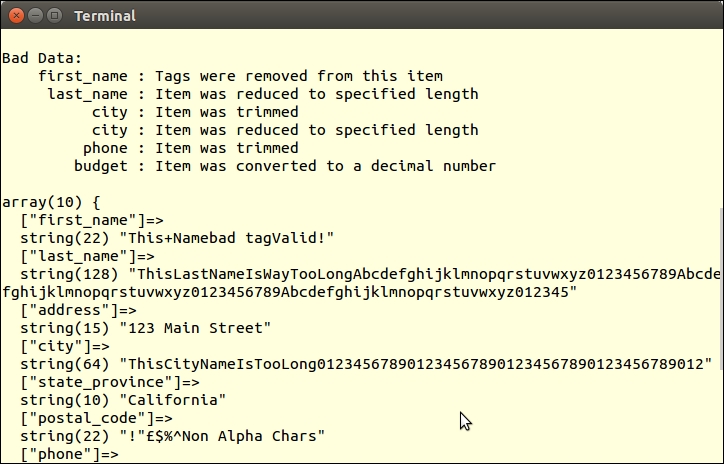
You will also notice that tags were removed from first_name, and that both last_name and city were truncated.
The filter_input_array() function takes two arguments: the input source (in the form of a pre-defined constant used to indicate one of the $_* PHP super-globals, that is, $_POST), and an array of matching field definitions as keys and filters or validators as values. This function performs not only filtering operations, but validation as well. The flags labeled sanitize are actually filters.
Documentation and examples of filter_input_array() can be found at http://php.net/manual/en/function.filter-input-array.php. You might also have a look at the different types of filters that are available on http://php.net/manual/en/filter.filters.php.
The heavy lifting for this recipe has already been accomplished in the preceding recipe. Core functionality is defined by Application\Filter\AbstractFilter. The actual validation is performed by an array of validating callbacks.
Application\Filter\CallbackInterface, and should return an instance of Application\Filter\Result. Validators would take this generic form:use Application\Filter\ { Result, Messages, CallbackInterface };
$config = [
// validator callbacks
'validators' => [
'key' => new class () implements CallbackInterface
{
public function __invoke($item, $params) : Result
{
// validation logic goes here
return new Result($valid, $error);
}
},
// etc.Application\Filter\Validator class, which loops through the array of assignments, testing each data item against its assigned validator callbacks. We make this class extend AbstractFilter in order to provide the core functionality described previously:namespace Application\Filter;
class Validator extends AbstractFilter
{
// code
}process() method that scans an array of data and applies validators as per the array of assignments. If there are no assigned validators for this data set, we simply return the current status of $valid (which is TRUE):public function process(array $data)
{
$valid = TRUE;
if (!(isset($this->assignments)
&& count($this->assignments))) {
return $valid;
}$this->results to an array of Result objects where the $item property is set to TRUE, and the $messages property is an empty array:foreach ($data as $key => $value) {
$this->results[$key] = new Result(TRUE, array());
}$this->assignments and check to see if there are any global filters (identified by the '*' key). If so, we run processGlobal() and then unset the '*' key:$toDo = $this->assignments;
if (isset($toDo['*'])) {
$this->processGlobalAssignment($toDo['*'], $data);
unset($toDo['*']);
}processAssignment(). This is an ideal place to check to see if any fields present in the assignments array is missing from the data. Note that we set $valid to FALSE if any validation callback returns FALSE:foreach ($toDo as $key => $assignment) {
if (!isset($data[$key])) {
$this->results[$key] =
new Result(FALSE, $this->missingMessage);
} else {
$this->processAssignment(
$assignment, $key, $data[$key]);
}
if (!$this->results[$key]->item) $valid = FALSE;
}
return $valid;
}processGlobalAssignment(), we need to loop through the array of callbacks. In this case, however, because these assignments are global, we also need to loop through the entire data set, and apply each global filter in turn.Application\Filter\Fiter::processGlobalAssignment() method, we need to call mergeValidationResults(). The reason for this is that if the value of $result->item is already FALSE, we need to ensure that it does not subsequently get overwritten by a value of TRUE. Any validator in the chain that returns FALSE must overwrite any other validation result:protected function processGlobalAssignment($assignment, $data)
{
foreach ($assignment as $callback) {
if ($callback === NULL) continue;
foreach ($data as $k => $value) {
$result = $this->callbacks[$callback['key']]
($value, $callback['params']);
$this->results[$k]->mergeValidationResults($result);
}
}
}processAssignment(), in a manner akin to processGlobalAssignment(), we need to execute each remaining callback assigned to each data key, again calling mergeValidationResults():protected function processAssignment($assignment, $key, $value)
{
foreach ($assignment as $callback) {
if ($callback === NULL) continue;
$result = $this->callbacks[$callback['key']]
($value, $callback['params']);
$this->results[$key]->mergeValidationResults($result);
}
}As with the preceding recipe, be sure to define the following classes:
Application\Filter\ResultApplication\Filter\CallbackInterfaceApplication\Filter\MessagesApplication\Filter\AbstractFilterYou can use the chap_06_post_data_config_messages.php file, also described in the previous recipe.
Next, create a Validator.php file in the Application\Filter folder. Place the code described in step 3 to 10.
Next, create a chap_06_post_data_config_callbacks.php callback configuration file that contains configurations for validation callbacks, as described in step 2. Each callback should follow this generic template:
'validation_key' => new class () implements CallbackInterface
{
public function __invoke($item, $params) : Result
{
$error = array();
$valid = /* perform validation operation on $item */
if (!$valid)
$error[] = Messages::$messages['validation_key'];
return new Result($valid, $error);
}
}Now you can create a chap_06_post_data_validation.php calling script that initializes autoloading and includes the configuration scripts:
<?php require __DIR__ . '/../Application/Autoload/Loader.php'; Application\Autoload\Loader::init(__DIR__ . '/..'); include __DIR__ . '/chap_06_post_data_config_messages.php'; include __DIR__ . '/chap_06_post_data_config_callbacks.php';
Next, define an array of assignments, mapping data fields to validator callback keys:
$assignments = [
'first_name' => [ ['key' => 'length',
'params' => ['min' => 1, 'max' => 128]],
['key' => 'alnum',
'params' => ['allowWhiteSpace' => TRUE]],
['key' => 'required','params' => []] ],
'last_name'=> [ ['key' => 'length',
'params' => ['min' => 1, 'max' => 128]],
['key' => 'alnum',
'params' => ['allowWhiteSpace' => TRUE]],
['key' => 'required','params' => []] ],
'address' => [ ['key' => 'length',
'params' => ['max' => 256]] ],
'city' => [ ['key' => 'length',
'params' => ['min' => 1, 'max' => 64]] ],
'state_province'=> [ ['key' => 'length',
'params' => ['min' => 1, 'max' => 32]] ],
'postal_code' => [ ['key' => 'length',
'params' => ['min' => 1, 'max' => 16] ],
['key' => 'alnum',
'params' => ['allowWhiteSpace' => TRUE]],
['key' => 'required','params' => []] ],
'phone' => [ ['key' => 'phone', 'params' => []] ],
'country' => [ ['key' => 'in_array',
'params' => $countries ],
['key' => 'required','params' => []] ],
'email' => [ ['key' => 'email', 'params' => [] ],
['key' => 'length',
'params' => ['max' => 250] ],
['key' => 'required','params' => [] ] ],
'budget' => [ ['key' => 'float', 'params' => []] ]
];For test data, use the same good and bad data defined in the chap_06_post_data_filtering.php file described in the previous recipe. After that, you are in a position to create an Application\Filter\Validator instance, and test the data:
$validator = new Application\Filter\Validator($config['validators'], $assignments); $validator->setSeparator(PHP_EOL); $validator->process($badData); echo $validator->getMessageString(40, '%14s : %-26s' . PHP_EOL); var_dump($validator->getItemsAsArray()); $validator->process($goodData); echo $validator->getMessageString(40, '%14s : %-26s' . PHP_EOL); var_dump($validator->getItemsAsArray());
As expected, the good data does not produce any validation errors. The bad data, on the other hand, generates the following output:
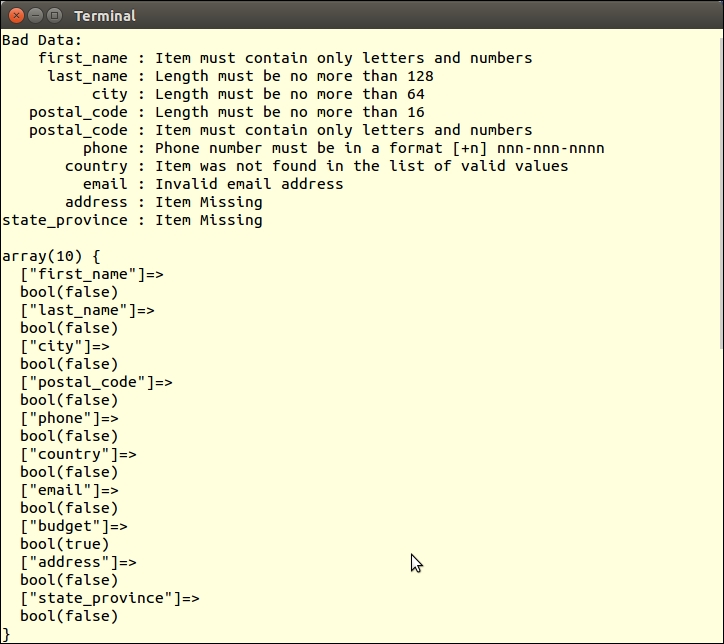
Notice that the missing fields, address and state_province validate FALSE, and return the missing item message.
When a form is first rendered, there is little value in having a form class (such as Application\Form\Factory, described in the previous recipe) tied to a class that can perform filtering or validation (such as the Application\Filter\* described in the previous recipe). Once the form data has been submitted, however, interest grows. If the form data fails validation, the values can be filtered, and then re-displayed. Validation error messages can be tied to form elements, and rendered next to form fields.
Application\Form\Factory class, and add properties and setters that allow us to attach instances of Application\Filter\Filter and Application\Filter\Validator. We also need define $data, which will be used to retain the filtered and/or validated data:const DATA_NOT_FOUND = 'Data not found. Run setData()';
const FILTER_NOT_FOUND = 'Filter not found. Run setFilter()';
const VALIDATOR_NOT_FOUND = 'Validator not found. Run setValidator()';
protected $filter;
protected $validator;
protected $data;
public function setFilter(Filter $filter)
{
$this->filter = $filter;
}
public function setValidator(Validator $validator)
{
$this->validator = $validator;
}
public function setData($data)
{
$this->data = $data;
}validate() method that calls the process() method of the embedded Application\Filter\Validator instance. We check to see if $data and $validator exist. If not, the appropriate exceptions are thrown with instructions on which method needs to be run first:public function validate()
{
if (!$this->data)
throw new RuntimeException(self::DATA_NOT_FOUND);
if (!$this->validator)
throw new RuntimeException(self::VALIDATOR_NOT_FOUND);process() method, we associate validation result messages with form element messages. Note that the process() method returns a boolean value that represents the overall validation status of the data set. When the form is re-displayed following failed validation, error messages will appear next to each element:$valid = $this->validator->process($this->data);
foreach ($this->elements as $element) {
if (isset($this->validator->getResults()
[$element->getName()])) {
$element->setErrors($this->validator->getResults()
[$element->getName()]->messages);
}
}
return $valid;
}filter() method that calls the process() method of the embedded Application\Filter\Filter instance. As with the validate() method described in step 3, we need to check for the existence of $data and $filter. If either is missing, we throw a RuntimeException with the appropriate message:public function filter()
{
if (!$this->data)
throw new RuntimeException(self::DATA_NOT_FOUND);
if (!$this->filter)
throw new RuntimeException(self::FILTER_NOT_FOUND);process() method, which produces an array of Result objects where the $item property represents the end result of the filter chain. We then loop through the results, and, if the corresponding $element key matches, set the value attribute to the filtered value. We also add any messages resulting from the filtering process. When the form is then re-displayed, all value attributes will display filtered results:$this->filter->process($this->data);
foreach ($this->filter->getResults() as $key => $result) {
if (isset($this->elements[$key])) {
$this->elements[$key]
->setSingleAttribute('value', $result->item);
if (isset($result->messages)
&& count($result->messages)) {
foreach ($result->messages as $message) {
$this->elements[$key]->addSingleError($message);
}
}
}
}
}You can start by making the changes to Application\Form\Factory as described above. For a test target you can use the prospects database table shown in the How it works... section of the Chaining $_POST filters recipe. The various column settings should give you an idea of which form elements, filters, and validators to define.
As an example, you can define a chap_06_tying_filters_to_form_definitions.php file, which will contain definitions for form wrappers, elements, and filter assignments. Here are some examples:
<?php
use Application\Form\Generic;
define('VALIDATE_SUCCESS', 'SUCCESS: form submitted ok!');
define('VALIDATE_FAILURE', 'ERROR: validation errors detected');
$wrappers = [
Generic::INPUT => ['type' => 'td', 'class' => 'content'],
Generic::LABEL => ['type' => 'th', 'class' => 'label'],
Generic::ERRORS => ['type' => 'td', 'class' => 'error']
];
$elements = [
'first_name' => [
'class' => 'Application\Form\Generic',
'type' => Generic::TYPE_TEXT,
'label' => 'First Name',
'wrappers' => $wrappers,
'attributes'=> ['maxLength'=>128,'required'=>'']
],
'last_name' => [
'class' => 'Application\Form\Generic',
'type' => Generic::TYPE_TEXT,
'label' => 'Last Name',
'wrappers' => $wrappers,
'attributes'=> ['maxLength'=>128,'required'=>'']
],
// etc.
];
// overall form config
$formConfig = [
'name' => 'prospectsForm',
'attributes' => [
'method'=>'post',
'action'=>'chap_06_tying_filters_to_form.php'
],
'row_wrapper' => ['type' => 'tr', 'class' => 'row'],
'form_wrapper' => [
'type'=>'table',
'class'=>'table',
'id'=>'prospectsTable',
'class'=>'display','cellspacing'=>'0'
],
'form_tag_inside_wrapper' => FALSE,
];
$assignments = [
'first_name' => [ ['key' => 'length',
'params' => ['min' => 1, 'max' => 128]],
['key' => 'alnum',
'params' => ['allowWhiteSpace' => TRUE]],
['key' => 'required','params' => []] ],
'last_name' => [ ['key' => 'length',
'params' => ['min' => 1, 'max' => 128]],
['key' => 'alnum',
'params' => ['allowWhiteSpace' => TRUE]],
['key' => 'required','params' => []] ],
'address' => [ ['key' => 'length',
'params' => ['max' => 256]] ],
'city' => [ ['key' => 'length',
'params' => ['min' => 1, 'max' => 64]] ],
'state_province'=> [ ['key' => 'length',
'params' => ['min' => 1, 'max' => 32]] ],
'postal_code' => [ ['key' => 'length',
'params' => ['min' => 1, 'max' => 16] ],
['key' => 'alnum',
'params' => ['allowWhiteSpace' => TRUE]],
['key' => 'required','params' => []] ],
'phone' => [ ['key' => 'phone', 'params' => []] ],
'country' => [ ['key' => 'in_array',
'params' => $countries ],
['key' => 'required','params' => []] ],
'email' => [ ['key' => 'email', 'params' => [] ],
['key' => 'length',
'params' => ['max' => 250] ],
['key' => 'required','params' => [] ] ],
'budget' => [ ['key' => 'float', 'params' => []] ]
];You can use the already existing chap_06_post_data_config_callbacks.php and chap_06_post_data_config_messages.php files described in the previous recipes. Finally, define a chap_06_tying_filters_to_form.php file that sets up autoloading and includes these three configuration files:
<?php require __DIR__ . '/../Application/Autoload/Loader.php'; Application\Autoload\Loader::init(__DIR__ . '/..'); include __DIR__ . '/chap_06_post_data_config_messages.php'; include __DIR__ . '/chap_06_post_data_config_callbacks.php'; include __DIR__ . '/chap_06_tying_filters_to_form_definitions.php';
Next, you can create instances of the form factory, filter, and validator classes:
use Application\Form\Factory;
use Application\Filter\ { Validator, Filter };
$form = Factory::generate($elements);
$form->setFilter(new Filter($callbacks['filters'], $assignments['filters']));
$form->setValidator(new Validator($callbacks['validators'], $assignments['validators']));You can then check to see if there is any $_POST data. If so, perform validation and filtering:
$message = '';
if (isset($_POST['submit'])) {
$form->setData($_POST);
if ($form->validate()) {
$message = VALIDATE_SUCCESS;
} else {
$message = VALIDATE_FAILURE;
}
$form->filter();
}
?>The view logic is extremely simple: just render the form. Any validation messages and values for the various elements will be assigned as part of validation and filtering:
<?= $form->render($form, $formConfig); ?>
Here is an example using bad form data:
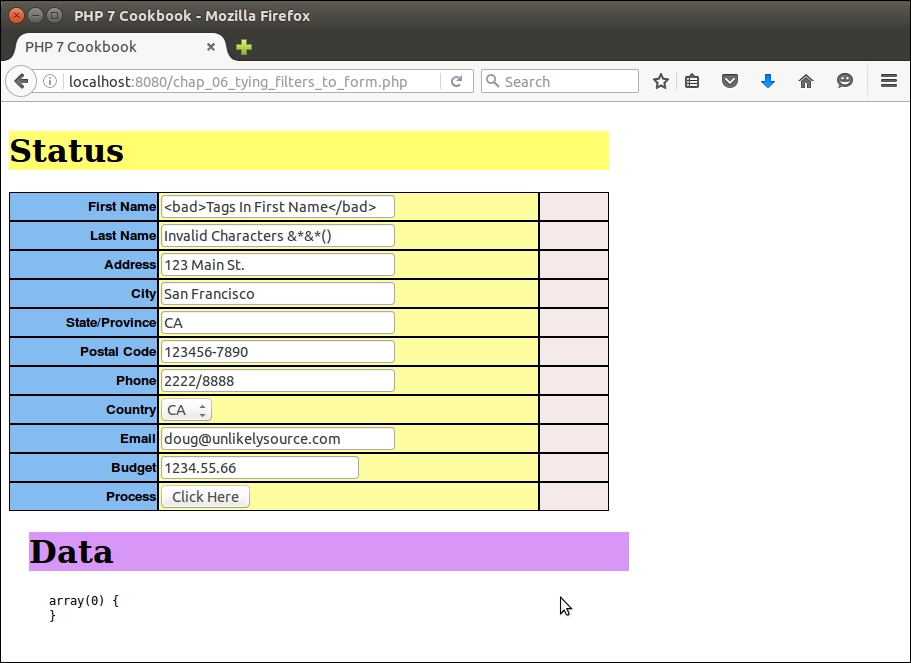
Notice the filtering and validation messages. Also notice the bad tags:
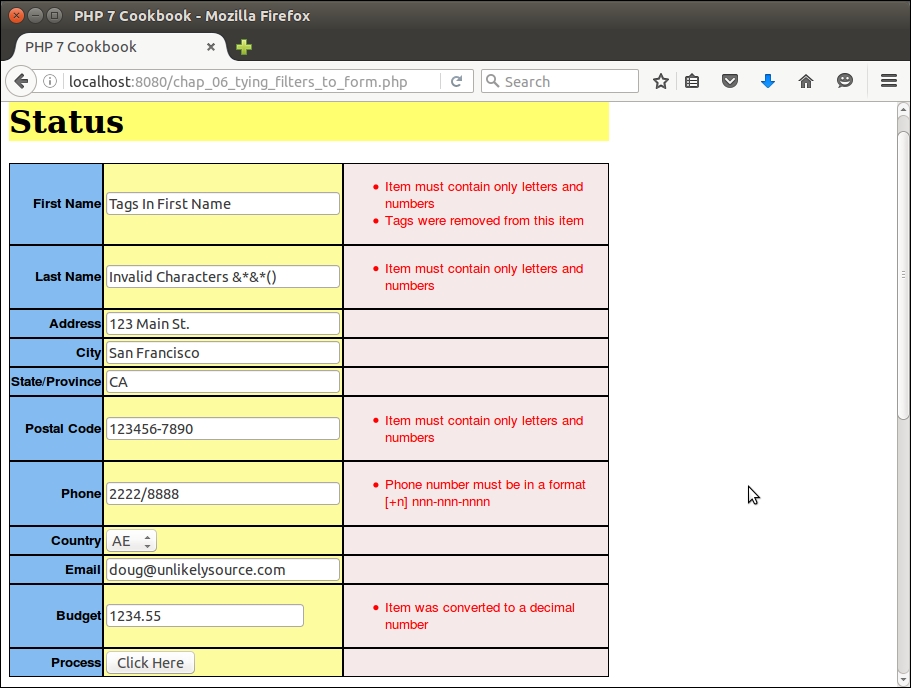
In this chapter, we will cover the following topics:
Making background queries to external web services is becoming an ever-increasing part of any PHP web practice. The ability to provide appropriate, timely, and plentiful data means more business for your customers and the websites you develop. We start with a couple of recipes aimed at data conversion between eXtensible Markup Language (XML) and native PHP. Next, we show you how to implement a simple Representational State Transfer (REST) client and server. After that, we turn our attention to SOAP clients and servers.
When considering a conversion between PHP native data types and XML, we would normally consider an array as the primary target. With this in mind, the process of converting from a PHP array to XML differs radically from the approach needed to do the reverse.
Application\Parse\ConvertXml class. This class will holdthe methods that will convert from XML to a PHP array, and vice versa. We will need both the SimpleXMLElement and SimpleXMLIterator classes from the SPL:namespace Application\Parse;
use SimpleXMLIterator;
use SimpleXMLElement;
class ConvertXml
{
}xmlToArray() method that will accept a SimpleXMLIterator instance as an argument. It will be called recursively and will produce a PHP array from an XML document. We take advantage of the SimpleXMLIterator ability to advance through the XML document, using the key(), current(), next(), and rewind() methods to navigate:public function xmlToArray(SimpleXMLIterator $xml) : array
{
$a = array();
for( $xml->rewind(); $xml->valid(); $xml->next() ) {
if(!array_key_exists($xml->key(), $a)) {
$a[$xml->key()] = array();
}
if($xml->hasChildren()){
$a[$xml->key()][] = $this->xmlToArray($xml->current());
}
else{
$a[$xml->key()] = (array) $xml->current()->attributes();
$a[$xml->key()]['value'] = strval($xml->current());
}
}
return $a;
}arrayToXml(), sets up an initial SimpleXMLElement instance, and then calls the second method, phpToXml():public function arrayToXml(array $a)
{
$xml = new SimpleXMLElement(
'<?xml version="1.0" standalone="yes"?><root></root>');
$this->phpToXml($a, $xml);
return $xml->asXML();
}get_object_vars() in case one of the array elements is an object. You'll also note that numbers alone are not allowed as XML tags, which means adding some text in front of the number:protected function phpToXml($value, &$xml)
{
$node = $value;
if (is_object($node)) {
$node = get_object_vars($node);
}
if (is_array($node)) {
foreach ($node as $k => $v) {
if (is_numeric($k)) {
$k = 'number' . $k;
}
if (is_array($v)) {
$newNode = $xml->addChild($k);
$this->phpToXml($v, $newNode);
} elseif (is_object($v)) {
$newNode = $xml->addChild($k);
$this->phpToXml($v, $newNode);
} else {
$xml->addChild($k, $v);
}
}
} else {
$xml->addChild(self::UNKNOWN_KEY, $node);
}
}As a sample XML document, you can use the Web Services Definition Language (WSDL) for the United States National Weather Service. This is an XML document that describes a SOAP service, and can be found at http://graphical.weather.gov/xml/SOAP_server/ndfdXMLserver.php?wsdl.
We will use the SimpleXMLIterator class to provide an iteration mechanism. You can then configure autoloading, and get an instance of Application\Parse\ConvertXml, using xmlToArray() to convert the WSDL to a PHP array:
require __DIR__ . '/../Application/Autoload/Loader.php'; Application\Autoload\Loader::init(__DIR__ . '/..'); use Application\Parse\ConvertXml; $wsdl = 'http://graphical.weather.gov/xml/' . 'SOAP_server/ndfdXMLserver.php?wsdl'; $xml = new SimpleXMLIterator($wsdl, 0, TRUE); $convert = new ConvertXml(); var_dump($convert->xmlToArray($xml));
The resulting array is shown here:
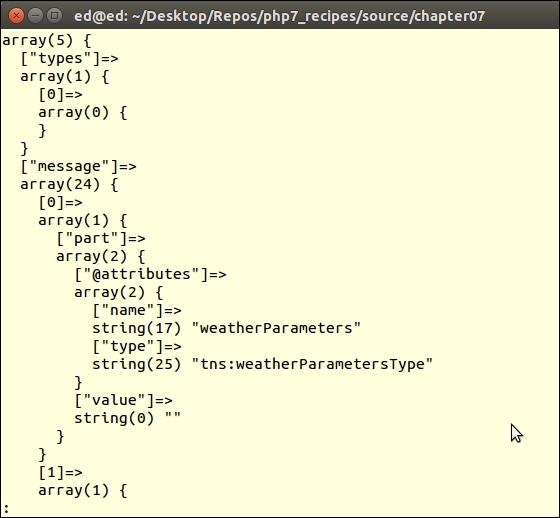
To do the reverse, use the arrayToXml() method described in this recipe. As a source document, you can use a source/data/mongo.db.global.php file that contains an outline for a training video on MongoDB available through O'Reilly Media (disclaimer: by this author!). Using the same autoloader configuration and instance of Application\Parse\ConvertXml, here is the sample code you could use:
$convert = new ConvertXml();
header('Content-Type: text/xml');
echo $convert->arrayToXml(include CONFIG_FILE);Here is the output in a browser:
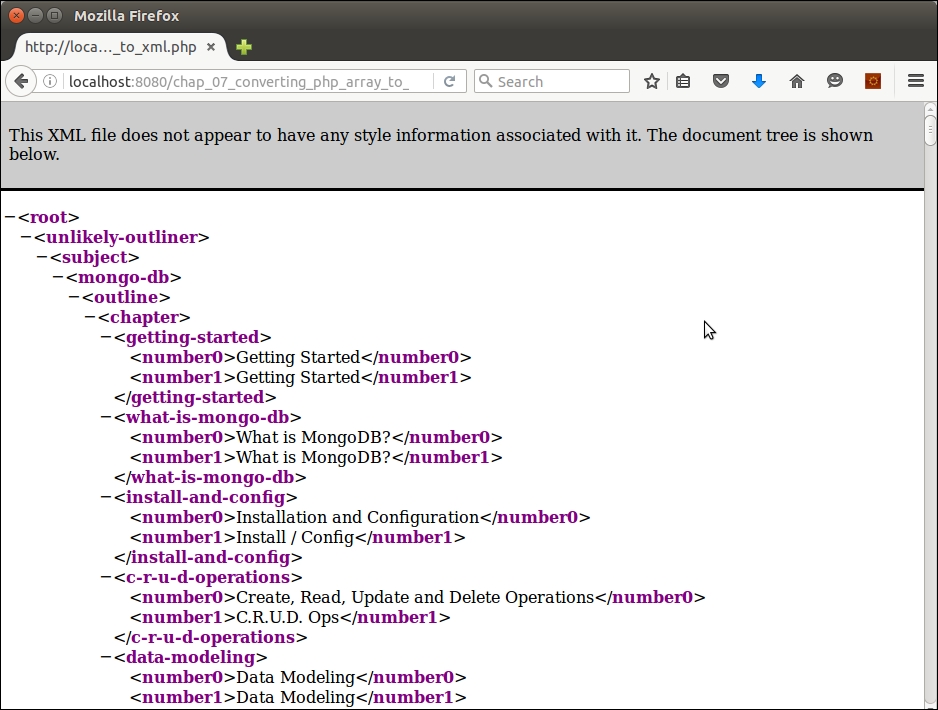
REST clients use HyperText Transfer Protocol (HTTP) to generate requests to external web services. By changing the HTTP method, we can cause the external service to perform different operations. Although there are quite a few methods (or verbs) available, we will only focus on GET and POST. In this recipe, we will use the Adapter software design pattern to present two different ways of implementing a REST client.
namespace Application\Web;
class AbstractHttp
{const METHOD_GET = 'GET'; const METHOD_POST = 'POST'; const METHOD_PUT = 'PUT'; const METHOD_DELETE = 'DELETE'; const CONTENT_TYPE_HTML = 'text/html'; const CONTENT_TYPE_JSON = 'application/json'; const CONTENT_TYPE_FORM_URL_ENCODED = 'application/x-www-form-urlencoded'; const HEADER_CONTENT_TYPE = 'Content-Type'; const TRANSPORT_HTTP = 'http'; const TRANSPORT_HTTPS = 'https'; const STATUS_200 = '200'; const STATUS_401 = '401'; const STATUS_500 = '500';
protected $uri; // i.e. http://xxx.com/yyy protected $method; // i.e. GET, PUT, POST, DELETE protected $headers; // HTTP headers protected $cookies; // cookies protected $metaData; // information about the transmission protected $transport; // i.e. http or https protected $data = array();
public function setMethod($method)
{
$this->method = $method;
}
public function getMethod()
{
return $this->method ?? self::METHOD_GET;
}
// etc.getXxxByKey() and setXxxByKey() methods:public function setHeaderByKey($key, $value)
{
$this->headers[$key] = $value;
}
public function getHeaderByKey($key)
{
return $this->headers[$key] ?? NULL;
}
public function getDataByKey($key)
{
return $this->data[$key] ?? NULL;
}
public function getMetaDataByKey($key)
{
return $this->metaData[$key] ?? NULL;
}$data property. We can then build the request URL using the http_build_query() function:public function setUri($uri, array $params = NULL)
{
$this->uri = $uri;
$first = TRUE;
if ($params) {
$this->uri .= '?' . http_build_query($params);
}
}
public function getDataEncoded()
{
return http_build_query($this->getData());
}$transport based on the original request:public function setTransport($transport = NULL)
{
if ($transport) {
$this->transport = $transport;
} else {
if (substr($this->uri, 0, 5) == self::TRANSPORT_HTTPS) {
$this->transport = self::TRANSPORT_HTTPS;
} else {
$this->transport = self::TRANSPORT_HTTP;
}
}
}Application\Web\Request class that can accept parameters when we wish to generate a request, or, alternatively, populate properties with incoming request information when implementing a server that accepts requests:namespace Application\Web;
class Request extends AbstractHttp
{
public function __construct(
$uri = NULL, $method = NULL, array $headers = NULL,
array $data = NULL, array $cookies = NULL)
{
if (!$headers) $this->headers = $_SERVER ?? array();
else $this->headers = $headers;
if (!$uri) $this->uri = $this->headers['PHP_SELF'] ?? '';
else $this->uri = $uri;
if (!$method) $this->method =
$this->headers['REQUEST_METHOD'] ?? self::METHOD_GET;
else $this->method = $method;
if (!$data) $this->data = $_REQUEST ?? array();
else $this->data = $data;
if (!$cookies) $this->cookies = $_COOKIE ?? array();
else $this->cookies = $cookies;
$this->setTransport();
}
}Application\Web\Received class. The name reflects the fact that we are re-packaging data received from the external web service:namespace Application\Web;
class Received extends AbstractHttp
{
public function __construct(
$uri = NULL, $method = NULL, array $headers = NULL,
array $data = NULL, array $cookies = NULL)
{
$this->uri = $uri;
$this->method = $method;
$this->headers = $headers;
$this->data = $data;
$this->cookies = $cookies;
$this->setTransport();
}
}We are now ready to consider two different ways to implement a REST client. The first approach is to use an underlying PHP I/O layer referred to as Streams. This layer provides a series of wrappers that provide access to external streaming resources. By default, any of the PHP file commands will use the file wrapper, which gives access to the local filesystem. We will use the http:// or https:// wrappers to implement the Application\Web\Client\Streams adapter:
Application\Web\Client\Streams class:namespace Application\Web\Client;
use Application\Web\ { Request, Received };
class Streams
{
const BYTES_TO_READ = 4096;GET, we add the parameters to the URI. In the case of POST, we create a stream context that contains metadata instructing the remote service that we are supplying data. Using PHP Streams, making a request is just a matter of composing the URI, and, in the case of POST, setting the stream context. We then use a simple fopen():public static function send(Request $request)
{
$data = $request->getDataEncoded();
$received = new Received();
switch ($request->getMethod()) {
case Request::METHOD_GET :
if ($data) {
$request->setUri($request->getUri() . '?' . $data);
}
$resource = fopen($request->getUri(), 'r');
break;
case Request::METHOD_POST :
$opts = [
$request->getTransport() =>
[
'method' => Request::METHOD_POST,
'header' => Request::HEADER_CONTENT_TYPE
. ': ' . Request::CONTENT_TYPE_FORM_URL_ENCODED,
'content' => $data
]
];
$resource = fopen($request->getUri(), 'w',
stream_context_create($opts));
break;
}
return self::getResults($received, $resource);
}Received object. You will notice that we added a provision to decode data received in JSON format:protected static function getResults(Received $received, $resource)
{
$received->setMetaData(stream_get_meta_data($resource));
$data = $received->getMetaDataByKey('wrapper_data');
if (!empty($data) && is_array($data)) {
foreach($data as $item) {
if (preg_match('!^HTTP/\d\.\d (\d+?) .*?$!',
$item, $matches)) {
$received->setHeaderByKey('status', $matches[1]);
} else {
list($key, $value) = explode(':', $item);
$received->setHeaderByKey($key, trim($value));
}
}
}
$payload = '';
while (!feof($resource)) {
$payload .= fread($resource, self::BYTES_TO_READ);
}
if ($received->getHeaderByKey(Received::HEADER_CONTENT_TYPE)) {
switch (TRUE) {
case stripos($received->getHeaderByKey(
Received::HEADER_CONTENT_TYPE),
Received::CONTENT_TYPE_JSON) !== FALSE:
$received->setData(json_decode($payload));
break;
default :
$received->setData($payload);
break;
}
}
return $received;
}We will now have a look at our second approach for a REST client, one of which is based on the cURL extension:
namespace Application\Web\Client;
use Application\Web\ { Request, Received };
class Curl
{send() method is quite a bit simpler than when using Streams. All we need to do is to define an array of options, and let cURL do the rest:public static function send(Request $request)
{
$data = $request->getDataEncoded();
$received = new Received();
switch ($request->getMethod()) {
case Request::METHOD_GET :
$uri = ($data)
? $request->getUri() . '?' . $data
: $request->getUri();
$options = [
CURLOPT_URL => $uri,
CURLOPT_HEADER => 0,
CURLOPT_RETURNTRANSFER => TRUE,
CURLOPT_TIMEOUT => 4
];
break;POST requires slightly different cURL parameters:case Request::METHOD_POST :
$options = [
CURLOPT_POST => 1,
CURLOPT_HEADER => 0,
CURLOPT_URL => $request->getUri(),
CURLOPT_FRESH_CONNECT => 1,
CURLOPT_RETURNTRANSFER => 1,
CURLOPT_FORBID_REUSE => 1,
CURLOPT_TIMEOUT => 4,
CURLOPT_POSTFIELDS => $data
];
break;
}getResults():$ch = curl_init();
curl_setopt_array($ch, ($options));
if( ! $result = curl_exec($ch))
{
trigger_error(curl_error($ch));
}
$received->setMetaData(curl_getinfo($ch));
curl_close($ch);
return self::getResults($received, $result);
}getResults() method packages results into a Received object:protected static function getResults(Received $received, $payload)
{
$type = $received->getMetaDataByKey('content_type');
if ($type) {
switch (TRUE) {
case stripos($type,
Received::CONTENT_TYPE_JSON) !== FALSE):
$received->setData(json_decode($payload));
break;
default :
$received->setData($payload);
break;
}
}
return $received;
}Be sure to copy all the preceding code into these classes:
Application\Web\AbstractHttpApplication\Web\RequestApplication\Web\ReceivedApplication\Web\Client\StreamsApplication\Web\Client\CurlFor this illustration, you can make a REST request to the Google Maps API to obtain driving directions between two points. You also need to create an API key for this purpose by following the directions given at https://developers.google.com/maps/documentation/directions/get-api-key.
You can then define a chap_07_simple_rest_client_google_maps_curl.php calling script that issues a request using the Curl client. You might also consider define a chap_07_simple_rest_client_google_maps_streams.php calling script that issues a request using the Streams client:
<?php
define('DEFAULT_ORIGIN', 'New York City');
define('DEFAULT_DESTINATION', 'Redondo Beach');
define('DEFAULT_FORMAT', 'json');
$apiKey = include __DIR__ . '/google_api_key.php';
require __DIR__ . '/../Application/Autoload/Loader.php';
Application\Autoload\Loader::init(__DIR__ . '/..');
use Application\Web\Request;
use Application\Web\Client\Curl;You can then get the origin and destination:
$start = $_GET['start'] ?? DEFAULT_ORIGIN; $end = $_GET['end'] ?? DEFAULT_DESTINATION; $start = strip_tags($start); $end = strip_tags($end);
You are now in a position to populate the Request object, and use it to generate the request:
$request = new Request( 'https://maps.googleapis.com/maps/api/directions/json', Request::METHOD_GET, NULL, ['origin' => $start, 'destination' => $end, 'key' => $apiKey], NULL ); $received = Curl::send($request); $routes = $received->getData()->routes[0]; include __DIR__ . '/chap_07_simple_rest_client_google_maps_template.php';
For the purposes of illustration, you could also define a template that represents view logic to display the results of the request:
<?php foreach ($routes->legs as $item) : ?>
<!-- Trip Info -->
<br>Distance: <?= $item->distance->text; ?>
<br>Duration: <?= $item->duration->text; ?>
<!-- Driving Directions -->
<table>
<tr>
<th>Distance</th><th>Duration</th><th>Directions</th>
</tr>
<?php foreach ($item->steps as $step) : ?>
<?php $class = ($count++ & 01) ? 'color1' : 'color2'; ?>
<tr>
<td class="<?= $class ?>"><?= $step->distance->text ?></td>
<td class="<?= $class ?>"><?= $step->duration->text ?></td>
<td class="<?= $class ?>">
<?= $step->html_instructions ?></td>
</tr>
<?php endforeach; ?>
</table>
<?php endforeach; ?>Here are the results of the request as seen in a browser:
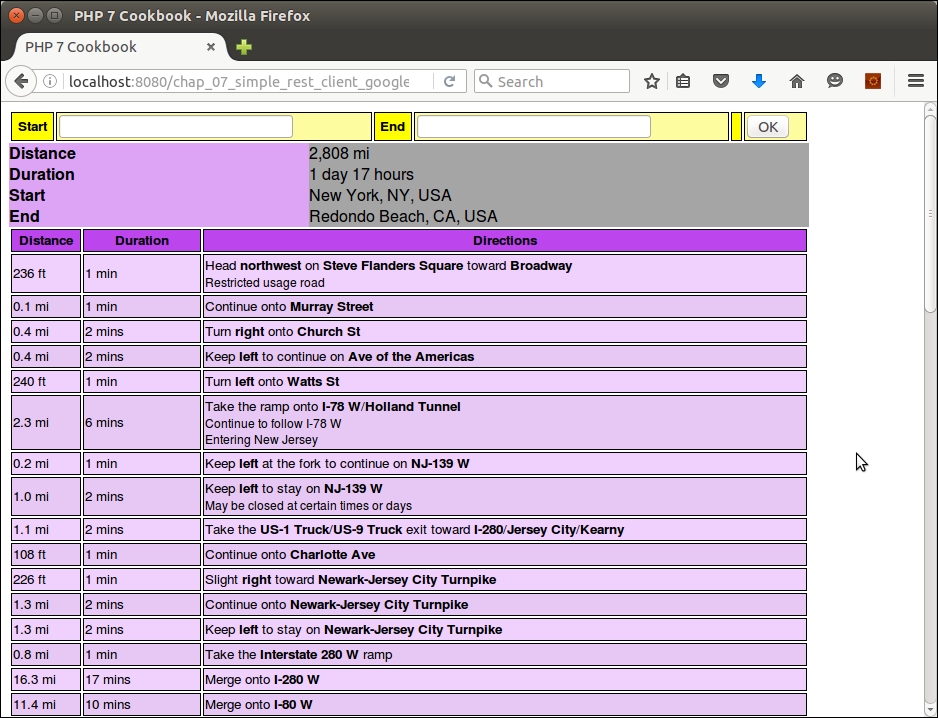
PHP Standards Recommendations (PSR-7) precisely defines request and response objects to be used when making requests between PHP applications. This is covered extensively in Appendix, Defining PSR-7 Classes .
For more information on
Streams, see this PHP documentation page http://php.net/manual/en/book.stream.php. An often asked question is "what is the difference between HTTP PUT and POST?" for an excellent discussion on this topic please refer to http://stackoverflow.com/questions/107390/whats-the-difference-between-a-post-and-a-put-http-request. For more information on obtaining an API key from Google, please refer to these web pages:
https://developers.google.com/maps/documentation/directions/get-api-key
https://developers.google.com/maps/documentation/directions/intro#Introduction
There are several considerations when implementing a REST server. The answers to these three questions will then let you define your REST service:
Application\Web\AbstractHttpApplication\Web\RequestApplication\Web\ReceivedApplication\Web\Response response class, based on AbstractHttp. The primary difference between this class and the others is that it accepts an instance of Application\Web\Request as an argument. The primary work is accomplished in the __construct() method. It's also important to set the Content-Type header and status:namespace Application\Web;
class Response extends AbstractHttp
{
public function __construct(Request $request = NULL,
$status = NULL, $contentType = NULL)
{
if ($request) {
$this->uri = $request->getUri();
$this->data = $request->getData();
$this->method = $request->getMethod();
$this->cookies = $request->getCookies();
$this->setTransport();
}
$this->processHeaders($contentType);
if ($status) {
$this->setStatus($status);
}
}
protected function processHeaders($contentType)
{
if (!$contentType) {
$this->setHeaderByKey(self::HEADER_CONTENT_TYPE,
self::CONTENT_TYPE_JSON);
} else {
$this->setHeaderByKey(self::HEADER_CONTENT_TYPE,
$contentType);
}
}
public function setStatus($status)
{
$this->status = $status;
}
public function getStatus()
{
return $this->status;
}
}Application\Web\Rest\Server class. You may be surprised at how simple it is. The real work is done in the associated API class:namespace Application\Web\Rest;
use Application\Web\ { Request, Response, Received };
class Server
{
protected $api;
public function __construct(ApiInterface $api)
{
$this->api = $api;
}listen() method that serves as a target for the request. The heart of the server implementation is this line of code:$jsonData = json_decode(file_get_contents('php://input'),true);public function listen()
{
$request = new Request();
$response = new Response($request);
$getPost = $_REQUEST ?? array();
$jsonData = json_decode(
file_get_contents('php://input'),true);
$jsonData = $jsonData ?? array();
$request->setData(array_merge($getPost,$jsonData));We have also added a provision for authentication. Otherwise, anybody could make requests and obtain potentially sensitive data. You will note that we do not have the server class performing authentication; rather, we leave it to the API class:
if (!$this->api->authenticate($request)) {
$response->setStatus(Request::STATUS_401);
echo $this->api::ERROR;
exit;
}GET, PUT, POST,and DELETE:$id = $request->getData()[$this->api::ID_FIELD] ?? NULL;
switch (strtoupper($request->getMethod())) {
case Request::METHOD_POST :
$this->api->post($request, $response);
break;
case Request::METHOD_PUT :
$this->api->put($request, $response);
break;
case Request::METHOD_DELETE :
$this->api->delete($request, $response);
break;
case Request::METHOD_GET :
default :
// return all if no params
$this->api->get($request, $response);
}$this->processResponse($response); echo json_encode($response->getData()); }
processResponse() method sets headers and makes sure the result is packaged as an Application\Web\Response object:protected function processResponse($response)
{
if ($response->getHeaders()) {
foreach ($response->getHeaders() as $key => $value) {
header($key . ': ' . $value, TRUE,
$response->getStatus());
}
}
header(Request::HEADER_CONTENT_TYPE
. ': ' . Request::CONTENT_TYPE_JSON, TRUE);
if ($response->getCookies()) {
foreach ($response->getCookies() as $key => $value) {
setcookie($key, $value);
}
}
}get(), put(), and so on are represented, and that all such methods accept request and response objects as arguments. You might notice that we have added a generateToken() method that uses the PHP 7 random_bytes() function to generate a truly random series of 16 bytes:namespace Application\Web\Rest;
use Application\Web\ { Request, Response };
abstract class AbstractApi implements ApiInterface
{
const TOKEN_BYTE_SIZE = 16;
protected $registeredKeys;
abstract public function get(Request $request,
Response $response);
abstract public function put(Request $request,
Response $response);
abstract public function post(Request $request,
Response $response);
abstract public function delete(Request $request,
Response $response);
abstract public function authenticate(Request $request);
public function __construct($registeredKeys, $tokenField)
{
$this->registeredKeys = $registeredKeys;
}
public static function generateToken()
{
return bin2hex(random_bytes(self::TOKEN_BYTE_SIZE));
}
}namespace Application\Web\Rest;
use Application\Web\ { Request, Response };
interface ApiInterface
{
public function get(Request $request, Response $response);
public function put(Request $request, Response $response);
public function post(Request $request, Response $response);
public function delete(Request $request, Response $response);
public function authenticate(Request $request);
}AbstractApi. This class leverages database classes defined in Chapter 5, Interacting with a Database:namespace Application\Web\Rest;
use Application\Web\ { Request, Response, Received };
use Application\Entity\Customer;
use Application\Database\ { Connection, CustomerService };
class CustomerApi extends AbstractApi
{
const ERROR = 'ERROR';
const ERROR_NOT_FOUND = 'ERROR: Not Found';
const SUCCESS_UPDATE = 'SUCCESS: update succeeded';
const SUCCESS_DELETE = 'SUCCESS: delete succeeded';
const ID_FIELD = 'id'; // field name of primary key
const TOKEN_FIELD = 'token'; // field used for authentication
const LIMIT_FIELD = 'limit';
const OFFSET_FIELD = 'offset';
const DEFAULT_LIMIT = 20;
const DEFAULT_OFFSET = 0;
protected $service;
public function __construct($registeredKeys,
$dbparams, $tokenField = NULL)
{
parent::__construct($registeredKeys, $tokenField);
$this->service = new CustomerService(
new Connection($dbparams));
}getDataByKey() to retrieve data items. The actual database interaction is performed by the service class. You might also notice that in all cases, we set an HTTP status code to inform the client of success or failure. In the case of get(), we look for an ID parameter. If received, we deliver information on a single customer only. Otherwise, we deliver a list of all customers using limit and offset:public function get(Request $request, Response $response)
{
$result = array();
$id = $request->getDataByKey(self::ID_FIELD) ?? 0;
if ($id > 0) {
$result = $this->service->
fetchById($id)->entityToArray();
} else {
$limit = $request->getDataByKey(self::LIMIT_FIELD)
?? self::DEFAULT_LIMIT;
$offset = $request->getDataByKey(self::OFFSET_FIELD)
?? self::DEFAULT_OFFSET;
$result = [];
$fetch = $this->service->fetchAll($limit, $offset);
foreach ($fetch as $row) {
$result[] = $row;
}
}
if ($result) {
$response->setData($result);
$response->setStatus(Request::STATUS_200);
} else {
$response->setData([self::ERROR_NOT_FOUND]);
$response->setStatus(Request::STATUS_500);
}
}put() method is used to insert customer data:public function put(Request $request, Response $response)
{
$cust = Customer::arrayToEntity($request->getData(),
new Customer());
if ($newCust = $this->service->save($cust)) {
$response->setData(['success' => self::SUCCESS_UPDATE,
'id' => $newCust->getId()]);
$response->setStatus(Request::STATUS_200);
} else {
$response->setData([self::ERROR]);
$response->setStatus(Request::STATUS_500);
}
}post() method is used to update existing customer entries:public function post(Request $request, Response $response)
{
$id = $request->getDataByKey(self::ID_FIELD) ?? 0;
$reqData = $request->getData();
$custData = $this->service->
fetchById($id)->entityToArray();
$updateData = array_merge($custData, $reqData);
$updateCust = Customer::arrayToEntity($updateData,
new Customer());
if ($this->service->save($updateCust)) {
$response->setData(['success' => self::SUCCESS_UPDATE,
'id' => $updateCust->getId()]);
$response->setStatus(Request::STATUS_200);
} else {
$response->setData([self::ERROR]);
$response->setStatus(Request::STATUS_500);
}
}delete() removes a customer entry:public function delete(Request $request, Response $response)
{
$id = $request->getDataByKey(self::ID_FIELD) ?? 0;
$cust = $this->service->fetchById($id);
if ($cust && $this->service->remove($cust)) {
$response->setData(['success' => self::SUCCESS_DELETE,
'id' => $id]);
$response->setStatus(Request::STATUS_200);
} else {
$response->setData([self::ERROR_NOT_FOUND]);
$response->setStatus(Request::STATUS_500);
}
}authenticate() to provide, in this example, a low-level mechanism to protect API usage:public function authenticate(Request $request)
{
$authToken = $request->getDataByKey(self::TOKEN_FIELD)
?? FALSE;
if (in_array($authToken, $this->registeredKeys, TRUE)) {
return TRUE;
} else {
return FALSE;
}
}
}Define the following classes, which were discussed in the previous recipe:
Application\Web\AbstractHttpApplication\Web\RequestApplication\Web\ReceivedYou can then define the following classes, described in this recipe, summarized in this table:
|
Class Application\Web\* |
Discussed in these steps |
|---|---|
|
|
2 |
|
|
3 - 8 |
|
|
9 |
|
|
10 |
|
|
11 - 16 |
You are now free to develop your own API class. If you choose to follow the illustration Application\Web\Rest\CustomerApi, however, you will need to also be sure to implement these classes, covered in Chapter 5, Interacting with a Database:
Application\Entity\CustomerApplication\Database\ConnectionApplication\Database\CustomerServiceYou can now define a chap_07_simple_rest_server.php script that invokes the REST server:
<?php $dbParams = include __DIR__ . '/../../config/db.config.php'; require __DIR__ . '/../Application/Autoload/Loader.php'; Application\Autoload\Loader::init(__DIR__ . '/..'); use Application\Web\Rest\Server; use Application\Web\Rest\CustomerApi; $apiKey = include __DIR__ . '/api_key.php'; $server = new Server(new CustomerApi([$apiKey], $dbParams, 'id')); $server->listen();
You can then use the built-in PHP 7 development server to listen on port 8080 for REST requests:
php -S localhost:8080 chap_07_simple_rest_server.php
To test your API, use the Application\Web\Rest\AbstractApi::generateToken() method to generate an authentication token that you can place in an api_key.php file, something like this:
<?php return '79e9b5211bbf2458a4085707ea378129';
You can then use a generic API client (such as the one described in the previous recipe), or a browser plugin such as RESTClient by Chao Zhou (see http://restclient.net/ for more information) to generate sample requests. Make sure you include the token for your request, otherwise the API as defined will reject the request.
Here is an example of a POST request for ID 1, which sets the balance field to a value of 888888:
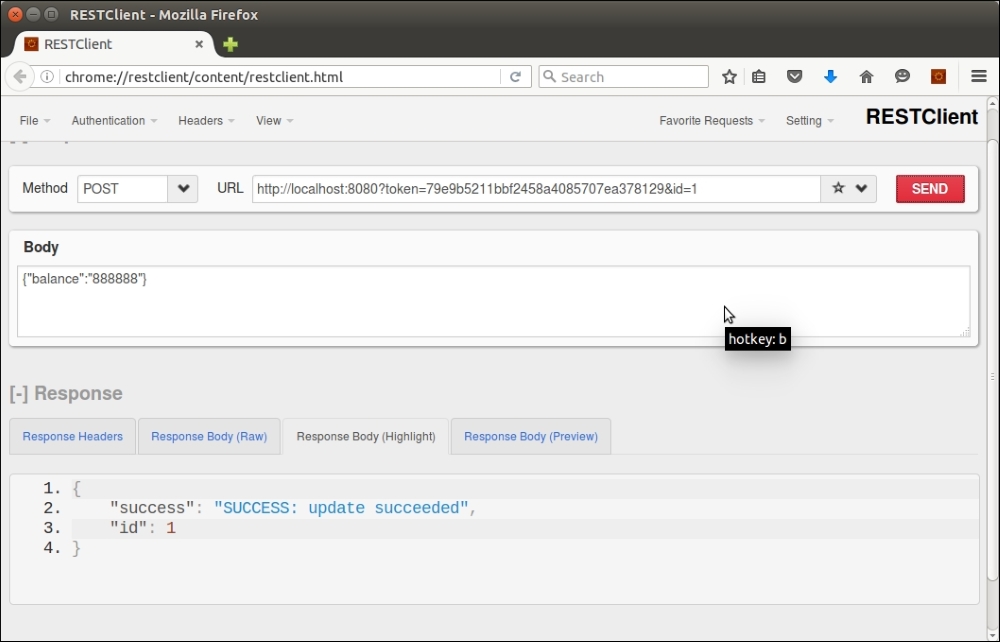
There are a number of libraries that help you implement a REST server. One of my favorites is an example implementing a REST server in a single file: https://www.leaseweb.com/labs/2015/10/creating-a-simple-rest-api-in-php/
Various frameworks, such as CodeIgniter and Zend Framework, also have REST server implementations.
Using SOAP, in contrast to the process of implementing a REST client or server, is quite easy as there is a PHP SOAP extension that provides both capabilities.
A frequently asked question is "what is the difference between SOAP and REST?" SOAP uses XML internally as its data format. SOAP uses HTTP but only for transport, and otherwise has no awareness of other HTTP methods. REST directly operates HTTP, and can use anything for data formats, but JSON is preferred. Another key difference is that SOAP can operate in conjunction with a WSDL, which makes the service self-describing, thus more publicly available. Thus, SOAP services are often offered by public institutions such as national health organizations.
For this example, we will make a SOAP request for an existing SOAP service offered by the United States National Weather service:
$wsdl = 'http://graphical.weather.gov/xml/SOAP_server/' . 'ndfdXMLserver.php?wsdl';
soap client instance using the WSDL:$soap = new SoapClient($wsdl, array('trace' => TRUE));$units = 'm'; $params = ''; $numDays = 7; $weather = ''; $format = '24 hourly'; $startTime = new DateTime();
LatLonListCityNames() SOAP request, identified as an operation in the WSDL, for a list of cities supported by the service. The request is returned in XML format, which suggests creating a SimpleXLMElement instance:$xml = new SimpleXMLElement($soap->LatLonListCityNames(1));
array_combine() PHP function to create an associative array where latitude/longitude is the key, and the city name is the value. We can then later use this to present an HTML SELECT drop-down list, using asort() to alphabetize the list:$cityNames = explode('|', $xml->cityNameList);
$latLonCity = explode(' ', $xml->latLonList);
$cityLatLon = array_combine($latLonCity, $cityNames);
asort($cityLatLon);$currentLatLon = (isset($_GET['city'])) ? strip_tags(urldecode($_GET['city'])) : '';
NDFDgenByDay(). We can determine the nature of the parameters supplied to the SOAP server by examining the WSDL:<message name="NDFDgenByDayRequest"> <part name="latitude" type="xsd:decimal"/> <part name="longitude" type="xsd:decimal"/> <part name="startDate" type="xsd:date"/> <part name="numDays" type="xsd:integer"/> <part name="Unit" type="xsd:string"/> <part name="format" type="xsd:string"/> </message>
$currentLatLon is set, we can process the request. We wrap the request in a try {} catch {} block in case any exceptions are thrown:if ($currentLatLon) {
list($lat, $lon) = explode(',', $currentLatLon);
try {
$weather = $soap->NDFDgenByDay($lat,$lon,
$startTime->format('Y-m-d'),$numDays,$unit,$format);
} catch (Exception $e) {
$weather .= PHP_EOL;
$weather .= 'Latitude: ' . $lat . ' | Longitude: ' . $lon;
$weather .= 'ERROR' . PHP_EOL;
$weather .= $e->getMessage() . PHP_EOL;
$weather .= $soap->__getLastResponse() . PHP_EOL;
}
}
?>Copy all the preceding code into a chap_07_simple_soap_client_weather_service.php file. You can then add view logic that displays a form with the list of cities, as well as the results:
<form method="get" name="forecast"> <br> City List: <select name="city"> <?php foreach ($cityLatLon as $latLon => $city) : ?> <?php $select = ($currentLatLon == $latLon) ? ' selected' : ''; ?> <option value="<?= urlencode($latLon) ?>" <?= $select ?>> <?= $city ?></option> <?php endforeach; ?> </select> <br><input type="submit" value="OK"></td> </form> <pre> <?php var_dump($weather); ?> </pre>
Here is the result, in a browser, of requesting the weather forecast for Cleveland, Ohio:

For a good discussion on the difference between SOAP and REST, refer to the article present at http://stackoverflow.com/questions/209905/representational-state-transfer-rest-and-simple-object-access-protocol-soap?lq=1.
As with the SOAP client, we can use the PHP SOAP extension to implement a SOAP server. The most difficult part of the implementation will be generating the WSDL from the API class. We do not cover that process here as there are a number of good WSDL generators available.
Application\Web\Soap\ProspectsApi class that allows us to create, read, update, and delete the prospects table:namespace Application\Web\Soap;
use PDO;
class ProspectsApi
{
protected $registerKeys;
protected $pdo;
public function __construct($pdo, $registeredKeys)
{
$this->pdo = $pdo;
$this->registeredKeys = $registeredKeys;
}
}put(), get(), post(), and delete(). These, in turn, call methods that generate SQL requests that are executed from a PDO instance. An example for get() is as follows:public function get(array $request, array $response)
{
if (!$this->authenticate($request)) return FALSE;
$result = array();
$id = $request[self::ID_FIELD] ?? 0;
$email = $request[self::EMAIL_FIELD] ?? 0;
if ($id > 0) {
$result = $this->fetchById($id);
$response[self::ID_FIELD] = $id;
} elseif ($email) {
$result = $this->fetchByEmail($email);
$response[self::ID_FIELD] = $result[self::ID_FIELD] ?? 0;
} else {
$limit = $request[self::LIMIT_FIELD]
?? self::DEFAULT_LIMIT;
$offset = $request[self::OFFSET_FIELD]
?? self::DEFAULT_OFFSET;
$result = [];
foreach ($this->fetchAll($limit, $offset) as $row) {
$result[] = $row;
}
}
$response = $this->processResponse(
$result, $response, self::SUCCESS, self::ERROR);
return $response;
}
protected function processResponse($result, $response,
$success_code, $error_code)
{
if ($result) {
$response['data'] = $result;
$response['code'] = $success_code;
$response['status'] = self::STATUS_200;
} else {
$response['data'] = FALSE;
$response['code'] = self::ERROR_NOT_FOUND;
$response['status'] = self::STATUS_500;
}
return $response;
}phpDocumentor tags before the methods that will be published. In our example, the two arguments are both arrays. Here is the full WSDL for the API discussed earlier:<?xml version="1.0" encoding="UTF-8"?>
<wsdl:definitions xmlns:tns="php7cookbook" targetNamespace="php7cookbook" xmlns:soap="http://schemas.xmlsoap.org/wsdl/soap/" xmlns:s="http://www.w3.org/2001/XMLSchema" xmlns:wsdl="http://schemas.xmlsoap.org/wsdl/" xmlns:soapenc="http://schemas.xmlsoap.org/soap/encoding/">
<wsdl:message name="getSoapIn">
<wsdl:part name="request" type="tns:array" />
<wsdl:part name="response" type="tns:array" />
</wsdl:message>
<wsdl:message name="getSoapOut">
<wsdl:part name="return" type="tns:array" />
</wsdl:message>
<!—some nodes removed to conserve space -->
<wsdl:portType name="CustomerApiSoap">
<!—some nodes removed to conserve space -->
<wsdl:binding name="CustomerApiSoap" type="tns:CustomerApiSoap">
<soap:binding transport="http://schemas.xmlsoap.org/soap/http" style="rpc" />
<wsdl:operation name="get">
<soap:operation soapAction="php7cookbook#get" />
<wsdl:input>
<soap:body use="encoded" encodingStyle= "http://schemas.xmlsoap.org/soap/encoding/" namespace="php7cookbook" parts="request response" />
</wsdl:input>
<wsdl:output>
<soap:body use="encoded" encodingStyle= "http://schemas.xmlsoap.org/soap/encoding/" namespace="php7cookbook" parts="return" />
</wsdl:output>
</wsdl:operation>
<!—some nodes removed to conserve space -->
</wsdl:binding>
<wsdl:service name="CustomerApi">
<wsdl:port name="CustomerApiSoap" binding="tns:CustomerApiSoap">
<soap:address location="http://localhost:8080/" />
</wsdl:port>
</wsdl:service>
</wsdl:definitions>chap_07_simple_soap_server.php file, which will execute the SOAP server. Start by defining the location of the WSDL and any other necessary files (in this case, one for database configuration). If the wsdl parameter is set, deliver the WSDL rather than attempting to process the request. In this example, we use a simple API key to authenticate requests. We then create a SOAP server instance, assign an instance of our API class, and run handle():<?php
define('DB_CONFIG_FILE', '/../config/db.config.php');
define('WSDL_FILENAME', __DIR__ . '/chap_07_wsdl.xml');
if (isset($_GET['wsdl'])) {
readfile(WSDL_FILENAME);
exit;
}
$apiKey = include __DIR__ . '/api_key.php';
require __DIR__ . '/../Application/Web/Soap/ProspectsApi.php';
require __DIR__ . '/../Application/Database/Connection.php';
use Application\Database\Connection;
use Application\Web\Soap\ProspectsApi;
$connection = new Application\Database\Connection(
include __DIR__ . DB_CONFIG_FILE);
$api = new Application\Web\Soap\ProspectsApi(
$connection->pdo, [$apiKey]);
$server = new SoapServer(WSDL_FILENAME);
$server->setObject($api);
echo $server->handle();You can easily test this recipe by first creating your target API class, and then generating a WSDL. You can then use the built-in PHP webserver to deliver the SOAP service with this command:
php -S localhost:8080 chap_07_simple_soap_server.php
You can then use the SOAP client discussed in the previous recipe to make a call to test the SOAP service:
<?php
define('WSDL_URL', 'http://localhost:8080?wsdl=1');
$clientKey = include __DIR__ . '/api_key.php';
try {
$client = new SoapClient(WSDL_URL);
$response = [];
$email = some_email_generated_by_test;
$email = 'test5393@unlikelysource.com';
echo "\nGet Prospect Info for Email: " . $email . "\n";
$request = ['token' => $clientKey, 'email' => $email];
$result = $client->get($request,$response);
var_dump($result);
} catch (SoapFault $e) {
echo 'ERROR' . PHP_EOL;
echo $e->getMessage() . PHP_EOL;
} catch (Throwable $e) {
echo 'ERROR' . PHP_EOL;
echo $e->getMessage() . PHP_EOL;
} finally {
echo $client->__getLastResponse() . PHP_EOL;
}Here is the output for email address test5393@unlikelysource.com:

A simple Google search for WSDL generators for PHP came back with easily a dozen results. The one used to generate the WSDL for the ProspectsApi class was based on https://code.google.com/archive/p/php-wsdl-creator/. For more information on phpDocumentor, refer to the page at https://www.phpdoc.org/.
In this chapter, we will cover the following topics:
We will start this chapter with two recipes that take advantage of a new Unicode escape syntax introduced with PHP 7. After that, we will cover how to determine a web visitor's locale from browser data. The next few recipes will cover the creation of a locale class, which will allow you to represent numbers, currency, dates, and time in a format specific to a locale. Finally, we will cover recipes that demonstrate how to generate an internationalized calendar, handle recurring events, and perform translation without having to use gettext.
The word emoticons is a composite of emotion and icon. Emoji, originating from Japan, is another, larger, widely used set of icons. These icons are the little smiley faces, tiny ninjas, and rolling-on-the-floor-laughing icons that are so popular on any website that has a social networking aspect. Prior to PHP 7, however, producing these little beasties was an exercise in frustration.
U+1F648, U+1F649, and U+1F64A

meta tag. You should set the character set to UTF-8. Here is an example:<head> <title>PHP 7 Cookbook</title> <meta http-equiv="content-type" content="text/html;charset=utf-8" /> </head>
<table>
<tr>
<td>🙈</td>
<td>🙉</td>
<td>🙊</td>
</tr>
</table>"\u{xxx}". Here is an example with the same three icons as in the preceding bullet:<table>
<tr>
<td><?php echo "\u{1F648}"; ?></td>
<td><?php echo "\u{1F649}"; ?></td>
<td><?php echo "\u{1F64A}"; ?></td>
</tr>
</table>In PHP 7, a new syntax was introduced that lets you render any Unicode character. Unlike other languages, the new PHP syntax allows for a variable number of hex digits. The basic format is this:
\u{xxxx}The entire construct must be double quoted (or use heredoc). xxxx could be any combination of hex digits, 2, 4, 6, and above.
Create a file called chap_08_emoji_using_html.php. Be sure to include the meta tag that signals the browser that UTF-8 character encoding is being used:
<!DOCTYPE html>
<html>
<head>
<title>PHP 7 Cookbook</title>
<meta http-equiv="content-type" content="text/html;charset=utf-8" />
</head>Next, set up a basic HTML table, and display a row of emoticons/emoji:
<body>
<table>
<tr>
<td>🙈</td>
<td>🙉</td>
<td>🙊</td>
</tr>
</table>
</body>
</html>Now add a row using PHP to emit emoticons/emoji:
<tr>
<td><?php echo "\u{1F648}"; ?></td>
<td><?php echo "\u{1F649}"; ?></td>
<td><?php echo "\u{1F64A}"; ?></td>
</tr>Here is the output seen from Firefox:
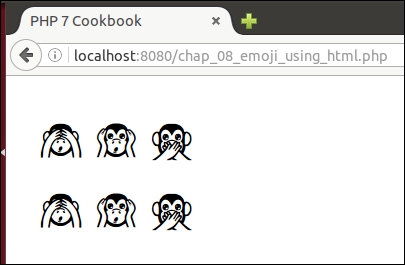
The ability to access the entire Unicode character set opens up many new possibilities for rendering complex characters, especially characters in alphabets other than Latin-1.
U+202E Unicode character for right-to-left override. The following line of code prints txet desreveR:echo "\u{202E}Reversed text";
echo "\u{202D}"; // returns output to left-to-rightñ (the letter n with a tilde ~ floating above). This is used in words such as mañana (the Spanish word for morning or tomorrow, depending on the context). There is a composed character available, represented by Unicode code U+00F1. Here is an example of its use, which echoes mañana:echo "ma\u{00F1}ana"; // shows mañanaman in an attempt to search for mañana, they will be unsuccessful.n along with the Unicode combining code, which places a floating tilde on top of the letter. In this echo command, the output is the same as previously. Only the way the word is formed differs:echo "man\u{0303}ana"; // also shows mañanaélève (student). You could render it using composed characters, or by using combining codes to float the accents above the letter. Consider the two following examples. Both examples produce the same output, but are rendered differently:echo "\u{00E9}l\u{00E8}ve";
echo "e\u{0301}le\u{0300}ve";Create a file called chap_08_control_and_combining_unicode.php. Be sure to include the meta tag that signals the browser that UTF-8 character encoding is being used:
<!DOCTYPE html>
<html>
<head>
<title>PHP 7 Cookbook</title>
<meta http-equiv="content-type" content="text/html;charset=utf-8" />
</head>Next, set up basic PHP and HTML to display the examples discussed previously:
<body>
<pre>
<?php
echo "\u{202E}Reversed text"; // reversed
//echo "\u{202D}"; // stops reverse
echo "mañana"; // using pre-composed characters
echo "ma\u{00F1}ana"; // pre-composed character
echo "man\u{0303}ana"; // "n" with combining ~ character (U+0303)
echo "élève";
echo "\u{00E9}l\u{00E8}ve"; // pre-composed characters
echo "e\u{0301}le\u{0300}ve"; // e + combining characters
?>
</pre>
</body>
</html>Here is the output from a browser:
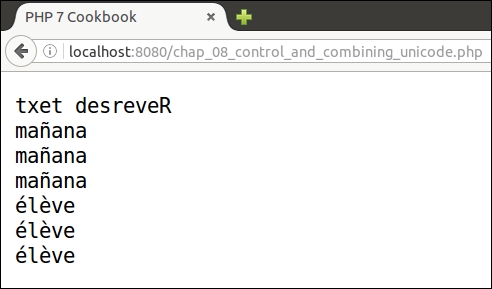
In order to improve the user experience on a website, it's important to display information in a format that is acceptable in the user's locale. Locale is a generic term used to indicate an area of the world. An effort in the I.T. community has been made to codify locales using a two-part designation consisting of codes for both language and country. But when a person visits your website, how do you know their locale? Probably the most useful technique involves examining the HTTP language header.
Application\I18n\Locale. We will have this class extend an existing class, Locale, which is part of the PHP Intl extension.namespace Application\I18n;
use Locale as PhpLocale;
class Locale extends PhpLocale
{
const FALLBACK_LOCALE = 'en';
// some code
}phpinfo(INFO_VARIABLES). Be sure to disable this function immediately after testing as it gives away too much information to potential attackers:<?php phpinfo(INFO_VARIABLES); ?>
$_SERVER['HTTP_ACCEPT_LANGUAGE']. The value will take this general form: ll-CC,rl;q=0.n, ll-CC,rl;q=0.n, as defined in this table:|
Abbreviation |
Meaning |
|---|---|
|
|
Two-character lowercase code representing the language. |
|
|
Separates language from country in the locale code |
|
| |
|
|
Separates locale code from fallback root locale code (usually the same as the language code). |
|
|
Two-character lowercase code representing the suggested root locale. |
|
|
Separates locale information from quality. If quality is missing, default is |
|
|
Quality. |
|
|
Some value between 0.00 and 1.0. Multiply this value by 100 to get the percentage of probability that this is the actual language preferred by this visitor. |
Locale class has a method, acceptFromHttp(), which reads the Accept-language header string and gives us the desired setting:protected $localeCode;
public function setLocaleCode($acceptLangHeader)
{
$this->localeCode = $this->acceptFromHttp($acceptLangHeader);
}get AcceptLanguage() method returns the value from $_SERVER['HTTP_ACCEPT_LANGUAGE']:public function getAcceptLanguage()
{
return $_SERVER['HTTP_ACCEPT_LANGUAGE'] ?? self::FALLBACK_LOCALE;
}
public function getLocaleCode()
{
return $this->localeCode;
}public function __construct($localeString = NULL)
{
if ($localeString) {
$this->setLocaleCode($localeString);
} else {
$this->setLocaleCode($this->getAcceptLanguage());
}
}Even though a visitor appears to accept one or more languages, that visitor does not necessarily want contents in the language/locale indicated by their browser. Accordingly, although you can certainly set the locale given this information, you should also provide them with a static list of alternative languages.
In this illustration, let's take three examples:
fr-FRda, en-gb;q=0.8, en;q=0.7Place the code from steps 1 to 6 into a file, Locale.php, which is in the Application\I18n folder.
Next, create a file, chap_08_getting_locale_from_browser.php, which sets up autoloading and uses the new class:
<?php require __DIR__ . '/../Application/Autoload/Loader.php'; Application\Autoload\Loader::init(__DIR__ . '/..'); use Application\I18n\Locale;
Now you can define an array with the three test locale strings:
$locale = [NULL, 'fr-FR', 'da, en-gb;q=0.8, en;q=0.7'];
Finally, loop through the three locale strings, creating instances of the new class. Echo the value returned from getLocaleCode() to see what choice was made:
echo '<table>';
foreach ($locale as $code) {
$locale = new Locale($code);
echo '<tr>
<td>' . htmlspecialchars($code) . '</td>
<td>' . $locale->getLocaleCode() . '</td>
</tr>';
}
echo '</table>';Here is the result (with a little bit of styling):
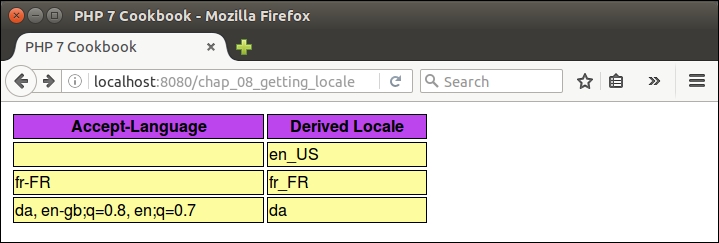
Locale class, see http://php.net/manual/en/class.locale.phpAccept-Language header, see section 14.4 of RFC 2616: https://www.w3.org/Protocols/rfc2616/rfc2616-sec14.htmlNumeric representations can vary by locale. As a simple example, in the UK one would see the number three million, eighty thousand, five hundred and twelve, and ninety-two one hundredths as follows:
3,080,512.92.
In France, however, the same number might appear like so:
3 080 512,92
Before you can represent a number in a locale-specific manner, you need to determine the locale. This can be accomplished using the Application\I18n\Locale class discussed in the previous recipe. The locale can be set manually or from header information.
format() method of the NumberFormatter class, to both output and parse numbers in a locale-specific format. First we add a property that will contain an instance of the NumberFormatter class:use NumberFormatter; protected $numberFormatter;
Our initial thought would be to consider using the PHP function setlocale() to produce numbers formatted according to locale. The problem with this legacy approach, however, is that everything will be considered based on this locale. This could introduce problems dealing with data that is stored according to database specifications. Another issue with setlocale() is that it is based on outdated standards, including RFC 1766 and ISO 639. Finally, setlocale() is highly dependent on operating system locale support, which will make our code non-portable.
$numberFormatter in the constructor. The problem with this approach, in the case of our Application\I18n\Locale class, is that we would end up with a top-heavy class, as we will also need to perform currency and date formatting as well. Accordingly, we add a getter that first checks to see whether an instance of NumberFormatter has already been created. If not, an instance is created and returned. The first argument in the new NumberFormatter is the locale code. The second argument, NumberFormatter::DECIMAL, represents what type of formatting we need:public function getNumberFormatter()
{
if (!$this->numberFormatter) {
$this->numberFormatter = new NumberFormatter($this->getLocaleCode(), NumberFormatter::DECIMAL);
}
return $this->numberFormatter;
}public function formatNumber($number)
{
return $this->getNumberFormatter()->format($number);
}FALSE on parse failure depending on the server's ICU version:public function parseNumber($string)
{
$result = $this->getNumberFormatter()->parse($string);
return ($result) ? $result : self::ERROR_UNABLE_TO_PARSE;
}Make the additions to the Application\I18n\Locale class as discussed in the preceding bullet points. You can then create a chap_08_formatting_numbers.php file, which sets up autoloading and uses this class:
<?php require __DIR__ . '/../Application/Autoload/Loader.php'; Application\Autoload\Loader::init(__DIR__ . '/..'); use Application\I18n\Locale;
For this illustration, create two Locale instances, one for the UK, the other for France. You can also designate a large number to be used for testing:
$localeFr = new Locale('fr_FR');
$localeUk = new Locale('en_GB');
$number = 1234567.89;
?>Finally, you can wrap the formatNumber() and parseNumber() methods in the appropriate HTML display logic and view the results:
<!DOCTYPE html>
<html>
<head>
<title>PHP 7 Cookbook</title>
<meta http-equiv="content-type" content="text/html;charset=utf-8" />
<link rel="stylesheet" type="text/css" href="php7cookbook_html_table.css">
</head>
<body>
<table>
<tr>
<th>Number</th>
<td>1234567.89</td>
</tr>
<tr>
<th>French Format</th>
<td><?= $localeFr->formatNumber($number); ?></td>
</tr>
<tr>
<th>UK Format</th>
<td><?= $localeUk->formatNumber($number); ?></td>
</tr>
<tr>
<th>UK Parse French Number: <?= $localeFr->formatNumber($number) ?></th>
<td><?= $localeUk->parseNumber($localeFr->formatNumber($number)); ?></td>
</tr>
<tr>
<th>UK Parse UK Number: <?= $localeUk->formatNumber($number) ?></th>
<td><?= $localeUk->parseNumber($localeUk->formatNumber($number)); ?></td>
</tr>
<tr>
<th>FR Parse FR Number: <?= $localeFr->formatNumber($number) ?></th>
<td><?= $localeFr->parseNumber($localeFr->formatNumber($number)); ?></td>
</tr>
<tr>
<th>FR Parse UK Number: <?= $localeUk->formatNumber($number) ?></th>
<td><?= $localeFr->parseNumber($localeUk->formatNumber($number)); ?></td>
</tr>
</table>
</body>
</html>Here is the result as seen from a browser:

Note that if the locale is set to fr_FR, a UK formatted number, when parsed, does not return the correct value. Likewise, when the locale is set to en_GB, a French formatted number does not return the correct value upon parsing. Accordingly, you might want to consider adding a validation check before attempting to parse the number.
setlocale() please refer to this page: http://php.net/manual/en/function.setlocale.php.The technique for handling currency is similar to that for numbers. We will even use the same NumberFormatter class! There is one major difference, however, and it is a show stopper: in order to properly format currency, you will need to have on hand the currency code.
Application\I18n\Locale class constructor argument:const FALLBACK_CURRENCY = 'GBP';
protected $currencyCode;
public function __construct($localeString = NULL, $currencyCode = NULL)
{
// add this to the existing code:
$this->currencyCode = $currencyCode ?? self::FALLBACK_CURRENCY;
}This approach, although obviously solid and workable, tends to fall into the category called halfway measures or the easy way out! This approach would also tend to eliminate full automation as the currency code is not available from the HTTP header. As you have probably gathered from other recipes in this book, we do not shy away from a more complex solution so, as the saying goes, strap on your seat belts!
Application\I18n\IsoCodes. As you can see, this class has all the pertinent properties, along with a sort-of universal constructor:namespace Application\I18n;
class IsoCodes
{
public $name;
public $iso2;
public $iso3;
public $iso_numeric;
public $iso_3166;
public $currency_name;
public $currency_code;
public $currency_number;
public function __construct(array $data)
{
$vars = get_object_vars($this);
foreach ($vars as $key => $value) {
$this->$key = $data[$key] ?? NULL;
}
}
}Application\I18n\IsoCodesInterface:namespace Application\I18n;
interface IsoCodesInterface
{
public function getCurrencyCodeFromIso2CountryCode($iso2) : IsoCodes;
}Application\I18n\IsoCodesDb. It implements the abovementioned interface, and accepts an Application\Database\Connection instance (see Chapter 1, Building a Foundation), which is used to perform the lookup. The constructor sets up the required information, including the connection, the lookup table name, and the column that represents the ISO2 code. The lookup method required by the interface then issues an SQL statement and returns an array, which is then used to build an IsoCodes instance:namespace Application\I18n;
use PDO;
use Application\Database\Connection;
class IsoCodesDb implements IsoCodesInterface
{
protected $isoTableName;
protected $iso2FieldName;
protected $connection;
public function __construct(Connection $connection, $isoTableName, $iso2FieldName)
{
$this->connection = $connection;
$this->isoTableName = $isoTableName;
$this->iso2FieldName = $iso2FieldName;
}
public function getCurrencyCodeFromIso2CountryCode($iso2) : IsoCodes
{
$sql = sprintf('SELECT * FROM %s WHERE %s = ?', $this->isoTableName, $this->iso2FieldName);
$stmt = $this->connection->pdo->prepare($sql);
$stmt->execute([$iso2]);
return new IsoCodes($stmt->fetch(PDO::FETCH_ASSOC);
}
}Application\I18n\Locale class. We first add a couple of new properties and class constants:const ERROR_UNABLE_TO_PARSE = 'ERROR: Unable to parse'; const FALLBACK_CURRENCY = 'GBP'; protected $currencyFormatter; protected $currencyLookup; protected $currencyCode;
getRegion() method, which comes from the PHP Locale class (which we extend). Just in case it's needed, we also add a method, getCurrencyCode():public function getCountryCode()
{
return $this->getRegion($this->getLocaleCode());
}
public function getCurrencyCode()
{
return $this->currencyCode;
}getCurrencyFormatter(I), much as we did getNumberFormatter() (shown previously). Notice that $currencyFormatter is defined using NumberFormatter, but with a different second parameter:public function getCurrencyFormatter()
{
if (!$this->currencyFormatter) {
$this->currencyFormatter = new NumberFormatter($this->getLocaleCode(), NumberFormatter::CURRENCY);
}
return $this->currencyFormatter;
}public function __construct($localeString = NULL, IsoCodesInterface $currencyLookup = NULL)
{
// add this to the existing code:
$this->currencyLookup = $currencyLookup;
if ($this->currencyLookup) {
$this->currencyCode = $this->currencyLookup->getCurrencyCodeFromIso2CountryCode($this->getCountryCode())->currency_code;
} else {
$this->currencyCode = self::FALLBACK_CURRENCY;
}
}FALSE if the parsing operation is not successful:public function formatCurrency($currency)
{
return $this->getCurrencyFormatter()->formatCurrency($currency, $this->currencyCode);
}
public function parseCurrency($string)
{
$result = $this->getCurrencyFormatter()->parseCurrency($string, $this->currencyCode);
return ($result) ? $result : self::ERROR_UNABLE_TO_PARSE;
}Create the following classes, as covered in the first several bullet points:
|
Class |
Bullet point discussed |
|---|---|
|
|
3 |
|
|
4 |
|
|
5 |
We will assume, for the purposes of this illustration, that we have a populated MySQL database table, iso_country_codes, which has this structure:
CREATE TABLE `iso_country_codes` ( `name` varchar(128) NOT NULL, `iso2` varchar(2) NOT NULL, `iso3` varchar(3) NOT NULL, `iso_numeric` int(11) NOT NULL AUTO_INCREMENT, `iso_3166` varchar(32) NOT NULL, `currency_name` varchar(32) DEFAULT NULL, `currency_code` char(3) DEFAULT NULL, `currency_number` int(4) DEFAULT NULL, PRIMARY KEY (`iso_numeric`) ) ENGINE=InnoDB AUTO_INCREMENT=895 DEFAULT CHARSET=utf8;
Make the additions to the Application\I18n\Locale class, as discussed in bullet points 6 to 9 previously. You can then create a chap_08_formatting_currency.php file, which sets up autoloading and uses the appropriate classes:
<?php
define('DB_CONFIG_FILE', __DIR__ . '/../config/db.config.php');
require __DIR__ . '/../Application/Autoload/Loader.php';
Application\Autoload\Loader::init(__DIR__ . '/..');
use Application\I18n\Locale;
use Application\I18n\IsoCodesDb;
use Application\Database\Connection;
use Application\I18n\Locale;Next, we create instances of the Connection and IsoCodesDb classes:
$connection = new Connection(include DB_CONFIG_FILE); $isoLookup = new IsoCodesDb($connection, 'iso_country_codes', 'iso2');
For this illustration, create two Locale instances, one for the UK, the other for France. You can also designate a large number to be used for testing:
$localeFr = new Locale('fr-FR', $isoLookup);
$localeUk = new Locale('en_GB', $isoLookup);
$number = 1234567.89;
?>Finally, you can wrap the formatCurrency() and parseCurrency() methods in the appropriate HTML display logic and view the results. Base your view logic on that presented in the How it works... section of the previous recipe (not repeated here to save trees!). Here is the final output:
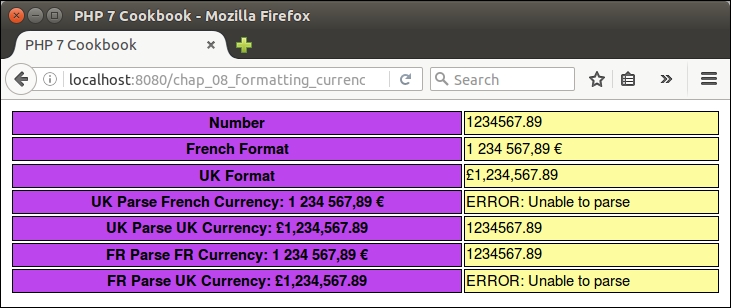
The formatting of date and time varies region to region. As a classic example, consider the year 2016, month April, day 15 and a time in the evening. The format preferred by denizens of the United States would be 7:23 PM, 4/15/2016, whereas in China you would most likely see 2016-04-15 19:23. As mentioned with number and currency formatting, it would also be important to display (and parse) dates in a format acceptable to your web visitors.
Application\I18n\Locale, adding statements to use date formatting classes:use IntlCalendar; use IntlDateFormatter;
IntlDateFormatter instance, as well as a series of predefined constants:const DATE_TYPE_FULL = IntlDateFormatter::FULL; const DATE_TYPE_LONG = IntlDateFormatter::LONG; const DATE_TYPE_MEDIUM = IntlDateFormatter::MEDIUM; const DATE_TYPE_SHORT = IntlDateFormatter::SHORT; const ERROR_UNABLE_TO_PARSE = 'ERROR: Unable to parse'; const ERROR_UNABLE_TO_FORMAT = 'ERROR: Unable to format date'; const ERROR_ARGS_STRING_ARRAY = 'ERROR: Date must be string YYYY-mm-dd HH:ii:ss or array(y,m,d,h,i,s)'; const ERROR_CREATE_INTL_DATE_FMT = 'ERROR: Unable to create international date formatter'; protected $dateFormatter;
getDateFormatter(), which returns an IntlDateFormatter instance. The value of $type matches one of the DATE_TYPE_* constants defined previously:public function getDateFormatter($type)
{
switch ($type) {
case self::DATE_TYPE_SHORT :
$formatter = new IntlDateFormatter($this->getLocaleCode(),
IntlDateFormatter::SHORT, IntlDateFormatter::SHORT);
break;
case self::DATE_TYPE_MEDIUM :
$formatter = new IntlDateFormatter($this->getLocaleCode(), IntlDateFormatter::MEDIUM, IntlDateFormatter::MEDIUM);
break;
case self::DATE_TYPE_LONG :
$formatter = new IntlDateFormatter($this->getLocaleCode(), IntlDateFormatter::LONG, IntlDateFormatter::LONG);
break;
case self::DATE_TYPE_FULL :
$formatter = new IntlDateFormatter($this->getLocaleCode(), IntlDateFormatter::FULL, IntlDateFormatter::FULL);
break;
default :
throw new InvalidArgumentException(self::ERROR_CREATE_INTL_DATE_FMT);
}
$this->dateFormatter = $formatter;
return $this->dateFormatter;
}$date is a bit tricky. It cannot be locale-specific, otherwise we will need to parse it according to locale rules, with unpredictable results. A better strategy would be to accept an array of values that represent year, month, day, and so on as integers. As a fallback, we will accept a string but only in this format: YYYY-mm-dd HH:ii:ss. Time zone is optional, and can be set separately. First we initialize variables:public function formatDate($date, $type, $timeZone = NULL)
{
$result = NULL;
$year = date('Y');
$month = date('m');
$day = date('d');
$hour = 0;
$minutes = 0;
$seconds = 0;if (is_string($date)) {
list($dateParts, $timeParts) = explode(' ', $date);
list($year,$month,$day) = explode('-',$dateParts);
list($hour,$minutes,$seconds) = explode(':',$timeParts);
} elseif (is_array($date)) {
list($year,$month,$day,$hour,$minutes,$seconds) = $date;
} else {
throw new InvalidArgumentException(self::ERROR_ARGS_STRING_ARRAY);
}IntlCalendar instance, which will serve as an argument when running format(). We set the date using the discreet integer values:$intlDate = IntlCalendar::createInstance($timeZone, $this->getLocaleCode()); $intlDate->set($year,$month,$day,$hour,$minutes,$seconds);
$formatter = $this->getDateFormatter($type);
if ($timeZone) {
$formatter->setTimeZone($timeZone);
}
$result = $formatter->format($intlDate);
return $result ?? self::ERROR_UNABLE_TO_FORMAT;
}parseDate() method is actually simpler than formatting. The only complication is what to do if the type is not specified (which will be the most likely case). All we need to do is to loop through all possible types (of which there are only four) until a result is produced:public function parseDate($string, $type = NULL)
{
if ($type) {
$result = $this->getDateFormatter($type)->parse($string);
} else {
$tryThese = [self::DATE_TYPE_FULL,
self::DATE_TYPE_LONG,
self::DATE_TYPE_MEDIUM,
self::DATE_TYPE_SHORT];
foreach ($tryThese as $type) {
$result = $this->getDateFormatter($type)->parse($string);
if ($result) {
break;
}
}
}
return ($result) ? $result : self::ERROR_UNABLE_TO_PARSE;
}Code the changes to Application\I18n\Locale, discussed previously. You can then create a test file, chap_08_formatting_date.php, which sets up autoloading, and creates two instances of the Locale class, one for the USA, the other for France:
<?php
require __DIR__ . '/../Application/Autoload/Loader.php';
Application\Autoload\Loader::init(__DIR__ . '/..');
use Application\I18n\Locale;
$localeFr = new Locale('fr-FR');
$localeUs = new Locale('en_US');
$date = '2016-02-29 17:23:58';
?>Next, with suitable styling, run a test of formatDate() and parseDate():
echo $localeFr->formatDate($date, Locale::DATE_TYPE_FULL); echo $localeUs->formatDate($date, Locale::DATE_TYPE_MEDIUM); $localeUs->parseDate($localeFr->formatDate($date, Locale::DATE_TYPE_MEDIUM)); // etc.
An example of the output is shown here:
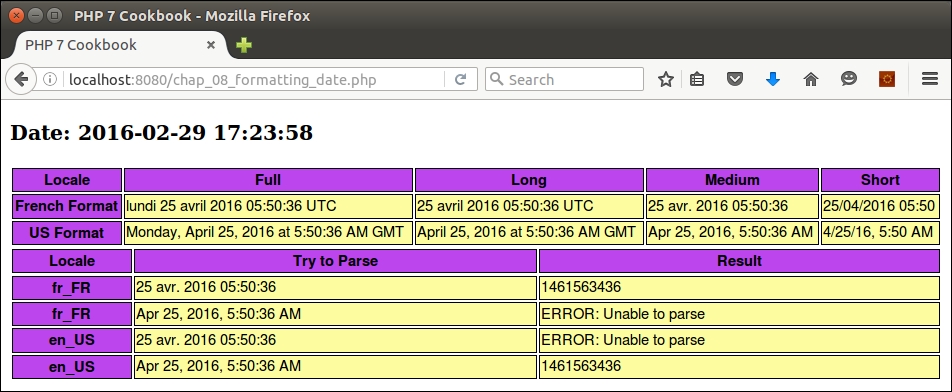
Creating a program to display a calendar is something you would most likely do as a student at secondary school. A nested for() loop, where the inside loop generates a list of seven days, will generally suffice. Even the problem of how many days there are in the month is easily solved in the form of a simple array. Where it starts to get tricky is when you need to figure out, for any given year, on what day of the week does the 1st of January fall. Also, what if you want to represent the months and days of the week in a language and format acceptable to a specific locale? As you have probably guessed, we will build a solution using the previously discussed Application\I18n\Locale class.
$dayOfMonth. Later, in the next recipe, we'll expand it to include events. As the primary purpose of this class will be to yield $dayOfMonth, we'll incorporate this value into its constructor, and define __invoke() to return this value as well:namespace Application\I18n;
class Day
{
public $dayOfMonth;
public function __construct($dayOfMonth)
{
$this->dayOfMonth = $dayOfMonth;
}
public function __invoke()
{
return $this->dayOfMonth ?? '';
}
}Application\I18n\Locale, and will define a couple of class constants and properties. The format codes, such as EEEEE and MMMM, are drawn from ICU date formats:namespace Application\I18n;
use IntlCalendar;
class Calendar
{
const DAY_1 = 'EEEEE'; // T
const DAY_2 = 'EEEEEE'; // Tu
const DAY_3 = 'EEE'; // Tue
const DAY_FULL = 'EEEE'; // Tuesday
const MONTH_1 = 'MMMMM'; // M
const MONTH_3 = 'MMM'; // Mar
const MONTH_FULL = 'MMMM'; // March
const DEFAULT_ACROSS = 3;
const HEIGHT_FULL = '150px';
const HEIGHT_SMALL = '60px';
protected $locale;
protected $dateFormatter;
protected $yearArray;
protected $height;
public function __construct(Locale $locale)
{
$this->locale = $locale;
}
// other methods are discussed in the following bullets
}IntlDateFormatter instance from our locale class. This is stored in a class property, as it will be used frequently:protected function getDateFormatter()
{
if (!$this->dateFormatter) {
$this->dateFormatter = $this->locale->getDateFormatter(Locale::DATE_TYPE_FULL);
}
return $this->dateFormatter;
}buildMonthArray(), which creates a multi-dimensional array where the outer key is the week of the year, and the inner array is seven elements representing the days of the week. We accept the year, month, and optional time zone as arguments. Note, as part of variable initialization, we subtract 1 from the month. This is because the IntlCalendar::set() method expects a 0-based value for the month, where 0 represents January, 1 is February, and so on:public function buildMonthArray($year, $month, $timeZone = NULL)
{
$month -= 1;
//IntlCalendar months are 0 based; Jan==0, Feb==1 and so on
$day = 1;
$first = TRUE;
$value = 0;
$monthArray = array();IntlCalendar instance, and use it to determine how many days are in this month:$cal = IntlCalendar::createInstance($timeZone, $this->locale->getLocaleCode()); $cal->set($year, $month, $day); $maxDaysInMonth = $cal->getActualMaximum(IntlCalendar::FIELD_DAY_OF_MONTH);
IntlDateFormatter instance to determine what day of the week equates to the 1st of this month. After that, we set the pattern to w, which will subsequently give us the week number:$formatter = $this->getDateFormatter();
$formatter->setPattern('e');
$firstDayIsWhatDow = $formatter->format($cal);while() loop ensures we don't go past the end of the month. The inner loop represents the days of the week. You will note that we take advantage of IntlCalendar::get(), which allows us to retrieve values from a wide range of predefined fields. We also adjust the week of the year value to 0 if it exceeds 52:while ($day <= $maxDaysInMonth) {
for ($dow = 1; $dow <= 7; $dow++) {
$cal->set($year, $month, $day);
$weekOfYear = $cal->get(IntlCalendar::FIELD_WEEK_OF_YEAR);
if ($weekOfYear > 52) $weekOfYear = 0;$first is still set TRUE. If so, we start adding day numbers to the array. Otherwise, the array value is set to NULL. We then close all open statements and return the array. Note that we also need to make sure the inner loop doesn't go past the number of days in the month, hence the extra if() statement in the outer else clause. if ($first) {
if ($dow == $firstDayIsWhatDow) {
$first = FALSE;
$value = $day++;
} else {
$value = NULL;
}
} else {
if ($day <= $maxDaysInMonth) {
$value = $day++;
} else {
$value = NULL;
}
}
$monthArray[$weekOfYear][$dow] = new Day($value);
}
}
return $monthArray;
}protected function getDay($type, $cal)
{
$formatter = $this->getDateFormatter();
$formatter->setPattern($type);
return $formatter->format($cal);
}getDay() method. As mentioned previous, the type dictates the appearance of the days:protected function getWeekHeaderRow($type, $cal, $year, $month, $week)
{
$output = '<tr>';
$width = (int) (100/7);
foreach ($week as $day) {
$cal->set($year, $month, $day());
$output .= '<th style="vertical-align:top;" width="' . $width . '%">' . $this->getDay($type, $cal) . '</th>';
}
$output .= '</tr>' . PHP_EOL;
return $output;
}Day::__invoke() using: $day():protected function getWeekDaysRow($week)
{
$output = '<tr style="height:' . $this->height . ';">';
$width = (int) (100/7);
foreach ($week as $day) {
$output .= '<td style="vertical-align:top;" width="' . $width . '%">' . $day() . '</td>';
}
$output .= '</tr>' . PHP_EOL;
return $output;
}$yearArray is not already available:public function calendarForMonth($year,
$month,
$timeZone = NULL,
$dayType = self::DAY_3,
$monthType = self::MONTH_FULL,
$monthArray = NULL)
{
$first = 0;
if (!$monthArray)
$monthArray = $this->yearArray[$year][$month]
?? $this->buildMonthArray($year, $month, $timeZone);1 as IntlCalendar months are 0-based: Jan = 0, Feb = 1, and so on. We then build an IntlCalendar instance using the time zone (if any), and the locale. We next create a IntlDateFormatter instance to retrieve the month name and other information according to locale:$month--; $cal = IntlCalendar::createInstance($timeZone, $this->locale->getLocaleCode()); $cal->set($year, $month, 1); $formatter = $this->getDateFormatter(); $formatter->setPattern($monthType);
$this->height = ($dayType == self::DAY_FULL)
? self::HEIGHT_FULL : self::HEIGHT_SMALL;
$html = '<h1>' . $formatter->format($cal) . '</h1>';
$header = '';
$body = '';
foreach ($monthArray as $weekNum => $week) {
if ($first++ == 1) {
$header .= $this->getWeekHeaderRow($dayType, $cal, $year, $month, $week);
}
$body .= $this->getWeekDaysRow($dayType, $week);
}
$html .= '<table>' . $header . $body . '</table>' . PHP_EOL;
return $html;
}public function buildYearArray($year, $timeZone = NULL)
{
$this->yearArray = array();
for ($month = 1; $month <= 12; $month++) {
$this->yearArray[$year][$month] = $this->buildMonthArray($year, $month, $timeZone);
}
return $this->yearArray;
}
public function getYearArray()
{
return $this->yearArray;
}calendarForYear(). If the year array has not been build, we call buildYearArray(). We take into account how many monthly calendars we wish to display across and then call calendarForMonth():public function calendarForYear($year,
$timeZone = NULL,
$dayType = self::DAY_1,
$monthType = self::MONTH_3,
$across = self::DEFAULT_ACROSS)
{
if (!$this->yearArray) $this->buildYearArray($year, $timeZone);
$yMax = (int) (12 / $across);
$width = (int) (100 / $across);
$output = '<table>' . PHP_EOL;
$month = 1;
for ($y = 1; $y <= $yMax; $y++) {
$output .= '<tr>';
for ($x = 1; $x <= $across; $x++) {
$output .= '<td style="vertical-align:top;" width="' . $width . '%">' . $this->calendarForMonth($year, $month, $timeZone, $dayType, $monthType, $this->yearArray[$year][$month++]) . '</td>';
}
$output .= '</tr>' . PHP_EOL;
}
$output .= '</table>';
return $output;
}First of all, make sure you build the Application\I18n\Locale class as defined in the previous recipe. After that, create a new file, Calendar.php, in the Application\I18n folder, with all the methods described in this recipe.
Next, define a calling program, chap_08_html_calendar.php, which sets up autoloading and creates Locale and Calendar instances. Also be sure to define the year and month:
<?php
require __DIR__ . '/../Application/Autoload/Loader.php';
Application\Autoload\Loader::init(__DIR__ . '/..');
use Application\I18n\Locale;
use Application\I18n\Calendar;
$localeFr = new Locale('fr-FR');
$localeUs = new Locale('en_US');
$localeTh = new Locale('th_TH');
$calendarFr = new Calendar($localeFr);
$calendarUs = new Calendar($localeUs);
$calendarTh = new Calendar($localeTh);
$year = 2016;
$month = 1;
?>You can then develop appropriate view logic to display the different calendars. For example, you can include parameters to display the full month and day names:
<!DOCTYPE html>
<html>
<head>
<title>PHP 7 Cookbook</title>
<meta http-equiv="content-type" content="text/html;charset=utf-8" />
<link rel="stylesheet" type="text/css" href="php7cookbook_html_table.css">
</head>
<body>
<h3>Year: <?= $year ?></h3>
<?= $calendarFr->calendarForMonth($year, $month, NULL, Calendar::DAY_FULL); ?>
<?= $calendarUs->calendarForMonth($year, $month, NULL, Calendar::DAY_FULL); ?>
<?= $calendarTh->calendarForMonth($year, $month, NULL, Calendar::DAY_FULL); ?>
</body>
</html>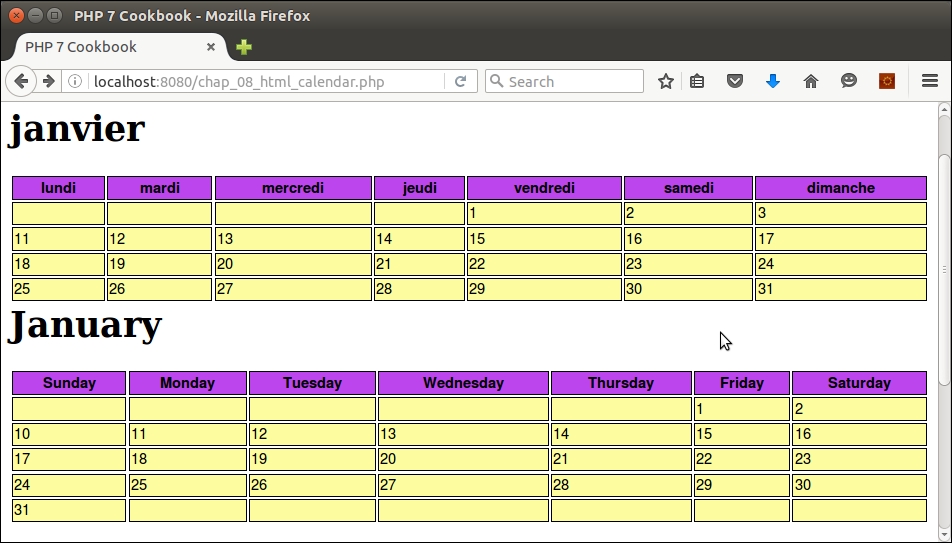
With a couple of modifications, you can also display a calendar for the entire year:
$localeTh = new Locale('th_TH');
$localeEs = new Locale('es_ES');
$calendarTh = new Calendar($localeTh);
$calendarEs = new Calendar($localeEs);
$year = 2016;
echo $calendarTh->calendarForYear($year);
echo $calendarEs->calendarForYear($year);Here is the browser output showing a full year calendar in Spanish:
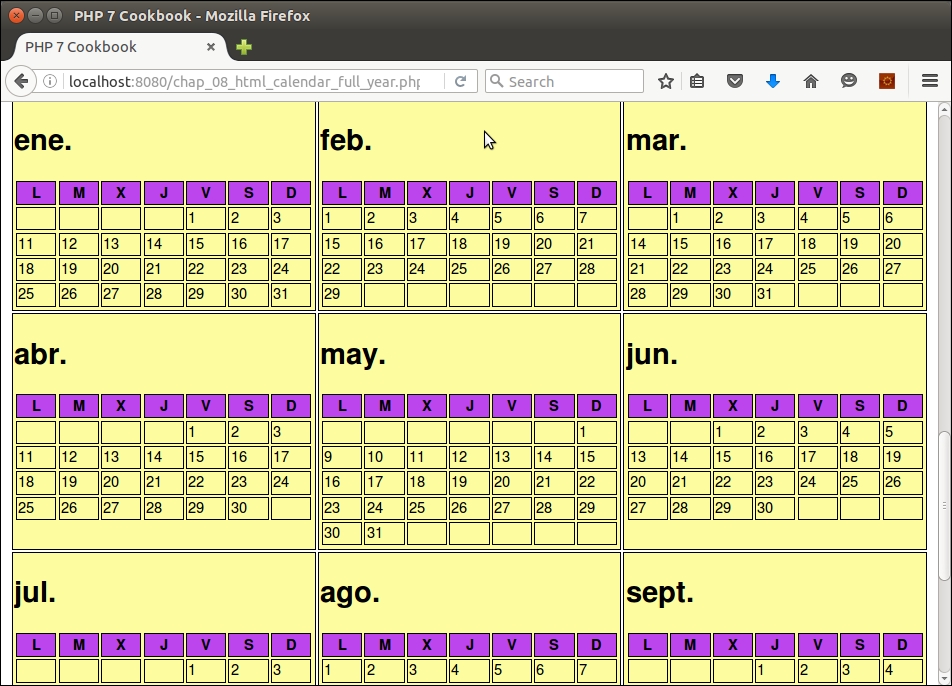
IntlDateFormatter::setPattern(), see this article: http://userguide.icu-project.org/formatparse/datetimeA very common need related to generating a calendar is the scheduling of events. Events can be in the form of one-off events, which take place on one day, or on a weekend. There is a much greater need, however, to track events that are recurring. We need to account for the start date, the recurring interval (daily, weekly, monthly), and the number of occurrences or a specific end date.
DateTime extension admirably suited to event generation:namespace Application\I18n;
use DateTime;
use DatePeriod;
use DateInterval;
use InvalidArgumentException;
class Event
{
// code
}public in order to economize on the number of getters and setters needed. The intervals are defined as sprintf() format strings; %d will be substituted for a value:const INTERVAL_DAY = 'P%dD'; const INTERVAL_WEEK = 'P%dW'; const INTERVAL_MONTH = 'P%dM'; const FLAG_FIRST = 'FIRST'; // 1st of the month const ERROR_INVALID_END = 'Need to supply either # occurrences or an end date'; const ERROR_INVALID_DATE = 'String i.e. YYYY-mm-dd or DateTime instance only'; const ERROR_INVALID_INTERVAL = 'Interval must take the form "P\d+(D | W | M)"'; public $id; public $flag; public $value; public $title; public $locale; public $interval; public $description; public $occurrences; public $nextDate; protected $endDate; protected $startDate;
public function __construct($title,
$description,
$startDate,
$interval,
$value,
$occurrences = NULL,
$endDate = NULL,
$flag = NULL)
{events table. Here we use md5() not for security purposes, but rather to quickly generate a hash so that IDs have a consistent appearance:$this->id = md5($title . $interval . $value) . sprintf('%04d', rand(0,9999));
$this->flag = $flag;
$this->value = $value;
$this->title = $title;
$this->description = $description;
$this->occurrences = $occurrences;sprintf() pattern used to construct a proper DateInterval instance:try {
$this->interval = new DateInterval(sprintf($interval, $value));
} catch (Exception $e) {
error_log($e->getMessage());
throw new InvalidArgumentException(self::ERROR_INVALID_INTERVAL);
}$startDate, we call stringOrDate(). We then attempt to generate a value for $endDate by calling either stringOrDate() or calcEndDateFromOccurrences(). If we have neither an end date nor a number of occurrences, an exception is thrown: $this->startDate = $this->stringOrDate($startDate);
if ($endDate) {
$this->endDate = $this->stringOrDate($endDate);
} elseif ($occurrences) {
$this->endDate = $this->calcEndDateFromOccurrences();
} else {
throw new InvalidArgumentException(self::ERROR_INVALID_END);
}
$this->nextDate = $this->startDate;
}stringOrDate() method consists of a few lines of code that check the data type of the date variable, and return a DateTime instance or NULL:protected function stringOrDate($date)
{
if ($date === NULL) {
$newDate = NULL;
} elseif ($date instanceof DateTime) {
$newDate = $date;
} elseif (is_string($date)) {
$newDate = new DateTime($date);
} else {
throw new InvalidArgumentException(self::ERROR_INVALID_END);
}
return $newDate;
}calcEndDateFromOccurrences() method from the constructor if $occurrences is set so that we'll know the end date for this event. We take advantage of the DatePeriod class, which provides an iteration based on a start date, DateInterval, and number of occurrences:protected function calcEndDateFromOccurrences()
{
$endDate = new DateTime('now');
$period = new DatePeriod(
$this->startDate, $this->interval, $this->occurrences);
foreach ($period as $date) {
$endDate = $date;
}
return $endDate;
}__toString() magic method, which simple echoes the title of the event:public function __toString()
{
return $this->title;
}Event class is getNextDate(), which is used when generating a calendar:public function getNextDate(DateTime $today)
{
if ($today > $this->endDate) {
return FALSE;
}
$next = clone $today;
$next->add($this->interval);
return $next;
}Application\I18n\Calendar class described in the previous recipe. With a bit of minor surgery, we are ready to tie our newly defined Event class into the calendar. First we add a new property, $events, and a method to add events in the form of an array. We use the Event::$id property to make sure events are merged and not overwritten:protected $events = array();
public function addEvent(Event $event)
{
$this->events[$event->id] = $event;
}processEvents(), which adds an Event instance to a Day object when building the year calendar. First we check to see whether there are any events, and whether or not the Day object is NULL. As you may recall, it's likely that the first day of the month doesn't fall on the first day of the week, and thus the need to set the value of a Day object to NULL. We certainly do not want to add events to a non-operative day! We then call Event::getNextDate() and see whether the dates match. If so, we store the Event into Day::$events[] and set the next date on the Event object:protected function processEvents($dayObj, $cal)
{
if ($this->events && $dayObj()) {
$calDateTime = $cal->toDateTime();
foreach ($this->events as $id => $eventObj) {
$next = $eventObj->getNextDate($eventObj->nextDate);
if ($next) {
if ($calDateTime->format('Y-m-d') ==
$eventObj->nextDate->format('Y-m-d')) {
$dayObj->events[$eventObj->id] = $eventObj;
$eventObj->nextDate = $next;
}
}
}
}
return $dayObj;
}Note that we do not do a direct comparison of the two objects. Two reasons for this: first of all, one is a DateTime instance, the other is an IntlCalendar instance. The other, more compelling reason, is that it's possible that hours:minutes:seconds were included when the DateTime instance was obtained, resulting in actual value differences between the two objects.
processEvents() in the buildMonthArray() method so that it looks like this: while ($day <= $maxDaysInMonth) {
for ($dow = 1; $dow <= 7; $dow++) {
// add this to the existing code:
$dayObj = $this->processEvents(new Day($value), $cal);
$monthArray[$weekOfYear][$dow] = $dayObj;
}
}getWeekDaysRow(), adding the necessary code to output event information inside the box along with the date:protected function getWeekDaysRow($type, $week)
{
$output = '<tr style="height:' . $this->height . ';">';
$width = (int) (100/7);
foreach ($week as $day) {
$events = '';
if ($day->events) {
foreach ($day->events as $single) {
$events .= '<br>' . $single->title;
if ($type == self::DAY_FULL) {
$events .= '<br><i>' . $single->description . '</i>';
}
}
}
$output .= '<td style="vertical-align:top;" width="' . $width . '%">'
. $day() . $events . '</td>';
}
$output .= '</tr>' . PHP_EOL;
return $output;
}To tie events to the calendar, first code the Application\I18n\Event class described in steps 1 to 10. Next, modify Application\I18n\Calendar as described in steps 11 to 14. You can then create a test script, chap_08_recurring_events.php, which sets up autoloading and creates Locale and Calendar instances. For the purposes of illustration, go ahead and use 'es_ES' as a locale:
<?php
require __DIR__ . '/../Application/Autoload/Loader.php';
Application\Autoload\Loader::init(__DIR__ . '/..');
use Application\I18n\ { Locale, Calendar, Event };
try {
$year = 2016;
$localeEs = new Locale('es_ES');
$calendarEs = new Calendar($localeEs);Now we can start defining and adding events to the calendar. The first example adds an event that lasts 3 days and starts on 8 January 2016:
// add event: 3 days
$title = 'Conf';
$description = 'Special 3 day symposium on eco-waste';
$startDate = '2016-01-08';
$event = new Event($title, $description, $startDate,
Event::INTERVAL_DAY, 1, 2);
$calendarEs->addEvent($event);Here is another example, an event that occurs on the first of every month until September 2017:
$title = 'Pay Rent';
$description = 'Sent rent check to landlord';
$startDate = new DateTime('2016-02-01');
$event = new Event($title, $description, $startDate,
Event::INTERVAL_MONTH, 1, '2017-09-01', NULL, Event::FLAG_FIRST);
$calendarEs->addEvent($event);You can then add sample weekly, bi-weekly, monthly, and so on events as desired. You can then close the try...catch block, and produce suitable display logic:
} catch (Throwable $e) {
$message = $e->getMessage();
}
?>
<!DOCTYPE html>
<head>
<title>PHP 7 Cookbook</title>
<meta http-equiv="content-type" content="text/html;charset=utf-8" />
<link rel="stylesheet" type="text/css" href="php7cookbook_html_table.css">
</head>
<body>
<h3>Year: <?= $year ?></h3>
<?= $calendarEs->calendarForYear($year, 'Europe/Berlin',
Calendar::DAY_3, Calendar::MONTH_FULL, 2); ?>
<?= $calendarEs->calendarForMonth($year, 1 , 'Europe/Berlin',
Calendar::DAY_FULL); ?>
</body>
</html>Here is the output showing the first few months of the year:
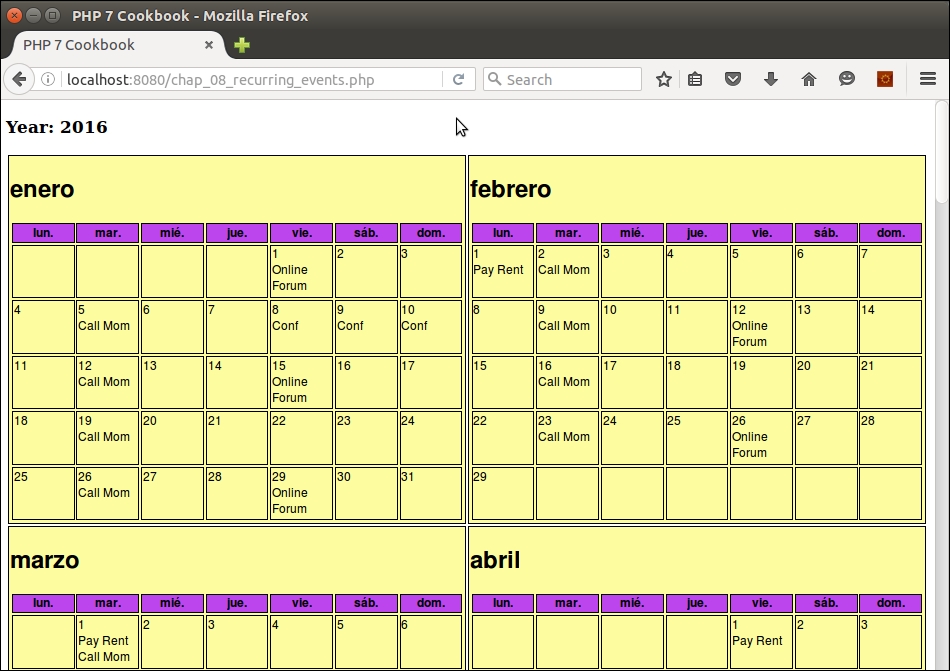
IntlCalendar field constants that can be used with get(), please refer to this page: http://php.net/manual/en/class.intlcalendar.php#intlcalendar.constantsTranslation is an important part of making your website accessible to an international customer base. One way this is accomplished it to use the PHP gettext functions, which are based on the GNU gettext operating system tools installed on the local server. gettext is well documented and well supported, but uses a legacy approach and has distinct disadvantages. Accordingly, in this recipe, we present an alternative approach to translation where you can build your own adapter.
Something important to recognize is that the programmatic translation tools available to PHP are primarily designed to provide limited translation of a word or phrase, referred to as the msgid (message ID). The translated equivalent is referred to as the msgstr (message string). Accordingly, incorporating translation typically only involves relatively unchanging items such as menus, forms, error or success messages, and so on. For the purposes of this recipe, we will assume that you have the actual web page translations stored as blocks of text.
If you need to translate entire pages of content, you might consider using the Google Translate API. This is, however, a paid service. Alternatively, you could outsource the translation to individuals with multi-lingual skills cheaply using Amazon Mechanical Turk. See the See Also section at the end of this recipe for the URLs.
.ini files, .csv files, and databases.namespace Application\I18n\Translate\Adapter;
interface TranslateAdapterInterface
{
public function translate($msgid);
}namespace Application\I18n\Translate\Adapter;
trait TranslateAdapterTrait
{
protected $translation;
public function translate($msgid)
{
return $this->translation[$msgid] ?? $msgid;
}
}.ini file as the source of translations. The first thing you'll notice is that we use the trait defined previously. The constructor method will vary between adapters. In this case, we use parse_ini_file() to produce an array of key/value pairs where the key is the message ID. Notice that we use the $filePattern parameter to substitute the locale, which then allows us to load the appropriate translation file:namespace Application\I18n\Translate\Adapter;
use Exception;
use Application\I18n\Locale;
class Ini implements TranslateAdapterInterface
{
use TranslateAdapterTrait;
const ERROR_NOT_FOUND = 'Translation file not found';
public function __construct(Locale $locale, $filePattern)
{
$translateFileName = sprintf($filePattern, $locale->getLocaleCode());
if (!file_exists($translateFileName)) {
error_log(self::ERROR_NOT_FOUND . ':' . $translateFileName);
throw new Exception(self::ERROR_NOT_FOUND);
} else {
$this->translation = parse_ini_file($translateFileName);
}
}
}Application\I18n\Translate\Adapter\Csv, is identical, except that we open the translation file and loop through using fgetcsv() to retrieve the message ID / message string key pairs. Here we show only the difference in the constructor:public function __construct(Locale $locale, $filePattern)
{
$translateFileName = sprintf($filePattern, $locale->getLocaleCode());
if (!file_exists($translateFileName)) {
error_log(self::ERROR_NOT_FOUND . ':' . $translateFileName);
throw new Exception(self::ERROR_NOT_FOUND);
} else {
$fileObj = new SplFileObject($translateFileName, 'r');
while ($row = $fileObj->fgetcsv()) {
$this->translation[$row[0]] = $row[1];
}
}
}PDO prepared statement which is sent to the database in the beginning, and only one time. We then execute as many times as needed, supplying the message ID as an argument. You will also notice that we needed to override the translate() method defined in the trait. Finally, you might have noticed the use of PDOStatement::fetchColumn() as we only need the one value:namespace Application\I18n\Translate\Adapter;
use Exception;
use Application\Database\Connection;
use Application\I18n\Locale;
class Database implements TranslateAdapterInterface
{
use TranslateAdapterTrait;
protected $connection;
protected $statement;
protected $defaultLocaleCode;
public function __construct(Locale $locale,
Connection $connection,
$tableName)
{
$this->defaultLocaleCode = $locale->getLocaleCode();
$this->connection = $connection;
$sql = 'SELECT msgstr FROM ' . $tableName
. ' WHERE localeCode = ? AND msgid = ?';
$this->statement = $this->connection->pdo->prepare($sql);
}
public function translate($msgid, $localeCode = NULL)
{
if (!$localeCode) $localeCode = $this->defaultLocaleCode;
$this->statement->execute([$localeCode, $msgid]);
return $this->statement->fetchColumn();
}
}Translation class, which is tied to one (or more) adapters. We assign a class constant to represent the default locale, and properties for the locale, adapter, and text file pattern (explained later):namespace Application\I18n\Translate;
use Application\I18n\Locale;
use Application\I18n\Translate\Adapter\TranslateAdapterInterface;
class Translation
{
const DEFAULT_LOCALE_CODE = 'en_GB';
protected $defaultLocaleCode;
protected $adapter = array();
protected $textFilePattern = array();public function __construct(TranslateAdapterInterface $adapter,
$defaultLocaleCode = NULL,
$textFilePattern = NULL)
{
if (!$defaultLocaleCode) {
$this->defaultLocaleCode = self::DEFAULT_LOCALE_CODE;
} else {
$this->defaultLocaleCode = $defaultLocaleCode;
}
$this->adapter[$this->defaultLocaleCode] = $adapter;
$this->textFilePattern[$this->defaultLocaleCode] = $textFilePattern;
}public function setAdapter($localeCode, TranslateAdapterInterface $adapter)
{
$this->adapter[$localeCode] = $adapter;
}
public function setDefaultLocaleCode($localeCode)
{
$this->defaultLocaleCode = $localeCode;
}
public function setTextFilePattern($localeCode, $pattern)
{
$this->textFilePattern[$localeCode] = $pattern;
}__invoke(), which lets us make a direct call to the translator instance, returning the message string given the message ID:public function __invoke($msgid, $locale = NULL)
{
if ($locale === NULL) $locale = $this->defaultLocaleCode;
return $this->adapter[$locale]->translate($msgid);
}public function text($key, $localeCode = NULL)
{
if ($localeCode === NULL) $localeCode = $this->defaultLocaleCode;
$contents = $key;
if (isset($this->textFilePattern[$localeCode])) {
$fn = sprintf($this->textFilePattern[$localeCode], $localeCode, $key);
if (file_exists($fn)) {
$contents = file_get_contents($fn);
}
}
return $contents;
}First you will need to define a directory structure to house the translation files. For the purposes of this illustration, you can make a directory ,/path/to/project/files/data/languages. Under this directory structure, create sub-directories that represent different locales. For this illustration, you could use these: de_DE, fr_FR, en_GB, and es_ES, representing German, French, English, and Spanish.
Next you will need to create the different translation files. As an example, here is a representative data/languages/es_ES/translation.ini file in Spanish:
Welcome=Bienvenido About Us=Sobre Nosotros Contact Us=Contáctenos Find Us=Encontrarnos click=clic para más información
Likewise, to demonstrate the CSV adapter, create the same thing as a CSV file, data/languages/es_ES/translation.csv:
"Welcome","Bienvenido" "About Us","Sobre Nosotros" "Contact Us","Contáctenos" "Find Us","Encontrarnos" "click","clic para más información"
Finally, create a database table, translation, and populate it with the same data. The main difference is that the database table will have three fields: msgid, msgstr, and locale_code:
CREATE TABLE `translation` ( `msgid` varchar(255) NOT NULL, `msgstr` varchar(255) NOT NULL, `locale_code` char(6) NOT NULL DEFAULT '', PRIMARY KEY (`msgid`,`locale_code`) ) ENGINE=InnoDB DEFAULT CHARSET=latin1;
Next, define the classes mentioned previously, using the code shown in this recipe:
Application\I18n\Translate\Adapter\TranslateAdapterInterfaceApplication\I18n\Translate\Adapter\TranslateAdapterTraitApplication\I18n\Translate\Adapter\IniApplication\I18n\Translate\Adapter\CsvApplication\I18n\Translate\Adapter\DatabaseApplication\I18n\Translate\TranslationNow you can create a test file, chap_08_translation_database.php, to test the database translation adapter. It should implement autoloading, use the appropriate classes, and create a Locale and Connection instance. Note that the TEXT_FILE_PATTERN constant is a sprintf() pattern in which the locale code and filename are substituted:
<?php
define('DB_CONFIG_FILE', '/../config/db.config.php');
define('TEXT_FILE_PATTERN', __DIR__ . '/../data/languages/%s/%s.txt');
require __DIR__ . '/../Application/Autoload/Loader.php';
Application\Autoload\Loader::init(__DIR__ . '/..');
use Application\I18n\Locale;
use Application\I18n\Translate\ { Translation, Adapter\Database };
use Application\Database\Connection;
$conn = new Connection(include __DIR__ . DB_CONFIG_FILE);
$locale = new Locale('fr_FR');Next, create a translation adapter instance and use that to create a Translation instance:
$adapter = new Database($locale, $conn, 'translation'); $translate = new Translation($adapter, $locale->getLocaleCode(), TEXT_FILE_PATTERN); ?>
Finally, create display logic that uses the $translate instance:
<!DOCTYPE html>
<head>
<title>PHP 7 Cookbook</title>
<meta http-equiv="content-type" content="text/html;charset=utf-8" />
<link rel="stylesheet" type="text/css" href="php7cookbook_html_table.css">
</head>
<body>
<table>
<tr>
<th><h1 style="color:white;"><?= $translate('Welcome') ?></h1></th>
<td>
<div style="float:left;width:50%;vertical-align:middle;">
<h3 style="font-size:24pt;"><i>Some Company, Inc.</i></h3>
</div>
<div style="float:right;width:50%;">
<img src="jcartier-city.png" width="300px"/>
</div>
</td>
</tr>
<tr>
<th>
<ul>
<li><?= $translate('About Us') ?></li>
<li><?= $translate('Contact Us') ?></li>
<li><?= $translate('Find Us') ?></li>
</ul>
</th>
<td>
<p>
<?= $translate->text('main_page'); ?>
</p>
<p>
<a href="#"><?= $translate('click') ?></a>
</p>
</td>
</tr>
</table>
</body>
</html>You can then perform additional similar tests, substituting a new locale to get a different language, or using another adapter to test a different data source. Here is an example of output using a locale of fr_FR and the database translation adapter:
gettext, see http://www.gnu.org/software/gettext/manual/gettext.html.In this chapter, we will cover the following topics:
As often happens in the IT industry, terms get invented, and then used and abused. The term middleware is no exception. Arguably the first use of the term came out of the Internet Engineering Task Force (IETF) in the year 2000. Originally, the term was applied to any software which operates between the transport (that is, TCP/IP) and the application layer. More recently, especially with the acceptance of PHP Standard Recommendation number 7 (PSR-7), middleware, specifically in the PHP world, has been applied to the web client-server environment.
The recipes in this section will make use of the concrete classes defined in Appendix, Defining PSR-7 Classes.
One very important usage of middleware is to provide authentication. Most web-based applications need the ability to verify a visitor via username and password. By incorporating PSR-7 standards into an authentication class, you will make it generically useful across the board, so to speak, being secure enough that it can be used in any framework that provides PSR-7-compliant request and response objects.
Application\Acl\AuthenticateInterface class. We use this interface to support the Adapter software design pattern, making our Authenticate class more generically useful by allowing a variety of adapters, each of which can draw authentication from a different source (for example, from a file, using OAuth2, and so on). Note the use of the PHP 7 ability to define the return value data type:namespace Application\Acl;
use Psr\Http\Message\ { RequestInterface, ResponseInterface };
interface AuthenticateInterface
{
public function login(RequestInterface $request) :
ResponseInterface;
}login() method required by the interface. We make sure to use the appropriate classes, and define fitting constants and properties. The constructor makes use of Application\Database\Connection, defined in Chapter 5, Interacting with a Database:namespace Application\Acl;
use PDO;
use Application\Database\Connection;
use Psr\Http\Message\ { RequestInterface, ResponseInterface };
use Application\MiddleWare\ { Response, TextStream };
class DbTable implements AuthenticateInterface
{
const ERROR_AUTH = 'ERROR: authentication error';
protected $conn;
protected $table;
public function __construct(Connection $conn, $tableName)
{
$this->conn = $conn;
$this->table = $tableName;
}login() method extracts the username and password from the request object. We then do a straightforward database lookup. If there is a match, we store user information in the response body, JSON-encoded:public function login(RequestInterface $request) :
ResponseInterface
{
$code = 401;
$info = FALSE;
$body = new TextStream(self::ERROR_AUTH);
$params = json_decode($request->getBody()->getContents());
$response = new Response();
$username = $params->username ?? FALSE;
if ($username) {
$sql = 'SELECT * FROM ' . $this->table
. ' WHERE email = ?';
$stmt = $this->conn->pdo->prepare($sql);
$stmt->execute([$username]);
$row = $stmt->fetch(PDO::FETCH_ASSOC);
if ($row) {
if (password_verify($params->password,
$row['password'])) {
unset($row['password']);
$body =
new TextStream(json_encode($row));
$response->withBody($body);
$code = 202;
$info = $row;
}
}
}
return $response->withBody($body)->withStatus($code);
}
}Authenticate class is a wrapper for an adapter class that implements AuthenticationInterface. Accordingly, the constructor takes an adapter class as an argument, as well as a string that serves as the key, in which authentication information is stored in $_SESSION:namespace Application\Acl;
use Application\MiddleWare\ { Response, TextStream };
use Psr\Http\Message\ { RequestInterface, ResponseInterface };
class Authenticate
{
const ERROR_AUTH = 'ERROR: invalid token';
const DEFAULT_KEY = 'auth';
protected $adapter;
protected $token;
public function __construct(
AuthenticateInterface $adapter, $key)
{
$this->key = $key;
$this->adapter = $adapter;
}public function getToken()
{
$this->token = bin2hex(random_bytes(16));
$_SESSION['token'] = $this->token;
return $this->token;
}
public function matchToken($token)
{
$sessToken = $_SESSION['token'] ?? date('Ymd');
return ($token == $sessToken);
}
public function getLoginForm($action = NULL)
{
$action = ($action) ? 'action="' . $action . '" ' : '';
$output = '<form method="post" ' . $action . '>';
$output .= '<table><tr><th>Username</th><td>';
$output .= '<input type="text" name="username" /></td>';
$output .= '</tr><tr><th>Password</th><td>';
$output .= '<input type="password" name="password" />';
$output .= '</td></tr><tr><th> </th>';
$output .= '<td><input type="submit" /></td>';
$output .= '</tr></table>';
$output .= '<input type="hidden" name="token" value="';
$output .= $this->getToken() . '" />';
$output .= '</form>';
return $output;
}login() method in this class checks whether the token is valid. If not, a 400 response is returned. Otherwise, the login() method of the adapter is called:public function login(
RequestInterface $request) : ResponseInterface
{
$params = json_decode($request->getBody()->getContents());
$token = $params->token ?? FALSE;
if (!($token && $this->matchToken($token))) {
$code = 400;
$body = new TextStream(self::ERROR_AUTH);
$response = new Response($code, $body);
} else {
$response = $this->adapter->login($request);
}
if ($response->getStatusCode() >= 200
&& $response->getStatusCode() < 300) {
$_SESSION[$this->key] =
json_decode($response->getBody()->getContents());
} else {
$_SESSION[$this->key] = NULL;
}
return $response;
}
}First of all, be sure to follow the recipes defined in Appendix, Defining PSR-7 Classes. Next, go ahead and define the classes presented in this recipe, summarized in the following table:
|
Class |
Discussed in these steps |
|---|---|
|
|
1 |
|
|
2 - 3 |
|
|
4 - 6 |
You can then define a chap_09_middleware_authenticate.php calling program that sets up autoloading and uses the appropriate classes:
<?php
session_start();
define('DB_CONFIG_FILE', __DIR__ . '/../config/db.config.php');
define('DB_TABLE', 'customer_09');
define('SESSION_KEY', 'auth');
require __DIR__ . '/../Application/Autoload/Loader.php';
Application\Autoload\Loader::init(__DIR__ . '/..');
use Application\Database\Connection;
use Application\Acl\ { DbTable, Authenticate };
use Application\MiddleWare\ { ServerRequest, Request, Constants, TextStream };You are now in a position to set up the authentication adapter and core class:
$conn = new Connection(include DB_CONFIG_FILE); $dbAuth = new DbTable($conn, DB_TABLE); $auth = new Authenticate($dbAuth, SESSION_KEY);
Be sure to initialize the incoming request, and set up the request to be made to the authentication class:
$incoming = new ServerRequest(); $incoming->initialize(); $outbound = new Request();
Check the incoming class method to see if it is POST. If so, pass a request to the authentication class:
if ($incoming->getMethod() == Constants::METHOD_POST) {
$body = new TextStream(json_encode(
$incoming->getParsedBody()));
$response = $auth->login($outbound->withBody($body));
}
$action = $incoming->getServerParams()['PHP_SELF'];
?>The display logic looks like this:
<?= $auth->getLoginForm($action) ?>
Here is the output from an invalid authentication attempt. Notice the 401 status code on the right. In this illustration, you could add a var_dump() of the response object:
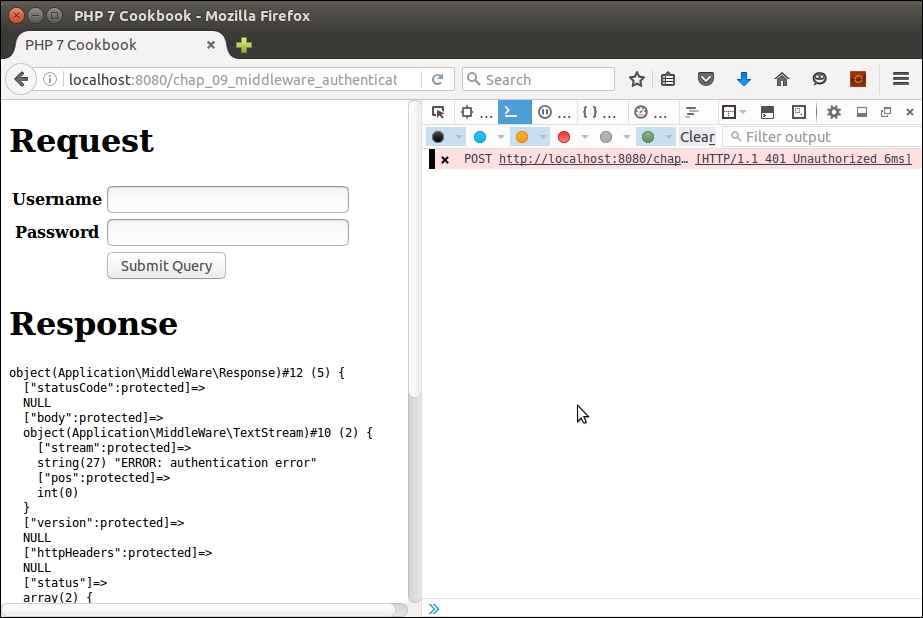
Here is a successful authentication:
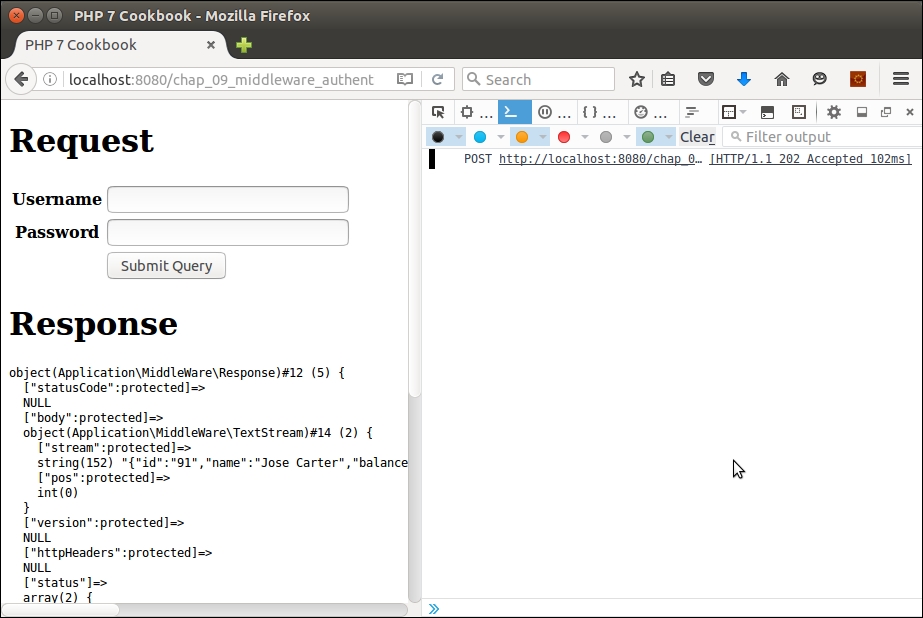
For guidance on how to avoid CSRF and other attacks, please see Chapter 12, Improving Web Security.
As the name implies, middleware sits in the middle of a sequence of function or method calls. Accordingly, middleware is well suited for the task of "gate keeper". You can easily implement an Access Control List (ACL) mechanism with a middleware class that reads the ACL, and allows or denies access to the next function or method call in the sequence.
level and a status. In this illustration, the level is defined as follows:'levels' => [0, 'BEG', 'INT', 'ADV']
0 could indicate they've initiated the membership signup process, but have not yet been confirmed. A status of 1 could indicate their e-mail address is confirmed, but they have not paid the monthly fee, and so on.'pages' => [0 => 'sorry', 'logout' => 'logout', 'login' => 'auth',
1 => 'page1', 2 => 'page2', 3 => 'page3',
4 => 'page4', 5 => 'page5', 6 => 'page6',
7 => 'page7', 8 => 'page8', 9 => 'page9']level and status. The generic template used in the configuration array might look like this:status => ['inherits' => <key>, 'pages' => [level => [pages allowed], etc.]]
Acl class. As before, we use a few classes, and define constants and properties appropriate for access control:namespace Application\Acl;
use InvalidArgumentException;
use Psr\Http\Message\RequestInterface;
use Application\MiddleWare\ { Constants, Response, TextStream };
class Acl
{
const DEFAULT_STATUS = '';
const DEFAULT_LEVEL = 0;
const DEFAULT_PAGE = 0;
const ERROR_ACL = 'ERROR: authorization error';
const ERROR_APP = 'ERROR: requested page not listed';
const ERROR_DEF =
'ERROR: must assign keys "levels", "pages" and "allowed"';
protected $default;
protected $levels;
protected $pages;
protected $allowed; __construct() method, we break up the assignments array into $pages, the resources to be controlled, $levels, and $allowed, which are the actual assignments. If the array does not include one of these three sub-components, an exception is thrown:public function __construct(array $assignments)
{
$this->default = $assignments['default']
?? self::DEFAULT_PAGE;
$this->pages = $assignments['pages'] ?? FALSE;
$this->levels = $assignments['levels'] ?? FALSE;
$this->allowed = $assignments['allowed'] ?? FALSE;
if (!($this->pages && $this->levels && $this->allowed)) {
throw new InvalidArgumentException(self::ERROR_DEF);
}
}$allowed, the inherits key can be set to another key within the array. If so, we need to merge its values with the values currently under examination. We iterate through $allowed in reverse, merging any inherited values each time through the loop. This method, incidentally, also only isolates rules that apply to a certain status and level:protected function mergeInherited($status, $level)
{
$allowed = $this->allowed[$status]['pages'][$level]
?? array();
for ($x = $status; $x > 0; $x--) {
$inherits = $this->allowed[$x]['inherits'];
if ($inherits) {
$subArray =
$this->allowed[$inherits]['pages'][$level]
?? array();
$allowed = array_merge($allowed, $subArray);
}
}
return $allowed;
}400 code:public function isAuthorized(RequestInterface $request)
{
$code = 401; // unauthorized
$text['page'] = $this->pages[$this->default];
$text['authorized'] = FALSE;
$page = $request->getUri()->getQueryParams()['page']
?? FALSE;
if ($page === FALSE) {
$code = 400; // bad requeststatus and level. We are then in a position to call mergeInherited(), which returns an array of pages accessible to this status and level:} else {
$params = json_decode(
$request->getBody()->getContents());
$status = $params->status ?? self::DEFAULT_LEVEL;
$level = $params->level ?? '*';
$allowed = $this->mergeInherited($status, $level);$allowed array, we set the status code to a happy 200, and return an authorized setting along with the web page that corresponds to the page code requested:if (in_array($page, $allowed)) {
$code = 200; // OK
$text['authorized'] = TRUE;
$text['page'] = $this->pages[$page];
} else {
$code = 401; }
}$body = new TextStream(json_encode($text)); return (new Response())->withStatus($code) ->withBody($body); } }
After that, you will need to define Application\Acl\Acl, which is discussed in this recipe. Now move to the /path/to/source/for/this/chapter folder and create two directories: public and
pages. In pages, create a series of PHP files, such as page1.php, page2.php, and so on. Here is an example of how one of these pages might look:
<?php // page 1 ?> <h1>Page 1</h1> <hr> <p>Lorem ipsum dolor sit amet, consectetur adipiscing elit. etc.</p>
You can also define a menu.php page, which could be included in the output:
<?php // menu ?> <a href="?page=1">Page 1</a> <a href="?page=2">Page 2</a> <a href="?page=3">Page 3</a> // etc.
The logout.php page should destroy the session:
<?php $_SESSION['info'] = FALSE; session_destroy(); ?> <a href="/">BACK</a>
The auth.php page will display a login screen (as described in the previous recipe):
<?= $auth->getLoginForm($action) ?>
You can then create a configuration file that allows access to web pages depending on level and status. For the sake of illustration, call it chap_09_middleware_acl_config.php and return an array that might look like this:
<?php
$min = [0, 'logout'];
return [
'default' => 0, // default page
'levels' => [0, 'BEG', 'INT', 'ADV'],
'pages' => [0 => 'sorry',
'logout' => 'logout',
'login' => 'auth',
1 => 'page1', 2 => 'page2', 3 => 'page3',
4 => 'page4', 5 => 'page5', 6 => 'page6',
7 => 'page7', 8 => 'page8', 9 => 'page9'],
'allowed' => [
0 => ['inherits' => FALSE,
'pages' => [ '*' => $min, 'BEG' => $min,
'INT' => $min,'ADV' => $min]],
1 => ['inherits' => FALSE,
'pages' => ['*' => ['logout'],
'BEG' => [1, 'logout'],
'INT' => [1,2, 'logout'],
'ADV' => [1,2,3, 'logout']]],
2 => ['inherits' => 1,
'pages' => ['BEG' => [4],
'INT' => [4,5],
'ADV' => [4,5,6]]],
3 => ['inherits' => 2,
'pages' => ['BEG' => [7],
'INT' => [7,8],
'ADV' => [7,8,9]]]
]
];Finally, in the public folder, define index.php, which sets up autoloading, and ultimately calls up both the Authenticate and Acl classes. As with other recipes, define configuration files, set up autoloading, and use certain classes. Also, don't forget to start the session:
<?php
session_start();
session_regenerate_id();
define('DB_CONFIG_FILE', __DIR__ . '/../../config/db.config.php');
define('DB_TABLE', 'customer_09');
define('PAGE_DIR', __DIR__ . '/../pages');
define('SESSION_KEY', 'auth');
require __DIR__ . '/../../Application/Autoload/Loader.php';
Application\Autoload\Loader::init(__DIR__ . '/../..');
use Application\Database\Connection;
use Application\Acl\ { Authenticate, Acl };
use Application\MiddleWare\ { ServerRequest, Request, Constants, TextStream };Best practice
It is a best practice to protect your sessions. An easy way to help protect a session is to use session_regenerate_id(), which invalidates the existing PHP session identifier and generates a new one. Thus, if an attacker were to obtain the session identifier through illegal means, the window of time in which any given session identifier is valid is kept to a minimum.
You can now pull in the ACL configuration, and create instances for Authenticate as well as Acl:
$config = require __DIR__ . '/../chap_09_middleware_acl_config.php'; $acl = new Acl($config); $conn = new Connection(include DB_CONFIG_FILE); $dbAuth = new DbTable($conn, DB_TABLE); $auth = new Authenticate($dbAuth, SESSION_KEY);
Next, define incoming and outbound request instances:
$incoming = new ServerRequest(); $incoming->initialize(); $outbound = new Request();
If the incoming request method was post, process the authentication calling the login() method:
if (strtolower($incoming->getMethod()) == Constants::METHOD_POST) {
$body = new TextStream(json_encode(
$incoming->getParsedBody()));
$response = $auth->login($outbound->withBody($body));
}If the session key defined for authentication is populated, that means the user has been successfully authenticated. If not, we program an anonymous function, called later, which includes the authentication login page:
$info = $_SESSION[SESSION_KEY] ?? FALSE;
if (!$info) {
$execute = function () use ($auth) {
include PAGE_DIR . '/auth.php';
};Otherwise, you can proceed with the ACL check. You first need to find, from the original query, which web page the user wants to visit, however:
} else {
$query = $incoming->getServerParams()['QUERY_STRING'] ?? '';You can then reprogram the $outbound request to include this information:
$outbound->withBody(new TextStream(json_encode($info))); $outbound->getUri()->withQuery($query);
Next, you'll be in a position to check authorization, supplying the outbound request as an argument:
$response = $acl->isAuthorized($outbound);
You can then examine the return response for the authorized parameter, and program an anonymous function to include the return page parameter if OK, and the sorry page otherwise:
$params = json_decode($response->getBody()->getContents());
$isAllowed = $params->authorized ?? FALSE;
if ($isAllowed) {
$execute = function () use ($response, $params) {
include PAGE_DIR .'/' . $params->page . '.php';
echo '<pre>', var_dump($response), '</pre>';
echo '<pre>', var_dump($_SESSION[SESSION_KEY]);
echo '</pre>';
};
} else {
$execute = function () use ($response) {
include PAGE_DIR .'/sorry.php';
echo '<pre>', var_dump($response), '</pre>';
echo '<pre>', var_dump($_SESSION[SESSION_KEY]);
echo '</pre>';
};
}
}Now all you need to do is to set the form action and wrap the anonymous function in HTML:
$action = $incoming->getServerParams()['PHP_SELF']; ?> <!DOCTYPE html> <head> <title>PHP 7 Cookbook</title> <meta http-equiv="content-type" content="text/html;charset=utf-8" /> </head> <body> <?php $execute(); ?> </body> </html>
To test it, you can use the built-in PHP web server, but you will need to use the -t flag to indicate that the document root is public:
cd /path/to/source/for/this/chapter php -S localhost:8080 -t public
From a browser, you can access the http://localhost:8080/ URL.
If you try to access any page, you will simply be redirected back to the login page. As per the configuration, a user with status = 1, and level = BEG can only access page 1 and log out. If, when logged in as this user, you try to access page 2, here is the output:
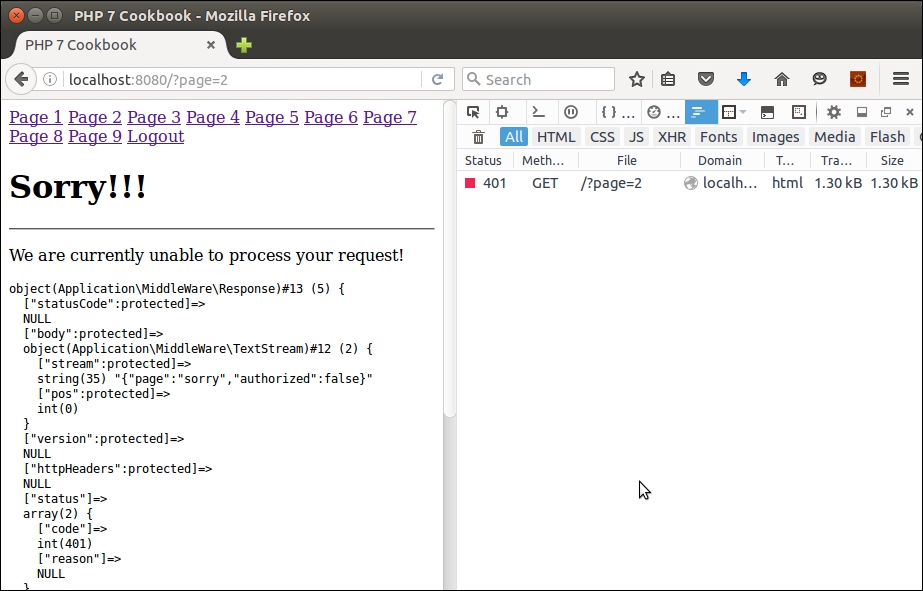
This example relies on $_SESSION as the sole means of user authentication once they have logged in. For good examples of how you can protect PHP sessions, please see Chapter 12, Improving Web Security, specifically the recipe entitled Safeguarding the PHP session.
The cache software design pattern is where you store a result that takes a long time to generate. This could take the form of a lengthy view script or a complex database query. The storage destination needs to be highly performant, of course, if you wish to improve the user experience of website visitors. As different installations will have different potential storage targets, the cache mechanism lends itself to the adapter pattern as well. Examples of potential storage destinations include memory, a database, and the filesystem.
Application\Cache\Constants class:<?php
namespace Application\Cache;
class Constants
{
const DEFAULT_GROUP = 'default';
const DEFAULT_PREFIX = 'CACHE_';
const DEFAULT_SUFFIX = '.cache';
const ERROR_GET = 'ERROR: unable to retrieve from cache';
// not all constants are shown to conserve space
}namespace Application\Cache;
interface CacheAdapterInterface
{
public function hasKey($key);
public function getFromCache($key, $group);
public function saveToCache($key, $data, $group);
public function removeByKey($key);
public function removeByGroup($group);
}namespace Application\Cache;
use PDO;
use Application\Database\Connection;
class Database implements CacheAdapterInterface
{
protected $sql;
protected $connection;
protected $table;
protected $dataColumnName;
protected $keyColumnName;
protected $groupColumnName;
protected $statementHasKey = NULL;
protected $statementGetFromCache = NULL;
protected $statementSaveToCache = NULL;
protected $statementRemoveByKey = NULL;
protected $statementRemoveByGroup= NULL;Application\Database\Connection instance and the name of the table used for the cache:public function __construct(Connection $connection,
$table,
$idColumnName,
$keyColumnName,
$dataColumnName,
$groupColumnName = Constants::DEFAULT_GROUP)
{
$this->connection = $connection;
$this->setTable($table);
$this->setIdColumnName($idColumnName);
$this->setDataColumnName($dataColumnName);
$this->setKeyColumnName($keyColumnName);
$this->setGroupColumnName($groupColumnName);
}public function prepareHasKey()
{
$sql = 'SELECT `' . $this->idColumnName . '` '
. 'FROM `' . $this->table . '` '
. 'WHERE `' . $this->keyColumnName . '` = :key ';
$this->sql[__METHOD__] = $sql;
$this->statementHasKey =
$this->connection->pdo->prepare($sql);
}
public function prepareGetFromCache()
{
$sql = 'SELECT `' . $this->dataColumnName . '` '
. 'FROM `' . $this->table . '` '
. 'WHERE `' . $this->keyColumnName . '` = :key '
. 'AND `' . $this->groupColumnName . '` = :group';
$this->sql[__METHOD__] = $sql;
$this->statementGetFromCache =
$this->connection->pdo->prepare($sql);
}public function hasKey($key)
{
$result = 0;
try {
if (!$this->statementHasKey) $this->prepareHasKey();
$this->statementHasKey->execute(['key' => $key]);
} catch (Throwable $e) {
error_log(__METHOD__ . ':' . $e->getMessage());
throw new Exception(Constants::ERROR_REMOVE_KEY);
}
return (int) $this->statementHasKey
->fetch(PDO::FETCH_ASSOC)[$this->idColumnName];
}SELECT, with a WHERE clause, which incorporates the key and group:public function getFromCache(
$key, $group = Constants::DEFAULT_GROUP)
{
try {
if (!$this->statementGetFromCache)
$this->prepareGetFromCache();
$this->statementGetFromCache->execute(
['key' => $key, 'group' => $group]);
while ($row = $this->statementGetFromCache
->fetch(PDO::FETCH_ASSOC)) {
if ($row && count($row)) {
yield unserialize($row[$this->dataColumnName]);
}
}
} catch (Throwable $e) {
error_log(__METHOD__ . ':' . $e->getMessage());
throw new Exception(Constants::ERROR_GET);
}
}UPDATE; otherwise, we perform an INSERT:public function saveToCache($key, $data, $group = Constants::DEFAULT_GROUP)
{
$id = $this->hasKey($key);
$result = 0;
try {
if ($id) {
if (!$this->statementUpdateCache)
$this->prepareUpdateCache();
$result = $this->statementUpdateCache
->execute(['key' => $key,
'data' => serialize($data),
'group' => $group,
'id' => $id]);
} else {
if (!$this->statementSaveToCache)
$this->prepareSaveToCache();
$result = $this->statementSaveToCache
->execute(['key' => $key,
'data' => serialize($data),
'group' => $group]);
}
} catch (Throwable $e) {
error_log(__METHOD__ . ':' . $e->getMessage());
throw new Exception(Constants::ERROR_SAVE);
}
return $result;
}public function removeByKey($key)
{
$result = 0;
try {
if (!$this->statementRemoveByKey)
$this->prepareRemoveByKey();
$result = $this->statementRemoveByKey->execute(
['key' => $key]);
} catch (Throwable $e) {
error_log(__METHOD__ . ':' . $e->getMessage());
throw new Exception(Constants::ERROR_REMOVE_KEY);
}
return $result;
}
public function removeByGroup($group)
{
$result = 0;
try {
if (!$this->statementRemoveByGroup)
$this->prepareRemoveByGroup();
$result = $this->statementRemoveByGroup->execute(
['group' => $group]);
} catch (Throwable $e) {
error_log(__METHOD__ . ':' . $e->getMessage());
throw new Exception(Constants::ERROR_REMOVE_GROUP);
}
return $result;
}public function setTable($name)
{
$this->table = $name;
}
public function getTable()
{
return $this->table;
}
// etc.
}md5(), not for security, but as a way of quickly generating a text string from the key:namespace Application\Cache;
use RecursiveIteratorIterator;
use RecursiveDirectoryIterator;
class File implements CacheAdapterInterface
{
protected $dir;
protected $prefix;
protected $suffix;
public function __construct(
$dir, $prefix = NULL, $suffix = NULL)
{
if (!file_exists($dir)) {
error_log(__METHOD__ . ':' . Constants::ERROR_DIR_NOT);
throw new Exception(Constants::ERROR_DIR_NOT);
}
$this->dir = $dir;
$this->prefix = $prefix ?? Constants::DEFAULT_PREFIX;
$this->suffix = $suffix ?? Constants::DEFAULT_SUFFIX;
}
public function hasKey($key)
{
$action = function ($name, $md5Key, &$item) {
if (strpos($name, $md5Key) !== FALSE) {
$item ++;
}
};
return $this->findKey($key, $action);
}
public function getFromCache($key, $group = Constants::DEFAULT_GROUP)
{
$fn = $this->dir . '/' . $group . '/'
. $this->prefix . md5($key) . $this->suffix;
if (file_exists($fn)) {
foreach (file($fn) as $line) { yield $line; }
} else {
return array();
}
}
public function saveToCache(
$key, $data, $group = Constants::DEFAULT_GROUP)
{
$baseDir = $this->dir . '/' . $group;
if (!file_exists($baseDir)) mkdir($baseDir);
$fn = $baseDir . '/' . $this->prefix . md5($key)
. $this->suffix;
return file_put_contents($fn, json_encode($data));
}
protected function findKey($key, callable $action)
{
$md5Key = md5($key);
$iterator = new RecursiveIteratorIterator(
new RecursiveDirectoryIterator($this->dir),
RecursiveIteratorIterator::SELF_FIRST);
$item = 0;
foreach ($iterator as $name => $obj) {
$action($name, $md5Key, $item);
}
return $item;
}
public function removeByKey($key)
{
$action = function ($name, $md5Key, &$item) {
if (strpos($name, $md5Key) !== FALSE) {
unlink($name);
$item++;
}
};
return $this->findKey($key, $action);
}
public function removeByGroup($group)
{
$removed = 0;
$baseDir = $this->dir . '/' . $group;
$pattern = $baseDir . '/' . $this->prefix . '*'
. $this->suffix;
foreach (glob($pattern) as $file) {
unlink($file);
$removed++;
}
return $removed;
}
}CacheAdapterInterface as an argument:namespace Application\Cache;
use Psr\Http\Message\RequestInterface;
use Application\MiddleWare\ { Request, Response, TextStream };
class Core
{
public function __construct(CacheAdapterInterface $adapter)
{
$this->adapter = $adapter;
}Psr\Http\Message\RequestInterface class an an argument, and return a Psr\Http\Message\ResponseInterface as a response. We start with a simple one: hasKey(). Note how we extract the key from the request parameters:public function hasKey(RequestInterface $request)
{
$key = $request->getUri()->getQueryParams()['key'] ?? '';
$result = $this->adapter->hasKey($key);
}204 code, which indicates the request was a success, but no content was produced. Otherwise, we set a 200 (success) code, and iterate through the results. Everything is then stuffed into a response object, which is returned:public function getFromCache(RequestInterface $request)
{
$text = array();
$key = $request->getUri()->getQueryParams()['key'] ?? '';
$group = $request->getUri()->getQueryParams()['group']
?? Constants::DEFAULT_GROUP;
$results = $this->adapter->getFromCache($key, $group);
if (!$results) {
$code = 204;
} else {
$code = 200;
foreach ($results as $line) $text[] = $line;
}
if (!$text || count($text) == 0) $code = 204;
$body = new TextStream(json_encode($text));
return (new Response())->withStatus($code)
->withBody($body);
}public function saveToCache(RequestInterface $request)
{
$text = array();
$key = $request->getUri()->getQueryParams()['key'] ?? '';
$group = $request->getUri()->getQueryParams()['group']
?? Constants::DEFAULT_GROUP;
$data = $request->getBody()->getContents();
$results = $this->adapter->saveToCache($key, $data, $group);
if (!$results) {
$code = 204;
} else {
$code = 200;
$text[] = $results;
}
$body = new TextStream(json_encode($text));
return (new Response())->withStatus($code)
->withBody($body);
}public function removeByKey(RequestInterface $request)
{
$text = array();
$key = $request->getUri()->getQueryParams()['key'] ?? '';
$results = $this->adapter->removeByKey($key);
if (!$results) {
$code = 204;
} else {
$code = 200;
$text[] = $results;
}
$body = new TextStream(json_encode($text));
return (new Response())->withStatus($code)
->withBody($body);
}
public function removeByGroup(RequestInterface $request)
{
$text = array();
$group = $request->getUri()->getQueryParams()['group']
?? Constants::DEFAULT_GROUP;
$results = $this->adapter->removeByGroup($group);
if (!$results) {
$code = 204;
} else {
$code = 200;
$text[] = $results;
}
$body = new TextStream(json_encode($text));
return (new Response())->withStatus($code)
->withBody($body);
}
} // closing brace for class CoreIn order to demonstrate the use of the Acl class, you will need to define the classes described in this recipe, summarized here:
|
Class |
Discussed in these steps |
|---|---|
|
|
1 |
|
|
2 |
|
|
3 - 10 |
|
|
11 |
|
|
12 - 16 |
Next, define a test program, which you could call chap_09_middleware_cache_db.php. In this program, as usual, define constants for necessary files, set up autoloading, use the appropriate classes, oh... and write a function that produces prime numbers (you're probably re-reading that last little bit at this point. Not to worry, we can help you with that!):
<?php
define('DB_CONFIG_FILE', __DIR__ . '/../config/db.config.php');
define('DB_TABLE', 'cache');
define('CACHE_DIR', __DIR__ . '/cache');
define('MAX_NUM', 100000);
require __DIR__ . '/../Application/Autoload/Loader.php';
Application\Autoload\Loader::init(__DIR__ . '/..');
use Application\Database\Connection;
use Application\Cache\{ Constants, Core, Database, File };
use Application\MiddleWare\ { Request, TextStream };Well, a function that takes a long time to run is needed, so prime number generator, here we go! The numbers 1, 2, and 3 are given as primes. We use the PHP 7 yield from syntax to produce these first three. then, we skip right to 5, and proceed up to the maximum value requested:
function generatePrimes($max)
{
yield from [1,2,3];
for ($x = 5; $x < $max; $x++)
{
if($x & 1) {
$prime = TRUE;
for($i = 3; $i < $x; $i++) {
if(($x % $i) === 0) {
$prime = FALSE;
break;
}
}
if ($prime) yield $x;
}
}
}You can then set up a database cache adapter instance, which serves as an argument for the core:
$conn = new Connection(include DB_CONFIG_FILE); $dbCache = new Database( $conn, DB_TABLE, 'id', 'key', 'data', 'group'); $core = new Core($dbCache);
Alternatively, if you wish to use the file cache adapter instead, here is the appropriate code:
$fileCache = new File(CACHE_DIR); $core = new Core($fileCache);
If you wanted to clear the cache, here is how it might be done:
$uriString = '/?group=' . Constants::DEFAULT_GROUP; $cacheRequest = new Request($uriString, 'get'); $response = $core->removeByGroup($cacheRequest);
You can use time() and microtime() to see how long this script runs with and without the cache:
$start = time() + microtime(TRUE); echo "\nTime: " . $start;
Next, generate a cache request. A status code of 200 indicates you were able to obtain a list of primes from the cache:
$uriString = '/?key=Test1';
$cacheRequest = new Request($uriString, 'get');
$response = $core->getFromCache($cacheRequest);
$status = $response->getStatusCode();
if ($status == 200) {
$primes = json_decode($response->getBody()->getContents());Otherwise, you can assume nothing was obtained from the cache, which means you need to generate prime numbers, and save the results to the cache:
} else {
$primes = array();
foreach (generatePrimes(MAX_NUM) as $num) {
$primes[] = $num;
}
$body = new TextStream(json_encode($primes));
$response = $core->saveToCache(
$cacheRequest->withBody($body));
}You can then check the stop time, calculate the difference, and have a look at your new list of primes:
$time = time() + microtime(TRUE); $diff = $time - $start; echo "\nTime: $time"; echo "\nDifference: $diff"; var_dump($primes);
Here is the expected output before values were stored in the cache:
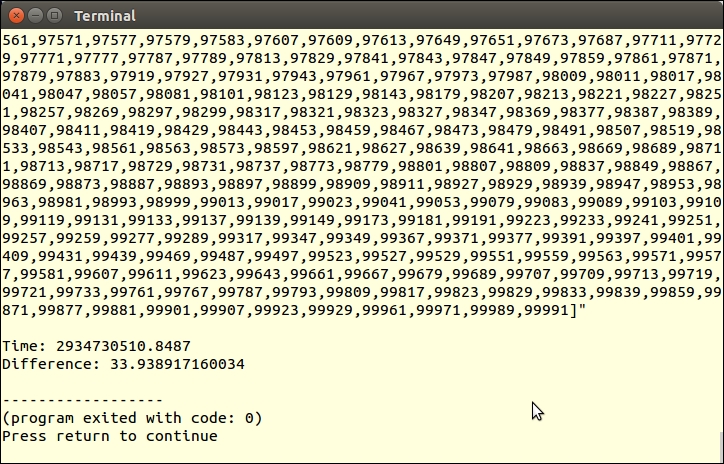
You can now run the same program again, this time retrieving from the cache:
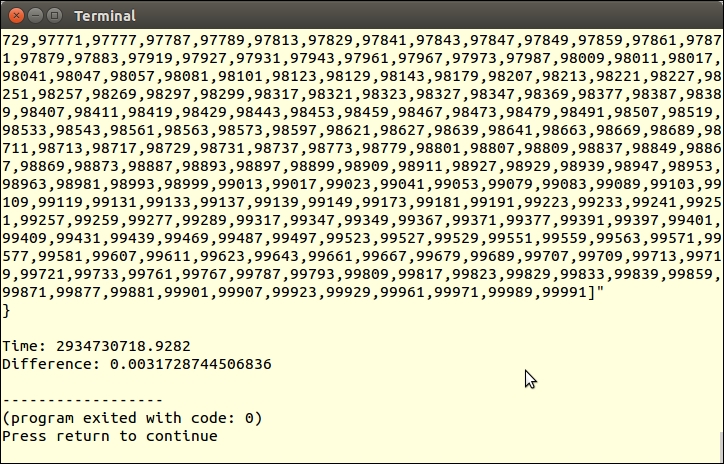
Allowing for the fact that our little prime number generator is not the world's most efficient, and also that the demonstration was run on a laptop, the time went from over 30 seconds down to milliseconds.
Another possible cache adapter could be built around commands that are part of the Alternate PHP Cache (APC) extension. This extension includes such functions as apc_exists(), apc_store(), apc_fetch(), and apc_clear_cache(). These functions are perfect for our hasKey(), saveToCache(), getFromCache(), and removeBy*() functions.
You might consider making slight changes to the cache adapter classes described previously following PSR-6, which is a standards recommendation directed towards the cache. There is not the same level of acceptance of this standard as with PSR-7, however, so we decided to not follow this standard exactly in the recipe presented here. For more information on PSR-6, please refer to http://www.php-fig.org/psr/psr-6/.
Routing refers to the process of accepting user-friendly URLs, dissecting the URL into its component parts, and then making a determination as to which class and method should be dispatched. The advantage of such an implementation is that not only can you make your URLs Search Engine Optimization (SEO)-friendly, but you can also create rules, incorporating regular expression patterns, which can extract values of parameters.
mod_rewrite. You then define rewriting rules that allow graphic file requests and requests for CSS and JavaScript to pass untouched. Otherwise, the request would be funneled through a routing method.home, page, and the default. The default should be last as it will match anything not matched previously. The action is in the form of an anonymous function that will be executed if a route match occurs:$config = [
'home' => [
'uri' => '!^/$!',
'exec' => function ($matches) {
include PAGE_DIR . '/page0.php'; }
],
'page' => [
'uri' => '!^/(page)/(\d+)$!',
'exec' => function ($matches) {
include PAGE_DIR . '/page' . $matches[2] . '.php'; }
],
Router::DEFAULT_MATCH => [
'uri' => '!.*!',
'exec' => function ($matches) {
include PAGE_DIR . '/sorry.php'; }
],
];Router class. We first define constants and properties that will be of use during the process of examining and matching a route:namespace Application\Routing;
use InvalidArgumentException;
use Psr\Http\Message\ServerRequestInterface;
class Router
{
const DEFAULT_MATCH = 'default';
const ERROR_NO_DEF = 'ERROR: must supply a default match';
protected $request;
protected $requestUri;
protected $uriParts;
protected $docRoot;
protected $config;
protected $routeMatch;ServerRequestInterface compliant class, the path to the document root, and the configuration file mentioned earlier. Note that we throw an exception if the default configuration is not supplied:public function __construct(ServerRequestInterface $request, $docRoot, $config)
{
$this->config = $config;
$this->docRoot = $docRoot;
$this->request = $request;
$this->requestUri =
$request->getServerParams()['REQUEST_URI'];
$this->uriParts = explode('/', $this->requestUri);
if (!isset($config[self::DEFAULT_MATCH])) {
throw new InvalidArgumentException(
self::ERROR_NO_DEF);
}
}public function getRequest()
{
return $this->request;
}
public function getDocRoot()
{
return $this->docRoot;
}
public function getRouteMatch()
{
return $this->routeMatch;
}isFileOrDir() method is used to determine whether we are trying to match against a CSS, JavaScript, or graphic request (among other possibilities):public function isFileOrDir()
{
$fn = $this->docRoot . '/' . $this->requestUri;
$fn = str_replace('//', '/', $fn);
if (file_exists($fn)) {
return $fn;
} else {
return '';
}
}match(), which iterates through the configuration array and runs the uri parameter through preg_match(). If positive, the configuration key and $matches array populated by preg_match() are stored in $routeMatch, and the callback is returned. If there is no match, the default callback is returned:public function match()
{
foreach ($this->config as $key => $route) {
if (preg_match($route['uri'],
$this->requestUri, $matches)) {
$this->routeMatch['key'] = $key;
$this->routeMatch['match'] = $matches;
return $route['exec'];
}
}
return $this->config[self::DEFAULT_MATCH]['exec'];
}
}First, change to /path/to/source/for/this/chapter and create a directory called routing. Next, define a file, index.php, which sets up autoloading and uses the right classes. You can define a constant PAGE_DIR that points to the pages directory created in the previous recipe:
<?php
define('DOC_ROOT', __DIR__);
define('PAGE_DIR', DOC_ROOT . '/../pages');
require_once __DIR__ . '/../../Application/Autoload/Loader.php';
Application\Autoload\Loader::init(__DIR__ . '/../..');
use Application\MiddleWare\ServerRequest;
use Application\Routing\Router;Next, add the configuration array discussed in step 3 of this recipe. Note that you could add (/)? at the end of the pattern to account for an optional trailing slash. Also, for the home route, you could offer two options: either / or /home:
$config = [
'home' => [
'uri' => '!^(/|/home)$!',
'exec' => function ($matches) {
include PAGE_DIR . '/page0.php'; }
],
'page' => [
'uri' => '!^/(page)/(\d+)(/)?$!',
'exec' => function ($matches) {
include PAGE_DIR . '/page' . $matches[2] . '.php'; }
],
Router::DEFAULT_MATCH => [
'uri' => '!.*!',
'exec' => function ($matches) {
include PAGE_DIR . '/sorry.php'; }
],
];You can then define a router instance, supplying an initialized ServerRequest instance as the first argument:
$router = new Router((new ServerRequest()) ->initialize(), DOC_ROOT, $config); $execute = $router->match(); $params = $router->getRouteMatch()['match'];
You then need to check to see whether the request is a file or directory, and also whether the route match is /:
if ($fn = $router->isFileOrDir()
&& $router->getRequest()->getUri()->getPath() != '/') {
return FALSE;
} else {
include DOC_ROOT . '/main.php';
}Next, define main.php, something like this:
<?php // demo using middleware for routing ?>
<!DOCTYPE html>
<head>
<title>PHP 7 Cookbook</title>
<meta http-equiv="content-type"
content="text/html;charset=utf-8" />
</head>
<body>
<?php include PAGE_DIR . '/route_menu.php'; ?>
<?php $execute($params); ?>
</body>
</html>And finally, a revised menu that uses user-friendly routing is required:
<?php // menu for routing ?> <a href="/home">Home</a> <a href="/page/1">Page 1</a> <a href="/page/2">Page 2</a> <a href="/page/3">Page 3</a> <!-- etc. -->
To test the configuration using Apache, define a virtual host definition that points to /path/to/source/for/this/chapter/routing. In addition, define a .htaccess file that directs any request that is not a file, directory, or link to index.php. Alternatively, you could just use the built-in PHP webserver. In a terminal window or command prompt, type this command:
cd /path/to/source/for/this/chapter/routing php -S localhost:8080
In a browser, the output when requesting http://localhost:8080/home is something like this:
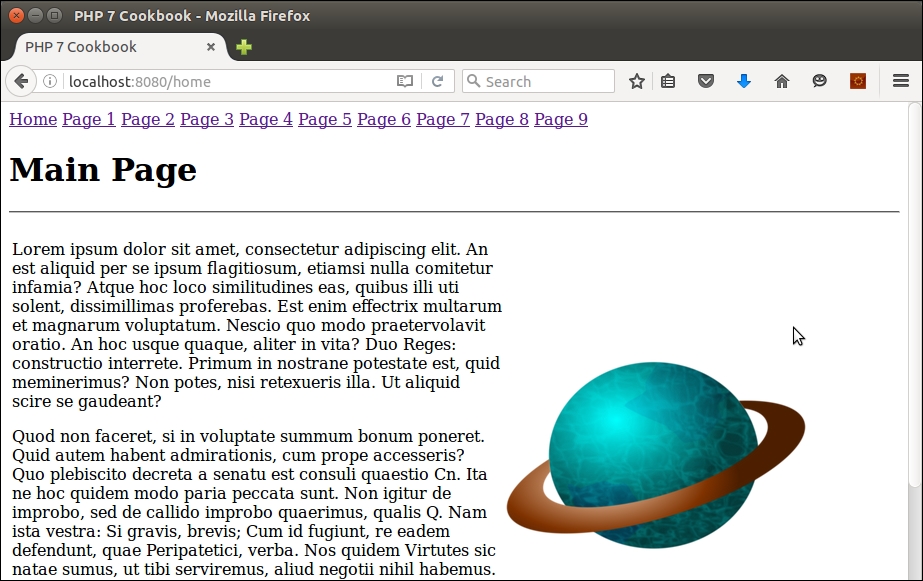
For information on rewriting using the NGINX web server, have a look at this article: http://nginx.org/en/docs/http/ngx_http_rewrite_module.html. There are plenty of sophisticated PHP routing libraries available that introduce far greater functionality than the simple router presented here. These include Altorouter (http://altorouter.com/), TreeRoute (https://github.com/baryshev/TreeRoute), FastRoute (https://github.com/nikic/FastRoute), and Aura.Router. (https://github.com/auraphp/Aura.Router). In addition, most frameworks (for example, Zend Framework 2 or CodeIgniter) have their own routing capabilities.
One of the primary reasons for the development of PSR-7 (and middleware) was a growing need to make calls between frameworks. It is of interest to note that the main documentation for PSR-7 is hosted by PHP Framework Interop Group (PHP-FIG).
Psr\Http\Message\ServerRequestInterface and Psr\Http\Message\ResponseInterface, respectively.thumbprint, which is a term we use to incorporate factors such as the website visitor's IP address, browser, and language settings:namespace Application\MiddleWare\Session;
use InvalidArgumentException;
use Psr\Http\Message\ {
ServerRequestInterface, ResponseInterface };
use Application\MiddleWare\ { Constants, Response, TextStream };
class Validator
{
const KEY_TEXT = 'text';
const KEY_SESSION = 'thumbprint';
const KEY_STATUS_CODE = 'code';
const KEY_STATUS_REASON = 'reason';
const KEY_STOP_TIME = 'stop_time';
const ERROR_TIME = 'ERROR: session has exceeded stop time';
const ERROR_SESSION = 'ERROR: thumbprint does not match';
const SUCCESS_SESSION = 'SUCCESS: session validates OK';
protected $sessionKey;
protected $currentPrint;
protected $storedPrint;
protected $currentTime;
protected $storedTime;ServerRequestInterface instance and the session as arguments. If the session is an array (such as $_SESSION), we wrap it in a class. The reason why we do this is in case we are passed a session object, such as JSession used in Joomla. We then create the thumbprint using the previously mentioned factors. If the stored thumbprint is not available, we assume this is the first time, and store the current print as well as stop time, if this parameter is set. We used md5() because it's a fast hash, is not exposed externally, and is therefore useful to this application:public function __construct(
ServerRequestInterface $request, $stopTime = NULL)
{
$this->currentTime = time();
$this->storedTime = $_SESSION[self::KEY_STOP_TIME] ?? 0;
$this->currentPrint =
md5($request->getServerParams()['REMOTE_ADDR']
. $request->getServerParams()['HTTP_USER_AGENT']
. $request->getServerParams()['HTTP_ACCEPT_LANGUAGE']);
$this->storedPrint = $_SESSION[self::KEY_SESSION]
?? NULL;
if (empty($this->storedPrint)) {
$this->storedPrint = $this->currentPrint;
$_SESSION[self::KEY_SESSION] = $this->storedPrint;
if ($stopTime) {
$this->storedTime = $stopTime;
$_SESSION[self::KEY_STOP_TIME] = $stopTime;
}
}
}__invoke(), but this magic method is quite convenient for standalone middleware classes. As is the convention, we accept ServerRequestInterface and ResponseInterface instances as arguments. In this method, we simply check to see whether the current thumbprint matches the one stored. The first time, of course, they will match. But on subsequent requests, the chances are an attacker intent on session hijacking will be caught out. In addition, if the session time exceeds the stop time (if set), likewise, a 401 code will be sent:public function __invoke(
ServerRequestInterface $request, Response $response)
{
$code = 401; // unauthorized
if ($this->currentPrint != $this->storedPrint) {
$text[self::KEY_TEXT] = self::ERROR_SESSION;
$text[self::KEY_STATUS_REASON] =
Constants::STATUS_CODES[401];
} elseif ($this->storedTime) {
if ($this->currentTime > $this->storedTime) {
$text[self::KEY_TEXT] = self::ERROR_TIME;
$text[self::KEY_STATUS_REASON] =
Constants::STATUS_CODES[401];
} else {
$code = 200; // success
}
}
if ($code == 200) {
$text[self::KEY_TEXT] = self::SUCCESS_SESSION;
$text[self::KEY_STATUS_REASON] =
Constants::STATUS_CODES[200];
}
$text[self::KEY_STATUS_CODE] = $code;
$body = new TextStream(json_encode($text));
return $response->withStatus($code)->withBody($body);
}middleware-pipeline.global.php, which is located in the config/autoload folder in a standard Expressive application. The dependencies key is used to identify the middleware wrapper classes that will be activated in the pipeline:<?php
use Zend\Expressive\Container\ApplicationFactory;
use Zend\Expressive\Helper;
return [
'dependencies' => [
'factories' => [
Helper\ServerUrlMiddleware::class =>
Helper\ServerUrlMiddlewareFactory::class,
Helper\UrlHelperMiddleware::class =>
Helper\UrlHelperMiddlewareFactory::class,
// insert your own class here
],
],middleware_pipline key, you can identify classes that will be executed before or after the routing process occurs. Optional parameters include path, error, and priority:'middleware_pipeline' => [
'always' => [
'middleware' => [
Helper\ServerUrlMiddleware::class,
],
'priority' => 10000,
],
'routing' => [
'middleware' => [
ApplicationFactory::ROUTING_MIDDLEWARE,
Helper\UrlHelperMiddleware::class,
// insert reference to middleware here
ApplicationFactory::DISPATCH_MIDDLEWARE,
],
'priority' => 1,
],
'error' => [
'middleware' => [
// Add error middleware here.
],
'error' => true,
'priority' => -10000,
],
],
];index.php file in the /path/to/joomla folder. Since Joomla! uses Composer, we can leverage the Composer autoloader:session_start(); // to support use of $_SESSION
$loader = include __DIR__ . '/libraries/vendor/autoload.php';
$loader->add('Application', __DIR__ . '/libraries/vendor');
$loader->add('Psr', __DIR__ . '/libraries/vendor');$app = JFactory::getApplication('site');:$session = JFactory::getSession();
$request =
(new Application\MiddleWare\ServerRequest())->initialize();
$response = new Application\MiddleWare\Response();
$validator = new Application\Security\Session\Validator(
$request, $session);
$response = $validator($request, $response);
if ($response->getStatusCode() != 200) {
// take some action
}First, create the Application\MiddleWare\Session\Validator test middleware class described in steps 2-5. Then you will need to go to https://getcomposer.org/ and follow the directions to obtain Composer. Download it to the /path/to/source/for/this/chapter folder. Next, build a basic Zend Expressive application, as shown next. Be sure to select No when prompted for minimal skeleton:
cd /path/to/source/for/this/chapter php composer.phar create-project zendframework/zend-expressive-skeleton expressive
This will create a folder /path/to/source/for/this/chapter/expressive. Change to this directory. Modify public/index.php as follows:
<?php
if (php_sapi_name() === 'cli-server'
&& is_file(__DIR__ . parse_url(
$_SERVER['REQUEST_URI'], PHP_URL_PATH))
) {
return false;
}
chdir(dirname(__DIR__));
session_start();
$_SESSION['time'] = time();
$appDir = realpath(__DIR__ . '/../../..');
$loader = require 'vendor/autoload.php';
$loader->add('Application', $appDir);
$container = require 'config/container.php';
$app = $container->get(\Zend\Expressive\Application::class);
$app->run();You will then need to create a wrapper class that invokes our session validator middleware. Create a SessionValidateAction.php file that needs to go in the /path/to/source/for/this/chapter/expressive/src/App/Action folder. For the purposes of this illustration, set the stop time parameter to a short duration. In this case, time() + 10 gives you 10 seconds:
namespace App\Action;
use Application\MiddleWare\Session\Validator;
use Zend\Diactoros\ { Request, Response };
use Psr\Http\Message\ResponseInterface;
use Psr\Http\Message\ServerRequestInterface;
class SessionValidateAction
{
public function __invoke(ServerRequestInterface $request,
ResponseInterface $response, callable $next = null)
{
$inbound = new Response();
$validator = new Validator($request, time()+10);
$inbound = $validator($request, $response);
if ($inbound->getStatusCode() != 200) {
session_destroy();
setcookie('PHPSESSID', 0, time()-300);
$params = json_decode(
$inbound->getBody()->getContents(), TRUE);
echo '<h1>',$params[Validator::KEY_TEXT],'</h1>';
echo '<pre>',var_dump($inbound),'</pre>';
exit;
}
return $next($request,$response);
}
}You will now need to add the new class to the middleware pipeline. Modify config/autoload/middleware-pipeline.global.php as follows. Modifications are shown in bold:
<?php use Zend\Expressive\Container\ApplicationFactory; use Zend\Expressive\Helper; return [ 'dependencies' => [ 'invokables' => [ App\Action\SessionValidateAction::class => App\Action\SessionValidateAction::class, ], 'factories' => [ Helper\ServerUrlMiddleware::class => Helper\ServerUrlMiddlewareFactory::class, Helper\UrlHelperMiddleware::class => Helper\UrlHelperMiddlewareFactory::class, ], ], 'middleware_pipeline' => [ 'always' => [ 'middleware' => [ Helper\ServerUrlMiddleware::class, ], 'priority' => 10000, ], 'routing' => [ 'middleware' => [ ApplicationFactory::ROUTING_MIDDLEWARE, Helper\UrlHelperMiddleware::class, App\Action\SessionValidateAction::class, ApplicationFactory::DISPATCH_MIDDLEWARE, ], 'priority' => 1, ], 'error' => [ 'middleware' => [ // Add error middleware here. ], 'error' => true, 'priority' => -10000, ], ], ];
You might also consider modifying the home page template to show the status of $_SESSION. The file in question is /path/to/source/for/this/chapter/expressive/templates/app/home-page.phtml. Simply adding var_dump($_SESSION) should suffice.
Initially, you should see something like this:
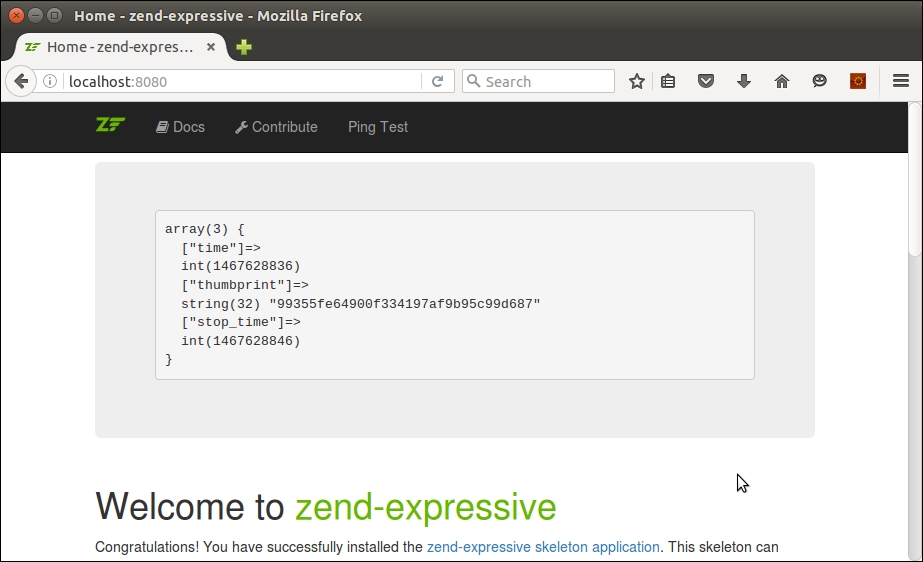
After 10 seconds, refresh the browser. You should now see this:
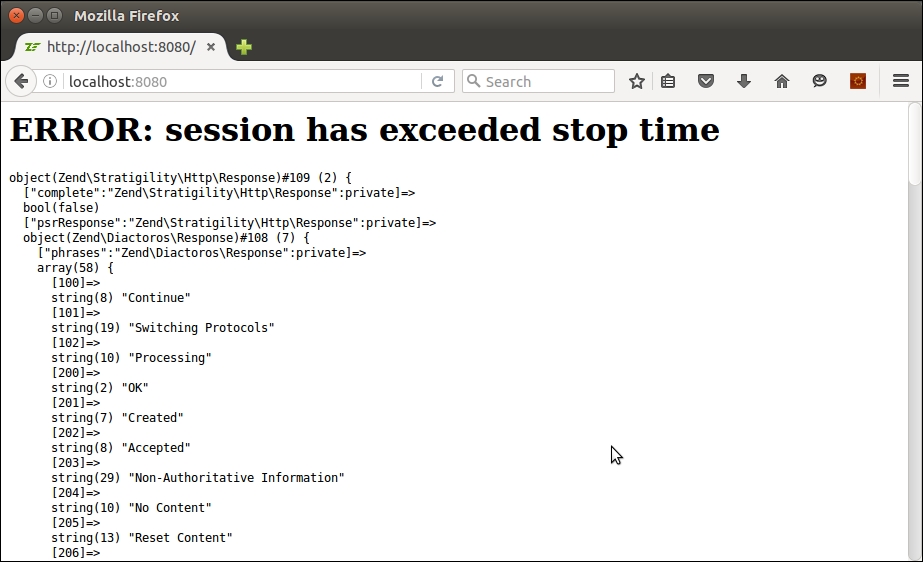
Except in cases where you are trying to communicate between different versions of PHP, PSR-7 middleware will be of minimal use. Recall what the acronym stands for: PHP Standards Recommendations. Accordingly, if you need to make a request to an application written in another language, treat it as you would any other web service HTTP request.
Application\MiddleWare\ServerRequest. The first thing to note is that there are no namespaces! Accordingly, we use a classname with underscores, _, in place of namespace separators:class Application_MiddleWare_ServerRequest
extends Application_MiddleWare_Request
implements Psr_Http_Message_ServerRequestInterface
{var:var $serverParams; var $cookies; var $queryParams; // not all properties are shown
initialize() method is almost the same, except that syntax such as $this->getServerParams()['REQUEST_URI'] was not allowed in PHP 4. Accordingly, we need to split this out into a separate variable:function initialize()
{
$params = $this->getServerParams();
$this->getCookieParams();
$this->getQueryParams();
$this->getUploadedFiles;
$this->getRequestMethod();
$this->getContentType();
$this->getParsedBody();
return $this->withRequestTarget($params['REQUEST_URI']);
}$_XXX super-globals were present in later versions of PHP 4:function getServerParams()
{
if (!$this->serverParams) {
$this->serverParams = $_SERVER;
}
return $this->serverParams;
}
// not all getXXX() methods are shown to conserve spaceisset(XXX) ? XXX : ''; instead:function getRequestMethod()
{
$params = $this->getServerParams();
$method = isset($params['REQUEST_METHOD'])
? $params['REQUEST_METHOD'] : '';
$this->method = strtolower($method);
return $this->method;
}serialize() or unserialize() in place of json_encode() and json_decode():function getParsedBody()
{
if (!$this->parsedBody) {
if (($this->getContentType() ==
Constants::CONTENT_TYPE_FORM_ENCODED
|| $this->getContentType() ==
Constants::CONTENT_TYPE_MULTI_FORM)
&& $this->getRequestMethod() ==
Constants::METHOD_POST)
{
$this->parsedBody = $_POST;
} elseif ($this->getContentType() ==
Constants::CONTENT_TYPE_JSON
|| $this->getContentType() ==
Constants::CONTENT_TYPE_HAL_JSON)
{
ini_set("allow_url_fopen", true);
$this->parsedBody =
file_get_contents('php://stdin');
} elseif (!empty($_REQUEST)) {
$this->parsedBody = $_REQUEST;
} else {
ini_set("allow_url_fopen", true);
$this->parsedBody =
file_get_contents('php://stdin');
}
}
return $this->parsedBody;
}withXXX() methods work pretty much the same in PHP 4:function withParsedBody($data)
{
$this->parsedBody = $data;
return $this;
}withoutXXX() methods work the same as well:function withoutAttribute($name)
{
if (isset($this->attributes[$name])) {
unset($this->attributes[$name]);
}
return $this;
}
}Request discussed in the recipe Developing a PSR-7 request class from this chapter. Here is the example from the How it works... section:$request = new Request( TARGET_WEBSITE_URL, Constants::METHOD_POST, new TextStream($contents), [Constants::HEADER_CONTENT_TYPE => Constants::CONTENT_TYPE_FORM_ENCODED, Constants::HEADER_CONTENT_LENGTH => $body->getSize()] ); $data = http_build_query(['data' => $request->getBody()->getContents()]); $defaults = array( CURLOPT_URL => $request->getUri()->getUriString(), CURLOPT_POST => true, CURLOPT_POSTFIELDS => $data, ); $ch = curl_init(); curl_setopt_array($ch, $defaults); $response = curl_exec($ch); curl_close($ch);
In this chapter, we will cover:
In this chapter, we cover recipes that implement various advanced algorithms such as linked list, bubble sort, stacks, and binary search. In addition, we cover getters and setters, as well as implementing a search engine and displaying values from a multi-dimensional array with accumulated totals.
At first glance, it would seemingly make sense to define classes with public properties, which can then be directly read or written. It is considered a best practice, however, to make properties protected, and to then define a getter and setter for each. As the name implies, a getter retrieves the value of a property. A setter is used to set the value.
Best practice
Define properties as protected to prevent accidental outside access. Use public get* and set* methods to provide access to these properties. In this manner, not only can you more precisely control access, but you can also make formatting and data type changes to the properties while getting and setting them.
get or set. The name of the property becomes the suffix. It is a convention to make the first letter of the variable uppercase. Thus, if the property is $testValue, the getter would be getTestValue().$date. Notice that the get and set methods allow for treatment as either a DateTime object or as a string. The value is actually stored in any event as a DateTime instance:$a = new class() {
protected $date;
public function setDate($date)
{
if (is_string($date)) {
$this->date = new DateTime($date);
} else {
$this->date = $date;
}
}
public function getDate($asString = FALSE)
{
if ($asString) {
return $this->date->format('Y-m-d H:i:s');
} else {
return $this->date;
}
}
};$intVal and $arrVal, which are set to a default initial value of NULL. Notice that not only are the return values for the getters data-typed, but they also provide defaults. The setters also either enforce the incoming data-type, or type-cast the incoming value to a certain data-type:<?php
class GetSet
{
protected $intVal = NULL;
protected $arrVal = NULL;
// note the use of the null coalesce operator to return a default value
public function getIntVal() : int
{
return $this->intVal ?? 0;
}
public function getArrVal() : array
{
return $this->arrVal ?? array();
}
public function setIntVal($val)
{
$this->intVal = (int) $val ?? 0;
}
public function setArrVal(array $val)
{
$this->arrVal = $val ?? array();
}
}__call(). The following class defines nine different properties. Instead of having to define nine getters and nine setters, we define a single method, __call(), which makes a determination whether or not the usage is get or set. If get, it retrieves the key from an internal array. If set, it stores the value in the internal array.<?php
class LotsProps
{
protected $firstName = NULL;
protected $lastName = NULL;
protected $addr1 = NULL;
protected $addr2 = NULL;
protected $city = NULL;
protected $state = NULL;
protected $province = NULL;
protected $postalCode = NULL;
protected $country = NULL;
protected $values = array();
public function __call($method, $params)
{
preg_match('/^(get|set)(.*?)$/i', $method, $matches);
$prefix = $matches[1] ?? '';
$key = $matches[2] ?? '';
$key = strtolower($key);
if ($prefix == 'get') {
return $this->values[$key] ?? '---';
} else {
$this->values[$key] = $params[0];
}
}
}Copy the code mentioned in step 1 into a new file, chap_10_oop_using_getters_and_setters.php. To test the class, add the following:
// set date using a string
$a->setDate('2015-01-01');
var_dump($a->getDate());
// retrieves the DateTime instance
var_dump($a->getDate(TRUE));
// set date using a DateTime instance
$a->setDate(new DateTime('now'));
var_dump($a->getDate());
// retrieves the DateTime instance
var_dump($a->getDate(TRUE));In the output (shown next), you can see that the $date property can be set using either a string or an actual DateTime instance. When getDate() is executed, you can return either a string or a DateTime instance, depending on the value of the $asString flag:
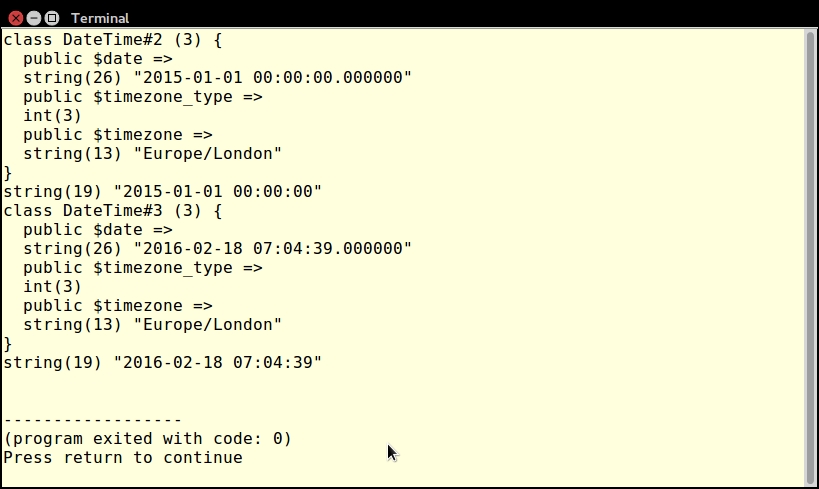
Next, have a look at the code defined in step 2. Copy this code into a file, chap_10_oop_using_getters_and_setters_defaults.php, and add the following:
// create the instance
$a = new GetSet();
// set a "proper" value
$a->setIntVal(1234);
echo $a->getIntVal();
echo PHP_EOL;
// set a bogus value
$a->setIntVal('some bogus value');
echo $a->getIntVal();
echo PHP_EOL;
// NOTE: boolean TRUE == 1
$a->setIntVal(TRUE);
echo $a->getIntVal();
echo PHP_EOL;
// returns array() even though no value was set
var_dump($a->getArrVal());
echo PHP_EOL;
// sets a "proper" value
$a->setArrVal(['A','B','C']);
var_dump($a->getArrVal());
echo PHP_EOL;
try {
$a->setArrVal('this is not an array');
var_dump($a->getArrVal());
echo PHP_EOL;
} catch (TypeError $e) {
echo $e->getMessage();
}
echo PHP_EOL;As you can see from the following output, setting a proper integer value works as expected. A non-numeric value defaults to 0. Interestingly, if you supply a Boolean TRUE as an argument to setIntVal(), it is interpolated to 1.
If you call getArrVal() without setting a value, the default is an empty array. Setting an array value works as expected. However, if you supply a non-array value as an argument, the type hint of the array causes a TypeError to be thrown, which can be caught as shown here:
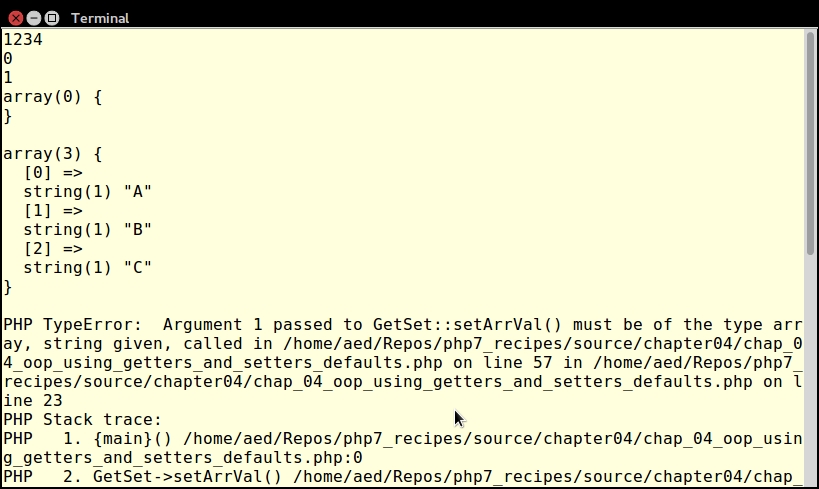
Finally, take the LotsProps class defined in step 3 and place it in a separate file, chap_10_oop_using_getters_and_setters_magic_call.php. Now add code to set values. What will happen, of course, is that the magic method __call() is invoked. After running preg_match(), the remainder of the non-existent property, after the letters set, will become a key in the internal array $values:
$a = new LotsProps();
$a->setFirstName('Li\'l Abner');
$a->setLastName('Yokum');
$a->setAddr1('1 Dirt Street');
$a->setCity('Dogpatch');
$a->setState('Kentucky');
$a->setPostalCode('12345');
$a->setCountry('USA');
?>You can then define HTML that displays the values using the corresponding get methods. These will in turn return keys from the internal array:
<div class="container">
<div class="left blue1">Name</div>
<div class="right yellow1">
<?= $a->getFirstName() . ' ' . $a->getLastName() ?></div>
</div>
<div class="left blue2">Address</div>
<div class="right yellow2">
<?= $a->getAddr1() ?>
<br><?= $a->getAddr2() ?>
<br><?= $a->getCity() ?>
<br><?= $a->getState() ?>
<br><?= $a->getProvince() ?>
<br><?= $a->getPostalCode() ?>
<br><?= $a->getCountry() ?>
</div>
</div>Here is the final output:
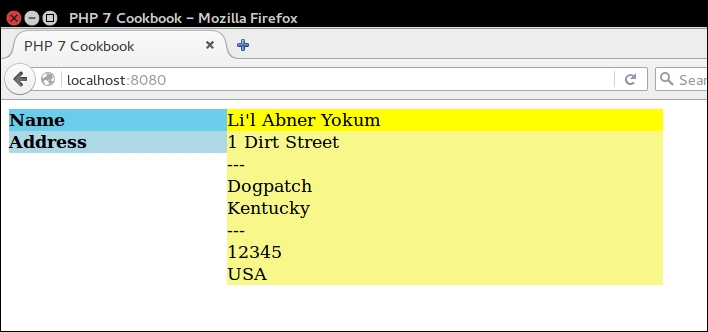
A linked list is where one list contains keys that point to keys in another list. An analogy, in database terms, would be where you have a table that contains data, and a separate index that points to the data. One index might produce a list of items by ID. Another index might yield a list according to title and so on. The salient feature of the linked list is that you do not have to touch the original list of items.
For example, in the diagram shown next, the primary list contains ID numbers and the names of fruits. If you were to directly output the primary list, the fruit names would display in this order: Apple, Grape, Banana, Orange, Cherry. If you were to use the linked list as an index, on the other hand, the resulting output of fruit names would be Apple, Banana, Cherry, Grape, and Orange:
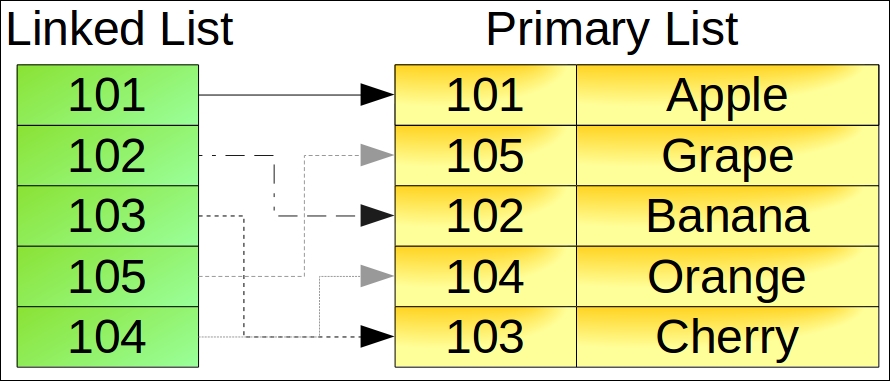
function buildLinkedList(array $primary,
callable $makeLink)
{
$linked = new ArrayIterator();
foreach ($primary as $key => $row) {
$linked->offsetSet($makeLink($row), $key);
}
$linked->ksort();
return $linked;
}ksort()) so that the linked list iterates in key order.$customer in this example:foreach ($linked as $key => $link) {
$output .= printRow($customer[$link]);
}buildLinkedList() function, adding a filter column and filter value:function buildLinkedList(array $primary,
callable $makeLink,
$filterCol = NULL,
$filterVal = NULL)
{
$linked = new ArrayIterator();
$filterVal = trim($filterVal);
foreach ($primary as $key => $row) {
if ($filterCol) {
if (trim($row[$filterCol]) == $filterVal) {
$linked->offsetSet($makeLink($row), $key);
}
} else {
$linked->offsetSet($makeLink($row), $key);
}
}
$linked->ksort();
return $linked;
}$filterCol in the primary list matches $filterVal. The iteration logic is the same as that shown in step 2.SplDoublyLinkedList, which neatly does the trick. Here is a function that builds a doubly linked list:function buildDoublyLinkedList(ArrayIterator $linked)
{
$double = new SplDoublyLinkedList();
foreach ($linked as $key => $value) {
$double->push($value);
}
return $double;
}Copy the code shown in the first bullet into a file, chap_10_linked_list_include.php. In order to demonstrate the use of a linked list, you will need a source of data. For this illustration, you can make use of the customer.csv file that was mentioned in earlier recipes. It is a CSV file with the following columns:
"id","name","balance","email","password","status","security_question", "confirm_code","profile_id","level"
You can add the following functions to the include file mentioned previously to generate a primary list of customers, and to display information about them. Note that we use the first column, id as the primary key:
function readCsv($fn, &$headers)
{
if (!file_exists($fn)) {
throw new Error('File Not Found');
}
$fileObj = new SplFileObject($fn, 'r');
$result = array();
$headers = array();
$firstRow = TRUE;
while ($row = $fileObj->fgetcsv()) {
// store 1st row as headers
if ($firstRow) {
$firstRow = FALSE;
$headers = $row;
} else {
if ($row && $row[0] !== NULL && $row[0] !== 0) {
$result[$row[0]] = $row;
}
}
}
return $result;
}
function printHeaders($headers)
{
return sprintf('%4s : %18s : %8s : %32s : %4s' . PHP_EOL,
ucfirst($headers[0]),
ucfirst($headers[1]),
ucfirst($headers[2]),
ucfirst($headers[3]),
ucfirst($headers[9]));
}
function printRow($row)
{
return sprintf('%4d : %18s : %8.2f : %32s : %4s' . PHP_EOL,
$row[0], $row[1], $row[2], $row[3], $row[9]);
}
function printCustomer($headers, $linked, $customer)
{
$output = '';
$output .= printHeaders($headers);
foreach ($linked as $key => $link) {
$output .= printRow($customer[$link]);
}
return $output;
}You can then define a calling program, chap_10_linked_list_in_order.php, which includes the file defined previously, and reads customer.csv:
<?php
define('CUSTOMER_FILE', __DIR__ . '/../data/files/customer.csv');
include __DIR__ . '/chap_10_linked_list_include.php';
$headers = array();
$customer = readCsv(CUSTOMER_FILE, $headers);You can then define an anonymous function that will produce a key in the linked list. In this illustration, define a function that breaks down column 1 (name) into first and last names:
$makeLink = function ($row) {
list($first, $last) = explode(' ', $row[1]);
return trim($last) . trim($first);
};You can then call the function to build the linked list, and use printCustomer() to display the results:
$linked = buildLinkedList($customer, $makeLink); echo printCustomer($headers, $linked, $customer);
Here is how the output might appear:
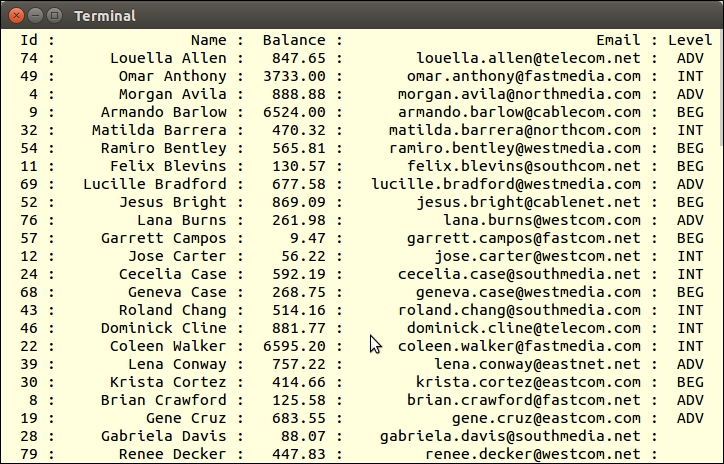
To produce a filtered result, modify buildLinkedList() as discussed in step 4. You can then add logic that checks to see whether the value of the filter column matches the value in the filter:
define('LEVEL_FILTER', 'INT');
$filterCol = 9;
$filterVal = LEVEL_FILTER;
$linked = buildLinkedList($customer, $makeLink, $filterCol, $filterVal);PHP 7.1 introduced the use of [ ] as an alternative to list(). If you look at the anonymous function mentioned previously, you could rewrite this in PHP 7.1 as follows:
$makeLink = function ($row) {
[$first, $last] = explode(' ', $row[1]);
return trim($last) . trim($first);
};For more information, see https://wiki.php.net/rfc/short_list_syntax.
The classic bubble sort is an exercise often assigned to university students. Nonetheless, it's important to master this algorithm as there are many occasions where built-in PHP sorting functions do not apply. An example would be sorting a multi-dimensional array where the sort key is not the first column.
The way the bubble sort works is to recursively iterate through the list and swap the current value with the next value. If you want items to be in ascending order, the swap occurs if the next item is less than the current item. For descending order, the swap occurs if the reverse is true. The sort is concluded when no more swaps occur.
In the following diagram, after the first pass, Grape and Banana are swapped, as are Orange and Cherry. After the 2nd pass, Grape and Cherry are swapped. No more swaps occur on the last pass, and the bubble sort ends:
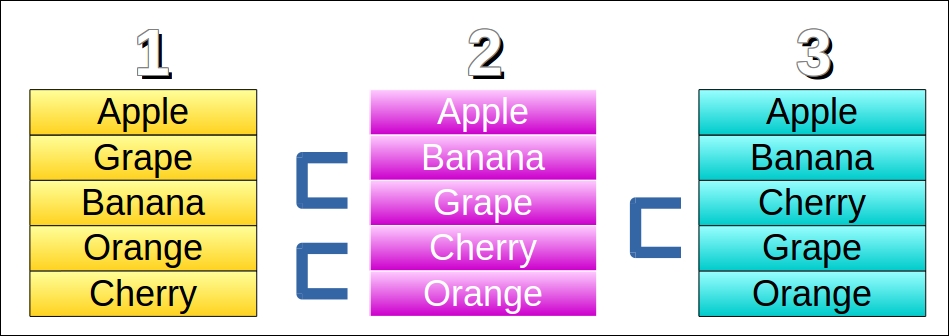
buildLinkedList() function discussed in the previous recipe.bubbleSort(), which accepts the linked list by reference, the primary list, a sort field, and a parameter that represents sort order (ascending or descending):function bubbleSort(&$linked, $primary, $sortField, $order = 'A')
{static $iterations = 0; $swaps = 0; $iterator = new ArrayIterator($linked);
while() loop, we only proceed if the iteration is still valid, which is to say still in progress. We then obtain the current key and value, and the next key and value. Note the extra if() statement to ensure the iteration is still valid (that is, to make sure we don't drop off the end of the list!):while ($iterator->valid()) {
$currentLink = $iterator->current();
$currentKey = $iterator->key();
if (!$iterator->valid()) break;
$iterator->next();
$nextLink = $iterator->current();
$nextKey = $iterator->key();$expr:if ($order == 'A') {
$expr = $primary[$linked->offsetGet
($currentKey)][$sortField] >
$primary[$linked->offsetGet($nextKey)][$sortField];
} else {
$expr = $primary[$linked->offsetGet
($currentKey)][$sortField] <
$primary[$linked->offsetGet($nextKey)][$sortField];
}$expr is TRUE, and we have valid current and next keys, the values are swapped in the linked list. We also increment $swaps:if ($expr && $currentKey && $nextKey
&& $linked->offsetExists($currentKey)
&& $linked->offsetExists($nextKey)) {
$tmp = $linked->offsetGet($currentKey);
$linked->offsetSet($currentKey,
$linked->offsetGet($nextKey));
$linked->offsetSet($nextKey, $tmp);
$swaps++;
}
}if ($swaps) bubbleSort($linked, $primary, $sortField, $order);
return ++$iterations; }
Add the bubbleSort() function discussed previously to the include file created in the previous recipe. You can use the same logic discussed in the previous recipe to read the customer.csv file, producing a primary list:
<?php
define('CUSTOMER_FILE', __DIR__ . '/../data/files/customer.csv');
include __DIR__ . '/chap_10_linked_list_include.php';
$headers = array();
$customer = readCsv(CUSTOMER_FILE, $headers);You can then produce a linked list using the first column as a sort key:
$makeLink = function ($row) {
return $row[0];
};
$linked = buildLinkedList($customer, $makeLink);Finally, call the bubbleSort() function, providing the linked list and customer list as arguments. You can also provide a sort column, in this illustration column 2, that represents the account balance, using the letter 'A' to indicate ascending order. The printCustomer() function can be used to display output:
echo 'Iterations: ' . bubbleSort($linked, $customer, 2, 'A') . PHP_EOL; echo printCustomer($headers, $linked, $customer);
Here is an example of the output:
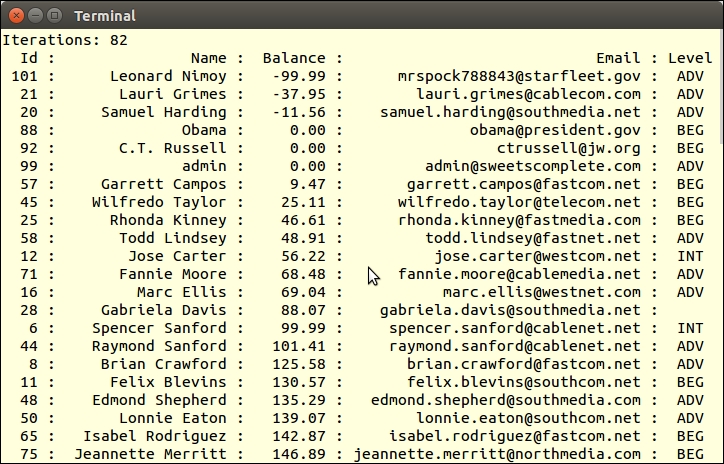
A stack is a simple algorithm normally implemented as Last In First Out (LIFO). Think of a stack of books sitting on a library table. When the librarian goes to restore the books to their place, the topmost book is processed first, and so on in order, until the book at the bottom of the stack has been replaced. The topmost book was the last one to be placed on the stack, thus last in first out.
In programming terms, a stack is used to temporarily store information. The retrieval order facilitates retrieving the most recent item first.
Application\Generic\Stack. The core logic is encapsulated in an SPL class, SplStack:namespace Application\Generic;
use SplStack;
class Stack
{
// code
}SplStack instance:protected $stack;
public function __construct()
{
$this->stack = new SplStack();
}push() and pop() methods:public function push($message)
{
$this->stack->push($message);
}
public function pop()
{
return $this->stack->pop();
}__invoke() that returns an instance of the stack property. This allows us to use the object in a direct function call:public function __invoke()
{
return $this->stack;
}One possible use for a stack is to store messages. In the case of messages, it is usually desirable to retrieve the latest first, thus it is a perfect use case for a stack. Define the Application\Generic\Stack class as discussed in this recipe. Next, define a calling program that sets up autoloading and creates an instance of the stack:
<?php // setup class autoloading require __DIR__ . '/../Application/Autoload/Loader.php'; Application\Autoload\Loader::init(__DIR__ . '/..'); use Application\Generic\Stack; $stack = new Stack();
To do something with the stack, store a series of messages. As you would most likely store messages at different points in your application, you can use sleep() to simulate other code running:
echo 'Do Something ... ' . PHP_EOL;
$stack->push('1st Message: ' . date('H:i:s'));
sleep(3);
echo 'Do Something Else ... ' . PHP_EOL;
$stack->push('2nd Message: ' . date('H:i:s'));
sleep(3);
echo 'Do Something Else Again ... ' . PHP_EOL;
$stack->push('3rd Message: ' . date('H:i:s'));
sleep(3);Finally, simply iterate through the stack to retrieve messages. Note that you can call the stack object as if it were a function, which returns the SplStack instance:
echo 'What Time Is It?' . PHP_EOL;
foreach ($stack() as $item) {
echo $item . PHP_EOL;
}Here is the expected output:
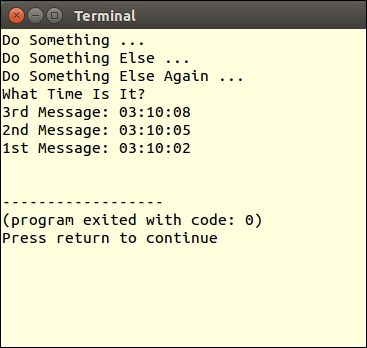
Conventional searches often proceed through the list of items in a sequential manner. This means that the maximum possible number of items to be searched could be the same as the length of the list! This is not very efficient. If you need to expedite a search, consider implementing a binary search.
The technique is quite simple: you find the midpoint in the list, and determine whether the search item is less than, equal to, or greater than the midpoint item. If less, you set the upper limit to the midpoint, and search only the first half of the list. If greater, set the lower limit to the midpoint, and search only the last half of the list. You would then proceed to divide the list into 1/4, 1/8, 1/16, and so on, until the search item is found (or not).
It's important to note that although the maximum number of comparisons is considerably smaller than a sequential search (log n + 1 where n is the number of elements in the list, and log is the binary logarithm), the list involved in the search must first be sorted, which of course downgrades performance.
Application\Generic\Search, which accepts the primary list as an argument. As a control, we also define a property, $iterations:namespace Application\Generic;
class Search
{
protected $primary;
protected $iterations;
public function __construct($primary)
{
$this->primary = $primary;
}binarySearch(), which sets up the search infrastructure. The first order of business is to build a separate array, $search, where the key is a composite of the columns included in the search. We then sort by key:public function binarySearch(array $keys, $item)
{
$search = array();
foreach ($this->primary as $primaryKey => $data) {
$searchKey = function ($keys, $data) {
$key = '';
foreach ($keys as $k) $key .= $data[$k]; return $key;
};
$search[$searchKey($keys, $data)] = $primaryKey;
}
ksort($search);$binary, so that we can perform the binary sort based on numeric keys. We then call doBinarySearch(), which results in a key from our intermediary array $search, or a Boolean, FALSE:$binary = array_keys($search); $result = $this->doBinarySearch($binary, $item); return $this->primary[$search[$result]] ?? FALSE; }
doBinarySearch() initializes a series of parameters. $iterations, $found, $loop, $done, and $max are all used to prevent an endless loop. $upper and $lower represent the slice of the list to be examined:public function doBinarySearch($binary, $item)
{
$iterations = 0;
$found = FALSE;
$loop = TRUE;
$done = -1;
$max = count($binary);
$lower = 0;
$upper = $max - 1;while() loop and set the midpoint: while ($loop && !$found) {
$mid = (int) (($upper - $lower) / 2) + $lower;switch ($item <=> $binary[$mid]) {
// $item < $binary[$mid]
case -1 :
$upper = $mid;
break;
// $item == $binary[$mid]
case 0 :
$found = $binary[$mid];
break;
// $item > $binary[$mid]
case 1 :
default :
$lower = $mid;
} $loop = (($iterations++ < $max) && ($done < 1));
$done += ($upper == $lower) ? 1 : 0;
}
$this->iterations = $iterations;
return $found;
}First, implement the Application\Generic\Search class defining the methods described in this recipe. Next, define a calling program, chap_10_binary_search.php, which sets up autoloading and reads the customer.csv file as a search target (as discussed in the previous recipe):
<?php
define('CUSTOMER_FILE', __DIR__ . '/../data/files/customer.csv');
include __DIR__ . '/chap_10_linked_list_include.php';
require __DIR__ . '/../Application/Autoload/Loader.php';
Application\Autoload\Loader::init(__DIR__ . '/..');
use Application\Generic\Search;
$headers = array();
$customer = readCsv(CUSTOMER_FILE, $headers);You can then create a new Search instance, and specify an item somewhere in the middle of the list. In this illustration, the search is based on column 1, customer name, and the item is Todd Lindsey:
$search = new Search($customer); $item = 'Todd Lindsey'; $cols = [1]; echo "Searching For: $item\n"; var_dump($search->binarySearch($cols, $item));
For illustration, add this line just before switch() in Application\Generic\Search::doBinarySearch():
echo 'Upper:Mid:Lower:<=> | ' . $upper . ':' . $mid . ':' . $lower . ':' . ($item <=> $binary[$mid]);
The output is shown here. Notice how the upper, middle, and lower limits adjust until the item is found:
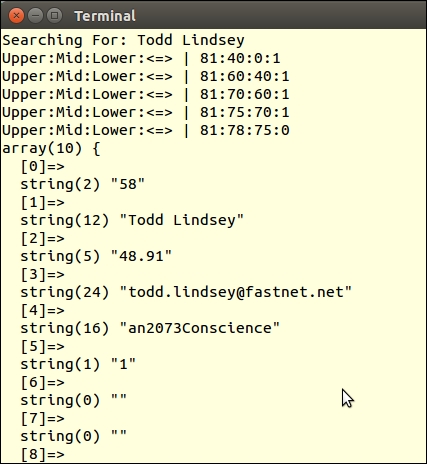
For more information on binary search, there is an excellent article on Wikipedia that goes through the basic math at https://en.wikipedia.org/wiki/Binary_search_algorithm.
In order to implement a search engine, we need to make provision for multiple columns to be included in the search. In addition, it's important to recognize that the search item might be found in the middle of the field, and that very rarely will users provide enough information for an exact match. Accordingly, we will rely heavily on the SQL LIKE %value% clause.
LIKE, <, >, and so on); and optionally an item. The reason why an item is optional is that some operators, such as IS NOT NULL, do not require specific data:namespace Application\Database\Search;
class Criteria
{
public $key;
public $item;
public $operator;
public function __construct($key, $operator, $item = NULL)
{
$this->key = $key;
$this->operator = $operator;
$this->item = $item;
}
}Application\Database\Search\Engine, and provide the necessary class constants and properties. The difference between $columns and $mapping is that $columns holds information that will ultimately appear in an HTML SELECT field (or the equivalent). For security reasons, we do not want to expose the actual names of the database columns, thus the need for another array $mapping:namespace Application\Database\Search;
use PDO;
use Application\Database\Connection;
class Engine
{
const ERROR_PREPARE = 'ERROR: unable to prepare statement';
const ERROR_EXECUTE = 'ERROR: unable to execute statement';
const ERROR_COLUMN = 'ERROR: column name not on list';
const ERROR_OPERATOR= 'ERROR: operator not on list';
const ERROR_INVALID = 'ERROR: invalid search criteria';
protected $connection;
protected $table;
protected $columns;
protected $mapping;
protected $statement;
protected $sql = ''; protected $operators = [
'LIKE' => 'Equals',
'<' => 'Less Than',
'>' => 'Greater Than',
'<>' => 'Not Equals',
'NOT NULL' => 'Exists',
];Application\Database\Connection, defined in Chapter 5, Interacting with a Database. We also need to provide the name of the database table, as well as $columns, an array of arbitrary column keys and labels, which will appear in the HTML form. This will reference $mapping, where the key matches $columns, but where the value represents actual database column names:public function __construct(Connection $connection,
$table, array $columns, array $mapping)
{
$this->connection = $connection;
$this->setTable($table);
$this->setColumns($columns);
$this->setMapping($mapping);
}public function setColumns($columns)
{
$this->columns = $columns;
}
public function getColumns()
{
return $this->columns;
}
// etc.SELECT setup, we add a WHERE clause, using $mapping to add the actual database column name. We then add the operator and implement switch() which, based on the operator, may or may not add a named placeholder that will represent the search item:public function prepareStatement(Criteria $criteria)
{
$this->sql = 'SELECT * FROM ' . $this->table . ' WHERE ';
$this->sql .= $this->mapping[$criteria->key] . ' ';
switch ($criteria->operator) {
case 'NOT NULL' :
$this->sql .= ' IS NOT NULL OR ';
break;
default :
$this->sql .= $criteria->operator . ' :'
. $this->mapping[$criteria->key] . ' OR ';
}SELECT has been defined, we remove any trailing OR keywords, and add a clause that causes the result to be sorted according to the search column. The statement is then sent to the database to be prepared: $this->sql = substr($this->sql, 0, -4)
. ' ORDER BY ' . $this->mapping[$criteria->key];
$statement = $this->connection->pdo->prepare($this->sql);
return $statement;
}search() method. We accept an Application\Database\Search\Criteria object as an argument. This ensures that we have an item key and operator at a minimum. To be on the safe side, we add an if() statement to check these properties:public function search(Criteria $criteria)
{
if (empty($criteria->key) || empty($criteria->operator)) {
yield ['error' => self::ERROR_INVALID];
return FALSE;
}prepareStatement() using try / catch to trap errors:try {
if (!$statement = $this->prepareStatement($criteria)) {
yield ['error' => self::ERROR_PREPARE];
return FALSE;
}execute(). The key represents the database column name that was used as a placeholder in the prepared statement. Note that instead of using =, we use the LIKE %value% construct:$params = array();
switch ($criteria->operator) {
case 'NOT NULL' :
// do nothing: already in statement
break;
case 'LIKE' :
$params[$this->mapping[$criteria->key]] =
'%' . $criteria->item . '%';
break;
default :
$params[$this->mapping[$criteria->key]] =
$criteria->item;
}yield keywords, which effectively turns this method into a generator: $statement->execute($params);
while ($row = $statement->fetch(PDO::FETCH_ASSOC)) {
yield $row;
}
} catch (Throwable $e) {
error_log(__METHOD__ . ':' . $e->getMessage());
throw new Exception(self::ERROR_EXECUTE);
}
return TRUE;
}Place the code discussed in this recipe in the files Criteria.php and Engine.php under Application\Database\Search. You can then define a calling script, chap_10_search_engine.php, which sets up autoloading. You can take advantage of the Application\Database\Connection class discussed in Chapter 5, Interacting with a Database, and the form element classes covered in Chapter 6, Building Scalable Websites:
<?php
define('DB_CONFIG_FILE', '/../config/db.config.php');
require __DIR__ . '/../Application/Autoload/Loader.php';
Application\Autoload\Loader::init(__DIR__ . '/..');
use Application\Database\Connection;
use Application\Database\Search\ { Engine, Criteria };
use Application\Form\Generic;
use Application\Form\Element\Select;You can now define which database columns will appear in the form, and a matching mapping file:
$dbCols = [ 'cname' => 'Customer Name', 'cbal' => 'Account Balance', 'cmail' => 'Email Address', 'clevel' => 'Level' ]; $mapping = [ 'cname' => 'name', 'cbal' => 'balance', 'cmail' => 'email', 'clevel' => 'level' ];
You can now set up the database connection and create the search engine instance:
$conn = new Connection(include __DIR__ . DB_CONFIG_FILE); $engine = new Engine($conn, 'customer', $dbCols, $mapping);
In order to display the appropriate drop-down SELECT elements, we define wrappers and elements based on Application\Form\* classes:
$wrappers = [
Generic::INPUT => ['type' => 'td', 'class' => 'content'],
Generic::LABEL => ['type' => 'th', 'class' => 'label'],
Generic::ERRORS => ['type' => 'td', 'class' => 'error']
];
// define elements
$fieldElement = new Select('field',
Generic::TYPE_SELECT,
'Field',
$wrappers,
['id' => 'field']);
$opsElement = new Select('ops',
Generic::TYPE_SELECT,
'Operators',
$wrappers,
['id' => 'ops']);
$itemElement = new Generic('item',
Generic::TYPE_TEXT,
'Searching For ...',
$wrappers,
['id' => 'item','title' => 'If more than one item, separate with commas']);
$submitElement = new Generic('submit',
Generic::TYPE_SUBMIT,
'Search',
$wrappers,
['id' => 'submit','title' => 'Click to Search', 'value' => 'Search']);We then get input parameters (if defined), set form element options, create search criteria, and run the search:
$key = (isset($_GET['field']))
? strip_tags($_GET['field']) : NULL;
$op = (isset($_GET['ops'])) ? $_GET['ops'] : NULL;
$item = (isset($_GET['item'])) ? strip_tags($_GET['item']) : NULL;
$fieldElement->setOptions($dbCols, $key);
$itemElement->setSingleAttribute('value', $item);
$opsElement->setOptions($engine->getOperators(), $op);
$criteria = new Criteria($key, $op, $item);
$results = $engine->search($criteria);
?>The display logic mainly orients towards rendering the form. A more thorough presentation is discussed in Chapter 6, Building Scalable Websites, but we show the core logic here:
<form name="search" method="get">
<table class="display" cellspacing="0" width="100%">
<tr><?= $fieldElement->render(); ?></tr>
<tr><?= $opsElement->render(); ?></tr>
<tr><?= $itemElement->render(); ?></tr>
<tr><?= $submitElement->render(); ?></tr>
<tr>
<th class="label">Results</th>
<td class="content" colspan=2>
<span style="font-size: 10pt;font-family:monospace;">
<table>
<?php foreach ($results as $row) : ?>
<tr>
<td><?= $row['id'] ?></td>
<td><?= $row['name'] ?></td>
<td><?= $row['balance'] ?></td>
<td><?= $row['email'] ?></td>
<td><?= $row['level'] ?></td>
</tr>
<?php endforeach; ?>
</table>
</span>
</td>
</tr>
</table>
</form>Here is sample output from a browser:
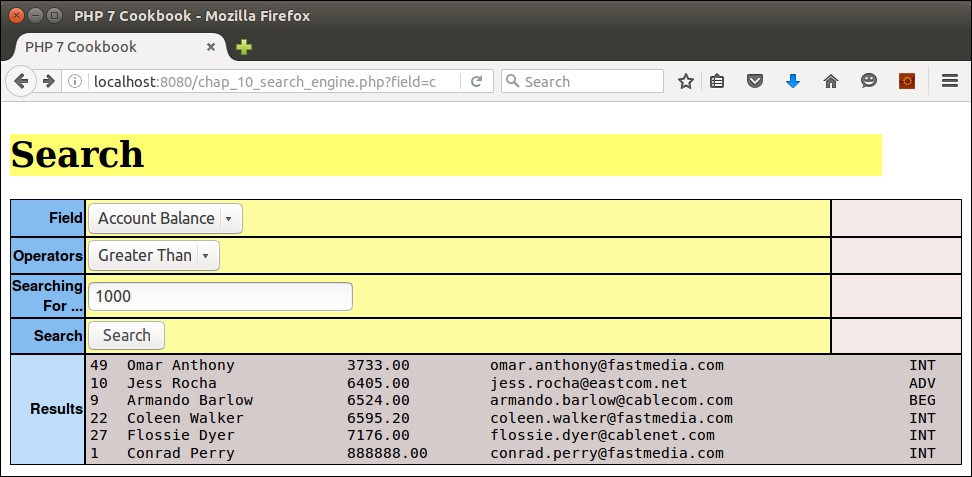
How to properly display data from a multi-dimensional array has been a classic problem for any web developer. For illustration, assume you wish to display a list of customers and their purchases. For each customer, you wish to show their name, phone number, account balance, and so on. This already represents a two dimensional array where the x axis represents customers and the y axis represents data for that customer. Now add in purchases and you have a third axis! How can you represent a 3D model on a 2D screen? One possible solution would be to incorporate "hidden" division tags with a simple JavaScript visibility toggle.
JOIN clauses. We will use the Application/Database/Connection class introduced in Chapter 1, Building a Foundation, to formulate an appropriate SQL query. We leave two parameters open, min and max, in order to support pagination. Unfortunately, we cannot use a simple LIMIT and OFFSET in this case, as the number of rows will vary depending on the number of purchases for any given customer. Accordingly, we can restrict the number of rows by placing restrictions on the customer ID that presumably (hopefully) is incremental. To make this work properly, we also need to set the primary ORDER to customer ID:define('ITEMS_PER_PAGE', 6);
define('SUBROWS_PER_PAGE', 6);
define('DB_CONFIG_FILE', '/../config/db.config.php');
include __DIR__ . '/../Application/Database/Connection.php';
use Application\Database\Connection;
$conn = new Connection(include __DIR__ . DB_CONFIG_FILE);
$sql = 'SELECT c.id,c.name,c.balance,c.email,f.phone, '
. 'u.transaction,u.date,u.quantity,u.sale_price,r.title '
. 'FROM customer AS c '
. 'JOIN profile AS f '
. 'ON f.id = c.id '
. 'JOIN purchases AS u '
. 'ON u.customer_id = c.id '
. 'JOIN products AS r '
. 'ON u.product_id = r.id '
. 'WHERE c.id >= :min AND c.id < :max '
. 'ORDER BY c.id ASC, u.date DESC ';$_GET parameters. Note that we add an extra check to make sure the value of $prev does not go below zero. You might consider adding another control that ensures the value of $next does not go beyond the last customer ID. In this illustration, we just allow it to increment:$page = $_GET['page'] ?? 1; $page = (int) $page; $next = $page + 1; $prev = $page - 1; $prev = ($prev >= 0) ? $prev : 0;
$min and $max, and prepare and execute the SQL statement:$min = $prev * ITEMS_PER_PAGE; $max = $page * ITEMS_PER_PAGE; $stmt = $conn->pdo->prepare($sql); $stmt->execute(['min' => $min, 'max' => $max]);
while() loop can be used to fetch results. We use a simple fetch mode of PDO::FETCH_ASSOC for the purpose of this example. Using the customer ID as a key, we store basic customer information as array parameters. We then store an array of purchase information in a sub-array, $results[$key]['purchases'][]. When the customer ID changes, it's a signal to store the same information for the next customer. Note that we accumulate totals per customer in an array key total:$custId = 0;
$result = array();
$grandTotal = 0.0;
while ($row = $stmt->fetch(PDO::FETCH_ASSOC)) {
if ($row['id'] != $custId) {
$custId = $row['id'];
$result[$custId] = [
'name' => $row['name'],
'balance' => $row['balance'],
'email' => $row['email'],
'phone' => $row['phone'],
];
$result[$custId]['total'] = 0;
}
$result[$custId]['purchases'][] = [
'transaction' => $row['transaction'],
'date' => $row['date'],
'quantity' => $row['quantity'],
'sale_price' => $row['sale_price'],
'title' => $row['title'],
];
$result[$custId]['total'] += $row['sale_price'];
$grandTotal += $row['sale_price'];
}
?><div class="container">
<?php foreach ($result as $key => $data) : ?>
<div class="mainLeft color0">
<?= $data['name'] ?> [<?= $key ?>]
</div>
<div class="mainRight">
<div class="row">
<div class="left">Balance</div>
<div class="right"><?= $data['balance']; ?></div>
</div>
<div class="row">
<div class="left color2">Email</div>
<div class="right"><?= $data['email']; ?></div>
</div>
<div class="row">
<div class="left">Phone</div>
<div class="right"><?= $data['phone']; ?></div>
</div>
<div class="row">
<div class="left color2">Total Purchases</div>
<div class="right">
<?= number_format($data['total'],2); ?>
</div>
</div><!-- Purchases Info --> <table> <tr> <th>Transaction</th><th>Date</th><th>Qty</th> <th>Price</th><th>Product</th> </tr> <?php $count = 0; ?> <?php foreach ($data['purchases'] as $purchase) : ?> <?php $class = ($count++ & 01) ? 'color1' : 'color2'; ?> <tr> <td class="<?= $class ?>"><?= $purchase['transaction'] ?></td> <td class="<?= $class ?>"><?= $purchase['date'] ?></td> <td class="<?= $class ?>"><?= $purchase['quantity'] ?></td> <td class="<?= $class ?>"><?= $purchase['sale_price'] ?></td> <td class="<?= $class ?>"><?= $purchase['title'] ?></td> </tr> <?php endforeach; ?> </table>
<?php endforeach; ?>
<div class="container">
<a href="?page=<?= $prev ?>">
<input type="button" value="Previous"></a>
<a href="?page=<?= $next ?>">
<input type="button" value="Next" class="buttonRight"></a>
</div>
<div class="clearRow"></div>
</div><div> tag based on its id attribute:<script type="text/javascript">
function showOrHide(id) {
var div = document.getElementById(id);
div.style.display = div.style.display == "none" ? "block" : "none";
}
</script><div> tag. Then, we can place a limit of how many sub-rows are initially visible, and add a link that reveals the remaining purchase data:<div class="row" id="<?= 'purchase' . $key ?>" style="display:none;">
<table>
<tr>
<th>Transaction</th><th>Date</th><th>Qty</th>
<th>Price</th><th>Product</th>
</tr>
<?php $count = 0; ?>
<?php $first = TRUE; ?>
<?php foreach ($data['purchases'] as $purchase) : ?>
<?php if ($count > SUBROWS_PER_PAGE && $first) : ?>
<?php $first = FALSE; ?>
<?php $subId = 'subrow' . $key; ?>
</table>
<a href="#" onClick="showOrHide('<?= $subId ?>')">More</a>
<div id="<?= $subId ?>" style="display:none;">
<table>
<?php endif; ?>
<?php $class = ($count++ & 01) ? 'color1' : 'color2'; ?>
<tr>
<td class="<?= $class ?>"><?= $purchase['transaction'] ?></td>
<td class="<?= $class ?>"><?= $purchase['date'] ?></td>
<td class="<?= $class ?>"><?= $purchase['quantity'] ?></td>
<td class="<?= $class ?>"><?= $purchase['sale_price'] ?></td>
<td class="<?= $class ?>"><?= $purchase['title'] ?></td>
</tr>
<?php endforeach; ?>
</table>
<?php if (!$first) : ?></div><?php endif; ?>
</div><div> tag:<input type="button" value="Purchases" class="buttonRight"
onClick="showOrHide('<?= 'purchase' . $key ?>')">Place the code described in steps 1 to 5 into a file, chap_10_html_table_multi_array_hidden.php.
Just inside the while() loop, add the following:
printf('%6s : %20s : %8s : %20s' . PHP_EOL,
$row['id'], $row['name'], $row['transaction'], $row['title']);Just after the while() loop, add an exit command. Here is the output:
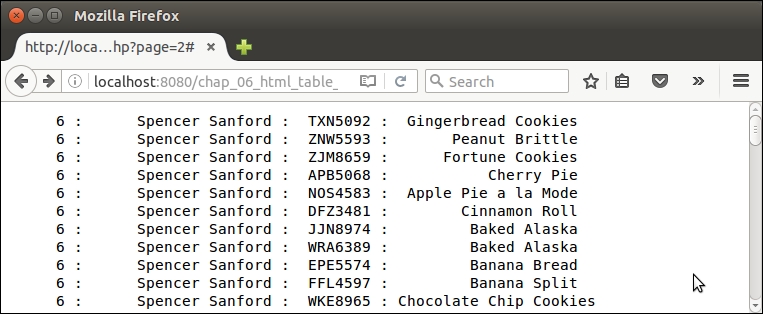
You will notice that the basic customer information, such as the ID and name, repeats for each result row, but purchase information, such as transaction and product title, varies. Go ahead and remove the printf() statement.
Replace the exit command with the following:
echo '<pre>', var_dump($result), '</pre>'; exit;
Here is how the newly composed 3D array looks:
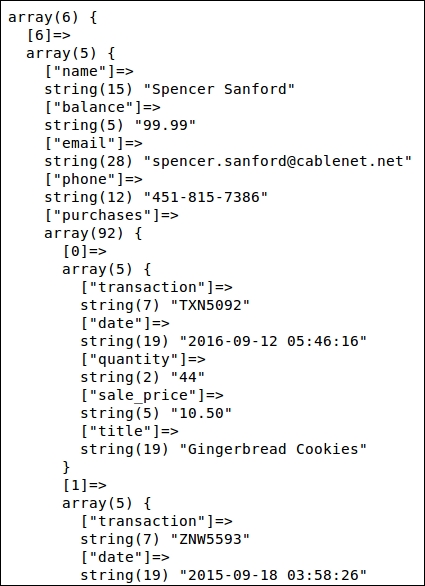
You can now add the display logic shown in steps 5 to 7. As mentioned, although you are now showing all data, the visual display is not helpful. Now go ahead and add the refinements mentioned in the remaining steps. Here is how the initial output might appear:
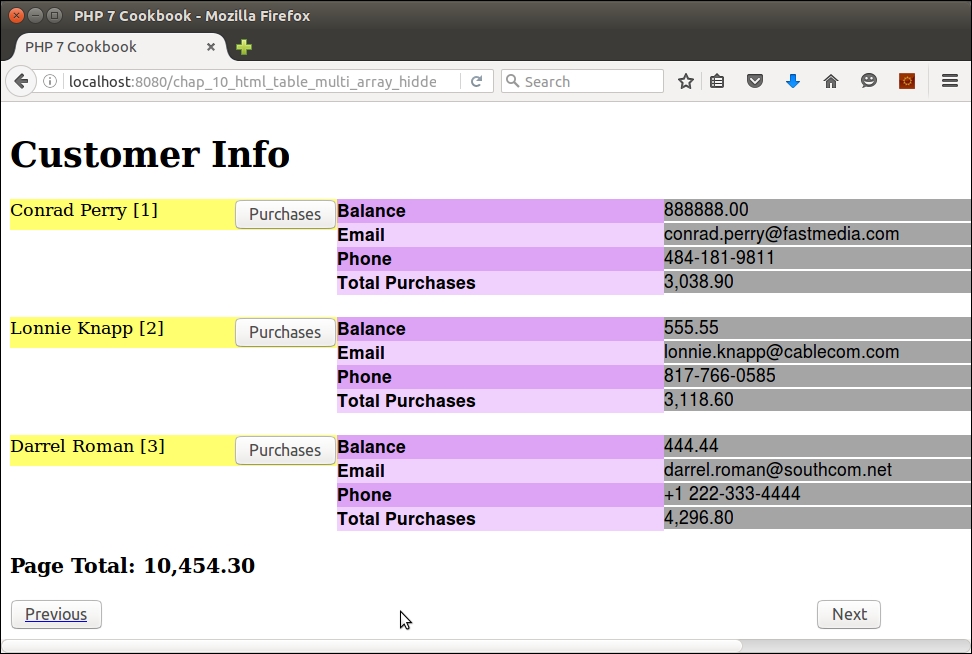
When the Purchases button is clicked, initial purchase info appears. If the link to More is clicked, the remaining purchase information shows:
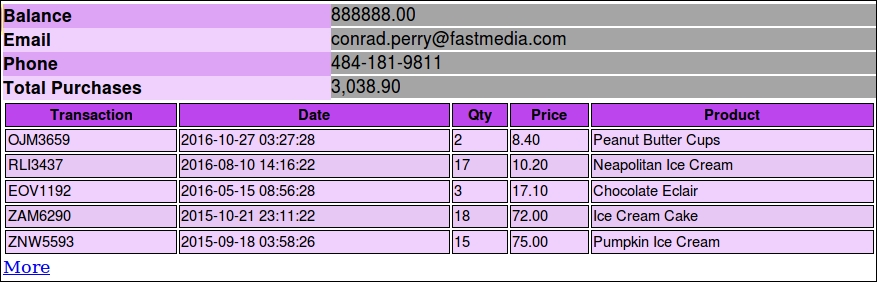
In this chapter, we will cover the following topics:
The idea of incorporating software design patterns into object-oriented programming (OOP) code was first discussed in a seminal work entitled Design Patterns: Elements of Reusable Object-Oriented Software, authored by the famous Gang of Four (E. Gamma, R. Helm, R. Johnson, and J. Vlissides) in 1994. Defining neither standards nor protocols, this work identified common generic software designs that have proven useful over the years. The patterns discussed in this book are generally thought to fall into three categories: creational, structural, and behavioral.
Examples of many of these patterns have already been presented in this book. Here is a brief summary:
|
Design pattern |
Chapter |
Recipe |
|---|---|---|
|
Singleton |
2 |
Defining visibility |
|
Factory |
6 |
Implementing a form factory |
|
Adapter |
8 |
Handling translation without |
|
Proxy |
7 |
Creating a simple REST client Creating a simple SOAP client |
|
Iterator |
2 3 |
Recursive directory iterator Using iterators |
In this chapter, we will examine a number of additional design patterns, focusing primarily on Concurrency and Architectural patterns.
The Hydrator pattern is a variation of the Data Transfer Object design pattern. Its design principle is quite simple: moving data from one place to another. In this illustration, we will define classes to move data from an array to an object.
Hydrator class that is able to use getters and setters. For this illustration we will use Application\Generic\Hydrator\GetSet:namespace Application\Generic\Hydrator;
class GetSet
{
// code
}hydrate() method, which takes both an array and an object as arguments. It then calls the setXXX() methods on the object to populate it with values from the array. We use get_class() to determine the object's class, and then get_class_methods() to get a list of all methods. preg_match() is used to match the method prefix and its suffix, which is subsequently assumed to be the array key:public static function hydrate(array $array, $object)
{
$class = get_class($object);
$methodList = get_class_methods($class);
foreach ($methodList as $method) {
preg_match('/^(set)(.*?)$/i', $method, $matches);
$prefix = $matches[1] ?? '';
$key = $matches[2] ?? '';
$key = strtolower(substr($key, 0, 1)) . substr($key, 1);
if ($prefix == 'set' && !empty($array[$key])) {
$object->$method($array[$key]);
}
}
return $object;
}To demonstrate how the array to hydrator object is used, first define the Application\Generic\Hydrator\GetSet class as described in the How to do it... section. Next, define an entity class that can be used to test the concept. For the purposes of this illustration, create a Application\Entity\Person class, with the appropriate properties and methods. Be sure to define getters and setters for all properties. Not all such methods are shown here:
namespace Application\Entity;
class Person
{
protected $firstName = '';
protected $lastName = '';
protected $address = '';
protected $city = '';
protected $stateProv = '';
protected $postalCode = '';
protected $country = '';
public function getFirstName()
{
return $this->firstName;
}
public function setFirstName($firstName)
{
$this->firstName = $firstName;
}
// etc.
}You can now create a calling program called chap_11_array_to_object.php, which sets up autoloading, and uses the appropriate classes:
<?php require __DIR__ . '/../Application/Autoload/Loader.php'; Application\Autoload\Loader::init(__DIR__ . '/..'); use Application\Entity\Person; use Application\Generic\Hydrator\GetSet;
Next, you can define a test array with values that will be added to a new Person instance:
$a['firstName'] = 'Li\'l Abner'; $a['lastName'] = 'Yokum'; $a['address'] = '1 Dirt Street'; $a['city'] = 'Dogpatch'; $a['stateProv'] = 'Kentucky'; $a['postalCode']= '12345'; $a['country'] = 'USA';
You can now call hydrate() and extract() in a static manner:
$b = GetSet::hydrate($a, new Person()); var_dump($b);
The results are shown in the following screenshot:
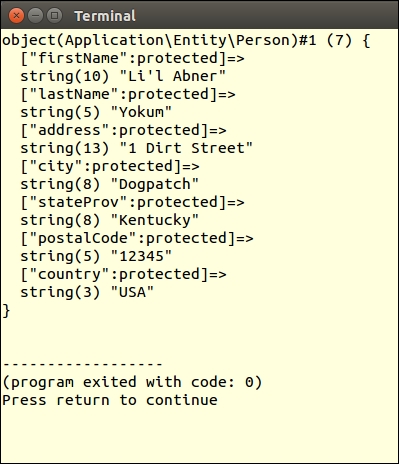
This recipe is the converse of the Creating an array to object hydrator recipe. In this case, we need to pull values from object properties and return an associative array where the key will be the column name.
Application\Generic\Hydrator\GetSet class defined in the previous recipe:namespace Application\Generic\Hydrator;
class GetSet
{
// code
}hydrate() method defined in the previous recipe, we define an extract() method, which takes an object as an argument. The logic is similar to that used with hydrate(), except this time we're searching for getXXX() methods. Again, preg_match() is used to match the method prefix and its suffix, which is subsequently assumed to be the array key:public static function extract($object)
{
$array = array();
$class = get_class($object);
$methodList = get_class_methods($class);
foreach ($methodList as $method) {
preg_match('/^(get)(.*?)$/i', $method, $matches);
$prefix = $matches[1] ?? '';
$key = $matches[2] ?? '';
$key = strtolower(substr($key, 0, 1)) . substr($key, 1);
if ($prefix == 'get') {
$array[$key] = $object->$method();
}
}
return $array;
}
}Define a calling program called chap_11_object_to_array.php, which sets up autoloading, and uses the appropriate classes:
<?php require __DIR__ . '/../Application/Autoload/Loader.php'; Application\Autoload\Loader::init(__DIR__ . '/..'); use Application\Entity\Person; use Application\Generic\Hydrator\GetSet;
Next, define an instance of Person, setting values for its properties:
$obj = new Person();
$obj->setFirstName('Li\'lAbner');
$obj->setLastName('Yokum');
$obj->setAddress('1DirtStreet');
$obj->setCity('Dogpatch');
$obj->setStateProv('Kentucky');
$obj->setPostalCode('12345');
$obj->setCountry('USA');Finally, call the new extract() method in a static manner:
$a = GetSet::extract($obj); var_dump($a);
The output is shown in the following screenshot:
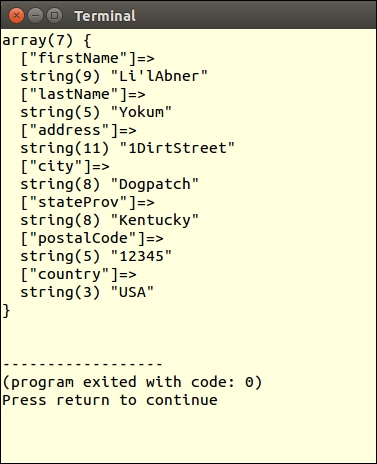
It is often the case that runtime conditions force the developer to define several ways of doing the same thing. Traditionally, this involved a massive if/elseif/else block of commands. You would then either have to define large blocks of logic inside the if statement, or create a series of functions or methods to enable the different approaches. The strategy pattern attempts to formalize this process by having the primary class encapsulate a series of sub-classes that represent different approaches to solve the same problem.
GetSet hydrator class defined previously as a strategy. We will define a primary Application\Generic\Hydrator\Any class, which will then consume strategy classes in the Application\Generic\Hydrator\Strategy namespace, including GetSet, PublicProps, and Extending.namespace Application\Generic\Hydrator;
use InvalidArgumentException;
use Application\Generic\Hydrator\Strategy\ {
GetSet, PublicProps, Extending };
class Any
{
const STRATEGY_PUBLIC = 'PublicProps';
const STRATEGY_GET_SET = 'GetSet';
const STRATEGY_EXTEND = 'Extending';
protected $strategies;
public $chosen;$strategies property:public function __construct()
{
$this->strategies[self::STRATEGY_GET_SET] = new GetSet();
$this->strategies[self::STRATEGY_PUBLIC] = new PublicProps();
$this->strategies[self::STRATEGY_EXTEND] = new Extending();
}addStrategy() method that allows us to overwrite or add new strategies without having to recode the class:public function addStrategy($key, HydratorInterface $strategy)
{
$this->strategies[$key] = $strategy;
}hydrate() and extract() methods simply call those of the chosen strategy:public function hydrate(array $array, $object)
{
$strategy = $this->chooseStrategy($object);
$this->chosen = get_class($strategy);
return $strategy::hydrate($array, $object);
}
public function extract($object)
{
$strategy = $this->chooseStrategy($object);
$this->chosen = get_class($strategy);
return $strategy::extract($object);
}chooseStrategy(), which takes an object as an argument. We first perform some detective work by way of getting a list of class methods. We then scan through the list to see if we have any getXXX() or setXXX() methods. If so, we choose the GetSet hydrator as our chosen strategy:public function chooseStrategy($object)
{
$strategy = NULL;
$methodList = get_class_methods(get_class($object));
if (!empty($methodList) && is_array($methodList)) {
$getSet = FALSE;
foreach ($methodList as $method) {
if (preg_match('/^get|set.*$/i', $method)) {
$strategy = $this->strategies[self::STRATEGY_GET_SET];
break;
}
}
}chooseStrategy() method, if there are no getters or setters, we next use get_class_vars() to determine if there are any available properties. If so, we choose PublicProps as our hydrator:if (!$strategy) {
$vars = get_class_vars(get_class($object));
if (!empty($vars) && count($vars)) {
$strategy = $this->strategies[self::STRATEGY_PUBLIC];
}
}Extending hydrator, which returns a new class that simply extends the object class, thus making any public or protected properties available:if (!$strategy) {
$strategy = $this->strategies[self::STRATEGY_EXTEND];
}
return $strategy;
}
}Application\Generic\Hydrator\Strategy namespace.Application\Generic\Hydrator\Any:namespace Application\Generic\Hydrator\Strategy;
interface HydratorInterface
{
public static function hydrate(array $array, $object);
public static function extract($object);
}GetSet hydrator is exactly as defined in the previous two recipes, with the only addition being that it will implement the new interface:namespace Application\Generic\Hydrator\Strategy;
class GetSet implements HydratorInterface
{
public static function hydrate(array $array, $object)
{
// defined in the recipe:
// "Creating an Array to Object Hydrator"
}
public static function extract($object)
{
// defined in the recipe:
// "Building an Object to Array Hydrator"
}
}namespace Application\Generic\Hydrator\Strategy;
class PublicProps implements HydratorInterface
{
public static function hydrate(array $array, $object)
{
$propertyList= array_keys(
get_class_vars(get_class($object)));
foreach ($propertyList as $property) {
$object->$property = $array[$property] ?? NULL;
}
return $object;
}
public static function extract($object)
{
$array = array();
$propertyList = array_keys(
get_class_vars(get_class($object)));
foreach ($propertyList as $property) {
$array[$property] = $object->$property;
}
return $array;
}
}Extending, the Swiss Army knife of hydrators, extends the object class, thus providing direct access to properties. We further define magic getters and setters to provide access to properties.hydrate() method is the most difficult as we are assuming no getters or setters are defined, nor are the properties defined with a visibility level of public. Accordingly, we need to define a class that extends the class of the object to be hydrated. We do this by first defining a string that will be used as a template to build the new class:namespace Application\Generic\Hydrator\Strategy;
class Extending implements HydratorInterface
{
const UNDEFINED_PREFIX = 'undefined';
const TEMP_PREFIX = 'TEMP_';
const ERROR_EVAL = 'ERROR: unable to evaluate object';
public static function hydrate(array $array, $object)
{
$className = get_class($object);
$components = explode('\\', $className);
$realClass = array_pop($components);
$nameSpace = implode('\\', $components);
$tempClass = $realClass . self::TEMP_SUFFIX;
$template = 'namespace '
. $nameSpace . '{'
. 'class ' . $tempClass
. ' extends ' . $realClass . ' 'hydrate() method, we define a $values property, and a constructor that assigns the array to be hydrated into the object as an argument. We loop through the array of values, assigning values to properties. We also define a useful getArrayCopy() method, which returns these values if needed, as well as a magic __get() method to simulate direct property access:. '{ '
. ' protected $values; '
. ' public function __construct($array) '
. ' { $this->values = $array; '
. ' foreach ($array as $key => $value) '
. ' $this->$key = $value; '
. ' } '
. ' public function getArrayCopy() '
. ' { return $this->values; } '__get() method, which simulates direct variable access as if they were public:. ' public function __get($key) '
. ' { return $this->values[$key] ?? NULL; } '__call() method, which simulates getters and setters:. ' public function __call($method, $params) '
. ' { '
. ' preg_match("/^(get|set)(.*?)$/i", '
. ' $method, $matches); '
. ' $prefix = $matches[1] ?? ""; '
. ' $key = $matches[2] ?? ""; '
. ' $key = strtolower(substr($key, 0, 1)) '
. ' substr($key, 1); '
. ' if ($prefix == "get") { '
. ' return $this->values[$key] ?? NULL; '
. ' } else { '
. ' $this->values[$key] = $params[0]; '
. ' } '
. ' } '
. '} '
. '} // ends namespace ' . PHP_EOL. 'namespace { '
. 'function build($array) '
. '{ return new ' . $nameSpace . '\\'
. $tempClass . '($array); } '
. '} // ends global namespace '
. PHP_EOL;hydrate() method, we execute the completed template using eval(). We then run the build() method defined just at the end of the template. Note that as we are unsure of the namespace of the class to be populated, we define and call build() from the global namespace:try {
eval($template);
} catch (ParseError $e) {
error_log(__METHOD__ . ':' . $e->getMessage());
throw new Exception(self::ERROR_EVAL);
}
return \build($array);
}extract() method is much easier to define as our choices are extremely limited. Extending a class and populating it from an array using magic methods is easily accomplished. The reverse is not the case. If we were to extend the class, we would lose all the property values, as we are extending the class, not the object instance. Accordingly, our only option is to use a combination of getters and public properties:public static function extract($object)
{
$array = array();
$class = get_class($object);
$methodList = get_class_methods($class);
foreach ($methodList as $method) {
preg_match('/^(get)(.*?)$/i', $method, $matches);
$prefix = $matches[1] ?? '';
$key = $matches[2] ?? '';
$key = strtolower(substr($key, 0, 1))
. substr($key, 1);
if ($prefix == 'get') {
$array[$key] = $object->$method();
}
}
$propertyList= array_keys(get_class_vars($class));
foreach ($propertyList as $property) {
$array[$property] = $object->$property;
}
return $array;
}
}You can begin by defining three test classes with identical properties: firstName, lastName, and so on. The first, Person, should have protected properties along with getters and setters. The second, PublicPerson, will have public properties. The third, ProtectedPerson, has protected properties but no getters nor setters:
<?php
namespace Application\Entity;
class Person
{
protected $firstName = '';
protected $lastName = '';
protected $address = '';
protected $city = '';
protected $stateProv = '';
protected $postalCode = '';
protected $country = '';
public function getFirstName()
{
return $this->firstName;
}
public function setFirstName($firstName)
{
$this->firstName = $firstName;
}
// be sure to define remaining getters and setters
}
<?php
namespace Application\Entity;
class PublicPerson
{
private $id = NULL;
public $firstName = '';
public $lastName = '';
public $address = '';
public $city = '';
public $stateProv = '';
public $postalCode = '';
public $country = '';
}
<?php
namespace Application\Entity;
class ProtectedPerson
{
private $id = NULL;
protected $firstName = '';
protected $lastName = '';
protected $address = '';
protected $city = '';
protected $stateProv = '';
protected $postalCode = '';
protected $country = '';
}You can now define a calling program called chap_11_strategy_pattern.php, which sets up autoloading and uses the appropriate classes:
<?php
require __DIR__ . '/../Application/Autoload/Loader.php';
Application\Autoload\Loader::init(__DIR__ . '/..');
use Application\Entity\ { Person, PublicPerson, ProtectedPerson };
use Application\Generic\Hydrator\Any;
use Application\Generic\Hydrator\Strategy\ { GetSet, Extending, PublicProps };Next, create an instance of Person and run the setters to define values for properties:
$obj = new Person();
$obj->setFirstName('Li\'lAbner');
$obj->setLastName('Yokum');
$obj->setAddress('1 Dirt Street');
$obj->setCity('Dogpatch');
$obj->setStateProv('Kentucky');
$obj->setPostalCode('12345');
$obj->setCountry('USA');Next, create an instance of the Any hydrator, call extract(), and use var_dump() to view the results:
$hydrator = new Any(); $b = $hydrator->extract($obj); echo "\nChosen Strategy: " . $hydrator->chosen . "\n"; var_dump($b);
Observe, in the following output, that the GetSet strategy was chosen:
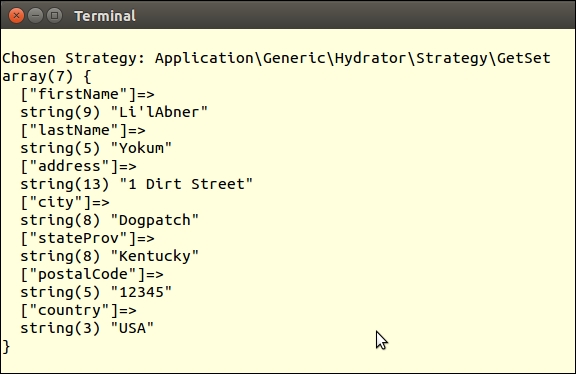
Next, you can define an array with the same values. Call hydrate() on the Any instance, and supply a new PublicPerson instance as an argument:
$a = [ 'firstName' => 'Li\'lAbner', 'lastName' => 'Yokum', 'address' => '1 Dirt Street', 'city' => 'Dogpatch', 'stateProv' => 'Kentucky', 'postalCode' => '12345', 'country' => 'USA' ]; $p = $hydrator->hydrate($a, new PublicPerson()); echo "\nChosen Strategy: " . $hydrator->chosen . "\n"; var_dump($p);
Here is the result. Note that the PublicProps strategy was chosen in this case:
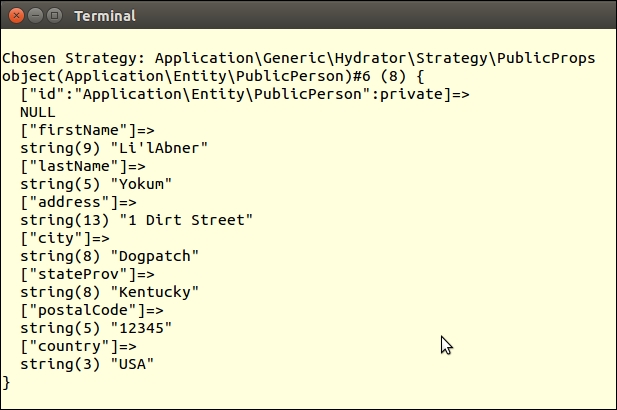
Finally, call hydrate() again, but this time supply an instance of ProtectedPerson as the object argument. We then call getFirstName() and getLastName() to test the magic getters. We also access first and last names as direct variable access:
$q = $hydrator->hydrate($a, new ProtectedPerson());
echo "\nChosen Strategy: " . $hydrator->chosen . "\n";
echo "Name: {$q->getFirstName()} {$q->getLastName()}\n";
echo "Name: {$q->firstName} {$q->lastName}\n";
var_dump($q);Here is the last output, showing that the Extending strategy was chosen. You'll also note that the instance is a new ProtectedPerson_TEMP class, and that the protected properties are fully populated:
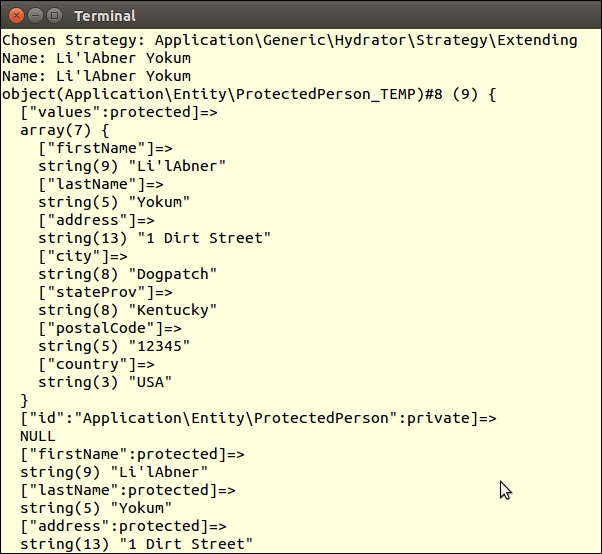
A mapper or data mapper works in much the same manner as a hydrator: converting data from one model, be it array or object, into another. A critical difference is that the hydrator is generic and does not need to have object property names pre-programmed, whereas the mapper is the opposite: it needs precise information on property names for both models. In this recipe we will demonstrate the use of a mapper to convert data from one database table into another.
Application\Database\Mapper\FieldConfig class, which contains mapping instructions for individual fields. We also define appropriate class constants:namespace Application\Database\Mapper;
use InvalidArgumentException;
class FieldConfig
{
const ERROR_SOURCE =
'ERROR: need to specify destTable and/or source';
const ERROR_DEST = 'ERROR: need to specify either '
. 'both destTable and destCol or neither';$key is used to identify the object. $source represents the column from the source database table. $destTable and $destCol represent the target database table and column. $default, if defined, contains a default value or a callback that produces the appropriate value:public $key; public $source; public $destTable; public $destCol; public $default;
$source or $destTable and $destCol are defined:public function __construct($source = NULL,
$destTable = NULL,
$destCol = NULL,
$default = NULL)
{
// generate key from source + destTable + destCol
$this->key = $source . '.' . $destTable . '.' . $destCol;
$this->source = $source;
$this->destTable = $destTable;
$this->destCol = $destCol;
$this->default = $default;
if (($destTable && !$destCol) ||
(!$destTable && $destCol)) {
throw new InvalidArgumentException(self::ERROR_DEST);
}
if (!$destTable && !$source) {
throw new InvalidArgumentException(
self::ERROR_SOURCE);
}
}public function getDefault()
{
if (is_callable($this->default)) {
return call_user_func($this->default, $row);
} else {
return $this->default;
}
}public function getKey()
{
return $this->key;
}
public function setKey($key)
{
$this->key = $key;
}
// etc.Application\Database\Mapper\Mapping mapping class, which accepts the name of the source and destination tables as well as an array of FieldConfig objects as an argument. You will see later that we allow the destination table property to be an array, as the mapping might be to two or more destination tables:namespace Application\Database\Mapper;
class Mapping
{
protected $sourceTable;
protected $destTable;
protected $fields;
protected $sourceCols;
protected $destCols;
public function __construct(
$sourceTable, $destTable, $fields = NULL)
{
$this->sourceTable = $sourceTable;
$this->destTable = $destTable;
$this->fields = $fields;
}public function getSourceTable()
{
return $this->sourceTable;
}
public function setSourceTable($sourceTable)
{
$this->sourceTable = $sourceTable;
}
// etc.FieldConfig instance:public function addField(FieldConfig $field)
{
$this->fields[$field->getKey()] = $field;
return $this;
}FieldConfig object. Accordingly, when this method is called, we loop through the array of FieldConfig objects and invoke getSource() on each one to obtain the source column name:public function getSourceColumns()
{
if (!$this->sourceCols) {
$this->sourceCols = array();
foreach ($this->getFields() as $field) {
if (!empty($field->getSource())) {
$this->sourceCols[$field->getKey()] =
$field->getSource();
}
}
}
return $this->sourceCols;
}getDestColumns(). The big difference compared to getting a list of source columns is that we only want the columns for one specific destination table, which is critical if there's more than one such table is defined. We do not need to check to see if $destCol is set as this is already taken care of in the constructor for FieldConfig:public function getDestColumns($table)
{
if (empty($this->destCols[$table])) {
foreach ($this->getFields() as $field) {
if ($field->getDestTable()) {
if ($field->getDestTable() == $table) {
$this->destCols[$table][$field->getKey()] =
$field->getDestCol();
}
}
}
}
return $this->destCols[$table];
}NULL, data from the source is used. Note that if further processing is required, the default should be defined as a callback.public function mapData($sourceData, $destTable)
{
$dest = array();
foreach ($this->fields as $field) {
if ($field->getDestTable() == $destTable) {
$dest[$field->getDestCol()] = NULL;
$default = $field->getDefault($sourceData);
if ($default) {
$dest[$field->getDestCol()] = $default;
} else {
$dest[$field->getDestCol()] =
$sourceData[$field->getSource()];
}
}
}
return $dest;
}
}PDO::prepare()):public function getSourceSelect($where = NULL)
{
$sql = 'SELECT '
. implode(',', $this->getSourceColumns()) . ' ';
$sql .= 'FROM ' . $this->getSourceTable() . ' ';
if ($where) {
$where = trim($where);
if (stripos($where, 'WHERE') !== FALSE) {
$sql .= $where;
} else {
$sql .= 'WHERE ' . $where;
}
}
return trim($sql);
}:":public function getDestInsert($table)
{
$sql = 'INSERT INTO ' . $table . ' ';
$sql .= '( '
. implode(',', $this->getDestColumns($table))
. ' ) ';
$sql .= ' VALUES ';
$sql .= '( :'
. implode(',:', $this->getDestColumns($table))
. ' ) ';
return trim($sql);
}Use the code shown in steps 1 to 5 to produce an Application\Database\Mapper\FieldConfig class. Place the code shown in steps 6 to 14 into a second Application\Database\Mapper\Mapping class.
Before defining a calling program that performs mapping, it's important to consider the source and destination database tables. The definition for the source table, prospects_11, is as follows:
CREATE TABLE `prospects_11` ( `id` int(11) NOT NULL AUTO_INCREMENT, `first_name` varchar(128) NOT NULL, `last_name` varchar(128) NOT NULL, `address` varchar(256) DEFAULT NULL, `city` varchar(64) DEFAULT NULL, `state_province` varchar(32) DEFAULT NULL, `postal_code` char(16) NOT NULL, `phone` varchar(16) NOT NULL, `country` char(2) NOT NULL, `email` varchar(250) NOT NULL, `status` char(8) DEFAULT NULL, `budget` decimal(10,2) DEFAULT NULL, `last_updated` datetime DEFAULT NULL, PRIMARY KEY (`id`), UNIQUE KEY `UNIQ_35730C06E7927C74` (`email`) ) ENGINE=InnoDB DEFAULT CHARSET=utf8;
In this example, you can use two destination tables, customer_11 and profile_11, between which there is a 1:1 relationship:
CREATE TABLE `customer_11` (
`id` int(11) NOT NULL AUTO_INCREMENT,
`name` varchar(256) CHARACTER SET latin1
COLLATE latin1_general_cs NOT NULL,
`balance` decimal(10,2) NOT NULL,
`email` varchar(250) NOT NULL,
`password` char(16) NOT NULL,
`status` int(10) unsigned NOT NULL DEFAULT '0',
`security_question` varchar(250) DEFAULT NULL,
`confirm_code` varchar(32) DEFAULT NULL,
`profile_id` int(11) DEFAULT NULL,
`level` char(3) NOT NULL,
PRIMARY KEY (`id`),
UNIQUE KEY `UNIQ_81398E09E7927C74` (`email`)
) ENGINE=InnoDB AUTO_INCREMENT=80 DEFAULT CHARSET=utf8 COMMENT='Customers';
CREATE TABLE `profile_11` (
`id` int(11) NOT NULL AUTO_INCREMENT,
`address` varchar(256) NOT NULL,
`city` varchar(64) NOT NULL,
`state_province` varchar(32) NOT NULL,
`postal_code` varchar(10) NOT NULL,
`country` varchar(3) NOT NULL,
`phone` varchar(16) NOT NULL,
`photo` varchar(128) NOT NULL,
`dob` datetime NOT NULL,
PRIMARY KEY (`id`)
) ENGINE=InnoDB AUTO_INCREMENT=80 DEFAULT CHARSET=utf8 COMMENT='Customers';You can now define a calling program called chap_11_mapper.php, which sets up autoloading and uses the two classes mentioned previously. You can also use the Connection class defined in Chapter 5, Interacting with a Database:
<?php
define('DB_CONFIG_FILE', '/../config/db.config.php');
define('DEFAULT_PHOTO', 'person.gif');
require __DIR__ . '/../Application/Autoload/Loader.php';
Application\Autoload\Loader::init(__DIR__ . '/..');
use Application\Database\Mapper\ { FieldConfig, Mapping };
use Application\Database\Connection;
$conn = new Connection(include __DIR__ . DB_CONFIG_FILE);For demonstration purposes, after having made sure the two destination tables exist, you can truncate both tables so that any data that appears is clean:
$conn->pdo->query('DELETE FROM customer_11');
$conn->pdo->query('DELETE FROM profile_11');You are now ready to build the Mapping instance and populate it with FieldConfig objects. Each FieldConfig object represents a mapping between source and destination. In the constructor, supply the name of the source table and the two destination tables in the form of an array:
$mapper = new Mapping('prospects_11', ['customer_11','profile_11']);You can start simply by mapping fields between prospects_11 and customer_11 where there are no defaults:
$mapper>addField(new FieldConfig('email','customer_11','email'))Note that addField() returns the current mapping instance so there is no need to keep specifying $mapper->addField(). This technique is referred to as the fluent interface.
The name field is tricky, as in the prospects_11 table it's represented by two columns, but only one column in the customer_11 table. Accordingly, you can add a callback as default for first_name to combine the two fields into one. You will also need to define an entry for last_name but where there is no destination mapping:
->addField(new FieldConfig('first_name','customer_11','name',
function ($row) { return trim(($row['first_name'] ?? '')
. ' ' . ($row['last_name'] ?? ''));}))
->addField(new FieldConfig('last_name'))The customer_11::status field can use the null coalesce operator (??) to determine if it's set or not:
->addField(new FieldConfig('status','customer_11','status',
function ($row) { return $row['status'] ?? 'Unknown'; }))The customer_11::level field is not represented in the source table, thus you can make a NULL entry for the source field, but make sure the destination table and column are set. Likewise, customer_11::password is not present in the source table. In this case, the callback uses the phone number as a temporary password:
->addField(new FieldConfig(NULL,'customer_11','level','BEG'))
->addField(new FieldConfig(NULL,'customer_11','password',
function ($row) { return $row['phone']; }))You can also set mappings from prospects_11 to profile_11 as follows. Note that as the source photo and date of birth columns are not present in prospects_11, you can set any appropriate default:
->addField(new FieldConfig('address','profile_11','address'))
->addField(new FieldConfig('city','profile_11','city'))
->addField(new FieldConfig('state_province','profile_11',
'state_province', function ($row) {
return $row['state_province'] ?? 'Unknown'; }))
->addField(new FieldConfig('postal_code','profile_11',
'postal_code'))
->addField(new FieldConfig('phone','profile_11','phone'))
->addField(new FieldConfig('country','profile_11','country'))
->addField(new FieldConfig(NULL,'profile_11','photo',
DEFAULT_PHOTO))
->addField(new FieldConfig(NULL,'profile_11','dob',
date('Y-m-d')));In order to establish the 1:1 relationship between the profile_11 and customer_11 tables, we set the values of customer_11::id, customer_11::profile_id and profile_11::id to the value of $row['id'] using a callback:
$idCallback = function ($row) { return $row['id']; };
$mapper->addField(new FieldConfig('id','customer_11','id',
$idCallback))
->addField(new FieldConfig(NULL,'customer_11','profile_id',
$idCallback))
->addField(new FieldConfig('id','profile_11','id',$idCallback));You can now call the appropriate methods to generate three SQL statements, one to read from the source table, and two to insert into the two destination tables:
$sourceSelect = $mapper->getSourceSelect();
$custInsert = $mapper->getDestInsert('customer_11');
$profileInsert = $mapper->getDestInsert('profile_11');These three statements can immediately be prepared for later execution:
$sourceStmt = $conn->pdo->prepare($sourceSelect); $custStmt = $conn->pdo->prepare($custInsert); $profileStmt = $conn->pdo->prepare($profileInsert);
We then execute the SELECT statement, which produces rows from the source table. In a loop we then generate INSERT data for each destination table, and execute the appropriate prepared statements:
$sourceStmt->execute();
while ($row = $sourceStmt->fetch(PDO::FETCH_ASSOC)) {
$custData = $mapper->mapData($row, 'customer_11');
$custStmt->execute($custData);
$profileData = $mapper->mapData($row, 'profile_11');
$profileStmt->execute($profileData);
echo "Processing: {$custData['name']}\n";
}Here are the three SQL statements produced:
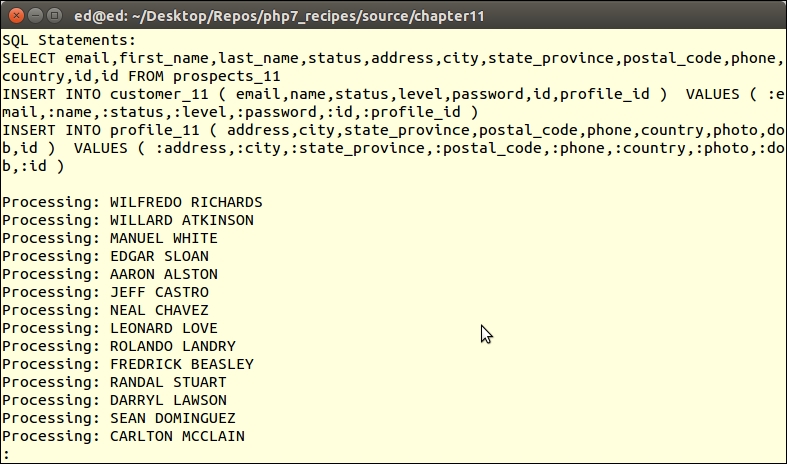
We can then view the data directly from the database using SQL JOIN to ensure the relationship has been maintained:
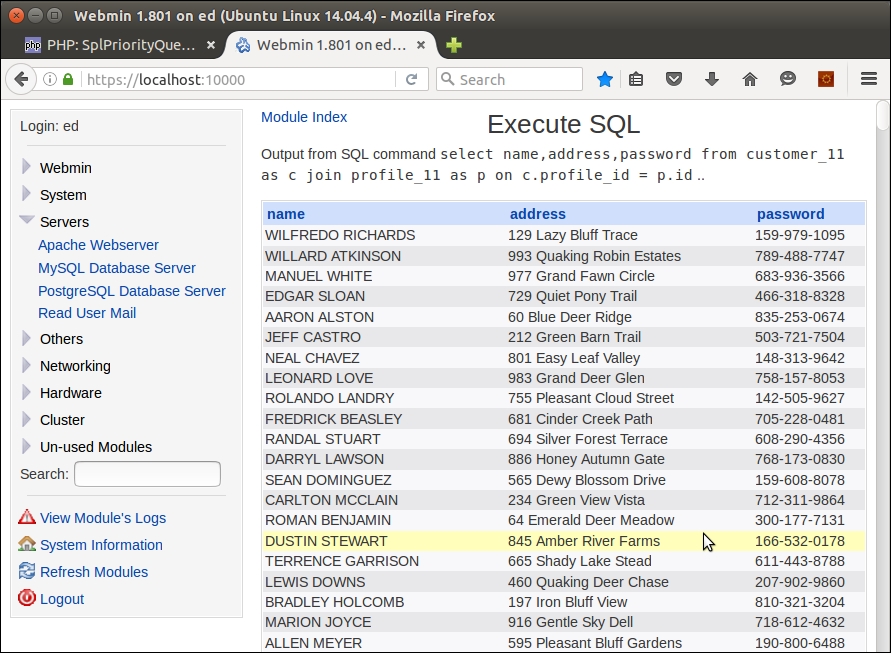
There are two primary techniques to achieve a relational mapping between objects. The first technique involves pre-loading the related child objects into the parent object. The advantage to this approach is that it is easy to implement, and all parent-child information is immediately available. The disadvantage is that large amounts of memory are potentially consumed, and the performance curve is skewed.
The second technique is to embed a secondary lookup into the parent object. In this latter approach, when you need to access the child objects, you would run a getter that would perform the secondary lookup. The advantage of this approach is that performance demands are spread out throughout the request cycle, and memory usage is (or can be) more easily managed. The disadvantage of this approach is that there are more queries generated, which means more work for the database server.
Let's have a look at two techniques to implement object-relational mapping.
First, we will discuss how to implement object relational mapping by pre-loading all child information into the parent class. For this illustration, we will use three related database tables, customer, purchases, and products:
Application\Entity\Customer class (defined in Chapter 5, Interacting with a Database, in the Defining entity classes to match database tables recipe) as a model to develop an Application\Entity\Purchase class. As before, we will use the database definition as the basis of the entity class definition. Here is the database definition for the purchases table:CREATE TABLE `purchases` ( `id` int(11) NOT NULL AUTO_INCREMENT, `transaction` varchar(8) NOT NULL, `date` datetime NOT NULL, `quantity` int(10) unsigned NOT NULL, `sale_price` decimal(8,2) NOT NULL, `customer_id` int(11) DEFAULT NULL, `product_id` int(11) DEFAULT NULL, PRIMARY KEY (`id`), KEY `IDX_C3F3` (`customer_id`), KEY `IDX_665A` (`product_id`), CONSTRAINT `FK_665A` FOREIGN KEY (`product_id`) REFERENCES `products` (`id`), CONSTRAINT `FK_C3F3` FOREIGN KEY (`customer_id`) REFERENCES `customer` (`id`) );
Application\Entity\Purchase might look. Note that not all getters and setters are shown:namespace Application\Entity;
class Purchase extends Base
{
const TABLE_NAME = 'purchases';
protected $transaction = '';
protected $date = NULL;
protected $quantity = 0;
protected $salePrice = 0.0;
protected $customerId = 0;
protected $productId = 0;
protected $mapping = [
'id' => 'id',
'transaction' => 'transaction',
'date' => 'date',
'quantity' => 'quantity',
'sale_price' => 'salePrice',
'customer_id' => 'customerId',
'product_id' => 'productId',
];
public function getTransaction() : string
{
return $this->transaction;
}
public function setTransaction($transaction)
{
$this->transaction = $transaction;
}
// NOTE: other getters / setters are not shown here
}Application\Entity\Product. Here is the database definition for the products table:CREATE TABLE `products` ( `id` int(11) NOT NULL AUTO_INCREMENT, `sku` varchar(16) DEFAULT NULL, `title` varchar(255) NOT NULL, `description` varchar(4096) DEFAULT NULL, `price` decimal(10,2) NOT NULL, `special` int(11) NOT NULL, `link` varchar(128) NOT NULL, PRIMARY KEY (`id`), UNIQUE KEY `UNIQ_38C4` (`sku`) );
Application\Entity\Product might look:namespace Application\Entity;
class Product extends Base
{
const TABLE_NAME = 'products';
protected $sku = '';
protected $title = '';
protected $description = '';
protected $price = 0.0;
protected $special = 0;
protected $link = '';
protected $mapping = [
'id' => 'id',
'sku' => 'sku',
'title' => 'title',
'description' => 'description',
'price' => 'price',
'special' => 'special',
'link' => 'link',
];
public function getSku() : string
{
return $this->sku;
}
public function setSku($sku)
{
$this->sku = $sku;
}
// NOTE: other getters / setters are not shown here
}Application\Entity\Customer parent class. For this section, we will assume the following relationships, illustrated in the following diagram: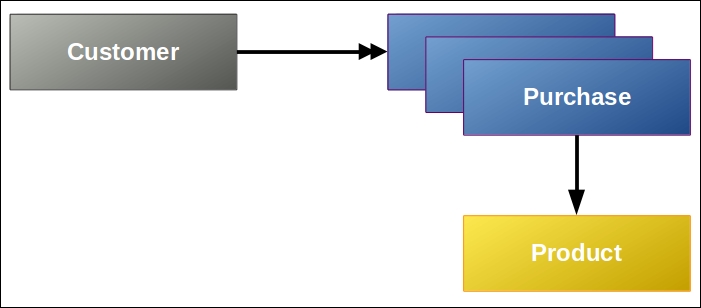
protected $purchases = array();
public function addPurchase($purchase)
{
$this->purchases[] = $purchase;
}
public function getPurchases()
{
return $this->purchases;
}Application\Entity\Purchase. In this case, there is a 1:1 relationship between a purchase and a product, so there's no need to process an array:protected $product = NULL;
public function getProduct()
{
return $this->product;
}
public function setProduct(Product $product)
{
$this->product = $product;
}Application\Database\CustomerService class described in Chapter 5, Interacting with a Database, in the Tying entity classes to RDBMS queries recipe. We can create a new Application\Database\CustomerOrmService_1 class, which extends Application\Database\CustomerService:namespace Application\Database;
use PDO;
use PDOException;
use Application\Entity\Customer;
use Application\Entity\Product;
use Application\Entity\Purchase;
class CustomerOrmService_1 extends CustomerService
{
// add methods here
}Product and Purchase entities, into the core customer entity. This method performs a lookup in the form of a JOIN. This is possible because there is a 1:1 relationship between purchase and product. Because the id column has the same name in both tables, we need to add the purchase ID column as an alias. We then loop through the results, creating Product and Purchase entities. After overriding the ID, we can then embed the Product entity into the Purchase entity, and then add the Purchase entity to the array in the Customer entity:protected function fetchPurchasesForCustomer(Customer $cust)
{
$sql = 'SELECT u.*,r.*,u.id AS purch_id '
. 'FROM purchases AS u '
. 'JOIN products AS r '
. 'ON r.id = u.product_id '
. 'WHERE u.customer_id = :id '
. 'ORDER BY u.date';
$stmt = $this->connection->pdo->prepare($sql);
$stmt->execute(['id' => $cust->getId()]);
while ($result = $stmt->fetch(PDO::FETCH_ASSOC)) {
$product = Product::arrayToEntity($result, new Product());
$product->setId($result['product_id']);
$purch = Purchase::arrayToEntity($result, new Purchase());
$purch->setId($result['purch_id']);
$purch->setProduct($product);
$cust->addPurchase($purch);
}
return $cust;
}fetchById() method. This block of code needs to not only get the original Customer entity, but needs to look up and embed Product and Purchase entities. We can call the new fetchByIdAndEmbedPurchases() method and accept a customer ID as an argument:public function fetchByIdAndEmbedPurchases($id)
{
return $this->fetchPurchasesForCustomer(
$this->fetchById($id));
}Now we will cover embedding secondary lookups into the related entity classes. We will continue to use the same illustration as above, using the entity classes defined that correspond to three related database tables, customer, purchases, and products:
Application\Entity\Customer class that adds a single entry to the purchases property. Instead of an array of Purchase entities, we will be supplying an anonymous function:public function setPurchases(Closure $purchaseLookup)
{
$this->purchases = $purchaseLookup;
}Application\Database\CustomerOrmService_1 class, and call it Application\Database\CustomerOrmService_2:namespace Application\Database;
use PDO;
use PDOException;
use Application\Entity\Customer;
use Application\Entity\Product;
use Application\Entity\Purchase;
class CustomerOrmService_2 extends CustomerService
{
// code
}fetchPurchaseById() method, which looks up a single purchase based on its ID and produces a Purchase entity. Because we will ultimately be making a series of repetitive requests for single purchases in this approach, we can regain database efficiency by working off the same prepared statement, in this case, a property called $purchPreparedStmt:public function fetchPurchaseById($purchId)
{
if (!$this->purchPreparedStmt) {
$sql = 'SELECT * FROM purchases WHERE id = :id';
$this->purchPreparedStmt =
$this->connection->pdo->prepare($sql);
}
$this->purchPreparedStmt->execute(['id' => $purchId]);
$result = $this->purchPreparedStmt->fetch(PDO::FETCH_ASSOC);
return Purchase::arrayToEntity($result, new Purchase());
}fetchProductById() method that looks up a single product based on its ID and produces a Product entity. Given that a customer may have purchased the same product several times, we can introduce an additional level of efficiency by storing acquired product entities in a $products array. In addition, as with purchases, we can perform lookups on the same prepared statement:public function fetchProductById($prodId)
{
if (!isset($this->products[$prodId])) {
if (!$this->prodPreparedStmt) {
$sql = 'SELECT * FROM products WHERE id = :id';
$this->prodPreparedStmt =
$this->connection->pdo->prepare($sql);
}
$this->prodPreparedStmt->execute(['id' => $prodId]);
$result = $this->prodPreparedStmt
->fetch(PDO::FETCH_ASSOC);
$this->products[$prodId] =
Product::arrayToEntity($result, new Product());
}
return $this->products[$prodId];
}fetchPurchasesForCustomer() method to have it embed an anonymous function that makes calls to both fetchPurchaseById() and fetchProductById(), and then assigns the resulting product entity to the newly found purchase entity. In this example, we do an initial lookup that just returns the IDs of all purchases for this customer. We then embed a sequence of anonymous functions in the Customer::$purchases property, storing the purchase ID as the array key, and the anonymous function as its value:public function fetchPurchasesForCustomer(Customer $cust)
{
$sql = 'SELECT id '
. 'FROM purchases AS u '
. 'WHERE u.customer_id = :id '
. 'ORDER BY u.date';
$stmt = $this->connection->pdo->prepare($sql);
$stmt->execute(['id' => $cust->getId()]);
while ($result = $stmt->fetch(PDO::FETCH_ASSOC)) {
$cust->addPurchaseLookup(
$result['id'],
function ($purchId, $service) {
$purchase = $service->fetchPurchaseById($purchId);
$product = $service->fetchProductById(
$purchase->getProductId());
$purchase->setProduct($product);
return $purchase; }
);
}
return $cust;
}Define the following classes based on the steps from this recipe as follows:
|
Class |
Technique #1 steps |
|---|---|
|
|
1 - 2, 7 |
|
|
3 - 4 |
|
|
6, 16, + described in Chapter 5, Interacting with a Database. |
|
|
8 - 10 |
The second approach to this would be as follows:
|
Class |
Technique #2 steps |
|---|---|
|
|
2 |
|
|
3 - 6 |
In order to implement approach #1, where entities are embedded, define a calling program called chap_11_orm_embedded.php, which sets up autoloading and uses the appropriate classes:
<?php
define('DB_CONFIG_FILE', '/../config/db.config.php');
require __DIR__ . '/../Application/Autoload/Loader.php';
Application\Autoload\Loader::init(__DIR__ . '/..');
use Application\Database\Connection;
use Application\Database\CustomerOrmService_1;Next, create an instance of the service, and look up a customer using a random ID:
$service = new CustomerOrmService_1(new Connection(include __DIR__ . DB_CONFIG_FILE)); $id = rand(1,79); $cust = $service->fetchByIdAndEmbedPurchases($id);
In the view logic, you will have acquired a fully populated Customer entity by way of the fetchByIdAndEmbedPurchases() method. Now all you need to do is to call the right getters to display information:
<!-- Customer Info -->
<h1><?= $cust->getname() ?></h1>
<div class="row">
<div class="left">Balance</div><div class="right">
<?= $cust->getBalance(); ?></div>
</div>
<!-- etc. -->The logic needed to display purchase information would then look something like the following HTML. Notice that Customer::getPurchases() returns an array of Purchase entities. To get product information from the Purchase entity, inside the loop, call Purchase::getProduct(), which produces a Product entity. You can then call any of the Product getters, in this example, Product::getTitle():
<!-- Purchases Info --> <table> <?php foreach ($cust->getPurchases() as $purchase) : ?> <tr> <td><?= $purchase->getTransaction() ?></td> <td><?= $purchase->getDate() ?></td> <td><?= $purchase->getQuantity() ?></td> <td><?= $purchase->getSalePrice() ?></td> <td><?= $purchase->getProduct()->getTitle() ?></td> </tr> <?php endforeach; ?> </table>
Turning your attention to the second approach, which uses secondary lookups, define a calling program called chap_11_orm_secondary_lookups.php, which sets up autoloading and uses the appropriate classes:
<?php
define('DB_CONFIG_FILE', '/../config/db.config.php');
require __DIR__ . '/../Application/Autoload/Loader.php';
Application\Autoload\Loader::init(__DIR__ . '/..');
use Application\Database\Connection;
use Application\Database\CustomerOrmService_2;Next, create an instance of the service, and look up a customer using a random ID:
$service = new CustomerOrmService_2(new Connection(include __DIR__ . DB_CONFIG_FILE)); $id = rand(1,79);
You can now retrieve an Application\Entity\Customer instance and call fetchPurchasesForCustomer() for this customer, which embeds the sequence of anonymous functions:
$cust = $service->fetchById($id); $cust = $service->fetchPurchasesForCustomer($cust);
The view logic for displaying core customer information remains the same as described previously. The logic needed to display purchase information would then look something like the following HTML code snippet. Notice that Customer::getPurchases() returns an array of anonymous functions. Each function call returns one specific purchase and related products:
<table> <?php foreach($cust->getPurchases() as $purchId => $function) : ?> <tr> <?php $purchase = $function($purchId, $service); ?> <td><?= $purchase->getTransaction() ?></td> <td><?= $purchase->getDate() ?></td> <td><?= $purchase->getQuantity() ?></td> <td><?= $purchase->getSalePrice() ?></td> <td><?= $purchase->getProduct()->getTitle() ?></td> </tr> <?php endforeach; ?> </table>
Here is an example of the output:

Best practice
Although each iteration of the loop represents two independent database queries (one for purchase, one for product), efficiency is retained by the use of prepared statements. Two statements are prepared in advance: one that looks up a specific purchase, and one that looks up a specific product. These prepared statements are then executed multiple times. Also, each product retrieval is independently stored in an array, resulting in even greater efficiency.
Probably the best example of a library that implements object-relational mapping is Doctrine. Doctrine uses an embedded approach that its documentation refers to as a proxy. For more information, please refer to http://www.doctrine-project.org/projects/orm.html.
You might also consider reviewing a training video on Learning Doctrine, available from O'Reilly Media at http://shop.oreilly.com/product/0636920041382.do. (Disclaimer: this is a shameless plug by the author of both this book and this video!)
The Publish/Subscribe (Pub/Sub) design pattern often forms the basis of software event-driven programming. This methodology allows asynchronous communications between different software applications, or different software modules within a single application. The purpose of the pattern is to allow a method or function to publish a signal when an action of significance has taken place. One or more classes would then subscribe and take action if a certain signal has been published.
Example of such actions are when the database is modified, or when a user has logged in. Another common use for this design pattern is when an application delivers news feeds. If an urgent news item has been posted, the application would publish this fact, allowing client subscribers to refresh their news listings.
Application\PubSub\Publisher. You'll notice that we are making use of two useful Standard PHP Library (SPL) interfaces, SplSubject and SplObserver:namespace Application\PubSub;
use SplSubject;
use SplObserver;
class Publisher implements SplSubject
{
// code
}protected $name; protected $data; protected $linked; protected $subscribers;
__toString() in case we need quick access to the name of this publisher:public function __construct($name)
{
$this->name = $name;
$this->data = array();
$this->subscribers = array();
$this->linked = array();
}
public function __toString()
{
return $this->name;
}attach(), which is specified in the SplSubject interface. We accept an SplObserver instance as an argument. Note that we need to add entries to both the $subscribers and $linked properties. $linked is then sorted by value, represented by the priority, using arsort(), which sorts in reverse and maintains the key:public function attach(SplObserver $subscriber)
{
$this->subscribers[$subscriber->getKey()] = $subscriber;
$this->linked[$subscriber->getKey()] =
$subscriber->getPriority();
arsort($this->linked);
}detach(), which removes the subscriber from the list:public function detach(SplObserver $subscriber)
{
unset($this->subscribers[$subscriber->getKey()]);
unset($this->linked[$subscriber->getKey()]);
}notify(), which calls update() on all the subscribers. Note that we loop through the linked list to ensure the subscribers are called in order of priority:public function notify()
{
foreach ($this->linked as $key => $value)
{
$this->subscribers[$key]->update($this);
}
}public function getName()
{
return $this->name;
}
public function setName($name)
{
$this->name = $name;
}notify() is invoked:public function setDataByKey($key, $value)
{
$this->data[$key] = $value;
}Application\PubSub\Subscriber. Typically, we would define multiple subscribers for each publisher. In this case, we implement the SplObserver interface:namespace Application\PubSub;
use SplSubject;
use SplObserver;
class Subscriber implements SplObserver
{
// code
}md5() and date/time information, combined with a random number. The constructor initializes the properties as follows. The actual logical functionality performed by the subscriber is in the form of a callback:protected $key;
protected $name;
protected $priority;
protected $callback;
public function __construct(
string $name, callable $callback, $priority = 0)
{
$this->key = md5(date('YmdHis') . rand(0,9999));
$this->name = $name;
$this->callback = $callback;
$this->priority = $priority;
}update() function is called when notifiy() on the publisher is invoked. We pass a publisher instance as an argument, and call the callback defined for this subscriber:public function update(SplSubject $publisher)
{
call_user_func($this->callback, $publisher);
}public function getKey()
{
return $this->key;
}
public function setKey($key)
{
$this->key = $key;
}
// other getters and setters not shownFor the purposes of this illustration, define a calling program called chap_11_pub_sub_simple_example.php, which sets up autoloading and uses the appropriate classes:
<?php
require __DIR__ . '/../Application/Autoload/Loader.php';
Application\Autoload\Loader::init(__DIR__ . '/..');
use Application\PubSub\ { Publisher, Subscriber };Next, create a publisher instance and assign data:
$pub = new Publisher('test');
$pub->setDataByKey('1', 'AAA');
$pub->setDataByKey('2', 'BBB');
$pub->setDataByKey('3', 'CCC');
$pub->setDataByKey('4', 'DDD');Now you can create test subscribers that read data from the publisher and echo the results. The first parameter is the name, the second the callback, and the last is the priority:
$sub1 = new Subscriber(
'1',
function ($pub) {
echo '1:' . $pub->getData()[1] . PHP_EOL;
},
10
);
$sub2 = new Subscriber(
'2',
function ($pub) {
echo '2:' . $pub->getData()[2] . PHP_EOL;
},
20
);
$sub3 = new Subscriber(
'3',
function ($pub) {
echo '3:' . $pub->getData()[3] . PHP_EOL;
},
99
);For test purposes, attach the subscribers out of order, and call notify() twice:
$pub->attach($sub2); $pub->attach($sub1); $pub->attach($sub3); $pub->notify(); $pub->notify();
Next, define and attach another subscriber that looks at the data for subscriber 1 and exits if it's not empty:
$sub4 = new Subscriber(
'4',
function ($pub) {
echo '4:' . $pub->getData()[4] . PHP_EOL;
if (!empty($pub->getData()[1]))
die('1 is set ... halting execution');
},
25
);
$pub->attach($sub4);
$pub->notify();Here is the output. Note that the output is in order of priority (where higher priority goes first), and that the second block of output is interrupted:
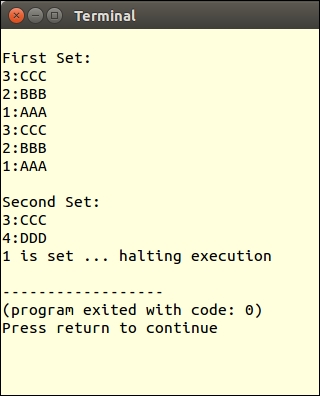
A closely related software design pattern is Observer. The mechanism is similar but the generally agreed difference is that Observer operates in a synchronous manner, where all observer methods are called when a signal (often also referred to as message or event) is received. The Pub/Sub pattern, in contrast, operates asynchronously, typically using a message queue. Another difference is that in the Pub/Sub pattern, publishers do not need to be aware of subscribers.
For a good discussion on the difference between the Observer and Pub/Sub patterns, refer to the article at http://stackoverflow.com/questions/15594905/difference-between-observer-pub-sub-and-data-binding.
In this chapter, we will cover the following topics:
$_POST data$_POST datamcryptIn this chapter, we will show you how to set up a simple yet effective mechanism for filtering and validating a block of post data. Then, we will cover how to protect your PHP sessions from potential session hijacking and other forms of attack. The next recipe shows how to protect forms from Cross Site Request Forgery (CSRF) attacks using a randomly generated token. The recipe on password generation shows you how to incorporate PHP 7 true randomization to generate secure passwords. We then show you two forms of CAPTCHA: one that is text based, the other using a distorted image. Finally, there is a recipe that covers strong encryption without using the discredited and soon-to-be-deprecated mcrypt extension.
The process of filtering data can encompass any or all of the following:
<script> tags)")Encryption is covered in the last recipe of this chapter. Otherwise, we will present a basic mechanism that can be used to filter $_POST data arriving following form submission.
$_POST. Also, perhaps more importantly, you will need to be aware of the restrictions imposed by the database table in which the form data will presumably be stored. As an example, have a look at the database structure for the prospects table:COLUMN TYPE NULL DEFAULT first_name varchar(128) No None NULL last_name varchar(128) No None NULL address varchar(256) Yes None NULL city varchar(64) Yes None NULL state_province varchar(32) Yes None NULL postal_code char(16) No None NULL phone varchar(16) No None NULL country char(2) No None NULL email varchar(250) No None NULL status char(8) Yes None NULL budget decimal(10,2) Yes None NULL last_updated datetime Yes None NULL
trim() function. All of the character data has length limits according to the database structure. Accordingly, you might consider using substr() to ensure the length is not exceeded. If you wanted to remove non-alphabetical characters, you might consider using preg_replace() with the appropriate pattern.prospects table:$filter = [
'trim' => function ($item) { return trim($item); },
'float' => function ($item) { return (float) $item; },
'upper' => function ($item) { return strtoupper($item); },
'email' => function ($item) {
return filter_var($item, FILTER_SANITIZE_EMAIL); },
'alpha' => function ($item) {
return preg_replace('/[^A-Za-z]/', '', $item); },
'alnum' => function ($item) {
return preg_replace('/[^0-9A-Za-z ]/', '', $item); },
'length' => function ($item, $length) {
return substr($item, 0, $length); },
'stripTags' => function ($item) { return strip_tags($item); },
];$_POST. In this array, we specify the key in the $filter array, along with any parameters. Note the first key, *. We will use that as a wildcard to be applied to all fields:$assignments = [
'*' => ['trim' => NULL, 'stripTags' => NULL],
'first_name' => ['length' => 32, 'alnum' => NULL],
'last_name' => ['length' => 32, 'alnum' => NULL],
'address' => ['length' => 64, 'alnum' => NULL],
'city' => ['length' => 32],
'state_province'=> ['length' => 20],
'postal_code' => ['length' => 12, 'alnum' => NULL],
'phone' => ['length' => 12],
'country' => ['length' => 2, 'alpha' => NULL,
'upper' => NULL],
'email' => ['length' => 128, 'email' => NULL],
'budget' => ['float' => NULL],
];$_POST) and apply the callbacks in turn. We first run all callbacks assigned to the wildcard (*) key.$data will be filtered:foreach ($data as $field => $item) {
foreach ($assignments['*'] as $key => $option) {
$item = $filter[$key]($item, $option);
}
foreach ($assignments[$field] as $key => $option) {
$item = $filter[$key]($item, $option);
}
}Place the code shown in steps 4 through 6 into a file called chap_12_post_data_filtering_basic.php. You will also need to define an array to simulate data that would be present in $_POST. In this case, you could define two arrays, one with good data, and one with bad data:
$testData = [
'goodData' => [
'first_name' => 'Doug',
'last_name' => 'Bierer',
'address' => '123 Main Street',
'city' => 'San Francisco',
'state_province'=> 'California',
'postal_code' => '94101',
'phone' => '+1 415-555-1212',
'country' => 'US',
'email' => 'doug@unlikelysource.com',
'budget' => '123.45',
],
'badData' => [
'first_name' => 'This+Name<script>bad tag</script>Valid!',
'last_name' => 'ThisLastNameIsWayTooLongAbcdefghijklmnopqrstuvwxyz0123456789Abcdefghijklmnopqrstuvwxyz0123456789Abcdefghijklmnopqrstuvwxyz0123456789Abcdefghijklmnopqrstuvwxyz0123456789',
//'address' => '', // missing
'city' => 'ThisCityNameIsTooLong012345678901234567890123456789012345678901234567890123456789 ',
//'state_province'=> '', // missing
'postal_code' => '!"£$%^Non Alpha Chars',
'phone' => ' 12345 ',
'country' => '12345',
'email' => 'this.is@not@an.email',
'budget' => 'XXX',
]
];Finally, you will need to loop through the filter assignments, presenting the good and bad data:
foreach ($testData as $data) {
foreach ($data as $field => $item) {
foreach ($assignments['*'] as $key => $option) {
$item = $filter[$key]($item, $option);
}
foreach ($assignments[$field] as $key => $option) {
$item = $filter[$key]($item, $option);
}
printf("%16s : %s\n", $field, $item);
}
}Here's how the output might appear for this example:
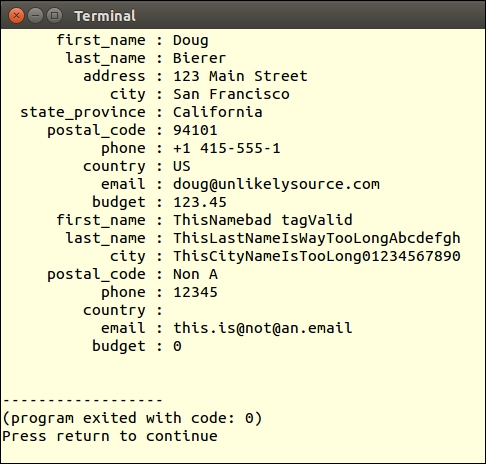
Note that the names were truncated and tags were removed. You will also note that although the e-mail address was filtered, it is still not a valid address. It's important to note that for proper treatment of data, it might be necessary to validate as well as to filter.
In Chapter 6, Building Scalable Websites, the recipe entitled Chaining $_POST filters, discusses how to incorporate the basic filtering concepts covered here into a comprehensive filter chaining mechanism.
The primary difference between filtering and validation is that the latter does not alter the original data. Another difference is in intent. The purpose of validation is to confirm that the data matches certain criteria established according to the needs of your customer.
strlen() to confirm that the length of the data submitted is less than or equal to 128 characters. Likewise, you could use ctype_alnum() to confirm that the data only contains letters and numbers, as appropriate.prospects table. We can now group the set of desired PHP functions into a single array of callbacks. Here is an example based on the validation needs for the form data, which will eventually be stored in the prospects table:$validator = [
'email' => [
'callback' => function ($item) {
return filter_var($item, FILTER_VALIDATE_EMAIL); },
'message' => 'Invalid email address'],
'alpha' => [
'callback' => function ($item) {
return ctype_alpha(str_replace(' ', '', $item)); },
'message' => 'Data contains non-alpha characters'],
'alnum' => [
'callback' => function ($item) {
return ctype_alnum(str_replace(' ', '', $item)); },
'message' => 'Data contains characters which are '
. 'not letters or numbers'],
'digits' => [
'callback' => function ($item) {
return preg_match('/[^0-9.]/', $item); },
'message' => 'Data contains characters which '
. 'are not numbers'],
'length' => [
'callback' => function ($item, $length) {
return strlen($item) <= $length; },
'message' => 'Item has too many characters'],
'upper' => [
'callback' => function ($item) {
return $item == strtoupper($item); },
'message' => 'Item is not upper case'],
'phone' => [
'callback' => function ($item) {
return preg_match('/[^0-9() -+]/', $item); },
'message' => 'Item is not a valid phone number'],
];$_POST. In this array, we specify the key in the $validator array, along with any parameters:$assignments = [
'first_name' => ['length' => 32, 'alpha' => NULL],
'last_name' => ['length' => 32, 'alpha' => NULL],
'address' => ['length' => 64, 'alnum' => NULL],
'city' => ['length' => 32, 'alnum' => NULL],
'state_province'=> ['length' => 20, 'alpha' => NULL],
'postal_code' => ['length' => 12, 'alnum' => NULL],
'phone' => ['length' => 12, 'phone' => NULL],
'country' => ['length' => 2, 'alpha' => NULL,
'upper' => NULL],
'email' => ['length' => 128, 'email' => NULL],
'budget' => ['digits' => NULL],
];foreach() loops to iterate through the block of data one field at a time. For each field, we loop through the callbacks assigned to that field:foreach ($data as $field => $item) {
echo 'Processing: ' . $field . PHP_EOL;
foreach ($assignments[$field] as $key => $option) {
if ($validator[$key]['callback']($item, $option)) {
$message = 'OK';
} else {
$message = $validator[$key]['message'];
}
printf('%8s : %s' . PHP_EOL, $key, $message);
}
}Instead of echoing the output directly, as shown, you might log the validation success/failure to be presented to the reviewer at a later time. Also, as shown in Chapter 6, Building Scalable Websites, you can work the validation mechanism into the form, displaying validation messages next to their matching form elements.
Place the code shown in steps 3 through 5 into a file called chap_12_post_data_validation_basic.php. You will also need to define an array of data that simulates data that would be present in $_POST. In this case, you use the two arrays mentioned in the preceding recipe, one with good data, and one with bad data. The final output should look something like this:
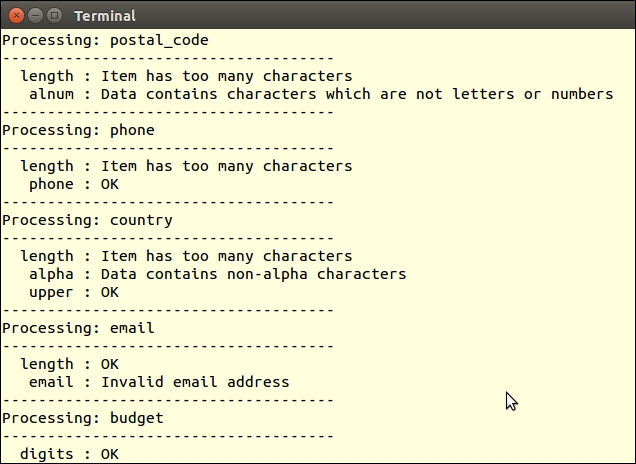
The PHP session mechanism is quite simple. Once the session is started using session_start() or the php.ini session.autostart setting, the PHP engine generates a unique token that is, by default, conveyed to the user by way of a cookie. On subsequent requests, while the session is still considered active, the user's browser (or equivalent) presents the session identifier, again usually by way of a cookie, for inspection. The PHP engine then uses this identifier to locate the appropriate file on the server, populating $_SESSION with the stored information. There are tremendous security concerns when the session identifier is the sole means of identifying a returning website visitor. In this recipe, we will present several techniques that will help you to safeguard your sessions, which, in turn, will vastly improve the overall security of the website.
loggedIn flag in $_SESSION:session_start();
$loggedIn = $_SESSION['isLoggedIn'] ?? FALSE;
if (isset($_POST['login'])) {
if ($_POST['username'] == // username lookup
&& $_POST['password'] == // password lookup) {
$loggedIn = TRUE;
$_SESSION['isLoggedIn'] = TRUE;
}
}$_SESSION['isLoggedIn'] is set to TRUE:<br>Secret Info <br><?php if ($loggedIn) echo // secret information; ?>
PHPSESSID cookie to the illegally obtained one, and they are now viewed by your application as a valid user.PHPSESSID is valid is to use session_regenerate_id(). This very simple command generates a new session identifier, invalidates the old one, maintains session data intact, and has a minimal impact on performance. This command can only be executed after the session has started:session_start(); session_regenerate_id();
session_destroy(), but also to unset $_SESSION data and to expire the session cookie:session_unset();
session_destroy();
setcookie('PHPSESSID', 0, time() - 3600);$remotePrint = md5($_SERVER['REMOTE_ADDR']
. $_SERVER['HTTP_USER_AGENT']
. $_SERVER['HTTP_ACCEPT_LANGUAGE']);
$printsMatch = file_exists(THUMB_PRINT_DIR . $remotePrint);
if ($loggedIn && !$printsMatch) {
$info = 'SESSION INVALID!!!';
error_log('Session Invalid: ' . date('Y-m-d H:i:s'), 0);
// take appropriate action
}To demonstrate how a session is vulnerable, code a simple login script that sets a $_SESSION['isLoggedIn'] flag upon successful login. You could call the file chap_12_session_hijack.php:
session_start();
$loggedUser = $_SESSION['loggedUser'] ?? '';
$loggedIn = $_SESSION['isLoggedIn'] ?? FALSE;
$username = 'test';
$password = 'password';
$info = 'You Can Now See Super Secret Information!!!';
if (isset($_POST['login'])) {
if ($_POST['username'] == $username
&& $_POST['password'] == $password) {
$loggedIn = TRUE;
$_SESSION['isLoggedIn'] = TRUE;
$_SESSION['loggedUser'] = $username;
$loggedUser = $username;
}
} elseif (isset($_POST['logout'])) {
session_destroy();
}You can then add code that displays a simple login form. To test for session vulnerability, follow this procedure using the chap_12_session_hijack.php file we just created:
php -S localhost:8080 command.http://localhost:8080/<filename>.test with a password as password.PHPSESSID cookie.PHPSESSID.For illustration, we are also showing the value of $_COOKIE and $_SESSION, shown in the following screenshot using the Vivaldi browser:
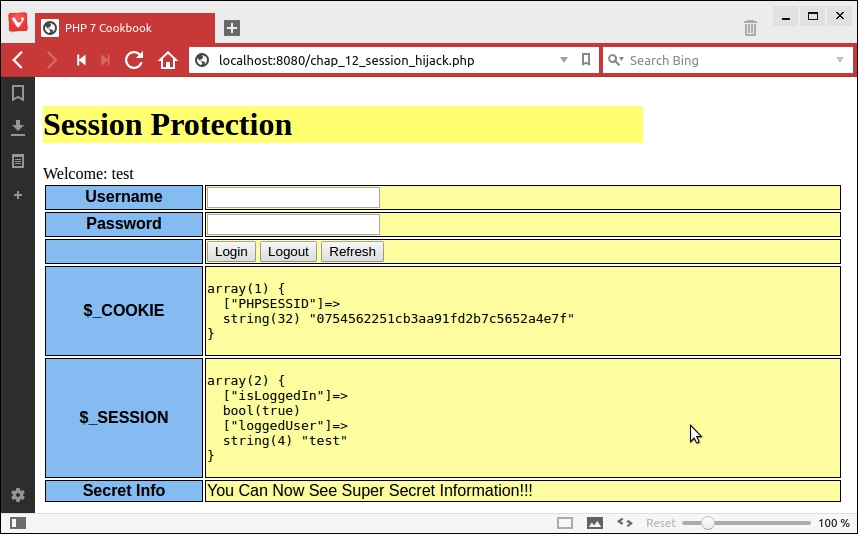
We then copy the value of PHPSESSID, open a Firefox browser, and use a tool called Tamper Data to modify the value of the cookie:
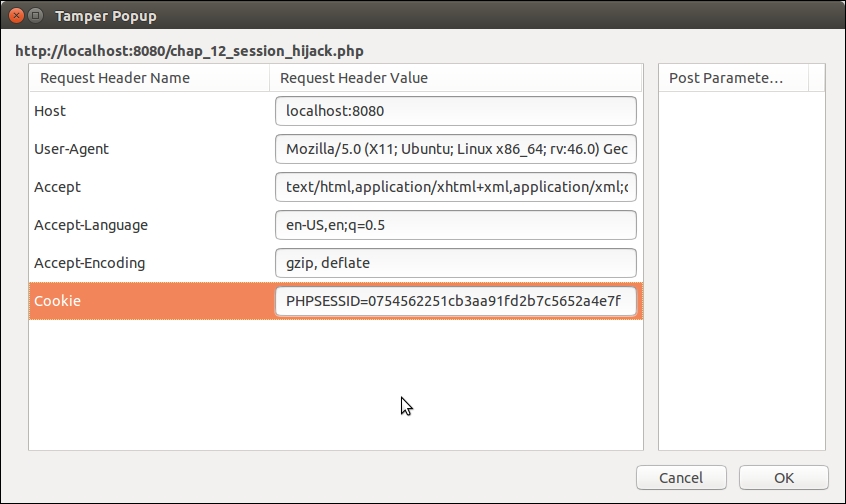
You can see in the next screenshot that we are now an authenticated user without entering the username or password:
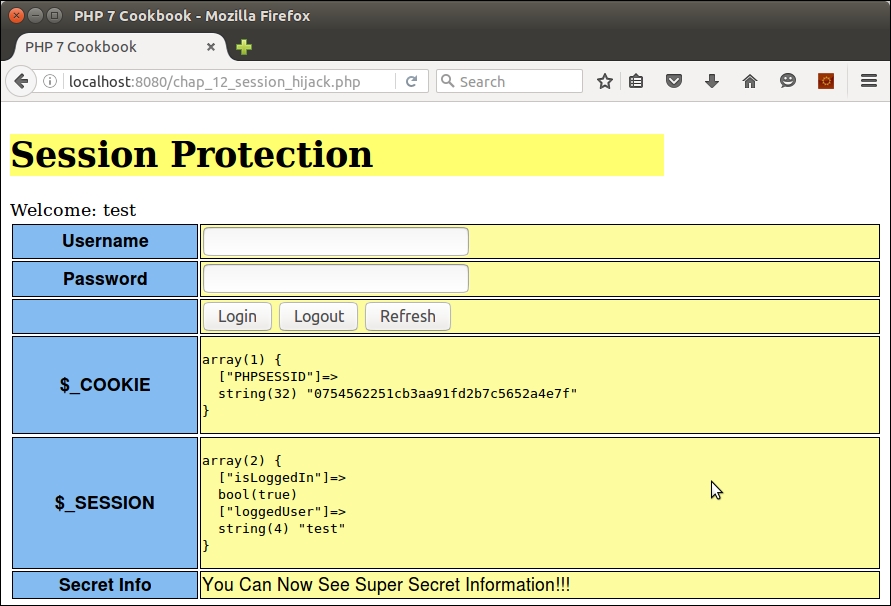
You can now implement the changes discussed in the preceding steps. Copy the file created previously to chap_12_session_protected.php. Now go ahead and regenerate the session ID:
<?php
define('THUMB_PRINT_DIR', __DIR__ . '/../data/');
session_start();
session_regenerate_id();Next, initialize variables and determine the logged in status (as before):
$username = 'test'; $password = 'password'; $info = 'You Can Now See Super Secret Information!!!'; $loggedIn = $_SESSION['isLoggedIn'] ?? FALSE; $loggedUser = $_SESSION['user'] ?? 'guest';
You can add a session thumb-print using the remote address, user agent, and language settings:
$remotePrint = md5($_SERVER['REMOTE_ADDR'] . $_SERVER['HTTP_USER_AGENT'] . $_SERVER['HTTP_ACCEPT_LANGUAGE']); $printsMatch = file_exists(THUMB_PRINT_DIR . $remotePrint);
If the login is successful, we store thumb-print info and login status in the session:
if (isset($_POST['login'])) {
if ($_POST['username'] == $username
&& $_POST['password'] == $password) {
$loggedIn = TRUE;
$_SESSION['user'] = strip_tags($username);
$_SESSION['isLoggedIn'] = TRUE;
file_put_contents(
THUMB_PRINT_DIR . $remotePrint, $remotePrint);
}You can also check for the logout option and implement a proper logout procedure: unset $_SESSION variables, invalidate the session, and expire the cookie. You can also remove the thumb-print file and implement a redirect:
} elseif (isset($_POST['logout'])) {
session_unset();
session_destroy();
setcookie('PHPSESSID', 0, time() - 3600);
if (file_exists(THUMB_PRINT_DIR . $remotePrint))
unlink(THUMB_PRINT_DIR . $remotePrint);
header('Location: ' . $_SERVER['REQUEST_URI'] );
exit;Otherwise, if the operation is not login or logout, you can check to see whether the user is considered logged in, and if the thumb-print doesn't match, the session is considered invalid, and the appropriate action is taken:
} elseif ($loggedIn && !$printsMatch) {
$info = 'SESSION INVALID!!!';
error_log('Session Invalid: ' . date('Y-m-d H:i:s'), 0);
// take appropriate action
}You can now run the same procedure as mentioned previously using the new chap_12_session_protected.php file. The first thing you will notice is that the session is now considered invalid. The output will look something like this:
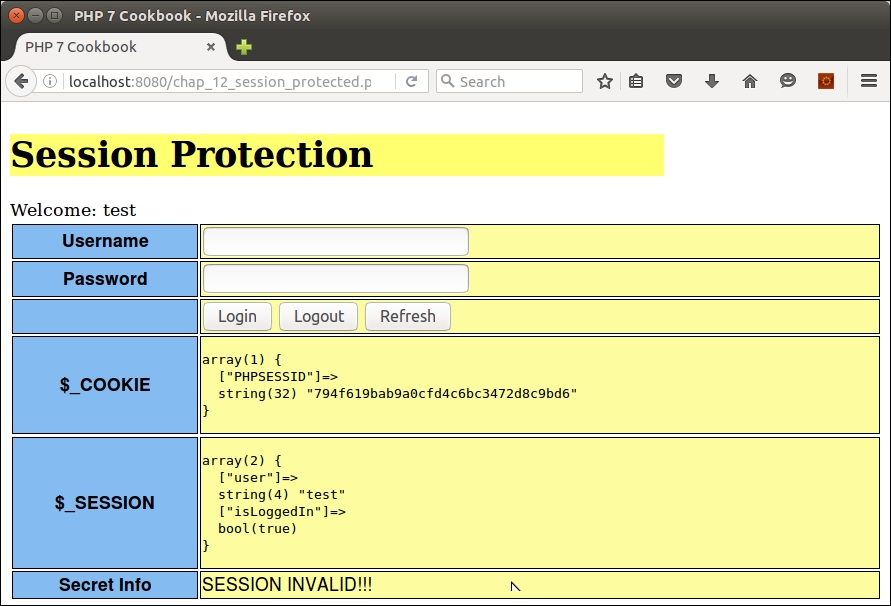
The reason for this is that the thumb-print does not match as you are now using a different browser. Likewise, if you refresh the page of the first browser, the session identifier is regenerated, making any previously copied identifier obsolete. Finally, the logout button will completely clear session information.
For an excellent overview of website vulnerabilities, please refer to the article present at https://www.owasp.org/index.php/Category:Vulnerability. For information on session hijacking, refer to https://www.owasp.org/index.php/Session_hijacking_attack.
This recipe presents another very simple technique that will safeguard your forms against Cross Site Request Forgery (CSRF) attacks. Simply put, a CSRF attack is possible when, possibly using other techniques, an attacker is able to infect a web page on your website. In most cases, the infected page will then start issuing requests (that is, using JavaScript to purchase items, or make settings changes) using the credentials of a valid, logged-in user. It's extremely difficult for your application to detect such activity. One measure that can easily be taken is to generate a random token that is included in every form to be submitted. Since the infected page will not have access to the token, nor have the ability to generate one that matches, form validation will fail.
chap_12_form_csrf_test_unprotected.html:<!DOCTYPE html>
<body onload="load()">
<form action="/chap_12_form_unprotected.php"
method="post" id="csrf_test" name="csrf_test">
<input name="name" type="hidden" value="No Goodnick" />
<input name="email" type="hidden" value="malicious@owasp.org" />
<input name="comments" type="hidden"
value="Form is vulnerable to CSRF attacks!" />
<input name="process" type="hidden" value="1" />
</form>
<script>
function load() { document.forms['csrf_test'].submit(); }
</script>
</body>
</html>chap_12_form_unprotected.php that responds to the form posting. As with other calling programs in this book, we set up autoloading and use the Application\Database\Connection class covered in Chapter 5, Interacting with a Database:<?php
define('DB_CONFIG_FILE', '/../config/db.config.php');
require __DIR__ . '/../Application/Autoload/Loader.php';
Application\Autoload\Loader::init(__DIR__ . '/..');
use Application\Database\Connection;
$conn = new Connection(include __DIR__ . DB_CONFIG_FILE);if ($_POST['process']) {
$filter = [
'trim' => function ($item) { return trim($item); },
'email' => function ($item) {
return filter_var($item, FILTER_SANITIZE_EMAIL); },
'length' => function ($item, $length) {
return substr($item, 0, $length); },
'stripTags' => function ($item) {
return strip_tags($item); },
];
$assignments = [
'*' => ['trim' => NULL, 'stripTags' => NULL],
'email' => ['length' => 249, 'email' => NULL],
'name' => ['length' => 128],
'comments'=> ['length' => 249],
];
$data = $_POST;
foreach ($data as $field => $item) {
foreach ($assignments['*'] as $key => $option) {
$item = $filter[$key]($item, $option);
}
if (isset($assignments[$field])) {
foreach ($assignments[$field] as $key => $option) {
$item = $filter[$key]($item, $option);
}
$filteredData[$field] = $item;
}
}chap_12_form_view_results.php, which simply dumps the contents of the visitors table:try {
$filteredData['visit_date'] = date('Y-m-d H:i:s');
$sql = 'INSERT INTO visitors '
. ' (email,name,comments,visit_date) '
. 'VALUES (:email,:name,:comments,:visit_date)';
$insertStmt = $conn->pdo->prepare($sql);
$insertStmt->execute($filteredData);
} catch (PDOException $e) {
echo $e->getMessage();
}
}
header('Location: /chap_12_form_view_results.php');
exit;random_bytes() PHP 7 function to generate a truly random token, one which will be difficult, if not impossible, for an attacker to match:session_start(); $token = urlencode(base64_encode((random_bytes(32)))); $_SESSION['token'] = $token;
<input type="hidden" name="token" value="<?= $token ?>" />
chap_12_form_unprotected.php script mentioned previously, adding logic to first check to see whether the token matches the one stored in the session. Note that we unset the current token to make it invalid for future use. We call the new script chap_12_form_protected_with_token.php:if ($_POST['process']) {
$sessToken = $_SESSION['token'] ?? 1;
$postToken = $_POST['token'] ?? 2;
unset($_SESSION['token']);
if ($sessToken != $postToken) {
$_SESSION['message'] = 'ERROR: token mismatch';
} else {
$_SESSION['message'] = 'SUCCESS: form processed';
// continue with form processing
}
}To test how an infected web page might launch a CSRF attack, create the following files, as shown earlier in the recipe:
chap_12_form_csrf_test_unprotected.htmlchap_12_form_unprotected.phpYou can then define a file called chap_12_form_view_results.php, which dumps the visitors table:
<?php
session_start();
define('DB_CONFIG_FILE', '/../config/db.config.php');
require __DIR__ . '/../Application/Autoload/Loader.php';
Application\Autoload\Loader::init(__DIR__ . '/..');
use Application\Database\Connection;
$conn = new Connection(include __DIR__ . DB_CONFIG_FILE);
$message = $_SESSION['message'] ?? '';
unset($_SESSION['message']);
$stmt = $conn->pdo->query('SELECT * FROM visitors');
?>
<!DOCTYPE html>
<body>
<div class="container">
<h1>CSRF Protection</h1>
<h3>Visitors Table</h3>
<?php while ($row = $stmt->fetch(PDO::FETCH_ASSOC)) : ?>
<pre><?php echo implode(':', $row); ?></pre>
<?php endwhile; ?>
<?php if ($message) : ?>
<b><?= $message; ?></b>
<?php endif; ?>
</div>
</body>
</html>From a browser, launch chap_12_form_csrf_test_unprotected.html. Here is how the output might appear:
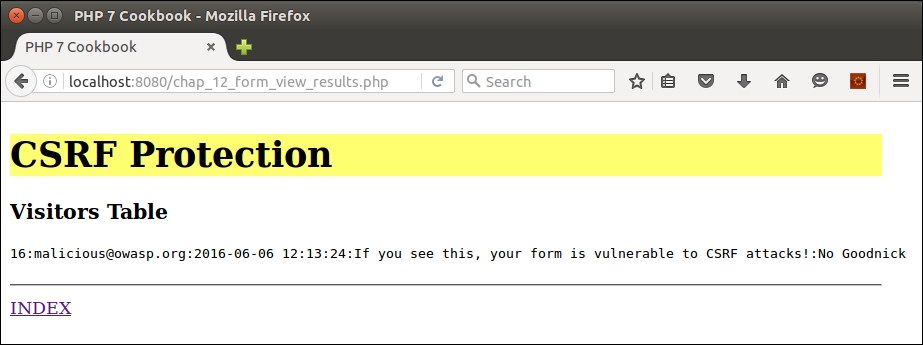
As you can see, the attack was successful despite filtering and the use of prepared statements!
Next, copy the
chap_12_form_unprotected.php file to chap_12_form_protected.php. Make the change indicated in step 8 in the recipe. You will also need to alter the test HTML file, copying chap_12_form_csrf_test_unprotected.html to chap_12_form_csrf_test_protected.html. Change the value for the action parameter in the FORM tag as follows:
<form action="/chap_12_form_protected_with_token.php" method="post" id="csrf_test" name="csrf_test">
When you run the new HTML file from a browser, it calls chap_12_form_protected.php, which looks for a token that does not exist. Here is the expected output:
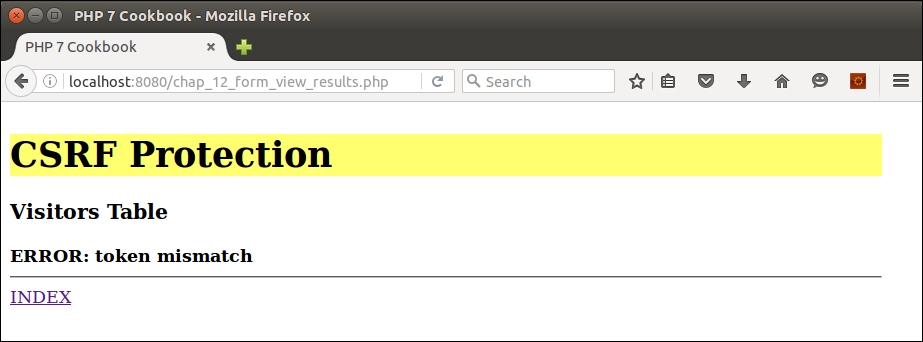
Finally, go ahead and define a file called chap_12_form_protected.php that generates a token and displays it as a hidden element:
<?php
session_start();
$token = urlencode(base64_encode((random_bytes(32))));
$_SESSION['token'] = $token;
?>
<!DOCTYPE html>
<body onload="load()">
<div class="container">
<h1>CSRF Protected Form</h1>
<form action="/chap_12_form_protected_with_token.php"
method="post" id="csrf_test" name="csrf_test">
<table>
<tr><th>Name</th><td><input name="name" type="text" /></td></tr>
<tr><th>Email</th><td><input name="email" type="text" /></td></tr>
<tr><th>Comments</th><td>
<input name="comments" type="textarea" rows=4 cols=80 />
</td></tr>
<tr><th> </th><td>
<input name="process" type="submit" value="Process" />
</td></tr>
</table>
<input type="hidden" name="token" value="<?= $token ?>" />
</form>
<a href="/chap_12_form_view_results.php">
CLICK HERE</a> to view results
</div>
</body>
</html>When we display and submit data from the form, the token is validated and the data insertion is allowed to continue, as shown here:
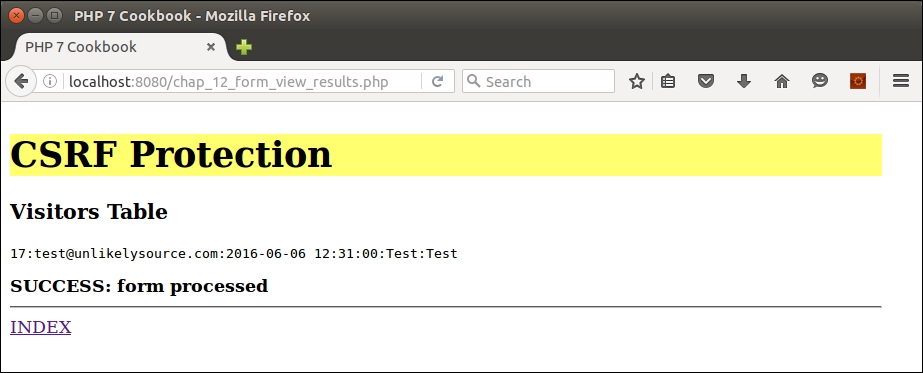
For more information on CSFR attacks, please refer to https://www.owasp.org/index.php/Cross-Site_Request_Forgery_(CSRF).
A common misconception is that the only way attackers crack hashed passwords is by using brute force attacks and rainbow tables. Although this is often the first pass in an attack sequence, attackers will use much more sophisticated attacks on a second, third, or fourth pass. Other attacks include combination, dictionary, mask, and rules-based. Dictionary attacks use a database of words literally from the dictionary to guess passwords. Combination is where dictionary words are combined. Mask attacks are similar to brute force, but more selective, thus cutting down the time to crack. Rules-based attacks will detect things such as substituting the number 0 for the letter o.
The good news is that by simply increasing the length of the password beyond the magic length of six characters exponentially increases the time to crack the hashed password. Other factors, such as interspersing uppercase with lowercase letters randomly, random digits, and special characters, will also have an exponential impact on the time to crack. At the end of the day, we need to bear in mind that a human being will eventually need to enter the passwords created, which means that need to be at least marginally memorable.
Best practice
Passwords should be stored as a hash, and never as plain text. MD5 and SHA* are no longer considered secure (although SHA* is much better than MD5). Using a utility such as oclHashcat, an attacker can generate an average of 55 billion attempts per second on a password hashed using MD5 that has been made available through an exploit (that is, a successful SQL injection attack).
Application\Security\PassGen class that will hold the methods needed for password generation. We also define certain class constants and properties that will be used as part of the process:namespace Application\Security;
class PassGen
{
const SOURCE_SUFFIX = 'src';
const SPECIAL_CHARS =
'\`¬|!"£$%^&*()_-+={}[]:@~;\'#<>?,./|\\';
protected $algorithm;
protected $sourceList;
protected $word;
protected $list;digits() produces random digits, and special() produces a single character from the SPECIAL_CHARS class constant:public function digits($max = 999)
{
return random_int(1, $max);
}
public function special()
{
$maxSpecial = strlen(self::SPECIAL_CHARS) - 1;
return self::SPECIAL_CHARS[random_int(0, $maxSpecial)];
}$wordSource constructor parameter comes into play. It is an array of websites from which our word base will be derived. Accordingly, we need a method that will pull a unique list of words from the sources indicated, and store the results in a file. We accept the $wordSource array as an argument, and loop through each URL. We use md5() to produce a hash of the website name, which is then built into a filename. The newly produced filename is then stored in $sourceList:public function processSource(
$wordSource, $minWordLength, $cacheDir)
{
foreach ($wordSource as $html) {
$hashKey = md5($html);
$sourceFile = $cacheDir . '/' . $hashKey . '.'
. self::SOURCE_SUFFIX;
$this->sourceList[] = $sourceFile;<body> tag. We then use str_word_count() to pull a list of words out of the string, also employing strip_tags() to remove any markup:if (!file_exists($sourceFile) || filesize($sourceFile) == 0) {
echo 'Processing: ' . $html . PHP_EOL;
$contents = file_get_contents($html);
if (preg_match('/<body>(.*)<\/body>/i',
$contents, $matches)) {
$contents = $matches[1];
}
$list = str_word_count(strip_tags($contents), 1);array_unique() to get rid of duplicates. The final result is stored in a file: foreach ($list as $key => $value) {
if (strlen($value) < $minWordLength) {
$list[$key] = 'xxxxxx';
} else {
$list[$key] = trim($value);
}
}
$list = array_unique($list);
file_put_contents($sourceFile, implode("\n",$list));
}
}
return TRUE;
}public function flipUpper($word)
{
$maxLen = strlen($word);
$numFlips = random_int(1, $maxLen - 1);
$flipped = strtolower($word);
for ($x = 0; $x < $numFlips; $x++) {
$pos = random_int(0, $maxLen - 1);
$word[$pos] = strtoupper($word[$pos]);
}
return $word;
}file() function to read from the appropriate cached file:public function word()
{
$wsKey = random_int(0, count($this->sourceList) - 1);
$list = file($this->sourceList[$wsKey]);
$maxList = count($list) - 1;
$key = random_int(0, $maxList);
$word = $list[$key];
return $this->flipUpper($word);
}['word', 'digits', 'word', 'special'] might end up looking like hElLo123aUTo!:public function initAlgorithm()
{
$this->algorithm = [
['word', 'digits', 'word', 'special'],
['digits', 'word', 'special', 'word'],
['word', 'word', 'special', 'digits'],
['special', 'word', 'special', 'digits'],
['word', 'special', 'digits', 'word', 'special'],
['special', 'word', 'special', 'digits',
'special', 'word', 'special'],
];
}public function __construct(
array $wordSource, $minWordLength, $cacheDir)
{
$this->processSource($wordSource, $minWordLength, $cacheDir);
$this->initAlgorithm();
}public function generate()
{
$pwd = '';
$key = random_int(0, count($this->algorithm) - 1);
foreach ($this->algorithm[$key] as $method) {
$pwd .= $this->$method();
}
return str_replace("\n", '', $pwd);
}
}First, you will need to place the code described in the previous recipe into a file called PassGen.php in the Application\Security folder. Now you can create a calling program called chap_12_password_generate.php that sets up autoloading, uses PassGen, and defines the location of the cache directory:
<?php
define('CACHE_DIR', __DIR__ . '/cache');
require __DIR__ . '/../Application/Autoload/Loader.php';
Application\Autoload\Loader::init(__DIR__ . '/..');
use Application\Security\PassGen;Next, you will need to define an array of websites that will be used as a source for the word-base to be used in password generation. In this illustration, we will choose from the Project Gutenberg texts Ulysses (J. Joyce), War and Peace (L. Tolstoy), and Pride and Prejudice (J. Austen):
$source = [ 'https://www.gutenberg.org/files/4300/4300-0.txt', 'https://www.gutenberg.org/files/2600/2600-h/2600-h.htm', 'https://www.gutenberg.org/files/1342/1342-h/1342-h.htm', ];
Next, we create the PassGen instance, and run generate():
$passGen = new PassGen($source, 4, CACHE_DIR); echo $passGen->generate();
Here are a few example passwords produced by PassGen:
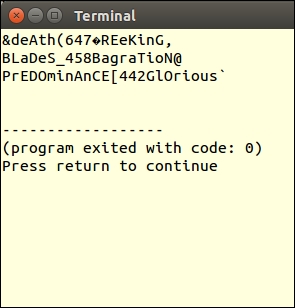
An excellent article on how an attacker would approach cracking a password can be viewed at http://arstechnica.com/security/2013/05/how-crackers-make-minced-meat-out-of-your-passwords/. To find out more about brute force attacks you can refer to https://www.owasp.org/index.php/Brute_force_attack. For information on oclHashcat, see this page: http://hashcat.net/oclhashcat/.
CAPTCHA is actually an acronym for Completely Automated Public Turing Test to Tell Computers and Humans Apart. The technique is similar to the one presented in the preceding recipe, Securing forms with a token. The difference is that instead of storing the token in a hidden form input field, the token is rendered into a graphic that is difficult for an automated attack system to decipher. Also, the intent of a CAPTCHA is slightly different from a form token: it is designed to confirm that the web visitor is a human being, and not an automated system.
Application\Captcha\Phrase class. We also define properties and class constants used in the phrase generation process:namespace Application\Captcha;
class Phrase
{
const DEFAULT_LENGTH = 5;
const DEFAULT_NUMBERS = '0123456789';
const DEFAULT_UPPER = 'ABCDEFGHJKLMNOPQRSTUVWXYZ';
const DEFAULT_LOWER = 'abcdefghijklmnopqrstuvwxyz';
const DEFAULT_SPECIAL =
'¬\`|!"£$%^&*()_-+={}[]:;@\'~#<,>.?/|\\';
const DEFAULT_SUPPRESS = ['O','l'];
protected $phrase;
protected $includeNumbers;
protected $includeUpper;
protected $includeLower;
protected $includeSpecial;
protected $otherChars;
protected $suppressChars;
protected $string;
protected $length;$include* flags are used to signal which character sets will be present in the base string from which the phrase will be generated. For example, if you wish to only have numbers, $includeUpper and $includeLower would both be set to FALSE. $otherChars is provided for extra flexibility. Finally, $suppressChars represents an array of characters that will be removed from the base string. The default removes uppercase O and lowercase l:public function __construct(
$length = NULL,
$includeNumbers = TRUE,
$includeUpper= TRUE,
$includeLower= TRUE,
$includeSpecial = FALSE,
$otherChars = NULL,
array $suppressChars = NULL)
{
$this->length = $length ?? self::DEFAULT_LENGTH;
$this->includeNumbers = $includeNumbers;
$this->includeUpper = $includeUpper;
$this->includeLower = $includeLower;
$this->includeSpecial = $includeSpecial;
$this->otherChars = $otherChars;
$this->suppressChars = $suppressChars
?? self::DEFAULT_SUPPRESS;
$this->phrase = $this->generatePhrase();
}public function getString()
{
return $this->string;
}
public function setString($string)
{
$this->string = $string;
}
// other getters and setters not shown$include* flags and append to the base string as appropriate. At the end, we use str_replace() to remove the characters represented in $suppressChars:public function initString()
{
$string = '';
if ($this->includeNumbers) {
$string .= self::DEFAULT_NUMBERS;
}
if ($this->includeUpper) {
$string .= self::DEFAULT_UPPER;
}
if ($this->includeLower) {
$string .= self::DEFAULT_LOWER;
}
if ($this->includeSpecial) {
$string .= self::DEFAULT_SPECIAL;
}
if ($this->otherChars) {
$string .= $this->otherChars;
}
if ($this->suppressChars) {
$string = str_replace(
$this->suppressChars, '', $string);
}
return $string;
}for() loop, and use the new PHP 7 random_int() function to jump around in the base string:public function generatePhrase()
{
$phrase = '';
$this->string = $this->initString();
$max = strlen($this->string) - 1;
for ($x = 0; $x < $this->length; $x++) {
$phrase .= substr(
$this->string, random_int(0, $max), 1);
}
return $phrase;
}
}Application\Captcha\Phrase. Note that getImage() will return text, text art, or an actual image, depending on which class we decide to use:namespace Application\Captcha;
interface CaptchaInterface
{
public function getLabel();
public function getImage();
public function getPhrase();
}Application\Captcha\Reverse class. The reason for this name is that this class produces not just text, but text in reverse. The __construct() method builds an instance of Phrase. Note that getImage() returns the phrase in reverse:namespace Application\Captcha;
class Reverse implements CaptchaInterface
{
const DEFAULT_LABEL = 'Type this in reverse';
const DEFAULT_LENGTH = 6;
protected $phrase;
public function __construct(
$label = self::DEFAULT_LABEL,
$length = self:: DEFAULT_LENGTH,
$includeNumbers = TRUE,
$includeUpper = TRUE,
$includeLower = TRUE,
$includeSpecial = FALSE,
$otherChars = NULL,
array $suppressChars = NULL)
{
$this->label = $label;
$this->phrase = new Phrase(
$length,
$includeNumbers,
$includeUpper,
$includeLower,
$includeSpecial,
$otherChars,
$suppressChars);
}
public function getLabel()
{
return $this->label;
}
public function getImage()
{
return strrev($this->phrase->getPhrase());
}
public function getPhrase()
{
return $this->phrase->getPhrase();
}
}Application\Captcha\Image class that implements CaptchaInterface. The class constants and properties include not only those needed for phrase generation, but what is needed for image generation as well:namespace Application\Captcha;
use DirectoryIterator;
class Image implements CaptchaInterface
{
const DEFAULT_WIDTH = 200;
const DEFAULT_HEIGHT = 50;
const DEFAULT_LABEL = 'Enter this phrase';
const DEFAULT_BG_COLOR = [255,255,255];
const DEFAULT_URL = '/captcha';
const IMAGE_PREFIX = 'CAPTCHA_';
const IMAGE_SUFFIX = '.jpg';
const IMAGE_EXP_TIME = 300; // seconds
const ERROR_REQUIRES_GD = 'Requires the GD extension + '
. ' the JPEG library';
const ERROR_IMAGE = 'Unable to generate image';
protected $phrase;
protected $imageFn;
protected $label;
protected $imageWidth;
protected $imageHeight;
protected $imageRGB;
protected $imageDir;
protected $imageUrl;$imageDir and $imageUrl. The first is where the graphic will be written. The second is the base URL, after which we will append the generated filename. $imageFont is provided in case we want to provide TrueType fonts, which will produce a more secure CAPTCHA. Otherwise, we're limited to the default fonts which, to quote a line in a famous movie, ain't a pretty sight:public function __construct(
$imageDir,
$imageUrl,
$imageFont = NULL,
$label = NULL,
$length = NULL,
$includeNumbers = TRUE,
$includeUpper= TRUE,
$includeLower= TRUE,
$includeSpecial = FALSE,
$otherChars = NULL,
array $suppressChars = NULL,
$imageWidth = NULL,
$imageHeight = NULL,
array $imageRGB = NULL
)
{imagecreatetruecolor function exists. If this comes back as FALSE, we know the GD extension is not available. Otherwise, we assign parameters to properties, generate the phrase, remove old images, and write out the CAPTCHA graphic:if (!function_exists('imagecreatetruecolor')) {
throw new \Exception(self::ERROR_REQUIRES_GD);
}
$this->imageDir = $imageDir;
$this->imageUrl = $imageUrl;
$this->imageFont = $imageFont;
$this->label = $label ?? self::DEFAULT_LABEL;
$this->imageRGB = $imageRGB ?? self::DEFAULT_BG_COLOR;
$this->imageWidth = $imageWidth ?? self::DEFAULT_WIDTH;
$this->imageHeight= $imageHeight ?? self::DEFAULT_HEIGHT;
if (substr($imageUrl, -1, 1) == '/') {
$imageUrl = substr($imageUrl, 0, -1);
}
$this->imageUrl = $imageUrl;
if (substr($imageDir, -1, 1) == DIRECTORY_SEPARATOR) {
$imageDir = substr($imageDir, 0, -1);
}
$this->phrase = new Phrase(
$length,
$includeNumbers,
$includeUpper,
$includeLower,
$includeSpecial,
$otherChars,
$suppressChars);
$this->removeOldImages();
$this->generateJpg();
}DirectoryIterator class to scan the designated directory and check the access time. We calculate an old image file as one that is the current time minus the value specified by IMAGE_EXP_TIME:public function removeOldImages()
{
$old = time() - self::IMAGE_EXP_TIME;
foreach (new DirectoryIterator($this->imageDir)
as $fileInfo) {
if($fileInfo->isDot()) continue;
if ($fileInfo->getATime() < $old) {
unlink($this->imageDir . DIRECTORY_SEPARATOR
. $fileInfo->getFilename());
}
}
}$imageRGB array into $red, $green, and $blue. We use the core imagecreatetruecolor() function to generate the base graphic with the width and height specified. We use the RGB values to colorize the background:public function generateJpg()
{
try {
list($red,$green,$blue) = $this->imageRGB;
$im = imagecreatetruecolor(
$this->imageWidth, $this->imageHeight);
$black = imagecolorallocate($im, 0, 0, 0);
$imageBgColor = imagecolorallocate(
$im, $red, $green, $blue);
imagefilledrectangle($im, 0, 0, $this->imageWidth,
$this->imageHeight, $imageBgColor);$xMargin = (int) ($this->imageWidth * .1 + .5);
$yMargin = (int) ($this->imageHeight * .3 + .5);
$phrase = $this->getPhrase();
$max = strlen($phrase);
$count = 0;
$x = $xMargin;
$size = 5;
for ($i = 0; $i < $max; $i++) {$imageFont is specified, we are able to write each character with a different size and angle. We also need to adjust the x axis (that is, horizontal) value according to the size:if ($this->imageFont) {
$size = rand(12, 32);
$angle = rand(0, 30);
$y = rand($yMargin + $size, $this->imageHeight);
imagettftext($im, $size, $angle, $x, $y, $black,
$this->imageFont, $phrase[$i]);
$x += (int) ($size + rand(0,5));5, as smaller sizes are unreadable. We provide a low level of distortion by alternating between imagechar(), which writes the image normally, and imagecharup(), which writes it sideways:} else {
$y = rand(0, ($this->imageHeight - $yMargin));
if ($count++ & 1) {
imagechar($im, 5, $x, $y, $phrase[$i], $black);
} else {
imagecharup($im, 5, $x, $y, $phrase[$i], $black);
}
$x += (int) ($size * 1.2);
}
} // end for ($i = 0; $i < $max; $i++)$numDots = rand(10, 999);
for ($i = 0; $i < $numDots; $i++) {
imagesetpixel($im, rand(0, $this->imageWidth),
rand(0, $this->imageHeight), $black);
}md5() with the date and a random number from 0 to 9999 as arguments. Note that we can safely use md5() as we are not trying to hide any secret information; we're merely interested in generating a unique filename quickly. We wipe out the image object as well to conserve memory:$this->imageFn = self::IMAGE_PREFIX
. md5(date('YmdHis') . rand(0,9999))
. self::IMAGE_SUFFIX;
imagejpeg($im, $this->imageDir . DIRECTORY_SEPARATOR
. $this->imageFn);
imagedestroy($im);try/catch block. If an error or exception is thrown, we log the message and take the appropriate action:} catch (\Throwable $e) {
error_log(__METHOD__ . ':' . $e->getMessage());
throw new \Exception(self::ERROR_IMAGE);
}
}getImage() returns an HTML <img> tag, which can then be immediately displayed:public function getLabel()
{
return $this->label;
}
public function getImage()
{
return sprintf('<img src="%s/%s" />',
$this->imageUrl, $this->imageFn);
}
public function getPhrase()
{
return $this->phrase->getPhrase();
}
}Be sure to define the classes discussed in this recipe, summarized in the following table:
|
Class |
Subsection |
The steps it appears in |
|---|---|---|
|
|
Generating a text CAPTCHA |
1 - 5 |
|
|
6 | |
|
|
7 | |
|
|
Generating an image CAPTCHA |
2 - 13 |
Next, define a calling program called chap_12_captcha_text.php that implements a text CAPTCHA. You first need to set up autoloading and use the appropriate classes:
<?php require __DIR__ . '/../Application/Autoload/Loader.php'; Application\Autoload\Loader::init(__DIR__ . '/..'); use Application\Captcha\Reverse;
After that, be sure to start the session. You would use appropriate measures to protect the session as well. To conserve space, we only show one simple measure, session_regenerate_id():
session_start(); session_regenerate_id();
Next, you can define a function that creates the CAPTCHA; retrieves the phrase, label, and image (in this case, reverse text); and stores the value in the session:
function setCaptcha(&$phrase, &$label, &$image)
{
$captcha = new Reverse();
$phrase = $captcha->getPhrase();
$label = $captcha->getLabel();
$image = $captcha->getImage();
$_SESSION['phrase'] = $phrase;
}Now is a good time to initialize variables and determine the loggedIn status:
$image = ''; $label = ''; $phrase = $_SESSION['phrase'] ?? ''; $message = ''; $info = 'You Can Now See Super Secret Information!!!'; $loggedIn = $_SESSION['isLoggedIn'] ?? FALSE; $loggedUser = $_SESSION['user'] ?? 'guest';
You can then check to see whether the login button has been pressed. If so, check to see whether the CAPTCHA phrase has been entered. If not, initialize a message informing the user they need to enter the CAPTCHA phrase:
if (!empty($_POST['login'])) {
if (empty($_POST['captcha'])) {
$message = 'Enter Captcha Phrase and Login Information';If the CAPTCHA phrase is present, check to see whether it matches what is stored in the session. If it doesn't match, proceed as if the form is invalid. Otherwise, process the login as you would have otherwise. For the purposes of this illustration, you can simulate a login by using hard-coded values for the username and password:
} else {
if ($_POST['captcha'] == $phrase) {
$username = 'test';
$password = 'password';
if ($_POST['user'] == $username
&& $_POST['pass'] == $password) {
$loggedIn = TRUE;
$_SESSION['user'] = strip_tags($username);
$_SESSION['isLoggedIn'] = TRUE;
} else {
$message = 'Invalid Login';
}
} else {
$message = 'Invalid Captcha';
}
}You might also want to add code for a logout option, as described in the Safeguarding the PHP session recipe:
} elseif (isset($_POST['logout'])) {
session_unset();
session_destroy();
setcookie('PHPSESSID', 0, time() - 3600);
header('Location: ' . $_SERVER['REQUEST_URI'] );
exit;
}You can then run setCaptcha():
setCaptcha($phrase, $label, $image);
Lastly, don't forget the view logic, which, in this example, presents a basic login form. Inside the form tag, you'll need to add view logic to display the CAPTCHA and label:
<tr> <th><?= $label; ?></th> <td><?= $image; ?><input type="text" name="captcha" /></td> </tr>
Here is the resulting output:
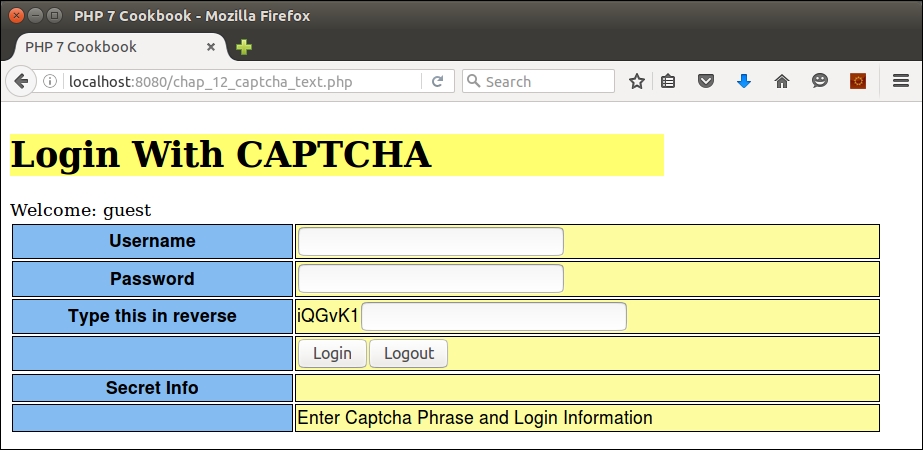
To demonstrate how to use the image CAPTCHA, copy the code from chap_12_captcha_text.php to cha_12_captcha_image.php. We define constants that represent the location of the directory in which we will write the CAPTCHA images. (Be sure to create this directory!) Otherwise, the autoloading and use statement structure is similar. Note that we also define a TrueType font. Differences are noted in bold:
<?php
define('IMAGE_DIR', __DIR__ . '/captcha');
define('IMAGE_URL', '/captcha');
define('IMAGE_FONT', __DIR__ . '/FreeSansBold.ttf');
require __DIR__ . '/../Application/Autoload/Loader.php';
Application\Autoload\Loader::init(__DIR__ . '/..');
use Application\Captcha\Image;
session_start();
session_regenerate_id();Important!
Fonts can potentially be protected under copyright, trademark, patent, or other intellectual property laws. If you use a font for which you are not licensed, you and your customer could be held liable in court! Use an open source font, or one that is available on the web server for which you have a valid license.
Of course, in the setCaptcha() function, we use the Image class instead of Reverse:
function setCaptcha(&$phrase, &$label, &$image)
{
$captcha = new Image(IMAGE_DIR, IMAGE_URL, IMAGE_FONT);
$phrase = $captcha->getPhrase();
$label = $captcha->getLabel();
$image = $captcha->getImage();
$_SESSION['phrase'] = $phrase;
return $captcha;
}Variable initialization is the same as the previous script, and login processing is identical to the previous script:
$image = '';
$label = '';
$phrase = $_SESSION['phrase'] ?? '';
$message = '';
$info = 'You Can Now See Super Secret Information!!!';
$loggedIn = $_SESSION['isLoggedIn'] ?? FALSE;
$loggedUser = $_SESSION['user'] ?? 'guest';
if (!empty($_POST['login'])) {
// etc. -- identical to chap_12_captcha_text.phpEven the view logic remains the same, as we are using getImage(), which, in the case of the image CAPTCHA, returns directly usable HTML. Here is the output using a TrueType font:
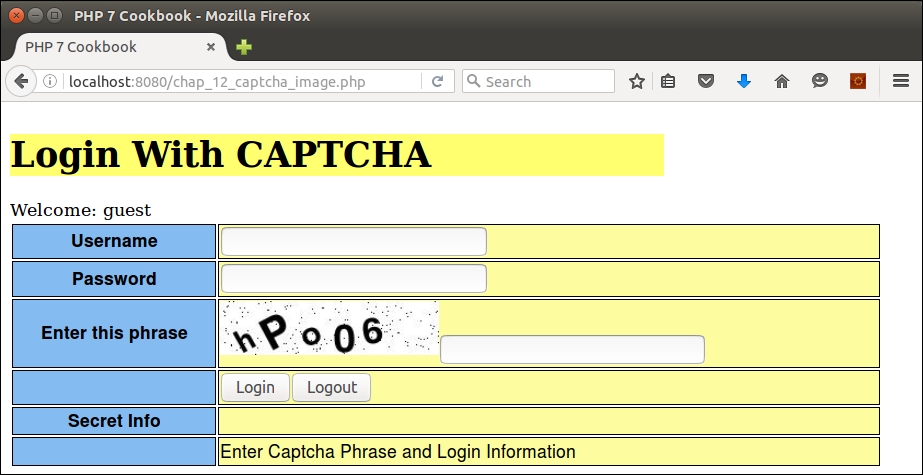
If you are not inclined to use the preceding code to generate your own in-house CAPTCHA, there are plenty of libraries available. Most popular frameworks have this ability. Zend Framework, for example, has its Zend\Captcha component class. There is also reCAPTCHA, which is generally invoked as a service in which your application makes a call to an external website that generates the CAPTCHA and token for you. A good place to start looking is http://www.captcha.net/ website.
For more information on the protection of fonts as intellectual property, refer to the article present at https://en.wikipedia.org/wiki/Intellectual_property_protection_of_typefaces.
It is a little-known fact among members of the general PHP community that the mcrypt extension, the core of most PHP-based encryption considered secure, is anything but secure. One of the biggest issues, from a security perspective, is that the mcrypt extension requires advanced knowledge of cryptography to successfully operate, which few programmers have. This leads to gross misuse and ultimately problems such as a 1 in 256 chance of data corruption. Not good odds. Furthermore, developer support for libmcrypt, the core library upon which the mcrypt extension is based, was abandoned in 2007, which means the code base is out-of-date, bug-ridden, and has no mechanism to apply patches. Accordingly, it is extremely important to understand how to perform strong encryption/decryption without using mcrypt!
openssl. This extension is well maintained, and has modern and very strong encryption/decryption capabilities.openssl_get_cipher_methods() command. Examples will include algorithms based on Advanced Encryption Standard (AES), BlowFish (BF), CAMELLIA, CAST5, Data Encryption Standard (DES), Rivest Cipher (RC) (also affectionately known as Ron's Code), and SEED. You will note that this method shows cipher methods duplicated in upper and lowercase.|
Method |
Published |
Key size (bits) |
Key block size (bytes) |
Notes |
|---|---|---|---|---|
|
|
2000 |
128, 192, 256 |
16 |
Developed by Mitsubishi and NTT |
|
|
1998 |
128, 192, 256 |
16 |
Developed by Joan Daemen and Vincent Rijmen. Originally submitted as Rijndael |
|
|
1998 |
128 |
16 |
Developed by the Korea Information Security Agency |
|
|
1996 |
40 to 128 |
8 |
Developed by Carlisle Adams and Stafford Tavares |
|
|
1993 |
1 to 448 |
8 |
Designed by Bruce Schneier |
|
|
1987 |
8 to 1,024 defaults to 64 |
8 |
Designed by Ron Rivest (one of the core founders of RSA) |
|
|
1977 |
56 (+8 parity bits) |
8 |
Developed by IBM, based on work done by Horst Feistel |
random_bytes() (new in PHP 7), which returns a true CSPRNG sequence of bytes. The length of the IV varies considerably. Try a size of 16 to start with. If a warning is generated, the correct number of bytes to be supplied for that algorithm will be shown, so adjust the size accordingly:$iv = random_bytes(16);
openssl_encrypt(). Here are the parameters that should be passed:$plainText = 'Super Secret Credentials'; $key = random_bytes(16); $method = 'aes-256-xts'; $cipherText = openssl_encrypt($plainText, $method, $key, 0, $iv);
$key and $iv, along with the openssl_decrypt() function:$plainText = openssl_decrypt($cipherText, $method, $key, 0, $iv);
In order to see which cipher methods are available, create a PHP script called chap_12_openssl_encryption.php and run this command:
<?php
echo implode(', ', openssl_get_cipher_methods());The output should look something like this:
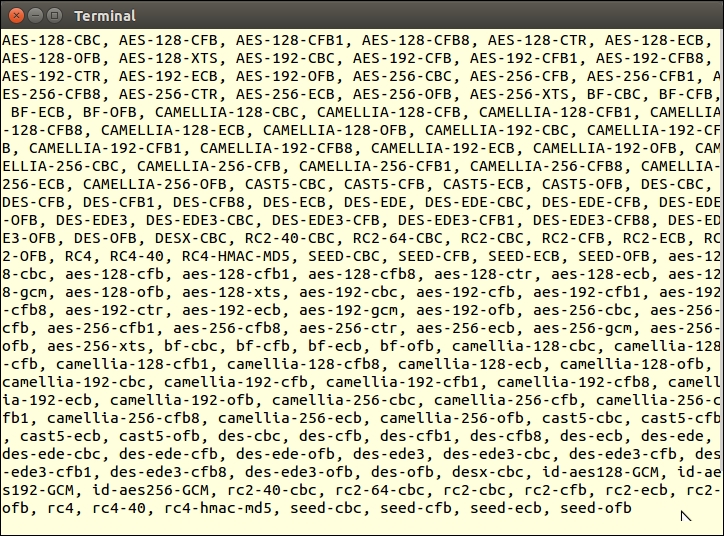
Next, you can add values for the plain text to be encrypted, the method, key, and IV. As an example, try AES, with a key size of 256, using the XTS operating mode:
$plainText = 'Super Secret Credentials'; $method = 'aes-256-xts'; $key = random_bytes(16); $iv = random_bytes(16);
To encrypt, you can use openssl_encrypt(), specifying the parameters configured previously:
$cipherText = openssl_encrypt($plainText, $method, $key, 0, $iv);
You might also want to base 64-encode the result to make it more usable:
$cipherText = base64_encode($cipherText);
To decrypt, use the same $key and $iv values. Don't forget to un-encode the base 64 value first:
$plainText = openssl_decrypt(base64_decode($cipherText), $method, $key, 0, $iv);
Here is the output showing the base 64-encoded cipher text, followed by the decrypted plain text:
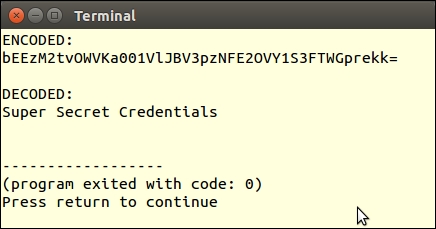
If you supply an incorrect number of bytes for the IV, for the cipher method chosen, a warning message will be shown:
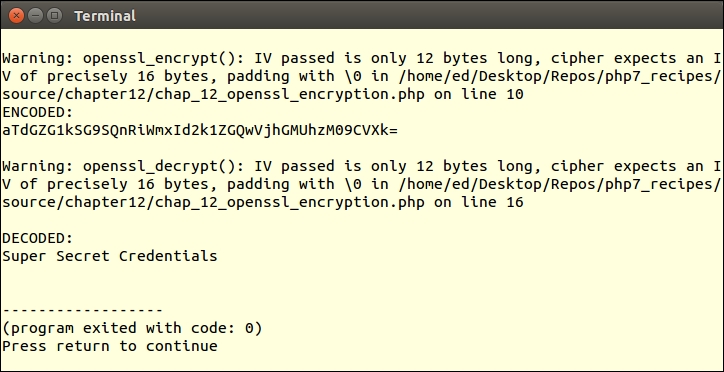
In PHP 7, there was a problem when using open_ssl_encrypt() and open_ssl_decrypt() and the
Authenticated Encrypt with Associated Data (AEAD) modes supported: GCM and CCM. Accordingly, in PHP 7.1, three extra parameters have been added to these functions, as follows:
For more information, you can refer to https://wiki.php.net/rfc/openssl_aead.
For an excellent discussion on why the mcrypt extension is being deprecated in PHP 7.1, please refer to the article at https://wiki.php.net/rfc/mcrypt-viking-funeral. For a good description of block cipher, which forms the basis for the various cipher methods, refer to the article present at https://en.wikipedia.org/wiki/Block_cipher. For an excellent description of AES, refer to https://en.wikipedia.org/wiki/Advanced_Encryption_Standard. A good article that describes encryption operation modes can be seen at https://en.wikipedia.org/wiki/Block_cipher_mode_of_operation.
For some of the newer modes, if the data to be encrypted is less than the block size, openssl_decrypt() will return no value. If you pad the data to be at least the block size, the problem goes away. Most of the modes implement internal padding so this is not an issue. With some of the newer modes (that is, xts) you might see this problem. Be sure to conduct tests on short strings of data less than eight characters before putting your code into production.
In this chapter, we will cover the following topics:
session_start parametersIn this chapter, we will show you how traits and interfaces work together. Then, we turn our attention to the design of a fallback mechanism that will catch errors and exceptions in situations where you were not able (or forgot) to define specific try/catch blocks. We will then venture into the world of unit testing, showing you first how to write simple tests, and then how to group those tests together into test suites. Next, we define a class that lets you create any amount of generic test data. We close the chapter with a discussion of how to easily manage sessions using new PHP 7 features.
It is considered a best practice to make use of interfaces as a means of establishing the classification of a set of classes, and to guarantee the existence of certain methods. Traits and Interfaces often work together, and are an important aspect of implementation. Wherever you have a frequently used Interface that defines a method where the code does not change (such as a setter or getter), it is useful to also define a Trait that contains the actual code implementation.
ConnectionAwareInterface, first presented in Chapter 4, Working with PHP Object-Oriented Programming. This interface defines a setConnection() method that sets a $connection property. Two classes in the Application\Generic namespace, CountryList and CustomerList, contain redundant code, which matches the method defined in the interface.CountryList looks like before the change:class CountryList
{
protected $connection;
protected $key = 'iso3';
protected $value = 'name';
protected $table = 'iso_country_codes';
public function setConnection(Connection $connection)
{
$this->connection = $connection;
}
public function list()
{
$list = [];
$sql = sprintf('SELECT %s,%s FROM %s', $this->key,
$this->value, $this->table);
$stmt = $this->connection->pdo->query($sql);
while ($item = $stmt->fetch(PDO::FETCH_ASSOC)) {
$list[$item[$this->key]] = $item[$this->value];
}
return $list;
}
}list() into a trait called ListTrait:trait ListTrait
{
public function list()
{
$list = [];
$sql = sprintf('SELECT %s,%s FROM %s',
$this->key, $this->value, $this->table);
$stmt = $this->connection->pdo->query($sql);
while ($item = $stmt->fetch(PDO::FETCH_ASSOC)) {
$list[$item[$this->key]] = $item[$this->value];
}
return $list;
}
}ListTrait into a new class, CountryListUsingTrait, as shown next:class CountryListUsingTrait
{
use ListTrait;
protected $connection;
protected $key = 'iso3';
protected $value = 'name';
protected $table = 'iso_country_codes';
public function setConnection(Connection $connection)
{
$this->connection = $connection;
}
}Application\Database namespace. Here is the new trait:namespace Application\Database;
trait ConnectionTrait
{
protected $connection;
public function setConnection(Connection $connection)
{
$this->connection = $connection;
}
}Application\Database\ConnectionAwareInterface:namespace Application\Database;
use Application\Database\Connection;
interface ConnectionAwareInterface
{
public function setConnection(Connection $connection);
}CountryListUsingTrait class. Note that as the new trait is affected by its location in the namespace, we needed to add a use statement at the top of the class. You will also note that we implement ConnectionAwareInterface to identify the fact that this class requires the method defined in the trait. Notice that we are taking advantage of the new PHP 7 group use syntax:namespace Application\Generic;
use PDO;
use Application\Database\ {
Connection, ConnectionTrait, ConnectionAwareInterface
};
class CountryListUsingTrait implements ConnectionAwareInterface
{
use ListTrait;
use ConnectionTrait;
protected $key = 'iso3';
protected $value = 'name';
protected $table = 'iso_country_codes';
}First of all, make sure the classes developed in Chapter 4, Working with PHP Object-Oriented Programming, have been created. These include the Application\Generic\CountryList and Application\Generic\CustomerList classes discussed in Chapter 4, Working with PHP Object-Oriented Programming, in the recipe Using interfaces. Save each class in a new file in the Application\Generic folder as CountryListUsingTrait.php and CustomerListUsingTrait.php. Be sure to change the class names to match the new names of the files!
As discussed in step 3, remove the list() method from both CountryListUsingTrait.php and CustomerListUsingTrait.php. Add use ListTrait; in place of the method removed. Place the removed code into a separate file, in the same folder, called ListTrait.php.
You will also notice further duplication of code between the two list classes, in this case the setConnection() method. This calls for another trait!
Cut the setConnection() method out of both CountryListUsingTrait.php and CustomerListUsingTrait.php list classes, and place the removed code into a separate file called ConnectionTrait.php. As this trait is logically related to ConnectionAwareInterface and Connection, it makes sense to place the file in the Application\Database folder, and to specify its namespace accordingly.
Finally, define
Application\Database\ConnectionAwareInterface as discussed in step 6. Here is the final Application\Generic\CustomerListUsingTrait class after all changes:
<?php
namespace Application\Generic;
use PDO;
use Application\Database\Connection;
use Application\Database\ConnectionTrait;
use Application\Database\ConnectionAwareInterface;
class CustomerListUsingTrait implements ConnectionAwareInterface
{
use ListTrait;
use ConnectionTrait;
protected $key = 'id';
protected $value = 'name';
protected $table = 'customer';
}You can now copy the chap_04_oop_simple_interfaces_example.php file mentioned in Chapter 4, Working with PHP Object-Oriented Programming, to a new file called chap_13_trait_and_interface.php. Change the reference from CountryList to CountryListUsingTrait. Likewise, change the reference from CustomerList to CustomerListUsingTrait. Otherwise, the code can remain the same:
<?php
define('DB_CONFIG_FILE', '/../config/db.config.php');
require __DIR__ . '/../Application/Autoload/Loader.php';
Application\Autoload\Loader::init(__DIR__ . '/..');
$params = include __DIR__ . DB_CONFIG_FILE;
try {
$list = Application\Generic\ListFactory::factory(
new Application\Generic\CountryListUsingTrait(), $params);
echo 'Country List' . PHP_EOL;
foreach ($list->list() as $item) echo $item . ' ';
$list = Application\Generic\ListFactory::factory(
new Application\Generic\CustomerListUsingTrait(),
$params);
echo 'Customer List' . PHP_EOL;
foreach ($list->list() as $item) echo $item . ' ';
} catch (Throwable $e) {
echo $e->getMessage();
}The output will be exactly as described in the Using interfaces recipe of Chapter 4, Working with Object-Oriented Programming. You can see the country list portion of the output in the following screenshot:
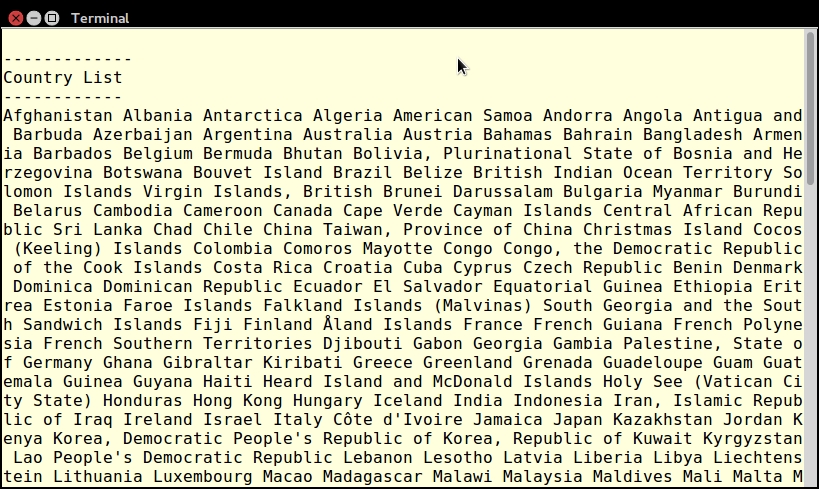
The next image displays the customer list portion of the output:

Exceptions are especially useful when used in conjunction with code in a try/catch block. Using this construct, however, can be awkward in some situations, making code virtually unreadable. Another consideration is that many classes end up throwing exceptions that you have not anticipated. In such cases, it would be highly desirable to have some sort of fallback exception handler.
Application\Error\Handler:namespace Application\Error;
class Handler
{
// code goes here
}set_exception_handler() to assign the exceptionHandler() method (in this class) as the fallback handler:protected $logFile;
public function __construct(
$logFileDir = NULL, $logFile = NULL)
{
$logFile = $logFile ?? date('Ymd') . '.log';
$logFileDir = $logFileDir ?? __DIR__;
$this->logFile = $logFileDir . '/' . $logFile;
$this->logFile = str_replace('//', '/', $this->logFile);
set_exception_handler([$this,'exceptionHandler']);
}exceptionHandler() method, which takes an Exception object as an argument. We record the date and time, the class name of the exception, and its message in the log file:public function exceptionHandler($ex)
{
$message = sprintf('%19s : %20s : %s' . PHP_EOL,
date('Y-m-d H:i:s'), get_class($ex), $ex->getMessage());
file_put_contents($this->logFile, $message, FILE_APPEND);
}try/catch block in our code, this will override our universal exception handler. If, on the other hand, we do not use try/catch and an exception is thrown, the universal exception handler will come into play.First, place the code shown in the preceding recipe into a Handler.php file in the Application\Error folder. Next, define a test class that will throw an exception. For the purposes of illustration, create an Application\Error\ThrowsException class that will throw an exception. As an example, set up a PDO instance with the error mode set to PDO::ERRMODE_EXCEPTION. You then craft an SQL statement that is guaranteed to fail:
namespace Application\Error;
use PDO;
class ThrowsException
{
protected $result;
public function __construct(array $config)
{
$dsn = $config['driver'] . ':';
unset($config['driver']);
foreach ($config as $key => $value) {
$dsn .= $key . '=' . $value . ';';
}
$pdo = new PDO(
$dsn,
$config['user'],
$config['password'],
[PDO::ATTR_ERRMODE => PDO::ERRMODE_EXCEPTION]);
$stmt = $pdo->query('This Is Not SQL');
while ($row = $stmt->fetch(PDO::FETCH_ASSOC)) {
$this->result[] = $row;
}
}
}Next, define a calling program called chap_13_exception_handler.php that sets up autoloading, uses the appropriate classes:
<?php
define('DB_CONFIG_FILE', __DIR__ . '/../config/db.config.php');
$config = include DB_CONFIG_FILE;
require __DIR__ . '/../Application/Autoload/Loader.php';
Application\Autoload\Loader::init(__DIR__ . '/..');
use Application\Error\ { Handler, ThrowsException };At this point, if you create a ThrowsException instance without implementing the universal handler, a Fatal Error is generated as an exception has been thrown but not caught:
$throws1 = new ThrowsException($config);
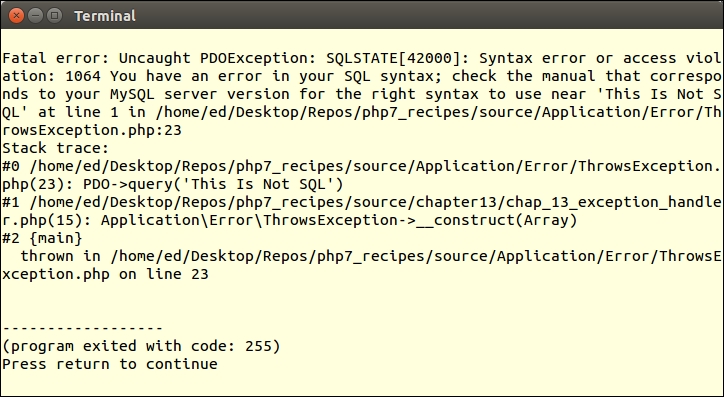
If, on the other hand, you use a try/catch block, the exception will be caught and your application is allowed to continue, if it is stable enough:
try {
$throws1 = new ThrowsException($config);
} catch (Exception $e) {
echo 'Exception Caught: ' . get_class($e) . ':' . $e->getMessage() . PHP_EOL;
}
echo 'Application Continues ...' . PHP_EOL;You will observe the following output:
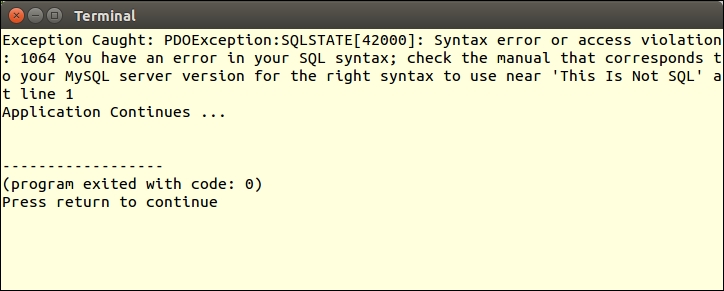
To demonstrate use of the exception handler, define a Handler instance, passing a parameter that represents the directory to contain log files, before the try/catch block. After try/catch, outside the block, create another instance of ThrowsException. When you run this sample program, you will notice that the first exception is caught inside the try/catch block, and the second exception is caught by the handler. You will also note that after the handler, the application ends:
$handler = new Handler(__DIR__ . '/logs');
try {
$throws1 = new ThrowsException($config);
} catch (Exception $e) {
echo 'Exception Caught: ' . get_class($e) . ':'
. $e->getMessage() . PHP_EOL;
}
$throws1 = new ThrowsException($config);
echo 'Application Continues ...' . PHP_EOL;Here is the output from the completed example program, along with the contents of the log file:
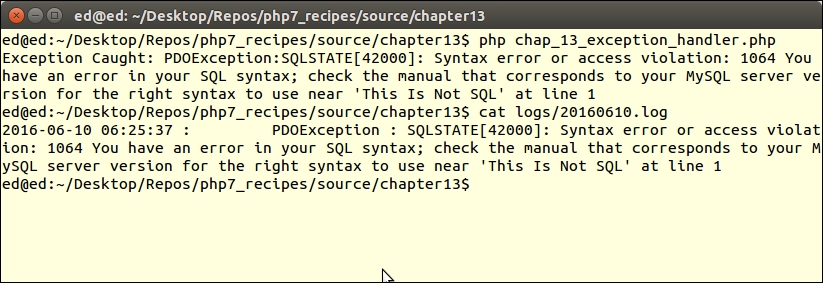
set_exception_handler() function. Have a look, especially, at the comment (posted 7 years ago, but still pertinent) by Anonymous that clarifies how this function works: http://php.net/manual/en/function.set-exception-handler.php.The process of developing a universal error handler is quite similar to the preceding recipe. There are certain differences, however. First of all, in PHP 7, some errors are thrown and can be caught, whereas others simply stop your application dead in its tracks. To further confuse matters, some errors are treated like exceptions, whereas others are derived from the new PHP 7 Error class. Fortunately for us, in PHP 7, both Error and Exception implement a new interface called Throwable. Accordingly, if you are not sure whether your code will throw an Exception or an Error, simply catch an instance of Throwable and you'll catch both.
Application\Error\Handler class defined in the preceding recipe. In the constructor, set a new errorHandler() method as the default error handler:public function __construct($logFileDir = NULL, $logFile = NULL)
{
$logFile = $logFile ?? date('Ymd') . '.log';
$logFileDir = $logFileDir ?? __DIR__;
$this->logFile = $logFileDir . '/' . $logFile;
$this->logFile = str_replace('//', '/', $this->logFile);
set_exception_handler([$this,'exceptionHandler']);
set_error_handler([$this, 'errorHandler']);
}public function errorHandler($errno, $errstr, $errfile, $errline)
{
$message = sprintf('ERROR: %s : %d : %s : %s : %s' . PHP_EOL,
date('Y-m-d H:i:s'), $errno, $errstr, $errfile, $errline);
file_put_contents($this->logFile, $message, FILE_APPEND);
}EXCEPTION to the message sent to the log file in the exceptionHandler() method:public function exceptionHandler($ex)
{
$message = sprintf('EXCEPTION: %19s : %20s : %s' . PHP_EOL,
date('Y-m-d H:i:s'), get_class($ex), $ex->getMessage());
file_put_contents($this->logFile, $message, FILE_APPEND);
}First, make the changes to Application\Error\Handler as defined previously. Next, create a class that throws an error that, for this illustration, could be defined as Application\Error\ThrowsError. For example, you could have a method that attempts a divide by zero operation, and another that attempts to parse non-PHP code using eval():
<?php
namespace Application\Error;
class ThrowsError
{
const NOT_PARSE = 'this will not parse';
public function divideByZero()
{
$this->zero = 1 / 0;
}
public function willNotParse()
{
eval(self::NOT_PARSE);
}
}You can then define a calling program called chap_13_error_throwable.php that sets up autoloading, uses the appropriate classes, and creates an instance of ThrowsError:
<?php
require __DIR__ . '/../Application/Autoload/Loader.php';
Application\Autoload\Loader::init(__DIR__ . '/..');
use Application\Error\ { Handler, ThrowsError };
$error = new ThrowsError();If you then call the two methods, without a try/catch block and without defining the universal error handler, the first method generates a Warning, whereas the second throws a ParseError:
$error->divideByZero(); $error->willNotParse(); echo 'Application continues ... ' . PHP_EOL;
Because this is an error, program execution stops, and you will not see Application continues ...:
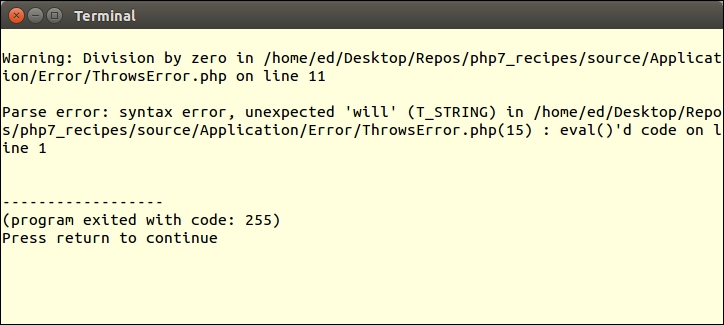
If you wrap the method calls in try/catch blocks and catch Throwable, the code execution continues:
try {
$error->divideByZero();
} catch (Throwable $e) {
echo 'Error Caught: ' . get_class($e) . ':'
. $e->getMessage() . PHP_EOL;
}
try {
$error->willNotParse();
} catch (Throwable $e) {
echo 'Error Caught: ' . get_class($e) . ':'
. $e->getMessage() . PHP_EOL;
}
echo 'Application continues ... ' . PHP_EOL;From the following output, you will also note that the program exits with code 0, which tells us all is OK:
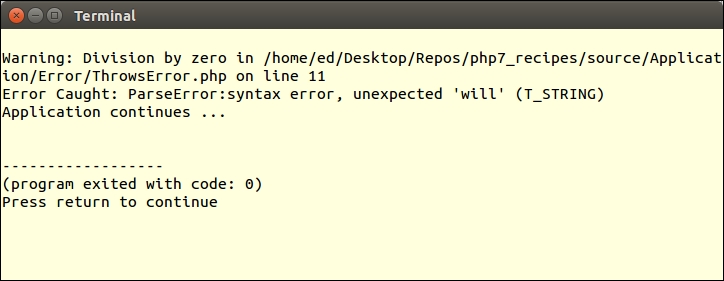
Finally, after the try/catch blocks, run the errors again, moving the echo statement to the end. You will see in the output that the errors were caught, but in the log file, notice that DivisionByZeroError is caught by the exception handler, whereas the ParseError is caught by the error hander:
$handler = new Handler(__DIR__ . '/logs'); $error->divideByZero(); $error->willNotParse(); echo 'Application continues ... ' . PHP_EOL;
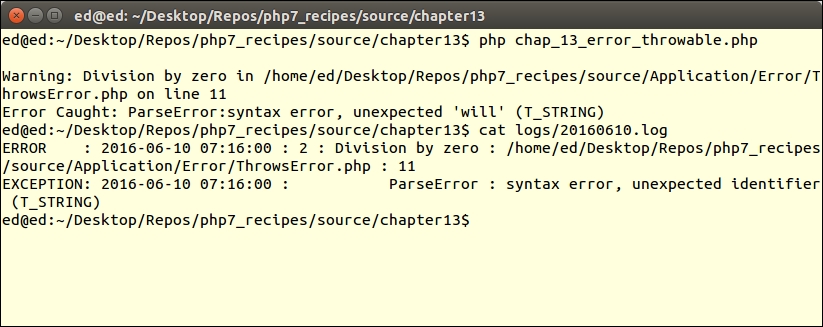
The primary means of testing PHP code is to use PHPUnit, which is based on a methodology called Unit Testing. The philosophy behind unit testing is quite simple: you break down your code into the smallest possible logical units. You then test each unit in isolation to confirm that it performs as expected. These expectations are codified into a series of assertions. If all assertions return TRUE, then the unit has passed the test.
<hash>:php -r "copy('https://getcomposer.org/installer', 'composer-setup.php');"
php -r "if (hash_file('SHA384', 'composer-setup.php') === '<hash>') {
echo 'Installer verified';
} else {
echo 'Installer corrupt'; unlink('composer-setup.php');
} echo PHP_EOL;"
php composer-setup.php
php -r "unlink('composer-setup.php');"composer.json file that contains a series of directives outlining project parameters and dependencies. A full description of these directives is beyond the scope of this book; however, for the purposes of this recipe, we create a minimal set of directives using the key parameter require. You will also note that the contents of the file are in JavaScript Object Notation (JSON) format:{
"require-dev": {
"phpunit/phpunit": "*"
}
}
php composer.phar install
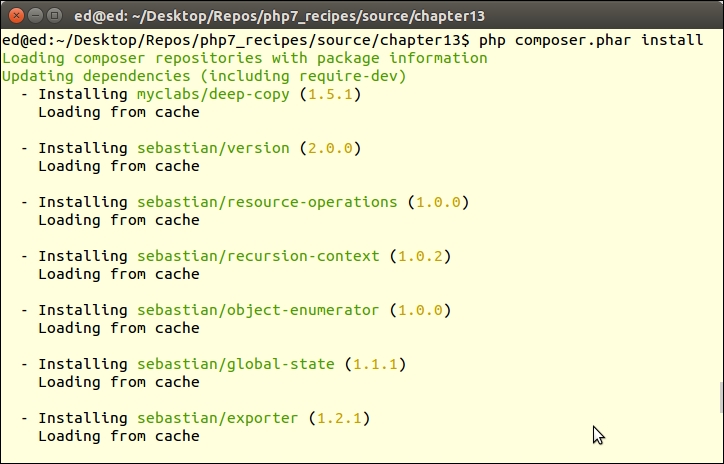
vendor folder that Composer will create if it does not already exist. The primary command to invoke PHPUnit is then symbolically linked into the vendor/bin folder. If you place this folder in your PATH, all you need do is to run this command, which checks the version and incidentally confirms the installation:
phpunit --version
chap_13_unit_test_simple.php file that contains the add() function:<?php
function add($a = NULL, $b = NULL)
{
return $a + $b;
}PHPUnit\Framework\TestCase. If you are testing a library of functions, at the beginning of the test class, include the file that contains function definitions. You would then write methods that start with the word test, usually followed by the name of the function you are testing, and possibly some additional CamelCase words to further describe the test. For the purposes of this recipe, we will define a SimpleTest test class:<?php
use PHPUnit\Framework\TestCase;
require_once __DIR__ . '/chap_13_unit_test_simple.php';
class SimpleTest extends TestCase
{
// testXXX() methods go here
}See also section gives you the documentation reference for the complete list of assertions. An assertion is a PHPUnit method that compares a known value against a value produced by that which you wish to test. An example is assertEquals(), which checks to see whether the first argument equals the second. The following example tests a method called add() and confirms 2 is the return value for add(1,1):public function testAdd()
{
$this->assertEquals(2, add(1,1));
}$this->assertNotEquals(3, add(1,1));
assertRegExp(). Assume, for this illustration, that we are testing a function that produces an HTML table out of a multidimensional array:function table(array $a)
{
$table = '<table>';
foreach ($a as $row) {
$table .= '<tr><td>';
$table .= implode('</td><td>', $row);
$table .= '</td></tr>';
}
$table .= '</table>';
return $table;
}<table>, one or more characters, followed by </table>. Further, we wish to confirm that a <td>B</td> element exists. When writing the test, we build a test array that consists of three sub-arrays containing the letters A—C, D—F, and G—I. We then pass the test array to the function, and run assertions against the result:public function testTable()
{
$a = [range('A', 'C'),range('D', 'F'),range('G','I')];
$table = table($a);
$this->assertRegExp('!^<table>.+</table>$!', $table);
$this->assertRegExp('!<td>B</td>!', $table);
}Demo class:<?php
class Demo
{
public function add($a, $b)
{
return $a + $b;
}
public function sub($a, $b)
{
return $a - $b;
}
// etc.
}SimpleClassTest test class, instead of including the library file, we include the file that represents the Demo class. We need an instance of Demo in order to run tests. For this purpose, we use a specially designed setup() method, which is run before each test. Also, you will note a teardown() method, which is run immediately after each test:<?php
use PHPUnit\Framework\TestCase;
require_once __DIR__ . '/Demo.php';
class SimpleClassTest extends TestCase
{
protected $demo;
public function setup()
{
$this->demo = new Demo();
}
public function teardown()
{
unset($this->demo);
}
public function testAdd()
{
$this->assertEquals(2, $this->demo->add(1,1));
}
public function testSub()
{
$this->assertEquals(0, $this->demo->sub(1,1));
}
// etc.
}setup() and teardown() could also be used to add or remove test data.VisitorOps. The new class will include methods to add, remove, and find visitors. Note that we've also added a method to return the latest SQL statement executed:<?php
require __DIR__ . '/../Application/Database/Connection.php';
use Application\Database\Connection;
class VisitorOps
{
const TABLE_NAME = 'visitors';
protected $connection;
protected $sql;
public function __construct(array $config)
{
$this->connection = new Connection($config);
}
public function getSql()
{
return $this->sql;
}
public function findAll()
{
$sql = 'SELECT * FROM ' . self::TABLE_NAME;
$stmt = $this->runSql($sql);
while ($row = $stmt->fetch(PDO::FETCH_ASSOC)) {
yield $row;
}
}
public function findById($id)
{
$sql = 'SELECT * FROM ' . self::TABLE_NAME;
$sql .= ' WHERE id = ?';
$stmt = $this->runSql($sql, [$id]);
return $stmt->fetch(PDO::FETCH_ASSOC);
}
public function removeById($id)
{
$sql = 'DELETE FROM ' . self::TABLE_NAME;
$sql .= ' WHERE id = ?';
return $this->runSql($sql, [$id]);
}
public function addVisitor($data)
{
$sql = 'INSERT INTO ' . self::TABLE_NAME;
$sql .= ' (' . implode(',',array_keys($data)) . ') ';
$sql .= ' VALUES ';
$sql .= ' ( :' . implode(',:',array_keys($data)) . ') ';
$this->runSql($sql, $data);
return $this->connection->pdo->lastInsertId();
}
public function runSql($sql, $params = NULL)
{
$this->sql = $sql;
try {
$stmt = $this->connection->pdo->prepare($sql);
$result = $stmt->execute($params);
} catch (Throwable $e) {
error_log(__METHOD__ . ':' . $e->getMessage());
return FALSE;
}
return $stmt;
}
}setup() method.setup() method.teardown() method.VisitorService, which makes use of the VisitorOps class discussed earlier:<?php
require_once __DIR__ . '/VisitorOps.php';
require_once __DIR__ . '/../Application/Database/Connection.php';
use Application\Database\Connection;
class VisitorService
{
protected $visitorOps;
public function __construct(array $config)
{
$this->visitorOps = new VisitorOps($config);
}
public function showAllVisitors()
{
$table = '<table>';
foreach ($this->visitorOps->findAll() as $row) {
$table .= '<tr><td>';
$table .= implode('</td><td>', $row);
$table .= '</td></tr>';
}
$table .= '</table>';
return $table;
}$visitorOps property. This allows us to insert a mock class in place of the real VisitorOps class:public function getVisitorOps()
{
return $this->visitorOps;
}
public function setVisitorOps(VisitorOps $visitorOps)
{
$this->visitorOps = $visitorOps;
}
} // closing brace for VisitorServiceVisitorOpsMock mock class that mimics the functionality of its parent class. Class constants and properties are inherited. We then add mock test data, and a getter in case we need access to the test data later:<?php
require_once __DIR__ . '/VisitorOps.php';
class VisitorOpsMock extends VisitorOps
{
protected $testData;
public function __construct()
{
$data = array();
for ($x = 1; $x <= 3; $x++) {
$data[$x]['id'] = $x;
$data[$x]['email'] = $x . 'test@unlikelysource.com';
$data[$x]['visit_date'] =
'2000-0' . $x . '-0' . $x . ' 00:00:00';
$data[$x]['comments'] = 'TEST ' . $x;
$data[$x]['name'] = 'TEST ' . $x;
}
$this->testData = $data;
}
public function getTestData()
{
return $this->testData;
}findAll() to return test data using yield, just as in the parent class. Note that we still build the SQL string, as this is what the parent class does:public function findAll()
{
$sql = 'SELECT * FROM ' . self::TABLE_NAME;
foreach ($this->testData as $row) {
yield $row;
}
}findById() we simply return that array key from $this->testData. For removeById(), we unset the array key supplied as a parameter from $this->testData:public function findById($id)
{
$sql = 'SELECT * FROM ' . self::TABLE_NAME;
$sql .= ' WHERE id = ?';
return $this->testData[$id] ?? FALSE;
}
public function removeById($id)
{
$sql = 'DELETE FROM ' . self::TABLE_NAME;
$sql .= ' WHERE id = ?';
if (empty($this->testData[$id])) {
return 0;
} else {
unset($this->testData[$id]);
return 1;
}
}id parameter might not be supplied, as the database would normally auto-generate this for us. To get around this, we check for the id parameter. If not set, we find the largest array key and increment:public function addVisitor($data)
{
$sql = 'INSERT INTO ' . self::TABLE_NAME;
$sql .= ' (' . implode(',',array_keys($data)) . ') ';
$sql .= ' VALUES ';
$sql .= ' ( :' . implode(',:',array_keys($data)) . ') ';
if (!empty($data['id'])) {
$id = $data['id'];
} else {
$keys = array_keys($this->testData);
sort($keys);
$id = end($keys) + 1;
$data['id'] = $id;
}
$this->testData[$id] = $data;
return 1;
}
} // ending brace for the class VisitorOpsMockVisitorServiceTest.php presented previously, calling it VisitorServiceTestAnonClass.php:<?php
use PHPUnit\Framework\TestCase;
require_once __DIR__ . '/VisitorService.php';
require_once __DIR__ . '/VisitorOps.php';
class VisitorServiceTestAnonClass extends TestCase
{
protected $visitorService;
protected $dbConfig = [
'driver' => 'mysql',
'host' => 'localhost',
'dbname' => 'php7cookbook_test',
'user' => 'cook',
'password' => 'book',
'errmode' => PDO::ERRMODE_EXCEPTION,
];
protected $testData;setup(), we define an anonymous class that extends VisitorOps. We only need to override the findAll() method:public function setup()
{
$data = array();
for ($x = 1; $x <= 3; $x++) {
$data[$x]['id'] = $x;
$data[$x]['email'] = $x . 'test@unlikelysource.com';
$data[$x]['visit_date'] =
'2000-0' . $x . '-0' . $x . ' 00:00:00';
$data[$x]['comments'] = 'TEST ' . $x;
$data[$x]['name'] = 'TEST ' . $x;
}
$this->testData = $data;
$this->visitorService =
new VisitorService($this->dbConfig);
$opsMock =
new class ($this->testData) extends VisitorOps {
protected $testData;
public function __construct($testData)
{
$this->testData = $testData;
}
public function findAll()
{
return $this->testData;
}
};
$this->visitorService->setVisitorOps($opsMock);
}testShowAllVisitors(), when $this->visitorService->showAllVisitors() is executed, the anonymous class is called by the visitor service, which in turn calls the overridden findAll():public function teardown()
{
unset($this->visitorService);
}
public function testShowAllVisitors()
{
$result = $this->visitorService->showAllVisitors();
$this->assertRegExp('!^<table>.+</table>$!', $result);
foreach ($this->testData as $key => $value) {
$dataWeWant = '!<td>' . $key . '</td>!';
$this->assertRegExp($dataWeWant, $result);
}
}
}getMockBuilder(). Although this approach does not allow a great deal of finite control over the mock object produced, it's extremely useful in situations where you only need to confirm that an object of a certain class is returned, and when a specified method is run, this method returns some expected value.VisitorServiceTestAnonClass; the only difference is in how an instance of VisitorOps is supplied in setup(), in this case, using getMockBuilder(). Note that although we did not use with() in this example, it is used to feed controlled parameters to the mocked method:<?php
use PHPUnit\Framework\TestCase;
require_once __DIR__ . '/VisitorService.php';
require_once __DIR__ . '/VisitorOps.php';
class VisitorServiceTestAnonMockBuilder extends TestCase
{
// code is identical to VisitorServiceTestAnon
public function setup()
{
$data = array();
for ($x = 1; $x <= 3; $x++) {
$data[$x]['id'] = $x;
$data[$x]['email'] = $x . 'test@unlikelysource.com';
$data[$x]['visit_date'] =
'2000-0' . $x . '-0' . $x . ' 00:00:00';
$data[$x]['comments'] = 'TEST ' . $x;
$data[$x]['name'] = 'TEST ' . $x;
}
$this->testData = $data;
$this->visitorService =
new VisitorService($this->dbConfig);
$opsMock = $this->getMockBuilder(VisitorOps::class)
->setMethods(['findAll'])
->disableOriginalConstructor()
->getMock();
$opsMock->expects($this->once())
->method('findAll')
->with()
->will($this->returnValue($this->testData));
$this->visitorService->setVisitorOps($opsMock);
}
// remaining code is the same
}First, you need to install PHPUnit, as discussed in steps 1 to 5. Be sure to include vendor/bin in your PATH so that you can run PHPUnit from the command line.
Next, define a chap_13_unit_test_simple.php program file with a series of simple functions, such as add(), sub() and so on, as discussed in step 1. You can then define a simple test class contained in SimpleTest.php as mentioned in steps 2 and 3.
Assuming phpunit is in your PATH, from a terminal window, change to the directory containing the code developed for this recipe, and run the following command:
phpunit SimpleTest SimpleTest.php
You should see the following output:
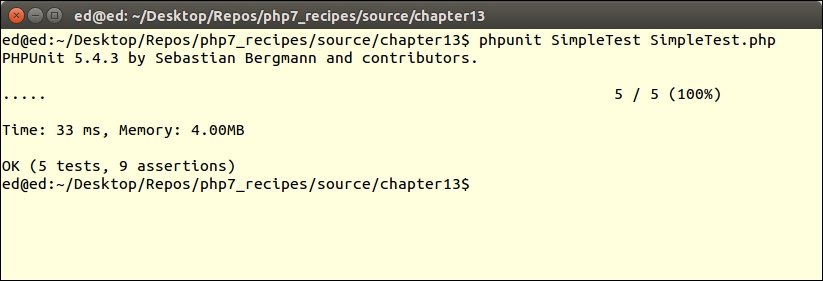
Make a change in SimpleTest.php so that the test will fail (step 4):
public function testDiv()
{
$this->assertEquals(2, div(4, 2));
$this->assertEquals(99, div(4, 0));
}Here is the revised output:
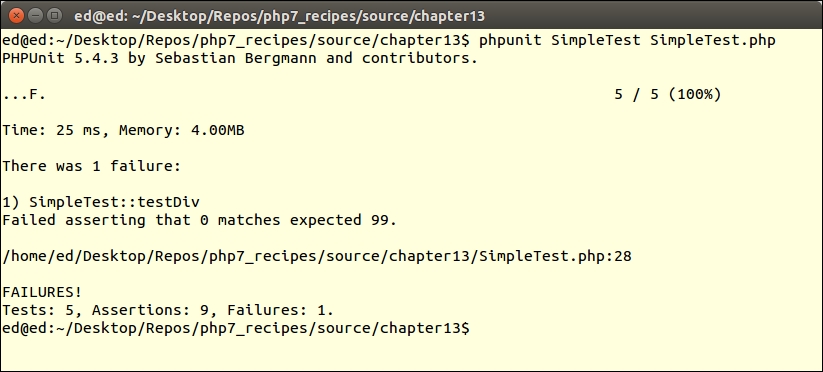
Next, add the table() function to chap_13_unit_test_simple.php (step 5), and testTable() to SimpleTest.php (step 6). Re-run the unit test and observe the results.
To test a class, copy the functions developed in chap_13_unit_test_simple.php to a Demo class (step 7). After making the modifications to SimpleTest.php suggested in step 8, re-run the simple test and observe the results.
First, create an example class to be tested, VisitorOps, shown in step 2 in this subsection. You can now define a class we will call SimpleDatabaseTest to test VisitorOps. First of all, use require_once to load the class to test. (We will discuss how to incorporate autoloading in the next recipe!) Then define key properties, including test database configuration and test data. You could use php7cookbook_test as the test database:
<?php
use PHPUnit\Framework\TestCase;
require_once __DIR__ . '/VisitorOps.php';
class SimpleDatabaseTest extends TestCase
{
protected $visitorOps;
protected $dbConfig = [
'driver' => 'mysql',
'host' => 'localhost',
'dbname' => 'php7cookbook_test',
'user' => 'cook',
'password' => 'book',
'errmode' => PDO::ERRMODE_EXCEPTION,
];
protected $testData = [
'id' => 1,
'email' => 'test@unlikelysource.com',
'visit_date' => '2000-01-01 00:00:00',
'comments' => 'TEST',
'name' => 'TEST'
];
}Next, define setup(), which inserts the test data, and confirms that the last SQL statement was INSERT. You should also check to see whether the return value was positive:
public function setup()
{
$this->visitorOps = new VisitorOps($this->dbConfig);
$this->visitorOps->addVisitor($this->testData);
$this->assertRegExp('/INSERT/', $this->visitorOps->getSql());
}After that, define teardown(), which removes the test data and confirms that the query for id = 1 comes back as FALSE:
public function teardown()
{
$result = $this->visitorOps->removeById(1);
$result = $this->visitorOps->findById(1);
$this->assertEquals(FALSE, $result);
unset($this->visitorOps);
}The first test is for findAll(). First, confirm the data type of the result. You could take the topmost element using current(). We confirm there are five elements, that one of them is name, and that the value is the same as that in the test data:
public function testFindAll()
{
$result = $this->visitorOps->findAll();
$this->assertInstanceOf(Generator::class, $result);
$top = $result->current();
$this->assertCount(5, $top);
$this->assertArrayHasKey('name', $top);
$this->assertEquals($this->testData['name'], $top['name']);
}The next test is for findById(). It is almost identical to testFindAll():
public function testFindById()
{
$result = $this->visitorOps->findById(1);
$this->assertCount(5, $result);
$this->assertArrayHasKey('name', $result);
$this->assertEquals($this->testData['name'], $result['name']);
}You do not need to bother with a test for removeById() as this is already done in teardown(). Likewise, there is no need to test runSql() as this is done as part of the other tests.
First, define a VisitorService service class as described in steps 2 and 3 in this subsection. Next, define a VisitorOpsMock mock class, which is discussed in steps 4 to 7.
You are now in a position to develop a test, VisitorServiceTest, for the service class. Note that you need provide your own database configuration as it is a best practice to use a test database instead of the production version:
<?php
use PHPUnit\Framework\TestCase;
require_once __DIR__ . '/VisitorService.php';
require_once __DIR__ . '/VisitorOpsMock.php';
class VisitorServiceTest extends TestCase
{
protected $visitorService;
protected $dbConfig = [
'driver' => 'mysql',
'host' => 'localhost',
'dbname' => 'php7cookbook_test',
'user' => 'cook',
'password' => 'book',
'errmode' => PDO::ERRMODE_EXCEPTION,
];
}In setup(), create an instance of the service, and insert VisitorOpsMock in place of the original class:
public function setup()
{
$this->visitorService = new VisitorService($this->dbConfig);
$this->visitorService->setVisitorOps(new VisitorOpsMock());
}
public function teardown()
{
unset($this->visitorService);
}In our test, which produces an HTML table from the list of visitors, you can then look for certain elements, knowing what to expect in advance as you have control over the test data:
public function testShowAllVisitors()
{
$result = $this->visitorService->showAllVisitors();
$this->assertRegExp('!^<table>.+</table>$!', $result);
$testData = $this->visitorService->getVisitorOps()->getTestData();
foreach ($testData as $key => $value) {
$dataWeWant = '!<td>' . $key . '</td>!';
$this->assertRegExp($dataWeWant, $result);
}
}
}You might then wish to experiment with the variations suggested in the last two subsections, Using Anonymous Classes as Mock Objects, and Using Mock Builder.
Other assertions test operations on numbers, strings, arrays, objects, files, JSON, and XML, as summarized in the following table:
|
Category |
Assertions |
|---|---|
|
General |
|
|
Numeric |
|
|
String |
|
|
Array/iterator |
|
|
File |
|
|
Objects |
|
|
JSON |
|
|
XML |
|
composer.json file directives, see https://getcomposer.org/doc/04-schema.md.getMockBuilder() in detail here: https://phpunit.de/manual/current/en/phpunit-book.html#test-doubles.mock-objectsYou may have noticed after having read through the previous recipe that it can quickly become tedious to have to manually run phpunit and specify test classes and PHP filenames. This is especially true when dealing with applications that employ dozens or even hundreds of classes and files. The PHPUnit project has a built-in capability to handle running multiple tests with a single command. Such a set of tests is referred to as a test suite.
mkdir tests cp *Test.php tests
SimpleTest) was developed in the preceding recipe:<?php
use PHPUnit\Framework\TestCase;
require_once __DIR__ . '/../chap_13_unit_test_simple.php';
class SimpleTest extends TestCase
{
// etc.phpunit with the directory path as an argument. PHPUnit will then automatically run all tests in that folder. In this example, we assume there is a tests subdirectory:
phpunit tests
--bootstrap option to specify a file that is executed prior to running the tests. A typical use for this option is to initiate autoloading:
phpunit --boostrap tests_with_autoload/bootstrap.php tests
bootstrap.php file that implements autoloading:<?php require __DIR__ . '/../../Application/Autoload/Loader.php'; Application\Autoload\Loader::init([__DIR__]);
<phpunit>
<testsuites>
<testsuite name="simple">
<file>SimpleTest.php</file>
<file>SimpleDbTest.php</file>
<file>SimpleClassTest.php</file>
</testsuite>
</testsuites>
</phpunit><phpunit bootstrap="bootstrap.php">
<testsuites>
<testsuite name="visitor">
<directory>Simple</directory>
</testsuite>
</testsuites>
</phpunit>Make sure all the tests discussed in the previous recipe, Writing a simple test, have been defined. You can then create a tests folder and move or copy all the *Test.php files into this folder. You'll then need to adjust the path in the require_once statements, as shown in step 2.
In order to demonstrate how PHPUnit can run all tests in a folder, from the directory containing the source code you defined for this chapter, run the following command:
phpunit tests
You should see the following output:
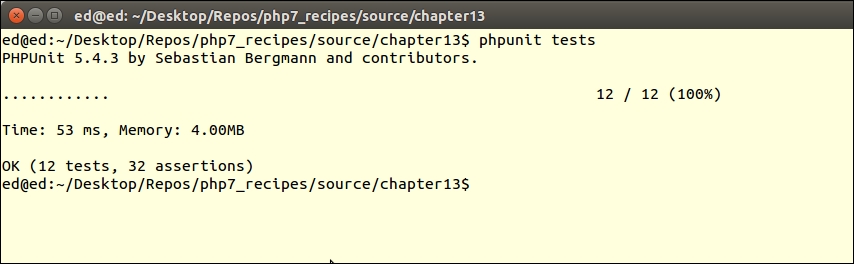
To demonstrate the use of a autoloading via a bootstrap file, create a new tests_with_autoload directory. In this folder, define a bootstrap.php file with the code shown in step 5. Create two directories in tests_with_autoload: Demo and Simple.
From the directory containing the source code for this chapter, copy the file (discussed in step 12 of the previous recipe) into tests_with_autoload/Demo/Demo.php. After the opening <?php tag, add this line:
namespace Demo;
Next, copy the SimpleTest.php file to tests_with_autoload/Simple/ClassTest.php. (Notice the filename change!). You will need to change the first few lines to the following:
<?php
namespace Simple;
use Demo\Demo;
use PHPUnit\Framework\TestCase;
class ClassTest extends TestCase
{
protected $demo;
public function setup()
{
$this->demo = new Demo();
}
// etc.After that, create a tests_with_autoload/phpunit.xml file that pulls everything together:
<phpunit bootstrap="bootstrap.php">
<testsuites>
<testsuite name="visitor">
<directory>Simple</directory>
</testsuite>
</testsuites>
</phpunit>Finally, change to the directory that contains the code for this chapter. You can now run a unit test that incorporates a bootstrap file, along with autoloading and namespaces, as follows:
phpunit -c tests_with_autoload/phpunit.xml
The output should appear as follows:
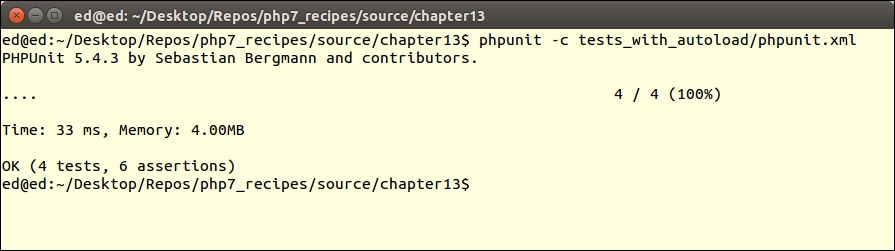
Part of the testing and debugging process involves incorporating realistic test data. In some cases, especially when testing database access and producing benchmarks, large amounts of test data are needed. One way in which this can be accomplished is to incorporate a process of scraping data from websites, and then putting the data together in realistic, yet random, combinations to be inserted into a database.
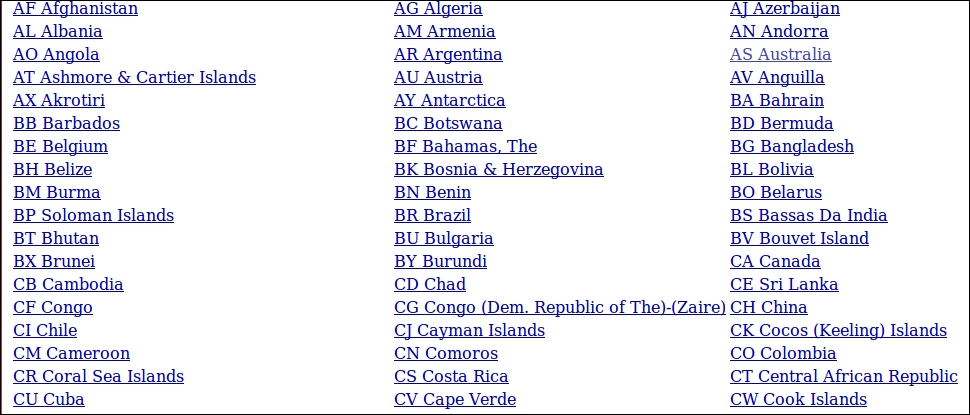
\n", which gives us this: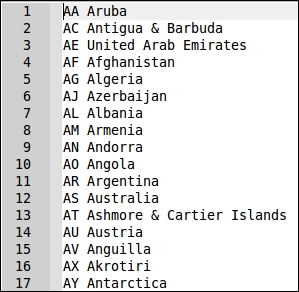
prospects table. Here is the SQL statement used to create this table:CREATE TABLE 'prospects' (
'id' int(11) NOT NULL AUTO_INCREMENT,
'first_name' varchar(128) NOT NULL,
'last_name' varchar(128) NOT NULL,
'address' varchar(256) DEFAULT NULL,
'city' varchar(64) DEFAULT NULL,
'state_province' varchar(32) DEFAULT NULL,
'postal_code' char(16) NOT NULL,
'phone' varchar(16) NOT NULL,
'country' char(2) NOT NULL,
'email' varchar(250) NOT NULL,
'status' char(8) DEFAULT NULL,
'budget' decimal(10,2) DEFAULT NULL,
'last_updated' datetime DEFAULT NULL,
PRIMARY KEY ('id'),
UNIQUE KEY 'UNIQ_35730C06E7927C74' ('email')
) ENGINE=InnoDB DEFAULT CHARSET=utf8;id, which is auto-generated:namespace Application\Test;
use PDO;
use Exception;
use DateTime;
use DateInterval;
use PDOException;
use SplFileObject;
use InvalidArgumentsException;
use Application\Database\Connection;
class FakeData
{
// data generation methods here
}const MAX_LOOKUPS = 10; const SOURCE_FILE = 'file'; const SOURCE_TABLE = 'table'; const SOURCE_METHOD = 'method'; const SOURCE_CALLBACK = 'callback'; const FILE_TYPE_CSV = 'csv'; const FILE_TYPE_TXT = 'txt'; const ERROR_DB = 'ERROR: unable to read source table'; const ERROR_FILE = 'ERROR: file not found'; const ERROR_COUNT = 'ERROR: unable to ascertain count or ID column missing'; const ERROR_UPLOAD = 'ERROR: unable to upload file'; const ERROR_LOOKUP = 'ERROR: unable to find any IDs in the source table'; protected $connection; protected $mapping; protected $files; protected $tables;
protected $alpha = 'ABCDEFGHIJKLMNOPQRSTUVWXYZ'; protected $street1 = ['Amber','Blue','Bright','Broad','Burning', 'Cinder','Clear','Dewy','Dusty','Easy']; // etc. protected $street2 = ['Anchor','Apple','Autumn','Barn','Beacon', 'Bear','Berry','Blossom','Bluff','Cider','Cloud']; // etc. protected $street3 = ['Acres','Arbor','Avenue','Bank','Bend', 'Canyon','Circle','Street']; protected $email1 = ['northern','southern','eastern','western', 'fast','midland','central']; protected $email2 = ['telecom','telco','net','connect']; protected $email3 = ['com','net'];
Connection object, used for database access, an array of mappings to the fake data:public function __construct(Connection $conn, array $mapping)
{
$this->connection = $conn;
$this->mapping = $mapping;
}public function getAddress($entry)
{
return random_int(1,999)
. ' ' . $this->street1[array_rand($this->street1)]
. ' ' . $this->street2[array_rand($this->street2)]
. ' ' . $this->street3[array_rand($this->street3)];
}public function getPostalCode($entry, $pattern = 1)
{
return $this->alpha[random_int(0,25)]
. $this->alpha[random_int(0,25)]
. random_int(1, 99)
. ' '
. random_int(1, 9)
. $this->alpha[random_int(0,25)]
. $this->alpha[random_int(0,25)];
}$entry array, with parameters, and use those parameters to create the name portion of the address:public function getEmail($entry, $params = NULL)
{
$first = $entry[$params[0]] ?? $this->alpha[random_int(0,25)];
$last = $entry[$params[1]] ?? $this->alpha[random_int(0,25)];
return $first[0] . '.' . $last
. '@'
. $this->email1[array_rand($this->email1)]
. $this->email2[array_rand($this->email2)]
. '.'
. $this->email3[array_rand($this->email3)];
}$entry array, with parameters. The parameters would be an array where the first value is a start date. The second parameter would be the maximum number of days to subtract from the start date. This effectively lets you return a random date from a range. Note that we use DateTime::sub() to subtract a random number of days. sub() requires a DateInterval instance, which we build using P, the random number of days, and then 'D':public function getDate($entry, $params)
{
list($fromDate, $maxDays) = $params;
$date = new DateTime($fromDate);
$date->sub(new DateInterval('P' . random_int(0, $maxDays) . 'D'));
return $date->format('Y-m-d H:i:s');
}public function getEntryFromFile($name, $type)
{
if (empty($this->files[$name])) {
$this->pullFileData($name, $type);
}
return $this->files[$name][
random_int(0, count($this->files[$name]))];
}Exception if the specified file is not found. The file type is identified as one of our class constants: FILE_TYPE_TEXT or FILE_TYPE_CSV. Depending on the type, we use either fgetcsv() or fgets():public function pullFileData($name, $type)
{
if (!file_exists($name)) {
throw new Exception(self::ERROR_FILE);
}
$fileObj = new SplFileObject($name, 'r');
if ($type == self::FILE_TYPE_CSV) {
while ($data = $fileObj->fgetcsv()) {
$this->files[$name][] = trim($data);
}
} else {
while ($data = $fileObj->fgets()) {
$this->files[$name][] = trim($data);
}
}public function getEntryFromTable($tableName, $idColumn, $mapping)
{
$entry = array();
try {
if (empty($this->tables[$tableName])) {
$sql = 'SELECT ' . $idColumn . ' FROM ' . $tableName
. ' ORDER BY ' . $idColumn . ' ASC LIMIT 1';
$stmt = $this->connection->pdo->query($sql);
$this->tables[$tableName]['first'] =
$stmt->fetchColumn();
$sql = 'SELECT ' . $idColumn . ' FROM ' . $tableName
. ' ORDER BY ' . $idColumn . ' DESC LIMIT 1';
$stmt = $this->connection->pdo->query($sql);
$this->tables[$tableName]['last'] =
$stmt->fetchColumn();
}$result = FALSE; $count = self::MAX_LOOKUPS; $sql = 'SELECT * FROM ' . $tableName . ' WHERE ' . $idColumn . ' = ?'; $stmt = $this->connection->pdo->prepare($sql);
do...while loop. The reason for this is that we need to run the query at least once to achieve results. Only if we do not arrive at a result do we continue with the loop. We generate a random number between the lowest ID and the highest ID, and then use this in a parameter in the query. Notice that we also decrement a counter to prevent an endless loop. This is in case the IDs are not sequential, in which case we could accidentally generate an ID that does not exist. If we exceed the maximum attempts, still with no results, we throw an Exception:do {
$id = random_int($this->tables[$tableName]['first'],
$this->tables[$tableName]['last']);
$stmt->execute([$id]);
$result = $stmt->fetch(PDO::FETCH_ASSOC);
} while ($count-- && !$result);
if (!$result) {
error_log(__METHOD__ . ':' . self::ERROR_LOOKUP);
throw new Exception(self::ERROR_LOOKUP);
}
} catch (PDOException $e) {
error_log(__METHOD__ . ':' . $e->getMessage());
throw new Exception(self::ERROR_DB);
}foreach ($mapping as $key => $value) {
$entry[$value] = $result[$key] ?? NULL;
}
return $entry;
}getRandomEntry() method, which generates a single array of fake data. We loop through $mapping one entry at a time and examine the various parameters:public function getRandomEntry()
{
$entry = array();
foreach ($this->mapping as $key => $value) {
if (isset($value['source'])) {
switch ($value['source']) {source parameter is used to implement what effectively serves as a Strategy Pattern. We support four different possibilities for source, all defined as class constants. The first one is SOURCE_FILE. In this case, we use the getEntryFromFile() method discussed previously: case self::SOURCE_FILE :
$entry[$key] = $this->getEntryFromFile(
$value['name'], $value['type']);
break;$mapping array: case self::SOURCE_CALLBACK :
$entry[$key] = $value['name']();
break;SOURCE_TABLE option uses the database table defined in $mapping as a lookup. Note that getEntryFromTable(), discussed previously, is able to return an array of values, which means we need to use array_merge() to consolidate the results: case self::SOURCE_TABLE :
$result = $this->getEntryFromTable(
$value['name'],$value['idCol'],$value['mapping']);
$entry = array_merge($entry, $result);
break;SOURCE_METHOD option, which is also the default, uses a method already included with this class. We check to see whether parameters are included, and, if so, add those to the method call. Note the use of {} to influence interpolation. If we made a $this->$value['name']() PHP 7 call, due to the Abstract Syntax Tree (AST) rewrite, it would interpolate like this, ${$this->$value}['name'](), which is not what we want: case self::SOURCE_METHOD :
default :
if (!empty($value['params'])) {
$entry[$key] = $this->{$value['name']}(
$entry, $value['params']);
} else {
$entry[$key] = $this->{$value['name']}($entry);
}
}
}
}
return $entry;
}getRandomEntry() to produce multiple lines of fake data. We also add an option to insert to a destination table. If this option is enabled, we set up a prepared statement to insert, and also check to see whether we need to truncate any data currently in this table:public function generateData(
$howMany, $destTableName = NULL, $truncateDestTable = FALSE)
{
try {
if ($destTableName) {
$sql = 'INSERT INTO ' . $destTableName
. ' (' . implode(',', array_keys($this->mapping))
. ') '. ' VALUES ' . ' (:'
. implode(',:', array_keys($this->mapping)) . ')';
$stmt = $this->connection->pdo->prepare($sql);
if ($truncateDestTable) {
$sql = 'DELETE FROM ' . $destTableName;
$this->connection->pdo->query($sql);
}
}
} catch (PDOException $e) {
error_log(__METHOD__ . ':' . $e->getMessage());
throw new Exception(self::ERROR_COUNT);
}getRandomEntry(). If a database insert is requested, we execute the prepared statement in a try/catch block. In any event, we turn this method into a generator using the yield keyword:for ($x = 0; $x < $howMany; $x++) {
$entry = $this->getRandomEntry();
if ($insert) {
try {
$stmt->execute($entry);
} catch (PDOException $e) {
error_log(__METHOD__ . ':' . $e->getMessage());
throw new Exception(self::ERROR_DB);
}
}
yield $entry;
}
}The first thing to do is to ensure you have the data ready for random data generation. In this recipe, we will presume that the destination table is prospects, which has the following SQL database definition shown in step 7.
As a data source for names, you could create text files for first names and surnames. In this illustration, we will reference the data/files directory, and the files first_names.txt and surnames.txt. For city, state or province, postal code, and country, it might be useful to download the data from a source such as http://www.geonames.org/, and upload to a world_city_data table. For the remaining fields, such as address, e-mail, status, and so on, you could either use methods built into FakeData, or define callbacks.
Next, be sure to define Application\Test\FakeData, adding the content discussed in steps 8 to 29. After you have finished, create a calling program called chap_13_fake_data.php, which sets up autoloading and uses the appropriate classes. You should also define constants that match the path to the database configuration, and names files:
<?php
define('DB_CONFIG_FILE', __DIR__ . '/../config/db.config.php');
define('FIRST_NAME_FILE', __DIR__ . '/../data/files/first_names.txt');
define('LAST_NAME_FILE', __DIR__ . '/../data/files/surnames.txt');
require __DIR__ . '/../Application/Autoload/Loader.php';
Application\Autoload\Loader::init(__DIR__ . '/..');
use Application\Test\FakeData;
use Application\Database\Connection;Next, define a mapping array that uses the column names in the destination table (prospects) as a key. You need to then define sub-keys for source, name, and any other parameters that are required. For starters, 'first_name' and 'last_name' will both use a file as a source, 'name' points to the name of the file, and 'type' indicates a file type of text:
$mapping = [ 'first_name' => ['source' => FakeData::SOURCE_FILE, 'name' => FIRST_NAME_FILE, 'type' => FakeData::FILE_TYPE_TXT], 'last_name' => ['source' => FakeData::SOURCE_FILE, 'name' => LAST_NAME_FILE, 'type' => FakeData::FILE_TYPE_TXT],
The 'address', 'email', and 'last_updated' all use built-in methods as a data source. The last two also define parameters to be passed:
'address' => ['source' => FakeData::SOURCE_METHOD,
'name' => 'getAddress'],
'email' => ['source' => FakeData::SOURCE_METHOD,
'name' => 'getEmail',
'params' => ['first_name','last_name']],
'last_updated' => ['source' => FakeData::SOURCE_METHOD,
'name' => 'getDate',
'params' => [date('Y-m-d'), 365*5]]The 'phone', 'status' and 'budget' could all use callbacks to provide fake data:
'phone' => ['source' => FakeData::SOURCE_CALLBACK,
'name' => function () {
return sprintf('%3d-%3d-%4d', random_int(101,999),
random_int(101,999), random_int(0,9999)); }],
'status' => ['source' => FakeData::SOURCE_CALLBACK,
'name' => function () { $status = ['BEG','INT','ADV'];
return $status[rand(0,2)]; }],
'budget' => ['source' => FakeData::SOURCE_CALLBACK,
'name' => function() { return random_int(0, 99999)
+ (random_int(0, 99) * .01); }]And finally, 'city' draws its data from a lookup table, which also gives you data for the fields listed in the 'mapping' parameter. You can then leave those keys undefined. Notice that you should also specify the column representing the primary key for the table:
'city' => ['source' => FakeData::SOURCE_TABLE, 'name' => 'world_city_data', 'idCol' => 'id', 'mapping' => [ 'city' => 'city', 'state_province' => 'state_province', 'postal_code_prefix' => 'postal_code', 'iso2' => 'country'] ], 'state_province'=> [], 'postal_code' => [], 'country' => [], ];
You can then define the destination table, a Connection instance, and create the FakeData instance. A foreach() loop will suffice to display a given number of entries:
$destTableName = 'prospects';
$conn = new Connection(include DB_CONFIG_FILE);
$fake = new FakeData($conn, $mapping);
foreach ($fake->generateData(10) as $row) {
echo implode(':', $row) . PHP_EOL;
}The output, for 10 rows, would look something like this:
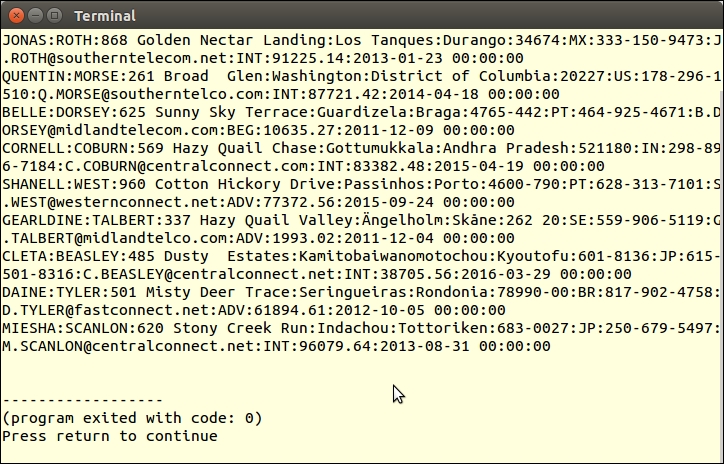
Here is a summary of websites with various lists of data that could be of use when generating test data:
|
Type of Data |
URL |
Notes |
|---|---|---|
|
Names | ||
|
http://www.babynamewizard.com/international-names-lists-popular-names-from-around-the-world | ||
|
Raw Name Lists | ||
|
US male first names | ||
|
US female first names | ||
|
US male first names | ||
|
Last Names |
US surnames from census | |
|
http://surname.sofeminine.co.uk/w/surnames/most-common-surnames-in-great-britain.html | ||
|
List of US surnames in the form of a PHP array | ||
|
Dutch surnames | ||
|
International surnames; just change the last letter(s) to get a list of names starting with that letter(s) | ||
|
Cities |
World cities | |
|
Postal Codes |
US only; includes cities, postal codes, latitude and longitude | |
|
International; city names, postal codes, EVERYTHING!; free download |
Up until PHP 7, in order to override php.ini settings for secure session management, you had to use a series of ini_set() commands. This approach is extremely annoying in that you also needed to know which settings were available, and being able to re-use the same settings in other applications was difficult. As of PHP 7, however, you can supply an array of parameters to the session_start() command, which immediately sets those values.
Application\Security\SessOptions class, which will hold session parameters and also have the ability to start the session. We also define a class constant in case invalid session options are passed:namespace Application\Security;
use ReflectionClass;
use InvalidArgumentsException;
class SessOptions
{
const ERROR_PARAMS = 'ERROR: invalid session options';php.ini session directives (documented at http://php.net/manual/en/session.configuration.php). We are specifically looking for directives that, in the Changeable column, are marked PHP_INI_ALL. Such directives can be overridden at runtime, and are thus available as arguments to session_start():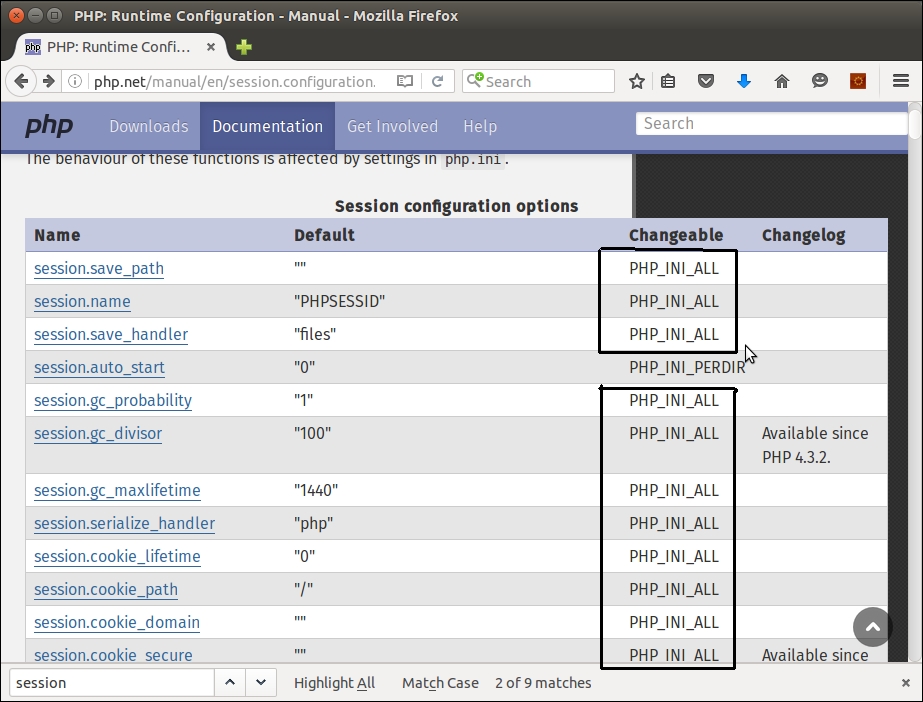
const SESS_OP_NAME = 'name'; const SESS_OP_LAZY_WRITE = 'lazy_write'; // AVAILABLE // SINCE PHP 7.0.0. const SESS_OP_SAVE_PATH = 'save_path'; const SESS_OP_SAVE_HANDLER = 'save_handler'; // etc.
php.ini session settings as an argument. We use ReflectionClass to get a list of class constants, and run the $options argument through a loop to confirm the setting is allowed. Also note the use of array_flip(), which flips keys and values, so that the actual values for our class constants form the array key, and the name of the class constant becomes the value:protected $options;
protected $allowed;
public function __construct(array $options)
{
$reflect = new ReflectionClass(get_class($this));
$this->allowed = $reflect->getConstants();
$this->allowed = array_flip($this->allowed);
unset($this->allowed[self::ERROR_PARAMS]);
foreach ($options as $key => $value) {
if(!isset($this->allowed[$key])) {
error_log(__METHOD__ . ':' . self::ERROR_PARAMS);
throw new InvalidArgumentsException(
self::ERROR_PARAMS);
}
}
$this->options = $options;
}public function getAllowed()
{
return $this->allowed;
}
public function start()
{
session_start($this->options);
}Place all the code discussed in this recipe into a SessOptions.php file in the Application\Security directory. You can then define a calling program called chap_13_session_options.php to test the new class, which sets up autoloading and uses the class:
<?php require __DIR__ . '/../Application/Autoload/Loader.php'; Application\Autoload\Loader::init(__DIR__ . '/..'); use Application\Security\SessOptions;
Next, define an array that uses the class constants as keys, with values as desired to manage the session. Note that in the example shown here, session information is stored in a subdirectory, session, which you need to create:
$options = [ SessOptions::SESS_OP_USE_ONLY_COOKIES => 1, SessOptions::SESS_OP_COOKIE_LIFETIME => 300, SessOptions::SESS_OP_COOKIE_HTTPONLY => 1, SessOptions::SESS_OP_NAME => 'UNLIKELYSOURCE', SessOptions::SESS_OP_SAVE_PATH => __DIR__ . '/session' ];
You can now create the SessOptions instance and run start() to start the session. You could use phpinfo() here to show some information on the session:
$sessOpt = new SessOptions($options); $sessOpt->start(); $_SESSION['test'] = 'TEST'; phpinfo(INFO_VARIABLES);
If you look for information on cookies using your browser's developer tools, you will note the name is set to UNLIKELYSOURCE and the expiration time is 5 minutes from now:
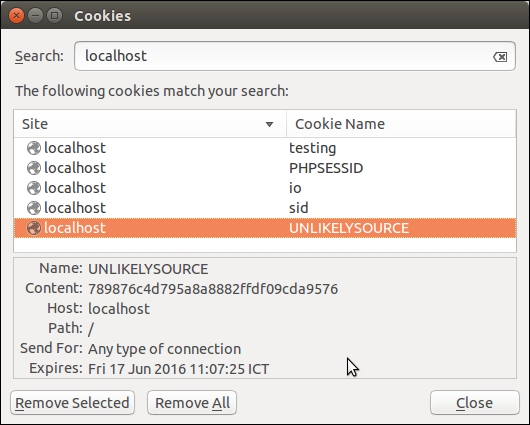
If you do a scan of the session directory, you will see that the session information has been stored there:
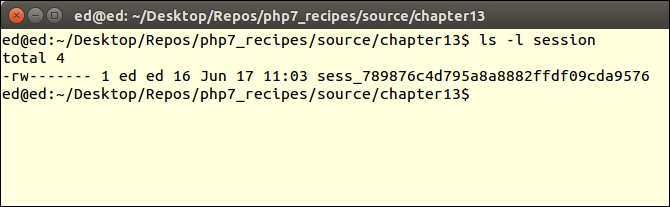
php.ini directives, see this summary: http://php.net/manual/en/session.configuration.phpIn this appendix, we will cover the following topics:
In order to work with PSR-7 requests and responses, we first need to define a series of value objects. These are classes that represent logical objects used in web-based activities such as URIs, file uploads, and streaming request or response bodies.
The source code for the PSR-7 interfaces is available as a Composer package. It is considered a best practice to use Composer to manage external software, including PSR-7 interfaces.
|
Interface |
Extends |
Notes |
What the methods handle |
|---|---|---|---|
|
|
Defines methods common to HTTP messages |
Headers, message body (that is, content), and protocol | |
|
|
|
Represents requests generated by a client |
The URI, HTTP method, and the request target |
|
|
|
Represents a request coming to a server from a client |
Server and query parameters, cookies, uploaded files, and the parsed body |
|
|
|
Represents a response from the server to client |
HTTP status code and reason |
|
|
Represents the data stream |
Streaming behavior such as seek, tell, read, write, and so on | |
|
|
Represents the URI |
Scheme (that is, HTTP, HTTPS), host, port, username, password (that is, for FTP), query parameters, path, and fragment | |
|
|
Deals with uploaded files |
File size, media type, moving the file, and filename |
namespace Application\MiddleWare;
class Constants
{
const HEADER_HOST = 'Host'; // host header
const HEADER_CONTENT_TYPE = 'Content-Type';
const HEADER_CONTENT_LENGTH = 'Content-Length';
const METHOD_GET = 'get';
const METHOD_POST = 'post';
const METHOD_PUT = 'put';
const METHOD_DELETE = 'delete';
const HTTP_METHODS = ['get','put','post','delete'];
const STANDARD_PORTS = [
'ftp' => 21, 'ssh' => 22, 'http' => 80, 'https' => 443
];
const CONTENT_TYPE_FORM_ENCODED =
'application/x-www-form-urlencoded';
const CONTENT_TYPE_MULTI_FORM = 'multipart/form-data';
const CONTENT_TYPE_JSON = 'application/json';
const CONTENT_TYPE_HAL_JSON = 'application/hal+json';
const DEFAULT_STATUS_CODE = 200;
const DEFAULT_BODY_STREAM = 'php://input';
const DEFAULT_REQUEST_TARGET = '/';
const MODE_READ = 'r';
const MODE_WRITE = 'w';
// NOTE: not all error constants are shown to conserve space
const ERROR_BAD = 'ERROR: ';
const ERROR_UNKNOWN = 'ERROR: unknown';
// NOTE: not all status codes are shown here!
const STATUS_CODES = [
200 => 'OK',
301 => 'Moved Permanently',
302 => 'Found',
401 => 'Unauthorized',
404 => 'Not Found',
405 => 'Method Not Allowed',
418 => 'I_m A Teapot',
500 => 'Internal Server Error',
];
}A complete list of HTTP status codes can be found here: https://tools.ietf.org/html/rfc7231#section-6.1.
parse_url() function:namespace Application\MiddleWare;
use InvalidArgumentException;
use Psr\Http\Message\UriInterface;
class Uri implements UriInterface
{
protected $uriString;
protected $uriParts = array();
public function __construct($uriString)
{
$this->uriParts = parse_url($uriString);
if (!$this->uriParts) {
throw new InvalidArgumentException(
Constants::ERROR_INVALID_URI);
}
$this->uriString = $uriString;
}URI stands for Uniform Resource Indicator. This is what you would see at the top of your browser when making a request. For more information on what comprises a URI, have a look at http://tools.ietf.org/html/rfc3986.
public function getScheme()
{
return strtolower($this->uriParts['scheme']) ?? '';
}public function getAuthority()
{
$val = '';
if (!empty($this->getUserInfo()))
$val .= $this->getUserInfo() . '@';
$val .= $this->uriParts['host'] ?? '';
if (!empty($this->uriParts['port']))
$val .= ':' . $this->uriParts['port'];
return $val;
}ftp://username:password@website.com:/path:public function getUserInfo()
{
if (empty($this->uriParts['user'])) {
return '';
}
$val = $this->uriParts['user'];
if (!empty($this->uriParts['pass']))
$val .= ':' . $this->uriParts['pass'];
return $val;
}public function getHost()
{
if (empty($this->uriParts['host'])) {
return '';
}
return strtolower($this->uriParts['host']);
}STANDARD_PORTS constant, the return value is NULL, according to the requirements of PSR-7:public function getPort()
{
if (empty($this->uriParts['port'])) {
return NULL;
} else {
if ($this->getScheme()) {
if ($this->uriParts['port'] ==
Constants::STANDARD_PORTS[$this->getScheme()]) {
return NULL;
}
}
return (int) $this->uriParts['port'];
}
}rawurlencode() PHP function as it is compliant with RFC 3986. We cannot just encode the entire path, however, as the path separator (that is, /) would also get encoded! Accordingly, we need to first break it up using explode(), encode the parts, and then reassemble it:public function getPath()
{
if (empty($this->urlParts['path'])) {
return '';
}
return implode('/', array_map("rawurlencode", explode('/', $this->urlParts['path'])));
}query string (that is, from $_GET). These too must be URL-encoded. First, we define getQueryParams(), which breaks the query string into an associative array. You will note the reset option in case we wish to refresh the query parameters. We then define getQuery(), which takes the array and produces a proper URL-encoded string:public function getQueryParams($reset = FALSE)
{
if ($this->queryParams && !$reset) {
return $this->queryParams;
}
$this->queryParams = [];
if (!empty($this->uriParts['query'])) {
foreach (explode('&', $this->uriParts['query']) as $keyPair) {
list($param,$value) = explode('=',$keyPair);
$this->queryParams[$param] = $value;
}
}
return $this->queryParams;
}
public function getQuery()
{
if (!$this->getQueryParams()) {
return '';
}
$output = '';
foreach ($this->getQueryParams() as $key => $value) {
$output .= rawurlencode($key) . '='
. rawurlencode($value) . '&';
}
return substr($output, 0, -1);
}fragment (that is, a # in the URI), and any part following it:public function getFragment()
{
if (empty($this->urlParts['fragment'])) {
return '';
}
return rawurlencode($this->urlParts['fragment']);
}withXXX() methods, which match the getXXX() methods described above. These methods are designed to add, replace, or remove properties associated with the request class (scheme, authority, user info, and so on). In addition, these methods return the current instance that allows us to use these methods in a series of successive calls (often referred to as the fluent interface). We start with withScheme():public function withScheme($scheme)
{
if (empty($scheme) && $this->getScheme()) {
unset($this->uriParts['scheme']);
} else {
if (isset(STANDARD_PORTS[strtolower($scheme)])) {
$this->uriParts['scheme'] = $scheme;
} else {
throw new InvalidArgumentException(Constants::ERROR_BAD . __METHOD__);
}
}
return $this;
}withQuery() method resets the query parameters array. withHost(), withPort(), withPath(), and withFragment() use the same logic, but are not shown to conserve space:public function withUserInfo($user, $password = null)
{
if (empty($user) && $this->getUserInfo()) {
unset($this->uriParts['user']);
} else {
$this->urlParts['user'] = $user;
if ($password) {
$this->urlParts['pass'] = $password;
}
}
return $this;
}
// Not shown: withHost(),withPort(),withPath(),withFragment()
public function withQuery($query)
{
if (empty($query) && $this->getQuery()) {
unset($this->uriParts['query']);
} else {
$this->uriParts['query'] = $query;
}
// reset query params array
$this->getQueryParams(TRUE);
return $this;
}Application\MiddleWare\Uri class with __toString(), which, when the object is used in a string context, returns a proper URI, assembled from $uriParts. We also define a convenience method, getUriString(), that simply calls __toString():public function __toString()
{
$uri = ($this->getScheme())
? $this->getScheme() . '://' : '';authority URI part is present, we add it. authority includes the user information, host, and port. Otherwise, we just append host and port:if ($this->getAuthority()) {
$uri .= $this->getAuthority();
} else {
$uri .= ($this->getHost()) ? $this->getHost() : '';
$uri .= ($this->getPort())
? ':' . $this->getPort() : '';
}path, we first check whether the first character is /. If not, we need to add this separator. We then add query and fragment, if present:$path = $this->getPath();
if ($path) {
if ($path[0] != '/') {
$uri .= '/' . $path;
} else {
$uri .= $path;
}
}
$uri .= ($this->getQuery())
? '?' . $this->getQuery() : '';
$uri .= ($this->getFragment())
? '#' . $this->getFragment() : '';
return $uri;
}
public function getUriString()
{
return $this->__toString();
}
}Streams sub-system, so this is a natural fit. PSR-7 formalizes this by way of Psr\Http\Message\StreamInterface that defines such methods as read(), write(), seek(), and so on. We now present Application\MiddleWare\Stream that we can use to represent the body of incoming or outgoing requests and/or responses:namespace Application\MiddleWare;
use SplFileInfo;
use Throwable;
use RuntimeException;
use Psr\Http\Message\StreamInterface;
class Stream implements StreamInterface
{
protected $stream;
protected $metadata;
protected $info;fopen() command. We then use stream_get_meta_data() to get information on the stream. For other details, we create an SplFileInfo instance:public function __construct($input, $mode = self::MODE_READ)
{
$this->stream = fopen($input, $mode);
$this->metadata = stream_get_meta_data($this->stream);
$this->info = new SplFileInfo($input);
}SplFileInfo instance:public function getStream()
{
return $this->stream;
}
public function getInfo()
{
return $this->info;
}public function read($length)
{
if (!fread($this->stream, $length)) {
throw new RuntimeException(self::ERROR_BAD . __METHOD__);
}
}
public function write($string)
{
if (!fwrite($this->stream, $string)) {
throw new RuntimeException(self::ERROR_BAD . __METHOD__);
}
}
public function rewind()
{
if (!rewind($this->stream)) {
throw new RuntimeException(self::ERROR_BAD . __METHOD__);
}
}
public function eof()
{
return eof($this->stream);
}
public function tell()
{
try {
return ftell($this->stream);
} catch (Throwable $e) {
throw new RuntimeException(self::ERROR_BAD . __METHOD__);
}
}
public function seek($offset, $whence = SEEK_SET)
{
try {
fseek($this->stream, $offset, $whence);
} catch (Throwable $e) {
throw new RuntimeException(self::ERROR_BAD . __METHOD__);
}
}
public function close()
{
if ($this->stream) {
fclose($this->stream);
}
}
public function detach()
{
return $this->close();
}public function getMetadata($key = null)
{
if ($key) {
return $this->metadata[$key] ?? NULL;
} else {
return $this->metadata;
}
}
public function getSize()
{
return $this->info->getSize();
}
public function isSeekable()
{
return boolval($this->metadata['seekable']);
}
public function isWritable()
{
return $this->stream->isWritable();
}
public function isReadable()
{
return $this->info->isReadable();
}getContents() and __toString() in order to dump the contents of the stream:public function __toString()
{
$this->rewind();
return $this->getContents();
}
public function getContents()
{
ob_start();
if (!fpassthru($this->stream)) {
throw new RuntimeException(self::ERROR_BAD . __METHOD__);
}
return ob_get_clean();
}
}Stream class shown previously is TextStream that is designed for situations where the body is a string (that is, an array encoded as JSON) rather than a file. As we need to make absolutely certain that the incoming $input value is of the string data type, we invoke PHP 7 strict types just after the opening tag. We also identify a $pos property (that is, position) that will emulate a file pointer, but instead point to a position within the string:<?php
declare(strict_types=1);
namespace Application\MiddleWare;
use Throwable;
use RuntimeException;
use SplFileInfo;
use Psr\Http\Message\StreamInterface;
class TextStream implements StreamInterface
{
protected $stream;
protected $pos = 0;$stream property is the input string:public function __construct(string $input)
{
$this->stream = $input;
}
public function getStream()
{
return $this->stream;
}
public function getInfo()
{
return NULL;
}
public function getContents()
{
return $this->stream;
}
public function __toString()
{
return $this->getContents();
}
public function getSize()
{
return strlen($this->stream);
}
public function close()
{
// do nothing: how can you "close" string???
}
public function detach()
{
return $this->close(); // that is, do nothing!
}tell(), eof(), seek(), and so on, work with $pos:public function tell()
{
return $this->pos;
}
public function eof()
{
return ($this->pos == strlen($this->stream));
}
public function isSeekable()
{
return TRUE;
}
public function seek($offset, $whence = NULL)
{
if ($offset < $this->getSize()) {
$this->pos = $offset;
} else {
throw new RuntimeException(
Constants::ERROR_BAD . __METHOD__);
}
}
public function rewind()
{
$this->pos = 0;
}
public function isWritable()
{
return TRUE;
}read() and write() methods work with $pos and substrings:public function write($string)
{
$temp = substr($this->stream, 0, $this->pos);
$this->stream = $temp . $string;
$this->pos = strlen($this->stream);
}
public function isReadable()
{
return TRUE;
}
public function read($length)
{
return substr($this->stream, $this->pos, $length);
}
public function getMetadata($key = null)
{
return NULL;
}
}Application\MiddleWare\UploadedFile. As with the other classes, we first define properties that represent aspects of a file upload:namespace Application\MiddleWare;
use RuntimeException;
use InvalidArgumentException;
use Psr\Http\Message\UploadedFileInterface;
class UploadedFile implements UploadedFileInterface
{
protected $field; // original name of file upload field
protected $info; // $_FILES[$field]
protected $randomize;
protected $movedName = '';$_FILES. We add the last parameter to signal whether or not we want the class to generate a new random filename once the uploaded file is confirmed:public function __construct($field, array $info, $randomize = FALSE)
{
$this->field = $field;
$this->info = $info;
$this->randomize = $randomize;
}Stream class instance for the temporary or moved file:public function getStream()
{
if (!$this->stream) {
if ($this->movedName) {
$this->stream = new Stream($this->movedName);
} else {
$this->stream = new Stream($info['tmp_name']);
}
}
return $this->stream;
}moveTo() method performs the actual file movement. Note the extensive series of safety checks to help prevent an injection attack. If randomize is not enabled, we use the original user-supplied filename:public function moveTo($targetPath)
{
if ($this->moved) {
throw new Exception(Constants::ERROR_MOVE_DONE);
}
if (!file_exists($targetPath)) {
throw new InvalidArgumentException(Constants::ERROR_BAD_DIR);
}
$tempFile = $this->info['tmp_name'] ?? FALSE;
if (!$tempFile || !file_exists($tempFile)) {
throw new Exception(Constants::ERROR_BAD_FILE);
}
if (!is_uploaded_file($tempFile)) {
throw new Exception(Constants::ERROR_FILE_NOT);
}
if ($this->randomize) {
$final = bin2hex(random_bytes(8)) . '.txt';
} else {
$final = $this->info['name'];
}
$final = $targetPath . '/' . $final;
$final = str_replace('//', '/', $final);
if (!move_uploaded_file($tempFile, $final)) {
throw new RuntimeException(Constants::ERROR_MOVE_UNABLE);
}
$this->movedName = $final;
return TRUE;
}$_FILES from the $info property. Please note that the return values from getClientFilename() and getClientMediaType() should be considered untrusted, as they originate from the outside. We also add a method to return the moved filename:public function getMovedName()
{
return $this->movedName ?? NULL;
}
public function getSize()
{
return $this->info['size'] ?? NULL;
}
public function getError()
{
if (!$this->moved) {
return UPLOAD_ERR_OK;
}
return $this->info['error'];
}
public function getClientFilename()
{
return $this->info['name'] ?? NULL;
}
public function getClientMediaType()
{
return $this->info['type'] ?? NULL;
}
}First of all, go to https://github.com/php-fig/http-message/tree/master/src, the GitHub repository for the PSR-7 interfaces, and download them. Create a directory called Psr/Http/Message in /path/to/source and places the files there. Alternatively, you can visit https://packagist.org/packages/psr/http-message and install the source code using Composer. (For instructions on how to obtain and use
Composer, you can visit https://getcomposer.org/.)
Then, go ahead and define the classes discussed previously, summarized in this table:
|
Class |
Steps discussed in |
|---|---|
|
|
2 |
|
|
3 to 16 |
|
|
17 to 22 |
|
|
23 to 26 |
|
|
27 to 31 |
Next, define a chap_09_middleware_value_objects_uri.php calling program that implements autoloading and uses the appropriate classes. Please note that if you use Composer, unless otherwise instructed, it will create a folder called vendor. Composer also adds its own autoloader, which you are free to use here:
<?php require __DIR__ . '/../Application/Autoload/Loader.php'; Application\Autoload\Loader::init(__DIR__ . '/..'); use Application\MiddleWare\Uri;
You can then create a Uri instance and use the with methods to add parameters. You can then echo the Uri instance directly as __toString() is defined:
$uri = new Uri();
$uri->withScheme('https')
->withHost('localhost')
->withPort('8080')
->withPath('chap_09_middleware_value_objects_uri.php')
->withQuery('param=TEST');
echo $uri;Here is the expected result:
Next, create a directory called uploads from /path/to/source/for/this/chapter. Go ahead and define another calling program, chap_09_middleware_value_objects_file_upload.php, that sets up autoloading and uses the appropriate classes:
<?php
define('TARGET_DIR', __DIR__ . '/uploads');
require __DIR__ . '/../Application/Autoload/Loader.php';
Application\Autoload\Loader::init(__DIR__ . '/..');
use Application\MiddleWare\UploadedFile;Inside a try...catch block, check to see whether any files were uploaded. If so, loop through $_FILES and create UploadedFile instances where tmp_name is set. You can then use the moveTo() method to move the files to TARGET_DIR:
try {
$message = '';
$uploadedFiles = array();
if (isset($_FILES)) {
foreach ($_FILES as $key => $info) {
if ($info['tmp_name']) {
$uploadedFiles[$key] = new UploadedFile($key, $info, TRUE);
$uploadedFiles[$key]->moveTo(TARGET_DIR);
}
}
}
} catch (Throwable $e) {
$message = $e->getMessage();
}
?>In the view logic, display a simple file upload form. You could also use phpinfo() to display information about what was uploaded:
<form name="search" method="post" enctype="<?= Constants::CONTENT_TYPE_MULTI_FORM ?>">
<table class="display" cellspacing="0" width="100%">
<tr><th>Upload 1</th><td><input type="file" name="upload_1" /></td></tr>
<tr><th>Upload 2</th><td><input type="file" name="upload_2" /></td></tr>
<tr><th>Upload 3</th><td><input type="file" name="upload_3" /></td></tr>
<tr><th> </th><td><input type="submit" /></td></tr>
</table>
</form>
<?= ($message) ? '<h1>' . $message . '</h1>' : ''; ?>Next, if there were any uploaded files, you can display information on each one. You can also use getStream() followed by getContents() to display each file (assuming you're using short text files):
<?php if ($uploadedFiles) : ?>
<table class="display" cellspacing="0" width="100%">
<tr>
<th>Filename</th><th>Size</th>
<th>Moved Filename</th><th>Text</th>
</tr>
<?php foreach ($uploadedFiles as $obj) : ?>
<?php if ($obj->getMovedName()) : ?>
<tr>
<td><?= htmlspecialchars($obj->getClientFilename()) ?></td>
<td><?= $obj->getSize() ?></td>
<td><?= $obj->getMovedName() ?></td>
<td><?= $obj->getStream()->getContents() ?></td>
</tr>
<?php endif; ?>
<?php endforeach; ?>
</table>
<?php endif; ?>
<?php phpinfo(INFO_VARIABLES); ?>Here is how the output might appear:

One of the key characteristics of PSR-7 middleware is the use of Request and Response classes. When applied, this enables different blocks of software to perform together without sharing any specific knowledge between them. In this context, a request class should encompass all aspects of the original user request, including such items as browser settings, the original URL requested, parameters passed, and so forth.
Uri, Stream, and UploadedFile value objects, as described in the previous recipe.Application\MiddleWare\Message class. This class consumes Stream and Uri and implements Psr\Http\Message\MessageInterface. We first define properties for the key value objects, including those representing the message body (that is, a StreamInterface instance), version, and HTTP headers:namespace Application\MiddleWare;
use Psr\Http\Message\ {
MessageInterface,
StreamInterface,
UriInterface
};
class Message implements MessageInterface
{
protected $body;
protected $version;
protected $httpHeaders = array();getBody() method that represents a StreamInterface instance. A companion method, withBody(), returns the current Message instance and allows us to overwrite the current value of body:public function getBody()
{
if (!$this->body) {
$this->body = new Stream(self::DEFAULT_BODY_STREAM);
}
return $this->body;
}
public function withBody(StreamInterface $body)
{
if (!$body->isReadable()) {
throw new InvalidArgumentException(self::ERROR_BODY_UNREADABLE);
}
$this->body = $body;
return $this;
}findHeader() method (not directly defined by MessageInterface) that locates a header using stripos():protected function findHeader($name)
{
$found = FALSE;
foreach (array_keys($this->getHeaders()) as $header) {
if (stripos($header, $name) !== FALSE) {
$found = $header;
break;
}
}
return $found;
}$httpHeaders property. This property is assumed to be an associative array where the key is the header, and the value is the string representing the header value. If there is more than one value, additional values separated by commas are appended to the string. There is an excellent apache_request_headers() PHP function from the Apache extension that produces headers if they are not already available in $httpHeaders:protected function getHttpHeaders()
{
if (!$this->httpHeaders) {
if (function_exists('apache_request_headers')) {
$this->httpHeaders = apache_request_headers();
} else {
$this->httpHeaders = $this->altApacheReqHeaders();
}
}
return $this->httpHeaders;
}apache_request_headers() is not available (that is, the Apache extension is not enabled), we provide an alternative, altApacheReqHeaders():protected function altApacheReqHeaders()
{
$headers = array();
foreach ($_SERVER as $key => $value) {
if (stripos($key, 'HTTP_') !== FALSE) {
$headerKey = str_ireplace('HTTP_', '', $key);
$headers[$this->explodeHeader($headerKey)] = $value;
} elseif (stripos($key, 'CONTENT_') !== FALSE) {
$headers[$this->explodeHeader($key)] = $value;
}
}
return $headers;
}
protected function explodeHeader($header)
{
$headerParts = explode('_', $header);
$headerKey = ucwords(implode(' ', strtolower($headerParts)));
return str_replace(' ', '-', $headerKey);
}getHeaders() (required in PSR-7) is now a trivial loop through the $httpHeaders property produced by the getHttpHeaders() method discussed in step 4:public function getHeaders()
{
foreach ($this->getHttpHeaders() as $key => $value) {
header($key . ': ' . $value);
}
}with methods designed to overwrite or replace headers. Since there can be many headers, we also have a method that adds to the existing set of headers. The withoutHeader() method is used to remove a header instance. Notice the consistent use of findHeader(), mentioned in the previous step, to allow for case-insensitive handling of headers:public function withHeader($name, $value)
{
$found = $this->findHeader($name);
if ($found) {
$this->httpHeaders[$found] = $value;
} else {
$this->httpHeaders[$name] = $value;
}
return $this;
}
public function withAddedHeader($name, $value)
{
$found = $this->findHeader($name);
if ($found) {
$this->httpHeaders[$found] .= $value;
} else {
$this->httpHeaders[$name] = $value;
}
return $this;
}
public function withoutHeader($name)
{
$found = $this->findHeader($name);
if ($found) {
unset($this->httpHeaders[$found]);
}
return $this;
}public function hasHeader($name)
{
return boolval($this->findHeader($name));
}
public function getHeaderLine($name)
{
$found = $this->findHeader($name);
if ($found) {
return $this->httpHeaders[$found];
} else {
return '';
}
}
public function getHeader($name)
{
$line = $this->getHeaderLine($name);
if ($line) {
return explode(',', $line);
} else {
return array();
}
}getHeadersAsString that produces a single header string with the headers separated by \r\n for direct use with PHP stream contexts:public function getHeadersAsString()
{
$output = '';
$headers = $this->getHeaders();
if ($headers && is_array($headers)) {
foreach ($headers as $key => $value) {
if ($output) {
$output .= "\r\n" . $key . ': ' . $value;
} else {
$output .= $key . ': ' . $value;
}
}
}
return $output;
}Message class, we now turn our attention to version handling. According to PSR-7, the return value for the protocol version (that is, HTTP/1.1) should only be the numerical part. For this reason, we also provide onlyVersion() that strips off any non-digit character, allowing periods:public function getProtocolVersion()
{
if (!$this->version) {
$this->version = $this->onlyVersion($_SERVER['SERVER_PROTOCOL']);
}
return $this->version;
}
public function withProtocolVersion($version)
{
$this->version = $this->onlyVersion($version);
return $this;
}
protected function onlyVersion($version)
{
if (!empty($version)) {
return preg_replace('/[^0-9\.]/', '', $version);
} else {
return NULL;
}
}
}Request class. It must be noted here, however, that we need to consider both out-bound as well as in-bound requests. That is to say, we need a class to represent an outgoing request a client will make to a server, as well as a request received from a client by a server. Accordingly, we provide Application\MiddleWare\Request (requests a client will make to a server), and Application\MiddleWare\ServerRequest (requests received from a client by a server). The good news is that most of our work has already been done: notice that our Request class extends Message. We also provide properties to represent the URI and HTTP method:namespace Application\MiddleWare;
use InvalidArgumentException;
use Psr\Http\Message\ { RequestInterface, StreamInterface, UriInterface };
class Request extends Message implements RequestInterface
{
protected $uri;
protected $method; // HTTP method
protected $uriObj; // Psr\Http\Message\UriInterface instanceNULL, but we leave open the possibility of defining the appropriate arguments right away. We use the inherited onlyVersion() method to sanitize the version. We also define checkMethod() to make sure any method supplied is on our list of supported HTTP methods, defined as a constant array in Constants:public function __construct($uri = NULL,
$method = NULL,
StreamInterface $body = NULL,
$headers = NULL,
$version = NULL)
{
$this->uri = $uri;
$this->body = $body;
$this->method = $this->checkMethod($method);
$this->httpHeaders = $headers;
$this->version = $this->onlyVersion($version);
}
protected function checkMethod($method)
{
if (!$method === NULL) {
if (!in_array(strtolower($method), Constants::HTTP_METHODS)) {
throw new InvalidArgumentException(Constants::ERROR_HTTP_METHOD);
}
}
return $method;
}Uri class has methods that will parse this into its component parts, hence our provision of the $uriObj property. In the case of withRequestTarget(), notice that we run getUri() that performs the aforementioned parsing process:public function getRequestTarget()
{
return $this->uri ?? Constants::DEFAULT_REQUEST_TARGET;
}
public function withRequestTarget($requestTarget)
{
$this->uri = $requestTarget;
$this->getUri();
return $this;
}get and with methods, which represent the HTTP method, reveal no surprises. We use checkMethod(), used in the constructor as well, to ensure the method matches those we plan to support:public function getMethod()
{
return $this->method;
}
public function withMethod($method)
{
$this->method = $this->checkMethod($method);
return $this;
}get and with method for the URI. As mentioned in step 14, we retain the original request string in the $uri property and the newly parsed Uri instance in $uriObj. Note the extra flag to preserve any existing Host header:public function getUri()
{
if (!$this->uriObj) {
$this->uriObj = new Uri($this->uri);
}
return $this->uriObj;
}
public function withUri(UriInterface $uri, $preserveHost = false)
{
if ($preserveHost) {
$found = $this->findHeader(Constants::HEADER_HOST);
if (!$found && $uri->getHost()) {
$this->httpHeaders[Constants::HEADER_HOST] = $uri->getHost();
}
} elseif ($uri->getHost()) {
$this->httpHeaders[Constants::HEADER_HOST] = $uri->getHost();
}
$this->uri = $uri->__toString();
return $this;
}
}ServerRequest class extends Request and provides additional functionality to retrieve information of interest to a server handling an incoming request. We start by defining properties that will represent incoming data read from the various PHP $_ super-globals (that is, $_SERVER, $_POST, and so on):namespace Application\MiddleWare;
use Psr\Http\Message\ { ServerRequestInterface, UploadedFileInterface } ;
class ServerRequest extends Request implements ServerRequestInterface
{
protected $serverParams;
protected $cookies;
protected $queryParams;
protected $contentType;
protected $parsedBody;
protected $attributes;
protected $method;
protected $uploadedFileInfo;
protected $uploadedFileObjs;public function getServerParams()
{
if (!$this->serverParams) {
$this->serverParams = $_SERVER;
}
return $this->serverParams;
}
// getCookieParams() reads $_COOKIE
// getQueryParams() reads $_GET
// getUploadedFileInfo() reads $_FILES
public function getRequestMethod()
{
$method = $this->getServerParams()['REQUEST_METHOD'] ?? '';
$this->method = strtolower($method);
return $this->method;
}
public function getContentType()
{
if (!$this->contentType) {
$this->contentType = $this->getServerParams()['CONTENT_TYPE'] ?? '';
$this->contentType = strtolower($this->contentType);
}
return $this->contentType;
}UploadedFile objects (presented in the previous recipe), we also define a method that takes $uploadedFileInfo and creates UploadedFile objects:public function getUploadedFiles()
{
if (!$this->uploadedFileObjs) {
foreach ($this->getUploadedFileInfo() as $field => $value) {
$this->uploadedFileObjs[$field] = new UploadedFile($field, $value);
}
}
return $this->uploadedFileObjs;
}with methods that add or overwrite properties and return the new instance:public function withCookieParams(array $cookies)
{
array_merge($this->getCookieParams(), $cookies);
return $this;
}
public function withQueryParams(array $query)
{
array_merge($this->getQueryParams(), $query);
return $this;
}
public function withUploadedFiles(array $uploadedFiles)
{
if (!count($uploadedFiles)) {
throw new InvalidArgumentException(Constant::ERROR_NO_UPLOADED_FILES);
}
foreach ($uploadedFiles as $fileObj) {
if (!$fileObj instanceof UploadedFileInterface) {
throw new InvalidArgumentException(Constant::ERROR_INVALID_UPLOADED);
}
}
$this->uploadedFileObjs = $uploadedFiles;
}getParsedBody() and its accompanying with method. The PSR-7 recommendations are quite specific when it comes to form posting. Note the series of if statements that check the Content-Type header as well as the method:public function getParsedBody()
{
if (!$this->parsedBody) {
if (($this->getContentType() == Constants::CONTENT_TYPE_FORM_ENCODED
|| $this->getContentType() == Constants::CONTENT_TYPE_MULTI_FORM)
&& $this->getRequestMethod() == Constants::METHOD_POST)
{
$this->parsedBody = $_POST;
} elseif ($this->getContentType() == Constants::CONTENT_TYPE_JSON
|| $this->getContentType() == Constants::CONTENT_TYPE_HAL_JSON)
{
ini_set("allow_url_fopen", true);
$this->parsedBody = json_decode(file_get_contents('php://input'));
} elseif (!empty($_REQUEST)) {
$this->parsedBody = $_REQUEST;
} else {
ini_set("allow_url_fopen", true);
$this->parsedBody = file_get_contents('php://input');
}
}
return $this->parsedBody;
}
public function withParsedBody($data)
{
$this->parsedBody = $data;
return $this;
}withoutAttributes() that allows you to remove attributes at will:public function getAttributes()
{
return $this->attributes;
}
public function getAttribute($name, $default = NULL)
{
return $this->attributes[$name] ?? $default;
}
public function withAttribute($name, $value)
{
$this->attributes[$name] = $value;
return $this;
}
public function withoutAttribute($name)
{
if (isset($this->attributes[$name])) {
unset($this->attributes[$name]);
}
return $this;
}
}initialize(), which is not in PSR-7, but is extremely convenient:public function initialize()
{
$this->getServerParams();
$this->getCookieParams();
$this->getQueryParams();
$this->getUploadedFiles;
$this->getRequestMethod();
$this->getContentType();
$this->getParsedBody();
return $this;
}First, be sure to complete the preceding recipe, as the Message and Request classes consume Uri, Stream, and UploadedFile value objects. After that, go ahead and define the classes summarized in the following table:
|
Class |
Steps they are discussed in |
|---|---|
|
|
2 to 9 |
|
|
10 to 14 |
|
|
15 to 20 |
After that, you can define a server program, chap_09_middleware_server.php, which sets up autoloading and uses the appropriate classes. This script will pull the incoming request into a ServerRequest instance, initialize it, and then use var_dump() to show what information was received:
<?php require __DIR__ . '/../Application/Autoload/Loader.php'; Application\Autoload\Loader::init(__DIR__ . '/..'); use Application\MiddleWare\ServerRequest; $request = new ServerRequest(); $request->initialize(); echo '<pre>', var_dump($request), '</pre>';
To run the server program, first change to the /path/to/source/for/this/chapter folder. You can then run the following command:
php -S localhost:8080 chap_09_middleware_server.php'
As for the client, first create a calling program, chap_09_middleware_request.php, that sets up autoloading, uses the appropriate classes, and defines the target server and a local text file:
<?php
define('READ_FILE', __DIR__ . '/gettysburg.txt');
define('TEST_SERVER', 'http://localhost:8080');
require __DIR__ . '/../Application/Autoload/Loader.php';
Application\Autoload\Loader::init(__DIR__ . '/..');
use Application\MiddleWare\ { Request, Stream, Constants };Next, you can create a Stream instance using the text as a source. This will become the body of a new Request, which, in this case, mirrors what might be expected for a form posting:
$body = new Stream(READ_FILE);
You can then directly build a Request instance, supplying parameters as appropriate:
$request = new Request(
TEST_SERVER,
Constants::METHOD_POST,
$body,
[Constants::HEADER_CONTENT_TYPE => Constants::CONTENT_TYPE_FORM_ENCODED,Constants::HEADER_CONTENT_LENGTH => $body->getSize()]
);Alternatively, you can use the fluent interface syntax to produce exactly the same results:
$uriObj = new Uri(TEST_SERVER);
$request = new Request();
$request->withRequestTarget(TEST_SERVER)
->withMethod(Constants::METHOD_POST)
->withBody($body)
->withHeader(Constants::HEADER_CONTENT_TYPE, Constants::CONTENT_TYPE_FORM_ENCODED)
->withAddedHeader(Constants::HEADER_CONTENT_LENGTH, $body->getSize());You can then set up a cURL resource to simulate a form posting, where the data parameter is the contents of the text file. You can follow that with curl_init(), curl_exec(), and so on, echoing the results:
$data = http_build_query(['data' => $request->getBody()->getContents()]);
$defaults = array(
CURLOPT_URL => $request->getUri()->getUriString(),
CURLOPT_POST => true,
CURLOPT_POSTFIELDS => $data,
);
$ch = curl_init();
curl_setopt_array($ch, $defaults);
$response = curl_exec($ch);
curl_close($ch);Here is how the direct output might appear:
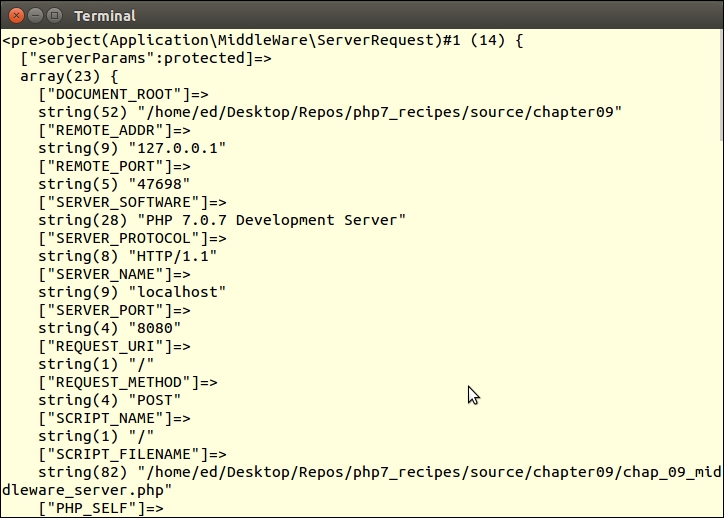
The Response class represents outbound information returned to whatever entity made the original request. HTTP headers play an important role in this context as we need to know that format is requested by the client, usually in the incoming Accept header. We then need to set the appropriate Content-Type header in the Response class to match that format. Otherwise, the actual body of the response will be HTML, JSON, or whatever else has been requested (and delivered).
Response class is actually much easier to implement than the Request class as we are only concerned with returning the response from the server to the client. Additionally, it extends our Application\MiddleWare\Message class where most of the work has been done. So, all that remains to be done is to define an Application\MiddleWare\Response class. As you will note, the only unique property is $statusCode:namespace Application\MiddleWare;
use Psr\Http\Message\ { Constants, ResponseInterface, StreamInterface };
class Response extends Message implements ResponseInterface
{
protected $statusCode;Response instance with all parts intact. We use methods from Message and constants from the Constants class to verify the arguments:public function __construct($statusCode = NULL,
StreamInterface $body = NULL,
$headers = NULL,
$version = NULL)
{
$this->body = $body;
$this->status['code'] = $statusCode ?? Constants::DEFAULT_STATUS_CODE;
$this->status['reason'] = Constants::STATUS_CODES[$statusCode] ?? '';
$this->httpHeaders = $headers;
$this->version = $this->onlyVersion($version);
if ($statusCode) $this->setStatusCode();
}http_response_code(), available from PHP 5.4 onwards. As this work is on PHP 7, we are safe in the knowledge that this method exists:public function setStatusCode()
{
http_response_code($this->getStatusCode());
}public function getStatusCode()
{
return $this->status['code'];
}with method that sets the status code and returns the current instance. Note the use of STATUS_CODES to confirm its existence:public function withStatus($statusCode, $reasonPhrase = '')
{
if (!isset(Constants::STATUS_CODES[$statusCode])) {
throw new InvalidArgumentException(Constants::ERROR_INVALID_STATUS);
}
$this->status['code'] = $statusCode;
$this->status['reason'] = ($reasonPhrase) ? Constants::STATUS_CODES[$statusCode] : NULL;
$this->setStatusCode();
return $this;
}?? that returns the first non-null item out of three possible choices:public function getReasonPhrase()
{
return $this->status['reason']
?? Constants::STATUS_CODES[$this->status['code']]
?? '';
}
}First of all, be sure to define the classes discussed in the previous two recipes. After that, you can create another simple server program, chap_09_middleware_server_with_response.php, which sets up autoloading and uses the appropriate classes:
<?php
require __DIR__ . '/../Application/Autoload/Loader.php';
Application\Autoload\Loader::init(__DIR__ . '/..');
use Application\MiddleWare\ { Constants, ServerRequest, Response, Stream };You can then define an array with key/value pairs, where the value points to a text file in the current directory to be used as content:
$data = [ 1 => 'churchill.txt', 2 => 'gettysburg.txt', 3 => 'star_trek.txt' ];
Next, inside a try...catch block, you can initialize some variables, initialize the server request, and set up a temporary filename:
try {
$body['text'] = 'Initial State';
$request = new ServerRequest();
$request->initialize();
$tempFile = bin2hex(random_bytes(8)) . '.txt';
$code = 200;After that, check to see whether the method is GET or POST. If it's GET, check to see whether an id parameter was passed. If so, return the body of the matching text file. Otherwise, return a list of text files:
if ($request->getMethod() == Constants::METHOD_GET) {
$id = $request->getQueryParams()['id'] ?? NULL;
$id = (int) $id;
if ($id && $id <= count($data)) {
$body['text'] = file_get_contents(
__DIR__ . '/' . $data[$id]);
} else {
$body['text'] = $data;
}Otherwise, return a response indicating a success code 204 and the size of the request body received:
} elseif ($request->getMethod() == Constants::METHOD_POST) {
$size = $request->getBody()->getSize();
$body['text'] = $size . ' bytes of data received';
if ($size) {
$code = 201;
} else {
$code = 204;
}
}You can then catch any exceptions and report them with a status code of 500:
} catch (Exception $e) {
$code = 500;
$body['text'] = 'ERROR: ' . $e->getMessage();
}The response needs to be wrapped in a stream, so you can write the body out to the temp file and create it as Stream. You can also set the Content-Type header to application/json and run getHeaders(), which outputs the current set of headers. After that, echo the body of the response. For this illustration, you could also dump the Response instance to confirm it was constructed correctly:
try {
file_put_contents($tempFile, json_encode($body));
$body = new Stream($tempFile);
$header[Constants::HEADER_CONTENT_TYPE] = 'application/json';
$response = new Response($code, $body, $header);
$response->getHeaders();
echo $response->getBody()->getContents() . PHP_EOL;
var_dump($response);To wrap things up, catch any errors or exceptions using Throwable, and don't forget to delete the temp file:
} catch (Throwable $e) {
echo $e->getMessage();
} finally {
unlink($tempFile);
}To test, it's just a matter of opening a terminal window, changing to the /path/to/source/for/this/chapter directory, and running the following command:
php -S localhost:8080
From a browser, you can then call this program, adding an id parameter. You might consider opening the developer tools to monitor the response header. Here is an example of the expected output. Note the content type of application/json:

|
Framework |
Website |
Notes |
|---|---|---|
|
Slim |
http://www.slimframework.com/docs/concepts/value-objects.html | |
|
Laravel/Lumen | ||
|
Zend Framework 3/Expressive |
https://framework.zend.com/blog/2016-06-28-zend-framework-3.html or https://zendframework.github.io/zend-expressive/ respectively |
High PSR-7 compliance Also Diactoros, and Straigility |
|
Zend Framework 2 | ||
|
Symfony | ||
|
Joomla | ||
|
Cake PHP |
PSR-7 support is in the roadmap and will use the bridge approach |
|
Middleware |
Website |
Notes |
|---|---|---|
|
Guzzle | ||
|
Relay |
Dispatcher | |
|
Radar |
Action/domain/responder skeleton | |
|
NegotiationMiddleware | ||
|
psr7-csrf-middleware |
https://packagist.org/packages/schnittstabil/psr7-csrf-middleware | |
|
oauth2-server |
http://alexbilbie.com/2016/04/league-oauth2-server-version-5-is-out | |
|
zend-diactoros |
PHP 7 has finally been released. For a long time, the PHP community was talking about it and has still not stopped. The main improvement in PHP 7 is its performance. For a long time, the PHP community faced performance issues in large-scale applications. Even some small applications with high traffic faced performance issues. Server resources were increased, but it did not help much because in the end the bottleneck was PHP itself. Different caching techniques were used, such as APC, and this helped a little. However, the community still needed a version of PHP that could boost the application's performance at its peak. And this is where PHPNG comes in.
PHPNG stands for PHP next generation. It is a completely separate branch and is mainly targeted for performance. Some people thought that PHPNG is JIT (Just In Time) compilation, but in reality, PHPNG is based on a refactored Zend Engine, which was highly optimized for performance. PHPNG is used as a base for PHP 7 development, and according to the official PHP wiki page, the PHPNG branch is now merged into the master branch.
Before starting to build an application, the development environment should be finalized and configured. In this chapter, we will discuss setting up the development environment on different systems, such as Windows and different flavors of Linux.
We will cover the following topics:
All other environments can be skipped, and we can set up the environment that we will use.
There are many tools available that have Apache, PHP, and MySQL bundled for Windows, provide easy installation, and are very easy to use. Most of these tools already provide support for PHP 7 with Apache, such as through XAMPP, WAMPP, and EasyPHP. EasyPHP is the only one that also provides support for NGINX and provides easy steps to changes webserver from NGINX to Apache or Apache to Nginx.
Any of the three tools can be used, but we require more control over every element of our web server tools, so we will also install NGINX, PHP 7, and MySQL individually and then connect them together.
NGINX Windows binaries can be downloaded from http://nginx.org/en/download.html. We recommend using a stable version, though there is no problem with using a mainline version. PHP Windows binaries can be downloaded from http://windows.php.net/download/. Download either 32-bit or 64-bit binaries of the non-thread safe version according to your system.
Perform the following steps:
.ini files, php.ini-development and php.ini-production. Rename either one of them to php.ini. PHP will be using this configuration file.php-cgi –b 127.0.0.1:9000
The –b option starts PHP and binds to the path for external FastCGI servers. The preceding command binds PHP to loop back the 127.0.0.1 IP on port 9000. Now, PHP is accessible on this path.
nginx_folder/conf/nginx.conf file. The first thing to do is to add root and index to the server block, as follows:server {
root html;
index index.php index.html index.htm;
nginx.conf file, uncomment the following location block for PHP:location ~ \.php$ {
fastcgi_pass 127.0.0.1:9000;
fastcgi_param SCRIPT_FILENAME complete_path_webroot_folder$fastcgi_script_name;
include fastcgi_params;
}Note the fastcgi_param option. The highlighted complete_path_webroot_folder path should be the absolute path to the HTML directory inside the nginx folder. Let's say that your NGINX is placed at the D:\nginx path; then, the absolute path to the HTML folder will be D:\nginx\html. However, for the preceding fastcgi_param option, \ should be replaced by /.
nginx –s restart
info.php file in webroot and enter the following code in it:<?php phpinfo(); ?>
On Windows and Mac OS X, we recommend that you use a virtual machine installed with all the tools on a Linux flavor to get the best performance out of the server. It is easy to manage everything in Linux. There are vagrant boxes available that have everything ready to use. Also, a custom virtual machine configuration with all the tools, including NGINX, Apache, PHP 7, Ubuntu, Debian, or CentOS, and other great ones, can be made at https://puphpet.com, which is an easy-to-use GUI. Another nice tool is Laravel Homestead, which is a Vagrant box with great tools.
Ubuntu is derived from Debian, so the process is the same for both Ubuntu and Debian. We will use Debian 8 Jessie and Ubuntu 14.04 Server LTS. The same process can be applied to desktop versions for both.
First, add the repositories for both Debian and Ubuntu.
As of the time we're writing this book, Debian does not provide an official repository for PHP 7. So, for Debian, we will use dotdeb repositories to install NGINX and PHP 7. Perform the following steps:
/etc/apt/sources.list file and add the following two lines at the end of the file:deb http://packages.dotdeb.org jessie all deb-src http://packages.dotdeb.org jessie all
wget https://www.dotdeb.org/dotdeb.gpg sudo apt-key add dotdeb.gpg sudo apt-get update
The first two commands will add dotdeb repo to Debian and the last command will refresh the cache for sources.
As of the time of writing this book, Ubuntu also does not provide PHP 7 in their official repos, so we will use a third-party repo for the PHP 7 installation. Perform the following steps:
sudo add-apt-repository ppa:ondrej/php sudo apt-get update
sudo apt-get install nginx
The following is a list of three useful NGINX commands:
service nginx start: This starts the NGINX serverservice nginx restart: This restarts the NGINX serverservice nginx stop: This stops the NGINX server
sudo apt-get install php7.0 php7.0-fpm php7.0-mysql php7.0-mcrypt php7.0-cli
This will install PHP 7 along with the other modules mentioned. Also, we installed PHP Cli for the command-line purpose. To verify whether PHP 7 is properly installed, issue the following command in the terminal:
php –v
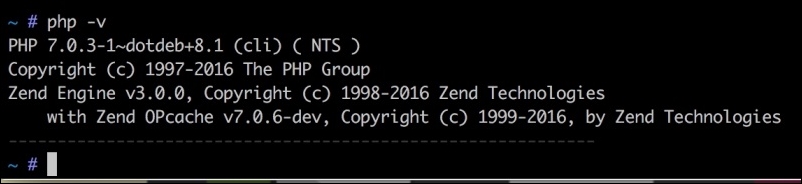
/etc/nginx/sites-available/default to /etc/nginx/sites-available/www.packt.com.conf using the following command in the terminal:cd /etc/nginx/sites-available sudo cp default www.packt.com.conf sudo ln –s /etc/nginx /sites-available/www.packt.com.conf /etc/ nginx/sites-enabled/www.packt.com.conf
First, we copied the default configuration file, created another virtual host configuration file, www.packt.com.conf, and then created a symbolic link file to this virtual host file in the sites-enabled folder.
/etc/nginx/sites-available/www.packt.com.conf file and add or edit the highlighted code, as shown here:server {
server_name your_ip:80;
root /var/www/html;
index index.php index.html index.htm;
location ~ \.php$ {
fastcgi_pass unix:/var/run/php/php7.0-fpm.sock;
fastcgi_index index.php;
include fastcgi_params;
}
}The preceding configuration is not a complete configuration file. We copied only those configuration options that are important and that we may want to change.
In the preceding code, our webroot path is /var/www/html, where our PHP files and other application files will be placed. In the index config option, add index.php so that if no file is provided in the URL, NGINX can look for and parse index.php.
We added a location block for PHP that includes a fastcgi_pass option, which has a path to the PHP7 FPM socket. Here, our PHP runs on a Unix socket, which is faster than that of TCP/IP.
info.php file at the root of the webroot folder and place the following code in it:<?php phpinfo(); ?>
server_ip/info.php, and if you see a PHP configuration page, then congratulations! PHP and NGINX are both properly configured.Now, let's install Percona Server. Percona Server is a fork of MySQL and is optimized for high performance. We will read more about Percona Server in Chapter 3, Increasing PHP 7 Application Performance. Now, let's install Percona Server on Debian/Ubuntu via the following steps:
sudo wget https://repo.percona.com/apt/percona-release_0.1-3.$(lsb_release -sc)_all.deb sudo dpkg -i percona-release_0.1-3.$(lsb_release -sc)_all.deb
The first command will download the repo packages from the Percona repo. The second command will install the downloaded packages and will create a percona-release.list file at /etc/apt/sources.list.d/percona-release.list.
sudo apt-get update
sudo apt-get install percona-server-5.5
The installation process will start. It will take a while to download it.
During the installation, the password for the root user will be asked, as shown in the following screenshot:
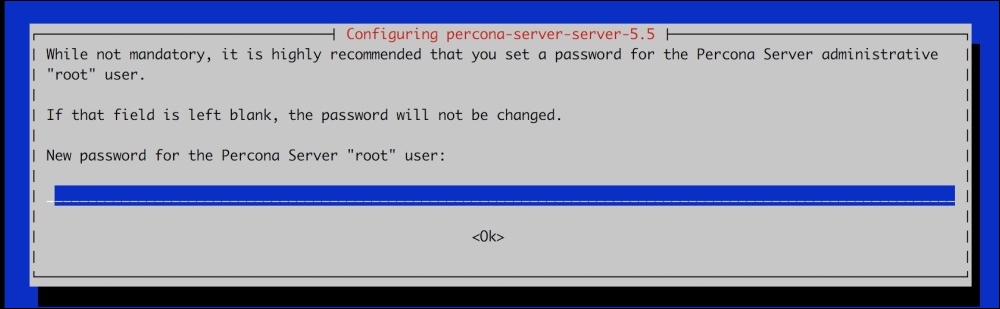
It is optional but recommended to enter the password. After entering the password, re-enter the password on the next screen. The installation process will continue.
mysql –-version
It will display the version of Percona Server. As mentioned before, Percona Server is a fork of MySQL, so all the same MySQL commands, queries, and settings can be used.
CentOS is a fork of Red Hat Enterprise Linux (RHEL) and stands for Community Enterprise Operating System. It is a widely used OS on servers specially used by hosting companies to provide shared hosting.
Let's start by configuring CentOS for our development environment. Perform the following steps:
sudo rpm -Uvh http://nginx.org/packages/centos/7/noarch/RPMS/nginx-release-centos-7-0.el7.ngx.noarch.rpm
This will add the NGINX repo to CentOS.
sudo yum --showduplicates list Nginx
This will show you the latest stable releases. In our case, it displays NGINX 1.8.0 and NGINX 1.8.1.
sudo yum install Nginx
This will install NGINX.
systemctl enable Nginx.service
systemctl start Nginx.service
To check which version of NGINX is installed, issue the following command in the terminal:
Nginx –v
On our server, the NGINX version installed is 1.8.1.
Now, our web server is ready.
rpm -Uvh https://dl.fedoraproject.org/pub/epel/epel-release-latest-7.noarch.rpm rpm -Uvh https://mirror.webtatic.com/yum/el7/webtatic-release.rpm
sudo yum –showduplicates list php70w
In our case, PHP 7.0.3 is available to install.
sudo yum install php70w php70w-common php70w-cli php70w-fpm php70w-mysql php70w-opcache php70w-mcrypt
sudo yum search php70w-
We will see a long list of all the available modules for PHP 7.
sudo yum install php70w-gd
This will install the gd module. Multiple modules can be installed using the same command and separating each module by a space, as we did in the initial installation of PHP.
Now, to check which version of PHP is installed, issue the following command:
php –v
In our case, PHP 7.0.3 is installed.
sudo systemctl start php-fpm sudo systemctl restart php-fpm sudo systemctl stop php-fpm
/etc/Nginx/conf.d/default.conf using either vi, nano, or any other editor of your choice. Now, make sure that two options are set in the server block, as follows:server {
listen 80;
server_name localhost;
root /usr/share/nginx/html;
index index.php index.html index.htm;
The root option indicates the web document root where our website source code files will be placed. Index indicates the default files that will be loaded along with extensions. If any of these files are found, they will be executed by default, regardless of any file mentioned in the URLs.
location ~ \.php$ {
try_files $uri =404;
fastcgi_split_path_info ^(.+\.php)(/.+)$;
fastcgi_pass 127.0.0.1:9000;
fastcgi_index index.php;
fastcgi_param SCRIPT_FILENAME$document_root$fastcgi_script_name;
include fastcgi_params;
}The preceding block is the most important configuration as it enables NGINX to communicate with PHP. The line fastcgi_pass 127.0.0.1:9000 tells NGINX that PHP FPM can be accessed on the 127.0.0.1 loopback IP on port 9000. The rest of the details are the same as those we discussed for Debian and Ubuntu.
info.php with the following contents:<?php phpinfo(); ?>
After saving the file, type http://server_ip/info.php or http://hostname/info.php, and we will get a page with complete information about PHP. If you see this page, congratulations! PHP runs alongside NGINX.
sudo yum install http://www.percona.com/downloads/percona-release/redhat/0.1-3/percona-release-0.1-3.noarch.rpm
After the repo installation is completed, a message will be displayed stating the completion of the installation.
sudo yum search percona
sudo yum install Percona-Server-server-55
The installation process will start. The rest of the process is the same as for Debian/Ubuntu.
Vagrant is a tool used by developers for development environments. Vagrant provides an easy command-line interface to set up virtual machines with all the tools required. Vagrant uses boxes called Vagrant Boxes that can have a Linux operating system and other tools according to this box. Vagrant supports both Oracle VM VirtualBox and VMware. For the purpose of this book, we will use VirtualBox, which we assume is installed on your machine as well.
Vagrant has several boxes for PHP 7, including Laravel Homestead and Rasmus PHP7dev. So, let's get started by configuring the Rasmus PHP7dev box on Windows and Mac OS X.
We assume that both VirutalBox and Vagrant are installed on our machine. VirtualBox can be downloaded from https://www.virtualbox.org/wiki/Downloads, and Vagrant can be downloaded from https://www.vagrantup.com/downloads.html for different platforms. Details about Rasmus PHP7dev VagrantBox can be found at https://github.com/rlerdorf/php7dev.
Perform the following steps:
php7 directory in our D drive. Then, open the command line in this specific folder directly by holding the Shift key, right-clicking, and then selecting Open command window here.
vagrant box add rasmus/php7dev
It will start downloading the Vagrant box, as shown in the following screenshot:
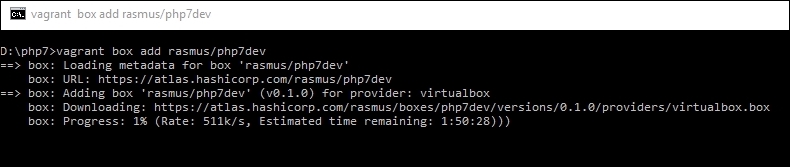
vagrant init rasmus/php7dev
This will start adding the box to VirtualBox and configuring it. When the process is completed, it will display a message, as in the following screenshot:
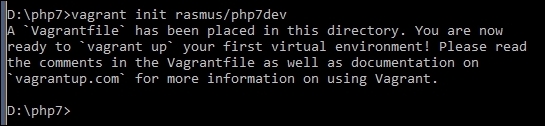
vagrant up
This process will take a little bit of time. When it is completed, your box is ready and running and can be used.
php7dev directory and issue the following command:
vagrant ssh
It will connect us with the virtual machines through SSH.
In Windows, if SSH in not installed or not configured in the PATH variable, PuTTY can be used. It can be downloaded from http://www.chiark.greenend.org.uk/~sgtatham/putty/download.html. For PuTTY, the host will be 127.0.0.1, and the port will be 2222. Vagrant is both the username and password for SSH.
sudo apt-get update sudo apt-get upgrade
This will update the core system, NGINX, MySQL, PHP 7, and other installed tools if new versions are available.
sudo ifconfig
This will display some details. Find out the IPv4 details there and take the IP of the box.
In this chapter, we configured different environments for the purpose of development. We installed NGINX and PHP 7 on the windows machine. We also configured Debian/Ubuntu and installed NGINX, PHP, and Percona Server 5.5. Then, we configured CentOS and installed NGINX, PHP, and Percona Server 5.5. Lastly, we discussed how to configure Vagrant Box on a Windows machine.
In the next chapter, we will study new features in PHP 7, such as type hints, namespace groupings and declarations, the Spaceship operator, and other features.
PHP 7 has introduced new features that can help programmers write high-performing and effective code. Also, some old-fashioned features are completely removed, and PHP 7 will throw an error if used. Most of the fatal errors are now exceptions, so PHP won't show an ugly fatal error message any more; instead, it will go through an exception with the available details.
In this chapter, we will cover the following topics:
PHP 7 introduced a few new OOP features that will enable developers to write clean and effective code. In this section, we will discuss these features.
Prior to PHP 7, there was no need to declare the data type of the arguments passed to a function or class method. Also, there was no need to mention the return data type. Any data type can be passed to and returned from a function or method. This is one of the huge problems in PHP, in which it is not always clear which data types should be passed or received from a function or method. To fix this problem, PHP 7 introduced type hints. As of now, two type hints are introduced: scalar and return type hints. These are discussed in the following sections.
Type hints is a feature in both OOP and procedural PHP because it can be used for both procedural functions and object methods.
PHP 7 made it possible to use scalar type hints for integers, floats, strings, and Booleans for both functions and methods. Let's have a look at the following example:
class Person
{
public function age(int $age)
{
return $age;
}
public function name(string $name)
{
return $name;
}
public function isAlive(bool $alive)
{
return $alive;
}
}
$person = new Person();
echo $person->name('Altaf Hussain');
echo $person->age(30);
echo $person->isAlive(TRUE);In the preceding code, we created a Person class. We have three methods, and each method receives different arguments whose data types are defined with them, as is highlighted in the preceding code. If you run the preceding code, it will work fine as we will pass the desired data types for each method.
Age can be a float, such as 30.5 years; so, if we pass a float number to the age method, it will still work, as follows:
echo $person->age(30.5);
Why is that? It is because, by default, scalar type hints are nonrestrictive. This means that we can pass float numbers to a method that expects an integer number.
To make it more restrictive, the following single-line code can be placed at the top of the file:
declare(strict_types = 1);
Now, if we pass a float number to the age function, we will get an Uncaught Type Error, which is a fatal error that tells us that Person::age must be of the int type given the float. Similar errors will be generated if we pass a string to a method that is not of the string type. Consider the following example:
echo $person->isAlive('true');The preceding code will generate the fatal error as the string is passed to it.
Another important feature of PHP 7 is the ability to define the return data type for a function or method. It behaves the same way scalar type hints behave. Let's modify our Person class a little to understand return type hints, as follows:
class Person
{
public function age(float $age) : string
{
return 'Age is '.$age;
}
public function name(string $name) : string
{
return $name;
}
public function isAlive(bool $alive) : string
{
return ($alive) ? 'Yes' : 'No';
}
}The changes in the class are highlighted. The return type is defined using the: data-type syntax. It does not matter if the return type is the same as the scalar type. These can be different as long as they match their respective data types.
Now, let's try an example with the object return type. Consider the previous Person class and add a getAddress method to it. Also, we will add a new class, Address, to the same file, as shown in the following code:
class Address { public function getAddress() { return ['street' => 'Street 1', 'country' => 'Pak']; } } class Person { public function age(float $age) : string { return 'Age is '.$age; } public function name(string $name) : string { return $name; } public function isAlive(bool $alive) : string { return ($alive) ? 'Yes' : 'No'; } public function getAddress() : Address { return new Address(); } }
The additional code added to the Person class and the new Address class is highlighted. Now, if we call the getAddress method of the Person class, it will work perfectly and won't throw an error. However, let's suppose that we change the return statement, as follows:
public function getAddress() : Address
{
return ['street' => 'Street 1', 'country' => 'Pak'];
}In this case, the preceding method will throw an uncaught exception similar to the following:
Fatal error: Uncaught TypeError: Return value of Person::getAddress() must be an instance of Address, array returned
This is because we return an array instead of an Address object. Now, the question is: why use type hints? The big advantage of using type hints is that it will always avoid accidentally passing or returning wrong and unexpected data to methods or functions.
As can be seen in the preceding examples, this makes the code clear, and by looking at the declarations of the methods, one can exactly know which data types should be passed to each of the methods and what kind of data is returned by looking into the code of each method or comment, if any.
In a very large codebase, classes are divided into namespaces, which makes them easy to manage and work with. However, if there are too many classes in a namespace and we need to use 10 of them, then we have to type the complete use statement for all these classes.
For example, we have a Publishers/Packt namespace and the classes Book, Ebook, Video, and Presentation. Also, we have a functions.php file, which has our normal functions and is in the same Publishers/Packt namespace. Another file, constants.php, has the constant values required for the application and is in the same namespace. The code for each class and the functions.php and constants.php files is as follows:
//book.php
namespace Publishers\Packt;
class Book
{
public function get() : string
{
return get_class();
}
}Now, the code for the Ebook class is as follows:
//ebook.php
namespace Publishers\Packt;
class Ebook
{
public function get() : string
{
return get_class();
}
}The code for the Video class is as follows:
//presentation.php
namespace Publishers\Packt;
class Video
{
public function get() : string
{
return get_class();
}
}Similarly, the code for the presentation class is as follows:
//presentation.php
namespace Publishers\Packt;
class Presentation
{
public function get() : string
{
return get_class();
}
}All the four classes have the same methods, which return the classes' names using the PHP built-in get_class() function.
Now, add the following two functions to the functions.php file:
//functions.php
namespace Publishers\Packt;
function getBook() : string
{
return 'PHP 7';
}
function saveBook(string $book) : string
{
return $book.' is saved';
}Now, let's add the following code to the constants.php file:
//constants.php namespace Publishers/Packt; const COUNT = 10; const KEY = '123DGHtiop09847'; const URL = 'https://www.Packtpub.com/';
The code in both functions.php and constants.php is self-explanatory. Note that each file has a namespace Publishers/Packt line at the top, which makes these classes, functions, and constants belong to this namespace.
Now, there are three ways to use the classes, functions, and constants. Let's consider each one.
Take a look at the following code:
//Instantiate objects for each class in namespace
$book = new Publishers\Packt\Book();
$ebook = new Publishers\Packt\Ebook();
$video = new Publishers\Packt\Video();
$presentation = new Publishers\Packt\Presentation();
//Use functions in namespace
echo Publishers/Packt/getBook();
echo Publishers/Packt/saveBook('PHP 7 High Performance');
//Use constants
echo Publishers\Packt\COUNT;
echo Publishers\Packt\KEY;In the preceding code, we used namespace names directly while creating objects or using functions and constants. The code looks fine, but it is cluttered. Namespace is everywhere, and if we have lots of namespaces, it will look very ugly, and the readability will be affected.
Now, let's rewrite the preceding code to make it more readable, as follows:
use Publishers\Packt\Book;
use Publishers\Packt\Ebook;
use Publishers\Packt\Video;
use Publishers\Packt\Presentation;
use function Publishers\Packt\getBook;
use function Publishers\Packt\saveBook;
use const Publishers\Packt\COUNT;
use const Publishers\Packt\KEY;
$book = new Book();
$ebook = new Ebook(();
$video = new Video();
$pres = new Presentation();
echo getBook();
echo saveBook('PHP 7 High Performance');
echo COUNT;
echo KEY;In the preceding code, at the top, we used PHP statements for specific classes, functions, and constants in a namespace. However, we still wrote duplicate lines of code for each class, function, and/or constant. This may lead to us have lots of use statements at the top of the file, and the overall verbosity would not be good.
To fix this problem, PHP 7 introduced group use declaration. There are three types of group use declarations:
Consider that we have different types of features in a namespace, as we have classes, functions, and contacts in a namespace. In non mixed group use declarations, we declare them separately using a use statement. To better understand it, take a look at the following code:
use Publishers\Packt\{ Book, Ebook, Video, Presentation };
use function Publishers\Packt\{ getBook, saveBook };
use const Publishers\Packt\{ COUNT, KEY };We have three types of features in a namespace: class, functions, and constants. So, we have used separate group use declaration statements to use them. The code is now looking more cleaner, organized, and readable and doesn't require too much duplicate typing.
In this declaration, we combine all types into a single use statement. Take a look at the following code:
use Publishers\Packt\{
Book,
Ebook,
Video,
Presentation,
function getBook,
function saveBook,
const COUNT,
const KEY
};To understand the compound namespace declaration, we will consider the following criteria.
Let's say we have a Book class in the Publishers\Packt\Paper namespace. Also, we have an Ebook class in the Publishers\Packt\Electronic namespace. The Video and Presentation classes are in the Publishers\Packt\Media namespace. So, to use these classes, we will use the code, as follows:
use Publishers\Packt\Paper\Book;
use Publishers\Packt\Electronic\Ebook;
use Publishers\Packt\Media\{Video,Presentation};In the compound namespace declaration, we can use the preceding namespaces as follows:
use Publishers\Packt\{
Paper\Book,
Electronic\Ebook,
Media\Video,
Media\Presentation
};It is more elegant and clear, and it doesn't require extra typing if the namespace names are long.
An anonymous class is a class that is declared and instantiated at the same time. It does not have a name and can have the full features of a normal class. These classes are useful when a single one-time small task is required to be performed and there is no need to write a full-blown class for it.
The syntax of this class is the same as that of the named classes, but only the name of the class is missing, as shown in the following syntax:
new class(argument) { definition };Let's look at a basic and very simple example of an anonymous class, as follows:
$name = new class() {
public function __construct()
{
echo 'Altaf Hussain';
}
};The preceding code will just display the output as Altaf Hussain.
Arguments can also be passed to the anonymous class constructor, as shown in the following code:
$name = new class('Altaf Hussain') {
public function __construct(string $name)
{
echo $name;
}
};This will give us the same output as the first example.
Anonymous classes can extend other classes and have the same parent-child classes functioning as normal named classes. Let's have another example; take a look at the following:
class Packt
{
protected $number;
public function __construct()
{
echo 'I am parent constructor';
}
public function getNumber() : float
{
return $this->number;
}
}
$number = new class(5) extends packt
{
public function __construct(float $number)
{
parent::__construct();
$this->number = $number;
}
};
echo $number->getNumber();The preceding code will display I am parent constructor and 5. As can be seen, we extended the Packt class the way we extend named classes. Also, we can access the public and protected properties and methods within the anonymous class and public properties and methods using anonymous class objects.
Anonymous classes can implement interfaces too, the same as named classes. Let's create an interface first. Run the following:
interface Publishers
{
public function __construct(string $name, string $address);
public function getName();
public function getAddress();
}Now, let's modify our Packt class as follows. We added the highlighted code:
class Packt
{
protected $number;
protected $name;
protected $address;
public function …
}The rest of the code is same as the first Packt class. Now, let's create our anonymous class, which will implement the Publishers interface created in the previous code and extend the new Packt class, as follows:
$info = new class('Altaf Hussain', 'Islamabad, Pakistan')extends packt implements Publishers
{
public function __construct(string $name, string $address)
{
$this->name = $name;
$this->address = $address;
}
public function getName() : string
{
return $this->name;
}
public function getAddress() : string
{
return $this->address;
}
}
echo $info->getName(). ' '.$info->getAddress();The preceding code is self-explanatory and will output Altaf Hussain along with the address.
It is possible to use anonymous classes within another class, as shown here:
class Math
{
public $first_number = 10;
public $second_number = 20;
public function add() : float
{
return $this->first_number + $this->second_number;
}
public function multiply_sum()
{
return new class() extends Math
{
public function multiply(float $third_number) : float
{
return $this->add() * $third_number;
}
};
}
}
$math = new Math();
echo $math->multiply_sum()->multiply(2);The preceding code will return 60. How does this happen? The Math class has a multiply_sum method that returns the object of an anonymous class. This anonymous class is extended from the Math class and has a multiply method. So, our echo statement can be divided into two parts: the first is $math->multiply_sum(), which returns the object of the anonymous class, and the second is ->multiply(2), in which we chained this object to call the anonymous class's multiply method along with an argument of the value 2.
In the preceding case, the Math class can be called the outer class, and the anonymous class can be called the inner class. However, remember that it is not required for the inner class to extend the outer class. In the preceding example, we extended it just to ensure that the inner classes could have access to the outer classes' properties and methods by extending the outer classes.
Back in PHP 4, the constructor of a class has the same name method as that of the class. It is still used and is valid until PHP's 5.6 version. However, now, in PHP 7, it is deprecated. Let's have an example, as shown here:
class Packt
{
public function packt()
{
echo 'I am an old style constructor';
}
}
$packt = new Packt();The preceding code will display the output I am an old style constructor with a deprecated message, as follows:
Deprecated: Methods with the same name as their class will not be constructors in a future version of PHP; Packt has a deprecated constructor in…
However, the old style constructor is still called. Now, let's add the PHP __construct method to our class, as follows:
class Packt
{
public function __construct()
{
echo 'I am default constructor';
}
public function packt()
{
echo 'I am just a normal class method';
}
}
$packt = new Packt();
$packt->packt();In the preceding code, when we instantiated the object of the class, the normal __construct constructor was called. The packt()method isn't considered a normal class method.
PHP 7 introduced a base interface that can be base for every object that can use the throw statement. In PHP, exceptions and errors can occur. Previously, exceptions could be handled, but it was not possible to handle errors, and thus, any fatal error caused the complete application or a part of the application to halt. To make errors (the most fatal errors) catchable as well, PHP 7 introduced the throwable interface, which is implemented by both the exception and error.
We all know exceptions, so in this topic, we will only discuss errors, which can handle the ugly, fatal errors.
Almost all fatal errors can now throw an error instance, and similarly to exceptions, error instances can be caught using the try/catch block. Let's have a simple example:
function iHaveError($object)
{
return $object->iDontExist();
{
//Call the function
iHaveError(null);
echo "I am still running";If the preceding code is executed, a fatal error will be displayed, the application will be halted, and the echo statement won't be executed in the end.
Now, let's place the function call in the try/catch block, as follows:
try
{
iHaveError(null);
} catch(Error $e)
{
//Either display the error message or log the error message
echo $e->getMessage();
}
echo 'I am still running';Now, if the preceding code is executed, the catch body will be executed, and after this, the rest of the application will continue running. In the preceding case, the echo statement will be executed.
In most cases, the error instance will be thrown for the most fatal errors, but for some errors, a subinstance of error will be thrown, such as TypeError, DivisionByZeroError, ParseError, and so on.
Now, let's take a look at a DivisionByZeroError exception in the following example:
try
{
$a = 20;
$division = $a / 20;
} catch(DivisionByZeroError $e)
{
echo $e->getMessage();
}Before PHP 7, the preceding code would have issued a warning about the division by zero. However, now in PHP 7, it will throw a DivisionByZeroError, which can be handled.
PHP 7 introduced two interested operators. These operators can help write less and cleaner code, so the final code will be more readable as compared to the traditional operators in use. Let's have a look at them.
The Spaceship or Combined Comparison operator is useful to compare values (strings, integers, floats, and so on), arrays, and objects. This operator is just a wrapper and performs the same tasks as the three comparison operators ==, <, and >. This operator can also be used to write clean and less code for callback functions for usort, uasort, and uksort. This operator works as follows:
Let's take a look at a few examples by comparing integers, strings, objects, and arrays and note the result:
$int1 = 1; $int2 = 2; $int3 = 1; echo $int1 <=> $int3; //Returns 0 echo '<br>'; echo $int1 <=> $int2; //Returns -1 echo '<br>'; echo $int2 <=> $int3; //Returns 1
Run the preceding code, and you will have an output similar to the following:
0 -1 1
In the first comparison, in which we compare $int1 and $int3, both are equal, so it will return 0. In the second comparison, in which $int1 and $int2 are compared, it will return -1 because the right operand ($int2) in greater than the left operand ($int1). Finally, the third comparison will return 1 as the left operand ($int2) is greater than the right operand ($int3).
The preceding is a simple example in which we compared integers. We can check strings, objects, and arrays in the same way, and they are compared the same standard PHP way.
Some examples for the <=> operator can be found at https://wiki.php.net/rfc/combined-comparison-operator. This is an RFC publication that has more useful details about its usage.
This operator can be more useful in sorting arrays. Take a look at the following code:
Function normal_sort($a, $b) : int
{
if( $a == $b )
return 0;
if( $a < $b )
return -1;
return 1;
}
function space_sort($a, $b) : int
{
return $a <=> $b;
}
$normalArray = [1,34,56,67,98,45];
//Sort the array in asc
usort($normalArray, 'normal_sort');
foreach($normalArray as $k => $v)
{
echo $k.' => '.$v.'<br>';
}
$spaceArray = [1,34,56,67,98,45];
//Sort it by spaceship operator
usort($spaceArray, 'space_sort');
foreach($spaceArray as $key => $value)
{
echo $key.' => '.$value.'<br>';
}In the preceding code, we used two functions to sort the two different arrays with the same values. The $normalArray array is sorted by the normal_sort function, in which the normal_sort function uses if statements to compare the values. The second array $spaceArray has the same values as $normalArray, but this array is sorted by the space_sort function, which uses the Spaceship operator. The final result for both array sorts is the same, but the code in the callback functions is different. The normal_sort function has if statements and multiple lines of code, while the space_sort function has a single line of code—that's it! The space_sort function code is clearer and does not require multiple if statements.
We all know ternary operators, and we use them most of the time. Ternary operators are just a single-line replacement for if-else statements. For example, consider the following code:
$post = ($_POST['title']) ? $_POST['title'] : NULL;
If $_POST['title'] exists, then the $post variable will be assigned its value; otherwise, NULL will be assigned. However, if $_POST or $_POST['title'] does not exist or is null, then PHP will issue a notice of Undefined index. To fix this notice, we need to use the isset function, as follows:
$post = isset($_POST['title']) ? $_POST['title'] : NULL;
Mostly, it will seem fine, but it becomes very nasty when we have to check for values in multiple places, especially when using PHP as a templating language.
In PHP 7, the coalescence operator is introduced, which is simple and returns the value of its first operand (left operand) if it exists and is not null. Otherwise, it returns its second operand (right operand). Consider the following example:
$post = $_POST['title'] ?? NULL;
This example is exactly similar to the preceding code. The coalesce operator checks whether $_POST['title'] exists. If it does, the operator returns it; otherwise, it returns NULL.
Another great feature of this operator is that it can be chained. Here's an example:
$title = $_POST['title'] ?? $_GET['title'] ?? 'No POST or GET';
According to the definition, it will first check whether the first operand exists and return it; if it does not exist, it will return the second operand. Now, if there is another coalesce operator used on the second operand, the same rule will be applied, and the value on the left operand will be returned if it exists. Otherwise, the value of the right operand will be returned.
So, the preceding code is the same as the following:
If(isset($_POST['title'])) $title = $_POST['title']; elseif(isset($_GET['title'])) $title = $_GET['title']; else $title = 'No POST or GET';
As can be noted in the preceding examples, the coalesce operator can help write clean, concise, and less code.
Most of the time, we may face a situation in which the method, variable, or classes names are stored in other variables. Take a look at the following example:
$objects['class']->name;
In the preceding code, first, $objects['class'] will be interpreted, and after this, the property name will be interpreted. As shown in the preceding example, variables are normally evaluated from left to right.
Now, consider the following scenario:
$first = ['name' => 'second']; $second = 'Howdy'; echo $$first['name'];
In PHP 5.x, this code would be executed, and the output would be Howdy. However, this is not inconsistent with the left-to-right expression evaluation. This is because $$first should be evaluated first and then the index name, but in the preceding case, it is evaluated as ${$first['name']}. It is clear that the variable syntax is not consistent and may create confusion. To avoid this inconsistency, PHP 7 introduced a new syntax called uniform variable syntax. Without using this syntax, the preceding example will bring it into notice, and the desired results won't be produced. To make it work in PHP 7, the curly brackets should be added, as follows:
echo ${$first['name']};Now, let's have another example, as follows:
class Packt
{
public $title = 'PHP 7';
public $publisher = 'Packt Publisher';
public function getTitle() : string
{
return $this->title;
}
public function getPublisher() : string
{
return $this->publisher;
}
}
$mthods = ['title' => 'getTitle', 'publisher' => 'getPublisher'];
$object = new Packt();
echo 'Book '.$object->$methods['title']().' is published by '.$object->$methods['publisher']();If the preceding code is executed in PHP 5.x, it will work fine and output our desired result. However, if we execute this code in PHP 7, it will give a fatal error. The error will be at the last line of the code, which is highlighted. PHP 7 will first try to evaluate $object->$method. After this, it will try to evaluate ['title']; and so on; this is not correct.
To make it work in PHP 7, the curly brackets should be added, as in the following code:
echo 'Book '.$object->{$methods['title']}().' is published by '.$object->{$methods['publisher']}();
After making the changes mentioned before, we will get our desired output.
PHP 7 also introduced some other new features with small changes, such as new syntax for array constants, multiple default cases in switch statement, options array in session_start, and so on. Let's have a look at these too.
Starting with PHP 5.6, constant arrays can be initialized using the const keyword, as follows:
const STORES = ['en', 'fr', 'ar'];
Now, starting with PHP 7, constant arrays can be initialized using the define function, as follows:
define('STORES', ['en', 'fr', 'ar']);Prior to PHP 7, multiple default cases in a switch statement were allowed. Check out the following example:
switch(true)
{
default:
echo 'I am first one';
break;
default:
echo 'I am second one';
}Before PHP 7, the preceding code was allowed, but in PHP 7, this will result in a fatal error similar to the following:
Fatal error: Switch statements may only contain one default clause in…
Before PHP 7, whenever we needed to start a session, we just used the session_start() function. This function did not take any arguments, and all the settings defined in php.ini were used. Now, starting with PHP 7, an optional array for options can be passed, which will override the session settings in the php.ini file.
A simple example is as follows:
session_start([ 'cookie_lifetime' => 3600, 'read_and_close' => true ]);
As can be seen in the preceding example, it is possible to override the php.ini settings for a session easily.
It is common practice to serialize and unserialize objects. However, the PHP unserialize() function was not secure because it did not have any filtering options and could unserialize objects of any type. PHP 7 introduced filtering in this function. The default filtering option is to unserialize objects of all classes or types. Its basic working is as follows:
$result = unserialize($object, ['allowed_classes' => ['Packt', 'Books', 'Ebooks']]);
In this chapter, we discussed new OOP features, such as type hints, anonymous classes, the throwable interface, group use declaration for namespaces, and two important new operators, the Spaceship or Combined Comparison operator and the null Coalesce operator. Also, we discussed the uniform variable syntax and a few other new features, such as new syntax for the contact array definition, options array for the session_start() function, and removal of multiple default cases in the switch statement.
In the next chapter, we will discuss how to improve the application's performance. We will discuss Apache and NGINX and different settings for them to improve performance.
We will discuss different settings for PHP to improve its performance. The Google page speed module, CSS/JavaScript combining and compression, CDN, and so on will also be discussed.
PHP 7 has been completely rewritten from the ground up based on the PHP Next Generation (phpng or PHPNG) targeting performance. However, there are always more ways to improve the performance of the application, including writing high performance code, using best practices, web server optimizations, caching, and so on. In this chapter, we will discuss such optimizations listed as follows:
There are too many HTTP server software available, and each one has its pros and cons. The two most popular HTTP servers used are NGINX and Apache. Let's have a look at both of them and note which one is better for our needs.
Apache is the most widely used HTTP server and is loved by most administrators. It is selected by administrators because of its flexibility, widespread support, power, and modules for most of the interpreted languages, such as PHP. As Apache can process a vast number of interpreted languages, it does not need to communicate with other software to fulfill the request. Apache can process requests in prefork (the processes are spawned across thread), worker (threads are spawned across processes), and event-driven (same as worker process, but it sets dedicated threads for keep-alive connections and separate threads for active connections); thus, it provides much more flexibility.
As discussed earlier, each request will be processed by a single thread or process, so Apache consumes too many resources. When it comes to high-traffic applications, Apache may slow down the application as it does not provide good support for concurrent processing.
NGINX was built to solve the concurrency problems with high-traffic applications. NGINX provides asynchronous, event-driven, and nonblocking request handling. As requests are processed asynchronously, NGINX does not wait for a request to be completed to block the resource.
NGINX creates worker processes, and each individual worker process can handle thousands of connections. So, a few processes can handle high traffic at once.
NGINX does not provide any built-in support for any interpreted languages. It relies on external resources for this. This is also good because the processing is made outside NGINX, and NGINX only processes the connections and requests. Mostly, NGINX is considered faster than Apache. In some situations, such as with static content (serving images, .css and .js files, and so on), this can be true, but in current high performance servers, Apache is not the problem; PHP is the bottleneck.
As mentioned before, we will use NGINX for this book.
Each HTTP server provides certain features that can be used to optimize request handling and serving content. In this section, we will share some techniques for both Apache and NGINX that can be used to optimize the web server and provide the best performance and scalability. Mostly, when these optimizations are applied, a restart for Apache or NGINX is required.
Mostly, static files, such as images, .css, .js, and fonts don't change frequently. So, it is best practice to cache these static files on the end user machine. For this purpose, the web server adds special headers to the response, which tells the user browser to cache the static content for a certain amount of time. The following is the configuration code for both Apache and NGINX.
Let's have a look at the Apache configuration to cache the following static content:
<FilesMatch "\.(ico|jpg|jpeg|png|gif|css|js|woff)$"> Header set Cache-Control "max-age=604800, public" Apache Configuration </FileMatch> Should be </FilesMatch> </FileMatch>
In the preceding code that has to be placed in a .htaccess file, we used the Apache FilesMatch directive to match the extensions of files. If a desired extension file is requested, Apache sets the headers to cache control for seven days. The browser then caches these static files for seven days.
The following configuration can be placed in /etc/nginx/sites-available/your-virtual-host-conf-file:
Location ~* .(ico|jpg|jpeg|png|gif|css|js|woff)$ {
Expires 7d;
}In the preceding code, we used the NGINX Location block with a case-insensitive modifier (~*) to set Expires for seven days. This code will set the cache-control header for seven days for all the defined file types.
After making these settings, the response headers for a request will be as follows:
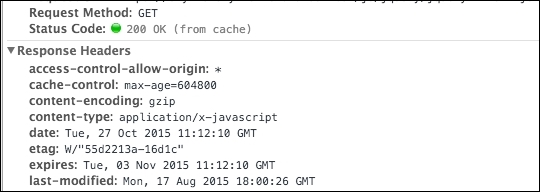
In the preceding figure, it can be clearly seen that the .js file is loaded from cache. Its cache-control header is set to seven days or 604,800 seconds. The expiry date can also be noted clearly in the expires headers. After the expiry date, the browser will load this .js file from the server and cache it again for the duration defined in the cache-control headers.
In HTTP persistent connection, or HTTP keep-alive, a single TCP/IP connection is used for multiple requests or responses. It has a huge performance improvement over the normal connection as it uses only a single connection instead of opening and closing connections for each and every single request or response. Some of the benefits of the HTTP keep-alive are as follows:
Besides these benefits, there are some side effects of keep-alive. Every server has a concurrency limit, and when this concurrency limit is reached or consumed, there can be a huge degradation in the application's performance. To overcome this issue, a time-out is defined for each connection, after which the HTTP keep-alive connection is closed automatically. Now, let's enable HTTP keep-alive on both Apache and NGINX.
In Apache, keep-alive can be enabled in two ways. You can enable it either in the .htaccess file or in the Apache config file.
To enable it in the .htaccess file, place the following configuration in the .htaccess file:
<ifModule mod_headers.c> Header set Connection keep-alive </ifModule>
In the preceding configuration, we set the Connection header to keep-alive in the .htaccess file. As the .htaccess configuration overrides the configuration in the config files, this will override whatever configuration is made for keep-alive in the Apache config file.
To enable the keep-alive connection in the Apache config file, we have to modify three configuration options. Search for the following configuration and set the values to the ones in the example:
KeepAlive On MaxKeepAliveRequests 100 KeepAliveTimeout 100
In the preceding configuration, we turned on the keep-alive configuration by setting the value of KeepAlive to On.
The next is MaxKeepAliveRequests, which defines the maximum number of keep-alive connections to the web server at the time. A value of 100 is the default in Apache, and it can be changed according to the requirements. For high performance, this value should be kept high. If set to 0, it will allow unlimited keep-alive connections, which is not recommended.
The last configuration is KeepAliveTimeout, which is set to 100 seconds. This defines the number of seconds to wait for the next request from the same client on the same TCP connection. If no request is made, then the connection is closed.
HTTP keep-alive is part of the http_core module and is enabled by default. In the NGINX configuration file, we can edit a few options, such as timeout. Open the nginx config file, edit the following configuration options, and set its values to the following:
keepalive_requests 100 keepalive_timeout 100
The keepalive_requests config defines the maximum number of requests a single client can make on a single HTTP keep-alive connection.
The keepalive_timeout config is the number of seconds that the server needs to wait for the next request until it closes the keep-alive connection.
Content compression provides a way to reduce the contents' size delivered by the HTTP server. Both Apache and NGINX provide support for GZIP compression, and similarly, most modern browsers support GZIP. When the GZIP compression is enabled, the HTTP server sends compressed HTML, CSS, JavaScript, and images that are small in size. This way, the contents are loaded fast.
A web server only compresses content via GZIP when the browser sends information about itself that it supports GZIP compression. Usually, a browser sends such information in Request headers.
The following are codes for both Apache and NGINX to enable GZIP compression.
The following code can be placed in the .htaccess file:
<IfModule mod_deflate.c>
SetOutputFilter DEFLATE
#Add filters to different content types
AddOutputFilterByType DEFLATE text/html text/plain text/xml text/css text/javascript application/javascript
#Don't compress images
SetEnvIfNoCase Request_URI \.(?:gif|jpe?g|png)$ no-gzip dont-
vary
</IfModule>In the preceding code, we used the Apache deflate module to enable compression. We used filter by type to compress only certain types of files, such as .html, plain text, .xml, .css, and .js. Also, before ending the module, we set a case to not compress the images because compressing images can cause image quality degradation.
As mentioned previously, you have to place the following code in your virtual host conf file for NGINX:
gzip on; gzip_vary on; gzip_types text/plain text/xml text/css text/javascript application/x-javascript; gzip_com_level 4;
In the preceding code, GZIP compression is activated by the gzip on; line. The gzip_vary on; line is used to enable varying headers. The gzip_types line is used to define the types of files to be compressed. Any file types can be added depending on the requirements. The gzip_com_level 4; line is used to set the compression level, but be careful with this value; you don't want to set it too high. Its range is from 1 to 9, so keep it in the middle.
Now, let's check whether the compression really works. In the following screenshot, the request is sent to a server that does not have GZIP compression enabled. The size of the final HTML page downloaded or transferred is 59 KB:
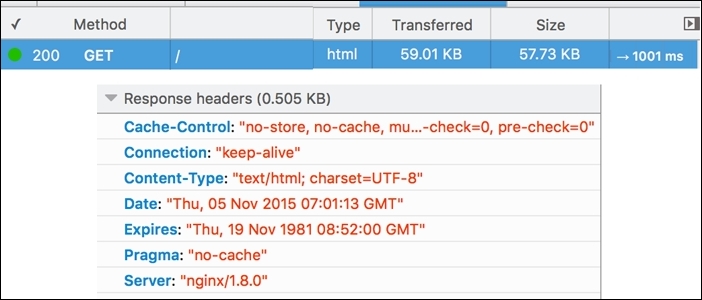
After enabling GZIP compression on the web server, the size of the transferred HTML page is reduced up to 9.95 KB, as shown in the following screenshot:
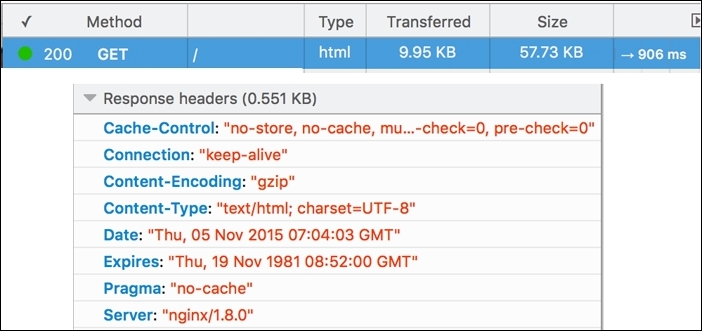
Also, it can be noted that the time to load the contents is also reduced. So, the smaller the size of your contents, the faster the page will load.
Apache uses the mod_php module for PHP. This way, the PHP interpreter is integrated to Apache, and all processing is done by this Apache module, which eats up more server hardware resources. It is possible to use PHP-FPM with Apache, which uses the FastCGI protocol and runs in a separate process. This enables Apache to worry about HTTP request handlings, and the PHP processing is made by the PHP-FPM.
NGINX, on the other hand, does not provide any built-in support or any support by module for PHP processing. So, with NGINX, PHP is always used in a separate service.
Now, let's take a look at what happens when PHP runs as a separate service: the web server does not know how to process the dynamic content request and forwards the request to another external service, which reduces the processing load on the web server.
Both Apache and NGINX come with lots of modules built into them. In most cases, you won't need some of these modules. It is good practice to disable these modules.
It is good practice to make a list of the modules that are enabled, disable those modules one by one, and restart the server. After this, check whether your application is working or not. If it works, go ahead; otherwise, enable the module(s) after which the application stopped working properly again.
This is because you may see that a certain module may not be required, but some other useful module depends on this module. So, it's best practice it to make a list and enable or disable the modules, as stated before.
To list all the modules that are loaded for Apache, issue the following command in the terminal:
sudo apachectl –M
This command will list all the loaded modules, as can be seen in the following screenshot:
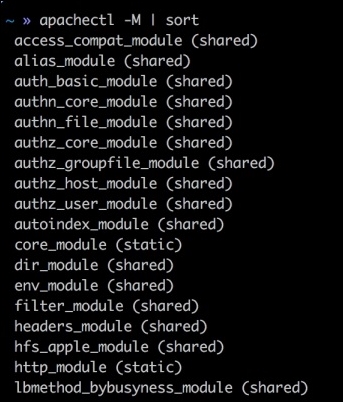
Now, analyze all the loaded modules, check whether they are needed for the application, and disable them, as follows.
Open up the Apache config file and find the section where all the modules are loaded. A sample is included here:
LoadModule access_compat_module modules/mod_access_compat.so LoadModule actions_module modules/mod_actions.so LoadModule alias_module modules/mod_alias.so LoadModule allowmethods_module modules/mod_allowmethods.so LoadModule asis_module modules/mod_asis.so LoadModule auth_basic_module modules/mod_auth_basic.so #LoadModule auth_digest_module modules/mod_auth_digest.so #LoadModule auth_form_module modules/mod_auth_form.so #LoadModule authn_anon_module modules/mod_authn_anon.so
The modules that have a # sign in front of them are not loaded. So, to disable a module in the complete list, just place a # sign. The # sign will comment out the line, and the module won't be loaded anymore.
To check which modules NGINX is compiled with, issue the following command in the terminal:
sudo Nginx –V
This will list complete information about the NGINX installation, including the version and modules with which NGINX is compiled. Have a look at the following screenshot:
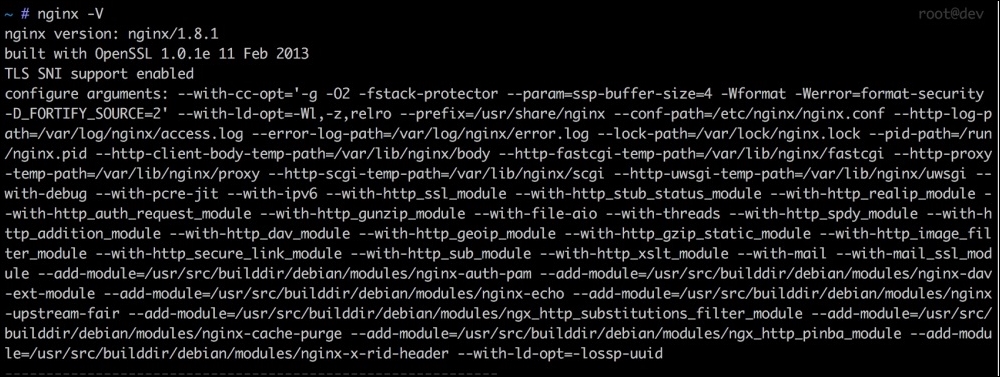
Normally, NGINX enables only those modules that are required for NGINX to work. To enable any other module that is compiled with NGINX installed, we can place a little configuration for it in the nginx.conf file, but there is no single way to disable any NGINX module. So, it is good to search for this specific module and take a look at the module page on the NGINX website. There, we can find information about this specific module, and if available, we can find information about how to disable and configure this module.
Each web server comes with its own optimum settings for general use. However, these settings may be not optimum for your current server hardware. The biggest problem on the web server hardware is the RAM. The more RAM the server has, the more the web server will be able to handle requests.
NGINX provides two variables to adjust the resources, which are worker_processes and worker_connections. The worker_processes settings decide how many NGINX processes should run.
Now, how many worker_processes resources should we use? This depends on the server. Usually, it is one worker processes per processor core. So, if your server processor has four cores, this value can be set to 4.
The value of worker_connections shows the number of connections per worker_processes setting per second. Simply speaking, worker_connections tells NGINX how many simultaneous requests can be handled by NGINX. The value of worker_connections depends on the system processor core. To find out the core's limitations on a Linux system (Debian/Ubuntu), issue the following command in the terminal:
Ulimit –n
This command will show you a number that should be used for worker_connections.
Now, let's say that our processor has four cores, and each core's limitation is 512. Then, we can set the values for these two variables in the NGINX main configuration file. On Debian/Ubuntu, it is located at /etc/nginx/nginx.conf.
Now, find out these two variables and set them as follows:
Worker_processes 4; Worker_connections 512
The preceding values can be high, specially worker_connections, because server processor cores have high limitations.
Content Delivery Network is used to host static media files, such as images, .css and .js files, and audio and video files. These files are stored on a geographical network whose servers are located in different locations. Then, these files are served to requests from a specific server, depending on the request location.
CDN provides the following features:
So, how do you use CDN in your application? In best practice, if your application has high traffic, creating different subdomains at your CDN for each content type is the best. For example, a separate domain for CSS and JavaScript files, a subdomain for images, and another separate subdomain for audio/videos files can be created. This way, the browser will send parallel requests for each content type. Let's say, we have the following URLs for each content type:
Now, most open source applications provide settings at their admin control panel to set up CDN URLs, but in case you happened to use an open source framework or a custom-build application, you can define your own setting for CDN by placing the previous URLs either in the database or in a configuration file loaded globally.
For our example, we will place the preceding URLs in a config file and create three constants for them, as follows:
Constant('CSS_JS_URL', 'http://css-js.yourcdn.com/');
Constant('IMAGES_URL', 'http://images.yourcdn.com/');
Constant('MEDiA_URL', 'http://css-js.yourcdn.com/');If we need to load a CSS file, it can be loaded as follows:
<script type="text/javascript" src="<?php echo CSS_JS_URL ?>js/file.js"></script>
For a JavaScript file, it can be loaded as follows:
<link rel="stylesheet" type="text/css" href="<?php echo CSS_JS_URL ?>css/file.css" />
If we load images, we can use the previous way in the src attribute of the img tag, as follows:
<img src="<?php echo IMAGES_URL ?>images/image.png" />
In the preceding examples, if we don't need to use CDN or want to change the CDN URLs, it will be easy to change in just one place.
Most famous JavaScript libraries and templating engines host their static resources on their own personal CDN. Google hosts query libraries, fonts, and other JavaScript libraries on its own CDN, which can be used directly in applications.
Sometimes, we may not want to use CDN or be able to afford them. For this, we can use a technique called domain sharing. Using domain sharding, we can create subdomains or point out other domains to our resources' directories on the same server and application. The technique is the same as discussed earlier; the only difference is that we direct other domains or subdomains to our media, CSS, JavaScript, and image directories ourselves.
This may seem be fine, but it won't provide us with CDN's best performance. This is because CDN decides the geographical availability of content depending on the customer's location, extensive caching, and files optimization on the fly.
Every web application has CSS and JavaScript files. Nowadays, it is common that most applications have lots of CSS and JavaScript files to make the application attractive and interactive. Each CSS and JavaScript file needs a browser to send a request to the server to fetch the file. So, the more the CSS and JavaScript files you have, the more requests the browser will need to send, thus affecting its performance.
Each file has a content size, and it takes time for the browser to download it. For example, if we have 10 CSS files of 10 KB each and 10 JavaScript files of 50 KB each, the total content size of the CSS files is 100 KB, and for JavaScript it is 500 KB—600 KB for both types of files. This is too much, and the browser will take time to download them.
Performance plays a vital role in web applications. Even Google counts performance in its indexing. Don't think of a file that has a few KBs and takes a 1 ms to download because when it comes to performance, each millisecond is counted. The best thing is to optimize, compress, and cache everything.
In this section, we will discuss two ways to optimize our CSS and JS, which are as follows:
In the merging process, we can merge all the CSS files into a single file, and the same process is carried out with JavaScript files, thus creating a single file for CSS and JavaScript. If we have 10 files for CSS, the browser sends 10 requests for all these files. However, if we merge them in a single file, the browser will send only one request, and thus, the time taken for nine requests is saved.
In the minifying process, all the empty lines, comments, and extra spaces are removed from the CSS and JavaScript files. This way, the size of the file is reduced, and the file loads fast.
For example, let's say you have the following CSS code in a file:
.header {
width: 1000px;
height: auto;
padding: 10px
}
/* move container to left */
.float-left {
float: left;
}
/* Move container to right */
.float-right {
float: right;
}After minifying the file, we will have CSS code similar to the following:
.header{width:100px;height:auto;padding:10px}.float-left{float:left}.float-right{float:right}Similarly for JavaScript, let's consider that we have the following code in a JavaScript file:
/* Alert on page load */
$(document).ready(function() {
alert("Page is loaded");
});
/* add three numbers */
function addNumbers(a, b, c) {
return a + b + c;
}Now, if the preceding file is minified, we will have the following code:
$(document).ready(function(){alert("Page is loaded")});function addNumbers(a,b,c){return a+b+c;}It can be noted in the preceding examples that all the unnecessary white spaces and new lines are removed. Also, it places the complete file code in one single line. All code comments are removed. This way, the file size is reduced, which helps the file be loaded fast. Also, this file will consume less bandwidth, which is useful if the server resources are limited.
Most open source applications, such as Magento, Drupal, and WordPress, provide either built-in support or support the application by third-party plugins/modules. Here, we won't cover how to merge CSS or JavaScript files in these applications, but we will discuss a few tools that can merge CSS and JavaScript files.
Minify is a set of libraries completely written in PHP. Minify supports both merging and minifying for both CSS and JavaScript files. Its code is completely object-oriented and namespaced, so it can be embedded into any current or proprietary framework.
The Minify homepage is located at http://minifier.org. It is also hosted on GitHub at https://github.com/matthiasmullie/minify. It is important to note that the Minify library uses a path converter library, which is written by the same author. The path converter library can be downloaded from https://github.com/matthiasmullie/path-converter. Download this library and place it in the same folder as the minify libraries.
Now, let's create a small project that we will use to minify and merge CSS and JavaScript files. The folder structure of the project will be as in the following screenshot:
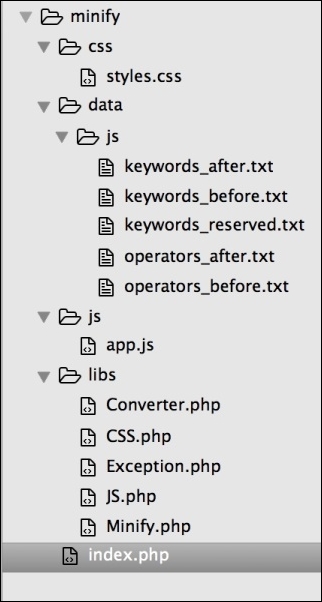
In the preceding screenshot, the complete project structure is shown. The project name is minify. The css folder has all of our CSS files, including the minified or merged ones. Similarly, the js folder has all our JavaScript files, including the minified or merged ones. The libs folder has the Minify library along with the Converter library. Index.php has our main code to minify and merge CSS and JavaScript files.
So, let's start by minifying our CSS and JavaScript files using the following code in index.php:
include('libs/Converter.php');
include('libs/Minify.php');
include('libs/CSS.php');
include('libs/JS.php');
include('libs/Exception.php');
use MatthiasMullie\Minify;
/* Minify CSS */
$cssSourcePath = 'css/styles.css';
$cssOutputPath = 'css/styles.min.css';
$cssMinifier = new Minify\CSS($cssSourcePath);
$cssMinifier->minify($cssOutputPath);
/* Minify JS */
$jsSourcePath = 'js/app.js';
$jsOutputPath = 'js/app.min.js';
$jsMinifier = new Minify\JS($jsSourcePath);
$jsMinifier->minify($jsOutputPath);The preceding code is simple. First, we included all our required libraries. Then, in the Minify CSS block, we created two path variables: $cssSourcePath, which has the path to the CSS file that we need to minify, and $cssOutputPath, which has path to the minified CSS file that will be generated.
After this, we instantiated an object of the CSS.php class and passed the CSS file that we need to minify. Finally, we called the minify method of the CSS class and passed the output path along with the filename, which will generate the required file for us.
The same explanation goes for the JS minifying process.
If we run the preceding PHP code, all the files are in place, and everything goes fine, then two new filenames will be created: styles.min.css and app.min.js. These are the new minified versions of their original files.
Now, let's use Minify to merge multiple CSS and JavaScript files. First, add some CSS and JavaScript files to the respective folders in the project. After this, we just need to add a little code to the current code. In the following code, I will skip including all the libraries, but these files have to be loaded whenever you need to use Minify:
/* Minify CSS */ $cssSourcePath = 'css/styles.css'; $cssOutputPath = 'css/styles.min.merged.css'; $cssMinifier = new Minify\CSS($cssSourcePath); $cssMinifier->add('css/style.css'); $cssMinifier->add('css/forms.js'); $cssMinifier->minify($cssOutputPath); /* Minify JS */ $jsSourcePath = 'js/app.js'; $jsOutputPath = 'js/app.min.merged.js'; $jsMinifier = new Minify\JS($jsSourcePath); $jsMinifier->add('js/checkout.js'); $jsMinifier->minify($jsOutputPath);
Now, take a look at the highlighted code. In the CSS part, we saved the minified and merged file as style.min.merged.css, but naming is not important; it is all up to our own choice.
Now, we will simply use the add method of the $cssMinifier and $jsMinifier objects to add new files and then call minify. This causes all the additional files to be merged in the initial file and then minified, thus generating a single merged and minified file.
According to its official website, Grunt is a JavaScript task runner. It automates certain repetitive tasks so that you don't have to work repeatedly. It is an awesome tool and is widely used among web programmers.
Installing Grunt is very easy. Here, we will install it on MAC OS X, and the same method is used for most Linux systems, such as Debian and Ubuntu.
If Node.js and npm are installed on your machine, just fire up the following command in your terminal:
sudo npm install –g grunt
This will install Grunt CLI. If everything goes fine, then the following command will show you the version the of Grunt CLI:
grunt –version
The output of the preceding command is grunt-cli v0.1.13; as of writing this book, this version is available.
Grunt provides you with a command-line, which enables you to run a Grunt command. A Grunt project requires two files in your project file tree. One is package.json, which is used by npm and lists Grunt and the Grunt plugins that the project needs as DevDependencies.
The second file is the GruntFile, which is stored as GruntFile.js or GruntFile.coffee and is used to configure and define Grunt tasks and load Grunt plugins.
Now, we will use the same preceding project, but our folder structure will be as follows:
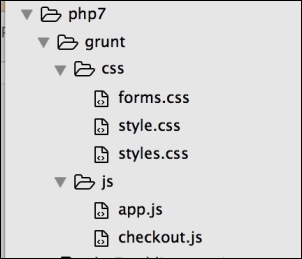
Now, open the terminal in your project root and issue the following command:
sudo npm init
This will generate the package.json file by asking a few questions. Now, open the package.json file and modify it so that the contents of the final package.json files look similar to the following:
{
"name" : "grunt" //Name of the project
"version : "1.0.0" //Version of the project
"description" : "Minify and Merge JS and CSS file",
"main" : "index.js",
"DevDependencies" : {
"grunt" : "0.4.1", //Version of Grunt
//Concat plugin version used to merge css and js files
"grunt-contrib-concat" : "0.1.3"
//CSS minifying plugin
"grunt-contrib-cssmin" : "0.6.1",
//Uglify plugin used to minify JS files.
"grunt-contrib-uglify" : "0.2.0"
},
"author" : "Altaf Hussain",
"license" : ""
}I added comments to different parts of the package.json file so that it is easy to understand. Note that for the final file, we will remove the comments from this file.
It can be seen that in the DevDependencies section, we added three Grunt plugins used for different tasks.
The next step is to add GruntFile. Let's create a file called GruntFile.js in our project root similar to the package.json file. Place the following contents in GruntFile:
module.exports = function(grunt) {
/*Load the package.json file*/
pkg: grunt.file.readJSON('package.json'),
/*Define Tasks*/
grunt.initConfig({
concat: {
css: {
src: [
'css/*' //Load all files in CSS folder
],
dest: 'dest/combined.css' //Destination of the final combined file.
}, //End of CSS
js: {
src: [
'js/*' //Load all files in js folder
],
dest: 'dest/combined.js' //Destination of the final combined file.
}, //End of js
}, //End of concat
cssmin: {
css: {
src : 'dest/combined.css',
dest : 'dest/combined.min.css'
}
},//End of cssmin
uglify: {
js: {
files: {
'dest/combined.min.js' : ['dest/combined.js'] // destination Path : [src path]
}
}
} //End of uglify
}); //End of initConfig
grunt.loadNpmTasks('grunt-contrib-concat');
grunt.loadNpmTasks('grunt-contrib-uglify');
grunt.loadNpmTasks('grunt-contrib-cssmin');
grunt.registerTask('default', ['concat:css', 'concat:js', 'cssmin:css', 'uglify:js']);
}; //End of module.exportsThe preceding code is simple and self-explanatory, and the comments are added whenever needed. At the top, we loaded our package.json file, and after this, we defined different tasks along with their src and destination files. Remember that every task's src and destination syntax is different, and it depends on the plugin. After initConfig block, we loaded different plugins and npm tasks and then registered them with GRUNT.
Now, let's run our tasks.
First, let's combine CSS and JavaScript files and store them in their respective destinations defined in our tasks list in GruntFile via the following command:
grunt concat
After running the preceding command in your terminal, if you see a message such as Done, without errors, then the task is completed successfully.
In the same way, let's minify our css file using the following command:
grunt cssmin
Then, we will minify our JavaScript file using the following command:
grunt uglify
Now, it may seem like a lot of work to use Grunt, but it provides some other features that can make a developer's life easy. For example, what if you need to change your JavaScript and CSS files? Should you run all the preceding commands again? No, Grunt provides a watch plugin, which activates and executes all the files in the destination paths in the tasks, and if any changes occur, it runs the tasks automatically.
For a more detailed learning, take a look at Grunt's official website at http://gruntjs.com/.
In full page caching, the complete page of the website is stored in a cache, and for the next requests, this cached page is served. Full page cache is more effective if your website content does not change too often; for example, on a blog with simple posts, new posts are added on a weekly basis. In this case, the cache can be cleared after new posts are added.
What if you have a website that has pages with dynamic parts, such as an e-commerce website? In this case, a complete page caching will create problems because the page is always different for each request; as a user is logged in, he/she may add products to the shopping cart and so on. In this case, using full page caching may not be that easy.
Most popular platforms provide either built-in support for full page cache or through plugins and modules. In this case, the plugin or module takes care of the dynamic blocks of the page for each request.
Varnish, as mentioned on its official website, makes your website fly; and this is true! Varnish is an open source web application accelerator that runs in front of your web server software. It has to be configured on port 80 so that each request comes to it.
Now, the Varnish configuration file (called VCL files with the .vcl extenstion) has a definition for backends. A backend is the web server (Apache or NGINX) configured on another port (let's say 8080). Multiple backends can be defined, and Varnish will take care of the load balancing too.
When a request comes to Varnish, it checks whether the data for this request in available at its cache or not. If it finds the data in its cache, this cached data is returned to the request, and no request is sent to the web server or backend. If Varnish does not find any data in its cache, it sends a request to the web server and requests the data. When it receives data from the web server, it first caches this data and then sends it back to the request.
As it is clear in the preceding discussion, if Varnish finds the data in the cache, there is no need for a request to the web server and, therefore, for processing in there, and the response is sent back very fast.
Varnish also provides features such as load balancing and health checks. Also, Varnish has no support for SSL and cookies. If Varnish receives cookies from the web server or backend, this page is not cached. There are different ways to overcome these issues easily.
We've done enough theory; now, let's install Varnish on a Debian/Ubuntu server via the following steps:
sources.list file. Place the following line in the file:deb https://repo.varnish-cache.org/debian/ Jessie varnish-4.1
sudo apt-get update
sudo apt-get install varnish
/etc/default/varnish and change it so that it looks similar to the following code: DAEMON_OPS="-a :80 \
-T localhost:6082 \
-f /etc/varnish/default.vcl \
-S /etc/varnish/secret \
-s malloc,256m"
sudo service varnish restart
80. Let's make NGINX run on port 8080. Edit the NGINX vhost file for the application and change the listen port from 80 to 8080, as follows:listen 8080;
sudo service nginx restart
8080. Edit the Varnish VCL file located at /etc/varnish/default.vcl, as follows: backend default {
.host = "127.0.0.1";
.port = "8080";
}In the preceding configuration, our backend host is located at the same server on which Varnish runs, so we entered the local IP. We can also enter a localhost in this case. However, if our backend runs on a remote host or another server, the IP of this server should be entered.
Now, we are done with Varnish and web server configuration. Restart both Varnish and NGINX. Open your browser and enter the IP or hostname of the server. The first response may seem slow, which is because Varnish is fetching data from the backend and then caching it, but other subsequent responses will be extremely fast, as Varnish cached them and is now sending back the cached data without communicating with the backend.
Varnish provides a tool in which we can easily monitor the Varnish cache status. It is a real-time tool and updates its contents in real time. It is called varnishstat. To start varnishstat, just issue the following command in the terminal:
varnishstat
The preceding command will display a session similar to the following screenshot:
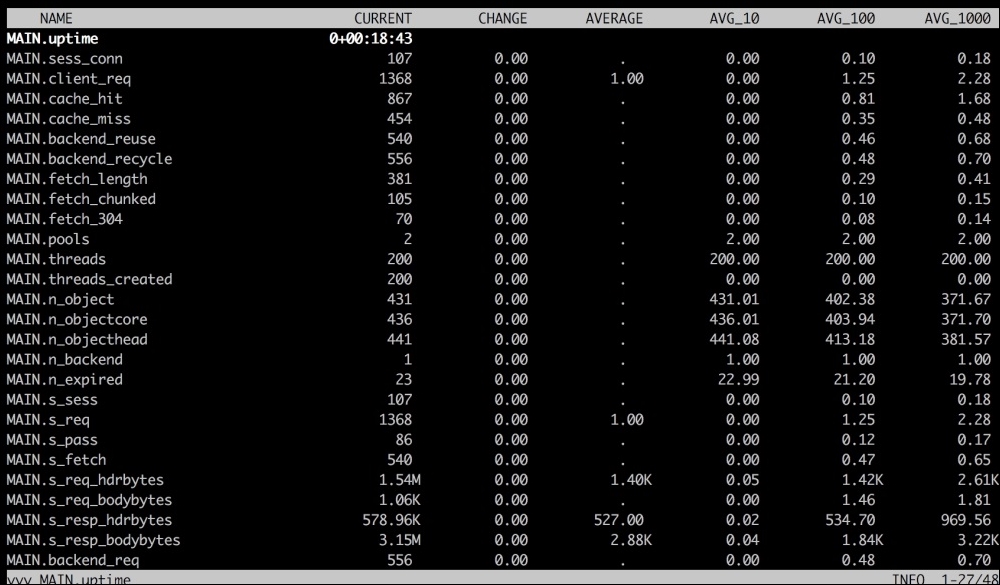
As can be seen in the preceding screenshot, it displays very useful information, such as the running time and the number of requests made at the beginning, cache hits, cache misses, all backends, backend reusages, and so on. We can use this information to tune Varnish for its best performance.
A complete Varnish configuration is out of the scope of this book, but a good documentation can be found on the Varnish official website at https://www.varnish-cache.org.
We discussed too many topics on increasing the performance of our application. Now, let's discuss the scalability and availability of our application. With time, the traffic on our application can increase to thousands of users at a time. If our application runs on a single server, the performance will be hugely effected. Also, it is not a good idea to keep the application running at a single point because in case this server goes down, our complete application will be down.
To make our application more scalable and better in availability, we can use an infrastructure setup in which we can host our application on multiple servers. Also, we can host different parts of the application on different servers. To better understand, take a look at the following diagram:
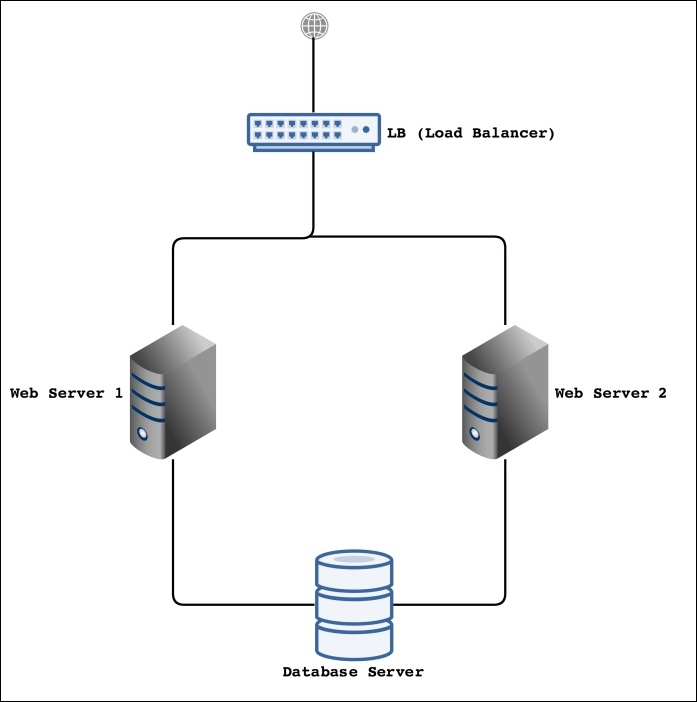
This is a very basic design for the infrastructure. Let's talk about its different parts and what operations will be performed by each part and server.
It is possible that only the Load Balancer (LB) will be connected to the public Internet, and the rest of the parts can be connected to each through a private network in a Rack. If a Rack is available, this will be very good because all the communication between all the servers will be on a private network and therefore secure.
In the preceding diagram, we have two web servers. There can be as many web servers as needed, and they can be easily connected to LB. The web servers will host our actual application, and the application will run on NGINX or Apache and PHP 7. All the performance tunings we will discuss in this chapter can be used on these web servers. Also, it is not necessary that these servers should be listening at port 80. It is good that our web server should listen at another port to avoid any public access using browsers.
The database server is mainly used for the database where the MySQL or Percona Server can be installed. However, one of the problems in the infrastructure setup is to store session data in a single place. For this purpose, we can also install the Redis server on the database server, which will handle our application's session data.
The preceding infrastructure design is not a final or perfect design. It is just to give the idea of a multiserver application hosting. It has room for a lot of improvement, such as adding another local balancer, more web servers, and servers for the database cluster.
The first part is the load balancer (LB). The purpose of the load balancer is to divide the traffic among the web servers according to the load on each web server.
For the load balancer, we can use HAProxy, which is widely used for this purpose. Also, HAProxy checks the health of each web server, and if a web server is down, it automatically redirects the traffic of this down web server to other available web servers. For this purpose, only LB will be listening at port 80.
We don't want to place a load on our available web servers (in our case, two web servers) of encrypting and decrypting the SSL communication, so we will use the HAProxy server to terminate SSL there. When our LB receives a request with SSL, it will terminate SSL and send a normal request to one of the web servers. When it receives a response, HAProxy will encrypt the response and send it back to the client. This way, instead of using both the servers for SSL encryption/decryption, only a single LB server will be used for this purpose.
In the preceding infrastructure, we placed a load balancer in front of our web servers, which balance load on each server, check the health of each server, and terminate SSL. We will install HAProxy and configure it to achieve all the configurations mentioned before.
We will install HAProxy on Debian/Ubuntu. As of writing this book, HAProxy 1.6 is the latest stable version available. Perform the following steps to install HAProxy:
sudo apt-get update
sudo apt-get install haproxy
This will install HAProxy on the system.
haproxy -v
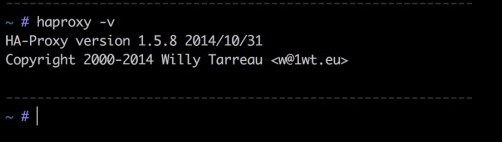
If the output is as in the preceding screenshot, then congratulations! HAProxy is installed successfully.
Now, it's time to use HAProxy. For this purpose, we have the following three servers:
The Web1 and Web2 servers are also called backend servers. First, let's configure the LB or frontend server to listen at port 80.
Open the haproxy.cfg file located at /etc/haproxy/ and add the following lines at the end of the file:
frontend http bind *:80 mode http default_backend web-backends
In the preceding code, we set HAProxy to listen at the HTTP port 80 on any IP address, either the local loopback IP 127.0.0.1 or the public IP. Then, we set the default backend.
Now, we will add two backend servers. In the same file, at the end, place the following code:
backend web-backend mode http balance roundrobin option forwardfor server web1 10.211.55.2:8080 check server web2 10.211.55.3:8080 check
In the preceding configuration, we added two servers into the web backend. The reference name for the backend is web-backend, which is used in the frontend configuration too. As we know, both our web servers listen at port 8080, so we mentioned that it is the definition of each web server. Also, we used check at the end of the definition of each web server, which tells HAProxy to check the server's health.
Now, restart HAProxy by issuing the following command in the terminal:
sudo service haproxy restart
Now, enter the IP or hostname of the LB server in the browser, and our web application page will be displayed either from Web1 or Web2.
Now, disable any of the web servers and then reload the page again. The application will still work fine, because HAProxy automatically detected that one of web servers is down and redirected the traffic to the second web server.
HAProxy also provides a stats page, which is browser-based. It provides complete monitoring information about the LB and all the backends. To enable stats, open haprox.cfg, and place the following code at the end of the file:
listen stats *:1434 stats enable stats uri /haproxy-stats stats auth phpuser:packtPassword
The stats are enabled at port 1434, which can be set to any port. The URL of the page is stats uri. It can be set to any URL. The auth section is for basic HTTP authentication. Save the file and restart HAProxy. Now, open the browser and enter the URL, such as 10.211.55.1:1434/haproxy-stats. The stats page will be displayed as follows:
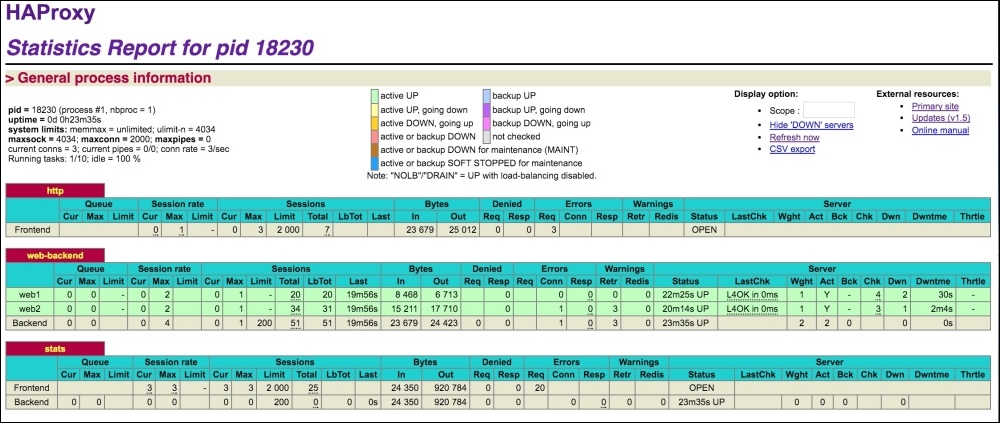
In the preceding screenshot, each backend web server can be seen, including frontend information.
Also, if a web server is down, HAProxy stats will highlight the row for this web server, as can be seen in the following screenshot:
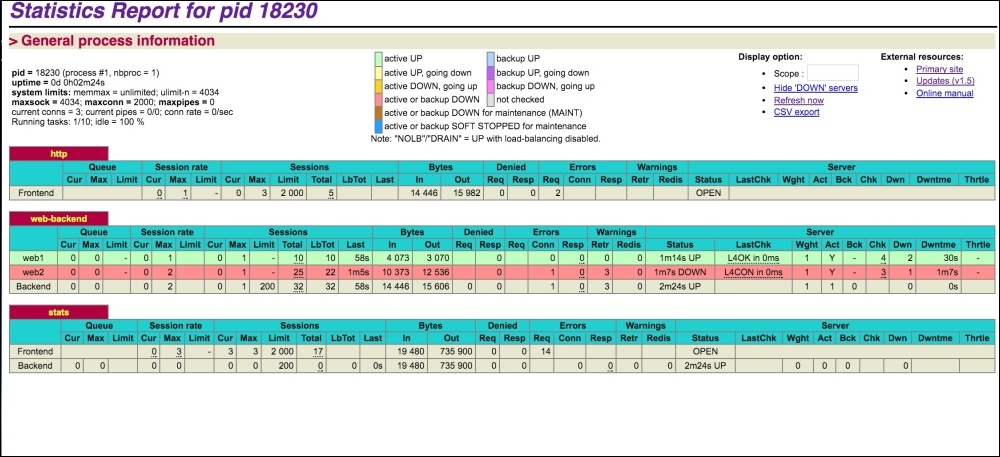
For our test, we stopped NGINX at our Web2 server and refreshed the stats page, and the Web2 server row in the backend section was highlighted.
To terminate SSL using HAProxy, it is pretty simple. To terminate SSL using HAProxy, we will just add the SSL port 443 binding along with the SSL certificate file location. Open the haproxy.cfg file, edit the frontend block, and add the highlighted code in it, as in the following block:
frontend http
bind *:80
bind *:443 ssl crt /etc/ssl/www.domain.crt
mode http
default_backend web-backendsNow, HAProxy also listens at 443, and when an SSL request is sent to it, it processes it there and terminates it so that no HTTPS requests are sent to backend servers. This way, the load of SSL encryption/decryption is removed from the web servers and is managed by the HAProxy server only. As SSL is terminated at the HAProxy server, there is no need for web servers to listen at port 443, as regular requests from HAProxy server are sent to the backend.
In this chapter, we discussed several topics starting from NGINX and Apache to Varnish. We discussed how we can optimize our web server's software settings for the best performance. Also, we discussed CDNs and how to use them in our customer applications. We discussed two ways to optimize JavaScript and CSS files for the best performance. We briefly discussed full page cache and Varnish installation and configuration. At the end, we discussed multiserver hosting or infrastructure setup for our application to be scalable and the best in availability.
In next chapter, we will look into the ways of increasing the performance of our database. We will discuss several topics, including the Percona Server, different storage engines for the database, query caching, Redis, and Memcached.
Databases play a key role in dynamic websites. All incoming and outgoing data is stored in a database. So, if the database for a PHP application is not well designed and optimized, it will effect the application's performance tremendously. In this chapter, we will look into the ways of optimizing our PHP application's database. The following topics will be covered in this chapter:
MySQL is the most commonly used Relational Database Management System (RDMS) for the Web. It is open source and has a free community version. It provides all those features that can be provided by an enterprise-level database.
The default settings provided with the MySQL installation may not be so good for performance, and there are always ways to fine-tune these settings to get an improved performance. Also, remember that your database design plays a big role in performance. A poorly designed database will have an effect on the overall performance.
In this section, we will discuss how to improve the MySQL database's performance.
We will modify the MySQL configuration's my.cnf file. This file is located in different places in different operating systems. Also, if you are using XAMPP, WAMP, or any other cross-platform web server solution stack package on Windows, this file will be located in the respective folder. Whenever my.cnf is mentioned, it is assumed that the file is open no matter which OS is used.
Query caching is an important performance feature of MySQL. It caches SELECT queries along with the resulting dataset. When an identical SELECT query occurs, MySQL fetches the data from memory so that the query is executed faster and thus reduces the load on the database.
To check whether query cache is enabled on a MySQL server or not, issue the following command in your MySQL command line:
SHOW VARIABLES LIKE 'have_query_cache';
The preceding command will display the following output:
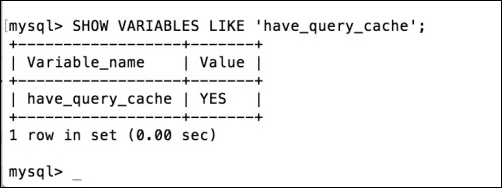
The previous result set shows that query cache is enabled. If query cache is disabled, the value will be NO.
To enable query caching, open up the my.cnf file and add the following lines. If these lines are there and are commented, just uncomment them:
query_cache_type = 1 query_cache_size = 128MB query_cache_limit = 1MB
Save the my.cnf file and restart the MySQL server. Let's discuss what the preceding three configurations mean:
query_cache_type: This plays a little confusing role.query_cache_type is set to 1 and query_cache_size is 0, then no memory is allocated, and query cache is disabled.If query_cache_size is greater than 0, then query cache is enabled, memory is allocated, and all queries that do not exceed the query_cache_limit value or use the SQL_NO_CACHE option are cached.
query_cache_type value is 0 and query_cache_size is 0, then no memory is allocated, and cache is disabled.If query_cache_size is greater than 0, then memory is allocated, but nothing is cached—that is, cache is disabled.
query_cache_size: query_cache_size: This indicates how much memory will be allocated. Some think that the more memory is used, the better it will be, but this is just a misunderstanding. It all depends on the database size, query types and ratios between read and writes, hardware, database traffic, and other factors. A good value for query_cache_size is between 100 MB and 200 MB; then, you can monitor the performance and other variables on which query cache depends, as mentioned, and adjust the size. We have used 128MB for a medium traffic Magento website and it is working perfectly. Set this value to 0 to disable query cache.query_cache_limit: This defines the maximum size of a query dataset to be cached. If a query dataset's size is larger than this value, it isn't cached. The value of this configuration can be guessed by finding out the largest SELECT query and the size of its returned dataset.Storage engines (or table types) are a part of core MySQL and are responsible for handling operations on tables. MySQL provides several storage engines, and the two most widely used are MyISAM and InnoDB. Both these storage engines have their own pros and cons, but InnoDB is always prioritized. MySQL started using InnoDB as the default storage engine, starting from 5.5.
MySQL provides some other storage engines that have their own purposes. During the database design process, which table should use which storage engine can be decided. A complete list of storage engines for MySQL 5.6 can be found at http://dev.mysql.com/doc/refman/5.6/en/storage-engines.html.
A storage engine can be set at database level, which is then used as the default storage engine for each newly created table. Note that the storage engine is the table's base, and different tables can have different storage engines in a single database. What if we have a table already created and want to change its storage engine? It is easy. Let's say that our table name is pkt_users, its storage engine is MyISAM, and we want to change it to InnoDB; we will use the following MySQL command:
ALTER TABLE pkt_users ENGINE=INNODB;
This will change the storage engine value of the table to INNODB.
Now, let's discuss the difference between the two most widely used storage engines: MyISAM and InnoDB.
A brief list of features that are or are not supported by MyISAM is as follows:
SELECT statement.COMMIT and ROLLBACK. If a query on a table is executed, it is executed, and there is no coming back.A brief list of features that are or are not supported by InnoDB is as follows:
SELECT, DELETE, or UPDATE operations, and during these operations, other data in this table can be manipulated.In the following sections, we will discuss some more performance features that are related to InnoDB. Values for the following configuration are set in the my.cnf file.
This setting defines how much memory should be used for InnoDB data and the indices loaded into memory. For a dedicated MySQL server, the recommended value is 50-80% of the installed memory on the server. If this value is set too high, there will be no memory left for the operating system and other subsystems of MySQL, such as transaction logs. So, let's open our my.cnf file, search for innodb_buffer_pool_size, and set the value between the recommended value (that is, 50-80%) of our RAM.
This feature is not that widely used. It enables multiple buffer pool instances to work together to reduce the chances of memory contentions on a 64-bit system and with a large value for innodb_buffer_pool_size.
There are different choices on which the value for innodb_buffer_pool_instances are calculated. One way is to use one instance per GB of innodb_buffer_pool_size. So, if the value of innodb_bufer_pool_size is 16 GB, we will set innodb_buffer_pool_instances to 16.
According to the Percona website, Percona is a free, fully compatible, enhanced, open source, and drop-in replacement for MySQL that provides superior performance, scalability, and instrumentation.
Percona is a fork of MySQL with enhanced features for performance. All the features available in MySQL are available in Percona. Percona uses an enhanced storage engine called XtraDB. According to the Percona website, it is an enhanced version of the InnoDB storage engine for MySQL that has more features, faster performance, and better scalability on modern hardware. Percona XtraDB uses memory more efficiently in high-load environments.
As mentioned earlier, XtraDB is a fork of InnoDB, so all the features available in InnoDB are available in XtraDB.
Percona is only available for Linux systems. It is not available for Windows as of now. In this book, we will install Percona Server on Debian 8. The process is same for both Ubuntu and Debian.
To install the Percona Server on other Linux flavors, check out the Percona installation manual at https://www.percona.com/doc/percona-server/5.5/installation.html. As of now, they provide instructions for Debian, Ubuntu, CentOS, and RHEL. They also provide instructions to install the Percona Server from sources and Git.
Now, let's install the Percona Server through the following steps:
sudo nano /etc/apt/sources.list
If prompted for a password, enter your Debian password. The file will be opened.
sources.list file:deb http://repo.percona.com/apt jessie main deb-src http://repo.percona.com/apt jessie main
sudo apt-get update
sudo apt-get install percona-server-server-5.5
There is always a need to monitor the performance of database servers. For this purpose, there are many tools available that make it easy to monitor MySQL servers and performance. Most of them are open source and free, and some provide a GUI. The command-line tools are more powerful and the best to use, though it takes a little time to understand and get used to them. We will discuss a few here.
This is the most famous, web-based, open source, and free tool available to manage MySQL databases. Despite managing a MySQL server, it also provides some good tools to monitor a MySQL server. If we log in to phpMyAdmin and then click on the Status tab at the top, we will see the following screen:
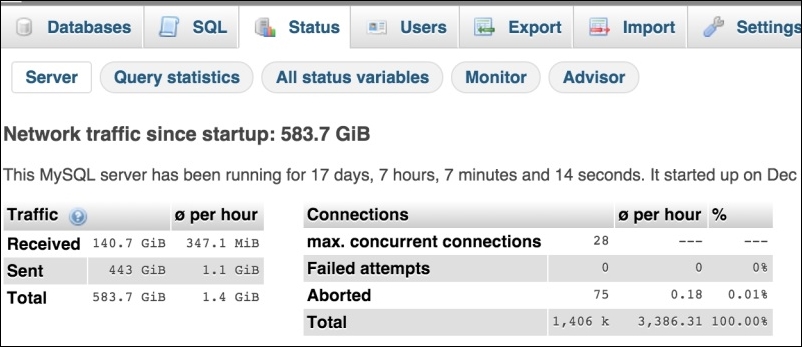
The Server tab shows us basic data about the MySQL server, such as when it started, how much traffic is handled from the last start, information about connections, and so on.
The next is Query Statistics. This section provides full stats about all of the queries executed. It also provides a pie chart, which visualizes the percentage of each query type, as shown in the following screenshot.
If we carefully look at the chart, we can see that we have 54% of the SELECT queries running. If we use some kind of cache, such as Memcached or Redis, these SELECT queries should not be this high. So, this graph and statistics information provides us with a mean to analyze our cache systems.
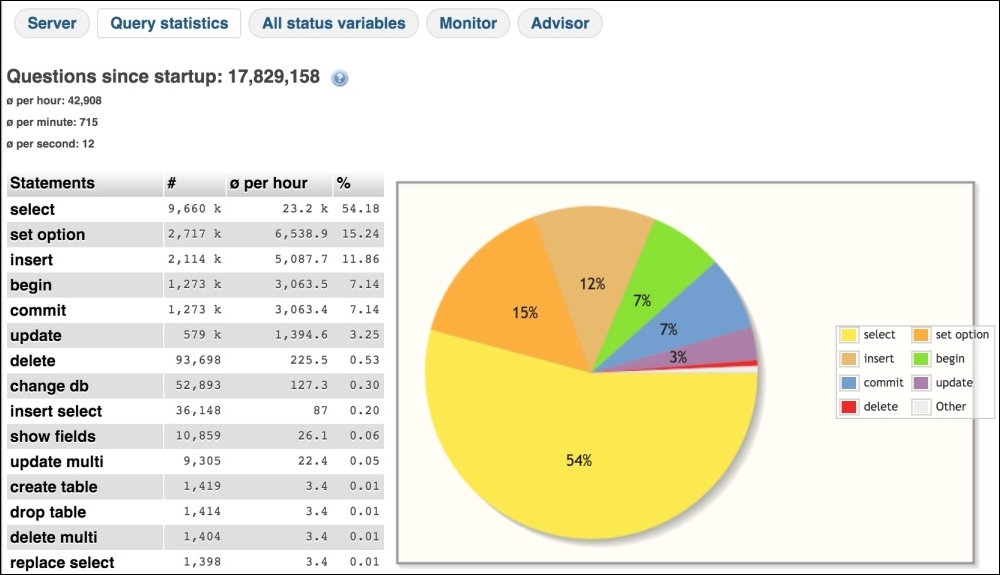
The next option is All Status Variables, which lists all of the MySQL variables and their current values. In this list, one can easily find out how MySQL is configured. In the following screenshot, our query cache variables and their values are shown:
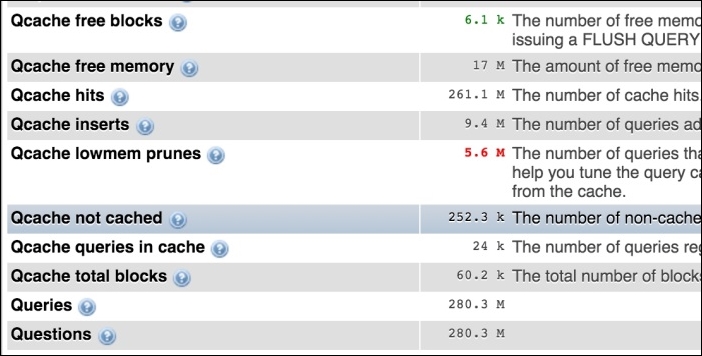
The next option that phpMyAdmin provides is Monitor. This is a very powerful tool that displays the server resources and their usages in real time in a graphical way.
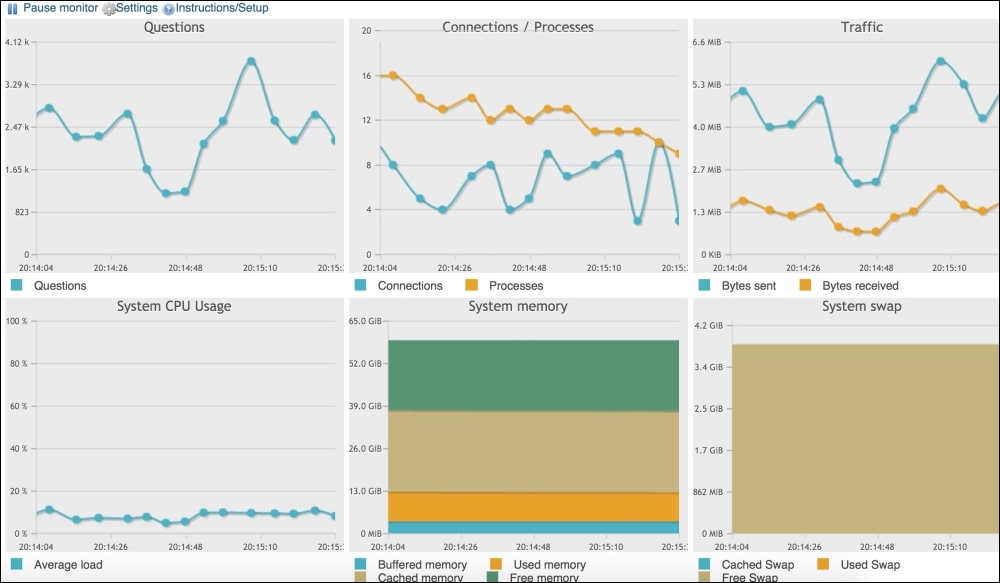
As shown in the preceding screenshot, we can see Questions, Connections/Processes, System CPU Usage, Traffic, System Memory, and System swap in a nice graphical interface.
The last important section is Advisor. This gives us advice regarding the settings for performance. It gives you as many details as possible so that the MySQL server can be tuned for performance. A small section from the advisor section is shown in the following screenshot:
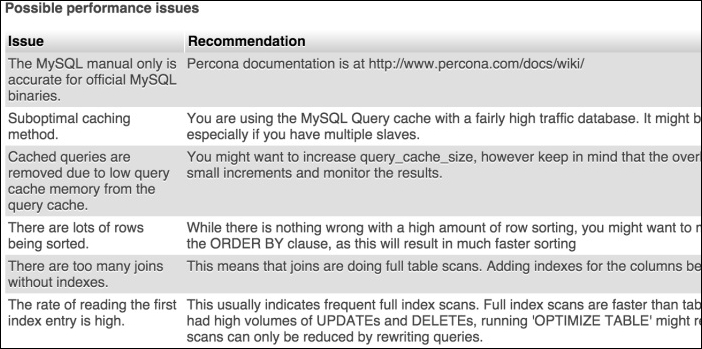
If all these advices are applied, some performance can be gained.
This is a desktop application from MySQL and is fully equipped with tools to manage and monitor the MySQL server. It provides us with a dashboard for performance in which all the data related to the server can be seen in a beautiful and graphical way, as shown in the screenshot that follows:
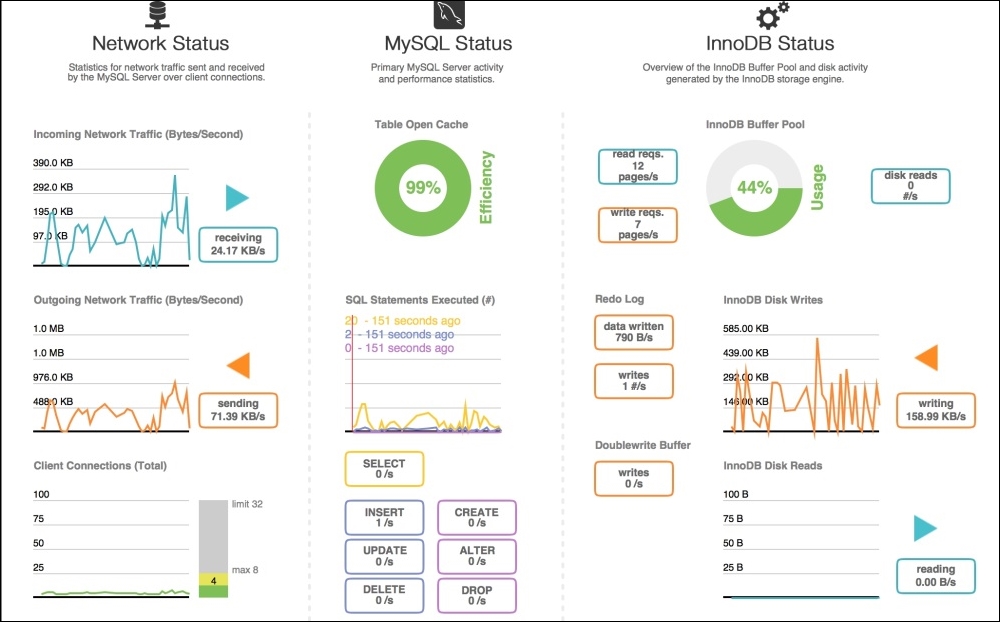
All the tools mentioned before are good and provide some visual information about our database server. However, they are not good enough to show us some more useful information or provide more features that can make our lives easy. For this purpose, another command-line toolkit is available, which is called Percona Toolkit.
Percona Toolkit is a set of more than 30 command-line tools, which includes those used to do an analysis of slow queries, archive, optimize indices and many more.
Percona Toolkit is free and open source and is available under GPL. Most of its tools run on Linux/Unix-based systems, but some can run on Windows too. An installation guide can be found at https://www.percona.com/doc/percona-toolkit/2.2/installation.html. A complete set of tools can be found at https://www.percona.com/doc/percona-toolkit/2.2/index.html.
Now, let's discuss a few tools in the subsections to follow.
This tool analyzes queries from slow, general, and binary log files. It generates a sophisticated report about the queries. Let's run this tool for slow queries using the following command:
Pt-query-digest /var/log/mysql/mysql-slow.log
After entering the preceding command in the terminal, we will see a long report. Here, we will discuss a short part of the report, as shown in the following screenshot:

In the preceding screenshot, slow queries are listed with the slowest at the top. The first query, which is a SELECT query, takes the most time, which is about 12% of the total time. The second query, which is also a SELECT query, takes 11.5% of the total time. From this report, we can see which queries are slow so that we can optimize them for the best performance.
Also, pt-query-digest displays information for each query, as shown in the following screenshot. In the screenshot, data about the first query is mentioned, including the total timing; percentage (pct) of time; min, max, and average time; bytes sent; and some other parameters:
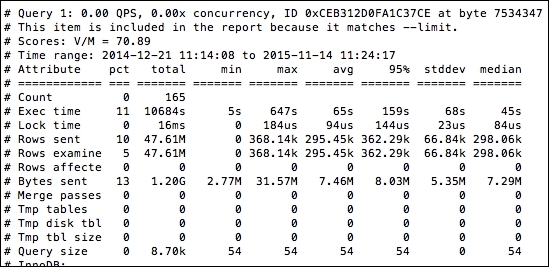
This tool finds duplicate indices and duplicate foreign keys either in a set of specified tables or in a complete database. Let's execute this tool again in a large database using the following command in the terminal:
Pt-duplicate-key-checker –user packt –password dbPassword –database packt_pub
When executed, the following output is printed:
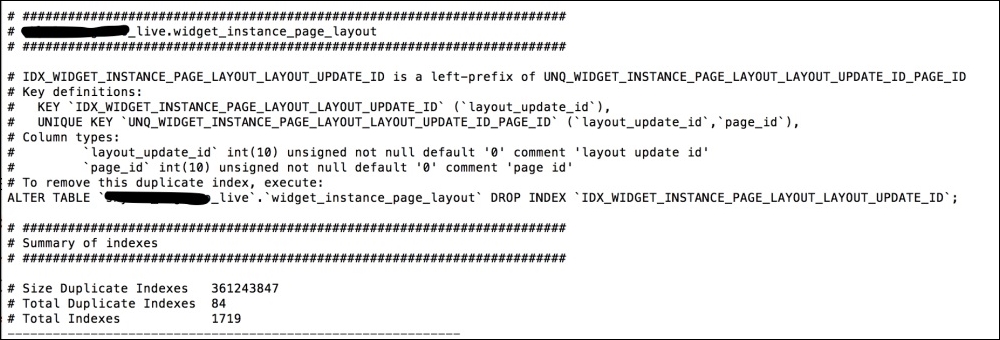
At the end of the report, a summary of the indices is displayed, which is self-explanatory. Also, this tool prints out an ALTER query for each duplicate index that can be executed as a MySQL query to fix the index, as follows:
Pt-variable-advisor
This tool displays MySQL config information and advice for each query. This is a good tool that can help us set up MySQL configurations properly. We can execute this tool by running the following command:
Pt-variable-advisor –user packt –password DbPassword localhost
After execution, the following output will be displayed:
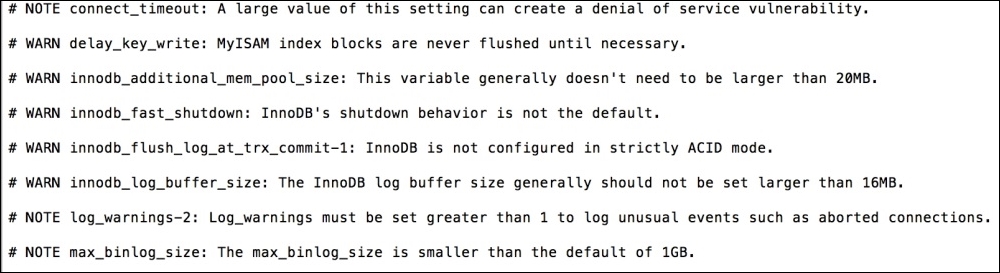
There are many other tools provided by Percona Toolkit that are out of the scope of this book. However, the documentation at https://www.percona.com/doc/percona-toolkit/2.2/index.html is very helpful and easy to understand. It provides complete details for each tool, including its description and risks, how to execute it, and other options if there are any. This documentation is worth reading if you wish to understand any tool in Percona Toolkit.
Percona XtraDB Cluster provides a high-performance cluster environment that can help easily configure and manage a database on multiple servers. It enables databases to communicate with each other using the binary logs. The cluster environment helps divide the load among different database servers and provides safety from failure in case a server is down.
To set up the cluster, we need the following servers:
As we already have the Percona repository in our sources, let's start by installing and configuring Percona XtraDB Cluster, also called PXC. Perform the following steps:
apt-get install percona-xtradb-cluster-56
The installation will start similarly to a normal Percona Server installation. During the installation, the password for a root user will be also asked.
CREATE USER 'sstpackt'@'localhost' IDENTIFIED BY 'sstuserpassword'; GRANT RELOAD, LOCK TABLES, REPLICATION CLIENT ON *.* TO 'sstpackt'@'localhost'; FLUSH PRIVILEGES;
The first query creates a user with the username sstpackt and password sstuserpassword. The username and password can be anything, but a good and strong password is recommended. The second query sets proper privileges to our new user, including locking tables and replication. The third query refreshes the privileges.
/etc/mysql/my.cnf. Then, place the following configuration in the mysqld block:#Add the galera library wsrep_provider=/usr/lib/libgalera_smm.so #Add cluster nodes addresses wsrep_cluster_address=gcomm://10.211.55.1,10.211.55.2,10.211.55.3 #The binlog format should be ROW. It is required for galera to work properly binlog_format=ROW #default storage engine for mysql will be InnoDB default_storage_engine=InnoDB #The InnoDB auto increment lock mode should be 2, and it is required for galera innodb_autoinc_lock_mode=2 #Node 1 address wsrep_node_address=10.211.55.1 #SST method wsrep_sst_method=xtrabackup #Authentication for SST method. Use the same user name and password created in above step 2 wsrep_sst_auth="sstpackt:sstuserpassword" #Give the cluster a name wsrep_cluster_name=packt_cluster
Save the file after adding the preceding configuration.
/etc/init.d/mysql bootstrap-pxc
This will bootstrap the first node. Bootstrapping means getting the initial cluster up and running and defining which node has the correct information and which one all the other nodes should sync to. As Node1 is our initial cluster node and we created a new user here, we have to only bootstrap Node1.
SST stands for State Snapshot Transfer. It is responsible for copying full data from one node to another. It is only used when a new node is added to the cluster and this node has to get complete initial data from an existing node. Three SST methods are available in Percona XtraDB Cluster, mysqldump, rsync, and xtrabackup.
SHOW STATUS LIKE '%wsrep%';
A very long list will be displayed. A few of them are shown in the following screenshot:
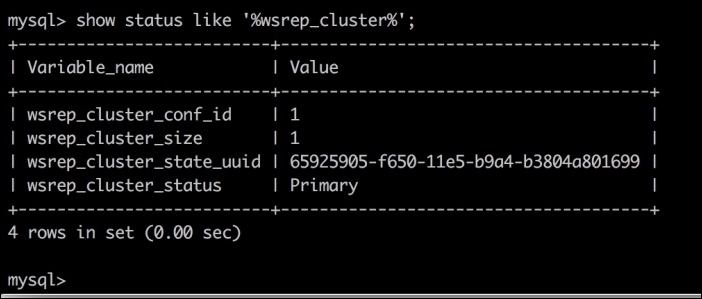
wsrep_node_address, which should be the IP address of the node. Edit the my.cnf configuration file for all the nodes and place the node address in wsrep_node_address.
/etc/init.d/mysql start
Now each node can be verified by repeating step 7.
To verify whether the cluster is working fine, create a database in one node and add some tables and data into the tables. After this, check other nodes for the newly created database, tables, and the data entered in each table. We will have all this data synced to each node.
Redis is an open source, in-memory key-value data store that is widely used for database caching. According to the Redis website (www.Redis.io), Redis supports data structures such as strings, hashes, lists, sets, and sorted lists. Also, Redis supports replication and transactions.
Redis installation instructions can be found at http://redis.io/topics/quickstart.
To check whether Redis is working fine on your server or not, start the Redis server instance by running the following command in the terminal:
redis server
Then issue the following command in a different terminal window:
redis-cli ping
If the output of the preceding command is as follows, the Redis server is ready to be run:
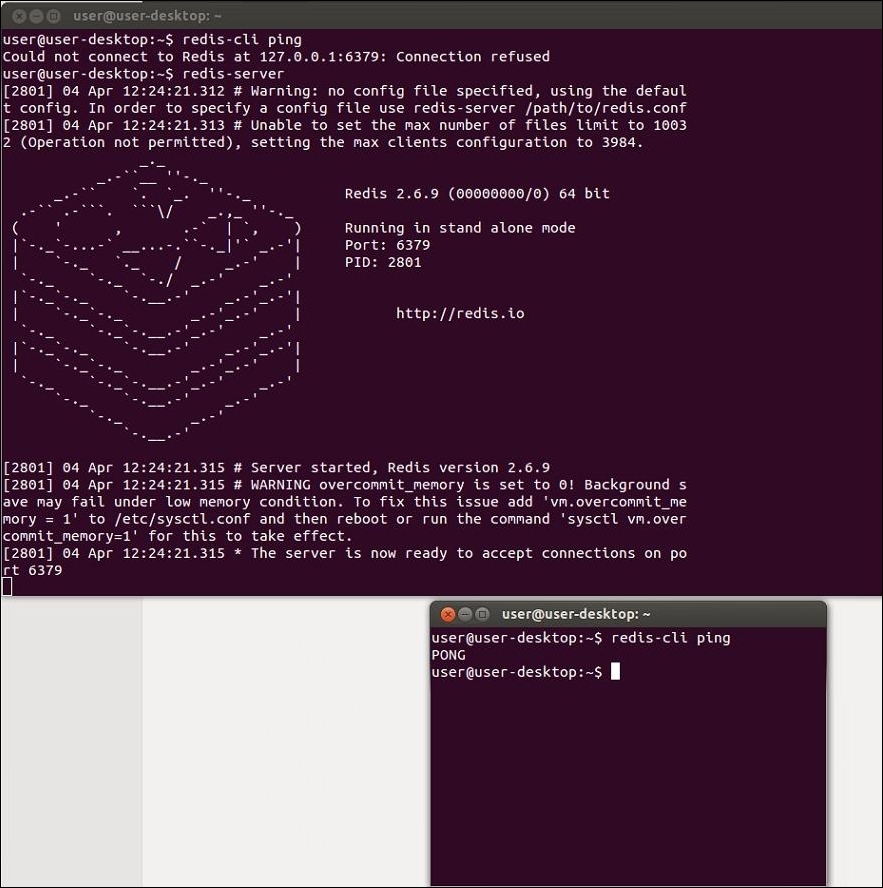
Redis provides a command line, which provides some useful commands. There are two ways to execute commands on the Redis server. You can either use the previous method or just type redis-cli and hit Enter; we will be presented with the Redis command line, where we can then just type the Redis commands that will be executed.
By default, Redis uses the IP 127.0.0.1 and port 6379. Remote connections are not allowed, though remote connections can be enabled. Redis stores data that is already created in the database. Database names are integer numbers, such as 0, 1, 2, and so on.
We won't go in much detail about Redis here, but we will discuss a few commands that are worth noting. Note that all these commands can be either executed in the previous way, or we can just enter the redis-cli command window and type the commands without typing redis-cli. Also, the following commands can be executed directly in PHP, which makes it possible to clear out the cache directly from our PHP application:
SELECT: This command changes the current database. By default, redis-cli will be opened at database 0. So, if we want to go to database 1, we will run the following command:
SELECT 1
FLUSHDB: This command flushes the current database. All keys or data from the current database will be deleted.FLUSHALL: This command flushes all the databases, no matter which database it is executed in.KEYS: This command lists all the keys in the current database matching a pattern. The following command lists all the keys in the current database.
KEYS *
Now, it's time for some action in PHP with Redis.
As of writing this topic, PHP 7 does not have built-in support for Redis yet. For this book's purpose, we compiled the PHPRedis module for PHP 7, and it works very nicely. The module can be found at https://github.com/phpredis/phpredis.
As mentioned before, by default, the Redis server runs on the IP 127.0.0.1 and port 6379. So, to make a connection, we will use these details. Take a look at the following code:
$redisObject = new Redis();
if( !$redisObject->connect('127.0.0.1', 6379))
die("Can't connect to Redis Server");In the first line, we instantiated a Redis object by the name of redisObject, which is then used in the second line to connect to the Redis server. The host is the local IP address 127.0.0.1, and the port is 6379. The connect() method returns TRUE if the connection is successful; otherwise, it returns FALSE.
Now, we are connected to our Redis server. Let's save some data in the Redis database. For our example, we want to store some string data in the Redis database. The code is as follows:
//Use same code as above for connection.
//Save Data in to Redis database.
$rdisObject->set('packt_title', 'Packt Publishing');
//Lets get our data from database
echo $redisObject->get('packt_title');The set method stores data into the current Redis database and takes two arguments: a key and a value. A key can be any unique name, and a value is what we need to store. So, our key is packt_title, and the value is Packt Publishing. The default database is always set to 0 (zero) unless explicitly set otherwise. So, the preceding set method will save our data to database 0 with the packt_title key.
Now, the get method is used to fetch data from the current database. It takes the key as the argument. So, the output of the preceding code will be our saved string data Packt Publishing.
Now, what about arrays or a set of data coming from the database? We can store them in several ways in Redis. Let's first try the normal strings way, as shown here:
//Use same connection code as above.
/* This $array can come from anywhere, either it is coming from database or user entered form data or an array defined in code */
$array = ['PHP 5.4', PHP 5.5, 'PHP 5.6', PHP 7.0];
//Json encode the array
$encoded = json_encode($array);
//Select redis database 1
$redisObj->select(1);
//store it in redis database 1
$redisObject->set('my_array', $encoded);
//Now lets fetch it
$data = $redisObject->get('my_array');
//Decode it to array
$decoded = json_decode($data, true);
print_r($decoded); The output of the preceding code will be the same array. For testing purposes, we can comment out the set method and check whether the get method fetches the data or not. Remember that in the preceding code, we stored the array as a json string, then fetched it as a json string, and decoded it to the array. This is because we used the methods that are available for the string datatype, and it is not possible to store arrays in the string datatype.
Also, we used the select method to select another database and use it instead of 0. This data will be stored in database 1 and can't be fetched if we are at database 0.
Redis management tools provide an easy way to manage Redis databases. These tools provide features so that every key can be checked and a cache can be cleared easily. One default tool comes with Redis, called Redis-cli, and we discussed it earlier. Now, let's discuss a visual tool that is great and easy to use, called Redis Desktop Manage (RDM). A screenshot of the main window of RDM looks like the following screenshot:
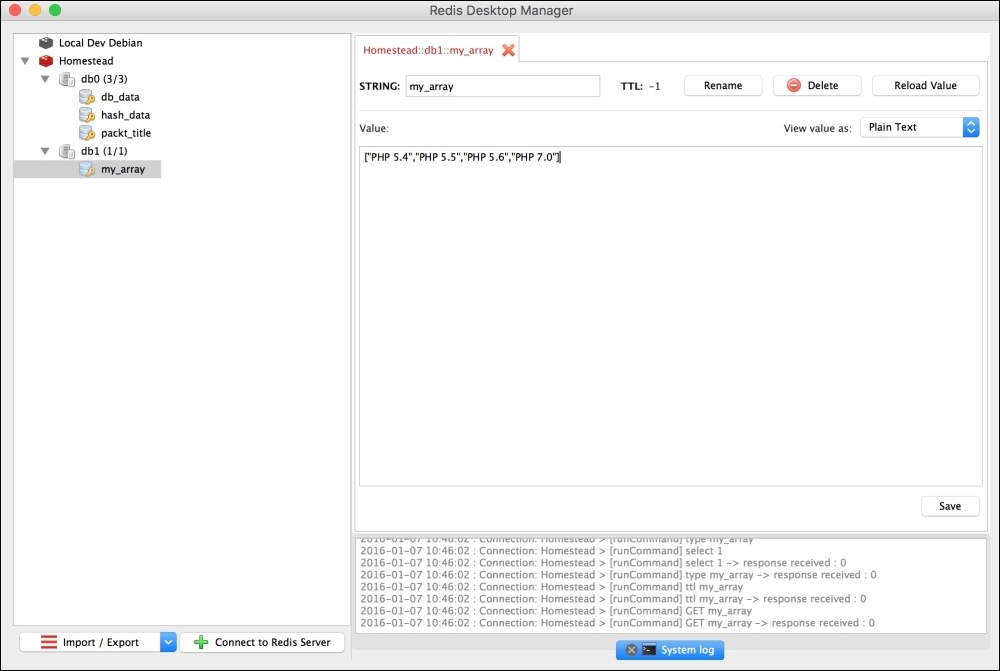
RDM provides the following features:
There are some other tools that can be used, but RDM and Redis-cli are the best and easiest to use.
According to the Memcached official website, it's a free, open source, high performance, and distributed memory object caching system. Memcached is an in-memory key-value store that can store datasets from a database or API calls.
Similarly to Redis, Memcached also helps a lot in speeding up a website. It stores the data (strings or objects) in the memory. This allows us to reduce the communication with outside resources, such as databases and or APIs.
Now, let's play a little with Memcachd in PHP. Take a look at the following code:
//Instantiate Memcached Object
$memCached = new Memcached();
//Add server
$memCached->addServer('127.0.0.1', 11211);
//Lets get some data
$data = $memCached->get('packt_title');
//Check if data is available
if($data)
{
echo $data;
}
else
{
/*No data is found. Fetch your data from any where and add to memcached */
$memCached->set('packt_title', 'Packt Publishing');
}The preceding code is a very simple example of using Memcached. The comments are written with each line of code and are self-explanatory. After instantiating a Memcached object, we have to add a Memcached server. By default, the Memcached server server runs on the localhost IP, which is 127.0.0.1, and on the port 11211. After this, we checked for some data using a key, and if it is available, we can process it (in this case, we displayed it. It can be returned, or whatever processing is required can be carried out.). If the data is not available, we can just add it. Please note that the data can come from a remote server API or from the database.
In this chapter, we covered MySQL and the Percona Server. Also, we discussed in detail query caching and other MySQL configuration options for performance in detail. We mentioned different storage engines, such as MyISAM, InnoDB, and Percona XtraDB. We also configured Percona XtraDB Cluster on three nodes. We discussed different monitoring tools, such as PhpMyAdmin monitoring tools, MySQL workbench performance monitoring, and Percona Toolkit. We also discussed Redis and Memcached caching for PHP and MySQL.
In the next chapter, we will discuss benchmarking and different tools. We will use XDebug, Apache JMeter, ApacheBench, and Siege to benchmark different open source systems, such as WordPress, Magento, Drupal, and different versions of PHP, and compare their performance with PHP 7.
During development, every developer faces problems, and it becomes unclear what is really going on here and why the problem is generated. Most the time, these issues can be logical or with the data. It is always hard to find such issues. Debugging is a process to find such issues and problems and fix them. Similarly, we often need to know how many resources a script consumes, including memory consumption, CPU, and how much time it takes to execute.
In this chapter, we will cover the following topics:
Xdebug is an extension for PHP that provides both debugging and profiling information for PHP scripts. Xdebug displays a full-stake trace information for errors, including function names, line numbers, and filenames. Also, it provides the ability to debug scripts interactively using different IDEs, such as Sublime Text, Eclipse, PHP Storm, and Zend Studio.
To check whether Xdebug is installed and enabled on our PHP installation, we need to check the phpinfo() details. On the phpinfo details page, search for Xdebug, and you should see details similar to the following screenshot:

This means that our PHP installation has Xdebug installed. Now, we need to configure Xdebug. Either the Xdebug configuration will be in the php.ini file, or it will have its separate .ini file. At our installation, we will have a separate 20-xdebug.ini file placed at the /etc/php/7.0/fpm/conf.d/ path.
For the purpose of this book, we will use the Homestead Vagrant box from Laravel. It provides complete tools on the Ubuntu 14.04 LTS installation, including PHP7 with Xdebug, NGINX, and MySQL. For the purpose of development, this Vagrant box is a perfect solution. More information can be found at https://laravel.com/docs/5.1/homestead.
Now, open the 20-xdebug.ini file and place the following configuration in it:
zend_extension = xdebug.so xdebug.remote_enable = on xdebug.remote_connect_back = on xdebug.idekey = "vagrant"
The preceding are the minimum configurations we should use that enable remote debugging and set an IDE key. Now, restart PHP by issuing the following command in the terminal:
sudo service php-fpm7.0 restart
Now we are ready to debug some code.
The Sublime Text editor has a plugin that can be used to debug PHP code with Xdebug. First, let's install the xdebug package for Sublime Text.
First, go to Tools | Command Pallet. A popup similar to the following will be displayed:
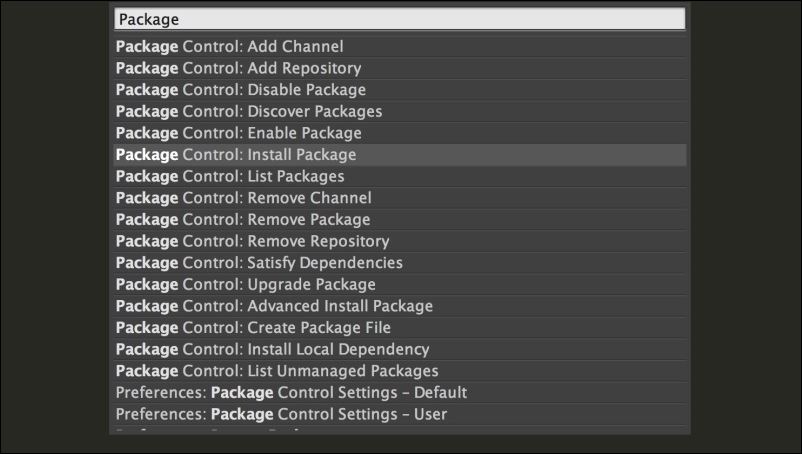
Select Package Control: Install Package, and a popup similar to the following screenshot will be displayed:
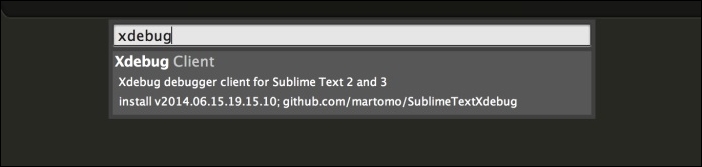
Type in xdebug, and the Xdebug Client package will be displayed. Click on it and wait for a while until it is installed.
Now, create a project in Sublime Text and save it. Open the Sublime Text project file and insert the following code in it:
{
"folders":
[
{
"follow_symlinks": true,
"path": "."
}
],
"settings": {
"xdebug": {
"path_mapping": {
"full_path_on_remote_host" : "full_path_on_local_host"
},
"url" : http://url-of-application.com/,
"super_globals" : true,
"close_on_stop" : true,
}
}
}The highlighted code is important, and it has to be entered for Xdebug. Path mapping is the most important part. It should have a full path to the root of the application on the remote host and a full path to the root of the application on the localhost.
Now, let's start debugging. Create a file at the project's root, name it index.php, and place the following code in it:
$a = [1,2,3,4,5]; $b = [4,5,6,7,8]; $c = array_merge($a, $b);
Now, right-click on a line in the editor and select Xdebug. Then, click on Add/Remove Breakpoint. Let's add a few breakpoints as shown in the following screenshot:
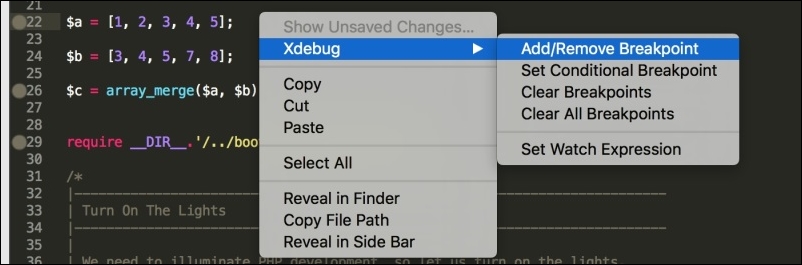
When a breakpoint is added to a line, a filled circle will be displayed on the left-hand side near the line number, as can be seen in the preceding screenshot.
Now we are ready to debug our PHP code. Navigate to Tools | Xdebug | Start Debugging (Launch in Browser). A browser window will open the application along with a Sublime Text debug session parameter. The browser windows will be in the loading state because as soon as the first breakpoint is reached, the execution stops. The browser window will be similar to the following:

Some new small windows will also open in the Sublime Text editor that will display debugging information along with all the variables available, as in the following screenshot:
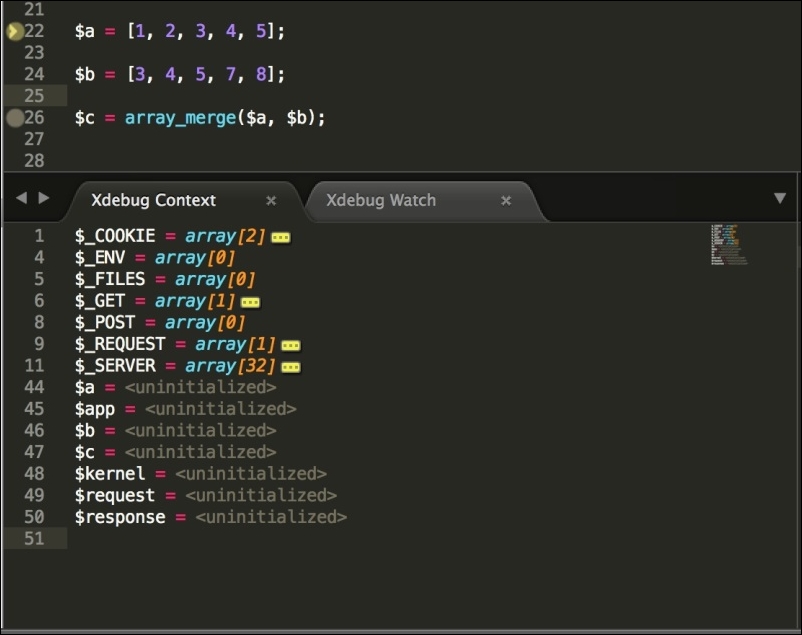
In the preceding screenshot, our $a, $b, and $c arrays are uninitialized because the execution cursor is at Line 22, and it has stopped there. Also, all server variables, cookies, environment variables, request data, and POST and GET data can be seen here. This way, we can debug all kind of variables, arrays, and objects and check what data each variable, object, or array holds at a certain point. This gives us the possibility to find out the errors that are very hard to detect without debugging.
Now, let's move the execution cursor ahead. Right-click in the editor code section and go to Xdebug | Step Into. The cursor will move ahead, and the variables data may change according to the next line. This can be noted in the following screenshot:
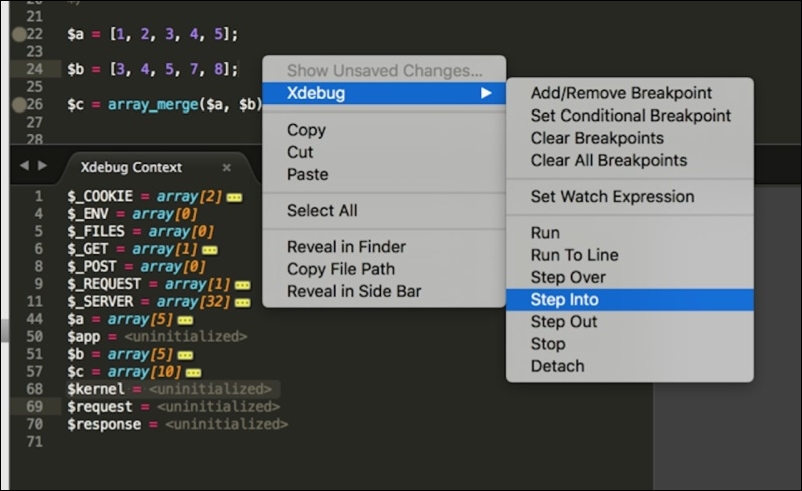
Debugging can be stopped by clicking on Tools | Xdebug | Stop Debugging.
Eclipse is the most free and powerful IDE widely used. It supports almost all major programming languages, including PHP. We will discuss how to configure Eclipse to use Xdebug to debug.
First, open the project in Eclipse. Then, click on the down arrow to the right of the small bug icon in the tool bar, as shown in the following screenshot:
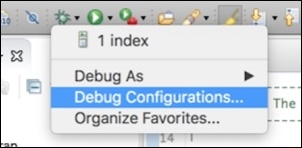
After this, click on the Debug Configuration menu, and the following windows will open:
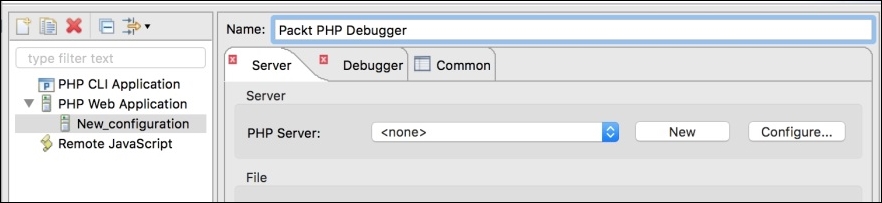
Select PHP Web Application on left panel and then click on the Add New icon in the top-left corner. This will add a new configuration, as shown in the preceding screenshot. Give the configuration a name. Now, we need to add a PHP server to our configuration. Click on the New button on the right-hand side panel, and the following window will open:
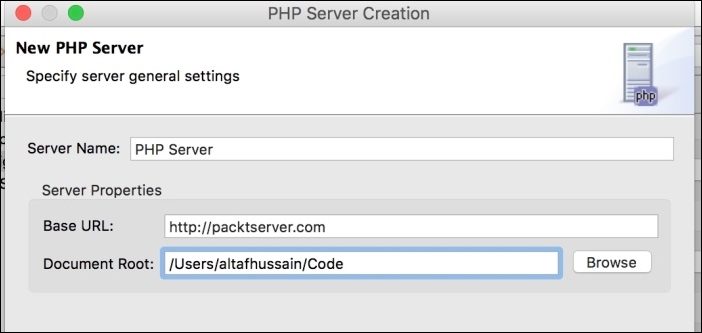
We will enter the server name as PHP Server. The server name can be anything as long as it is user-friendly and can be recognized for later use. In the Base URL field, enter the complete URL of the application. Document Root should be the local path of the root of the application. After entering all the valid data, click on the Next button, and we will see the following window:
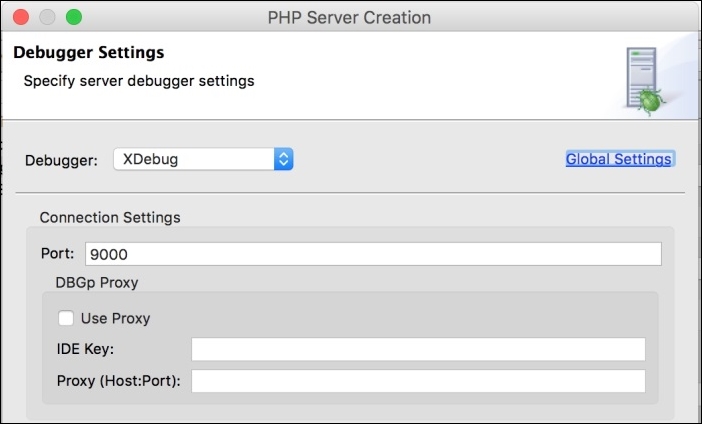
Select XDebug in the Debugger drop-down list and leave rest of the fields as they are. Click on the Next button, and we will have the path mapping window. It is very important to map the correct local path to the correct remote path. Click on the Add button, and we will have the following window:
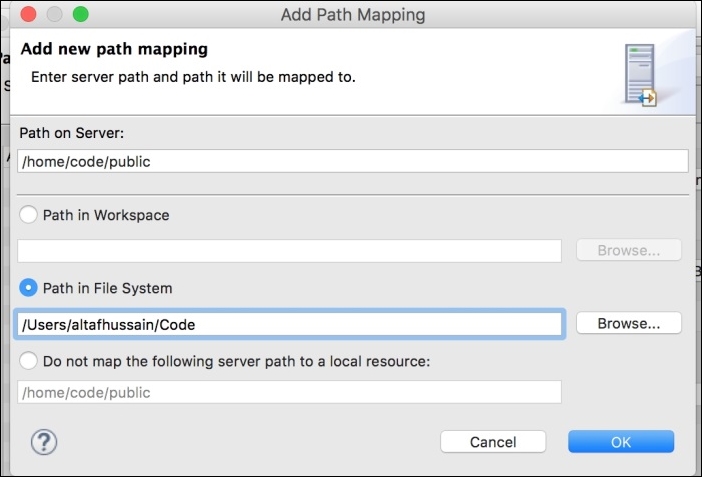
Enter the full path to the document root of the application on the remote server. Then, select Path in File System and enter the local path of the application's document root. Click on OK and then click on the Finish button in the path mapping window. Then, click on Finish in the next window to complete adding a PHP server.
Now, our configuration is ready. First, we will add some breakpoints to our PHP file by clicking on the line number bar and a small blue dot will appear there, as shown in the following screenshot. Now, click on the small bug icon on the tool bar, select Debug As, and then click on PHP Web Application. The debug process will start, and a window will be opened in the browser. It will be in the loading state, same as we saw in Sublime Text debugging. Also, the Debug perspective will be opened in Eclipse, as shown here:
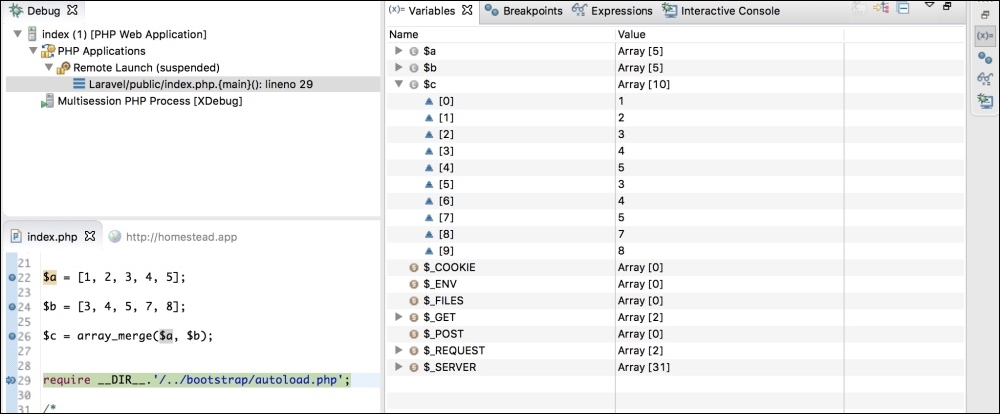
When we click on the small (X)= icon in the right-hand side bar, we will see all the variables there. Also, it is possible to edit any variable data, even the element values of any array, object properties, and cookie data. The modified data will be retained for the current debug session.
To step into the next line, we will just press F5, and the execution cursor will be moved to the next line. To step out to the next breakpoint, we will press F6.
Profiling gives us information about the cost of each script or task executed in an application. It helps to provide information about how much time a task takes, and hence we can optimize our code to consume less time.
Xdebug has a profiler that is disabled by default. To enable the profiler, open the configuration file and place the following two lines in it:
xdebug.profiler_enable=on xdebug.profiler_output_dir=/var/xdebug/profiler/
The first line enables the profiler. The second line, where we defined the output directory for the profiler file, is important. In this directory, Xdebug will store the output file when the profiler is executed. The output file is stored with a name, such as cachegrind.out.id. This file contains all the profile data in a simple text format.
Now, we are set to profile a simple installation of the Laravel application home page. The installation is a fresh and clean one. Now, let's open the application in a browser and append ?XDEBUG_PROFILE=on at the end, as shown here:
http://application_url.com?XDEBUG_PROFILE=on
After this page is loaded, a cachegrind file will be generated at the specified location. Now, when we open the file in a text editor, we will just see some text data.
The cachegrind file can be opened with different tools. One of the tools for Windows is WinCacheGrind. For Mac, we have qcachegrind. Any of these applications will view the file data in such a way that we will see all the data in an interactive form that can be easily analyzed. Also, PHP Storm has a nice analyzer for cachegrind. For this topic, we used PHP Storm IDE.
After opening the file in PHP Storm, we will get a window similar to the following screenshot:
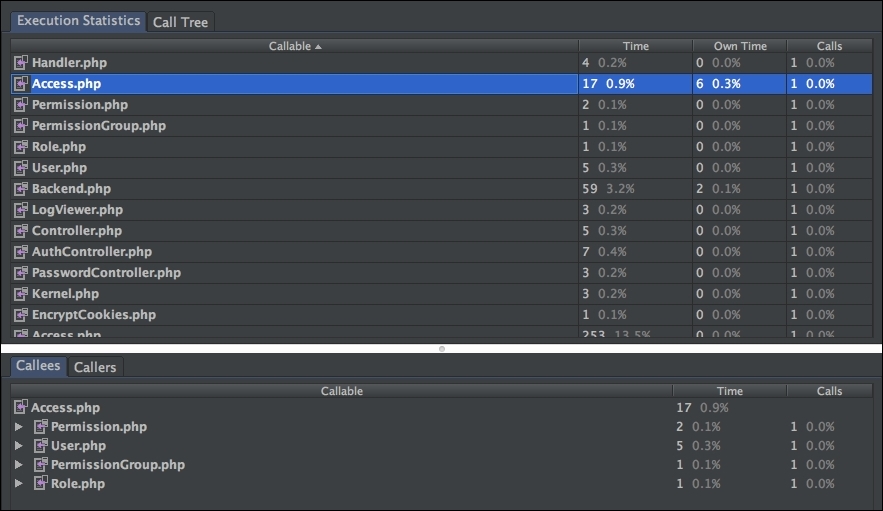
As shown in the preceding screenshot, we have execution statistics in the upper pane that shows the time (in ms) taken by each called script individually along with the number of times it is called. In the lower pane, we have the callees that called this script.
We can analyze which script takes more time, and we can optimize this script to reduce its execution time. Also, we can find out whether, at a certain point, we need to call a specific script or not. If not, then we can remove this call.
PHP DebugBar is another awesome tool that displays a nice and full information bar at the bottom of the page. It can display custom messages added for the purposes of debugging and full request information including $_COOKIE, $_SERVER, $_POST, and $_GET arrays along with the data if any of them have. Besides that, PHP DebugBar displays details about exceptions if there are any, database queries executed, and their details. Also it displays the memory taken by the script and the time the page is loaded in.
According to the PHP Debug website, DebugBar integrates easily in any application project and displays debugging and profiling data from any part of the application.
Its installation is easy. You can either download the complete source code, place it somewhere in your application, and set up the autoloader to load all the classes, or use composer to install it. We will use composer as it is the easy and clean way to install it.
Composer is a nice tool for PHP to manage the dependencies of a project. It is written in PHP and is freely available from https://getcomposer.org/. We assume that composer is installed on your machine.
In your project's composer.json file, place the following code in the required section:
"maximebf/debugbar" : ">=1.10.0"
Save the file and then issue the following command:
composer update
The Composer will start updating the dependencies and install composer. Also, it will generate the autoloader file and/or the other dependencies required for DebugBar.
After it is installed, the project tree for the DebugBar can be as follows:
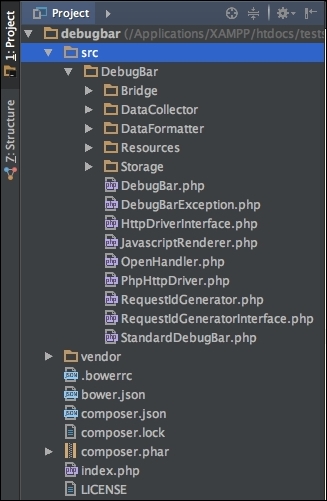
The directories' structure may be a little bit different, but normally, it will be as we previously noted. The src directory has the complete source code for DebugBar. The vendor directory has some third-party modules or PHP tools that may or may not be required. Also, note that the vendor folder has the autoloader to autoload all the classes.
Let's check our installation now to see whether it is working or not. Create a new file in your project root and name it index.php. After this, place the following code in it:
<?php
require "vendor/autoloader.php";
use Debugbar\StandardDebugBar;
$debugger = new StandardDebugBar();
$debugbarRenderer = $debugbar->getJavascriptRenderer();
//Add some messages
$debugbar['messages']->addMessage('PHP 7 by Packt');
$debugbar['messages']->addMessage('Written by Altaf Hussain');
?>
<html>
<head>
<?php echo $debugbarRenderer->renderHead(); ?>
</head>
<title>Welcome to Debug Bar</title>
<body>
<h1>Welcome to Debug Bar</h1>
<!—- display debug bar here -->
<?php echo $debugbarRenderer->render(); ?>
</body>
</html>In the preceding code, we first included our autoloader, which is generated by composer for us to autoload all the classes. Then, we used the DebugBar\StandardDebugbar namespace. After this, we instantiated two objects: StandardDebugBar and getJavascriptRenderer. The StandardDebugBar object is an array of objects that has objects for different collectors, such as message collectors and others. The getJavascriptRenderer object is responsible for placing the required JavaScript and CSS code at the header and displaying the bar at the bottom of the page.
We used the $debugbar object to add messages to the message collector. Collectors are responsible for collecting data from different sources, such as databases, HTTP requests, messages, and others.
In the head section of the HTML code, we used the renderHead method of $debugbarRenderer to place the required JavaScript and CSS code. After this, just before the end of the <body> block, we used the render method of the same object to display the debug bar.
Now, load the application in the browser, and if you notice a bar at the bottom of the browser as in the following screenshot, then congrats! DebugBar is properly installed and is working fine.

On the right-hand side, we have the memory consumed by our application and the time it is loaded in.
If we click on the Messages tab, we will see the messages we added, as shown in the following screenshot:
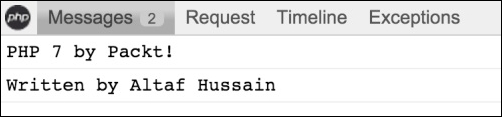
DebugBar provides data collectors, which are used to collect data from different sources. These are called base collectors, and some of the data collectors are as follows:
$_SERVER, $_POST, $_GET, and othersAlso, there are some collectors that provide the ability to collect data from third-party frameworks such as Twig, Swift Mailer, Doctrine, and others. These collectors are called bridge collectors. PHP DebugBar can be easily integrated into famous PHP frameworks such as Laravel and Zend Framework 2 too.
A complete discussion of PHP DebugBar is not possible in this book. Therefore, only a simple introduction is provided here. PHP DebugBar has a nice documentation that provides complete details with examples. The documentation can be found at http://phpdebugbar.com/docs/readme.html.
In this chapter, we discussed different tools to debug a PHP application. We used Xdebug, Sublime Text 3, and Eclipse to debug our applications. Then, we used the Xdebug profiler to profile an application to find out the execution statistics. Finally, we discussed PHP DebugBar to debug an application.
In the next chapter, we will discuss load testing tools, which we can use to place load or virtual visitors on our application in order to load test it, and find out how much load our application can bear, and how it affects the performance.
After an application is developed, tested, debugged and then profiled, it is time to bring it to production. However, before going to production, it is best practice to stress/load test the application. This test will give us an approximate result of how many requests at a certain time can be handled by our server running the application. Using these results, we can optimize the application, web server, database, and our caching tools to get a better result and process more requests.
In this chapter, we will load test different open source tools on both PHP 5.6 and PHP 7 and compare these applications' performance for both versions of PHP.
We will cover the following topics:
Apache JMeter is a graphical and open source tool used to load test a server's performance. JMeter is completely written in Java, so it is compatible with all operating systems that have Java installed. JMeter has a complete set of extensive tools for every kind of load testing, from static content to dynamic resources and web services.
Its installation is simple. We need to download it from the JMeter website and then just run the application. As mentioned before, it will require Java to be installed on the machine.
JMeter can test FTP servers, mail servers, database servers, queries, and more. In this book, we can't cover all these topics, so we will only load test web servers. Apache JMeter's list of features can be found at http://jmeter.apache.org/.
When we run the application at first, we will see the following window:
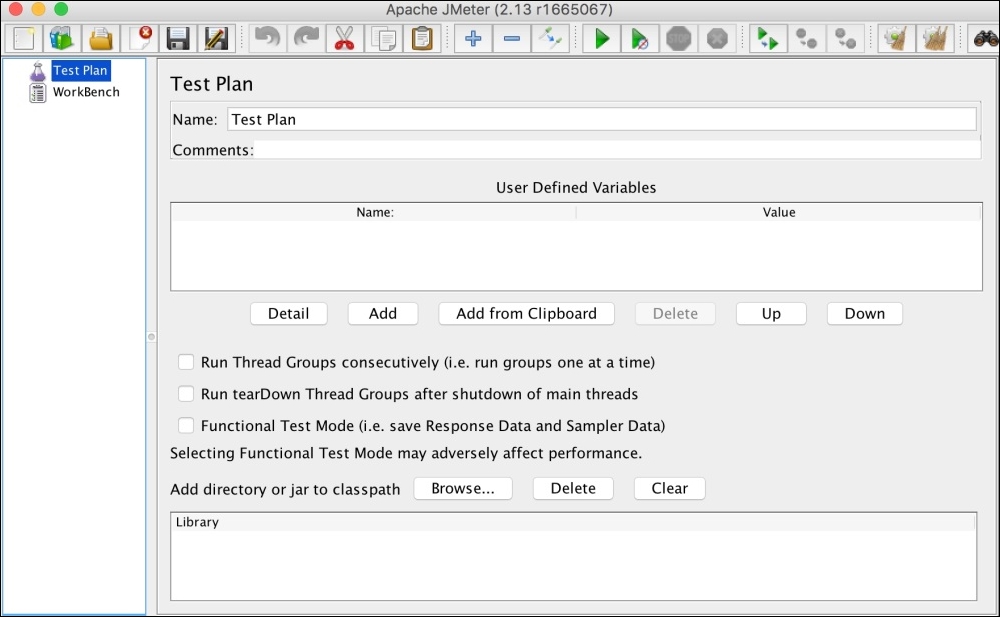
To run any kind of test, you need to first create a test plan. A test plan has all the components required to execute this test. By default, JMeter has a test plan called Test Plan. Let's name it to our own plan, Packt Publisher Test Plan, as shown in the following screenshot:

Now, save the test plan, and JMeter we will create a .jmx file. Save it in an appropriate place.
The next step is to add a thread group. A thread group defines some basic properties for the test plan, which can be common among all types of tests. To add a thread group, right-click on the plan in the left panel, then navigate to Add | Threads (Users) | Thread Group. The following window will be displayed:
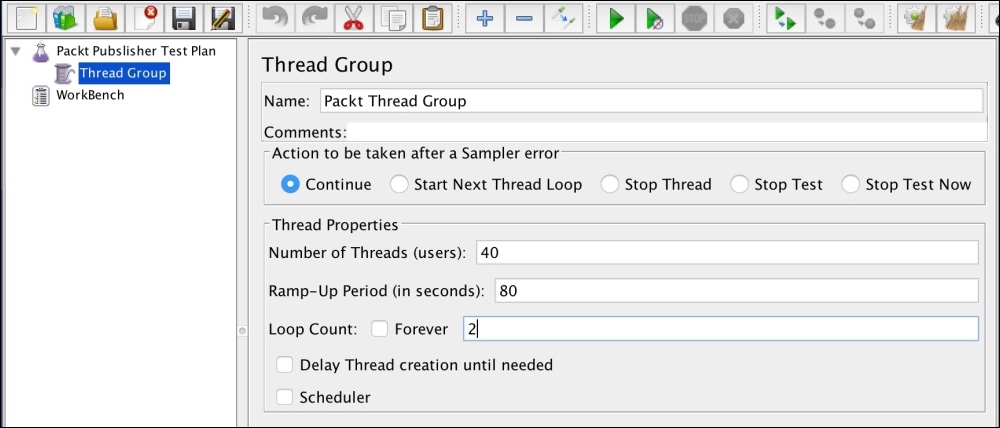
The thread group has the following important properties:
Now, we will need to add the HTTP request defaults. Right-click on Packt Thread Group and then go to Add | Config Element | HTTP Request Defaults. A window similar to the following will appear:
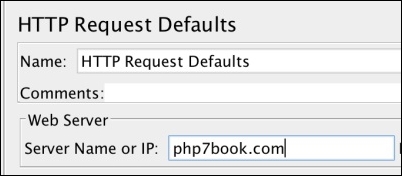
In the preceding window, we have to just enter the URL of the application or the IP address. If the web server uses cookies, we can add HTTP Cookie Manager too, in which we can add user-defined cookies with all the data, such as the name, value, domain, path, and so on.
Next, we will add an HTTP request by right-clicking and navigating to Packt Thread Group | Add | Sampler | HTTP Request, and the following window will appear:
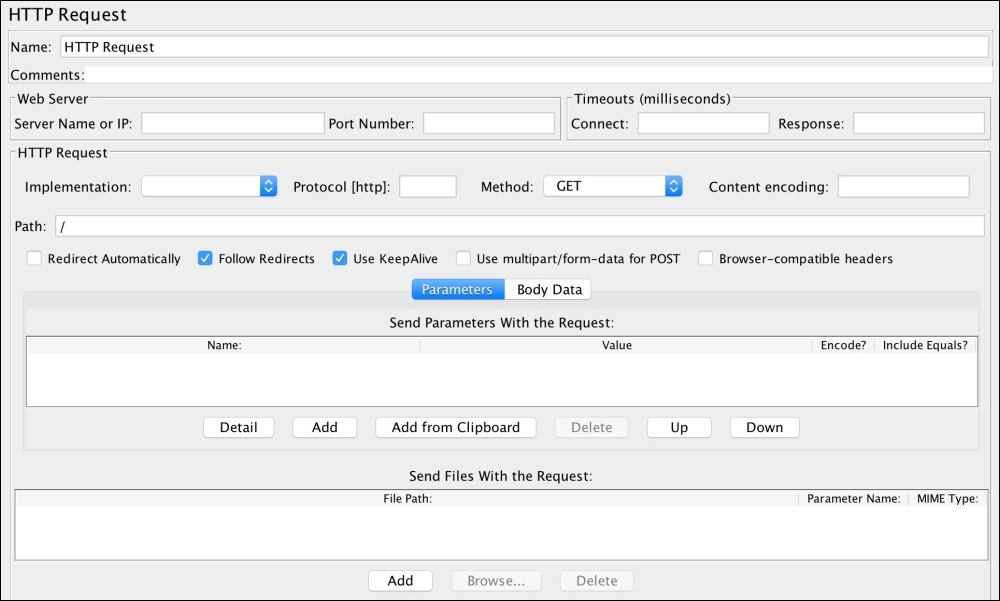
The important field here is Path. We want to run the test only against the home page, so for this HTTP request, we will just add a slash (/) in the Path field. If we want to test another path, such as "Contact us", we will need to add another HTTP request sampler, as in the preceding screenshot. Then, in the path, we will add path/contact-us.
The HTTP Request sampler can be used to test forms too, where POST requests can be sent to the URL by selecting the POST method in the Method field. Also, file upload can be simulated.
The next step is to add some listeners. Listeners provide some powerful views to display results. The results can be displayed in a table view and different kinds of graphs can be saved in a file. For this thread group, we will add three listeners: View Results in Table, Response Time Graph, and Graph Results. Each listener view displays a different kind of data. Add all the preceding listeners by right-clicking on Packt Thread Group and then navigating to Add | Listeners. We will have a complete list of all the available listeners. Add all the three listeners one by one. Our final Packt Publisher Test Plan panel on the left-hand side of JMeter will look similar to the following:
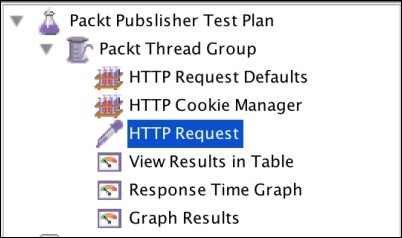
Now, we are ready to run our test plan by clicking on the Start button in the upper tool bar, as shown in the following screenshot:

As soon as we click on the Start button (the green arrow pointing to the right-hand side), JMeter will start our test plan. Now, if we click on the View Results in Table listener on the left panel, we will see data for each request in a table, as shown in the following screenshot:
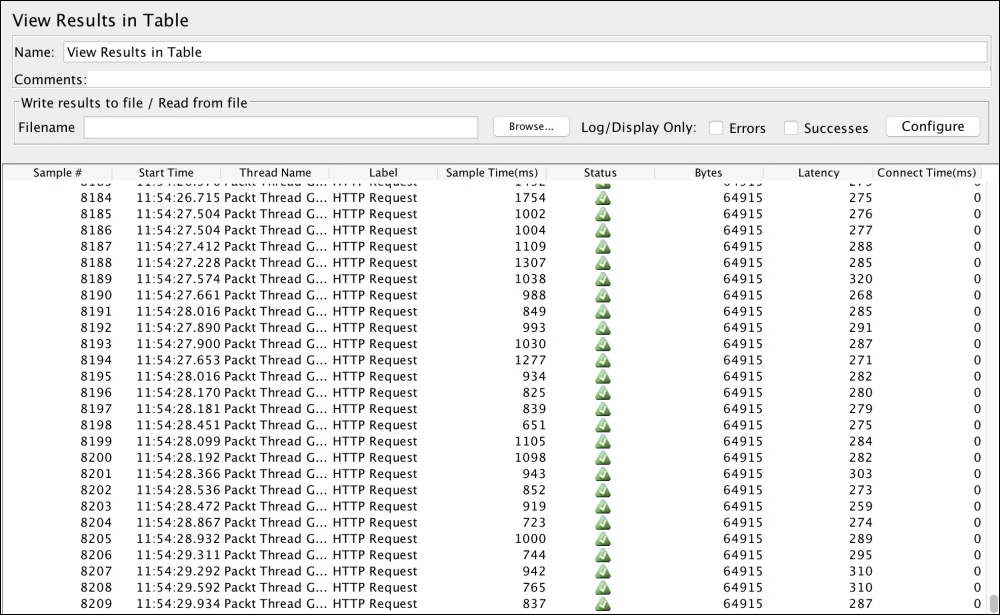
The preceding screenshot shows some interesting data, such as sample time, status, bytes, and latency.
Sample time is the number of milliseconds in which the server served the complete request. Status is the status of the request. It can be either a success, warning, or error. Bytes is the number of bytes received for the request. Latency is the number of milliseconds in which JMeter received the initial response from the server.
Now, if we click on Response Time Graph, we will see a visual graph for the response time, which is similar to the one that follows:

Now, if we click on Graph Results, we will see the response time data along with graphs for average, median, deviation, and throughput graphs, as shown in the following graph:
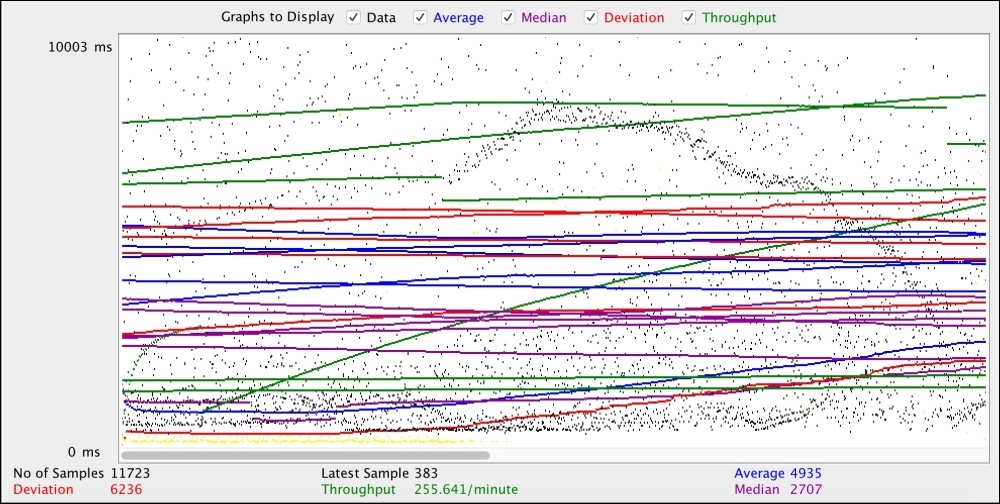
Apache JMeter provides very powerful tools to load test our web servers by simulating users. It can provide us with data regarding the amount of load that makes our web server's response slow, and using this data, we can optimize our web server and application.
ApacheBench (ab) is also provided by Apache and is a command-line tool. It is a lovely tool for command line lovers. This tool is normally installed on most Linux flavors by default. Also, it is installed with Apache, so if you have Apache installed, you will probably have ab installed too.
The basic syntax for an ab command is as follows:
ab –n <Number_Requests> -c <Concurrency> <Address>:<Port><Path>
Let's discuss what each part of the preceding command means:
n: This is the number of requests for test.c: This is concurrency, which is the number of simultaneous requests at a time.Address: This is either the application URL or IP address of the web server.Port: This is the port number at which the application is running.Path: This is the web path of the application that we can use to test. A slash (/) is used for the home page.Now, let's conduct a test using the ab tool by issuing the following command:
ab –n 500 –c 10 packtpub.com/
As the default port for the web server is 80, it is not required to mention it. Note the slash at the end; this is required to place it there because it is the path's part.
After executing the preceding command, we will have an output that looks similar to the following:
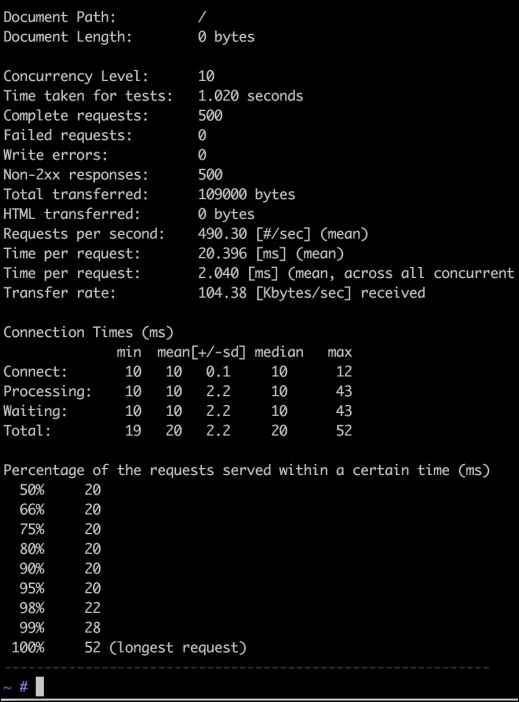
We can see some useful information here, including the number of requests per second, which is 490.3; the total time taken for the test, which is 1.020 seconds; the shortest request, which is 20 ms; and the longest request, which is 52 ms.
The server load limit can be found by increasing the number of requests and concurrency level and checking the web server's performance.
Siege is another command-line open source tool to test load and performance. Siege is an HTTP/FTP load tester and benchmarking utility. It is designed for developers and administrators to measure the performance of their applications under load. It can send a configurable number of simultaneous requests to a server and those requests that place the server under a siege.
Its installation is simple and easy. For Linux and Mac OS X, first download Siege by issuing the following command in the terminal:
wget http://download.joedog.org/siege/siege-3.1.4.tar.gz
It will download the Siege TAR compressed file. Now, uncompress it by issuing the following command:
tar –xvf siege-3.1.4.tar.gz
Now, all the files will be in the siege-3.1.4 folder. Build and install it by issuing the following commands one by one in the terminal:
cd siege-3.1.4 ./configure make make install
Now, Siege is installed. To confirm this, issue the following command to check the Siege version:
siege –V
If it displays the version with some other information, then Siege is installed successfully.
Now, let's have a load test. A basic load test can be executed by running the following command:
siege some_url_or_ip
Siege will then start the test. We have to enter the application URL or server IP that we want to load test. To stop the test, press Ctrl + C, and we will have an output similar to the following:
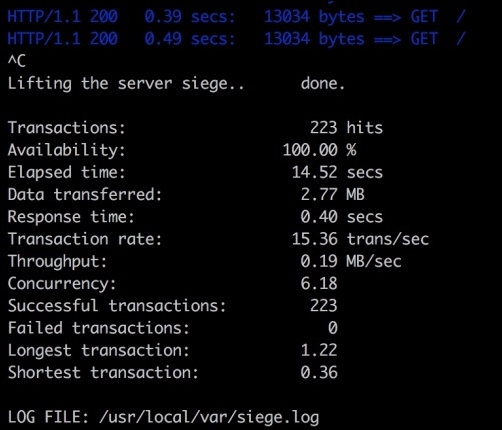
In the preceding screenshot we can see Transactions, Response time, and Transaction rate along with Longest transaction and Shortest transaction.
By default, Siege creates 15 concurrent users. This can be changed by using the –c option, which is done by making the following alteration in the command:
siege url_or_ip –c 100
However, Siege has a limitation for the concurrent users, which may be different for each OS. This can be set in the Siege configuration file. To find out the config file location and concurrent user limit, issue the following command in terminal:
siege -C
A list of the configuration options will be displayed. Also the resource file or config file location will be displayed. Open that file and find the config concurrent and set its value to an appropriate required value.
Another important feature of Siege is that a file that has all the URLs that need to be tested can be used. The file should have a single URL in each line. The –f flag is used with Siege as follows:
siege -f /path/to/url/file.txt –c 120
Siege will load the file and start load testing each URL.
Another interesting feature of Siege is the internet mode, which can be entered using the –i flag in the following command:
siege –if path_to_urls_file –c 120
In the internet mode, each URL is hit randomly and mimics a real-life situation, in which it can't be predicted which URL will be hit.
Siege has lots of useful flags and features. A detailed list can be found in the official documentation at https://www.joedog.org/siege-manual/.
We studied three tools in this chapter to load test. Now, it is time to load test some real-world applications. In this section, we will test Magento 2, Drupal 8, and WordPress 4. All these open source tools will have their default data.
We have three VPS configured with NGINX as the web server. One VPS has PHP 5.5-FPM, the second has PHP 5.6-FPM, and the third has PHP 7-FPM installed. The hardware specs for all the three VPS are same, and all applications we will test will have the same data and the same versions.
This way, we will benchmark these applications with PHP 5.5, PHP 5.6, and PHP 7 and take a look at how fast these applications can run on different versions of PHP.
Magento 2 is installed on all VPS, and all the caches are enabled for Magento. PHP OPcache is also enabled. After running the tests, we got an average result for all the three Magento 2 installations, as shown in the following graphs:
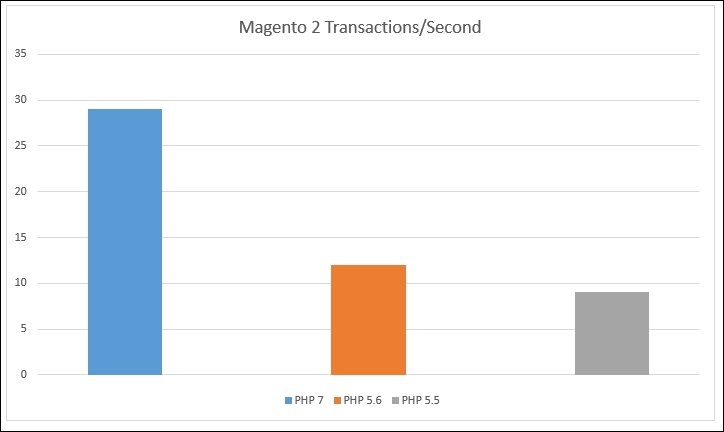
In the preceding chart, the vertical line, or Y-axis, shows the transactions per second. As can be seen in the charts, Magento 2 on PHP 7 has 29 transactions per second, while the same Magento 2 installation on the same hardware with PHP 5.6 has 12 transactions per second. Also, on PHP 5.5, the same Magento installation has 9 transactions per second. So, in this case, Magento runs about 241% faster on PHP 7 than PHP 5.6 and about 320% faster than in PHP 5.5. This is a very huge improvement of PHP 7 on both PHP 5.6 and PHP 5.5.
WordPress is installed on all of the three VPS. Unfortunately, there is no default cache embedded into WordPress, and we will not install any third-party modules, so no cache is used. The results are still good, as can be seen in the following graphs. PHP OPcache is enabled.

As can be seen in the preceding graph, WordPress runs 135% faster in PHP 7 than in PHP 5.6 and 182% faster than in PHP 5.5.
We used the same VPS for PHP 5.5, PHP 5.6, and PHP 7. The default Drupal 8 cache is enabled. After load testing the default home of Drupal 8, we got the following results:
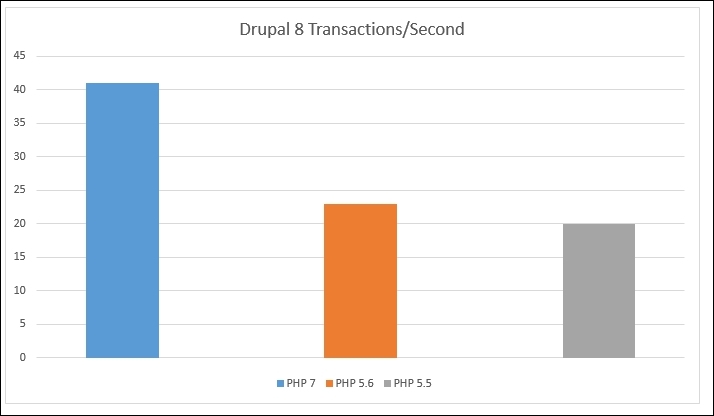
The preceding graph shows that Drupal 8 runs 178% faster in PHP 7 than in PHP 5.6 and 205% faster than in PHP 5.5.
In the preceding graphs, all these values are approximate values. If a low-power hardware is used, then smaller values will be generated. If we use a more powerful multiprocessor-dedicated server with the web server and database optimizations, we will get higher values. The point to consider is that we will always get better performance for PHP 7 than PHP 5.6.
A combined graph is shown here, which displays the performance improvements for different applications in PHP 7 over PHP 5.5 and PHP 5.6:
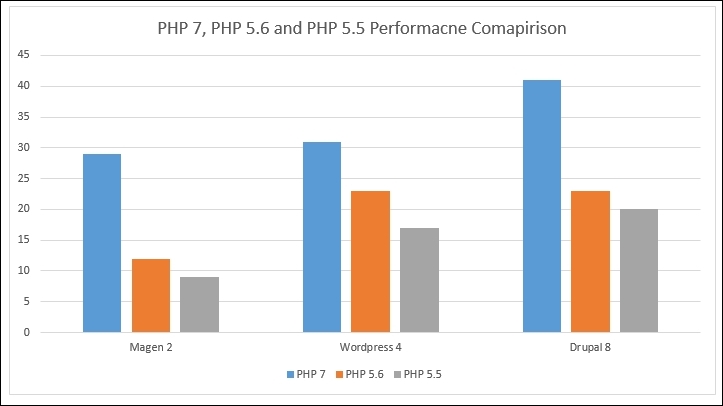
In this chapter, we discussed a few load testing and benchmarking tools, such as JMeter, ApacheBench (ab), and Siege. We used each tool to load test, and discussed the output and what it means. Finally, we load tested three famous open source applications, Magento 2, WordPress 4, and Drupal 8, and created graphs for each application's transactions per second in both PHP 7 and PHP 5.6.
In the next chapter, we will discuss best practices for PHP development. These practices are not limited only to PHP and can be used for any programming language.
So far, we discussed performance-related topics. Now, in this chapter, we will study best practices in PHP applications' development and deployment. This is a vast topic, but we will cover it briefly. PHP provides all levels of programmers with the ability to write quality code easily and quickly. However, when the application advances to a more complex nature, we forget to follow the best practices. To produce a high performance PHP application, it is necessary to keep in mind the performance at every line of the code.
We will cover the following topics:
There are too many coding styles out there, such as PSR-0, PSR-1, PSR-2, PSR-3, and so on. Programmers can use different standards as they want, but it is necessary to follow a standard that is already used in the libraries or a framework in use to make the code more readable. For example, Laravel uses the PSR-1 and PSR-4 coding standards, so if we are developing in Laravel, we should follow these coding standards. Some PHP frameworks, such as Yii 2 and Zend Framework 2, follow the PSR-2 coding standards. However, none of these frameworks stick to a single standard; most of them follow a mixed standard according to their requirements.
The important point is to follow the standard that is used in the libraries used in the application. An organization can also use its own coding standards for internal purposes. It is not a requirement for coding; it is a requirement for readability and producing quality code that others can understand.
PHP Framework Interop Group (PHP-FIG) is a group whose members defined coding standards for PHP. Full details about PSR standards can be found on their website at http://www.php-fig.org/.
Instead of discussing a specific coding standard, let's discuss best practices in coding styles for PHP:
class Foo
{
…
…
…
}public function phpBook($arg1, $arg2, $arg3)
{
…
…
…
}extends and implements keywords must be on the same line as the class declaration. Here's an example:namespace Packt\Videos;
use Packt\Books;
use Packt\Presentations;
class PacktClass extends VideosClass implements BaseClass
{
…
…
…
}class PacktClass
{
public $books;
private $electronicBooks;
…
…
…
}abstract keyword, it must come before the class keyword for classes, and the final keyword must come before the method's visibility in the case of methods. On the other hand, the static keyword must come after the method visibility. Take a look at this example:abstract class PacktClass
{
final public static function favoriteBooks()
{
…
…
…
}
}true and false keywords. Constants must be declared and used in capital case.if ($book == "PHP 7") {
…
…
…
} else {
…
…
…
}for ($h = 0; $h < 10; $h++) {
…
…
…
}
foreach ($books as $key => $value) {
…
…
…
}
while ($book) {
…
…
…
}For the purpose of this book, I did not follow the rule of the opening brace being on the same line as the control structure declaration and always used it on the next line of the declaration. I did not find it clearer; it is a personal choice, and anybody can follow the standards mentioned here.
Standards are good to follow as they make the code more readable and professional. However, never try to invent your own new standards; always follow those that are already invented and followed by the community.
Test-driven development is the process of testing every aspect of the application during development. Either the tests are defined before development and then development is made to pass these tests, or the classes and libraries are built and then tested. Testing the application is very important, and launching an application without tests is like jumping from a 30-floor-high building without a parachute.
PHP does not provide any built-in features to test, but there are other test frameworks that can be used for this purpose. One of most widely used frameworks or libraries is PHPUnit. It is a very powerful tool and provides lots of features. Now, let's have a look at it.
The installation of PHPUnit is easy. Just download it and place it in your project root so that it can be accessed from the command line.
PHPUnit installation and basic details, including features and examples, can be found at https://phpunit.de/.
Let's have a simple example. We have a Book class, as follows:
class Book
{
public $title;
public function __construct($title)
{
$this->title = $title;
}
public function getBook()
{
return $this->title;
}
}This is an example of a simple class that initializes the title property when the class is instantiated. When the getBook method is called, it returns the title of the book.
Now, we want to make a test in which we will check whether the getBook method returns PHP 7 as a title. So, perform the following steps to create the test:
tests directory at your project's root. Create a BookTest.php file in the tests directory.BookTest.php file:include (__DIR__.'/../Book.php');
class BookTest extends PHPUnit_Framework_TestCase
{
public function testBookClass()
{
$expected = 'PHP 7';
$book = new Book('PHP 7');
$actual = $book->getBook();
$this->assertEquals($expected, $book);
}
}BookTest, which extends the PHPUnit_Framework_TestCase class. We can name our test class whatever we want. However, the name should be easily recognizable so that we know this is written for the class that needs to be tested.testBookClass. We are also free to select whatever name we want to give to this method, but it should start with the word test. If not, PHPUnit will not execute the method and will issue a warning—in our case, for the preceding test class—that no tests were found.In the testBookClass method, we created an object of the Book class and passed PHP 7 as our title. Then, we fetched the title using the getBook method of the Book class. The important part is the last line of the testBookClass method, which performs the assertion and checks whether the data returned from getBook is the desired data or not.
php phpunit.phar tests/BookTest.php
When the command is executed, we will have an output similar to the following screenshot:
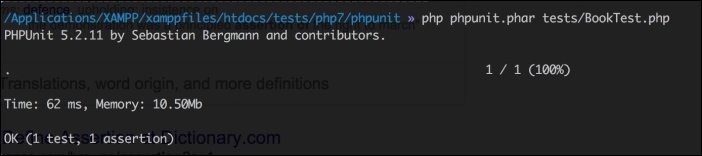
Our test is executed successfully as it met the criteria defined in our test.
PHP to the Book class, as shown in the following code:public function testBookClass()
{
$book = new Book('PHP');
$title = $book->getBook();
$this->assertEquals('PHP 7', $book);
}Book class returns PHP, so it does not pass our test. After executing this test, we will have a failure, as shown in the following screenshot: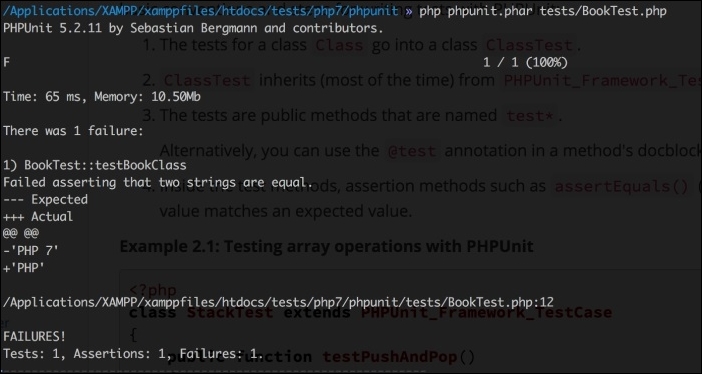
As seen in the preceding screenshot, we expected PHP 7, and we got an actual result of PHP 7. The – sign shows the expected value, and the + sign shows the actual value.
In the previous topic, we discussed how we can perform tests on our libraries. We only discussed a simple basic test. PHPUnit is not limited to these simple tests, but covering PHPUnit completely is out of the scope of this book. A very nice book on PHPUnit is PHPUnit Essentials, published by Packt Publishing.
A design pattern solves a specific problem. It is not a tool; it is just a description or template that describes how to solve a specific problem. Design patterns are important, and they play a good role in writing clean and clear code.
One of the most widely used design patterns in the PHP community is the Model View Controller (MVC) pattern. Most PHP frameworks are built upon this pattern. MVC advises you to keep the business logic and data operations (that is, the model) separate from the presentation (the view). Controllers just play the role of a middleman between models and views and make the communication between them possible. There is no direct communication between models and views. If a view needs any kind of data, it sends a request to the controller. The controller knows how to operate on this request and, if needed, make a call to the model to perform any operation on the data (fetch, insert, validate, delete, and so on). Then at last, the controller sends a response to the view.
In best practices, fat models and skinny controllers are used. This means that controllers are only used to take a specific action on a request and nothing else. Even in some modern frameworks, the validation is moved out of the controllers and is performed at the model level. These models perform all the operations on the data. In modern frameworks, models are considered as a layer, which can have multiple parts, such as the business logic, Create Read Update Delete (CRUD) database operations, data mapper pattern and services, and so on. So, a full load of models and controllers is just sitting there and enjoying the lazy work load.
Another widely used design pattern is the factory design pattern. This pattern simply creates objects that are needed to be used. Another good pattern is the observer pattern, in which an object calls different observers on a specific event or task on it. This is mainly used for event handling. Yet another widely used pattern is the singleton pattern, which is used when there is a requirement that only a single object of a class be used throughout the application's execution. A singleton object can't be serialized and cloned.
In service-oriented architecture, the application's components provide services to each other on a defined protocol. Each component is loosely coupled with each other, and the only way of communication between them is through the services they provide.
In PHP, Symfony provides the best way to have SOA as it is mainly an HTTP-centric framework. Symfony is the most mature, well-tested collection of libraries that are widely used by other PHP frameworks, such as Zend Framework, Yii, Laravel, and others.
Let's consider a scenario where we have a backend and a frontend for a website and a mobile application. Normally, in most applications, the backend and frontend run on the same code base and on a single access point, and an API or web service is built for mobile applications to communicate with this backend. It is good, but we need great. So, for high performance and scalable applications, the separate components run independently of each other. If they need to communicate with each other, they communicate through the web services.
Web services are the central communication point between the frontend and backend and between the backend and mobile applications. The backend is the main hub of data and any other business logic. It can be standalone and built using any programming language, such as PHP. The frontend can be built using normal HTML/CSS, AngularJS, Node.js, jQuery, or any other technology for the frontend. Similarly, mobile apps can be native or built on cross-platform technologies. The backend doesn't care what the frontend and mobile apps are built on.
This may seem difficult for a small, single-page application in which only a few things are happening, but this is not the case. The classes are easy to handle, and the code is always clear. Also, the classes separate the application logic from the views. This make things more logical. In the earlier days when structure code was used and a bunch of functions had to be created either in the view files or in a separate file, this would have been too easy. However, when applications got more complex, it got more difficult to handle.
Always try to create loosely coupled classes to make them more reusable in other applications. Also, always perform a single task in each method of the class.
We all know about frameworks, and they are not essential to a programmer's life. There are lots of frameworks, and each framework has its own superiority over other frameworks in some features. All frameworks are good, but what make a framework not suitable for an application are the application's requirements.
Let's say that we want to build an enterprise-level CRM application, which framework will suit us best? This is the most important, confusing, and time-wasting question. First, we need to know the complete requirements for the CRM application, usage capacity, features, data security, and performance.
Version controller system provides the flexibility to properly maintain code, changes, and versions of the application. Using VCS, a complete team can work together on an application, and they can pull other team members' changes and their own changes to the system without any big troubles. In case of a disaster, VCS provides the ability to fall back to an old, more stable version of the application.
Oh wait! Are we talking about VCS? Did we mention Git? Nope! So, let's start with Git.
Git is a powerful tool. It monitors changes in each file in a branch, and when pushed to a remote branch, only the changed files are uploaded. Git keeps a history of the file changes and provides you with the ability to compare the changed files.
A very informative and good book on Git is Git Essentials published by Packt Publishing. Also, an official and free book about Git can be found at https://git-scm.com/book/en/v2.
FTP is obsolete. It is not feasible for today, it makes things slow, and a normal FTP connection is insecure. It is hard for a team to deploy their changes using FTP because it creates huge conflicts in their code and this may cause problems, while uploading changes and can override each other's changes.
Using a Git versioning system, such as GitHub, GitLab, and Bitbucket, we can make our deployment automatic. Different developers use different setups for automatic deployments, and it all depends on their own choice and ease. The general rules of using automatic deployments are to make them easy for a team and to not use FTP.
The following is a general flowchart for a deployment setup:
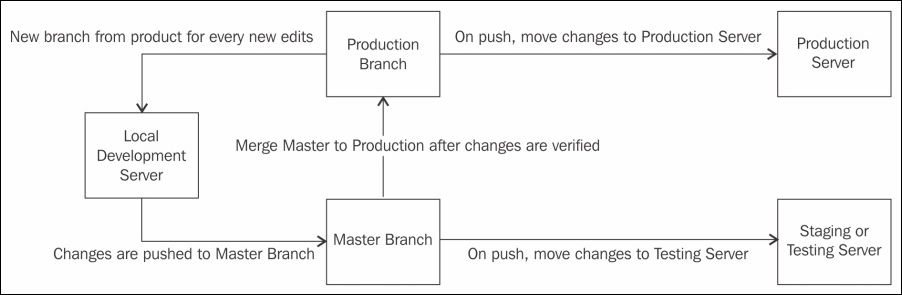
As shown in the preceding flowchart, we have two servers: the staging or testing the server and production server. On the staging server, we have an exact copy of the website to test new features and others, and the production server has our live website.
Now, we have a repository that has two main branches: the master branch and the production branch. The master branch is used for development and testing purposes, and the production branch is used for final production features. Note that the production branch should only accept merging, and it should not accept commits so that the production environment is completely safe.
Now, let's say that we want to add a customer registration feature to our application. We will perform the following steps:
customer-registration.customer-registration branch and while verifying on the local development server, merge this branch to the local master branch.Continuous Integration (CI) is a technique in which all the members of a team have to integrate their code into a shared repository, and then each check by the team member is verified by automatic builds to catch errors and problems in the early stages.
There are several tools that are used for CI for PHP; some of these are PHPCI, Jenkins, Travis CI, and others.
In this chapter, we discussed a few best practices, including coding standards and styles, PHP frameworks, design patterns, Git, and deployment. Also, we discussed the PHPUnit framework to test classes and libraries against tests. Also, we discussed Service-oriented design, which plays a major role in creating APIs for applications.
In this book, we studied setting up development environments, including Linux servers, specifically Debian and Ubuntu, and we also discussed Vagrant. The new features of PHP are also listed with sample codes. You read in detail about the tools that we can use to improve the performance of an application and a database. Also, we discussed debugging and stress or load testing our applications and some best practices of writing quality code.
We mostly summarized the tools and techniques with simple examples to introduce the reader to these tools and techniques. There is a good chance that each tool and technique has its own book written for a more advanced usage. We recommend you follow up on these tools and techniques and conduct more research for their advance usage. Good luck Php-ing!
We covered many things in this book, starting with new features in PHP 7 and ending with the best techniques in programming. In each chapter, we used and talked about some tools, but due to the finite length of chapters and the book, we did not go too much in detail for these tools. In this appendix, we will discuss three of these tools in much more detail. The tools we will to discuss are as follows:
So, let's start.
Composer is a dependency management tool for PHP that enables us to define dependencies for a PHP application, and Composer installs/updates them. Composer is completely written in PHP and is an application in the PHP Archive (PHAR) format.
Composer downloads dependencies from https://packagist.org/. Any dependency for an application can be installed through Composer as long as it is available on Packagist. Also, complete applications can be installed through Composer if they are available at Packagist.
Composer is a command line tool and can be installed globally in the operating system, or the composer.phar file can be placed in the root of the application and then executed from the command line. For Windows, an executable setup file is provided, which can be used to install Composer globally. For this book, we will follow the instructions for Debian/Ubuntu globally. Perform the following steps:
installer and can only be executed with PHP once installed via the following code:
Wget https://getcomposer.org/installer
Php install --install-dir=/usr/local/bin --filename=composer
This command will download Composer and will install it in the /usr/local/bin directory with the file name composer. Now, we will be able to run Composer globally.
Composer --version
If the Composer version is displayed, then Composer is successfully installed globally.
Now, Composer is installed successfully and is working; it's time to use it.
To use Composer in our project, we will need a composer.json file. This file contains all the dependencies required for the project and some other metadata. Composer uses this file to install and update different libraries.
Let's assume that our application needs to log different information in different ways. For this, we can use the monolog library. First, we will create a composer.json file in the root of our application and add the following code to it:
{
"require": {
"monolog/monolog": "1.0.*"
}
}After saving the file, execute the following command to install the dependencies of the application:
Composer install
This command will download the dependencies and place them in the vendor directory, as can be seen in the following screenshot:
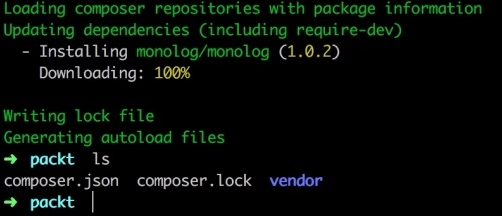
As can be seen in the preceding screenshot, monolog version 1.0.2 is downloaded, and a vendor directory is created. The monolog library is placed in this directory. Also, if a package has to autoload information, then Composer places the library in the Composer autoloader, which is also placed in the vendor directory. So, any new libraries or dependencies will be autoloaded automatically during the application's execution.
Also a new file can be seen, which is composer.lock. When Composer downloads and installs any dependencies, the exact version and other information is written to this file to lock the application to this specific version of dependencies. This ensures that all the team members or whoever wants to set up the application will use the exact same version of the dependencies, and thus, it will reduce the chances of using different versions of dependencies.
Nowadays, Composer is widely used for package management. Big open source projects such as Magento, Zend Framework, Laravel, Yii, and many others are easily available for installation through Composer. We will install some of these in the next appendix using Composer.
Git is the most widely used version control system. According to the Git official website, it is a distributed version control system capable of handling everything from small- to large-sized projects with speed and efficiency.
Git is available for all major operating systems. For Windows, an executable setup file is provided that can be used to install Git and use it in the command line. On OS X, Git comes already installed, but if it is not found, it can be downloaded from their official website. To install Git on Debian/Ubuntu, just issue the following command in the terminal:
sudo apt-get install git
After installation, issue the following command to check whether it is properly installed:
git –version
Then, we will see the current installed version of Git.
For a better understanding of Git, we will start with a test project. Our test project name is packt-git. For this project, we also created a GitHub repository named packt-git, where will push our project files.
First, we will initialize Git in our project by issuing the following command:
git init
The preceding command will initialize an empty Git repository in our project root directory, and the head will be kept on the master branch, which is the default branch for every Git repository. It will create a hidden .git directory that will contain all the information about the repository. Next, we will add a remote repository that we will create on GitHub. I created a test repository at GitHub that has the URL https://github.com/altafhussain10/packt-git.git.
Now, issue the following command to add the GitHub repository to our empty repository:
git remote add origin https://github.com/altafhussain10/packt-git.git
Now, create a README.md file at your project root and add some content to it. The README.md file is used to display the repository information and other details about the repository at Git. This file is also used to display instructions regarding how to use the repository and/or the project for which this repository is created.
Now, issue the following command to see the status of our Git repository:
git status
This command will display the status of the repository, as can be seen in the following screenshot:
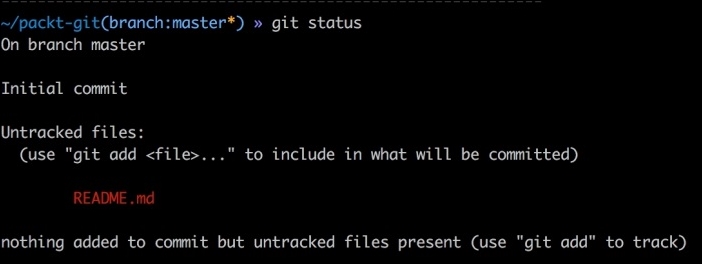
As can be seen in the preceding screenshot, we have an untracked file in our repository that is not committed yet. First, we will add the files to be tracked by issuing the following command in the terminal:
git add README.md
The git add command updates the index using the current contents found in the working tree. This command adds all the changes made to the path. There are some options that can be used to add some specific changes. The previous command we used will only add the README.md file to the track in the repository. So, if we want to track all the files, then we will use the following command:
git add
This will start tracking all the files in the current working directory or at the root of the current branch. Now, if we want to track some specific files, such as all files with the .php extension, then we can use it as follows:
git add '*.php'
This will add all the files with the .php extension to track.
Next, we will commit changes or additions to our repository using the following command:
git commit –m "Initial Commit"
The git commit command commits all the changes to the local repository. The -m flag specifies any log message to commit. Remember that the changes are only committed to the local repository.
Now, we will push the changes to our remote repository using the following command:
git push –u origin master
The preceding command will push all the changes from the local repository to the remote repository or origin. The -u flag is used to set the upstream, and it links our local repo to our remote central repo. As we pushed our changes for the first time, we have to use the -u option. After this, we can just use the following command:
git push
This will push all the changes to the main repository of the current branch at which we are.
New branches are always required during development. If any kind of changes are required, it is good to create a new branch for these changes. Then, make all the changes on this branch and finally commit, merge, and push them to the remote origin.
To better understand this, let's suppose we want to fix an issue in the login page. The issue is about validation errors. We will name our new branch login_validation_errors_fix. It is good practice to give a more understandable name to branches. Also, we would like to create this new branch from the master branch head. This means that we want the new branch to inherit all the data from the master branch. So, if we are not at the master branch, we have to use the following command to switch to the master branch:
git checkout master
The preceding command will switch us to the master branch no matter which branch we are at. To create the branch, issue the following command in the terminal:
git branch login_validation_errors_fix
Now, our new branch is created from the master branch head, so all the changes should be made to this new branch. After all the changes and fixes are done, we have to commit the changes to the local and remote repositories. Note that we did not create the new branch in our remote repository. Now, let's commit the changes using the following command:
git commit -a -m "Login validation errors fix"
Note that we did not use git add to add the changes or new additions. To automatically commit our changes, we used the -a option in commit, which will add all the files automatically. If git add is used, then there is no need to use the -a option in commit. Now, our changes are committed to the local repository. We will need to push the changes to the remote origin. Issue the following command in the terminal:
git push -u origin login_validation_errors_fix
The preceding command will create a new branch at the remote repository, set the tracking of the same local branch to the remote branch, and push all the changes to it.
Now, we want to merge the changes with our master branch. First, we need to switch to our master branch using the following command:
git checkout master
Next, we will issue the following commands to merge our new branch login_validation_errors_fix with the master branch:
git checkout master git merge login_validation_errors_fix git push
It is important to switch to the branch to which we want to merge our new branch. After this, we need to use the git merge branch_to_merge syntax to merge this branch with the current branch. Finally, we can just push to the remote origin. Now, if we take a look at our remote repository, we will see the new branch and also the changes in our master branch.
Sometimes, we need to work on a project that is hosted on a repository. For this, we will first clone this repository, which will download the complete repository to our local system, and then create a local repository for this remote repository. The rest of the working is the same as we discussed before. To clone a repository, we should first know the remote repository web address. Let's say that we want to clone the PHPUnit repository. If we go to the GitHub repository for PHPUnit, we will see the web address of the repository at the upper right-hand side, as shown in the screenshot that follows:

The URL just after the HTTPS button is the web address for this repository. Copy this URL and use the following command to clone this repository:
git clone https://github.com/sebastianbergmann/phpunit.git
This will start downloading the repository. After it is completed, we will have a PHPUnit folder that will have the repository and all its files. Now, all the operations mentioned in the preceding topics can be performed.
One of the most powerful features of Git is webhooks. Webhooks are events that are fired when a specific action occurs on the repository. If an event or hook for the Push request is made, then this hook will be fired every time a push is made to this repository.
To add a webhook to a repository, click on the Settings link for the repository in the upper right-hand side. In the new page, on the left-hand side, we will have a Webhooks and Services link. Click on it, and we will see a page similar to the following one:
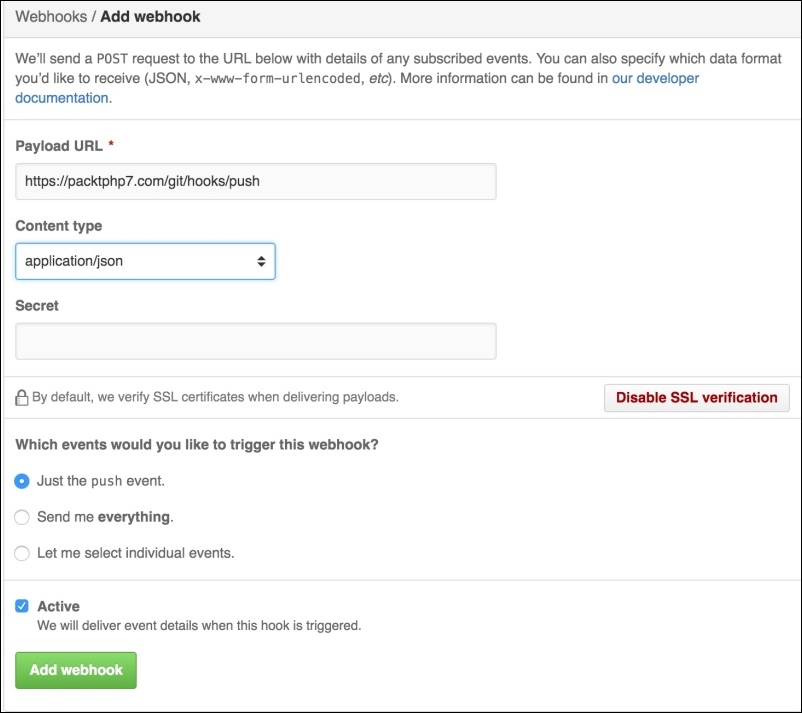
As can be seen in the preceding screenshot, we have to enter a payload URL, which will be called every time our selected event is fired. In Content type, we will select the data format in which the payload will be sent to our URL. In the events section, we can select whether we want only push events or all the events; we can select multiple events for which we want this hook to be fired. After saving this hook, it will be fired every time the selected event occurs.
Webhooks are mostly used for deployment. When the changes are pushed and if there is a webhook for the push event, the specific URL is called. Then, this URL executes some command to download the changes and processes them on the local server and places them at the appropriate place. Also, webhooks are used for continues integration and to deploy to cloud services.
There are several tools that can be used to manage Git repositories. GitHub provides its own tool called GitHub Desktop that can be used to manage GitHub repositories. This can be used to create new repositories, see the history, and push, pull, and clone repositories. It provides every feature that we can use in the command line. The screenshot that follows shows our test packt-git repository:

GitHub Desktop can be downloaded from https://desktop.github.com/ and is available for Mac and Windows only. Also, GitHub Desktop can be only used with GitHub unless some hacks are used to make it work with other repositories, such as GitLab or Bitbucket.
Another powerful tool is SourceTree. SourceTree can be used with GitHub, GitLab, and Bitbucket easily. It provides complete features to manage repositories, pull, push, commit, merge, and other actions. SourceTree provides a very powerful and beautiful graph tool for the branches and commits. The following is a screenshot for SourceTree that is used to connect with our packt-git test repository:
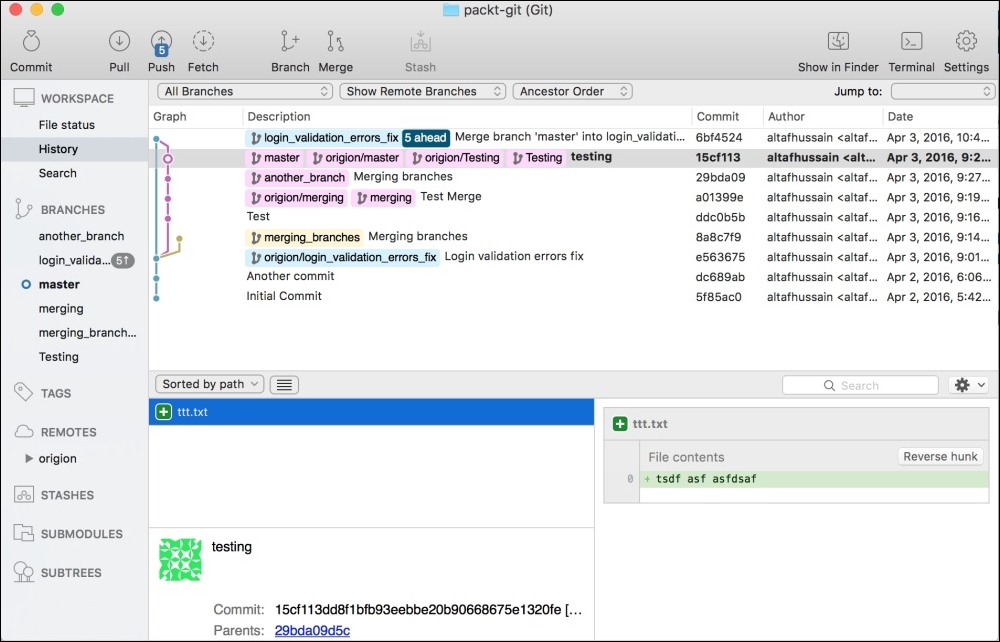
Besides the previous two nice tools, every development IDE provides version control systems with full support and also provides features such as different colors for modified and newly added files.
Git is a powerful tool; it can't be covered in this appendix. There are several books available, but Git Book is a very good place to start. This can be downloaded in different formats from https://git-scm.com/book/en/v2 or can be read online.
We studied Grunt in Chapter 3, Improving PHP 7 Application Performance. We only used it to merge CSS and JavaScript files and minify them. However, Grunt is not used only for this purpose. It is a JavaScript task runner, which can run tasks either by watching specific files for changes or by manually running tasks. We studied how we can run tasks manually, so now we will study how to use grunt watch to run specific tasks when some changes are made.
Grunt watch is useful and saves a lot of time because it runs the specific tasks automatically instead of running the tasks manually every time we change something.
Let's recall our examples from Chapter 3, Improving PHP 7 Application Performance. We used Grunt to combine and compress CSS and JavaScript files. For this purpose, we created four tasks. One task was combining all CSS files, the second task was combining all JavaScript files, the third task was compressing the CSS files, and the fourth task was compressing all JavaScript files. It will be very time consuming if we run all these tasks manually every time we make some changes. Grunt provides a feature called watch that watches different destinations for file changes, and if any change occurs, it executes the tasks that are defined in the watch.
First, check whether the grunt watch module is installed or not. Check the node_modules directory and see whether there is another directory with the name grunt-contrib-watch. If this directory is there, then watch is already installed. If the directory is not there, then just issue the following command in the terminal at the project root directory where GruntFile.js is located:
npm install grunt-contrib-watch
The preceding command will install Grunt watch and the grunt-contrib-watch directory will be available with the watch module.
Now, we will modify this GruntFile.js file to add the watch module, which will monitor all the files in our defined directories, and if any changes occur, it will run these tasks automatically. This will save a lot of time in manually executing these tasks again and again. Look at the following code; the highlighted code is the modified section:
module.exports = function(grunt) {
/*Load the package.json file*/
pkg: grunt.file.readJSON('package.json'),
/*Define Tasks*/
grunt.initConfig({
concat: {
css: {
src: [
'css/*' //Load all files in CSS folder
],
dest: 'dest/combined.css' //Destination of the final combined file.
},//End of CSS
js: {
src: [
'js/*' //Load all files in js folder
],
dest: 'dest/combined.js' //Destination of the final combined file.
}, //End of js
}, //End of concat
cssmin: {
css: {
src : 'dest/combined.css',
dest : 'dest/combined.min.css'
}
}, //End of cssmin
uglify: {
js: {
files: {
'dest/combined.min.js' : ['dest/combined.js']//destination Path : [src path]
}
}
}, //End of uglify
//The watch starts here
watch: {
mywatch: {
files: ['css/*', 'js/*', 'dist/*'],
tasks: ['concat', 'cssmin', 'uglify']
},
},
}); //End of initConfig
grunt.loadNpmTasks('grunt-contrib-watch'); //Include watch module
grunt.loadNpmTasks('grunt-contrib-concat');
grunt.loadNpmTasks('grunt-contrib-uglify');
grunt.loadNpmTasks('grunt-contrib-cssmin');
grunt.registerTask('default', ['concat:css', 'concat:js', 'cssmin:css', 'uglify:js']);
}; //End of module.exportsIn preceding highlighted code, we added a watch block. The mywatch title can be any name. The files block is required, and it takes an array of the source paths. The Grunt watch watches for changes in these destinations and executes the tasks that are defined in the tasks block. Also, the tasks that are mentioned in the tasks block are already created in GruntFile.js. Also, we have to load the watch module using grunt.loadNpmTasks.
Now, open the terminal at the root of the project where GruntFile.js is located and run the following command:
grunt watch
Grunt will start watching the source files for changes. Now, modify any file in the paths defined in the files block in GruntFile.js and save the file. As soon as the file is saved, the tasks will be executed and the output for the tasks will be displayed in the terminal. A sample output can be seen in the following screenshot:
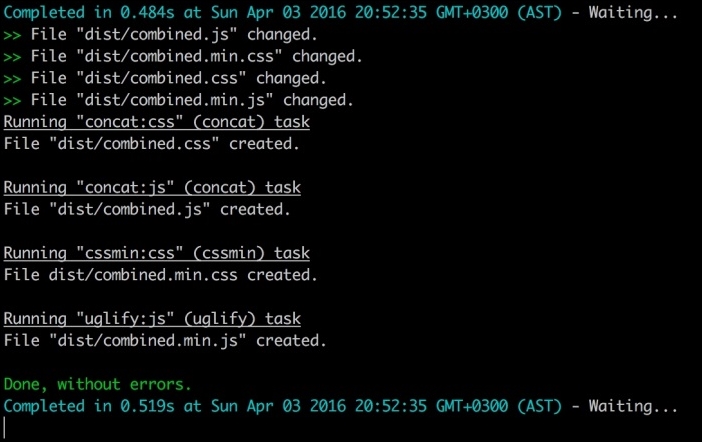
It is possible to watch as many tasks as required in the watch block, but these tasks should be present in GruntFile.js.
In this appendix, we discussed Composer and how to use it to install and update packages. Also, we discussed Git in detail, including pushing, pulling, committing, creating branches, and merging different branches. Also, we discussed Git hooks. Lastly, we discussed Grunt watch and created a watch that executed four tasks whenever any changes occurred in the files paths defined in GruntFile.js.
We covered the names of some of the frameworks in different chapters, but we did not discuss them. In today's world, we don't invent the wheel again; we build upon the tools that are already built, tested, and widely used. So, as best practice, if there is nothing available to fulfill the requirements, we can build it using a framework that suits the requirements best.
We will cover the following topics:
Model View Controller (MVC) is a design pattern widely used in different programming languages. Most PHP frameworks use this design pattern. This pattern divides the application into three layers: Model, View, and Controller. Each one of these has separate tasks, and they are all interconnected. There are different visual representations for MVC, but an overall and simple representation can be seen in the following diagram:
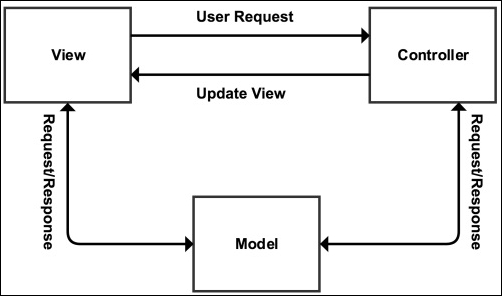
Now, let's discuss each part of the MVC design pattern.
The model layer is the backbone of the application and handles the data logic. Mostly, it is considered that model is responsible for CRUD operations on a database, which may or may not be true. As we mentioned previously, model is responsible for the data logic, which means that data validation operations can also be performed here. In simple words, models provide an abstraction for the data. The remaining application layers don't know or care how and from where the data comes or how an operation is performed on data. It is the model's responsibility to take care of all data logic.
In today's complex framework structures, the overall MVC structure is changed, and not only do models handle data operations, but also, every other application logic is handled by models. The method followed is fat models and slim controllers, which means keep all the application logic in models and the controllers as clean as possible.
Views are what is visible to end users. All data related to this user and public is displayed in the views, so views can be called the visual representation of the models. Views need data to display. It asks for some specific data or action from the controller. Views do not know or want to know from where the controller gets this data; it just asks the controller to get it. Controller knows who to ask for this specific data and communicates with the specific model. It means that views do not have any direct link to models. However, in the earlier diagram, we linked model to view directly. This is because in the advanced systems nowadays, views can directly take data from models. For example, Magento controllers can't send data back to views. For the data (that is, to get data directly from the database) and/or to communicate with models, views communicate with blocks and helper classes. In modern practices, views can be connected to models directly.
Controllers respond to actions performed by a user in the views and respond to the view. For example, a user fills a form and submits it. Here, the controller comes in the middle and starts taking action on the submission of the form. Now, the controller will first check whether the user is allowed to make this request or not. Then, the controller will take the appropriate action, such as communicating with the model or any other operation. In a simple analogy, the controller is the middle man between views and models. As we mentioned before in the models section, controllers should be slim. So, mostly, controllers are only used to handle the requests and communicate with models and views. All kinds of data operations are performed in models.
The MVC design pattern's sole job is to separate the responsibilities of different parts in an application. So, models are used to manage the application data. Controllers are used to take actions on user inputs, and views are responsible for the visual representation of data. As we mentioned before, MVC separates the responsibilities of each part, so it does not matter whether it accesses the model from controllers or views; the only thing that matters is that views and controllers should not be used to perform operations on data, as it is the model's responsibility, and controllers should not be used to view any kind of data by the end user as this is the view's responsibility.
Laravel is one of the most popular PHP frameworks, and according to the Laravel official website, it is a framework for Web Artisans. Laravel is beautiful, powerful, and has tons of features that can enable developers to write efficient and quality code. The Laravel official documentation is well written and very easy to understand. So, let's play a little with Laravel.
Installation is very easy and simple. Let's use Composer to install Laravel. We discussed Composer in Appendix A. Issue the following command in the terminal to install and create a project in Laravel:
composer create-project --prefer-dist laravel/laravel packt
If Composer is not installed globally on the system, place composer.phar in a directory where Laravel should be installed and issue the following command in the terminal at the root of this directory:
php composer.phar create-project --prefer-dist laravel/laravel packt
Now, Laravel will be downloaded, and a new project with the name packt will be created. Also, Composer will download and install all the dependencies for the project.
Open the browser and head to the project's URL, and we will be welcomed with a nice simple page saying Laravel 5.
Laravel provides tons of features, and we will only discuss a few here.
Laravel provides powerful routing. Routes can be grouped, and prefixes, namespaces, and middleware can be defined for route groups. Also, Laravel supports all HTTP methods, including POST, GET, DELETE, PUT, OPTIONS, and PATCH. All the routes are defined in the routes.php file in the application's app folder. Take a look at the following example:
Route::group(['prefix' => 'customer', 'namespace' => 'Customer', 'middleware' => 'web'], function() {
Route::get('/', 'CustomerController@index');
Route::post('save', 'CustomerController@save');
Route::delete('delete/{id}', 'CustomerController@delete');
});In the preceding snippet, we created a new routes group. This will be only used when the URL has a prefixed customer. For example, if a URL is similar to domain.com/customer, this group will be used. We also used a customer namespace. Namespacing allows us to use standard PHP namespaces and divide our files in subfolders. In the preceding example, all customer controllers can be placed in the Customer subfolder in the Controllers directory, and the controller will be created as follows:
namespace App\Http\Controllers\Customer
use App\Http\{
Controllers\Controller,
Requests,
};
use Illuminate\Http\Request;
Class CustomerController extends Controller
{
…
…
}So, namespacing a route group enables us to place our controller files in subfolders, which are easy to manage. Also, we used the web middleware. Middleware provides a way to filter the request before entering the application, which enables us to use it to check whether a user is logged in or not, the CSRF protection, or whether there are any other actions that can be performed in a middleware and need to be performed before the request is sent to application. Laravel comes with a few middleware, including web, api, auth, and so on.
If a route is defined as GET, no POST request can be sent to this route. It is very convenient, which enables us to not worry about the request method filtering. However, HTML forms do not support the HTTP methods like DELETE, PATCH, and PUT. For this, Laravel provides method spoofing, in which a hidden form field with name _method and the value of the HTTP method is used to make this request possible. For example, in our routes group, to make the request possible to delete a route, we need a form similar to the following:
<form action="/customer/delete" method="post">
{{ method_field('DELETE') }}
{{ csrf_field() }}
</form>When the preceding form is submitted, it will work, and the delete route will be used. Also, we created a CSRF hidden field, which is used for CSRF protection.
Laravel routing is very interesting, and it is a big topic. More in-depth detail can be found at https://laravel.com/docs/5.2/routing.
Eloquent ORM provides active records to interact with the database. To use Eloquent ORM, we have to just extend our models from the Eloquent model. Let's have a look at a simple user model, as follows:
namespace App;
use Illuminate\Database\Eloquent\Model;
class user extends Model
{
//protected $table = 'customer';
//protected $primaryKey = 'id_customer';
…
…
}That's it; we have a model that can handle all the CRUD operations now. Note that we commented the $table property and did the same for $primaryKey. This is because Laravel uses a plural name of the class to look for the table unless the table is defined with the protected $table property. In our case, Laravel will look for table name users and use it. However, if we want to use a table named customers, we can just uncomment the line, as follows:
protected $table = 'customers';
Similarly, Laravel thinks that a table will have a primary key with the column name id. However, if another column is needed, we can override the default primary key, as follows:
protected $primaryKey = 'id_customer';
Eloquent models also make it easy for timestamps. By default, if the table has the created_at and updated_at fields, then these two dates will be generated automatically and saved. If no timestamps are required, these can be disabled, as follows:
protected $timestamps = false;
Saving data to the table is easy. The table columns are used as properties of the models, so if our customer table has columns such as name, email, phone, and so on, we can set them as follows in our customer controller, mentioned in the routing section:
namespace App\Http\Controllers\Customer
use App\Http\{
Controllers\Controller,
Requests,
};
use Illuminate\Http\Request;
use App\Customer
Class CustomerController extends Controller
{
public function save(Request $request)
{
$customer = new Customer();
$customer->name = $request->name;
$customer->email = $request->email;
$customer->phone = $request->phone;
$customer->save();
}
}In the preceding example, we added the save action to our controller. Now, if a POST or GET request is made along the form data, Laravel assigns all the form-submitted data to a Request object as properties with the same names as that of the form fields. Then, using this request object, we can access all the data submitted by the form either using POST or GET. After assigning all the data to model properties (the same names as those of table columns), we can just call the save method. Now, our model does not have any save method, but its parent class, which is the Eloquent model, has this method defined. However, we can override this save method in our model class in case we need some other features in this method.
Fetching data from the Eloquent model is also easy. Let's try an example. Add a new action to the customer controller, as follows:
public function index()
{
$customers = Customer::all();
}We used the all() static method in the model, which is basically defined in the Eloquent model, which, in turn, fetches all the data in our customers table. Now, if we want to get a single customer by the primary key, we can use the find($id) method, as follows:
$customer = Customer::find(3);
This will fetch the customer with the ID 3.
Updating is simple, and the same save() method is used, as shown here:
$customer = Customer::find(3); $customer->name = 'Altaf Hussain'; $customer->save();
This will update the customer with the ID 3. First, we loaded the customer, then we assigned new data to its properties, and then we called the same save() method. Deleting the model is simple and easy and can be done as follows:
$customer = Customer::find(3); $customer->delete();
We first loaded the customer with the ID 3, and then we called the delete method, which will delete the customer with the ID 3.
Laravel's Eloquent models are very powerful and provide lots of features. These are well explained in the documentation at https://laravel.com/docs/5.2/eloquent. The Laravel database section is also worth reading and can be found at https://laravel.com/docs/5.2/database.
Artisan is the command-line interface provided with Laravel, and it has some nice commands that can be used for quicker operations. It has lots of commands, and a full list can be seen using the following command:
php artisan list
This will list all the options and commands available.
Some of the basic commands are as follows:
make:controller: This command creates a new controller in the Controllers folder. The command can be used as follows:
php artisan make:controller MyController
If a namespaced controller is required, as it happened before with the Customer namespace, it can be done as follows:
php artisan make:controller Customer/CustomerController
This command will create CustomerController in the Customer folder. If the Customer folder is not available, it will create the folder as well.
make:model: This creates a new model in the app folder. The syntax is the same as the make:controller command, as follows:
php artisan make:model Customer
For the namespaced models, it can be used as follows:
php artisan make:model Customer/Customer
This will create the Customer model in the Customer folder and use the Customer namespace for it.
make:event: This creates a new event class in the Events folder. It can be used as follows:
php artisan make:event MyEvent
make:listener: This command creates a new listener for an event. This can be used as follows:
php artisan make:listener MyListener --event MyEvent
The preceding command will create a new listener for our MyEvent event. We have to always mention the event for which we need to create a listener using the --event option.
make:migration: This command creates a new migration in the database/migrations folder.php artisan migrate: This runs all the available migrations that are not executed.php artisan optimize: This command optimizes the framework for better performance.php artisan down: This puts the application in maintenance mode.php artisan up: This command brings the application back live from the maintenance mode.php artisan cache:clear: This command clears the application cache.php artisan db:seed: This command seeds the database with records.php artisan view:clear: This clears all the compiled view files.More detail about the Artisan console or Artisan CLI can be found in the documentation at https://laravel.com/docs/5.2/homestead.
Migrations is another powerful feature in Laravel. In migrations, we define the database schemas—whether it creates tables, removes tables, or adds/updates columns in the tables. Migrations are very convenient in deployment and act as version control for the database. Let's create a migration for our customer table that is not available in the database yet. To create a migration, issue the following command in the terminal:
php artisan make:migration create_custmer_table
A new file in the database/migrations folder will be created with the filename create_customer_table prefixed with the current date and a unique ID. The class is created as CreateCustomerTable. This is a class as follows:
use Illuminate\Database\Schema\Blueprint;
use Illuminate\Database\Migrations\Migration;
class CreateCustomerTable extends Migrations
{
//Run the migrations
public function up()
{
//schemas defined here
}
public function down()
{
//Reverse migrations
}
}The class will have two public methods: up() and down(). The up() method should have all the new schemas for the table(s). The down() method is responsible for reversing the executed migration. Now, lets add the customers table schema to the up() method, as follows:
public function up()
{
Schema::create('customers', function (Blueprint $table)
{
$table->increments('id', 11);
$table->string('name', 250)
$table->string('email', 50);
$table->string('phone', 20);
$table->timestamps();
});
}
public function down()
{
Schema::drop('customers');
}In the up() method, we defined the schema and table name. Columns for the table are individually defined, including the column size. The increments() method defines the autoincrement column, which, in our case, is the id column. Next, we created three string columns for name, email, and phone. Then, we used the timestamps() method, which creates the created_at and updated_at timestamp columns. In the down() method, we just used the drop() method of the Schema class to drop out the customers table. Now, we need to run our migrations using the following command:
php artisan migrate
The preceding command will not only run our migration but will also run all those migrations that are not executed yet. When a migration is executed, Laravel stores the migration name in a table called migrations, from where Laravel decides which migrations it has to execute and which to skip.
Now, if we need to roll back the latest executed migration, we can use the following command:
php artisan migrate:rollback
This will roll back to the last batch of migrations. To roll back all the migrations of the application, we can use the reset command, as follows:
php artisan migrate:reset
This will roll back the complete application migrations.
Migrations make it easy for deployment because we won't need to upload the database schemas every time we create some new changes in the tables or database. We will just create the migrations and upload all the files, and after this, we will just execute the migration command, and all the schemas will be updated.
Laravel comes with its own template language called Blade. Also, Blade template files support plain PHP code. Blade template files are compiled to plain PHP files and are cached until they are changed. Blade also supports layouts. For example, the following is our master page layout in Blade, placed in the resources/views/layout folder with the name master.blade.php. Take a look at the following code:
<!DOCTYPE html>
<html>
<head>
<title>@yield('title')</title>
</head>
<body>
@section('sidebar')
Our main sidebar
@show
<div class="contents">
@yield('content')
</div>
</body>
</html>In the preceding example, we had a section for the sidebar that defines a content section. Also, we had @yield, which displays the contents of a section. Now, if we want to use this layout, we will need to extend it in the child template files. Let's create the customers.blade.php file in the resources/views/ folder and place the following code in it:
@extend('layouts.master')
@section('title', 'All Customers')
@section('sidebar')
This will be our side bar contents
@endsection
@section('contents')
These will be our main contents of the page
@endsectionAs can be seen in the preceding code, we extended the master layout and then placed contents in every section of the master layout. Also, it is possible to include different templates in another template. For example, let's have two files, sidebar.blade.php and menu.blade.php, in the resources/views/includes folder. Then, we can include these files in any template, as follows:
@include(includes.menu) @include(includes.sidebar)
We used @include to include a template. The dot (.) indicates a folder separation. We can easily send data to Blade templates or views from our controllers or routers. We have to just pass the data as an array to a view, as follows:
return view('customers', ['count => 5]);Now, count is available in our customers view file and can be accessed as follows:
Total Number of Customers: {{ count }}Yes, Blade uses double curly braces to echo a variable. For control structures and loops, let's have another example. Let's send data to the customers view, as follows:
return view('customers', ['customers' => $allCustomers]);Now, our customers view file will be similar to the following if we want to display all the customers data:
…
…
@if (count($customers) > 0)
{{ count($customers) }} found. <br />
@foreach ($customers as $customer)
{{ $customer->name }} {{ $customer->email }} {{ $customer->phone }} <br>
@endforeach
@else
Now customers found.
@endif;
…
…All the preceding syntax looks familiar as it is almost the same as plain PHP. However, to display a variable, we have to use double curly braces {{}}.
A nice and easy-to-read documentation for Blade templates can be found at https://laravel.com/docs/5.2/blade.
We only discussed a few basic features in the previous section. Laravel has tons of other features, such as Authentication and Authorization, which provide an easy way to authenticate and authorize users. Also, Laravel provides a powerful caching system, which supports file-based cache, the Memcached, and Redis cache. Laravel also provides events and listeners for these events, which is very convenient when we want to perform a specific action and when a specific event occurs. Laravel supports localization, which enables us to use localized contents and multiple languages. Laravel also supports task scheduling and queues, in which we schedule some tasks to run at a specific time and queue some tasks to be run when their turn arrives.
Lumen is a micro-framework provided by Laravel. Lumen is mainly intended to create stateless APIs and has a minimal set of features of Laravel. Also, Lumen is compatible with Laravel, which means that if we just copy our Lumen application to Laravel, it will work fine. The installation is simple. Just use the following Composer command to create a Lumen project, and it will download all the dependencies, including Lumen:
composer create-project --prefer-dist laravel/lumen api
The preceding command will download Lumen and then create our API application. After this, rename .env.example as .env. Also, create a 32-characters-long app key and place it in the .env file. Now, the basic application is ready to use and create APIs.
Lumen is almost the same as Laravel, but some Laravel features are not included by default. More details can be found at https://lumen.laravel.com/docs/5.2.
Apigility is built and developed by Zend in Zend Framework 2. Apigility provides an easy to use GUI to create and manage APIs. It is very easy to use and is capable of creating complex APIs. Let's start by installing Apigility using Composer. Issue the following command in the terminal:
composer create-project -sdev zfcampus/zf-apigility-skeleton packt
The preceding command will download Apigility and its dependencies, including Zend Framework 2, and will set up our project named packt. Now, issue the following command to enable the development mode so that we can have access to the GUI:
php public/index.php development enable
Now, open the URL as yourdomain.com/packt/public, and we will see a beautiful GUI, as shown in the following screenshot:
Now, let's create our first API. We will call this API "books", which will return a list of books. Click on the New API button, as shown in the preceding picture, and a popup will be displayed. In the text box, enter books as the API name and click on Create button; the new API will be created. When the API is created, we will be presented with the following screen:
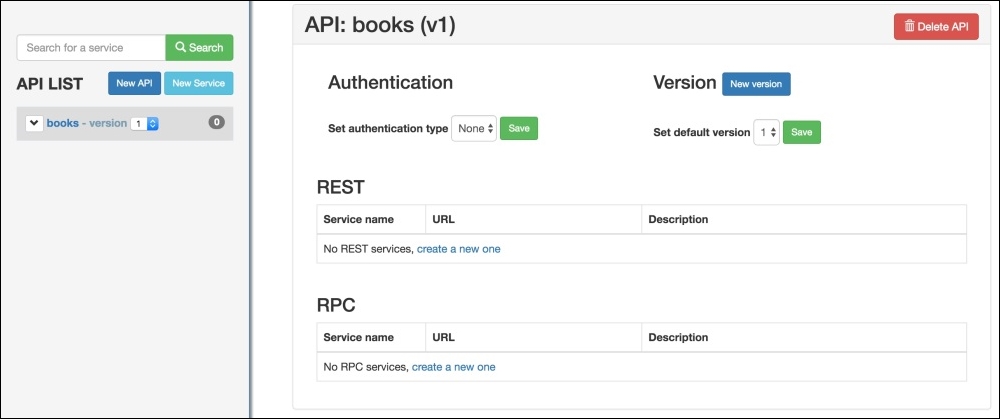
Apigility provides easy ways to set other properties for the API, such as versioning and authentication. Now, let's create an RPC service by clicking on the New Service button in the left sidebar. Also, we can click on the Create a new one link in the RPC section in the preceding screenshot. We will be presented with the following screen:
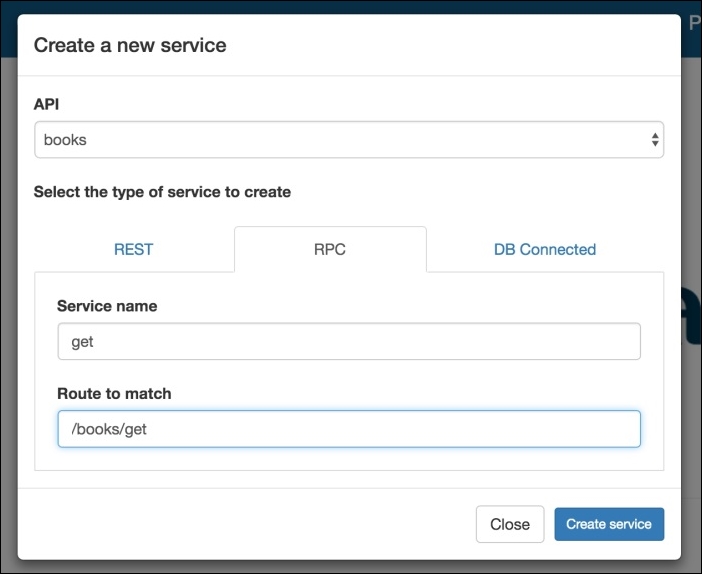
As shown in the preceding screenshot, we created an RPC service named get in the books API. The route URI entered is /books/get, which will be used to call this RPC service. When we click on the Create service button, the API creation successful message will be displayed, and also, the following screen will be displayed:
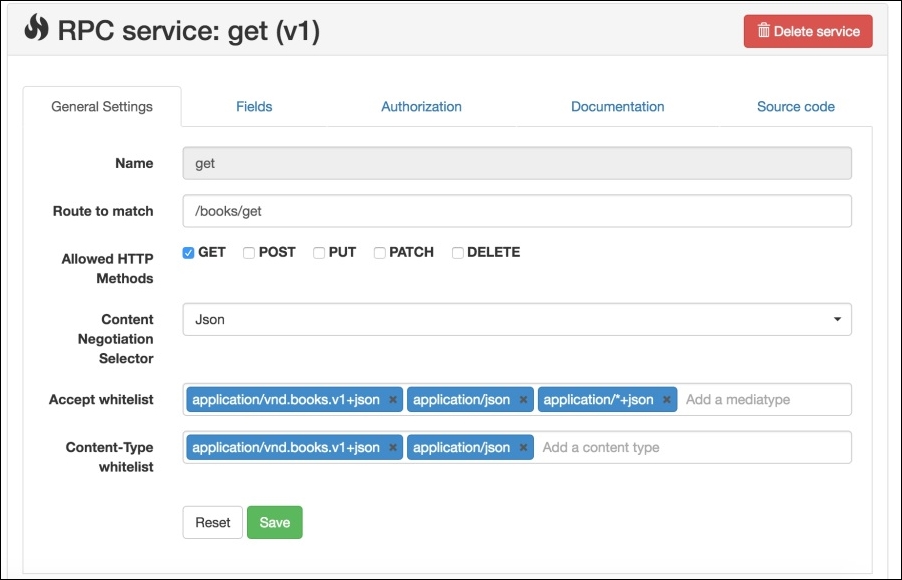
As can be seen in the preceding screenshot, the allowed HTTP method for this service is only GET. Let's keep this as it is, but we can select all or any of them. Also, we want to keep Content Negotiation Selector as Json, and our service will accept/receive all the content in the JSON format. Also, we can select different media types and content types.
Next, we should add some fields to our service that will be used. Click on the Fields tab, and we will see the Fields screen. Click on the New Field button, and we will be presented with the following popup:
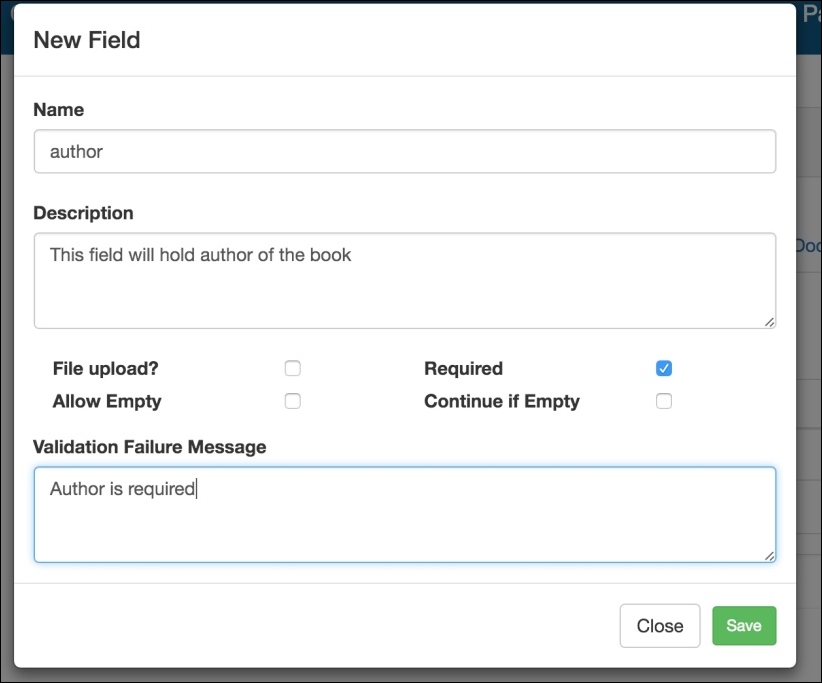
As can be seen in the preceding screenshot, we can set all the properties for a field, such as the Name, Description, whether it is required or not, and some other settings, including an error message if the validation fails. After we created two fields, title and author, we will have a screen similar to the following:
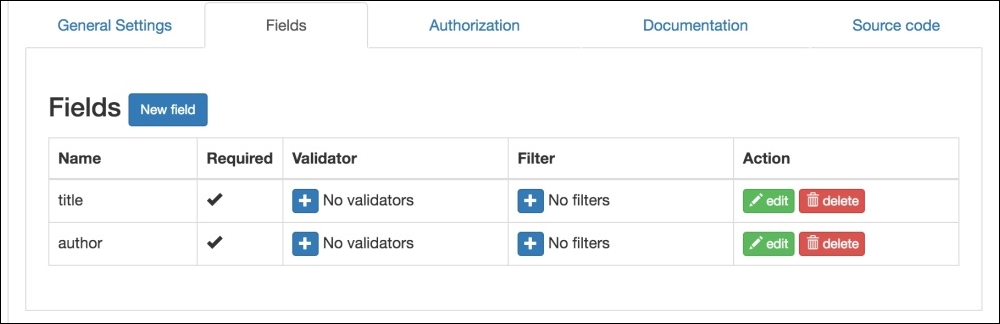
As can be seen in the preceding screen, we can add validators and filters to each individual field too.
The next topic is documentation. When we click on the Documentation tab, we will see the following screen:
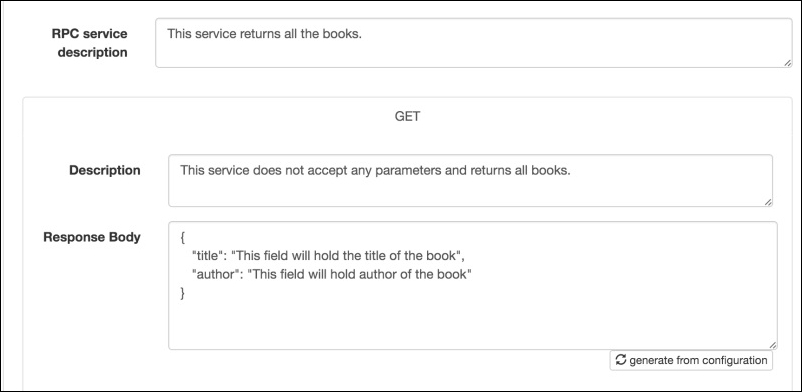
Here, we will document our service, add some description, and also can generate the response body for documentation purposes. This is very important as it will enable others to better understand our APIs and services.
Now, we need to get the all the books from somewhere. It can be either from the database or from another service or any other source. However, for now, we will just use an array of books for test purposes. If we click on the Source tab, we will find that our code for the service is placed at module/books/src/books/V1/Rpc/Get/GetController.php. Apigility created a module for our API books and then placed all the source code in this module in different folders according to the version of our API, which is V1 by default. We can add more versions, such as V2 and V3, to our APIs. Now, if we open the GetController file, we will find some code and an action called getAction according to our route URI. The code is as follows, and the highlighted code is the one we added:
namespace books\V1\Rpc\Get; use Zend\Mvc\Controller\AbstractActionController; use ZF\ContentNegotiation\ViewModel; class GetController extends AbstractActionController { public function getAction() { $books = [ 'success' => [ [ 'title' => 'PHP 7 High Performance', 'author' => 'Altaf Hussain' ], [ 'title' => 'Magento 2', 'author' => 'Packt Publisher' ], ] ]; return new ViewModel($books); } }
In the preceding code, we used ContentNegotiation\ViewModel, which is responsible for responding with the data in the format that we selected in the service setup, which is JSON in our case. Then, we created a simple $books array with the fieldnames we created for the service and assigned our values to them. Then, we returned them using the ViewModel object, which handles the response data conversion to JSON.
Now, let's test our API. As our service can accept GET requests, we will just type our URL in the browser with the books/get URI, and we will see the JSON response. It is best to check the API with tools such as RestClient or Postman for Google Chrome, which provides an easy-to-use interface to make different types of requests to APIs. We tested it with Postman and got the response shown in the following screenshot:
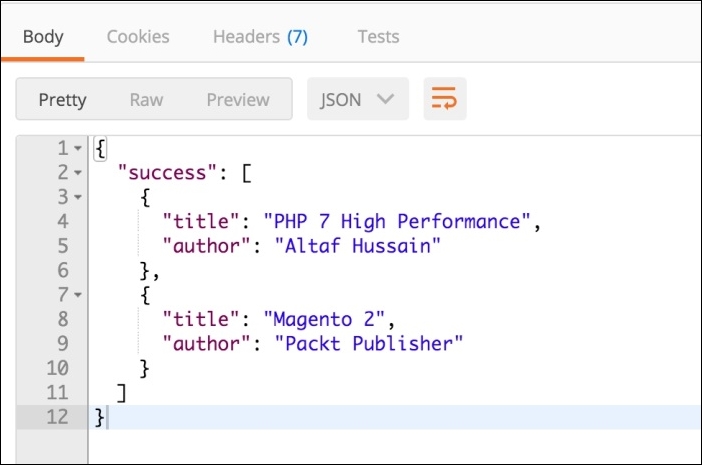
Also note that we set our service to accept only GET requests. So, if we send a request other than GET, we will get an HTTP Status code 405 methods not allowed error.
Apigility is very powerful and provides tons of features, such as RESTFul APIs, HTTP authentication, database connected services with easy-to-create DB connectors, and a selection of tables for a service. While using Apigility, we need not worry about the API, service structure security, and other things, as Apigility does this for us. We need to only concentrate on the business logic of the APIs and services.
Apigility can't be covered completely in this Appendix. Apigility has lots of features that can be covered in a complete book. Apigility's official documentation at https://apigility.org/documentation is a good place to get started and read more about this.
In this Appendix, we discussed the basics of the MVC design pattern. We also discussed the Laravel framework and some of its good features. We introduced you to the Laravel-based micro-framework, Lumen. At the end, we had a small introduction to Apigility and created a test API and web service.
In IT, things get obsolete in a very short time span. It is always required to study upgraded tools and find new ways and techniques for the best approaches in programming. Therefore, one should not stop after completing this book and start studying new topics and also the topics that are not covered completely in this book. Until this point, you will have the knowledge that you can use to set up high-performance environments for high-performance applications. We wish you good luck and success in PHP-ing!
It has been more than two decades now since the birth of PHP. Originally created by Rasmus Lerdorf in 1994, the PHP acronym initially stood for Personal Home Page. Back then, PHP was merely a few Common Gateway Interface (CGI) programs in C, used to power a simple web page.
Though PHP was not intended to be a new programming language, the idea caught on. During the late nineties Zeev Suraski and Andi Gutmans, co-founders of Zend Technologies, continued the work on PHP by rewriting its entire parser, giving birth to PHP 3. The PHP language name acronym now stood for PHP: Hypertext Preprocessor.
PHP positions itself among the top ten programming languages in the world. According to TIOBE, the software quality company, it currently holds sixth place. For the last decade, especially since the release of PHP 5 in July 2004, PHP has been recognized as the popular solution for building web applications.
Though PHP still presents itself as a scripting language, it's safe to say that as of PHP 5 it is far more than that. Some of the world web's most popular platforms like WordPress, Drupal, Magento, and PrestaShop are built in PHP. It is projects like these that played a role in further raising the popularity of PHP. Some of them stretch the boundaries of PHP by implementing complex OOP (Object Oriented Programming) design patterns found in other programming languages like Java, C#, and their frameworks.
Even though PHP 5 had decent OOP support, lots of things were still left to be dreamed of. Work on PHP 6 was planned to give more support for the PHP Unicode strings. Sadly, its development came to a halt and PHP 6 was canceled in 2010.
That same year, Facebook announced its HipHop compiler. Their compiler was converting PHP code into C++ code. The C++ code was further compiled into native machine code via a C++ compiler. This concept brought major performance improvements for PHP. However, this approach was not very practical, because it took too long to compile PHP scripts all the way to native machine code.
Shortly after, Dmitry Stogov, Zend Technologies Chief Performance Engineer, announced a project called PHPNG, which became the basis for the next PHP version, PHP 7.
In Dec 2015, PHP 7 was released, bringing numerous improvements and new features:
In this chapter, we will look at the following topics:
PHP 7 comes with quite a big list of changes. These changes affect both the PHP interpreter and the various extensions and libraries. Though most of the PHP 5 code will continue to operate normally on the PHP 7 interpreter, it is worth getting up to speed with the newly available features.
Moving forward, we will look into some of these features and the benefits they provide.
Scalar type hints are not an entirely new feature in PHP. With the introduction of PHP 5.0 we were given the ability to type hint classes and interfaces. PHP 5.1 extended this by introducing array type hinting. Later on, with PHP 5.4, we were additionally given the ability to type hint callable. Finally, PHP 7 introduced scalar type hints. Extending the type hints to scalars makes this probably one of the most exciting features added to PHP 7.
The following scalar type hints are now available:
By default, PHP 7 works in weak type-checking mode, and will attempt to convert to the specified type without complaint. We can control this mode using the strict_typesdeclare() directive.
The declare(strict_types=1); directive must be the first statement in a file, or else it will generate a compiler error. It only affects the specific file it is used in, and does not affect other included files. The directive is entirely compile-time and cannot be controlled at runtime:
declare(strict_types=0); //weak type-checking declare(strict_types=1); // strict type-checking
Let's assume the following simple function that accepts hinted scalar types.
function hint (int $A, float $B, string $C, bool $D)
{
var_dump($A, $B, $C, $D);
}The weak type-checking rules for the new scalar type declarations are mostly the same as those of extensions and built-in PHP functions. Because of this automated conversion we might unknowingly lose data when passing it into a function. One simple example is passing a float into a function that requires an int; in which case conversion would simply strip away decimals.
Assuming the weak type-checking is on, as by default, the following can be observed:
hint(2, 4.6, 'false', true); /* int(2) float(4.6) string(5) "false" bool(true) */ hint(2.4, 4, true, 8); /* int(2) float(4) string(1) "1" bool(true) */
We can see that the first function call passes on parameters as they are hinted. The second function call does not pass the exact types of parameters but still the function manages to execute as parameters go through conversion.
Assuming the weak type-checking is off, by using the declare(strict_types=1); directive, the following can be observed:
hint(2.4, 4, true, 8);
Fatal error: Uncaught TypeError: Argument 1 passed to hint() must be of the type integer, float given, called in php7.php on line 16 and defined in php7.php:8 Stack trace: #0 php7.php(16): hint(2.4, 4, true, 8) #1 {main} thrown in php7.php on line 8The function call broke on the first argument resulting in the \TypeError exception. The strict_types=1 directive does not allow any type juggling. The parameter has to be of the same type, as hinted by the function definition.
In addition to type hinting, we can also type hint the return values. All of the type hints that can be applied to function parameters can be applied to function return values. This also implies to the weak type-checking rules.
To add a return type hint, simply follow the parameter list with a colon and the return type, as shown in the following example:
function divide(int $A, int $B) : int
{
return $A / $B;
}The preceding function definition says that the divide function expects two parameters of the int type, and is supposed to return a parameter of the int type.
Assuming the weak type-checking is on, as by default, the following can be observed:
var_dump(divide(10, 2)); // int(5) var_dump(divide(10, 3)); // int(3)
Though the actual result of divide(10, 3)should be a float, the return type hint triggers conversion into an integer.
Assuming the weak type-checking is off, by using the declare(strict_types=1); directive, the following can be observed:
int(5)
Fatal error: Uncaught TypeError: Return value of divide() must be of the type integer, float returned in php7.php:10 Stack trace: #0php7.php(14): divide(10, 3) #1 {main} thrown in php7.php on line 10With the strict_types=1 directive in place, the divide(10, 3) fails with the \TypeError exception.
With the addition of anonymous classes, PHP objects gained closure-like capabilities. We can now instantiate objects through nameless classes, which brings us closer to object literal syntax found in other languages. Let's take a look at the following simple example:
$object = new class {
public function hello($message) {
return "Hello $message";
}
};
echo$object->hello('PHP');The preceding example shows an $object variable storing a reference to an instance of an anonymous class. The more likely usage would be to directly pass the new class to a function parameter, without storing it as a variable, as shown here:
$helper->sayHello(new class {
public function hello($message) {
return "Hello $message";
}
});Similar to any normal class, anonymous classes can pass arguments through to their constructors, extend other classes, implement interfaces, and use traits:
class TheClass {}
interface TheInterface {}
trait TheTrait {}
$object = new class('A', 'B', 'C') extends TheClass implements TheInterface {
use TheTrait;
public $A;
private $B;
protected $C;
public function __construct($A, $B, $C)
{
$this->A = $A;
$this->B = $B;
$this->C = $C;
}
};
var_dump($object);The above example would output:
object(class@anonymous)#1 (3) { ["A"]=> string(1) "A"["B":"class@anonymous":private]=> string(1) "B"["C":protected]=> string(1) "C" }The internal name of an anonymous class is generated with a unique reference based on its address.
There is no definitive answer as to when to use anonymous classes. It depends almost entirely on the application we are building, and the objects, depending on their perspective and usage.
Some of the benefits of using anonymous classes are as follows:
Anonymous classes, or rather objects instantiated from anonymous classes, cannot be serialized. Trying to serialize them results in a fatal error as follows:
Fatal error: Uncaught Exception: Serialization of 'class@anonymous' is not allowed in php7.php:29 Stack trace: #0 php7.php(29): serialize(Object(class@anonymous)) #1 {main} thrown in php7.php on line 29Nesting an anonymous class does not give it access to private or protected methods and properties of the outer class. In order to use the outer class protected methods and properties, the anonymous class can extend the outer class. Ignoring methods, private or protected properties of the outer class can be used in the anonymous class if passed through its constructor:
class Outer
{
private $prop = 1;
protected $prop2 = 2;
protected function outerFunc1()
{
return 3;
}
public function outerFunc2()
{
return new class($this->prop) extends Outer
{
private $prop3;
public function __construct($prop)
{
$this->prop3 = $prop;
}
public function innerFunc1()
{
return $this->prop2 + $this->prop3 + $this->outerFunc1();
}
};
}
}
echo (new Outer)->outerFunc2()->innerFunc1(); //6Though we labeled them as anonymous classes, they are not really anonymous in terms of the internal name the PHP engine assigns to objects instantiated from these classes. The internal name of an anonymous class is generated with a unique reference based on its address.
The statement get_class(new class{}); would result in something like class@anonymous/php7.php0x7f33c22381c8, where 0x7f33c22381c8 is the internal address. If we were to define the exact same anonymous class elsewhere in the code, its class name would be different as it would have a different memory address assigned. The resulting object in that case might have the same property values, which means they will be equal (==) but not identical (===).
PHP introduced the Closure class in the 5.3 version. Closure class is used to represent anonymous functions. Anonymous functions, implemented in PHP 5.3, yield objects of this type. As of PHP 5.4, the Closure class got several methods (bind, bindTo) that allow further control of the anonymous function after it has been created. These methods basically duplicate the Closure with a specific bound object and class scope. PHP 7 introduced the call method on a Closure class. The call method does not duplicate the closure, it temporarily binds the closure to new this ($newThis), and calls it with any given parameters. It then returns the return value of the closure.
The call function signature looks like the following:
function call ($newThis, ...$parameters) {}
$newThis is the object to bind the closure for the duration of the call. The parameters, which will be given as $parameters to the closure are optional, meaning zero or more.
Let's take a look at the following example of a simple Customer class and a $greeting closure:
class Customer {
private $firstname;
private $lastname;
public function __construct($firstname, $lastname)
{
$this->firstname = $firstname;
$this->lastname = $lastname;
}
}
$customer = new Customer('John', 'Doe');
$greeting = function ($message) {
return "$message $this->firstname $this->lastname!";
};
echo $greeting->call($customer, 'Hello');
Within the actual $greeting closure, there is no $this, it does not exist until the actual binding occurs. We could easily confirm this by directly calling a closure like $greeting('Hello');. However, we assume $this will come in to existence when we bind the closure to a given object instance via its call function. In which case, $this within the closure becomes $this of the customer object instance. The preceding example shows binding of $customer to the closure using a call method call. The resulting output displays Hello John Doe!
Generators provide a simple way to implement iterators without the overhead of implementing a class that implements the Iterator interface. They allow us to write code which uses foreach to iterate over a set of data without needing to build an array in memory. This eliminates the exceeds memory limit errors. They were not new to PHP, as they were added in PHP 5.5.
However, PHP 7 brings several new improvements to generators, one of which is generator delegation.
Generator delegation allows a generator to yield other generators, arrays, or objects that implement the Traversable interface. In another words, we might say that generator delegation is yielding subgenerators.
Let's take a look at the following example with three generator type functions:
function gen1() {
yield '1';
yield '2';
yield '3';
}
function gen2() {
yield '4';
yield '5';
yield '6';
}
function gen3() {
yield '7';
yield '8';
yield from gen1();
yield '9';
yield from gen2();
yield '10';
}
// output of the below code: 123
foreach (gen1() as $number) {
echo $number;
}
//output of the below code: 78123945610
foreach (gen3() as $number) {
echo $number;
}Yielding other generators requires using the yield from <expression> syntax.
Prior to PHP 7, generator functions were not able to return expressions. The inability of generator functions to specify return values limited their usefulness for multitasking in co-routine contexts.
PHP 7 made it possible for generators to return expressions. We can now call $generator->getReturn() to retrieve the return expression. Calling $generator->getReturn() when the generator has not yet returned, or has thrown an uncaught exception, will throw an exception.
If the generator has no return expression defined and has completed yielding, null is returned.
Let's take a look at the following example:
function gen() {
yield 'A';
yield 'B';
yield 'C';
return 'gen-return';
}
$generator = gen();
//output of the below code: object(Generator)#1 (0) { }
var_dump($generator);
// output of the below code: Fatal error
// var_dump($generator->getReturn());
// output of the below code: ABC
foreach ($generator as $letter) {
echo $letter;
}
// string(10) "gen-return"
var_dump($generator->getReturn());Looking at the gen() function definition and its return expression, one might expect the value of the $generator variable to be equal to the gen-return string. However, this is not the case, as the $generator variable becomes the instance of the \Generator class. Calling the getReturn() method on the generator while it is still open (not iterated over) will result in a fatal error.
If the code is structured in such a way that it is not obvious if the generator has been closed, we can use the valid method to check, before fetching the return value:
if ($generator->valid() === false) {
var_dump($generator->getReturn());
}In PHP 5 we had the ternary operator which tests a value and then returns the second element if that value is true, or third element if that value is false, as shown in the following code block:
$check = (5 > 3) ? 'Correct!' : 'Faulty!'; // Correct! $check = (5 < 3) ? 'Correct!' : 'Faulty!'; // Faulty!
While processing user-provided data in web-centered languages such as PHP, it is common to check for variable existence. If a variable doesn't exist, then set it to some default value. A ternary operator makes this easy for us, as shown here:
$role = isset($_GET['role']) ? $_GET['role'] : 'guest';
However, easy is not always quick or elegant. With that in mind, PHP 7 set out to resolve one of the most common usage patterns, by introducing the null coalesce operator(??).
The null coalesce operator enables us to write even shorter expressions, as in the following code block:
$role = $_GET['role'] ??'guest';The coalesce operator(??) is added right after the $_GET['role'] variable, which returns the result of its first operand if it exists and is not NULL, or else its second operand. This means the $_GET['role'] ?? 'guest' is completely safe and will not raise an E_NOTICE.
We can also nest the coalesce operator:
$A = null; // or not set $B = 10; echo $A ?? 20; // 20 echo $A ?? $B ?? 30; // 10
Reading from left to right, the first value which exists and is not null is the value that will be returned. The benefit of this construct is that it enables a clean and effective way to achieve safe fallback to the desired value.
The code bundle for the book is also hosted on GitHub at https://github.com/PacktPublishing/Modular-Programming-with-PHP7. We also have other code bundles from our rich catalog of books and videos available at https://github.com/PacktPublishing/. Check them out!
The three-way comparison operator, also known as the Spaceship operator, was introduced in PHP 7. Its syntax goes as follows:
(expr) <=> (expr)
The operator returns 0 if both operands are equal, 1 if the left is greater, and -1 if the right is greater.
It uses the same comparison rules as other existing comparison operators: <, <=, ==, >=, and >:
operator<=> equivalent $a < $b($a <=> $b) === -1 $a <= $b($a <=> $b) === -1 || ($a <=> $b) === 0 $a == $b($a <=> $b) === 0 $a != $b($a <=> $b) !== 0 $a >= $b($a <=> $b) === 1 || ($a <=> $b) === 0 $a > $b($a <=> $b) === 1
The following are some examples of Spaceship operator behavior:
// Floats echo 1.5 <=> 1.5; // 0 echo 1.5 <=> 2.5; // -1 echo 2.5 <=> 1.5; // 1 // Strings echo "a"<=>"a"; // 0 echo "a"<=>"b"; // -1 echo "b"<=>"a"; // 1 echo "a"<=>"aa"; // -1 echo "zz"<=>"aa"; // 1 // Arrays echo [] <=> []; // 0 echo [1, 2, 3] <=> [1, 2, 3]; // 0 echo [1, 2, 3] <=> []; // 1 echo [1, 2, 3] <=> [1, 2, 1]; // 1 echo [1, 2, 3] <=> [1, 2, 4]; // -1 // Objects $a = (object) ["a" =>"b"]; $b = (object) ["a" =>"b"]; echo $a <=> $b; // 0 $a = (object) ["a" =>"b"]; $b = (object) ["a" =>"c"]; echo $a <=> $b; // -1 $a = (object) ["a" =>"c"]; $b = (object) ["a" =>"b"]; echo $a <=> $b; // 1 // only values are compared $a = (object) ["a" =>"b"]; $b = (object) ["b" =>"b"]; echo $a <=> $b; // 0
One practical use case for this operator is for writing callbacks used in sorting functions like usort, uasort, and uksort:
$letters = ['D', 'B', 'A', 'C', 'E'];
usort($letters, function($a, $b) {
return $a <=> $b;
});
var_dump($letters);
// array(5) { [0]=> string(1) "A" [1]=> string(1) "B" [2]=>string(1) "C" [3]=> string(1) "D" [4]=> string(1) "E" }Though PHP 5 introduced the exception model, overall errors and error handling remained somewhat unpolished. Basically PHP had two error handling systems. Traditional errors still popped out and were not handled by try…catch blocks.
Take the following E_RECOVERABLE_ERROR as an example:
class Address
{
private $customer;
public function __construct(Customer $customer)
{
$this->customer = $customer;
}
}
$customer = new stdClass();
try {
$address = new Address($customer);
} catch (\Exception $e) {
echo 'handling';
} finally {
echo 'cleanup';
}The try…catch block has no effect here, as the error is not interpreted as an exception, rather a catchable fatal error:
Catchable fatal error: Argument 1 passed to Address::__construct() must be an instance of Customer, instance of stdClass given, called in script.php on line 15 and defined in script.php on line 6.
A possible workaround involves setting a user-defined error handler by using the set_error_handler function as follows:
set_error_handler(function($code, $message) {
throw new \Exception($message, $code);
});The error handler, as written above, would now transform every error into an exception, therefore making it catchable with try…catch blocks.
PHP 7 made fatal and catchable fatal errors part of engine exceptions, therefore catchable with try…catch blocks. This excludes warnings and notices which still do not pass through the exception system, which makes sense for backward compatibility reasons.
It also introduced a new exception hierarchy via the \Throwable interface. \Exception and \Error implement the \Throwable interface.
Standard PHP fatal and catchable fatal are now thrown as \Error exceptions, though they will continue to trigger traditional fatal error if they are uncaught.
Throughout our application we must use \Exception and \Error, as we cannot implement the \Throwable interface directly. We could, however, use the following block to catch all errors, regardless of whether it is the \Exception or \Error type:
try {
// statements
} catch (\Throwable $t) {
// handling
} finally {
// cleanup
}The ParseError is a nice PHP 7 addition to error handling. We can now handle parse errors triggered by eval(), include and require statements, as well as those thrown by \ParseError exceptions. It extends \Error, which in turn implements a \Throwable interface.
The following is an example of a broken PHP file, because of a missing "," inbetween between array items:
<?php $config = [ 'host' =>'localhost' 'user' =>'john' ]; return $config;
The following is an example of a file including config.php:
<?php
try {
include 'config.php';
} catch (\ParseError $e) {
// handle broken file case
}We can now safely catch possible parse errors.
The dirname function has been with us since PHP 4. It's probably one of the most often used functions in PHP. Up until PHP 7, this function only accepted the path parameter. With PHP 7, the new levels parameter was added.
Let's take a look at the following example:
// would echo '/var/www/html/app/etc'
echo dirname('/var/www/html/app/etc/config/');
// would echo '/var/www/html/app/etc'
echo dirname('/var/www/html/app/etc/config.php');
// would echo '/var/www/html/app'
echo dirname('/var/www/html/app/etc/config.php', 2);
// would echo '/var/www/html'
echo dirname('/var/www/html/app/etc/config.php', 3);By assigning the levels value, we indicate how many levels to go up from the assigned path value. Though small, the addition of the levels parameter will certainly make it easier to write some of the code that deals with paths.
The intdiv is a new integer division function introduced in PHP 7. The function accepts dividend and divisor as parameters and returns the integer quotient of their division, as shown here by the function description:
int intdiv(int $dividend, int $divisor)
Let's take a look at the following few examples:
intdiv(5, 3); // int(1) intdiv(-5, 3); // int(-1) intdiv(5, -2); // int(-2) intdiv(-5, -2); // int(2) intdiv(PHP_INT_MAX, PHP_INT_MAX); // int(1) intdiv(PHP_INT_MIN, PHP_INT_MIN); // int(1) // following two throw error intdiv(PHP_INT_MIN, -1); // ArithmeticError intdiv(1, 0); // DivisionByZeroError
If the dividend is PHP_INT_MIN and the divisor is -1, then an ArithmeticError exception is thrown. If the divisor is 0, then the DivisionByZeroError exception is thrown.
Prior to PHP 7, constants defined with define() could only contain scalar expressions, but not arrays. As of PHP 5.6, it is possible to define an array constant by using const keywords, and as of PHP 7, array constants can also be defined using define():
// the define() example
define('FRAMEWORK', [
'version' => 1.2,
'licence' =>'enterprise'
]);
echo FRAMEWORK['version']; // 1.2
echo FRAMEWORK['licence']; // enterprise
// the class const example
class App {
const FRAMEWORK = [
'version' => 1.2,
'licence' =>'enterprise'
];
}
echo App::FRAMEWORK['version']; // 1.2
echo App::FRAMEWORK['licence']; // enterpriseConstants may not be redefined or undefined once they have been set.
To make PHP's parser more complete for various variable dereferences, PHP 7 introduced a uniform variable syntax. With uniform variable syntax all variables are evaluated from left to right.
Unlike various functions, keywords, or settings being removed, changes in semantics like this one can be quite impacting for the existing code base. The following code demonstrates the syntax, its old meaning and new:
// Syntax
$$foo['bar']['baz']
// PHP 5.x:
// Using a multidimensional array value as variable name
${$foo['bar']['baz']}
// PHP 7:
// Accessing a multidimensional array within a variable-variable
($$foo)['bar']['baz']
// Syntax
$foo->$bar['baz']
// PHP 5.x:
// Using an array value as a property name
$foo->{$bar['baz']}
// PHP 7:
// Accessing an array within a variable-property
($foo->$bar)['baz']
// Syntax
$foo->$bar['baz']()
// PHP 5.x:
// Using an array value as a method name
$foo->{$bar['baz']}()
// PHP 7:
// Calling a closure within an array in a variable-property
($foo->$bar)['baz']()
// Syntax
Foo::$bar['baz']()
// PHP 5.x:
// Using an array value as a static method name
Foo::{$bar['baz']}()
// PHP 7:
// Calling a closure within an array in a static variable
(Foo::$bar)['baz']()Aside from previously rewritten examples of old-to-new syntax, there are now a few newly supported syntax combinations.
PHP 7 now supports nested double colons,::, and following is an example of it:
// Access a static property on a string class name // or object inside an array $foo['bar']::$baz; // Access a static property on a string class name or object // returned by a static method call on a string class name // or object $foo::bar()::$baz; // Call a static method on a string class or object returned by // an instance method call $foo->bar()::baz();
We can also nest methods and function calls—or any callables—by doubling up on parentheses as shown in the following code examples:
// Call a callable returned by a function foo()(); // Call a callable returned by an instance method $foo->bar()(); // Call a callable returned by a static method Foo::bar()(); // Call a callable return another callable $foo()();
Furthermore, we can now dereference any valid expression enclosed with parentheses:
// Access an array key
(expression)['foo'];
// Access a property
(expression)->foo;
// Call a method
(expression)->foo();
// Access a static property
(expression)::$foo;
// Call a static method
(expression)::foo();
// Call a callable
(expression)();
// Access a character
(expression){0};PHP 7 introduced two new CSPRNG functions. CSPRNG is an acronym for cryptographically secure pseudo-random number generator.
The first, random_bytes, generates an arbitrary length string of cryptographic random bytes that are suitable for cryptographic use, such as when generating salts, keys, or initialization vectors. The function accepts only one (length) parameter, representing the length of the random string that should be returned in bytes. It returns a string containing the requested number of cryptographically secure random bytes, or, optionally, it throws an exception if an appropriate source of randomness cannot be found.
The following is an example of random_bytes usage:
$bytes = random_bytes(5);
The second, random_int, generates cryptographic random integers that are suitable for use where unbiased results are critical, such as when shuffling a deck of cards for a poker game. The function accepts two (min, max) parameters, representing the lowest value to be returned (must be PHP_INT_MIN or higher) and the highest value to be returned (must be less than or equal to PHP_INT_MAX). It returns a cryptographically secure random integer in the range min to max (inclusive).
The following is an example of random_int usage:
$int = random_int(1, 10); $int = random_int(PHP_INT_MIN, 500); $int = random_int(20, PHP_INT_MAX); $int = random_int(PHP_INT_MIN, PHP_INT_MAX);
Serialized data can include objects. These objects can further include functions like destructors, __toString, and __call. In order to increase security when unserializing objects on unstructured data, PHP 7 introduced the optional options parameter to the existing unserialize function.
The options parameter is of type array that currently only accepts the allowed_classes key.
The allowed_classes can have one of three values:
true: This is a default value and allows all objects just as beforefalse: Here no objects allowedThe following is an example of using the allowed_classes option:
class Customer{
public function __construct(){
echo '__construct';
}
public function __destruct(){
echo '__destruct';
}
public function __toString(){
echo '__toString';
return '__toString';
}
public function __call($name, $arguments) {
echo '__call';
}
}
$customer = new Customer();
$s = serialize($customer); // triggers: __construct, __destruct
$u = unserialize($s); // triggers: __destruct
echo get_class($u); // Customer
$u = unserialize($s, ['allowed_classes'=>false]); // does not trigger anything
echo get_class($u); // __PHP_Incomplete_ClassWe can see that the object of that class which is not accepted is instantiated as __PHP_Incomplete_Class.
According to the http://php.net/manual/en/reserved.keywords.php list, PHP has over 60 reserved keywords. These make up for language constructs, like names for properties, methods, constants within classes, interfaces, and traits.
Sometimes these reserved words end up clashing with user defined API declarations.
To resolve the issue, PHP 7.0 introduced the context sensitive lexer. With the context sensitive lexer, we may now use keywords for property, function, and constant names within our code.
The following are a few practical examples related to the impact of context sensitive lexer:
class ReportPool {
public function include(Report $report) {
//
}
}
$reportPool = new ReportPool();
$reportPool->include(new Report());
class Collection extends \ArrayAccess, \Countable, \IteratorAggregate {
public function forEach(callable $callback) {
//
}
public function list() {
//
}
public static function new(array $items) {
return new self($items);
}
}
Collection::new(['var1', 'var2'])
->forEach(function($index, $item){ /* ... */ })
->list();The only exception being the class keyword, which remains reserved in class constant context, as shown here:
class Customer {
const class = 'Retail'; // Fatal error
}The group use declarations are introduced in PHP 7 as a way to cut verbosities when importing multiple classes from a common namespace. They enable shorthand syntax as follows:
use Library\Group1\Group2\{ ClassA, ClassB, ClassC as Classy };Let's take a look at the following examples where class names within the same namespace are group used:
// Current use syntax
use Doctrine\Common\Collections\Expr\Comparison;
use Doctrine\Common\Collections\Expr\Value;
use Doctrine\Common\Collections\Expr\CompositeExpression;
// Group use syntax
use Doctrine\Common\Collections\Expr\{ Comparison, Value, CompositeExpression };We can also use the group use declarations on part of namespaces, as shown in the following example:
// Current use syntax
use Symfony\Component\Console\Helper\Table;
use Symfony\Component\Console\Input\ArrayInput;
use Symfony\Component\Console\Output\NullOutput;
use Symfony\Component\Console\Question\Question;
use Symfony\Component\Console\Input\InputInterface;
use Symfony\Component\Console\Output\OutputInterface;
use Symfony\Component\Console\Question\ChoiceQuestion as Choice;
use Symfony\Component\Console\Question\ConfirmationQuestion;
// Group use syntax
use Symfony\Component\Console\{
Helper\Table,
Input\ArrayInput,
Input\InputInterface,
Output\NullOutput,
Output\OutputInterface,
Question\Question,
Question\ChoiceQuestion as Choice,
Question\ConfirmationQuestion,
};We can further use group use for importing functions and constants as shown in the following lines of code:
use Framework\Component\{
SubComponent\ClassA,
function OtherComponent\someFunction,
const OtherComponent\SOME_CONSTANT
};Unicode, and UTF-8 in particular, have grown increasingly popular in PHP applications.
PHP 7 adds the new escape sequence for double-quoted strings and heredocs, with the syntax as follows:
\u{code-point}It produces the UTF-8 encoding of a Unicode code point, specified with hexadecimal digits. It is worth noting that the length of the code-point within curly braces is arbitrary. This means that we can use \u{FF} or the more traditional \u{00FF}.
The following is a simple listing of the four most traded currencies, their symbols, and their UTF-8 code points:
Euro€U+20AC Japanese Yen¥U+00A5 Pound sterling£U+00A3 Australian dollar$U+0024
Some of these symbols usually exist directly on a keyboard, so it's easy to write them down as shown here:
echo "the € currency"; echo "the ¥ currency"; echo "the £ currency"; echo "the $ currency";
However, the majority of other symbols are not as easily accessible via the keyboard as single keystrokes, and therefore need to be written in the form of code-points, shown as follows:
echo "the \u{1F632} face";
echo "the \u{1F609} face";
echo "the \u{1F60F} face";In older versions of PHP, the resulting output of preceding statements would be the following:
the \u{1F632} face
the \u{1F609} face
the \u{1F60F} faceThis obviously did not parse code-points, as it was outputting them literally.
PHP 7 introduced Unicode code-point escape sequence syntax to string literals, making previous statements result in the following output:
the 😉 face the 😉 face the 😉 face
Assertions is a debug feature, used to check the given assertion and take appropriate action if its result is false. They have been part of PHP for years, ever since PHP 4.
Assertions differ from error handling in a way that assertions cover for impossible cases, whereas errors are possible and need to be handled.
Using assertions as a general-purpose error handling mechanism should be avoided. Assertions do not allow for recovery from errors. Assertion failure will normally halt the execution of a program.
With modern debugging tools like Xdebug, not many developers use assertions for debugging.
Assertions can be easily enabled and disabled using the assert_options function or the assert.active INI setting.
To use assertions, we pass in either an expression or a string as shown in the following function signature:
// PHP 5 bool assert ( mixed $assertion [, string $description ] ) // PHP 7 bool assert ( mixed $assertion [, Throwable $exception ] )
These two signatures differ in the second parameter. PHP 7 can accept either string $description or $exception.
If the expression result or the result of evaluating the string evaluates to false, then a warning is raised. If the second parameter is passed as $exception, then an exception will be thrown instead of failure.
In regards to php.ini configuration options, the assert function has been expanded to allow for so-called zero-cost assertions:
zend.assertions = 1 // Enable zend.assertions = 0 // Disable zend.assertions = -1 // Zero-cost
With zero-cost settings, assertions have zero impact on performance and execution as they are not compiled.
Finally, the Boolean assert.exception option was added to the INI setting. Setting it to true, results in AssertionError exceptions for the failed assertions.
In PHP 5, list() assigns the values starting with the right-most parameter. In PHP 7, list() starts with the left-most parameter. Basically, values are now assigned to variables in the order they are defined.
However, this only affects the case where list() is being used in conjunction with the array [] operator, as discussed in the following code block:
<?php list($color1, $color2, $color3) = ['green', 'yellow', 'blue']; var_dump($color1, $color2, $color3); list($colors[], $colors[], $colors[]) = ['green', 'yellow', 'blue']; var_dump($colors);
Output of the preceding code in PHP 5 would result in the following:
string(5) "green"
string(6) "yellow"
string(4) "blue"
array(3) {
[0]=> string(5) "blue"
[1]=> string(6) "yellow"
[2]=> string(4) "green"
}Output of the preceding code in PHP 7 would result in the following:
string(5) "green"
string(6) "yellow"
string(4) "blue"
array(3) {
[0]=> string(5) "green"
[1]=> string(6) "yellow"
[2]=> string(4) "blue"
}The order of assignment might change again in the future, so we should not rely heavily on it.
Prior to PHP 7, the session_start() function did not directly accept any configuration options. Any configuration options we wanted to set on the session, needed to come from php.ini:
// PHP 5
ini_set('session.name', 'THEAPP');
ini_set('session.cookie_lifetime', 3600);
ini_set('session.cookie_httponly', 1);
session_start();
// PHP 7
session_start([
'name' =>'THEAPP',
'cookie_lifetime' => 3600,
'cookie_httponly' => 1
]);Driven by the goal of performance optimization, a new lazy_write runtime configuration was added in PHP 7. When lazy_write is set to 1, the session data is only rewritten if it changes. This is the default behavior:
session_start([ 'name' =>'THEAPP', 'cookie_lifetime' => 3600, 'cookie_httponly' => 1, 'lazy_write' => 1 ]);
While changes listed here might not look impressive at first, being able to override session options directly via the session_start function gives certain flexibility to our code.
Globally accepted, major versions of software have the luxury of breaking backward compatibility. Ideally, not much, but in order to keep the software moving forward, some old ideas need to be left behind. These changes don't come overnight. Certain features are first flagged as deprecated to warn developers that it will be removed in future versions of the language. Sometimes this period of deprecation takes years.
Throughout PHP 5.x, a number of features have been marked as deprecated, and in PHP 7.0, they have all been removed.
The POSIX-compatible regular expressions have been deprecated in PHP 5.3, and now completely removed in PHP 7.
The following functions are no longer available for use:
ereg_replaceeregeregi_replaceeregisplitsplitisql_regcaseWe should instead use Perl Compatible Regular Expressions (PCRE). The http://php.net/manual/en/book.pcre.php is a great source of documentation for these functions.
The mysql extension, which had been deprecated in PHP 5.5, has now been removed. None of the mysql_* functions are available anymore. We should instead use the mysqli extension. The good thing is that moving from mysql to mysqli functions is mostly simple, as when adding i to our code, the mysql_* function calls and passes the database handle (returned by mysqli_connect) as the first parameter. The http://php.net/manual/en/book.mysqli.php is a great source of documentation for these functions.
The PHP script and ASP tags are no longer available:
<!-- PHP script tag example --> <script language="php"> // Code here </script> <!-- PHP ASP tag example --> <% // Code here %> <%=$varToEcho; %>
Application frameworks are a collection of functions, classes, configurations, and conventions all designed to support the development of web applications, services, and APIs. Some applications are embracing an API first approach, whereas server-side REST and SOAP APIs are built via PHP, and client side in other technologies like JavaScript.
When building a web application, we usually have three obvious choices:
In a nutshell, frameworks are here to make it easier and quicker for us to build our software. A great deal of programming languages out there have popular frameworks. PHP is no exception to this.
Given the popularity of PHP as a go-to web programming language, it is no surprise that dozens of frameworks have sprouted over the years. Choosing the "right" framework is a daunting task, even so more for fresh starters. What is right for one project or a team might not be right for another.
However, there are some general, high level segments each modern framework should encompass. These account for:
While it's perfectly alright to code an entire web application in pure PHP without using any framework, the majority of today's projects do use frameworks.
The benefits of using frameworks outweigh the purity of doing it all from scratch. Frameworks are usually well supported and documented, which makes it easier for teams to catch up with libraries, project structure, conventions, and other things.
When it comes to PHP frameworks, it is worth pointing out a few popular ones:
This is by no means a complete or even a popularity sorted list.
Laravel is released under an MIT license, and can be downloaded from https://laravel.com/.
Aside from the usual routing, controllers, requests, responses, views, and (blade) templates, out of the box Laravel provides a large amount of additional services such as authentication, cache, events, localization, and many others.
Another neat feature of Laravel, is Artisan, the command line tool, that provides a number of useful commands that we can use during development. Artisan can further be extended by writing our own console commands.
Laravel has a pretty active and vibrant community. Its documentation is simple and clear, which makes it easy for newcomers to get started. Furthermore, there is also https://laracasts.com, which extends out beyond Laravel in terms of documentation and other content. Laracasts is a web service providing a series of expert screencasts, some of which are free.
All of these features make Laravel a choice worth evaluating when it comes to the selection of a framework.
Symfony is released under an MIT license, and can be downloaded from http://symfony.com.
Over time, Symfony introduced the concept of Long-term Support(LTS) releases. This release process has been adopted as of Symfony 2.2, and strictly followed as of Symfony 2.4. The standard version of Symfony is maintained for eight months. Long-term Support versions are supported for three years.
One other interesting thing about new releases is the time-based release model. All of the new versions of Symfony releases come out every six months: one in May and one in November.
Symfony has great community support via mailing lists, IRC, and StackOverflow. Furthermore, SensioLabs professional support provides a full range of solutions from consulting, training, coaching, to certification.
Lots of Symfony components are used in other web applications and frameworks, such as Laravel, Silex, Drupal 8, Sylius, and others.
What made Symfony such a popular framework is its interoperability. The idea of "Don't lock yourself up within Symfony!" made it popular with developers as it allowed for building applications that precisely meet our needs.
By embracing the "don't reinvent the wheel" philosophy, Symfony itself makes heavy use of existing PHP open-source projects as part of the framework, including:
Depending on our project needs, we can choose to use a full-stack Symfony framework, the Silex micro-framework, or simply some of the components individually.
Out of the box, Symfony provides a lot of structural ground for new web applications. It does so via its bundle system. Bundles are sort of like micro-applications inside our main application. Within them, the entire app is nicely structured into models, controllers, templates, configuration files, and other building blocks. Being able to fully separate logic from different domains helps us to keep a clean separation of concerns and autonomously develop every single feature of our domain.
Symfony is one of the PHP pioneers when it comes to embracing the dependency injection across the framework, allowing it to achieve decoupled components and to keep high flexibility of code.
Documented, modular, highly flexible, performant, supported, those are the attributes that make Symfony a choice worth evaluating.
Zend Framework is released under a new BSD license, and can be downloaded from http://framework.zend.com.
Zend Framework features include:
Aside from a free Zend Framework, Zend Technologies Ltd provides its own commercial version of a PHP stack called Zend Server, and Zend Studio IDE that includes features specifically to integrate with Zend Framework. While Zend Framework is perfectly fine running on any PHP stack, Zend Server is advertised as an optimized solution for running Zend Framework applications.
By its architectural design, Zend Framework is merely a collection of classes. There is no strictly imposed structure our application needs to follow. This is one of the features that makes it so appealing to a certain range of developers. We could either utilize Zend MVC components to create a fully-functional Zend Framework project, or we can simply load the components we need.
The so called full-stack frameworks impose structure, ORM implementations, code-generation, and other fixed things onto your projects. Zend Framework, on the other hand, with its decoupled nature, classifies for a glue type of framework. We can easily glue it to an existing application, or use it to build a new one.
The latest versions of Zend Framework follow the SOLID object oriented design principle. The so called "use-at-will" design allows developers to use whichever components they want.
Though the main driving force behind Zend Framework is Zend Technologies, many other companies have contributed significant features to the framework.
Furthermore, Zend Technologies provides excellent Zend Certified PHP Engineer certifications. Quality community, official company support, education, hosting, and development tools make the Zend Framework choice worth evaluating.
CodeIgniter is released under an MIT license, and can be downloaded from https://www.codeigniter.com.
CodeIgniter prides itself in being lightweight. The core system requires only a handful of small libraries, which is not always the case with other frameworks.
The framework uses the simple Model-View-Control approach, allowing for clean separation between logic and presentation. The View layer does not impose any special template language, so it uses native PHP out of the box.
Here are some of the outstanding features of CodeIgniter:
CodeIgniter has an active community gathered around http://forum.codeigniter.com.
Small footprint, flexibility, exceptional performance, near-zero configuration, and thorough documentation are what makes this framework choice worth evaluating.
CakePHP is released under an MIT license, and can be downloaded from http://cakephp.org.
The CakePHP framework was greatly inspired by Ruby on Rails, using many of its concepts. It values conventions over configuration.
It comes with "batteries included". Most of the things we need for modern web applications are already built-in. Translations, database access, caching, validation, authentication, and much more are all built-in.
Security is another big part of the CakePHP philosophy. CakePHP comes with built-in tools for input validation, CSRF protection, form tampering protection, SQL injection prevention, and XSS prevention, helping us to secure our application.
CakePHP supports a variety of database storage engines, such as MySQL, PostgreSQL, Microsoft SQL Server, and SQLite. The built-in CRUD feature is very handy for database interaction.
It counts on a big community behind it. It also has a big list of plugins, available at http://plugins.cakephp.org.
CakePHP provides a certification exam, whereby developers are tested in their knowledge of the CakePHP framework, MVC principles, and standards used within CakePHP. Certification is geared towards real world scenarios and intimate CakePHP specifics.
Commercial support, consultation, code review, performance analysis, security audits, and even development services are provided by the Cake Development Corporation http://www.cakedc.com. The Cake Development Corporation is the commercial entity behind the framework, established in 2007 by Larry Masters, a founder of CakePHP.
Slim is released under an MIT license, and can be downloaded from http://www.slimframework.com.
While frameworks with the "batteries included" mindset provide robust libraries, directory structures, and configurations, micro frameworks get us started with a few lines of code.
Micro frameworks usually lack even the basic framework features such as:
This limits their use, but also makes them a great tool for rapid prototyping.
Slim supports any PSR-7 HTTP message implementation. An HTTP message is either a request from a client to a server or a response from a server to a client. Slim functions like a dispatcher that receives an HTTP request, invokes an appropriate callback routine, and returns an HTTP response.
The good thing about Slim is that it plays nicely with middleware. The middleware is basically a callable that accepts three arguments:
\Psr\Http\Message\ServerRequestInterface: The PSR7 request object\Psr\Http\Message\ResponseInterface: The PSR7 response objectcallable: The next middleware callableMiddlewares are free to manipulate request and response objects, as long as they return an instance of \Psr\Http\Message\ResponseInterface. Furthermore, each middleware needs to invoke the next middleware and pass it to request and response objects as arguments.
This simple concept gives Slim the power of extensibility, through various possible third party middlewares.
Even though Slim provides good documentation, a vibrant community, and the project is being actively developed to date, its usage is limited. Micro frameworks are hardly a choice for robust enterprise applications. Still, they have their place in development.
Yii is released under a BSD License, and can be downloaded from http://www.yiiframework.com.
Yii's focus on performance optimization makes it a perfect choice for almost any type of project, including the enterprise type of applications.
Some of the outstanding Yii features include:
One of the neat features of Yii is a tool called Gii. It's an extension that provides a web-based code generator. We can use Gii's graphical interface to quickly set up generate models, forms, modules, CRUD, and so on. There is also a command line version of Gii for those who prefer consoles over GUI.
Yii's architecture allows it to play nicely with third-party code, like PEAR libraries, Zend Framework, and the like. It adopts the MVC architecture, allowing for clean separation of concerns.
Yii provides an impressive library of extensions available at http://www.yiiframework.com/extensions. The majority of extensions are distributed as composer packages. They empower us with accelerated development. We can easily package our code as extensions and share it with others. This makes Yii even more interesting for modular application development.
Official documentation is quite comprehensive. There are also several books available.
Rich documentation, a vibrant community, active releases, performance optimization, security emphasis, feature richness, and flexibility make Yii a choice worth evaluating.
Phalcon is released under a BSD License, and can be downloaded from https://phalconphp.com.
Phalcon was originally released in 2012, by Andres Gutierrez and collaborators. The goal of the project was to find a new approach to traditional web application frameworks written in PHP. This new approach came in the form of C language extensions. The entire Phalcon framework is developed as a C extension.
The benefits of C-based frameworks lies in the fact that an entire PHP extension is loaded during runtime. This greatly reduces I/O operations massively since there is no need to load .php files any more. Furthermore, compiled C language code executes faster than PHP bytecode. Since C extensions are loaded together with PHP one time during the web server daemon start process, their memory footprint is small. The downside of C-based frameworks is that the code is compiled, so we cannot easily debug it and patch it as we would with PHP classes.
Low-level architecture and optimizations make Phalcon one of the lowest overheads for MVC-based applications.
Phalcon is a full-stack, loosely coupled framework. While it does provide full MVC structure to our application, it also allows us to use its objects as glue components based on the needs of our application. We can choose if we want to create a full blown MVC application, or the minimal style micro application. Micro applications are suitable to implement small applications, APIs, and prototypes in a practical way.
All of the frameworks we mentioned so far enable some form of extensions, where we can add new libraries or entire packages to a framework. Since Phalcon is a C-code framework, contributions to the framework doesn't come in the form of PHP code. On the other hand, writing and compiling C language code can be somewhat challenging for an average PHP developer.
Zephir project http://zephir-lang.com addresses these challenges by introducing high-level Zephir language. Zephir is designed to ease the creation and maintainability of C extensions for PHP with a focus on type and memory safety.
When communicating with databases, Phalcon uses Phalcon Query Language, PhalconQL, or simply PHQL for short. PHQL is a high-level, object-oriented SQL dialect that allows us to write queries using SQL-like language that works with objects instead of tables.
View templates are handled by Volt, Phalcon's own templating engine. It is highly integrated with other components, and can be used independently in our applications.
Phalcon is pretty easy to pick up. Its documentation covers both the MVC and micro applications style of using a framework, with practical examples. The framework itself is rich enough to support the structure and libraries we need for most of today's applications. On top of that, there is an official Phalcon website called Phalconist https://phalconist.com which provides additional resources to framework.
Though there is no official company behind it, no certifications, no commercial support, and similar enterprise looking things, Phalcon does a great job of positioning itself as a choice worth evaluating even with a robust enterprise application development.
Looking back on the release of PHP 5 and its support to OOP programming, we can see the enormous positive impact it had on the PHP ecosystem. A large number of frameworks and libraries have sprawled out, offering enterprise level solutions to web application development.
The release of PHP 7 is likely to be another leap forward for the PHP ecosystem. Though none of the new features are revolutionary as such, as they can be found in other programming languages from years ago, they impact PHP greatly. We are yet to see how its new features will reshape existing and future frameworks and the way we write applications.
The introduction of more advanced errors to exceptions handling, scalar type hints, and function return type hints will surely bring much awaited stability to applications and frameworks using them. The speed improvements compared to PHP 5.6 are significant enough to cut down the hosting costs for higher load sites. Thankfully, the PHP development team minimized backward incomparability changes, so they should not stand in the way of swift PHP 7 adoption.
Choosing the right framework is all but an easy task. What classifies a framework as an enterprise class framework is more than just collection of classes. It has an entire ecosystem around it.
One should never be driven by hype when evaluating a framework for a project. Questions like the following should be taken into consideration:
There are a number of established PHP frameworks and libraries out there, so the choice is all but easy. Most of these frameworks and libraries are still to fully catch up with the latest features added in PHP 7.
Moving forward, in the next chapter, we will look into common design patterns and how to integrate them in PHP.
There are a handful of things that make a great software developer. Knowledge and usage of design patterns is one of them. Design patterns empower developers to communicate using well-known names for various software interactions. Whether someone is a PHP, Python, C#, Ruby, or any other language developer, design patterns provide language agnostic solutions for frequently occurring software problems.
The concept of design patterns emerged in 1994 as part of the Elements of Reusable Object-Oriented Software book. Detailing 23 different design patterns, the book was written by four authors Erich Gamma, Richard Helm, Ralph Johnson, and John Vlissides. The authors are often referred to as the Gang of Four (GoF), and the presented design patterns are sometimes referred to as GoF design patterns. In Today, more than two decades later, designing software that is extensible, reusable, maintainable, and adaptable is near to impossible without embracing design patterns as part of implementation.
There are three types of design patterns which we will cover in this chapter:
Throughout this chapter we will not go deep into the theory of each of them, as that alone is an entire book's worth of material. Moving forward, we will focus more on simple PHP implementation examples for each of the patterns, just so we get a more visual sense of things.
Creational patterns, as the name suggests, create objects for us, so we do not have to instantiate them directly. Implementing creation patterns gives our application a level of flexibility, where the application itself can decide what objects to instantiate at a given time. The following is a list of patterns we categorize as creational patterns:
See https://en.wikipedia.org/wiki/Creational_pattern for more information about creational design patterns.
Building portable applications requires a great level of dependencies encapsulation. The abstract factory facilitates this by abstracting the creation of families of related or dependent objects. Clients never create these platform objects directly, the factory does it for them, making it possible to interchange concrete implementations without changing the code that uses them, even at runtime.
The following is an example of possible abstract factory pattern implementation:
interface Button {
public function render();
}
interface GUIFactory {
public function createButton();
}
class SubmitButton implements Button {
public function render() {
echo 'Render Submit Button';
}
}
class ResetButton implements Button {
public function render() {
echo 'Render Reset Button';
}
}
class SubmitFactory implements GUIFactory {
public function createButton() {
return new SubmitButton();
}
}
class ResetFactory implements GUIFactory {
public function createButton() {
return new ResetButton();
}
}
// Client
$submitFactory = new SubmitFactory();
$button = $submitFactory->createButton();
$button->render();
$resetFactory = new ResetFactory();
$button = $resetFactory->createButton();
$button->render();We started off by creating an interface Button, which is later implemented by our SubmitButton and ResetButton concrete classes. GUIFactory and ResetFactory implement the GUIFactory interface, which specifies the createButton method. The client then simply instantiates factories and calls for createButton, which returns a proper button instance that we call the render method.
The builder pattern separates the construction of a complex object from its representation, making it possible for the same construction process to create different representations. While some creational patterns construct a product in one call, builder pattern does it step by step under the control of the director.
The following is an example of builder pattern implementation:
class Car {
public function getWheels() {
/* implementation... */
}
public function setWheels($wheels) {
/* implementation... */
}
public function getColour($colour) {
/* implementation... */
}
public function setColour() {
/* implementation... */
}
}
interface CarBuilderInterface {
public function setColour($colour);
public function setWheels($wheels);
public function getResult();
}
class CarBuilder implements CarBuilderInterface {
private $car;
public function __construct() {
$this->car = new Car();
}
public function setColour($colour) {
$this->car->setColour($colour);
return $this;
}
public function setWheels($wheels) {
$this->car->setWheels($wheels);
return $this;
}
public function getResult() {
return $this->car;
}
}
class CarBuildDirector {
private $builder;
public function __construct(CarBuilder $builder) {
$this->builder = $builder;
}
public function build() {
$this->builder->setColour('Red');
$this->builder->setWheels(4);
return $this;
}
public function getCar() {
return $this->builder->getResult();
}
}
// Client
$carBuilder = new CarBuilder();
$carBuildDirector = new CarBuildDirector($carBuilder);
$car = $carBuildDirector->build()->getCar();We started off by creating a concrete Car class with several methods defining some base characteristics of a car. We then created a CarBuilderInterface that will control some of those characteristics and get the final result (car). The concrete class CarBuilder then implemented the CarBuilderInterface, followed by the concrete CarBuildDirector class, which defined build and the getCar method. The client then simply instantiated a new instance of CarBuilder, passing it as a constructor parameter to a new instance of CarBuildDirector. Finally, we called the build and getCar methods of CarBuildDirector to get the actual car Car instance.
The factory method pattern deals with the problem of creating objects without having to specify the exact class of the object that will be created.
The following is an example of factory method pattern implementation:
interface Product {
public function getType();
}
interface ProductFactory {
public function makeProduct();
}
class SimpleProduct implements Product {
public function getType() {
return 'SimpleProduct';
}
}
class SimpleProductFactory implements ProductFactory {
public function makeProduct() {
return new SimpleProduct();
}
}
/* Client */
$factory = new SimpleProductFactory();
$product = $factory->makeProduct();
echo $product->getType(); //outputs: SimpleProductWe started off by creating a ProductFactory and Product interfaces. The SimpleProductFactory implements the ProductFactory and returns the new product instance via its makeProduct method. The SimpleProduct class implements Product, and returns the product type. Finally, the client creates the instance of SimpleProductFactory, calling the makeProduct method on it. The makeProduct returns the instance of the Product, whose getType method returns the SimpleProduct string.
The prototype pattern replicates other objects by use of cloning. What this means is that we are not using the new keyword to instantiate new objects. PHP provides a clone keyword which makes a shallow copy of an object, thus providing pretty much straight forward prototype pattern implementation. Shallow copy does not copy references, only values to the new object. We can further utilize the magic __clone method on our class in order to implement more robust clone behavior.
The following is an example of prototype pattern implementation:
class User {
public $name;
public $email;
}
class Employee extends User {
public function __construct() {
$this->name = 'Johhn Doe';
$this->email = 'john.doe@fake.mail';
}
public function info() {
return sprintf('%s, %s', $this->name, $this->email);
}
public function __clone() {
/* additional changes for (after)clone behavior? */
}
}
$employee = new Employee();
echo $employee->info();
$director = clone $employee;
$director->name = 'Jane Doe';
$director->email = 'jane.doe@fake.mail';
echo $director->info(); //outputs: Jane Doe, jane.doe@fake.mailWe started off by creating a simple User class. The Employee then extends the User, while setting name and email in its constructor. The client then instantiates the Employee via the new keyword, and clones it into the director variable. The $director variable is now a new instance, one made not by the new keyword, but with cloning, using the clone keyword. Changing name and email on $director, does not affect $employee.
The purpose of singleton pattern is to restrict instantiation of class to a single object. It is implemented by creating a method within the class that creates a new instance of that class if one does not exist. If an object instance already exists, the method simply returns a reference to an existing object.
The following is an example of singleton pattern implementation:
class Logger {
private static $instance;
public static function getInstance() {
if (!isset(self::$instance)) {
self::$instance = new self;
}
return self::$instance;
}
public function logNotice($msg) {
return 'logNotice: ' . $msg;
}
public function logWarning($msg) {
return 'logWarning: ' . $msg;
}
public function logError($msg) {
return 'logError: ' . $msg;
}
}
// Client
echo Logger::getInstance()->logNotice('test-notice');
echo Logger::getInstance()->logWarning('test-warning');
echo Logger::getInstance()->logError('test-error');
// Outputs:
// logNotice: test-notice
// logWarning: test-warning
// logError: test-errorWe started off by creating a Logger class with a static $instance member, and the getInstance method that always returns a single instance of the class. Then we added a few sample methods to demonstrate the client executing various methods on a single instance.
Structural patterns deal with class and object composition. Using interfaces or abstract classes and methods, they define ways to compose objects, which in turn obtain new functionality. The following is a list of patterns we categorize as structural patterns:
See https://en.wikipedia.org/wiki/Structural_pattern for more information about structural design patterns.
The adapter pattern allows the interface of an existing class to be used from another interface, basically, helping two incompatible interfaces to work together by converting the interface of one class into an interface expected by another class.
The following is an example of adapter pattern implementation:
class Stripe {
public function capturePayment($amount) {
/* Implementation... */
}
public function authorizeOnlyPayment($amount) {
/* Implementation... */
}
public function cancelAmount($amount) {
/* Implementation... */
}
}
interface PaymentService {
public function capture($amount);
public function authorize($amount);
public function cancel($amount);
}
class StripePaymentServiceAdapter implements PaymentService {
private $stripe;
public function __construct(Stripe $stripe) {
$this->stripe = $stripe;
}
public function capture($amount) {
$this->stripe->capturePayment($amount);
}
public function authorize($amount) {
$this->stripe->authorizeOnlyPayment($amount);
}
public function cancel($amount) {
$this->stripe->cancelAmount($amount);
}
}
// Client
$stripe = new StripePaymentServiceAdapter(new Stripe());
$stripe->authorize(49.99);
$stripe->capture(19.99);
$stripe->cancel(9.99);We started off by creating a concrete Stripe class. We then defined the PaymentService interface with some basic payment handling methods. The StripePaymentServiceAdapter implements the PaymentService interface, providing concrete implementation of payment handling methods. Finally, the client instantiates the StripePaymentServiceAdapter and executes the payment handling methods.
The bridge pattern is used when we want to decouple a class or abstraction from its implementation, allowing them both to change independently. This is useful when the class and its implementation vary often.
The following is an example of bridge pattern implementation:
interface MailerInterface {
public function setSender(MessagingInterface $sender);
public function send($body);
}
abstract class Mailer implements MailerInterface {
protected $sender;
public function setSender(MessagingInterface $sender) {
$this->sender = $sender;
}
}
class PHPMailer extends Mailer {
public function send($body) {
$body .= "\n\n Sent from a phpmailer.";
return $this->sender->send($body);
}
}
class SwiftMailer extends Mailer {
public function send($body) {
$body .= "\n\n Sent from a SwiftMailer.";
return $this->sender->send($body);
}
}
interface MessagingInterface {
public function send($body);
}
class TextMessage implements MessagingInterface {
public function send($body) {
echo 'TextMessage > send > $body: ' . $body;
}
}
class HtmlMessage implements MessagingInterface {
public function send($body) {
echo 'HtmlMessage > send > $body: ' . $body;
}
}
// Client
$phpmailer = new PHPMailer();
$phpmailer->setSender(new TextMessage());
$phpmailer->send('Hi!');
$swiftMailer = new SwiftMailer();
$swiftMailer->setSender(new HtmlMessage());
$swiftMailer->send('Hello!');We started off by creating a MailerInterface. The concrete Mailer class then implements the MailerInterface, providing a base class for PHPMailer and SwiftMailer. We then define the MessagingInterface, which gets implemented by the TextMessage and HtmlMessage classes. Finally, the client instantiates PHPMailer and SwiftMailer, passing on instances of TextMessage and HtmlMessage prior to calling the send method.
The composite pattern is about treating the hierarchy of objects as a single object, through a common interface. Where the objects are composed into three structures and the client is oblivious to changes in the underlying structure because it only consumes the common interface.
The following is an example of composite pattern implementation:
interface Graphic {
public function draw();
}
class CompositeGraphic implements Graphic {
private $graphics = array();
public function add($graphic) {
$objId = spl_object_hash($graphic);
$this->graphics[$objId] = $graphic;
}
public function remove($graphic) {
$objId = spl_object_hash($graphic);
unset($this->graphics[$objId]);
}
public function draw() {
foreach ($this->graphics as $graphic) {
$graphic->draw();
}
}
}
class Circle implements Graphic {
public function draw()
{
echo 'draw-circle';
}
}
class Square implements Graphic {
public function draw() {
echo 'draw-square';
}
}
class Triangle implements Graphic {
public function draw() {
echo 'draw-triangle';
}
}
$circle = new Circle();
$square = new Square();
$triangle = new Triangle();
$compositeObj1 = new CompositeGraphic();
$compositeObj1->add($circle);
$compositeObj1->add($triangle);
$compositeObj1->draw();
$compositeObj2 = new CompositeGraphic();
$compositeObj2->add($circle);
$compositeObj2->add($square);
$compositeObj2->add($triangle);
$compositeObj2->remove($circle);
$compositeObj2->draw();We started off by creating a Graphic interface. We then created the CompositeGraphic, Circle, Square, and Triangle, all of which implement the Graphic interface. Aside from just implementing the draw method from the Graphic interface, the CompositeGraphic adds two more methods, used to track internal collection of graphics added to it. The client then instantiates all of these Graphic classes, adding them all to the CompositeGraphic, which then calls the draw method.
The decorator pattern allows behavior to be added to an individual object instance, without affecting the behavior of other instances of the same class. We can define multiple decorators, where each adds new functionality.
The following is an example of decorator pattern implementation:
interface LoggerInterface {
public function log($message);
}
class Logger implements LoggerInterface {
public function log($message) {
file_put_contents('app.log', $message, FILE_APPEND);
}
}
abstract class LoggerDecorator implements LoggerInterface {
protected $logger;
public function __construct(Logger $logger) {
$this->logger = $logger;
}
abstract public function log($message);
}
class ErrorLoggerDecorator extends LoggerDecorator {
public function log($message) {
$this->logger->log('ERROR: ' . $message);
}
}
class WarningLoggerDecorator extends LoggerDecorator {
public function log($message) {
$this->logger->log('WARNING: ' . $message);
}
}
class NoticeLoggerDecorator extends LoggerDecorator {
public function log($message) {
$this->logger->log('NOTICE: ' . $message);
}
}
$logger = new Logger();
$logger->log('Resource not found.');
$logger = new Logger();
$logger = new ErrorLoggerDecorator($logger);
$logger->log('Invalid user role.');
$logger = new Logger();
$logger = new WarningLoggerDecorator($logger);
$logger->log('Missing address parameters.');
$logger = new Logger();
$logger = new NoticeLoggerDecorator($logger);
$logger->log('Incorrect type provided.');We started off by creating a LoggerInterface, with a simple log method. We then defined Logger and LoggerDecorator, both of which implement the LoggerInterface. Followed by ErrorLoggerDecorator, WarningLoggerDecorator, and NoticeLoggerDecorator which implement the LoggerDecorator. Finally, the client part instantiates the logger three times, passing it different decorators.
The facade pattern is used when we want to simplify the complexities of large systems through a simpler interface. It does so by providing convenient methods for most common tasks, through a single wrapper class used by a client.
The following is an example of facade pattern implementation:
class Product {
public function getQty() {
// Implementation
}
}
class QuickOrderFacade {
private $product = null;
private $orderQty = null;
public function __construct($product, $orderQty) {
$this->product = $product;
$this->orderQty = $orderQty;
}
public function generateOrder() {
if ($this->qtyCheck()) {
$this->addToCart();
$this->calculateShipping();
$this->applyDiscount();
$this->placeOrder();
}
}
private function addToCart() {
// Implementation...
}
private function qtyCheck() {
if ($this->product->getQty() > $this->orderQty) {
return true;
} else {
return true;
}
}
private function calculateShipping() {
// Implementation...
}
private function applyDiscount() {
// Implementation...
}
private function placeOrder() {
// Implementation...
}
}
// Client
$order = new QuickOrderFacade(new Product(), $qty);
$order->generateOrder();We started off by creating a Product class, with a single getQty method. We then created a QuickOrderFacade class that accepts product instance and quantity via a constructor and further provides the generateOrder method that aggregates all of the order generating actions. Finally, the client instantiates the product, which it passes onto the instance of QuickOrderFacade, calling the generateOrder on it.
The flyweight pattern is about performance and resource reduction, sharing as much data as possible between similar objects. What this means is that instances of a class which are identical are shared in an implementation. This works best when a large number of same class instances are expected to be created.
The following is an example of flyweight pattern implementation:
interface Shape {
public function draw();
}
class Circle implements Shape {
private $colour;
private $radius;
public function __construct($colour) {
$this->colour = $colour;
}
public function draw() {
echo sprintf('Colour %s, radius %s.', $this->colour, $this->radius);
}
public function setRadius($radius) {
$this->radius = $radius;
}
}
class ShapeFactory {
private $circleMap;
public function getCircle($colour) {
if (!isset($this->circleMap[$colour])) {
$circle = new Circle($colour);
$this->circleMap[$colour] = $circle;
}
return $this->circleMap[$colour];
}
}
// Client
$shapeFactory = new ShapeFactory();
$circle = $shapeFactory->getCircle('yellow');
$circle->setRadius(10);
$circle->draw();
$shapeFactory = new ShapeFactory();
$circle = $shapeFactory->getCircle('orange');
$circle->setRadius(15);
$circle->draw();
$shapeFactory = new ShapeFactory();
$circle = $shapeFactory->getCircle('yellow');
$circle->setRadius(20);
$circle->draw();We started off by creating a Shape interface, with a single draw method. We then defined the Circle class implementing the Shape interface, followed by the ShapeFactory class. Within the ShapeFactory, the getCircle method returns an instance of a new Circle, based on the color option. Finally, the client instantiates several ShapeFactory objects, passing in different colors to the getCircle method call.
The proxy design pattern functions as an interface to an original object behind the scenes. It can act as a simple forwarding wrapper or even provide additional functionality around the object it wraps. Examples of extra added functionality might be lazy loading or caching that might compensate for resource intense operations of an original object.
The following is an example of proxy pattern implementation:
interface ImageInterface {
public function draw();
}
class Image implements ImageInterface {
private $file;
public function __construct($file) {
$this->file = $file;
sleep(5); // Imagine resource intensive image load
}
public function draw() {
echo 'image: ' . $this->file;
}
}
class ProxyImage implements ImageInterface {
private $image = null;
private $file;
public function __construct($file) {
$this->file = $file;
}
public function draw() {
if (is_null($this->image)) {
$this->image = new Image($this->file);
}
$this->image->draw();
}
}
// Client
$image = new Image('image.png'); // 5 seconds
$image->draw();
$image = new ProxyImage('image.png'); // 0 seconds
$image->draw();We started off by creating an ImageInterface, with a single draw method. We then defined the Image and ProxyImage classes, both of which extend the ImageInterface. Within the __construct of the Image class, we simulated the resource intense operation with the sleep method call. Finally, the client instantiates both Image and ProxyImage, showing the execution time difference between the two.
Behavioral patterns tackle the challenge of communication between various objects. They describe how different objects and classes send messages to each other to make things happen. The following is a list of patterns we categorize as behavioral patterns:
The chain of responsibility pattern decouples the sender of a request from its receiver, by enabling more than one object to handle requests, in a chain manner. Various types of handling objects can be added dynamically to the chain. Using a recursive composition chain allows for an unlimited number of handling objects.
The following is an example of chain of responsibility pattern implementation:
abstract class SocialNotifier {
private $notifyNext = null;
public function notifyNext(SocialNotifier $notifier) {
$this->notifyNext = $notifier;
return $this->notifyNext;
}
final public function push($message) {
$this->publish($message);
if ($this->notifyNext !== null) {
$this->notifyNext->push($message);
}
}
abstract protected function publish($message);
}
class TwitterSocialNotifier extends SocialNotifier {
public function publish($message) {
// Implementation...
}
}
class FacebookSocialNotifier extends SocialNotifier {
protected function publish($message) {
// Implementation...
}
}
class PinterestSocialNotifier extends SocialNotifier {
protected function publish($message) {
// Implementation...
}
}
// Client
$notifier = new TwitterSocialNotifier();
$notifier->notifyNext(new FacebookSocialNotifier())
->notifyNext(new PinterestSocialNotifier());
$notifier->push('Awesome new product available!');We started off by creating an abstract SocialNotifier class with the abstract method publish, notifyNext, and push method implementations. We then defined TwitterSocialNotifier, FacebookSocialNotifier, and PinterestSocialNotifier, all of which extend the abstract SocialNotifier. The client starts by instantiating the TwitterSocialNotifier, followed by two notifyNext calls, passing it instances of two other notifier types before it calls the final push method.
The command pattern decouples the object that executes certain operations from objects that know how to use it. It does so by encapsulating all of the relevant information needed for later execution of a certain action. This implies information about object, method name, and method parameters.
The following is an example of command pattern implementation:
interface LightBulbCommand {
public function execute();
}
class LightBulbControl {
public function turnOn() {
echo 'LightBulb turnOn';
}
public function turnOff() {
echo 'LightBulb turnOff';
}
}
class TurnOnLightBulb implements LightBulbCommand {
private $lightBulbControl;
public function __construct(LightBulbControl $lightBulbControl) {
$this->lightBulbControl = $lightBulbControl;
}
public function execute() {
$this->lightBulbControl->turnOn();
}
}
class TurnOffLightBulb implements LightBulbCommand {
private $lightBulbControl;
public function __construct(LightBulbControl $lightBulbControl) {
$this->lightBulbControl = $lightBulbControl;
}
public function execute() {
$this->lightBulbControl->turnOff();
}
}
// Client
$command = new TurnOffLightBulb(new LightBulbControl());
$command->execute();We started off by creating a LightBulbCommand interface. We then defined the LightBulbControl class that provides two simple turnOn / turnOff methods. Then we defined the TurnOnLightBulb and TurnOffLightBulb classes which implement the LightBulbCommand interface. Finally, the client is instantiating the TurnOffLightBulb object with an instance of LightBulbControl, and calling the execute method on it.
The interpreter pattern specifies how to evaluate language grammar or expressions. We define a representation for language grammar along with an interpreter. Representation of language grammar uses composite class hierarchy, where rules are mapped to classes. The interpreter then uses the representation to interpret expressions in the language.
The following is an example of interpreter pattern implementation:
interface MathExpression
{
public function interpret(array $values);
}
class Variable implements MathExpression {
private $char;
public function __construct($char) {
$this->char = $char;
}
public function interpret(array $values) {
return $values[$this->char];
}
}
class Literal implements MathExpression {
private $value;
public function __construct($value) {
$this->value = $value;
}
public function interpret(array $values) {
return $this->value;
}
}
class Sum implements MathExpression {
private $x;
private $y;
public function __construct(MathExpression $x, MathExpression $y) {
$this->x = $x;
$this->y = $y;
}
public function interpret(array $values) {
return $this->x->interpret($values) + $this->y->interpret($values);
}
}
class Product implements MathExpression {
private $x;
private $y;
public function __construct(MathExpression $x, MathExpression $y) {
$this->x = $x;
$this->y = $y;
}
public function interpret(array $values) {
return $this->x->interpret($values) * $this->y->interpret($values);
}
}
// Client
$expression = new Product(
new Literal(5),
new Sum(
new Variable('c'),
new Literal(2)
)
);
echo $expression->interpret(array('c' => 3)); // 25We started off by creating a MathExpression interface, with a single interpret method. We then add Variable, Literal, Sum, and Product classes, all of which implement the MathExpression interface. The client then instantiates from the Product class, passing it instances of Literal and Sum, finishing with an interpret method call.
The iterator pattern is used to traverse a container and access its elements. In other words, one class becomes able to traverse the elements of another class. The PHP has a native support for the iterator as part of built in \Iterator and \IteratorAggregate interfaces.
The following is an example of iterator pattern implementation:
class ProductIterator implements \Iterator {
private $position = 0;
private $productsCollection;
public function __construct(ProductCollection $productsCollection) {
$this->productsCollection = $productsCollection;
}
public function current() {
return $this->productsCollection->getProduct($this->position);
}
public function key() {
return $this->position;
}
public function next() {
$this->position++;
}
public function rewind() {
$this->position = 0;
}
public function valid() {
return !is_null($this->productsCollection->getProduct($this->position));
}
}
class ProductCollection implements \IteratorAggregate {
private $products = array();
public function getIterator() {
return new ProductIterator($this);
}
public function addProduct($string) {
$this->products[] = $string;
}
public function getProduct($key) {
if (isset($this->products[$key])) {
return $this->products[$key];
}
return null;
}
public function isEmpty() {
return empty($products);
}
}
$products = new ProductCollection();
$products->addProduct('T-Shirt Red');
$products->addProduct('T-Shirt Blue');
$products->addProduct('T-Shirt Green');
$products->addProduct('T-Shirt Yellow');
foreach ($products as $product) {
var_dump($product);
}We started off by creating a ProductIterator which implements the standard PHP \Iterator interface. We then added the ProductCollection which implements the standard PHP \IteratorAggregate interface. The client creates an instance of ProductCollection, stacking values into it via the addProduct method call and loops through the entire collection.
The more classes we have in our software, the more complex their communication becomes. The mediator pattern addresses this complexity by encapsulating it into a mediator object. Objects no longer communicate directly, but rather through a mediator object, therefore lowering the overall coupling.
The following is an example of mediator pattern implementation:
interface MediatorInterface {
public function fight();
public function talk();
public function registerA(ColleagueA $a);
public function registerB(ColleagueB $b);
}
class ConcreteMediator implements MediatorInterface {
protected $talk; // ColleagueA
protected $fight; // ColleagueB
public function registerA(ColleagueA $a) {
$this->talk = $a;
}
public function registerB(ColleagueB $b) {
$this->fight = $b;
}
public function fight() {
echo 'fighting...';
}
public function talk() {
echo 'talking...';
}
}
abstract class Colleague {
protected $mediator; // MediatorInterface
public abstract function doSomething();
}
class ColleagueA extends Colleague {
public function __construct(MediatorInterface $mediator) {
$this->mediator = $mediator;
$this->mediator->registerA($this);
}
public function doSomething() {
$this->mediator->talk();
}
}
class ColleagueB extends Colleague {
public function __construct(MediatorInterface $mediator) {
$this->mediator = $mediator;
$this->mediator->registerB($this);
}
public function doSomething() {
$this->mediator->fight();
}
}
// Client
$mediator = new ConcreteMediator();
$talkColleague = new ColleagueA($mediator);
$fightColleague = new ColleagueB($mediator);
$talkColleague->doSomething();
$fightColleague->doSomething();We started off by creating a MediatorInterface with several methods, implemented by the ConcreteMediator class. We then defined the abstract class Colleague to force the doSomething method implementation on the following ColleagueA and ColleagueB classes. The client instantiates the ConcreteMediator first, and passes its instance to the instances of ColleagueA and ColleagueB, upon which it calls the doSomething method.
The memento pattern provides the object restore functionality. Implementation is done through three different objects; originator, caretaker, and a memento, where the originator is the one preserving the internal state required for a later restore.
The following is an example of memento pattern implementation:
class Memento {
private $state;
public function __construct($state) {
$this->state = $state;
}
public function getState() {
return $this->state;
}
}
class Originator {
private $state;
public function setState($state) {
return $this->state = $state;
}
public function getState() {
return $this->state;
}
public function saveToMemento() {
return new Memento($this->state);
}
public function restoreFromMemento(Memento $memento) {
$this->state = $memento->getState();
}
}
// Client - Caretaker
$savedStates = array();
$originator = new Originator();
$originator->setState('new');
$originator->setState('pending');
$savedStates[] = $originator->saveToMemento();
$originator->setState('processing');
$savedStates[] = $originator->saveToMemento();
$originator->setState('complete');
$originator->restoreFromMemento($savedStates[1]);
echo $originator->getState(); // processingWe started off by creating a Memento class, which will provide the a current state of the object through the getState method. We then defined the Originator class that pushed the state to Memento. Finally, the client takes the role of caretaker by instantiating Originator, juggling among its few states, saving and restoring them from memento.
The observer pattern implements a one-too-many dependency between objects. The object that holds the list of dependencies is called subject, while the dependents are called observers. When the subject object changes state, all of the dependents are notified and updated automatically.
The following is an example of observer pattern implementation:
class Customer implements \SplSubject {
protected $data = array();
protected $observers = array();
public function attach(\SplObserver $observer) {
$this->observers[] = $observer;
}
public function detach(\SplObserver $observer) {
$index = array_search($observer, $this->observers);
if ($index !== false) {
unset($this->observers[$index]);
}
}
public function notify() {
foreach ($this->observers as $observer) {
$observer->update($this);
echo 'observer updated';
}
}
public function __set($name, $value) {
$this->data[$name] = $value;
// notify the observers, that user has been updated
$this->notify();
}
}
class CustomerObserver implements \SplObserver {
public function update(\SplSubject $subject) {
/* Implementation... */
}
}
// Client
$user = new Customer();
$customerObserver = new CustomerObserver();
$user->attach($customerObserver);
$user->name = 'John Doe';
$user->email = 'john.doe@fake.mail';We started off by creating a Customer class which implements the standard PHP \SplSubject interface. We then defined the CustomerObserver class which implements the standard PHP \SplObserver interface. Finally, the client instantiates the Customer and CustomerObserver objects and attaches the CustomerObserver objects to Customer. Any changes to name and email properties are then caught by the observer.
The state pattern encapsulates the varying behavior for the same object based on its internal state, making an object appear as if it has changed its class.
The following is an example of state pattern implementation:
interface Statelike {
public function writeName(StateContext $context, $name);
}
class StateLowerCase implements Statelike {
public function writeName(StateContext $context, $name) {
echo strtolower($name);
$context->setState(new StateMultipleUpperCase());
}
}
class StateMultipleUpperCase implements Statelike {
private $count = 0;
public function writeName(StateContext $context, $name) {
$this->count++;
echo strtoupper($name);
/* Change state after two invocations */
if ($this->count > 1) {
$context->setState(new StateLowerCase());
}
}
}
class StateContext {
private $state;
public function setState(Statelike $state) {
$this->state = $state;
}
public function writeName($name) {
$this->state->writeName($this, $name);
}
}
// Client
$stateContext = new StateContext();
$stateContext->setState(new StateLowerCase());
$stateContext->writeName('Monday');
$stateContext->writeName('Tuesday');
$stateContext->writeName('Wednesday');
$stateContext->writeName('Thursday');
$stateContext->writeName('Friday');
$stateContext->writeName('Saturday');
$stateContext->writeName('Sunday');We started off by creating a Statelike interface, followed by StateLowerCase and StateMultipleUpperCase which implement that interface. The StateMultipleUpperCase has a bit of counting logic added to its writeName, so it kicks off the new state after two invocations. We then defined the StateContext class, which we will use to switch contexts. Finally, the client instantiates the StateContext, and passes an instance of StateLowerCase to it through the setState method, followed by several writeName methods.
The strategy pattern defines a family of algorithms, each of which is encapsulated and made interchangeable with other members within that family.
The following is an example of strategy pattern implementation:
interface PaymentStrategy {
public function pay($amount);
}
class StripePayment implements PaymentStrategy {
public function pay($amount) {
echo 'StripePayment...';
}
}
class PayPalPayment implements PaymentStrategy {
public function pay($amount) {
echo 'PayPalPayment...';
}
}
class Checkout {
private $amount = 0;
public function __construct($amount = 0) {
$this->amount = $amount;
}
public function capturePayment() {
if ($this->amount > 99.99) {
$payment = new PayPalPayment();
} else {
$payment = new StripePayment();
}
$payment->pay($this->amount);
}
}
$checkout = new Checkout(49.99);
$checkout->capturePayment(); // StripePayment...
$checkout = new Checkout(199.99);
$checkout->capturePayment(); // PayPalPayment...We started off by creating a PaymentStrategy interface followed with concrete classes StripePayment and PayPalPayment which implement it. We then defined the Checkout class with a bit of decision making logic within the capturePayment method. Finally, the client instantiates the Checkout, passing a certain amount through its constructor. Based on the amount, the Checkout internally triggers one or another payment when capturePayment is called.
The template design pattern defines the program skeleton of an algorithm in a method. It lets us, via use of class overriding, redefine certain steps of an algorithm without really changing the algorithm's structure.
The following is an example of template pattern implementation:
abstract class Game {
private $playersCount;
abstract function initializeGame();
abstract function makePlay($player);
abstract function endOfGame();
abstract function printWinner();
public function playOneGame($playersCount)
{
$this->playersCount = $playersCount;
$this->initializeGame();
$j = 0;
while (!$this->endOfGame()) {
$this->makePlay($j);
$j = ($j + 1) % $playersCount;
}
$this->printWinner();
}
}
class Monopoly extends Game {
public function initializeGame() {
// Implementation...
}
public function makePlay($player) {
// Implementation...
}
public function endOfGame() {
// Implementation...
}
public function printWinner() {
// Implementation...
}
}
class Chess extends Game {
public function initializeGame() {
// Implementation...
}
public function makePlay($player) {
// Implementation...
}
public function endOfGame() {
// Implementation...
}
public function printWinner() {
// Implementation...
}
}
$game = new Chess();
$game->playOneGame(2);
$game = new Monopoly();
$game->playOneGame(4);We started off by creating an abstract Game class that provides all of the actual abstract methods encapsulating the game-play. We then defined the Monopoly and Chess classes, both of which extend from the Game class, implementing game specific method game-play for each. The client simply instantiates the Monopoly and Chess objects, calling the playOneGame method on each.
The visitor design pattern is a way of separating an algorithm from an object structure on which it operates. As a result, we are able to add new operations to existing object structures without actually modifying those structures.
The following is an example of visitor pattern implementation:
interface RoleVisitorInterface {
public function visitUser(User $role);
public function visitGroup(Group $role);
}
class RolePrintVisitor implements RoleVisitorInterface {
public function visitGroup(Group $role) {
echo 'Role: ' . $role->getName();
}
public function visitUser(User $role) {
echo 'Role: ' . $role->getName();
}
}
abstract class Role {
public function accept(RoleVisitorInterface $visitor) {
$klass = get_called_class();
preg_match('#([^\\\\]+)$#', $klass, $extract);
$visitingMethod = 'visit' . $extract[1];
if (!method_exists(__NAMESPACE__ . '\RoleVisitorInterface', $visitingMethod)) {
throw new \InvalidArgumentException("The visitor you provide cannot visit a $klass instance");
}
call_user_func(array($visitor, $visitingMethod), $this);
}
}
class User extends Role {
protected $name;
public function __construct($name) {
$this->name = (string)$name;
}
public function getName() {
return 'User ' . $this->name;
}
}
class Group extends Role {
protected $name;
public function __construct($name) {
$this->name = (string)$name;
}
public function getName() {
return 'Group: ' . $this->name;
}
}
$group = new Group('my group');
$user = new User('my user');
$visitor = new RolePrintVisitor;
$group->accept($visitor);
$user->accept($visitor);We started off by creating a RoleVisitorInterface, followed by RolePrintVisitor which implements the RoleVisitorInterface itself. We then defined the abstract class Role, with an accept method taking in the RoleVisitorInterface parameter type. We further defined the concrete User and Group classes, both of which extend from Role. The client instantiates User, Group, and the RolePrintVisitor; passing in the visitor to the accept method call of User and Group instances.
Design patterns are a common, high-level language for developers. They enable a short-hand way of communicating application design among team members. Understanding how to recognize and implement design patterns shifts our focus to business requirement solving, rather than tinkering with how to glue our solution together on a code level.
Coding, like most hand-crafted disciplines, is one of those where you get what you pay for. While implementing a number of design patterns takes a certain amount of time, lack of doing so on a larger project will likely catch up with us in the future, one way or another. Similar to the "use a framework or not" debate, implementing the right design patterns affects extensibility, re-usability, adaptability, and maintainability of our code. Therefore, making it more future proof.
Moving forward, in the next chapter, we will look into the SOLID design principles and the role they play in software development processes.
Building modular software requires strong knowledge of the class design. There are numerous guidelines out there, addressing the way we name our classes, number of variables they should have, what the size of methods should be, and so on. The PHP ecosystem managed to pack these into official PSR standard, more precisely PSR-1: Basic Coding Standard and PSR-2: Coding Style Guide. These are all general programming guidelines that keep our code readable, understandable, and maintainable.
Aside from programming guidelines, there are more specific design principles that we can apply during the class design. Ones that address the notions of low coupling, high cohesion, and strong encapsulation. We call them SOLID design principles, a term coined by Robert Cecil Martin in the early 2000s.
SOLID is an acronym for the following five principles:
Over a decade old, the idea of SOLID principles is far from obsolete, as they are at the heart of good class design. Throughout this chapter, we will look into each of these principles, getting to understand them by observing some of the obvious violations that break them.
In this chapter, we will be covering the following topics:
The single responsibility principle deals with classes that try to do too much. The responsibility in this context refers to reason to change. As per the Robert C. Martin definition:
"A class should have only one reason to change."
The following is an example of a class that violates the SRP:
class Ticket {
const SEVERITY_LOW = 'low';
const SEVERITY_HIGH = 'high';
// ...
protected $title;
protected $severity;
protected $status;
protected $conn;
public function __construct(\PDO $conn) {
$this->conn = $conn;
}
public function setTitle($title) {
$this->title = $title;
}
public function setSeverity($severity) {
$this->severity = $severity;
}
public function setStatus($status) {
$this->status = $status;
}
private function validate() {
// Implementation...
}
public function save() {
if ($this->validate()) {
// Implementation...
}
}
}
// Client
$conn = new PDO(/* ... */);
$ticket = new Ticket($conn);
$ticket->setTitle('Checkout not working!');
$ticket->setStatus(Ticket::STATUS_OPEN);
$ticket->setSeverity(Ticket::SEVERITY_HIGH);
$ticket->save();The Ticket class deals with validation and saving of the ticket entity to the database. These two responsibilities are its two reasons to change. Whenever the requirements change regarding the ticket validation, or regarding the saving of the ticket, the Ticket class will have to be modified. To address the SRP violation here, we can use the assisting classes and interfaces to split the responsibilities.
The following is an example of refactored implementation, which complies with SRP:
interface KeyValuePersistentMembers {
public function toArray();
}
class Ticket implements KeyValuePersistentMembers {
const STATUS_OPEN = 'open';
const SEVERITY_HIGH = 'high';
//...
protected $title;
protected $severity;
protected $status;
public function setTitle($title) {
$this->title = $title;
}
public function setSeverity($severity) {
$this->severity = $severity;
}
public function setStatus($status) {
$this->status = $status;
}
public function toArray() {
// Implementation...
}
}
class EntityManager {
protected $conn;
public function __construct(\PDO $conn) {
$this->conn = $conn;
}
public function save(KeyValuePersistentMembers $entity)
{
// Implementation...
}
}
class Validator {
public function validate(KeyValuePersistentMembers $entity) {
// Implementation...
}
}
// Client
$conn = new PDO(/* ... */);
$ticket = new Ticket();
$ticket->setTitle('Payment not working!');
$ticket->setStatus(Ticket::STATUS_OPEN);
$ticket->setSeverity(Ticket::SEVERITY_HIGH);
$validator = new Validator();
if ($validator->validate($ticket)) {
$entityManager = new EntityManager($conn);
$entityManager->save($ticket);
}Here we introduced a simple KeyValuePersistentMembers interface with a single toArray method, which is then used with both EntityManager and Validator classes, both of which take on a single responsibility now. The Ticket class became a simple data holding model, whereas client now controls instantiation, validation, and save as three different steps. While this is certainly no universal formula of how to separate responsibilities, it does provide a simple and clear example of how to approach it.
Designing with the single responsibilities principle in mind yields smaller classes with greater readability and easier to test code.
The open/closed principle states that a class should be open for extension but closed for modification, as per the definition found on Wikipedia:
"software entities (classes, modules, functions, etc.) should be open for extension, but closed for modification"
The open for extension part means that we should design our classes so that new functionality can be added if needed. The closed for modification part means that this new functionality should fit in without modifying the original class. The class should only be modified in case of a bug fix, not for adding new functionality.
The following is an example of a class that violates the open/closed principle:
class CsvExporter {
public function export($data) {
// Implementation...
}
}
class XmlExporter {
public function export($data) {
// Implementation...
}
}
class GenericExporter {
public function exportToFormat($data, $format) {
if ('csv' === $format) {
$exporter = new CsvExporter();
} elseif ('xml' === $format) {
$exporter = new XmlExporter();
} else {
throw new \Exception('Unknown export format!');
}
return $exporter->export($data);
}
}Here we have two concrete classes, CsvExporter and XmlExporter, each with a single responsibility. Then we have a GenericExporter with its exportToFormat method that actually triggers the export function on a proper instance type. The problem here is that we cannot add a new type of exporter to the mix without modifying the GenericExporter class. To put it in other words, GenericExporter is not open for extension and closed for modification.
The following is an example of refactored implementation, which complies with OCP:
interface ExporterFactoryInterface {
public function buildForFormat($format);
}
interface ExporterInterface {
public function export($data);
}
class CsvExporter implements ExporterInterface {
public function export($data) {
// Implementation...
}
}
class XmlExporter implements ExporterInterface {
public function export($data) {
// Implementation...
}
}
class ExporterFactory implements ExporterFactoryInterface {
private $factories = array();
public function addExporterFactory($format, callable $factory) {
$this->factories[$format] = $factory;
}
public function buildForFormat($format) {
$factory = $this->factories[$format];
$exporter = $factory(); // the factory is a callable
return $exporter;
}
}
class GenericExporter {
private $exporterFactory;
public function __construct(ExporterFactoryInterface $exporterFactory) {
$this->exporterFactory = $exporterFactory;
}
public function exportToFormat($data, $format) {
$exporter = $this->exporterFactory->buildForFormat($format);
return $exporter->export($data);
}
}
// Client
$exporterFactory = new ExporterFactory();
$exporterFactory->addExporterFactory(
'xml',
function () {
return new XmlExporter();
}
);
$exporterFactory->addExporterFactory(
'csv',
function () {
return new CsvExporter();
}
);
$data = array(/* ... some export data ... */);
$genericExporter = new GenericExporter($exporterFactory);
$csvEncodedData = $genericExporter->exportToFormat($data, 'csv');Here we added two interfaces, ExporterFactoryInterface and ExporterInterface. We then modified the CsvExporter and XmlExporter to implement that interface. The ExporterFactory was added, implementing the ExporterFactoryInterface. Its main role is defined by the buildForFormat method, which returns the exporter as a callback function. Finally, the GenericExporter was rewritten to accept the ExporterFactoryInterface via its constructor, and its exportToFormat method now builds the exporter by use of an exporter factory and calls the execute method on it.
The client itself has taken a more robust role now, by first instantiating the ExporterFactory and adding two exporters to it, which it then passed onto GenericExporter. Adding a new export format to GenericExporter now, no longer requires modifying it, therefore making it open for extension and closed for modification. Again, this is by no means a universal formula, rather a concept of possible approach towards satisfying the OCP.
The Liskov substitution principle talks about inheritance. It specifies how we should design our classes so that client dependencies can be replaced by subclasses without the client seeing the difference, as per the definition found on Wikipedia:
"objects in a program should be replaceable with instances of their subtypes without altering the correctness of that program"
While there might be some specific functionality added to the subclass, it has to conform to the same behavior as its base class. Otherwise the Liskov principle is violated.
When it comes to PHP and sub-classing, we have to look beyond simple concrete classes and differentiate: concrete class, abstract class, and interface. Each of the three can be put in the context of a base class, while everything extending or implementing it can be looked at as a derived class.
The following is an example of LSP violation, where the derived class does not have an implementation for all methods:
interface User {
public function getEmail();
public function getName();
public function getAge();
}
class Employee implements User {
public function getEmail() {
// Implementation...
}
public function getAge() {
// Implementation...
}
}Here we see an employee class which does not implement the getName method enforced by the interface. We could have easily used an abstract class instead of the interface and abstract method type for the getName method, the effect would have been the same. Luckily, the PHP would throw an error in this case, warning us that we haven't really implemented the interface fully.
The following is an example of Liskov principle violation, where different derived classes return things of different types:
class UsersCollection implements \Iterator {
// Implementation...
}
interface UserList {
public function getUsers();
}
class Emloyees implements UserList {
public function getUsers() {
$users = new UsersCollection();
//...
return $users;
}
}
class Directors implements UserList {
public function getUsers() {
$users = array();
//...
return $users;
}
}Here we see a simple example of an edge case. Calling getUsers on both derived classes will return a result we can loop through. However, PHP developers tend to use the count method often on array structures, and using it on Employees instances the getUsers result will not work. This is because the Employees class returns UsersCollection which implements Iterator, not the actual array structure. Since UsersCollection does not implement Countable, we cannot use count on it, which leads to potential bugs down the line.
We can further spot LSP violations in cases where the derived class behaves less permissively with regard to method arguments. These can usually be spotted by use of the instance of type operator, as shown in the following example:
interface LoggerProcessor {
public function log(LoggerInterface $logger);
}
class XmlLogger implements LoggerInterface {
// Implementation...
}
class JsonLogger implements LoggerInterface {
// Implementation...
}
class FileLogger implements LoggerInterface {
// Implementation...
}
class Processor implements LoggerProcessor {
public function log(LoggerInterface $logger) {
if ($logger instanceof XmlLogger) {
throw new \Exception('This processor does not work with XmlLogger');
} else {
// Implementation...
}
}
}Here, the derived class Processor puts restrictions on method arguments, while it should accept everything conforming to the LoggerInterface. By being less permissive, it alters the behavior implied by the base class, in this case LoggerInterface.
The outlined examples are merely a fragment of what constitutes a violation of LSP. To satisfy the principle, we need to make sure that derived classes do not, in any way, alter the behavior imposed by the base class.
The Interface Segregation Principle states that clients should only implement interfaces they actually use. They should not be forced to implement interfaces they do not use. As per the definition found on Wikipedia:
"many client-specific interfaces are better than one general-purpose interface"
What this means is that we should split large and fat interfaces into several small and lighter ones, segregating it so that smaller interfaces are based on groups of methods, each serving one specific functionality.
Let's take a look at the following leaky abstraction that violates the ISP:
interface Appliance {
public function powerOn();
public function powerOff();
public function bake();
public function mix();
public function wash();
}
class Oven implements Appliance {
public function powerOn() { /* Implement ... */ }
public function powerOff() { /* Implement ... */ }
public function bake() { /* Implement... */ }
public function mix() { /* Nothing to implement ... */ }
public function wash() { /* Cannot implement... */ }
}
class Mixer implements Appliance {
public function powerOn() { /* Implement... */ }
public function powerOff() { /* Implement... */ }
public function bake() { /* Cannot implement... */ }
public function mix() { /* Implement... */ }
public function wash() { /* Cannot implement... */ }
}
class WashingMachine implements Appliance {
public function powerOn() { /* Implement... */ }
public function powerOff() { /* Implement... */ }
public function bake() { /* Cannot implement... */ }
public function mix() { /* Cannot implement... */ }
public function wash() { /* Implement... */ }
}Here we have an interface setting requirements for several appliance related methods. Then we have several classes implementing that interface. The problem is quite obvious; not all appliances can be squeezed into the same interface. It makes no sense for a washing machine to be forced to implement bake and mix methods. These methods need to be split each into its own interface. That way concrete appliance classes get to implement only the methods that actually make sense.
The dependency inversion principle states that entities should depend on abstractions and not on concretions. That is, a high level module should not depend on a low level module, rather the abstraction. As per the definition found on Wikipedia:
"One should depend upon abstractions. Do not depend upon concretions."
This principle is important as it plays a major role in decoupling our software.
The following is an example of a class that violates the DIP:
class Mailer {
// Implementation...
}
class NotifySubscriber {
public function notify($emailTo) {
$mailer = new Mailer();
$mailer->send('Thank you for...', $emailTo);
}
}Here we can see a notify method within the NotifySubscriber class coding in a dependency towards the Mailer class. This makes for tightly coupled code, which is what we are trying to avoid. To rectify the problem, we can pass the dependency through the class constructor, or possibly via some other method. Furthermore, we should move away from concrete class dependency towards an abstracted one, as shown in the rectified example shown here:
interface MailerInterface {
// Implementation...
}
class Mailer implements MailerInterface {
// Implementation...
}
class NotifySubscriber {
private $mailer;
public function __construct(MailerInterface $mailer) {
$this->mailer = $mailer;
}
public function notify($emailTo) {
$this->mailer->send('Thank you for...', $emailTo);
}
}Here we see a dependency being injected through the constructor. The injection is abstracted by a type hinting interface, and the actual concrete class. This makes our code loosely coupled. The DIP can be used anytime a class needs to call a method of another class, or shall we say send a message to it.
When it comes to modular development, extensibility is something to constantly think about. Writing a code that locks itself in will likely result in a future failure to integrate it with other projects or libraries. While SOLID design principles might look like an overreach for some of the parts, actively applying these principles is likely to result in components that are easy to maintain and extend over time.
Embracing the SOLID principles for class design prepares our code for future changes. It does so by localizing and minimizing these changes within our classes, so any integration using it does not feel the significant impact of the change.
Moving forward, in the next chapter, we will look into defining our application specification which we will build across all other chapters.
Building a software application from the ground up requires diverse skills, as it involves more than just writing down a code. Writing down functional requirements and sketching out a wireframe are often among the first steps in the process, especially if we are working on a client project. These steps are usually done by someone other than the developer, as they require certain insight into client business case, user behavior, and the like. Being part of a larger development team means that we, as developers, usually get requirements, designs, and wireframes then start coding against them. Delivering projects by oneself, makes it tempting to skip these steps and get our hands started with code alone. More often than not, this is an unproductive approach. Laying down functional requirements and a few wireframes is a skill worth knowing and following, even if one is just a developer.
Later in this chapter, we will go over a high-level application requirement, alongside a rough wireframe.
In this chapter, we will be covering the following topics:
We need to build a simple, but responsive web shop application. In order to do so, we need to lay out some basic requirements. The types of requirements we are interested in at the moment are those that touch upon interactions between a user and a system. The two most common techniques to specify requirements in regards to user usage are use case and user story. The user stories are a less formal yet descriptive enough way to outline these requirements. Using user stories, we encapsulate the customer and store manager actions as mentioned here.
A customer should be able to do the following:
A store manager should be able to do the following:
title, price, sku, url-key, description, qty, category, and image)title, url-key, description, and image)User stories are a convenient high-level way of writing down application requirements. Especially useful as an agile mode of development.
With user stories laid out, let's shift our focus to actual wireframing. For reasons we will get into later on, our wireframing efforts will be focused around the customer perspective.
There are numerous wireframing tools out there, both free and commercial. Some commercial tools like https://ninjamock.com, which we will use for our examples, still provide a free plan. This can be very handy for personal projects, as it saves us a lot of time.
The starting point of every web application is its home page. The following wireframe illustrates our web shop app's homepage:
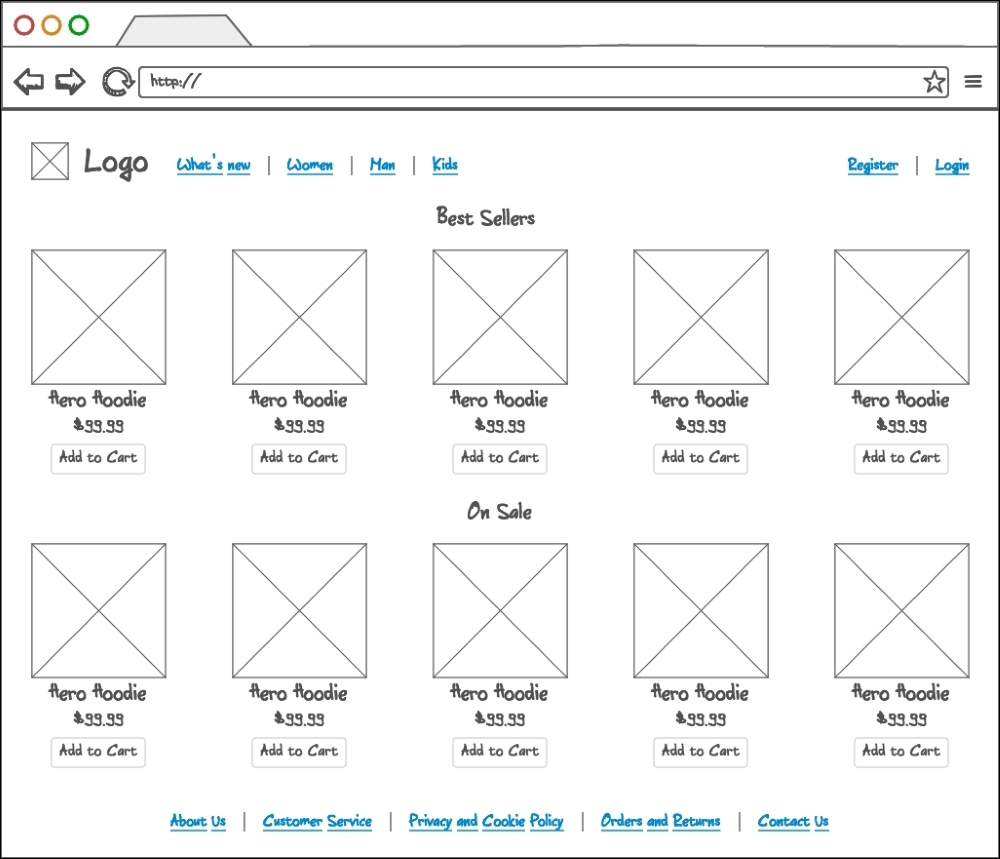
Here we can see a few sections determining the page structure. The header is comprised of a logo, category menu, and user menu. The requirements don't say anything about category structure, and we are building a simple web shop app, so we are going to stick to a flat category structure, without any sub-categories. The user menu will initially show Register and Login links, until the user is actually logged in, in which case the menu will change as shown in following wireframes. The content area is filled with best sellers and on sale items, each of which have an image, title, price, and Add to Cart button defined. The footer area contains links to mostly static content pages, and a Contact Us page.
The following wireframe illustrates our web shop app's category page:
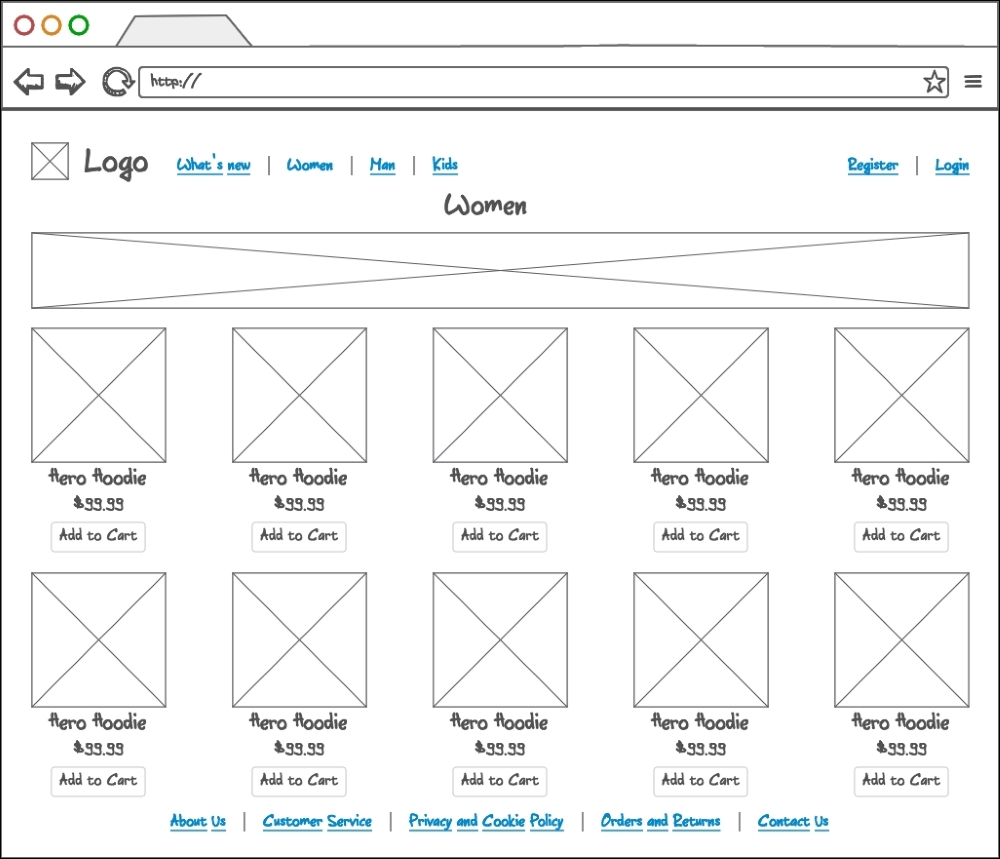
The header and footer areas remain conceptually the same across the entire site. The content area has now changed to list products within any given category. Individual product areas are rendered in the same manner as it is on the home page. Category names and images are rendered above the product list. The width of a category image gives some hints as to what type of images we should be preparing and uploading onto our categories.
The following wireframe illustrates our web shop app's product page:
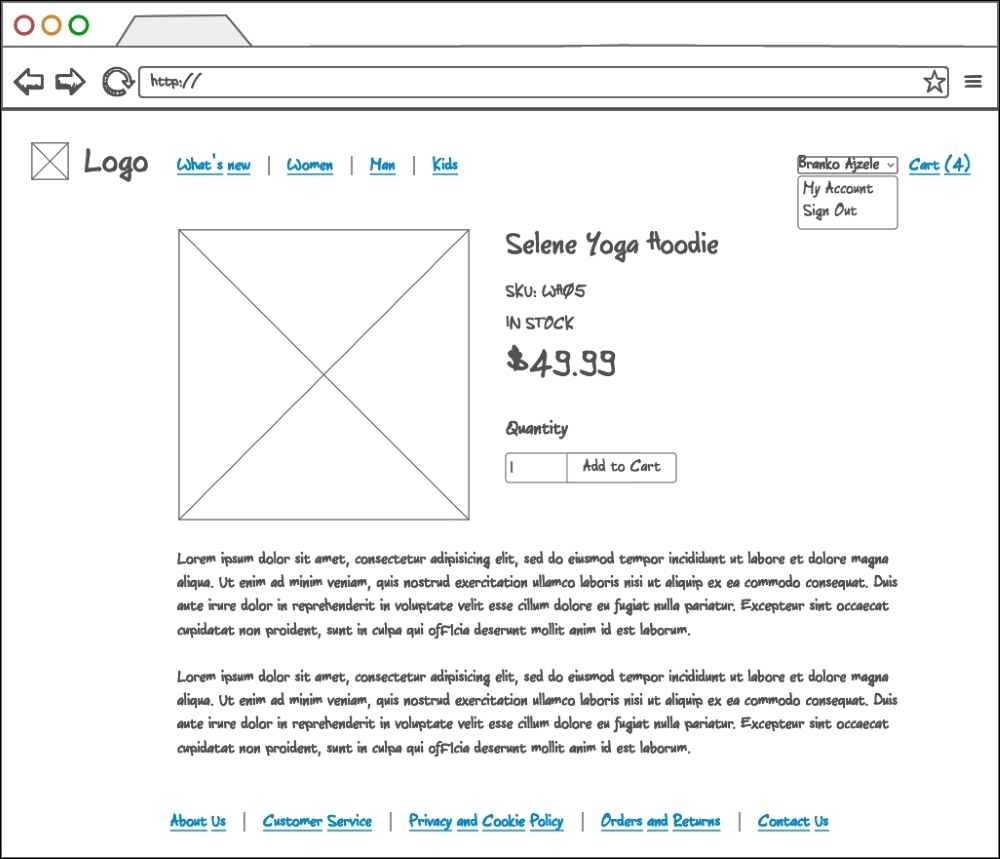
The content area here now changes to list individual product information. We can see a large image placeholder, title, sku, stock status, price, quantity field, Add to Cart button, and product description being rendered. The IN STOCK message is to be displayed when an item is available for purchase and OUT OF STOCK when an item is no longer available. This is to be related to the product quantity attribute. We also need to keep in mind the "See the product image with a big view (zoom)" requirement, where clicking on an image would zoom into it.
The following wireframe illustrates our web shop app's register page:
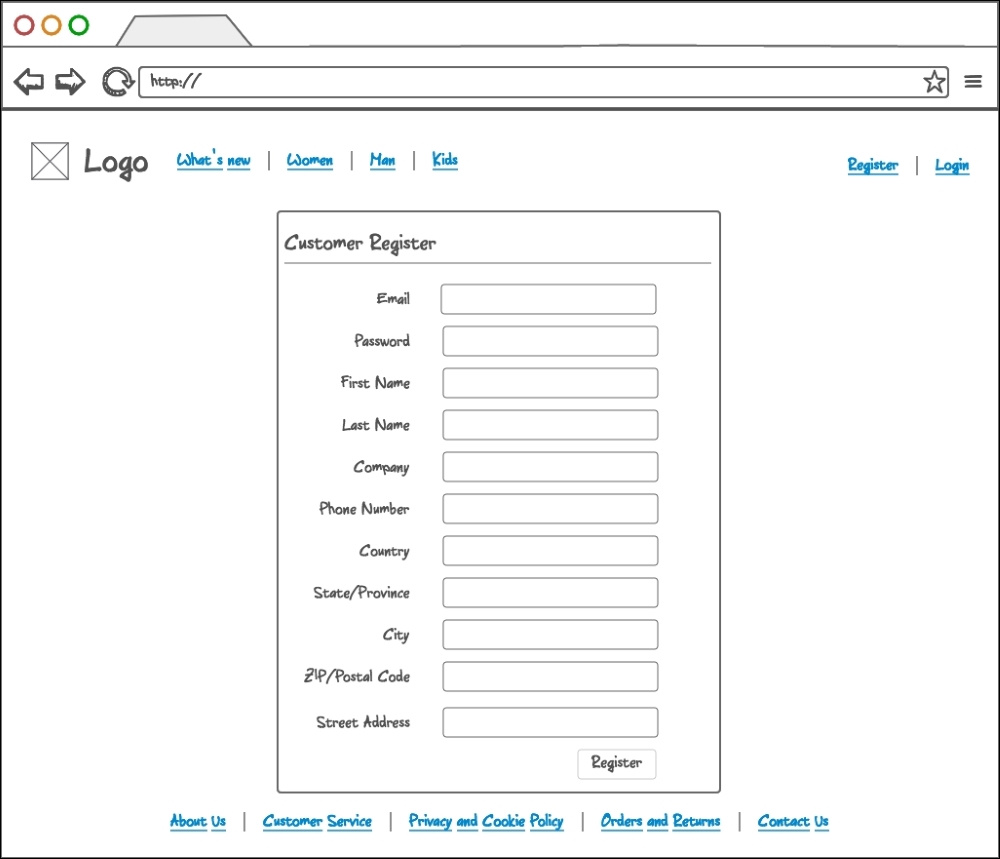
The content area here now changes to render a registration form. There are many ways that we can implement the registration system. More often than not, the minimal amount of information is asked on a registration screen, as we want to get the user in as quickly as possible. However, let's proceed as if we are trying to get more complete user information right here on the registration screen. We ask not just for an e-mail and password, but for entire address information as well.
The following wireframe illustrates our web shop app's login page:
The content area here now changes to render a customer login and forgotten password form. We provide the user with Email and Password fields in case of login, or just an Email field in case of a password reset action.
The following wireframe illustrates our web shop app's customer account page:
The content area here now changes to render the customer account area, visible only to logged in customers. Here we see a screen with two main pieces of information. The customer information being one, and order history being the other. The customer can change their e-mail, password, and other address information from this screen. Furthermore, the customer can view, cancel, and print all of their previous orders. The My Orders table lists orders top to bottom, from newest to oldest. Though not specified by the user stories, the order cancelation should work only on pending orders. This is something that we will touch upon in more detail later on.
This is also the first screen that shows the state of the user menu when the user is logged in. We can see a dropdown showing the user's full name, My Account, and Sign Out links. Right next to it, we have the Cart (%s) link, which is to list exact quantities in a cart.
The following wireframe illustrates our web shop app's checkout cart page:

The content area here now changes to render the cart in its current state. If the customer has added any products to the cart, they are to be listed here. Each item should list the product title, individual price, quantity added, and subtotal. The customer should be able to change quantities and press the Update Cart button to update the state of the cart. If 0 is provided as the quantity, clicking the Update Cart button will remove such an item from the cart. Cart quantities should at all time reflect the state of the header menu Cart (%s) link. The right-hand side of a screen shows a quick summary of current order total value, alongside a big, clear Go to Checkout button.
The following wireframe illustrates our web shop app's checkout cart shipping page:
The content area here now changes to render the first step of a checkout process, the shipping information collection. This screen should not be accessible for non-logged in customers. The customer can provide us with their address details here, alongside a shipping method selection. The shipping method area lists several shipping methods. On the right hand side, the collapsible order summary section is shown, listing current items in the cart. Below it, we have the cart subtotal value and a big clear Next button. The Next button should trigger only when all of the required information is provided, in which case it should take us to payment information on the checkout cart payment page.
The following wireframe illustrates our web shop app's checkout cart payment page:
The content area here now changes to render the second step of a checkout process, the payment information collection. This screen should not be accessible for non-logged in customers. The customer is presented with a list of available payment methods. For the simplicity of the application, we will focus only on flat/fixed payments, nothing robust such as PayPal or Stripe. On the right-hand side of the screen, we can see a collapsible Order summary section, listing current items in the cart. Below it, we have the order totals section, individually listing Cart Subtotal, Standard Delivery, Order Total, and a big clear Place Order button. The Place Order button should trigger only when all of the required information is provided, in which case it should take us to the checkout success page.
The following wireframe illustrates our web shop app's checkout success page:
The content area here now changes to output the checkout successful message. Clearly this page is only visible to logged in customers that just finished the checkout process. The order number is clickable and links to the My Account area, focusing on the exact order. By reaching this screen, both the customer and store manager should receive a notification email, as per the Get email notification after order has been placed and Be notified if the new sales order has been created requirements.
With this, we conclude our customer facing wireframes.
In regards to store manager user story requirements, we will simply define a landing administration interface for now, as shown in the following screenshot:
Using the framework later on, we will get a complete auto-generated CRUD interface for the multiple Add New and List & Manage links. The access to this interface and its links will be controlled by the framework's security component, since this user will not be a customer or any user in the database as such.
Furthermore, throughout the following chapters, we will split our application into several modules. In such a setup, each module will take ownership of individual functionalities, taking care of customer, catalog, checkout, and other requirements.
Once the requirements and wireframes are set, we can focus our attention to the selection of a technology stack. In Chapter 1, Ecosystem Overview we glossed over several of the most popular PHP frameworks, pointing out their strengths. Choosing the right one in this case, is more of a matter of preference, as application requirements for the most part can be easily met by be met any one of those frameworks. Our choice, however, falls to Symfony. Aside from PHP frameworks, we still need a CSS framework to deliver some structure, styling, and responsiveness within the browser on the client side. Since the focus of this book is on PHP technologies, let's just say we chose the Foundation CSS framework for that task.
The Symfony framework makes a nice choice for our application. It is an enterprise level framework that has been around for years, and is extremely well documented and supported. It can be downloaded from the official http://symfony.com page as shown here:
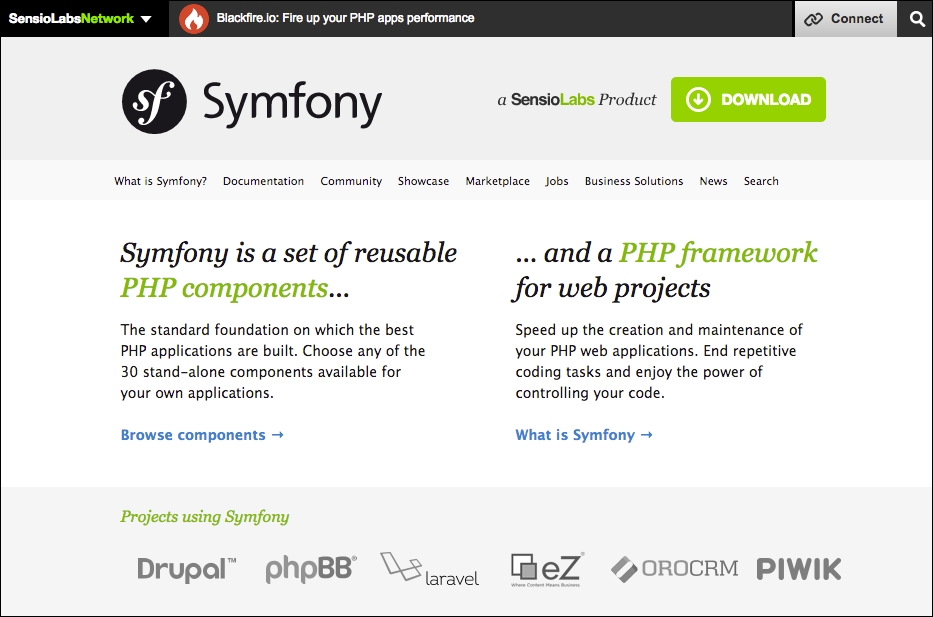
The benefits of using Symfony as part of our technology stack are numerous. The framework provides robust and well documented:
These are essential features required by our application. The ORM in particular, plays a major role in rapid application development. Having to worry less about coding, every aspect of CRUD can boost the speed of development by a factor or two. The great thing about Symfony in this regard is that it allows for automatic generation of entities and CRUD actions around them by executing two simple commands such as the following:
php bin/console doctrine:generate:entity php app/console generate:doctrine:crud
By doing so, Symfony generates entity models and necessary controllers that empower us to perform the following operations:
Basically, we get a minimal store manager interface for free. This alone covers most of the CRUD related requirements set for the store manager role. We can then easily modify the generated templates to further integrate the remaining functionality.
On top of that, security components provide authentication and authorization that we can use to satisfy the customer and store manager logins. So a store manager will be a fixed, pre-created user attached to Symfony's firewall, the only one having access to CRUD controller actions.
Backed by the company Zurb, the Foundation framework makes a great choice for a modern responsive web application. We might say it is an enterprise level framework, providing a collection of HTML, CSS, and JavaScript that we can build upon. It can be downloaded from the official http://foundation.zurb.com page as shown here:
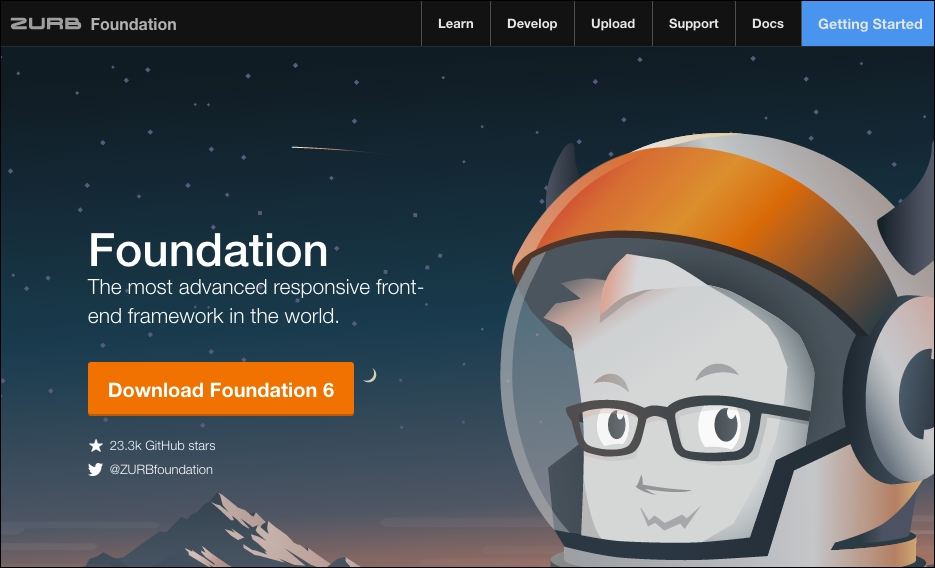
Foundation comes in three flavors:
We are interested in the sites version. Aside from general styling, Foundation for sites provides a great deal of controls, navigational elements, containers, media elements, and plugins. These will be particularly useful in our application, for things like header menus, category product listings, responsive cart tables, and so on.
Foundation is built as a mobile-first framework, where we code for small screens first and larger screens then inherit those styles. Its default 12-column grid system enables us to create powerful multi-device layouts quickly and easily.
We will use Foundation simply to provide structure, some basic styling, and responsiveness to our application, without writing a single line of CSS on our own. This alone should make our application visually pleasing enough to work with both on mobile and desktop screens, while still focusing the majority of our coding skills around backend things.
Aside from providing robust functionality, the company behind Foundation also provides premium technical support. Though we will not need it as part of this book, these sorts of things establish confidence when choosing application frameworks.
Creating web applications can be a tedious and time consuming task, web shops probably being one of the most robust and intensive type of application out there, as they encompass a great deal of features. There are many components involved in delivering the final product; from database, server side (PHP) code to client side (HTML, CSS, and JavaScript) code. In this chapter, we started off by defining some basic user stories which in turn defined high-level application requirements for our small web shop. Adding wireframes to the mix helped us to visualize the customer facing interface, while the store manager interface is to be provided out of the box by the framework.
We further glossed over two of the most popular frameworks that support modular application design. We turned our attention to Symfony as server side technology and Foundation as a client side responsive framework.
Moving forward, in the next chapter, we will take a more in-depth look into Symfony. As well as being a set of reusable components, Symfony is also one of the most robust and popular full-stack PHP frameworks. Therefore, it is an interesting choice for rapid web application development.
Full-stack frameworks like Symfony help ease the process of building modular applications by providing all of the necessary components, from user interface to data store. This enables a much rapid cycle of delivering individual bits and pieces of application as it grows. We will experience this later on by segmenting our application in several smaller modules, or bundles in Symfony terminology.
Moving forward we will install Symfony, create a blank project, and start looking into individual framework features essential for building modular application:
Installing Symfony is pretty straightforward. We can use the following command to install Symfony on Linux or Mac OS X:
sudo curl -LsS https://symfony.com/installer -o /usr/local/bin/symfony sudo chmod a+x /usr/local/bin/symfony
We can use the following command to install Symfony on Windows:
c:\> php -r "file_put_contents('symfony', file_get_contents('https://symfony.com/installer'));"
Once the command is executed, we can simply move the newly created symfony file to our project directory and execute it further as symfony, or php symfony in Windows.
This should trigger an output shown as follows:
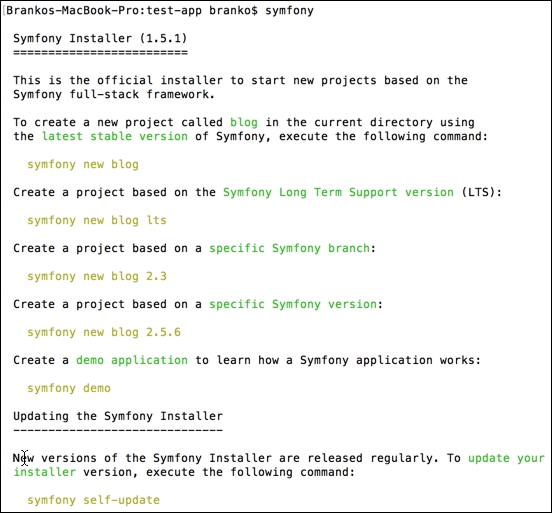
Preceding response indicates we have successfully setup Symfony and are now ready to start creating new projects.
Now that we have a Symfony installer all setup, let's go ahead and create a new blank project. We do so by simply executing a symfony new test-app command, as shown in the following command line instance:
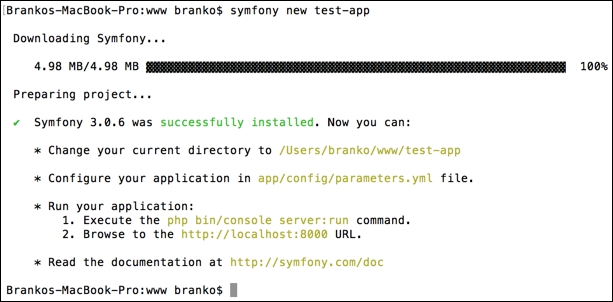
Here we are creating a new project, called test-app. We can see that the Symfony installer is downloading the latest Symfony framework from the internet, alongside outputting a brief instruction on how to run the built in PHP server via Symfony console application. The whole process might take up to a few minutes.
The structure of newly created test-app directory occurs similar to the following one:
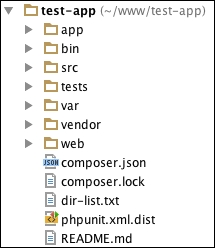
There are numerous files and directories created here for us. Our interest, however, is focused on app and src directories. The app directory is where the site wide application configuration resides. Here we can find configuration for database, routing, security, and other services. Also, this is where default layout and template file reside, as shown in the following screenshot:
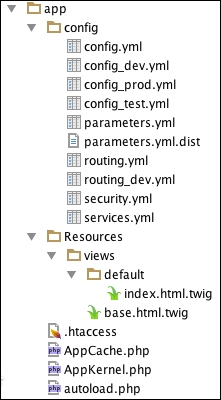
The src directory on the other hand contains already modularized code in form of the base AppBundle module, as in the following screenshot:
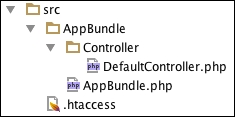
We are going to speak about the role of these files in more details later as we progress. For now, its worth nothing that pointing our browser to this project would make DefaultController.php the one to actually render the output.
Symfony framework comes with a built-in console tool that we can trigger by simply executing the following command within our project root directory:
php bin/console
By doing so, an extensive list of available commands is shown on screen, sectioned into the following groups:
assetscacheconfigdebugdoctrinegeneratelintormroutersecurityserverswiftmailertranslationThese empower us with various functionalities. Our special interest moving forward is going to be around doctrine and generate commands. The doctrine command, more specifically doctrine:generate:crud, generates a CRUD based on an existing Doctrine entity. Furthermore, the doctrine:generate:entity command generates a new Doctrine entity inside an existing bundle. These can be extremely handy for cases where we want a quick and easy entity creation, alongside the entire CRUD around it. Similarly, generate:doctrine:entity and generate:doctrine:crud do the same thing.
Before we go ahead and test these commands, we need to make sure we have our database configuration parameters in place so that Symfony can see and talk to our database. To do so, we need to set appropriate values in app/config/parameters.yml file.
For the purpose of this section, let's go ahead and create a simple Customer entity within the default AppBundle bundle, with entire CRUD around it, assuming the following properties on Customer entity: firstname, lastname, and e-mail. We start by running the php bin/console generate:doctrine:entity command from within the project root directory, which results in the following output:
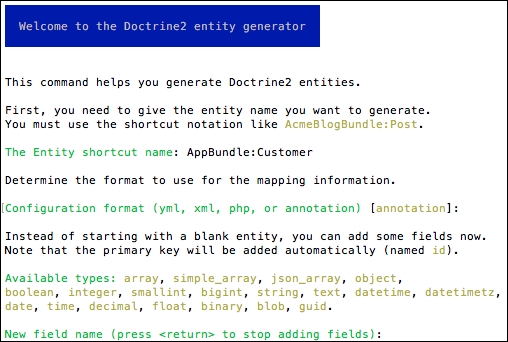
Here we first provided AppBundle:Customer as entity name and confirmed the use of annotations as configuration format.
Finally, we are asked to start adding the fields to our entity. Typing in the first name and hitting enter moves us through a series of short questions about our field type, length, nullable, and unique states, as shown in the following screenshot:
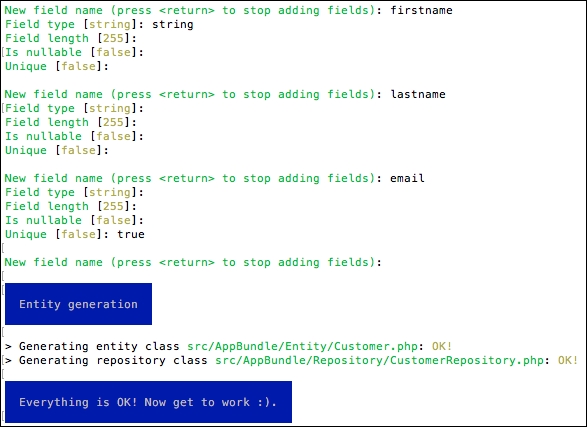
We should now have two classes generated for our Customer entity. Via the help of Symfony and Doctrine, these classes are put in context of Object Relational Mapper (ORM), as they link the Customer entity with the proper database table. However, we haven't yet instructed Symfony to actually create the table for our entity. To do so, we execute the following command:
php bin/console doctrine:schema:update --force
This should produce the output as shown in the following screenshot:

If we now take a look at the database, we should see a customer table with all the proper columns created with SQL create dsyntax as follows:
CREATE TABLE `customer` ( `id` int(11) NOT NULL AUTO_INCREMENT, `firstname` varchar(255) COLLATE utf8_unicode_ci NOT NULL, `lastname` varchar(255) COLLATE utf8_unicode_ci NOT NULL, `email` varchar(255) COLLATE utf8_unicode_ci NOT NULL, PRIMARY KEY (`id`), UNIQUE KEY `UNIQ_81398E09E7927C74` (`email`) ) ENGINE=InnoDB DEFAULT CHARSET=utf8 COLLATE=utf8_unicode_ci;
At this point, we still do not have an actual CRUD functionality in place. We simply have an ORM empowered Customer entity class and appropriate database table behind it. The following command will generate the actual CRUD controllers and templates for us:
php bin/console generate:doctrine:crud
This should produce the following interactive output:

By providing the fully classified entity name AppBundle:Customer, generator proceeds with a series of additional inputs, from generating write actions, type of configuration to read, to prefix of route, as shown in the following screenshot:
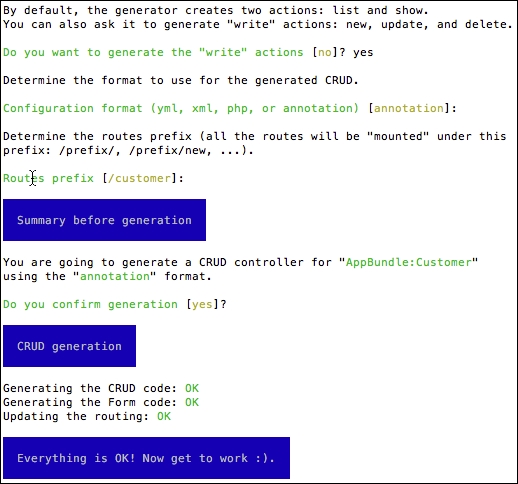
Once done, we should be able to access our Customer CRUD actions by simply opening a URL like http://test.app/customer/ (assuming test.app is the host we set for our example) as shown:
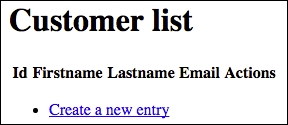
If we click on the Create a new entry link, we will be redirected to the /customer/new/ URL, as shown in the following screenshot:
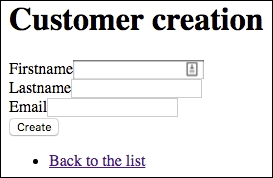
Here we can enter the actual values for our Customer entity and click Create button in order to persist it into the database customer table. After adding a few entities, the initial /customer/ URL is now able to list them all, as shown in the following screenshot:
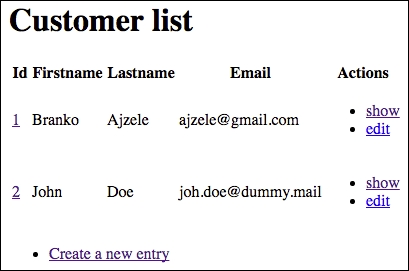
Here we see links to show and edit actions. The show action is what we might consider the customer facing action, whereas the edit action is the administrator facing action. Clicking on the edit action, takes us to the URL of the form /customer/1/edit/, whereas number 1 in this case is the ID of customer entity in database:
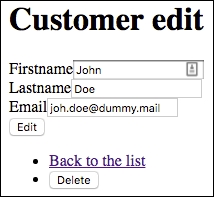
Here we can change the property values and click Edit to persist them back into the database, or we can click on the Delete button to remove the entity from the database.
If we were to create a new entity with an already existing e-mail, which is flagged as a unique field, the system would throw a generic error as such the following one:

This is merely default system behavior, and as we progress further we will look into making this more user friendly. By now, we have seen how powerful Symfony's console is. With a few simple commands, we were able to create our entity and its entire CRUD actions. There is plenty more the console is capable of. We can even create our own console commands as we can implement any type of logic. However, for the purpose of our needs, current implementation will suffice for a moment.
Controllers play a major role in web applications by being at the forefront of any application output. They are the endpoints, the code that executes behind each URL. In a more technical manner, we can say the controller is any callable (a function, method on an object, or a closure) that takes the HTTP request and returns an HTTP response. The response is not bound to a single format like HTML, it can be anything from XML, JSON, CSV, image, redirect, error, and so on.
Let's take a look at the previously created (partial) src/AppBundle/Controller/CustomerController.php file, more precisely its newAction method:
/**
* Creates a new Customer entity.
*
* @Route("/new", name="customer_new")
* @Method({"GET", "POST"})
*/
public function newAction(Request $request)
{
//...
return $this->render('customer/new.html.twig', array(
'customer' => $customer,
'form' => $form->createView(),
));
}If we ignore the actual data retrieval part (//…), there are three important things to note in this little example:
@Route: this is the Symfony's annotation way of specifying HTTP endpoint, the URL we will use to access this. The first "/new" parameter states the actual endpoint, the second name="customer_new" parameter sets the name for this route that we can then use as an alias in URL generation functions in templates and so on. It is worth noting, that this builds upon the @Route("/customer") annotation set on the actual CustomerController class where the method is defined, thus making for the full URL to be something like http://test.app/customer/new.@Method: This takes the name of one or more HTTP methods. This means that the newAction method will trigger only if the HTTP requests match the previously defined @Route and are of one or more HTTP method types defined in @Method.$this->render: This returns the Response object. The $this->render calls the render function of the Symfony\Bundle\FrameworkBundle\Controller\Controller class, which instantiates new Response(), sets its content, and returns the whole instance of that object.Now let's take a look at the editAction method within our controller, as partially shown in the following code block:
/**
* Displays a form to edit an existing Customer entity.
*
* @Route("/{id}/edit", name="customer_edit")
* @Method({"GET", "POST"})
*/
public function editAction(Request $request, Customer $customer)
{
//...
}Here we see a route that accepts a singe ID, marked as {id} within the first @Route annotation parameter. The body of the method (excluded here), does not contain any direct reference to fetching the id parameter. We can see that the editAction function accepts two parameters, one being Request, the other being Customer. But how does the method know to accept the Customer object? This is where Symfony's @ParamConverter annotation comes into play. It calls converters to convert the request parameters to objects.
The great thing about @ParamConverter annotation is that we can use it explicitly or implicitly. That is, if we do not add @ParamConverter annotation but add type hinting to the method parameter, Symfony is going to try and load the object for us. This is the exact case we have in our example above, as we did not explicitly type the @ParamConverter annotation.
Terminology wise, controllers are often exchanged for routing. However, they are not the same thing.
In the shortest terms, routing is about linking the controllers with URLs entered in browser. Todays modern web applications need nice URLs. This means moving away from URLs like /index.php?product_id=23 to something like /catalog/product/t-shirt. This is where routing comes in to play.
Symfony has a powerful routing mechanism that enables us to do the following:
The way routing works in Symfony is that all of the requests come through app.php. Then, the Symfony core asks the router to inspect the request. The router then matches the incoming URL to a specific route and returns information about the route. This information, among other things, includes the controller that should be executed. Finally, the Symfony kernel executes the controller, which returns a response object.
All of the application routes are loaded from a single routing configuration file, usually app/config/routing.yml file, as shown by our test app:
app: resource: "@AppBundle/Controller/" type: annotation
The app is simply one of many possible entries. Its resource value points to AppBundle controller directory, and type is set to annotation which means that the class annotations will be read to specify exact routes.
We can define a route with several variations. One of them is shown in the following block:
// Basic Route Configuration
/**
* @Route("/")
*/
public function homeAction()
{
// ...
}
// Routing with Placeholders
/**
* @Route("/catalog/product/{sku}")
*/
public function showAction($sku)
{
// ...
}
// >>Required<< and Optional Placeholders
/**
* @Route("/catalog/product/{id}")
*/
public function indexAction($id)
{
// ...
}
// Required and >>Optional<< Placeholders
/**
* @Route("/catalog/product/{id}", defaults={"id" = 1})
*/
public function indexAction($id)
{
// ...
}The preceding examples show several ways we can define our route. The interesting one is the case with required and optional parameter. If we think about it, removing ID from the latest example will match the example before it with sku. The Symfony router will always choose the first matching route it finds. We can solve the problem by adding regular expression requirements attributed on @Route annotation as follows:
@Route(
"/catalog/product/{id}",
defaults={"id": 1},
requirements={"id": "\d+"}
)There is more to be said about controllers and routing, as we will see once we start building our application.
Previously we said that controllers accept request and return response. The response, however, can often be any content type. The production of actual content is something controllers delegate to the templating engine. The templating engine then has the capability to turn the response into HTML, JSON, XML, CSV, LaTeX, or any other text-based content type.
In the old days, programmers mixed PHP with HTML into the so called PHP templates (.php and .phtml). Though still used with some platforms, this kind of approach is considered insecure and lacking in many aspects. One of which was cramming business logic into template files.
To address these shortcomings, Symfony packs its own templating language called Twig. Unlike PHP, Twig is meant to strictly express presentation and not to thinker about program logic. We cannot execute any of the PHP code within the Twig. And the Twig code is nothing more than an HTML with a few special syntax types.
Twig defines three types of special syntax:
{{ ... }}: This outputs variable or the result of an expression to the template.{% ... %}: This tag controls the logic of the template (if and for loops, and others).{# ... #}: It is the equivalent of the PHP /* comment */ syntax. The Comments content isn't included in the rendered page.Filters are another nice feature of Twig. They act like chained method calls upon a variable value, modifying the content before it is outputted, as follows:
<h1>{{ title|upper }}</h1>
{{ filter upper }}
<h1>{{ title }}</h1>
{% endfilter %}
<h1>{{ title|lower|escape }}</h1>
{% filter lower|escape %}
<h1>{{ title }}</h1>
{% endfilter %}It also supports functions listed as follows:
{{ random(['phone', 'tablet', 'laptop']) }}The preceding random function call would return one random value from within the array. With all the built-in list of filters and functions, Twig also allows for writing our own if needed.
Similar to PHP class inheritance, Twig also supports template and layout inheritance. Let's take a quick look back at the the app/Resources/views/customer/index.html.twig file as follows:
{% extends 'base.html.twig' %}
{% block body %}
<h1>Customer list</h1>
…
{% endblock %}Here we see a customer index.html.twig template using the extends tag to extend a template from another one, in this case base.html.twig found in app/Resources/views/ directory with content as follows:
<!DOCTYPE html>
<html>
<head>
<meta charset="UTF-8" />
<title>{% block title %}Welcome!{% endblock %}</title>
{% block stylesheets%}{% endblock %}
<link rel="icon" type="image/x-icon"href="{{ asset('favicon.ico') }}" />
</head>
<body>
{% block body %}{% endblock %}
{% block javascripts%}{% endblock %}
</body>
</html>Here we see several block tags: title, stylesheets, body, and javascripts. We can declare as many blocks as we want here and name them any way we like. This makes the extend tag a key to template inheritance. It tells the Twig to first evaluate the base template, which sets the layout and defines blocks, after which the child template like customer/index.html.twig fills in the content of these blocks.
Templates live in two locations:
app/Resources/views/bundle-directory/Resources/views/What this means is in order to render/extend app/Resources/views/base.html.twig we would use base.html.twig within our template file, and to render/extend app/Resources/views/customer/index.html.twig we would use the customer/index.html.twig path.
When used with templates that reside in bundles, we have to reference them slightly differently. In this case, the bundle:directory:filename string syntax is used. Take the FoggylineCatalogBundle:Product:index.html.twig path for example. This would be a full path to use one of the bundles template file. Here the FoggylineCatalogBundle is a bundle name, Product is a name of a directory within that bundle Resources/views directory, and index.html.twig is the name of the actual template within the Product directory.
Each template filename has two extensions that first specify the format and then the engine for that template; such as *.html.twig, *.html.php, and*.css.twig.
We will get into more details regarding these templates once we move onto building our app.
Sign up, sign in, add to cart, checkout, all of these and more are actions that make use of HTML forms in web shop applications and beyond. Building forms is one of the most common tasks for developers. One that often takes time to do it right.
Symfony has a form component through which we can build HTML forms in an OO way. The component itself is also a standalone library that can be used independently of Symfony.
Let's take a look at the content of the src/AppBundle/Entity/Customer.php file, our Customer entity class that was auto-generated for us when we defined it via console:
class Customer {
private $id;
private $firstname;
private $lastname;
private $email;
public function getId() {
return $this->id;
}
public function setFirstname($firstname) {
$this->firstname = $firstname;
return $this;
}
public function getFirstname() {
return $this->firstname;
}
public function setLastname($lastname) {
$this->lastname = $lastname;
return $this;
}
public function getLastname() {
return $this->lastname;
}
public function setEmail($email) {
$this->email = $email;
return $this;
}
public function getEmail() {
return $this->email;
}
}Here we have a plain PHP class, which does not extend anything nor is in any other way linked to Symfony. It represents a single customer entity, for which it sets and gets the data. With the entity class in place, we would like to render a form that will pick up all of the relevant data used by our class. This is where the Form component comes in place.
When we used the CRUD generator via console earlier, it created the Form class for our Customer entity within the src/AppBundle/Form/CustomerType.php file with content as follows:
namespace AppBundle\Form;
use Symfony\Component\Form\AbstractType;
use Symfony\Component\Form\FormBuilderInterface;
use Symfony\Component\OptionsResolver\OptionsResolver;
class CustomerType extends AbstractType
{
public function buildForm(FormBuilderInterface $builder, array $options) {
$builder
->add('firstname')
->add('lastname')
->add('email')
;
}
public function configureOptions(OptionsResolver $resolver) {
$resolver->setDefaults(array(
'data_class' =>'AppBundle\Entity\Customer'
));
}
}We can see the simplicity behind the form component comes down to the following:
Symfony\Component\Form\AbstractType classdata_class configuration which points to our Customer entity.The form builder object is the one doing the heavy lifting here. It does not take much for it to create a form. With the form class in place, let's take a look at the controller action in charge of feeding the template with the form. In this case, we will focus on newAction within the src/AppBundle/Controller/CustomerController.php file, with content shown as follows:
$customer = new Customer();
$form = $this->createForm('AppBundle\Form\CustomerType', $customer);
$form->handleRequest($request);
if ($form->isSubmitted() && $form->isValid()) {
$em = $this->getDoctrine()->getManager();
$em->persist($customer);
$em->flush();
return $this->redirectToRoute('customer_show', array('id' =>$customer->getId()));
}
return $this->render('customer/new.html.twig', array(
'customer' => $customer,
'form' => $form->createView(),
));The preceding code first instantiates the Customer entity class. The $this->createForm(…) is actually calling $this->container->get('form.factory')->create(…), passing it our form class name and instance of customer object. We then have the isSubmitted and isValid check, to see if this is a GET or valid POST request. Based on that check, the code either returns to customer listing or sets the form and customer instance to be used with the template customer/new.html.twig. We will speak more about the actual validation later on.
Finally, lets take a look at the actual template found in the app/Resources/views/customer/new.html.twig file:
{% extends 'base.html.twig' %}
{% block body %}
<h1>Customer creation</h1>
{{ form_start(form) }}
{{ form_widget(form) }}
<input type="submit" value="Create" />
{{ form_end(form) }}
<ul>
<li>
<a href="{{ path('customer_index') }}">Back to the list</a>
</li>
</ul>
{% endblock %}Here we see extends and block tags, alongside some form of related functions. Symfony adds several form rendering function to Twig as follows:
form(view, variables)form_start(view, variables)form_end(view, variables)form_label(view, label, variables)form_errors(view)form_widget(view, variables)form_row(view, variables)form_rest(view, variables)Most of our application forms will be auto-generated like this one, so we are able to get a fully functional CRUD without going too deep into the rest of form functionality.
In order to keep up with modern demands, today's frameworks and applications require a flexible configuration system. Symfony fulfils this role nicely through its robust configuration files and environments concept.
The default Symfony configuration file config.yml is located under the app/config/ directory, with (partial) content sectioned as follows:
imports:
- { resource: parameters.yml }
- { resource: security.yml }
- { resource: services.yml }
framework:
…
# Twig Configuration
twig:
…
# Doctrine Configuration
doctrine:
…
# Swiftmailer Configuration
swiftmailer:
…The top-level entries like framework, twig, doctrine, and swiftmailer define the configuration of an individual bundle.
Optionally, the configuration file can be of XML or PHP format (config.xml or config.php). While YAML is simple and readable, XML is more powerful, whereas PHP is powerful but less readable.
We can use the console tool to dump the entire configuration as shown here:
php bin/console config:dump-reference FrameworkBundle
The preceding example lists the config file for core FrameworkBundle. We can use the same command to show possible configurations for any bundle that implements container extension, something we will look into later on.
Symfony has a nice implementation of environment concept. Looking into the app/config directory, we can see that default Symfony project actually starts with three different environments:
config_dev.ymlconfig_prod.ymlconfig_test.ymlEach application can run in various environments. Each environment shares the same code, but different configuration. Whereas dev environment might make use of extensive logging, a prod environment might make use of extensive caching.
The way these environments get triggered is via the front controller file, as in the following partial examples:
# web/app.php
…
$kernel = new AppKernel('prod', false);
…
# web/app_dev.php
…
$kernel = new AppKernel('dev', true);
…The test environment is missing here, as it is used only when running automated tests and cannot be accessed directly via a browser.
The app/AppKernel.php file is the one that actually loads the configuration, whether it is YAML, XML, or PHP as shown in the following code fragment:
public function registerContainerConfiguration(LoaderInterface $loader)
{
$loader->load($this->getRootDir().'/config/config_'.$this->getEnvironment().'.yml');
}The environments follow the same concept, whereas each environment imports the base configuration file and then modifies its values to suit the needs of the specific environment.
Most of the popular frameworks and platforms support some form of modules, plugins, extensions or bundles. For most of the time, the difference really lies just in the naming, while the concept of extensibility and modularity is the same. With Symfony, these modular blocks are called bundles.
Bundles are a first-class citizen in Symfony, as they support all of the operations available to other components. Everything in Symfony is a bundle, even the core framework. Bundles enable us to build modularized applications, whereas the entire code for a given feature is contained within a single directory.
A single bundle holds all its PHP files, templates, style sheets, JavaScript files, tests, and anything else in one root directory.
When we first setup our test app, it created an AppBundle for us, under the src directory. As we moved forward with the auto-generated CRUD, we saw our bundle getting all sorts of directories and files.
For a bundle to be noticed by Symfony, it needs to be added to the app/AppKernel.php file, with the registerBundles method as shown here:
public function registerBundles()
{
$bundles = [
new Symfony\Bundle\FrameworkBundle\FrameworkBundle(),
new Symfony\Bundle\SecurityBundle\SecurityBundle(),
new Symfony\Bundle\TwigBundle\TwigBundle(),
new Symfony\Bundle\SwiftmailerBundle\SwiftmailerBundle(),
new Doctrine\Bundle\DoctrineBundle\DoctrineBundle(),
//…
new AppBundle\AppBundle(),
];
//…
return $bundles;
}Creating a new bundle is as simple as creating a single PHP file. Let's go ahead and create an src/TestBundle/TestBundle.php file with content that looks like:
namespace TestBundle;
use Symfony\Component\HttpKernel\Bundle\Bundle;
class TestBundle extends Bundle
{
…
}Once the file is in place, all we need to do is to register it via the registerBundles method of the app/AppKernel.php file as shown here:
class AppKernel extends Kernel {
//…
public function registerBundles() {
$bundles = [
// …
new TestBundle\TestBundle(),
// …
];
return $bundles;
}
//…
}An even easier way to create a bundle would be to just run a console command as follows:
php bin/console generate:bundle --namespace=Foggyline/TestBundle
This would trigger a series of questions about bundle that in the end results in bundle creation that looks like the following screenshot:
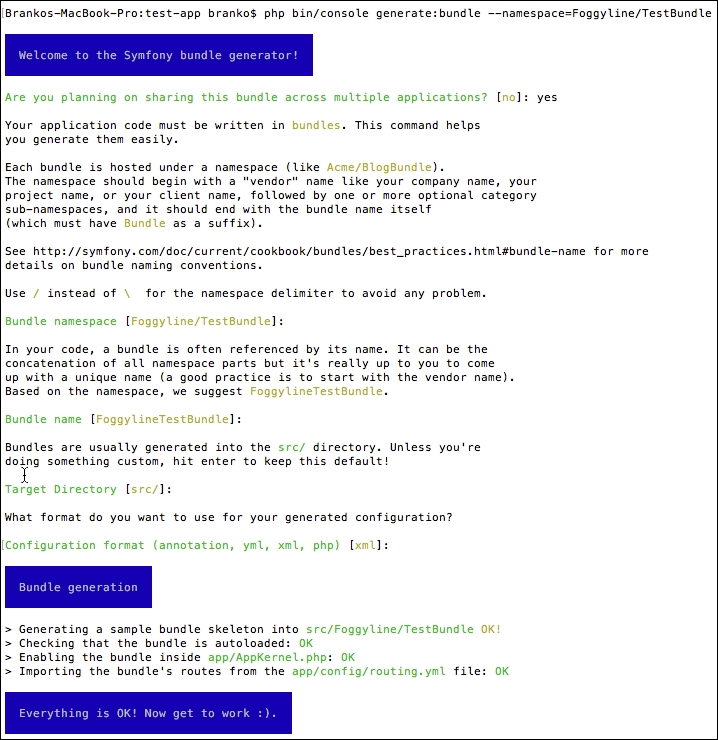
Once the process is complete, a new bundle with several directories and files is created as shown in the following screenshot:
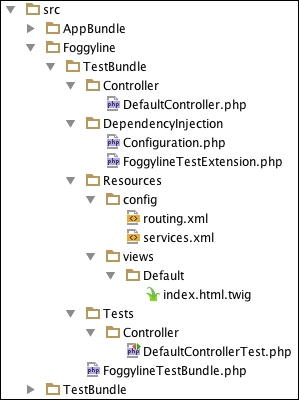
Bundle generator was kind enough to create controller, dependency injection extension extension, routing, prepare services configuration, templates, and even tests. Since we chose to share our bundle, Symfony opted for XML as default configuration format. The dependency extension simply means we can access our bundle configuration by using foggyline_test as the root element in Symfony's main config.yml. The actual foggyline_test element is defined within the DependencyInjection/Configuration.php file.
Databases are the backbone of almost every web application. Every time we need to store or retrieve data, we do so with the help of databases. The challenge in the modern OOP world is to abstract the database so that our PHP code is database agnostic. MySQL is probably the most known database in the PHP world. PHP itself has a great support for working with MySQL, whether it is via the mysqli_* extension or via PDO. However, both approaches are MySQL specific, to o close to database. Doctrine solves this problem by introducing a level of abstraction, enabling us to work with PHP objects that represent tables, rows, and their relations in MySQL.
Doctrine is completely decoupled from Symfony, so using it is completely optional. The great thing about it, however, is that the Symfony console provides great auto-generated CRUD based on Doctrine ORM, as we saw in previous examples when creating Customer entity.
As soon as we created the project, Symfony provided us with an auto-generated app/config/parameters.yml file. This is the file in which we, among other things, provide database access information as shown in the following example:
parameters: database_host: 127.0.0.1 database_port: null database_name: symfony database_user: root database_password: mysql
Once we configure proper parameters, we can use console generation features.
It is worth noting that parameters within this file are merely a convention, as app/config/config.yml is pulling them under doctrine dbal configuration like the one shown here:
doctrine: dbal: driver: pdo_mysql host: "%database_host%" port: "%database_port%" dbname: "%database_name%" user: "%database_user%" password: "%database_password%" charset: UTF8
The Symfony console tool allows us to drop and create a database based on this config, which comes in handy during development, as shown in the following code block:
php bin/console doctrine:database:drop --force php bin/console doctrine:database:create
We saw previously how the console tool enables us to create entities and their mapping into database tables. This will suffice for our needs throughout this book. Once we have them created, we need to be able to perform CRUD operations on them. If we gloss over the auto-generated CRUD controller src/AppBundle/Controller/CustomerController.php file, we can the CRUD related code as follows:
// Fetch all entities
$customers = $em->getRepository('AppBundle:Customer')->findAll();
// Persist single entity (existing or new)
$em = $this->getDoctrine()->getManager();
$em->persist($customer);
$em->flush();
// Delete single entity
$em = $this->getDoctrine()->getManager();
$em->remove($customer);
$em->flush();There is a lot more to be said about Doctrine, which is far out of the scope of this book. More information can be found at the official page (http://www.doctrine-project.org).
Nowadays testing has become an integral part of every modern web application. Usually the term testing implies unit and functional testing. Unit testing is about testing our PHP classes. Every single PHP class is considered to be a unit, thus the name unit test. Functional tests on the other hand test various layers of our application, usually concentrated on testing the functionality overall, like the sign in or sign up process.
The PHP ecosystem has a great unit testing framework called PHPUnit, available for download at https://phpunit.de. It enables us to write primarily unit, but also functional type tests. The great thing about Symfony is that it comes with built in support for PHPUnit.
Before we can start running Symfony's tests, we need to make sure we have PHPUnit installed and available as console command. When executed, PHPUnit automatically tries to pick up and read testing configuration from phpunit.xml or phpunit.xml.dist within the current working directory, if available. By default Symfony comes with a phpunit.xml.dist file in its root folder, thus making it possible for the phpunit command to pick up its test configuration.
The following is a partial example of a default phpunit.xml.dist file:
<phpunit … >
<php>
<ini name="error_reporting" value="-1" />
<server name="KERNEL_DIR" value="app/" />
</php>
<testsuites>
<testsuite name="Project Test Suite">
<directory>tests</directory>
</testsuite>
</testsuites>
<filter>
<whitelist>
<directory>src</directory>
<exclude>
<directory>src/*Bundle/Resources</directory>
<directory>src/*/*Bundle/Resources</directory>
<directory>src/*/Bundle/*Bundle/Resources</directory>
</exclude>
</whitelist>
</filter>
</phpunit>The testsuites element defines the directory tests, in which all of our tests are located. The filter element with its children is used to configure the whitelist for the code coverage reporting. The php element with its children is used to configure PHP settings, constants, and global variables.
Running a phpunit command against a default project like ours would result in output like the following:
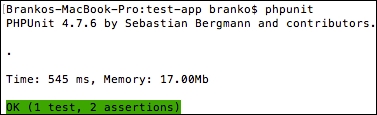
Note that bundle tests are not automatically picked up. Our src/AppBundle/Tests/Controller/CustomerControllerTest.php file, which was created for us automatically when we used auto-generated CRUD, was not executed. Not because its content is commented out by default, but because the bundle test directory isn't visible to phpunit. To make it execute, we need to extend the phpunit.xml.dist file by adding to directory testsuite as follows:
<testsuites>
<testsuite name="Project Test Suite">
<directory>tests</directory>
<directory>src/AppBundle/Tests</directory>
</testsuite>
</testsuites>Depending on how we build our application, we might want to add all of our bundles to the testsuite list, even if we plan on distributing bundles independently.
There is plenty more to be said about testing. We will do so bit by bit as we progress through further chapters and cover the needs of individual bundles. For the moment, it is suffice to know how to trigger tests and how to add new locations to testing configuration.
Validation plays an essential role in modern applications. When talking about web applications, we can say we differentiate between two main types of validation; form data and persisted data validation. Taking input from a user via a web form should be validated, the same as any persisting data that goes into a database.
Symfony excels here by providing a Validation component based on JSR 303 Bean Validation drafted and available at http://beanvalidation.org/1.0/spec/. If we look back at our app/config/config.yml, under the framework root element, we can see that the validation service is turned on by default:
framework:
validation:{ enable_annotations: true }We can access the validation service from any controller class by simply calling it via the $this->get('validator') expression, as shown in the following example:
$customer = new Customer();
$validator = $this->get('validator');
$errors = $validator->validate($customer);
if (count($errors) > 0) {
// Handle error state
}
// Handle valid stateThe problem with the example above is that validation would never return any errors. The reason for this is that we do not have any assertions set on our class. The console auto-generated CRUD did not really define any constraints on our Customer class. We can confirm that by trying to add a new customer and typing in any text in the e-mail field, as we can see the e-mail wont be validated.
Let's go ahead and edit the src/AppBundle/Entity/Customer.php file by adding the @Assert\Email function to the $email property like the one shown here:
//…
use Symfony\Component\Validator\Constraints as Assert;
//…
class Customer
{
//…
/**
* @var string
*
* @ORM\Column(name="email", type="string", length=255, unique=true)
* @Assert\Email(
* checkMX = true,
* message = "Email '{{ value }}' is invalid.",
* )
*/
private $email;
//…
}The great thing about assertions constraints is that they accept parameters just as functions. We can therefore fine-tune individual constraints to our specific needs. If we now try to skip or add a faulty e-mail address, we would get a message like Email "john@gmail.test" is invalid.
There are numerous constraints available, for the full list we can consult the http://symfony.com/doc/current/book/validation.html page.
Constraints can be applied to a class property or a public getter method. While the property constraints are most common and easy to use, the getter method constraints allow us to specify more complex validation rules.
Let's take look at the newAction method of an src/AppBundle/Controller/CustomerController.php file as follows:
$customer = new Customer();
$form = $this->createForm('AppBundle\Form\CustomerType', $customer);
$form->handleRequest($request);
if ($form->isSubmitted() && $form->isValid()) {
// …Here we see an instance of a CustomerType form being bind to the Customer instance. The actual GET or POST request data is passed to an instance of a form via the handleRequest method. The form is now able to understand entity validation constraints and respond properly via its isValid method call. What this means is that we do not have to manually validate by using the validation service ourselves, the forms can do it for us.
We will continue to expand on validation features as we progress through individual bundles.
Throughout this chapter we touched on some important functionality, which makes Symfony so great. Controllers, templates, Doctrine, ORM, forms, and validation make for a complete solution from data presentation and persistence. We have seen the flexibility and power behind each of the components. The bundle system takes it a step further by wrapping these into individual mini applications, or modules. We are now able to take full control of incoming HTTP requests, manipulate the data store, and present data to the user, all of this within a single bundle.
Moving forward, in the next chapter, we will utilize the insights and knowledge gained throughout the previous chapters to finally start building our modular application according to the requirements.
Up until now we have familiarized ourselves with the latest changes in PHP 7, design patterns, design principles, and popular PHP frameworks. We also took a more detailed look into Symfony as our framework of choice moving forward. We have now finally reached a point where we can start building our modular application. Building modular applications with Symfony is done via the bundles mechanism. Terminology-wise, from this point on, we will consider bundle and module to be the same thing.
In this chapter we will be covering the following topics with respect to the core module:
Looking back in Chapter 4, Requirement Specification for Modular Web Shop App, and the wireframes presented there, we can outline some of the requirements this module will have. The core module is going to be used to set general, application-wide features, as follows:
We start by creating an entirely new Symfony project, running the following console command:
symfony new shop
This creates a new shop directory with all of the required files needed to run our application in the browser. Among these files and directories is the src/AppBundle directory, which is actually our core module. Before we can run our application in the browser, we need to map the newly created shop directory to a hostname, let's say shop.app, so we can access it in the browser via http://shop.app URL. Once this is done, if we open http://shop.app, we should see Welcome to Symfony 3.1.0 screen as shown here:
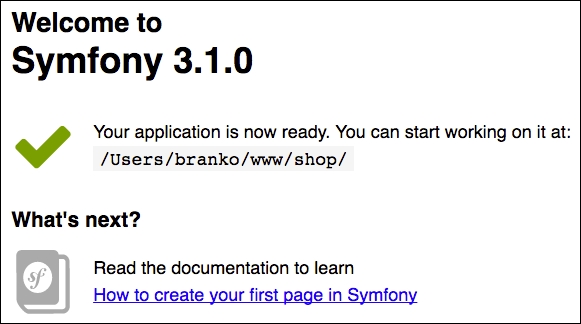
Though we have no need for the database just yet, other modules we will develop later on will assume database connection, so it's worth setting it up right from the start. We do so by configuring app/config/parameters.yml with proper database connection parameters.
We then download Foundation for Sites from http://foundation.zurb.com/sites.html. Once downloaded, we need to unpack it and copy over the /js and /css directories into the Symfony /web directory as shown in the following screenshot:
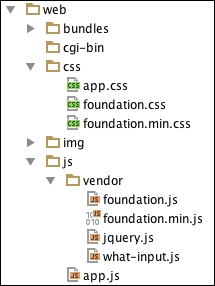
With Foundation CSS and JavaScript files in place, we edit the app/Resources/views/base.html.twig file as follows:
<!doctype html>
<html class="no-js"lang="en">
<head>
<meta charset="utf-8"/>
<meta http-equiv="x-ua-compatible" content="ie=edge">
<meta name="viewport" content="width=device-width, initial-scale=1.0"/>
<title>{% block title %}Welcome!{% endblock %}</title>
<link rel="stylesheet"href="{{ asset('css/foundation.css') }}"/>
{% block stylesheets%}{% endblock %}
</head>
<body>
<!-- START BODY -->
<!-- TOP-MENU -->
<!-- SYSTEM-WIDE-MESSAGES -->
<!-- PER-PAGE-BODY -->
<!-- FOOTER -->
<!-- START BODY -->
<script src="{{ asset('js/vendor/jquery.js') }}"></script>
<script src="{{ asset('js/vendor/what-input.js') }}"></script>
<script src="{{ asset('js/vendor/foundation.js') }}"></script>
<script>
$(document).foundation();
</script>
{% block javascripts%}{% endblock %}
</body>
</html>Here we are setting the entire head and before body end areas, with all the necessary CSS and JavaScript loading. The Twigs asset tag helps us with building URL paths, where we simply pass on the URL path itself and it builds a complete URL for us. In regard to the actual body of the page, there are several things to consider here. How are we going to build category, customer, and checkout menus? At this point we do not have any of these modules, and neither do we want to make them mandatory for our core module. So how do we solve the challenge of accounting for something that is not there yet?
What we can do for category, customer, and checkout menus is to define global Twig variables for each of those menu items that will then be used to render the menu. These variables will be filed via proper services. Since the core bundle is not aware of future catalog, customer, and checkout modules, we will initially create a few dummy services and hook them to global Twig variables. Later on, when we develop catalog, customer, and checkout modules, those modules will override the appropriate services, thus providing the right values for into menus.
This approach might not fit ideally with the notion of modular application, but it will suffice for our needs, as we are not hard-coding any dependencies as such.
We start off by adding the following entry into the app/config/config.yml file:
twig: # ... globals: category_menu: '@category_menu' customer_menu: '@customer_menu' checkout_menu: '@checkout_menu' products_bestsellers: '@bestsellers' products_onsale: '@onsale'
The category_menu_items, customer_menu_items, checkout_menu_items, products_bestsellers, and products_onsale variables become global Twig variables that we can use in any Twig template as shown in the following example:
<ul>
{% for category in category_menu.getItems() %}
<li>{{ category.name }}</li>
{% endfor %}
</ul>The @ character in the Twig global variable config is used to denote a beginning of the service name. This is the service that will provide a value object for our Twig variable. Next, we go ahead and create the actual category_menu, customer_menu, checkout_menu, bestsellers, and onsale services by modifying app/config/services.yml as follows:
services: category_menu: class: AppBundle\Service\Menu\Category customer_menu: class: AppBundle\Service\Menu\Customer checkout_menu: class: AppBundle\Service\Menu\Checkout bestsellers: class: AppBundle\Service\Menu\BestSellers onsale: class: AppBundle\Service\Menu\OnSale
Furthermore, we create each of the listed service classes under the src/AppBundle/Service/Menu/ directory. We start with the src/AppBundle/Service/Menu/Bestsellers.php file with the following content:
namespace AppBundle\Service\Menu;
class BestSellers {
public function getItems() {
// Note, this can be arranged as per some "Product"interface, so to know what dummy data to return
return array(
ay('path' =>'iphone', 'name' =>'iPhone', 'img' =>'/img/missing-image.png', 'price' => 49.99, 'add_to_cart_url' =>'#'),
array('path' =>'lg', 'name' =>'LG', 'img' =>
'/img/missing-image.png', 'price' => 19.99, 'add_to_cart_url' =>'#'),
array('path' =>'samsung', 'name' =>'Samsung', 'img'=>'/img/missing-image.png', 'price' => 29.99, 'add_to_cart_url' =>'#'),
array('path' =>'lumia', 'name' =>'Lumia', 'img' =>'/img/missing-image.png', 'price' => 19.99, 'add_to_cart_url' =>'#'),
array('path' =>'edge', 'name' =>'Edge', 'img' =>'/img/missing-image.png', 'price' => 39.99, 'add_to_cart_url' =>'#'),
);
}
}We then add the src/AppBundle/Service/Menu/Category.php file with content as follows:
class Category {
public function getItems() {
return array(
array('path' =>'women', 'label' =>'Women'),
array('path' =>'men', 'label' =>'Men'),
array('path' =>'sport', 'label' =>'Sport'),
);
}
}Following this, we add the src/AppBundle/Service/Menu/Checkout.php file with content as shown here:
class Checkout
{
public function getItems()
{
// Initial dummy menu
return array(
array('path' =>'cart', 'label' =>'Cart (3)'),
array('path' =>'checkout', 'label' =>'Checkout'),
);
}
}Once this is done, we will go on and add the following content to the src/AppBundle/Service/Menu/Customer.php file:
class Customer
{
public function getItems()
{
// Initial dummy menu
return array(
array('path' =>'account', 'label' =>'John Doe'),
array('path' =>'logout', 'label' =>'Logout'),
);
}
}We then add the src/AppBundle/Service/Menu/OnSale.php file with the following content:
class OnSale
{
public function getItems()
{
// Note, this can be arranged as per some "Product" interface, so to know what dummy data to return
return array(
array('path' =>'iphone', 'name' =>'iPhone', 'img' =>'/img/missing-image.png', 'price' => 19.99, 'add_to_cart_url' =>'#'),
array('path' =>'lg', 'name' =>'LG', 'img' =>'/img/missing-image.png', 'price' => 29.99, 'add_to_cart_url' =>'#'),
array('path' =>'samsung', 'name' =>'Samsung', 'img'=>'/img/missing-image.png', 'price' => 39.99, 'add_to_cart_url' =>'#'),
array('path' =>'lumia', 'name' =>'Lumia', 'img' =>'/img/missing-image.png', 'price' => 49.99, 'add_to_cart_url' =>'#'),
array('path' =>'edge', 'name' =>'Edge', 'img' =>'/img/missing-image.png', 'price' => 69.99, 'add_to_cart_url' =>'#'),
;
}
}We have now defined five global Twig variables that will be used to build our application menus. Even though variables are now hooked to a dummy service that returns nothing more than a dummy array, we have effectively decoupled menu items into other soon-to-be built modules. When we get to building our category, customer, and checkout modules later on, we will simply write a service override and properly fill the menu items array with real items. This would be the ideal situation.
We can now go back to our app/Resources/views/base.html.twig file and replace <!-- TOP-MENU --> from the preceding code with the following:
<div class="title-bar" data-responsive-toggle="appMenu" data-hide-for="medium">
<button class="menu-icon" type="button" data-toggle></button>
<div class="title-bar-title">Menu</div>
</div>
<div class="top-bar" id="appMenu">
<div class="top-bar-left">
{# category_menu is global twig var filled from service, and later overriden by another module service #}
<ul class="menu">
<li><a href="{{ path('homepage') }}">HOME</a></li>
{% block category_menu %}
{% for link in category_menu.getItems() %}
<li><a href="{{ link.path }}">{{ link.label }}</li></a>
{% endfor %}
{% endblock %}
</ul>
</div>
<div class="top-bar-right">
<ul class="menu">
{# customer_menu is global twig var filled from service, and later overriden by another module service #}
{% block customer_menu %}
{% for link in customer_menu.getItems() %}
<li><a href="{{ link.path }}">{{ link.label }}</li></a>
{% endfor %}
{% endblock %}
{# checkout_menu is global twig var filled from service, and later overriden by another module service #}
{% block checkout_menu %}
{% for link in checkout_menu.getItems() %}
<li><a href="{{ link.path }}">{{ link.label }}</li></a>
{% endfor %}
{% endblock %}
</ul>
</div>
</div>We can then replace <!-- SYSTEM-WIDE-MESSAGES --> with the following:
<div class="row column">
{% for flash_message in app.session.flashBag.get('alert') %}
<div class="alert callout">
{{ flash_message }}
</div>
{% endfor %}
{% for flash_message in app.session.flashBag.get('warning') %}
<div class="warning callout">
{{ flash_message }}
</div>
{% endfor %}
{% for flash_message in app.session.flashBag.get('success') %}
<div class="success callout">
{{ flash_message }}
</div>
{% endfor %}
</div>We replace <!-- PER-PAGE-BODY --> with the following:
<div class="row column">
{% block body %}{% endblock %}
</div>We replace <!-- FOOTER --> with the following:
<div class="row column">
<ul class="menu">
<li><a href="{{ path('about') }}">About Us</a></li>
<li><a href="{{ path('customer_service') }}">Customer Service</a></li>
<li><a href="{{ path('privacy_cookie') }}">Privacy and Cookie Policy</a></li>
<li><a href="{{ path('orders_returns') }}">Orders and Returns</a></li>
<li><a href="{{ path('contact') }}">Contact Us</a></li>
</ul>
</div>Now we can go ahead and edit the src/AppBundle/Controller/DefaultController.php file and add the following code to it:
/**
* @Route("/", name="homepage")
*/
public function indexAction(Request $request)
{
return $this->render('AppBundle:default:index.html.twig');
}
/**
* @Route("/about", name="about")
*/
public function aboutAction()
{
return $this->render('AppBundle:default:about.html.twig');
}
/**
* @Route("/customer-service", name="customer_service")
*/
public function customerServiceAction()
{
return $this->render('AppBundle:default:customer-service.html.twig');
}
/**
* @Route("/orders-and-returns", name="orders_returns")
*/
public function ordersAndReturnsAction()
{
return $this->render('AppBundle:default:orders-returns.html.twig');
}
/**
* @Route("/privacy-and-cookie-policy", name="privacy_cookie")
*/
public function privacyAndCookiePolicyAction()
{
return $this->render('AppBundle:default:privacy-cookie.html.twig');
}All of the used template files (about.html.twig, customer-service.html.twig, orders-returns.html.twig, privacy-cookie.html.twig) residing within the src/AppBundle/Resources/views/default directory can be similarly defined as follows:
{% extends 'base.html.twig' %}
{% block body %}
<div class="row">
<h1>About Us</h1>
</div>
<div class="row">
<p>Loremipsum dolor sit amet, consecteturadipiscingelit...</p>
</div>
{% endblock %}Here we are merely wrapping header and content into the div elements with the row class, just to give it some structure. The result should be pages similar to those shown here:

The Contact Us page requires a different approach as it will contain a form. To build a form we use Symfony's Form component by adding the following to the src/AppBundle/Controller/DefaultController.php file:
/**
* @Route("/contact", name="contact")
*/
public function contactAction(Request $request) {
// Build a form, with validation rules in place
$form = $this->createFormBuilder()
->add('name', TextType::class, array(
'constraints' => new NotBlank()
))
->add('email', EmailType::class, array(
'constraints' => new Email()
))
->add('message', TextareaType::class, array(
'constraints' => new Length(array('min' => 3))
))
->add('save', SubmitType::class, array(
'label' =>'Reach Out!',
'attr' => array('class' =>'button'),
))
->getForm();
// Check if this is a POST type request and if so, handle form
if ($request->isMethod('POST')) {
$form->handleRequest($request);
if ($form->isSubmitted() && $form->isValid()) {
$this->addFlash(
'success',
'Your form has been submitted. Thank you.'
);
// todo: Send an email out...
return $this->redirect($this->generateUrl('contact'));
}
}
// Render "contact us" page
return $this->render('AppBundle:default:contact.html.twig', array(
'form' => $form->createView()
));
}Here we started off by building a form via form builder. The add methods accept both field definitions and field constraints upon which validation can be based. We then added a check for the HTTP POST method, in case of which we feed the form with request parameters and run validation against it.
With the contactAction method in place, we still need a template file to actually render the form. We do so by adding the src/AppBundle/Resources/views/default/contact.html.twig file with content that follows:
{% extends 'base.html.twig' %}
{% block body %}
<div class="row">
<h1>Contact Us</h1>
</div>
<div class="row">
{{ form_start(form) }}
{{ form_widget(form) }}
{{ form_end(form) }}
</div>
{% endblock %}Based on these few tags, Twig handles the form rendering for us. The resulting browser output is a page as shown in the following:
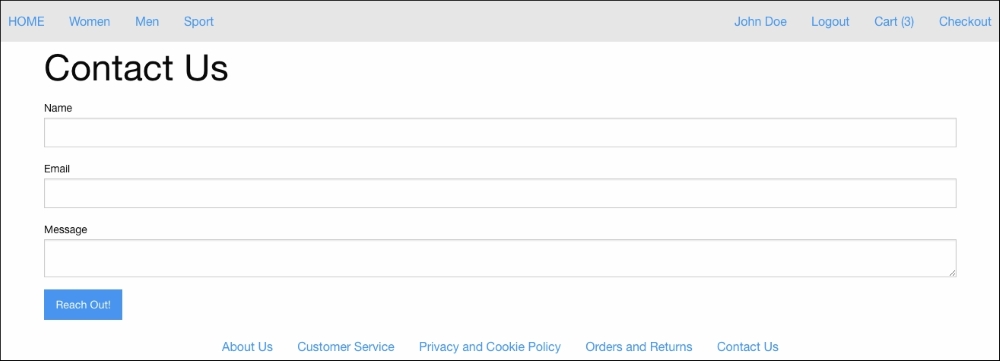
We are almost there with getting all of our pages ready. One thing is missing, though, the body area of our home page. Unlike other pages with static content, this one is actually dynamic, as it lists bestsellers and products on sale. This data is expected to come from other modules, which are not available yet. Still, this does not mean we cannot prepare dummy placeholders for them. Let's go ahead and edit the app/Resources/views/default/index.html.twig file as follows:
{% extends 'base.html.twig' %}
{% block body %}
<!--products_bestsellers -->
<!--products_onsale -->
{% endblock %}Now we need to replace <!-- products_bestsellers --> with the following:
{% if products_bestsellers %}
<h2 class="text-center">Best Sellers</h2>
<div class="row products_bestsellers text-center small-up-1 medium-up-3 large-up-5" data-equalizer data-equalize-by- row="true">
{% for product in products_bestsellers.getItems() %}
<div class="column product">
<img src="{{ asset(product.img) }}" alt="missing image"/>
<a href="{{ product.path }}">{{ product.name }}</a>
<div>${{ product.price }}</div>
<div><a class="small button"href="{{ product.add_to_cart_url }}">Add to Cart</a></div>
</div>
{% endfor %}
</div>
{% endif %}Now we need to replace <!-- products_onsale -->with the following:
{% if products_onsale %}
<h2 class="text-center">On Sale</h2>
<div class="row products_onsale text-center small-up-1 medium-up-3 large-up-5" data-equalizer data-equalize-by-row="true">
{% for product in products_onsale.getItems() %}
<div class="column product">
<img src="{{ asset(product.img) }}" alt="missing image"/>
<a href="{{ product.path }}">{{ product.name }}</a>
<div>${{ product.price }}</div>
<div><a class="small button"href="{{ product.add_to_cart_url }}">Add to Cart</a></div>
</div>
{% endfor %}
</div>
{% endif %}The http://dummyimage.com enables us to create a placeholder images for our app.
At this point we should be seeing the home page as shown here:
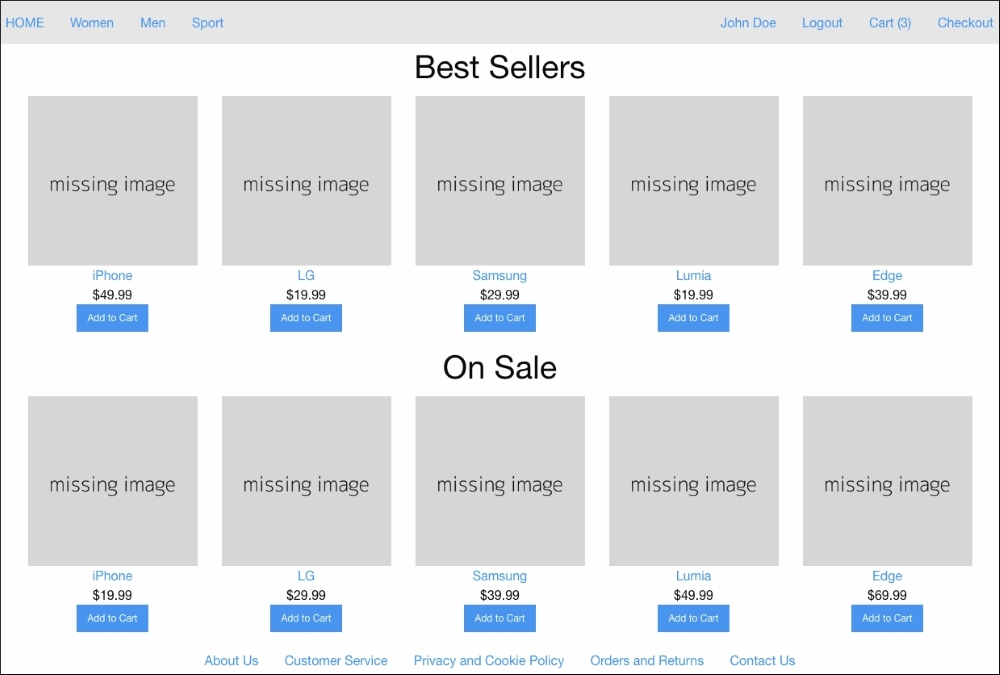
What we are trying to achieve as part of our applicationwide security is to set some basic protection against future customers or any other user being able to access and use future auto-generated CRUD controllers. We do so by modifying the app/config/security.yml file. There are several components to the security.yml file we need to address: Firewalls, access control, providers, and encoders. If we observe the auto-generated CRUD from the previous test app, it becomes clear that we need to protect the following from customer access:
GET|POST /newGET|POST /{id}/editDELETE /{id}In another words, everything that has /new and /edit in the URL, and everything that is of DELETE method, needs to be protected from the customer. With that in mind, we will use Symfony security features to create an in-memory user of role ROLE_ADMIN. We will then create an access control list that allows only ROLE_ADMIN to access the resources we just mentioned, and a firewall that triggers an HTTP basic authentication login form when we try to access these resources.
Using an in-memory provider means hard-coding users in our security.yml file. For purposes of our application, we will do so for the admin type of users. The actual password, however, does not need to be hard-coded. Assuming we will use 1L6lllW9zXg0 for the password, let's jump to the console and type in the following command:
php bin/console security:encode-password
This will produce an output as follows.
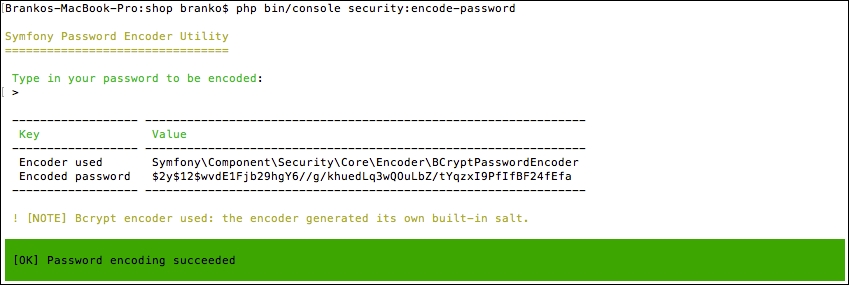
We can now edit security.yml by adding an in-memory provider and copy-paste the generated encoded password into it, as shown here:
security:
providers:
in_memory:
memory:
users:
john:
password: $2y$12$DFozWehwPkp14sVXr7.IbusW8ugvmZs9dQMExlggtyEa/TxZUStnO
roles: 'ROLE_ADMIN'Here we defined a user john of role ROLE_ADMIN with an encoded 1L6lllW9zXg0 password.
Once we have the providers in place, we can go ahead and add encoders to our security.yml file. Otherwise Symfony would not know what to make of the current password assigned to john user:
security:
encoders:
Symfony\Component\Security\Core\User\User:
algorithm: bcrypt
cost: 12Then we add the firewall as follows:
security:
firewalls:
guard_new_edit:
pattern: /(new)|(edit)
methods: [GET, POST]
anonymous: ~
http_basic: ~
guard_delete:
pattern: /
methods: [DELETE]
anonymous: ~
http_basic: ~The guard_new_edit and guard_delete names are freely given names to our two application firewalls. The guard_new_edit firewall will be intercepting all GET and POST requests to any route containing the /new or /edit string in its URL. The guard_delete firewall will be intercepting any HTTP DELETE method on any URL. Once these firewalls kick in, they will show an HTTP basic authentication form, and only allow access if the user is logged in.
Then we add the access control list as follows:
security:
access_control:
# protect any possible auto-generated CRUD actions from everyone's access
- { path: /new, roles: ROLE_ADMIN }
- { path: /edit, roles: ROLE_ADMIN }
- { path: /, roles: ROLE_ADMIN, methods: [DELETE] }With these entries in place, an one who tries to access any URL with any of the patterns defined under access_control will be presented with the browser login as shown here:
The only user that can login is john with the password 1L6lllW9zXg0. Once authenticated, the user can access all the CRUD links. This should be enough for our simple application.
Before we start writing our functional tests, we need to edit the phpunit.xml.dist file by adding our bundle Tests directory to the testsuite paths, as follows:
<testsuites>
<testsuite name="Project Test Suite">
<-- ... other elements ... -->
<directory>src/AppBundle/Tests</directory>
<-- ... other elements ... -->
</testsuite>
</testsuites>Our functional tests will cover only one controller, since we have no other. We start off by creating a src/AppBundle/Tests/Controller/DefaultControllerTest.php file with content as follows:
namespace AppBundle\Tests\Controller;
use Symfony\Bundle\FrameworkBundle\Test\WebTestCase;
class DefaultControllerTest extends WebTestCase
{
//…
}The next step is to test each and every one of our controller actions. At the very least we should test if the page content is being outputted properly.
To get an auto-complete in our IDE we can download the PHPUnitphar file from the official site here https://phpunit.de. Once downloaded, we can simply add it to the root of our project, so that IDE, like PHPStorm, picks it up. This makes it easy to follow up on all those $this->assert method calls and their parameters.
The first thing we want to test is our home page. We do so by adding the following to the body of the DefaultControllerTest class.
public function testHomepage()
{
// @var \Symfony\Bundle\FrameworkBundle\Client
$client = static::createClient();
/** @var \Symfony\Component\DomCrawler\Crawler */
$crawler = $client->request('GET', '/');
// Check if homepage loads OK
$this->assertEquals(200, $client->getResponse()->getStatusCode());
// Check if top bar left menu is present
$this->assertNotEmpty($crawler->filter('.top-bar-left li')->count());
// Check if top bar right menu is present
$this->assertNotEmpty($crawler->filter('.top-bar-right li')->count());
// Check if footer is present
$this->assertNotEmpty($crawler->filter('.footer li')->children()->count());
}Here we are checking several things at once. We are checking with the page loads OK, with HTTP 200 status. Then we are grabbing the left and right menu and counting their the items to see if they have any. If all of the individual checks pass, the testHomepage test is considered to have passed.
We further test all of the static pages by adding the following to the DefaultControllerTest class:
public function testStaticPages()
{
// @var \Symfony\Bundle\FrameworkBundle\Client
$client = static::createClient();
/** @var \Symfony\Component\DomCrawler\Crawler */
// Test About Us page
$crawler = $client->request('GET', '/about');
$this->assertEquals(200, $client->getResponse()->getStatusCode());
$this->assertContains('About Us', $crawler->filter('h1')->text());
// Test Customer Service page
$crawler = $client->request('GET', '/customer-service');
$this->assertEquals(200, $client->getResponse()->getStatusCode());
$this->assertContains('Customer Service', $crawler->filter('h1')->text());
// Test Privacy and Cookie Policy page
$crawler = $client->request('GET', '/privacy-and-cookie-policy');
$this->assertEquals(200, $client->getResponse()->getStatusCode());
$this->assertContains('Privacy and Cookie Policy', $crawler->filter('h1')->text());
// Test Orders and Returns page
$crawler = $client->request('GET', '/orders-and-returns');
$this->assertEquals(200, $client->getResponse()->getStatusCode());
$this->assertContains('Orders and Returns', $crawler->filter('h1')->text());
// Test Contact Us page
$crawler = $client->request('GET', '/contact');
$this->assertEquals(200, $client->getResponse()->getStatusCode());
$this->assertContains('Contact Us', $crawler->filter('h1')->text());
}Here we are running the same assertEquals and assertContains functions for all of our pages. We are merely trying to confirm that each page is loaded with HTTP 200, and that the proper value is returned for the page title, that is to say, the h1 element.
Finally, we address the form submission test which we perform by adding the following into the DefaultControllerTest class:
public function testContactFormSubmit()
{
// @var \Symfony\Bundle\FrameworkBundle\Client
$client = static::createClient();
/** @var \Symfony\Component\DomCrawler\Crawler */
$crawler = $client->request('GET', '/contact');
// Find a button labeled as "Reach Out!"
$form = $crawler->selectButton('Reach Out!')->form();
// Note this does not validate form, it merely tests against submission and response page
$crawler = $client->submit($form);
$this->assertEquals(200, $client->getResponse()->getStatusCode());
}Here we are grabbing the form element through its Reach Out! submit button. Once the form is fetched, we trigger the submit method on the client passing it the instance from element. It is worth noting that the actual form validation is not being tested here. Even so, the submitted form should result in an HTTP 200 status.
These tests are conclusive. We can write them to be much more robust if we wanted to, as there are numerous elements we can test against.
In this chapter we have built our first module, or bundle in Symfony terminology. The module itself is not really loosely coupled, as it relies on some of the things within the app directory, such as the app/Resources/views/base.html.twig layout template. We can get away with this when it comes to core modules, as they are merely a foundation we are setting up for rest of the modules.
Moving forward, in the next chapter, we will build a catalog module. This will be the basis of our web shop application.
The catalog module is an essential part of every web shop application. At the very basic level, it is responsible for the management and display of categories and products. It is a foundation for later modules, such as checkout, that add the actual sales capabilities to our web shop application.
The more robust catalog features might include mass product imports, product exports, multi-warehouse inventory management, private members categories, and so on. These however, are out of the scope of this chapter.
In this chapter, we will be covering following topics:
Following the high level application requirements, defined in Chapter 4, Requirement Specification for Modular Web Shop App, our module will have several entities and other specific features implemented.
Following is a list of required module entities:
The Category entity includes the following properties and their data types:
id: integer, auto-incrementtitle: stringurl_key: string, uniquedescription: textimage: stringThe Product entity includes the following properties:
id: integer, auto-incrementcategory_id: integer, foreign key that references the category table ID columntitle: stringprice: decimalsku: string, uniqueurl_key: string, uniquedescription: textqty: integerimage: stringonsale: booleanAside from just adding these entities and their CRUD pages, we also need to override the core module services responsible for building the category menu and on sale items.
The module has no firm dependencies on any other module. The Symfony framework service layer enables us to code modules in such a way that, most of the time, there is no need for a dependency between them. While the module does override a service defined in the core module, the module itself is not dependent on it, as nothing will break if the overriding service is missing.
We start off by creating a new module called Foggyline\CatalogBundle. We do so with the help of the console, by running the command as follows:
php bin/console generate:bundle --namespace=Foggyline/CatalogBundle
The command triggers an interactive process that asks us several questions along the way, as shown in the following screenshot:
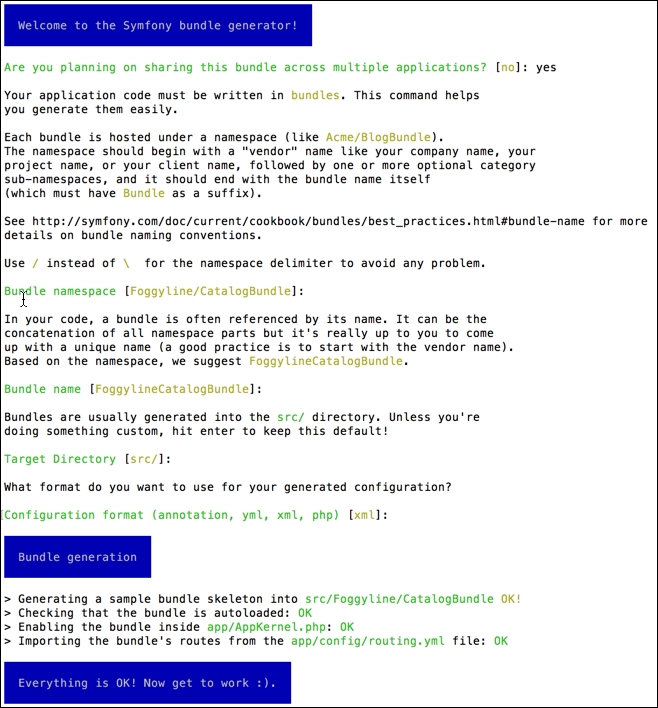
Once done, the following structure is generated for us:
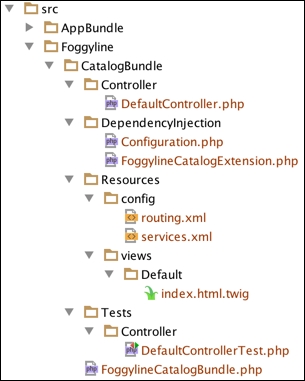
If we now take a look at the app/AppKernel.php file, we would see the following line under the registerBundles method:
new Foggyline\CatalogBundle\FoggylineCatalogBundle()
Similarly, the app/config/routing.yml has the following route definition added to it:
foggyline_catalog: resource: "@FoggylineCatalogBundle/Resources/config/routing.xml" prefix: /
Here we need to change prefix: / into prefix: /catalog/, so we don't collide with core module routes. Leaving it as prefix: / would simply overrun our core AppBundle and output Hello World! from the src/Foggyline/CatalogBundle/Resources/views/Default/index.html.twig template to the browser at this point. We want to keep things nice and separated. What this means is that the module does not define the root route for itself.
Let's go ahead and create a Category entity. We do so by using the console, as shown here:
php bin/console generate:doctrine:entity
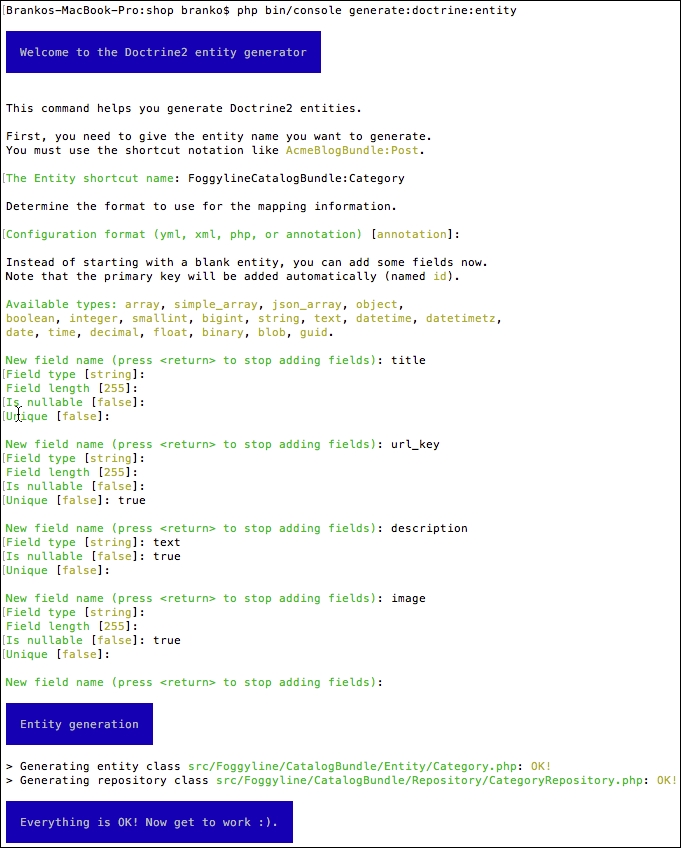
This creates the Entity/Category.php and Repository/CategoryRepository.php files within the src/Foggyline/CatalogBundle/ directory. After this, we need to update the database, so it pulls in the Category entity, as shown in the following command line instance:
php bin/console doctrine:schema:update --force
This results in a screen that looks similar to the following screenshot:

With entity in place, we are ready to generate its CRUD. We do so by using the following command:
php bin/console generate:doctrine:crud
This results with interactive output as shown here:
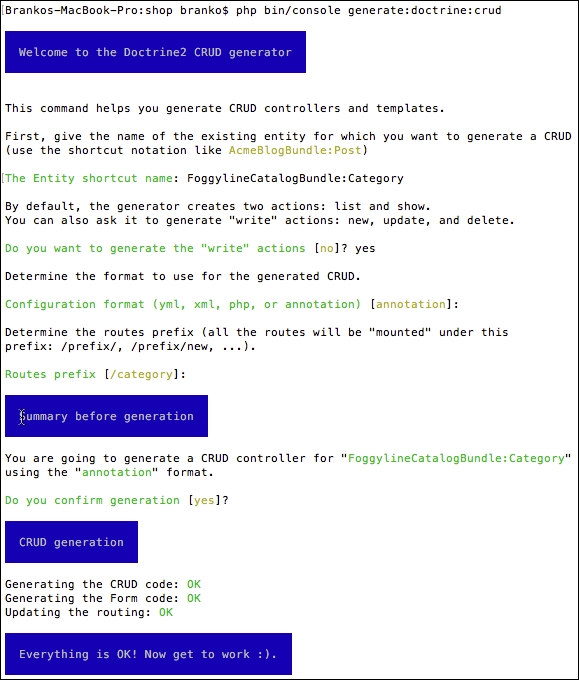
This results in src/Foggyline/CatalogBundle/Controller/CategoryController.php being created. It also adds an entry to our app/config/routing.yml file as follows:
foggyline_catalog_category: resource: "@FoggylineCatalogBundle/Controller/CategoryController.php" type: annotation
Furthermore, the view files are created under the app/Resources/views/category/ directory, which is not what we might expect. We want them under our module src/Foggyline/CatalogBundle/Resources/views/Default/category/ directory, so we need to copy them over. Additionally, we need to modify all of the $this->render calls within our CategoryController by appending the FoggylineCatalogBundle:default: string to each of the template paths.
Next, we go ahead and create the Product entity by using the interactive generator as discussed earlier:
php bin/console generate:doctrine:entity
We follow the interactive generator, respecting the minimum of the following attributes: title, price, sku, url_key, description, qty, category, and image. Aside from price and qty, which are of types decimal and integer, all other attributes are of type string. Furthermore, sku and url_key are flagged as unique. This creates the Entity/Product.php and Repository/ProductRepository.php files within the src/Foggyline/CatalogBundle/ directory.
Similar to what we have done for the Category view templates, we need to do for the Product view templates. That is, copy them over from the app/Resources/views/product/ directory to src/Foggyline/CatalogBundle/Resources/views/Default/product/ and update all of the $this->render calls within our ProductController by appending the FoggylineCatalogBundle:default: string to each of the template paths.
At this point, we won't rush updating the schema, as we want to add proper relations to our code. Each product should be able to have a relation to a single Category entity. To achieve this, we need to edit Category.php and Product.php from within the src/Foggyline/CatalogBundle/Entity/ directory, as follows:
// src/Foggyline/CatalogBundle/Entity/Category.php
/**
* @ORM\OneToMany(targetEntity="Product", mappedBy="category")
*/
private $products;
public function __construct()
{
$this->products = new \Doctrine\Common\Collections\ArrayCollection();
}
// src/Foggyline/CatalogBundle/Entity/Product.php
/**
* @ORM\ManyToOne(targetEntity="Category", inversedBy="products")
* @ORM\JoinColumn(name="category_id", referencedColumnName="id")
*/
private $category;We further need to edit the Category.php file by adding the __toString method implementation to it, as follows:
public function __toString()
{
return $this->getTitle();
}The reason we are doing so is that, later on, our Product-editing form would know what labels to list under the Category selection, otherwise the system would throw the following error:
Catchable Fatal Error: Object of class Foggyline\CatalogBundle\Entity\Category could not be converted to string
With the above changes in place, we can now run the schema update, as follows:
php bin/console doctrine:schema:update --force
If we now take a look at our database, the CREATE command syntax for our product table looks like the following:
CREATE TABLE `product` ( `id` int(11) NOT NULL AUTO_INCREMENT, `category_id` int(11) DEFAULT NULL, `title` varchar(255) COLLATE utf8_unicode_ci NOT NULL, `price` decimal(10,2) NOT NULL, `sku` varchar(255) COLLATE utf8_unicode_ci NOT NULL, `url_key` varchar(255) COLLATE utf8_unicode_ci NOT NULL, `description` longtext COLLATE utf8_unicode_ci, `qty` int(11) NOT NULL, `image` varchar(255) COLLATE utf8_unicode_ci DEFAULT NULL, PRIMARY KEY (`id`), UNIQUE KEY `UNIQ_D34A04ADF9038C4` (`sku`), UNIQUE KEY `UNIQ_D34A04ADDFAB7B3B` (`url_key`), KEY `IDX_D34A04AD12469DE2` (`category_id`), CONSTRAINT `FK_D34A04AD12469DE2` FOREIGN KEY (`category_id`) REFERENCES `category` (`id`) ) ENGINE=InnoDB DEFAULT CHARSET=utf8 COLLATE=utf8_unicode_ci;
We can see two unique keys and one foreign key restraint defined, as per the entries provided to our interactive entity generator. Now we are ready to generate the CRUD for our Product entity. To do so, we run the generate:doctrine:crud command and follow the interactive generator as shown here:
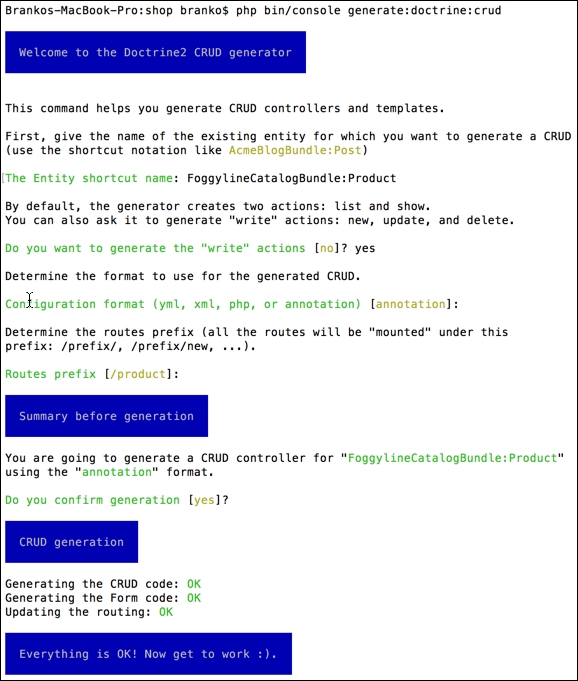
At this point, if we access either /category/new/ or /product/new/ URL, the image field is just a simple input text field, not the actual image upload we would like. To make it into an image upload field, we need to edit the $image property of Category.php and Product.php as follows:
//…
use Symfony\Component\Validator\Constraints as Assert;
//…
class [Category|Product]
{
//…
/**
* @var string
*
* @ORM\Column(name="image", type="string", length=255, nullable=true)
* @Assert\File(mimeTypes={ "image/png", "image/jpeg" }, mimeTypesMessage="Please upload the PNG or JPEG image file.")
*/
private $image;
//…
}As soon as we do so, the input fields turn into the file upload fields, as shown here:

Next, we will go ahead and implement the upload functionality into the forms.
We do so by first defining the service that will handle the actual upload. Service is defined by adding the following entry into the src/Foggyline/CatalogBundle/Resources/config/services.xml file, under the services element:
<service id="foggyline_catalog.image_uploader" class="Foggyline\CatalogBundle\Service\ImageUploader"> <argument>%foggyline_catalog_images_directory%</argument> </service>
The %foggyline_catalog_images_directory% argument value is the name of a parameter the we will soon define.
We then create the src/Foggyline/CatalogBundle/Service/ImageUploader.php file with content as follows:
namespace Foggyline\CatalogBundle\Service;
use Symfony\Component\HttpFoundation\File\UploadedFile;
class ImageUploader
{
private $targetDir;
public function __construct($targetDir)
{
$this->targetDir = $targetDir;
}
public function upload(UploadedFile $file)
{
$fileName = md5(uniqid()) . '.' . $file->guessExtension();
$file->move($this->targetDir, $fileName);
return $fileName;
}
}We then create our own parameters.yml file within the src/Foggyline/CatalogBundle/Resources/config directory with content as follows:
parameters: foggyline_catalog_images_directory: "%kernel.root_dir%/../web/uploads/foggyline_catalog_images"
This is the parameter our service expects to find. It can easily be overridden with the same entry under app/config/parameters.yml if needed.
In order for our bundle to see the parameters.yml file, we still need to edit the FoggylineCatalogExtension.php file within the src/Foggyline/CatalogBundle/DependencyInjection/ directory, by adding the following loader to the end of the load method:
$loader = new Loader\YamlFileLoader($container, new FileLocator(__DIR__.'/../Resources/config'));
$loader->load('parameters.yml');At this point, our Symfony module is able to read its parameters.yml, thus making it possible for the defined service to pickup the proper value for its argument. All that is left is to adjust the code for our new and edit forms, attaching the upload functionality to them. Since both forms are the same, the following is a Category example that equally applies to the Product form as well:
public function newAction(Request $request) {
// ...
if ($form->isSubmitted() && $form->isValid()) {
/* @var $image \Symfony\Component\HttpFoundation\File\UploadedFile */
if ($image = $category->getImage()) {
$name = $this->get('foggyline_catalog.image_uploader')->upload($image);
$category->setImage($name);
}
$em = $this->getDoctrine()->getManager();
// ...
}
// ...
}
public function editAction(Request $request, Category $category) {
$existingImage = $category->getImage();
if ($existingImage) {
$category->setImage(
new File($this->getParameter('foggyline_catalog_images_directory') . '/' . $existingImage)
);
}
$deleteForm = $this->createDeleteForm($category);
// ...
if ($editForm->isSubmitted() && $editForm->isValid()) {
/* @var $image \Symfony\Component\HttpFoundation\File\UploadedFile */
if ($image = $category->getImage()) {
$name = $this->get('foggyline_catalog.image_uploader')->upload($image);
$category->setImage($name);
} elseif ($existingImage) {
$category->setImage($existingImage);
}
$em = $this->getDoctrine()->getManager();
// ...
}
// ...
}Both the new and edit forms should now be able to handle file uploads.
Now let's go ahead and address the category menu and the on-sale items. Back when we were building the core module, we defined the global variables under the twig:global section of the app/config/config.yml file. These variables were pointing to services defined in the app/config/services.yml file. In order for us to change the content of the category menu and the on sale items, we need to override those services.
We start off by adding the following two service definitions under the src/Foggyline/CatalogBundle/Resources/config/services.xml file:
<service id="foggyline_catalog.category_menu" class="Foggyline\CatalogBundle\Service\Menu\Category"> <argument type="service" id="doctrine.orm.entity_manager" /> <argument type="service" id="router" /> </service> <service id="foggyline_catalog.onsale" class="Foggyline\CatalogBundle\Service\Menu\OnSale"> <argument type="service" id="doctrine.orm.entity_manager" /> <argument type="service" id="router" /> </service>
Both of the services accept the Doctrine ORM entity manager and router service arguments, as we will need to use those internally.
We then create the actual Category and OnSale service classes within the src/Foggyline/CatalogBundle/Service/Menu/ directory as follows:
//Category.php
namespace Foggyline\CatalogBundle\Service\Menu;
class Category
{
private $em;
private $router;
public function __construct(
\Doctrine\ORM\EntityManager $entityManager,
\Symfony\Bundle\FrameworkBundle\Routing\Router $router
)
{
$this->em = $entityManager;
$this->router = $router;
}
public function getItems()
{
$categories = array();
$_categories = $this->em->getRepository('FoggylineCatalogBundle:Category')->findAll();
foreach ($_categories as $_category) {
/* @var $_category \Foggyline\CatalogBundle\Entity\Category */
$categories[] = array(
'path' => $this->router->generate('category_show', array('id' => $_category->getId())),
'label' => $_category->getTitle(),
);
}
return $categories;
}
}
//OnSale.php
namespace Foggyline\CatalogBundle\Service\Menu;
class OnSale
{
private $em;
private $router;
public function __construct(\Doctrine\ORM\EntityManager $entityManager, $router)
{
$this->em = $entityManager;
$this->router = $router;
}
public function getItems()
{
$products = array();
$_products = $this->em->getRepository('FoggylineCatalogBundle:Product')->findBy(
array('onsale' => true),
null,
5
);
foreach ($_products as $_product) {
/* @var $_product \Foggyline\CatalogBundle\Entity\Product */
$products[] = array(
'path' => $this->router->generate('product_show', array('id' => $_product->getId())),
'name' => $_product->getTitle(),
'image' => $_product->getImage(),
'price' => $_product->getPrice(),
'id' => $_product->getId(),
);
}
return $products;
}
}This alone won't trigger the override of the core module services. Within the src/Foggyline/CatalogBundle/DependencyInjection/Compiler/ directory we need to create an OverrideServiceCompilerPass class that implements the CompilerPassInterface. Within its process method, we can then change the definition of the service, as follows:
namespace Foggyline\CatalogBundle\DependencyInjection\Compiler;
use Symfony\Component\DependencyInjection\Compiler\CompilerPassInterface;
use Symfony\Component\DependencyInjection\ContainerBuilder;
class OverrideServiceCompilerPass implements CompilerPassInterface
{
public function process(ContainerBuilder $container)
{
// Override the core module 'category_menu' service
$container->removeDefinition('category_menu');
$container->setDefinition('category_menu', $container->getDefinition('foggyline_catalog.category_menu'));
// Override the core module 'onsale' service
$container->removeDefinition('onsale');
$container->setDefinition('onsale', $container->getDefinition('foggyline_catalog.onsale'));
}
}Finally, we need to edit the build method of the src/Foggyline/CatalogBundle/FoggylineCatalogBundle.php file in order to add this compiler pass as shown here:
public function build(ContainerBuilder $container)
{
parent::build($container);
$container->addCompilerPass(new \Foggyline\CatalogBundle\DependencyInjection\Compiler\OverrideServiceCompilerPass());
}Now our Category and OnSale services should override the ones defined in the core module, thus providing the right values for the header Category menu and On Sale section of the homepage.
The auto-generated CRUD made a Category page for us with the layout as follows:
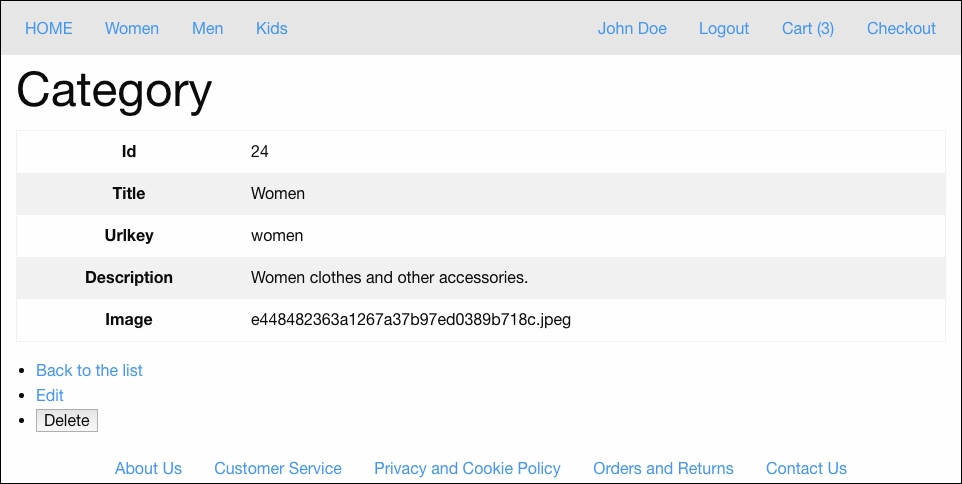
This is significantly different from the Category page defined under Chapter 4, Requirement Specification for Modular Web Shop App. We therefore need to make amends to our Category Show page, by modifying the show.html.twig file within the src/Foggyline/CatalogBundle/Resources/views/Default/category/ directory. We do so by replacing the entire content of body block with code as follows:
<div class="row">
<div class="small-12 large-12 columns text-center">
<h1>{{ category.title }}</h1>
<p>{{ category.description }}</p>
</div>
</div>
<div class="row">
<img src="{{ asset('uploads/foggyline_catalog_images/' ~ category.image) }}"/>
</div>
{% set products = category.getProducts() %}
{% if products %}
<div class="row products_onsale text-center small-up-1 medium-up-3 large-up-5" data-equalizer data-equalize-by-row="true">
{% for product in products %}
<div class="column product">
<img src="{{ asset('uploads/foggyline_catalog_images/' ~ product.image) }}"
alt="missing image"/>
<a href="{{ path('product_show', {'id': product.id}) }}">{{ product.title }}</a>
<div>${{ product.price }}</div>
<div><a class="small button" href="{{ path('product_show', {'id': product.id}) }}">View</a></div>
</div>
{% endfor %}
</div>
{% else %}
<div class="row">
<p>There are no products assigned to this category.</p>
</div>
{% endif %}
{% if is_granted('ROLE_ADMIN') %}
<ul>
<li>
<a href="{{ path('category_edit', { 'id': category.id }) }}">Edit</a>
</li>
<li>
{{ form_start(delete_form) }}
<input type="submit" value="Delete">
form_end(delete_form) }}
</li>
</ul>
{% endif %}The body is now sectioned into three areas. First, we are addressing the category title and description output. We are then fetching and looping through the list of products assigned to category, rendering each individual product. Finally, we are using the is_granted Twig extension to check if the current user role is ROLE_ADMIN, in which case we show the Edit and Delete links for the category.
The auto-generated CRUD made a Product page for us with the layout as follows:
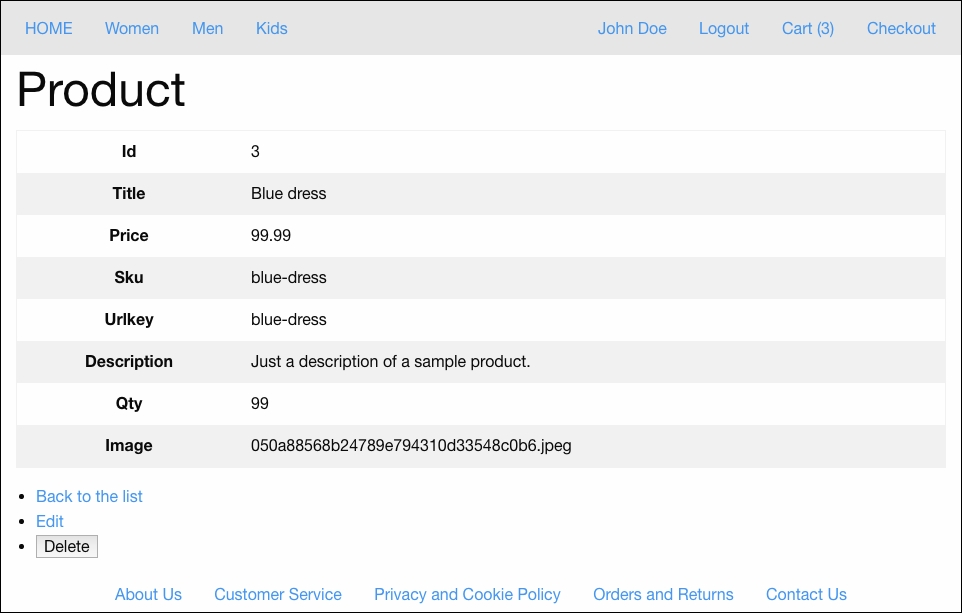
This differs from the Product page defined under Chapter 4, Requirement Specification for Modular Web Shop App. To rectify the problem, we need to make amends to our Product Show page, by modifying the show.html.twig file within the src/Foggyline/CatalogBundle/Resources/views/Default/product/ directory. We do so by replacing entire content of body block with code as follows:
<div class="row">
<div class="small-12 large-6 columns">
<img class="thumbnail" src="{{ asset('uploads/foggyline_catalog_images/' ~ product.image) }}"/>
</div>
<div class="small-12 large-6 columns">
<h1>{{ product.title }}</h1>
<div>SKU: {{ product.sku }}</div>
{% if product.qty %}
<div>IN STOCK</div>
{% else %}
<div>OUT OF STOCK</div>
{% endif %}
<div>$ {{ product.price }}</div>
<form action="{{ add_to_cart_url.getAddToCartUrl
(product.id) }}" method="get">
<div class="input-group">
<span class="input-group-label">Qty</span>
<input class="input-group-field" type="number">
<div class="input-group-button">
<input type="submit" class="button" value="Add to Cart">
</div>
</div>
</form>
</div>
</div>
<div class="row">
<p>{{ product.description }}</p>
</div>
{% if is_granted('ROLE_ADMIN') %}
<ul>
<li>
<a href="{{ path('product_edit', { 'id': product.id }) }}">Edit</a>
</li>
<li>
{{ form_start(delete_form) }}
<input type="submit" value="Delete">
{{ form_end(delete_form) }}
</li>
</ul>
{% endif %}The body is now sectioned into two main areas. First, we are addressing the product image, title, stock status, and add to cart output. The add to cart form uses the add_to_cart_url service to provide the right link. This service is defined under the core module and, at this point, only provides a dummy link. Later on, when we get to the checkout module, we will implement an override for this service and inject the right add to cart link. We then output the description section. Finally, we use the is_granted Twig extension, like we did on the Category example, to determine if the user can access the Edit and Delete links for a product.
We now have several class files that are not related to the controllers, meaning we can run unit tests against them. Still, we won't be going after a full code coverage as part of this book, rather focus on some of the little-big things, like using containers within our test classes.
We start of by adding the following line under the testsuites element of our phpunit.xml.dist file:
<directory>src/Foggyline/CatalogBundle/Tests</directory>
With that in place, running the phpunit command from the root of our shop should pick up any test we have defined under the src/Foggyline/CatalogBundle/Tests/ directory.
Now let's go ahead and create a test for our Category service menu. We do so by creating an src/Foggyline/CatalogBundle/Tests/Service/Menu/CategoryTest.php file with the following content:
namespace Foggyline\CatalogBundle\Tests\Service\Menu;
use Symfony\Bundle\FrameworkBundle\Test\KernelTestCase;
use Foggyline\CatalogBundle\Service\Menu\Category;
class CategoryTest extends KernelTestCase
{
private $container;
private $em;
private $router;
public function setUp()
{
static::bootKernel();
$this->container = static::$kernel->getContainer();
$this->em = $this->container->get('doctrine.orm.entity_manager');
$this->router = $this->container->get('router');
}
public function testGetItems()
{
$service = new Category($this->em, $this->router);
$this->assertNotEmpty($service->getItems());
}
protected function tearDown()
{
$this->em->close();
unset($this->em, $this->router);
}
}The preceding example shows the usage of the setUp and tearDown method calls, which are analogous in behavior to the PHP's __construct and __destruct methods. We use the setUp method to set the entity manager and router service that we can use through out the rest of the class. The tearDown method is merely a clean up. Now if we run the phpunit command, we should see our test being picked up and executed alongside other tests.
We can even target this class specifically by executing a phpunit command with the full class path, as shown here:
phpunit src/Foggyline/CatalogBundle/Tests/Service/Menu/CategoryTest.php
Similarly to what we did for CategoryTest, we can go ahead and create OnSaleTest; the only difference between the two being the class name.
The great thing about the auto-generate CRUD tool is that it generates even the functional tests for us. More specifically, in this case, it generated the CategoryControllerTest.php and ProductControllerTest.php files within the src/Foggyline/CatalogBundle/Tests/Controller/ directory.
If we look into these two files, we can see that they both have a single testCompleteScenario method defined, which is entirely commented out. Let's go ahead and change the CategoryControllerTest.php content as follows:
// Create a new client to browse the application
$client = static::createClient(
array(), array(
'PHP_AUTH_USER' => 'john',
'PHP_AUTH_PW' => '1L6lllW9zXg0',
)
);
// Create a new entry in the database
$crawler = $client->request('GET', '/category/');
$this->assertEquals(200, $client->getResponse()->getStatusCode(), "Unexpected HTTP status code for GET /product/");
$crawler = $client->click($crawler->selectLink('Create a new entry')->link());
// Fill in the form and submit it
$form = $crawler->selectButton('Create')->form(array(
'category[title]' => 'Test',
'category[urlKey]' => 'Test urlKey',
'category[description]' => 'Test description',
));
$client->submit($form);
$crawler = $client->followRedirect();
// Check data in the show view
$this->assertGreaterThan(0, $crawler->filter('h1:contains("Test")')->count(), 'Missing element h1:contains("Test")');
// Edit the entity
$crawler = $client->click($crawler->selectLink('Edit')->link());
$form = $crawler->selectButton('Edit')->form(array(
'category[title]' => 'Foo',
'category[urlKey]' => 'Foo urlKey',
'category[description]' => 'Foo description',
));
$client->submit($form);
$crawler = $client->followRedirect();
// Check the element contains an attribute with value equals "Foo"
$this->assertGreaterThan(0, $crawler->filter('[value="Foo"]')->count(), 'Missing element [value="Foo"]');
// Delete the entity
$client->submit($crawler->selectButton('Delete')->form());
$crawler = $client->followRedirect();
// Check the entity has been delete on the list
$this->assertNotRegExp('/Foo title/', $client->getResponse()->getContent());We started off by setting PHP_AUTH_USER and PHP_AUTH_PW as parameters for the createClient method. This is because our /new and /edit routes are protected by the core module security. These settings allow us to pass the basic HTTP authentication along the request. We then tested if the category listing page can be accessed and if its Create a new entry link can be clicked. Furthermore, both the create and edit forms were tested, along with their results.
All that remains is to repeat the approach we just used for CategoryControllerTest.php with ProductControllerTest.php. We simply need to change a few labels within the ProductControllerTest class file to match the product routes and expected results.
Running the phpunit command now should successfully execute our tests.
Throughout this chapter we have built a miniature, but functional, catalog module. It allowed us to create, edit, and delete categories and products. By adding a few custom lines of code on top of the auto-generated CRUD, we were able to achieve image upload functionality for both categories and products. We also saw how to override the core module service, by simply removing the existing service definition and providing a new one. In regard to tests, we saw how we can pass the authentication along our requests to test for protected routes.
Moving forward, in the next chapter, we will build a customer module.
The customer module provides a basis for further sales functionality of our web shop. At the very basic level, it is responsible for register, login, management and display of relevant customer information. It is a requirement for the later sales module, that adds the actual sales capabilities to our web shop application.
In this chapter we will be covering following topics:
Following the high level application requirements, defined under Chapter 4, Requirement Specification for Modular Web Shop App, our module will have a single Customer entity defined.
The Customer entity includes the following properties:
id: integer, auto-incrementemail: string, uniqueusername: string, unique, needed for login systempassword: stringfirst_name: stringlast_name: stringcompany: stringphone_number: stringcountry: stringstate: stringcity: stringpostcode: stringstreet: stringThroughout this chapter, aside from just adding the Customer entity and its CRUD pages, we also need to address the creation of login, register, forgot your password pages, as well as override a core module service responsible for building a customer menu.
We start of by creating a new module called Foggyline\CustomerBundle. We do so with the help of console, by running the command as follows:
php bin/console generate:bundle --namespace=Foggyline/CustomerBundle
The command triggers an interactive process asking us several questions along the way, as shown in the following screenshot:
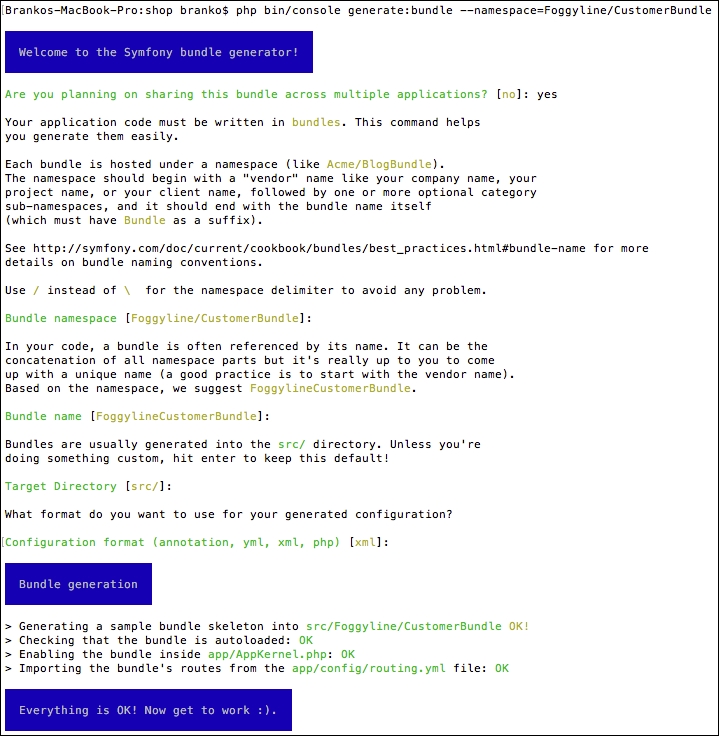
Once done, the following structure is generated for us:
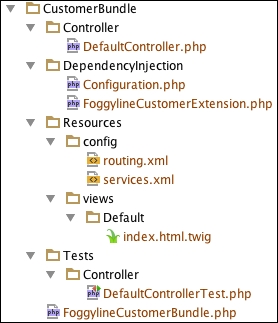
If we now take a look at the app/AppKernel.php file, we would see the following line under the registerBundles method:
new Foggyline\CustomerBundle\FoggylineCustomerBundle()
Similarly, the app/config/routing.yml directory has the following route definition added to it:
foggyline_customer: resource: "@FoggylineCustomerBundle/Resources/config/routing.xml" prefix: /
Here we need to change prefix: / into prefix: /customer/, so we don't collide with core module routes. Leaving it as prefix: / would simply overrun our core AppBundle and output Hello World! from the src/Foggyline/CustomerBundle/Resources/views/Default/index.html.twig template to the browser at this point. We want to keep things nice and separated. What this means is that the module does not define root route for itself.
Let's go ahead and create a Customer entity. We do so by using the console, as shown here:
php bin/console generate:doctrine:entity
This command triggers the interactive generator, where we need to provide entity properties. Once done, the generator creates the Entity/Customer.php and Repository/CustomerRepository.php files within the src/Foggyline/CustomerBundle/ directory. After this, we need to update the database, so it pulls in the Customer entity, by running the following command:
php bin/console doctrine:schema:update --force
This results in a screen as shown in the following screenshot:

With entity in place, we are ready to generate its CRUD. We do so by using the following command:
php bin/console generate:doctrine:crud
This results in an interactive output as shown here:
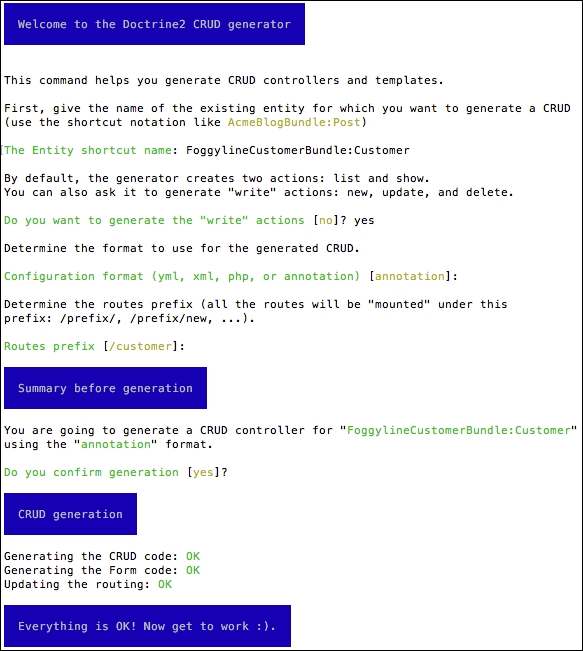
This results in the src/Foggyline/CustomerBundle/Controller/CustomerController.php directory being created. It also adds an entry to our app/config/routing.yml file as follows:
foggyline_customer_customer: resource: "@FoggylineCustomerBundle/Controller/CustomerController.php" type: annotation
Again, the view files were created under the app/Resources/views/customer/ directory, which is not what we might expect. We want them under our module src/Foggyline/CustomerBundle/Resources/views/Default/customer/ directory, so we need to copy them over. Additionally, we need to modify all of the $this->render calls within our CustomerController by appending the FoggylineCustomerBundle:default: string to each of the template path.
Before we proceed further with the actual changes within our module, let's imagine our module requirements mandate a certain security configuration in order to make it work. These requirements state that we need to apply several changes to the app/config/security.yml file. We first edit the providers element by adding to it the following entry:
foggyline_customer:
entity:
class: FoggylineCustomerBundle:Customer
property: usernameThis effectively defines our Customer class as a security provider, whereas the username element is the property storing user identity.
We then define the encoder type under the encoders element, as follows:
Foggyline\CustomerBundle\Entity\Customer: algorithm: bcrypt cost: 12
This tells Symfony to use the bcrypt algorithm with a value of 12 for algorithmic cost while encrypting our password. This way our passwords won't end up in clear text when saved in the database.
We then go ahead and define a new firewall entry under the firewalls element, as follows:
foggyline_customer:
anonymous: ~
provider: foggyline_customer
form_login:
login_path: foggyline_customer_login
check_path: foggyline_customer_login
default_target_path: customer_account
logout:
path: /customer/logout
target: /There is quite a lot going on here. Our firewall uses the anonymous: ~ definition to denote that it does not really need a user to be logged in to see certain pages. By default, all Symfony users are authenticated as anonymous, as shown in the following screenshot, on the Developer toolbar:
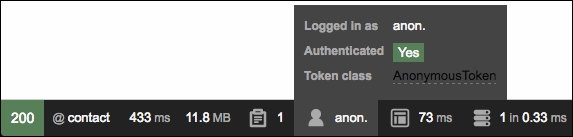
The form_login definition takes three properties. The login_path and the check_path point to our custom route foggyline_customer_login. When the security system initiates the authentication process, it will redirect the user to the foggyline_customer_login route, where we will soon implement needed controller logic and view templates in order to handle the login form. Once logged in, the default_target_path determines where the user will be redirected to.
Finally, we reuse the Symfony anonymous user feature in order to exclude certain pages from being forbidden. We want our non-authenticated customer to be able to access login, register, and forgotten password pages. To make that possible, we add the following entries under the access_control element:
- { path: customer/login, roles: IS_AUTHENTICATED_ANONYMOUSLY }
- { path: customer/register, roles: IS_AUTHENTICATED_ANONYMOUSLY }
- { path: customer/forgotten_password, roles: IS_AUTHENTICATED_ANONYMOUSLY }
- { path: customer/account, roles: ROLE_USER }
- { path: customer/logout, roles: ROLE_USER }
- { path: customer/, roles: ROLE_ADMIN }It is worth noting that this approach to handling security between module and base application is by far the ideal one. This is merely one possible example of how we can achieve what is needed for this module to make it functional.
With the preceding security.yml additions in place, we are now ready to actually start implementing the registration process. First we edit the Customer entity within the src/Foggyline/CustomerBundle/Entity/ directory, by making it implement the Symfony\Component\Security\Core\User\UserInterface, \Serializable. This implies implementation of the following methods:
public function getSalt()
{
return null;
}
public function getRoles()
{
return array('ROLE_USER');
}
public function eraseCredentials()
{
}
public function serialize()
{
return serialize(array(
$this->id,
$this->username,
$this->password
));
}
public function unserialize($serialized)
{
list (
$this->id,
$this->username,
$this->password,
) = unserialize($serialized);
}Even though all of the passwords need to be hashed with salt, the getSalt function in this case is irrelevant since bcrypt does this internally. The getRoles function is the important bit. We can return one or more roles that individual customers will have. To make things simple, we will only assign one ROLE_USER role to each of our customers. But this can easily be made much more robust, so that the roles are stored in the database as well. The eraseCredentials function is merely a cleanup method, which we left blank.
Since the user object is first unserialized, serialized, and saved to a session per each request, we implement the \Serializable interface. The actual implementation of serialize and unserialize can include only a fraction of customer properties, as we do not need to store everything in the session.
Before we go ahead and start implementing the register, login, forgot your password, and other bits, let's go ahead and define the needed services we are going to use later on.
We will create an orders service which will be used to fill in the data available under the My Account page. Later on, other modules can override this service and inject real customer orders. To define an orders service, we edit the src/Foggyline/CustomerBundle/Resources/config/services.xml file by adding the following under the services element:
<service id="foggyline_customer.customer_orders" class="Foggyline\CustomerBundle\Service\CustomerOrders"> </service>
Then, we go ahead and create the src/Foggyline/CustomerBundle/Service/CustomerOrders.php directory with content as follows:
namespace Foggyline\CustomerBundle\Service;
class CustomerOrders
{
public function getOrders()
{
return array(
array(
'id' => '0000000001',
'date' => '23/06/2016 18:45',
'ship_to' => 'John Doe',
'order_total' => 49.99,
'status' => 'Processing',
'actions' => array(
array(
'label' => 'Cancel',
'path' => '#'
),
array(
'label' => 'Print',
'path' => '#'
)
)
),
);
}
}The getOrders method simply returns some dummy data here. We can easily make it return an empty array. Ideally, we would want this to return a collection of certain types of element that conform to some specific interface.
In the previous module we defined a customer service that filled in the Customer menu with some dummy data. Now we will create an overriding service that fills the menu with actual customer data, depending on customer login status. To define a customer menu service, we edit the src/Foggyline/CustomerBundle/Resources/config/services.xml file by adding the following under the services element:
<service id="foggyline_customer.customer_menu" class="Foggyline\CustomerBundle\Service\Menu\CustomerMenu"> <argument type="service" id="security.token_storage"/> <argument type="service" id="router"/> </service>
Here we are injecting the token_storage and router objects into our service, as we will need them to construct the menu based on the login state of a customer.
We then go ahead and create the src/Foggyline/CustomerBundle/Service/Menu/CustomerMenu.php directory with content as follows:
namespace Foggyline\CustomerBundle\Service\Menu;
class CustomerMenu
{
private $token;
private $router;
public function __construct(
$tokenStorage,
\Symfony\Bundle\FrameworkBundle\Routing\Router $router
)
{
$this->token = $tokenStorage->getToken();
$this->router = $router;
}
public function getItems()
{
$items = array();
$user = $this->token->getUser();
if ($user instanceof \Foggyline\CustomerBundle\Entity\Customer) {
// customer authentication
$items[] = array(
'path' => $this->router->generate('customer_account'),
'label' => $user->getFirstName() . ' ' . $user->getLastName(),
);
$items[] = array(
'path' => $this->router->generate('customer_logout'),
'label' => 'Logout',
);
} else {
$items[] = array(
'path' => $this->router->generate('foggyline_customer_login'),
'label' => 'Login',
);
$items[] = array(
'path' => $this->router->generate('foggyline_customer_register'),
'label' => 'Register',
);
}
return $items;
}
}Here we see a menu being constructed based on user login state. This way a customer gets to see the Logout link when logged in, or Login when not logged in.
We then add the src/Foggyline/CustomerBundle/DependencyInjection/Compiler/OverrideServiceCompilerPass.php directory with content as follows:
namespace Foggyline\CustomerBundle\DependencyInjection\Compiler;
use Symfony\Component\DependencyInjection\Compiler\CompilerPassInterface;
use Symfony\Component\DependencyInjection\ContainerBuilder;
class OverrideServiceCompilerPass implements CompilerPassInterface
{
public function process(ContainerBuilder $container)
{
// Override the core module 'onsale' service
$container->removeDefinition('customer_menu');
$container->setDefinition('customer_menu', $container->getDefinition('foggyline_customer.customer_menu'));
}
}Here we are doing the actual customer_menu service override. However, this won't kick in until we edit the src/Foggyline/CustomerBundle/FoggylineCustomerBundle.php directory, by adding the build method to it as follows:
namespace Foggyline\CustomerBundle;
use Symfony\Component\HttpKernel\Bundle\Bundle;
use Symfony\Component\DependencyInjection\ContainerBuilder;
use Foggyline\CustomerBundle\DependencyInjection\Compiler\OverrideServiceCompilerPass;
class FoggylineCustomerBundle extends Bundle
{
public function build(ContainerBuilder $container)
{
parent::build($container);;
$container->addCompilerPass(new OverrideServiceCompilerPass());
}
}The addCompilerPass method call accepts the instance of our OverrideServiceCompilerPass, ensuring our service override will kick in.
To implement a register page, we first modify the src/Foggyline/CustomerBundle/Controller/CustomerController.php file as follows:
/**
* @Route("/register", name="foggyline_customer_register")
*/
public function registerAction(Request $request)
{
// 1) build the form
$user = new Customer();
$form = $this->createForm(CustomerType::class, $user);
// 2) handle the submit (will only happen on POST)
$form->handleRequest($request);
if ($form->isSubmitted() && $form->isValid()) {
// 3) Encode the password (you could also do this via Doctrine listener)
$password = $this->get('security.password_encoder')
->encodePassword($user, $user->getPlainPassword());
$user->setPassword($password);
// 4) save the User!
$em = $this->getDoctrine()->getManager();
$em->persist($user);
$em->flush();
// ... do any other work - like sending them an email, etc
// maybe set a "flash" success message for the user
return $this->redirectToRoute('customer_account');
}
return $this->render(
'FoggylineCustomerBundle:default:customer/register.html.twig',
array('form' => $form->createView())
);
}The register page uses a standard auto-generated Customer CRUD form, simply pointing it to the src/Foggyline/CustomerBundle/Resources/views/Default/customer/register.html.twig template file with content as follows:
{% extends 'base.html.twig' %}
{% block body %}
{{ form_start(form) }}
{{ form_widget(form) }}
<button type="submit">Register!</button>
{{ form_end(form) }}
{% endblock %}Once these two files are in place, our register functionality should be working.
We will implement the login page on its own /customer/login URL, thus we edit the CustomerController.php file by adding the loginAction function as follows:
/**
* Creates a new Customer entity.
*
* @Route("/login", name="foggyline_customer_login")
*/
public function loginAction(Request $request)
{
$authenticationUtils = $this->get('security.authentication_utils');
// get the login error if there is one
$error = $authenticationUtils->getLastAuthenticationError();
// last username entered by the user
$lastUsername = $authenticationUtils->getLastUsername();
return $this->render(
'FoggylineCustomerBundle:default:customer/login.html.twig',
array(
// last username entered by the user
'last_username' => $lastUsername,
'error' => $error,
)
);
}Here we are simply checking if the user already tried to login, and if it did we are passing that info to the template, along with the potential errors. We then edit the src/Foggyline/CustomerBundle/Resources/views/Default/customer/login.html.twig file with content as follows:
{% extends 'base.html.twig' %}
{% block body %}
{% if error %}
<div>{{ error.messageKey|trans(error.messageData, 'security') }}</div>
{% endif %}
<form action="{{ path('foggyline_customer_login') }}" method="post">
<label for="username">Username:</label>
<input type="text" id="username" name="_username" value="{{ last_username }}"/>
<label for="password">Password:</label>
<input type="password" id="password" name="_password"/>
<button type="submit">login</button>
</form>
<div class="row">
<a href="{{ path('customer_forgotten_password') }}">Forgot your password?</a>
</div>
{% endblock %}Once logged in, the user will be redirected to the /customer/account page. We create this page by adding the accountAction method to the CustomerController.php file as follows:
/**
* Finds and displays a Customer entity.
*
* @Route("/account", name="customer_account")
* @Method({"GET", "POST"})
*/
public function accountAction(Request $request)
{
if (!$this->get('security.authorization_checker')->isGranted('ROLE_USER')) {
throw $this->createAccessDeniedException();
}
if ($customer = $this->getUser()) {
$editForm = $this->createForm('Foggyline\CustomerBundle\Form\CustomerType', $customer, array( 'action' => $this->generateUrl('customer_account')));
$editForm->handleRequest($request);
if ($editForm->isSubmitted() && $editForm->isValid()) {
$em = $this->getDoctrine()->getManager();
$em->persist($customer);
$em->flush();
$this->addFlash('success', 'Account updated.');
return $this->redirectToRoute('customer_account');
}
return $this->render('FoggylineCustomerBundle:default:customer/account.html.twig', array(
'customer' => $customer,
'form' => $editForm->createView(),
'customer_orders' => $this->get('foggyline_customer.customer_orders')->getOrders()
));
} else {
$this->addFlash('notice', 'Only logged in customers can access account page.');
return $this->redirectToRoute('foggyline_customer_login');
}
}Using $this->getUser() we are checking if logged in user is set, and if so, passing its info to the template. We then edit the src/Foggyline/CustomerBundle/Resources/views/Default/customer/account.html.twig file with content as follows:
{% extends 'base.html.twig' %}
{% block body %}
<h1>My Account</h1>
{{ form_start(form) }}
<div class="row">
<div class="medium-6 columns">
{{ form_row(form.email) }}
{{ form_row(form.username) }}
{{ form_row(form.plainPassword.first) }}
{{ form_row(form.plainPassword.second) }}
{{ form_row(form.firstName) }}
{{ form_row(form.lastName) }}
{{ form_row(form.company) }}
{{ form_row(form.phoneNumber) }}
</div>
<div class="medium-6 columns">
{{ form_row(form.country) }}
{{ form_row(form.state) }}
{{ form_row(form.city) }}
{{ form_row(form.postcode) }}
{{ form_row(form.street) }}
<button type="submit">Save</button>
</div>
</div>
{{ form_end(form) }}
<!-- customer_orders -->
{% endblock %}With this we address the actual customer information section of the My Account page. In its current state, this page should render an Edit form as shown in the following screenshot, enabling us to edit all of our customer information:
We then address the <!-- customer_orders -->, by replacing it with the following bits:
{% block customer_orders %}
<h2>My Orders</h2>
<div class="row">
<table>
<thead>
<tr>
<th width="200">Order Id</th>
<th>Date</th>
<th width="150">Ship To</th>
<th width="150">Order Total</th>
<th width="150">Status</th>
<th width="150">Actions</th>
</tr>
</thead>
<tbody>
{% for order in customer_orders %}
<tr>
<td>{{ order.id }}</td>
<td>{{ order.date }}</td>
<td>{{ order.ship_to }}</td>
<td>{{ order.order_total }}</td>
<td>{{ order.status }}</td>
<td>
<div class="small button-group">
{% for action in order.actions %}
<a class="button" href="{{ action.path }}">{{ action.label }}</a>
{% endfor %}
</div>
</td>
</tr>
{% endfor %}
/tbody>
</table>
</div>
{% endblock %}This should now render the My Orders section of the My Account page as shown here:

This is just dummy data coming from service defined in a src/Foggyline/CustomerBundle/Resources/config/services.xml. In a later chapter, when we get to the sales module, we will make sure it overrides the foggyline_customer.customer_orders service in order to insert real customer data here.
One of the changes we did to security.yml when defining our firewall, was configuring the logout path, which we pointed to /customer/logout. The implementation of that path is done within the CustomerController.php file as follows:
/**
* @Route("/logout", name="customer_logout")
*/
public function logoutAction()
{
}Note, the logoutAction method is actually empty. There is no implementation as such. Implementation is not needed, as Symfony intercepts the request and processes the logout for us. We did, however, need to define this route as we referenced it from our system.xml file.
The forgotten password feature is going to be implemented as a separate page. We edit the CustomerController.php file by adding the forgottenPasswordAction function to it as follows:
/**
* @Route("/forgotten_password", name="customer_forgotten_password")
* @Method({"GET", "POST"})
*/
public function forgottenPasswordAction(Request $request)
{
// Build a form, with validation rules in place
$form = $this->createFormBuilder()
->add('email', EmailType::class, array(
'constraints' => new Email()
))
->add('save', SubmitType::class, array(
'label' => 'Reset!',
'attr' => array('class' => 'button'),
))
->getForm();
// Check if this is a POST type request and if so, handle form
if ($request->isMethod('POST')) {
$form->handleRequest($request);
if ($form->isSubmitted() && $form->isValid()) {
$this->addFlash('success', 'Please check your email for reset password.');
// todo: Send an email out to website admin or something...
return $this->redirect($this->generateUrl('foggyline_customer_login'));
}
}
// Render "contact us" page
return $this->render('FoggylineCustomerBundle:default:customer/forgotten_password.html.twig', array(
'form' => $form->createView()
));
}Here we merely check if the HTTP request is GET or POST, then either send an e-mail or load the template. For the sake of simplicity, we haven't really implemented the actual e-mail sending. This is something that needs to be tackled outside of this book. The rendered template is pointing to the src/Foggyline/CustomerBundle/Resources/views/Default/customer/ forgotten_password.html.twig file with content as follows:
{% extends 'base.html.twig' %}
{% block body %}
<div class="row">
<h1>Forgotten Password</h1>
</div>
<div class="row">
{{ form_start(form) }}
{{ form_widget(form) }}
{{ form_end(form) }}
</div>
{% endblock %}Aside from the auto-generated Customer entity and its CRUD controller, there are only two custom service classes that we created as part of this module. Since we are not going after full code coverage, we will merely cover CustomerOrders and CustomerMenu service classes as part of the unit testing.
We start off by adding the following line under the testsuites element of our phpunit.xml.dist file:
<directory>src/Foggyline/CustomerBundle/Tests</directory>
With that in place, running the phpunit command from the root of our shop should pick up any test we have defined under the src/Foggyline/CustomerBundle/Tests/ directory.
Now let's go ahead and create a test for our CustomerOrders service. We do so by creating a src/Foggyline/CustomerBundle/Tests/Service/CustomerOrders.php file with content as follows:
namespace Foggyline\CustomerBundle\Tests\Service;
use Symfony\Bundle\FrameworkBundle\Test\KernelTestCase;
class CustomerOrders extends KernelTestCase
{
private $container;
public function setUp()
{
static::bootKernel();
$this->container = static::$kernel->getContainer();
}
public function testGetItemsViaService()
{
$orders = $this->container->get('foggyline_customer.customer_orders');
$this->assertNotEmpty($orders->getOrders());
}
public function testGetItemsViaClass()
{
$orders = new \Foggyline\CustomerBundle\Service\CustomerOrders();
$this->assertNotEmpty($orders->getOrders());
}
}Here we have two tests in total, one instantiating the class through the service and the other directly. We are using the setUp method merely to set the container property which we then reuse in the testGetItemsViaService method.
Next, we create the CustomerMenu test within the directory as follows:
namespace Foggyline\CustomerBundle\Tests\Service\Menu;
use Symfony\Bundle\FrameworkBundle\Test\KernelTestCase;
class CustomerMenu extends KernelTestCase
{
private $container;
private $tokenStorage;
private $router;
public function setUp()
{
static::bootKernel();
$this->container = static::$kernel->getContainer();
$this->tokenStorage = $this->container->get('security.token_storage');
$this->router = $this->container->get('router');
}
public function testGetItemsViaService()
{
$menu = $this->container->get('foggyline_customer.customer_menu');
$this->assertNotEmpty($menu->getItems());
}
public function testGetItemsViaClass()
{
$menu = new \Foggyline\CustomerBundle\Service\Menu\CustomerMenu(
$this->tokenStorage,
$this->router
);
$this->assertNotEmpty($menu->getItems());
}
}Now, if we run the phpunit command, we should see our test being picked up and executed alongside other tests. We can even target these two tests specifically by executing a phpunit command with full class path, as shown here:
phpunit src/Foggyline/CustomerBundle/Tests/Service/CustomerOrders.php phpunit src/Foggyline/CustomerBundle/Tests/Service/Menu/CustomerMenu.php
The auto-generate CRUD tool generated the CustomerControllerTest.php file for us within the src/Foggyline/CustomerBundle/Tests/Controller/ directory. In the previous chapter we showed how to pass an authentication parameter to static::createClient in order to make it simulate user logging. However, that is not the same login as our customers will be using. We are no longer using a basic HTTP authentication, rather a full blown login form.
In order to address the login form testing, let's go ahead and edit the src/Foggyline/CustomerBundle/Tests/Controller/CustomerControllerTest.php file as follows:
namespace Foggyline\CustomerBundle\Tests\Controller;
use Symfony\Bundle\FrameworkBundle\Test\WebTestCase;
use Symfony\Component\BrowserKit\Cookie;
use Symfony\Component\Security\Core\Authentication\Token\UsernamePasswordToken;
class CustomerControllerTest extends WebTestCase
{
private $client = null;
public function setUp()
{
$this->client = static::createClient();
}
public function testMyAccountAccess()
{
$this->logIn();
$crawler = $this->client->request('GET', '/customer/account');
$this->assertTrue($this->client->getResponse()->
isSuccessful());
$this->assertGreaterThan(0, $crawler->filter('html:contains("My Account")')->count());
}
private function logIn()
{
$session = $this->client->getContainer()->get('session');
$firewall = 'foggyline_customer'; // firewall name
$em = $this->client->getContainer()->get('doctrine')->getManager();
$user = $em->getRepository('FoggylineCustomerBundle:Customer')->findOneByUsername('john@test.loc');
$token = new UsernamePasswordToken($user, null, $firewall, array('ROLE_USER'));
$session->set('_security_' . $firewall, serialize($token));
$session->save();
$cookie = new Cookie($session->getName(), $session->getId());
$this->client->getCookieJar()->set($cookie);
}
}Here we first created the logIn method, whose purpose is to simulate the login, by setting up the proper token value into the session, and passing on that session ID to the client via a cookie. We then created the testMyAccountAccess method, which first calls the logIn method and then checks if the crawler was able to access the My Account page. The great thing about this approach is that we did not have to code in the user password, only its username.
Now, let's go ahead and address the customer registration form, by adding the following to the CustomerControllerTest:
public function testRegisterForm()
{
$crawler = $this->client->request('GET', '/customer/register');
$uniqid = uniqid();
$form = $crawler->selectButton('Register!')->form(array(
'customer[email]' => 'john_' . $uniqid . '@test.loc',
'customer[username]' => 'john_' . $uniqid,
'customer[plainPassword][first]' => 'pass123',
'customer[plainPassword][second]' => 'pass123',
'customer[firstName]' => 'John',
'customer[lastName]' => 'Doe',
'customer[company]' => 'Foggyline',
'customer[phoneNumber]' => '00 385 111 222 333',
'customer[country]' => 'HR',
'customer[state]' => 'Osijek',
'customer[city]' => 'Osijek',
'customer[postcode]' => '31000',
'customer[street]' => 'The Yellow Street',
));
$this->client->submit($form);
$crawler = $this->client->followRedirect();
//var_dump($this->client->getResponse()->getContent());
$this->assertGreaterThan(0, $crawler->filter('html:contains("customer/login")')->count());
}We have already seen a test similar to this one in the previous chapter. Here we are merely opening a customer/register page, then finding a button with Register! label, so we can fetch the entire form through it. We then set all of the required form data, and simulate the form submit. If successful, we observe for the redirect body and assert against value expected in it.
Running the phpunit command now should successfully execute our tests.
Throughout this chapter we built a miniature but functional customer module. The module assumed a certain level of setup done on our security.yml file, which can be covered as part of module documentation if we were to redistribute it. These changes included defining our own custom firewall, with a custom security provider. The security provider pointed to our customer class, which in turn was built in a way that complies to the Symfony UserInterface. We then built a register, login, and forgot your password form. Though each comes with a minimal set of functionalities, we saw how simple it is to build a fully custom register and login system.
Furthermore, we applied some forward thinking, by using the specially defined service to set up the My Orders section under the My Account page. This is by far the ideal way of doing it, and it serves a purpose, as we will later override this service cleanly from the sales module.
Moving forward, in the next chapter, we will build a payment module.
The payment module provides a basis for further sales functionality in our web shop. It will enable us to actually choose a payment method when we reach the checkout process of the upcoming sales module. The payment methods can generally be of various types. Some can be static, like Check Money and Cash on Delivery, while others can be regular credit cards like Visa, MasterCard, American Express, Discover, and Switch/Solo. Throughout this chapter we will address both types.
In this chapter, we will be looking into the following topics:
Our application requirements, defined under Chapter 4, Requirement Specification for Modular Web Shop App, do not really say anything about the type of payment method we need to implement. Thus, for the purpose of this chapter, we will develop two payment methods: a card payment and a check money payment. In regards to the credit card payment, we will not be connecting to a real payment processor, but everything else will be done as if we are working with a credit card.
Ideally, we want this done by an interface, similar to the following:
namespace Foggyline\SalesBundle\Interface;
interface Payment
{
function authorize();
function capture();
function cancel();
}This would then impose the requirement of having the SalesBundle module, which we still haven't developed. We will therefore proceed with our payment methods using a simple Symfony controller class that provides its own way to address the following features:
authorize();capture();cancel();The authorize method is used for cases where we merely want to authorize the transaction, without actually executing it. The result is a transaction ID that our future SalesBundle module can store and reuse for further capture and cancel actions. The capture method takes us a step further by first executing the authorize action and then capturing the funds. The cancel method performs the cancelation based on a previously stored authorization token.
We will expose our payment methods through tagged Symfony services. The tagging of a service is a nice feature which enables us to view the container and all of the services tagged with the same tag, which is something we can use to fetch all of the paymentmethod services. The tag naming has to follow a certain pattern, which we impose on ourselves as application creators. With that in mind, we will tag each payment service with a name,payment_method.
Later on, the SalesBundle module will fetch and use all of the services tagged with payment_method and then use them internally to generate a list of available payment methods that you can work with.
We start off by creating a new module called Foggyline\PaymentBundle. We do so with the help of the console by running the following command:
php bin/console generate:bundle --namespace=Foggyline/PaymentBundle
The command triggers an interactive process which asks us several questions along the way, shown as follows:

Once done, files app/AppKernel.php and app/config/routing.yml are modified automatically. The registerBundles method of an AppKernel class has been added to the following line under the $bundles array:
new Foggyline\PaymentBundle\FoggylinePaymentBundle(),
The routing.yml has been updated with the following entry:
foggyline_payment: resource: "@FoggylinePaymentBundle/Resources/config/routing.xml" prefix: /
In order to avoid colliding with the core application code, we need to change the prefix: / to prefix: /payment/.
Even though we won't be storing any credit cards in our database as part of this chapter, we want to reuse the Symfony auto-generate CRUD feature in order for it to provide us with a credit card model and form. Let's go ahead and create a Card entity. We will do so by using the console, shown as follows:
php bin/console generate:doctrine:entity
The command triggers the interactive generator, providing it with FoggylinePaymentBundle:Card for an entity shortcut, where we also need to provide entity properties. We want to model our Card entity with the following fields:
card_type: stringcard_number: stringexpiry_date: datesecurity_code: stringOnce done, the generator creates Entity/Card.php and Repository/CardRepository.php within the src/Foggyline/PaymentBundle/ directory. We can now update the database so it pulls in the Card entity, shown as follows:
php bin/console doctrine:schema:update --force
With the entity in place, we are ready to generate its CRUD. We will do so by using the following command:
php bin/console generate:doctrine:crud
This results in a src/Foggyline/PaymentBundle/Controller/CardController.php file being created. It also adds an entry to our app/config/routing.yml file, as follows:
foggyline_payment_card: resource: "@FoggylinePaymentBundle/Controller/CardController.php" type: annotation
Again, the view files were created under the app/Resources/views/card/ directory. Since we won't actually be doing any CRUD related actions around cards as such, we can go ahead and delete all of the generated view files, as well as the entire body of the CardController class. At this point, we should have our Card entity, CardType form, and empty CardController class.
The card payment service is going to provide the relevant information our future sales module will need for its checkout process. Its role is to provide the payment method label, code, and processing URLs of an order, such as authorize, capture, and cancel.
We will start by defining the following service under the services element of the src/Foggyline/PaymentBundle/Resources/config/services.xml file:
<service id="foggyline_payment.card_payment"class="Foggyline\PaymentBundle\Service\CardPayment"> <argument type="service" id="form.factory"/> <argument type="service" id="router"/> <tag name="payment_method"/> </service>
This service accepts two arguments: one being form.factory and the other being router. form.factory that will be used within service to create a form view for the CardType form. The tag is a crucial element here, as our SalesBundle module will be looking for payment methods based on the payment_method tag assigned to the service.
We now need to create the actual service class within the src/Foggyline/PaymentBundle/Service/CardPayment.php file as follows:
namespace Foggyline\PaymentBundle\Service;
use Foggyline\PaymentBundle\Entity\Card;
class CardPayment
{
private $formFactory;
private $router;
public function __construct(
$formFactory,
\Symfony\Bundle\FrameworkBundle\Routing\Router $router
)
{
$this->formFactory = $formFactory;
$this->router = $router;
}
public function getInfo()
{
$card = new Card();
$form = $this->formFactory->create('Foggyline\PaymentBundle\Form\CardType', $card);
return array(
'payment' => array(
'title' =>'Foggyline Card Payment',
'code' =>'card_payment',
'url_authorize' => $this->router->generate('foggyline_payment_card_authorize'),
'url_capture' => $this->router->generate('foggyline_payment_card_capture'),
'url_cancel' => $this->router->generate('foggyline_payment_card_cancel'),
'form' => $form->createView()
)
);
}
}The getInfo method is what's going to provide the necessary information to our future SalesBundle module in order for it to construct the payment step of the checkout process. We are passing on three different types of URLs here: authorize, capture, and cancel. These routes do not exist just yet, as we will create them soon. The idea is that we will shift the payment actions and process to the actual payment method. Our future SalesBundle module will merely be doing an AJAX POST
to these payment URLs, and will expect either a success or error JSON response. A success response should yield some sort of transaction ID and an error response should yield a label message to show to the user.
We will edit the src/Foggyline/PaymentBundle/Resources/config/routing.xml file by adding the following route definitions to it:
<route id="foggyline_payment_card_authorize" path="/card/authorize"> <default key="_controller">FoggylinePaymentBundle:Card:authorize</default> </route> <route id="foggyline_payment_card_capture" path="/card/capture"> <default key="_controller">FoggylinePaymentBundle:Card:capture</default> </route> <route id="foggyline_payment_card_cancel" path="/card/cancel"> <default key="_controller">FoggylinePaymentBundle:Card:cancel</default> </route>
We will then edit the body of the CardController class by adding the following to it:
public function authorizeAction(Request $request)
{
$transaction = md5(time() . uniqid()); // Just a dummy string, simulating some transaction id, if any
if ($transaction) {
return new JsonResponse(array(
'success' => $transaction
));
}
return new JsonResponse(array(
'error' =>'Error occurred while processing Card payment.'
));
}
public function captureAction(Request $request)
{
$transaction = md5(time() . uniqid()); // Just a dummy string, simulating some transaction id, if any
if ($transaction) {
return new JsonResponse(array(
'success' => $transaction
));
}
return new JsonResponse(array(
'error' =>'Error occurred while processing Card payment.'
));
}
public function cancelAction(Request $request)
{
$transaction = md5(time() . uniqid()); // Just a dummy string, simulating some transaction id, if any
if ($transaction) {
return new JsonResponse(array(
'success' => $transaction
));
}
return new JsonResponse(array(
'error' =>'Error occurred while processing Card payment.'
));
}We should now be able to access URLs like /app_dev.php/payment/card/authorize and see the output of authorizeAction. Implementations given here are dummy ones. For the purpose of this chapter ,we are not going to connect to a real payment processing API. What is important for us to know is that the sales module will, during its checkout process, render any possible form view pushed through the ['payment']['form'] key of the getInfo method of a payment_method tagged service. Meaning, the checkout process should show a credit card form under card payment. The behavior of checking out will be coded such that if payment with a form is selected and the Place Order button is clicked, that payment form will prevent the checkout process from proceeding until the payment form is submitted to either authorize or capture the URL defined in the payment itself. We will touch upon this some more when we get to the SalesBundle module.
Aside from the credit card payment method, let's go ahead and define one more static payment, called Check Money.
We will start by defining the following service under the services element of the src/Foggyline/PaymentBundle/Resources/config/services.xml file:
<service id="foggyline_payment.check_money"class="Foggyline\PaymentBundle\Service\CheckMoneyPayment"> <argument type="service" id="router"/> <tag name="payment_method"/> </service>
The service defined here accepts only one router argument. The tag name is the same as with the card payment service.
We will then create the src/Foggyline/PaymentBundle/Service/CheckMoneyPayment.php file, with content as follows:
namespace Foggyline\PaymentBundle\Service;
class CheckMoneyPayment
{
private $router;
public function __construct(
\Symfony\Bundle\FrameworkBundle\Routing\Router $router
)
{
$this->router = $router;
}
public function getInfo()
{
return array(
'payment' => array(
'title' =>'Foggyline Check Money Payment',
'code' =>'check_money',
'url_authorize' => $this->router->generate('foggyline_payment_check_money_authorize'),
'url_capture' => $this->router->generate('foggyline_payment_check_money_capture'),
'url_cancel' => $this->router->generate('foggyline_payment_check_money_cancel'),
//'form' =>''
)
);
}
}Unlike a card payment, the check money payment has no form key defined under the getInfo method. This is because there are no credit card entries for it to define. It is just going to be a static payment method. However, we still need to define the authorize, capture, and cancel URLs, even though their implementation might be nothing more than just a simple JSON response with success or error keys.
Once the check money payment service is in place, we can go ahead and create the necessary routes for it. We will start by adding the following route definitions to the src/Foggyline/PaymentBundle/Resources/config/routing.xml file:
<route id="foggyline_payment_check_money_authorize"path="/check_money/authorize"> <default key="_controller">FoggylinePaymentBundle:CheckMoney:authorize</default> </route> <route id="foggyline_payment_check_money_capture"path="/check_money/capture"> <default key="_controller">FoggylinePaymentBundle:CheckMoney:capture</default> </route> <route id="foggyline_payment_check_money_cancel"path="/check_money/cancel"> <default key="_controller">FoggylinePaymentBundle:CheckMoney:cancel</default> </route>
We will then create the src/Foggyline/PaymentBundle/Controller/CheckMoneyController.php file, with content as follows:
namespace Foggyline\PaymentBundle\Controller;
use Symfony\Component\HttpFoundation\JsonResponse;
use Symfony\Component\HttpFoundation\Request;
use Symfony\Bundle\FrameworkBundle\Controller\Controller;
class CheckMoneyController extends Controller
{
public function authorizeAction(Request $request)
{
$transaction = md5(time() . uniqid());
return new JsonResponse(array(
'success' => $transaction
));
}
public function captureAction(Request $request)
{
$transaction = md5(time() . uniqid());
return new JsonResponse(array(
'success' => $transaction
));
}
public function cancelAction(Request $request)
{
$transaction = md5(time() . uniqid());
return new JsonResponse(array(
'success' => $transaction
));
}
}Similar to a card payment, here we added a simple dummy implementation of the authorize, capture, and cancel methods. The method responses will feed into the SalesBundle module later on. We can easily implement more robust functionality from within these methods, but that is out of the scope of this chapter.
Our FoggylinePaymentBundle module is really simple. It provides only two payment methods: card and check money. It does so via two simple service classes. Since we are not going after full code coverage tests, we will only cover the CardPayment and CheckMoneyPayment service classes as part of unit testing.
We will start off by adding the following line under the testsuites element of our phpunit.xml.dist file:
<directory>src/Foggyline/PaymentBundle/Tests</directory>
With that in place, running the phpunit command from the root of our shop should pick up any test we have defined under the src/Foggyline/PaymentBundle/Tests/ directory.
Now, let's go ahead and create a test for our CardPayment service. We will do so by creating a src/Foggyline/PaymentBundle/Tests/Service/CardPaymentTest.php file, with content as follows:
namespace Foggyline\PaymentBundle\Tests\Service;
use Symfony\Bundle\FrameworkBundle\Test\KernelTestCase;
class CardPaymentTest extends KernelTestCase
{
private $container;
private $formFactory;
private $router;
public function setUp()
{
static::bootKernel();
$this->container = static::$kernel->getContainer();
$this->formFactory = $this->container->get('form.factory');
$this->router = $this->container->get('router');
}
public function testGetInfoViaService()
{
$payment = $this->container->get('foggyline_payment.card_payment');
$info = $payment->getInfo();
$this->assertNotEmpty($info);
$this->assertNotEmpty($info['payment']['form']);
}
public function testGetInfoViaClass()
{
$payment = new \Foggyline\PaymentBundle\Service\CardPayment(
$this->formFactory,
$this->router
);
$info = $payment->getInfo();
$this->assertNotEmpty($info);
$this->assertNotEmpty($info['payment']['form']);
}
}Here, we are running two simple tests to see if we can instantiate a service, either via a container or directly, and simply call its getInfo method. The method is expected to return a response that contains the ['payment']['form'] key.
Now, let's go ahead and create a test for our CheckMoneyPayment service. We will do so by creating a src/Foggyline/PaymentBundle/Tests/Service/CheckMoneyPaymentTest.php file, with content as follows:
namespace Foggyline\PaymentBundle\Tests\Service;
use Symfony\Bundle\FrameworkBundle\Test\KernelTestCase;
class CheckMoneyPaymentTest extends KernelTestCase
{
private $container;
private $router;
public function setUp()
{
static::bootKernel();
$this->container = static::$kernel->getContainer();
$this->router = $this->container->get('router');
}
public function testGetInfoViaService()
{
$payment = $this->container->get('foggyline_payment.check_money');
$info = $payment->getInfo();
$this->assertNotEmpty($info);
}
public function testGetInfoViaClass()
{
$payment = new \Foggyline\PaymentBundle\Service\CheckMoneyPayment(
$this->router
);
$info = $payment->getInfo();
$this->assertNotEmpty($info);
}
}Similarly, here we also have two simple tests: one fetching the payment method via a container, and the other directly via a class. The difference being that we are not checking for the presence of a form key under the getInfo method response.
Our module has two controller classes that we want to test for responses. We want to make sure that the authorize, capture, and cancel methods of the CardController and CheckMoneyController classes are working.
We first create asrc/Foggyline/PaymentBundle/Tests/Controller/CardControllerTest.php file, with content as follows:
namespace Foggyline\PaymentBundle\Tests\Controller;
use Symfony\Bundle\FrameworkBundle\Test\WebTestCase;
class CardControllerTest extends WebTestCase
{
private $client;
private $router;
public function setUp()
{
$this->client = static::createClient();
$this->router = $this->client->getContainer()->get('router');
}
public function testAuthorizeAction()
{
$this->client->request('GET', $this->router->generate('foggyline_payment_card_authorize'));
$this->assertTests();
}
public function testCaptureAction()
{
$this->client->request('GET', $this->router->generate('foggyline_payment_card_capture'));
$this->assertTests();
}
public function testCancelAction()
{
$this->client->request('GET', $this->router->generate('foggyline_payment_card_cancel'));
$this->assertTests();
}
private function assertTests()
{
$this->assertSame(200, $this->client->getResponse()->getStatusCode());
$this->assertSame('application/json', $this->client->getResponse()->headers->get('Content-Type'));
$this->assertContains('success', $this->client->getResponse()->getContent());
$this->assertNotEmpty($this->client->getResponse()->getContent());
}
}We then create src/Foggyline/PaymentBundle/Tests/Controller/CheckMoneyControllerTest.php, with content as follows:
namespace Foggyline\PaymentBundle\Tests\Controller;
use Symfony\Bundle\FrameworkBundle\Test\WebTestCase;
class CheckMoneyControllerTest extends WebTestCase
{
private $client;
private $router;
public function setUp()
{
$this->client = static::createClient();
$this->router = $this->client->getContainer()->get('router');
}
public function testAuthorizeAction()
{
$this->client->request('GET', $this->router->generate('foggyline_payment_check_money_authorize'));
$this->assertTests();
}
public function testCaptureAction()
{
$this->client->request('GET', $this->router->generate('foggyline_payment_check_money_capture'));
$this->assertTests();
}
public function testCancelAction()
{
$this->client->request('GET', $this->router->generate('foggyline_payment_check_money_cancel'));
$this->assertTests();
}
private function assertTests()
{
$this->assertSame(200, $this->client->getResponse()->getStatusCode());
$this->assertSame('application/json', $this->client->getResponse()->headers->get('Content-Type'));
$this->assertContains('success', $this->client->getResponse()->getContent());
$this->assertNotEmpty($this->client->getResponse()->getContent());
}
}Both tests are nearly identical. They contain a test for each of the authorize, capture, and cancel methods. Since our methods are implemented with a fixed success JSON response, there are no surprises here. However, we can easily play around with it by extending our payment methods into something more robust.
Throughout this chapter we have built a payment module with two payment methods. The card payment method is made so that it is simulating payment with the credit cards involved. For that reason, it includes a form as part of its getInfo method. The check money payment, on the other hand, is simulating a static payment method - one that does not include any form of credit card. Both methods are implemented as dummy methods, meaning they are not actually communicating to any external payment processor.
The idea was to create a minimal structure that showcases how one can develop a simple payment module for further customization. We did so by exposing each payment method via a tagged service. Using the payment_method tag was a matter of consensus, since we are the ones building the full application so we get to choose how we will implement this in the sales module.By using the same tag name for each payment method, we effectively created conditions for the future sales module to pick all of the payments methods and render them under its checkout process.
Moving forward, in the next chapter we will build a shipment module.
The shipment module, alongside the payment module, provides a basis for further sales functionality in our web shop. It will enable us to choose the shipment method when we reach the checkout process of the upcoming sales module. Similar to payment, shipment can be sort of static and dynamic. Whereas static might imply a fixed pricing value, or even a calculated one by some simple conditions, dynamic usually implies a connection to external API services.
Throughout this chapter, we will touch base with both types and see how we can set up a basic structure for implementing the shipment module.
In this chapter, we will be covering the following topics of the shipment module:
Application requirements, defined under Chapter 4, Requirement Specification for Modular Web Shop App, do not give us any specifics as to what type of shipment we need to implement. Thus, for the purpose of this chapter, we will develop two shipment methods: dynamic rate shipment and flat rate shipment. Dynamic rate shipment is used as a way of connecting the shipment method to a real shipment processor, such as UPS, FedEx, and so on. It will not, however, actually connect to any of the external APIs.
Ideally, we want this done by an interface similar to the following:
namespace Foggyline\SalesBundle\Interface;
interface Shipment
{
function getInfo($street, $city, $country, $postcode, $amount, $qty);
function process($street, $city, $country, $postcode, $amount, $qty);
}The getInfo method can then be used to fetch the available delivery options for the given order information, while the process method would then process the selected delivery option. For example, we might have an API return "same day delivery ($9.99)",= and "standard delivery ($4.99)" as delivery options under the dynamic rate shipment method.
Having such a shipment interface would then impose the requirement of having the SalesBundle module, which we still haven't developed. We will therefore proceed with our shipment methods, using a Symfony controller for handling the process method and a service for handling the getInfo method.
Similarly, as we did with the payment method in the previous chapter, we will expose our getInfo method through tagged Symfony services. The tag we will be using for shipment methods is shipment_method. Later on, during the checkout process, the SalesBundle module will fetch all of the services tagged with shipment_method and use them internally for a list of available shipment methods to work with.
We are building the module the other way round. That is, we are building it before we know anything about the SalesBundle module, which is the only module that will be using it. With that in mind, the shipment module has no firm dependencies on any other module. However, it might have been more convenient to build the SalesBundle module first and then expose a few interfaces that the shipment module might use.
We will start off by creating a new module called Foggyline\ShipmentBundle. We will do so with the help of the console by running the following command:
php bin/console generate:bundle --namespace=Foggyline/ShipmentBundle
The command triggers an interactive process, which asks us several questions along the way, shown as follows:
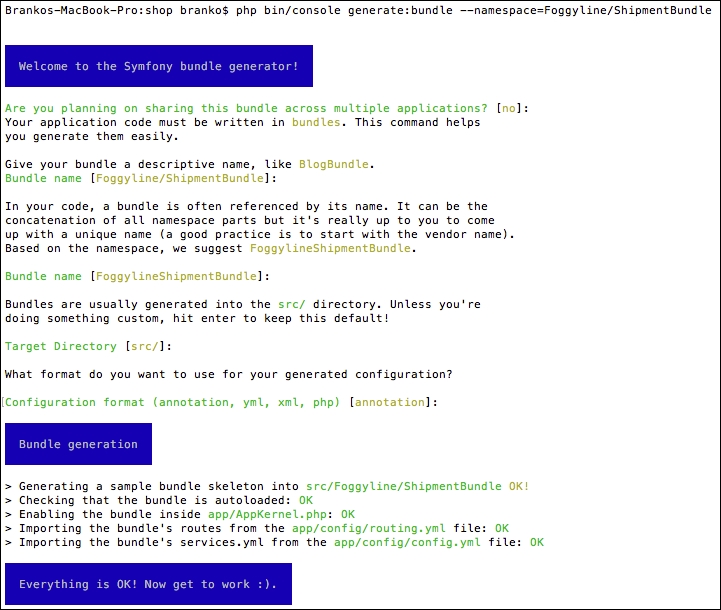
Once done, files app/AppKernel.php and app/config/routing.yml are modified automatically. The registerBundles method of an AppKernel class has been added to the following line under the $bundles array:
new Foggyline\PaymentBundle\FoggylineShipmentBundle(),
The routing.yml file has been updated with the following entry:
foggyline_payment: resource: "@FoggylineShipmentBundle/Resources/config/routing.xml" prefix: /
In order to avoid colliding with the core application code, we need to change prefix: /into prefix: /shipment/.
The flat rate shipment service is going to provide the fixed shipment method that our sales module is going to use for its checkout process. Its role is to provide the shipment method labels, code, delivery options, and processing URLs.
We will start by defining the following service under the services element of the src/Foggyline/ShipmentBundle/Resources/config/services.xml file:
<service id="foggyline_shipment.dynamicrate_shipment"class="Foggyline\ShipmentBundle\Service\DynamicRateShipment"> <argument type="service" id="router"/> <tag name="shipment_method"/> </service>
This service accepts only one argument: the router. The tagname value is set to shipment_method, as our SalesBundle module will be looking for shipment methods based on the shipment_method tag assigned to the service.
We will now create the actual service class, within the src/Foggyline/ShipmentBundle/Service/FlatRateShipment.php file as follows:
namespace Foggyline\ShipmentBundle\Service;
class FlatRateShipment
{
private $router;
public function __construct(
\Symfony\Bundle\FrameworkBundle\Routing\Router $router
)
{
$this->router = $router;
}
public function getInfo($street, $city, $country, $postcode, $amount, $qty)
{
return array(
'shipment' => array(
'title' =>'Foggyline FlatRate Shipment',
'code' =>'flat_rate',
'delivery_options' => array(
'title' =>'Fixed',
'code' =>'fixed',
'price' => 9.99
),
'url_process' => $this->router->generate('foggyline_shipment_flat_rate_process'),
)
;
}
}The getInfo method is what's going to provide the necessary information to our future SalesBundle module in order for it to construct the shipment step of the checkout process. It accepts a series of arguments:$street, $city, $country, $postcode, $amount, and $qty. We can consider these to be part of some unified shipment interface. delivery_options in this case returns a single, fixed value. url_process is the URL to which we will be inserting our selected shipment method. Our future SalesBundle module will then merely be doing an AJAX POST to this URL, expecting either a success or error JSON response, which is quite similar to what we imagined doing with payment methods.
We edit the src/Foggyline/ShipmentBundle/Resources/config/routing.xml file by adding the following route definitions to it:
<route id="foggyline_shipment_flat_rate_process"path="/flat_rate/process"> <default key="_controller">FoggylineShipmentBundle:FlatRate:process </default> </route>
We then create a src/Foggyline/ShipmentBundle/Controller/FlatRateController.php. file with content as follows:
namespace Foggyline\ShipmentBundle\Controller;
use Symfony\Component\HttpFoundation\JsonResponse;
use Symfony\Component\HttpFoundation\Request;
use Symfony\Bundle\FrameworkBundle\Controller\Controller;
class FlatRateController extends Controller
{
public function processAction(Request $request)
{
// Simulating some transaction id, if any
$transaction = md5(time() . uniqid());
return new JsonResponse(array(
'success' => $transaction
));
}
}We should now be able to access a URL, like /app_dev.php/shipment/flat_rate/process, and see the output of processAction. Implementations given here are dummy ones. What is important for us to know is that the sales module will, during its checkout process, render any possible delivery_options pushed through the getInfo method of a shipment_method tagged service. Meaning, the checkout process should show flat rate shipment as an option. The behavior of checking out will be coded such that if a shipment method is not selected, it will prevent the checkout process from going any further. We will touch upon this some more when we get to the SalesBundle module.
Aside from the flat rate shipment method, let's go ahead and define one more dynamic shipment, called Dynamic Rate.
We will start by defining the following service under the services element of the src/Foggyline/ShipmentBundle/Resources/config/services.xml file:
<service id="foggyline_shipment.dynamicrate_shipment"class="Foggyline\ShipmentBundle\Service\DynamicRateShipment"> <argument type="service" id="router"/> <tag name="shipment_method"/> </service>
The service defined here accepts only one router argument. The tag name property is the same as with the flat rate shipment service.
We will then create the src/Foggyline/ShipmentBundle/Service/DynamicRateShipment.php file, with content as follows:
namespace Foggyline\ShipmentBundle\Service;
class DynamicRateShipment
{
private $router;
public function __construct(
\Symfony\Bundle\FrameworkBundle\Routing\Router $router
)
{
$this->router = $router;
}
public function getInfo($street, $city, $country, $postcode, $amount, $qty)
{
return array(
'shipment' => array(
'title' =>'Foggyline DynamicRate Shipment',
'code' =>'dynamic_rate_shipment',
'delivery_options' => $this->getDeliveryOptions($street, $city, $country, $postcode, $amount, $qty),
'url_process' => $this->router->generate('foggyline_shipment_dynamic_rate_process'),
)
);
}
public function getDeliveryOptions($street, $city, $country, $postcode, $amount, $qty)
{
// Imagine we are hitting the API with: $street, $city, $country, $postcode, $amount, $qty
return array(
array(
'title' =>'Same day delivery',
'code' =>'dynamic_rate_sdd',
'price' => 9.99
),
array(
'title' =>'Standard delivery',
'code' =>'dynamic_rate_sd',
'price' => 4.99
),
);
}
}Unlike the flat rate shipment, here the delivery_options key of the getInfo method is constructed with the response of the getDeliveryOptions method. The method is internal to the service and is not imagined as exposed or to be looked at as part of an interface. We can easily imagine doing some API calls within it, in order to fetch calculated rates for our dynamic shipment method.
Once the dynamic rates shipment service is in place, we can go ahead and create the necessary route for it. We will start by adding the following route definition to the src/Foggyline/ShipmentBundle/Resources/config/routing.xml file:
<route id="foggyline_shipment_dynamic_rate_process" path="/dynamic_rate/process"> <default key="_controller">FoggylineShipmentBundle:DynamicRate:process </default> </route>
We will then create the src/Foggyline/ShipmentBundle/Controller/DynamicRateController.php file, with content as follows:
namespace Foggyline\ShipmentBundle\Controller;
use Foggyline\ShipmentBundle\Entity\DynamicRate;
use Symfony\Component\HttpFoundation\JsonResponse;
use Symfony\Component\HttpFoundation\Request;
use Symfony\Bundle\FrameworkBundle\Controller\Controller;
use Symfony\Component\Form\Extension\Core\Type\ChoiceType;
class DynamicRateController extends Controller
{
public function processAction(Request $request)
{
// Just a dummy string, simulating some transaction id
$transaction = md5(time() . uniqid());
if ($transaction) {
return new JsonResponse(array(
'success' => $transaction
));
}
return new JsonResponse(array(
'error' =>'Error occurred while processing DynamicRate shipment.'
));
}
}Similar to the flat rate shipment, here we have added a simple dummy implementation of the process and method. The incoming $request should contain the same info as the service getInfo method, meaning, it should have the following arguments available: $street, $city, $country, $postcode, $amount, and $qty. The method responses will feed into the SalesBundle module later on. We can easily implement more robust functionality from within these methods, but that is out of the scope of this chapter.
The FoggylineShipmentBundle module is quite simple. By providing only two simple services and two simple controllers, it's easy to test.
We will start off by adding the following line under the testsuites element of our phpunit.xml.dist file:
<directory>src/Foggyline/ShipmentBundle/Tests</directory>
With that in place, running the phpunit command from root of our shop should pick up any test we have defined under the src/Foggyline/ShipmentBundle/Tests/ directory.
Now, let's go ahead and create a test for our FlatRateShipment service. We will do so by creating a src/Foggyline/ShipmentBundle/Tests/Service/FlatRateShipmentTest.php file, with content as follows:
namespace Foggyline\ShipmentBundle\Tests\Service;
use Symfony\Bundle\FrameworkBundle\Test\KernelTestCase;
class FlatRateShipmentTest extends KernelTestCase
{
private $container;
private $router;
private $street = 'Masonic Hill Road';
private $city = 'Little Rock';
private $country = 'US';
private $postcode = 'AR 72201';
private $amount = 199.99;
private $qty = 7;
public function setUp()
{
static::bootKernel();
$this->container = static::$kernel->getContainer();
$this->router = $this->container->get('router');
}
public function testGetInfoViaService()
{
$shipment = $this->container->get('foggyline_shipment.flat_rate');
$info = $shipment->getInfo(
$this->street, $this->city, $this->country, $this->postcode, $this->amount, $this->qty
);
$this->validateGetInfoResponse($info);
}
public function testGetInfoViaClass()
{
$shipment = new \Foggyline\ShipmentBundle\Service\FlatRateShipment($this->router);
$info = $shipment->getInfo(
$this->street, $this->city, $this->country, $this->postcode, $this->amount, $this->qty
);
$this->validateGetInfoResponse($info);
}
public function validateGetInfoResponse($info)
{
$this->assertNotEmpty($info);
$this->assertNotEmpty($info['shipment']['title']);
$this->assertNotEmpty($info['shipment']['code']);
$this->assertNotEmpty($info['shipment']['delivery_options']);
$this->assertNotEmpty($info['shipment']['url_process']);
}
}Two simple tests are being run here. One checks if we can instantiate a service via a container, and the other checks if we can do so directly. Once instantiated, we simply call the getInfo method of a service, passing it a dummy address and order information. Although we are not actually using this data within the getInfo method, we need to pass something along otherwise the test will fail. The method is expected to return a response that contains several keys under the shipment key, most notably title, code, delivery_options, and url_process.
Now, let's go ahead and create a test for our DynamicRateShipment service. We will do so by creating a src/Foggyline/ShipmentBundle/Tests/Service/DynamicRateShipmentTest.php file, with content as follows:
namespace Foggyline\ShipmentBundle\Tests\Service;
use Symfony\Bundle\FrameworkBundle\Test\KernelTestCase;
class DynamicRateShipmentTest extends KernelTestCase
{
private $container;
private $router;
private $street = 'Masonic Hill Road';
private $city = 'Little Rock';
private $country = 'US';
private $postcode = 'AR 72201';
private $amount = 199.99;
private $qty = 7;
public function setUp()
{
static::bootKernel();
$this->container = static::$kernel->getContainer();
$this->router = $this->container->get('router');
}
public function testGetInfoViaService()
{
$shipment = $this->container->get('foggyline_shipment.dynamicrate_shipment');
$info = $shipment->getInfo(
$this->street, $this->city, $this->country, $this->postcode, $this->amount, $this->qty
);
$this->validateGetInfoResponse($info);
}
public function testGetInfoViaClass()
{
$shipment = new \Foggyline\ShipmentBundle\Service\DynamicRateShipment($this->router);
$info = $shipment->getInfo(
$this->street, $this->city, $this->country, $this->postcode, $this->amount, $this->qty
);
$this->validateGetInfoResponse($info);
}
public function validateGetInfoResponse($info)
{
$this->assertNotEmpty($info);
$this->assertNotEmpty($info['shipment']['title']);
$this->assertNotEmpty($info['shipment']['code']);
// Could happen that dynamic rate has none?!
//$this->assertNotEmpty($info['shipment']['delivery_options']);
$this->assertNotEmpty($info['shipment']['url_process']);
}
}This test is nearly identical to that of the FlatRateShipment service. Here, we also have two simple tests: one fetching the payment method via a container, and the other directly via a class. The difference being that we are no longer asserting the presence of delivery_options not being empty. This is because a real API request might not return any options for delivery, depending on the given address and order information.
Our entire module has only two controller classes that we want to test for responses. We want to make sure that the process method of the FlatRateController and DynamicRateController classes are accessible and working.
We will first create an src/Foggyline/ShipmentBundle/Tests/Controller/FlatRateControllerTest.php file, with content as follows:
namespace Foggyline\ShipmentBundle\Tests\Controller;
use Symfony\Bundle\FrameworkBundle\Test\WebTestCase;
class FlatRateControllerTest extends WebTestCase
{
private $client;
private $router;
public function setUp()
{
$this->client = static::createClient();
$this->router = $this->client->getContainer()->get('router');
}
public function testProcessAction()
{
$this->client->request('GET', $this->router->generate('foggyline_shipment_flat_rate_process'));
$this->assertSame(200, $this->client->getResponse()->getStatusCode());
$this->assertSame('application/json', $this->client->getResponse()->headers->get('Content-Type'));
$this->assertContains('success', $this->client->getResponse()->getContent());
$this->assertNotEmpty($this->client->getResponse()->getContent());
}
}We will then create a src/Foggyline/ShipmentBundle/Tests/Controller/DynamicRateControllerTest.php file, with content as follows:
namespace Foggyline\ShipmentBundle\Tests\Controller;
use Symfony\Bundle\FrameworkBundle\Test\WebTestCase;
class DynamicRateControllerTest extends WebTestCase
{
private $client;
private $router;
public function setUp()
{
$this->client = static::createClient();
$this->router = $this->client->getContainer()->get('router');
}
public function testProcessAction()
{
$this->client->request('GET', $this->router->generate('foggyline_shipment_dynamic_rate_process'));
$this->assertSame(200, $this->client->getResponse()->getStatusCode());
$this->assertSame('application/json', $this->client->getResponse()->headers->get('Content-Type'));
$this->assertContains('success', $this->client->getResponse()->getContent());
$this->assertNotEmpty($this->client->getResponse()->getContent());
}
}Both tests are nearly identical. They contain a test for a single process action method. As it is coded now, the controller process action simply returns a fixed success JSON response. We can easily extend it to return more than just a fixed response and can accompany that change with a more robust functional test.
Throughout this chapter we have built a shipment module with two shipment methods. Each shipment method provided the available delivery options. The flat rate shipment method has only one fixed value under its delivery options, whereas the dynamic rate method gets its values from the getDeliveryOptions method. We can easily embed a real shipping API as part of getDeliveryOptions in order to provide truly dynamic shipping options.
Obviously, we lack the official interfaces here, as we did with payment methods. However, this is something we can always come back to and refactor in our application as we finalize the final module.
Similar to the payment methods, the idea here was to create a minimal structure that showcases how one can develop a simple shipment module for further customization. Using the shipment_methodservice tag, we effectively exposed the shipment methods for the future sales module.
Moving forward, in the next chapter, we will build a sales module, which will finally make use of our payment and shipment modules.
The Sales module is the final one in the series of modules we will build in order to deliver a simple yet functional web shop application. We will do so by adding the cart and the checkout features on top of the catalog. The checkout itself will finally make use of the shipping and payment services defined throughout the previous chapters. The overall focus here will be on absolute basics, since the real shopping cart application would take a far more robust approach. However, understanding how to tie it all together in a simple way is the first step toward opening up a door for more robust web shop application implementations later on.
In this chapter, we will be covering the following topics of the Sales module:
Application requirements, defined in Chapter 4, Requirement Specification for Modular Web Shop App, give us some wireframes relating to the cart and checkout. Based on these wireframes, we can speculate about what type of entities we need to create in order to deliver on functionality.
The following is a list of required module entities:
The Cart entity includes the following properties and their data types:
id: integer, auto-incrementcustomer_id: stringcreated_at: datetimemodified_at: datetimeThe Cart Item entity includes the following properties:
id: integer, auto-incrementcart_id: integer, foreign key that references the category table id columnproduct_id: integer, foreign key that references product table id columnqty: stringunit_price: decimalcreated_at: datetimemodified_at: datetimeThe Order entity includes the following properties:
id: integer, auto-incrementcustomer_id: integer, foreign key that references the customer table id columnitems_price: decimalshipment_price: decimaltotal_price: decimalstatus: stringcustomer_email: stringcustomer_first_name: stringcustomer_last_name: stringaddress_first_name: stringaddress_last_name: stringaddress_country: stringaddress_state: stringaddress_city: stringaddress_postcode: stringaddress_street: stringaddress_telephone: stringpayment_method: stringshipment_method: stringcreated_at: datetimemodified_at: datetimeThe Order Item entity includes the following properties:
id: integer, auto-incrementsales_order_id: integer, foreign key that references the order table id columnproduct_id: integer, foreign key that references product table id columntitle: stringqty: intunit_price: decimaltotal_price: decimalcreated_at: datetimemodified_at: datetimeAside from just adding these entities and their CRUD pages, we also need to override a core module service responsible for building the category menu and on-sale items.
We start by creating a new module called Foggyline\SalesBundle. We do so with the help of the console, by running the command as follows:
php bin/console generate:bundle --namespace=Foggyline/SalesBundle
The command triggers an interactive process, asking us several questions along the way, as shown here:
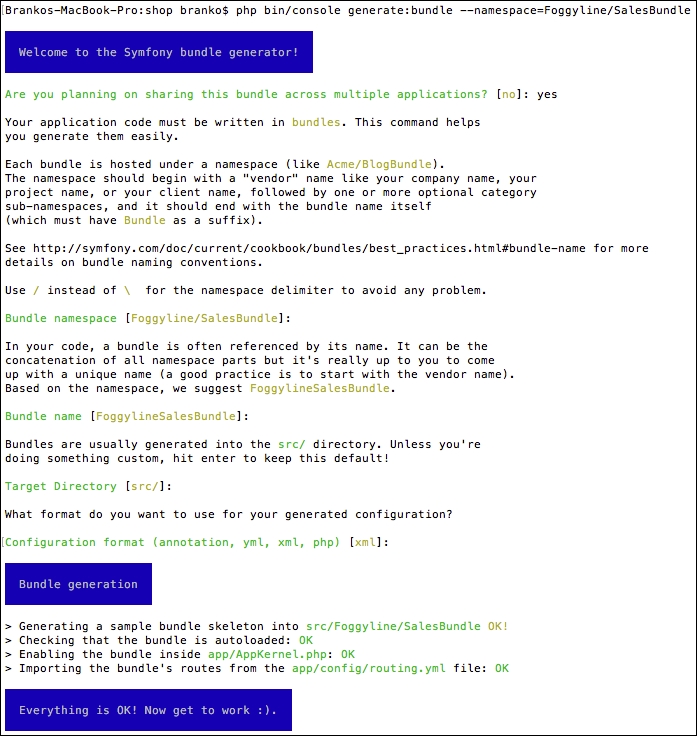
Once done, the app/AppKernel.php and app/config/routing.yml files get modified automatically. The registerBundles method of an AppKernel class has been added to the following line under the $bundles array:
new Foggyline\PaymentBundle\FoggylineSalesBundle(),
The routing.yml file has been updated with the following entry:
foggyline_payment: resource: "@FoggylineSalesBundle/Resources/config/routing.xml" prefix: /
In order to avoid collision with the core application code, we need to change prefix: / into prefix: /sales/.
Let's go ahead and create a Cart entity. We do so by using the console, as shown here:
php bin/console generate:doctrine:entity
This triggers the interactive generator as shown in the following sreenshot:
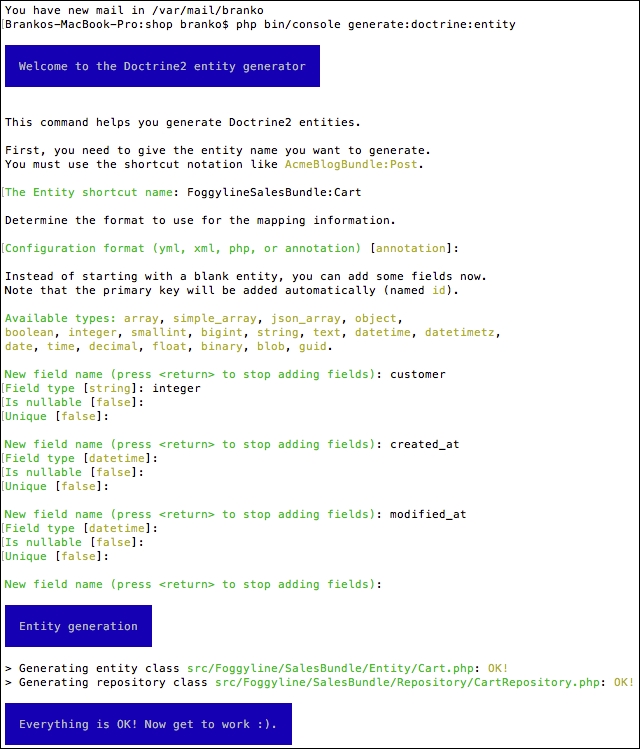
This creates the Entity/Cart.php and Repository/CartRepository.php files within the src/Foggyline/SalesBundle/ directory. After this, we need to update the database, so it pulls in the Cart entity, by running the following command:
php bin/console doctrine:schema:update --force
With the Cart entity in place, we can go ahead and generate the CartItem entity.
Let's go ahead and create a CartItem entity. We do so by using the now well-known console command:
php bin/console generate:doctrine:entity
This triggers the interactive generator as shown in the following screenshot:
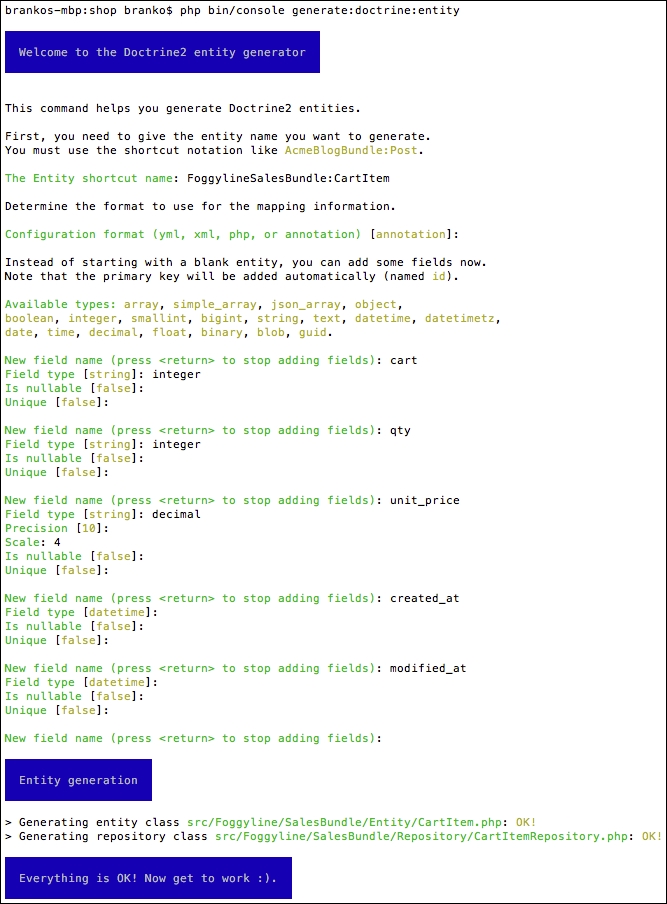
This creates Entity/CartItem.php and Repository/CartItemRepository.php within the src/Foggyline/SalesBundle/ directory. Once the auto generate has done its work, we need to go back and edit the CartItem entity to update the cart field relation as follows:
/** * @ORM\ManyToOne(targetEntity="Cart", inversedBy="items") * @ORM\JoinColumn(name="cart_id", referencedColumnName="id") */ private $cart;
Here, we have defined the so-called bidirectional one-to-many association. The foreign key in a one-to-many association is being defined on the many side, which in this case is the CartItem entity. The bidirectional mapping requires the mappedBy attribute on the OneToMany association and the inversedBy attribute on the ManyToOne association. The OneToMany side in this case is the Cart entity, so we go back to the src/Foggyline/SalesBundle/Entity/Cart.php file and add the following to it:
/**
* @ORM\OneToMany(targetEntity="CartItem", mappedBy="cart")
*/
private $items;
public function __construct() {
$this->items = new \Doctrine\Common\Collections\ArrayCollection();
}We then need to update the database, so it pulls in the CartItem entity, by running the following command:
php bin/console doctrine:schema:update --force
With the CartItem entity in place, we can go ahead and generate the Order entity.
Let's go ahead and create an Order entity. We do so by using the console, as shown here:
php bin/console generate:doctrine:entity
If we tried to provide FoggylineSalesBundle:Order as an entity shortcut name, the generated output would throw an error as shown in the following screenshot:
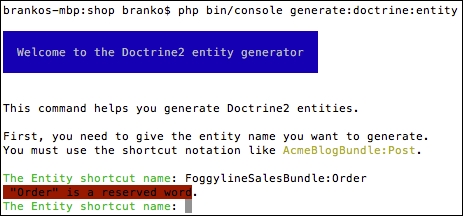
Instead, we will use SensioGeneratorBundle:SalesOrder for the entity shortcut name, and follow the generator through as shown here:
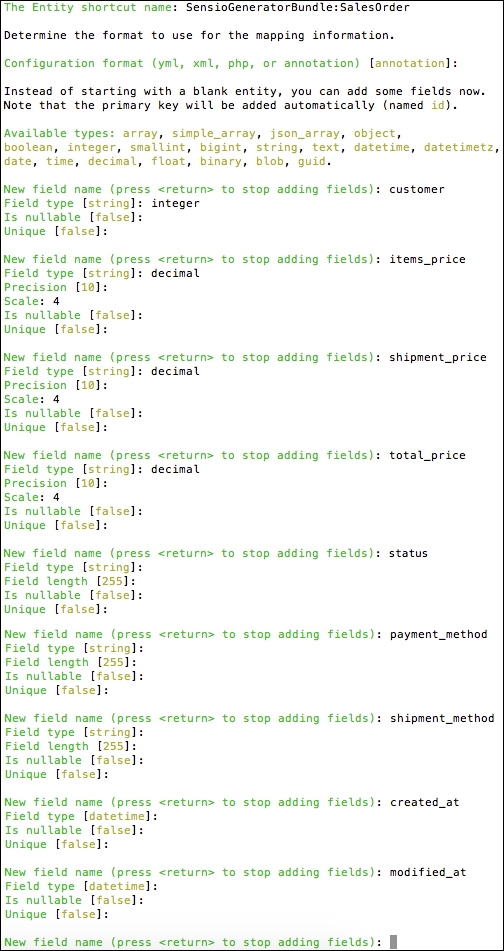
This is followed by the rest of the customer-information-related fields. To get a better idea, look at the following screenshot:
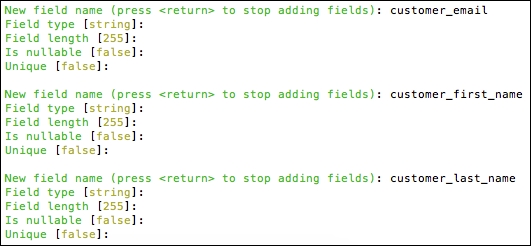
This is followed by the rest of the order-address-related fields as shown here:
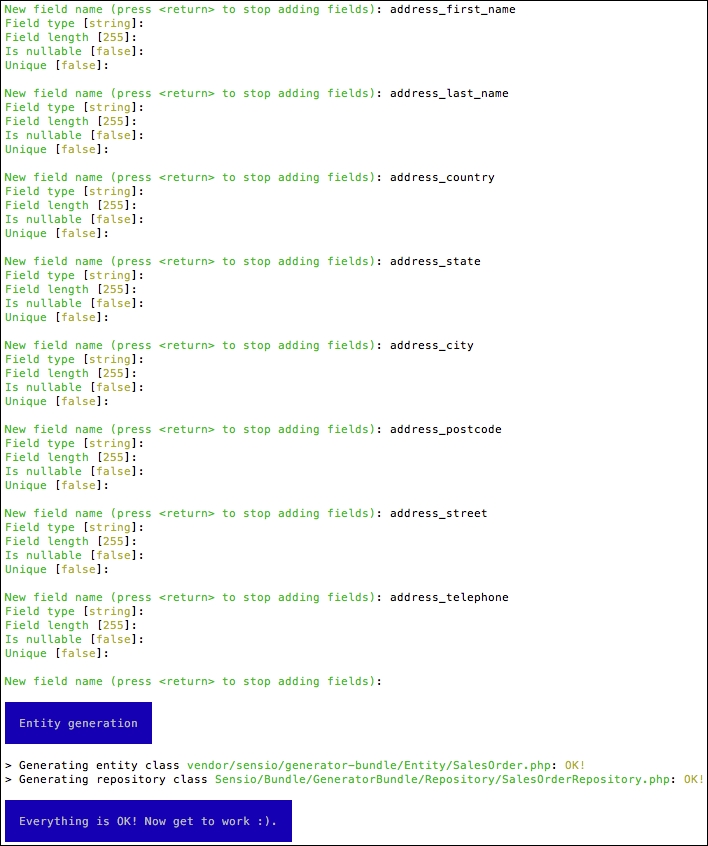
It is worth noting that normally we would like to extract the address information in its own table, that is make it its own entity. However, to keep things simple, we will proceed by keeping it as part of the SalesOrder entity.
Once done, this creates Entity/SalesOrder.php and Repository/SalesOrderRepository.php files within the src/Foggyline/SalesBundle/ directory. After this, we need to update the database, so it pulls in the SalesOrder entity, by running the following command:
php bin/console doctrine:schema:update --force
With the SalesOrder entity in place, we can go ahead and generate the SalesOrderItem entity.
Let's go ahead and create a SalesOrderItem entity. We start the code generator by using the following console command:
php bin/console generate:doctrine:entity
When asked for the entity shortcut name, we provide FoggylineSalesBundle:SalesOrderItem, and then follow the generator field definitions as shown in the following screenshot:
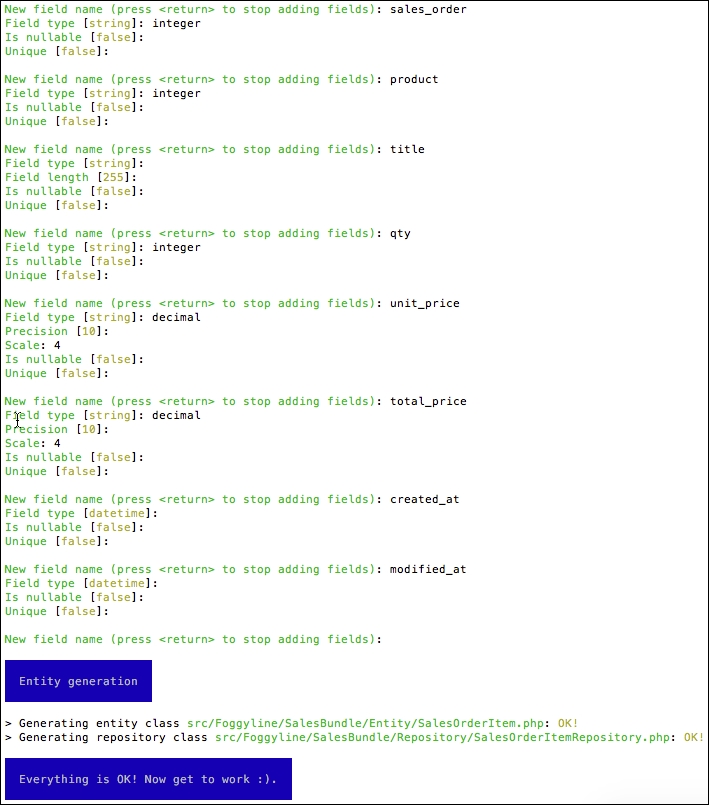
This creates Entity/SalesOrderItem.php and Repository/SalesOrderItemRepository.php files within the src/Foggyline/SalesBundle/ directory. Once the auto-generate has done its work, we need to go back and edit the SalesOrderItem entity to update the SalesOrder field relation as follows:
/** * @ORM\ManyToOne(targetEntity="SalesOrder", inversedBy="items") * @ORM\JoinColumn(name="sales_order_id", referencedColumnName="id") */ private $salesOrder; /** * @ORM\OneToOne(targetEntity="Foggyline\CatalogBundle\Entity\Product") * @ORM\JoinColumn(name="product_id", referencedColumnName="id") */ private $product;
Here, we have defined two types of relations. The first one, relating to $salesOrder, is the bidirectional one-to-many association, which we saw in the Cart and CartItem entities. The second one, relating to $product, is the unidirectional one-to-one association. The reference is said to be unidirectional because CartItem references Product, while Product won't be referencing CartItem, as we do not want to change something that is part of another module.
We still need to go back to the src/Foggyline/SalesBundle/Entity/SalesOrder.php file and add the following to it:
/**
* @ORM\OneToMany(targetEntity="SalesOrderItem", mappedBy="salesOrder")
*/
private $items;
public function __construct() {
$this->items = new \Doctrine\Common\Collections\ArrayCollection();
}We then need to update the database, so it pulls in the SalesOrderItem entity, by running the following command:
php bin/console doctrine:schema:update --force
With the SalesOrderItem entity in place, we can go ahead and start building the cart and checkout pages.
The add_to_cart_url service was originally declared in FoggylineCustomerBundle with dummy data. This is because we needed a way to build Add to Cart URLs on products before sales functionality was available. While certainly not ideal, it is one possible way of doing it.
Now we are going to override that service with the one declared in our Sales module in order to provide correct Add to Cart URLs. We start off by defining the service within src/Foggyline/SalesBundle/Resources/config/services.xml, by adding the following service element under the services as follows:
<service id="foggyline_sales.add_to_cart_url" class="Foggyline\SalesBundle\Service\AddToCartUrl"> <argument type="service" id="doctrine.orm.entity_manager"/> <argument type="service" id="router"/> </service>
We then create src/Foggyline/SalesBundle/Service/AddToCartUrl.php with content as follows:
namespace Foggyline\SalesBundle\Service;
class AddToCartUrl
{
private $em;
private $router;
public function __construct(
\Doctrine\ORM\EntityManager $entityManager,
\Symfony\Bundle\FrameworkBundle\Routing\Router $router
)
{
$this->em = $entityManager;
$this->router = $router;
}
public function getAddToCartUrl($productId)
{
return $this->router->generate('foggyline_sales_cart_add', array('id' => $productId));
}
}The router service here expects the route named foggyline_sales_cart_add, which still does not exist. We create the route by adding the following entry under the routes element of the src/Foggyline/SalesBundle/Resources/config/routing.xml file as follows:
<route id="foggyline_sales_cart_add" path="/cart/add/{id}">
<default key="_controller">FoggylineSalesBundle:Cart:add</default>
</route>Route definition expects to find the addAction function within the cart controller in the src/Foggyline/SalesBundle/Controller/CartController.php file, which we define as follows:
namespace Foggyline\SalesBundle\Controller;
use Symfony\Component\HttpFoundation\Request;
use Symfony\Bundle\FrameworkBundle\Controller\Controller;
class CartController extends Controller
{
public function addAction($id)
{
if ($customer = $this->getUser()) {
$em = $this->getDoctrine()->getManager();
$now = new \DateTime();
$product = $em->getRepository('FoggylineCatalogBundle:Product')->find($id);
// Grab the cart for current user
$cart = $em->getRepository('FoggylineSalesBundle:Cart')->findOneBy(array('customer' => $customer));
// If there is no cart, create one
if (!$cart) {
$cart = new \Foggyline\SalesBundle\Entity\Cart();
$cart->setCustomer($customer);
$cart->setCreatedAt($now);
$cart->setModifiedAt($now);
} else {
$cart->setModifiedAt($now);
}
$em->persist($cart);
$em->flush();
// Grab the possibly existing cart item
// But, lets find it directly
$cartItem = $em->getRepository('FoggylineSalesBundle:CartItem')->findOneBy(array('cart' => $cart, 'product' => $product));
if ($cartItem) {
// Cart item exists, update it
$cartItem->setQty($cartItem->getQty() + 1);
$cartItem->setModifiedAt($now);
} else {
// Cart item does not exist, add new one
$cartItem = new \Foggyline\SalesBundle\Entity\CartItem();
$cartItem->setCart($cart);
$cartItem->setProduct($product);
$cartItem->setQty(1);
$cartItem->setUnitPrice($product->getPrice());
$cartItem->setCreatedAt($now);
$cartItem->setModifiedAt($now);
}
$em->persist($cartItem);
$em->flush();
$this->addFlash('success', sprintf('%s successfully added to cart', $product->getTitle()));
return $this->redirectToRoute('foggyline_sales_cart');
} else {
$this->addFlash('warning', 'Only logged in users can add to cart.');
return $this->redirect('/');
}
}
}There is quite a bit of logic going on here in the addAction method. We are first checking whether the current user already has a cart entry in the database; if not, we create a new one. We then add or update the existing cart item.
In order for our new add_to_cart service to actually override the one from the Customermodule, we still need to add a compiler. We do so by defining the src/Foggyline/SalesBundle/DependencyInjection/Compiler/OverrideServiceCompilerPass.phpfile with content as follows:
namespace Foggyline\SalesBundle\DependencyInjection\Compiler;
use Symfony\Component\DependencyInjection\Compiler\CompilerPassInterface;
use Symfony\Component\DependencyInjection\ContainerBuilder;
use Symfony\Component\DependencyInjection\Definition;
class OverrideServiceCompilerPass implements CompilerPassInterface
{
public function process(ContainerBuilder $container)
{
// Override 'add_to_cart_url' service
$container->removeDefinition('add_to_cart_url');
$container->setDefinition('add_to_cart_url', $container->getDefinition('foggyline_sales.add_to_cart_url'));
// Override 'checkout_menu' service
// Override 'foggyline_customer.customer_orders' service
// Override 'bestsellers' service
// Pickup/parse 'shipment_method' services
// Pickup/parse 'payment_method' services
}
}Later on, we will add the rest of the overrides to this file. In order to tie things up for the moment, and make the add_to_cart service override kick in, we need to register the compiler pass within the build method of our src/Foggyline/SalesBundle/FoggylineSalesBundle.php file as follows:
public function build(ContainerBuilder $container)
{
parent::build($container);;
$container->addCompilerPass(new OverrideServiceCompilerPass());
}The override should now be in effect, and our Sales module should now be providing valid Add to Cart links.
The checkout menu service defined in the Customer module has a simple purpose which is to provide a link to the cart and the first step of the checkout process. Since the Sales module was unknown at the time, the Customer module provided a dummy link, which we will now override.
We start by adding the following service entry under the services element of the src/Foggyline/SalesBundle/Resources/config/services.xml file as follows:
<service id="foggyline_sales.checkout_menu" class="Foggyline\SalesBundle\Service\CheckoutMenu"> <argument type="service" id="doctrine.orm.entity_manager"/> <argument type="service" id="security.token_storage"/> <argument type="service" id="router"/> </service>
We then add the src/Foggyline/SalesBundle/Service/CheckoutMenu.php file with content as follows:
namespace Foggyline\SalesBundle\Service;
class CheckoutMenu
{
private $em;
private $token;
private $router;
public function __construct(
\Doctrine\ORM\EntityManager $entityManager,
$tokenStorage,
\Symfony\Bundle\FrameworkBundle\Routing\Router $router
)
{
$this->em = $entityManager;
$this->token = $tokenStorage->getToken();
$this->router = $router;
}
public function getItems()
{
if ($this->token
&& $this->token->getUser() instanceof \Foggyline\CustomerBundle\Entity\Customer
) {
$customer = $this->token->getUser();
$cart = $this->em->getRepository('FoggylineSalesBundle:Cart')->findOneBy(array('customer' => $customer));
if ($cart) {
return array(
array('path' => $this->router->generate('foggyline_sales_cart'), 'label' =>sprintf('Cart (%s)', count($cart->getItems()))),
array('path' => $this->router->generate('foggyline_sales_checkout'), 'label' =>'Checkout'),
);
}
}
return array();
}
}The service expects two routes, foggyline_sales_cart and foggyline_sales_checkout, so we need to amend the src/Foggyline/SalesBundle/Resources/config/routing.xml by file adding the following route definitions to it:
<route id="foggyline_sales_cart" path="/cart/"> <default key="_controller">FoggylineSalesBundle:Cart:index</default> </route> <route id="foggyline_sales_checkout" path="/checkout/"> <default key="_controller">FoggylineSalesBundle:Checkout:index</default> </route>
The newly added routes expect the cart and checkout controller. The cart controller is already in place, so we just need to add the indexAction to it. At this point, let's just add an empty one as follows:
public function indexAction(Request $request)
{
}Similarly, let's create a src/Foggyline/SalesBundle/Controller/CheckoutController.php file with content as follows:
namespace Foggyline\SalesBundle\Controller;
use Symfony\Component\HttpFoundation\Request;
use Symfony\Bundle\FrameworkBundle\Controller\Controller;
use Symfony\Component\Form\Extension\Core\Type\TextType;
use Symfony\Component\Form\Extension\Core\Type\CountryType;
class CheckoutController extends Controller
{
public function indexAction()
{
}
}Later on, we will revert back to these two indexAction methods and add proper method body implementations.
To conclude the service override, we now amend the previously created src/Foggyline/SalesBundle/DependencyInjection/Compiler/OverrideServiceCompilerPass.php file, by replacing the // Override 'checkout_menu' service comment with the following:
$container->removeDefinition('checkout_menu');
$container->setDefinition('checkout_menu', $container->getDefinition('foggyline_sales.checkout_menu'));Our newly defined service should now override the one defined in the Customer module, thus providing the right checkout and cart (with items in the cart count) URL.
The foggyline_customer.customer_orders service was to provide a collection of previously created orders for currently logged-in customers. The Customer module defined a dummy service for this purpose, just so we can move forward with building up the My Orders section under My Account page. We now need to override this service, making it return proper orders.
We start by adding the following service element under the services of the src/Foggyline/SalesBundle/Resources/config/services.xml file as follows:
<service id="foggyline_sales.customer_orders" class="Foggyline\SalesBundle\Service\CustomerOrders"> <argument type="service" id="doctrine.orm.entity_manager"/> <argument type="service" id="security.token_storage"/> <argument type="service" id="router"/> </service>
We then add the src/Foggyline/SalesBundle/Service/CustomerOrders.php file with content as follows:
namespace Foggyline\SalesBundle\Service;
class CustomerOrders
{
private $em;
private $token;
private $router;
public function __construct(
\Doctrine\ORM\EntityManager $entityManager,
$tokenStorage,
\Symfony\Bundle\FrameworkBundle\Routing\Router $router
)
{
$this->em = $entityManager;
$this->token = $tokenStorage->getToken();
$this->router = $router;
}
public function getOrders()
{
$orders = array();
if ($this->token
&& $this->token->getUser() instanceof \Foggyline\CustomerBundle\Entity\Customer
) {
$salesOrders = $this->em->getRepository('FoggylineSalesBundle:SalesOrder')
->findBy(array('customer' => $this->token->getUser()));
foreach ($salesOrders as $salesOrder) {
$orders[] = array(
'id' => $salesOrder->getId(),
'date' => $salesOrder->getCreatedAt()->format('d/m/Y H:i:s'),
'ship_to' => $salesOrder->getAddressFirstName() . '' . $salesOrder->getAddressLastName(),
' 'order_total' => $salesOrder->getTotalPrice(),
'status' => $salesOrder->getStatus(),
'actions' => array(
array(
'label' =>'Cancel',
'path' => $this->router->generate('foggyline_sales_order_cancel', array('id' => $salesOrder->getId()))
),
array(
'label' =>'Print',
'path' => $this->router->generate('foggyline_sales_order_print', array('id' => $salesOrder->getId()))
)
)
);
}
}
return $orders;
}
}The route generate method expects to find two routes, foggyline_sales_order_cancel and foggyline_sales_order_print, which are not yet created.
Let's go ahead and create them by adding the following under the route element of the src/Foggyline/SalesBundle/Resources/config/routing.xml file:
<route id="foggyline_sales_order_cancel"path="/order/cancel/{id}">
<default key="_controller">FoggylineSalesBundle:SalesOrder:cancel</default>
</route>
<route id="foggyline_sales_order_print" path="/order/print/{id}">
<default key="_controller">FoggylineSalesBundle:SalesOrder:print</default>
</route>The routes definition, in turn, expects SalesOrderController to be defined. Since our application will require an admin user to be able to list and edit the orders, we will use the following Symfony command to auto-generate the CRUD for our Sales Orderentity:
php bin/console generate:doctrine:crud
When asked for the entity shortcut name, we simply provide FoggylineSalesBundle:SalesOrder and proceed, allowing for creation of write actions. At this point, several files have been created for us, as well as a few entries outside of the Sales bundle. One of these entries is the route definition within the app/config/routing.yml file, as follows:
foggyline_sales_sales_order: resource: "@FoggylineSalesBundle/Controller/SalesOrderController.php" type: annotation
We should already have a foggyline_sales entry in there as well. The difference being that foggyline_sales points to our router.xml file and the newly created foggyline_sales_sales_order points to the exact newly created SalesOrderController. For the sake of simplicity, we can keep them both.
The auto-generator also created a salesorder directory under the app/Resources/views/ directory, which we need to move over into our bundle as the src/Foggyline/SalesBundle/Resources/views/Default/salesorder/ directory.
We can now address our print and cancel actions by adding the following into the src/Foggyline/SalesBundle/Controller/SalesOrderController.php file as follows:
public function cancelAction($id)
{
if ($customer = $this->getUser()) {
$em = $this->getDoctrine()->getManager();
$salesOrder = $em->getRepository('FoggylineSalesBundle:SalesOrder')
->findOneBy(array('customer' => $customer, 'id' => $id));
if ($salesOrder->getStatus() != \Foggyline\SalesBundle\Entity\SalesOrder::STATUS_COMPLETE) {
$salesOrder->setStatus(\Foggyline\SalesBundle\Entity\SalesOrder::STATUS_CANCELED);
$em->persist($salesOrder);
$em->flush();
}
}
return $this->redirectToRoute('customer_account');
}
public function printAction($id)
{
if ($customer = $this->getUser()) {
$em = $this->getDoctrine()->getManager();
$salesOrder = $em->getRepository('FoggylineSalesBundle:SalesOrder')
->findOneBy(array('customer' => $customer, 'id' =>$id));
return $this->render('FoggylineSalesBundle:default:salesorder/print.html.twig', array(
'salesOrder' => $salesOrder,
'customer' => $customer
));
}
return $this->redirectToRoute('customer_account');
}The cancelAction method merely checks whether the order in question belongs to the currently logged-in customer; if so, a change of order status is allowed. The printAction method merely loads the order if it belongs to the currently logged-in customer, and passes it on to a print.html.twig template.
We then create the src/Foggyline/SalesBundle/Resources/views/Default/salesorder/print.html.twig template with content as follows:
{% block body %}
<h1>Printing Order #{{ salesOrder.id }}</h1>
{#<p>Just a dummy Twig dump of entire variable</p>#}
{{ dump(salesOrder) }}
{% endblock %}Obviously, this is just a simplified output, which we can further customize to our needs. The important bit is that we have passed along the order object to our template, and can now extract any piece of information needed from it.
Finally, we replace the // Override 'foggyline_customer.customer_orders' service comment within the src/Foggyline/SalesBundle/DependencyInjection/Compiler/OverrideServiceCompilerPass.php file with code as follows:
$container->removeDefinition('foggyline_customer.customer_orders');
$container->setDefinition('foggyline_customer.customer_orders', $container->getDefinition('foggyline_sales.customer_orders'));This will make the service override kick in, and pull in all of the changes we just made.
The bestsellers service defined in the Customer module was supposed to provide dummy data for the bestsellers feature shown on the homepage. The idea is to showcase five of the bestselling products in the store. The Sales module now needs to override this service in order to provide the right implementation, where actual sold product quantities will affect the content of the bestsellers shown.
We start off by adding the following definition under the service element of the src/Foggyline/SalesBundle/Resources/config/services.xml file:
<service id="foggyline_sales.bestsellers" class="Foggyline\SalesBundle\Service\BestSellers"> <argument type="service" id="doctrine.orm.entity_manager"/> <argument type="service" id="router"/> </service>
We then define the src/Foggyline/SalesBundle/Service/BestSellers.php file with content as follows:
namespace Foggyline\SalesBundle\Service;
class BestSellers
{
private $em;
private $router;
public function __construct(
\Doctrine\ORM\EntityManager $entityManager,
\Symfony\Bundle\FrameworkBundle\Routing\Router $router
)
{
$this->em = $entityManager;
$this->router = $router;
}
public function getItems()
{
$products = array();
$salesOrderItem = $this->em->getRepository('FoggylineSalesBundle:SalesOrderItem');
$_products = $salesOrderItem->getBestsellers();
foreach ($_products as $_product) {
$products[] = array(
'path' => $this->router->generate('product_show', array('id' => $_product->getId())),
'name' => $_product->getTitle(),
'img' => $_product->getImage(),
'price' => $_product->getPrice(),
'id' => $_product->getId(),
);
}
return $products;
}
}Here, we are fetching the instance of the SalesOrderItemRepository class and calling the getBestsellers method on it. This method still has not been defined. We do so by adding it to file src/Foggyline/SalesBundle/Repository/SalesOrderItemRepository.php file as follows:
public function getBestsellers()
{
$products = array();
$query = $this->_em->createQuery('SELECT IDENTITY(t.product), SUM(t.qty) AS HIDDEN q
FROM Foggyline\SalesBundle\Entity\SalesOrderItem t
GROUP BY t.product ORDER BY q DESC')
->setMaxResults(5);
$_products = $query->getResult();
foreach ($_products as $_product) {
$products[] = $this->_em->getRepository('FoggylineCatalogBundle:Product')
->find(current($_product));
}
return $products;
}Here, we are using Doctrine Query Language (DQL) in order to build a list of the five bestselling products. Finally, we need to replace the // Override 'bestsellers' service comment from within the src/Foggyline/SalesBundle/DependencyInjection/Compiler/OverrideServiceCompilerPass.php file with code as follows:
$container->removeDefinition('bestsellers');
$container->setDefinition('bestsellers', $container->getDefinition('foggyline_sales.bestsellers'));By overriding the bestsellers service, we are exposing the actual sales-based list of bestselling products for other modules to fetch.
The cart page is where the customer gets to see a list of products added to the cart via Add to Cart buttons, from either the homepage, a category page, or a product page. We previously created CartController and an empty indexAction function. Now let's go ahead and edit the indexAction function as follows:
public function indexAction()
{
if ($customer = $this->getUser()) {
$em = $this->getDoctrine()->getManager();
$cart = $em->getRepository('FoggylineSalesBundle:Cart')->findOneBy(array('customer' => $customer));
$items = $cart->getItems();
$total = null;
foreach ($items as $item) {
$total += floatval($item->getQty() * $item->getUnitPrice());
}
return $this->render('FoggylineSalesBundle:default:cart/index.html.twig', array(
'customer' => $customer,
'items' => $items,
'total' => $total,
));
} else {
$this->addFlash('warning', 'Only logged in customers can access cart page.');
return $this->redirectToRoute('foggyline_customer_login');
}
}Here, we are checking whether the user is logged in; if they are, we are showing them the cart with all their items. The non-logged-in user is redirected to a customer login URL. The indexAction function is expecting the src/Foggyline/SalesBundle/Resources/views/Default/cart/index.html.twig file, whose content we define as follows:
{% extends 'base.html.twig' %}
{% block body %}
<h1>Shopping Cart</h1>
<div class="row">
<div class="large-8 columns">
<form action="{{ path('foggyline_sales_cart_update') }}"method="post">
<table>
<thead>
<tr>
<th>Item</th>
<th>Price</th>
<th>Qty</th>
<th>Subtotal</th>
</tr>
</thead>
<tbody>
{% for item in items %}
<tr>
<td>{{ item.product.title }}</td>
<td>{{ item.unitPrice }}</td>
<td><input name="item[{{ item.id }}]" value="{{ item.qty }}"/></td>
<td>{{ item.qty * item.unitPrice }}</td>
</tr>
{% endfor %}
</tbody>
</table>
<button type="submit" class="button">Update Cart</button>
</form>
</div>
<div class="large-4 columns">
<div>Order Total: {{ total }}</div>
<div><a href="{{ path('foggyline_sales_checkout') }}"class="button">Go to Checkout</a></div>
</div>
</div>
{% endblock %}When rendered, the template will show quantity input elements under each added product, alongside the Update Cart button. The Update Cart button submits the form, whose action is pointing to the foggyline_sales_cart_update route.
Let's go ahead and create foggyline_sales_cart_update, by adding the following entry under the route element of the src/Foggyline/SalesBundle/Resources/config/routing.xml file as follows:
<route id="foggyline_sales_cart_update" path="/cart/update"> <default key="_controller">FoggylineSalesBundle:Cart:update</default> </route>
The newly defined route expects to find an updateAction function under the src/Foggyline/SalesBundle/Controller/CartController.php file, which we add as follows:
public function updateAction(Request $request)
{
$items = $request->get('item');
$em = $this->getDoctrine()->getManager();
foreach ($items as $_id => $_qty) {
$cartItem = $em->getRepository('FoggylineSalesBundle:CartItem')->find($_id);
if (intval($_qty) > 0) {
$cartItem->setQty($_qty);
$em->persist($cartItem);
} else {
$em->remove($cartItem);
}
}
// Persist to database
$em->flush();
$this->addFlash('success', 'Cart updated.');
return $this->redirectToRoute('foggyline_sales_cart');
}To remove a product from the cart, we simply insert 0 as the quantity value and click the Update Cart button. This completes our simple cart page.
In order to move from cart to checkout, we need to sort out payment and shipment services. The previous Payment and Shipment modules exposed some of their Payment and Shipment services, which we now need to aggregate into a single Payment and Shipment service that our checkout process will use.
We start by replacing the previously added // Pickup/parse 'payment_method' services comment under the src/Foggyline/SalesBundle/DependencyInjection/Compiler/OverrideServiceCompilerPass.php file with code as follows:
$container->getDefinition('foggyline_sales.payment')
->addArgument(
array_keys($container->findTaggedServiceIds('payment_method'))
);The findTaggedServiceIds method returns a key-value list of all the services tagged with payment_method, which we then pass on as argument to our foggyline_sales.payment service. This is the only way to fetch the list of services in Symfony during the compilation time.
We then edit the src/Foggyline/SalesBundle/Resources/config/services.xml file by adding the following under the service element:
<service id="foggyline_sales.payment" class="Foggyline\SalesBundle\Service\Payment"> <argument type="service" id="service_container"/> </service>
Finally, we create the Payment class under the src/Foggyline/SalesBundle/Service/Payment.php file as follows:
namespace Foggyline\SalesBundle\Service;
class Payment
{
private $container;
private $methods;
public function __construct($container, $methods)
{
$this->container = $container;
$this->methods = $methods;
}
public function getAvailableMethods()
{
$methods = array();
foreach ($this->methods as $_method) {
$methods[] = $this->container->get($_method);
}
return $methods;
}
}In compliance with the service definition in the services.xml file, our service accepts two parameters, one being $container and the second one being $methods. The $methods argument is passed during compilation time, where we are able to fetch a list of all the payment_method tagged services. This effectively means our getAvailableMethods is now capable of returning all payment_method tagged services, from any module.
The Shipment service is implemented much like the Payment service. The overall idea is similar, with merely a few differences along the way. We start by replacing the previously added // Pickup/parse shipment_method' services comment under the src/Foggyline/SalesBundle/DependencyInjection/Compiler/OverrideServiceCompilerPass.php file with code as follows:
$container->getDefinition('foggyline_sales.shipment')
->addArgument(
array_keys($container->findTaggedServiceIds('shipment_method'))
);We then edit the src/Foggyline/SalesBundle/Resources/config/services.xml file by adding the following under the service element:
<service id="foggyline_sales.shipment"class="Foggyline\SalesBundle\Service\Payment"> <argument type="service" id="service_container"/> </service>
Finally, we create the Shipment class under the src/Foggyline/SalesBundle/Service/Shipment.php file as follows:
namespace Foggyline\SalesBundle\Service;
class Shipment
{
private $container;
private $methods;
public function __construct($container, $methods)
{
$this->container = $container;
$this->methods = $methods;
}
public function getAvailableMethods()
{
$methods = array();
foreach ($this->methods as $_method) {
$methods[] = $this->container->get($_method);
}
return $methods;
}
}We are now able to fetch all the Payment and Shipment services via our unified Payment and Shipment service, thus making the checkout process easy.
The checkout page will be constructed out of two checkout steps, the first one being shipment information gathering, and the second one being payment information gathering.
We start off with a shipment step, by changing our src/Foggyline/SalesBundle/Controller/CheckoutController.php file and its indexAction as follows:
public function indexAction()
{
if ($customer = $this->getUser()) {
$form = $this->getAddressForm();
$em = $this->getDoctrine()->getManager();
$cart = $em->getRepository('FoggylineSalesBundle:Cart')->findOneBy(array('customer' => $customer));
$items = $cart->getItems();
$total = null;
foreach ($items as $item) {
$total += floatval($item->getQty() * $item->getUnitPrice());
}
return $this->render('FoggylineSalesBundle:default:checkout/index.html.twig', array(
'customer' => $customer,
'items' => $items,
'cart_subtotal' => $total,
'shipping_address_form' => $form->createView(),
'shipping_methods' => $this->get('foggyline_sales.shipment')->getAvailableMethods()
));
} else {
$this->addFlash('warning', 'Only logged in customers can access checkout page.');
return $this->redirectToRoute('foggyline_customer_login');
}
}
private function getAddressForm()
{
return $this->createFormBuilder()
->add('address_first_name', TextType::class)
->add('address_last_name', TextType::class)
->add('company', TextType::class)
->add('address_telephone', TextType::class)
->add('address_country', CountryType::class)
->add('address_state', TextType::class)
->add('address_city', TextType::class)
->add('address_postcode', TextType::class)
->add('address_street', TextType::class)
->getForm();
}Here, we are fetching the currently logged-in customer cart and passing it onto a checkout/index.html.twig template, alongside several other variables needed for the shipment step. The getAddressForm method simply builds an address form for us. There is also a call toward our newly created the foggyline_sales.shipment service, which enables us to fetch a list of all available shipment methods.
We then create src/Foggyline/SalesBundle/Resources/views/Default/checkout/index.html.twig with content as follows:
{% extends 'base.html.twig' %}
{% block body %}
<h1>Checkout</h1>
<div class="row">
<div class="large-8 columns">
<form action="{{ path('foggyline_sales_checkout_payment') }}" method="post" id="shipping_form">
<fieldset>
<legend>Shipping Address</legend>
{{ form_widget(shipping_address_form) }}
</fieldset>
<fieldset>
<legend>Shipping Methods</legend>
<ul>
{% for method in shipping_methods %}
{% set shipment = method.getInfo('street', 'city', 'country', 'postcode', 'amount', 'qty')['shipment'] %}
<li>
<label>{{ shipment.title }}</label>
<ul>
{% for delivery_option in shipment.delivery_options %}
<li>
<input type="radio" name="shipment_method"
value="{{ shipment.code }}____{{ delivery_option.code }}____{{ delivery_option.price }}"> {{ delivery_option.title }}
({{ delivery_option.price }})
<br>
</li>
{% endfor %}
</ul>
</li>
{% endfor %}
</ul>
</fieldset>
</form>
</div>
<div class="large-4 columns">
{% include 'FoggylineSalesBundle:default:checkout/order_sumarry.html.twig'
%}
<div>Cart Subtotal: {{ cart_subtotal }}</div>
<div><a id="shipping_form_submit" href="#" class="button">Next</a>
</div>
</div>
</div>
<script type="text/javascript">
var form = document.getElementById('shipping_form');
document.getElementById('shipping_form_submit').addEventListener('click', function () {
form.submit();
});
</script>
{% endblock %}The template lists all of the address-related form fields, alongside available shipment methods. The JavaScript part handles the Next button click, which basically submits the form to the foggyline_sales_checkout_payment route.
We then define the foggyline_sales_checkout_payment route by adding the following entry under the routes element of the src/Foggyline/SalesBundle/Resources/config/routing.xml file:
<route id="foggyline_sales_checkout_payment" path="/checkout/payment"> <default key="_controller">FoggylineSalesBundle:Checkout:payment</default> </route>
The route entry expects to find a paymentAction within CheckoutController, which we define as follows:
public function paymentAction(Request $request)
{
$addressForm = $this->getAddressForm();
$addressForm->handleRequest($request);
if ($addressForm->isSubmitted() && $addressForm->isValid() && $customer = $this->getUser()) {
$em = $this->getDoctrine()->getManager();
$cart = $em->getRepository('FoggylineSalesBundle:Cart')->findOneBy(array('customer' => $customer));
$items = $cart->getItems();
$cartSubtotal = null;
foreach ($items as $item) {
$cartSubtotal += floatval($item->getQty() * $item->getUnitPrice());
}
$shipmentMethod = $_POST['shipment_method'];
$shipmentMethod = explode('____', $shipmentMethod);
$shipmentMethodCode = $shipmentMethod[0];
$shipmentMethodDeliveryCode = $shipmentMethod[1];
$shipmentMethodDeliveryPrice = $shipmentMethod[2];
// Store relevant info into session
$checkoutInfo = $addressForm->getData();
$checkoutInfo['shipment_method'] = $shipmentMethodCode . '____' . $shipmentMethodDeliveryCode;
$checkoutInfo['shipment_price'] = $shipmentMethodDeliveryPrice;
$checkoutInfo['items_price'] = $cartSubtotal;
$checkoutInfo['total_price'] = $cartSubtotal + $shipmentMethodDeliveryPrice;
$this->get('session')->set('checkoutInfo', $checkoutInfo);
return $this->render('FoggylineSalesBundle:default:checkout/payment.html.twig', array(
'customer' => $customer,
'items' => $items,
'cart_subtotal' => $cartSubtotal,
'delivery_subtotal' => $shipmentMethodDeliveryPrice,
'delivery_label' =>'Delivery Label Here',
'order_total' => $cartSubtotal + $shipmentMethodDeliveryPrice,
'payment_methods' => $this->get('foggyline_sales.payment')->getAvailableMethods()
));
} else {
$this->addFlash('warning', 'Only logged in customers can access checkout page.');
return $this->redirectToRoute('foggyline_customer_login');
}
}The preceding code fetches the submission made from the shipment step of the checkout process, stores the relevant values into the session, fetches the variables required for the payment step and renders back the checkout/payment.html.twig template.
We define the src/Foggyline/SalesBundle/Resources/views/Default/checkout/payment.html.twig file with content as follows:
{% extends 'base.html.twig' %}
{% block body %}
<h1>Checkout</h1>
<div class="row">
<div class="large-8 columns">
<form action="{{ path('foggyline_sales_checkout_process') }}"method="post" id="payment_form">
<fieldset>
<legend>Payment Methods</legend>
<ul>
{% for method in payment_methods %}
{% set payment = method.getInfo()['payment'] %}
<li>
<input type="radio" name="payment_method"
value="{{ payment.code }}"> {{ payment.title }}
{% if payment['form'] is defined %}
<div id="{{ payment.code }}_form">
{{ form_widget(payment['form']) }}
</div>
{% endif %}
</li>
{% endfor %}
</ul>
</fieldset>
</form>
</div>
<div class="large-4 columns">
{% include 'FoggylineSalesBundle:default:checkout/order_sumarry.html.twig' %}
<div>Cart Subtotal: {{ cart_subtotal }}</div>
<div>{{ delivery_label }}: {{ delivery_subtotal }}</div>
<div>Order Total: {{ order_total }}</div>
<div><a id="payment_form_submit" href="#" class="button">Place Order</a>
</div>
</div>
</div>
<script type="text/javascript">
var form = document.getElementById('payment_form');
document.getElementById('payment_form_submit').addEventListener('click', function () {
form.submit();
});
</script>
{% endblock %}Similar to the shipment step, we have a rendering of available payment methods here, alongside a Place Order button which is handled by JavaScript as the button is located outside of the submission form. Once an order is placed, the POST submission is made onto the foggyline_sales_checkout_process route, which we defined under the routes element of the src/Foggyline/SalesBundle/Resources/config/routing.xml file as follows:
<route id="foggyline_sales_checkout_process"path="/checkout/process"> <default key="_controller">FoggylineSalesBundle:Checkout:process</default> </route>
The route points to the processAction function within CheckoutController, which we define as follows:
public function processAction()
{
if ($customer = $this->getUser()) {
$em = $this->getDoctrine()->getManager();
// Merge all the checkout info, for SalesOrder
$checkoutInfo = $this->get('session')->get('checkoutInfo');
$now = new \DateTime();
// Create Sales Order
$salesOrder = new \Foggyline\SalesBundle\Entity\SalesOrder();
$salesOrder->setCustomer($customer);
$salesOrder->setItemsPrice($checkoutInfo['items_price']);
$salesOrder->setShipmentPrice
($checkoutInfo['shipment_price']);
$salesOrder->setTotalPrice($checkoutInfo['total_price']);
$salesOrder->setPaymentMethod($_POST['payment_method']);
$salesOrder->setShipmentMethod($checkoutInfo['shipment_method']);
$salesOrder->setCreatedAt($now);
$salesOrder->setModifiedAt($now);
$salesOrder->setCustomerEmail($customer->getEmail());
$salesOrder->setCustomerFirstName($customer->getFirstName());
$salesOrder->setCustomerLastName($customer->getLastName());
$salesOrder->setAddressFirstName($checkoutInfo['address_first_name']);
$salesOrder->setAddressLastName($checkoutInfo['address_last_name']);
$salesOrder->setAddressCountry($checkoutInfo['address_country']);
$salesOrder->setAddressState($checkoutInfo['address_state']);
$salesOrder->setAddressCity($checkoutInfo['address_city']);
$salesOrder->setAddressPostcode($checkoutInfo['address_postcode']);
$salesOrder->setAddressStreet($checkoutInfo['address_street']);
$salesOrder->setAddressTelephone($checkoutInfo['address_telephone']);
$salesOrder->setStatus(\Foggyline\SalesBundle\Entity\SalesOrder::STATUS_PROCESSING);
$em->persist($salesOrder);
$em->flush();
// Foreach cart item, create order item, and delete cart item
$cart = $em->getRepository('FoggylineSalesBundle:Cart')->findOneBy(array('customer' => $customer));
$items = $cart->getItems();
foreach ($items as $item) {
$orderItem = new \Foggyline\SalesBundle\Entity\SalesOrderItem();
$orderItem->setSalesOrder($salesOrder);
$orderItem->setTitle($item->getProduct()->getTitle());
$orderItem->setQty($item->getQty());
$orderItem->setUnitPrice($item->getUnitPrice());
$orderItem->setTotalPrice($item->getQty() * $item->getUnitPrice());
$orderItem->setModifiedAt($now);
$orderItem->setCreatedAt($now);
$orderItem->setProduct($item->getProduct());
$em->persist($orderItem);
$em->remove($item);
}
$em->remove($cart);
$em->flush();
$this->get('session')->set('last_order', $salesOrder->getId());
return $this->redirectToRoute('foggyline_sales_checkout_success');
} else {
$this->addFlash('warning', 'Only logged in customers can access checkout page.');
return $this->redirectToRoute('foggyline_customer_login');
}
}Once the POST submission hits the controller, a new order with all of the related items gets created. At the same time, the cart and cart items are cleared. Finally, the customer is redirected to the order success page.
The order success page has an important role in full-blown web shop applications. This is where we get to thank the customer for their purchase and possibly present some more related or cross-related shopping options, alongside some optional discounts. Though our application is simple, it's worth building a simple order success page.
We start by adding the following route definition under the routes element of the src/Foggyline/SalesBundle/Resources/config/routing.xml file:
<route id="foggyline_sales_checkout_success" path="/checkout/success"> <default key="_controller">FoggylineSalesBundle:Checkout:success</default> </route>
The route points to a successAction function within CheckoutController, which we define as follows:
public function successAction()
{
return $this->render('FoggylineSalesBundle:default:checkout/success.html.twig', array(
'last_order' => $this->get('session')->get('last_order')
));
}Here, we are simply fetching the last created order ID for the currently logged-in customer and passing the full order object to the src/Foggyline/SalesBundle/Resources/views/Default/checkout/success.html.twig template as follows:
{% extends 'base.html.twig' %}
{% block body %}
<h1>Checkout Success</h1>
<div class="row">
<p>Thank you for placing your order #{{ last_order }}.</p>
<p>You can see order details <a href="{{ path('customer_account') }}">here</a>.</p>
</div>
{% endblock %}With this, we finalize the entire checkout process for our web shop. Though it is an absolutely simplistic one, it sets the foundation for more robust implementations.
Now that we have finalized the checkout Sales module, let's revert quickly to our core module, AppBundle. As per our application requirements, let's go ahead and create a simple store manager dashboard.
We start by adding the src/AppBundle/Controller/StoreManagerController.php file with content as follows:
namespace AppBundle\Controller;
use Sensio\Bundle\FrameworkExtraBundle\Configuration\Route;
use Symfony\Bundle\FrameworkBundle\Controller\Controller;
class StoreManagerController extends Controller
{
/**
* @Route("/store_manager", name="store_manager")
*/
public function indexAction()
{
return $this->render('AppBundle:default:store_manager.html.twig');
}
}The indexAction function simply returns the src/AppBundle/Resources/views/default/store_manager.html.twig file, whose content we define as follows:
{% extends 'base.html.twig' %}
{% block body %}
<h1>Store Manager</h1>
<div class="row">
<div class="large-6 columns">
<div class="stacked button-group">
<a href="{{ path('category_new') }}" class="button">Add new Category</a>
<a href="{{ path('product_new') }}" class="button">Add new Product</a>
<a href="{{ path('customer_new') }}" class="button">Add new Customer</a>
</div>
</div>
<div class="large-6 columns">
<div class="stacked button-group">
<a href="{{ path('category_index') }}" class="button">List & Manage Categories</a>
<a href="{{ path('product_index') }}" class="button">List & Manage Products</a>
<a href="{{ path('customer_index') }}" class="button">List & Manage Customers</a>
<a href="{{ path('salesorder_index') }}" class="button">List & Manage Orders</a>
</div>
</div>
</div>
{% endblock %}The template merely renders the category, product, customer, and order management links. The actual access to these links is controlled by the firewall, as explained in previous chapters.
The Sales module is far more robust than any of the previous modules. There are several things we can unit test. However, we won't be covering full unit testing as part of this chapter. We will simply turn our attention to a single unit test, the one for the CustomerOrders service.
We start off by adding the following line under the testsuites element of our phpunit.xml.dist file:
<directory>src/Foggyline/SalesBundle/Tests</directory>
With that in place, running the phpunit command from the root of our shop should pick up any test we have defined under the src/Foggyline/SalesBundle/Tests/ directory.
Now, let's go ahead and create a test for our CustomerOrders service. We do so by defining the src/Foggyline/SalesBundle/Tests/Service/CustomerOrdersTest.php file with content as follows:
namespace Foggyline\SalesBundle\Test\Service;
use Symfony\Bundle\FrameworkBundle\Test\KernelTestCase;
use Symfony\Component\Security\Core\Authentication\Token\UsernamePasswordToken;
class CustomerOrdersTest extends KernelTestCase
{
private $container;
public function setUp()
{
static::bootKernel();
$this->container = static::$kernel->getContainer();
}
public function testGetOrders()
{
$firewall = 'foggyline_customer';
$em = $this->container->get('doctrine.orm.entity_manager');
$user = $em->getRepository('FoggylineCustomerBundle:Customer')->findOneByUsername
('ajzele@gmail.com');
$token = new UsernamePasswordToken($user, null, $firewall, array('ROLE_USER'));
$tokenStorage = $this->container->get('security.token_storage');
$tokenStorage->setToken($token);
$orders = new \Foggyline\SalesBundle\Service\CustomerOrders(
$em,
$tokenStorage,
$this->container->get('router')
);
$this->assertNotEmpty($orders->getOrders());
}
}Here, we are using the UsernamePasswordToken function in order to simulate a customer login. The password token is then passed on to the CustomerOrders service. The CustomerOrders service then internally checks whether token storage has a token assigned, flagging it as a logged-in user and returning the list of its orders. Being able to simulate customer login is essential for any other tests we might be writing for our sales module.
Similar to unit testing, we will only focus on a single functional test, as doing anything more robust would be out of the scope of this chapter. We will write a simple code that adds a product to the cart and accesses the checkout page. In order to add an item to the cart, here we also need to simulate the user login.
We write the src/Foggyline/SalesBundle/Tests/Controller/CartControllerTest.php test as follows:
namespace Foggyline\SalesBundle\Tests\Controller;
use Symfony\Bundle\FrameworkBundle\Test\WebTestCase;
use Symfony\Component\BrowserKit\Cookie;
use Symfony\Component\Security\Core\Authentication\Token\UsernamePasswordToken;
class CartControllerTest extends WebTestCase
{
private $client = null;
public function setUp()
{
$this->client = static::createClient();
}
public function testAddToCartAndAccessCheckout()
{
$this->logIn();
$crawler = $this->client->request('GET', '/');
$crawler = $this->client->click($crawler->selectLink('Add to Cart')->link());
$crawler = $this->client->followRedirect();
$this->assertTrue($this->client->getResponse()->isSuccessful());
$this->assertGreaterThan(0, $crawler->filter('html:contains("added to cart")')->count());
$crawler = $this->client->request('GET', '/sales/cart/');
$crawler = $this->client->click($crawler->selectLink('Go to Checkout')->link());
$this->assertTrue($this->client->getResponse()->isSuccessful());
$this->assertGreaterThan(0, $crawler->filter('html:contains("Checkout")')->count());
}
private function logIn()
{
$session = $this->client->getContainer()->get('session');
$firewall = 'foggyline_customer'; // firewall name
$em = $this->client->getContainer()->get('doctrine')->getManager();
$user = $em->getRepository('FoggylineCustomerBundle:Customer')->findOneByUsername('ajzele@gmail.com');
$token = new UsernamePasswordToken($user, null, $firewall, array('ROLE_USER'));
$session->set('_security_' . $firewall, serialize($token));
$session->save();
$cookie = new Cookie($session->getName(), $session->getId());
$this->client->getCookieJar()->set($cookie);
}
}Once run, the test will simulate the customer login, add an item to the cart, and try to access the checkout page. Depending on the actual customers we have in our database, we might need to change the customer e-mail provided in the preceding test.
Running the phpunit command now should successfully execute our tests.
In this chapter, we built a simple yet functional Sales module. With just four simple entities (Cart, CartItem, SalesOrder, and SalesOrderItem), we managed to implement simple cart and checkout features. By doing so, we empowered customers to actually make a purchase, instead of just browsing the product catalog. The sales module made use of the payment and shipment services defined in previous chapters. While the payment and shipment services are implemented as imaginary, dummy ones, they do provide a basic skeleton that we can use for real payment and shipment API implementations.
Furthermore, in this chapter, we addressed the admin dashboard, by making a simple interface that merely aggregates a few of the existing CRUD interfaces. Access to the dashboard and the management links is protected by entries in app/config/security.yml, and allowed only for ROLE_ADMIN.
Together, the modules written so far make up a simplified application. Writing robust web shop applications would normally include tens of other features found in modern e-commerce platforms such as Magento. These include multiple language, currency, and website support; robust category, product, and product inventory management; shopping cart and catalog sales rules; and many others. Modularizing our application makes development and maintenance processes easier.
Moving forward, in the final chapter, we will look into distributing our modules.
Throughout a few of the previous chapters, we built a simple web shop application in a modular manner. Each of the modules play a special role in handling individual bits and pieces, which add to the overall application. The application itself, though written in modular, was kept in a Git single version control repository. It would be a far cleaner separation if each of the modules was provided in its own repository. This way, we will be able to keep the different module developments as completely different projects while still being able to use them together. As we move forward, we will see how we can achieve this via GIT and Composer in two different manners.
In this chapter, we will cover the following tools and services:
Originally started by Linus Torvalds, Git version control is currently one of the most popular version control systems. Overall speed and efficiency with large projects, alongside a great branching system, has made it popular among developers.
Learning about Git version control itself is out of the scope of this book, for which recommended reading is the Pro Git book.
The Pro Git book, written by Scott Chacon and Ben Straub, and published by Apress, is available for free at https://git-scm.com/book/en/v2.
One neat feature of Git, which we are interested in as part of this chapter, is its submodules. They enable us to slice larger modular projects, such as our web shop app, into a series of smaller submodules, whereas each submodule is a Git repository on its own.
Within three years of Git's appearance, GitHub emerged. GitHub is basically a web service built on top of the Git version control system. It enables developers to easily post their code online, where others can simply clone their repository and use their code. Creating an account on GitHub is free and can be done by following instructions on their official homepage (https://github.com).
Currently, our application is structured as per the following image:
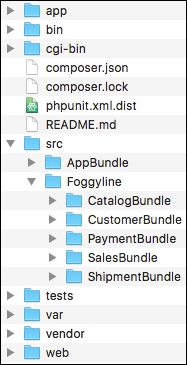
What we want to do is to split it into six different Git repositories, as follows:
corecatalogcustomerpaymentsalesshipmentThe core repository is to contain everything except the content of the src/Foggyline directory.
Assuming we created an empty core repository on GitHub, and our local all-in-one app is currently held in the shop directory, we initialize the following commands on our computer:
cp -R shop core-repository rm -Rfcore-repository/.git/ rm -Rfcore-repository/src/Foggyline/* touch core-repository/src/Foggyline/.gitkeep cd core-repository git init git remote add origin git@github.com:<user>/<core-repository>.git git add --all git commit -m "Initial commit of core application" git push origin master
At this point, we merely pushed the core application part of our all-in-one web shop app into the core repository on GitHub. The src/Foggyline/ directory does not contain any modules in it.
Now, let's go back to GitHub and create an appropriate empty repository for each of the five modules, that is, catalog, customer, payment, sales, and shipment. We can now execute a set of console commands for each of the modules, as shown in the following CatalogBundle example:
cp -R shop/src/Foggyline/CatalogBundle catalog-repository cd catalog-repository git init git remote add origin git@github.com:<user>/<catalog-repository>.git git add --all git commit -m "Initial commit of catalog module" git push origin master
Once all of the five modules are pushed to a repository, we can finally treat them as submodules, as shown here:
cd core-repository git submodule add git@github.com:<user>/<catalog-repository>.git src/Foggyline/CatalogBundle git submodule add git@github.com:<user>/<customer-repository>.git src/Foggyline/CustomerBundle git submodule add git@github.com:<user>/<payment-repository>.git src/Foggyline/PaymentBundle git submodule add git@github.com:<user>/<sales-repository>.git src/Foggyline/SalesBundle git submodule add git@github.com:<user>/<shipment-repository>.git src/Foggyline/ShipmentBundle
If we were to run the ls-al command within the core repository directory now, we should be able to see a .gitmodules file in there with the following content:
[submodule "src/Foggyline/CatalogBundle"] path = src/Foggyline/CatalogBundle url = git@github.com:<user>/<catalog-repository>.git [submodule "src/Foggyline/CustomerBundle"] path = src/Foggyline/CustomerBundle url = git@github.com:<user>/<customer-repository>.git [submodule "src/Foggyline/PaymentBundle"] path = src/Foggyline/PaymentBundle url = git@github.com:<user>/<payment-repository>.git [submodule "src/Foggyline/SalesBundle"] path = src/Foggyline/SalesBundle url = git@github.com:<user>/<sales-repository>.git [submodule "src/Foggyline/ShipmentBundle"] path = src/Foggyline/ShipmentBundle url = git@github.com:<user>/<shipment-repository>.git
The .gitmodules file, basically, contains the list of all of the submodules added to our core project, that is, core application. We should commit and push this file to the core repository now. Assuming that the .gitmodules file is pushed to the core repository, we can easily delete all directories created so far and initiate the project with one simple command, as follows:
git clone --recursive git@github.com:<user>/<core-repository>.git
The --recursive argument to the git clone command automatically initializes and updates each submodule in the repository based on the .gitmodules file.
Composer is a dependency management tool for PHP. By default, it does not install anything global but rather on a per-project basis. We can use it to redistribute our project in order to define which libraries and packages it needs for it to be successfully executed. Using Composer is quite simple. All it creating is to create a composer.json file in the root directory of our project with similar content, as follows:
{
"require": {
"twig/twig": "~1.0"
}
}If we were to create the preceding composer.json file in some empty directory and execute the composer install command within that directory, Composer will pickup the composer.json file and install the defined dependencies for our project. The actual install action implies on downloading the required code from a remote repository to our machine. In doing so, the install command creates the composer.lock file, which writes a list of the exact versions of dependencies installed.
We can also simply execute the command twig/twig:~1.0 that a Composer requires, which does the same thing but with a different approach. It does not require us to write a composer.json file, and if one exists, it will update it.
Learning about Composer itself is out of the scope of this book, for which the recommended official documentation is available at https://getcomposer.org/doc.
Composer allows packaging and formal dependency management, making it a great choice to slice our all-in-one modular application into a series of Composer packages. These packages need a repository.
The main repository, when it comes to Composer packages, is Packagist (https://packagist.org). It is a web service that we can access through our browser, open an account on for free, and start submitting our packages to the repository. We can also use it to search through already existing packages.
Packagist is generally used for free open source packages, though we can attach privateGitHub and BitBucket repositories to it in the same manner, the only difference being that the private repositories require SSH keys in order to work.
There are more convenient commercial installations of the Composer packager, such as Toran Proxy (https://toranproxy.com). This allows easier hosting of private packages, higher bandwidth for faster package installations, and commercial support.
Up to this point, we sliced our applications into six different Git repositories, one for core application and the remaining five for each module (catalog, customer, payment, sales, and shipment) individually. Now, let's take the final step and see how we can move away from the Git submodules to the Composer packages.
Assuming we created an account on https://packagist.org and successfully logged in, we will start by clicking on the Submit button, which should land us on a screen similar to the following screenshot:
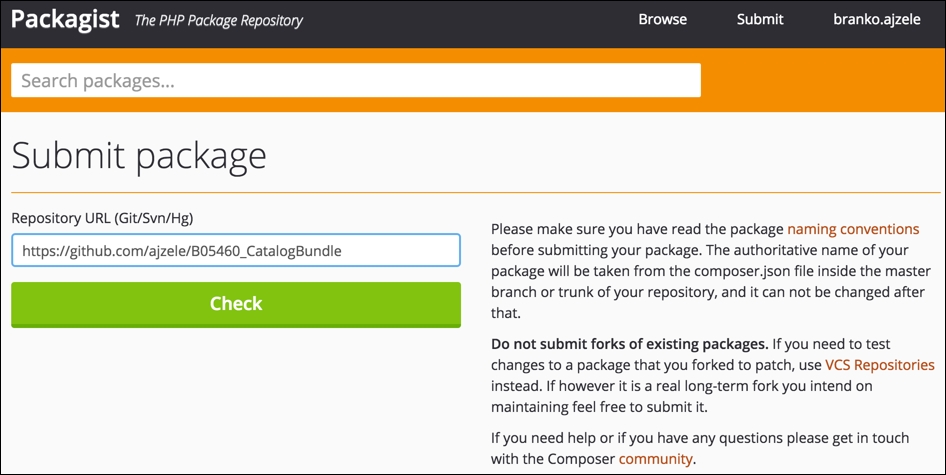
Here, we need to provide a link to our existing Git, SVN, or Mercurial (HG) repository. The preceding example provides a link (https://github.com/ajzele/B05460_CatalogBundle) to the Git repository. Before we press the Check button, we will need to make sure that our repository has a composer.json file defined in its root, otherwise an error similar to the one shown in the following screenshot will be thrown.

We will then create the composer.json file for our CatalogBundle with the following content:
{
"name": "foggyline/catalogbundle",
"version" : "1.0.0",
"type": "library",
"description": "Just a test module for web shop application.",
"keywords": [
"catalog"
],
"homepage": "https://github.com/ajzele/B05460_CatalogBundle",
"license": "MIT",
"authors": [
{
"name": "Branko Ajzele",
"email": "ajzele@gmail.com",
"homepage": "http://foggyline.net",
"role": "Developer"
}
],
"minimum-stability": "dev",
"prefer-stable": true,
"autoload": {
"psr-0": {
"Foggyline\\CatalogBundle\\": ""
}
},
"target-dir": "Foggyline/CatalogBundle"
}There are quite a lot of attributes here, all of which are fully documented over on the https://getcomposer.org/doc/04-schema.md page.
With the preceding composer.json file in place, running the composer install command on console will pull in the code under the vendor/foggyline/catalogbundle directory, making for a full path of our bundle file under vendor/foggyline/catalogbundle/Foggyline/CatalogBundle/FoggylineCatalogBundle.php.
Once we add the preceding composer.json file to our Git repository, we can go back to Packagist and proceed with clicking the Check button, which should result in a screen similar to the following screenshot:
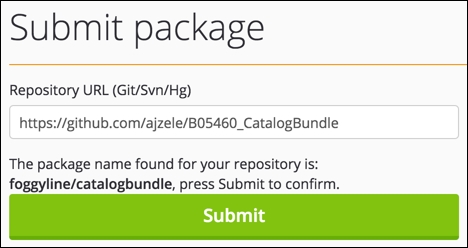
Finally, when we click the Submit button, a screen similar to the following screenshot should appear:
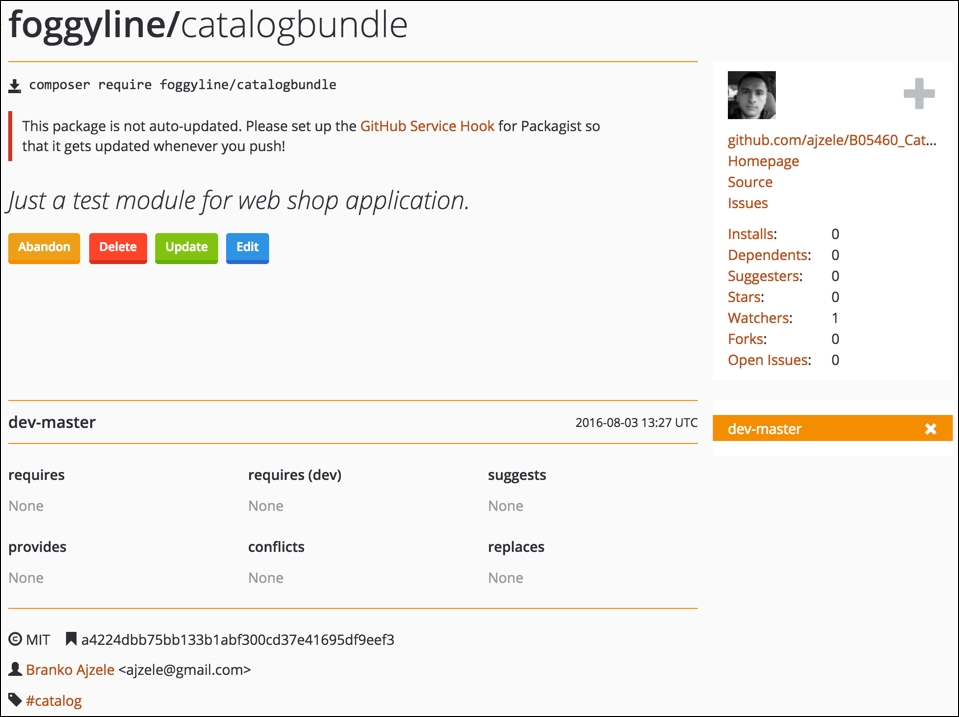
Our package is now added to Packagist, and running the following command on console will install it to into the project:
composer require foggyline/catalogbundle:dev-master
Similarly, we can just add the proper entry to the existing project's composer.json file, as shown in the following code block:
{
"require": {
"foggyline/catalogbundle": "dev-master"
},
}Now that we know how to slice out the application across several Git repositories and Composer packages, we need to do the same for the remaining modules within the src/Foggyline/ directory, as only those modules will be registered as the Composer packages.
During the sales module development, we noticed that it depends on several other modules, such as catalog and customer. We can use the require attribute of the composer.json file to outline this dependency.
Once all of the Git repositories for the src/Foggyline/ modules are updated with the proper composer.json definitions, we can go back to our core application repository and update the require attribute in its composer.json file, as follows:
{
"require": {
// ...
"foggyline/catalogbundle": "dev-master"
"foggyline/customerbundle": "dev-master"
"foggyline/paymentbundle": "dev-master"
"foggyline/salesbundle": "dev-master"
"foggyline/shipmentbundle": "dev-master"
// ...
},
}The difference between using submodules and packages might not be that obvious at this point. However, packages, unlike submodules, allow versioning. Though all of our packages are pulled in from dev-master, we could have easily targeted specific versions of packages, if any.
Throughout this chapter, we took a quick look at Git and Composer and how we can integrate and distribute our modules via GitHub and Packagist as their respectful services. Publishing packages under Packagist has been shown to be a pretty straightforward and easy process. All it took was a public link to the version control system repository and a composer.json file definition within the root of our project.
Writing our own applications from ground up does not necessarily mean we need to use the Git submodules or the Composer packages, as presented in this chapter. The Symfony application, on its own, is structured modularly via bundles. The version control system, when used on a Symfony project, is supposed to save only our code, which means all of the Symfony libraries and other dependencies are to be pulled in via Composer when the project is being set. The examples shown in this chapter merely show what can be accomplished if we are after writing modular components that are to be shared with others. As an example, if we were really working on a robust catalog module, others interested in coding their own web shop might find it interesting to require and use it in their project.
This book started by looking into the current state of the PHP ecosystem. We then touched upon design patterns and principles, as a foundation of professional programming. Then we moved onto writing a brief, more visual, specification for our web shop application. Finally, we split our application into core and several other smaller modules, which we then coded following the specification. Along the way, we familiarized ourselves with some of the most commonly used Symfony features. The overall application we wrote is far from being robust. It is a web shop in its simplest form, which leaves much to be desired on a feature side. However, the concepts applied showcase how easy and quick it can be to write modular applications in PHP.
Copyright © 2016 Packt Publishing
All rights reserved. No part of this course may be reproduced, stored in a retrieval system, or transmitted in any form or by any means, without the prior written permission of the publisher, except in the case of brief quotations embedded in critical articles or reviews.
Every effort has been made in the preparation of this course to ensure the accuracy of the information presented. However, the information contained in this course is sold without warranty, either express or implied. Neither the authors, nor Packt Publishing, and its dealers and distributors will be held liable for any damages caused or alleged to be caused directly or indirectly by this course.
Packt Publishing has endeavored to provide trademark information about all of the companies and products mentioned in this course by the appropriate use of capitals. However, Packt Publishing cannot guarantee the accuracy of this information.
Published on: Month 2011
Published by Packt Publishing Ltd.
Livery Place
35 Livery Street
Birmingham B3 2PB, UK.
ISBN 978-1-78712-900-9
PHP 7 has taken the open source community by storm, breaking records for speed, which is, metaphorically, causing heads to turn. In its most fundamental sense, the core engineering team has effected a major rewrite of the language but has still managed to maintain backward compatibility to a high degree. PHP is a great language for developing web applications. It is essentially a server-side scripting language that is also used for general-purpose programming. PHP 7 is the latest version, providing major backward-compatibility breaks and focusing on improved performance and speed. This means you can maintain high traffic on your websites with low-cost hardware and servers through a multithreading web server.
Module 1, PHP 7 Programming Cookbook, This module demonstrates intermediate to advanced PHP techniques with a focus on PHP 7. Each recipe is designed to solve practical, real-world problems faced by PHP developers like yourself every day. It also cover new ways of writing PHP code made possible only in version 7. In addition, we discuss backward-compatibility breaks and give you plenty of guidance on when and where PHP 5 code needs to be changed to produce the correct results when running under PHP 7. This module also incorporates the latest PHP 7.x features.By the end of the module, you will be equipped with the tools and skills required to deliver efficient applications for your websites and enterprises
Module 2, Learning PHP 7 High Performance, This module is fast-paced introduction to PHP 7 will improve your productivity and coding skills. The concepts covered will allow you, as a PHP programmer, to improve the performance standards of your applications. We will introduce you to the new features in PHP 7 and then will run through the concepts of object-oriented programming (OOP) in PHP 7. Next, we will shed some light on how to improve your PHP 7 applications’ performance and database performance. Through this module, you will be able to improve the performance of your programs using the various benchmarking tools discussed in the module. At the end,module discusses some best practices in PHP programming to help you improve the quality of your code
Module 3, Modernizing Legacy Applications in PHP, This module will show you how to modernize your application in terms of practice and technique, rather than in terms of using tools such as frameworks and libraries, by extracting and replacing its legacy artifacts. We will use a step-by-step approach, moving slowly and methodically, to improve your application from the ground up. We’ll show you how dependency injection can replace both the new and global dependencies. We’ll also show you how to change the presentation logic to view files and the action logic to a controller. Moreover, we’ll keep your application running the whole time. Each completed step in the process will keep your codebase fully operational with higher quality. When we are done, you will be able to breeze through your code like the wind. Your code will be autoloaded, dependency-injected, unit-tested, layer-separated, and front-controlled. Most of the very limited code we will add to your application is specific to this module. We will be improving ourselves as programmers, as well as improving the quality of our legacy application.
Module 1:
All you need, to successfully implement the recipes presented in this module will be a computer, 100MB of extra disk space, and a text or code editor (not a word processor!). The first chapter will cover how to set up a PHP 7 development environment. Having a web server is optional as PHP 7 includes a development web server. An Internet connection is not required, but it might be useful to download code (such as the set of PSR-7 interfaces), and review PHP 7.x documentation.
Module 2:
Any hardware specification that is compliant to run the latest versions of the following software should be enough to get through this module:
Apache JMeter, ApacheBench, Siege, and Git
Module 3:
You will have refer ‘Chapter 2, Prerequisites’ of this module to understand the basic hardware and software requirements needed on this module. This chapter gives a detailed description of the requirements.
Feedback from our readers is always welcome. Let us know what you think about this course—what you liked or disliked. Reader feedback is important for us as it helps us develop titles that you will really get the most out of.
To send us general feedback, simply e-mail <feedback@packtpub.com>, and mention the course’s title in the subject of your message.
If there is a topic that you have expertise in and you are interested in either writing or contributing to a course, see our author guide at www.packtpub.com/authors.
Now that you are the proud owner of a Packt course, we have a number of things to help you to get the most from your purchase.
You can download the example code files for this course from your account at http://www.packtpub.com. If you purchased this course elsewhere, you can visit http://www.packtpub.com/support and register to have the files e-mailed directly to you.
You can download the code files by following these steps:
You can also download the code files by clicking on the Code Files button on the course’s webpage at the Packt Publishing website. This page can be accessed by entering the course’s name in the Search box. Please note that you need to be logged in to your Packt account.
Once the file is downloaded, please make sure that you unzip or extract the folder using the latest version of:
The code bundle for the course is also hosted on GitHub at https://github.com/PacktPublishing/PHP-7-Be-Pro-at-Applications-Development. We also have other code bundles from our rich catalog of books and videos available at https://github.com/PacktPublishing/. Check them out!
Although we have taken every care to ensure the accuracy of our content, mistakes do happen. If you find a mistake in one of our courses—maybe a mistake in the text or the code—we would be grateful if you could report this to us. By doing so, you can save other readers from frustration and help us improve subsequent versions of this course. If you find any errata, please report them by visiting http://www.packtpub.com/submit-errata, selecting your course, clicking on the Errata Submission Form link, and entering the details of your errata. Once your errata are verified, your submission will be accepted and the errata will be uploaded to our website or added to any list of existing errata under the Errata section of that title.
To view the previously submitted errata, go to https://www.packtpub.com/books/content/support and enter the name of the course in the search field. The required information will appear under the Errata section.
Piracy of copyrighted material on the Internet is an ongoing problem across all media. At Packt, we take the protection of our copyright and licenses very seriously. If you come across any illegal copies of our works in any form on the Internet, please provide us with the location address or website name immediately so that we can pursue a remedy.
Please contact us at <copyright@packtpub.com> with a link to the suspected pirated material.
We appreciate your help in protecting our authors and our ability to bring you valuable content.
If you have a problem with any aspect of this course, you can contact us at <questions@packtpub.com>, and we will do our best to address the problem.
In this chapter, we will cover the following topics:
This chapter is designed as a quick start that will get you up and running on PHP 7 so that you can start implementing the recipes right away. The underlying assumption for this book is that you already have a good knowledge of PHP and programming. Although this book will not go into detail about the actual installation of PHP, given that PHP 7 is relatively new, we will do our best to point out the quirks and gotchas you might encounter during a PHP 7 installation.
There are three primary means of acquiring PHP 7:
The three methods are listed in order of difficulty. However, the first approach, although tedious, will give you the most finite control over extensions and options.
In order to utilize this approach, you will need to have a C compiler available. If you are running Windows, MinGW is a free compiler that has proven popular. It is based on the GNU Compiler Collection (GCC) compiler provided by the GNU project. Non-free compilers include the classic Turbo C compiler from Borland, and, of course, the compiler that is preferred by Windows developers is Visual Studio. The latter, however, is designed mainly for C++ development, so when you compile PHP, you will need to specify C mode.
When working on an Apple Mac, the best solution is to install the Apple Developer Tools. You can use the Xcode IDE to compile PHP 7, or run gcc from a terminal window. In a Linux environment, from a terminal window, run gcc.
When compiling from a terminal window or command line, the normal procedure is as follows:
configuremakemake testmake installFor information on configuration options (that is, when running configure), use the help option:
configure --help
Errors you might encounter during the configuration stage are mentioned in the following table:
|
Error |
Fix |
|---|---|
|
|
You just need to install http://superuser.com/questions/740399/how-to-fix-php-installation-when-xml2-config-is-missing |
|
|
Install |
|
|
Not a big deal. These options are defaults and don't need to be included. For more details, please refer to the following link: http://jcutrer.com/howto/linux/how-to-compile-php7-on-ubuntu-14-04 |
As the title implies, pre-compiled binaries are a set of binary files that somebody else has kindly compiled from PHP 7 source code and has made available.
In the case of Windows, go to http://windows.php.net/. You will find a good set of tips in the left column that pertain to which version to choose, thread safe versus non-read safe, and so forth. You can then click on Downloads and look for the ZIP file that applies to your environment. Once the ZIP file has been downloaded, extract the files into the folder of your choice, add php.exe to your path, and configure PHP 7 using the php.ini file.
To install the pre-compiled binaries on a Mac OS X system, it is best to involve a package management system. The ones recommended for PHP include the following:
In the case of Linux, the packaging system used depends on which Linux distribution you are using. The following table, organized by Linux distribution, summarizes where to look for the PHP 7 package.
AMP refers to Apache, MySQL, and PHP (also Perl and Python). The * refers to Linux, Windows, Mac, and so on (that is, LAMP, WAMP, and MAMP). This approach is often the easiest, but gives you less control over the initial PHP installation. On the other hand, you can always modify the php.ini file and install additional extensions to customize your installation as needed. The following table summarizes a number of popular *AMP packages:
|
Package |
Where is it found |
Free? |
Supports* |
|---|---|---|---|
|
|
Y |
WML | |
|
|
Y |
WML | |
|
|
Y |
WM | |
|
|
Y |
W | |
|
|
Y |
W | |
|
|
N |
WML |
In the preceding table, we've enlisted the *AMP packages where * is replaced by W for Windows, M for Mac OS X, and L for Linux.
When you install a pre-compiled binary from a package, only core extensions are installed. Non-core PHP extensions must be installed separately.
It's worth noting that PHP 7 installation on cloud computing platforms will often follow the installation procedure outlined for pre-compiled binaries. Find out if your cloud environment uses Linux, Mac, or Windows virtual machines, and then follow the appropriate procedure as mentioned in this recipe.
It's possible that PHP 7 hasn't yet reached your favorite repository for pre-compiled binaries. You can always install from source, or consider installing one of the *AMP packages (see the next section). An alternative for Linux-based systems is to use the Personal Package Archive (PPA) approach. Because PPAs have not undergone a rigorous screening process, however, security could be a concern. A good discussion on security considerations for PPAs is found at http://askubuntu.com/questions/35629/are-ppas-safe-to-add-to-my-system-and-what-are-some-red-flags-to-watch-out-fo.
General installation considerations, as well as instructions for each of the three major OS platforms (Windows, Mac OS X, and Linux), can be found at http://php.net/manual/en/install.general.php.
The website for MinGW is http://www.mingw.org/.
Instructions on how to compile a C program using Visual Studio can be found at https://msdn.microsoft.com/en-us/library/bb384838.
Another possible way to test PHP 7 is by using a virtual machine. Here are a couple of tools with their links, which might prove useful:
Aside from unit testing and running PHP directly from the command line, the obvious way to test your applications is to use a web server. For long-term projects, it would be beneficial to develop a virtual host definition for a web server that most closely mirrors the one used by your customer. Creating such definitions for the various web servers (that is, Apache, NGINX, and so on) is beyond the scope of this book. Another quick and easy-to-use alternative (which we have room to discuss here) is to use the built-in PHP 7 web server.
cd /path/to/recipes php -S localhost:8080
You will see output on your screen that looks something like this:
-t flag. The flag must then be followed by a valid directory path. The built-in web server will treat this directory as if it were the web document root, which is useful for security reasons. For security reasons, some frameworks, such as Zend Framework, require that the web document root is different from where your actual source code resides.Here is an example using the -t flag:
php -S localhost:8080 -t source/chapter01
Here is an example of the output:
For test purposes, along with the source code for the book, we've provided an SQL file with sample data at https://github.com/dbierer/php7cookbook. The name of the database used in the recipes for this book is php7cookbook.
php7cookbook. Also assign rights to the new database to a user called cook with the password book. The following table summarizes these settings:|
Item |
Notes |
|---|---|
|
Database name |
|
|
Database user |
|
|
Database user password |
|
CREATE DATABASE IF NOT EXISTS dbname DEFAULT CHARACTER SET utf8 COLLATE utf8_general_ci;
CREATE USER 'user'@'%' IDENTIFIED WITH mysql_native_password;
SET PASSWORD FOR 'user'@'%' = PASSWORD('userPassword');
GRANT ALL PRIVILEGES ON dbname.* to 'user'@'%';
GRANT ALL PRIVILEGES ON dbname.* to 'user'@'localhost';
FLUSH PRIVILEGES;php7cookbook.sql, is located at https://github.com/dbierer/php7cookbook/blob/master/php7cookbook.sql.Unit testing is arguably the most popular means of testing PHP code. Most developers will agree that a solid suite of tests is a requirement for any properly developed project. Few developers actually write these tests. A lucky few have an independent testing group that writes the tests for them! After months of skirmishing with the testing group, however, the remains of the lucky few tend to grumble and complain. In any event, any book on PHP would not be complete without at least a nod and a wink towards testing.
The place to find the latest version of PHPUnit is https://phpunit.de/. PHPUnit5.1 and above support PHP 7. Click on the link for the desired version, and you will download a phpunit.phar file. You can then execute commands using the archive, as follows:
php phpunit.phar <command>
When developing PHP using an object-oriented programming (OOP) approach, the recommendation is to place each class in its own file. The advantage of following this recommendation is the ease of long-term maintenance and improved readability. The disadvantage is that each class definition file must be included (that is, using include or its variants). To address this issue, there is a mechanism built into the PHP language that will autoload any class that has not already been specifically included.
The minimum requirement for PHP autoloading is to define a global __autoload() function. This is a magic function called automatically by the PHP engine when a class is requested but where said class has not been included. The name of the requested class will appear as a parameter when __autoload() is invoked (assuming that you have defined it!). If you are using PHP namespaces, the full namespaced name of the class will be passed. Because __autoload() is a function, it must be in the global namespace; however, there are limitations on its use. Accordingly, in this recipe, we will make use of the spl_autoload_register() function, which gives us more flexibility.
Application\Autoload\Loader. In order to take advantage of the relationship between PHP namespaces and autoloading, we name the file Loader.php and place it in the /path/to/cookbook/files/Application/Autoload folder.file_exists() to check before running require_once(). The reason for this is that if the file is not found, require_once() will generate a fatal error that cannot be caught using PHP 7's new error handling capabilities:protected static function loadFile($file)
{
if (file_exists($file)) {
require_once $file;
return TRUE;
}
return FALSE;
}loadFile() in the calling program and loop through a list of alternate directories before throwing an Exception if it's ultimately unable to load the file.loadFile() and actually performs the logic to locate the file based on the namespaced classname. This method derives a filename by converting the PHP namespace separator \ into the directory separator appropriate for this server and appending .php:public static function autoLoad($class)
{
$success = FALSE;
$fn = str_replace('\\', DIRECTORY_SEPARATOR, $class)
. '.php';
foreach (self::$dirs as $start) {
$file = $start . DIRECTORY_SEPARATOR . $fn;
if (self::loadFile($file)) {
$success = TRUE;
break;
}
}
if (!$success) {
if (!self::loadFile(__DIR__
. DIRECTORY_SEPARATOR . $fn)) {
throw new \Exception(
self::UNABLE_TO_LOAD . ' ' . $class);
}
}
return $success;
}self::$dirs, using each directory as a starting point for the derived filename. If not successful, as a last resort, the method attempts to load the file from the current directory. If even that is not successful, an Exception is thrown.array_merge() is used. Otherwise, we simply add the directory string to the self::$dirs array:public static function addDirs($dirs)
{
if (is_array($dirs)) {
self::$dirs = array_merge(self::$dirs, $dirs);
} else {
self::$dirs[] = $dirs;
}
} autoload() method as a Standard PHP Library (SPL) autoloader. This is accomplished using spl_autoload_register() with the init() method:public static function init($dirs = array())
{
if ($dirs) {
self::addDirs($dirs);
}
if (self::$registered == 0) {
spl_autoload_register(__CLASS__ . '::autoload');
self::$registered++;
}
}__construct(), which calls self::init($dirs). This allows us to also create an instance of Loader if desired:public function __construct($dirs = array())
{
self::init($dirs);
}In order to use the autoloader class that we just defined, you will need to require Loader.php. If your namespace files are located in a directory other than the current one, you should also run Loader::init() and supply additional directory paths.
In order to make sure the autoloader works, we'll also need a test class. Here is a definition of /path/to/cookbook/files/Application/Test/TestClass.php:
<?php
namespace Application\Test;
class TestClass
{
public function getTest()
{
return __METHOD__;
}
}Now create a sample chap_01_autoload_test.php code file to test the autoloader:
<?php require __DIR__ . '/../Application/Autoload/Loader.php'; Application\Autoload\Loader::init(__DIR__ . '/..');
Next, get an instance of a class that has not already been loaded:
$test = new Application\Test\TestClass(); echo $test->getTest();
Finally, try to get a fake class that does not exist. Note that this will throw an error:
$fake = new Application\Test\FakeClass(); echo $fake->getTest();
Very frequently, it is of interest to scan a website and extract information from specific tags. This basic mechanism can be used to trawl the web in search of useful bits of information. At other times you need to get a list of <IMG> tags and the SRC attribute, or <A> tags and the corresponding HREF attribute. The possibilities are endless.
file_get_contents(). The problem with these approaches is that we will end up having to do a massive amount of string manipulation, most likely having to make inordinate use of the dreaded regular expression. In order to avoid all of this, we'll simply take advantage of an already existing PHP 7 class DOMDocument. So we create a DOMDocument instance, setting it to UTF-8. We don't care about whitespace, and use the handy loadHTMLFile() method to load the contents of the website into the object:public function getContent($url)
{
if (!$this->content) {
if (stripos($url, 'http') !== 0) {
$url = 'http://' . $url;
}
$this->content = new DOMDocument('1.0', 'utf-8');
$this->content->preserveWhiteSpace = FALSE;
// @ used to suppress warnings generated from // improperly configured web pages
@$this->content->loadHTMLFile($url);
}
return $this->content;
}Note that we precede the call to the loadHTMLFile() method with an @. This is not done to obscure bad coding (!) as was often the case in PHP 5! Rather, the @ suppresses notices generated when the parser encounters poorly written HTML. Presumably, we could capture the notices and log them, possibly giving our Hoover class a diagnostic capability as well.
getElementsByTagName() method for this purpose. If we wish to extract all tags, we can supply * as an argument:public function getTags($url, $tag)
{
$count = 0;
$result = array();
$elements = $this->getContent($url)
->getElementsByTagName($tag);
foreach ($elements as $node) {
$result[$count]['value'] = trim(preg_replace('/\s+/', ' ', $node->nodeValue));
if ($node->hasAttributes()) {
foreach ($node->attributes as $name => $attr)
{
$result[$count]['attributes'][$name] =
$attr->value;
}
}
$count++;
}
return $result;
}getAttribute(). You'll notice that there is a parameter for the DNS domain. We've added this in order to keep the scan within the same domain (if you're building a web tree, for example):public function getAttribute($url, $attr, $domain = NULL)
{
$result = array();
$elements = $this->getContent($url)
->getElementsByTagName('*');
foreach ($elements as $node) {
if ($node->hasAttribute($attr)) {
$value = $node->getAttribute($attr);
if ($domain) {
if (stripos($value, $domain) !== FALSE) {
$result[] = trim($value);
}
} else {
$result[] = trim($value);
}
}
}
return $result;
}In order to use the new Hoover class, initialize the autoloader (described previously) and create an instance of the Hoover class. You can then run the Hoover::getTags() method to produce an array of tags from the URL you specify as an argument.
Here is a block of code from chap_01_vacuuming_website.php that uses the Hoover class to scan the O'Reilly website for <A> tags:
<?php
// modify as needed
define('DEFAULT_URL', 'http://oreilly.com/');
define('DEFAULT_TAG', 'a');
require __DIR__ . '/../Application/Autoload/Loader.php';
Application\Autoload\Loader::init(__DIR__ . '/..');
// get "vacuum" class
$vac = new Application\Web\Hoover();
// NOTE: the PHP 7 null coalesce operator is used
$url = strip_tags($_GET['url'] ?? DEFAULT_URL);
$tag = strip_tags($_GET['tag'] ?? DEFAULT_TAG);
echo 'Dump of Tags: ' . PHP_EOL;
var_dump($vac->getTags($url, $tag));The output will look something like this:
For more information on DOM, see the PHP reference page at http://php.net/manual/en/class.domdocument.php.
Sometimes you need to scan a website, but go one level deeper. For example, you want to build a web tree diagram of a website. This can be accomplished by looking for all <A> tags and following the HREF attributes to the next web page. Once you have acquired the child pages, you can then continue scanning in order to complete the tree.
Hoover class, as described previously. The basic procedure presented in this recipe is to scan the target website and hoover up all the HREF attributes. For this purpose, we define a Application\Web\Deep class. We add a property that represents the DNS domain:namespace Application\Web;
class Deep
{
protected $domain;yield from has been added is because we need to yield the entire array produced by Hoover::getTags(). The yield from syntax allows us to treat the array as a sub-generator:public function scan($url, $tag)
{
$vac = new Hoover();
$scan = $vac->getAttribute($url, 'href',
$this->getDomain($url));
$result = array();
foreach ($scan as $subSite) {
yield from $vac->getTags($subSite, $tag);
}
return count($scan);
}The use of yield from turns the scan() method into a PHP 7 delegating generator. Normally, you would be inclined to store the results of the scan into an array. The problem, in this case, is that the amount of information retrieved could potentially be massive. Thus, it's better to immediately yield the results in order to conserve memory and to produce immediate results. Otherwise, there would be a lengthy wait, which would probably be followed by an out of memory error.
parse_url() function for this purpose:public function getDomain($url)
{
if (!$this->domain) {
$this->domain = parse_url($url, PHP_URL_HOST);
}
return $this->domain;
}First of all, go ahead and define the Application\Web\Deep class defined previously, as well as the Application\Web\Hoover class defined in the previous recipe.
Next, define a block of code from chap_01_deep_scan_website.php that sets up autoloading (as described earlier in this chapter):
<?php
// modify as needed
define('DEFAULT_URL', 'unlikelysource.com');
define('DEFAULT_TAG', 'img');
require __DIR__ . '/../../Application/Autoload/Loader.php';
Application\Autoload\Loader::init(__DIR__ . '/../..');Next, get an instance of our new class:
$deep = new Application\Web\Deep();
At this point, you can retrieve URL and tag information from URL parameters. The PHP 7 null coalesce operator is useful for establishing fallback values:
$url = strip_tags($_GET['url'] ?? DEFAULT_URL); $tag = strip_tags($_GET['tag'] ?? DEFAULT_TAG);
Some simple HTML will display results:
foreach ($deep->scan($url, $tag) as $item) {
$src = $item['attributes']['src'] ?? NULL;
if ($src && (stripos($src, 'png') || stripos($src, 'jpg'))) {
printf('<br><img src="%s"/>', $src);
}
}For more information on generators and yield from, please see the article at http://php.net/manual/en/language.generators.syntax.php.
For the most part, PHP 5.x code can run unchanged on PHP 7. There are a few changes, however, that are classified as backwards incompatible. What this means is that if your PHP 5 code is written in a certain way, or uses functions that have been removed, your code will break, and you'll have a nasty error on your hands.
The PHP 5 to PHP 7 Code Converter does two things:
// WARNING where changes in language usage have occurred, but where a re-write is not possibleThe core of this recipe is the new PHP 7 preg_replace_callback_array() function. What this amazing function allows you to do is to present an array of regular expressions as keys, with the value representing an independent callback. You can then pass the string through a series of transformations. Not only that, the subject of the array of callbacks can itself be an array.
Application\Parse\Convert, we begin with a scan() method, which accepts a filename as an argument. It checks to see if the file exists. If so, it calls the PHP file() function, which loads the file into an array, with each array element representing one line:public function scan($filename)
{
if (!file_exists($filename)) {
throw new Exception(
self::EXCEPTION_FILE_NOT_EXISTS);
}
$contents = file($filename);
echo 'Processing: ' . $filename . PHP_EOL;
$result = preg_replace_callback_array( [ // replace no-longer-supported opening tags
'!^\<\%(\n| )!' =>
function ($match) {
return '<?php' . $match[1];
},
// replace no-longer-supported opening tags
'!^\<\%=(\n| )!' =>
function ($match) {
return '<?php echo ' . $match[1];
},
// replace no-longer-supported closing tag
'!\%\>!' =>
function ($match) {
return '?>';
},WARNING is added: // changes in how $$xxx interpretation is handled
'!(.*?)\$\$!' =>
function ($match) {
return '// WARNING: variable interpolation
. ' now occurs left-to-right' . PHP_EOL
. '// see: http://php.net/manual/en/'
. '// migration70.incompatible.php'
. $match[0];
},
// changes in how the list() operator is handled
'!(.*?)list(\s*?)?\(!' =>
function ($match) {
return '// WARNING: changes have been made '
. 'in list() operator handling.'
. 'See: http://php.net/manual/en/'
. 'migration70.incompatible.php'
. $match[0];
},
// instances of \u{
'!(.*?)\\\u\{!' =>
function ($match) {
return '// WARNING: \\u{xxx} is now considered '
. 'unicode escape syntax' . PHP_EOL
. '// see: http://php.net/manual/en/'
. 'migration70.new-features.php'
. '#migration70.new-features.unicode-'
. 'codepoint-escape-syntax' . PHP_EOL
. $match[0];
},
// relying upon set_error_handler()
'!(.*?)set_error_handler(\s*?)?.*\(!' =>
function ($match) {
return '// WARNING: might not '
. 'catch all errors'
. '// see: http://php.net/manual/en/'
. '// language.errors.php7.php'
. $match[0];
},
// session_set_save_handler(xxx)
'!(.*?)session_set_save_handler(\s*?)?\((.*?)\)!' =>
function ($match) {
if (isset($match[3])) {
return '// WARNING: a bug introduced in'
. 'PHP 5.4 which '
. 'affects the handler assigned by '
. 'session_set_save_handler() and '
. 'where ignore_user_abort() is TRUE
. 'has been fixed in PHP 7.'
. 'This could potentially break '
. 'your code under '
. 'certain circumstances.' . PHP_EOL
. 'See: http://php.net/manual/en/'
. 'migration70.incompatible.php'
. $match[0];
} else {
return $match[0];
}
},<< or >> with a negative operator, or beyond 64, is wrapped in a try { xxx } catch() { xxx } block, looking for an ArithmeticError to be thrown: // wraps bit shift operations in try / catch
'!^(.*?)(\d+\s*(\<\<|\>\>)\s*-?\d+)(.*?)$!' =>
function ($match) {
return '// WARNING: negative and '
. 'out-of-range bitwise '
. 'shift operations will now
. 'throw an ArithmeticError' . PHP_EOL
. 'See: http://php.net/manual/en/'
. 'migration70.incompatible.php'
. 'try {' . PHP_EOL
. "\t" . $match[0] . PHP_EOL
. '} catch (\\ArithmeticError $e) {'
. "\t" . 'error_log("File:"
. $e->getFile()
. " Message:" . $e->getMessage());'
. '}' . PHP_EOL;
},call_user_method*(), which has been removed in PHP 7. These are replaced with the equivalent using call_user_func*(): // replaces "call_user_method()" with
// "call_user_func()"
'!call_user_method\((.*?),(.*?)(,.*?)\)(\b|;)!' =>
function ($match) {
$params = $match[3] ?? '';
return '// WARNING: call_user_method() has '
. 'been removed from PHP 7' . PHP_EOL
. 'call_user_func(['. trim($match[2]) . ','
. trim($match[1]) . ']' . $params . ');';
},
// replaces "call_user_method_array()"
// with "call_user_func_array()"
'!call_user_method_array\((.*?),(.*?),(.*?)\)(\b|;)!' =>
function ($match) {
return '// WARNING: call_user_method_array()'
. 'has been removed from PHP 7'
. PHP_EOL
. 'call_user_func_array(['
. trim($match[2]) . ','
. trim($match[1]) . '], '
. $match[3] . ');';
},preg_replace() with the /e modifier is rewritten using a preg_replace_callback(): '!^(.*?)preg_replace.*?/e(.*?)$!' =>
function ($match) {
$last = strrchr($match[2], ',');
$arg2 = substr($match[2], 2, -1 * (strlen($last)));
$arg1 = substr($match[0],
strlen($match[1]) + 12,
-1 * (strlen($arg2) + strlen($last)));
$arg1 = trim($arg1, '(');
$arg1 = str_replace('/e', '/', $arg1);
$arg3 = '// WARNING: preg_replace() "/e" modifier
. 'has been removed from PHP 7'
. PHP_EOL
. $match[1]
. 'preg_replace_callback('
. $arg1
. 'function ($m) { return '
. str_replace('$1','$m', $match[1])
. trim($arg2, '"\'') . '; }, '
. trim($last, ',');
return str_replace('$1', '$m', $arg3);
},
// end array
],
// this is the target of the transformations
$contents
);
// return the result as a string
return implode('', $result);
}To use the converter, run the following code from the command line. You'll need to supply the filename of the PHP 5 code to be scanned as an argument.
This block of code, chap_01_php5_to_php7_code_converter.php, run from the command line, calls the converter:
<?php
// get filename to scan from command line
$filename = $argv[1] ?? '';
if (!$filename) {
echo 'No filename provided' . PHP_EOL;
echo 'Usage: ' . PHP_EOL;
echo __FILE__ . ' <filename>' . PHP_EOL;
exit;
}
// setup class autoloading
require __DIR__ . '/../Application/Autoload/Loader.php';
// add current directory to the path
Application\Autoload\Loader::init(__DIR__ . '/..');
// get "deep scan" class
$convert = new Application\Parse\Convert();
echo $convert->scan($filename);
echo PHP_EOL;For more information on backwards incompatible changes, please refer to http://php.net/manual/en/migration70.incompatible.php.
In this chapter we will discuss and understand the syntax differences between PHP 5 and PHP 7, featuring the following recipes:
foreach() handlingIn this chapter we will move directly into PHP 7, presenting recipes that take advantage of new high performance features. First, however, we will present a series of smaller recipes that serve to illustrate the differences in how PHP 7 handles parameter parsing, syntax, a foreach() loop, and other enhancements. Before we go into depth in this chapter, let's discuss some basic differences between PHP 5 and PHP 7.
PHP 7 introduced a new layer referred to as the Abstract Syntax Tree (AST), which effectively decouples the parsing process from the pseudo-compile process. Although the new layer has little or no impact on performance, it gives the language a new uniformity of syntax, which was not possible previously.
Another benefit of AST is the process of dereferencing. Dereferencing, simply put, refers to the ability to immediately acquire a property from, or run a method of, an object, immediately access an array element, and immediately execute a callback. In PHP 5 such support was inconsistent and incomplete. To execute a callback, for example, often you would first need to assign the callback or anonymous function to a variable, and then execute it. In PHP 7 you can execute it immediately.
As a developer, it might be of interest for you to be free from certain syntax restrictions imposed in PHP 5 and earlier. Aside from the uniformity of the syntax mentioned previously, where you'll see the most improvement in syntax is the ability to call any return value, which is callable by simply appending an extra set of parentheses. Also, you'll be able to directly access any array element when the return value is an array.
() (with or without parameters). An element can be immediately dereferenced from any function or method that returns an array by simply indicating the element using square brackets [];. In the short (but trivial) example shown next, the function test() returns an array. The array contains six anonymous functions. $a has a value of $t. $$a is interpreted as $test:function test()
{
return [
1 => function () { return [
1 => function ($a) { return 'Level 1/1:' . ++$a; },
2 => function ($a) { return 'Level 1/2:' . ++$a; },
];},
2 => function () { return [
1 => function ($a) { return 'Level 2/1:' . ++$a; },
2 => function ($a) { return 'Level 2/2:' . ++$a; },
];}
];
}
$a = 't';
$t = 'test';
echo $$a()[1]()[2](100);echo $$a()[1]()[2](100) command. This is parsed left-to-right, which executes as follows:$$a() interprets as test(), which returns an array[1] dereferences array element 1, which returns a callback() executes this callback, which returns an array of two elements[2] dereferences array element 2, which returns a callback(100) executes this callback, supplying a value of 100, which returns Level 1/2:101Application\Web\Securityclass. In the constructor, we build and define two arrays. The first array consists of filter callbacks. The second array has validation callbacks:public function __construct()
{
$this->filter = [
'striptags' => function ($a) { return strip_tags($a); },
'digits' => function ($a) { return preg_replace(
'/[^0-9]/', '', $a); },
'alpha' => function ($a) { return preg_replace(
'/[^A-Z]/i', '', $a); }
];
$this->validate = [
'alnum' => function ($a) { return ctype_alnum($a); },
'digits' => function ($a) { return ctype_digit($a); },
'alpha' => function ($a) { return ctype_alpha($a); }
];
}$security->filterDigits($item));
__call(), which gives us access to non-existent methods:public function __call($method, $params)
{
preg_match('/^(filter|validate)(.*?)$/i', $method, $matches);
$prefix = $matches[1] ?? '';
$function = strtolower($matches[2] ?? '');
if ($prefix && $function) {
return $this->$prefix[$function]($params[0]);
}
return $value;
}We use preg_match() to match the $method param against filter or validate. The second sub-match will then be converted into an array key in either $this->filter or $this->validate. If both sub-patterns produce a sub-match, we assign the first sub-match to $prefix, and the second sub-match $function. These end up as variable parameters when executing the appropriate callback.
First of all, we create a sample file, chap_02_web_filtering_ast_example.php, to take advantage of the autoloading class defined in Chapter 1, Building the Foundation, to obtain an instance of Application\Web\Security:
require __DIR__ . '/../Application/Autoload/Loader.php'; Application\Autoload\Loader::init(__DIR__ . '/..'); $security = new Application\Web\Security();
Next, we define a block of test data:
$data = [
'<ul><li>Lots</li><li>of</li><li>Tags</li></ul>',
12345,
'This is a string',
'String with number 12345',
];Finally, we call each filter and validator for each item of test data:
foreach ($data as $item) {
echo 'ORIGINAL: ' . $item . PHP_EOL;
echo 'FILTERING' . PHP_EOL;
printf('%12s : %s' . PHP_EOL,'Strip Tags', $security->filterStripTags($item));
printf('%12s : %s' . PHP_EOL, 'Digits', $security->filterDigits($item));
printf('%12s : %s' . PHP_EOL, 'Alpha', $security->filterAlpha($item));
echo 'VALIDATORS' . PHP_EOL;
printf('%12s : %s' . PHP_EOL, 'Alnum',
($security->validateAlnum($item)) ? 'T' : 'F');
printf('%12s : %s' . PHP_EOL, 'Digits',
($security->validateDigits($item)) ? 'T' : 'F');
printf('%12s : %s' . PHP_EOL, 'Alpha',
($security->validateAlpha($item)) ? 'T' : 'F');
}Here is the output of some input strings:
For more information on AST, please consult the RFC that addresses the Abstract Syntax Tree, which can be viewed at https://wiki.php.net/rfc/abstract_syntax_tree.
In PHP 5, expressions on the right side of an assignment operation were parsed right-to-left. In PHP 7, parsing is consistently left-to-right.
$$foo is interpreted as ${$bar}. The final return value is thus the value of $bar instead of the direct value of $foo (which would be bar):$foo = 'bar'; $bar = 'baz'; echo $$foo; // returns 'baz';
$$foo, which references a multi-dimensional array with a bar key and a baz sub-key:$foo = 'bar'; $bar = ['bar' => ['baz' => 'bat']]; // returns 'bat' echo $$foo['bar']['baz'];
$foo array, with a bar key and a baz. sub-key The return value of the element would then be interpreted to obtain the final value ${$foo['bar']['baz']}.$foo is interpreted first ($$foo)['bar']['baz'].$foo->$bar['bada'] is interpreted quite differently in PHP 5, compared with PHP 7. In the following example, PHP 5 would first interpret $bar['bada'], and reference this return value against a $foo object instance. In PHP 7, on the other hand, parsing is consistently left-to-right, which means that $foo->$bar is interpreted first, and expects an array with a bada element. You will also note, incidentally, that this example uses the PHP 7 anonymous class feature:// PHP 5: $foo->{$bar['bada']}
// PHP 7: ($foo->$bar)['bada']
$bar = 'baz';
// $foo = new class
{
public $baz = ['bada' => 'boom'];
};
// returns 'boom'
echo $foo->$bar['bada'];// PHP 5: $foo->{$bar['bada']}()
// PHP 7: ($foo->$bar)['bada']()
$bar = 'baz';
// NOTE: this example uses the new PHP 7 anonymous class feature
$foo = new class
{
public function __construct()
{
$this->baz = ['bada' => function () { return 'boom'; }];
}
};
// returns 'boom'
echo $foo->$bar['bada']();Place the code examples illustrated in 1 and 2 into a single PHP file that you can call chap_02_understanding_diffs_in_parsing.php. Execute the script first using PHP 5, and you will notice that a series of errors will result, as follows:
The reason for the errors is that PHP 5 parses inconsistently, and arrives at the wrong conclusion regarding the state of the variable variables requested (as previously mentioned). Now you can go ahead and add the remaining examples, as shown in steps 5 and 6. If you then run this script in PHP 7, the results described will appear, as shown here:
For more information on parsing, please consult the RFC, which addresses Uniform Variable Syntax, and can be viewed at https://wiki.php.net/rfc/uniform_variable_syntax.
In certain relatively obscure circumstances, the behavior of code inside a foreach() loop will vary between PHP 5 and PHP 7. First of all, there have been massive internal improvements, which means that in terms of sheer speed, processing inside the foreach() loop will be much faster running under PHP 7, compared with PHP 5. Problems that are noticed in PHP 5 include the use of current(), and unset() on the array inside the foreach() loop. Other problems have to do with passing values by reference while manipulating the array itself.
$a = [1, 2, 3];
foreach ($a as $v) {
printf("%2d\n", $v);
unset($a[1]);
}1 2 3
$a = [1, 2, 3];
$b = &$a;
foreach ($a as $v) {
  printf("%2d\n", $v);
  unset($a[1]);
}|
PHP 5 |
PHP 7 |
|---|---|
|
1 3 |
1 2 3 |
$a = [1,2,3];
foreach($a as &$v) {
    printf("%2d - %2d\n", $v, current($a));
}|
PHP 5 |
PHP 7 |
|---|---|
|
1 - 2 2 - 3 3 - 0 |
1 - 1 2 - 1 3 - 1 |
foreach() loop, once the array iteration by reference is complete, is also problematic in PHP 5. This behavior has been made consistent in PHP 7. The following code example demonstrates this:$a = [1];
foreach($a as &$v) {
printf("%2d -\n", $v);
$a[1]=2;
}|
PHP 5 |
PHP 7 |
|---|---|
|
1 - |
1 - 2- |
array_push(), array_pop(), array_shift(), and array_unshift().Have a look at this example:
$a=[1,2,3,4];
foreach($a as &$v) {
    echo "$v\n";
    array_pop($a);
}|
PHP 5 |
PHP 7 |
|---|---|
|
1 2 1 1 |
1 2 |
foreach() loop, which itself iterates on the same array by reference. In PHP 5 this construct simply did not work. In PHP 7 this has been fixed. The following block of code demonstrates this behavior:$a = [0, 1, 2, 3];
foreach ($a as &$x) {
foreach ($a as &$y) {
echo "$x - $y\n";
if ($x == 0 && $y == 1) {
unset($a[1]);
unset($a[2]);
}
}
}|
PHP 5 |
PHP 7 |
|---|---|
|
0 - 0 0 - 1 0 - 3 |
0 - 0 0 - 1 0 - 3 3 - 0 3 -3 |
Add these code examples to a single PHP file, chap_02_foreach.php. Run the script under PHP 5 from the command line. The expected output is as follows:
Run the same script under PHP 7 and notice the difference:
For more information, consult the RFC addressing this issue, which was accepted. A write-up on this RFC can be found at: https://wiki.php.net/rfc/php7_foreach.
One trend that developers are taking advantage of is the use of anonymous functions. One classic problem, when dealing with anonymous functions, is to write them in such a way that any object can be bound to $this and the function will still work. The approach used in PHP 5 code is to use bindTo(). In PHP 7, a new method, call(), was added, which offers similar functionality, but vastly improved performance.
To take advantage of call(), execute an anonymous function in a lengthy loop. In this example, we will demonstrate an anonymous function, that scans through a log file, identifying IP addresses sorted by how frequently they appear:
Application\Web\Access class. In the constructor, we accept a filename as an argument. The log file is opened as an SplFileObject and assigned to $this->log:Namespace Application\Web;
use Exception;
use SplFileObject;
class Access
{
const ERROR_UNABLE = 'ERROR: unable to open file';
protected $log;
public $frequency = array();
public function __construct($filename)
{
if (!file_exists($filename)) {
$message = __METHOD__ . ' : ' . self::ERROR_UNABLE . PHP_EOL;
$message .= strip_tags($filename) . PHP_EOL;
throw new Exception($message);
}
$this->log = new SplFileObject($filename, 'r');
}public function fileIteratorByLine()
{
$count = 0;
while (!$this->log->eof()) {
yield $this->log->fgets();
$count++;
}
return $count;
}public function getIp($line)
{
preg_match('/(\d{1,3}\.\d{1,3}\.\d{1,3}\.\d{1,3})/', $line, $match);
return $match[1] ?? '';
}
}First of all, we define a calling program, chap_02_performance_using_php7_enchancement_call.php, that takes advantage of the autoloading class defined in Chapter 1 , Building a Foundation, to obtain an instance of Application\Web\Access:
define('LOG_FILES', '/var/log/apache2/*access*.log');
require __DIR__ . '/../Application/Autoload/Loader.php';
Application\Autoload\Loader::init(__DIR__ . '/..');
Next we define the anonymous function, which processes one line in the log file. If an IP address is detected, it becomes a key in the $frequency array, and the current value for this key is incremented:
// define functions
$freq = function ($line) {
  $ip = $this->getIp($line);
  if ($ip) {
    echo '.';
    $this->frequency[$ip] =
    (isset($this->frequency[$ip])) ? $this->frequency[$ip] + 1 : 1;
  }
};
We then loop through the iteration of lines in each log file found, processing IP addresses:
foreach (glob(LOG_FILES) as $filename) {
  echo PHP_EOL . $filename . PHP_EOL;
  // access class
  $access = new Application\Web\Access($filename);
  foreach ($access->fileIteratorByLine() as $line) {
    $freq->call($access, $line);
  }
}Finally, we reverse-sort the array, but maintain the keys. The output is produced in a simple foreach() loop:
arsort($access->frequency);
foreach ($access->frequency as $key => $value) {
  printf('%16s : %6d' . PHP_EOL, $key, $value);
}
The output will vary depending on which access.log you process. Here is a sample:
Many of the PHP 7 performance improvements have nothing to do with new features and functions. Rather, they take the form of internal improvements, which are invisible until you start running your programs. Here is a short list of improvements that fall into this category:
Functions such as file_get_contents() and file() are quick and easy to use however, owing to memory limitations, they quickly cause problems when dealing with massive files. The default setting for the php.ini memory_limit setting is 128 megabytes. Accordingly, any file larger than this will not be loaded.
Another consideration when parsing through massive files is how quickly does your function or class method produce output? When producing user output, for example, although it might at first glance seem better to accumulate output in an array. You would then output it all at once for improved efficiency. Unfortunately, this might have an adverse impact on the user experience. It might be better to create a generator, and use the yield keyword to produce immediate results.
As mentioned before, the file* functions (that is, file_get_contents()), are not suitable for large files. The simple reason is that these functions, at one point, have the entire contents of the file represented in memory. Accordingly, the focus of this recipe will be on the f* functions (that is, fopen()).
In a slight twist, however, instead of using the f* functions directly, instead we will use the SplFileObject class, which is included in the SPL (Standard PHP Library):
Application\Iterator\LargeFile class with the appropriate properties and constants:namespace Application\Iterator;
use Exception;
use InvalidArgumentException;
use SplFileObject;
use NoRewindIterator;
class LargeFile
{
const ERROR_UNABLE = 'ERROR: Unable to open file';
const ERROR_TYPE = 'ERROR: Type must be "ByLength", "ByLine" or "Csv"';
protected $file;
protected $allowedTypes = ['ByLine', 'ByLength', 'Csv'];__construct() method that accepts a filename as an argument and populates the $file property with an SplFileObject instance. This is also a good place to throw an exception if the file does not exist:public function __construct($filename, $mode = 'r')
{
if (!file_exists($filename)) {
$message = __METHOD__ . ' : ' . self::ERROR_UNABLE . PHP_EOL;
$message .= strip_tags($filename) . PHP_EOL;
throw new Exception($message);
}
$this->file = new SplFileObject($filename, $mode);
}fileIteratorByLine()method which uses fgets() to read one line of the file at a time. It's not a bad idea to create a complimentary fileIteratorByLength()method that does the same thing but uses fread() instead. The method that uses fgets() would be suitable for text files that include linefeeds. The other method could be used if parsing a large binary file:protected function fileIteratorByLine()
{
$count = 0;
while (!$this->file->eof()) {
yield $this->file->fgets();
$count++;
}
return $count;
}
protected function fileIteratorByLength($numBytes = 1024)
{
$count = 0;
while (!$this->file->eof()) {
yield $this->file->fread($numBytes);
$count++;
}
return $count;
}getIterator()method that returns a NoRewindIterator() instance. This method accepts as arguments either ByLine or ByLength, which refer to the two methods defined in the previous step. This method also needs to accept $numBytes in case ByLength is called. The reason we need a NoRewindIterator() instance is to enforce the fact that we're reading through the file only in one direction in this example:public function getIterator($type = 'ByLine', $numBytes = NULL)
{
if(!in_array($type, $this->allowedTypes)) {
$message = __METHOD__ . ' : ' . self::ERROR_TYPE . PHP_EOL;
throw new InvalidArgumentException($message);
}
$iterator = 'fileIterator' . $type;
return new NoRewindIterator($this->$iterator($numBytes));
}First of all, we take advantage of the autoloading class defined in Chapter 1, Building a Foundation, to obtain an instance of Application\Iterator\LargeFile in a calling program, chap_02_iterating_through_a_massive_file.php:
define('MASSIVE_FILE', '/../data/files/war_and_peace.txt');
require __DIR__ . '/../Application/Autoload/Loader.php';
Application\Autoload\Loader::init(__DIR__ . '/..');
Next, inside a try {...} catch () {...} block, we get an instance of a ByLine iterator:
try {
  $largeFile = new Application\Iterator\LargeFile(__DIR__ . MASSIVE_FILE);
  $iterator = $largeFile->getIterator('ByLine');
We then provide an example of something useful to do, in this case, defining an average of words per line:
$words = 0;
foreach ($iterator as $line) {
  echo $line;
  $words += str_word_count($line);
}
echo str_repeat('-', 52) . PHP_EOL;
printf("%-40s : %8d\n", 'Total Words', $words);
printf("%-40s : %8d\n", 'Average Words Per Line',
($words / $iterator->getReturn()));
echo str_repeat('-', 52) . PHP_EOL;
We then end the catch block:
} catch (Throwable $e) {
  echo $e->getMessage();
}
The expected output (too large to show here!) shows us that there are 566,095 words in the project Gutenberg version of War and Peace. Also, we find the average number of words per line is eight.
Although PHP does not have any direct capability to read a specific spreadsheet format (that is, XLSX, ODS, and so on), it does have the ability to read (CSV Comma Separated Values) files. Accordingly, in order to process customer spreadsheets, you will need to either ask them to furnish their files in CSV format, or you will need to perform the conversion yourself.
When uploading a spreadsheet (that is, a CSV file) into a database, there are three major considerations:
Massive file iteration will be handled using the preceding recipe. We will use the fgetcsv() function to convert a CSV row into a PHP array. Finally, we will use the (PDO PHP Data Objects) class to make a database connection and perform the insert.
Application\Database\Connection class that creates a PDO instance based on a set of parameters supplied to the constructor:<?php
namespace Application\Database;
use Exception;
use PDO;
class Connection
{
const ERROR_UNABLE = 'ERROR: Unable to create database connection';
public $pdo;
public function __construct(array $config)
{
if (!isset($config['driver'])) {
$message = __METHOD__ . ' : ' . self::ERROR_UNABLE . PHP_EOL;
throw new Exception($message);
}
$dsn = $config['driver']
. ':host=' . $config['host']
. ';dbname=' . $config['dbname'];
try {
$this->pdo = new PDO($dsn,
$config['user'],
$config['password'],
[PDO::ATTR_ERRMODE => $config['errmode']]);
} catch (PDOException $e) {
error_log($e->getMessage());
}
}
}Application\Iterator\LargeFile. We add a new method to this class that is designed to iterate through CSV files:protected function fileIteratorCsv()
{
$count = 0;
while (!$this->file->eof()) {
yield $this->file->fgetcsv();
$count++;
}
return $count;
} Csv to the list of allowed iterator methods: const ERROR_UNABLE = 'ERROR: Unable to open file';
const ERROR_TYPE = 'ERROR: Type must be "ByLength", "ByLine" or "Csv"';
protected $file;
protected $allowedTypes = ['ByLine', 'ByLength', 'Csv'];First we define a config file,/path/to/source/config/db.config.php, that contains database connection parameters:
<?php
return [
  'driver'   => 'mysql',
  'host'     => 'localhost',
  'dbname'   => 'php7cookbook',
  'user'     => 'cook',
  'password' => 'book',
  'errmode'  => PDO::ERRMODE_EXCEPTION,
];
Next, we take advantage of the autoloading class defined in Chapter 1, Building a Foundation, to obtain an instance of Application\Database\Connection and Application\Iterator\LargeFile, defining a calling program, chap_02_uploading_csv_to_database.php:
define('DB_CONFIG_FILE', '/../data/config/db.config.php');
define('CSV_FILE', '/../data/files/prospects.csv');
require __DIR__ . '/../../Application/Autoload/Loader.php';
Application\Autoload\Loader::init(__DIR__ . '/..');
After that, we set up a try {...} catch () {...} block, which catches Throwable. This allows us to catch both exceptions and errors:
try {
  // code goes here
} catch (Throwable $e) {
  echo $e->getMessage();
}
Inside the try {...} catch () {...} block we get an instance of the connection and large file iterator classes:
$connection = new Application\Database\Connection(
include __DIR__ . DB_CONFIG_FILE);
$iterator  = (new Application\Iterator\LargeFile(__DIR__ . CSV_FILE))
->getIterator('Csv');
We then take advantage of the PDO prepare/execute functionality. The SQL for the prepared statement uses ? to represent values that are supplied in a loop:
$sql = 'INSERT INTO `prospects` '
  . '(`id`,`first_name`,`last_name`,`address`,`city`,`state_province`,'
  . '`postal_code`,`phone`,`country`,`email`,`status`,`budget`,`last_updated`) '
  . ' VALUES (?,?,?,?,?,?,?,?,?,?,?,?,?)';
$statement = $connection->pdo->prepare($sql);
We then use foreach() to loop through the file iterator. Each yield statement produces an array of values that represents a row in the database. We can then use these values with PDOStatement::execute() to execute the prepared statement, inserting the row of values into the database:
foreach ($iterator as $row) {
  echo implode(',', $row) . PHP_EOL;
  $statement->execute($row);
}
You can then examine the database to verify that the data was successfully inserted.
Getting a list of files in a directory is extremely easy. Traditionally, developers have used the glob() function for this purpose. To recursively get a list of all files and directories from a specific point in a directory tree is more problematic. This recipe takes advantage of an (SPL Standard PHP Library) class RecursiveDirectoryIterator, which will serve this purpose admirably.
What this class does is to parse the directory tree, finding the first child, then it follows the branches, until there are no more children, and then it stops! Unfortunately this is not what we want. Somehow we need to get the RecursiveDirectoryIterator to continue parsing every tree and branch, from a given starting point, until there are no more files or directories. It so happens there is a marvelous class, RecursiveIteratorIterator, that does exactly that. By wrapping RecursiveDirectoryIterator inside RecursiveIteratorIterator, we accomplish a complete traversal of any directory tree.
Application\Iterator\Directory class that defines the appropriate properties and constants and uses external classes:namespace Application\Iterator;
use Exception;
use RecursiveDirectoryIterator;
use RecursiveIteratorIterator;
use RecursiveRegexIterator;
use RegexIterator;
class Directory
{
const ERROR_UNABLE = 'ERROR: Unable to read directory';
protected $path;
protected $rdi;
// recursive directory iteratorRecursiveDirectoryIterator instance inside RecursiveIteratorIterator based on a directory path:public function __construct($path)
{
try {
$this->rdi = new RecursiveIteratorIterator(
new RecursiveDirectoryIterator($path),
RecursiveIteratorIterator::SELF_FIRST);
} catch (\Throwable $e) {
$message = __METHOD__ . ' : ' . self::ERROR_UNABLE . PHP_EOL;
$message .= strip_tags($path) . PHP_EOL;
echo $message;
exit;
}
}ls -l -R command. Notice that we use the yield keyword, effectively making this method into a Generator, which can then be called from the outside. Each object produced by the directory iteration is an SPL FileInfo object, which can give us useful information on the file. Here is how this method might look:public function ls($pattern = NULL)
{
$outerIterator = ($pattern)
? $this->regex($this->rdi, $pattern)
: $this->rdi;
foreach($outerIterator as $obj){
if ($obj->isDir()) {
if ($obj->getFileName() == '..') {
continue;
}
$line = $obj->getPath() . PHP_EOL;
} else {
$line = sprintf('%4s %1d %4s %4s %10d %12s %-40s' . PHP_EOL,
substr(sprintf('%o', $obj->getPerms()), -4),
($obj->getType() == 'file') ? 1 : 2,
$obj->getOwner(),
$obj->getGroup(),
$obj->getSize(),
date('M d Y H:i', $obj->getATime()),
$obj->getFileName());
}
yield $line;
}
}RegexIterator class:protected function regex($iterator, $pattern)
{
$pattern = '!^.' . str_replace('.', '\\.', $pattern) . '$!';
return new RegexIterator($iterator, $pattern);
}dir /s command:public function dir($pattern = NULL)
{
$outerIterator = ($pattern)
? $this->regex($this->rdi, $pattern)
: $this->rdi;
foreach($outerIterator as $name => $obj){
yield $name . PHP_EOL;
}
}
}First of all, we take advantage of the autoloading class defined in Chapter 1, Building a Foundation, to obtain an instance of Application\Iterator\Directory, defining a calling program, chap_02_recursive_directory_iterator.php:
define('EXAMPLE_PATH', realpath(__DIR__ . '/../'));
require __DIR__ . '/../Application/Autoload/Loader.php';
Application\Autoload\Loader::init(__DIR__ . '/..');
$directory = new Application\Iterator\Directory(EXAMPLE_PATH);
Then, in a try {...} catch () {...} block, we make a call to our two methods, using an example directory path:
try {
  echo 'Mimics "ls -l -R" ' . PHP_EOL;
  foreach ($directory->ls('*.php') as $info) {
    echo $info;
  }

  echo 'Mimics "dir /s" ' . PHP_EOL;
  foreach ($directory->dir('*.php') as $info) {
    echo $info;
  }

} catch (Throwable $e) {
  echo $e->getMessage();
}
The output for ls() will look something like this:
The output for dir() will appear as follows:
In this chapter we will cover the following topics:
In this chapter we will consider recipes that take advantage of PHP's functional programming capabilities. Functional, or procedural, programming is the traditional way PHP code was written prior to the introduction of the first implementation of object-oriented programming (OOP) in PHP version 4. Functional programming is a programming paradigm—a style of building the structure and elements of computer programs—that treats computation as the evaluation of mathematical functions and avoids changing-state and mutable data. This file can then be included in any future scripts, allowing the functions that are defined to be called at will.
The most difficult aspect is deciding how to break up programming logic into functions. The mechanics of developing a function in PHP, on the other hand, are quite easy. Just use the function keyword, give it a name, and follow it with parentheses.
function someName ($parameter)
{
  $result = 'INIT';
  // one or more statements which do something
  // to affect $result
  $result .= ' and also ' . $parameter;
  return $result;
}NULL:function someOtherName ($requiredParam, $optionalParam = NULL)
{
$result = 0;
$result += $requiredParam;
$result += $optionalParam ?? 0;
return $result;
}... followed by a variable name. All parameters supplied will appear as an array in the variable:function someInfinite(...$params)
{
// any params passed go into an array $params
return var_export($params, TRUE);
}function someDirScan($dir)
{
// uses "static" to retain value of $list
static $list = array();
// get a list of files and directories for this path
$list = glob($dir . DIRECTORY_SEPARATOR . '*');
// loop through
foreach ($list as $item) {
if (is_dir($item)) {
$list = array_merge($list, someDirScan($item));
}
}
return $list;
}Usage of the static keyword inside functions has been in the language for more than 12 years. What static does is to initialize the variable once (that is, at the time static is declared), and then retain the value between function calls within the same request.
If you need to retain the value of a variable between HTTP requests, make sure the PHP session has been started and store the value in $_SESSION.
use keyword. The following examples are placed in separate namespaces. Notice that even though the function name is the same, there is no conflict as they are not visible to each other.someFunction() in namespace Alpha. We save this to a separate PHP file, chap_03_developing_functions_namespace_alpha.php:<?php
namespace Alpha;
function someFunction()
{
echo __NAMESPACE__ . ':' . __FUNCTION__ . PHP_EOL;
}someFunction() in namespace Beta. We save this to a separate PHP file, chap_03_developing_functions_namespace_beta.php:<?php
namespace Beta;
function someFunction()
{
echo __NAMESPACE__ . ':' . __FUNCTION__ . PHP_EOL;
}someFunction() by prefixing the function name with the namespace name:include (__DIR__ . DIRECTORY_SEPARATOR
. 'chap_03_developing_functions_namespace_alpha.php');
include (__DIR__ . DIRECTORY_SEPARATOR
. 'chap_03_developing_functions_namespace_beta.php');
echo Alpha\someFunction();
echo Beta\someFunction();Best practice
It is considered best practice to place function libraries (and classes too!) into separate files: one file per namespace, and one class or function library per file.
It is possible to define many classes or function libraries in a single namespace. The only reason you would develop into a separate namespace is if you want to foster logical separation of functionality.
It is considered best practice to place all logically related functions into a separate PHP file. Create a file called chap_03_developing_functions_library.php and place these functions (described previously) inside:
someName()someOtherName()someInfinite()someDirScan()someTypeHint()This file is then included in the code that uses these functions.
include (__DIR__ . DIRECTORY_SEPARATOR . 'chap_03_developing_functions_library.php');
To call the someName() function, use the name and supply the parameter.
echo someName('TEST'); // returns "INIT and also TEST"You can call the someOtherName() function using one or two parameters, as shown here:
echo someOtherName(1);    // returns  1
echo someOtherName(1, 1);   //  returns 2
The someInfinite() function accepts an infinite (or variable) number of parameters. Here are a couple of examples calling this function:
echo someInfinite(1, 2, 3);
echo PHP_EOL;
echo someInfinite(22.22, 'A', ['a' => 1, 'b' => 2]);
The output looks like this:
We can call someInfinite() as follows:
foreach (someDirScan(__DIR__ . DIRECTORY_SEPARATOR . '..') as $item) {
    echo $item . PHP_EOL;
}In many cases when developing functions, you might reuse the same library of functions in other projects. Also, if you work with a team, your code might be used by other developers. In order to control the use of your code, it might be appropriate to make use of a type hint. This involves specifying the data type your function expects for that particular parameter.
TypeError is thrown. The following example requires an array, an instance of DateTime, and an anonymous function:function someTypeHint(Array $a, DateTime $t, Callable $c)
{
$message = '';
$message .= 'Array Count: ' . count($a) . PHP_EOL;
$message .= 'Date: ' . $t->format('Y-m-d') . PHP_EOL;
$message .= 'Callable Return: ' . $c() . PHP_EOL;
return $message;
}You don't have to provide a type hint for every single parameter. Use this technique only where supplying a different data type would have a negative effect on the processing of your function. As an example, if your function uses a foreach() loop, if you do not supply an array, or something which implements Traversable, an error will be generated.
declare() directive is made, scalar (that is, integer, float, boolean, and string) type hints are allowed. Another function demonstrates how this is accomplished. At the top of the code library file which contains the function in which you wish to use scalar type hinting, add this declare() directive just after the opening PHP tag:declare(strict_types=1);
function someScalarHint(bool $b, int $i, float $f, string $s)
{
  return sprintf("\n%20s : %5s\n%20s : %5d\n%20s " .
                 ": %5.2f\n%20s : %20s\n\n",
                 'Boolean', ($b ? 'TRUE' : 'FALSE'),
                 'Integer', $i,
                 'Float',   $f,
                 'String',  $s);
}TypeError will be thrown! However, the incoming value will automatically be converted to the boolean data type once passed into the function. If you pass any data type other than scalar (that is, array or object) a TypeError will be thrown. Here is an example of a function that defines a boolean data type. Note that the return value will be automatically converted to a boolean:function someBoolHint(bool $b)
{
return $b;
}First of all, you can place the three functions, someTypeHint(), someScalarHint(), and someBoolHint(), into a separate file to be included. For this example, we will name the file chap_03_developing_functions_type_hints_library.php. Don't forget to add declare(strict_types=1) at the top!
In our calling code, you would then include the file:
include (__DIR__ . DIRECTORY_SEPARATOR . 'chap_03_developing_functions_type_hints_library.php');
To test someTypeHint(), call the function twice, once with the correct data types, and the second time with incorrect types. This will throw a TypeError, however, so you will need to wrap the function calls in a try { ... } catch () { ...} block:
try {
    $callable = function () { return 'Callback Return'; };
    echo someTypeHint([1,2,3], new DateTime(), $callable);
    echo someTypeHint('A', 'B', 'C');
} catch (TypeError $e) {
    echo $e->getMessage();
    echo PHP_EOL;
}
As you can see from the output shown at the end of this sub-section, when passing the correct data types there is no problem. When passing the incorrect types, a TypeError is thrown.
In PHP 7, certain errors have been converted into an Error class, which is processed in a somewhat similar manner to an Exception. This means you can catch an Error. TypeError is a specific descendant of Error that is thrown when incorrect data types are passed to functions.
All PHP 7 Error classes implement the Throwable interface, as does the Exception class. If you are not sure if you need to catch an Error or an Exception, you can add a block which catches Throwable.
Next you can test someScalarHint(), calling it twice with correct and incorrect values, wrapping the calls in a try { ... } catch () { ...} block:
try {
    echo someScalarHint(TRUE, 11, 22.22, 'This is a string');
    echo someScalarHint('A', 'B', 'C', 'D');
} catch (TypeError $e) {
    echo $e->getMessage();
}
As expected, the first call to the function works, and the second throws a TypeError.
When type hinting for boolean values, any scalar value passed will not cause a TypeError to be thrown! Instead, the value will be interpreted into its boolean equivalent. If you subsequently return this value, the data type will be changed to boolean.
To test this, call the someBoolHint() function defined previously, and pass any scalar value in as an argument. The var_dump() method reveals that the data type is always boolean:
try {
    // positive results
    $b = someBooleanHint(TRUE);
    $i = someBooleanHint(11);
    $f = someBooleanHint(22.22);
    $s = someBooleanHint('X');
    var_dump($b, $i, $f, $s);
    // negative results
    $b = someBooleanHint(FALSE);
    $i = someBooleanHint(0);
    $f = someBooleanHint(0.0);
    $s = someBooleanHint('');
    var_dump($b, $i, $f, $s);
} catch (TypeError $e) {
    echo $e->getMessage();
}
If you now try the same function call, but pass in a non-scalar data type, a TypeError is thrown:
try {
    $a = someBoolHint([1,2,3]);
    var_dump($a);
} catch (TypeError $e) {
    echo $e->getMessage();
}
try {
    $o = someBoolHint(new stdClass());
    var_dump($o);
} catch (TypeError $e) {
    echo $e->getMessage();
}PHP 7 allows you to specify a data type for the return value of a function. Unlike scalar type hinting, however, you don't need to add any special declarations.
function returnsString(DateTime $date, $format) : string
{
  return $date->format($format);
}$a, $b, and $c are added together to produce a single sum, which is returned. Normally you would expect the return value to be a numeric data type. In this case, however, the return data type is declared as string, which overrides PHP's type-juggling process:function convertsToString($a, $b, $c) : string
return $a + $b + $c;
}DateTime, part of the PHP DateTime extension:function makesDateTime($year, $month, $day) : DateTime
{
$date = new DateTime();
$date->setDate($year, $month, $day);
return $date;
}The makesDateTime() function would be a potential candidate for scalar type hinting. If $year, $month, or $day are not integers, a Warning is generated when setDate() is called. If you use scalar type hinting, and the wrong data types are passed, a TypeError is thrown. Although it really doesn't matter whether a warning is generated or a TypeError is thrown, at least the TypeError will cause the errant developer who is misusing your code to sit up and take notice!
TypeError will be thrown at runtime. This function assigns a return type of DateTime, but returns a string instead. A TypeError will be thrown, but not until runtime, when the PHP engine detects the discrepancy:function wrongDateTime($year, $month, $day) : DateTime
{
return date($year . '-' . $month . '-' . $day);
}First, place the functions mentioned previously into a library file called chap_03_developing_functions_return_types_library.php. This file needs to be included in the chap_03_developing_functions_return_types.php script that calls these functions:
include (__DIR__ . '/chap_03_developing_functions_return_types_library.php');
Now you can call returnsString(), supplying a DateTime instance and a format string:
$date   = new DateTime();
$format = 'l, d M Y';
$now    = returnsString($date, $format);
echo $now . PHP_EOL;
var_dump($now);
As expected, the output is a string:
Now you can call convertsToString() and supply three integers as arguments. Notice that the return type is string:
echo "\nconvertsToString()\n";
var_dump(convertsToString(2, 3, 4));
To demonstrate that, you can assign a class as a return value, call makesDateTime() with three integer parameters:
echo "\nmakesDateTime()\n";
$d = makesDateTime(2015, 11, 21);
var_dump($d);
Finally, call wrongDateTime() with three integer parameters:
try {
    $e = wrongDateTime(2015, 11, 21);
    var_dump($e);
} catch (TypeError $e) {
    echo $e->getMessage();
}
Notice that a TypeError is thrown at runtime:
PHP 7.1 adds a new return value type, void. This is used when you do not wish to return any value from the function. For more information, please refer to https://wiki.php.net/rfc/void_return_type.
An iterator is a special type of class that allows you to traverse a container or list. The keyword here is traverse. What this means is that the iterator provides the means to go through a list, but it does not perform the traversal itself.
The SPL provides a rich assortment of generic and specialized iterators designed for different contexts. The ArrayIterator, for example, is designed to allow object-oriented traversal of arrays. The DirectoryIterator is designed for filesystem scanning.
Certain SPL iterators are designed to work with others, and add value. Examples include FilterIterator and LimitIterator. The former gives you the ability to remove unwanted values from the parent iterator. The latter provides a pagination capability whereby you can designate how many items to traverse along with an offset that determines where to start.
Finally, there are a series of recursive iterators, which allow you to repeatedly call the parent iterator. An example would be RecursiveDirectoryIterator which scans a directory tree all the way from a starting point to the last possible subdirectory.
ArrayIterator class. It's extremely easy to use. All you need to do is to supply an array as an argument to the constructor. After that you can use any of the methods that are standard to all SPL-based iterators, such as current(), next(), and so on.$iterator = new ArrayIterator($array);
<ul> and <li> tags:function htmlList($iterator)
{
$output = '<ul>';
while ($value = $iterator->current()) {
$output .= '<li>' . $value . '</li>';
$iterator->next();
}
$output .= '</ul>';
return $output;
}ArrayIterator instance into a simple foreach() loop:function htmlList($iterator)
{
$output = '<ul>';
foreach($iterator as $value) {
$output .= '<li>' . $value . '</li>';
}
$output .= '</ul>';
return $output;
}CallbackFilterIterator is a great way to add value to any existing iterator you might be using. It allows you to wrap any existing iterator and screen the output. In this example we'll define fetchCountryName(), which iterates through a database query which produces a list of country names. First, we define an ArrayIterator instance from a query that uses the Application\Database\Connection class defined in Chapter 1, Building a Foundation:function fetchCountryName($sql, $connection)
{
$iterator = new ArrayIterator();
$stmt = $connection->pdo->query($sql);
while($row = $stmt->fetch(PDO::FETCH_ASSOC)) {
$iterator->append($row['name']);
}
return $iterator;
}nameFilterIterator(), which accepts a partial country name as an argument along with the ArrayIterator instance:function nameFilterIterator($innerIterator, $name)
{
if (!$name) return $innerIterator;
$name = trim($name);
$iterator = new CallbackFilterIterator($innerIterator,
function($current, $key, $iterator) use ($name) {
$pattern = '/' . $name . '/i';
return (bool) preg_match($pattern, $current);
}
);
return $iterator;
}LimitIterator adds a basic pagination aspect to your applications. To use this iterator, you only need to supply the parent iterator, an offset, and a limit. LimitIterator will then only produce a subset of the entire data set starting at the offset. Taking the same example mentioned in step 2, we'll paginate the results coming from our database query. We can do this quite simply by wrapping the iterator produced by the fetchCountryName() method inside a LimitIterator instance:$pagination = new LimitIterator(fetchCountryName( $sql, $connection), $offset, $limit);
ArrayIterator is processed by a FilterIterator, which in turn is limited by a LimitIterator. First we set up an instance of ArrayIterator:$i = new ArrayIterator($a);
ArrayIterator into a FilterIterator instance. Note that we are using the new PHP 7 anonymous class feature. In this case the anonymous class extends FilterIterator and overrides the accept() method, allowing only letters with even-numbered ASCII codes:$f = new class ($i) extends FilterIterator {
public function accept()
{
$current = $this->current();
return !(ord($current) & 1);
}
};FilterIterator instance as an argument to LimitIterator, and provide an offset (2 in this example) and a limit (6 in this example):$l = new LimitIterator($f, 2, 6);
range('A', 'Z'):function showElements($iterator)
{
foreach($iterator as $item) echo $item . ' ';
echo PHP_EOL;
}
$a = range('A', 'Z');
$i = new ArrayIterator($a);
showElements($i);FilterIterator on top of an ArrayIterator:$f = new class ($i) extends FilterIterator {
public function accept()
{
$current = $this->current();
return !(ord($current) & 1);
}
};
showElements($f);F H J L N P, which demonstrates a LimitIterator that consumes a FilterIterator, which in turn consumes an ArrayIterator. The output of these three examples is as follows:$l = new LimitIterator($f, 2, 6); showElements($l);
ArrayIterator instance populated with data from the query:function fetchAllAssoc($sql, $connection)
{
$iterator = new ArrayIterator();
$stmt = $connection->pdo->query($sql);
while($row = $stmt->fetch(PDO::FETCH_ASSOC)) {
$iterator->append($row);
}
return $iterator;
}ArrayIterator instance inside RecursiveArrayIterator. Unfortunately, this approach only performs a shallow iteration, and doesn't give us what we want: an iteration through all elements of the multi-dimensional array that is returned from a database query:$iterator = fetchAllAssoc($sql, $connection); $shallow = new RecursiveArrayIterator($iterator);
RecursiveIteratorIterator.RecursiveArrayIterator class to work overtime and perform a deep iteration through all levels of the array:$deep = new RecursiveIteratorIterator($shallow);
As a practical example, you can develop a test script which implements filtering and pagination using iterators. For this illustration, you could call the chap_03_developing_functions_filtered_and_paginated.php test code file.
First of all, following best practices, place the functions described above into an include file called chap_03_developing_functions_iterators_library.php. In the test script, be sure to include this file.
The data source is a table called iso_country_codes, which contains ISO2, ISO3, and country names. The database connection could be in a config/db.config.php file. You could also include the Application\Database\Connection class discussed in the previous chapter:
define('DB_CONFIG_FILE', '/../config/db.config.php');
define('ITEMS_PER_PAGE', [5, 10, 15, 20]);
include (__DIR__ . '/chap_03_developing_functions_iterators_library.php');
include (__DIR__ . '/../Application/Database/Connection.php');Next, you can process input parameters for the country name and the number of items per page. The current page number will start at 0 and can be incremented (next page) or decremented (previous page):
$name = strip_tags($_GET['name'] ?? ''); $limit = (int) ($_GET['limit'] ?? 10); $page = (int) ($_GET['page'] ?? 0); $offset = $page * $limit; $prev = ($page > 0) ? $page - 1 : 0; $next = $page + 1;
Now you're ready to fire up the database connection and run a simple SELECT query. This should be placed in a try {} catch {} block. You can then place the iterators to be stacked inside the try {} block:
try {
$connection = new Application\Database\Connection(
include __DIR__ . DB_CONFIG_FILE);
$sql = 'SELECT * FROM iso_country_codes';
$arrayIterator = fetchCountryName($sql, $connection);
$filteredIterator = nameFilterIterator($arrayIterator, $name);
$limitIterator = pagination(
$filteredIterator, $offset, $limit);
} catch (Throwable $e) {
echo $e->getMessage();
}Now we're ready for the HTML. In this simple example we present a form that lets the user select the number of items per page and the country name:
<form>
Country Name:
<input type="text" name="name"
value="<?= htmlspecialchars($name) ?>">
Items Per Page:
<select name="limit">
<?php foreach (ITEMS_PER_PAGE as $item) : ?>
<option<?= ($item == $limit) ? ' selected' : '' ?>>
<?= $item ?></option>
<?php endforeach; ?>
</select>
<input type="submit" />
</form>
<a href="?name=<?= $name ?>&limit=<?= $limit ?>
&page=<?= $prev ?>">
<< PREV</a>
<a href="?name=<?= $name ?>&limit=<?= $limit ?>
&page=<?= $next ?>">
NEXT >></a>
<?= htmlList($limitIterator); ?>The output will look something like this:
Finally, in order to test the recursive iteration of the country database lookup, you will need to include the iterator's library file, as well as the Application\Database\Connection class:
define('DB_CONFIG_FILE', '/../config/db.config.php');
include (__DIR__ . '/chap_03_developing_functions_iterators_library.php');
include (__DIR__ . '/../Application/Database/Connection.php');As before, you should wrap your database query in a try {} catch {} block. You can then place the code to test the recursive iteration inside the try {} block:
try {
$connection = new Application\Database\Connection(
include __DIR__ . DB_CONFIG_FILE);
$sql = 'SELECT * FROM iso_country_codes';
$iterator = fetchAllAssoc($sql, $connection);
$shallow  = new RecursiveArrayIterator($iterator);
foreach ($shallow as $item) var_dump($item);
$deep = new RecursiveIteratorIterator($shallow);
foreach ($deep as $item) var_dump($item);
} catch (Throwable $e) {
echo $e->getMessage();
}Here is what you can expect to see in terms of output from RecursiveArrayIterator:
Here is the output after using RecursiveIteratorIterator:
In the preceding set of recipes we demonstrated the use of iterators provided in the PHP 7 SPL. But what if this set doesn't provide you with what is needed for a given project? One solution would be to develop a function that, instead of building an array that is then returned, uses the yield keyword to return values progressively by way of iteration. Such a function is referred to as a generator. In fact, in the background, the PHP engine will automatically convert your function into a special built-in class called Generator.
There are several advantages to this approach. The main benefit is seen when you have a large container to traverse (that is, parsing a massive file). The traditional approach has been to build up an array, and then return that array. The problem with this is that you are effectively doubling the amount of memory required! Also, performance is affected in that results are only achieved once the final array has been returned.
ArrayIterator, FilterIterator, and LimitIterator.filteredResultsGenerator() function. We then calculate the offset based on the page number and limit (that is, number of items per page). Next, we loop through the array, apply the filter, and continue the loop if the offset has not yet been reached, or break if the limit has been reached:function filteredResultsGenerator(array $array, $filter, $limit = 10, $page = 0)
{
$max = count($array);
$offset = $page * $limit;
foreach ($array as $key => $value) {
if (!stripos($value, $filter) !== FALSE) continue;
if (--$offset >= 0) continue;
if (--$limit <= 0) break;
yield $value;
}
}yield keyword. The effect of this keyword is to signal the PHP engine to produce a Generator instance and encapsulate the code.To demonstrate the use of the filteredResultsGenerator() function we'll have you implement a web application that scans a web page and produces a filtered and paginated list of URLs hoovered from HREF attributes.
First you need to add the code for the filteredResultsGenerator() function to the library file used in the previous recipe, then place the functions described previously into an include file, chap_03_developing_functions_iterators_library.php.
Next, define a test script, chap_03_developing_functions_using_generator.php, that includes both the function library as well as the file that defines Application\Web\Hoover, described in Chapter 1, Building a Foundation:
include (__DIR__ . DIRECTORY_SEPARATOR . 'chap_03_developing_functions_iterators_library.php');
include (__DIR__ . '/../Application/Web/Hoover.php');
You will then need to gather input from the user regarding which URL to scan, what string to use as a filter, how many items per page, and the current page number.
$url    = trim(strip_tags($_GET['url'] ?? ''));
$filter = trim(strip_tags($_GET['filter'] ?? ''));
$limit  = (int) ($_GET['limit'] ?? 10);
$page   = (int) ($_GET['page']  ?? 0);
You are then in a position to define variables used in links for previous and next pages in the paginated list. Note that you could also apply a sanity check to make sure the next page doesn't go off the end of the result set. For the sake of brevity, such a sanity check was not applied in this example:
$next   = $page + 1;
$prev   = $page - 1;
$base   = '?url=' . htmlspecialchars($url)
        . '&filter=' . htmlspecialchars($filter)
        . '&limit=' . $limit
        . '&page=';
We then need to create an Application\Web\Hoover instance and grab HREF attributes from the target URL:
$vac    = new Application\Web\Hoover();
$list   = $vac->getAttribute($url, 'href');
Finally, we define HTML output that renders an input form and runs our generator through the htmlList() function described previously:
<form> <table> <tr> <th>URL</th> <td> <input type="text" name="url" value="<?= htmlspecialchars($url) ?>"/> </td> </tr> <tr> <th>Filter</th> <td> <input type="text" name="filter" value="<?= htmlspecialchars($filter) ?>"/></td> </tr> <tr> <th>Limit</th> <td><input type="text" name="limit" value="<?= $limit ?>"/></td> </tr> <tr> <th> </th><td><input type="submit" /></td> </tr> <tr> <td> </td> <td> <a href="<?= $base . $prev ?>"><-- PREV | <a href="<?= $base . $next ?>">NEXT --></td> </tr> </table> </form> <hr> <?= htmlList(filteredResultsGenerator( $list, $filter, $limit, $page)); ?>
Here is an example of the output:
In this chapter we will cover:
In this chapter, we will consider recipes that take advantage of the object-oriented programming (OOP) capabilities available in PHP 7.0, 7.1, and above. Most of the OOP functionality available in PHP 7.x is also available in PHP 5.6. A new feature introduced in PHP 7 is support for anonymous classes. In PHP 7.1, you can modify the visibility of class constants.
Another radically new feature is the ability to catch certain types of error. This is discussed in greater detail in Chapter 13, Best Practices, Testing, and Debugging.
The traditional development approach is to place the class into its own file. Typically, classes contain logic that implements a single purpose. Classes are further broken down into self-contained functions which are referred to as methods. Variables defined inside classes are referred to as properties. It is recommended to develop a test class at the same time, a topic discussed in more detail in Chapter 13, Best Practices, Testing, and Debugging.
class, add a DocBlock. You can then define properties and methods. In this example, we define a class Test. It has a property $test, and a method getTest():<?php
declare(strict_types=1);
/**
* This is a demonstration class.
*
* The purpose of this class is to get and set
* a protected property $test
*
*/
class Test
{
protected $test = 'TEST';
/**
* This method returns the current value of $test
*
* @return string $test
*/
public function getTest() : string
{
return $this->test;
}
/**
* This method sets the value of $test
*
* @param string $test
* @return Test $this
*/
public function setTest(string $test)
{
$this->test = $test;
return $this;
}
}Best practice
It is considered best practice to name the file after the class. Although class names in PHP are not case sensitive, it is further considered best practice to use an uppercase letter for the first name of a class. You should not put executable code in a class definition file.
Each class should contain a DocBlock before the keyword class. In the DocBlock you should include a short description of the purpose of the class. Skip a line, and then include a more detailed description. You can also include @ tags such as @author, @license and so on. Each method should likewise be preceded by a DocBlock that identifies the purpose of the method, as well as its incoming parameters and return value.
NameAddress.php, which defines two classes, Name and Address:<?php
declare(strict_types=1);
class Name
{
protected $name = '';
public function getName() : string
{
return $this->name;
}
public function setName(string $name)
{
$this->name = $name;
return $this;
}
}
class Address
{
protected $address = '';
public function getAddress() : string
{
return $this->address;
}
public function setAddress(string $address)
{
$this->address = $address;
return $this;
}
}TwoClass.php, we define two classes, TwoClass and twoclass:<?php
class TwoClass
{
public function showOne()
{
return 'ONE';
}
}
// a fatal error will occur when the second class definition is parsed
class twoclass
{
public function showTwo()
{
return 'TWO';
}
}$this. Although permitted in PHP 7.0 and PHP 5.x, any of the following uses of $this will now generate an error as of PHP 7.1, if $this is used as:static variableglobal variabletry...catch blocksforeach()unset()$a = 'this'; echo $$a)stdClass which is built into PHP. stdClass allows you to define properties on the fly without having to define a discreet class that extends stdClass:$obj = new stdClass();
PDO::FETCH_OBJ. This mode returns instances of stdClass where the properties represent database table columns:$stmt = $connection->pdo->query($sql); $row = $stmt->fetch(PDO::FETCH_OBJ);
Take the example for the Test class shown in the preceding code snippet, and place the code in a file named Test.php. Create another file called chap_04_oop_defining_class_test.php. Add the following code:
require __DIR__ . '/Test.php';

$test = new Test();
echo $test->getTest();
echo PHP_EOL;

$test->setTest('ABC');
echo $test->getTest();
echo PHP_EOL;
The output will show the initial value of the $test property, followed by the new value modified by calling setTest():
The next example has you define two classes, Name and Address in a single file NameAddress.php. You can call and use these two classes with the following code:
require __DIR__ . '/NameAddress.php';

$name = new Name();
$name->setName('TEST');
$addr = new Address();
$addr->setAddress('123 Main Street');

echo $name->getName() . ' lives at ' . $addr->getAddress();The output from this example is shown next:
Step 3 also shows two class definitions in one file. In this case, however, the objective is to demonstrate that classnames in PHP are case-insensitive. Place the code into a file, TwoClass.php. When you try to include the file, an error is generated:
To demonstrate the direct use of stdClass, create an instance, assign a value to a property, and use var_dump()to display the results. To see how stdClass is used internally, use var_dump() to display the results of a PDO query where the fetch mode is set to FETCH_OBJ.
Enter the following code:
$obj = new stdClass();
$obj->test = 'TEST';
echo $obj->test;
echo PHP_EOL;

include (__DIR__ . '/../Application/Database/Connection.php');
$connection = new Application\Database\Connection(
  include __DIR__ . DB_CONFIG_FILE);

$sql  = 'SELECT * FROM iso_country_codes';
$stmt = $connection->pdo->query($sql);
$row  = $stmt->fetch(PDO::FETCH_OBJ);
var_dump($row);
Here is the output:
For more information on refinements in PHP 7.1 on the keyword $this, please see https://wiki.php.net/rfc/this_var.
One of the primary reasons developers use OOP is because of its ability to re-use existing code, yet, at the same time, add or override functionality. In PHP, the keyword extends is used to establish a parent/child relationship between classes.
child class, use the keyword extends to set up inheritance. In the example that follows, the Customer class extends the Base class. Any instance of Customer will inherit visible methods and properties, in this case, $id, getId() and setId():class Base
{
protected $id;
public function getId()
{
return $this->id;
}
public function setId($id)
{
$this->id = $id;
}
}
class Customer extends Base
{
protected $name;
public function getName()
{
return $this->name;
}
public function setName($name)
{
$this->name = $name;
}
}abstract. In this example, the Base class defines as abstract the validate() method. The reason why it must be abstract is because it would be impossible to determine exactly how a child class would be validated from the perspective of the parent Base class:abstract class Base
{
protected $id;
public function getId()
{
return $this->id;
}
public function setId($id)
{
$this->id = $id;
}
public function validate();
}Member, which inherits from Customer. Customer, in turn, inherits from Base:class Base
{
protected $id;
public function getId()
{
return $this->id;
}
public function setId($id)
{
$this->id = $id;
}
}
class Customer extends Base
{
protected $name;
public function getName()
{
return $this->name;
}
public function setName($name)
{
$this->name = $name;
}
}
class Member extends Customer
{
protected $membership;
public function getMembership()
{
return $this->membership;
}
public function setMembership($memberId)
{
$this->membership = $memberId;
}
}test() function, shown in the following code snippet, requires an instance of the Base class as an argument. Any class within the line of inheritance can be accepted as an argument. Anything else passed to test() throws a TypeError:function test(Base $object)
{
return $object->getId();
}In the first bullet point, a Base class and a Customer class were defined. For the sake of demonstration, place these two class definitions in a single file, chap_04_oop_extends.php, and add the following code:
$customer = new Customer();
$customer->setId(100);
$customer->setName('Fred');
var_dump($customer);Note that the $id property and the getId() and setId() methods are inherited from the parent Base class into the child Customer class:
To illustrate the use of an abstract method, imagine that you wish to add some sort of validation capability to any class that extends Base. The problem is that there is no way to know what might be validated in the inherited classes. The only thing that is certain is that you must have a validation capability.
Take the same Base class mentioned in the preceding explanation and add a new method, validate(). Label the method as abstract, and do not define any code. Notice what happens when the child Customer class extends Base.
If you then label the Base class as abstract, but fail to define a validate() method in the child class, the same error will be generated. Finally, go ahead and implement the validate() method in a child Customer class:
class Customer extends Base
{
protected $name;
public function getName()
{
return $this->name;
}
public function setName($name)
{
$this->name = $name;
}
public function validate()
{
$valid = 0;
$count = count(get_object_vars($this));
if (!empty($this->id) &&is_int($this->id)) $valid++;
if (!empty($this->name)
&&preg_match('/[a-z0-9 ]/i', $this->name)) $valid++;
return ($valid == $count);
}
}You can then add the following procedural code to test the results:
$customer = new Customer();
$customer->setId(100);
$customer->setName('Fred');
echo "Customer [id]: {$customer->getName()}" .
. "[{$customer->getId()}]\n";
echo ($customer->validate()) ? 'VALID' : 'NOT VALID';
$customer->setId('XXX');
$customer->setName('$%£&*()');
echo "Customer [id]: {$customer->getName()}"
. "[{$customer->getId()}]\n";
echo ($customer->validate()) ? 'VALID' : 'NOT VALID';To show a single line of inheritance, add a new Member class to the first example of Base and Customer shown in the preceding step 1:
class Member extends Customer
{
protected $membership;
public function getMembership()
{
return $this->membership;
}
public function setMembership($memberId)
{
$this->membership = $memberId;
}
}Create an instance of Member, and notice, in the following code, that all properties and methods are available from every inherited class, even if not directly inherited:
$member = new Member();
$member->setId(100);
$member->setName('Fred');
$member->setMembership('A299F322');
var_dump($member);Here is the output:
Now define a function, test(), which takes an instance of Base as an argument:
function test(Base $object)
{
  return $object->getId();
}Notice that instances of Base, Customer, and Member are all acceptable as arguments:
$base = new Base(); $base->setId(100); $customer = new Customer(); $customer->setId(101); $member = new Member(); $member->setId(102); // all 3 classes work in test() echo test($base) . PHP_EOL; echo test($customer) . PHP_EOL; echo test($member) . PHP_EOL;
Here is the output:
However, if you try to run test() with an object instance that is not in the line of inheritance, a TypeError is thrown:
class Orphan
{
protected $id;
public function getId()
{
return $this->id;
}
public function setId($id)
{
$this->id = $id;
}
}
try {
$orphan = new Orphan();
$orphan->setId(103);
echo test($orphan) . PHP_EOL;
} catch (TypeError $e) {
echo 'Does not work!' . PHP_EOL;
echo $e->getMessage();
}We can observe this in the following image:
PHP lets you access properties or methods without having to create an instance of the class. The keyword used for this purpose is static.
static keyword after stating the visibility level when declaring an ordinary property or method. Use the self keyword to reference the property internally:class Test
{
public static $test = 'TEST';
public static function getTest()
{
return self::$test;
}
}self keyword will bind early, which will cause problems when accessing static information in child classes. If you absolutely need to access information from the child class, use the static keyword in place of self. This process is referred to as Late Static Binding.Child::getEarlyTest(), the output will be TEST. If, on the other hand, you run Child::getLateTest(), the output will be CHILD. The reason is that PHP will bind to the earliest definition when using self, whereas the latest binding is used for the static keyword:class Test2
{
public static $test = 'TEST2';
public static function getEarlyTest()
{
return self::$test;
}
public static function getLateTest()
{
return static::$test;
}
}
class Child extends Test2
{
public static $test = 'CHILD';
}factory() is defined which returns a PDO connection:public static function factory(
$driver,$dbname,$host,$user,$pwd,array $options = [])
{
$dsn = sprintf('%s:dbname=%s;host=%s',
$driver, $dbname, $host);
try {
return new PDO($dsn, $user, $pwd, $options);
} catch (PDOException $e) {
error_log($e->getMessage);
}
}You can reference static properties and methods using the class resolution operator "::". Given the Test class shown previously, if you run this code:
echo Test::$test; echo PHP_EOL; echo Test::getTest(); echo PHP_EOL;
You will see this output:
To illustrate Late Static Binding, based on the classes Test2 and Child shown previously, try this code:
echo Test2::$test; echo Child::$test; echo Child::getEarlyTest(); echo Child::getLateTest();
The output illustrates the difference between self and static:
Finally, to test the factory() method shown previously, save the code into the Application\Database\Connection class in a Connection.php file in the Application\Database folder. You can then try this:
include __DIR__ . '/../Application/Database/Connection.php';
use Application\Database\Connection;
$connection = Connection::factory(
'mysql', 'php7cookbook', 'localhost', 'test', 'password');
$stmt = $connection->query('SELECT name FROM iso_country_codes');
while ($country = $stmt->fetch(PDO::FETCH_COLUMN))
echo $country . '';You will see a list of countries pulled from the sample database:
For more information on Late Static Binding, see this explanation in the PHP documentation:
http://php.net/manual/en/language.oop5.late-static-bindings.php
An aspect that is critical to advanced PHP development is the use of namespaces. The arbitrarily defined namespace becomes a prefix to the class name, thereby avoiding the problem of accidental class duplication, and allowing you extraordinary freedom of development. Another benefit to the use of a namespace, assuming it matches the directory structure, is that it facilitates autoloading, as discussed in Chapter 1, Building a Foundation.
namespace at the top of the code file:namespace Application\Entity;
namespace would be a comment and/or the keyword declare:<?php
declare(strict_types=1);
namespace Application\Entity;
/**
* Address
*
*/
class Address
{
// some code
}use statement containing only the namespace. You would need to then prefix any class reference within this namespace with the last component of the namespace:use Application\Entity; $name = new Entity\Name(); $addr = new Entity\Address(); $prof = new Entity\Profile();
use Application\Entity\Name; use Application\Entity\Address; use Application\Entity\Profile; $name = new Name(); $addr = new Address(); $prof = new Profile();
use Application\Entity\ {
Name,
Address,
Profile
};
$name = new Name();
$addr = new Address();
$prof = new Profile();function __autoload($class)
{
echo "Argument Passed to Autoloader = $class\n";
include __DIR__ . '/../' . str_replace('\\', DIRECTORY_SEPARATOR, $class) . '.php';
}For illustration purposes, define a directory structure that matches the Application\* namespace. Create a base folder Application, and a sub-folder Entity. You can also include any sub-folders as desired, such as Database and Generic, used in other chapters:
Next, create three entity classes, each in their own file, under the Application/Entity folder: Name.php, Address.php, and Profile.php. We only show Application\Entity\Name here. Application\Entity\Address and Application\Entity\Profile will be the same, except that Address has an $address property, and Profile has a $profile property, each with an appropriate get and set method:
<?php
declare(strict_types=1);
namespace Application\Entity;
/**
* Name
*
*/
class Name
{
protected $name = '';
/**
* This method returns the current value of $name
*
* @return string $name
*/
public function getName() : string
{
return $this->name;
}
/**
* This method sets the value of $name
*
* @param string $name
* @return name $this
*/
public function setName(string $name)
{
$this->name = $name;
return $this;
}
}You can then either use the autoloader defined in Chapter 1, Building a Foundation, or use the simple autoloader mentioned previously. Place the commands to set up autoloading in a file, chap_04_oop_namespace_example_1.php. In this file, you can then specify a use statement which only references the namespace, not the class names. Create instances of the three entity classes Name, Address and Profile, by prefixing the class name with the last part of the namespace, Entity:
use Application\Entity; $name = new Entity\Name(); $addr = new Entity\Address(); $prof = new Entity\Profile(); var_dump($name); var_dump($addr); var_dump($prof);
Here is the output:
Next, use Save as to copy the file to a new one named chap_04_oop_namespace_example_2.php. Change the use statement to the following:
use Application\Entity\Name; use Application\Entity\Address; use Application\Entity\Profile;
You can now create class instances using only the class name:
$name = new Name(); $addr = new Address(); $prof = new Profile();
When you run this script, here is the output:
Finally, again run Save as and create a new file, chap_04_oop_namespace_example_3.php. You can now test the group use feature introduced in PHP 7:
use Application\Entity\ {
Name,
Address,
Profile
};
$name = new Name();
$addr = new Address();
$prof = new Profile();Again, when you run this block of code, the output will be the same as the preceding output:
Deceptively, the word visibility has nothing to do with application security! Instead it is simply a mechanism to control the use of your code. It can be used to steer an inexperienced developer away from the public use of methods that should only be called inside the class definition.
public, protected, or private keyword in front of any property or method definition. You can label properties as protected or private to enforce access only through public getters and setters.Base class is defined with a protected property $id. In order to access this property, the getId() and setId() public methods are defined. The protected method generateRandId() can be used internally, and is inherited in the Customer child class. This method cannot be called directly outside of class definitions. Note the use of the new PHP 7 random_bytes() function to create a random ID.class Base
{
protected $id;
private $key = 12345;
public function getId()
{
return $this->id;
}
public function setId()
{
$this->id = $this->generateRandId();
}
protected function generateRandId()
{
return unpack('H*', random_bytes(8))[1];
}
}
class Customer extends Base
{
protected $name;
public function getName()
{
return $this->name;
}
public function setName($name)
{
$this->name = $name;
}
}private to prevent it from being inherited or visible from outside the class definition. This is a good way to create a class as a singleton.Registry, of which there can only be one instance. Because the constructor is marked as private, the only way an instance can be created is through the static method getInstance():class Registry
{
protected static $instance = NULL;
protected $registry = array();
private function __construct()
{
// nobody can create an instance of this class
}
public static function getInstance()
{
if (!self::$instance) {
self::$instance = new self();
}
return self::$instance;
}
public function __get($key)
{
return $this->registry[$key] ?? NULL;
}
public function __set($key, $value)
{
$this->registry[$key] = $value;
}
}public. As of PHP 7.1, you can declare class constants to be protected or private. In the following example, the TEST_WHOLE_WORLD class constant behaves exactly as in PHP 5. The next two constants, TEST_INHERITED and TEST_LOCAL, follow the same rules as any protected or private property or method:class Test
{
public const TEST_WHOLE_WORLD = 'visible.everywhere';
// NOTE: only works in PHP 7.1 and above
protected const TEST_INHERITED = 'visible.in.child.classes';
// NOTE: only works in PHP 7.1 and above
private const TEST_LOCAL= 'local.to.class.Test.only';
public static function getTestInherited()
{
return static::TEST_INHERITED;
}
public static function getTestLocal()
{
return static::TEST_LOCAL;
}
}Create a file chap_04_basic_visibility.php and define two classes: Base and Customer. Next, write code to create instances of each:
$base = new Base(); $customer = new Customer();
Notice that the following code works OK, and is in fact considered the best practice:
$customer->setId();
$customer->setName('Test');
echo 'Welcome ' . $customer->getName() . PHP_EOL;
echo 'Your new ID number is: ' . $customer->getId() . PHP_EOL;Even though $id is protected, the corresponding methods, getId() and setId(), are both public, and therefore accessible from outside the class definition. Here is the output:
The following lines of code will not work, however, as private and protected properties are not accessible from outside the class definition:
echo 'Key (does not work): ' . $base->key; echo 'Key (does not work): ' . $customer->key; echo 'Name (does not work): ' . $customer->name; echo 'Random ID (does not work): ' . $customer->generateRandId();
The following output shows the expected errors:
For more information on getters and setters, see the recipe in this chapter entitled Using getters and setters. For more information on PHP 7.1 class constant visibility settings, please see https://wiki.php.net/rfc/class_const_visibility.
Interfaces are useful tools for systems architects and are often used to prototype an Application Programming Interface (API). Interfaces don't contain actual code, but can contain names of methods as well as method signatures.
ConnectionAwareInterface identifies a method, setConnection(), which requires an instance of Connection as an argument:interface ConnectionAwareInterface
{
public function setConnection(Connection $connection);
}implements after the open line that defines the class. We have defined two classes, CountryList and CustomerList, both of which require access to the Connection class via a method, setConnection(). In order to identify this dependency, both classes implement ConnectionAwareInterface:class CountryList implements ConnectionAwareInterface
{
protected $connection;
public function setConnection(Connection $connection)
{
$this->connection = $connection;
}
public function list()
{
$list = [];
$stmt = $this->connection->pdo->query(
'SELECT iso3, name FROM iso_country_codes');
while ($country = $stmt->fetch(PDO::FETCH_ASSOC)) {
$list[$country['iso3']] = $country['name'];
}
return $list;
}
}
class CustomerList implements ConnectionAwareInterface
{
protected $connection;
public function setConnection(Connection $connection)
{
$this->connection = $connection;
}
public function list()
{
$list = [];
$stmt = $this->connection->pdo->query(
'SELECT id, name FROM customer');
while ($customer = $stmt->fetch(PDO::FETCH_ASSOC)) {
$list[$customer['id']] = $customer['name'];
}
return $list;
}
}ListFactory, contains a factory() method, which initializes any class that implements ConnectionAwareInterface. The interface is a guarantee that the setConnection() method is defined. Setting the type hint to the interface instead of a specific class instance makes the factory method more generically useful:namespace Application\Generic;
use PDO;
use Exception;
use Application\Database\Connection;
use Application\Database\ConnectionAwareInterface;
class ListFactory
{
const ERROR_AWARE = 'Class must be Connection Aware';
public static function factory(
ConnectionAwareInterface $class, $dbParams)
{
if ($class instanceof ConnectionAwareInterface) {
$class->setConnection(new Connection($dbParams));
return $class;
} else {
throw new Exception(self::ERROR_AWARE);
}
return FALSE;
}
}DateAware and TimeAware. In addition to defining the setDate() and setTime() methods, they both define setBoth(). Having duplicate method names is not an issue, although it is not considered best practice. The problem lies in the fact that the method signatures differ:interface DateAware
{
public function setDate($date);
public function setBoth(DateTime $dateTime);
}
interface TimeAware
{
public function setTime($time);
public function setBoth($date, $time);
}
class DateTimeHandler implements DateAware, TimeAware
{
protected $date;
protected $time;
public function setDate($date)
{
$this->date = $date;
}
public function setTime($time)
{
$this->time = $time;
}
public function setBoth(DateTime $dateTime)
{
$this->date = $date;
}
}setBoth() from one or the other interface. Alternatively, you could adjust the method signatures to match.In the Application/Database folder, create a file, ConnectionAwareInterface.php. Insert the code discussed in the preceding step 2.
Next, in the Application/Generic folder, create two files, CountryList.php and CustomerList.php. Insert the code discussed in step 3.
Next, in a directory parallel to the Application directory, create a source code file, chap_04_oop_simple_interfaces_example.php, which initializes the autoloader and includes the database parameters:
<?php
define('DB_CONFIG_FILE', '/../config/db.config.php');
require __DIR__ . '/../Application/Autoload/Loader.php';
Application\Autoload\Loader::init(__DIR__ . '/..');
$params = include __DIR__ . DB_CONFIG_FILE;The database parameters in this example are assumed to be in a database configuration file indicated by the DB_CONFIG_FILE constant.
You are now in a position to use ListFactory::factory() to generate CountryList and CustomerList objects. Note that if these classes did not implement ConnectionAwareInterface, an error would be thrown:
$list = Application\Generic\ListFactory::factory(
new Application\Generic\CountryList(), $params);
foreach ($list->list() as $item) echo $item . '';Here is the output for country list:
You can also use the factory method to generate a CustomerList object and use it:
$list = Application\Generic\ListFactory::factory(
new Application\Generic\CustomerList(), $params);
foreach ($list->list() as $item) echo $item . '';Here is the output for
CustomerList:
If you want to examine what happens when multiple interfaces are implemented, but where the method signature differs, enter the code shown in the preceding step 4 into a file, chap_04_oop_interfaces_collisions.php. When you try to run the file, an error is generated, as shown here:
If you make the following adjustment in the TimeAware interface, no errors will result:
interface TimeAware
{
public function setTime($time);
// this will cause a problem
public function setBoth(DateTime $dateTime);
}If you have ever done any C programming, you are perhaps familiar with macros. A macro is a predefined block of code that expands at the line indicated. In a similar manner, traits can contain blocks of code that are copied and pasted into a class at the line indicated by the PHP interpreter.
trait, and can contain properties and/or methods. You may have noticed duplication of code when examining the previous recipe featuring the CountryList and CustomerList classes. In this example, we will re-factor the two classes, and move the functionality of the list() method into a Trait. Notice that the list() method is the same in both classes.list() into a trait called ListTrait:trait ListTrait
{
public function list()
{
$list = [];
$sql = sprintf('SELECT %s, %s FROM %s',
$this->key, $this->value, $this->table);
$stmt = $this->connection->pdo->query($sql);
while ($item = $stmt->fetch(PDO::FETCH_ASSOC)) {
$list[$item[$this->key]] = $item[$this->value];
}
return $list;
}
}ListTrait into a new class, CountryListUsingTrait, as shown in the following code snippet. The entire list() method can now be removed from this class:class CountryListUsingTrait implements ConnectionAwareInterface
{
use ListTrait;
protected $connection;
protected $key = 'iso3';
protected $value = 'name';
protected $table = 'iso_country_codes';
public function setConnection(Connection $connection)
{
$this->connection = $connection;
}
}Any time you have duplication of code, a potential problem arises when you need to make a change. You might find yourself having to do too many global search and replace operations, or cutting and pasting of code, often with disastrous results. Traits are a great way to avoid this maintenance nightmare.
CountryListUsingTrait class is placed into a namespace, Application\Generic, we will also need to move ListTrait into that namespace as well:namespace Application\Generic;
use PDO;
trait ListTrait
{
public function list()
{
// code as shown above
}
}setId() method differs between the Base parent class and the Test trait. The Customer class inherits from Base, but also uses Test. In this case, the method defined in the trait will override the method defined in the Base parent class:trait Test
{
public function setId($id)
{
$obj = new stdClass();
$obj->id = $id;
$this->id = $obj;
}
}
class Base
{
protected $id;
public function getId()
{
return $this->id;
}
public function setId($id)
{
$this->id = $id;
}
}
class Customer extends Base
{
use Test;
protected $name;
public function getName()
{
return $this->name;
}
public function setName($name)
{
$this->name = $name;
}
}Test trait defines a property $id along with the getId() methods and setId(). The trait also defines setName(), which conflicts with the same method defined in the Customer class. In this case, the directly defined setName() method from Customer will override the setName() defined in the trait:trait Test
{
protected $id;
public function getId()
{
return $this->id;
}
public function setId($id)
{
$this->id = $id;
}
public function setName($name)
{
$obj = new stdClass();
$obj->name = $name;
$this->name = $obj;
}
}
class Customer
{
use Test;
protected $name;
public function getName()
{
return $this->name;
}
public function setName($name)
{
$this->name = $name;
}
}insteadof keywords to resolve method name conflicts when using multiple traits. In conjunction, use the as keyword to alias method names.IdTrait and NameTrait. Both traits define a setKey() method, but express the key in different ways. The Test class uses both traits. Note the insteadof keyword, which allows us to distinguish between the conflicting methods. Thus, when setKey() is called from the Test class, the source will be drawn from NameTrait. In addition, setKey() from IdTrait will still be available, but under an alias, setKeyDate():trait IdTrait
{
protected $id;
public $key;
public function setId($id)
{
$this->id = $id;
}
public function setKey()
{
$this->key = date('YmdHis')
. sprintf('%04d', rand(0,9999));
}
}
trait NameTrait
{
protected $name;
public $key;
public function setName($name)
{
$this->name = $name;
}
public function setKey()
{
$this->key = unpack('H*', random_bytes(18))[1];
}
}
class Test
{
use IdTrait, NameTrait {
NameTrait::setKeyinsteadofIdTrait;
IdTrait::setKey as setKeyDate;
}
}From step 1, you learned that traits are used in situations where there is duplication of code. You need to gauge whether or not you could simply define a base class and extend it, or whether using a trait better serves your purposes. Traits are especially useful where the duplication of code is seen in logically unrelated classes.
To illustrate how trait methods override inherited methods, copy the block of code mentioned in step 7 into a separate file, chap_04_oop_traits_override_inherited.php. Add these lines of code:
$customer = new Customer();
$customer->setId(100);
$customer->setName('Fred');
var_dump($customer);As you can see from the output (shown next), the property $id is stored as an instance of stdClass(), which is the behavior defined in the trait:
To illustrate how directly defined class methods override trait methods, copy the block of code mentioned in step 9 into a separate file, chap_04_oop_trait_methods_do_not_override_class_methods.php. Add these lines of code:
$customer = new Customer();
$customer->setId(100);
$customer->setName('Fred');
var_dump($customer);As you can see from the following output, the $id property is stored as an integer, as defined in the Customer class, whereas the trait defines $id as an instance of stdClass:
In step 10, you learned how to resolve duplicate method name conflicts when using multiple traits. Copy the block of code shown in step 11 into a separate file, chap_04_oop_trait_multiple.php. Add the following code:
$a = new Test();
$a->setId(100);
$a->setName('Fred');
$a->setKey();
var_dump($a);
$a->setKeyDate();
var_dump($a);Notice in the following output that setKey() yields the output produced from the new PHP 7 function, random_bytes() (defined in NameTrait), whereas setKeyDate() produces a key using the date() and rand() functions (defined in IdTrait):
PHP 7 introduced a new feature, anonymous classes. Much like anonymous functions, anonymous classes can be defined as part of an expression, creating a class that has no name. Anonymous classes are used in situations where you need to create an object on the fly, which is used and then discarded.
stdClass is to define an anonymous class.In the definition, you can define any properties and methods (including magic methods). In this example, we define an anonymous class with two properties and a magic method, __construct():
$a = new class (123.45, 'TEST') {
public $total = 0;
public $test = '';
public function __construct($total, $test)
{
$this->total = $total;
$this->test = $test;
}
};In this example, an anonymous class extends FilterIterator, and overrides both the __construct() and accept() methods. As an argument, it accepts ArrayIterator $b, which represents an array of 10 to 100 in increments of 10. The second argument serves as a limit on the output:
$b = new ArrayIterator(range(10,100,10));
$f = new class ($b, 50) extends FilterIterator {
public $limit = 0;
public function __construct($iterator, $limit)
{
$this->limit = $limit;
parent::__construct($iterator);
}
public function accept()
{
return ($this->current() <= $this->limit);
}
};In this example, an anonymous class is used to generate an HTML color code chart. The class implements the built-in PHP Countable interface. A count() method is defined, which is called when this class is used with a method or function that requires Countable:
define('MAX_COLORS', 256 ** 3);
$d = new class () implements Countable {
public $current = 0;
public $maxRows = 16;
public $maxCols = 64;
public function cycle()
{
$row = '';
$max = $this->maxRows * $this->maxCols;
for ($x = 0; $x < $this->maxRows; $x++) {
$row .= '<tr>';
for ($y = 0; $y < $this->maxCols; $y++) {
$row .= sprintf(
'<td style="background-color: #%06X;"',
$this->current);
$row .= sprintf(
'title="#%06X"> </td>',
$this->current);
$this->current++;
$this->current = ($this->current >MAX_COLORS) ? 0
: $this->current;
}
$row .= '</tr>';
}
return $row;
}
public function count()
{
return MAX_COLORS;
}
};Test, we define an anonymous class instead:$a = new class() {
use IdTrait, NameTrait {
NameTrait::setKeyinsteadofIdTrait;
IdTrait::setKey as setKeyDate;
}
};In an anonymous class you can define any properties or methods. Using the preceding example, you could define an anonymous class that accepts constructor arguments, and where you can access properties. Place the code described in step 2 into a test script chap_04_oop_anonymous_class.php. Add these echo statements:
echo "\nAnonymous Class\n"; echo $a->total .PHP_EOL; echo $a->test . PHP_EOL;
Here is the output from the anonymous class:
In order to use FilterIterator you must override the accept() method. In this method, you define criteria for which elements of the iteration are to be included as output. Go ahead now and add the code shown in step 4 to the test script. You can then add these echo statements to test the anonymous class:
echo "\nAnonymous Class Extends FilterIterator\n"; foreach ($f as $item) echo $item . ''; echo PHP_EOL;
In this example, a limit of 50 is established. The original ArrayIterator contains an array of values, 10 to 100, in increments of 10, as seen in the following output:
To have a look at an anonymous class that implements an interface, consider the example shown in steps 5 and 6. Place this code in a file, chap_04_oop_anonymous_class_interfaces.php.
Next, add code that lets you paginate through the HTML color chart:
$d->current = $_GET['current'] ?? 0;
$d->current = hexdec($d->current);
$factor = ($d->maxRows * $d->maxCols);
$next = $d->current + $factor;
$prev = $d->current - $factor;
$next = ($next <MAX_COLORS) ? $next : MAX_COLORS - $factor;
$prev = ($prev>= 0) ? $prev : 0;
$next = sprintf('%06X', $next);
$prev = sprintf('%06X', $prev);
?>Finally, go ahead and present the HTML color chart as a web page:
<h1>Total Possible Color Combinations: <?= count($d); ?></h1> <hr> <table> <?= $d->cycle(); ?> </table> <a href="?current=<?= $prev ?>"><<PREV</a> <a href="?current=<?= $next ?>">NEXT >></a>
Notice that you can take advantage of the Countable interface by passing the instance of the anonymous class into the count() function (shown between <H1> tags). Here is the output shown in a browser window:
Lastly, to illustrate the use of traits in anonymous classes, copy the chap_04_oop_trait_multiple.php file mentioned in the previous recipe to a new file, chap_04_oop_trait_anonymous_class.php. Remove the definition of the Test class, and replace it with an anonymous class:
$a = new class() {
use IdTrait, NameTrait {
NameTrait::setKeyinsteadofIdTrait;
IdTrait::setKey as setKeyDate;
}
};Remove this line:
$a = new Test();
When you run the code, you will see exactly the same output as shown in the preceding screenshot, except that the class reference will be anonymous:
In this chapter, we will cover the following topics:
In this chapter, we will cover a series of database connectivity recipes that take advantage of the PHP Data Objects (PDO) extension. Common programming problems such as Structured Query Language (SQL) generation, pagination, and tying objects to database tables, will be addressed. Finally, at the end, we will present code that processes secondary lookups in the form of embedded anonymous functions, and using jQuery DataTables to make AJAX requests.
PDO is a highly performant and actively maintained database extension that has a unique advantage over vendor-specific extensions. It has a common Application Programming Interface (API) that is compatible with almost a dozen different Relational Database Management Systems (RDBMS). Learning how to use this extension will save you hours of time trying to master the command subsets of the equivalent individual vendor-specific database extensions.
PDO is subdivided into four main classes, as summarized in the following table:
|
Class |
Functionality |
|---|---|
|
|
Maintains the actual connection to the database, and also handles low-level functionality such as transaction support |
|
| |
|
| |
|
|
PDO instance.$params = [
'host' => 'localhost',
'user' => 'test',
'pwd' => 'password',
'db' => 'php7cookbook'
];
try {
$dsn = sprintf('mysql:host=%s;dbname=%s',
$params['host'], $params['db']);
$pdo = new PDO($dsn, $params['user'], $params['pwd']);
} catch (PDOException $e) {
echo $e->getMessage();
} catch (Throwable $e) {
echo $e->getMessage();
}$params = [
'db' => __DIR__ . '/../data/db/php7cookbook.db.sqlite'
];
$dsn = sprintf('sqlite:' . $params['db']);$params = [
'host' => 'localhost',
'user' => 'test',
'pwd' => 'password',
'db' => 'php7cookbook'
];
$dsn = sprintf('pgsql:host=%s;dbname=%s;user=%s;password=%s',
$params['host'],
$params['db'],
$params['user'],
$params['pwd']);unix_socket, as shown in the following example:$params = [
'host' => 'localhost',
'user' => 'test',
'pwd' => 'password',
'db' => 'php7cookbook',
'sock' => '/var/run/mysqld/mysqld.sock'
];
try {
$dsn = sprintf('mysql:host=%s;dbname=%s;unix_socket=%s',
$params['host'], $params['db'], $params['sock']);
$opts = [PDO::ATTR_ERRMODE => PDO::ERRMODE_EXCEPTION];
$pdo = new PDO($dsn, $params['user'], $params['pwd'], $opts);
} catch (PDOException $e) {
echo $e->getMessage();
} catch (Throwable $e) {
echo $e->getMessage();
}Best practice
Wrap the statement that creates the PDO instance in a try {} catch {} block. Catch a PDOException for database-specific information in case of failure. Catch Throwable for errors or any other exceptions. Set the PDO error mode to PDO::ERRMODE_EXCEPTION for best results. See step 8 for more details about error modes.
In PHP 5, if the PDO object cannot be constructed (for example, when invalid parameters are used), the instance is assigned a value of NULL. In PHP 7, an Exception is thrown. If you wrap the construction of the PDO object in a try {} catch {} block, and the PDO::ATTR_ERRMODE is set to PDO::ERRMODE_EXCEPTION, you can catch and log such errors without having to test for NULL.
PDO::query(). A PDOStatement instance is returned, against which you can fetch results. In this example, we are looking for the first 20 customers sorted by ID:$stmt = $pdo->query( 'SELECT * FROM customer ORDER BY id LIMIT 20');
PDOStatement instance to process results. Set the fetch mode to either PDO::FETCH_NUM or PDO::FETCH_ASSOC to return results in the form of a numeric or associative array. In this example we use a while() loop to process results. When the last result has been fetched, the result is a boolean FALSE, ending the loop:while ($row = $stmt->fetch(PDO::FETCH_ASSOC)) {
printf('%4d | %20s | %5s' . PHP_EOL, $row['id'],
$row['name'], $row['level']);
}PDO fetch operations involve a cursor that defines the direction (that is, forward or reverse) of the iteration. The second argument to PDOStatement::fetch() can be any of the PDO::FETCH_ORI_* constants. Cursor orientations include prior, first, last, absolute, and relative. The default cursor orientation is PDO::FETCH_ORI_NEXT.
PDO::FETCH_OBJ to return results as a stdClass instance. Here you will note that the while() loop takes advantage of the fetch mode, PDO::FETCH_OBJ. Notice that the printf() statement refers to object properties, in contrast with the preceding example, which references array elements:while ($row = $stmt->fetch(PDO::FETCH_OBJ)) {
printf('%4d | %20s | %5s' . PHP_EOL,
$row->id, $row->name, $row->level);
}PDO::FETCH_CLASS. You must also have the class definition available, and PDO::query() should set the class name. As you can see in the following code snippet, we have defined a class called Customer, with public properties $id, $name, and $level. Properties need to be public for the fetch injection to work properly:class Customer
{
public $id;
public $name;
public $level;
}
$stmt = $pdo->query($sql, PDO::FETCH_CLASS, 'Customer');PDOStatement::fetchObject():while ($row = $stmt->fetchObject('Customer')) {
printf('%4d | %20s | %5s' . PHP_EOL,
$row->id, $row->name, $row->level);
}PDO::FETCH_INTO, which is essentially the same as PDO::FETCH_CLASS, but you need an active object instance instead of a class reference. Each iteration through the loop re-populates the same object instance with the current information set. This example assumes the same class Customer as in step 5, with the same database parameters and PDO connections as defined in step 1:$cust = new Customer(); while ($stmt->fetch(PDO::FETCH_INTO)) { printf('%4d | %20s | %5s' . PHP_EOL, $cust->id, $cust->name, $cust->level); }
PDO::ERRMODE_SILENT. You can set the error mode using the PDO::ATTR_ERRMODE key, and either the PDO::ERRMODE_WARNING or the PDO::ERRMODE_EXCEPTION value. The error mode can be specified as the fourth argument to the PDO constructor in the form of an associative array. Alternatively, you can use PDO::setAttribute() on an existing instance.$params = [
'host' => 'localhost',
'user' => 'test',
'pwd' => 'password',
'db' => 'php7cookbook'
];
$dsn = sprintf('mysql:host=%s;dbname=%s', $params['host'], $params['db']);
$sql = 'THIS SQL STATEMENT WILL NOT WORK';PDOStatement instance, the PDO::query() will return a boolean FALSE:$pdo1 = new PDO($dsn, $params['user'], $params['pwd']); $stmt = $pdo1->query($sql); $row = ($stmt) ? $stmt->fetch(PDO::FETCH_ASSOC) : 'No Good';
WARNING using the constructor approach:$pdo2 = new PDO( $dsn, $params['user'], $params['pwd'], [PDO::ATTR_ERRMODE => PDO::ERRMODE_WARNING]);
PDO::prepare() and PDOStatement::execute() instead. The statement is then sent to the database server to be pre-compiled. You can then execute the statement as many times as is warranted, most likely in a loop.PDO::prepare() can be an SQL statement with placeholders in place of actual values. An array of values can then be supplied to PDOStatement::execute(). PDO automatically provides database quoting, which helps safeguard against SQL Injection.Best practice
Any application in which external input (that is, from a form posting) is combined with an SQL statement is subject to an SQL injection attack. All external input must first be properly filtered, validated, and otherwise sanitized. Do not put external input directly into the SQL statement. Instead, use placeholders, and provide the actual (sanitized) values during the execution phase.
ORDER BY from ASC to DESC. This line of code sets up a PDOStatement object requesting a scrollable cursor:$dsn = sprintf('pgsql:charset=UTF8;host=%s;dbname=%s', $params['host'], $params['db']);
$opts = [PDO::ATTR_ERRMODE => PDO::ERRMODE_EXCEPTION];
$pdo = new PDO($dsn, $params['user'], $params['pwd'], $opts);
$sql = 'SELECT * FROM customer '
. 'WHERE balance > :min AND balance < :max '
. 'ORDER BY id LIMIT 20';
$stmt = $pdo->prepare($sql, [PDO::ATTR_CURSOR => PDO::CURSOR_SCROLL]);$stmt->execute(['min' => $min, 'max' => $max]); $row = $stmt->fetch(PDO::FETCH_ASSOC, PDO::FETCH_ORI_LAST); do { printf('%4d | %20s | %5s | %8.2f' . PHP_EOL, $row['id'], $row['name'], $row['level'], $row['balance']); } while ($row = $stmt->fetch(PDO::FETCH_ASSOC, PDO::FETCH_ORI_PRIOR));
$dsn = sprintf('mysql:charset=UTF8;host=%s;dbname=%s', $params['host'], $params['db']);
$opts = [PDO::ATTR_ERRMODE => PDO::ERRMODE_EXCEPTION];
$pdo = new PDO($dsn, $params['user'], $params['pwd'], $opts);
$sql = 'SELECT * FROM customer '
. 'WHERE balance > :min AND balance < :max '
. 'ORDER BY id DESC
. 'LIMIT 20';
$stmt = $pdo->prepare($sql);
while ($row = $stmt->fetch(PDO::FETCH_ASSOC));
printf('%4d | %20s | %5s | %8.2f' . PHP_EOL,
$row['id'],
$row['name'],
$row['level'],
$row['balance']);
} INSERT series of commands into a transactional block:try {
$pdo->beginTransaction();
$sql = "INSERT INTO customer ('"
. implode("','", $fields) . "') VALUES (?,?,?,?,?,?)";
$stmt = $pdo->prepare($sql);
foreach ($data as $row) $stmt->execute($row);
$pdo->commit();
} catch (PDOException $e) {
error_log($e->getMessage());
$pdo->rollBack();
}Application\Database\Connection. Here, we build a connection through the constructor. Alternatively, there is a static factory() method that lets us generate a series of PDO instances:namespace Application\Database;
use Exception;
use PDO;
class Connection
{
const ERROR_UNABLE = 'ERROR: no database connection';
public $pdo;
public function __construct(array $config)
{
if (!isset($config['driver'])) {
$message = __METHOD__ . ' : '
. self::ERROR_UNABLE . PHP_EOL;
throw new Exception($message);
}
$dsn = $this->makeDsn($config);
try {
$this->pdo = new PDO(
$dsn,
$config['user'],
$config['password'],
[PDO::ATTR_ERRMODE => $config['errmode']]);
return TRUE;
} catch (PDOException $e) {
error_log($e->getMessage());
return FALSE;
}
}
public static function factory(
$driver, $dbname, $host, $user,
$pwd, array $options = array())
{
$dsn = $this->makeDsn($config);
try {
return new PDO($dsn, $user, $pwd, $options);
} catch (PDOException $e) {
error_log($e->getMessage);
}
}Connection class is a generic method that can be used to construct a DSN. All we need for this to work is to establish the PDODriver as a prefix, followed by ":". After that, we simply append key/value pairs from our configuration array. Each key/value pair is separated by a semi-colon. We also need to strip off the trailing semi-colon, using substr() with a negative limit for that purpose: public function makeDsn($config)
{
$dsn = $config['driver'] . ':';
unset($config['driver']);
foreach ($config as $key => $value) {
$dsn .= $key . '=' . $value . ';';
}
return substr($dsn, 0, -1);
}
}First of all, you can copy the initial connection code from step 1 into a chap_05_pdo_connect_mysql.php file. For the purposes of this illustration, we will assume you have created a MySQL database called php7cookbook, with a username of cook and a password of book. Next, we send a simple SQL statement to the database using the PDO::query() method. Finally, we use the resulting statement object to fetch results in the form of an associative array. Don't forget to wrap your code in a try {} catch {} block:
<?php
$params = [
'host' => 'localhost',
'user' => 'test',
'pwd' => 'password',
'db' => 'php7cookbook'
];
try {
$dsn = sprintf('mysql:charset=UTF8;host=%s;dbname=%s',
$params['host'], $params['db']);
$pdo = new PDO($dsn, $params['user'], $params['pwd']);
$stmt = $pdo->query(
'SELECT * FROM customer ORDER BY id LIMIT 20');
printf('%4s | %20s | %5s | %7s' . PHP_EOL,
'ID', 'NAME', 'LEVEL', 'BALANCE');
printf('%4s | %20s | %5s | %7s' . PHP_EOL,
'----', str_repeat('-', 20), '-----', '-------');
while ($row = $stmt->fetch(PDO::FETCH_ASSOC)) {
printf('%4d | %20s | %5s | %7.2f' . PHP_EOL,
$row['id'], $row['name'], $row['level'], $row['balance']);
}
} catch (PDOException $e) {
error_log($e->getMessage());
} catch (Throwable $e) {
error_log($e->getMessage());
}Here is the resulting output:
Add the option to the PDO constructor, which sets the error mode to EXCEPTION. Now alter the SQL statement and observe the resulting error message:
$opts = [PDO::ATTR_ERRMODE => PDO::ERRMODE_EXCEPTION];
$pdo = new PDO($dsn, $params['user'], $params['pwd'], $opts);
$stmt = $pdo->query('THIS SQL STATEMENT WILL NOT WORK');You will observe something like this:
Placeholders can be named or positional. Named placeholders are preceded by a colon (:) in the prepared SQL statement, and are references as keys in an associative array provided to
execute(). Positional placeholders are represented as question marks (?) in the prepared SQL statement.
In the following example, named placeholders are used to represent values in a WHERE clause:
try {
$dsn = sprintf('mysql:host=%s;dbname=%s',
$params['host'], $params['db']);
$pdo = new PDO($dsn,
$params['user'],
$params['pwd'],
[PDO::ATTR_ERRMODE => PDO::ERRMODE_EXCEPTION]);
$sql = 'SELECT * FROM customer '
. 'WHERE balance < :val AND level = :level '
. 'ORDER BY id LIMIT 20'; echo $sql . PHP_EOL;
$stmt = $pdo->prepare($sql);
$stmt->execute(['val' => 100, 'level' => 'BEG']);
while ($row = $stmt->fetch(PDO::FETCH_ASSOC)) {
printf('%4d | %20s | %5s | %5.2f' . PHP_EOL,
$row['id'], $row['name'], $row['level'], $row['balance']);
}
} catch (PDOException $e) {
echo $e->getMessage();
} catch (Throwable $e) {
echo $e->getMessage();
}This example shows using positional placeholders in an INSERT operation. Notice that the data to be inserted as the fourth customer includes a potential SQL injection attack. You will also notice that some awareness of the SQL syntax for the database being used is required. In this case, MySQL column names are quoted using back-ticks ('):
$fields = ['name', 'balance', 'email',
'password', 'status', 'level'];
$data = [
['Saleen',0,'saleen@test.com', 'password',0,'BEG'],
['Lada',55.55,'lada@test.com', 'password',0,'INT'],
['Tonsoi',999.99,'tongsoi@test.com','password',1,'ADV'],
['SQL Injection',0.00,'bad','bad',1,
'BEG\';DELETE FROM customer;--'],
];
try {
$dsn = sprintf('mysql:host=%s;dbname=%s',
$params['host'], $params['db']);
$pdo = new PDO($dsn,
$params['user'],
$params['pwd'],
[PDO::ATTR_ERRMODE => PDO::ERRMODE_EXCEPTION]);
$sql = "INSERT INTO customer ('"
. implode("','", $fields)
. "') VALUES (?,?,?,?,?,?)";
$stmt = $pdo->prepare($sql);
foreach ($data as $row) $stmt->execute($row);
} catch (PDOException $e) {
echo $e->getMessage();
} catch (Throwable $e) {
echo $e->getMessage();
}To test the use of a prepared statement with named parameters, modify the SQL statement to add a WHERE clause that checks for customers with a balance less than a certain amount, and a level equal to either BEG, INT, or ADV (that is, beginning, intermediate, or advanced). Instead of using PDO::query(), use PDO::prepare(). Before fetching results, you must then perform PDOStatement::execute(), supplying the values for balance and level:
$sql = 'SELECT * FROM customer '
. 'WHERE balance < :val AND level = :level '
. 'ORDER BY id LIMIT 20';
$stmt = $pdo->prepare($sql);
$stmt->execute(['val' => 100, 'level' => 'BEG']);Here is the resulting output:
Instead of providing parameters when calling PDOStatement::execute(), you could alternatively bind parameters. This allows you to assign variables to placeholders. At the time of execution, the current value of the variable is used.
In this example, we bind the variables $min, $max, and $level to the prepared statement:
$min = 0;
$max = 0;
$level = '';
try {
$dsn = sprintf('mysql:host=%s;dbname=%s', $params['host'], $params['db']);
$opts = [PDO::ATTR_ERRMODE => PDO::ERRMODE_EXCEPTION];
$pdo = new PDO($dsn, $params['user'], $params['pwd'], $opts);
$sql = 'SELECT * FROM customer '
. 'WHERE balance > :min '
. 'AND balance < :max AND level = :level '
. 'ORDER BY id LIMIT 20';
$stmt = $pdo->prepare($sql);
$stmt->bindParam('min', $min);
$stmt->bindParam('max', $max);
$stmt->bindParam('level', $level);
$min = 5000;
$max = 10000;
$level = 'ADV';
$stmt->execute();
showResults($stmt, $min, $max, $level);
$min = 0;
$max = 100;
$level = 'BEG';
$stmt->execute();
showResults($stmt, $min, $max, $level);
} catch (PDOException $e) {
echo $e->getMessage();
} catch (Throwable $e) {
echo $e->getMessage();
}When the values of these variables change, the next execution will reflect the modified criteria.
PHP 7 implements something called a context sensitive lexer. What this means is that words that are normally reserved can be used if the context allows. Thus, when building an object-oriented SQL builder, we can get away with using methods named and, or, not, and so on.
Application\Database\Finder class. In the class, we define methods that match our favorite SQL operations:namespace Application\Database;
class Finder
{
public static $sql = '';
public static $instance = NULL;
public static $prefix = '';
public static $where = array();
public static $control = ['', ''];
// $a == name of table
// $cols = column names
public static function select($a, $cols = NULL)
{
self::$instance = new Finder();
if ($cols) {
self::$prefix = 'SELECT ' . $cols . ' FROM ' . $a;
} else {
self::$prefix = 'SELECT * FROM ' . $a;
}
return self::$instance;
}
public static function where($a = NULL)
{
self::$where[0] = ' WHERE ' . $a;
return self::$instance;
}
public static function like($a, $b)
{
self::$where[] = trim($a . ' LIKE ' . $b);
return self::$instance;
}
public static function and($a = NULL)
{
self::$where[] = trim('AND ' . $a);
return self::$instance;
}
public static function or($a = NULL)
{
self::$where[] = trim('OR ' . $a);
return self::$instance;
}
public static function in(array $a)
{
self::$where[] = 'IN ( ' . implode(',', $a) . ' )';
return self::$instance;
}
public static function not($a = NULL)
{
self::$where[] = trim('NOT ' . $a);
return self::$instance;
}
public static function limit($limit)
{
self::$control[0] = 'LIMIT ' . $limit;
return self::$instance;
}
public static function offset($offset)
{
self::$control[1] = 'OFFSET ' . $offset;
return self::$instance;
}
public static function getSql()
{
self::$sql = self::$prefix
. implode(' ', self::$where)
. ' '
. self::$control[0]
. ' '
. self::$control[1];
preg_replace('/ /', ' ', self::$sql);
return trim(self::$sql);
}
}$instance. This allows us to represent the code using a fluent interface, such as this:$sql = Finder::select('project')->where('priority > 9') ... etc.Copy the code defined precedingly into a Finder.php file in the Application\Database folder. You can then create a chap_05_oop_query_builder.php calling program, which initializes the autoloader defined in Chapter 1, Building a Foundation. You can then run Finder::select() to generate an object from which the SQL string can be rendered:
<?php
require __DIR__ . '/../Application/Autoload/Loader.php';
Application\Autoload\Loader::init(__DIR__ . '/..');
use Application\Database\Finder;
$sql = Finder::select('project')
->where()
->like('name', '%secret%')
->and('priority > 9')
->or('code')->in(['4', '5', '7'])
->and()->not('created_at')
->limit(10)
->offset(20);
echo Finder::getSql();Here is the result of the precding code:
Pagination involves providing a limited subset of the results of a database query. This is usually done for display purposes, but could easily apply to other situations. At first glance, it would seem the LimitIterator class is ideally suited for the purposes of pagination. In cases where the potential result set could be massive; however, LimitIterator is not such an ideal candidate, as you would need to supply the entire result set as an inner iterator, which would most likely exceed memory limitations. The second and third arguments to the LimitIterator class constructor are offset and count. This suggests the pagination solution we will adopt, which is native to SQL: adding LIMIT and OFFSET clauses to a given SQL statement.
Application\Database\Paginate to hold the pagination logic. We add properties to represent values associated with pagination, $sql, $page, and $linesPerPage:namespace Application\Database;
class Paginate
{
const DEFAULT_LIMIT = 20;
const DEFAULT_OFFSET = 0;
protected $sql;
protected $page;
protected $linesPerPage;
}__construct() method that accepts a base SQL statement, the current page number, and the number of lines per page as arguments. We then need to refactor the SQL string modifying or adding the LIMIT and OFFSET clauses.LIMIT and OFFSET are already present in the SQL statement. Finally, we need to revise the statement using lines per page as our LIMIT with the recalculated OFFSET:public function __construct($sql, $page, $linesPerPage)
{
$offset = $page * $linesPerPage;
switch (TRUE) {
case (stripos($sql, 'LIMIT') && strpos($sql, 'OFFSET')) :
// no action needed
break;
case (stripos($sql, 'LIMIT')) :
$sql .= ' LIMIT ' . self::DEFAULT_LIMIT;
break;
case (stripos($sql, 'OFFSET')) :
$sql .= ' OFFSET ' . self::DEFAULT_OFFSET;
break;
default :
$sql .= ' LIMIT ' . self::DEFAULT_LIMIT;
$sql .= ' OFFSET ' . self::DEFAULT_OFFSET;
break;
}
$this->sql = preg_replace('/LIMIT \d+.*OFFSET \d+/Ui',
'LIMIT ' . $linesPerPage . ' OFFSET ' . $offset,
$sql);
}Application\Database\Connection class discussed in the first recipe.paginate() method, which takes a Connection instance as an argument. We also need the PDO fetch mode, and optional prepared statement parameters:use PDOException;
public function paginate(
Connection $connection,
$fetchMode,
$params = array())
{
try {
$stmt = $connection->pdo->prepare($this->sql);
if (!$stmt) return FALSE;
if ($params) {
$stmt->execute($params);
} else {
$stmt->execute();
}
while ($result = $stmt->fetch($fetchMode)) yield $result;
} catch (PDOException $e) {
error_log($e->getMessage());
return FALSE;
} catch (Throwable $e) {
error_log($e->getMessage());
return FALSE;
}
}LIMIT and OFFSET much easier. All we need to do to provide support for Application\Database\Finder is to use the class and modify the __construct() method to check to see if the incoming SQL is an instance of this class: if ($sql instanceof Finder) {
$sql->limit($linesPerPage);
$sql->offset($offset);
$this->sql = $sql::getSql();
} elseif (is_string($sql)) {
switch (TRUE) {
case (stripos($sql, 'LIMIT')
&& strpos($sql, 'OFFSET')) :
// remaining code as shown in bullet #3 above
}
}getSql() method in case we need to confirm that the SQL statement was correctly formed:public function getSql()
{
return $this->sql;
}Copy the preceding code into a Paginate.php file in the Application/Database folder. You can then create a chap_05_pagination.php calling program, which initializes the autoloader defined in Chapter 1, Building a Foundation:
<?php
define('DB_CONFIG_FILE', '/../config/db.config.php');
define('LINES_PER_PAGE', 10);
define('DEFAULT_BALANCE', 1000);
require __DIR__ . '/../Application/Autoload/Loader.php';
Application\Autoload\Loader::init(__DIR__ . '/..');Next, use the Application\Database\Finder, Connection, and Paginate classes, create an instance of Application\Database\Connection, and use Finder to generate SQL:
use Application\Database\ { Finder, Connection, Paginate};
$conn = new Connection(include __DIR__ . DB_CONFIG_FILE);
$sql = Finder::select('customer')->where('balance < :bal');We can now get the page number and balance from $_GET parameters, and create the Paginate object, ending the PHP block:
$page = (int) ($_GET['page'] ?? 0); $bal = (float) ($_GET['balance'] ?? DEFAULT_BALANCE); $paginate = new Paginate($sql::getSql(), $page, LINES_PER_PAGE); ?>
In the output portion of the script, we simply iterate through the pagination using a simple foreach() loop:
<h3><?= $paginate->getSql(); ?></h3>
<hr>
<pre>
<?php
printf('%4s | %20s | %5s | %7s' . PHP_EOL,
'ID', 'NAME', 'LEVEL', 'BALANCE');
printf('%4s | %20s | %5s | %7s' . PHP_EOL,
'----', str_repeat('-', 20), '-----', '-------');
foreach ($paginate->paginate($conn, PDO::FETCH_ASSOC,
['bal' => $bal]) as $row) {
printf('%4d | %20s | %5s | %7.2f' . PHP_EOL,
$row['id'],$row['name'],$row['level'],$row['balance']);
}
printf('%4s | %20s | %5s | %7s' . PHP_EOL,
'----', str_repeat('-', 20), '-----', '-------');
?>
<a href="?page=<?= $page - 1; ?>&balance=<?= $bal ?>">
<< Prev </a>
<a href="?page=<?= $page + 1; ?>&balance=<?= $bal ?>">
Next >></a>
</pre>Here is page 3 of the output, where the balance is less than 1,000:
A very common practice among PHP developers is to create classes that represent database tables. Such classes are often referred to as entity classes, and form the core of the domain model software design pattern.
Application\Entity\Base class. All future entity classes will then extend Base.$mapping (discussed later), and $id (with its corresponding getter and setter):namespace Application\Entity;
class Base
{
protected $id = 0;
protected $mapping = ['id' => 'id'];
public function getId() : int
{
return $this->id;
}
public function setId($id)
{
$this->id = (int) $id;
}
}arrayToEntity() method, which converts an array to an instance of the entity class, and vice versa (entityToArray()). These methods implement a process often referred to as hydration. As these methods should be generic, they are best placed in the Base class.$mapping property is used to translate between database column names and object property names. arrayToEntity() populates values of this object instance from an array. We can define this method as static in case we need to call it outside of an active instance:public static function arrayToEntity($data, Base $instance)
{
if ($data && is_array($data)) {
foreach ($instance->mapping as $dbColumn => $propertyName) {
$method = 'set' . ucfirst($propertyName);
$instance->$method($data[$dbColumn]);
}
return $instance;
}
return FALSE;
}entityToArray() produces an array from current instance property values:public function entityToArray()
{
$data = array();
foreach ($this->mapping as $dbColumn => $propertyName) {
$method = 'get' . ucfirst($propertyName);
$data[$dbColumn] = $this->$method() ?? NULL;
}
return $data;
}customer table. Here is the CREATE statement from a MySQL data dump, which illustrates its data structure:CREATE TABLE 'customer' (
'id' int(11) NOT NULL AUTO_INCREMENT,
'name' varchar(256) CHARACTER SET latin1 COLLATE latin1_general_cs NOT NULL,
'balance' decimal(10,2) NOT NULL,
'email' varchar(250) NOT NULL,
'password' char(16) NOT NULL,
'status' int(10) unsigned NOT NULL DEFAULT '0',
'security_question' varchar(250) DEFAULT NULL,
'confirm_code' varchar(32) DEFAULT NULL,
'profile_id' int(11) DEFAULT NULL,
'level' char(3) NOT NULL,
PRIMARY KEY ('id'),
UNIQUE KEY 'UNIQ_81398E09E7927C74' ('email')
);TABLE_NAME class constant:namespace Application\Entity;
class Customer extends Base
{
const TABLE_NAME = 'customer';
protected $name = '';
protected $balance = 0.0;
protected $email = '';
protected $password = '';
protected $status = '';
protected $securityQuestion = '';
protected $confirmCode = '';
protected $profileId = 0;
protected $level = '';
}protected. In order to access these properties, you will need to design public methods that get and set the properties. Here is a good place to put to use the PHP 7 ability to data-type to the return value.$name and $balance. You can imagine how the remainder of these methods will be defined: public function getName() : string
{
return $this->name;
}
public function setName($name)
{
$this->name = $name;
}
public function getBalance() : float
{
return $this->balance;
}
public function setBalance($balance)
{
$this->balance = (float) $balance;
}
}mapping property, an array of key/value pairs where the key represents the database column name and the value the property name.$securityQuestion, $confirmCode, and $profileId, do not correspond to their equivalent column names, security_question, confirm_code, and profile_id. The $mapping property will ensure that the appropriate translation takes place:protected $mapping = [ 'id' => 'id', 'name' => 'name', 'balance' => 'balance', 'email' => 'email', 'password' => 'password', 'status' => 'status', 'security_question' => 'securityQuestion', 'confirm_code' => 'confirmCode', 'profile_id' => 'profileId', 'level' => 'level' ];
Copy the code from steps 2, 4, and 5 into a Base.php file in the Application/Entity folder. Copy the code from steps 8 through 12 into a Customer.php file, also in the Application/Entity folder. You will then need to create getters and setters for the remaining properties not shown in step 10: email, password, status, securityQuestion, confirmCode, profileId, and level.
You can then create a chap_05_matching_entity_to_table.php calling program, which initializes the autoloader defined in Chapter 1, Building a Foundation, uses the Application\Database\Connection, and the newly created Application\Entity\Customer classes:
<?php
define('DB_CONFIG_FILE', '/../config/db.config.php');
require __DIR__ . '/../Application/Autoload/Loader.php';
Application\Autoload\Loader::init(__DIR__ . '/..');
use Application\Database\Connection;
use Application\Entity\Customer;Next, get a database connection, and use the connection to acquire an associative array of data for one customer at random:
$conn = new Connection(include __DIR__ . DB_CONFIG_FILE); $id = rand(1,79); $stmt = $conn->pdo->prepare( 'SELECT * FROM customer WHERE id = :id'); $stmt->execute(['id' => $id]); $result = $stmt->fetch(PDO::FETCH_ASSOC);
Finally, you can create a new Customer entity instance from the array and use var_dump() to view the result:
$cust = Customer::arrayToEntity($result, new Customer()); var_dump($cust);
Here is the output of the preceding code:
There are many good works that describe the domain model. Probably the most influential is Patterns of Enterprise Application Architecture by Martin Fowler (see http://martinfowler.com/books/eaa.html). There is also a nice study, also available as a free download, entitled Domain Driven Design Quickly by InfoQ (see http://www.infoq.com/minibooks/domain-driven-design-quickly).
Most commercially viable RDBMS systems evolved at a time when procedural programming was at the fore. Imagine the RDBMS world as two dimensional, square, and procedurally oriented. In contrast, entities could be thought of as round, three dimensional, and object oriented. This gives you a picture of what we want to accomplish by tying the results of an RDBMS query into an iteration of entity instances.
Application\Database\CustomerService. The class will accept an Application\Database\Connection instance as an argument:namespace Application\Database;
use Application\Entity\Customer;
class CustomerService
{
protected $connection;
public function __construct(Connection $connection)
{
$this->connection = $connection;
}
}fetchById() method, which takes a customer ID as an argument, and returns a single Application\Entity\Customer instance or boolean FALSE on failure. At first glance, it would seem a no-brainer to simply use PDOStatement::fetchObject() and specify the entity class as an argument:public function fetchById($id)
{
$stmt = $this->connection->pdo
->prepare(Finder::select('customer')
->where('id = :id')::getSql());
$stmt->execute(['id' => (int) $id]);
return $stmt->fetchObject('Application\Entity\Customer');
}The danger here, however, is that fetchObject() actually populates the properties (even if they are protected) before the constructor is called! Accordingly, there is a danger that the constructor could accidentally overwrite values. If you don't define a constructor, or if you can live with this danger, we're done. Otherwise, it starts to get tougher to properly implement the tie between RDBMS query and OOP results.
fetchById() method is to create the object instance first, thereby running its constructor, and setting the fetch mode to PDO::FETCH_INTO, as shown in the following example:public function fetchById($id)
{
$stmt = $this->connection->pdo
->prepare(Finder::select('customer')
->where('id = :id')::getSql());
$stmt->execute(['id' => (int) $id]);
$stmt->setFetchMode(PDO::FETCH_INTO, new Customer());
return $stmt->fetch();
}fetch(), unlike fetchObject(), is not able to overwrite protected properties; the following error message is generated if it tries. This means we will either have to define all properties as public, or consider another approach.private or protected:public function fetchById($id)
{
$stmt = $this->connection->pdo
->prepare(Finder::select('customer')
->where('id = :id')::getSql());
$stmt->execute(['id' => (int) $id]);
return Customer::arrayToEntity(
$stmt->fetch(PDO::FETCH_ASSOC));
}fetchByLevel() method that returns all customers for a given level, in the form of Application\Entity\Customer instances:public function fetchByLevel($level)
{
$stmt = $this->connection->pdo->prepare(
Finder::select('customer')
->where('level = :level')::getSql());
$stmt->execute(['level' => $level]);
while ($row = $stmt->fetch(PDO::FETCH_ASSOC)) {
yield Customer::arrayToEntity($row, new Customer());
}
}save(). Before we can proceed, however, some thought must be given to what value will be returned if an INSERT takes place.INSERT. There is a convenient PDO::lastInsertId() method which, at first glance, would seem to do the trick. Further reading of the documentation reveals, however, that not all database extensions support this feature, and the ones that do are not consistent in their implementation. Accordingly, it would be a good idea to have a unique column other than $id that can be used to uniquely identify the new customer.email column, and thus need to implement a fetchByEmail() service method:public function fetchByEmail($email)
{
$stmt = $this->connection->pdo->prepare(
Finder::select('customer')
->where('email = :email')::getSql());
$stmt->execute(['email' => $email]);
return Customer::arrayToEntity(
$stmt->fetch(PDO::FETCH_ASSOC), new Customer());
}save() method. Rather than distinguish between INSERT and UPDATE, we will architect this method to update if the ID already exists, and otherwise do an insert.save() method, which accepts a Customer entity as an argument, and uses fetchById() to determine if this entry already exists. If it exists, we call an doUpdate() update method; otherwise, we call a doInsert() insert method:public function save(Customer $cust)
{
// check to see if customer ID > 0 and exists
if ($cust->getId() && $this->fetchById($cust->getId())) {
return $this->doUpdate($cust);
} else {
return $this->doInsert($cust);
}
}doUpdate(), which pulls Customer entity object properties into an array, builds an initial SQL statement, and calls a flush() method, which pushes data to the database. We do not want the ID field updated, as it's the primary key. Also we need to specify which row to update, which means appending a WHERE clause:protected function doUpdate($cust)
{
// get properties in the form of an array
$values = $cust->entityToArray();
// build the SQL statement
$update = 'UPDATE ' . $cust::TABLE_NAME;
$where = ' WHERE id = ' . $cust->getId();
// unset ID as we want do not want this to be updated
unset($values['id']);
return $this->flush($update, $values, $where);
}doInsert() method is similar, except that the initial SQL needs to start with INSERT INTO ... and the id array element needs to be unset. The reason for the latter is that we want this property to be auto-generated by the database. If this is successful, we use our newly defined fetchByEmail() method to look up the new customer and return a completed instance:protected function doInsert($cust)
{
$values = $cust->entityToArray();
$email = $cust->getEmail();
unset($values['id']);
$insert = 'INSERT INTO ' . $cust::TABLE_NAME . ' ';
if ($this->flush($insert, $values)) {
return $this->fetchByEmail($email);
} else {
return FALSE;
}
}flush(), which does the actual preparation and execution:protected function flush($sql, $values, $where = '')
{
$sql .= ' SET ';
foreach ($values as $column => $value) {
$sql .= $column . ' = :' . $column . ',';
}
// get rid of trailing ','
$sql = substr($sql, 0, -1) . $where;
$success = FALSE;
try {
$stmt = $this->connection->pdo->prepare($sql);
$stmt->execute($values);
$success = TRUE;
} catch (PDOException $e) {
error_log(__METHOD__ . ':' . __LINE__ . ':'
. $e->getMessage());
$success = FALSE;
} catch (Throwable $e) {
error_log(__METHOD__ . ':' . __LINE__ . ':'
. $e->getMessage());
$success = FALSE;
}
return $success;
}remove() method, which deletes a customer from the database. Again, as with the save() method defined previously, we use fetchById() to ensure the operation was successful:public function remove(Customer $cust)
{
$sql = 'DELETE FROM ' . $cust::TABLE_NAME . ' WHERE id = :id';
$stmt = $this->connection->pdo->prepare($sql);
$stmt->execute(['id' => $cust->getId()]);
return ($this->fetchById($cust->getId())) ? FALSE : TRUE;
}Copy the code described in steps 1 to 5 into a CustomerService.php file in the Application/Database folder. Define a chap_05_entity_to_query.php calling program. Have the calling program initialize the autoloader, using the appropriate classes:
<?php
define('DB_CONFIG_FILE', '/../config/db.config.php');
require __DIR__ . '/../Application/Autoload/Loader.php';
Application\Autoload\Loader::init(__DIR__ . '/..');
use Application\Database\Connection;
use Application\Database\CustomerService;You can now create an instance of the service, and fetch a single customer at random. The service will then return a customer entity as a result:
// get service instance $service = new CustomerService(new Connection(include __DIR__ . DB_CONFIG_FILE)); echo "\nSingle Result\n"; var_dump($service->fetchById(rand(1,79)));
Here is the output:
Now copy the code shown in steps 6 to 15 into the service class. Add the data to insert to the chap_05_entity_to_query.php calling program. We then generate a Customer entity instance using this data:
// sample data $data = [ 'name' => 'Doug Bierer', 'balance' => 326.33, 'email' => 'doug' . rand(0,999) . '@test.com', 'password' => 'password', 'status' => 1, 'security_question' => 'Who\'s on first?', 'confirm_code' => 12345, 'level' => 'ADV' ]; // create new Customer $cust = Customer::arrayToEntity($data, new Customer());
We can then examine the ID before and after the call to save():
echo "\nCustomer ID BEFORE Insert: {$cust->getId()}\n";
$cust = $service->save($cust);
echo "Customer ID AFTER Insert: {$cust->getId()}\n";Finally, we modify the balance, and again call save(), viewing the results:
echo "Customer Balance BEFORE Update: {$cust->getBalance()}\n";
$cust->setBalance(999.99);
$service->save($cust);
echo "Customer Balance AFTER Update: {$cust->getBalance()}\n";
var_dump($cust);Here is the output from the calling program:
For more information on the relational model, please refer to https://en.wikipedia.org/wiki/Relational_model. For more information on RDBMS, please refer to https://en.wikipedia.org/wiki/Relational_database_management_system. For information on how PDOStatement::fetchObject() inserts property values even before the constructor, have a look at the comment by "rasmus at mindplay dot dk" in the php.net documentation reference on fetchObject() (http://php.net/manual/en/pdostatement.fetchobject.php).
On the road towards implementing relationships between entity classes, let us first take a look at how we can embed the code needed to perform a secondary lookup. An example of such a lookup is when displaying information on a customer, have the view logic perform a second lookup that gets a list of purchases for that customer.
The advantage of this approach is that processing is deferred until the actual view logic is executed. This will ultimately smooth the performance curve, with the workload distributed more evenly between the initial query for customer information, and the later query for purchase information. Another benefit is that a massive JOIN is avoided with its inherent redundant data.
PDO::FETCH_ASSOC. We will also continue to use the Application\Database\Connection class discussed in Chapter 1, Building a Foundation:function findCustomerById($id, Connection $conn)
{
$stmt = $conn->pdo->query(
'SELECT * FROM customer WHERE id = ' . (int) $id);
$results = $stmt->fetch(PDO::FETCH_ASSOC);
return $results;
}customer and product tables are linked. As you can see from the CREATE statement for this table, the customer_id and product_id foreign keys form the relationships:CREATE TABLE 'purchases' (
'id' int(11) NOT NULL AUTO_INCREMENT,
'transaction' varchar(8) NOT NULL,
'date' datetime NOT NULL,
'quantity' int(10) unsigned NOT NULL,
'sale_price' decimal(8,2) NOT NULL,
'customer_id' int(11) DEFAULT NULL,
'product_id' int(11) DEFAULT NULL,
PRIMARY KEY ('id'),
KEY 'IDX_C3F3' ('customer_id'),
KEY 'IDX_665A' ('product_id'),
CONSTRAINT 'FK_665A' FOREIGN KEY ('product_id')
REFERENCES 'products' ('id'),
CONSTRAINT 'FK_C3F3' FOREIGN KEY ('customer_id')
REFERENCES 'customer' ('id')
);findCustomerById() function, defining the secondary lookup in the form of an anonymous function, which can then be executed in a view script. The anonymous function is assigned to the $results['purchases'] element:function findCustomerById($id, Connection $conn)
{
$stmt = $conn->pdo->query(
'SELECT * FROM customer WHERE id = ' . (int) $id);
$results = $stmt->fetch(PDO::FETCH_ASSOC);
if ($results) {
$results['purchases'] =
// define secondary lookup
function ($id, $conn) {
$sql = 'SELECT * FROM purchases AS u '
. 'JOIN products AS r '
. 'ON u.product_id = r.id '
. 'WHERE u.customer_id = :id '
. 'ORDER BY u.date';
$stmt = $conn->pdo->prepare($sql);
$stmt->execute(['id' => $id]);
while ($row = $stmt->fetch(PDO::FETCH_ASSOC)) {
yield $row;
}
};
}
return $results;
}$results array, in the view logic, all we need to do is to loop through the return value of the anonymous function. In this example, we retrieve customer information at random:$result = findCustomerById(rand(1,79), $conn);
<table>
<tr>
<th>Transaction</th><th>Date</th><th>Qty</th>
<th>Price</th><th>Product</th>
</tr>
<?php
foreach ($result['purchases']($result['id'], $conn) as $purchase) : ?>
<tr>
<td><?= $purchase['transaction'] ?></td>
<td><?= $purchase['date'] ?></td>
<td><?= $purchase['quantity'] ?></td>
<td><?= $purchase['sale_price'] ?></td>
<td><?= $purchase['title'] ?></td>
</tr>
<?php endforeach; ?>
</table>Create a chap_05_secondary_lookups.php calling program and insert the code needed to create an instance of Application\Database\Connection:
<?php
define('DB_CONFIG_FILE', '/../config/db.config.php');
include __DIR__ . '/../Application/Database/Connection.php';
use Application\Database\Connection;
$conn = new Connection(include __DIR__ . DB_CONFIG_FILE);Next, add the findCustomerById()function shown in step 3. You can then pull information for a random customer, ending the PHP part of the calling program:
function findCustomerById($id, Connection $conn)
{
// code shown in bullet #3 above
}
$result = findCustomerById(rand(1,79), $conn);
?>For the view logic, you can display core customer information as shown in several of the preceding recipes:
<h1><?= $result['name'] ?></h1> <div class="row"> <div class="left">Balance</div> <div class="right"><?= $result['balance']; ?></div> </div> <!-- etc.l -->
You can display information on purchases like so:
<table>
<tr><th>Transaction</th><th>Date</th><th>Qty</th>
<th>Price</th><th>Product</th></tr>
<?php
foreach ($result['purchases']($result['id'], $conn) as $purchase) : ?>
<tr>
<td><?= $purchase['transaction'] ?></td>
<td><?= $purchase['date'] ?></td>
<td><?= $purchase['quantity'] ?></td>
<td><?= $purchase['sale_price'] ?></td>
<td><?= $purchase['title'] ?></td>
</tr>
<?php endforeach; ?>
</table>The critical piece is that the secondary lookup is performed as part of the view logic by calling the embedded anonymous function, $result['purchases']($result['id'], $conn). Here is the output:
Another approach to secondary lookups is to have the frontend generate the request. In this recipe, we will make a slight modification to the secondary lookup code presented in the preceding recipe, Embedding secondary lookups into QueryResults. In the previous recipe, even though the view logic is performing the lookup, all processing is still done on the server. When using jQuery DataTables, however, the secondary lookup is actually performed directly by the client, in the form of an Asynchronous JavaScript and XML (AJAX) request issued by the browser.
chap_05_jquery_datatables_php_lookups_ajax.php. It looks for a $_GET parameter, id. Notice that the SELECT statement is very specific as to which columns are delivered. You will also note that the fetch mode has been changed to PDO::FETCH_NUM. You might also notice that the last line takes the results and assigns it to a data key in a JSON-encoded array.$id = $_GET['id'] ?? 0; sql = 'SELECT u.transaction,u.date, u.quantity,u.sale_price,r.title ' . 'FROM purchases AS u ' . 'JOIN products AS r ' . 'ON u.product_id = r.id ' . 'WHERE u.customer_id = :id'; $stmt = $conn->pdo->prepare($sql); $stmt->execute(['id' => (int) $id]); $results = array(); while ($row = $stmt->fetch(PDO::FETCH_NUM)) { $results[] = $row; } echo json_encode(['data' => $results]);
function findCustomerById($id, Connection $conn)
{
$stmt = $conn->pdo->query(
'SELECT * FROM customer WHERE id = ' . (int) $id);
$results = $stmt->fetch(PDO::FETCH_ASSOC);
return $results;
}jquery-1.12.0.min.js) and DataTables (jquery.dataTables.js). We've also added a convenient stylesheet associated with DataTables, jquery.dataTables.css:<!DOCTYPE html>
<head>
<script src="https://code.jquery.com/jquery-1.12.0.min.js">
</script>
<script type="text/javascript"
charset="utf8"
src="//cdn.datatables.net/1.10.11/js/jquery.dataTables.js">
</script>
<link rel="stylesheet"
type="text/css"
href="//cdn.datatables.net/1.10.11/css/jquery.dataTables.css">
</head>ready function, which associates a table with DataTables. In this case, we assign an id attribute of customerTable to the table element that will be assigned to DataTables. You'll also notice that we specify the AJAX data source as the script defined in step 1, chap_05_jquery_datatables_php_lookups_ajax.php. As we have the $id available, this is appended to the data source URL:<script>
$(document).ready(function() {
$('#customerTable').DataTable(
{ "ajax": '/chap_05_jquery_datatables_php_lookups_ajax.php?id=<?= $id ?>'
});
} );
</script>id attribute matches the one specified in the preceding code. We also need to define headers that will match the data presented in response to the AJAX request:<table id="customerTable" class="display" cellspacing="0" width="100%">
<thead>
<tr>
<th>Transaction</th>
<th>Date</th>
<th>Qty</th>
<th>Price</th>
<th>Product</th>
</tr>
</thead>
</table>Create a chap_05_jquery_datatables_php_lookups_ajax.php script, which will respond to an AJAX request. Inside, place the code to initialize auto-loading and create a Connection instance. You can then append the code shown in step 2 of the preceding recipe:
<?php
define('DB_CONFIG_FILE', '/../config/db.config.php');
include __DIR__ . '/../Application/Database/Connection.php';
use Application\Database\Connection;
$conn = new Connection(include __DIR__ . DB_CONFIG_FILE);Next, create a chap_05_jquery_datatables_php_lookups.php calling program that will pull information on a random customer. Add the function described in step 3 of the preceding code:
<?php
define('DB_CONFIG_FILE', '/../config/db.config.php');
include __DIR__ . '/../Application/Database/Connection.php';
use Application\Database\Connection;
$conn = new Connection(include __DIR__ . DB_CONFIG_FILE);
// add function findCustomerById() here
$id = random_int(1,79);
$result = findCustomerById($id, $conn);
?>The calling program will also contain the view logic that imports the minimum JavaScript to implement jQuery DataTables. You can add the code shown in step 3 of the preceding code. Then, add the document ready function and the display logic shown in steps 5 and 6. Here is the output:
For more information on jQuery, please visit their website at https://jquery.com/. To read about the DataTables plugin to jQuery, refer to this article at https://www.datatables.net/. Zero configuration data tables are discussed at https://datatables.net/examples/basic_init/zero_configuration.html. For more information on AJAX sourced data, have a look at https://datatables.net/examples/data_sources/ajax.html.
In this chapter, we will cover the following topics:
$_POST filters$_POST validatorsIn this chapter, we will show you how to build classes that generate HTML form elements. The generic element generator can be used for text, text areas, passwords, and similar HTML input types. After that, we will show variations that allow you to pre-configure the element with an array of values. The form factory recipe will bring all these generators together, allowing you to render an entire form using a single configuration array. Finally, we introduce recipes that allow filtering and the validation of incoming $_POST data.
It's pretty easy to create a function that simply outputs a form input tag such as <input type="text" name="whatever" >. In order to make a form generator generically useful, however, we need to think about the bigger picture. Here are some other considerations over and above the basic input tag:
input tag and its associated HTML attributes<div> tag, or an HTML table <td> tagApplication\Form\Generic class. This will also later serve as a base class for specialized form elements:namespace Application\Form;
class Generic
{
// some code ...
}const ROW = 'row'; const FORM = 'form'; const INPUT = 'input'; const LABEL = 'label'; const ERRORS = 'errors'; const TYPE_FORM = 'form'; const TYPE_TEXT = 'text'; const TYPE_EMAIL = 'email'; const TYPE_RADIO = 'radio'; const TYPE_SUBMIT = 'submit'; const TYPE_SELECT = 'select'; const TYPE_PASSWORD = 'password'; const TYPE_CHECKBOX = 'checkbox'; const DEFAULT_TYPE = self::TYPE_TEXT; const DEFAULT_WRAPPER = 'div';
$name and $type, as we cannot effectively use the element without these attributes. The other constructor arguments are optional. Furthermore, in order to base one form element on another, we include a provision whereby the second argument, $type, can alternatively be an instance of Application\Form\Generic, in which case we simply run the getters (discussed later) to populate properties:protected $name;
protected $type = self::DEFAULT_TYPE;
protected $label = '';
protected $errors = array();
protected $wrappers;
protected $attributes; // HTML form attributes
protected $pattern = '<input type="%s" name="%s" %s>';
public function __construct($name,
$type,
$label = '',
array $wrappers = array(),
array $attributes = array(),
array $errors = array())
{
$this->name = $name;
if ($type instanceof Generic) {
$this->type = $type->getType();
$this->label = $type->getLabelValue();
$this->errors = $type->getErrorsArray();
$this->wrappers = $type->getWrappers();
$this->attributes = $type->getAttributes();
} else {
$this->type = $type ?? self::DEFAULT_TYPE;
$this->label = $label;
$this->errors = $errors;
$this->attributes = $attributes;
if ($wrappers) {
$this->wrappers = $wrappers;
} else {
$this->wrappers[self::INPUT]['type'] =
self::DEFAULT_WRAPPER;
$this->wrappers[self::LABEL]['type'] =
self::DEFAULT_WRAPPER;
$this->wrappers[self::ERRORS]['type'] =
self::DEFAULT_WRAPPER;
}
}
$this->attributes['id'] = $name;
}getWrapperPattern() method, which will produce the appropriate wrapping tags for the label, input, and error display.<div>, and its attributes include ['class' => 'label'], this method will return a sprintf() format pattern that looks like this: <div class="label">%s</div>. The final HTML produced for the label, for example, would then replace %s.getWrapperPattern() method might look:public function getWrapperPattern($type)
{
$pattern = '<' . $this->wrappers[$type]['type'];
foreach ($this->wrappers[$type] as $key => $value) {
if ($key != 'type') {
$pattern .= ' ' . $key . '="' . $value . '"';
}
}
$pattern .= '>%s</' . $this->wrappers[$type]['type'] . '>';
return $pattern;
}getLabel() method. All this method needs to do is to plug the label into the wrapper using sprintf():public function getLabel()
{
return sprintf($this->getWrapperPattern(self::LABEL),
$this->label);
}input tag, we need a way to assemble the attributes. Fortunately, this is easily accomplished as long as they are supplied to the constructor in the form of an associative array. All we need to do, in this case, is to define a getAttribs() method that produces a string of key-value pairs separated by a space. We return the final value using trim() to remove excess spaces.value or href attribute, for security reasons we should escape the values on the assumption that they are, or could be, user-supplied (and therefore suspect). Accordingly, we need to add an if statement that checks and then uses htmlspecialchars() or urlencode():public function getAttribs()
{
foreach ($this->attributes as $key => $value) {
$key = strtolower($key);
if ($value) {
if ($key == 'value') {
if (is_array($value)) {
foreach ($value as $k => $i)
$value[$k] = htmlspecialchars($i);
} else {
$value = htmlspecialchars($value);
}
} elseif ($key == 'href') {
$value = urlencode($value);
}
$attribs .= $key . '="' . $value . '" ';
} else {
$attribs .= $key . ' ';
}
}
return trim($attribs);
}getInputOnly(), produces only the HTML input tag. The second method, getInputWithWrapper(), produces the input embedded in a wrapper. The reason for the split is that when creating spin-off classes, such as a class to generate radio buttons, we will not need the wrapper:public function getInputOnly()
{
return sprintf($this->pattern, $this->type, $this->name,
$this->getAttribs());
}
public function getInputWithWrapper()
{
return sprintf($this->getWrapperPattern(self::INPUT),
$this->getInputOnly());
}<ul><li>error 1</li><li>error 2</li></ul> and so on:public function getErrors()
{
if (!$this->errors || count($this->errors == 0)) return '';
$html = '';
$pattern = '<li>%s</li>';
$html .= '<ul>';
foreach ($this->errors as $error)
$html .= sprintf($pattern, $error);
$html .= '</ul>';
return sprintf($this->getWrapperPattern(self::ERRORS), $html);
}public function setSingleAttribute($key, $value)
{
$this->attributes[$key] = $value;
}
public function addSingleError($error)
{
$this->errors[] = $error;
}$pattern is <input type="%s" name="%s" %s>. For certain tags (for example, select and form tags), we will need to set this property to a different value:public function setPattern($pattern)
{
$this->pattern = $pattern;
}
public function setType($type)
{
$this->type = $type;
}
public function getType()
{
return $this->type;
}
public function addSingleError($error)
{
$this->errors[] = $error;
}
// define similar get and set methods
// for name, label, wrappers, errors and attributespublic function getLabelValue()
{
return $this->label;
}
public function getErrorsArray()
{
return $this->errors;
}Be sure to copy all the preceding code into a single Application\Form\Generic class. You can then define a chap_06_form_element_generator.php calling script that sets up autoloading and anchors the new class:
<?php require __DIR__ . '/../Application/Autoload/Loader.php'; Application\Autoload\Loader::init(__DIR__ . '/..'); use Application\Form\Generic;
Next, define the wrappers. For illustration, we'll use HTML table data and header tags. Note that the label uses TH, whereas input and errors use TD:
$wrappers = [ Generic::INPUT => ['type' => 'td', 'class' => 'content'], Generic::LABEL => ['type' => 'th', 'class' => 'label'], Generic::ERRORS => ['type' => 'td', 'class' => 'error'] ];
You can now define an email element by passing parameters to the constructor:
$email = new Generic('email', Generic::TYPE_EMAIL, 'Email', $wrappers,
['id' => 'email',
'maxLength' => 128,
'title' => 'Enter address',
'required' => '']);Alternatively, define the password element using setters:
$password = new Generic('password', $email);
$password->setType(Generic::TYPE_PASSWORD);
$password->setLabel('Password');
$password->setAttributes(['id' => 'password',
'title' => 'Enter your password',
'required' => '']);Lastly, be sure to define a submit button:
$submit = new Generic('submit',
Generic::TYPE_SUBMIT,
'Login',
$wrappers,
['id' => 'submit','title' => 'Click to login','value' => 'Click Here']);The actual display logic might look like this:
<div class="container">
<!-- Login Form -->
<h1>Login</h1>
<form name="login" method="post">
<table id="login" class="display"
cellspacing="0" width="100%">
<tr><?= $email->render(); ?></tr>
<tr><?= $password->render(); ?></tr>
<tr><?= $submit->render(); ?></tr>
<tr>
<td colspan=2>
<br>
<?php var_dump($_POST); ?>
</td>
</tr>
</table>
</form>
</div>Here is the actual output:
A radio button element generator will share similarities with the generic HTML form element generator. As with any generic element, a set of radio buttons needs the ability to display an overall label and errors. There are two major differences, however:
Application\Form\Element\Radio class that extends Application\Form\Generic:namespace Application\Form\Element; use Application\Form\Generic; class Radio extends Generic { // code }
spacer, which will be placed between the radio button and its label. We also need to decide whether to place the radio button label before or after the actual button, thus, we use the $after flag. If we need a default, or if we are re-displaying existing form data, we need a way of designating the selected key. Finally, we need an array of options from which we will populate the list of buttons:const DEFAULT_AFTER = TRUE;
const DEFAULT_SPACER = '&nbps;';
const DEFAULT_OPTION_KEY = 0;
const DEFAULT_OPTION_VALUE = 'Choose';
protected $after = self::DEFAULT_AFTER;
protected $spacer = self::DEFAULT_SPACER;
protected $options = array();
protected $selectedKey = DEFAULT_OPTION_KEY;Application\Form\Generic, we have the option of expanding the __construct() method, or, alternatively, simply defining a method that can be used to set specific options. For this illustration, we have chosen the latter course.$this->options is populated, the first parameter ($options) is defined as mandatory (without a default). All other parameters are optional.public function setOptions(array $options,
$selectedKey = self::DEFAULT_OPTION_KEY,
$spacer = self::DEFAULT_SPACER,
$after = TRUE)
{
$this->after = $after;
$this->spacer = $spacer;
$this->options = $options;
$this->selectedKey = $selectedKey;
} getInputOnly() method.id attribute into an independent variable, $baseId, and later combine it with $count so that each id attribute is unique. If the option associated with the selected key is defined, it is assigned as the value; otherwise, we use the default:public function getInputOnly()
{
$count = 1;
$baseId = $this->attributes['id'];foreach() loop we check to see if the key is the one selected. If so, the checked attribute is added for that radio button. We then call the parent class getInputOnly() method to return the HTML for each button. Note that the value attribute of the input element is the options array key. The button label is the options array element value:foreach ($this->options as $key => $value) {
$this->attributes['id'] = $baseId . $count++;
$this->attributes['value'] = $key;
if ($key == $this->selectedKey) {
$this->attributes['checked'] = '';
} elseif (isset($this->attributes['checked'])) {
unset($this->attributes['checked']);
}
if ($this->after) {
$html = parent::getInputOnly() . $value;
} else {
$html = $value . parent::getInputOnly();
}
$output .= $this->spacer . $html;
}
return $output;
}Copy the preceding code into a new Radio.php file in the Application/Form/Element folder. You can then define a chap_06_form_element_radio.php calling script that sets up autoloading and anchors the new class:
<?php require __DIR__ . '/../Application/Autoload/Loader.php'; Application\Autoload\Loader::init(__DIR__ . '/..'); use Application\Form\Generic; use Application\Form\Element\Radio;
Next, define the wrappers using the $wrappers array defined in the previous recipe.
Then you can define a $status array and create an element instance by passing parameters to the constructor:
$statusList = [
'U' => 'Unconfirmed',
'P' => 'Pending',
'T' => 'Temporary Approval',
'A' => 'Approved'
];
$status = new Radio('status',
Generic::TYPE_RADIO,
'Status',
$wrappers,
['id' => 'status']);Now you can see if there is any status input from $_GET and set the options. Any input will become the selected key. Otherwise, the selected key is the default:
$checked = $_GET['status'] ?? 'U'; $status->setOptions($statusList, $checked, '<br>', TRUE);
Lastly, don't forget to define a submit button:
$submit = new Generic('submit',
Generic::TYPE_SUBMIT,
'Process',
$wrappers,
['id' => 'submit','title' =>
'Click to process','value' => 'Click Here']);The display logic might look like this:
<form name="status" method="get">
<table id="status" class="display" cellspacing="0" width="100%">
<tr><?= $status->render(); ?></tr>
<tr><?= $submit->render(); ?></tr>
<tr>
<td colspan=2>
<br>
<pre><?php var_dump($_GET); ?></pre>
</td>
</tr>
</table>
</form>Here is the actual output:
Generating an HTML single select element is similar to the process of generating radio buttons. The tags are structured differently, however, in that both a SELECT tag and a series of OPTION tags need to be generated.
Application\Form\Element\Select class that extends Application\Form\Generic.Generic rather than Radio is because the structuring of the element is entirely different:namespace Application\Form\Element;
use Application\Form\Generic;
class Select extends Generic
{
// code
}Application\Form\Generic. Unlike radio buttons or checkboxes, there is no need to account for spacers or the placement of the selected text:const DEFAULT_OPTION_KEY = 0; const DEFAULT_OPTION_VALUE = 'Choose'; protected $options; protected $selectedKey = DEFAULT_OPTION_KEY;
$selectedKey property could be either a string or an array. Accordingly, we do not add a type hint for this property. It is important, however, that we identify whether or not the multiple attribute has been set. This can be obtained from a $this->attributes property via inheritance from the parent class.multiple attribute has been set, it's important to formulate the name attribute as an array. Accordingly, we would append [] to the name if this were the case:public function setOptions(array $options, $selectedKey = self::DEFAULT_OPTION_KEY)
{
$this->options = $options;
$this->selectedKey = $selectedKey;
if (isset($this->attributes['multiple'])) {
$this->name .= '[]';
}
}getInputOnly() method, we need to define a method to generate the select tag. We then return the final HTML using sprintf(), using $pattern, $name, and the return value of getAttribs() as arguments.$pattern with <select name="%s" %s>. We then loop through the attributes, adding them as key-value pairs with spaces in between:protected function getSelect()
{
$this->pattern = '<select name="%s" %s> ' . PHP_EOL;
return sprintf($this->pattern, $this->name,
$this->getAttribs());
}option tags that will be associated with the select tag.$this->options array represents the return value, whereas the value part of the array represents the text that will appear on screen. If $this->selectedKey is in array form, we check to see if the value is in the array. Otherwise, we assume $this-> selectedKey is a string and we simply determine if it is equal to the key. If the selected key matches, we add the selected attribute:protected function getOptions()
{
$output = '';
foreach ($this->options as $key => $value) {
if (is_array($this->selectedKey)) {
$selected = (in_array($key, $this->selectedKey))
? ' selected' : '';
} else {
$selected = ($key == $this->selectedKey)
? ' selected' : '';
}
$output .= '<option value="' . $key . '"'
. $selected . '>'
. $value
. '</option>';
}
return $output;
}getInputOnly() method.getSelect() and getOptions() methods described in the preceding code. We also need to add the closing </select> tag:public function getInputOnly()
{
$output = $this->getSelect();
$output .= $this->getOptions();
$output .= '</' . $this->getType() . '>';
return $output;
}Copy the code described above into a new Select.php file in the Application/Form/Element folder. Then define a chap_06_form_element_select.php calling script that sets up autoloading and anchors the new class:
<?php require __DIR__ . '/../Application/Autoload/Loader.php'; Application\Autoload\Loader::init(__DIR__ . '/..'); use Application\Form\Generic; use Application\Form\Element\Select;
Next, define the wrappers using the array $wrappers defined in the first recipe. You can also use the $statusList array defined in the Creating an HTML radio element generator recipe. You can then create instances of SELECT elements. The first instance is single select, and the second is multiple:
$status1 = new Select('status1',
Generic::TYPE_SELECT,
'Status 1',
$wrappers,
['id' => 'status1']);
$status2 = new Select('status2',
Generic::TYPE_SELECT,
'Status 2',
$wrappers,
['id' => 'status2',
'multiple' => '',
'size' => '4']);See if there is any status input from $_GET and set the options. Any input will become the selected key. Otherwise, the selected key is the default. As you will recall, the second instance is multiple select, so the value obtained from $_GET and the default setting should both be in the form of an array:
$checked1 = $_GET['status1'] ?? 'U'; $checked2 = $_GET['status2'] ?? ['U']; $status1->setOptions($statusList, $checked1); $status2->setOptions($statusList, $checked2);
Lastly, be sure to define a submit button (as shown in the Creating a generic form element generator recipe of this chapter).
The actual display logic is identical to the radio button recipe, except that we need to render two separate HTML select instances:
<form name="status" method="get">
<table id="status" class="display" cellspacing="0" width="100%">
<tr><?= $status1->render(); ?></tr>
<tr><?= $status2->render(); ?></tr>
<tr><?= $submit->render(); ?></tr>
<tr>
<td colspan=2>
<br>
<pre>
<?php var_dump($_GET); ?>
</pre>
</td>
</tr>
</table>
</form>Here is the actual output:
Also, you can see how the elements appear in the view source page:
The purpose of a form factory is to generate a usable form object from a single configuration array. The form object should have the ability to retrieve the individual elements it contains so that output can be generated.
Application\Form\Factory to contain the factory code. It will have only one property, $elements, with a getter:namespace Application\Form;
class Factory
{
protected $elements;
public function getElements()
{
return $this->elements;
}
// remaining code
}Factory instance, with an $elements property. This property would be an array of Application\Form\Generic or Application\Form\Element classes.generate() method. This will cycle through the configuration array, creating the appropriate Application\Form\Generic or Application\Form\Element\* objects, which in turn will be stored in the $elements array. The new method will accept the configuration array as an argument. It is convenient to define this method as static so that we can generate as many instances as are needed using different blocks of configuration.Application\Form\Factory, and then we start looping through the configuration array:public static function generate(array $config)
{
$form = new self();
foreach ($config as $key => $p) {Application\Form\Generic class:$p['errors'] = $p['errors'] ?? array(); $p['wrappers'] = $p['wrappers'] ?? array(); $p['attributes'] = $p['attributes'] ?? array();
$elements: $form->elements[$key] = new $p['class']
(
$key,
$p['type'],
$p['label'],
$p['wrappers'],
$p['attributes'],
$p['errors']
);options parameter is set, we extract the array values into variables using list(). We then test the element type using switch() and run setOptions() with the appropriate number of parameters: if (isset($p['options'])) {
list($a,$b,$c,$d) = $p['options'];
switch ($p['type']) {
case Generic::TYPE_RADIO :
case Generic::TYPE_CHECKBOX :
$form->elements[$key]->setOptions($a,$b,$c,$d);
break;
case Generic::TYPE_SELECT :
$form->elements[$key]->setOptions($a,$b);
break;
default :
$form->elements[$key]->setOptions($a,$b);
break;
}
}
}return $form; }
render() method. The view logic might look like this:<form name="status" method="get">
<table id="status" class="display" cellspacing="0" width="100%">
<?php foreach ($form->getElements() as $element) : ?>
<?php echo $element->render(); ?>
<?php endforeach; ?>
</table>
</form>Form class under Application\Form\Element:namespace Application\Form\Element;
class Form extends Generic
{
public function getInputOnly()
{
$this->pattern = '<form name="%s" %s> ' . PHP_EOL;
return sprintf($this->pattern, $this->name,
$this->getAttribs());
}
public function closeTag()
{
return '</' . $this->type . '>';
}
}Application\Form\Factory class, we now need to define a simple method that returns a sprintf() wrapper pattern that will serve as an envelope for input. As an example, if the wrapper is div with an attribute class="test" we would produce this pattern: <div class="test">%s</div>. Our content would then be substituted in place of %s by the sprintf() function:protected function getWrapperPattern($wrapper)
{
$type = $wrapper['type'];
unset($wrapper['type']);
$pattern = '<' . $type;
foreach ($wrapper as $key => $value) {
$pattern .= ' ' . $key . '="' . $value . '"';
}
$pattern .= '>%s</' . $type . '>';
return $pattern;
}sprintf() patterns for each form row. We then loop through the elements, render each one, and wrap the output in the row pattern. Next, we generate an Application\Form\Element\Form instance. We then retrieve the form wrapper sprintf() pattern and check the form_tag_inside_wrapper flag, which tells us whether we need to place the form tag inside or outside the form wrapper:public static function render($form, $formConfig)
{
$rowPattern = $form->getWrapperPattern(
$formConfig['row_wrapper']);
$contents = '';
foreach ($form->getElements() as $element) {
$contents .= sprintf($rowPattern, $element->render());
}
$formTag = new Form($formConfig['name'],
Generic::TYPE_FORM,
'',
array(),
$formConfig['attributes']);
$formPattern = $form->getWrapperPattern(
$formConfig['form_wrapper']);
if (isset($formConfig['form_tag_inside_wrapper'])
&& !$formConfig['form_tag_inside_wrapper']) {
$formPattern = '%s' . $formPattern . '%s';
return sprintf($formPattern, $formTag->getInputOnly(),
$contents, $formTag->closeTag());
} else {
return sprintf($formPattern, $formTag->getInputOnly()
. $contents . $formTag->closeTag());
}
}Referring to the preceding code, create the Application\Form\Factory and Application\Form\Element\Form classes.
Next, you can define a chap_06_form_factor.php calling script that sets up autoloading and anchors the new class:
<?php require __DIR__ . '/../Application/Autoload/Loader.php'; Application\Autoload\Loader::init(__DIR__ . '/..'); use Application\Form\Generic; use Application\Form\Factory;
Next, define the wrappers using the $wrappers array defined in the first recipe. You can also use the $statusList array defined in the second recipe.
See if there is any status input from $_POST. Any input will become the selected key. Otherwise, the selected key is the default.
$email = $_POST['email'] ?? ''; $checked0 = $_POST['status0'] ?? 'U'; $checked1 = $_POST['status1'] ?? 'U'; $checked2 = $_POST['status2'] ?? ['U']; $checked3 = $_POST['status3'] ?? ['U'];
Now you can define the overall form configuration. The name and attributes parameters are used to configure the form tag itself. The other two parameters represent form-level and row-level wrappers. Lastly, we provide a form_tag_inside_wrapper flag to indicate that the form tag should not appear inside the wrapper (that is, <table>). If the wrapper was <div>, we would set this flag to TRUE:
$formConfig = [
'name' => 'status_form',
'attributes' => ['id'=>'statusForm','method'=>'post', 'action'=>'chap_06_form_factory.php'],
'row_wrapper' => ['type' => 'tr', 'class' => 'row'],
'form_wrapper' => ['type'=>'table','class'=>'table', 'id'=>'statusTable',
'class'=>'display','cellspacing'=>'0'],
'form_tag_inside_wrapper' => FALSE,
];Next, define an array that holds parameters for each form element to be created by the factory. The array key becomes the name of the form element, and must be unique:
$config = [
'email' => [
'class' => 'Application\Form\Generic',
'type' => Generic::TYPE_EMAIL,
'label' => 'Email',
'wrappers' => $wrappers,
'attributes'=> ['id'=>'email','maxLength'=>128, 'title'=>'Enter address',
'required'=>'','value'=>strip_tags($email)]
],
'password' => [
'class' => 'Application\Form\Generic',
'type' => Generic::TYPE_PASSWORD,
'label' => 'Password',
'wrappers' => $wrappers,
'attributes' => ['id'=>'password',
'title' => 'Enter your password',
'required' => '']
],
// etc.
];Lastly, be sure to generate the form:
$form = Factory::generate($config);
The actual display logic is extremely simple, as we simply call the form level render() method:
<?= $form->render($form, $formConfig); ?>
Here is the actual output:
Proper filtering and validation is a common problem when processing data submitted by users from an online form. It is arguably also the number one security vulnerability for a website. Furthermore, it can be quite awkward to have the filters and validators scattered all over the application. A chaining mechanism would resolve these issues neatly, and would also allow you to exert control over the order in which the filters and validators are processed.
filter_input_array(), that, at first glance, seems well suited for this task. Looking more deeply into its functionality, however, it soon becomes apparent that this function was designed in the early days, and is not up to modern requirements for protection against attack and flexibility. Accordingly, we will instead present a much more flexible mechanism based on an array of callbacks performing filtering and validation.Application\Filter\Result.Result class will be to hold a $item value, which would be the filtered value or a boolean result of validation. Another property, $messages, will hold an array of messages populated during the filtering or validation operation. In the constructor, the value supplied for $messages is formulated as an array. You might observe that both properties are defined public. This is to facilitate ease of access:namespace Application\Filter;
class Result
{
public $item; // (mixed) filtered data | (bool) result of validation
public $messages = array(); // [(string) message, (string) message ]
public function __construct($item, $messages)
{
$this->item = $item;
if (is_array($messages)) {
$this->messages = $messages;
} else {
$this->messages = [$messages];
}
}Result instance with another. This is important as at some point we will be processing the same value through a chain of filters. In such a case, we want the newly filtered value to overwrite the existing one, but we want the messages to be merged:public function mergeResults(Result $result)
{
$this->item = $result->item;
$this->mergeMessages($result);
}
public function mergeMessages(Result $result)
{
if (isset($result->messages) && is_array($result->messages)) {
$this->messages = array_merge($this->messages, $result->messages);
}
}FALSE, up or down the validation chain, must cause the entire result to be FALSE:public function mergeValidationResults(Result $result)
{
if ($this->item === TRUE) {
$this->item = (bool) $result->item;
}
$this->mergeMessages($result);
}
}Application\Filter\CallbackInterface interface. You will note that we are taking advantage of the PHP 7 ability to data type the return value to ensure that we are getting a Result instance in return:namespace Application\Filter;
interface CallbackInterface
{
public function __invoke ($item, $params) : Result;
}Application\Filter\Messages class with a series of static properties. We provide methods to set all messages, or just one message. The $messages property has been made public for easier access:namespace Application\Filter;
class Messages
{
const MESSAGE_UNKNOWN = 'Unknown';
public static $messages;
public static function setMessages(array $messages)
{
self::$messages = $messages;
}
public static function setMessage($key, $message)
{
self::$messages[$key] = $message;
}
public static function getMessage($key)
{
return self::$messages[$key] ?? self::MESSAGE_UNKNOWN;
}
}Application\Web\AbstractFilter class that implements core functionality. As mentioned previously, this class will be relatively lightweight and we do not need to worry about specific filters or validators as they will be supplied through configuration. We use the UnexpectedValueException class, provided as part of the PHP 7 Standard PHP Library (SPL), in order to throw a descriptive exception in case one of the callbacks does not implement CallbackInterface:namespace Application\Filter;
use UnexpectedValueException;
abstract class AbstractFilter
{
// code described in the next several bulletsconst BAD_CALLBACK = 'Must implement CallbackInterface'; const DEFAULT_SEPARATOR = '<br>' . PHP_EOL; const MISSING_MESSAGE_KEY = 'item.missing'; const DEFAULT_MESSAGE_FORMAT = '%20s : %60s'; const DEFAULT_MISSING_MESSAGE = 'Item Missing';
$separator is used in conjunction with filtering and validation messages. $callbacks represents the array of callbacks that perform filtering and validation. $assignments map data fields to filters and/or validators. $missingMessage is represented as a property so that it can be overwritten (that is, for multi-language websites). Finally, $results is an array of Application\Filter\Result objects and is populated by the filtering or validation operation:protected $separator; // used for message display protected $callbacks; protected $assignments; protected $missingMessage; protected $results = array();
__construct() method. Its main function is to set the array of callbacks and assignments. It also either sets values or accepts defaults for the separator (used in message display), and the missing message:public function __construct(array $callbacks, array $assignments,
$separator = NULL, $message = NULL)
{
$this->setCallbacks($callbacks);
$this->setAssignments($assignments);
$this->setSeparator($separator ?? self::DEFAULT_SEPARATOR);
$this->setMissingMessage($message
?? self::DEFAULT_MISSING_MESSAGE);
}setOneCall() checks to see if the callback implements CallbackInterface. If it does not, an UnexpectedValueException is thrown:public function getCallbacks()
{
return $this->callbacks;
}
public function getOneCallback($key)
{
return $this->callbacks[$key] ?? NULL;
}
public function setCallbacks(array $callbacks)
{
foreach ($callbacks as $key => $item) {
$this->setOneCallback($key, $item);
}
}
public function setOneCallback($key, $item)
{
if ($item instanceof CallbackInterface) {
$this->callbacks[$key] = $item;
} else {
throw new UnexpectedValueException(self::BAD_CALLBACK);
}
}
public function removeOneCallback($key)
{
if (isset($this->callbacks[$key]))
unset($this->callbacks[$key]);
}getItemsAsArray(), otherwise getResults() will return an array of Result objects:public function getResults()
{
return $this->results;
}
public function getItemsAsArray()
{
$return = array();
if ($this->results) {
foreach ($this->results as $key => $item)
$return[$key] = $item->item;
}
return $return;
}$this ->results and extracting the $messages property. For convenience, we also added getMessageString() with some formatting options. To easily produce an array of messages, we use the PHP 7 yield from syntax. This has the effect of turning getMessages() into a delegating generator. The array of messages becomes a sub-generator:public function getMessages()
{
if ($this->results) {
foreach ($this->results as $key => $item)
if ($item->messages) yield from $item->messages;
} else {
return array();
}
}
public function getMessageString($width = 80, $format = NULL)
{
if (!$format)
$format = self::DEFAULT_MESSAGE_FORMAT . $this->separator;
$output = '';
if ($this->results) {
foreach ($this->results as $key => $value) {
if ($value->messages) {
foreach ($value->messages as $message) {
$output .= sprintf(
$format, $key, trim($message));
}
}
}
}
return $output;
} public function setMissingMessage($message)
{
$this->missingMessage = $message;
}
public function setSeparator($separator)
{
$this->separator = $separator;
}
public function getSeparator()
{
return $this->separator;
}
public function getAssignments()
{
return $this->assignments;
}
public function setAssignments(array $assignments)
{
$this->assignments = $assignments;
}
// closing bracket for class AbstractFilter
}Application\Filter\Filter. We make this class extend AbstractFilter in order to provide the core functionality described previously:namespace Application\Filter;
class Filter extends AbstractFilter
{
// code
}process() method that scans an array of data and applies filters as per the array of assignments. If there are no assigned filters for this data set, we simply return NULL:public function process(array $data)
{
if (!(isset($this->assignments)
&& count($this->assignments))) {
return NULL;
}$this->results to an array of Result objects where the $item property is the original value from $data, and the $messages property is an empty array:foreach ($data as $key => $value) {
$this->results[$key] = new Result($value, array());
}$this->assignments and check to see if there are any global filters (identified by the '*' key. If so, we run processGlobal() and then unset the '*' key:$toDo = $this->assignments;
if (isset($toDo['*'])) {
$this->processGlobalAssignment($toDo['*'], $data);
unset($toDo['*']);
}processAssignment():foreach ($toDo as $key => $assignment) {
$this->processAssignment($assignment, $key);
}processGlobalAssignment() we need to loop through the array of callbacks. In this case, however, because these assignments are global, we also need to loop through the entire data set, and apply each global filter in turn:protected function processGlobalAssignment($assignment, $data)
{
foreach ($assignment as $callback) {
if ($callback === NULL) continue;
foreach ($data as $k => $value) {
$result = $this->callbacks[$callback['key']]($this->results[$k]->item,
$callback['params']);
$this->results[$k]->mergeResults($result);
}
}
}The tricky bit is this line of code:
$result = $this->callbacks[$callback['key']]($this ->results[$k]->item, $callback['params']);
Remember, each callback is actually an anonymous class that defines the PHP magic __invoke() method. The arguments supplied are the actual data item to be filtered, and an array of parameters. By running $this->callbacks[$callback['key']]() we are in fact magically calling __invoke().
processAssignment(), in a manner akin to processGlobalAssignment(), we need to execute each remaining callback assigned to each data key: protected function processAssignment($assignment, $key)
{
foreach ($assignment as $callback) {
if ($callback === NULL) continue;
$result = $this->callbacks[$callback['key']]($this->results[$key]->item,
$callback['params']);
$this->results[$key]->mergeResults($result);
}
}
} // closing brace for Application\Filter\FilterCreate an Application\Filter folder. In this folder, create the following class files, using code from the preceding steps:
|
Application\Filter\* class file |
Code described in these steps |
|---|---|
|
|
3 - 5 |
|
|
6 |
|
|
7 |
|
|
8 - 15 |
|
|
16 - 22 |
Next, take the code discussed in step 5, and use it to configure an array of messages in a chap_06_post_data_config_messages.php file. Each callback references the Messages::$messages property. Here is a sample configuration:
<?php
use Application\Filter\Messages;
Messages::setMessages(
[
'length_too_short' => 'Length must be at least %d',
'length_too_long' => 'Length must be no more than %d',
'required' => 'Please be sure to enter a value',
'alnum' => 'Only letters and numbers allowed',
'float' => 'Only numbers or decimal point',
'email' => 'Invalid email address',
'in_array' => 'Not found in the list',
'trim' => 'Item was trimmed',
'strip_tags' => 'Tags were removed from this item',
'filter_float' => 'Converted to a decimal number',
'phone' => 'Phone number is [+n] nnn-nnn-nnnn',
'test' => 'TEST',
'filter_length' => 'Reduced to specified length',
]
);Next, create a chap_06_post_data_config_callbacks.php callback configuration file that contains configuration for filtering callbacks, as described in step 4. Each callback should follow this generic template:
'callback_key' => new class () implements CallbackInterface
{
public function __invoke($item, $params) : Result
{
$changed = array();
$filtered = /* perform filtering operation on $item */
if ($filtered !== $item) $changed = Messages::$messages['callback_key'];
return new Result($filtered, $changed);
}
}The callbacks themselves must implement the interface and return a Result instance. We can take advantage of the PHP 7
anonymous class capability by having our callbacks return an anonymous class that implements CallbackInterface. Here is how an array of filtering callbacks might look:
use Application\Filter\ { Result, Messages, CallbackInterface };
$config = [ 'filters' => [
'trim' => new class () implements CallbackInterface
{
public function __invoke($item, $params) : Result
{
$changed = array();
$filtered = trim($item);
if ($filtered !== $item)
$changed = Messages::$messages['trim'];
return new Result($filtered, $changed);
}
},
'strip_tags' => new class ()
implements CallbackInterface
{
public function __invoke($item, $params) : Result
{
$changed = array();
$filtered = strip_tags($item);
if ($filtered !== $item)
$changed = Messages::$messages['strip_tags'];
return new Result($filtered, $changed);
}
},
// etc.
]
];For test purposes, we will use the prospects table as a target. Instead of providing data from $_POST, we will construct an array of good and bad data:
You can now create a chap_06_post_data_filtering.php script that sets up autoloading, includes the messages and callbacks configuration files:
<?php require __DIR__ . '/../Application/Autoload/Loader.php'; Application\Autoload\Loader::init(__DIR__ . '/..'); include __DIR__ . '/chap_06_post_data_config_messages.php'; include __DIR__ . '/chap_06_post_data_config_callbacks.php';
You then need to define assignments that represent a mapping between the data fields and filter callbacks. Use the * key to define a global filter that applies to all data:
$assignments = [
'*' => [ ['key' => 'trim', 'params' => []],
['key' => 'strip_tags', 'params' => []] ],
'first_name' => [ ['key' => 'length',
'params' => ['length' => 128]] ],
'last_name' => [ ['key' => 'length',
'params' => ['length' => 128]] ],
'city' => [ ['key' => 'length',
'params' => ['length' => 64]] ],
'budget' => [ ['key' => 'filter_float', 'params' => []] ],
];Next, define good and bad test data:
$goodData = [ 'first_name' => 'Your Full', 'last_name' => 'Name', 'address' => '123 Main Street', 'city' => 'San Francisco', 'state_province' => 'California', 'postal_code' => '94101', 'phone' => '+1 415-555-1212', 'country' => 'US', 'email' => 'your@email.address.com', 'budget' => '123.45', ]; $badData = [ 'first_name' => 'This+Name<script>bad tag</script>Valid!', 'last_name' => 'ThisLastNameIsWayTooLongAbcdefghijklmnopqrstuvwxyz0123456789Abcdefghijklmnopqrstuvwxyz0123456789Abcdefghijklmnopqrstuvwxyz0123456789Abcdefghijklmnopqrstuvwxyz0123456789', //'address' => '', // missing 'city' => ' ThisCityNameIsTooLong012345678901234567890123456789012345678901234567890123456789 ', //'state_province'=> '', // missing 'postal_code' => '!"£$%^Non Alpha Chars', 'phone' => ' 12345 ', 'country' => 'XX', 'email' => 'this.is@not@an.email', 'budget' => 'XXX', ];
Finally, you can create an Application\Filter\Filter instance, and test the data:
$filter = new Application\Filter\Filter( $config['filters'], $assignments); $filter->setSeparator(PHP_EOL); $filter->process($goodData); echo $filter->getMessageString(); var_dump($filter->getItemsAsArray()); $filter->process($badData); echo $filter->getMessageString(); var_dump($filter->getItemsAsArray());
Processing good data produces no messages other than one indicating that the value for the float field was converted from string to float. The bad data, on the other hand, produces the following output:
You will also notice that tags were removed from first_name, and that both last_name and city were truncated.
The filter_input_array() function takes two arguments: the input source (in the form of a pre-defined constant used to indicate one of the $_* PHP super-globals, that is, $_POST), and an array of matching field definitions as keys and filters or validators as values. This function performs not only filtering operations, but validation as well. The flags labeled sanitize are actually filters.
Documentation and examples of filter_input_array() can be found at http://php.net/manual/en/function.filter-input-array.php. You might also have a look at the different types of filters that are available on http://php.net/manual/en/filter.filters.php.
The heavy lifting for this recipe has already been accomplished in the preceding recipe. Core functionality is defined by Application\Filter\AbstractFilter. The actual validation is performed by an array of validating callbacks.
Application\Filter\CallbackInterface, and should return an instance of Application\Filter\Result. Validators would take this generic form:use Application\Filter\ { Result, Messages, CallbackInterface };
$config = [
// validator callbacks
'validators' => [
'key' => new class () implements CallbackInterface
{
public function __invoke($item, $params) : Result
{
// validation logic goes here
return new Result($valid, $error);
}
},
// etc.Application\Filter\Validator class, which loops through the array of assignments, testing each data item against its assigned validator callbacks. We make this class extend AbstractFilter in order to provide the core functionality described previously:namespace Application\Filter;
class Validator extends AbstractFilter
{
// code
}process() method that scans an array of data and applies validators as per the array of assignments. If there are no assigned validators for this data set, we simply return the current status of $valid (which is TRUE):public function process(array $data)
{
$valid = TRUE;
if (!(isset($this->assignments)
&& count($this->assignments))) {
return $valid;
}$this->results to an array of Result objects where the $item property is set to TRUE, and the $messages property is an empty array:foreach ($data as $key => $value) {
$this->results[$key] = new Result(TRUE, array());
}$this->assignments and check to see if there are any global filters (identified by the '*' key). If so, we run processGlobal() and then unset the '*' key:$toDo = $this->assignments;
if (isset($toDo['*'])) {
$this->processGlobalAssignment($toDo['*'], $data);
unset($toDo['*']);
}processAssignment(). This is an ideal place to check to see if any fields present in the assignments array is missing from the data. Note that we set $valid to FALSE if any validation callback returns FALSE:foreach ($toDo as $key => $assignment) {
if (!isset($data[$key])) {
$this->results[$key] =
new Result(FALSE, $this->missingMessage);
} else {
$this->processAssignment(
$assignment, $key, $data[$key]);
}
if (!$this->results[$key]->item) $valid = FALSE;
}
return $valid;
}processGlobalAssignment(), we need to loop through the array of callbacks. In this case, however, because these assignments are global, we also need to loop through the entire data set, and apply each global filter in turn.Application\Filter\Fiter::processGlobalAssignment() method, we need to call mergeValidationResults(). The reason for this is that if the value of $result->item is already FALSE, we need to ensure that it does not subsequently get overwritten by a value of TRUE. Any validator in the chain that returns FALSE must overwrite any other validation result:protected function processGlobalAssignment($assignment, $data)
{
foreach ($assignment as $callback) {
if ($callback === NULL) continue;
foreach ($data as $k => $value) {
$result = $this->callbacks[$callback['key']]
($value, $callback['params']);
$this->results[$k]->mergeValidationResults($result);
}
}
}processAssignment(), in a manner akin to processGlobalAssignment(), we need to execute each remaining callback assigned to each data key, again calling mergeValidationResults():protected function processAssignment($assignment, $key, $value)
{
foreach ($assignment as $callback) {
if ($callback === NULL) continue;
$result = $this->callbacks[$callback['key']]
($value, $callback['params']);
$this->results[$key]->mergeValidationResults($result);
}
}As with the preceding recipe, be sure to define the following classes:
Application\Filter\ResultApplication\Filter\CallbackInterfaceApplication\Filter\MessagesApplication\Filter\AbstractFilterYou can use the chap_06_post_data_config_messages.php file, also described in the previous recipe.
Next, create a Validator.php file in the Application\Filter folder. Place the code described in step 3 to 10.
Next, create a chap_06_post_data_config_callbacks.php callback configuration file that contains configurations for validation callbacks, as described in step 2. Each callback should follow this generic template:
'validation_key' => new class () implements CallbackInterface
{
public function __invoke($item, $params) : Result
{
$error = array();
$valid = /* perform validation operation on $item */
if (!$valid)
$error[] = Messages::$messages['validation_key'];
return new Result($valid, $error);
}
}Now you can create a chap_06_post_data_validation.php calling script that initializes autoloading and includes the configuration scripts:
<?php require __DIR__ . '/../Application/Autoload/Loader.php'; Application\Autoload\Loader::init(__DIR__ . '/..'); include __DIR__ . '/chap_06_post_data_config_messages.php'; include __DIR__ . '/chap_06_post_data_config_callbacks.php';
Next, define an array of assignments, mapping data fields to validator callback keys:
$assignments = [
'first_name' => [ ['key' => 'length',
'params' => ['min' => 1, 'max' => 128]],
['key' => 'alnum',
'params' => ['allowWhiteSpace' => TRUE]],
['key' => 'required','params' => []] ],
'last_name'=> [ ['key' => 'length',
'params' => ['min' => 1, 'max' => 128]],
['key' => 'alnum',
'params' => ['allowWhiteSpace' => TRUE]],
['key' => 'required','params' => []] ],
'address' => [ ['key' => 'length',
'params' => ['max' => 256]] ],
'city' => [ ['key' => 'length',
'params' => ['min' => 1, 'max' => 64]] ],
'state_province'=> [ ['key' => 'length',
'params' => ['min' => 1, 'max' => 32]] ],
'postal_code' => [ ['key' => 'length',
'params' => ['min' => 1, 'max' => 16] ],
['key' => 'alnum',
'params' => ['allowWhiteSpace' => TRUE]],
['key' => 'required','params' => []] ],
'phone' => [ ['key' => 'phone', 'params' => []] ],
'country' => [ ['key' => 'in_array',
'params' => $countries ],
['key' => 'required','params' => []] ],
'email' => [ ['key' => 'email', 'params' => [] ],
['key' => 'length',
'params' => ['max' => 250] ],
['key' => 'required','params' => [] ] ],
'budget' => [ ['key' => 'float', 'params' => []] ]
];For test data, use the same good and bad data defined in the chap_06_post_data_filtering.php file described in the previous recipe. After that, you are in a position to create an Application\Filter\Validator instance, and test the data:
$validator = new Application\Filter\Validator($config['validators'], $assignments); $validator->setSeparator(PHP_EOL); $validator->process($badData); echo $validator->getMessageString(40, '%14s : %-26s' . PHP_EOL); var_dump($validator->getItemsAsArray()); $validator->process($goodData); echo $validator->getMessageString(40, '%14s : %-26s' . PHP_EOL); var_dump($validator->getItemsAsArray());
As expected, the good data does not produce any validation errors. The bad data, on the other hand, generates the following output:
Notice that the missing fields, address and state_province validate FALSE, and return the missing item message.
When a form is first rendered, there is little value in having a form class (such as Application\Form\Factory, described in the previous recipe) tied to a class that can perform filtering or validation (such as the Application\Filter\* described in the previous recipe). Once the form data has been submitted, however, interest grows. If the form data fails validation, the values can be filtered, and then re-displayed. Validation error messages can be tied to form elements, and rendered next to form fields.
Application\Form\Factory class, and add properties and setters that allow us to attach instances of Application\Filter\Filter and Application\Filter\Validator. We also need define $data, which will be used to retain the filtered and/or validated data:const DATA_NOT_FOUND = 'Data not found. Run setData()';
const FILTER_NOT_FOUND = 'Filter not found. Run setFilter()';
const VALIDATOR_NOT_FOUND = 'Validator not found. Run setValidator()';
protected $filter;
protected $validator;
protected $data;
public function setFilter(Filter $filter)
{
$this->filter = $filter;
}
public function setValidator(Validator $validator)
{
$this->validator = $validator;
}
public function setData($data)
{
$this->data = $data;
}validate() method that calls the process() method of the embedded Application\Filter\Validator instance. We check to see if $data and $validator exist. If not, the appropriate exceptions are thrown with instructions on which method needs to be run first:public function validate()
{
if (!$this->data)
throw new RuntimeException(self::DATA_NOT_FOUND);
if (!$this->validator)
throw new RuntimeException(self::VALIDATOR_NOT_FOUND);process() method, we associate validation result messages with form element messages. Note that the process() method returns a boolean value that represents the overall validation status of the data set. When the form is re-displayed following failed validation, error messages will appear next to each element:$valid = $this->validator->process($this->data);
foreach ($this->elements as $element) {
if (isset($this->validator->getResults()
[$element->getName()])) {
$element->setErrors($this->validator->getResults()
[$element->getName()]->messages);
}
}
return $valid;
}filter() method that calls the process() method of the embedded Application\Filter\Filter instance. As with the validate() method described in step 3, we need to check for the existence of $data and $filter. If either is missing, we throw a RuntimeException with the appropriate message:public function filter()
{
if (!$this->data)
throw new RuntimeException(self::DATA_NOT_FOUND);
if (!$this->filter)
throw new RuntimeException(self::FILTER_NOT_FOUND);process() method, which produces an array of Result objects where the $item property represents the end result of the filter chain. We then loop through the results, and, if the corresponding $element key matches, set the value attribute to the filtered value. We also add any messages resulting from the filtering process. When the form is then re-displayed, all value attributes will display filtered results:$this->filter->process($this->data);
foreach ($this->filter->getResults() as $key => $result) {
if (isset($this->elements[$key])) {
$this->elements[$key]
->setSingleAttribute('value', $result->item);
if (isset($result->messages)
&& count($result->messages)) {
foreach ($result->messages as $message) {
$this->elements[$key]->addSingleError($message);
}
}
}
}
}You can start by making the changes to Application\Form\Factory as described above. For a test target you can use the prospects database table shown in the How it works... section of the Chaining $_POST filters recipe. The various column settings should give you an idea of which form elements, filters, and validators to define.
As an example, you can define a chap_06_tying_filters_to_form_definitions.php file, which will contain definitions for form wrappers, elements, and filter assignments. Here are some examples:
<?php
use Application\Form\Generic;
define('VALIDATE_SUCCESS', 'SUCCESS: form submitted ok!');
define('VALIDATE_FAILURE', 'ERROR: validation errors detected');
$wrappers = [
Generic::INPUT => ['type' => 'td', 'class' => 'content'],
Generic::LABEL => ['type' => 'th', 'class' => 'label'],
Generic::ERRORS => ['type' => 'td', 'class' => 'error']
];
$elements = [
'first_name' => [
'class' => 'Application\Form\Generic',
'type' => Generic::TYPE_TEXT,
'label' => 'First Name',
'wrappers' => $wrappers,
'attributes'=> ['maxLength'=>128,'required'=>'']
],
'last_name' => [
'class' => 'Application\Form\Generic',
'type' => Generic::TYPE_TEXT,
'label' => 'Last Name',
'wrappers' => $wrappers,
'attributes'=> ['maxLength'=>128,'required'=>'']
],
// etc.
];
// overall form config
$formConfig = [
'name' => 'prospectsForm',
'attributes' => [
'method'=>'post',
'action'=>'chap_06_tying_filters_to_form.php'
],
'row_wrapper' => ['type' => 'tr', 'class' => 'row'],
'form_wrapper' => [
'type'=>'table',
'class'=>'table',
'id'=>'prospectsTable',
'class'=>'display','cellspacing'=>'0'
],
'form_tag_inside_wrapper' => FALSE,
];
$assignments = [
'first_name' => [ ['key' => 'length',
'params' => ['min' => 1, 'max' => 128]],
['key' => 'alnum',
'params' => ['allowWhiteSpace' => TRUE]],
['key' => 'required','params' => []] ],
'last_name' => [ ['key' => 'length',
'params' => ['min' => 1, 'max' => 128]],
['key' => 'alnum',
'params' => ['allowWhiteSpace' => TRUE]],
['key' => 'required','params' => []] ],
'address' => [ ['key' => 'length',
'params' => ['max' => 256]] ],
'city' => [ ['key' => 'length',
'params' => ['min' => 1, 'max' => 64]] ],
'state_province'=> [ ['key' => 'length',
'params' => ['min' => 1, 'max' => 32]] ],
'postal_code' => [ ['key' => 'length',
'params' => ['min' => 1, 'max' => 16] ],
['key' => 'alnum',
'params' => ['allowWhiteSpace' => TRUE]],
['key' => 'required','params' => []] ],
'phone' => [ ['key' => 'phone', 'params' => []] ],
'country' => [ ['key' => 'in_array',
'params' => $countries ],
['key' => 'required','params' => []] ],
'email' => [ ['key' => 'email', 'params' => [] ],
['key' => 'length',
'params' => ['max' => 250] ],
['key' => 'required','params' => [] ] ],
'budget' => [ ['key' => 'float', 'params' => []] ]
];You can use the already existing chap_06_post_data_config_callbacks.php and chap_06_post_data_config_messages.php files described in the previous recipes. Finally, define a chap_06_tying_filters_to_form.php file that sets up autoloading and includes these three configuration files:
<?php require __DIR__ . '/../Application/Autoload/Loader.php'; Application\Autoload\Loader::init(__DIR__ . '/..'); include __DIR__ . '/chap_06_post_data_config_messages.php'; include __DIR__ . '/chap_06_post_data_config_callbacks.php'; include __DIR__ . '/chap_06_tying_filters_to_form_definitions.php';
Next, you can create instances of the form factory, filter, and validator classes:
use Application\Form\Factory;
use Application\Filter\ { Validator, Filter };
$form = Factory::generate($elements);
$form->setFilter(new Filter($callbacks['filters'], $assignments['filters']));
$form->setValidator(new Validator($callbacks['validators'], $assignments['validators']));You can then check to see if there is any $_POST data. If so, perform validation and filtering:
$message = '';
if (isset($_POST['submit'])) {
$form->setData($_POST);
if ($form->validate()) {
$message = VALIDATE_SUCCESS;
} else {
$message = VALIDATE_FAILURE;
}
$form->filter();
}
?>The view logic is extremely simple: just render the form. Any validation messages and values for the various elements will be assigned as part of validation and filtering:
<?= $form->render($form, $formConfig); ?>
Here is an example using bad form data:
Notice the filtering and validation messages. Also notice the bad tags:
In this chapter, we will cover the following topics:
Making background queries to external web services is becoming an ever-increasing part of any PHP web practice. The ability to provide appropriate, timely, and plentiful data means more business for your customers and the websites you develop. We start with a couple of recipes aimed at data conversion between eXtensible Markup Language (XML) and native PHP. Next, we show you how to implement a simple Representational State Transfer (REST) client and server. After that, we turn our attention to SOAP clients and servers.
When considering a conversion between PHP native data types and XML, we would normally consider an array as the primary target. With this in mind, the process of converting from a PHP array to XML differs radically from the approach needed to do the reverse.
Application\Parse\ConvertXml class. This class will holdthe methods that will convert from XML to a PHP array, and vice versa. We will need both the SimpleXMLElement and SimpleXMLIterator classes from the SPL:namespace Application\Parse;
use SimpleXMLIterator;
use SimpleXMLElement;
class ConvertXml
{
}xmlToArray() method that will accept a SimpleXMLIterator instance as an argument. It will be called recursively and will produce a PHP array from an XML document. We take advantage of the SimpleXMLIterator ability to advance through the XML document, using the key(), current(), next(), and rewind() methods to navigate:public function xmlToArray(SimpleXMLIterator $xml) : array
{
$a = array();
for( $xml->rewind(); $xml->valid(); $xml->next() ) {
if(!array_key_exists($xml->key(), $a)) {
$a[$xml->key()] = array();
}
if($xml->hasChildren()){
$a[$xml->key()][] = $this->xmlToArray($xml->current());
}
else{
$a[$xml->key()] = (array) $xml->current()->attributes();
$a[$xml->key()]['value'] = strval($xml->current());
}
}
return $a;
}arrayToXml(), sets up an initial SimpleXMLElement instance, and then calls the second method, phpToXml():public function arrayToXml(array $a)
{
$xml = new SimpleXMLElement(
'<?xml version="1.0" standalone="yes"?><root></root>');
$this->phpToXml($a, $xml);
return $xml->asXML();
}get_object_vars() in case one of the array elements is an object. You'll also note that numbers alone are not allowed as XML tags, which means adding some text in front of the number:protected function phpToXml($value, &$xml)
{
$node = $value;
if (is_object($node)) {
$node = get_object_vars($node);
}
if (is_array($node)) {
foreach ($node as $k => $v) {
if (is_numeric($k)) {
$k = 'number' . $k;
}
if (is_array($v)) {
$newNode = $xml->addChild($k);
$this->phpToXml($v, $newNode);
} elseif (is_object($v)) {
$newNode = $xml->addChild($k);
$this->phpToXml($v, $newNode);
} else {
$xml->addChild($k, $v);
}
}
} else {
$xml->addChild(self::UNKNOWN_KEY, $node);
}
}As a sample XML document, you can use the Web Services Definition Language (WSDL) for the United States National Weather Service. This is an XML document that describes a SOAP service, and can be found at http://graphical.weather.gov/xml/SOAP_server/ndfdXMLserver.php?wsdl.
We will use the SimpleXMLIterator class to provide an iteration mechanism. You can then configure autoloading, and get an instance of Application\Parse\ConvertXml, using xmlToArray() to convert the WSDL to a PHP array:
require __DIR__ . '/../Application/Autoload/Loader.php'; Application\Autoload\Loader::init(__DIR__ . '/..'); use Application\Parse\ConvertXml; $wsdl = 'http://graphical.weather.gov/xml/' . 'SOAP_server/ndfdXMLserver.php?wsdl'; $xml = new SimpleXMLIterator($wsdl, 0, TRUE); $convert = new ConvertXml(); var_dump($convert->xmlToArray($xml));
The resulting array is shown here:
To do the reverse, use the arrayToXml() method described in this recipe. As a source document, you can use a source/data/mongo.db.global.php file that contains an outline for a training video on MongoDB available through O'Reilly Media (disclaimer: by this author!). Using the same autoloader configuration and instance of Application\Parse\ConvertXml, here is the sample code you could use:
$convert = new ConvertXml();
header('Content-Type: text/xml');
echo $convert->arrayToXml(include CONFIG_FILE);Here is the output in a browser:
REST clients use HyperText Transfer Protocol (HTTP) to generate requests to external web services. By changing the HTTP method, we can cause the external service to perform different operations. Although there are quite a few methods (or verbs) available, we will only focus on GET and POST. In this recipe, we will use the Adapter software design pattern to present two different ways of implementing a REST client.
namespace Application\Web;
class AbstractHttp
{const METHOD_GET = 'GET'; const METHOD_POST = 'POST'; const METHOD_PUT = 'PUT'; const METHOD_DELETE = 'DELETE'; const CONTENT_TYPE_HTML = 'text/html'; const CONTENT_TYPE_JSON = 'application/json'; const CONTENT_TYPE_FORM_URL_ENCODED = 'application/x-www-form-urlencoded'; const HEADER_CONTENT_TYPE = 'Content-Type'; const TRANSPORT_HTTP = 'http'; const TRANSPORT_HTTPS = 'https'; const STATUS_200 = '200'; const STATUS_401 = '401'; const STATUS_500 = '500';
protected $uri; // i.e. http://xxx.com/yyy protected $method; // i.e. GET, PUT, POST, DELETE protected $headers; // HTTP headers protected $cookies; // cookies protected $metaData; // information about the transmission protected $transport; // i.e. http or https protected $data = array();
public function setMethod($method)
{
$this->method = $method;
}
public function getMethod()
{
return $this->method ?? self::METHOD_GET;
}
// etc.getXxxByKey() and setXxxByKey() methods:public function setHeaderByKey($key, $value)
{
$this->headers[$key] = $value;
}
public function getHeaderByKey($key)
{
return $this->headers[$key] ?? NULL;
}
public function getDataByKey($key)
{
return $this->data[$key] ?? NULL;
}
public function getMetaDataByKey($key)
{
return $this->metaData[$key] ?? NULL;
}$data property. We can then build the request URL using the http_build_query() function:public function setUri($uri, array $params = NULL)
{
$this->uri = $uri;
$first = TRUE;
if ($params) {
$this->uri .= '?' . http_build_query($params);
}
}
public function getDataEncoded()
{
return http_build_query($this->getData());
}$transport based on the original request:public function setTransport($transport = NULL)
{
if ($transport) {
$this->transport = $transport;
} else {
if (substr($this->uri, 0, 5) == self::TRANSPORT_HTTPS) {
$this->transport = self::TRANSPORT_HTTPS;
} else {
$this->transport = self::TRANSPORT_HTTP;
}
}
}Application\Web\Request class that can accept parameters when we wish to generate a request, or, alternatively, populate properties with incoming request information when implementing a server that accepts requests:namespace Application\Web;
class Request extends AbstractHttp
{
public function __construct(
$uri = NULL, $method = NULL, array $headers = NULL,
array $data = NULL, array $cookies = NULL)
{
if (!$headers) $this->headers = $_SERVER ?? array();
else $this->headers = $headers;
if (!$uri) $this->uri = $this->headers['PHP_SELF'] ?? '';
else $this->uri = $uri;
if (!$method) $this->method =
$this->headers['REQUEST_METHOD'] ?? self::METHOD_GET;
else $this->method = $method;
if (!$data) $this->data = $_REQUEST ?? array();
else $this->data = $data;
if (!$cookies) $this->cookies = $_COOKIE ?? array();
else $this->cookies = $cookies;
$this->setTransport();
}
}Application\Web\Received class. The name reflects the fact that we are re-packaging data received from the external web service:namespace Application\Web;
class Received extends AbstractHttp
{
public function __construct(
$uri = NULL, $method = NULL, array $headers = NULL,
array $data = NULL, array $cookies = NULL)
{
$this->uri = $uri;
$this->method = $method;
$this->headers = $headers;
$this->data = $data;
$this->cookies = $cookies;
$this->setTransport();
}
}We are now ready to consider two different ways to implement a REST client. The first approach is to use an underlying PHP I/O layer referred to as Streams. This layer provides a series of wrappers that provide access to external streaming resources. By default, any of the PHP file commands will use the file wrapper, which gives access to the local filesystem. We will use the http:// or https:// wrappers to implement the Application\Web\Client\Streams adapter:
Application\Web\Client\Streams class:namespace Application\Web\Client;
use Application\Web\ { Request, Received };
class Streams
{
const BYTES_TO_READ = 4096;GET, we add the parameters to the URI. In the case of POST, we create a stream context that contains metadata instructing the remote service that we are supplying data. Using PHP Streams, making a request is just a matter of composing the URI, and, in the case of POST, setting the stream context. We then use a simple fopen():public static function send(Request $request)
{
$data = $request->getDataEncoded();
$received = new Received();
switch ($request->getMethod()) {
case Request::METHOD_GET :
if ($data) {
$request->setUri($request->getUri() . '?' . $data);
}
$resource = fopen($request->getUri(), 'r');
break;
case Request::METHOD_POST :
$opts = [
$request->getTransport() =>
[
'method' => Request::METHOD_POST,
'header' => Request::HEADER_CONTENT_TYPE
. ': ' . Request::CONTENT_TYPE_FORM_URL_ENCODED,
'content' => $data
]
];
$resource = fopen($request->getUri(), 'w',
stream_context_create($opts));
break;
}
return self::getResults($received, $resource);
}Received object. You will notice that we added a provision to decode data received in JSON format:protected static function getResults(Received $received, $resource)
{
$received->setMetaData(stream_get_meta_data($resource));
$data = $received->getMetaDataByKey('wrapper_data');
if (!empty($data) && is_array($data)) {
foreach($data as $item) {
if (preg_match('!^HTTP/\d\.\d (\d+?) .*?$!',
$item, $matches)) {
$received->setHeaderByKey('status', $matches[1]);
} else {
list($key, $value) = explode(':', $item);
$received->setHeaderByKey($key, trim($value));
}
}
}
$payload = '';
while (!feof($resource)) {
$payload .= fread($resource, self::BYTES_TO_READ);
}
if ($received->getHeaderByKey(Received::HEADER_CONTENT_TYPE)) {
switch (TRUE) {
case stripos($received->getHeaderByKey(
Received::HEADER_CONTENT_TYPE),
Received::CONTENT_TYPE_JSON) !== FALSE:
$received->setData(json_decode($payload));
break;
default :
$received->setData($payload);
break;
}
}
return $received;
}We will now have a look at our second approach for a REST client, one of which is based on the cURL extension:
namespace Application\Web\Client;
use Application\Web\ { Request, Received };
class Curl
{send() method is quite a bit simpler than when using Streams. All we need to do is to define an array of options, and let cURL do the rest:public static function send(Request $request)
{
$data = $request->getDataEncoded();
$received = new Received();
switch ($request->getMethod()) {
case Request::METHOD_GET :
$uri = ($data)
? $request->getUri() . '?' . $data
: $request->getUri();
$options = [
CURLOPT_URL => $uri,
CURLOPT_HEADER => 0,
CURLOPT_RETURNTRANSFER => TRUE,
CURLOPT_TIMEOUT => 4
];
break;POST requires slightly different cURL parameters:case Request::METHOD_POST :
$options = [
CURLOPT_POST => 1,
CURLOPT_HEADER => 0,
CURLOPT_URL => $request->getUri(),
CURLOPT_FRESH_CONNECT => 1,
CURLOPT_RETURNTRANSFER => 1,
CURLOPT_FORBID_REUSE => 1,
CURLOPT_TIMEOUT => 4,
CURLOPT_POSTFIELDS => $data
];
break;
}getResults():$ch = curl_init();
curl_setopt_array($ch, ($options));
if( ! $result = curl_exec($ch))
{
trigger_error(curl_error($ch));
}
$received->setMetaData(curl_getinfo($ch));
curl_close($ch);
return self::getResults($received, $result);
}getResults() method packages results into a Received object:protected static function getResults(Received $received, $payload)
{
$type = $received->getMetaDataByKey('content_type');
if ($type) {
switch (TRUE) {
case stripos($type,
Received::CONTENT_TYPE_JSON) !== FALSE):
$received->setData(json_decode($payload));
break;
default :
$received->setData($payload);
break;
}
}
return $received;
}Be sure to copy all the preceding code into these classes:
Application\Web\AbstractHttpApplication\Web\RequestApplication\Web\ReceivedApplication\Web\Client\StreamsApplication\Web\Client\CurlFor this illustration, you can make a REST request to the Google Maps API to obtain driving directions between two points. You also need to create an API key for this purpose by following the directions given at https://developers.google.com/maps/documentation/directions/get-api-key.
You can then define a chap_07_simple_rest_client_google_maps_curl.php calling script that issues a request using the Curl client. You might also consider define a chap_07_simple_rest_client_google_maps_streams.php calling script that issues a request using the Streams client:
<?php
define('DEFAULT_ORIGIN', 'New York City');
define('DEFAULT_DESTINATION', 'Redondo Beach');
define('DEFAULT_FORMAT', 'json');
$apiKey = include __DIR__ . '/google_api_key.php';
require __DIR__ . '/../Application/Autoload/Loader.php';
Application\Autoload\Loader::init(__DIR__ . '/..');
use Application\Web\Request;
use Application\Web\Client\Curl;You can then get the origin and destination:
$start = $_GET['start'] ?? DEFAULT_ORIGIN; $end = $_GET['end'] ?? DEFAULT_DESTINATION; $start = strip_tags($start); $end = strip_tags($end);
You are now in a position to populate the Request object, and use it to generate the request:
$request = new Request( 'https://maps.googleapis.com/maps/api/directions/json', Request::METHOD_GET, NULL, ['origin' => $start, 'destination' => $end, 'key' => $apiKey], NULL ); $received = Curl::send($request); $routes = $received->getData()->routes[0]; include __DIR__ . '/chap_07_simple_rest_client_google_maps_template.php';
For the purposes of illustration, you could also define a template that represents view logic to display the results of the request:
<?php foreach ($routes->legs as $item) : ?>
<!-- Trip Info -->
<br>Distance: <?= $item->distance->text; ?>
<br>Duration: <?= $item->duration->text; ?>
<!-- Driving Directions -->
<table>
<tr>
<th>Distance</th><th>Duration</th><th>Directions</th>
</tr>
<?php foreach ($item->steps as $step) : ?>
<?php $class = ($count++ & 01) ? 'color1' : 'color2'; ?>
<tr>
<td class="<?= $class ?>"><?= $step->distance->text ?></td>
<td class="<?= $class ?>"><?= $step->duration->text ?></td>
<td class="<?= $class ?>">
<?= $step->html_instructions ?></td>
</tr>
<?php endforeach; ?>
</table>
<?php endforeach; ?>Here are the results of the request as seen in a browser:
PHP Standards Recommendations (PSR-7) precisely defines request and response objects to be used when making requests between PHP applications. This is covered extensively in Appendix, Defining PSR-7 Classes .
For more information on
Streams, see this PHP documentation page http://php.net/manual/en/book.stream.php. An often asked question is "what is the difference between HTTP PUT and POST?" for an excellent discussion on this topic please refer to http://stackoverflow.com/questions/107390/whats-the-difference-between-a-post-and-a-put-http-request. For more information on obtaining an API key from Google, please refer to these web pages:
https://developers.google.com/maps/documentation/directions/get-api-key
https://developers.google.com/maps/documentation/directions/intro#Introduction
There are several considerations when implementing a REST server. The answers to these three questions will then let you define your REST service:
Application\Web\AbstractHttpApplication\Web\RequestApplication\Web\ReceivedApplication\Web\Response response class, based on AbstractHttp. The primary difference between this class and the others is that it accepts an instance of Application\Web\Request as an argument. The primary work is accomplished in the __construct() method. It's also important to set the Content-Type header and status:namespace Application\Web;
class Response extends AbstractHttp
{
public function __construct(Request $request = NULL,
$status = NULL, $contentType = NULL)
{
if ($request) {
$this->uri = $request->getUri();
$this->data = $request->getData();
$this->method = $request->getMethod();
$this->cookies = $request->getCookies();
$this->setTransport();
}
$this->processHeaders($contentType);
if ($status) {
$this->setStatus($status);
}
}
protected function processHeaders($contentType)
{
if (!$contentType) {
$this->setHeaderByKey(self::HEADER_CONTENT_TYPE,
self::CONTENT_TYPE_JSON);
} else {
$this->setHeaderByKey(self::HEADER_CONTENT_TYPE,
$contentType);
}
}
public function setStatus($status)
{
$this->status = $status;
}
public function getStatus()
{
return $this->status;
}
}Application\Web\Rest\Server class. You may be surprised at how simple it is. The real work is done in the associated API class:namespace Application\Web\Rest;
use Application\Web\ { Request, Response, Received };
class Server
{
protected $api;
public function __construct(ApiInterface $api)
{
$this->api = $api;
}listen() method that serves as a target for the request. The heart of the server implementation is this line of code:$jsonData = json_decode(file_get_contents('php://input'),true);public function listen()
{
$request = new Request();
$response = new Response($request);
$getPost = $_REQUEST ?? array();
$jsonData = json_decode(
file_get_contents('php://input'),true);
$jsonData = $jsonData ?? array();
$request->setData(array_merge($getPost,$jsonData));We have also added a provision for authentication. Otherwise, anybody could make requests and obtain potentially sensitive data. You will note that we do not have the server class performing authentication; rather, we leave it to the API class:
if (!$this->api->authenticate($request)) {
$response->setStatus(Request::STATUS_401);
echo $this->api::ERROR;
exit;
}GET, PUT, POST,and DELETE:$id = $request->getData()[$this->api::ID_FIELD] ?? NULL;
switch (strtoupper($request->getMethod())) {
case Request::METHOD_POST :
$this->api->post($request, $response);
break;
case Request::METHOD_PUT :
$this->api->put($request, $response);
break;
case Request::METHOD_DELETE :
$this->api->delete($request, $response);
break;
case Request::METHOD_GET :
default :
// return all if no params
$this->api->get($request, $response);
}$this->processResponse($response); echo json_encode($response->getData()); }
processResponse() method sets headers and makes sure the result is packaged as an Application\Web\Response object:protected function processResponse($response)
{
if ($response->getHeaders()) {
foreach ($response->getHeaders() as $key => $value) {
header($key . ': ' . $value, TRUE,
$response->getStatus());
}
}
header(Request::HEADER_CONTENT_TYPE
. ': ' . Request::CONTENT_TYPE_JSON, TRUE);
if ($response->getCookies()) {
foreach ($response->getCookies() as $key => $value) {
setcookie($key, $value);
}
}
}get(), put(), and so on are represented, and that all such methods accept request and response objects as arguments. You might notice that we have added a generateToken() method that uses the PHP 7 random_bytes() function to generate a truly random series of 16 bytes:namespace Application\Web\Rest;
use Application\Web\ { Request, Response };
abstract class AbstractApi implements ApiInterface
{
const TOKEN_BYTE_SIZE = 16;
protected $registeredKeys;
abstract public function get(Request $request,
Response $response);
abstract public function put(Request $request,
Response $response);
abstract public function post(Request $request,
Response $response);
abstract public function delete(Request $request,
Response $response);
abstract public function authenticate(Request $request);
public function __construct($registeredKeys, $tokenField)
{
$this->registeredKeys = $registeredKeys;
}
public static function generateToken()
{
return bin2hex(random_bytes(self::TOKEN_BYTE_SIZE));
}
}namespace Application\Web\Rest;
use Application\Web\ { Request, Response };
interface ApiInterface
{
public function get(Request $request, Response $response);
public function put(Request $request, Response $response);
public function post(Request $request, Response $response);
public function delete(Request $request, Response $response);
public function authenticate(Request $request);
}AbstractApi. This class leverages database classes defined in Chapter 5, Interacting with a Database:namespace Application\Web\Rest;
use Application\Web\ { Request, Response, Received };
use Application\Entity\Customer;
use Application\Database\ { Connection, CustomerService };
class CustomerApi extends AbstractApi
{
const ERROR = 'ERROR';
const ERROR_NOT_FOUND = 'ERROR: Not Found';
const SUCCESS_UPDATE = 'SUCCESS: update succeeded';
const SUCCESS_DELETE = 'SUCCESS: delete succeeded';
const ID_FIELD = 'id'; // field name of primary key
const TOKEN_FIELD = 'token'; // field used for authentication
const LIMIT_FIELD = 'limit';
const OFFSET_FIELD = 'offset';
const DEFAULT_LIMIT = 20;
const DEFAULT_OFFSET = 0;
protected $service;
public function __construct($registeredKeys,
$dbparams, $tokenField = NULL)
{
parent::__construct($registeredKeys, $tokenField);
$this->service = new CustomerService(
new Connection($dbparams));
}getDataByKey() to retrieve data items. The actual database interaction is performed by the service class. You might also notice that in all cases, we set an HTTP status code to inform the client of success or failure. In the case of get(), we look for an ID parameter. If received, we deliver information on a single customer only. Otherwise, we deliver a list of all customers using limit and offset:public function get(Request $request, Response $response)
{
$result = array();
$id = $request->getDataByKey(self::ID_FIELD) ?? 0;
if ($id > 0) {
$result = $this->service->
fetchById($id)->entityToArray();
} else {
$limit = $request->getDataByKey(self::LIMIT_FIELD)
?? self::DEFAULT_LIMIT;
$offset = $request->getDataByKey(self::OFFSET_FIELD)
?? self::DEFAULT_OFFSET;
$result = [];
$fetch = $this->service->fetchAll($limit, $offset);
foreach ($fetch as $row) {
$result[] = $row;
}
}
if ($result) {
$response->setData($result);
$response->setStatus(Request::STATUS_200);
} else {
$response->setData([self::ERROR_NOT_FOUND]);
$response->setStatus(Request::STATUS_500);
}
}put() method is used to insert customer data:public function put(Request $request, Response $response)
{
$cust = Customer::arrayToEntity($request->getData(),
new Customer());
if ($newCust = $this->service->save($cust)) {
$response->setData(['success' => self::SUCCESS_UPDATE,
'id' => $newCust->getId()]);
$response->setStatus(Request::STATUS_200);
} else {
$response->setData([self::ERROR]);
$response->setStatus(Request::STATUS_500);
}
}post() method is used to update existing customer entries:public function post(Request $request, Response $response)
{
$id = $request->getDataByKey(self::ID_FIELD) ?? 0;
$reqData = $request->getData();
$custData = $this->service->
fetchById($id)->entityToArray();
$updateData = array_merge($custData, $reqData);
$updateCust = Customer::arrayToEntity($updateData,
new Customer());
if ($this->service->save($updateCust)) {
$response->setData(['success' => self::SUCCESS_UPDATE,
'id' => $updateCust->getId()]);
$response->setStatus(Request::STATUS_200);
} else {
$response->setData([self::ERROR]);
$response->setStatus(Request::STATUS_500);
}
}delete() removes a customer entry:public function delete(Request $request, Response $response)
{
$id = $request->getDataByKey(self::ID_FIELD) ?? 0;
$cust = $this->service->fetchById($id);
if ($cust && $this->service->remove($cust)) {
$response->setData(['success' => self::SUCCESS_DELETE,
'id' => $id]);
$response->setStatus(Request::STATUS_200);
} else {
$response->setData([self::ERROR_NOT_FOUND]);
$response->setStatus(Request::STATUS_500);
}
}authenticate() to provide, in this example, a low-level mechanism to protect API usage:public function authenticate(Request $request)
{
$authToken = $request->getDataByKey(self::TOKEN_FIELD)
?? FALSE;
if (in_array($authToken, $this->registeredKeys, TRUE)) {
return TRUE;
} else {
return FALSE;
}
}
}Define the following classes, which were discussed in the previous recipe:
Application\Web\AbstractHttpApplication\Web\RequestApplication\Web\ReceivedYou can then define the following classes, described in this recipe, summarized in this table:
|
Class Application\Web\* |
Discussed in these steps |
|---|---|
|
|
2 |
|
|
3 - 8 |
|
|
9 |
|
|
10 |
|
|
11 - 16 |
You are now free to develop your own API class. If you choose to follow the illustration Application\Web\Rest\CustomerApi, however, you will need to also be sure to implement these classes, covered in Chapter 5, Interacting with a Database:
Application\Entity\CustomerApplication\Database\ConnectionApplication\Database\CustomerServiceYou can now define a chap_07_simple_rest_server.php script that invokes the REST server:
<?php $dbParams = include __DIR__ . '/../../config/db.config.php'; require __DIR__ . '/../Application/Autoload/Loader.php'; Application\Autoload\Loader::init(__DIR__ . '/..'); use Application\Web\Rest\Server; use Application\Web\Rest\CustomerApi; $apiKey = include __DIR__ . '/api_key.php'; $server = new Server(new CustomerApi([$apiKey], $dbParams, 'id')); $server->listen();
You can then use the built-in PHP 7 development server to listen on port 8080 for REST requests:
php -S localhost:8080 chap_07_simple_rest_server.php
To test your API, use the Application\Web\Rest\AbstractApi::generateToken() method to generate an authentication token that you can place in an api_key.php file, something like this:
<?php return '79e9b5211bbf2458a4085707ea378129';
You can then use a generic API client (such as the one described in the previous recipe), or a browser plugin such as RESTClient by Chao Zhou (see http://restclient.net/ for more information) to generate sample requests. Make sure you include the token for your request, otherwise the API as defined will reject the request.
Here is an example of a POST request for ID 1, which sets the balance field to a value of 888888:
There are a number of libraries that help you implement a REST server. One of my favorites is an example implementing a REST server in a single file: https://www.leaseweb.com/labs/2015/10/creating-a-simple-rest-api-in-php/
Various frameworks, such as CodeIgniter and Zend Framework, also have REST server implementations.
Using SOAP, in contrast to the process of implementing a REST client or server, is quite easy as there is a PHP SOAP extension that provides both capabilities.
A frequently asked question is "what is the difference between SOAP and REST?" SOAP uses XML internally as its data format. SOAP uses HTTP but only for transport, and otherwise has no awareness of other HTTP methods. REST directly operates HTTP, and can use anything for data formats, but JSON is preferred. Another key difference is that SOAP can operate in conjunction with a WSDL, which makes the service self-describing, thus more publicly available. Thus, SOAP services are often offered by public institutions such as national health organizations.
For this example, we will make a SOAP request for an existing SOAP service offered by the United States National Weather service:
$wsdl = 'http://graphical.weather.gov/xml/SOAP_server/' . 'ndfdXMLserver.php?wsdl';
soap client instance using the WSDL:$soap = new SoapClient($wsdl, array('trace' => TRUE));$units = 'm'; $params = ''; $numDays = 7; $weather = ''; $format = '24 hourly'; $startTime = new DateTime();
LatLonListCityNames() SOAP request, identified as an operation in the WSDL, for a list of cities supported by the service. The request is returned in XML format, which suggests creating a SimpleXLMElement instance:$xml = new SimpleXMLElement($soap->LatLonListCityNames(1));
array_combine() PHP function to create an associative array where latitude/longitude is the key, and the city name is the value. We can then later use this to present an HTML SELECT drop-down list, using asort() to alphabetize the list:$cityNames = explode('|', $xml->cityNameList);
$latLonCity = explode(' ', $xml->latLonList);
$cityLatLon = array_combine($latLonCity, $cityNames);
asort($cityLatLon);$currentLatLon = (isset($_GET['city'])) ? strip_tags(urldecode($_GET['city'])) : '';
NDFDgenByDay(). We can determine the nature of the parameters supplied to the SOAP server by examining the WSDL:<message name="NDFDgenByDayRequest"> <part name="latitude" type="xsd:decimal"/> <part name="longitude" type="xsd:decimal"/> <part name="startDate" type="xsd:date"/> <part name="numDays" type="xsd:integer"/> <part name="Unit" type="xsd:string"/> <part name="format" type="xsd:string"/> </message>
$currentLatLon is set, we can process the request. We wrap the request in a try {} catch {} block in case any exceptions are thrown:if ($currentLatLon) {
list($lat, $lon) = explode(',', $currentLatLon);
try {
$weather = $soap->NDFDgenByDay($lat,$lon,
$startTime->format('Y-m-d'),$numDays,$unit,$format);
} catch (Exception $e) {
$weather .= PHP_EOL;
$weather .= 'Latitude: ' . $lat . ' | Longitude: ' . $lon;
$weather .= 'ERROR' . PHP_EOL;
$weather .= $e->getMessage() . PHP_EOL;
$weather .= $soap->__getLastResponse() . PHP_EOL;
}
}
?>Copy all the preceding code into a chap_07_simple_soap_client_weather_service.php file. You can then add view logic that displays a form with the list of cities, as well as the results:
<form method="get" name="forecast"> <br> City List: <select name="city"> <?php foreach ($cityLatLon as $latLon => $city) : ?> <?php $select = ($currentLatLon == $latLon) ? ' selected' : ''; ?> <option value="<?= urlencode($latLon) ?>" <?= $select ?>> <?= $city ?></option> <?php endforeach; ?> </select> <br><input type="submit" value="OK"></td> </form> <pre> <?php var_dump($weather); ?> </pre>
Here is the result, in a browser, of requesting the weather forecast for Cleveland, Ohio:
For a good discussion on the difference between SOAP and REST, refer to the article present at http://stackoverflow.com/questions/209905/representational-state-transfer-rest-and-simple-object-access-protocol-soap?lq=1.
As with the SOAP client, we can use the PHP SOAP extension to implement a SOAP server. The most difficult part of the implementation will be generating the WSDL from the API class. We do not cover that process here as there are a number of good WSDL generators available.
Application\Web\Soap\ProspectsApi class that allows us to create, read, update, and delete the prospects table:namespace Application\Web\Soap;
use PDO;
class ProspectsApi
{
protected $registerKeys;
protected $pdo;
public function __construct($pdo, $registeredKeys)
{
$this->pdo = $pdo;
$this->registeredKeys = $registeredKeys;
}
}put(), get(), post(), and delete(). These, in turn, call methods that generate SQL requests that are executed from a PDO instance. An example for get() is as follows:public function get(array $request, array $response)
{
if (!$this->authenticate($request)) return FALSE;
$result = array();
$id = $request[self::ID_FIELD] ?? 0;
$email = $request[self::EMAIL_FIELD] ?? 0;
if ($id > 0) {
$result = $this->fetchById($id);
$response[self::ID_FIELD] = $id;
} elseif ($email) {
$result = $this->fetchByEmail($email);
$response[self::ID_FIELD] = $result[self::ID_FIELD] ?? 0;
} else {
$limit = $request[self::LIMIT_FIELD]
?? self::DEFAULT_LIMIT;
$offset = $request[self::OFFSET_FIELD]
?? self::DEFAULT_OFFSET;
$result = [];
foreach ($this->fetchAll($limit, $offset) as $row) {
$result[] = $row;
}
}
$response = $this->processResponse(
$result, $response, self::SUCCESS, self::ERROR);
return $response;
}
protected function processResponse($result, $response,
$success_code, $error_code)
{
if ($result) {
$response['data'] = $result;
$response['code'] = $success_code;
$response['status'] = self::STATUS_200;
} else {
$response['data'] = FALSE;
$response['code'] = self::ERROR_NOT_FOUND;
$response['status'] = self::STATUS_500;
}
return $response;
}phpDocumentor tags before the methods that will be published. In our example, the two arguments are both arrays. Here is the full WSDL for the API discussed earlier:<?xml version="1.0" encoding="UTF-8"?>
<wsdl:definitions xmlns:tns="php7cookbook" targetNamespace="php7cookbook" xmlns:soap="http://schemas.xmlsoap.org/wsdl/soap/" xmlns:s="http://www.w3.org/2001/XMLSchema" xmlns:wsdl="http://schemas.xmlsoap.org/wsdl/" xmlns:soapenc="http://schemas.xmlsoap.org/soap/encoding/">
<wsdl:message name="getSoapIn">
<wsdl:part name="request" type="tns:array" />
<wsdl:part name="response" type="tns:array" />
</wsdl:message>
<wsdl:message name="getSoapOut">
<wsdl:part name="return" type="tns:array" />
</wsdl:message>
<!—some nodes removed to conserve space -->
<wsdl:portType name="CustomerApiSoap">
<!—some nodes removed to conserve space -->
<wsdl:binding name="CustomerApiSoap" type="tns:CustomerApiSoap">
<soap:binding transport="http://schemas.xmlsoap.org/soap/http" style="rpc" />
<wsdl:operation name="get">
<soap:operation soapAction="php7cookbook#get" />
<wsdl:input>
<soap:body use="encoded" encodingStyle= "http://schemas.xmlsoap.org/soap/encoding/" namespace="php7cookbook" parts="request response" />
</wsdl:input>
<wsdl:output>
<soap:body use="encoded" encodingStyle= "http://schemas.xmlsoap.org/soap/encoding/" namespace="php7cookbook" parts="return" />
</wsdl:output>
</wsdl:operation>
<!—some nodes removed to conserve space -->
</wsdl:binding>
<wsdl:service name="CustomerApi">
<wsdl:port name="CustomerApiSoap" binding="tns:CustomerApiSoap">
<soap:address location="http://localhost:8080/" />
</wsdl:port>
</wsdl:service>
</wsdl:definitions>chap_07_simple_soap_server.php file, which will execute the SOAP server. Start by defining the location of the WSDL and any other necessary files (in this case, one for database configuration). If the wsdl parameter is set, deliver the WSDL rather than attempting to process the request. In this example, we use a simple API key to authenticate requests. We then create a SOAP server instance, assign an instance of our API class, and run handle():<?php
define('DB_CONFIG_FILE', '/../config/db.config.php');
define('WSDL_FILENAME', __DIR__ . '/chap_07_wsdl.xml');
if (isset($_GET['wsdl'])) {
readfile(WSDL_FILENAME);
exit;
}
$apiKey = include __DIR__ . '/api_key.php';
require __DIR__ . '/../Application/Web/Soap/ProspectsApi.php';
require __DIR__ . '/../Application/Database/Connection.php';
use Application\Database\Connection;
use Application\Web\Soap\ProspectsApi;
$connection = new Application\Database\Connection(
include __DIR__ . DB_CONFIG_FILE);
$api = new Application\Web\Soap\ProspectsApi(
$connection->pdo, [$apiKey]);
$server = new SoapServer(WSDL_FILENAME);
$server->setObject($api);
echo $server->handle();You can easily test this recipe by first creating your target API class, and then generating a WSDL. You can then use the built-in PHP webserver to deliver the SOAP service with this command:
php -S localhost:8080 chap_07_simple_soap_server.php
You can then use the SOAP client discussed in the previous recipe to make a call to test the SOAP service:
<?php
define('WSDL_URL', 'http://localhost:8080?wsdl=1');
$clientKey = include __DIR__ . '/api_key.php';
try {
$client = new SoapClient(WSDL_URL);
$response = [];
$email = some_email_generated_by_test;
$email = 'test5393@unlikelysource.com';
echo "\nGet Prospect Info for Email: " . $email . "\n";
$request = ['token' => $clientKey, 'email' => $email];
$result = $client->get($request,$response);
var_dump($result);
} catch (SoapFault $e) {
echo 'ERROR' . PHP_EOL;
echo $e->getMessage() . PHP_EOL;
} catch (Throwable $e) {
echo 'ERROR' . PHP_EOL;
echo $e->getMessage() . PHP_EOL;
} finally {
echo $client->__getLastResponse() . PHP_EOL;
}Here is the output for email address test5393@unlikelysource.com:
A simple Google search for WSDL generators for PHP came back with easily a dozen results. The one used to generate the WSDL for the ProspectsApi class was based on https://code.google.com/archive/p/php-wsdl-creator/. For more information on phpDocumentor, refer to the page at https://www.phpdoc.org/.
In this chapter, we will cover the following topics:
We will start this chapter with two recipes that take advantage of a new Unicode escape syntax introduced with PHP 7. After that, we will cover how to determine a web visitor's locale from browser data. The next few recipes will cover the creation of a locale class, which will allow you to represent numbers, currency, dates, and time in a format specific to a locale. Finally, we will cover recipes that demonstrate how to generate an internationalized calendar, handle recurring events, and perform translation without having to use gettext.
The word emoticons is a composite of emotion and icon. Emoji, originating from Japan, is another, larger, widely used set of icons. These icons are the little smiley faces, tiny ninjas, and rolling-on-the-floor-laughing icons that are so popular on any website that has a social networking aspect. Prior to PHP 7, however, producing these little beasties was an exercise in frustration.
U+1F648, U+1F649, and U+1F64A
meta tag. You should set the character set to UTF-8. Here is an example:<head> <title>PHP 7 Cookbook</title> <meta http-equiv="content-type" content="text/html;charset=utf-8" /> </head>
<table>
<tr>
<td>🙈</td>
<td>🙉</td>
<td>🙊</td>
</tr>
</table>"\u{xxx}". Here is an example with the same three icons as in the preceding bullet:<table>
<tr>
<td><?php echo "\u{1F648}"; ?></td>
<td><?php echo "\u{1F649}"; ?></td>
<td><?php echo "\u{1F64A}"; ?></td>
</tr>
</table>In PHP 7, a new syntax was introduced that lets you render any Unicode character. Unlike other languages, the new PHP syntax allows for a variable number of hex digits. The basic format is this:
\u{xxxx}The entire construct must be double quoted (or use heredoc). xxxx could be any combination of hex digits, 2, 4, 6, and above.
Create a file called chap_08_emoji_using_html.php. Be sure to include the meta tag that signals the browser that UTF-8 character encoding is being used:
<!DOCTYPE html>
<html>
<head>
<title>PHP 7 Cookbook</title>
<meta http-equiv="content-type" content="text/html;charset=utf-8" />
</head>Next, set up a basic HTML table, and display a row of emoticons/emoji:
<body>
<table>
<tr>
<td>🙈</td>
<td>🙉</td>
<td>🙊</td>
</tr>
</table>
</body>
</html>Now add a row using PHP to emit emoticons/emoji:
<tr>
<td><?php echo "\u{1F648}"; ?></td>
<td><?php echo "\u{1F649}"; ?></td>
<td><?php echo "\u{1F64A}"; ?></td>
</tr>Here is the output seen from Firefox:
The ability to access the entire Unicode character set opens up many new possibilities for rendering complex characters, especially characters in alphabets other than Latin-1.
U+202E Unicode character for right-to-left override. The following line of code prints txet desreveR:echo "\u{202E}Reversed text";
echo "\u{202D}"; // returns output to left-to-rightñ (the letter n with a tilde ~ floating above). This is used in words such as mañana (the Spanish word for morning or tomorrow, depending on the context). There is a composed character available, represented by Unicode code U+00F1. Here is an example of its use, which echoes mañana:echo "ma\u{00F1}ana"; // shows mañanaman in an attempt to search for mañana, they will be unsuccessful.n along with the Unicode combining code, which places a floating tilde on top of the letter. In this echo command, the output is the same as previously. Only the way the word is formed differs:echo "man\u{0303}ana"; // also shows mañanaélève (student). You could render it using composed characters, or by using combining codes to float the accents above the letter. Consider the two following examples. Both examples produce the same output, but are rendered differently:echo "\u{00E9}l\u{00E8}ve";
echo "e\u{0301}le\u{0300}ve";Create a file called chap_08_control_and_combining_unicode.php. Be sure to include the meta tag that signals the browser that UTF-8 character encoding is being used:
<!DOCTYPE html>
<html>
<head>
<title>PHP 7 Cookbook</title>
<meta http-equiv="content-type" content="text/html;charset=utf-8" />
</head>Next, set up basic PHP and HTML to display the examples discussed previously:
<body>
<pre>
<?php
echo "\u{202E}Reversed text"; // reversed
//echo "\u{202D}"; // stops reverse
echo "mañana"; // using pre-composed characters
echo "ma\u{00F1}ana"; // pre-composed character
echo "man\u{0303}ana"; // "n" with combining ~ character (U+0303)
echo "élève";
echo "\u{00E9}l\u{00E8}ve"; // pre-composed characters
echo "e\u{0301}le\u{0300}ve"; // e + combining characters
?>
</pre>
</body>
</html>Here is the output from a browser:
In order to improve the user experience on a website, it's important to display information in a format that is acceptable in the user's locale. Locale is a generic term used to indicate an area of the world. An effort in the I.T. community has been made to codify locales using a two-part designation consisting of codes for both language and country. But when a person visits your website, how do you know their locale? Probably the most useful technique involves examining the HTTP language header.
Application\I18n\Locale. We will have this class extend an existing class, Locale, which is part of the PHP Intl extension.namespace Application\I18n;
use Locale as PhpLocale;
class Locale extends PhpLocale
{
const FALLBACK_LOCALE = 'en';
// some code
}phpinfo(INFO_VARIABLES). Be sure to disable this function immediately after testing as it gives away too much information to potential attackers:<?php phpinfo(INFO_VARIABLES); ?>
$_SERVER['HTTP_ACCEPT_LANGUAGE']. The value will take this general form: ll-CC,rl;q=0.n, ll-CC,rl;q=0.n, as defined in this table:|
Abbreviation |
Meaning |
|---|---|
|
|
Two-character lowercase code representing the language. |
|
|
Separates language from country in the locale code |
|
| |
|
|
Separates locale code from fallback root locale code (usually the same as the language code). |
|
|
Two-character lowercase code representing the suggested root locale. |
|
|
Separates locale information from quality. If quality is missing, default is |
|
|
Quality. |
|
|
Some value between 0.00 and 1.0. Multiply this value by 100 to get the percentage of probability that this is the actual language preferred by this visitor. |
Locale class has a method, acceptFromHttp(), which reads the Accept-language header string and gives us the desired setting:protected $localeCode;
public function setLocaleCode($acceptLangHeader)
{
$this->localeCode = $this->acceptFromHttp($acceptLangHeader);
}get AcceptLanguage() method returns the value from $_SERVER['HTTP_ACCEPT_LANGUAGE']:public function getAcceptLanguage()
{
return $_SERVER['HTTP_ACCEPT_LANGUAGE'] ?? self::FALLBACK_LOCALE;
}
public function getLocaleCode()
{
return $this->localeCode;
}public function __construct($localeString = NULL)
{
if ($localeString) {
$this->setLocaleCode($localeString);
} else {
$this->setLocaleCode($this->getAcceptLanguage());
}
}Even though a visitor appears to accept one or more languages, that visitor does not necessarily want contents in the language/locale indicated by their browser. Accordingly, although you can certainly set the locale given this information, you should also provide them with a static list of alternative languages.
In this illustration, let's take three examples:
fr-FRda, en-gb;q=0.8, en;q=0.7Place the code from steps 1 to 6 into a file, Locale.php, which is in the Application\I18n folder.
Next, create a file, chap_08_getting_locale_from_browser.php, which sets up autoloading and uses the new class:
<?php require __DIR__ . '/../Application/Autoload/Loader.php'; Application\Autoload\Loader::init(__DIR__ . '/..'); use Application\I18n\Locale;
Now you can define an array with the three test locale strings:
$locale = [NULL, 'fr-FR', 'da, en-gb;q=0.8, en;q=0.7'];
Finally, loop through the three locale strings, creating instances of the new class. Echo the value returned from getLocaleCode() to see what choice was made:
echo '<table>';
foreach ($locale as $code) {
$locale = new Locale($code);
echo '<tr>
<td>' . htmlspecialchars($code) . '</td>
<td>' . $locale->getLocaleCode() . '</td>
</tr>';
}
echo '</table>';Here is the result (with a little bit of styling):
Locale class, see http://php.net/manual/en/class.locale.phpAccept-Language header, see section 14.4 of RFC 2616: https://www.w3.org/Protocols/rfc2616/rfc2616-sec14.htmlNumeric representations can vary by locale. As a simple example, in the UK one would see the number three million, eighty thousand, five hundred and twelve, and ninety-two one hundredths as follows:
3,080,512.92.
In France, however, the same number might appear like so:
3 080 512,92
Before you can represent a number in a locale-specific manner, you need to determine the locale. This can be accomplished using the Application\I18n\Locale class discussed in the previous recipe. The locale can be set manually or from header information.
format() method of the NumberFormatter class, to both output and parse numbers in a locale-specific format. First we add a property that will contain an instance of the NumberFormatter class:use NumberFormatter; protected $numberFormatter;
Our initial thought would be to consider using the PHP function setlocale() to produce numbers formatted according to locale. The problem with this legacy approach, however, is that everything will be considered based on this locale. This could introduce problems dealing with data that is stored according to database specifications. Another issue with setlocale() is that it is based on outdated standards, including RFC 1766 and ISO 639. Finally, setlocale() is highly dependent on operating system locale support, which will make our code non-portable.
$numberFormatter in the constructor. The problem with this approach, in the case of our Application\I18n\Locale class, is that we would end up with a top-heavy class, as we will also need to perform currency and date formatting as well. Accordingly, we add a getter that first checks to see whether an instance of NumberFormatter has already been created. If not, an instance is created and returned. The first argument in the new NumberFormatter is the locale code. The second argument, NumberFormatter::DECIMAL, represents what type of formatting we need:public function getNumberFormatter()
{
if (!$this->numberFormatter) {
$this->numberFormatter = new NumberFormatter($this->getLocaleCode(), NumberFormatter::DECIMAL);
}
return $this->numberFormatter;
}public function formatNumber($number)
{
return $this->getNumberFormatter()->format($number);
}FALSE on parse failure depending on the server's ICU version:public function parseNumber($string)
{
$result = $this->getNumberFormatter()->parse($string);
return ($result) ? $result : self::ERROR_UNABLE_TO_PARSE;
}Make the additions to the Application\I18n\Locale class as discussed in the preceding bullet points. You can then create a chap_08_formatting_numbers.php file, which sets up autoloading and uses this class:
<?php require __DIR__ . '/../Application/Autoload/Loader.php'; Application\Autoload\Loader::init(__DIR__ . '/..'); use Application\I18n\Locale;
For this illustration, create two Locale instances, one for the UK, the other for France. You can also designate a large number to be used for testing:
$localeFr = new Locale('fr_FR');
$localeUk = new Locale('en_GB');
$number = 1234567.89;
?>Finally, you can wrap the formatNumber() and parseNumber() methods in the appropriate HTML display logic and view the results:
<!DOCTYPE html>
<html>
<head>
<title>PHP 7 Cookbook</title>
<meta http-equiv="content-type" content="text/html;charset=utf-8" />
<link rel="stylesheet" type="text/css" href="php7cookbook_html_table.css">
</head>
<body>
<table>
<tr>
<th>Number</th>
<td>1234567.89</td>
</tr>
<tr>
<th>French Format</th>
<td><?= $localeFr->formatNumber($number); ?></td>
</tr>
<tr>
<th>UK Format</th>
<td><?= $localeUk->formatNumber($number); ?></td>
</tr>
<tr>
<th>UK Parse French Number: <?= $localeFr->formatNumber($number) ?></th>
<td><?= $localeUk->parseNumber($localeFr->formatNumber($number)); ?></td>
</tr>
<tr>
<th>UK Parse UK Number: <?= $localeUk->formatNumber($number) ?></th>
<td><?= $localeUk->parseNumber($localeUk->formatNumber($number)); ?></td>
</tr>
<tr>
<th>FR Parse FR Number: <?= $localeFr->formatNumber($number) ?></th>
<td><?= $localeFr->parseNumber($localeFr->formatNumber($number)); ?></td>
</tr>
<tr>
<th>FR Parse UK Number: <?= $localeUk->formatNumber($number) ?></th>
<td><?= $localeFr->parseNumber($localeUk->formatNumber($number)); ?></td>
</tr>
</table>
</body>
</html>Here is the result as seen from a browser:
Note that if the locale is set to fr_FR, a UK formatted number, when parsed, does not return the correct value. Likewise, when the locale is set to en_GB, a French formatted number does not return the correct value upon parsing. Accordingly, you might want to consider adding a validation check before attempting to parse the number.
setlocale() please refer to this page: http://php.net/manual/en/function.setlocale.php.The technique for handling currency is similar to that for numbers. We will even use the same NumberFormatter class! There is one major difference, however, and it is a show stopper: in order to properly format currency, you will need to have on hand the currency code.
Application\I18n\Locale class constructor argument:const FALLBACK_CURRENCY = 'GBP';
protected $currencyCode;
public function __construct($localeString = NULL, $currencyCode = NULL)
{
// add this to the existing code:
$this->currencyCode = $currencyCode ?? self::FALLBACK_CURRENCY;
}This approach, although obviously solid and workable, tends to fall into the category called halfway measures or the easy way out! This approach would also tend to eliminate full automation as the currency code is not available from the HTTP header. As you have probably gathered from other recipes in this book, we do not shy away from a more complex solution so, as the saying goes, strap on your seat belts!
Application\I18n\IsoCodes. As you can see, this class has all the pertinent properties, along with a sort-of universal constructor:namespace Application\I18n;
class IsoCodes
{
public $name;
public $iso2;
public $iso3;
public $iso_numeric;
public $iso_3166;
public $currency_name;
public $currency_code;
public $currency_number;
public function __construct(array $data)
{
$vars = get_object_vars($this);
foreach ($vars as $key => $value) {
$this->$key = $data[$key] ?? NULL;
}
}
}Application\I18n\IsoCodesInterface:namespace Application\I18n;
interface IsoCodesInterface
{
public function getCurrencyCodeFromIso2CountryCode($iso2) : IsoCodes;
}Application\I18n\IsoCodesDb. It implements the abovementioned interface, and accepts an Application\Database\Connection instance (see Chapter 1, Building a Foundation), which is used to perform the lookup. The constructor sets up the required information, including the connection, the lookup table name, and the column that represents the ISO2 code. The lookup method required by the interface then issues an SQL statement and returns an array, which is then used to build an IsoCodes instance:namespace Application\I18n;
use PDO;
use Application\Database\Connection;
class IsoCodesDb implements IsoCodesInterface
{
protected $isoTableName;
protected $iso2FieldName;
protected $connection;
public function __construct(Connection $connection, $isoTableName, $iso2FieldName)
{
$this->connection = $connection;
$this->isoTableName = $isoTableName;
$this->iso2FieldName = $iso2FieldName;
}
public function getCurrencyCodeFromIso2CountryCode($iso2) : IsoCodes
{
$sql = sprintf('SELECT * FROM %s WHERE %s = ?', $this->isoTableName, $this->iso2FieldName);
$stmt = $this->connection->pdo->prepare($sql);
$stmt->execute([$iso2]);
return new IsoCodes($stmt->fetch(PDO::FETCH_ASSOC);
}
}Application\I18n\Locale class. We first add a couple of new properties and class constants:const ERROR_UNABLE_TO_PARSE = 'ERROR: Unable to parse'; const FALLBACK_CURRENCY = 'GBP'; protected $currencyFormatter; protected $currencyLookup; protected $currencyCode;
getRegion() method, which comes from the PHP Locale class (which we extend). Just in case it's needed, we also add a method, getCurrencyCode():public function getCountryCode()
{
return $this->getRegion($this->getLocaleCode());
}
public function getCurrencyCode()
{
return $this->currencyCode;
}getCurrencyFormatter(I), much as we did getNumberFormatter() (shown previously). Notice that $currencyFormatter is defined using NumberFormatter, but with a different second parameter:public function getCurrencyFormatter()
{
if (!$this->currencyFormatter) {
$this->currencyFormatter = new NumberFormatter($this->getLocaleCode(), NumberFormatter::CURRENCY);
}
return $this->currencyFormatter;
}public function __construct($localeString = NULL, IsoCodesInterface $currencyLookup = NULL)
{
// add this to the existing code:
$this->currencyLookup = $currencyLookup;
if ($this->currencyLookup) {
$this->currencyCode = $this->currencyLookup->getCurrencyCodeFromIso2CountryCode($this->getCountryCode())->currency_code;
} else {
$this->currencyCode = self::FALLBACK_CURRENCY;
}
}FALSE if the parsing operation is not successful:public function formatCurrency($currency)
{
return $this->getCurrencyFormatter()->formatCurrency($currency, $this->currencyCode);
}
public function parseCurrency($string)
{
$result = $this->getCurrencyFormatter()->parseCurrency($string, $this->currencyCode);
return ($result) ? $result : self::ERROR_UNABLE_TO_PARSE;
}Create the following classes, as covered in the first several bullet points:
|
Class |
Bullet point discussed |
|---|---|
|
|
3 |
|
|
4 |
|
|
5 |
We will assume, for the purposes of this illustration, that we have a populated MySQL database table, iso_country_codes, which has this structure:
CREATE TABLE `iso_country_codes` ( `name` varchar(128) NOT NULL, `iso2` varchar(2) NOT NULL, `iso3` varchar(3) NOT NULL, `iso_numeric` int(11) NOT NULL AUTO_INCREMENT, `iso_3166` varchar(32) NOT NULL, `currency_name` varchar(32) DEFAULT NULL, `currency_code` char(3) DEFAULT NULL, `currency_number` int(4) DEFAULT NULL, PRIMARY KEY (`iso_numeric`) ) ENGINE=InnoDB AUTO_INCREMENT=895 DEFAULT CHARSET=utf8;
Make the additions to the Application\I18n\Locale class, as discussed in bullet points 6 to 9 previously. You can then create a chap_08_formatting_currency.php file, which sets up autoloading and uses the appropriate classes:
<?php
define('DB_CONFIG_FILE', __DIR__ . '/../config/db.config.php');
require __DIR__ . '/../Application/Autoload/Loader.php';
Application\Autoload\Loader::init(__DIR__ . '/..');
use Application\I18n\Locale;
use Application\I18n\IsoCodesDb;
use Application\Database\Connection;
use Application\I18n\Locale;Next, we create instances of the Connection and IsoCodesDb classes:
$connection = new Connection(include DB_CONFIG_FILE); $isoLookup = new IsoCodesDb($connection, 'iso_country_codes', 'iso2');
For this illustration, create two Locale instances, one for the UK, the other for France. You can also designate a large number to be used for testing:
$localeFr = new Locale('fr-FR', $isoLookup);
$localeUk = new Locale('en_GB', $isoLookup);
$number = 1234567.89;
?>Finally, you can wrap the formatCurrency() and parseCurrency() methods in the appropriate HTML display logic and view the results. Base your view logic on that presented in the How it works... section of the previous recipe (not repeated here to save trees!). Here is the final output:
The formatting of date and time varies region to region. As a classic example, consider the year 2016, month April, day 15 and a time in the evening. The format preferred by denizens of the United States would be 7:23 PM, 4/15/2016, whereas in China you would most likely see 2016-04-15 19:23. As mentioned with number and currency formatting, it would also be important to display (and parse) dates in a format acceptable to your web visitors.
Application\I18n\Locale, adding statements to use date formatting classes:use IntlCalendar; use IntlDateFormatter;
IntlDateFormatter instance, as well as a series of predefined constants:const DATE_TYPE_FULL = IntlDateFormatter::FULL; const DATE_TYPE_LONG = IntlDateFormatter::LONG; const DATE_TYPE_MEDIUM = IntlDateFormatter::MEDIUM; const DATE_TYPE_SHORT = IntlDateFormatter::SHORT; const ERROR_UNABLE_TO_PARSE = 'ERROR: Unable to parse'; const ERROR_UNABLE_TO_FORMAT = 'ERROR: Unable to format date'; const ERROR_ARGS_STRING_ARRAY = 'ERROR: Date must be string YYYY-mm-dd HH:ii:ss or array(y,m,d,h,i,s)'; const ERROR_CREATE_INTL_DATE_FMT = 'ERROR: Unable to create international date formatter'; protected $dateFormatter;
getDateFormatter(), which returns an IntlDateFormatter instance. The value of $type matches one of the DATE_TYPE_* constants defined previously:public function getDateFormatter($type)
{
switch ($type) {
case self::DATE_TYPE_SHORT :
$formatter = new IntlDateFormatter($this->getLocaleCode(),
IntlDateFormatter::SHORT, IntlDateFormatter::SHORT);
break;
case self::DATE_TYPE_MEDIUM :
$formatter = new IntlDateFormatter($this->getLocaleCode(), IntlDateFormatter::MEDIUM, IntlDateFormatter::MEDIUM);
break;
case self::DATE_TYPE_LONG :
$formatter = new IntlDateFormatter($this->getLocaleCode(), IntlDateFormatter::LONG, IntlDateFormatter::LONG);
break;
case self::DATE_TYPE_FULL :
$formatter = new IntlDateFormatter($this->getLocaleCode(), IntlDateFormatter::FULL, IntlDateFormatter::FULL);
break;
default :
throw new InvalidArgumentException(self::ERROR_CREATE_INTL_DATE_FMT);
}
$this->dateFormatter = $formatter;
return $this->dateFormatter;
}$date is a bit tricky. It cannot be locale-specific, otherwise we will need to parse it according to locale rules, with unpredictable results. A better strategy would be to accept an array of values that represent year, month, day, and so on as integers. As a fallback, we will accept a string but only in this format: YYYY-mm-dd HH:ii:ss. Time zone is optional, and can be set separately. First we initialize variables:public function formatDate($date, $type, $timeZone = NULL)
{
$result = NULL;
$year = date('Y');
$month = date('m');
$day = date('d');
$hour = 0;
$minutes = 0;
$seconds = 0;if (is_string($date)) {
list($dateParts, $timeParts) = explode(' ', $date);
list($year,$month,$day) = explode('-',$dateParts);
list($hour,$minutes,$seconds) = explode(':',$timeParts);
} elseif (is_array($date)) {
list($year,$month,$day,$hour,$minutes,$seconds) = $date;
} else {
throw new InvalidArgumentException(self::ERROR_ARGS_STRING_ARRAY);
}IntlCalendar instance, which will serve as an argument when running format(). We set the date using the discreet integer values:$intlDate = IntlCalendar::createInstance($timeZone, $this->getLocaleCode()); $intlDate->set($year,$month,$day,$hour,$minutes,$seconds);
$formatter = $this->getDateFormatter($type);
if ($timeZone) {
$formatter->setTimeZone($timeZone);
}
$result = $formatter->format($intlDate);
return $result ?? self::ERROR_UNABLE_TO_FORMAT;
}parseDate() method is actually simpler than formatting. The only complication is what to do if the type is not specified (which will be the most likely case). All we need to do is to loop through all possible types (of which there are only four) until a result is produced:public function parseDate($string, $type = NULL)
{
if ($type) {
$result = $this->getDateFormatter($type)->parse($string);
} else {
$tryThese = [self::DATE_TYPE_FULL,
self::DATE_TYPE_LONG,
self::DATE_TYPE_MEDIUM,
self::DATE_TYPE_SHORT];
foreach ($tryThese as $type) {
$result = $this->getDateFormatter($type)->parse($string);
if ($result) {
break;
}
}
}
return ($result) ? $result : self::ERROR_UNABLE_TO_PARSE;
}Code the changes to Application\I18n\Locale, discussed previously. You can then create a test file, chap_08_formatting_date.php, which sets up autoloading, and creates two instances of the Locale class, one for the USA, the other for France:
<?php
require __DIR__ . '/../Application/Autoload/Loader.php';
Application\Autoload\Loader::init(__DIR__ . '/..');
use Application\I18n\Locale;
$localeFr = new Locale('fr-FR');
$localeUs = new Locale('en_US');
$date = '2016-02-29 17:23:58';
?>Next, with suitable styling, run a test of formatDate() and parseDate():
echo $localeFr->formatDate($date, Locale::DATE_TYPE_FULL); echo $localeUs->formatDate($date, Locale::DATE_TYPE_MEDIUM); $localeUs->parseDate($localeFr->formatDate($date, Locale::DATE_TYPE_MEDIUM)); // etc.
An example of the output is shown here:
Creating a program to display a calendar is something you would most likely do as a student at secondary school. A nested for() loop, where the inside loop generates a list of seven days, will generally suffice. Even the problem of how many days there are in the month is easily solved in the form of a simple array. Where it starts to get tricky is when you need to figure out, for any given year, on what day of the week does the 1st of January fall. Also, what if you want to represent the months and days of the week in a language and format acceptable to a specific locale? As you have probably guessed, we will build a solution using the previously discussed Application\I18n\Locale class.
$dayOfMonth. Later, in the next recipe, we'll expand it to include events. As the primary purpose of this class will be to yield $dayOfMonth, we'll incorporate this value into its constructor, and define __invoke() to return this value as well:namespace Application\I18n;
class Day
{
public $dayOfMonth;
public function __construct($dayOfMonth)
{
$this->dayOfMonth = $dayOfMonth;
}
public function __invoke()
{
return $this->dayOfMonth ?? '';
}
}Application\I18n\Locale, and will define a couple of class constants and properties. The format codes, such as EEEEE and MMMM, are drawn from ICU date formats:namespace Application\I18n;
use IntlCalendar;
class Calendar
{
const DAY_1 = 'EEEEE'; // T
const DAY_2 = 'EEEEEE'; // Tu
const DAY_3 = 'EEE'; // Tue
const DAY_FULL = 'EEEE'; // Tuesday
const MONTH_1 = 'MMMMM'; // M
const MONTH_3 = 'MMM'; // Mar
const MONTH_FULL = 'MMMM'; // March
const DEFAULT_ACROSS = 3;
const HEIGHT_FULL = '150px';
const HEIGHT_SMALL = '60px';
protected $locale;
protected $dateFormatter;
protected $yearArray;
protected $height;
public function __construct(Locale $locale)
{
$this->locale = $locale;
}
// other methods are discussed in the following bullets
}IntlDateFormatter instance from our locale class. This is stored in a class property, as it will be used frequently:protected function getDateFormatter()
{
if (!$this->dateFormatter) {
$this->dateFormatter = $this->locale->getDateFormatter(Locale::DATE_TYPE_FULL);
}
return $this->dateFormatter;
}buildMonthArray(), which creates a multi-dimensional array where the outer key is the week of the year, and the inner array is seven elements representing the days of the week. We accept the year, month, and optional time zone as arguments. Note, as part of variable initialization, we subtract 1 from the month. This is because the IntlCalendar::set() method expects a 0-based value for the month, where 0 represents January, 1 is February, and so on:public function buildMonthArray($year, $month, $timeZone = NULL)
{
$month -= 1;
//IntlCalendar months are 0 based; Jan==0, Feb==1 and so on
$day = 1;
$first = TRUE;
$value = 0;
$monthArray = array();IntlCalendar instance, and use it to determine how many days are in this month:$cal = IntlCalendar::createInstance($timeZone, $this->locale->getLocaleCode()); $cal->set($year, $month, $day); $maxDaysInMonth = $cal->getActualMaximum(IntlCalendar::FIELD_DAY_OF_MONTH);
IntlDateFormatter instance to determine what day of the week equates to the 1st of this month. After that, we set the pattern to w, which will subsequently give us the week number:$formatter = $this->getDateFormatter();
$formatter->setPattern('e');
$firstDayIsWhatDow = $formatter->format($cal);while() loop ensures we don't go past the end of the month. The inner loop represents the days of the week. You will note that we take advantage of IntlCalendar::get(), which allows us to retrieve values from a wide range of predefined fields. We also adjust the week of the year value to 0 if it exceeds 52:while ($day <= $maxDaysInMonth) {
for ($dow = 1; $dow <= 7; $dow++) {
$cal->set($year, $month, $day);
$weekOfYear = $cal->get(IntlCalendar::FIELD_WEEK_OF_YEAR);
if ($weekOfYear > 52) $weekOfYear = 0;$first is still set TRUE. If so, we start adding day numbers to the array. Otherwise, the array value is set to NULL. We then close all open statements and return the array. Note that we also need to make sure the inner loop doesn't go past the number of days in the month, hence the extra if() statement in the outer else clause. if ($first) {
if ($dow == $firstDayIsWhatDow) {
$first = FALSE;
$value = $day++;
} else {
$value = NULL;
}
} else {
if ($day <= $maxDaysInMonth) {
$value = $day++;
} else {
$value = NULL;
}
}
$monthArray[$weekOfYear][$dow] = new Day($value);
}
}
return $monthArray;
}protected function getDay($type, $cal)
{
$formatter = $this->getDateFormatter();
$formatter->setPattern($type);
return $formatter->format($cal);
}getDay() method. As mentioned previous, the type dictates the appearance of the days:protected function getWeekHeaderRow($type, $cal, $year, $month, $week)
{
$output = '<tr>';
$width = (int) (100/7);
foreach ($week as $day) {
$cal->set($year, $month, $day());
$output .= '<th style="vertical-align:top;" width="' . $width . '%">' . $this->getDay($type, $cal) . '</th>';
}
$output .= '</tr>' . PHP_EOL;
return $output;
}Day::__invoke() using: $day():protected function getWeekDaysRow($week)
{
$output = '<tr style="height:' . $this->height . ';">';
$width = (int) (100/7);
foreach ($week as $day) {
$output .= '<td style="vertical-align:top;" width="' . $width . '%">' . $day() . '</td>';
}
$output .= '</tr>' . PHP_EOL;
return $output;
}$yearArray is not already available:public function calendarForMonth($year,
$month,
$timeZone = NULL,
$dayType = self::DAY_3,
$monthType = self::MONTH_FULL,
$monthArray = NULL)
{
$first = 0;
if (!$monthArray)
$monthArray = $this->yearArray[$year][$month]
?? $this->buildMonthArray($year, $month, $timeZone);1 as IntlCalendar months are 0-based: Jan = 0, Feb = 1, and so on. We then build an IntlCalendar instance using the time zone (if any), and the locale. We next create a IntlDateFormatter instance to retrieve the month name and other information according to locale:$month--; $cal = IntlCalendar::createInstance($timeZone, $this->locale->getLocaleCode()); $cal->set($year, $month, 1); $formatter = $this->getDateFormatter(); $formatter->setPattern($monthType);
$this->height = ($dayType == self::DAY_FULL)
? self::HEIGHT_FULL : self::HEIGHT_SMALL;
$html = '<h1>' . $formatter->format($cal) . '</h1>';
$header = '';
$body = '';
foreach ($monthArray as $weekNum => $week) {
if ($first++ == 1) {
$header .= $this->getWeekHeaderRow($dayType, $cal, $year, $month, $week);
}
$body .= $this->getWeekDaysRow($dayType, $week);
}
$html .= '<table>' . $header . $body . '</table>' . PHP_EOL;
return $html;
}public function buildYearArray($year, $timeZone = NULL)
{
$this->yearArray = array();
for ($month = 1; $month <= 12; $month++) {
$this->yearArray[$year][$month] = $this->buildMonthArray($year, $month, $timeZone);
}
return $this->yearArray;
}
public function getYearArray()
{
return $this->yearArray;
}calendarForYear(). If the year array has not been build, we call buildYearArray(). We take into account how many monthly calendars we wish to display across and then call calendarForMonth():public function calendarForYear($year,
$timeZone = NULL,
$dayType = self::DAY_1,
$monthType = self::MONTH_3,
$across = self::DEFAULT_ACROSS)
{
if (!$this->yearArray) $this->buildYearArray($year, $timeZone);
$yMax = (int) (12 / $across);
$width = (int) (100 / $across);
$output = '<table>' . PHP_EOL;
$month = 1;
for ($y = 1; $y <= $yMax; $y++) {
$output .= '<tr>';
for ($x = 1; $x <= $across; $x++) {
$output .= '<td style="vertical-align:top;" width="' . $width . '%">' . $this->calendarForMonth($year, $month, $timeZone, $dayType, $monthType, $this->yearArray[$year][$month++]) . '</td>';
}
$output .= '</tr>' . PHP_EOL;
}
$output .= '</table>';
return $output;
}First of all, make sure you build the Application\I18n\Locale class as defined in the previous recipe. After that, create a new file, Calendar.php, in the Application\I18n folder, with all the methods described in this recipe.
Next, define a calling program, chap_08_html_calendar.php, which sets up autoloading and creates Locale and Calendar instances. Also be sure to define the year and month:
<?php
require __DIR__ . '/../Application/Autoload/Loader.php';
Application\Autoload\Loader::init(__DIR__ . '/..');
use Application\I18n\Locale;
use Application\I18n\Calendar;
$localeFr = new Locale('fr-FR');
$localeUs = new Locale('en_US');
$localeTh = new Locale('th_TH');
$calendarFr = new Calendar($localeFr);
$calendarUs = new Calendar($localeUs);
$calendarTh = new Calendar($localeTh);
$year = 2016;
$month = 1;
?>You can then develop appropriate view logic to display the different calendars. For example, you can include parameters to display the full month and day names:
<!DOCTYPE html>
<html>
<head>
<title>PHP 7 Cookbook</title>
<meta http-equiv="content-type" content="text/html;charset=utf-8" />
<link rel="stylesheet" type="text/css" href="php7cookbook_html_table.css">
</head>
<body>
<h3>Year: <?= $year ?></h3>
<?= $calendarFr->calendarForMonth($year, $month, NULL, Calendar::DAY_FULL); ?>
<?= $calendarUs->calendarForMonth($year, $month, NULL, Calendar::DAY_FULL); ?>
<?= $calendarTh->calendarForMonth($year, $month, NULL, Calendar::DAY_FULL); ?>
</body>
</html>With a couple of modifications, you can also display a calendar for the entire year:
$localeTh = new Locale('th_TH');
$localeEs = new Locale('es_ES');
$calendarTh = new Calendar($localeTh);
$calendarEs = new Calendar($localeEs);
$year = 2016;
echo $calendarTh->calendarForYear($year);
echo $calendarEs->calendarForYear($year);Here is the browser output showing a full year calendar in Spanish:
IntlDateFormatter::setPattern(), see this article: http://userguide.icu-project.org/formatparse/datetimeA very common need related to generating a calendar is the scheduling of events. Events can be in the form of one-off events, which take place on one day, or on a weekend. There is a much greater need, however, to track events that are recurring. We need to account for the start date, the recurring interval (daily, weekly, monthly), and the number of occurrences or a specific end date.
DateTime extension admirably suited to event generation:namespace Application\I18n;
use DateTime;
use DatePeriod;
use DateInterval;
use InvalidArgumentException;
class Event
{
// code
}public in order to economize on the number of getters and setters needed. The intervals are defined as sprintf() format strings; %d will be substituted for a value:const INTERVAL_DAY = 'P%dD'; const INTERVAL_WEEK = 'P%dW'; const INTERVAL_MONTH = 'P%dM'; const FLAG_FIRST = 'FIRST'; // 1st of the month const ERROR_INVALID_END = 'Need to supply either # occurrences or an end date'; const ERROR_INVALID_DATE = 'String i.e. YYYY-mm-dd or DateTime instance only'; const ERROR_INVALID_INTERVAL = 'Interval must take the form "P\d+(D | W | M)"'; public $id; public $flag; public $value; public $title; public $locale; public $interval; public $description; public $occurrences; public $nextDate; protected $endDate; protected $startDate;
public function __construct($title,
$description,
$startDate,
$interval,
$value,
$occurrences = NULL,
$endDate = NULL,
$flag = NULL)
{events table. Here we use md5() not for security purposes, but rather to quickly generate a hash so that IDs have a consistent appearance:$this->id = md5($title . $interval . $value) . sprintf('%04d', rand(0,9999));
$this->flag = $flag;
$this->value = $value;
$this->title = $title;
$this->description = $description;
$this->occurrences = $occurrences;sprintf() pattern used to construct a proper DateInterval instance:try {
$this->interval = new DateInterval(sprintf($interval, $value));
} catch (Exception $e) {
error_log($e->getMessage());
throw new InvalidArgumentException(self::ERROR_INVALID_INTERVAL);
}$startDate, we call stringOrDate(). We then attempt to generate a value for $endDate by calling either stringOrDate() or calcEndDateFromOccurrences(). If we have neither an end date nor a number of occurrences, an exception is thrown: $this->startDate = $this->stringOrDate($startDate);
if ($endDate) {
$this->endDate = $this->stringOrDate($endDate);
} elseif ($occurrences) {
$this->endDate = $this->calcEndDateFromOccurrences();
} else {
throw new InvalidArgumentException(self::ERROR_INVALID_END);
}
$this->nextDate = $this->startDate;
}stringOrDate() method consists of a few lines of code that check the data type of the date variable, and return a DateTime instance or NULL:protected function stringOrDate($date)
{
if ($date === NULL) {
$newDate = NULL;
} elseif ($date instanceof DateTime) {
$newDate = $date;
} elseif (is_string($date)) {
$newDate = new DateTime($date);
} else {
throw new InvalidArgumentException(self::ERROR_INVALID_END);
}
return $newDate;
}calcEndDateFromOccurrences() method from the constructor if $occurrences is set so that we'll know the end date for this event. We take advantage of the DatePeriod class, which provides an iteration based on a start date, DateInterval, and number of occurrences:protected function calcEndDateFromOccurrences()
{
$endDate = new DateTime('now');
$period = new DatePeriod(
$this->startDate, $this->interval, $this->occurrences);
foreach ($period as $date) {
$endDate = $date;
}
return $endDate;
}__toString() magic method, which simple echoes the title of the event:public function __toString()
{
return $this->title;
}Event class is getNextDate(), which is used when generating a calendar:public function getNextDate(DateTime $today)
{
if ($today > $this->endDate) {
return FALSE;
}
$next = clone $today;
$next->add($this->interval);
return $next;
}Application\I18n\Calendar class described in the previous recipe. With a bit of minor surgery, we are ready to tie our newly defined Event class into the calendar. First we add a new property, $events, and a method to add events in the form of an array. We use the Event::$id property to make sure events are merged and not overwritten:protected $events = array();
public function addEvent(Event $event)
{
$this->events[$event->id] = $event;
}processEvents(), which adds an Event instance to a Day object when building the year calendar. First we check to see whether there are any events, and whether or not the Day object is NULL. As you may recall, it's likely that the first day of the month doesn't fall on the first day of the week, and thus the need to set the value of a Day object to NULL. We certainly do not want to add events to a non-operative day! We then call Event::getNextDate() and see whether the dates match. If so, we store the Event into Day::$events[] and set the next date on the Event object:protected function processEvents($dayObj, $cal)
{
if ($this->events && $dayObj()) {
$calDateTime = $cal->toDateTime();
foreach ($this->events as $id => $eventObj) {
$next = $eventObj->getNextDate($eventObj->nextDate);
if ($next) {
if ($calDateTime->format('Y-m-d') ==
$eventObj->nextDate->format('Y-m-d')) {
$dayObj->events[$eventObj->id] = $eventObj;
$eventObj->nextDate = $next;
}
}
}
}
return $dayObj;
}Note that we do not do a direct comparison of the two objects. Two reasons for this: first of all, one is a DateTime instance, the other is an IntlCalendar instance. The other, more compelling reason, is that it's possible that hours:minutes:seconds were included when the DateTime instance was obtained, resulting in actual value differences between the two objects.
processEvents() in the buildMonthArray() method so that it looks like this: while ($day <= $maxDaysInMonth) {
for ($dow = 1; $dow <= 7; $dow++) {
// add this to the existing code:
$dayObj = $this->processEvents(new Day($value), $cal);
$monthArray[$weekOfYear][$dow] = $dayObj;
}
}getWeekDaysRow(), adding the necessary code to output event information inside the box along with the date:protected function getWeekDaysRow($type, $week)
{
$output = '<tr style="height:' . $this->height . ';">';
$width = (int) (100/7);
foreach ($week as $day) {
$events = '';
if ($day->events) {
foreach ($day->events as $single) {
$events .= '<br>' . $single->title;
if ($type == self::DAY_FULL) {
$events .= '<br><i>' . $single->description . '</i>';
}
}
}
$output .= '<td style="vertical-align:top;" width="' . $width . '%">'
. $day() . $events . '</td>';
}
$output .= '</tr>' . PHP_EOL;
return $output;
}To tie events to the calendar, first code the Application\I18n\Event class described in steps 1 to 10. Next, modify Application\I18n\Calendar as described in steps 11 to 14. You can then create a test script, chap_08_recurring_events.php, which sets up autoloading and creates Locale and Calendar instances. For the purposes of illustration, go ahead and use 'es_ES' as a locale:
<?php
require __DIR__ . '/../Application/Autoload/Loader.php';
Application\Autoload\Loader::init(__DIR__ . '/..');
use Application\I18n\ { Locale, Calendar, Event };
try {
$year = 2016;
$localeEs = new Locale('es_ES');
$calendarEs = new Calendar($localeEs);Now we can start defining and adding events to the calendar. The first example adds an event that lasts 3 days and starts on 8 January 2016:
// add event: 3 days
$title = 'Conf';
$description = 'Special 3 day symposium on eco-waste';
$startDate = '2016-01-08';
$event = new Event($title, $description, $startDate,
Event::INTERVAL_DAY, 1, 2);
$calendarEs->addEvent($event);Here is another example, an event that occurs on the first of every month until September 2017:
$title = 'Pay Rent';
$description = 'Sent rent check to landlord';
$startDate = new DateTime('2016-02-01');
$event = new Event($title, $description, $startDate,
Event::INTERVAL_MONTH, 1, '2017-09-01', NULL, Event::FLAG_FIRST);
$calendarEs->addEvent($event);You can then add sample weekly, bi-weekly, monthly, and so on events as desired. You can then close the try...catch block, and produce suitable display logic:
} catch (Throwable $e) {
$message = $e->getMessage();
}
?>
<!DOCTYPE html>
<head>
<title>PHP 7 Cookbook</title>
<meta http-equiv="content-type" content="text/html;charset=utf-8" />
<link rel="stylesheet" type="text/css" href="php7cookbook_html_table.css">
</head>
<body>
<h3>Year: <?= $year ?></h3>
<?= $calendarEs->calendarForYear($year, 'Europe/Berlin',
Calendar::DAY_3, Calendar::MONTH_FULL, 2); ?>
<?= $calendarEs->calendarForMonth($year, 1 , 'Europe/Berlin',
Calendar::DAY_FULL); ?>
</body>
</html>Here is the output showing the first few months of the year:
IntlCalendar field constants that can be used with get(), please refer to this page: http://php.net/manual/en/class.intlcalendar.php#intlcalendar.constantsTranslation is an important part of making your website accessible to an international customer base. One way this is accomplished it to use the PHP gettext functions, which are based on the GNU gettext operating system tools installed on the local server. gettext is well documented and well supported, but uses a legacy approach and has distinct disadvantages. Accordingly, in this recipe, we present an alternative approach to translation where you can build your own adapter.
Something important to recognize is that the programmatic translation tools available to PHP are primarily designed to provide limited translation of a word or phrase, referred to as the msgid (message ID). The translated equivalent is referred to as the msgstr (message string). Accordingly, incorporating translation typically only involves relatively unchanging items such as menus, forms, error or success messages, and so on. For the purposes of this recipe, we will assume that you have the actual web page translations stored as blocks of text.
If you need to translate entire pages of content, you might consider using the Google Translate API. This is, however, a paid service. Alternatively, you could outsource the translation to individuals with multi-lingual skills cheaply using Amazon Mechanical Turk. See the See Also section at the end of this recipe for the URLs.
.ini files, .csv files, and databases.namespace Application\I18n\Translate\Adapter;
interface TranslateAdapterInterface
{
public function translate($msgid);
}namespace Application\I18n\Translate\Adapter;
trait TranslateAdapterTrait
{
protected $translation;
public function translate($msgid)
{
return $this->translation[$msgid] ?? $msgid;
}
}.ini file as the source of translations. The first thing you'll notice is that we use the trait defined previously. The constructor method will vary between adapters. In this case, we use parse_ini_file() to produce an array of key/value pairs where the key is the message ID. Notice that we use the $filePattern parameter to substitute the locale, which then allows us to load the appropriate translation file:namespace Application\I18n\Translate\Adapter;
use Exception;
use Application\I18n\Locale;
class Ini implements TranslateAdapterInterface
{
use TranslateAdapterTrait;
const ERROR_NOT_FOUND = 'Translation file not found';
public function __construct(Locale $locale, $filePattern)
{
$translateFileName = sprintf($filePattern, $locale->getLocaleCode());
if (!file_exists($translateFileName)) {
error_log(self::ERROR_NOT_FOUND . ':' . $translateFileName);
throw new Exception(self::ERROR_NOT_FOUND);
} else {
$this->translation = parse_ini_file($translateFileName);
}
}
}Application\I18n\Translate\Adapter\Csv, is identical, except that we open the translation file and loop through using fgetcsv() to retrieve the message ID / message string key pairs. Here we show only the difference in the constructor:public function __construct(Locale $locale, $filePattern)
{
$translateFileName = sprintf($filePattern, $locale->getLocaleCode());
if (!file_exists($translateFileName)) {
error_log(self::ERROR_NOT_FOUND . ':' . $translateFileName);
throw new Exception(self::ERROR_NOT_FOUND);
} else {
$fileObj = new SplFileObject($translateFileName, 'r');
while ($row = $fileObj->fgetcsv()) {
$this->translation[$row[0]] = $row[1];
}
}
}PDO prepared statement which is sent to the database in the beginning, and only one time. We then execute as many times as needed, supplying the message ID as an argument. You will also notice that we needed to override the translate() method defined in the trait. Finally, you might have noticed the use of PDOStatement::fetchColumn() as we only need the one value:namespace Application\I18n\Translate\Adapter;
use Exception;
use Application\Database\Connection;
use Application\I18n\Locale;
class Database implements TranslateAdapterInterface
{
use TranslateAdapterTrait;
protected $connection;
protected $statement;
protected $defaultLocaleCode;
public function __construct(Locale $locale,
Connection $connection,
$tableName)
{
$this->defaultLocaleCode = $locale->getLocaleCode();
$this->connection = $connection;
$sql = 'SELECT msgstr FROM ' . $tableName
. ' WHERE localeCode = ? AND msgid = ?';
$this->statement = $this->connection->pdo->prepare($sql);
}
public function translate($msgid, $localeCode = NULL)
{
if (!$localeCode) $localeCode = $this->defaultLocaleCode;
$this->statement->execute([$localeCode, $msgid]);
return $this->statement->fetchColumn();
}
}Translation class, which is tied to one (or more) adapters. We assign a class constant to represent the default locale, and properties for the locale, adapter, and text file pattern (explained later):namespace Application\I18n\Translate;
use Application\I18n\Locale;
use Application\I18n\Translate\Adapter\TranslateAdapterInterface;
class Translation
{
const DEFAULT_LOCALE_CODE = 'en_GB';
protected $defaultLocaleCode;
protected $adapter = array();
protected $textFilePattern = array();public function __construct(TranslateAdapterInterface $adapter,
$defaultLocaleCode = NULL,
$textFilePattern = NULL)
{
if (!$defaultLocaleCode) {
$this->defaultLocaleCode = self::DEFAULT_LOCALE_CODE;
} else {
$this->defaultLocaleCode = $defaultLocaleCode;
}
$this->adapter[$this->defaultLocaleCode] = $adapter;
$this->textFilePattern[$this->defaultLocaleCode] = $textFilePattern;
}public function setAdapter($localeCode, TranslateAdapterInterface $adapter)
{
$this->adapter[$localeCode] = $adapter;
}
public function setDefaultLocaleCode($localeCode)
{
$this->defaultLocaleCode = $localeCode;
}
public function setTextFilePattern($localeCode, $pattern)
{
$this->textFilePattern[$localeCode] = $pattern;
}__invoke(), which lets us make a direct call to the translator instance, returning the message string given the message ID:public function __invoke($msgid, $locale = NULL)
{
if ($locale === NULL) $locale = $this->defaultLocaleCode;
return $this->adapter[$locale]->translate($msgid);
}public function text($key, $localeCode = NULL)
{
if ($localeCode === NULL) $localeCode = $this->defaultLocaleCode;
$contents = $key;
if (isset($this->textFilePattern[$localeCode])) {
$fn = sprintf($this->textFilePattern[$localeCode], $localeCode, $key);
if (file_exists($fn)) {
$contents = file_get_contents($fn);
}
}
return $contents;
}First you will need to define a directory structure to house the translation files. For the purposes of this illustration, you can make a directory ,/path/to/project/files/data/languages. Under this directory structure, create sub-directories that represent different locales. For this illustration, you could use these: de_DE, fr_FR, en_GB, and es_ES, representing German, French, English, and Spanish.
Next you will need to create the different translation files. As an example, here is a representative data/languages/es_ES/translation.ini file in Spanish:
Welcome=Bienvenido About Us=Sobre Nosotros Contact Us=Contáctenos Find Us=Encontrarnos click=clic para más información
Likewise, to demonstrate the CSV adapter, create the same thing as a CSV file, data/languages/es_ES/translation.csv:
"Welcome","Bienvenido" "About Us","Sobre Nosotros" "Contact Us","Contáctenos" "Find Us","Encontrarnos" "click","clic para más información"
Finally, create a database table, translation, and populate it with the same data. The main difference is that the database table will have three fields: msgid, msgstr, and locale_code:
CREATE TABLE `translation` ( `msgid` varchar(255) NOT NULL, `msgstr` varchar(255) NOT NULL, `locale_code` char(6) NOT NULL DEFAULT '', PRIMARY KEY (`msgid`,`locale_code`) ) ENGINE=InnoDB DEFAULT CHARSET=latin1;
Next, define the classes mentioned previously, using the code shown in this recipe:
Application\I18n\Translate\Adapter\TranslateAdapterInterfaceApplication\I18n\Translate\Adapter\TranslateAdapterTraitApplication\I18n\Translate\Adapter\IniApplication\I18n\Translate\Adapter\CsvApplication\I18n\Translate\Adapter\DatabaseApplication\I18n\Translate\TranslationNow you can create a test file, chap_08_translation_database.php, to test the database translation adapter. It should implement autoloading, use the appropriate classes, and create a Locale and Connection instance. Note that the TEXT_FILE_PATTERN constant is a sprintf() pattern in which the locale code and filename are substituted:
<?php
define('DB_CONFIG_FILE', '/../config/db.config.php');
define('TEXT_FILE_PATTERN', __DIR__ . '/../data/languages/%s/%s.txt');
require __DIR__ . '/../Application/Autoload/Loader.php';
Application\Autoload\Loader::init(__DIR__ . '/..');
use Application\I18n\Locale;
use Application\I18n\Translate\ { Translation, Adapter\Database };
use Application\Database\Connection;
$conn = new Connection(include __DIR__ . DB_CONFIG_FILE);
$locale = new Locale('fr_FR');Next, create a translation adapter instance and use that to create a Translation instance:
$adapter = new Database($locale, $conn, 'translation'); $translate = new Translation($adapter, $locale->getLocaleCode(), TEXT_FILE_PATTERN); ?>
Finally, create display logic that uses the $translate instance:
<!DOCTYPE html>
<head>
<title>PHP 7 Cookbook</title>
<meta http-equiv="content-type" content="text/html;charset=utf-8" />
<link rel="stylesheet" type="text/css" href="php7cookbook_html_table.css">
</head>
<body>
<table>
<tr>
<th><h1 style="color:white;"><?= $translate('Welcome') ?></h1></th>
<td>
<div style="float:left;width:50%;vertical-align:middle;">
<h3 style="font-size:24pt;"><i>Some Company, Inc.</i></h3>
</div>
<div style="float:right;width:50%;">
<img src="jcartier-city.png" width="300px"/>
</div>
</td>
</tr>
<tr>
<th>
<ul>
<li><?= $translate('About Us') ?></li>
<li><?= $translate('Contact Us') ?></li>
<li><?= $translate('Find Us') ?></li>
</ul>
</th>
<td>
<p>
<?= $translate->text('main_page'); ?>
</p>
<p>
<a href="#"><?= $translate('click') ?></a>
</p>
</td>
</tr>
</table>
</body>
</html>You can then perform additional similar tests, substituting a new locale to get a different language, or using another adapter to test a different data source. Here is an example of output using a locale of fr_FR and the database translation adapter:
gettext, see http://www.gnu.org/software/gettext/manual/gettext.html.In this chapter, we will cover the following topics:
As often happens in the IT industry, terms get invented, and then used and abused. The term middleware is no exception. Arguably the first use of the term came out of the Internet Engineering Task Force (IETF) in the year 2000. Originally, the term was applied to any software which operates between the transport (that is, TCP/IP) and the application layer. More recently, especially with the acceptance of PHP Standard Recommendation number 7 (PSR-7), middleware, specifically in the PHP world, has been applied to the web client-server environment.
The recipes in this section will make use of the concrete classes defined in Appendix, Defining PSR-7 Classes.
One very important usage of middleware is to provide authentication. Most web-based applications need the ability to verify a visitor via username and password. By incorporating PSR-7 standards into an authentication class, you will make it generically useful across the board, so to speak, being secure enough that it can be used in any framework that provides PSR-7-compliant request and response objects.
Application\Acl\AuthenticateInterface class. We use this interface to support the Adapter software design pattern, making our Authenticate class more generically useful by allowing a variety of adapters, each of which can draw authentication from a different source (for example, from a file, using OAuth2, and so on). Note the use of the PHP 7 ability to define the return value data type:namespace Application\Acl;
use Psr\Http\Message\ { RequestInterface, ResponseInterface };
interface AuthenticateInterface
{
public function login(RequestInterface $request) :
ResponseInterface;
}login() method required by the interface. We make sure to use the appropriate classes, and define fitting constants and properties. The constructor makes use of Application\Database\Connection, defined in Chapter 5, Interacting with a Database:namespace Application\Acl;
use PDO;
use Application\Database\Connection;
use Psr\Http\Message\ { RequestInterface, ResponseInterface };
use Application\MiddleWare\ { Response, TextStream };
class DbTable implements AuthenticateInterface
{
const ERROR_AUTH = 'ERROR: authentication error';
protected $conn;
protected $table;
public function __construct(Connection $conn, $tableName)
{
$this->conn = $conn;
$this->table = $tableName;
}login() method extracts the username and password from the request object. We then do a straightforward database lookup. If there is a match, we store user information in the response body, JSON-encoded:public function login(RequestInterface $request) :
ResponseInterface
{
$code = 401;
$info = FALSE;
$body = new TextStream(self::ERROR_AUTH);
$params = json_decode($request->getBody()->getContents());
$response = new Response();
$username = $params->username ?? FALSE;
if ($username) {
$sql = 'SELECT * FROM ' . $this->table
. ' WHERE email = ?';
$stmt = $this->conn->pdo->prepare($sql);
$stmt->execute([$username]);
$row = $stmt->fetch(PDO::FETCH_ASSOC);
if ($row) {
if (password_verify($params->password,
$row['password'])) {
unset($row['password']);
$body =
new TextStream(json_encode($row));
$response->withBody($body);
$code = 202;
$info = $row;
}
}
}
return $response->withBody($body)->withStatus($code);
}
}Authenticate class is a wrapper for an adapter class that implements AuthenticationInterface. Accordingly, the constructor takes an adapter class as an argument, as well as a string that serves as the key, in which authentication information is stored in $_SESSION:namespace Application\Acl;
use Application\MiddleWare\ { Response, TextStream };
use Psr\Http\Message\ { RequestInterface, ResponseInterface };
class Authenticate
{
const ERROR_AUTH = 'ERROR: invalid token';
const DEFAULT_KEY = 'auth';
protected $adapter;
protected $token;
public function __construct(
AuthenticateInterface $adapter, $key)
{
$this->key = $key;
$this->adapter = $adapter;
}public function getToken()
{
$this->token = bin2hex(random_bytes(16));
$_SESSION['token'] = $this->token;
return $this->token;
}
public function matchToken($token)
{
$sessToken = $_SESSION['token'] ?? date('Ymd');
return ($token == $sessToken);
}
public function getLoginForm($action = NULL)
{
$action = ($action) ? 'action="' . $action . '" ' : '';
$output = '<form method="post" ' . $action . '>';
$output .= '<table><tr><th>Username</th><td>';
$output .= '<input type="text" name="username" /></td>';
$output .= '</tr><tr><th>Password</th><td>';
$output .= '<input type="password" name="password" />';
$output .= '</td></tr><tr><th> </th>';
$output .= '<td><input type="submit" /></td>';
$output .= '</tr></table>';
$output .= '<input type="hidden" name="token" value="';
$output .= $this->getToken() . '" />';
$output .= '</form>';
return $output;
}login() method in this class checks whether the token is valid. If not, a 400 response is returned. Otherwise, the login() method of the adapter is called:public function login(
RequestInterface $request) : ResponseInterface
{
$params = json_decode($request->getBody()->getContents());
$token = $params->token ?? FALSE;
if (!($token && $this->matchToken($token))) {
$code = 400;
$body = new TextStream(self::ERROR_AUTH);
$response = new Response($code, $body);
} else {
$response = $this->adapter->login($request);
}
if ($response->getStatusCode() >= 200
&& $response->getStatusCode() < 300) {
$_SESSION[$this->key] =
json_decode($response->getBody()->getContents());
} else {
$_SESSION[$this->key] = NULL;
}
return $response;
}
}First of all, be sure to follow the recipes defined in Appendix, Defining PSR-7 Classes. Next, go ahead and define the classes presented in this recipe, summarized in the following table:
|
Class |
Discussed in these steps |
|---|---|
|
|
1 |
|
|
2 - 3 |
|
|
4 - 6 |
You can then define a chap_09_middleware_authenticate.php calling program that sets up autoloading and uses the appropriate classes:
<?php
session_start();
define('DB_CONFIG_FILE', __DIR__ . '/../config/db.config.php');
define('DB_TABLE', 'customer_09');
define('SESSION_KEY', 'auth');
require __DIR__ . '/../Application/Autoload/Loader.php';
Application\Autoload\Loader::init(__DIR__ . '/..');
use Application\Database\Connection;
use Application\Acl\ { DbTable, Authenticate };
use Application\MiddleWare\ { ServerRequest, Request, Constants, TextStream };You are now in a position to set up the authentication adapter and core class:
$conn = new Connection(include DB_CONFIG_FILE); $dbAuth = new DbTable($conn, DB_TABLE); $auth = new Authenticate($dbAuth, SESSION_KEY);
Be sure to initialize the incoming request, and set up the request to be made to the authentication class:
$incoming = new ServerRequest(); $incoming->initialize(); $outbound = new Request();
Check the incoming class method to see if it is POST. If so, pass a request to the authentication class:
if ($incoming->getMethod() == Constants::METHOD_POST) {
$body = new TextStream(json_encode(
$incoming->getParsedBody()));
$response = $auth->login($outbound->withBody($body));
}
$action = $incoming->getServerParams()['PHP_SELF'];
?>The display logic looks like this:
<?= $auth->getLoginForm($action) ?>
Here is the output from an invalid authentication attempt. Notice the 401 status code on the right. In this illustration, you could add a var_dump() of the response object:
Here is a successful authentication:
For guidance on how to avoid CSRF and other attacks, please see Chapter 12, Improving Web Security.
As the name implies, middleware sits in the middle of a sequence of function or method calls. Accordingly, middleware is well suited for the task of "gate keeper". You can easily implement an Access Control List (ACL) mechanism with a middleware class that reads the ACL, and allows or denies access to the next function or method call in the sequence.
level and a status. In this illustration, the level is defined as follows:'levels' => [0, 'BEG', 'INT', 'ADV']
0 could indicate they've initiated the membership signup process, but have not yet been confirmed. A status of 1 could indicate their e-mail address is confirmed, but they have not paid the monthly fee, and so on.'pages' => [0 => 'sorry', 'logout' => 'logout', 'login' => 'auth',
1 => 'page1', 2 => 'page2', 3 => 'page3',
4 => 'page4', 5 => 'page5', 6 => 'page6',
7 => 'page7', 8 => 'page8', 9 => 'page9']level and status. The generic template used in the configuration array might look like this:status => ['inherits' => <key>, 'pages' => [level => [pages allowed], etc.]]
Acl class. As before, we use a few classes, and define constants and properties appropriate for access control:namespace Application\Acl;
use InvalidArgumentException;
use Psr\Http\Message\RequestInterface;
use Application\MiddleWare\ { Constants, Response, TextStream };
class Acl
{
const DEFAULT_STATUS = '';
const DEFAULT_LEVEL = 0;
const DEFAULT_PAGE = 0;
const ERROR_ACL = 'ERROR: authorization error';
const ERROR_APP = 'ERROR: requested page not listed';
const ERROR_DEF =
'ERROR: must assign keys "levels", "pages" and "allowed"';
protected $default;
protected $levels;
protected $pages;
protected $allowed; __construct() method, we break up the assignments array into $pages, the resources to be controlled, $levels, and $allowed, which are the actual assignments. If the array does not include one of these three sub-components, an exception is thrown:public function __construct(array $assignments)
{
$this->default = $assignments['default']
?? self::DEFAULT_PAGE;
$this->pages = $assignments['pages'] ?? FALSE;
$this->levels = $assignments['levels'] ?? FALSE;
$this->allowed = $assignments['allowed'] ?? FALSE;
if (!($this->pages && $this->levels && $this->allowed)) {
throw new InvalidArgumentException(self::ERROR_DEF);
}
}$allowed, the inherits key can be set to another key within the array. If so, we need to merge its values with the values currently under examination. We iterate through $allowed in reverse, merging any inherited values each time through the loop. This method, incidentally, also only isolates rules that apply to a certain status and level:protected function mergeInherited($status, $level)
{
$allowed = $this->allowed[$status]['pages'][$level]
?? array();
for ($x = $status; $x > 0; $x--) {
$inherits = $this->allowed[$x]['inherits'];
if ($inherits) {
$subArray =
$this->allowed[$inherits]['pages'][$level]
?? array();
$allowed = array_merge($allowed, $subArray);
}
}
return $allowed;
}400 code:public function isAuthorized(RequestInterface $request)
{
$code = 401; // unauthorized
$text['page'] = $this->pages[$this->default];
$text['authorized'] = FALSE;
$page = $request->getUri()->getQueryParams()['page']
?? FALSE;
if ($page === FALSE) {
$code = 400; // bad requeststatus and level. We are then in a position to call mergeInherited(), which returns an array of pages accessible to this status and level:} else {
$params = json_decode(
$request->getBody()->getContents());
$status = $params->status ?? self::DEFAULT_LEVEL;
$level = $params->level ?? '*';
$allowed = $this->mergeInherited($status, $level);$allowed array, we set the status code to a happy 200, and return an authorized setting along with the web page that corresponds to the page code requested:if (in_array($page, $allowed)) {
$code = 200; // OK
$text['authorized'] = TRUE;
$text['page'] = $this->pages[$page];
} else {
$code = 401; }
}$body = new TextStream(json_encode($text)); return (new Response())->withStatus($code) ->withBody($body); } }
After that, you will need to define Application\Acl\Acl, which is discussed in this recipe. Now move to the /path/to/source/for/this/chapter folder and create two directories: public and
pages. In pages, create a series of PHP files, such as page1.php, page2.php, and so on. Here is an example of how one of these pages might look:
<?php // page 1 ?> <h1>Page 1</h1> <hr> <p>Lorem ipsum dolor sit amet, consectetur adipiscing elit. etc.</p>
You can also define a menu.php page, which could be included in the output:
<?php // menu ?> <a href="?page=1">Page 1</a> <a href="?page=2">Page 2</a> <a href="?page=3">Page 3</a> // etc.
The logout.php page should destroy the session:
<?php $_SESSION['info'] = FALSE; session_destroy(); ?> <a href="/">BACK</a>
The auth.php page will display a login screen (as described in the previous recipe):
<?= $auth->getLoginForm($action) ?>
You can then create a configuration file that allows access to web pages depending on level and status. For the sake of illustration, call it chap_09_middleware_acl_config.php and return an array that might look like this:
<?php
$min = [0, 'logout'];
return [
'default' => 0, // default page
'levels' => [0, 'BEG', 'INT', 'ADV'],
'pages' => [0 => 'sorry',
'logout' => 'logout',
'login' => 'auth',
1 => 'page1', 2 => 'page2', 3 => 'page3',
4 => 'page4', 5 => 'page5', 6 => 'page6',
7 => 'page7', 8 => 'page8', 9 => 'page9'],
'allowed' => [
0 => ['inherits' => FALSE,
'pages' => [ '*' => $min, 'BEG' => $min,
'INT' => $min,'ADV' => $min]],
1 => ['inherits' => FALSE,
'pages' => ['*' => ['logout'],
'BEG' => [1, 'logout'],
'INT' => [1,2, 'logout'],
'ADV' => [1,2,3, 'logout']]],
2 => ['inherits' => 1,
'pages' => ['BEG' => [4],
'INT' => [4,5],
'ADV' => [4,5,6]]],
3 => ['inherits' => 2,
'pages' => ['BEG' => [7],
'INT' => [7,8],
'ADV' => [7,8,9]]]
]
];Finally, in the public folder, define index.php, which sets up autoloading, and ultimately calls up both the Authenticate and Acl classes. As with other recipes, define configuration files, set up autoloading, and use certain classes. Also, don't forget to start the session:
<?php
session_start();
session_regenerate_id();
define('DB_CONFIG_FILE', __DIR__ . '/../../config/db.config.php');
define('DB_TABLE', 'customer_09');
define('PAGE_DIR', __DIR__ . '/../pages');
define('SESSION_KEY', 'auth');
require __DIR__ . '/../../Application/Autoload/Loader.php';
Application\Autoload\Loader::init(__DIR__ . '/../..');
use Application\Database\Connection;
use Application\Acl\ { Authenticate, Acl };
use Application\MiddleWare\ { ServerRequest, Request, Constants, TextStream };Best practice
It is a best practice to protect your sessions. An easy way to help protect a session is to use session_regenerate_id(), which invalidates the existing PHP session identifier and generates a new one. Thus, if an attacker were to obtain the session identifier through illegal means, the window of time in which any given session identifier is valid is kept to a minimum.
You can now pull in the ACL configuration, and create instances for Authenticate as well as Acl:
$config = require __DIR__ . '/../chap_09_middleware_acl_config.php'; $acl = new Acl($config); $conn = new Connection(include DB_CONFIG_FILE); $dbAuth = new DbTable($conn, DB_TABLE); $auth = new Authenticate($dbAuth, SESSION_KEY);
Next, define incoming and outbound request instances:
$incoming = new ServerRequest(); $incoming->initialize(); $outbound = new Request();
If the incoming request method was post, process the authentication calling the login() method:
if (strtolower($incoming->getMethod()) == Constants::METHOD_POST) {
$body = new TextStream(json_encode(
$incoming->getParsedBody()));
$response = $auth->login($outbound->withBody($body));
}If the session key defined for authentication is populated, that means the user has been successfully authenticated. If not, we program an anonymous function, called later, which includes the authentication login page:
$info = $_SESSION[SESSION_KEY] ?? FALSE;
if (!$info) {
$execute = function () use ($auth) {
include PAGE_DIR . '/auth.php';
};Otherwise, you can proceed with the ACL check. You first need to find, from the original query, which web page the user wants to visit, however:
} else {
$query = $incoming->getServerParams()['QUERY_STRING'] ?? '';You can then reprogram the $outbound request to include this information:
$outbound->withBody(new TextStream(json_encode($info))); $outbound->getUri()->withQuery($query);
Next, you'll be in a position to check authorization, supplying the outbound request as an argument:
$response = $acl->isAuthorized($outbound);
You can then examine the return response for the authorized parameter, and program an anonymous function to include the return page parameter if OK, and the sorry page otherwise:
$params = json_decode($response->getBody()->getContents());
$isAllowed = $params->authorized ?? FALSE;
if ($isAllowed) {
$execute = function () use ($response, $params) {
include PAGE_DIR .'/' . $params->page . '.php';
echo '<pre>', var_dump($response), '</pre>';
echo '<pre>', var_dump($_SESSION[SESSION_KEY]);
echo '</pre>';
};
} else {
$execute = function () use ($response) {
include PAGE_DIR .'/sorry.php';
echo '<pre>', var_dump($response), '</pre>';
echo '<pre>', var_dump($_SESSION[SESSION_KEY]);
echo '</pre>';
};
}
}Now all you need to do is to set the form action and wrap the anonymous function in HTML:
$action = $incoming->getServerParams()['PHP_SELF']; ?> <!DOCTYPE html> <head> <title>PHP 7 Cookbook</title> <meta http-equiv="content-type" content="text/html;charset=utf-8" /> </head> <body> <?php $execute(); ?> </body> </html>
To test it, you can use the built-in PHP web server, but you will need to use the -t flag to indicate that the document root is public:
cd /path/to/source/for/this/chapter php -S localhost:8080 -t public
From a browser, you can access the http://localhost:8080/ URL.
If you try to access any page, you will simply be redirected back to the login page. As per the configuration, a user with status = 1, and level = BEG can only access page 1 and log out. If, when logged in as this user, you try to access page 2, here is the output:
This example relies on $_SESSION as the sole means of user authentication once they have logged in. For good examples of how you can protect PHP sessions, please see Chapter 12, Improving Web Security, specifically the recipe entitled Safeguarding the PHP session.
The cache software design pattern is where you store a result that takes a long time to generate. This could take the form of a lengthy view script or a complex database query. The storage destination needs to be highly performant, of course, if you wish to improve the user experience of website visitors. As different installations will have different potential storage targets, the cache mechanism lends itself to the adapter pattern as well. Examples of potential storage destinations include memory, a database, and the filesystem.
Application\Cache\Constants class:<?php
namespace Application\Cache;
class Constants
{
const DEFAULT_GROUP = 'default';
const DEFAULT_PREFIX = 'CACHE_';
const DEFAULT_SUFFIX = '.cache';
const ERROR_GET = 'ERROR: unable to retrieve from cache';
// not all constants are shown to conserve space
}namespace Application\Cache;
interface CacheAdapterInterface
{
public function hasKey($key);
public function getFromCache($key, $group);
public function saveToCache($key, $data, $group);
public function removeByKey($key);
public function removeByGroup($group);
}namespace Application\Cache;
use PDO;
use Application\Database\Connection;
class Database implements CacheAdapterInterface
{
protected $sql;
protected $connection;
protected $table;
protected $dataColumnName;
protected $keyColumnName;
protected $groupColumnName;
protected $statementHasKey = NULL;
protected $statementGetFromCache = NULL;
protected $statementSaveToCache = NULL;
protected $statementRemoveByKey = NULL;
protected $statementRemoveByGroup= NULL;Application\Database\Connection instance and the name of the table used for the cache:public function __construct(Connection $connection,
$table,
$idColumnName,
$keyColumnName,
$dataColumnName,
$groupColumnName = Constants::DEFAULT_GROUP)
{
$this->connection = $connection;
$this->setTable($table);
$this->setIdColumnName($idColumnName);
$this->setDataColumnName($dataColumnName);
$this->setKeyColumnName($keyColumnName);
$this->setGroupColumnName($groupColumnName);
}public function prepareHasKey()
{
$sql = 'SELECT `' . $this->idColumnName . '` '
. 'FROM `' . $this->table . '` '
. 'WHERE `' . $this->keyColumnName . '` = :key ';
$this->sql[__METHOD__] = $sql;
$this->statementHasKey =
$this->connection->pdo->prepare($sql);
}
public function prepareGetFromCache()
{
$sql = 'SELECT `' . $this->dataColumnName . '` '
. 'FROM `' . $this->table . '` '
. 'WHERE `' . $this->keyColumnName . '` = :key '
. 'AND `' . $this->groupColumnName . '` = :group';
$this->sql[__METHOD__] = $sql;
$this->statementGetFromCache =
$this->connection->pdo->prepare($sql);
}public function hasKey($key)
{
$result = 0;
try {
if (!$this->statementHasKey) $this->prepareHasKey();
$this->statementHasKey->execute(['key' => $key]);
} catch (Throwable $e) {
error_log(__METHOD__ . ':' . $e->getMessage());
throw new Exception(Constants::ERROR_REMOVE_KEY);
}
return (int) $this->statementHasKey
->fetch(PDO::FETCH_ASSOC)[$this->idColumnName];
}SELECT, with a WHERE clause, which incorporates the key and group:public function getFromCache(
$key, $group = Constants::DEFAULT_GROUP)
{
try {
if (!$this->statementGetFromCache)
$this->prepareGetFromCache();
$this->statementGetFromCache->execute(
['key' => $key, 'group' => $group]);
while ($row = $this->statementGetFromCache
->fetch(PDO::FETCH_ASSOC)) {
if ($row && count($row)) {
yield unserialize($row[$this->dataColumnName]);
}
}
} catch (Throwable $e) {
error_log(__METHOD__ . ':' . $e->getMessage());
throw new Exception(Constants::ERROR_GET);
}
}UPDATE; otherwise, we perform an INSERT:public function saveToCache($key, $data, $group = Constants::DEFAULT_GROUP)
{
$id = $this->hasKey($key);
$result = 0;
try {
if ($id) {
if (!$this->statementUpdateCache)
$this->prepareUpdateCache();
$result = $this->statementUpdateCache
->execute(['key' => $key,
'data' => serialize($data),
'group' => $group,
'id' => $id]);
} else {
if (!$this->statementSaveToCache)
$this->prepareSaveToCache();
$result = $this->statementSaveToCache
->execute(['key' => $key,
'data' => serialize($data),
'group' => $group]);
}
} catch (Throwable $e) {
error_log(__METHOD__ . ':' . $e->getMessage());
throw new Exception(Constants::ERROR_SAVE);
}
return $result;
}public function removeByKey($key)
{
$result = 0;
try {
if (!$this->statementRemoveByKey)
$this->prepareRemoveByKey();
$result = $this->statementRemoveByKey->execute(
['key' => $key]);
} catch (Throwable $e) {
error_log(__METHOD__ . ':' . $e->getMessage());
throw new Exception(Constants::ERROR_REMOVE_KEY);
}
return $result;
}
public function removeByGroup($group)
{
$result = 0;
try {
if (!$this->statementRemoveByGroup)
$this->prepareRemoveByGroup();
$result = $this->statementRemoveByGroup->execute(
['group' => $group]);
} catch (Throwable $e) {
error_log(__METHOD__ . ':' . $e->getMessage());
throw new Exception(Constants::ERROR_REMOVE_GROUP);
}
return $result;
}public function setTable($name)
{
$this->table = $name;
}
public function getTable()
{
return $this->table;
}
// etc.
}md5(), not for security, but as a way of quickly generating a text string from the key:namespace Application\Cache;
use RecursiveIteratorIterator;
use RecursiveDirectoryIterator;
class File implements CacheAdapterInterface
{
protected $dir;
protected $prefix;
protected $suffix;
public function __construct(
$dir, $prefix = NULL, $suffix = NULL)
{
if (!file_exists($dir)) {
error_log(__METHOD__ . ':' . Constants::ERROR_DIR_NOT);
throw new Exception(Constants::ERROR_DIR_NOT);
}
$this->dir = $dir;
$this->prefix = $prefix ?? Constants::DEFAULT_PREFIX;
$this->suffix = $suffix ?? Constants::DEFAULT_SUFFIX;
}
public function hasKey($key)
{
$action = function ($name, $md5Key, &$item) {
if (strpos($name, $md5Key) !== FALSE) {
$item ++;
}
};
return $this->findKey($key, $action);
}
public function getFromCache($key, $group = Constants::DEFAULT_GROUP)
{
$fn = $this->dir . '/' . $group . '/'
. $this->prefix . md5($key) . $this->suffix;
if (file_exists($fn)) {
foreach (file($fn) as $line) { yield $line; }
} else {
return array();
}
}
public function saveToCache(
$key, $data, $group = Constants::DEFAULT_GROUP)
{
$baseDir = $this->dir . '/' . $group;
if (!file_exists($baseDir)) mkdir($baseDir);
$fn = $baseDir . '/' . $this->prefix . md5($key)
. $this->suffix;
return file_put_contents($fn, json_encode($data));
}
protected function findKey($key, callable $action)
{
$md5Key = md5($key);
$iterator = new RecursiveIteratorIterator(
new RecursiveDirectoryIterator($this->dir),
RecursiveIteratorIterator::SELF_FIRST);
$item = 0;
foreach ($iterator as $name => $obj) {
$action($name, $md5Key, $item);
}
return $item;
}
public function removeByKey($key)
{
$action = function ($name, $md5Key, &$item) {
if (strpos($name, $md5Key) !== FALSE) {
unlink($name);
$item++;
}
};
return $this->findKey($key, $action);
}
public function removeByGroup($group)
{
$removed = 0;
$baseDir = $this->dir . '/' . $group;
$pattern = $baseDir . '/' . $this->prefix . '*'
. $this->suffix;
foreach (glob($pattern) as $file) {
unlink($file);
$removed++;
}
return $removed;
}
}CacheAdapterInterface as an argument:namespace Application\Cache;
use Psr\Http\Message\RequestInterface;
use Application\MiddleWare\ { Request, Response, TextStream };
class Core
{
public function __construct(CacheAdapterInterface $adapter)
{
$this->adapter = $adapter;
}Psr\Http\Message\RequestInterface class an an argument, and return a Psr\Http\Message\ResponseInterface as a response. We start with a simple one: hasKey(). Note how we extract the key from the request parameters:public function hasKey(RequestInterface $request)
{
$key = $request->getUri()->getQueryParams()['key'] ?? '';
$result = $this->adapter->hasKey($key);
}204 code, which indicates the request was a success, but no content was produced. Otherwise, we set a 200 (success) code, and iterate through the results. Everything is then stuffed into a response object, which is returned:public function getFromCache(RequestInterface $request)
{
$text = array();
$key = $request->getUri()->getQueryParams()['key'] ?? '';
$group = $request->getUri()->getQueryParams()['group']
?? Constants::DEFAULT_GROUP;
$results = $this->adapter->getFromCache($key, $group);
if (!$results) {
$code = 204;
} else {
$code = 200;
foreach ($results as $line) $text[] = $line;
}
if (!$text || count($text) == 0) $code = 204;
$body = new TextStream(json_encode($text));
return (new Response())->withStatus($code)
->withBody($body);
}public function saveToCache(RequestInterface $request)
{
$text = array();
$key = $request->getUri()->getQueryParams()['key'] ?? '';
$group = $request->getUri()->getQueryParams()['group']
?? Constants::DEFAULT_GROUP;
$data = $request->getBody()->getContents();
$results = $this->adapter->saveToCache($key, $data, $group);
if (!$results) {
$code = 204;
} else {
$code = 200;
$text[] = $results;
}
$body = new TextStream(json_encode($text));
return (new Response())->withStatus($code)
->withBody($body);
}public function removeByKey(RequestInterface $request)
{
$text = array();
$key = $request->getUri()->getQueryParams()['key'] ?? '';
$results = $this->adapter->removeByKey($key);
if (!$results) {
$code = 204;
} else {
$code = 200;
$text[] = $results;
}
$body = new TextStream(json_encode($text));
return (new Response())->withStatus($code)
->withBody($body);
}
public function removeByGroup(RequestInterface $request)
{
$text = array();
$group = $request->getUri()->getQueryParams()['group']
?? Constants::DEFAULT_GROUP;
$results = $this->adapter->removeByGroup($group);
if (!$results) {
$code = 204;
} else {
$code = 200;
$text[] = $results;
}
$body = new TextStream(json_encode($text));
return (new Response())->withStatus($code)
->withBody($body);
}
} // closing brace for class CoreIn order to demonstrate the use of the Acl class, you will need to define the classes described in this recipe, summarized here:
|
Class |
Discussed in these steps |
|---|---|
|
|
1 |
|
|
2 |
|
|
3 - 10 |
|
|
11 |
|
|
12 - 16 |
Next, define a test program, which you could call chap_09_middleware_cache_db.php. In this program, as usual, define constants for necessary files, set up autoloading, use the appropriate classes, oh... and write a function that produces prime numbers (you're probably re-reading that last little bit at this point. Not to worry, we can help you with that!):
<?php
define('DB_CONFIG_FILE', __DIR__ . '/../config/db.config.php');
define('DB_TABLE', 'cache');
define('CACHE_DIR', __DIR__ . '/cache');
define('MAX_NUM', 100000);
require __DIR__ . '/../Application/Autoload/Loader.php';
Application\Autoload\Loader::init(__DIR__ . '/..');
use Application\Database\Connection;
use Application\Cache\{ Constants, Core, Database, File };
use Application\MiddleWare\ { Request, TextStream };Well, a function that takes a long time to run is needed, so prime number generator, here we go! The numbers 1, 2, and 3 are given as primes. We use the PHP 7 yield from syntax to produce these first three. then, we skip right to 5, and proceed up to the maximum value requested:
function generatePrimes($max)
{
yield from [1,2,3];
for ($x = 5; $x < $max; $x++)
{
if($x & 1) {
$prime = TRUE;
for($i = 3; $i < $x; $i++) {
if(($x % $i) === 0) {
$prime = FALSE;
break;
}
}
if ($prime) yield $x;
}
}
}You can then set up a database cache adapter instance, which serves as an argument for the core:
$conn = new Connection(include DB_CONFIG_FILE); $dbCache = new Database( $conn, DB_TABLE, 'id', 'key', 'data', 'group'); $core = new Core($dbCache);
Alternatively, if you wish to use the file cache adapter instead, here is the appropriate code:
$fileCache = new File(CACHE_DIR); $core = new Core($fileCache);
If you wanted to clear the cache, here is how it might be done:
$uriString = '/?group=' . Constants::DEFAULT_GROUP; $cacheRequest = new Request($uriString, 'get'); $response = $core->removeByGroup($cacheRequest);
You can use time() and microtime() to see how long this script runs with and without the cache:
$start = time() + microtime(TRUE); echo "\nTime: " . $start;
Next, generate a cache request. A status code of 200 indicates you were able to obtain a list of primes from the cache:
$uriString = '/?key=Test1';
$cacheRequest = new Request($uriString, 'get');
$response = $core->getFromCache($cacheRequest);
$status = $response->getStatusCode();
if ($status == 200) {
$primes = json_decode($response->getBody()->getContents());Otherwise, you can assume nothing was obtained from the cache, which means you need to generate prime numbers, and save the results to the cache:
} else {
$primes = array();
foreach (generatePrimes(MAX_NUM) as $num) {
$primes[] = $num;
}
$body = new TextStream(json_encode($primes));
$response = $core->saveToCache(
$cacheRequest->withBody($body));
}You can then check the stop time, calculate the difference, and have a look at your new list of primes:
$time = time() + microtime(TRUE); $diff = $time - $start; echo "\nTime: $time"; echo "\nDifference: $diff"; var_dump($primes);
Here is the expected output before values were stored in the cache:
You can now run the same program again, this time retrieving from the cache:
Allowing for the fact that our little prime number generator is not the world's most efficient, and also that the demonstration was run on a laptop, the time went from over 30 seconds down to milliseconds.
Another possible cache adapter could be built around commands that are part of the Alternate PHP Cache (APC) extension. This extension includes such functions as apc_exists(), apc_store(), apc_fetch(), and apc_clear_cache(). These functions are perfect for our hasKey(), saveToCache(), getFromCache(), and removeBy*() functions.
You might consider making slight changes to the cache adapter classes described previously following PSR-6, which is a standards recommendation directed towards the cache. There is not the same level of acceptance of this standard as with PSR-7, however, so we decided to not follow this standard exactly in the recipe presented here. For more information on PSR-6, please refer to http://www.php-fig.org/psr/psr-6/.
Routing refers to the process of accepting user-friendly URLs, dissecting the URL into its component parts, and then making a determination as to which class and method should be dispatched. The advantage of such an implementation is that not only can you make your URLs Search Engine Optimization (SEO)-friendly, but you can also create rules, incorporating regular expression patterns, which can extract values of parameters.
mod_rewrite. You then define rewriting rules that allow graphic file requests and requests for CSS and JavaScript to pass untouched. Otherwise, the request would be funneled through a routing method.home, page, and the default. The default should be last as it will match anything not matched previously. The action is in the form of an anonymous function that will be executed if a route match occurs:$config = [
'home' => [
'uri' => '!^/$!',
'exec' => function ($matches) {
include PAGE_DIR . '/page0.php'; }
],
'page' => [
'uri' => '!^/(page)/(\d+)$!',
'exec' => function ($matches) {
include PAGE_DIR . '/page' . $matches[2] . '.php'; }
],
Router::DEFAULT_MATCH => [
'uri' => '!.*!',
'exec' => function ($matches) {
include PAGE_DIR . '/sorry.php'; }
],
];Router class. We first define constants and properties that will be of use during the process of examining and matching a route:namespace Application\Routing;
use InvalidArgumentException;
use Psr\Http\Message\ServerRequestInterface;
class Router
{
const DEFAULT_MATCH = 'default';
const ERROR_NO_DEF = 'ERROR: must supply a default match';
protected $request;
protected $requestUri;
protected $uriParts;
protected $docRoot;
protected $config;
protected $routeMatch;ServerRequestInterface compliant class, the path to the document root, and the configuration file mentioned earlier. Note that we throw an exception if the default configuration is not supplied:public function __construct(ServerRequestInterface $request, $docRoot, $config)
{
$this->config = $config;
$this->docRoot = $docRoot;
$this->request = $request;
$this->requestUri =
$request->getServerParams()['REQUEST_URI'];
$this->uriParts = explode('/', $this->requestUri);
if (!isset($config[self::DEFAULT_MATCH])) {
throw new InvalidArgumentException(
self::ERROR_NO_DEF);
}
}public function getRequest()
{
return $this->request;
}
public function getDocRoot()
{
return $this->docRoot;
}
public function getRouteMatch()
{
return $this->routeMatch;
}isFileOrDir() method is used to determine whether we are trying to match against a CSS, JavaScript, or graphic request (among other possibilities):public function isFileOrDir()
{
$fn = $this->docRoot . '/' . $this->requestUri;
$fn = str_replace('//', '/', $fn);
if (file_exists($fn)) {
return $fn;
} else {
return '';
}
}match(), which iterates through the configuration array and runs the uri parameter through preg_match(). If positive, the configuration key and $matches array populated by preg_match() are stored in $routeMatch, and the callback is returned. If there is no match, the default callback is returned:public function match()
{
foreach ($this->config as $key => $route) {
if (preg_match($route['uri'],
$this->requestUri, $matches)) {
$this->routeMatch['key'] = $key;
$this->routeMatch['match'] = $matches;
return $route['exec'];
}
}
return $this->config[self::DEFAULT_MATCH]['exec'];
}
}First, change to /path/to/source/for/this/chapter and create a directory called routing. Next, define a file, index.php, which sets up autoloading and uses the right classes. You can define a constant PAGE_DIR that points to the pages directory created in the previous recipe:
<?php
define('DOC_ROOT', __DIR__);
define('PAGE_DIR', DOC_ROOT . '/../pages');
require_once __DIR__ . '/../../Application/Autoload/Loader.php';
Application\Autoload\Loader::init(__DIR__ . '/../..');
use Application\MiddleWare\ServerRequest;
use Application\Routing\Router;Next, add the configuration array discussed in step 3 of this recipe. Note that you could add (/)? at the end of the pattern to account for an optional trailing slash. Also, for the home route, you could offer two options: either / or /home:
$config = [
'home' => [
'uri' => '!^(/|/home)$!',
'exec' => function ($matches) {
include PAGE_DIR . '/page0.php'; }
],
'page' => [
'uri' => '!^/(page)/(\d+)(/)?$!',
'exec' => function ($matches) {
include PAGE_DIR . '/page' . $matches[2] . '.php'; }
],
Router::DEFAULT_MATCH => [
'uri' => '!.*!',
'exec' => function ($matches) {
include PAGE_DIR . '/sorry.php'; }
],
];You can then define a router instance, supplying an initialized ServerRequest instance as the first argument:
$router = new Router((new ServerRequest()) ->initialize(), DOC_ROOT, $config); $execute = $router->match(); $params = $router->getRouteMatch()['match'];
You then need to check to see whether the request is a file or directory, and also whether the route match is /:
if ($fn = $router->isFileOrDir()
&& $router->getRequest()->getUri()->getPath() != '/') {
return FALSE;
} else {
include DOC_ROOT . '/main.php';
}Next, define main.php, something like this:
<?php // demo using middleware for routing ?>
<!DOCTYPE html>
<head>
<title>PHP 7 Cookbook</title>
<meta http-equiv="content-type"
content="text/html;charset=utf-8" />
</head>
<body>
<?php include PAGE_DIR . '/route_menu.php'; ?>
<?php $execute($params); ?>
</body>
</html>And finally, a revised menu that uses user-friendly routing is required:
<?php // menu for routing ?> <a href="/home">Home</a> <a href="/page/1">Page 1</a> <a href="/page/2">Page 2</a> <a href="/page/3">Page 3</a> <!-- etc. -->
To test the configuration using Apache, define a virtual host definition that points to /path/to/source/for/this/chapter/routing. In addition, define a .htaccess file that directs any request that is not a file, directory, or link to index.php. Alternatively, you could just use the built-in PHP webserver. In a terminal window or command prompt, type this command:
cd /path/to/source/for/this/chapter/routing php -S localhost:8080
In a browser, the output when requesting http://localhost:8080/home is something like this:
For information on rewriting using the NGINX web server, have a look at this article: http://nginx.org/en/docs/http/ngx_http_rewrite_module.html. There are plenty of sophisticated PHP routing libraries available that introduce far greater functionality than the simple router presented here. These include Altorouter (http://altorouter.com/), TreeRoute (https://github.com/baryshev/TreeRoute), FastRoute (https://github.com/nikic/FastRoute), and Aura.Router. (https://github.com/auraphp/Aura.Router). In addition, most frameworks (for example, Zend Framework 2 or CodeIgniter) have their own routing capabilities.
One of the primary reasons for the development of PSR-7 (and middleware) was a growing need to make calls between frameworks. It is of interest to note that the main documentation for PSR-7 is hosted by PHP Framework Interop Group (PHP-FIG).
Psr\Http\Message\ServerRequestInterface and Psr\Http\Message\ResponseInterface, respectively.thumbprint, which is a term we use to incorporate factors such as the website visitor's IP address, browser, and language settings:namespace Application\MiddleWare\Session;
use InvalidArgumentException;
use Psr\Http\Message\ {
ServerRequestInterface, ResponseInterface };
use Application\MiddleWare\ { Constants, Response, TextStream };
class Validator
{
const KEY_TEXT = 'text';
const KEY_SESSION = 'thumbprint';
const KEY_STATUS_CODE = 'code';
const KEY_STATUS_REASON = 'reason';
const KEY_STOP_TIME = 'stop_time';
const ERROR_TIME = 'ERROR: session has exceeded stop time';
const ERROR_SESSION = 'ERROR: thumbprint does not match';
const SUCCESS_SESSION = 'SUCCESS: session validates OK';
protected $sessionKey;
protected $currentPrint;
protected $storedPrint;
protected $currentTime;
protected $storedTime;ServerRequestInterface instance and the session as arguments. If the session is an array (such as $_SESSION), we wrap it in a class. The reason why we do this is in case we are passed a session object, such as JSession used in Joomla. We then create the thumbprint using the previously mentioned factors. If the stored thumbprint is not available, we assume this is the first time, and store the current print as well as stop time, if this parameter is set. We used md5() because it's a fast hash, is not exposed externally, and is therefore useful to this application:public function __construct(
ServerRequestInterface $request, $stopTime = NULL)
{
$this->currentTime = time();
$this->storedTime = $_SESSION[self::KEY_STOP_TIME] ?? 0;
$this->currentPrint =
md5($request->getServerParams()['REMOTE_ADDR']
. $request->getServerParams()['HTTP_USER_AGENT']
. $request->getServerParams()['HTTP_ACCEPT_LANGUAGE']);
$this->storedPrint = $_SESSION[self::KEY_SESSION]
?? NULL;
if (empty($this->storedPrint)) {
$this->storedPrint = $this->currentPrint;
$_SESSION[self::KEY_SESSION] = $this->storedPrint;
if ($stopTime) {
$this->storedTime = $stopTime;
$_SESSION[self::KEY_STOP_TIME] = $stopTime;
}
}
}__invoke(), but this magic method is quite convenient for standalone middleware classes. As is the convention, we accept ServerRequestInterface and ResponseInterface instances as arguments. In this method, we simply check to see whether the current thumbprint matches the one stored. The first time, of course, they will match. But on subsequent requests, the chances are an attacker intent on session hijacking will be caught out. In addition, if the session time exceeds the stop time (if set), likewise, a 401 code will be sent:public function __invoke(
ServerRequestInterface $request, Response $response)
{
$code = 401; // unauthorized
if ($this->currentPrint != $this->storedPrint) {
$text[self::KEY_TEXT] = self::ERROR_SESSION;
$text[self::KEY_STATUS_REASON] =
Constants::STATUS_CODES[401];
} elseif ($this->storedTime) {
if ($this->currentTime > $this->storedTime) {
$text[self::KEY_TEXT] = self::ERROR_TIME;
$text[self::KEY_STATUS_REASON] =
Constants::STATUS_CODES[401];
} else {
$code = 200; // success
}
}
if ($code == 200) {
$text[self::KEY_TEXT] = self::SUCCESS_SESSION;
$text[self::KEY_STATUS_REASON] =
Constants::STATUS_CODES[200];
}
$text[self::KEY_STATUS_CODE] = $code;
$body = new TextStream(json_encode($text));
return $response->withStatus($code)->withBody($body);
}middleware-pipeline.global.php, which is located in the config/autoload folder in a standard Expressive application. The dependencies key is used to identify the middleware wrapper classes that will be activated in the pipeline:<?php
use Zend\Expressive\Container\ApplicationFactory;
use Zend\Expressive\Helper;
return [
'dependencies' => [
'factories' => [
Helper\ServerUrlMiddleware::class =>
Helper\ServerUrlMiddlewareFactory::class,
Helper\UrlHelperMiddleware::class =>
Helper\UrlHelperMiddlewareFactory::class,
// insert your own class here
],
],middleware_pipline key, you can identify classes that will be executed before or after the routing process occurs. Optional parameters include path, error, and priority:'middleware_pipeline' => [
'always' => [
'middleware' => [
Helper\ServerUrlMiddleware::class,
],
'priority' => 10000,
],
'routing' => [
'middleware' => [
ApplicationFactory::ROUTING_MIDDLEWARE,
Helper\UrlHelperMiddleware::class,
// insert reference to middleware here
ApplicationFactory::DISPATCH_MIDDLEWARE,
],
'priority' => 1,
],
'error' => [
'middleware' => [
// Add error middleware here.
],
'error' => true,
'priority' => -10000,
],
],
];index.php file in the /path/to/joomla folder. Since Joomla! uses Composer, we can leverage the Composer autoloader:session_start(); // to support use of $_SESSION
$loader = include __DIR__ . '/libraries/vendor/autoload.php';
$loader->add('Application', __DIR__ . '/libraries/vendor');
$loader->add('Psr', __DIR__ . '/libraries/vendor');$app = JFactory::getApplication('site');:$session = JFactory::getSession();
$request =
(new Application\MiddleWare\ServerRequest())->initialize();
$response = new Application\MiddleWare\Response();
$validator = new Application\Security\Session\Validator(
$request, $session);
$response = $validator($request, $response);
if ($response->getStatusCode() != 200) {
// take some action
}First, create the Application\MiddleWare\Session\Validator test middleware class described in steps 2-5. Then you will need to go to https://getcomposer.org/ and follow the directions to obtain Composer. Download it to the /path/to/source/for/this/chapter folder. Next, build a basic Zend Expressive application, as shown next. Be sure to select No when prompted for minimal skeleton:
cd /path/to/source/for/this/chapter php composer.phar create-project zendframework/zend-expressive-skeleton expressive
This will create a folder /path/to/source/for/this/chapter/expressive. Change to this directory. Modify public/index.php as follows:
<?php
if (php_sapi_name() === 'cli-server'
&& is_file(__DIR__ . parse_url(
$_SERVER['REQUEST_URI'], PHP_URL_PATH))
) {
return false;
}
chdir(dirname(__DIR__));
session_start();
$_SESSION['time'] = time();
$appDir = realpath(__DIR__ . '/../../..');
$loader = require 'vendor/autoload.php';
$loader->add('Application', $appDir);
$container = require 'config/container.php';
$app = $container->get(\Zend\Expressive\Application::class);
$app->run();You will then need to create a wrapper class that invokes our session validator middleware. Create a SessionValidateAction.php file that needs to go in the /path/to/source/for/this/chapter/expressive/src/App/Action folder. For the purposes of this illustration, set the stop time parameter to a short duration. In this case, time() + 10 gives you 10 seconds:
namespace App\Action;
use Application\MiddleWare\Session\Validator;
use Zend\Diactoros\ { Request, Response };
use Psr\Http\Message\ResponseInterface;
use Psr\Http\Message\ServerRequestInterface;
class SessionValidateAction
{
public function __invoke(ServerRequestInterface $request,
ResponseInterface $response, callable $next = null)
{
$inbound = new Response();
$validator = new Validator($request, time()+10);
$inbound = $validator($request, $response);
if ($inbound->getStatusCode() != 200) {
session_destroy();
setcookie('PHPSESSID', 0, time()-300);
$params = json_decode(
$inbound->getBody()->getContents(), TRUE);
echo '<h1>',$params[Validator::KEY_TEXT],'</h1>';
echo '<pre>',var_dump($inbound),'</pre>';
exit;
}
return $next($request,$response);
}
}You will now need to add the new class to the middleware pipeline. Modify config/autoload/middleware-pipeline.global.php as follows. Modifications are shown in bold:
<?php use Zend\Expressive\Container\ApplicationFactory; use Zend\Expressive\Helper; return [ 'dependencies' => [ 'invokables' => [ App\Action\SessionValidateAction::class => App\Action\SessionValidateAction::class, ], 'factories' => [ Helper\ServerUrlMiddleware::class => Helper\ServerUrlMiddlewareFactory::class, Helper\UrlHelperMiddleware::class => Helper\UrlHelperMiddlewareFactory::class, ], ], 'middleware_pipeline' => [ 'always' => [ 'middleware' => [ Helper\ServerUrlMiddleware::class, ], 'priority' => 10000, ], 'routing' => [ 'middleware' => [ ApplicationFactory::ROUTING_MIDDLEWARE, Helper\UrlHelperMiddleware::class, App\Action\SessionValidateAction::class, ApplicationFactory::DISPATCH_MIDDLEWARE, ], 'priority' => 1, ], 'error' => [ 'middleware' => [ // Add error middleware here. ], 'error' => true, 'priority' => -10000, ], ], ];
You might also consider modifying the home page template to show the status of $_SESSION. The file in question is /path/to/source/for/this/chapter/expressive/templates/app/home-page.phtml. Simply adding var_dump($_SESSION) should suffice.
Initially, you should see something like this:
After 10 seconds, refresh the browser. You should now see this:
Except in cases where you are trying to communicate between different versions of PHP, PSR-7 middleware will be of minimal use. Recall what the acronym stands for: PHP Standards Recommendations. Accordingly, if you need to make a request to an application written in another language, treat it as you would any other web service HTTP request.
Application\MiddleWare\ServerRequest. The first thing to note is that there are no namespaces! Accordingly, we use a classname with underscores, _, in place of namespace separators:class Application_MiddleWare_ServerRequest
extends Application_MiddleWare_Request
implements Psr_Http_Message_ServerRequestInterface
{var:var $serverParams; var $cookies; var $queryParams; // not all properties are shown
initialize() method is almost the same, except that syntax such as $this->getServerParams()['REQUEST_URI'] was not allowed in PHP 4. Accordingly, we need to split this out into a separate variable:function initialize()
{
$params = $this->getServerParams();
$this->getCookieParams();
$this->getQueryParams();
$this->getUploadedFiles;
$this->getRequestMethod();
$this->getContentType();
$this->getParsedBody();
return $this->withRequestTarget($params['REQUEST_URI']);
}$_XXX super-globals were present in later versions of PHP 4:function getServerParams()
{
if (!$this->serverParams) {
$this->serverParams = $_SERVER;
}
return $this->serverParams;
}
// not all getXXX() methods are shown to conserve spaceisset(XXX) ? XXX : ''; instead:function getRequestMethod()
{
$params = $this->getServerParams();
$method = isset($params['REQUEST_METHOD'])
? $params['REQUEST_METHOD'] : '';
$this->method = strtolower($method);
return $this->method;
}serialize() or unserialize() in place of json_encode() and json_decode():function getParsedBody()
{
if (!$this->parsedBody) {
if (($this->getContentType() ==
Constants::CONTENT_TYPE_FORM_ENCODED
|| $this->getContentType() ==
Constants::CONTENT_TYPE_MULTI_FORM)
&& $this->getRequestMethod() ==
Constants::METHOD_POST)
{
$this->parsedBody = $_POST;
} elseif ($this->getContentType() ==
Constants::CONTENT_TYPE_JSON
|| $this->getContentType() ==
Constants::CONTENT_TYPE_HAL_JSON)
{
ini_set("allow_url_fopen", true);
$this->parsedBody =
file_get_contents('php://stdin');
} elseif (!empty($_REQUEST)) {
$this->parsedBody = $_REQUEST;
} else {
ini_set("allow_url_fopen", true);
$this->parsedBody =
file_get_contents('php://stdin');
}
}
return $this->parsedBody;
}withXXX() methods work pretty much the same in PHP 4:function withParsedBody($data)
{
$this->parsedBody = $data;
return $this;
}withoutXXX() methods work the same as well:function withoutAttribute($name)
{
if (isset($this->attributes[$name])) {
unset($this->attributes[$name]);
}
return $this;
}
}Request discussed in the recipe Developing a PSR-7 request class from this chapter. Here is the example from the How it works... section:$request = new Request( TARGET_WEBSITE_URL, Constants::METHOD_POST, new TextStream($contents), [Constants::HEADER_CONTENT_TYPE => Constants::CONTENT_TYPE_FORM_ENCODED, Constants::HEADER_CONTENT_LENGTH => $body->getSize()] ); $data = http_build_query(['data' => $request->getBody()->getContents()]); $defaults = array( CURLOPT_URL => $request->getUri()->getUriString(), CURLOPT_POST => true, CURLOPT_POSTFIELDS => $data, ); $ch = curl_init(); curl_setopt_array($ch, $defaults); $response = curl_exec($ch); curl_close($ch);
In this chapter, we will cover:
In this chapter, we cover recipes that implement various advanced algorithms such as linked list, bubble sort, stacks, and binary search. In addition, we cover getters and setters, as well as implementing a search engine and displaying values from a multi-dimensional array with accumulated totals.
At first glance, it would seemingly make sense to define classes with public properties, which can then be directly read or written. It is considered a best practice, however, to make properties protected, and to then define a getter and setter for each. As the name implies, a getter retrieves the value of a property. A setter is used to set the value.
Best practice
Define properties as protected to prevent accidental outside access. Use public get* and set* methods to provide access to these properties. In this manner, not only can you more precisely control access, but you can also make formatting and data type changes to the properties while getting and setting them.
get or set. The name of the property becomes the suffix. It is a convention to make the first letter of the variable uppercase. Thus, if the property is $testValue, the getter would be getTestValue().$date. Notice that the get and set methods allow for treatment as either a DateTime object or as a string. The value is actually stored in any event as a DateTime instance:$a = new class() {
protected $date;
public function setDate($date)
{
if (is_string($date)) {
$this->date = new DateTime($date);
} else {
$this->date = $date;
}
}
public function getDate($asString = FALSE)
{
if ($asString) {
return $this->date->format('Y-m-d H:i:s');
} else {
return $this->date;
}
}
};$intVal and $arrVal, which are set to a default initial value of NULL. Notice that not only are the return values for the getters data-typed, but they also provide defaults. The setters also either enforce the incoming data-type, or type-cast the incoming value to a certain data-type:<?php
class GetSet
{
protected $intVal = NULL;
protected $arrVal = NULL;
// note the use of the null coalesce operator to return a default value
public function getIntVal() : int
{
return $this->intVal ?? 0;
}
public function getArrVal() : array
{
return $this->arrVal ?? array();
}
public function setIntVal($val)
{
$this->intVal = (int) $val ?? 0;
}
public function setArrVal(array $val)
{
$this->arrVal = $val ?? array();
}
}__call(). The following class defines nine different properties. Instead of having to define nine getters and nine setters, we define a single method, __call(), which makes a determination whether or not the usage is get or set. If get, it retrieves the key from an internal array. If set, it stores the value in the internal array.<?php
class LotsProps
{
protected $firstName = NULL;
protected $lastName = NULL;
protected $addr1 = NULL;
protected $addr2 = NULL;
protected $city = NULL;
protected $state = NULL;
protected $province = NULL;
protected $postalCode = NULL;
protected $country = NULL;
protected $values = array();
public function __call($method, $params)
{
preg_match('/^(get|set)(.*?)$/i', $method, $matches);
$prefix = $matches[1] ?? '';
$key = $matches[2] ?? '';
$key = strtolower($key);
if ($prefix == 'get') {
return $this->values[$key] ?? '---';
} else {
$this->values[$key] = $params[0];
}
}
}Copy the code mentioned in step 1 into a new file, chap_10_oop_using_getters_and_setters.php. To test the class, add the following:
// set date using a string
$a->setDate('2015-01-01');
var_dump($a->getDate());
// retrieves the DateTime instance
var_dump($a->getDate(TRUE));
// set date using a DateTime instance
$a->setDate(new DateTime('now'));
var_dump($a->getDate());
// retrieves the DateTime instance
var_dump($a->getDate(TRUE));In the output (shown next), you can see that the $date property can be set using either a string or an actual DateTime instance. When getDate() is executed, you can return either a string or a DateTime instance, depending on the value of the $asString flag:
Next, have a look at the code defined in step 2. Copy this code into a file, chap_10_oop_using_getters_and_setters_defaults.php, and add the following:
// create the instance
$a = new GetSet();
// set a "proper" value
$a->setIntVal(1234);
echo $a->getIntVal();
echo PHP_EOL;
// set a bogus value
$a->setIntVal('some bogus value');
echo $a->getIntVal();
echo PHP_EOL;
// NOTE: boolean TRUE == 1
$a->setIntVal(TRUE);
echo $a->getIntVal();
echo PHP_EOL;
// returns array() even though no value was set
var_dump($a->getArrVal());
echo PHP_EOL;
// sets a "proper" value
$a->setArrVal(['A','B','C']);
var_dump($a->getArrVal());
echo PHP_EOL;
try {
$a->setArrVal('this is not an array');
var_dump($a->getArrVal());
echo PHP_EOL;
} catch (TypeError $e) {
echo $e->getMessage();
}
echo PHP_EOL;As you can see from the following output, setting a proper integer value works as expected. A non-numeric value defaults to 0. Interestingly, if you supply a Boolean TRUE as an argument to setIntVal(), it is interpolated to 1.
If you call getArrVal() without setting a value, the default is an empty array. Setting an array value works as expected. However, if you supply a non-array value as an argument, the type hint of the array causes a TypeError to be thrown, which can be caught as shown here:
Finally, take the LotsProps class defined in step 3 and place it in a separate file, chap_10_oop_using_getters_and_setters_magic_call.php. Now add code to set values. What will happen, of course, is that the magic method __call() is invoked. After running preg_match(), the remainder of the non-existent property, after the letters set, will become a key in the internal array $values:
$a = new LotsProps();
$a->setFirstName('Li\'l Abner');
$a->setLastName('Yokum');
$a->setAddr1('1 Dirt Street');
$a->setCity('Dogpatch');
$a->setState('Kentucky');
$a->setPostalCode('12345');
$a->setCountry('USA');
?>You can then define HTML that displays the values using the corresponding get methods. These will in turn return keys from the internal array:
<div class="container">
<div class="left blue1">Name</div>
<div class="right yellow1">
<?= $a->getFirstName() . ' ' . $a->getLastName() ?></div>
</div>
<div class="left blue2">Address</div>
<div class="right yellow2">
<?= $a->getAddr1() ?>
<br><?= $a->getAddr2() ?>
<br><?= $a->getCity() ?>
<br><?= $a->getState() ?>
<br><?= $a->getProvince() ?>
<br><?= $a->getPostalCode() ?>
<br><?= $a->getCountry() ?>
</div>
</div>Here is the final output:
A linked list is where one list contains keys that point to keys in another list. An analogy, in database terms, would be where you have a table that contains data, and a separate index that points to the data. One index might produce a list of items by ID. Another index might yield a list according to title and so on. The salient feature of the linked list is that you do not have to touch the original list of items.
For example, in the diagram shown next, the primary list contains ID numbers and the names of fruits. If you were to directly output the primary list, the fruit names would display in this order: Apple, Grape, Banana, Orange, Cherry. If you were to use the linked list as an index, on the other hand, the resulting output of fruit names would be Apple, Banana, Cherry, Grape, and Orange:
function buildLinkedList(array $primary,
callable $makeLink)
{
$linked = new ArrayIterator();
foreach ($primary as $key => $row) {
$linked->offsetSet($makeLink($row), $key);
}
$linked->ksort();
return $linked;
}ksort()) so that the linked list iterates in key order.$customer in this example:foreach ($linked as $key => $link) {
$output .= printRow($customer[$link]);
}buildLinkedList() function, adding a filter column and filter value:function buildLinkedList(array $primary,
callable $makeLink,
$filterCol = NULL,
$filterVal = NULL)
{
$linked = new ArrayIterator();
$filterVal = trim($filterVal);
foreach ($primary as $key => $row) {
if ($filterCol) {
if (trim($row[$filterCol]) == $filterVal) {
$linked->offsetSet($makeLink($row), $key);
}
} else {
$linked->offsetSet($makeLink($row), $key);
}
}
$linked->ksort();
return $linked;
}$filterCol in the primary list matches $filterVal. The iteration logic is the same as that shown in step 2.SplDoublyLinkedList, which neatly does the trick. Here is a function that builds a doubly linked list:function buildDoublyLinkedList(ArrayIterator $linked)
{
$double = new SplDoublyLinkedList();
foreach ($linked as $key => $value) {
$double->push($value);
}
return $double;
}Copy the code shown in the first bullet into a file, chap_10_linked_list_include.php. In order to demonstrate the use of a linked list, you will need a source of data. For this illustration, you can make use of the customer.csv file that was mentioned in earlier recipes. It is a CSV file with the following columns:
"id","name","balance","email","password","status","security_question", "confirm_code","profile_id","level"
You can add the following functions to the include file mentioned previously to generate a primary list of customers, and to display information about them. Note that we use the first column, id as the primary key:
function readCsv($fn, &$headers)
{
if (!file_exists($fn)) {
throw new Error('File Not Found');
}
$fileObj = new SplFileObject($fn, 'r');
$result = array();
$headers = array();
$firstRow = TRUE;
while ($row = $fileObj->fgetcsv()) {
// store 1st row as headers
if ($firstRow) {
$firstRow = FALSE;
$headers = $row;
} else {
if ($row && $row[0] !== NULL && $row[0] !== 0) {
$result[$row[0]] = $row;
}
}
}
return $result;
}
function printHeaders($headers)
{
return sprintf('%4s : %18s : %8s : %32s : %4s' . PHP_EOL,
ucfirst($headers[0]),
ucfirst($headers[1]),
ucfirst($headers[2]),
ucfirst($headers[3]),
ucfirst($headers[9]));
}
function printRow($row)
{
return sprintf('%4d : %18s : %8.2f : %32s : %4s' . PHP_EOL,
$row[0], $row[1], $row[2], $row[3], $row[9]);
}
function printCustomer($headers, $linked, $customer)
{
$output = '';
$output .= printHeaders($headers);
foreach ($linked as $key => $link) {
$output .= printRow($customer[$link]);
}
return $output;
}You can then define a calling program, chap_10_linked_list_in_order.php, which includes the file defined previously, and reads customer.csv:
<?php
define('CUSTOMER_FILE', __DIR__ . '/../data/files/customer.csv');
include __DIR__ . '/chap_10_linked_list_include.php';
$headers = array();
$customer = readCsv(CUSTOMER_FILE, $headers);You can then define an anonymous function that will produce a key in the linked list. In this illustration, define a function that breaks down column 1 (name) into first and last names:
$makeLink = function ($row) {
list($first, $last) = explode(' ', $row[1]);
return trim($last) . trim($first);
};You can then call the function to build the linked list, and use printCustomer() to display the results:
$linked = buildLinkedList($customer, $makeLink); echo printCustomer($headers, $linked, $customer);
Here is how the output might appear:
To produce a filtered result, modify buildLinkedList() as discussed in step 4. You can then add logic that checks to see whether the value of the filter column matches the value in the filter:
define('LEVEL_FILTER', 'INT');
$filterCol = 9;
$filterVal = LEVEL_FILTER;
$linked = buildLinkedList($customer, $makeLink, $filterCol, $filterVal);PHP 7.1 introduced the use of [ ] as an alternative to list(). If you look at the anonymous function mentioned previously, you could rewrite this in PHP 7.1 as follows:
$makeLink = function ($row) {
[$first, $last] = explode(' ', $row[1]);
return trim($last) . trim($first);
};For more information, see https://wiki.php.net/rfc/short_list_syntax.
The classic bubble sort is an exercise often assigned to university students. Nonetheless, it's important to master this algorithm as there are many occasions where built-in PHP sorting functions do not apply. An example would be sorting a multi-dimensional array where the sort key is not the first column.
The way the bubble sort works is to recursively iterate through the list and swap the current value with the next value. If you want items to be in ascending order, the swap occurs if the next item is less than the current item. For descending order, the swap occurs if the reverse is true. The sort is concluded when no more swaps occur.
In the following diagram, after the first pass, Grape and Banana are swapped, as are Orange and Cherry. After the 2nd pass, Grape and Cherry are swapped. No more swaps occur on the last pass, and the bubble sort ends:
buildLinkedList() function discussed in the previous recipe.bubbleSort(), which accepts the linked list by reference, the primary list, a sort field, and a parameter that represents sort order (ascending or descending):function bubbleSort(&$linked, $primary, $sortField, $order = 'A')
{static $iterations = 0; $swaps = 0; $iterator = new ArrayIterator($linked);
while() loop, we only proceed if the iteration is still valid, which is to say still in progress. We then obtain the current key and value, and the next key and value. Note the extra if() statement to ensure the iteration is still valid (that is, to make sure we don't drop off the end of the list!):while ($iterator->valid()) {
$currentLink = $iterator->current();
$currentKey = $iterator->key();
if (!$iterator->valid()) break;
$iterator->next();
$nextLink = $iterator->current();
$nextKey = $iterator->key();$expr:if ($order == 'A') {
$expr = $primary[$linked->offsetGet
($currentKey)][$sortField] >
$primary[$linked->offsetGet($nextKey)][$sortField];
} else {
$expr = $primary[$linked->offsetGet
($currentKey)][$sortField] <
$primary[$linked->offsetGet($nextKey)][$sortField];
}$expr is TRUE, and we have valid current and next keys, the values are swapped in the linked list. We also increment $swaps:if ($expr && $currentKey && $nextKey
&& $linked->offsetExists($currentKey)
&& $linked->offsetExists($nextKey)) {
$tmp = $linked->offsetGet($currentKey);
$linked->offsetSet($currentKey,
$linked->offsetGet($nextKey));
$linked->offsetSet($nextKey, $tmp);
$swaps++;
}
}if ($swaps) bubbleSort($linked, $primary, $sortField, $order);
return ++$iterations; }
Add the bubbleSort() function discussed previously to the include file created in the previous recipe. You can use the same logic discussed in the previous recipe to read the customer.csv file, producing a primary list:
<?php
define('CUSTOMER_FILE', __DIR__ . '/../data/files/customer.csv');
include __DIR__ . '/chap_10_linked_list_include.php';
$headers = array();
$customer = readCsv(CUSTOMER_FILE, $headers);You can then produce a linked list using the first column as a sort key:
$makeLink = function ($row) {
return $row[0];
};
$linked = buildLinkedList($customer, $makeLink);Finally, call the bubbleSort() function, providing the linked list and customer list as arguments. You can also provide a sort column, in this illustration column 2, that represents the account balance, using the letter 'A' to indicate ascending order. The printCustomer() function can be used to display output:
echo 'Iterations: ' . bubbleSort($linked, $customer, 2, 'A') . PHP_EOL; echo printCustomer($headers, $linked, $customer);
Here is an example of the output:
A stack is a simple algorithm normally implemented as Last In First Out (LIFO). Think of a stack of books sitting on a library table. When the librarian goes to restore the books to their place, the topmost book is processed first, and so on in order, until the book at the bottom of the stack has been replaced. The topmost book was the last one to be placed on the stack, thus last in first out.
In programming terms, a stack is used to temporarily store information. The retrieval order facilitates retrieving the most recent item first.
Application\Generic\Stack. The core logic is encapsulated in an SPL class, SplStack:namespace Application\Generic;
use SplStack;
class Stack
{
// code
}SplStack instance:protected $stack;
public function __construct()
{
$this->stack = new SplStack();
}push() and pop() methods:public function push($message)
{
$this->stack->push($message);
}
public function pop()
{
return $this->stack->pop();
}__invoke() that returns an instance of the stack property. This allows us to use the object in a direct function call:public function __invoke()
{
return $this->stack;
}One possible use for a stack is to store messages. In the case of messages, it is usually desirable to retrieve the latest first, thus it is a perfect use case for a stack. Define the Application\Generic\Stack class as discussed in this recipe. Next, define a calling program that sets up autoloading and creates an instance of the stack:
<?php // setup class autoloading require __DIR__ . '/../Application/Autoload/Loader.php'; Application\Autoload\Loader::init(__DIR__ . '/..'); use Application\Generic\Stack; $stack = new Stack();
To do something with the stack, store a series of messages. As you would most likely store messages at different points in your application, you can use sleep() to simulate other code running:
echo 'Do Something ... ' . PHP_EOL;
$stack->push('1st Message: ' . date('H:i:s'));
sleep(3);
echo 'Do Something Else ... ' . PHP_EOL;
$stack->push('2nd Message: ' . date('H:i:s'));
sleep(3);
echo 'Do Something Else Again ... ' . PHP_EOL;
$stack->push('3rd Message: ' . date('H:i:s'));
sleep(3);Finally, simply iterate through the stack to retrieve messages. Note that you can call the stack object as if it were a function, which returns the SplStack instance:
echo 'What Time Is It?' . PHP_EOL;
foreach ($stack() as $item) {
echo $item . PHP_EOL;
}Here is the expected output:
Conventional searches often proceed through the list of items in a sequential manner. This means that the maximum possible number of items to be searched could be the same as the length of the list! This is not very efficient. If you need to expedite a search, consider implementing a binary search.
The technique is quite simple: you find the midpoint in the list, and determine whether the search item is less than, equal to, or greater than the midpoint item. If less, you set the upper limit to the midpoint, and search only the first half of the list. If greater, set the lower limit to the midpoint, and search only the last half of the list. You would then proceed to divide the list into 1/4, 1/8, 1/16, and so on, until the search item is found (or not).
It's important to note that although the maximum number of comparisons is considerably smaller than a sequential search (log n + 1 where n is the number of elements in the list, and log is the binary logarithm), the list involved in the search must first be sorted, which of course downgrades performance.
Application\Generic\Search, which accepts the primary list as an argument. As a control, we also define a property, $iterations:namespace Application\Generic;
class Search
{
protected $primary;
protected $iterations;
public function __construct($primary)
{
$this->primary = $primary;
}binarySearch(), which sets up the search infrastructure. The first order of business is to build a separate array, $search, where the key is a composite of the columns included in the search. We then sort by key:public function binarySearch(array $keys, $item)
{
$search = array();
foreach ($this->primary as $primaryKey => $data) {
$searchKey = function ($keys, $data) {
$key = '';
foreach ($keys as $k) $key .= $data[$k]; return $key;
};
$search[$searchKey($keys, $data)] = $primaryKey;
}
ksort($search);$binary, so that we can perform the binary sort based on numeric keys. We then call doBinarySearch(), which results in a key from our intermediary array $search, or a Boolean, FALSE:$binary = array_keys($search); $result = $this->doBinarySearch($binary, $item); return $this->primary[$search[$result]] ?? FALSE; }
doBinarySearch() initializes a series of parameters. $iterations, $found, $loop, $done, and $max are all used to prevent an endless loop. $upper and $lower represent the slice of the list to be examined:public function doBinarySearch($binary, $item)
{
$iterations = 0;
$found = FALSE;
$loop = TRUE;
$done = -1;
$max = count($binary);
$lower = 0;
$upper = $max - 1;while() loop and set the midpoint: while ($loop && !$found) {
$mid = (int) (($upper - $lower) / 2) + $lower;switch ($item <=> $binary[$mid]) {
// $item < $binary[$mid]
case -1 :
$upper = $mid;
break;
// $item == $binary[$mid]
case 0 :
$found = $binary[$mid];
break;
// $item > $binary[$mid]
case 1 :
default :
$lower = $mid;
} $loop = (($iterations++ < $max) && ($done < 1));
$done += ($upper == $lower) ? 1 : 0;
}
$this->iterations = $iterations;
return $found;
}First, implement the Application\Generic\Search class defining the methods described in this recipe. Next, define a calling program, chap_10_binary_search.php, which sets up autoloading and reads the customer.csv file as a search target (as discussed in the previous recipe):
<?php
define('CUSTOMER_FILE', __DIR__ . '/../data/files/customer.csv');
include __DIR__ . '/chap_10_linked_list_include.php';
require __DIR__ . '/../Application/Autoload/Loader.php';
Application\Autoload\Loader::init(__DIR__ . '/..');
use Application\Generic\Search;
$headers = array();
$customer = readCsv(CUSTOMER_FILE, $headers);You can then create a new Search instance, and specify an item somewhere in the middle of the list. In this illustration, the search is based on column 1, customer name, and the item is Todd Lindsey:
$search = new Search($customer); $item = 'Todd Lindsey'; $cols = [1]; echo "Searching For: $item\n"; var_dump($search->binarySearch($cols, $item));
For illustration, add this line just before switch() in Application\Generic\Search::doBinarySearch():
echo 'Upper:Mid:Lower:<=> | ' . $upper . ':' . $mid . ':' . $lower . ':' . ($item <=> $binary[$mid]);
The output is shown here. Notice how the upper, middle, and lower limits adjust until the item is found:
For more information on binary search, there is an excellent article on Wikipedia that goes through the basic math at https://en.wikipedia.org/wiki/Binary_search_algorithm.
In order to implement a search engine, we need to make provision for multiple columns to be included in the search. In addition, it's important to recognize that the search item might be found in the middle of the field, and that very rarely will users provide enough information for an exact match. Accordingly, we will rely heavily on the SQL LIKE %value% clause.
LIKE, <, >, and so on); and optionally an item. The reason why an item is optional is that some operators, such as IS NOT NULL, do not require specific data:namespace Application\Database\Search;
class Criteria
{
public $key;
public $item;
public $operator;
public function __construct($key, $operator, $item = NULL)
{
$this->key = $key;
$this->operator = $operator;
$this->item = $item;
}
}Application\Database\Search\Engine, and provide the necessary class constants and properties. The difference between $columns and $mapping is that $columns holds information that will ultimately appear in an HTML SELECT field (or the equivalent). For security reasons, we do not want to expose the actual names of the database columns, thus the need for another array $mapping:namespace Application\Database\Search;
use PDO;
use Application\Database\Connection;
class Engine
{
const ERROR_PREPARE = 'ERROR: unable to prepare statement';
const ERROR_EXECUTE = 'ERROR: unable to execute statement';
const ERROR_COLUMN = 'ERROR: column name not on list';
const ERROR_OPERATOR= 'ERROR: operator not on list';
const ERROR_INVALID = 'ERROR: invalid search criteria';
protected $connection;
protected $table;
protected $columns;
protected $mapping;
protected $statement;
protected $sql = ''; protected $operators = [
'LIKE' => 'Equals',
'<' => 'Less Than',
'>' => 'Greater Than',
'<>' => 'Not Equals',
'NOT NULL' => 'Exists',
];Application\Database\Connection, defined in Chapter 5, Interacting with a Database. We also need to provide the name of the database table, as well as $columns, an array of arbitrary column keys and labels, which will appear in the HTML form. This will reference $mapping, where the key matches $columns, but where the value represents actual database column names:public function __construct(Connection $connection,
$table, array $columns, array $mapping)
{
$this->connection = $connection;
$this->setTable($table);
$this->setColumns($columns);
$this->setMapping($mapping);
}public function setColumns($columns)
{
$this->columns = $columns;
}
public function getColumns()
{
return $this->columns;
}
// etc.SELECT setup, we add a WHERE clause, using $mapping to add the actual database column name. We then add the operator and implement switch() which, based on the operator, may or may not add a named placeholder that will represent the search item:public function prepareStatement(Criteria $criteria)
{
$this->sql = 'SELECT * FROM ' . $this->table . ' WHERE ';
$this->sql .= $this->mapping[$criteria->key] . ' ';
switch ($criteria->operator) {
case 'NOT NULL' :
$this->sql .= ' IS NOT NULL OR ';
break;
default :
$this->sql .= $criteria->operator . ' :'
. $this->mapping[$criteria->key] . ' OR ';
}SELECT has been defined, we remove any trailing OR keywords, and add a clause that causes the result to be sorted according to the search column. The statement is then sent to the database to be prepared: $this->sql = substr($this->sql, 0, -4)
. ' ORDER BY ' . $this->mapping[$criteria->key];
$statement = $this->connection->pdo->prepare($this->sql);
return $statement;
}search() method. We accept an Application\Database\Search\Criteria object as an argument. This ensures that we have an item key and operator at a minimum. To be on the safe side, we add an if() statement to check these properties:public function search(Criteria $criteria)
{
if (empty($criteria->key) || empty($criteria->operator)) {
yield ['error' => self::ERROR_INVALID];
return FALSE;
}prepareStatement() using try / catch to trap errors:try {
if (!$statement = $this->prepareStatement($criteria)) {
yield ['error' => self::ERROR_PREPARE];
return FALSE;
}execute(). The key represents the database column name that was used as a placeholder in the prepared statement. Note that instead of using =, we use the LIKE %value% construct:$params = array();
switch ($criteria->operator) {
case 'NOT NULL' :
// do nothing: already in statement
break;
case 'LIKE' :
$params[$this->mapping[$criteria->key]] =
'%' . $criteria->item . '%';
break;
default :
$params[$this->mapping[$criteria->key]] =
$criteria->item;
}yield keywords, which effectively turns this method into a generator: $statement->execute($params);
while ($row = $statement->fetch(PDO::FETCH_ASSOC)) {
yield $row;
}
} catch (Throwable $e) {
error_log(__METHOD__ . ':' . $e->getMessage());
throw new Exception(self::ERROR_EXECUTE);
}
return TRUE;
}Place the code discussed in this recipe in the files Criteria.php and Engine.php under Application\Database\Search. You can then define a calling script, chap_10_search_engine.php, which sets up autoloading. You can take advantage of the Application\Database\Connection class discussed in Chapter 5, Interacting with a Database, and the form element classes covered in Chapter 6, Building Scalable Websites:
<?php
define('DB_CONFIG_FILE', '/../config/db.config.php');
require __DIR__ . '/../Application/Autoload/Loader.php';
Application\Autoload\Loader::init(__DIR__ . '/..');
use Application\Database\Connection;
use Application\Database\Search\ { Engine, Criteria };
use Application\Form\Generic;
use Application\Form\Element\Select;You can now define which database columns will appear in the form, and a matching mapping file:
$dbCols = [ 'cname' => 'Customer Name', 'cbal' => 'Account Balance', 'cmail' => 'Email Address', 'clevel' => 'Level' ]; $mapping = [ 'cname' => 'name', 'cbal' => 'balance', 'cmail' => 'email', 'clevel' => 'level' ];
You can now set up the database connection and create the search engine instance:
$conn = new Connection(include __DIR__ . DB_CONFIG_FILE); $engine = new Engine($conn, 'customer', $dbCols, $mapping);
In order to display the appropriate drop-down SELECT elements, we define wrappers and elements based on Application\Form\* classes:
$wrappers = [
Generic::INPUT => ['type' => 'td', 'class' => 'content'],
Generic::LABEL => ['type' => 'th', 'class' => 'label'],
Generic::ERRORS => ['type' => 'td', 'class' => 'error']
];
// define elements
$fieldElement = new Select('field',
Generic::TYPE_SELECT,
'Field',
$wrappers,
['id' => 'field']);
$opsElement = new Select('ops',
Generic::TYPE_SELECT,
'Operators',
$wrappers,
['id' => 'ops']);
$itemElement = new Generic('item',
Generic::TYPE_TEXT,
'Searching For ...',
$wrappers,
['id' => 'item','title' => 'If more than one item, separate with commas']);
$submitElement = new Generic('submit',
Generic::TYPE_SUBMIT,
'Search',
$wrappers,
['id' => 'submit','title' => 'Click to Search', 'value' => 'Search']);We then get input parameters (if defined), set form element options, create search criteria, and run the search:
$key = (isset($_GET['field']))
? strip_tags($_GET['field']) : NULL;
$op = (isset($_GET['ops'])) ? $_GET['ops'] : NULL;
$item = (isset($_GET['item'])) ? strip_tags($_GET['item']) : NULL;
$fieldElement->setOptions($dbCols, $key);
$itemElement->setSingleAttribute('value', $item);
$opsElement->setOptions($engine->getOperators(), $op);
$criteria = new Criteria($key, $op, $item);
$results = $engine->search($criteria);
?>The display logic mainly orients towards rendering the form. A more thorough presentation is discussed in Chapter 6, Building Scalable Websites, but we show the core logic here:
<form name="search" method="get">
<table class="display" cellspacing="0" width="100%">
<tr><?= $fieldElement->render(); ?></tr>
<tr><?= $opsElement->render(); ?></tr>
<tr><?= $itemElement->render(); ?></tr>
<tr><?= $submitElement->render(); ?></tr>
<tr>
<th class="label">Results</th>
<td class="content" colspan=2>
<span style="font-size: 10pt;font-family:monospace;">
<table>
<?php foreach ($results as $row) : ?>
<tr>
<td><?= $row['id'] ?></td>
<td><?= $row['name'] ?></td>
<td><?= $row['balance'] ?></td>
<td><?= $row['email'] ?></td>
<td><?= $row['level'] ?></td>
</tr>
<?php endforeach; ?>
</table>
</span>
</td>
</tr>
</table>
</form>Here is sample output from a browser:
How to properly display data from a multi-dimensional array has been a classic problem for any web developer. For illustration, assume you wish to display a list of customers and their purchases. For each customer, you wish to show their name, phone number, account balance, and so on. This already represents a two dimensional array where the x axis represents customers and the y axis represents data for that customer. Now add in purchases and you have a third axis! How can you represent a 3D model on a 2D screen? One possible solution would be to incorporate "hidden" division tags with a simple JavaScript visibility toggle.
JOIN clauses. We will use the Application/Database/Connection class introduced in Chapter 1, Building a Foundation, to formulate an appropriate SQL query. We leave two parameters open, min and max, in order to support pagination. Unfortunately, we cannot use a simple LIMIT and OFFSET in this case, as the number of rows will vary depending on the number of purchases for any given customer. Accordingly, we can restrict the number of rows by placing restrictions on the customer ID that presumably (hopefully) is incremental. To make this work properly, we also need to set the primary ORDER to customer ID:define('ITEMS_PER_PAGE', 6);
define('SUBROWS_PER_PAGE', 6);
define('DB_CONFIG_FILE', '/../config/db.config.php');
include __DIR__ . '/../Application/Database/Connection.php';
use Application\Database\Connection;
$conn = new Connection(include __DIR__ . DB_CONFIG_FILE);
$sql = 'SELECT c.id,c.name,c.balance,c.email,f.phone, '
. 'u.transaction,u.date,u.quantity,u.sale_price,r.title '
. 'FROM customer AS c '
. 'JOIN profile AS f '
. 'ON f.id = c.id '
. 'JOIN purchases AS u '
. 'ON u.customer_id = c.id '
. 'JOIN products AS r '
. 'ON u.product_id = r.id '
. 'WHERE c.id >= :min AND c.id < :max '
. 'ORDER BY c.id ASC, u.date DESC ';$_GET parameters. Note that we add an extra check to make sure the value of $prev does not go below zero. You might consider adding another control that ensures the value of $next does not go beyond the last customer ID. In this illustration, we just allow it to increment:$page = $_GET['page'] ?? 1; $page = (int) $page; $next = $page + 1; $prev = $page - 1; $prev = ($prev >= 0) ? $prev : 0;
$min and $max, and prepare and execute the SQL statement:$min = $prev * ITEMS_PER_PAGE; $max = $page * ITEMS_PER_PAGE; $stmt = $conn->pdo->prepare($sql); $stmt->execute(['min' => $min, 'max' => $max]);
while() loop can be used to fetch results. We use a simple fetch mode of PDO::FETCH_ASSOC for the purpose of this example. Using the customer ID as a key, we store basic customer information as array parameters. We then store an array of purchase information in a sub-array, $results[$key]['purchases'][]. When the customer ID changes, it's a signal to store the same information for the next customer. Note that we accumulate totals per customer in an array key total:$custId = 0;
$result = array();
$grandTotal = 0.0;
while ($row = $stmt->fetch(PDO::FETCH_ASSOC)) {
if ($row['id'] != $custId) {
$custId = $row['id'];
$result[$custId] = [
'name' => $row['name'],
'balance' => $row['balance'],
'email' => $row['email'],
'phone' => $row['phone'],
];
$result[$custId]['total'] = 0;
}
$result[$custId]['purchases'][] = [
'transaction' => $row['transaction'],
'date' => $row['date'],
'quantity' => $row['quantity'],
'sale_price' => $row['sale_price'],
'title' => $row['title'],
];
$result[$custId]['total'] += $row['sale_price'];
$grandTotal += $row['sale_price'];
}
?><div class="container">
<?php foreach ($result as $key => $data) : ?>
<div class="mainLeft color0">
<?= $data['name'] ?> [<?= $key ?>]
</div>
<div class="mainRight">
<div class="row">
<div class="left">Balance</div>
<div class="right"><?= $data['balance']; ?></div>
</div>
<div class="row">
<div class="left color2">Email</div>
<div class="right"><?= $data['email']; ?></div>
</div>
<div class="row">
<div class="left">Phone</div>
<div class="right"><?= $data['phone']; ?></div>
</div>
<div class="row">
<div class="left color2">Total Purchases</div>
<div class="right">
<?= number_format($data['total'],2); ?>
</div>
</div><!-- Purchases Info --> <table> <tr> <th>Transaction</th><th>Date</th><th>Qty</th> <th>Price</th><th>Product</th> </tr> <?php $count = 0; ?> <?php foreach ($data['purchases'] as $purchase) : ?> <?php $class = ($count++ & 01) ? 'color1' : 'color2'; ?> <tr> <td class="<?= $class ?>"><?= $purchase['transaction'] ?></td> <td class="<?= $class ?>"><?= $purchase['date'] ?></td> <td class="<?= $class ?>"><?= $purchase['quantity'] ?></td> <td class="<?= $class ?>"><?= $purchase['sale_price'] ?></td> <td class="<?= $class ?>"><?= $purchase['title'] ?></td> </tr> <?php endforeach; ?> </table>
<?php endforeach; ?>
<div class="container">
<a href="?page=<?= $prev ?>">
<input type="button" value="Previous"></a>
<a href="?page=<?= $next ?>">
<input type="button" value="Next" class="buttonRight"></a>
</div>
<div class="clearRow"></div>
</div><div> tag based on its id attribute:<script type="text/javascript">
function showOrHide(id) {
var div = document.getElementById(id);
div.style.display = div.style.display == "none" ? "block" : "none";
}
</script><div> tag. Then, we can place a limit of how many sub-rows are initially visible, and add a link that reveals the remaining purchase data:<div class="row" id="<?= 'purchase' . $key ?>" style="display:none;">
<table>
<tr>
<th>Transaction</th><th>Date</th><th>Qty</th>
<th>Price</th><th>Product</th>
</tr>
<?php $count = 0; ?>
<?php $first = TRUE; ?>
<?php foreach ($data['purchases'] as $purchase) : ?>
<?php if ($count > SUBROWS_PER_PAGE && $first) : ?>
<?php $first = FALSE; ?>
<?php $subId = 'subrow' . $key; ?>
</table>
<a href="#" onClick="showOrHide('<?= $subId ?>')">More</a>
<div id="<?= $subId ?>" style="display:none;">
<table>
<?php endif; ?>
<?php $class = ($count++ & 01) ? 'color1' : 'color2'; ?>
<tr>
<td class="<?= $class ?>"><?= $purchase['transaction'] ?></td>
<td class="<?= $class ?>"><?= $purchase['date'] ?></td>
<td class="<?= $class ?>"><?= $purchase['quantity'] ?></td>
<td class="<?= $class ?>"><?= $purchase['sale_price'] ?></td>
<td class="<?= $class ?>"><?= $purchase['title'] ?></td>
</tr>
<?php endforeach; ?>
</table>
<?php if (!$first) : ?></div><?php endif; ?>
</div><div> tag:<input type="button" value="Purchases" class="buttonRight"
onClick="showOrHide('<?= 'purchase' . $key ?>')">Place the code described in steps 1 to 5 into a file, chap_10_html_table_multi_array_hidden.php.
Just inside the while() loop, add the following:
printf('%6s : %20s : %8s : %20s' . PHP_EOL,
$row['id'], $row['name'], $row['transaction'], $row['title']);Just after the while() loop, add an exit command. Here is the output:
You will notice that the basic customer information, such as the ID and name, repeats for each result row, but purchase information, such as transaction and product title, varies. Go ahead and remove the printf() statement.
Replace the exit command with the following:
echo '<pre>', var_dump($result), '</pre>'; exit;
Here is how the newly composed 3D array looks:
You can now add the display logic shown in steps 5 to 7. As mentioned, although you are now showing all data, the visual display is not helpful. Now go ahead and add the refinements mentioned in the remaining steps. Here is how the initial output might appear:
When the Purchases button is clicked, initial purchase info appears. If the link to More is clicked, the remaining purchase information shows:
In this chapter, we will cover the following topics:
The idea of incorporating software design patterns into object-oriented programming (OOP) code was first discussed in a seminal work entitled Design Patterns: Elements of Reusable Object-Oriented Software, authored by the famous Gang of Four (E. Gamma, R. Helm, R. Johnson, and J. Vlissides) in 1994. Defining neither standards nor protocols, this work identified common generic software designs that have proven useful over the years. The patterns discussed in this book are generally thought to fall into three categories: creational, structural, and behavioral.
Examples of many of these patterns have already been presented in this book. Here is a brief summary:
|
Design pattern |
Chapter |
Recipe |
|---|---|---|
|
Singleton |
2 |
Defining visibility |
|
Factory |
6 |
Implementing a form factory |
|
Adapter |
8 |
Handling translation without |
|
Proxy |
7 |
Creating a simple REST client Creating a simple SOAP client |
|
Iterator |
2 3 |
Recursive directory iterator Using iterators |
In this chapter, we will examine a number of additional design patterns, focusing primarily on Concurrency and Architectural patterns.
The Hydrator pattern is a variation of the Data Transfer Object design pattern. Its design principle is quite simple: moving data from one place to another. In this illustration, we will define classes to move data from an array to an object.
Hydrator class that is able to use getters and setters. For this illustration we will use Application\Generic\Hydrator\GetSet:namespace Application\Generic\Hydrator;
class GetSet
{
// code
}hydrate() method, which takes both an array and an object as arguments. It then calls the setXXX() methods on the object to populate it with values from the array. We use get_class() to determine the object's class, and then get_class_methods() to get a list of all methods. preg_match() is used to match the method prefix and its suffix, which is subsequently assumed to be the array key:public static function hydrate(array $array, $object)
{
$class = get_class($object);
$methodList = get_class_methods($class);
foreach ($methodList as $method) {
preg_match('/^(set)(.*?)$/i', $method, $matches);
$prefix = $matches[1] ?? '';
$key = $matches[2] ?? '';
$key = strtolower(substr($key, 0, 1)) . substr($key, 1);
if ($prefix == 'set' && !empty($array[$key])) {
$object->$method($array[$key]);
}
}
return $object;
}To demonstrate how the array to hydrator object is used, first define the Application\Generic\Hydrator\GetSet class as described in the How to do it... section. Next, define an entity class that can be used to test the concept. For the purposes of this illustration, create a Application\Entity\Person class, with the appropriate properties and methods. Be sure to define getters and setters for all properties. Not all such methods are shown here:
namespace Application\Entity;
class Person
{
protected $firstName = '';
protected $lastName = '';
protected $address = '';
protected $city = '';
protected $stateProv = '';
protected $postalCode = '';
protected $country = '';
public function getFirstName()
{
return $this->firstName;
}
public function setFirstName($firstName)
{
$this->firstName = $firstName;
}
// etc.
}You can now create a calling program called chap_11_array_to_object.php, which sets up autoloading, and uses the appropriate classes:
<?php require __DIR__ . '/../Application/Autoload/Loader.php'; Application\Autoload\Loader::init(__DIR__ . '/..'); use Application\Entity\Person; use Application\Generic\Hydrator\GetSet;
Next, you can define a test array with values that will be added to a new Person instance:
$a['firstName'] = 'Li\'l Abner'; $a['lastName'] = 'Yokum'; $a['address'] = '1 Dirt Street'; $a['city'] = 'Dogpatch'; $a['stateProv'] = 'Kentucky'; $a['postalCode']= '12345'; $a['country'] = 'USA';
You can now call hydrate() and extract() in a static manner:
$b = GetSet::hydrate($a, new Person()); var_dump($b);
The results are shown in the following screenshot:
This recipe is the converse of the Creating an array to object hydrator recipe. In this case, we need to pull values from object properties and return an associative array where the key will be the column name.
Application\Generic\Hydrator\GetSet class defined in the previous recipe:namespace Application\Generic\Hydrator;
class GetSet
{
// code
}hydrate() method defined in the previous recipe, we define an extract() method, which takes an object as an argument. The logic is similar to that used with hydrate(), except this time we're searching for getXXX() methods. Again, preg_match() is used to match the method prefix and its suffix, which is subsequently assumed to be the array key:public static function extract($object)
{
$array = array();
$class = get_class($object);
$methodList = get_class_methods($class);
foreach ($methodList as $method) {
preg_match('/^(get)(.*?)$/i', $method, $matches);
$prefix = $matches[1] ?? '';
$key = $matches[2] ?? '';
$key = strtolower(substr($key, 0, 1)) . substr($key, 1);
if ($prefix == 'get') {
$array[$key] = $object->$method();
}
}
return $array;
}
}Define a calling program called chap_11_object_to_array.php, which sets up autoloading, and uses the appropriate classes:
<?php require __DIR__ . '/../Application/Autoload/Loader.php'; Application\Autoload\Loader::init(__DIR__ . '/..'); use Application\Entity\Person; use Application\Generic\Hydrator\GetSet;
Next, define an instance of Person, setting values for its properties:
$obj = new Person();
$obj->setFirstName('Li\'lAbner');
$obj->setLastName('Yokum');
$obj->setAddress('1DirtStreet');
$obj->setCity('Dogpatch');
$obj->setStateProv('Kentucky');
$obj->setPostalCode('12345');
$obj->setCountry('USA');Finally, call the new extract() method in a static manner:
$a = GetSet::extract($obj); var_dump($a);
The output is shown in the following screenshot:
It is often the case that runtime conditions force the developer to define several ways of doing the same thing. Traditionally, this involved a massive if/elseif/else block of commands. You would then either have to define large blocks of logic inside the if statement, or create a series of functions or methods to enable the different approaches. The strategy pattern attempts to formalize this process by having the primary class encapsulate a series of sub-classes that represent different approaches to solve the same problem.
GetSet hydrator class defined previously as a strategy. We will define a primary Application\Generic\Hydrator\Any class, which will then consume strategy classes in the Application\Generic\Hydrator\Strategy namespace, including GetSet, PublicProps, and Extending.namespace Application\Generic\Hydrator;
use InvalidArgumentException;
use Application\Generic\Hydrator\Strategy\ {
GetSet, PublicProps, Extending };
class Any
{
const STRATEGY_PUBLIC = 'PublicProps';
const STRATEGY_GET_SET = 'GetSet';
const STRATEGY_EXTEND = 'Extending';
protected $strategies;
public $chosen;$strategies property:public function __construct()
{
$this->strategies[self::STRATEGY_GET_SET] = new GetSet();
$this->strategies[self::STRATEGY_PUBLIC] = new PublicProps();
$this->strategies[self::STRATEGY_EXTEND] = new Extending();
}addStrategy() method that allows us to overwrite or add new strategies without having to recode the class:public function addStrategy($key, HydratorInterface $strategy)
{
$this->strategies[$key] = $strategy;
}hydrate() and extract() methods simply call those of the chosen strategy:public function hydrate(array $array, $object)
{
$strategy = $this->chooseStrategy($object);
$this->chosen = get_class($strategy);
return $strategy::hydrate($array, $object);
}
public function extract($object)
{
$strategy = $this->chooseStrategy($object);
$this->chosen = get_class($strategy);
return $strategy::extract($object);
}chooseStrategy(), which takes an object as an argument. We first perform some detective work by way of getting a list of class methods. We then scan through the list to see if we have any getXXX() or setXXX() methods. If so, we choose the GetSet hydrator as our chosen strategy:public function chooseStrategy($object)
{
$strategy = NULL;
$methodList = get_class_methods(get_class($object));
if (!empty($methodList) && is_array($methodList)) {
$getSet = FALSE;
foreach ($methodList as $method) {
if (preg_match('/^get|set.*$/i', $method)) {
$strategy = $this->strategies[self::STRATEGY_GET_SET];
break;
}
}
}chooseStrategy() method, if there are no getters or setters, we next use get_class_vars() to determine if there are any available properties. If so, we choose PublicProps as our hydrator:if (!$strategy) {
$vars = get_class_vars(get_class($object));
if (!empty($vars) && count($vars)) {
$strategy = $this->strategies[self::STRATEGY_PUBLIC];
}
}Extending hydrator, which returns a new class that simply extends the object class, thus making any public or protected properties available:if (!$strategy) {
$strategy = $this->strategies[self::STRATEGY_EXTEND];
}
return $strategy;
}
}Application\Generic\Hydrator\Strategy namespace.Application\Generic\Hydrator\Any:namespace Application\Generic\Hydrator\Strategy;
interface HydratorInterface
{
public static function hydrate(array $array, $object);
public static function extract($object);
}GetSet hydrator is exactly as defined in the previous two recipes, with the only addition being that it will implement the new interface:namespace Application\Generic\Hydrator\Strategy;
class GetSet implements HydratorInterface
{
public static function hydrate(array $array, $object)
{
// defined in the recipe:
// "Creating an Array to Object Hydrator"
}
public static function extract($object)
{
// defined in the recipe:
// "Building an Object to Array Hydrator"
}
}namespace Application\Generic\Hydrator\Strategy;
class PublicProps implements HydratorInterface
{
public static function hydrate(array $array, $object)
{
$propertyList= array_keys(
get_class_vars(get_class($object)));
foreach ($propertyList as $property) {
$object->$property = $array[$property] ?? NULL;
}
return $object;
}
public static function extract($object)
{
$array = array();
$propertyList = array_keys(
get_class_vars(get_class($object)));
foreach ($propertyList as $property) {
$array[$property] = $object->$property;
}
return $array;
}
}Extending, the Swiss Army knife of hydrators, extends the object class, thus providing direct access to properties. We further define magic getters and setters to provide access to properties.hydrate() method is the most difficult as we are assuming no getters or setters are defined, nor are the properties defined with a visibility level of public. Accordingly, we need to define a class that extends the class of the object to be hydrated. We do this by first defining a string that will be used as a template to build the new class:namespace Application\Generic\Hydrator\Strategy;
class Extending implements HydratorInterface
{
const UNDEFINED_PREFIX = 'undefined';
const TEMP_PREFIX = 'TEMP_';
const ERROR_EVAL = 'ERROR: unable to evaluate object';
public static function hydrate(array $array, $object)
{
$className = get_class($object);
$components = explode('\\', $className);
$realClass = array_pop($components);
$nameSpace = implode('\\', $components);
$tempClass = $realClass . self::TEMP_SUFFIX;
$template = 'namespace '
. $nameSpace . '{'
. 'class ' . $tempClass
. ' extends ' . $realClass . ' 'hydrate() method, we define a $values property, and a constructor that assigns the array to be hydrated into the object as an argument. We loop through the array of values, assigning values to properties. We also define a useful getArrayCopy() method, which returns these values if needed, as well as a magic __get() method to simulate direct property access:. '{ '
. ' protected $values; '
. ' public function __construct($array) '
. ' { $this->values = $array; '
. ' foreach ($array as $key => $value) '
. ' $this->$key = $value; '
. ' } '
. ' public function getArrayCopy() '
. ' { return $this->values; } '__get() method, which simulates direct variable access as if they were public:. ' public function __get($key) '
. ' { return $this->values[$key] ?? NULL; } '__call() method, which simulates getters and setters:. ' public function __call($method, $params) '
. ' { '
. ' preg_match("/^(get|set)(.*?)$/i", '
. ' $method, $matches); '
. ' $prefix = $matches[1] ?? ""; '
. ' $key = $matches[2] ?? ""; '
. ' $key = strtolower(substr($key, 0, 1)) '
. ' substr($key, 1); '
. ' if ($prefix == "get") { '
. ' return $this->values[$key] ?? NULL; '
. ' } else { '
. ' $this->values[$key] = $params[0]; '
. ' } '
. ' } '
. '} '
. '} // ends namespace ' . PHP_EOL. 'namespace { '
. 'function build($array) '
. '{ return new ' . $nameSpace . '\\'
. $tempClass . '($array); } '
. '} // ends global namespace '
. PHP_EOL;hydrate() method, we execute the completed template using eval(). We then run the build() method defined just at the end of the template. Note that as we are unsure of the namespace of the class to be populated, we define and call build() from the global namespace:try {
eval($template);
} catch (ParseError $e) {
error_log(__METHOD__ . ':' . $e->getMessage());
throw new Exception(self::ERROR_EVAL);
}
return \build($array);
}extract() method is much easier to define as our choices are extremely limited. Extending a class and populating it from an array using magic methods is easily accomplished. The reverse is not the case. If we were to extend the class, we would lose all the property values, as we are extending the class, not the object instance. Accordingly, our only option is to use a combination of getters and public properties:public static function extract($object)
{
$array = array();
$class = get_class($object);
$methodList = get_class_methods($class);
foreach ($methodList as $method) {
preg_match('/^(get)(.*?)$/i', $method, $matches);
$prefix = $matches[1] ?? '';
$key = $matches[2] ?? '';
$key = strtolower(substr($key, 0, 1))
. substr($key, 1);
if ($prefix == 'get') {
$array[$key] = $object->$method();
}
}
$propertyList= array_keys(get_class_vars($class));
foreach ($propertyList as $property) {
$array[$property] = $object->$property;
}
return $array;
}
}You can begin by defining three test classes with identical properties: firstName, lastName, and so on. The first, Person, should have protected properties along with getters and setters. The second, PublicPerson, will have public properties. The third, ProtectedPerson, has protected properties but no getters nor setters:
<?php
namespace Application\Entity;
class Person
{
protected $firstName = '';
protected $lastName = '';
protected $address = '';
protected $city = '';
protected $stateProv = '';
protected $postalCode = '';
protected $country = '';
public function getFirstName()
{
return $this->firstName;
}
public function setFirstName($firstName)
{
$this->firstName = $firstName;
}
// be sure to define remaining getters and setters
}
<?php
namespace Application\Entity;
class PublicPerson
{
private $id = NULL;
public $firstName = '';
public $lastName = '';
public $address = '';
public $city = '';
public $stateProv = '';
public $postalCode = '';
public $country = '';
}
<?php
namespace Application\Entity;
class ProtectedPerson
{
private $id = NULL;
protected $firstName = '';
protected $lastName = '';
protected $address = '';
protected $city = '';
protected $stateProv = '';
protected $postalCode = '';
protected $country = '';
}You can now define a calling program called chap_11_strategy_pattern.php, which sets up autoloading and uses the appropriate classes:
<?php
require __DIR__ . '/../Application/Autoload/Loader.php';
Application\Autoload\Loader::init(__DIR__ . '/..');
use Application\Entity\ { Person, PublicPerson, ProtectedPerson };
use Application\Generic\Hydrator\Any;
use Application\Generic\Hydrator\Strategy\ { GetSet, Extending, PublicProps };Next, create an instance of Person and run the setters to define values for properties:
$obj = new Person();
$obj->setFirstName('Li\'lAbner');
$obj->setLastName('Yokum');
$obj->setAddress('1 Dirt Street');
$obj->setCity('Dogpatch');
$obj->setStateProv('Kentucky');
$obj->setPostalCode('12345');
$obj->setCountry('USA');Next, create an instance of the Any hydrator, call extract(), and use var_dump() to view the results:
$hydrator = new Any(); $b = $hydrator->extract($obj); echo "\nChosen Strategy: " . $hydrator->chosen . "\n"; var_dump($b);
Observe, in the following output, that the GetSet strategy was chosen:
Next, you can define an array with the same values. Call hydrate() on the Any instance, and supply a new PublicPerson instance as an argument:
$a = [ 'firstName' => 'Li\'lAbner', 'lastName' => 'Yokum', 'address' => '1 Dirt Street', 'city' => 'Dogpatch', 'stateProv' => 'Kentucky', 'postalCode' => '12345', 'country' => 'USA' ]; $p = $hydrator->hydrate($a, new PublicPerson()); echo "\nChosen Strategy: " . $hydrator->chosen . "\n"; var_dump($p);
Here is the result. Note that the PublicProps strategy was chosen in this case:
Finally, call hydrate() again, but this time supply an instance of ProtectedPerson as the object argument. We then call getFirstName() and getLastName() to test the magic getters. We also access first and last names as direct variable access:
$q = $hydrator->hydrate($a, new ProtectedPerson());
echo "\nChosen Strategy: " . $hydrator->chosen . "\n";
echo "Name: {$q->getFirstName()} {$q->getLastName()}\n";
echo "Name: {$q->firstName} {$q->lastName}\n";
var_dump($q);Here is the last output, showing that the Extending strategy was chosen. You'll also note that the instance is a new ProtectedPerson_TEMP class, and that the protected properties are fully populated:
A mapper or data mapper works in much the same manner as a hydrator: converting data from one model, be it array or object, into another. A critical difference is that the hydrator is generic and does not need to have object property names pre-programmed, whereas the mapper is the opposite: it needs precise information on property names for both models. In this recipe we will demonstrate the use of a mapper to convert data from one database table into another.
Application\Database\Mapper\FieldConfig class, which contains mapping instructions for individual fields. We also define appropriate class constants:namespace Application\Database\Mapper;
use InvalidArgumentException;
class FieldConfig
{
const ERROR_SOURCE =
'ERROR: need to specify destTable and/or source';
const ERROR_DEST = 'ERROR: need to specify either '
. 'both destTable and destCol or neither';$key is used to identify the object. $source represents the column from the source database table. $destTable and $destCol represent the target database table and column. $default, if defined, contains a default value or a callback that produces the appropriate value:public $key; public $source; public $destTable; public $destCol; public $default;
$source or $destTable and $destCol are defined:public function __construct($source = NULL,
$destTable = NULL,
$destCol = NULL,
$default = NULL)
{
// generate key from source + destTable + destCol
$this->key = $source . '.' . $destTable . '.' . $destCol;
$this->source = $source;
$this->destTable = $destTable;
$this->destCol = $destCol;
$this->default = $default;
if (($destTable && !$destCol) ||
(!$destTable && $destCol)) {
throw new InvalidArgumentException(self::ERROR_DEST);
}
if (!$destTable && !$source) {
throw new InvalidArgumentException(
self::ERROR_SOURCE);
}
}public function getDefault()
{
if (is_callable($this->default)) {
return call_user_func($this->default, $row);
} else {
return $this->default;
}
}public function getKey()
{
return $this->key;
}
public function setKey($key)
{
$this->key = $key;
}
// etc.Application\Database\Mapper\Mapping mapping class, which accepts the name of the source and destination tables as well as an array of FieldConfig objects as an argument. You will see later that we allow the destination table property to be an array, as the mapping might be to two or more destination tables:namespace Application\Database\Mapper;
class Mapping
{
protected $sourceTable;
protected $destTable;
protected $fields;
protected $sourceCols;
protected $destCols;
public function __construct(
$sourceTable, $destTable, $fields = NULL)
{
$this->sourceTable = $sourceTable;
$this->destTable = $destTable;
$this->fields = $fields;
}public function getSourceTable()
{
return $this->sourceTable;
}
public function setSourceTable($sourceTable)
{
$this->sourceTable = $sourceTable;
}
// etc.FieldConfig instance:public function addField(FieldConfig $field)
{
$this->fields[$field->getKey()] = $field;
return $this;
}FieldConfig object. Accordingly, when this method is called, we loop through the array of FieldConfig objects and invoke getSource() on each one to obtain the source column name:public function getSourceColumns()
{
if (!$this->sourceCols) {
$this->sourceCols = array();
foreach ($this->getFields() as $field) {
if (!empty($field->getSource())) {
$this->sourceCols[$field->getKey()] =
$field->getSource();
}
}
}
return $this->sourceCols;
}getDestColumns(). The big difference compared to getting a list of source columns is that we only want the columns for one specific destination table, which is critical if there's more than one such table is defined. We do not need to check to see if $destCol is set as this is already taken care of in the constructor for FieldConfig:public function getDestColumns($table)
{
if (empty($this->destCols[$table])) {
foreach ($this->getFields() as $field) {
if ($field->getDestTable()) {
if ($field->getDestTable() == $table) {
$this->destCols[$table][$field->getKey()] =
$field->getDestCol();
}
}
}
}
return $this->destCols[$table];
}NULL, data from the source is used. Note that if further processing is required, the default should be defined as a callback.public function mapData($sourceData, $destTable)
{
$dest = array();
foreach ($this->fields as $field) {
if ($field->getDestTable() == $destTable) {
$dest[$field->getDestCol()] = NULL;
$default = $field->getDefault($sourceData);
if ($default) {
$dest[$field->getDestCol()] = $default;
} else {
$dest[$field->getDestCol()] =
$sourceData[$field->getSource()];
}
}
}
return $dest;
}
}PDO::prepare()):public function getSourceSelect($where = NULL)
{
$sql = 'SELECT '
. implode(',', $this->getSourceColumns()) . ' ';
$sql .= 'FROM ' . $this->getSourceTable() . ' ';
if ($where) {
$where = trim($where);
if (stripos($where, 'WHERE') !== FALSE) {
$sql .= $where;
} else {
$sql .= 'WHERE ' . $where;
}
}
return trim($sql);
}:":public function getDestInsert($table)
{
$sql = 'INSERT INTO ' . $table . ' ';
$sql .= '( '
. implode(',', $this->getDestColumns($table))
. ' ) ';
$sql .= ' VALUES ';
$sql .= '( :'
. implode(',:', $this->getDestColumns($table))
. ' ) ';
return trim($sql);
}Use the code shown in steps 1 to 5 to produce an Application\Database\Mapper\FieldConfig class. Place the code shown in steps 6 to 14 into a second Application\Database\Mapper\Mapping class.
Before defining a calling program that performs mapping, it's important to consider the source and destination database tables. The definition for the source table, prospects_11, is as follows:
CREATE TABLE `prospects_11` ( `id` int(11) NOT NULL AUTO_INCREMENT, `first_name` varchar(128) NOT NULL, `last_name` varchar(128) NOT NULL, `address` varchar(256) DEFAULT NULL, `city` varchar(64) DEFAULT NULL, `state_province` varchar(32) DEFAULT NULL, `postal_code` char(16) NOT NULL, `phone` varchar(16) NOT NULL, `country` char(2) NOT NULL, `email` varchar(250) NOT NULL, `status` char(8) DEFAULT NULL, `budget` decimal(10,2) DEFAULT NULL, `last_updated` datetime DEFAULT NULL, PRIMARY KEY (`id`), UNIQUE KEY `UNIQ_35730C06E7927C74` (`email`) ) ENGINE=InnoDB DEFAULT CHARSET=utf8;
In this example, you can use two destination tables, customer_11 and profile_11, between which there is a 1:1 relationship:
CREATE TABLE `customer_11` (
`id` int(11) NOT NULL AUTO_INCREMENT,
`name` varchar(256) CHARACTER SET latin1
COLLATE latin1_general_cs NOT NULL,
`balance` decimal(10,2) NOT NULL,
`email` varchar(250) NOT NULL,
`password` char(16) NOT NULL,
`status` int(10) unsigned NOT NULL DEFAULT '0',
`security_question` varchar(250) DEFAULT NULL,
`confirm_code` varchar(32) DEFAULT NULL,
`profile_id` int(11) DEFAULT NULL,
`level` char(3) NOT NULL,
PRIMARY KEY (`id`),
UNIQUE KEY `UNIQ_81398E09E7927C74` (`email`)
) ENGINE=InnoDB AUTO_INCREMENT=80 DEFAULT CHARSET=utf8 COMMENT='Customers';
CREATE TABLE `profile_11` (
`id` int(11) NOT NULL AUTO_INCREMENT,
`address` varchar(256) NOT NULL,
`city` varchar(64) NOT NULL,
`state_province` varchar(32) NOT NULL,
`postal_code` varchar(10) NOT NULL,
`country` varchar(3) NOT NULL,
`phone` varchar(16) NOT NULL,
`photo` varchar(128) NOT NULL,
`dob` datetime NOT NULL,
PRIMARY KEY (`id`)
) ENGINE=InnoDB AUTO_INCREMENT=80 DEFAULT CHARSET=utf8 COMMENT='Customers';You can now define a calling program called chap_11_mapper.php, which sets up autoloading and uses the two classes mentioned previously. You can also use the Connection class defined in Chapter 5, Interacting with a Database:
<?php
define('DB_CONFIG_FILE', '/../config/db.config.php');
define('DEFAULT_PHOTO', 'person.gif');
require __DIR__ . '/../Application/Autoload/Loader.php';
Application\Autoload\Loader::init(__DIR__ . '/..');
use Application\Database\Mapper\ { FieldConfig, Mapping };
use Application\Database\Connection;
$conn = new Connection(include __DIR__ . DB_CONFIG_FILE);For demonstration purposes, after having made sure the two destination tables exist, you can truncate both tables so that any data that appears is clean:
$conn->pdo->query('DELETE FROM customer_11');
$conn->pdo->query('DELETE FROM profile_11');You are now ready to build the Mapping instance and populate it with FieldConfig objects. Each FieldConfig object represents a mapping between source and destination. In the constructor, supply the name of the source table and the two destination tables in the form of an array:
$mapper = new Mapping('prospects_11', ['customer_11','profile_11']);You can start simply by mapping fields between prospects_11 and customer_11 where there are no defaults:
$mapper>addField(new FieldConfig('email','customer_11','email'))Note that addField() returns the current mapping instance so there is no need to keep specifying $mapper->addField(). This technique is referred to as the fluent interface.
The name field is tricky, as in the prospects_11 table it's represented by two columns, but only one column in the customer_11 table. Accordingly, you can add a callback as default for first_name to combine the two fields into one. You will also need to define an entry for last_name but where there is no destination mapping:
->addField(new FieldConfig('first_name','customer_11','name',
function ($row) { return trim(($row['first_name'] ?? '')
. ' ' . ($row['last_name'] ?? ''));}))
->addField(new FieldConfig('last_name'))The customer_11::status field can use the null coalesce operator (??) to determine if it's set or not:
->addField(new FieldConfig('status','customer_11','status',
function ($row) { return $row['status'] ?? 'Unknown'; }))The customer_11::level field is not represented in the source table, thus you can make a NULL entry for the source field, but make sure the destination table and column are set. Likewise, customer_11::password is not present in the source table. In this case, the callback uses the phone number as a temporary password:
->addField(new FieldConfig(NULL,'customer_11','level','BEG'))
->addField(new FieldConfig(NULL,'customer_11','password',
function ($row) { return $row['phone']; }))You can also set mappings from prospects_11 to profile_11 as follows. Note that as the source photo and date of birth columns are not present in prospects_11, you can set any appropriate default:
->addField(new FieldConfig('address','profile_11','address'))
->addField(new FieldConfig('city','profile_11','city'))
->addField(new FieldConfig('state_province','profile_11',
'state_province', function ($row) {
return $row['state_province'] ?? 'Unknown'; }))
->addField(new FieldConfig('postal_code','profile_11',
'postal_code'))
->addField(new FieldConfig('phone','profile_11','phone'))
->addField(new FieldConfig('country','profile_11','country'))
->addField(new FieldConfig(NULL,'profile_11','photo',
DEFAULT_PHOTO))
->addField(new FieldConfig(NULL,'profile_11','dob',
date('Y-m-d')));In order to establish the 1:1 relationship between the profile_11 and customer_11 tables, we set the values of customer_11::id, customer_11::profile_id and profile_11::id to the value of $row['id'] using a callback:
$idCallback = function ($row) { return $row['id']; };
$mapper->addField(new FieldConfig('id','customer_11','id',
$idCallback))
->addField(new FieldConfig(NULL,'customer_11','profile_id',
$idCallback))
->addField(new FieldConfig('id','profile_11','id',$idCallback));You can now call the appropriate methods to generate three SQL statements, one to read from the source table, and two to insert into the two destination tables:
$sourceSelect = $mapper->getSourceSelect();
$custInsert = $mapper->getDestInsert('customer_11');
$profileInsert = $mapper->getDestInsert('profile_11');These three statements can immediately be prepared for later execution:
$sourceStmt = $conn->pdo->prepare($sourceSelect); $custStmt = $conn->pdo->prepare($custInsert); $profileStmt = $conn->pdo->prepare($profileInsert);
We then execute the SELECT statement, which produces rows from the source table. In a loop we then generate INSERT data for each destination table, and execute the appropriate prepared statements:
$sourceStmt->execute();
while ($row = $sourceStmt->fetch(PDO::FETCH_ASSOC)) {
$custData = $mapper->mapData($row, 'customer_11');
$custStmt->execute($custData);
$profileData = $mapper->mapData($row, 'profile_11');
$profileStmt->execute($profileData);
echo "Processing: {$custData['name']}\n";
}Here are the three SQL statements produced:
We can then view the data directly from the database using SQL JOIN to ensure the relationship has been maintained:
There are two primary techniques to achieve a relational mapping between objects. The first technique involves pre-loading the related child objects into the parent object. The advantage to this approach is that it is easy to implement, and all parent-child information is immediately available. The disadvantage is that large amounts of memory are potentially consumed, and the performance curve is skewed.
The second technique is to embed a secondary lookup into the parent object. In this latter approach, when you need to access the child objects, you would run a getter that would perform the secondary lookup. The advantage of this approach is that performance demands are spread out throughout the request cycle, and memory usage is (or can be) more easily managed. The disadvantage of this approach is that there are more queries generated, which means more work for the database server.
Let's have a look at two techniques to implement object-relational mapping.
First, we will discuss how to implement object relational mapping by pre-loading all child information into the parent class. For this illustration, we will use three related database tables, customer, purchases, and products:
Application\Entity\Customer class (defined in Chapter 5, Interacting with a Database, in the Defining entity classes to match database tables recipe) as a model to develop an Application\Entity\Purchase class. As before, we will use the database definition as the basis of the entity class definition. Here is the database definition for the purchases table:CREATE TABLE `purchases` ( `id` int(11) NOT NULL AUTO_INCREMENT, `transaction` varchar(8) NOT NULL, `date` datetime NOT NULL, `quantity` int(10) unsigned NOT NULL, `sale_price` decimal(8,2) NOT NULL, `customer_id` int(11) DEFAULT NULL, `product_id` int(11) DEFAULT NULL, PRIMARY KEY (`id`), KEY `IDX_C3F3` (`customer_id`), KEY `IDX_665A` (`product_id`), CONSTRAINT `FK_665A` FOREIGN KEY (`product_id`) REFERENCES `products` (`id`), CONSTRAINT `FK_C3F3` FOREIGN KEY (`customer_id`) REFERENCES `customer` (`id`) );
Application\Entity\Purchase might look. Note that not all getters and setters are shown:namespace Application\Entity;
class Purchase extends Base
{
const TABLE_NAME = 'purchases';
protected $transaction = '';
protected $date = NULL;
protected $quantity = 0;
protected $salePrice = 0.0;
protected $customerId = 0;
protected $productId = 0;
protected $mapping = [
'id' => 'id',
'transaction' => 'transaction',
'date' => 'date',
'quantity' => 'quantity',
'sale_price' => 'salePrice',
'customer_id' => 'customerId',
'product_id' => 'productId',
];
public function getTransaction() : string
{
return $this->transaction;
}
public function setTransaction($transaction)
{
$this->transaction = $transaction;
}
// NOTE: other getters / setters are not shown here
}Application\Entity\Product. Here is the database definition for the products table:CREATE TABLE `products` ( `id` int(11) NOT NULL AUTO_INCREMENT, `sku` varchar(16) DEFAULT NULL, `title` varchar(255) NOT NULL, `description` varchar(4096) DEFAULT NULL, `price` decimal(10,2) NOT NULL, `special` int(11) NOT NULL, `link` varchar(128) NOT NULL, PRIMARY KEY (`id`), UNIQUE KEY `UNIQ_38C4` (`sku`) );
Application\Entity\Product might look:namespace Application\Entity;
class Product extends Base
{
const TABLE_NAME = 'products';
protected $sku = '';
protected $title = '';
protected $description = '';
protected $price = 0.0;
protected $special = 0;
protected $link = '';
protected $mapping = [
'id' => 'id',
'sku' => 'sku',
'title' => 'title',
'description' => 'description',
'price' => 'price',
'special' => 'special',
'link' => 'link',
];
public function getSku() : string
{
return $this->sku;
}
public function setSku($sku)
{
$this->sku = $sku;
}
// NOTE: other getters / setters are not shown here
}Application\Entity\Customer parent class. For this section, we will assume the following relationships, illustrated in the following diagram:protected $purchases = array();
public function addPurchase($purchase)
{
$this->purchases[] = $purchase;
}
public function getPurchases()
{
return $this->purchases;
}Application\Entity\Purchase. In this case, there is a 1:1 relationship between a purchase and a product, so there's no need to process an array:protected $product = NULL;
public function getProduct()
{
return $this->product;
}
public function setProduct(Product $product)
{
$this->product = $product;
}Application\Database\CustomerService class described in Chapter 5, Interacting with a Database, in the Tying entity classes to RDBMS queries recipe. We can create a new Application\Database\CustomerOrmService_1 class, which extends Application\Database\CustomerService:namespace Application\Database;
use PDO;
use PDOException;
use Application\Entity\Customer;
use Application\Entity\Product;
use Application\Entity\Purchase;
class CustomerOrmService_1 extends CustomerService
{
// add methods here
}Product and Purchase entities, into the core customer entity. This method performs a lookup in the form of a JOIN. This is possible because there is a 1:1 relationship between purchase and product. Because the id column has the same name in both tables, we need to add the purchase ID column as an alias. We then loop through the results, creating Product and Purchase entities. After overriding the ID, we can then embed the Product entity into the Purchase entity, and then add the Purchase entity to the array in the Customer entity:protected function fetchPurchasesForCustomer(Customer $cust)
{
$sql = 'SELECT u.*,r.*,u.id AS purch_id '
. 'FROM purchases AS u '
. 'JOIN products AS r '
. 'ON r.id = u.product_id '
. 'WHERE u.customer_id = :id '
. 'ORDER BY u.date';
$stmt = $this->connection->pdo->prepare($sql);
$stmt->execute(['id' => $cust->getId()]);
while ($result = $stmt->fetch(PDO::FETCH_ASSOC)) {
$product = Product::arrayToEntity($result, new Product());
$product->setId($result['product_id']);
$purch = Purchase::arrayToEntity($result, new Purchase());
$purch->setId($result['purch_id']);
$purch->setProduct($product);
$cust->addPurchase($purch);
}
return $cust;
}fetchById() method. This block of code needs to not only get the original Customer entity, but needs to look up and embed Product and Purchase entities. We can call the new fetchByIdAndEmbedPurchases() method and accept a customer ID as an argument:public function fetchByIdAndEmbedPurchases($id)
{
return $this->fetchPurchasesForCustomer(
$this->fetchById($id));
}Now we will cover embedding secondary lookups into the related entity classes. We will continue to use the same illustration as above, using the entity classes defined that correspond to three related database tables, customer, purchases, and products:
Application\Entity\Customer class that adds a single entry to the purchases property. Instead of an array of Purchase entities, we will be supplying an anonymous function:public function setPurchases(Closure $purchaseLookup)
{
$this->purchases = $purchaseLookup;
}Application\Database\CustomerOrmService_1 class, and call it Application\Database\CustomerOrmService_2:namespace Application\Database;
use PDO;
use PDOException;
use Application\Entity\Customer;
use Application\Entity\Product;
use Application\Entity\Purchase;
class CustomerOrmService_2 extends CustomerService
{
// code
}fetchPurchaseById() method, which looks up a single purchase based on its ID and produces a Purchase entity. Because we will ultimately be making a series of repetitive requests for single purchases in this approach, we can regain database efficiency by working off the same prepared statement, in this case, a property called $purchPreparedStmt:public function fetchPurchaseById($purchId)
{
if (!$this->purchPreparedStmt) {
$sql = 'SELECT * FROM purchases WHERE id = :id';
$this->purchPreparedStmt =
$this->connection->pdo->prepare($sql);
}
$this->purchPreparedStmt->execute(['id' => $purchId]);
$result = $this->purchPreparedStmt->fetch(PDO::FETCH_ASSOC);
return Purchase::arrayToEntity($result, new Purchase());
}fetchProductById() method that looks up a single product based on its ID and produces a Product entity. Given that a customer may have purchased the same product several times, we can introduce an additional level of efficiency by storing acquired product entities in a $products array. In addition, as with purchases, we can perform lookups on the same prepared statement:public function fetchProductById($prodId)
{
if (!isset($this->products[$prodId])) {
if (!$this->prodPreparedStmt) {
$sql = 'SELECT * FROM products WHERE id = :id';
$this->prodPreparedStmt =
$this->connection->pdo->prepare($sql);
}
$this->prodPreparedStmt->execute(['id' => $prodId]);
$result = $this->prodPreparedStmt
->fetch(PDO::FETCH_ASSOC);
$this->products[$prodId] =
Product::arrayToEntity($result, new Product());
}
return $this->products[$prodId];
}fetchPurchasesForCustomer() method to have it embed an anonymous function that makes calls to both fetchPurchaseById() and fetchProductById(), and then assigns the resulting product entity to the newly found purchase entity. In this example, we do an initial lookup that just returns the IDs of all purchases for this customer. We then embed a sequence of anonymous functions in the Customer::$purchases property, storing the purchase ID as the array key, and the anonymous function as its value:public function fetchPurchasesForCustomer(Customer $cust)
{
$sql = 'SELECT id '
. 'FROM purchases AS u '
. 'WHERE u.customer_id = :id '
. 'ORDER BY u.date';
$stmt = $this->connection->pdo->prepare($sql);
$stmt->execute(['id' => $cust->getId()]);
while ($result = $stmt->fetch(PDO::FETCH_ASSOC)) {
$cust->addPurchaseLookup(
$result['id'],
function ($purchId, $service) {
$purchase = $service->fetchPurchaseById($purchId);
$product = $service->fetchProductById(
$purchase->getProductId());
$purchase->setProduct($product);
return $purchase; }
);
}
return $cust;
}Define the following classes based on the steps from this recipe as follows:
|
Class |
Technique #1 steps |
|---|---|
|
|
1 - 2, 7 |
|
|
3 - 4 |
|
|
6, 16, + described in Chapter 5, Interacting with a Database. |
|
|
8 - 10 |
The second approach to this would be as follows:
|
Class |
Technique #2 steps |
|---|---|
|
|
2 |
|
|
3 - 6 |
In order to implement approach #1, where entities are embedded, define a calling program called chap_11_orm_embedded.php, which sets up autoloading and uses the appropriate classes:
<?php
define('DB_CONFIG_FILE', '/../config/db.config.php');
require __DIR__ . '/../Application/Autoload/Loader.php';
Application\Autoload\Loader::init(__DIR__ . '/..');
use Application\Database\Connection;
use Application\Database\CustomerOrmService_1;Next, create an instance of the service, and look up a customer using a random ID:
$service = new CustomerOrmService_1(new Connection(include __DIR__ . DB_CONFIG_FILE)); $id = rand(1,79); $cust = $service->fetchByIdAndEmbedPurchases($id);
In the view logic, you will have acquired a fully populated Customer entity by way of the fetchByIdAndEmbedPurchases() method. Now all you need to do is to call the right getters to display information:
<!-- Customer Info -->
<h1><?= $cust->getname() ?></h1>
<div class="row">
<div class="left">Balance</div><div class="right">
<?= $cust->getBalance(); ?></div>
</div>
<!-- etc. -->The logic needed to display purchase information would then look something like the following HTML. Notice that Customer::getPurchases() returns an array of Purchase entities. To get product information from the Purchase entity, inside the loop, call Purchase::getProduct(), which produces a Product entity. You can then call any of the Product getters, in this example, Product::getTitle():
<!-- Purchases Info --> <table> <?php foreach ($cust->getPurchases() as $purchase) : ?> <tr> <td><?= $purchase->getTransaction() ?></td> <td><?= $purchase->getDate() ?></td> <td><?= $purchase->getQuantity() ?></td> <td><?= $purchase->getSalePrice() ?></td> <td><?= $purchase->getProduct()->getTitle() ?></td> </tr> <?php endforeach; ?> </table>
Turning your attention to the second approach, which uses secondary lookups, define a calling program called chap_11_orm_secondary_lookups.php, which sets up autoloading and uses the appropriate classes:
<?php
define('DB_CONFIG_FILE', '/../config/db.config.php');
require __DIR__ . '/../Application/Autoload/Loader.php';
Application\Autoload\Loader::init(__DIR__ . '/..');
use Application\Database\Connection;
use Application\Database\CustomerOrmService_2;Next, create an instance of the service, and look up a customer using a random ID:
$service = new CustomerOrmService_2(new Connection(include __DIR__ . DB_CONFIG_FILE)); $id = rand(1,79);
You can now retrieve an Application\Entity\Customer instance and call fetchPurchasesForCustomer() for this customer, which embeds the sequence of anonymous functions:
$cust = $service->fetchById($id); $cust = $service->fetchPurchasesForCustomer($cust);
The view logic for displaying core customer information remains the same as described previously. The logic needed to display purchase information would then look something like the following HTML code snippet. Notice that Customer::getPurchases() returns an array of anonymous functions. Each function call returns one specific purchase and related products:
<table> <?php foreach($cust->getPurchases() as $purchId => $function) : ?> <tr> <?php $purchase = $function($purchId, $service); ?> <td><?= $purchase->getTransaction() ?></td> <td><?= $purchase->getDate() ?></td> <td><?= $purchase->getQuantity() ?></td> <td><?= $purchase->getSalePrice() ?></td> <td><?= $purchase->getProduct()->getTitle() ?></td> </tr> <?php endforeach; ?> </table>
Here is an example of the output:
Best practice
Although each iteration of the loop represents two independent database queries (one for purchase, one for product), efficiency is retained by the use of prepared statements. Two statements are prepared in advance: one that looks up a specific purchase, and one that looks up a specific product. These prepared statements are then executed multiple times. Also, each product retrieval is independently stored in an array, resulting in even greater efficiency.
Probably the best example of a library that implements object-relational mapping is Doctrine. Doctrine uses an embedded approach that its documentation refers to as a proxy. For more information, please refer to http://www.doctrine-project.org/projects/orm.html.
You might also consider reviewing a training video on Learning Doctrine, available from O'Reilly Media at http://shop.oreilly.com/product/0636920041382.do. (Disclaimer: this is a shameless plug by the author of both this book and this video!)
The Publish/Subscribe (Pub/Sub) design pattern often forms the basis of software event-driven programming. This methodology allows asynchronous communications between different software applications, or different software modules within a single application. The purpose of the pattern is to allow a method or function to publish a signal when an action of significance has taken place. One or more classes would then subscribe and take action if a certain signal has been published.
Example of such actions are when the database is modified, or when a user has logged in. Another common use for this design pattern is when an application delivers news feeds. If an urgent news item has been posted, the application would publish this fact, allowing client subscribers to refresh their news listings.
Application\PubSub\Publisher. You'll notice that we are making use of two useful Standard PHP Library (SPL) interfaces, SplSubject and SplObserver:namespace Application\PubSub;
use SplSubject;
use SplObserver;
class Publisher implements SplSubject
{
// code
}protected $name; protected $data; protected $linked; protected $subscribers;
__toString() in case we need quick access to the name of this publisher:public function __construct($name)
{
$this->name = $name;
$this->data = array();
$this->subscribers = array();
$this->linked = array();
}
public function __toString()
{
return $this->name;
}attach(), which is specified in the SplSubject interface. We accept an SplObserver instance as an argument. Note that we need to add entries to both the $subscribers and $linked properties. $linked is then sorted by value, represented by the priority, using arsort(), which sorts in reverse and maintains the key:public function attach(SplObserver $subscriber)
{
$this->subscribers[$subscriber->getKey()] = $subscriber;
$this->linked[$subscriber->getKey()] =
$subscriber->getPriority();
arsort($this->linked);
}detach(), which removes the subscriber from the list:public function detach(SplObserver $subscriber)
{
unset($this->subscribers[$subscriber->getKey()]);
unset($this->linked[$subscriber->getKey()]);
}notify(), which calls update() on all the subscribers. Note that we loop through the linked list to ensure the subscribers are called in order of priority:public function notify()
{
foreach ($this->linked as $key => $value)
{
$this->subscribers[$key]->update($this);
}
}public function getName()
{
return $this->name;
}
public function setName($name)
{
$this->name = $name;
}notify() is invoked:public function setDataByKey($key, $value)
{
$this->data[$key] = $value;
}Application\PubSub\Subscriber. Typically, we would define multiple subscribers for each publisher. In this case, we implement the SplObserver interface:namespace Application\PubSub;
use SplSubject;
use SplObserver;
class Subscriber implements SplObserver
{
// code
}md5() and date/time information, combined with a random number. The constructor initializes the properties as follows. The actual logical functionality performed by the subscriber is in the form of a callback:protected $key;
protected $name;
protected $priority;
protected $callback;
public function __construct(
string $name, callable $callback, $priority = 0)
{
$this->key = md5(date('YmdHis') . rand(0,9999));
$this->name = $name;
$this->callback = $callback;
$this->priority = $priority;
}update() function is called when notifiy() on the publisher is invoked. We pass a publisher instance as an argument, and call the callback defined for this subscriber:public function update(SplSubject $publisher)
{
call_user_func($this->callback, $publisher);
}public function getKey()
{
return $this->key;
}
public function setKey($key)
{
$this->key = $key;
}
// other getters and setters not shownFor the purposes of this illustration, define a calling program called chap_11_pub_sub_simple_example.php, which sets up autoloading and uses the appropriate classes:
<?php
require __DIR__ . '/../Application/Autoload/Loader.php';
Application\Autoload\Loader::init(__DIR__ . '/..');
use Application\PubSub\ { Publisher, Subscriber };Next, create a publisher instance and assign data:
$pub = new Publisher('test');
$pub->setDataByKey('1', 'AAA');
$pub->setDataByKey('2', 'BBB');
$pub->setDataByKey('3', 'CCC');
$pub->setDataByKey('4', 'DDD');Now you can create test subscribers that read data from the publisher and echo the results. The first parameter is the name, the second the callback, and the last is the priority:
$sub1 = new Subscriber(
'1',
function ($pub) {
echo '1:' . $pub->getData()[1] . PHP_EOL;
},
10
);
$sub2 = new Subscriber(
'2',
function ($pub) {
echo '2:' . $pub->getData()[2] . PHP_EOL;
},
20
);
$sub3 = new Subscriber(
'3',
function ($pub) {
echo '3:' . $pub->getData()[3] . PHP_EOL;
},
99
);For test purposes, attach the subscribers out of order, and call notify() twice:
$pub->attach($sub2); $pub->attach($sub1); $pub->attach($sub3); $pub->notify(); $pub->notify();
Next, define and attach another subscriber that looks at the data for subscriber 1 and exits if it's not empty:
$sub4 = new Subscriber(
'4',
function ($pub) {
echo '4:' . $pub->getData()[4] . PHP_EOL;
if (!empty($pub->getData()[1]))
die('1 is set ... halting execution');
},
25
);
$pub->attach($sub4);
$pub->notify();Here is the output. Note that the output is in order of priority (where higher priority goes first), and that the second block of output is interrupted:
A closely related software design pattern is Observer. The mechanism is similar but the generally agreed difference is that Observer operates in a synchronous manner, where all observer methods are called when a signal (often also referred to as message or event) is received. The Pub/Sub pattern, in contrast, operates asynchronously, typically using a message queue. Another difference is that in the Pub/Sub pattern, publishers do not need to be aware of subscribers.
For a good discussion on the difference between the Observer and Pub/Sub patterns, refer to the article at http://stackoverflow.com/questions/15594905/difference-between-observer-pub-sub-and-data-binding.
In this chapter, we will cover the following topics:
$_POST data$_POST datamcryptIn this chapter, we will show you how to set up a simple yet effective mechanism for filtering and validating a block of post data. Then, we will cover how to protect your PHP sessions from potential session hijacking and other forms of attack. The next recipe shows how to protect forms from Cross Site Request Forgery (CSRF) attacks using a randomly generated token. The recipe on password generation shows you how to incorporate PHP 7 true randomization to generate secure passwords. We then show you two forms of CAPTCHA: one that is text based, the other using a distorted image. Finally, there is a recipe that covers strong encryption without using the discredited and soon-to-be-deprecated mcrypt extension.
The process of filtering data can encompass any or all of the following:
<script> tags)")Encryption is covered in the last recipe of this chapter. Otherwise, we will present a basic mechanism that can be used to filter $_POST data arriving following form submission.
$_POST. Also, perhaps more importantly, you will need to be aware of the restrictions imposed by the database table in which the form data will presumably be stored. As an example, have a look at the database structure for the prospects table:COLUMN TYPE NULL DEFAULT first_name varchar(128) No None NULL last_name varchar(128) No None NULL address varchar(256) Yes None NULL city varchar(64) Yes None NULL state_province varchar(32) Yes None NULL postal_code char(16) No None NULL phone varchar(16) No None NULL country char(2) No None NULL email varchar(250) No None NULL status char(8) Yes None NULL budget decimal(10,2) Yes None NULL last_updated datetime Yes None NULL
trim() function. All of the character data has length limits according to the database structure. Accordingly, you might consider using substr() to ensure the length is not exceeded. If you wanted to remove non-alphabetical characters, you might consider using preg_replace() with the appropriate pattern.prospects table:$filter = [
'trim' => function ($item) { return trim($item); },
'float' => function ($item) { return (float) $item; },
'upper' => function ($item) { return strtoupper($item); },
'email' => function ($item) {
return filter_var($item, FILTER_SANITIZE_EMAIL); },
'alpha' => function ($item) {
return preg_replace('/[^A-Za-z]/', '', $item); },
'alnum' => function ($item) {
return preg_replace('/[^0-9A-Za-z ]/', '', $item); },
'length' => function ($item, $length) {
return substr($item, 0, $length); },
'stripTags' => function ($item) { return strip_tags($item); },
];$_POST. In this array, we specify the key in the $filter array, along with any parameters. Note the first key, *. We will use that as a wildcard to be applied to all fields:$assignments = [
'*' => ['trim' => NULL, 'stripTags' => NULL],
'first_name' => ['length' => 32, 'alnum' => NULL],
'last_name' => ['length' => 32, 'alnum' => NULL],
'address' => ['length' => 64, 'alnum' => NULL],
'city' => ['length' => 32],
'state_province'=> ['length' => 20],
'postal_code' => ['length' => 12, 'alnum' => NULL],
'phone' => ['length' => 12],
'country' => ['length' => 2, 'alpha' => NULL,
'upper' => NULL],
'email' => ['length' => 128, 'email' => NULL],
'budget' => ['float' => NULL],
];$_POST) and apply the callbacks in turn. We first run all callbacks assigned to the wildcard (*) key.$data will be filtered:foreach ($data as $field => $item) {
foreach ($assignments['*'] as $key => $option) {
$item = $filter[$key]($item, $option);
}
foreach ($assignments[$field] as $key => $option) {
$item = $filter[$key]($item, $option);
}
}Place the code shown in steps 4 through 6 into a file called chap_12_post_data_filtering_basic.php. You will also need to define an array to simulate data that would be present in $_POST. In this case, you could define two arrays, one with good data, and one with bad data:
$testData = [
'goodData' => [
'first_name' => 'Doug',
'last_name' => 'Bierer',
'address' => '123 Main Street',
'city' => 'San Francisco',
'state_province'=> 'California',
'postal_code' => '94101',
'phone' => '+1 415-555-1212',
'country' => 'US',
'email' => 'doug@unlikelysource.com',
'budget' => '123.45',
],
'badData' => [
'first_name' => 'This+Name<script>bad tag</script>Valid!',
'last_name' => 'ThisLastNameIsWayTooLongAbcdefghijklmnopqrstuvwxyz0123456789Abcdefghijklmnopqrstuvwxyz0123456789Abcdefghijklmnopqrstuvwxyz0123456789Abcdefghijklmnopqrstuvwxyz0123456789',
//'address' => '', // missing
'city' => 'ThisCityNameIsTooLong012345678901234567890123456789012345678901234567890123456789 ',
//'state_province'=> '', // missing
'postal_code' => '!"£$%^Non Alpha Chars',
'phone' => ' 12345 ',
'country' => '12345',
'email' => 'this.is@not@an.email',
'budget' => 'XXX',
]
];Finally, you will need to loop through the filter assignments, presenting the good and bad data:
foreach ($testData as $data) {
foreach ($data as $field => $item) {
foreach ($assignments['*'] as $key => $option) {
$item = $filter[$key]($item, $option);
}
foreach ($assignments[$field] as $key => $option) {
$item = $filter[$key]($item, $option);
}
printf("%16s : %s\n", $field, $item);
}
}Here's how the output might appear for this example:
Note that the names were truncated and tags were removed. You will also note that although the e-mail address was filtered, it is still not a valid address. It's important to note that for proper treatment of data, it might be necessary to validate as well as to filter.
In Chapter 6, Building Scalable Websites, the recipe entitled Chaining $_POST filters, discusses how to incorporate the basic filtering concepts covered here into a comprehensive filter chaining mechanism.
The primary difference between filtering and validation is that the latter does not alter the original data. Another difference is in intent. The purpose of validation is to confirm that the data matches certain criteria established according to the needs of your customer.
strlen() to confirm that the length of the data submitted is less than or equal to 128 characters. Likewise, you could use ctype_alnum() to confirm that the data only contains letters and numbers, as appropriate.prospects table. We can now group the set of desired PHP functions into a single array of callbacks. Here is an example based on the validation needs for the form data, which will eventually be stored in the prospects table:$validator = [
'email' => [
'callback' => function ($item) {
return filter_var($item, FILTER_VALIDATE_EMAIL); },
'message' => 'Invalid email address'],
'alpha' => [
'callback' => function ($item) {
return ctype_alpha(str_replace(' ', '', $item)); },
'message' => 'Data contains non-alpha characters'],
'alnum' => [
'callback' => function ($item) {
return ctype_alnum(str_replace(' ', '', $item)); },
'message' => 'Data contains characters which are '
. 'not letters or numbers'],
'digits' => [
'callback' => function ($item) {
return preg_match('/[^0-9.]/', $item); },
'message' => 'Data contains characters which '
. 'are not numbers'],
'length' => [
'callback' => function ($item, $length) {
return strlen($item) <= $length; },
'message' => 'Item has too many characters'],
'upper' => [
'callback' => function ($item) {
return $item == strtoupper($item); },
'message' => 'Item is not upper case'],
'phone' => [
'callback' => function ($item) {
return preg_match('/[^0-9() -+]/', $item); },
'message' => 'Item is not a valid phone number'],
];$_POST. In this array, we specify the key in the $validator array, along with any parameters:$assignments = [
'first_name' => ['length' => 32, 'alpha' => NULL],
'last_name' => ['length' => 32, 'alpha' => NULL],
'address' => ['length' => 64, 'alnum' => NULL],
'city' => ['length' => 32, 'alnum' => NULL],
'state_province'=> ['length' => 20, 'alpha' => NULL],
'postal_code' => ['length' => 12, 'alnum' => NULL],
'phone' => ['length' => 12, 'phone' => NULL],
'country' => ['length' => 2, 'alpha' => NULL,
'upper' => NULL],
'email' => ['length' => 128, 'email' => NULL],
'budget' => ['digits' => NULL],
];foreach() loops to iterate through the block of data one field at a time. For each field, we loop through the callbacks assigned to that field:foreach ($data as $field => $item) {
echo 'Processing: ' . $field . PHP_EOL;
foreach ($assignments[$field] as $key => $option) {
if ($validator[$key]['callback']($item, $option)) {
$message = 'OK';
} else {
$message = $validator[$key]['message'];
}
printf('%8s : %s' . PHP_EOL, $key, $message);
}
}Instead of echoing the output directly, as shown, you might log the validation success/failure to be presented to the reviewer at a later time. Also, as shown in Chapter 6, Building Scalable Websites, you can work the validation mechanism into the form, displaying validation messages next to their matching form elements.
Place the code shown in steps 3 through 5 into a file called chap_12_post_data_validation_basic.php. You will also need to define an array of data that simulates data that would be present in $_POST. In this case, you use the two arrays mentioned in the preceding recipe, one with good data, and one with bad data. The final output should look something like this:
The PHP session mechanism is quite simple. Once the session is started using session_start() or the php.ini session.autostart setting, the PHP engine generates a unique token that is, by default, conveyed to the user by way of a cookie. On subsequent requests, while the session is still considered active, the user's browser (or equivalent) presents the session identifier, again usually by way of a cookie, for inspection. The PHP engine then uses this identifier to locate the appropriate file on the server, populating $_SESSION with the stored information. There are tremendous security concerns when the session identifier is the sole means of identifying a returning website visitor. In this recipe, we will present several techniques that will help you to safeguard your sessions, which, in turn, will vastly improve the overall security of the website.
loggedIn flag in $_SESSION:session_start();
$loggedIn = $_SESSION['isLoggedIn'] ?? FALSE;
if (isset($_POST['login'])) {
if ($_POST['username'] == // username lookup
&& $_POST['password'] == // password lookup) {
$loggedIn = TRUE;
$_SESSION['isLoggedIn'] = TRUE;
}
}$_SESSION['isLoggedIn'] is set to TRUE:<br>Secret Info <br><?php if ($loggedIn) echo // secret information; ?>
PHPSESSID cookie to the illegally obtained one, and they are now viewed by your application as a valid user.PHPSESSID is valid is to use session_regenerate_id(). This very simple command generates a new session identifier, invalidates the old one, maintains session data intact, and has a minimal impact on performance. This command can only be executed after the session has started:session_start(); session_regenerate_id();
session_destroy(), but also to unset $_SESSION data and to expire the session cookie:session_unset();
session_destroy();
setcookie('PHPSESSID', 0, time() - 3600);$remotePrint = md5($_SERVER['REMOTE_ADDR']
. $_SERVER['HTTP_USER_AGENT']
. $_SERVER['HTTP_ACCEPT_LANGUAGE']);
$printsMatch = file_exists(THUMB_PRINT_DIR . $remotePrint);
if ($loggedIn && !$printsMatch) {
$info = 'SESSION INVALID!!!';
error_log('Session Invalid: ' . date('Y-m-d H:i:s'), 0);
// take appropriate action
}To demonstrate how a session is vulnerable, code a simple login script that sets a $_SESSION['isLoggedIn'] flag upon successful login. You could call the file chap_12_session_hijack.php:
session_start();
$loggedUser = $_SESSION['loggedUser'] ?? '';
$loggedIn = $_SESSION['isLoggedIn'] ?? FALSE;
$username = 'test';
$password = 'password';
$info = 'You Can Now See Super Secret Information!!!';
if (isset($_POST['login'])) {
if ($_POST['username'] == $username
&& $_POST['password'] == $password) {
$loggedIn = TRUE;
$_SESSION['isLoggedIn'] = TRUE;
$_SESSION['loggedUser'] = $username;
$loggedUser = $username;
}
} elseif (isset($_POST['logout'])) {
session_destroy();
}You can then add code that displays a simple login form. To test for session vulnerability, follow this procedure using the chap_12_session_hijack.php file we just created:
php -S localhost:8080 command.http://localhost:8080/<filename>.test with a password as password.PHPSESSID cookie.PHPSESSID.For illustration, we are also showing the value of $_COOKIE and $_SESSION, shown in the following screenshot using the Vivaldi browser:
We then copy the value of PHPSESSID, open a Firefox browser, and use a tool called Tamper Data to modify the value of the cookie:
You can see in the next screenshot that we are now an authenticated user without entering the username or password:
You can now implement the changes discussed in the preceding steps. Copy the file created previously to chap_12_session_protected.php. Now go ahead and regenerate the session ID:
<?php
define('THUMB_PRINT_DIR', __DIR__ . '/../data/');
session_start();
session_regenerate_id();Next, initialize variables and determine the logged in status (as before):
$username = 'test'; $password = 'password'; $info = 'You Can Now See Super Secret Information!!!'; $loggedIn = $_SESSION['isLoggedIn'] ?? FALSE; $loggedUser = $_SESSION['user'] ?? 'guest';
You can add a session thumb-print using the remote address, user agent, and language settings:
$remotePrint = md5($_SERVER['REMOTE_ADDR'] . $_SERVER['HTTP_USER_AGENT'] . $_SERVER['HTTP_ACCEPT_LANGUAGE']); $printsMatch = file_exists(THUMB_PRINT_DIR . $remotePrint);
If the login is successful, we store thumb-print info and login status in the session:
if (isset($_POST['login'])) {
if ($_POST['username'] == $username
&& $_POST['password'] == $password) {
$loggedIn = TRUE;
$_SESSION['user'] = strip_tags($username);
$_SESSION['isLoggedIn'] = TRUE;
file_put_contents(
THUMB_PRINT_DIR . $remotePrint, $remotePrint);
}You can also check for the logout option and implement a proper logout procedure: unset $_SESSION variables, invalidate the session, and expire the cookie. You can also remove the thumb-print file and implement a redirect:
} elseif (isset($_POST['logout'])) {
session_unset();
session_destroy();
setcookie('PHPSESSID', 0, time() - 3600);
if (file_exists(THUMB_PRINT_DIR . $remotePrint))
unlink(THUMB_PRINT_DIR . $remotePrint);
header('Location: ' . $_SERVER['REQUEST_URI'] );
exit;Otherwise, if the operation is not login or logout, you can check to see whether the user is considered logged in, and if the thumb-print doesn't match, the session is considered invalid, and the appropriate action is taken:
} elseif ($loggedIn && !$printsMatch) {
$info = 'SESSION INVALID!!!';
error_log('Session Invalid: ' . date('Y-m-d H:i:s'), 0);
// take appropriate action
}You can now run the same procedure as mentioned previously using the new chap_12_session_protected.php file. The first thing you will notice is that the session is now considered invalid. The output will look something like this:
The reason for this is that the thumb-print does not match as you are now using a different browser. Likewise, if you refresh the page of the first browser, the session identifier is regenerated, making any previously copied identifier obsolete. Finally, the logout button will completely clear session information.
For an excellent overview of website vulnerabilities, please refer to the article present at https://www.owasp.org/index.php/Category:Vulnerability. For information on session hijacking, refer to https://www.owasp.org/index.php/Session_hijacking_attack.
This recipe presents another very simple technique that will safeguard your forms against Cross Site Request Forgery (CSRF) attacks. Simply put, a CSRF attack is possible when, possibly using other techniques, an attacker is able to infect a web page on your website. In most cases, the infected page will then start issuing requests (that is, using JavaScript to purchase items, or make settings changes) using the credentials of a valid, logged-in user. It's extremely difficult for your application to detect such activity. One measure that can easily be taken is to generate a random token that is included in every form to be submitted. Since the infected page will not have access to the token, nor have the ability to generate one that matches, form validation will fail.
chap_12_form_csrf_test_unprotected.html:<!DOCTYPE html>
<body onload="load()">
<form action="/chap_12_form_unprotected.php"
method="post" id="csrf_test" name="csrf_test">
<input name="name" type="hidden" value="No Goodnick" />
<input name="email" type="hidden" value="malicious@owasp.org" />
<input name="comments" type="hidden"
value="Form is vulnerable to CSRF attacks!" />
<input name="process" type="hidden" value="1" />
</form>
<script>
function load() { document.forms['csrf_test'].submit(); }
</script>
</body>
</html>chap_12_form_unprotected.php that responds to the form posting. As with other calling programs in this book, we set up autoloading and use the Application\Database\Connection class covered in Chapter 5, Interacting with a Database:<?php
define('DB_CONFIG_FILE', '/../config/db.config.php');
require __DIR__ . '/../Application/Autoload/Loader.php';
Application\Autoload\Loader::init(__DIR__ . '/..');
use Application\Database\Connection;
$conn = new Connection(include __DIR__ . DB_CONFIG_FILE);if ($_POST['process']) {
$filter = [
'trim' => function ($item) { return trim($item); },
'email' => function ($item) {
return filter_var($item, FILTER_SANITIZE_EMAIL); },
'length' => function ($item, $length) {
return substr($item, 0, $length); },
'stripTags' => function ($item) {
return strip_tags($item); },
];
$assignments = [
'*' => ['trim' => NULL, 'stripTags' => NULL],
'email' => ['length' => 249, 'email' => NULL],
'name' => ['length' => 128],
'comments'=> ['length' => 249],
];
$data = $_POST;
foreach ($data as $field => $item) {
foreach ($assignments['*'] as $key => $option) {
$item = $filter[$key]($item, $option);
}
if (isset($assignments[$field])) {
foreach ($assignments[$field] as $key => $option) {
$item = $filter[$key]($item, $option);
}
$filteredData[$field] = $item;
}
}chap_12_form_view_results.php, which simply dumps the contents of the visitors table:try {
$filteredData['visit_date'] = date('Y-m-d H:i:s');
$sql = 'INSERT INTO visitors '
. ' (email,name,comments,visit_date) '
. 'VALUES (:email,:name,:comments,:visit_date)';
$insertStmt = $conn->pdo->prepare($sql);
$insertStmt->execute($filteredData);
} catch (PDOException $e) {
echo $e->getMessage();
}
}
header('Location: /chap_12_form_view_results.php');
exit;random_bytes() PHP 7 function to generate a truly random token, one which will be difficult, if not impossible, for an attacker to match:session_start(); $token = urlencode(base64_encode((random_bytes(32)))); $_SESSION['token'] = $token;
<input type="hidden" name="token" value="<?= $token ?>" />
chap_12_form_unprotected.php script mentioned previously, adding logic to first check to see whether the token matches the one stored in the session. Note that we unset the current token to make it invalid for future use. We call the new script chap_12_form_protected_with_token.php:if ($_POST['process']) {
$sessToken = $_SESSION['token'] ?? 1;
$postToken = $_POST['token'] ?? 2;
unset($_SESSION['token']);
if ($sessToken != $postToken) {
$_SESSION['message'] = 'ERROR: token mismatch';
} else {
$_SESSION['message'] = 'SUCCESS: form processed';
// continue with form processing
}
}To test how an infected web page might launch a CSRF attack, create the following files, as shown earlier in the recipe:
chap_12_form_csrf_test_unprotected.htmlchap_12_form_unprotected.phpYou can then define a file called chap_12_form_view_results.php, which dumps the visitors table:
<?php
session_start();
define('DB_CONFIG_FILE', '/../config/db.config.php');
require __DIR__ . '/../Application/Autoload/Loader.php';
Application\Autoload\Loader::init(__DIR__ . '/..');
use Application\Database\Connection;
$conn = new Connection(include __DIR__ . DB_CONFIG_FILE);
$message = $_SESSION['message'] ?? '';
unset($_SESSION['message']);
$stmt = $conn->pdo->query('SELECT * FROM visitors');
?>
<!DOCTYPE html>
<body>
<div class="container">
<h1>CSRF Protection</h1>
<h3>Visitors Table</h3>
<?php while ($row = $stmt->fetch(PDO::FETCH_ASSOC)) : ?>
<pre><?php echo implode(':', $row); ?></pre>
<?php endwhile; ?>
<?php if ($message) : ?>
<b><?= $message; ?></b>
<?php endif; ?>
</div>
</body>
</html>From a browser, launch chap_12_form_csrf_test_unprotected.html. Here is how the output might appear:
As you can see, the attack was successful despite filtering and the use of prepared statements!
Next, copy the
chap_12_form_unprotected.php file to chap_12_form_protected.php. Make the change indicated in step 8 in the recipe. You will also need to alter the test HTML file, copying chap_12_form_csrf_test_unprotected.html to chap_12_form_csrf_test_protected.html. Change the value for the action parameter in the FORM tag as follows:
<form action="/chap_12_form_protected_with_token.php" method="post" id="csrf_test" name="csrf_test">
When you run the new HTML file from a browser, it calls chap_12_form_protected.php, which looks for a token that does not exist. Here is the expected output:
Finally, go ahead and define a file called chap_12_form_protected.php that generates a token and displays it as a hidden element:
<?php
session_start();
$token = urlencode(base64_encode((random_bytes(32))));
$_SESSION['token'] = $token;
?>
<!DOCTYPE html>
<body onload="load()">
<div class="container">
<h1>CSRF Protected Form</h1>
<form action="/chap_12_form_protected_with_token.php"
method="post" id="csrf_test" name="csrf_test">
<table>
<tr><th>Name</th><td><input name="name" type="text" /></td></tr>
<tr><th>Email</th><td><input name="email" type="text" /></td></tr>
<tr><th>Comments</th><td>
<input name="comments" type="textarea" rows=4 cols=80 />
</td></tr>
<tr><th> </th><td>
<input name="process" type="submit" value="Process" />
</td></tr>
</table>
<input type="hidden" name="token" value="<?= $token ?>" />
</form>
<a href="/chap_12_form_view_results.php">
CLICK HERE</a> to view results
</div>
</body>
</html>When we display and submit data from the form, the token is validated and the data insertion is allowed to continue, as shown here:
For more information on CSFR attacks, please refer to https://www.owasp.org/index.php/Cross-Site_Request_Forgery_(CSRF).
A common misconception is that the only way attackers crack hashed passwords is by using brute force attacks and rainbow tables. Although this is often the first pass in an attack sequence, attackers will use much more sophisticated attacks on a second, third, or fourth pass. Other attacks include combination, dictionary, mask, and rules-based. Dictionary attacks use a database of words literally from the dictionary to guess passwords. Combination is where dictionary words are combined. Mask attacks are similar to brute force, but more selective, thus cutting down the time to crack. Rules-based attacks will detect things such as substituting the number 0 for the letter o.
The good news is that by simply increasing the length of the password beyond the magic length of six characters exponentially increases the time to crack the hashed password. Other factors, such as interspersing uppercase with lowercase letters randomly, random digits, and special characters, will also have an exponential impact on the time to crack. At the end of the day, we need to bear in mind that a human being will eventually need to enter the passwords created, which means that need to be at least marginally memorable.
Best practice
Passwords should be stored as a hash, and never as plain text. MD5 and SHA* are no longer considered secure (although SHA* is much better than MD5). Using a utility such as oclHashcat, an attacker can generate an average of 55 billion attempts per second on a password hashed using MD5 that has been made available through an exploit (that is, a successful SQL injection attack).
Application\Security\PassGen class that will hold the methods needed for password generation. We also define certain class constants and properties that will be used as part of the process:namespace Application\Security;
class PassGen
{
const SOURCE_SUFFIX = 'src';
const SPECIAL_CHARS =
'\`¬|!"£$%^&*()_-+={}[]:@~;\'#<>?,./|\\';
protected $algorithm;
protected $sourceList;
protected $word;
protected $list;digits() produces random digits, and special() produces a single character from the SPECIAL_CHARS class constant:public function digits($max = 999)
{
return random_int(1, $max);
}
public function special()
{
$maxSpecial = strlen(self::SPECIAL_CHARS) - 1;
return self::SPECIAL_CHARS[random_int(0, $maxSpecial)];
}$wordSource constructor parameter comes into play. It is an array of websites from which our word base will be derived. Accordingly, we need a method that will pull a unique list of words from the sources indicated, and store the results in a file. We accept the $wordSource array as an argument, and loop through each URL. We use md5() to produce a hash of the website name, which is then built into a filename. The newly produced filename is then stored in $sourceList:public function processSource(
$wordSource, $minWordLength, $cacheDir)
{
foreach ($wordSource as $html) {
$hashKey = md5($html);
$sourceFile = $cacheDir . '/' . $hashKey . '.'
. self::SOURCE_SUFFIX;
$this->sourceList[] = $sourceFile;<body> tag. We then use str_word_count() to pull a list of words out of the string, also employing strip_tags() to remove any markup:if (!file_exists($sourceFile) || filesize($sourceFile) == 0) {
echo 'Processing: ' . $html . PHP_EOL;
$contents = file_get_contents($html);
if (preg_match('/<body>(.*)<\/body>/i',
$contents, $matches)) {
$contents = $matches[1];
}
$list = str_word_count(strip_tags($contents), 1);array_unique() to get rid of duplicates. The final result is stored in a file: foreach ($list as $key => $value) {
if (strlen($value) < $minWordLength) {
$list[$key] = 'xxxxxx';
} else {
$list[$key] = trim($value);
}
}
$list = array_unique($list);
file_put_contents($sourceFile, implode("\n",$list));
}
}
return TRUE;
}public function flipUpper($word)
{
$maxLen = strlen($word);
$numFlips = random_int(1, $maxLen - 1);
$flipped = strtolower($word);
for ($x = 0; $x < $numFlips; $x++) {
$pos = random_int(0, $maxLen - 1);
$word[$pos] = strtoupper($word[$pos]);
}
return $word;
}file() function to read from the appropriate cached file:public function word()
{
$wsKey = random_int(0, count($this->sourceList) - 1);
$list = file($this->sourceList[$wsKey]);
$maxList = count($list) - 1;
$key = random_int(0, $maxList);
$word = $list[$key];
return $this->flipUpper($word);
}['word', 'digits', 'word', 'special'] might end up looking like hElLo123aUTo!:public function initAlgorithm()
{
$this->algorithm = [
['word', 'digits', 'word', 'special'],
['digits', 'word', 'special', 'word'],
['word', 'word', 'special', 'digits'],
['special', 'word', 'special', 'digits'],
['word', 'special', 'digits', 'word', 'special'],
['special', 'word', 'special', 'digits',
'special', 'word', 'special'],
];
}public function __construct(
array $wordSource, $minWordLength, $cacheDir)
{
$this->processSource($wordSource, $minWordLength, $cacheDir);
$this->initAlgorithm();
}public function generate()
{
$pwd = '';
$key = random_int(0, count($this->algorithm) - 1);
foreach ($this->algorithm[$key] as $method) {
$pwd .= $this->$method();
}
return str_replace("\n", '', $pwd);
}
}First, you will need to place the code described in the previous recipe into a file called PassGen.php in the Application\Security folder. Now you can create a calling program called chap_12_password_generate.php that sets up autoloading, uses PassGen, and defines the location of the cache directory:
<?php
define('CACHE_DIR', __DIR__ . '/cache');
require __DIR__ . '/../Application/Autoload/Loader.php';
Application\Autoload\Loader::init(__DIR__ . '/..');
use Application\Security\PassGen;Next, you will need to define an array of websites that will be used as a source for the word-base to be used in password generation. In this illustration, we will choose from the Project Gutenberg texts Ulysses (J. Joyce), War and Peace (L. Tolstoy), and Pride and Prejudice (J. Austen):
$source = [ 'https://www.gutenberg.org/files/4300/4300-0.txt', 'https://www.gutenberg.org/files/2600/2600-h/2600-h.htm', 'https://www.gutenberg.org/files/1342/1342-h/1342-h.htm', ];
Next, we create the PassGen instance, and run generate():
$passGen = new PassGen($source, 4, CACHE_DIR); echo $passGen->generate();
Here are a few example passwords produced by PassGen:
An excellent article on how an attacker would approach cracking a password can be viewed at http://arstechnica.com/security/2013/05/how-crackers-make-minced-meat-out-of-your-passwords/. To find out more about brute force attacks you can refer to https://www.owasp.org/index.php/Brute_force_attack. For information on oclHashcat, see this page: http://hashcat.net/oclhashcat/.
CAPTCHA is actually an acronym for Completely Automated Public Turing Test to Tell Computers and Humans Apart. The technique is similar to the one presented in the preceding recipe, Securing forms with a token. The difference is that instead of storing the token in a hidden form input field, the token is rendered into a graphic that is difficult for an automated attack system to decipher. Also, the intent of a CAPTCHA is slightly different from a form token: it is designed to confirm that the web visitor is a human being, and not an automated system.
Application\Captcha\Phrase class. We also define properties and class constants used in the phrase generation process:namespace Application\Captcha;
class Phrase
{
const DEFAULT_LENGTH = 5;
const DEFAULT_NUMBERS = '0123456789';
const DEFAULT_UPPER = 'ABCDEFGHJKLMNOPQRSTUVWXYZ';
const DEFAULT_LOWER = 'abcdefghijklmnopqrstuvwxyz';
const DEFAULT_SPECIAL =
'¬\`|!"£$%^&*()_-+={}[]:;@\'~#<,>.?/|\\';
const DEFAULT_SUPPRESS = ['O','l'];
protected $phrase;
protected $includeNumbers;
protected $includeUpper;
protected $includeLower;
protected $includeSpecial;
protected $otherChars;
protected $suppressChars;
protected $string;
protected $length;$include* flags are used to signal which character sets will be present in the base string from which the phrase will be generated. For example, if you wish to only have numbers, $includeUpper and $includeLower would both be set to FALSE. $otherChars is provided for extra flexibility. Finally, $suppressChars represents an array of characters that will be removed from the base string. The default removes uppercase O and lowercase l:public function __construct(
$length = NULL,
$includeNumbers = TRUE,
$includeUpper= TRUE,
$includeLower= TRUE,
$includeSpecial = FALSE,
$otherChars = NULL,
array $suppressChars = NULL)
{
$this->length = $length ?? self::DEFAULT_LENGTH;
$this->includeNumbers = $includeNumbers;
$this->includeUpper = $includeUpper;
$this->includeLower = $includeLower;
$this->includeSpecial = $includeSpecial;
$this->otherChars = $otherChars;
$this->suppressChars = $suppressChars
?? self::DEFAULT_SUPPRESS;
$this->phrase = $this->generatePhrase();
}public function getString()
{
return $this->string;
}
public function setString($string)
{
$this->string = $string;
}
// other getters and setters not shown$include* flags and append to the base string as appropriate. At the end, we use str_replace() to remove the characters represented in $suppressChars:public function initString()
{
$string = '';
if ($this->includeNumbers) {
$string .= self::DEFAULT_NUMBERS;
}
if ($this->includeUpper) {
$string .= self::DEFAULT_UPPER;
}
if ($this->includeLower) {
$string .= self::DEFAULT_LOWER;
}
if ($this->includeSpecial) {
$string .= self::DEFAULT_SPECIAL;
}
if ($this->otherChars) {
$string .= $this->otherChars;
}
if ($this->suppressChars) {
$string = str_replace(
$this->suppressChars, '', $string);
}
return $string;
}for() loop, and use the new PHP 7 random_int() function to jump around in the base string:public function generatePhrase()
{
$phrase = '';
$this->string = $this->initString();
$max = strlen($this->string) - 1;
for ($x = 0; $x < $this->length; $x++) {
$phrase .= substr(
$this->string, random_int(0, $max), 1);
}
return $phrase;
}
}Application\Captcha\Phrase. Note that getImage() will return text, text art, or an actual image, depending on which class we decide to use:namespace Application\Captcha;
interface CaptchaInterface
{
public function getLabel();
public function getImage();
public function getPhrase();
}Application\Captcha\Reverse class. The reason for this name is that this class produces not just text, but text in reverse. The __construct() method builds an instance of Phrase. Note that getImage() returns the phrase in reverse:namespace Application\Captcha;
class Reverse implements CaptchaInterface
{
const DEFAULT_LABEL = 'Type this in reverse';
const DEFAULT_LENGTH = 6;
protected $phrase;
public function __construct(
$label = self::DEFAULT_LABEL,
$length = self:: DEFAULT_LENGTH,
$includeNumbers = TRUE,
$includeUpper = TRUE,
$includeLower = TRUE,
$includeSpecial = FALSE,
$otherChars = NULL,
array $suppressChars = NULL)
{
$this->label = $label;
$this->phrase = new Phrase(
$length,
$includeNumbers,
$includeUpper,
$includeLower,
$includeSpecial,
$otherChars,
$suppressChars);
}
public function getLabel()
{
return $this->label;
}
public function getImage()
{
return strrev($this->phrase->getPhrase());
}
public function getPhrase()
{
return $this->phrase->getPhrase();
}
}Application\Captcha\Image class that implements CaptchaInterface. The class constants and properties include not only those needed for phrase generation, but what is needed for image generation as well:namespace Application\Captcha;
use DirectoryIterator;
class Image implements CaptchaInterface
{
const DEFAULT_WIDTH = 200;
const DEFAULT_HEIGHT = 50;
const DEFAULT_LABEL = 'Enter this phrase';
const DEFAULT_BG_COLOR = [255,255,255];
const DEFAULT_URL = '/captcha';
const IMAGE_PREFIX = 'CAPTCHA_';
const IMAGE_SUFFIX = '.jpg';
const IMAGE_EXP_TIME = 300; // seconds
const ERROR_REQUIRES_GD = 'Requires the GD extension + '
. ' the JPEG library';
const ERROR_IMAGE = 'Unable to generate image';
protected $phrase;
protected $imageFn;
protected $label;
protected $imageWidth;
protected $imageHeight;
protected $imageRGB;
protected $imageDir;
protected $imageUrl;$imageDir and $imageUrl. The first is where the graphic will be written. The second is the base URL, after which we will append the generated filename. $imageFont is provided in case we want to provide TrueType fonts, which will produce a more secure CAPTCHA. Otherwise, we're limited to the default fonts which, to quote a line in a famous movie, ain't a pretty sight:public function __construct(
$imageDir,
$imageUrl,
$imageFont = NULL,
$label = NULL,
$length = NULL,
$includeNumbers = TRUE,
$includeUpper= TRUE,
$includeLower= TRUE,
$includeSpecial = FALSE,
$otherChars = NULL,
array $suppressChars = NULL,
$imageWidth = NULL,
$imageHeight = NULL,
array $imageRGB = NULL
)
{imagecreatetruecolor function exists. If this comes back as FALSE, we know the GD extension is not available. Otherwise, we assign parameters to properties, generate the phrase, remove old images, and write out the CAPTCHA graphic:if (!function_exists('imagecreatetruecolor')) {
throw new \Exception(self::ERROR_REQUIRES_GD);
}
$this->imageDir = $imageDir;
$this->imageUrl = $imageUrl;
$this->imageFont = $imageFont;
$this->label = $label ?? self::DEFAULT_LABEL;
$this->imageRGB = $imageRGB ?? self::DEFAULT_BG_COLOR;
$this->imageWidth = $imageWidth ?? self::DEFAULT_WIDTH;
$this->imageHeight= $imageHeight ?? self::DEFAULT_HEIGHT;
if (substr($imageUrl, -1, 1) == '/') {
$imageUrl = substr($imageUrl, 0, -1);
}
$this->imageUrl = $imageUrl;
if (substr($imageDir, -1, 1) == DIRECTORY_SEPARATOR) {
$imageDir = substr($imageDir, 0, -1);
}
$this->phrase = new Phrase(
$length,
$includeNumbers,
$includeUpper,
$includeLower,
$includeSpecial,
$otherChars,
$suppressChars);
$this->removeOldImages();
$this->generateJpg();
}DirectoryIterator class to scan the designated directory and check the access time. We calculate an old image file as one that is the current time minus the value specified by IMAGE_EXP_TIME:public function removeOldImages()
{
$old = time() - self::IMAGE_EXP_TIME;
foreach (new DirectoryIterator($this->imageDir)
as $fileInfo) {
if($fileInfo->isDot()) continue;
if ($fileInfo->getATime() < $old) {
unlink($this->imageDir . DIRECTORY_SEPARATOR
. $fileInfo->getFilename());
}
}
}$imageRGB array into $red, $green, and $blue. We use the core imagecreatetruecolor() function to generate the base graphic with the width and height specified. We use the RGB values to colorize the background:public function generateJpg()
{
try {
list($red,$green,$blue) = $this->imageRGB;
$im = imagecreatetruecolor(
$this->imageWidth, $this->imageHeight);
$black = imagecolorallocate($im, 0, 0, 0);
$imageBgColor = imagecolorallocate(
$im, $red, $green, $blue);
imagefilledrectangle($im, 0, 0, $this->imageWidth,
$this->imageHeight, $imageBgColor);$xMargin = (int) ($this->imageWidth * .1 + .5);
$yMargin = (int) ($this->imageHeight * .3 + .5);
$phrase = $this->getPhrase();
$max = strlen($phrase);
$count = 0;
$x = $xMargin;
$size = 5;
for ($i = 0; $i < $max; $i++) {$imageFont is specified, we are able to write each character with a different size and angle. We also need to adjust the x axis (that is, horizontal) value according to the size:if ($this->imageFont) {
$size = rand(12, 32);
$angle = rand(0, 30);
$y = rand($yMargin + $size, $this->imageHeight);
imagettftext($im, $size, $angle, $x, $y, $black,
$this->imageFont, $phrase[$i]);
$x += (int) ($size + rand(0,5));5, as smaller sizes are unreadable. We provide a low level of distortion by alternating between imagechar(), which writes the image normally, and imagecharup(), which writes it sideways:} else {
$y = rand(0, ($this->imageHeight - $yMargin));
if ($count++ & 1) {
imagechar($im, 5, $x, $y, $phrase[$i], $black);
} else {
imagecharup($im, 5, $x, $y, $phrase[$i], $black);
}
$x += (int) ($size * 1.2);
}
} // end for ($i = 0; $i < $max; $i++)$numDots = rand(10, 999);
for ($i = 0; $i < $numDots; $i++) {
imagesetpixel($im, rand(0, $this->imageWidth),
rand(0, $this->imageHeight), $black);
}md5() with the date and a random number from 0 to 9999 as arguments. Note that we can safely use md5() as we are not trying to hide any secret information; we're merely interested in generating a unique filename quickly. We wipe out the image object as well to conserve memory:$this->imageFn = self::IMAGE_PREFIX
. md5(date('YmdHis') . rand(0,9999))
. self::IMAGE_SUFFIX;
imagejpeg($im, $this->imageDir . DIRECTORY_SEPARATOR
. $this->imageFn);
imagedestroy($im);try/catch block. If an error or exception is thrown, we log the message and take the appropriate action:} catch (\Throwable $e) {
error_log(__METHOD__ . ':' . $e->getMessage());
throw new \Exception(self::ERROR_IMAGE);
}
}getImage() returns an HTML <img> tag, which can then be immediately displayed:public function getLabel()
{
return $this->label;
}
public function getImage()
{
return sprintf('<img src="%s/%s" />',
$this->imageUrl, $this->imageFn);
}
public function getPhrase()
{
return $this->phrase->getPhrase();
}
}Be sure to define the classes discussed in this recipe, summarized in the following table:
|
Class |
Subsection |
The steps it appears in |
|---|---|---|
|
|
Generating a text CAPTCHA |
1 - 5 |
|
|
6 | |
|
|
7 | |
|
|
Generating an image CAPTCHA |
2 - 13 |
Next, define a calling program called chap_12_captcha_text.php that implements a text CAPTCHA. You first need to set up autoloading and use the appropriate classes:
<?php require __DIR__ . '/../Application/Autoload/Loader.php'; Application\Autoload\Loader::init(__DIR__ . '/..'); use Application\Captcha\Reverse;
After that, be sure to start the session. You would use appropriate measures to protect the session as well. To conserve space, we only show one simple measure, session_regenerate_id():
session_start(); session_regenerate_id();
Next, you can define a function that creates the CAPTCHA; retrieves the phrase, label, and image (in this case, reverse text); and stores the value in the session:
function setCaptcha(&$phrase, &$label, &$image)
{
$captcha = new Reverse();
$phrase = $captcha->getPhrase();
$label = $captcha->getLabel();
$image = $captcha->getImage();
$_SESSION['phrase'] = $phrase;
}Now is a good time to initialize variables and determine the loggedIn status:
$image = ''; $label = ''; $phrase = $_SESSION['phrase'] ?? ''; $message = ''; $info = 'You Can Now See Super Secret Information!!!'; $loggedIn = $_SESSION['isLoggedIn'] ?? FALSE; $loggedUser = $_SESSION['user'] ?? 'guest';
You can then check to see whether the login button has been pressed. If so, check to see whether the CAPTCHA phrase has been entered. If not, initialize a message informing the user they need to enter the CAPTCHA phrase:
if (!empty($_POST['login'])) {
if (empty($_POST['captcha'])) {
$message = 'Enter Captcha Phrase and Login Information';If the CAPTCHA phrase is present, check to see whether it matches what is stored in the session. If it doesn't match, proceed as if the form is invalid. Otherwise, process the login as you would have otherwise. For the purposes of this illustration, you can simulate a login by using hard-coded values for the username and password:
} else {
if ($_POST['captcha'] == $phrase) {
$username = 'test';
$password = 'password';
if ($_POST['user'] == $username
&& $_POST['pass'] == $password) {
$loggedIn = TRUE;
$_SESSION['user'] = strip_tags($username);
$_SESSION['isLoggedIn'] = TRUE;
} else {
$message = 'Invalid Login';
}
} else {
$message = 'Invalid Captcha';
}
}You might also want to add code for a logout option, as described in the Safeguarding the PHP session recipe:
} elseif (isset($_POST['logout'])) {
session_unset();
session_destroy();
setcookie('PHPSESSID', 0, time() - 3600);
header('Location: ' . $_SERVER['REQUEST_URI'] );
exit;
}You can then run setCaptcha():
setCaptcha($phrase, $label, $image);
Lastly, don't forget the view logic, which, in this example, presents a basic login form. Inside the form tag, you'll need to add view logic to display the CAPTCHA and label:
<tr> <th><?= $label; ?></th> <td><?= $image; ?><input type="text" name="captcha" /></td> </tr>
Here is the resulting output:
To demonstrate how to use the image CAPTCHA, copy the code from chap_12_captcha_text.php to cha_12_captcha_image.php. We define constants that represent the location of the directory in which we will write the CAPTCHA images. (Be sure to create this directory!) Otherwise, the autoloading and use statement structure is similar. Note that we also define a TrueType font. Differences are noted in bold:
<?php
define('IMAGE_DIR', __DIR__ . '/captcha');
define('IMAGE_URL', '/captcha');
define('IMAGE_FONT', __DIR__ . '/FreeSansBold.ttf');
require __DIR__ . '/../Application/Autoload/Loader.php';
Application\Autoload\Loader::init(__DIR__ . '/..');
use Application\Captcha\Image;
session_start();
session_regenerate_id();Important!
Fonts can potentially be protected under copyright, trademark, patent, or other intellectual property laws. If you use a font for which you are not licensed, you and your customer could be held liable in court! Use an open source font, or one that is available on the web server for which you have a valid license.
Of course, in the setCaptcha() function, we use the Image class instead of Reverse:
function setCaptcha(&$phrase, &$label, &$image)
{
$captcha = new Image(IMAGE_DIR, IMAGE_URL, IMAGE_FONT);
$phrase = $captcha->getPhrase();
$label = $captcha->getLabel();
$image = $captcha->getImage();
$_SESSION['phrase'] = $phrase;
return $captcha;
}Variable initialization is the same as the previous script, and login processing is identical to the previous script:
$image = '';
$label = '';
$phrase = $_SESSION['phrase'] ?? '';
$message = '';
$info = 'You Can Now See Super Secret Information!!!';
$loggedIn = $_SESSION['isLoggedIn'] ?? FALSE;
$loggedUser = $_SESSION['user'] ?? 'guest';
if (!empty($_POST['login'])) {
// etc. -- identical to chap_12_captcha_text.phpEven the view logic remains the same, as we are using getImage(), which, in the case of the image CAPTCHA, returns directly usable HTML. Here is the output using a TrueType font:
If you are not inclined to use the preceding code to generate your own in-house CAPTCHA, there are plenty of libraries available. Most popular frameworks have this ability. Zend Framework, for example, has its Zend\Captcha component class. There is also reCAPTCHA, which is generally invoked as a service in which your application makes a call to an external website that generates the CAPTCHA and token for you. A good place to start looking is http://www.captcha.net/ website.
For more information on the protection of fonts as intellectual property, refer to the article present at https://en.wikipedia.org/wiki/Intellectual_property_protection_of_typefaces.
It is a little-known fact among members of the general PHP community that the mcrypt extension, the core of most PHP-based encryption considered secure, is anything but secure. One of the biggest issues, from a security perspective, is that the mcrypt extension requires advanced knowledge of cryptography to successfully operate, which few programmers have. This leads to gross misuse and ultimately problems such as a 1 in 256 chance of data corruption. Not good odds. Furthermore, developer support for libmcrypt, the core library upon which the mcrypt extension is based, was abandoned in 2007, which means the code base is out-of-date, bug-ridden, and has no mechanism to apply patches. Accordingly, it is extremely important to understand how to perform strong encryption/decryption without using mcrypt!
openssl. This extension is well maintained, and has modern and very strong encryption/decryption capabilities.openssl_get_cipher_methods() command. Examples will include algorithms based on Advanced Encryption Standard (AES), BlowFish (BF), CAMELLIA, CAST5, Data Encryption Standard (DES), Rivest Cipher (RC) (also affectionately known as Ron's Code), and SEED. You will note that this method shows cipher methods duplicated in upper and lowercase.|
Method |
Published |
Key size (bits) |
Key block size (bytes) |
Notes |
|---|---|---|---|---|
|
|
2000 |
128, 192, 256 |
16 |
Developed by Mitsubishi and NTT |
|
|
1998 |
128, 192, 256 |
16 |
Developed by Joan Daemen and Vincent Rijmen. Originally submitted as Rijndael |
|
|
1998 |
128 |
16 |
Developed by the Korea Information Security Agency |
|
|
1996 |
40 to 128 |
8 |
Developed by Carlisle Adams and Stafford Tavares |
|
|
1993 |
1 to 448 |
8 |
Designed by Bruce Schneier |
|
|
1987 |
8 to 1,024 defaults to 64 |
8 |
Designed by Ron Rivest (one of the core founders of RSA) |
|
|
1977 |
56 (+8 parity bits) |
8 |
Developed by IBM, based on work done by Horst Feistel |
random_bytes() (new in PHP 7), which returns a true CSPRNG sequence of bytes. The length of the IV varies considerably. Try a size of 16 to start with. If a warning is generated, the correct number of bytes to be supplied for that algorithm will be shown, so adjust the size accordingly:$iv = random_bytes(16);
openssl_encrypt(). Here are the parameters that should be passed:$plainText = 'Super Secret Credentials'; $key = random_bytes(16); $method = 'aes-256-xts'; $cipherText = openssl_encrypt($plainText, $method, $key, 0, $iv);
$key and $iv, along with the openssl_decrypt() function:$plainText = openssl_decrypt($cipherText, $method, $key, 0, $iv);
In order to see which cipher methods are available, create a PHP script called chap_12_openssl_encryption.php and run this command:
<?php
echo implode(', ', openssl_get_cipher_methods());The output should look something like this:
Next, you can add values for the plain text to be encrypted, the method, key, and IV. As an example, try AES, with a key size of 256, using the XTS operating mode:
$plainText = 'Super Secret Credentials'; $method = 'aes-256-xts'; $key = random_bytes(16); $iv = random_bytes(16);
To encrypt, you can use openssl_encrypt(), specifying the parameters configured previously:
$cipherText = openssl_encrypt($plainText, $method, $key, 0, $iv);
You might also want to base 64-encode the result to make it more usable:
$cipherText = base64_encode($cipherText);
To decrypt, use the same $key and $iv values. Don't forget to un-encode the base 64 value first:
$plainText = openssl_decrypt(base64_decode($cipherText), $method, $key, 0, $iv);
Here is the output showing the base 64-encoded cipher text, followed by the decrypted plain text:
If you supply an incorrect number of bytes for the IV, for the cipher method chosen, a warning message will be shown:
In PHP 7, there was a problem when using open_ssl_encrypt() and open_ssl_decrypt() and the
Authenticated Encrypt with Associated Data (AEAD) modes supported: GCM and CCM. Accordingly, in PHP 7.1, three extra parameters have been added to these functions, as follows:
For more information, you can refer to https://wiki.php.net/rfc/openssl_aead.
For an excellent discussion on why the mcrypt extension is being deprecated in PHP 7.1, please refer to the article at https://wiki.php.net/rfc/mcrypt-viking-funeral. For a good description of block cipher, which forms the basis for the various cipher methods, refer to the article present at https://en.wikipedia.org/wiki/Block_cipher. For an excellent description of AES, refer to https://en.wikipedia.org/wiki/Advanced_Encryption_Standard. A good article that describes encryption operation modes can be seen at https://en.wikipedia.org/wiki/Block_cipher_mode_of_operation.
For some of the newer modes, if the data to be encrypted is less than the block size, openssl_decrypt() will return no value. If you pad the data to be at least the block size, the problem goes away. Most of the modes implement internal padding so this is not an issue. With some of the newer modes (that is, xts) you might see this problem. Be sure to conduct tests on short strings of data less than eight characters before putting your code into production.
In this chapter, we will cover the following topics:
session_start parametersIn this chapter, we will show you how traits and interfaces work together. Then, we turn our attention to the design of a fallback mechanism that will catch errors and exceptions in situations where you were not able (or forgot) to define specific try/catch blocks. We will then venture into the world of unit testing, showing you first how to write simple tests, and then how to group those tests together into test suites. Next, we define a class that lets you create any amount of generic test data. We close the chapter with a discussion of how to easily manage sessions using new PHP 7 features.
It is considered a best practice to make use of interfaces as a means of establishing the classification of a set of classes, and to guarantee the existence of certain methods. Traits and Interfaces often work together, and are an important aspect of implementation. Wherever you have a frequently used Interface that defines a method where the code does not change (such as a setter or getter), it is useful to also define a Trait that contains the actual code implementation.
ConnectionAwareInterface, first presented in Chapter 4, Working with PHP Object-Oriented Programming. This interface defines a setConnection() method that sets a $connection property. Two classes in the Application\Generic namespace, CountryList and CustomerList, contain redundant code, which matches the method defined in the interface.CountryList looks like before the change:class CountryList
{
protected $connection;
protected $key = 'iso3';
protected $value = 'name';
protected $table = 'iso_country_codes';
public function setConnection(Connection $connection)
{
$this->connection = $connection;
}
public function list()
{
$list = [];
$sql = sprintf('SELECT %s,%s FROM %s', $this->key,
$this->value, $this->table);
$stmt = $this->connection->pdo->query($sql);
while ($item = $stmt->fetch(PDO::FETCH_ASSOC)) {
$list[$item[$this->key]] = $item[$this->value];
}
return $list;
}
}list() into a trait called ListTrait:trait ListTrait
{
public function list()
{
$list = [];
$sql = sprintf('SELECT %s,%s FROM %s',
$this->key, $this->value, $this->table);
$stmt = $this->connection->pdo->query($sql);
while ($item = $stmt->fetch(PDO::FETCH_ASSOC)) {
$list[$item[$this->key]] = $item[$this->value];
}
return $list;
}
}ListTrait into a new class, CountryListUsingTrait, as shown next:class CountryListUsingTrait
{
use ListTrait;
protected $connection;
protected $key = 'iso3';
protected $value = 'name';
protected $table = 'iso_country_codes';
public function setConnection(Connection $connection)
{
$this->connection = $connection;
}
}Application\Database namespace. Here is the new trait:namespace Application\Database;
trait ConnectionTrait
{
protected $connection;
public function setConnection(Connection $connection)
{
$this->connection = $connection;
}
}Application\Database\ConnectionAwareInterface:namespace Application\Database;
use Application\Database\Connection;
interface ConnectionAwareInterface
{
  public function setConnection(Connection $connection);
}CountryListUsingTrait class. Note that as the new trait is affected by its location in the namespace, we needed to add a use statement at the top of the class. You will also note that we implement ConnectionAwareInterface to identify the fact that this class requires the method defined in the trait. Notice that we are taking advantage of the new PHP 7 group use syntax:namespace Application\Generic;
use PDO;
use Application\Database\ {
Connection, ConnectionTrait, ConnectionAwareInterface
};
class CountryListUsingTrait implements ConnectionAwareInterface
{
use ListTrait;
use ConnectionTrait;
protected $key = 'iso3';
protected $value = 'name';
protected $table = 'iso_country_codes';
}First of all, make sure the classes developed in Chapter 4, Working with PHP Object-Oriented Programming, have been created. These include the Application\Generic\CountryList and Application\Generic\CustomerList classes discussed in Chapter 4, Working with PHP Object-Oriented Programming, in the recipe Using interfaces. Save each class in a new file in the Application\Generic folder as CountryListUsingTrait.php and CustomerListUsingTrait.php. Be sure to change the class names to match the new names of the files!
As discussed in step 3, remove the list() method from both CountryListUsingTrait.php and CustomerListUsingTrait.php. Add use ListTrait; in place of the method removed. Place the removed code into a separate file, in the same folder, called ListTrait.php.
You will also notice further duplication of code between the two list classes, in this case the setConnection() method. This calls for another trait!
Cut the setConnection() method out of both CountryListUsingTrait.php and CustomerListUsingTrait.php list classes, and place the removed code into a separate file called ConnectionTrait.php. As this trait is logically related to ConnectionAwareInterface and Connection, it makes sense to place the file in the Application\Database folder, and to specify its namespace accordingly.
Finally, define
Application\Database\ConnectionAwareInterface as discussed in step 6. Here is the final Application\Generic\CustomerListUsingTrait class after all changes:
<?php
namespace Application\Generic;
use PDO;
use Application\Database\Connection;
use Application\Database\ConnectionTrait;
use Application\Database\ConnectionAwareInterface;
class CustomerListUsingTrait implements ConnectionAwareInterface
{
use ListTrait;
use ConnectionTrait;
protected $key = 'id';
protected $value = 'name';
protected $table = 'customer';
}You can now copy the chap_04_oop_simple_interfaces_example.php file mentioned in Chapter 4, Working with PHP Object-Oriented Programming, to a new file called chap_13_trait_and_interface.php. Change the reference from CountryList to CountryListUsingTrait. Likewise, change the reference from CustomerList to CustomerListUsingTrait. Otherwise, the code can remain the same:
<?php
define('DB_CONFIG_FILE', '/../config/db.config.php');
require __DIR__ . '/../Application/Autoload/Loader.php';
Application\Autoload\Loader::init(__DIR__ . '/..');
$params = include __DIR__ . DB_CONFIG_FILE;
try {
$list = Application\Generic\ListFactory::factory(
new Application\Generic\CountryListUsingTrait(), $params);
echo 'Country List' . PHP_EOL;
foreach ($list->list() as $item) echo $item . ' ';
$list = Application\Generic\ListFactory::factory(
new Application\Generic\CustomerListUsingTrait(),
$params);
echo 'Customer List' . PHP_EOL;
foreach ($list->list() as $item) echo $item . ' ';
} catch (Throwable $e) {
echo $e->getMessage();
}The output will be exactly as described in the Using interfaces recipe of Chapter 4, Working with Object-Oriented Programming. You can see the country list portion of the output in the following screenshot:
The next image displays the customer list portion of the output:
Exceptions are especially useful when used in conjunction with code in a try/catch block. Using this construct, however, can be awkward in some situations, making code virtually unreadable. Another consideration is that many classes end up throwing exceptions that you have not anticipated. In such cases, it would be highly desirable to have some sort of fallback exception handler.
Application\Error\Handler:namespace Application\Error;
class Handler
{
// code goes here
}set_exception_handler() to assign the exceptionHandler() method (in this class) as the fallback handler:protected $logFile;
public function __construct(
$logFileDir = NULL, $logFile = NULL)
{
$logFile = $logFile ?? date('Ymd') . '.log';
$logFileDir = $logFileDir ?? __DIR__;
$this->logFile = $logFileDir . '/' . $logFile;
$this->logFile = str_replace('//', '/', $this->logFile);
set_exception_handler([$this,'exceptionHandler']);
}exceptionHandler() method, which takes an Exception object as an argument. We record the date and time, the class name of the exception, and its message in the log file:public function exceptionHandler($ex)
{
$message = sprintf('%19s : %20s : %s' . PHP_EOL,
date('Y-m-d H:i:s'), get_class($ex), $ex->getMessage());
file_put_contents($this->logFile, $message, FILE_APPEND);
}try/catch block in our code, this will override our universal exception handler. If, on the other hand, we do not use try/catch and an exception is thrown, the universal exception handler will come into play.First, place the code shown in the preceding recipe into a Handler.php file in the Application\Error folder. Next, define a test class that will throw an exception. For the purposes of illustration, create an Application\Error\ThrowsException class that will throw an exception. As an example, set up a PDO instance with the error mode set to PDO::ERRMODE_EXCEPTION. You then craft an SQL statement that is guaranteed to fail:
namespace Application\Error;
use PDO;
class ThrowsException
{
protected $result;
public function __construct(array $config)
{
$dsn = $config['driver'] . ':';
unset($config['driver']);
foreach ($config as $key => $value) {
$dsn .= $key . '=' . $value . ';';
}
$pdo = new PDO(
$dsn,
$config['user'],
$config['password'],
[PDO::ATTR_ERRMODE => PDO::ERRMODE_EXCEPTION]);
$stmt = $pdo->query('This Is Not SQL');
while ($row = $stmt->fetch(PDO::FETCH_ASSOC)) {
$this->result[] = $row;
}
}
}Next, define a calling program called chap_13_exception_handler.php that sets up autoloading, uses the appropriate classes:
<?php
define('DB_CONFIG_FILE', __DIR__ . '/../config/db.config.php');
$config = include DB_CONFIG_FILE;
require __DIR__ . '/../Application/Autoload/Loader.php';
Application\Autoload\Loader::init(__DIR__ . '/..');
use Application\Error\ { Handler, ThrowsException };At this point, if you create a ThrowsException instance without implementing the universal handler, a Fatal Error is generated as an exception has been thrown but not caught:
$throws1 = new ThrowsException($config);
If, on the other hand, you use a try/catch block, the exception will be caught and your application is allowed to continue, if it is stable enough:
try {
$throws1 = new ThrowsException($config);
} catch (Exception $e) {
echo 'Exception Caught: ' . get_class($e) . ':' . $e->getMessage() . PHP_EOL;
}
echo 'Application Continues ...' . PHP_EOL;You will observe the following output:
To demonstrate use of the exception handler, define a Handler instance, passing a parameter that represents the directory to contain log files, before the try/catch block. After try/catch, outside the block, create another instance of ThrowsException. When you run this sample program, you will notice that the first exception is caught inside the try/catch block, and the second exception is caught by the handler. You will also note that after the handler, the application ends:
$handler = new Handler(__DIR__ . '/logs');
try {
$throws1 = new ThrowsException($config);
} catch (Exception $e) {
echo 'Exception Caught: ' . get_class($e) . ':'
. $e->getMessage() . PHP_EOL;
}
$throws1 = new ThrowsException($config);
echo 'Application Continues ...' . PHP_EOL;Here is the output from the completed example program, along with the contents of the log file:
set_exception_handler() function. Have a look, especially, at the comment (posted 7 years ago, but still pertinent) by Anonymous that clarifies how this function works: http://php.net/manual/en/function.set-exception-handler.php.The process of developing a universal error handler is quite similar to the preceding recipe. There are certain differences, however. First of all, in PHP 7, some errors are thrown and can be caught, whereas others simply stop your application dead in its tracks. To further confuse matters, some errors are treated like exceptions, whereas others are derived from the new PHP 7 Error class. Fortunately for us, in PHP 7, both Error and Exception implement a new interface called Throwable. Accordingly, if you are not sure whether your code will throw an Exception or an Error, simply catch an instance of Throwable and you'll catch both.
Application\Error\Handler class defined in the preceding recipe. In the constructor, set a new errorHandler() method as the default error handler:public function __construct($logFileDir = NULL, $logFile = NULL)
{
$logFile = $logFile ?? date('Ymd') . '.log';
$logFileDir = $logFileDir ?? __DIR__;
$this->logFile = $logFileDir . '/' . $logFile;
$this->logFile = str_replace('//', '/', $this->logFile);
set_exception_handler([$this,'exceptionHandler']);
set_error_handler([$this, 'errorHandler']);
}public function errorHandler($errno, $errstr, $errfile, $errline)
{
$message = sprintf('ERROR: %s : %d : %s : %s : %s' . PHP_EOL,
date('Y-m-d H:i:s'), $errno, $errstr, $errfile, $errline);
file_put_contents($this->logFile, $message, FILE_APPEND);
}EXCEPTION to the message sent to the log file in the exceptionHandler() method:public function exceptionHandler($ex)
{
$message = sprintf('EXCEPTION: %19s : %20s : %s' . PHP_EOL,
date('Y-m-d H:i:s'), get_class($ex), $ex->getMessage());
file_put_contents($this->logFile, $message, FILE_APPEND);
}First, make the changes to Application\Error\Handler as defined previously. Next, create a class that throws an error that, for this illustration, could be defined as Application\Error\ThrowsError. For example, you could have a method that attempts a divide by zero operation, and another that attempts to parse non-PHP code using eval():
<?php
namespace Application\Error;
class ThrowsError
{
const NOT_PARSE = 'this will not parse';
public function divideByZero()
{
$this->zero = 1 / 0;
}
public function willNotParse()
{
eval(self::NOT_PARSE);
}
}You can then define a calling program called chap_13_error_throwable.php that sets up autoloading, uses the appropriate classes, and creates an instance of ThrowsError:
<?php
require __DIR__ . '/../Application/Autoload/Loader.php';
Application\Autoload\Loader::init(__DIR__ . '/..');
use Application\Error\ { Handler, ThrowsError };
$error = new ThrowsError();If you then call the two methods, without a try/catch block and without defining the universal error handler, the first method generates a Warning, whereas the second throws a ParseError:
$error->divideByZero(); $error->willNotParse(); echo 'Application continues ... ' . PHP_EOL;
Because this is an error, program execution stops, and you will not see Application continues ...:
If you wrap the method calls in try/catch blocks and catch Throwable, the code execution continues:
try {
$error->divideByZero();
} catch (Throwable $e) {
echo 'Error Caught: ' . get_class($e) . ':'
. $e->getMessage() . PHP_EOL;
}
try {
$error->willNotParse();
} catch (Throwable $e) {
echo 'Error Caught: ' . get_class($e) . ':'
. $e->getMessage() . PHP_EOL;
}
echo 'Application continues ... ' . PHP_EOL;From the following output, you will also note that the program exits with code 0, which tells us all is OK:
Finally, after the try/catch blocks, run the errors again, moving the echo statement to the end. You will see in the output that the errors were caught, but in the log file, notice that DivisionByZeroError is caught by the exception handler, whereas the ParseError is caught by the error hander:
$handler = new Handler(__DIR__ . '/logs'); $error->divideByZero(); $error->willNotParse(); echo 'Application continues ... ' . PHP_EOL;
The primary means of testing PHP code is to use PHPUnit, which is based on a methodology called Unit Testing. The philosophy behind unit testing is quite simple: you break down your code into the smallest possible logical units. You then test each unit in isolation to confirm that it performs as expected. These expectations are codified into a series of assertions. If all assertions return TRUE, then the unit has passed the test.
<hash>:php -r "copy('https://getcomposer.org/installer', 'composer-setup.php');"
php -r "if (hash_file('SHA384', 'composer-setup.php') === '<hash>') {
echo 'Installer verified';
} else {
echo 'Installer corrupt'; unlink('composer-setup.php');
} echo PHP_EOL;"
php composer-setup.php
php -r "unlink('composer-setup.php');"composer.json file that contains a series of directives outlining project parameters and dependencies. A full description of these directives is beyond the scope of this book; however, for the purposes of this recipe, we create a minimal set of directives using the key parameter require. You will also note that the contents of the file are in JavaScript Object Notation (JSON) format:{
"require-dev": {
"phpunit/phpunit": "*"
}
}
php composer.phar install
vendor folder that Composer will create if it does not already exist. The primary command to invoke PHPUnit is then symbolically linked into the vendor/bin folder. If you place this folder in your PATH, all you need do is to run this command, which checks the version and incidentally confirms the installation:
phpunit --version
chap_13_unit_test_simple.php file that contains the add() function:<?php
function add($a = NULL, $b = NULL)
{
return $a + $b;
}PHPUnit\Framework\TestCase. If you are testing a library of functions, at the beginning of the test class, include the file that contains function definitions. You would then write methods that start with the word test, usually followed by the name of the function you are testing, and possibly some additional CamelCase words to further describe the test. For the purposes of this recipe, we will define a SimpleTest test class:<?php
use PHPUnit\Framework\TestCase;
require_once __DIR__ . '/chap_13_unit_test_simple.php';
class SimpleTest extends TestCase
{
// testXXX() methods go here
}See also section gives you the documentation reference for the complete list of assertions. An assertion is a PHPUnit method that compares a known value against a value produced by that which you wish to test. An example is assertEquals(), which checks to see whether the first argument equals the second. The following example tests a method called add() and confirms 2 is the return value for add(1,1):public function testAdd()
{
$this->assertEquals(2, add(1,1));
}$this->assertNotEquals(3, add(1,1));
assertRegExp(). Assume, for this illustration, that we are testing a function that produces an HTML table out of a multidimensional array:function table(array $a)
{
$table = '<table>';
foreach ($a as $row) {
$table .= '<tr><td>';
$table .= implode('</td><td>', $row);
$table .= '</td></tr>';
}
$table .= '</table>';
return $table;
}<table>, one or more characters, followed by </table>. Further, we wish to confirm that a <td>B</td> element exists. When writing the test, we build a test array that consists of three sub-arrays containing the letters A—C, D—F, and G—I. We then pass the test array to the function, and run assertions against the result:public function testTable()
{
$a = [range('A', 'C'),range('D', 'F'),range('G','I')];
$table = table($a);
$this->assertRegExp('!^<table>.+</table>$!', $table);
$this->assertRegExp('!<td>B</td>!', $table);
}Demo class:<?php
class Demo
{
public function add($a, $b)
{
return $a + $b;
}
public function sub($a, $b)
{
return $a - $b;
}
// etc.
}SimpleClassTest test class, instead of including the library file, we include the file that represents the Demo class. We need an instance of Demo in order to run tests. For this purpose, we use a specially designed setup() method, which is run before each test. Also, you will note a teardown() method, which is run immediately after each test:<?php
use PHPUnit\Framework\TestCase;
require_once __DIR__ . '/Demo.php';
class SimpleClassTest extends TestCase
{
protected $demo;
public function setup()
{
$this->demo = new Demo();
}
public function teardown()
{
unset($this->demo);
}
public function testAdd()
{
$this->assertEquals(2, $this->demo->add(1,1));
}
public function testSub()
{
$this->assertEquals(0, $this->demo->sub(1,1));
}
// etc.
}setup() and teardown() could also be used to add or remove test data.VisitorOps. The new class will include methods to add, remove, and find visitors. Note that we've also added a method to return the latest SQL statement executed:<?php
require __DIR__ . '/../Application/Database/Connection.php';
use Application\Database\Connection;
class VisitorOps
{
const TABLE_NAME = 'visitors';
protected $connection;
protected $sql;
public function __construct(array $config)
{
$this->connection = new Connection($config);
}
public function getSql()
{
return $this->sql;
}
public function findAll()
{
$sql = 'SELECT * FROM ' . self::TABLE_NAME;
$stmt = $this->runSql($sql);
while ($row = $stmt->fetch(PDO::FETCH_ASSOC)) {
yield $row;
}
}
public function findById($id)
{
$sql = 'SELECT * FROM ' . self::TABLE_NAME;
$sql .= ' WHERE id = ?';
$stmt = $this->runSql($sql, [$id]);
return $stmt->fetch(PDO::FETCH_ASSOC);
}
public function removeById($id)
{
$sql = 'DELETE FROM ' . self::TABLE_NAME;
$sql .= ' WHERE id = ?';
return $this->runSql($sql, [$id]);
}
public function addVisitor($data)
{
$sql = 'INSERT INTO ' . self::TABLE_NAME;
$sql .= ' (' . implode(',',array_keys($data)) . ') ';
$sql .= ' VALUES ';
$sql .= ' ( :' . implode(',:',array_keys($data)) . ') ';
$this->runSql($sql, $data);
return $this->connection->pdo->lastInsertId();
}
public function runSql($sql, $params = NULL)
{
$this->sql = $sql;
try {
$stmt = $this->connection->pdo->prepare($sql);
$result = $stmt->execute($params);
} catch (Throwable $e) {
error_log(__METHOD__ . ':' . $e->getMessage());
return FALSE;
}
return $stmt;
}
}setup() method.setup() method.teardown() method.VisitorService, which makes use of the VisitorOps class discussed earlier:<?php
require_once __DIR__ . '/VisitorOps.php';
require_once __DIR__ . '/../Application/Database/Connection.php';
use Application\Database\Connection;
class VisitorService
{
protected $visitorOps;
public function __construct(array $config)
{
$this->visitorOps = new VisitorOps($config);
}
public function showAllVisitors()
{
$table = '<table>';
foreach ($this->visitorOps->findAll() as $row) {
$table .= '<tr><td>';
$table .= implode('</td><td>', $row);
$table .= '</td></tr>';
}
$table .= '</table>';
return $table;
}$visitorOps property. This allows us to insert a mock class in place of the real VisitorOps class:public function getVisitorOps()
{
return $this->visitorOps;
}
public function setVisitorOps(VisitorOps $visitorOps)
{
$this->visitorOps = $visitorOps;
}
} // closing brace for VisitorServiceVisitorOpsMock mock class that mimics the functionality of its parent class. Class constants and properties are inherited. We then add mock test data, and a getter in case we need access to the test data later:<?php
require_once __DIR__ . '/VisitorOps.php';
class VisitorOpsMock extends VisitorOps
{
protected $testData;
public function __construct()
{
$data = array();
for ($x = 1; $x <= 3; $x++) {
$data[$x]['id'] = $x;
$data[$x]['email'] = $x . 'test@unlikelysource.com';
$data[$x]['visit_date'] =
'2000-0' . $x . '-0' . $x . ' 00:00:00';
$data[$x]['comments'] = 'TEST ' . $x;
$data[$x]['name'] = 'TEST ' . $x;
}
$this->testData = $data;
}
public function getTestData()
{
return $this->testData;
}findAll() to return test data using yield, just as in the parent class. Note that we still build the SQL string, as this is what the parent class does:public function findAll()
{
$sql = 'SELECT * FROM ' . self::TABLE_NAME;
foreach ($this->testData as $row) {
yield $row;
}
}findById() we simply return that array key from $this->testData. For removeById(), we unset the array key supplied as a parameter from $this->testData:public function findById($id)
{
$sql = 'SELECT * FROM ' . self::TABLE_NAME;
$sql .= ' WHERE id = ?';
return $this->testData[$id] ?? FALSE;
}
public function removeById($id)
{
$sql = 'DELETE FROM ' . self::TABLE_NAME;
$sql .= ' WHERE id = ?';
if (empty($this->testData[$id])) {
return 0;
} else {
unset($this->testData[$id]);
return 1;
}
}id parameter might not be supplied, as the database would normally auto-generate this for us. To get around this, we check for the id parameter. If not set, we find the largest array key and increment:public function addVisitor($data)
{
$sql = 'INSERT INTO ' . self::TABLE_NAME;
$sql .= ' (' . implode(',',array_keys($data)) . ') ';
$sql .= ' VALUES ';
$sql .= ' ( :' . implode(',:',array_keys($data)) . ') ';
if (!empty($data['id'])) {
$id = $data['id'];
} else {
$keys = array_keys($this->testData);
sort($keys);
$id = end($keys) + 1;
$data['id'] = $id;
}
$this->testData[$id] = $data;
return 1;
}
} // ending brace for the class VisitorOpsMockVisitorServiceTest.php presented previously, calling it VisitorServiceTestAnonClass.php:<?php
use PHPUnit\Framework\TestCase;
require_once __DIR__ . '/VisitorService.php';
require_once __DIR__ . '/VisitorOps.php';
class VisitorServiceTestAnonClass extends TestCase
{
protected $visitorService;
protected $dbConfig = [
'driver' => 'mysql',
'host' => 'localhost',
'dbname' => 'php7cookbook_test',
'user' => 'cook',
'password' => 'book',
'errmode' => PDO::ERRMODE_EXCEPTION,
];
protected $testData;setup(), we define an anonymous class that extends VisitorOps. We only need to override the findAll() method:public function setup()
{
$data = array();
for ($x = 1; $x <= 3; $x++) {
$data[$x]['id'] = $x;
$data[$x]['email'] = $x . 'test@unlikelysource.com';
$data[$x]['visit_date'] =
'2000-0' . $x . '-0' . $x . ' 00:00:00';
$data[$x]['comments'] = 'TEST ' . $x;
$data[$x]['name'] = 'TEST ' . $x;
}
$this->testData = $data;
$this->visitorService =
new VisitorService($this->dbConfig);
$opsMock =
new class ($this->testData) extends VisitorOps {
protected $testData;
public function __construct($testData)
{
$this->testData = $testData;
}
public function findAll()
{
return $this->testData;
}
};
$this->visitorService->setVisitorOps($opsMock);
}testShowAllVisitors(), when $this->visitorService->showAllVisitors() is executed, the anonymous class is called by the visitor service, which in turn calls the overridden findAll():public function teardown()
{
unset($this->visitorService);
}
public function testShowAllVisitors()
{
$result = $this->visitorService->showAllVisitors();
$this->assertRegExp('!^<table>.+</table>$!', $result);
foreach ($this->testData as $key => $value) {
$dataWeWant = '!<td>' . $key . '</td>!';
$this->assertRegExp($dataWeWant, $result);
}
}
}getMockBuilder(). Although this approach does not allow a great deal of finite control over the mock object produced, it's extremely useful in situations where you only need to confirm that an object of a certain class is returned, and when a specified method is run, this method returns some expected value.VisitorServiceTestAnonClass; the only difference is in how an instance of VisitorOps is supplied in setup(), in this case, using getMockBuilder(). Note that although we did not use with() in this example, it is used to feed controlled parameters to the mocked method:<?php
use PHPUnit\Framework\TestCase;
require_once __DIR__ . '/VisitorService.php';
require_once __DIR__ . '/VisitorOps.php';
class VisitorServiceTestAnonMockBuilder extends TestCase
{
// code is identical to VisitorServiceTestAnon
public function setup()
{
$data = array();
for ($x = 1; $x <= 3; $x++) {
$data[$x]['id'] = $x;
$data[$x]['email'] = $x . 'test@unlikelysource.com';
$data[$x]['visit_date'] =
'2000-0' . $x . '-0' . $x . ' 00:00:00';
$data[$x]['comments'] = 'TEST ' . $x;
$data[$x]['name'] = 'TEST ' . $x;
}
$this->testData = $data;
$this->visitorService =
new VisitorService($this->dbConfig);
$opsMock = $this->getMockBuilder(VisitorOps::class)
->setMethods(['findAll'])
->disableOriginalConstructor()
->getMock();
$opsMock->expects($this->once())
->method('findAll')
->with()
->will($this->returnValue($this->testData));
$this->visitorService->setVisitorOps($opsMock);
}
// remaining code is the same
}First, you need to install PHPUnit, as discussed in steps 1 to 5. Be sure to include vendor/bin in your PATH so that you can run PHPUnit from the command line.
Next, define a chap_13_unit_test_simple.php program file with a series of simple functions, such as add(), sub() and so on, as discussed in step 1. You can then define a simple test class contained in SimpleTest.php as mentioned in steps 2 and 3.
Assuming phpunit is in your PATH, from a terminal window, change to the directory containing the code developed for this recipe, and run the following command:
phpunit SimpleTest SimpleTest.php
You should see the following output:
Make a change in SimpleTest.php so that the test will fail (step 4):
public function testDiv()
{
$this->assertEquals(2, div(4, 2));
$this->assertEquals(99, div(4, 0));
}Here is the revised output:
Next, add the table() function to chap_13_unit_test_simple.php (step 5), and testTable() to SimpleTest.php (step 6). Re-run the unit test and observe the results.
To test a class, copy the functions developed in chap_13_unit_test_simple.php to a Demo class (step 7). After making the modifications to SimpleTest.php suggested in step 8, re-run the simple test and observe the results.
First, create an example class to be tested, VisitorOps, shown in step 2 in this subsection. You can now define a class we will call SimpleDatabaseTest to test VisitorOps. First of all, use require_once to load the class to test. (We will discuss how to incorporate autoloading in the next recipe!) Then define key properties, including test database configuration and test data. You could use php7cookbook_test as the test database:
<?php
use PHPUnit\Framework\TestCase;
require_once __DIR__ . '/VisitorOps.php';
class SimpleDatabaseTest extends TestCase
{
protected $visitorOps;
protected $dbConfig = [
'driver' => 'mysql',
'host' => 'localhost',
'dbname' => 'php7cookbook_test',
'user' => 'cook',
'password' => 'book',
'errmode' => PDO::ERRMODE_EXCEPTION,
];
protected $testData = [
'id' => 1,
'email' => 'test@unlikelysource.com',
'visit_date' => '2000-01-01 00:00:00',
'comments' => 'TEST',
'name' => 'TEST'
];
}Next, define setup(), which inserts the test data, and confirms that the last SQL statement was INSERT. You should also check to see whether the return value was positive:
public function setup()
{
$this->visitorOps = new VisitorOps($this->dbConfig);
$this->visitorOps->addVisitor($this->testData);
$this->assertRegExp('/INSERT/', $this->visitorOps->getSql());
}After that, define teardown(), which removes the test data and confirms that the query for id = 1 comes back as FALSE:
public function teardown()
{
$result = $this->visitorOps->removeById(1);
$result = $this->visitorOps->findById(1);
$this->assertEquals(FALSE, $result);
unset($this->visitorOps);
}The first test is for findAll(). First, confirm the data type of the result. You could take the topmost element using current(). We confirm there are five elements, that one of them is name, and that the value is the same as that in the test data:
public function testFindAll()
{
$result = $this->visitorOps->findAll();
$this->assertInstanceOf(Generator::class, $result);
$top = $result->current();
$this->assertCount(5, $top);
$this->assertArrayHasKey('name', $top);
$this->assertEquals($this->testData['name'], $top['name']);
}The next test is for findById(). It is almost identical to testFindAll():
public function testFindById()
{
$result = $this->visitorOps->findById(1);
$this->assertCount(5, $result);
$this->assertArrayHasKey('name', $result);
$this->assertEquals($this->testData['name'], $result['name']);
}You do not need to bother with a test for removeById() as this is already done in teardown(). Likewise, there is no need to test runSql() as this is done as part of the other tests.
First, define a VisitorService service class as described in steps 2 and 3 in this subsection. Next, define a VisitorOpsMock mock class, which is discussed in steps 4 to 7.
You are now in a position to develop a test, VisitorServiceTest, for the service class. Note that you need provide your own database configuration as it is a best practice to use a test database instead of the production version:
<?php
use PHPUnit\Framework\TestCase;
require_once __DIR__ . '/VisitorService.php';
require_once __DIR__ . '/VisitorOpsMock.php';
class VisitorServiceTest extends TestCase
{
protected $visitorService;
protected $dbConfig = [
'driver' => 'mysql',
'host' => 'localhost',
'dbname' => 'php7cookbook_test',
'user' => 'cook',
'password' => 'book',
'errmode' => PDO::ERRMODE_EXCEPTION,
];
}In setup(), create an instance of the service, and insert VisitorOpsMock in place of the original class:
public function setup()
{
$this->visitorService = new VisitorService($this->dbConfig);
$this->visitorService->setVisitorOps(new VisitorOpsMock());
}
public function teardown()
{
unset($this->visitorService);
}In our test, which produces an HTML table from the list of visitors, you can then look for certain elements, knowing what to expect in advance as you have control over the test data:
public function testShowAllVisitors()
{
$result = $this->visitorService->showAllVisitors();
$this->assertRegExp('!^<table>.+</table>$!', $result);
$testData = $this->visitorService->getVisitorOps()->getTestData();
foreach ($testData as $key => $value) {
$dataWeWant = '!<td>' . $key . '</td>!';
$this->assertRegExp($dataWeWant, $result);
}
}
}You might then wish to experiment with the variations suggested in the last two subsections, Using Anonymous Classes as Mock Objects, and Using Mock Builder.
Other assertions test operations on numbers, strings, arrays, objects, files, JSON, and XML, as summarized in the following table:
|
Category |
Assertions |
|---|---|
|
General |
|
|
Numeric |
|
|
String |
|
|
Array/iterator |
|
|
File |
|
|
Objects |
|
|
JSON |
|
|
XML |
|
composer.json file directives, see https://getcomposer.org/doc/04-schema.md.getMockBuilder() in detail here: https://phpunit.de/manual/current/en/phpunit-book.html#test-doubles.mock-objectsYou may have noticed after having read through the previous recipe that it can quickly become tedious to have to manually run phpunit and specify test classes and PHP filenames. This is especially true when dealing with applications that employ dozens or even hundreds of classes and files. The PHPUnit project has a built-in capability to handle running multiple tests with a single command. Such a set of tests is referred to as a test suite.
mkdir tests cp *Test.php tests
SimpleTest) was developed in the preceding recipe:<?php
use PHPUnit\Framework\TestCase;
require_once __DIR__ . '/../chap_13_unit_test_simple.php';
class SimpleTest extends TestCase
{
// etc.phpunit with the directory path as an argument. PHPUnit will then automatically run all tests in that folder. In this example, we assume there is a tests subdirectory:
phpunit tests
--bootstrap option to specify a file that is executed prior to running the tests. A typical use for this option is to initiate autoloading:
phpunit --boostrap tests_with_autoload/bootstrap.php tests
bootstrap.php file that implements autoloading:<?php require __DIR__ . '/../../Application/Autoload/Loader.php'; Application\Autoload\Loader::init([__DIR__]);
<phpunit>
<testsuites>
<testsuite name="simple">
<file>SimpleTest.php</file>
<file>SimpleDbTest.php</file>
<file>SimpleClassTest.php</file>
</testsuite>
</testsuites>
</phpunit><phpunit bootstrap="bootstrap.php">
<testsuites>
<testsuite name="visitor">
<directory>Simple</directory>
</testsuite>
</testsuites>
</phpunit>Make sure all the tests discussed in the previous recipe, Writing a simple test, have been defined. You can then create a tests folder and move or copy all the *Test.php files into this folder. You'll then need to adjust the path in the require_once statements, as shown in step 2.
In order to demonstrate how PHPUnit can run all tests in a folder, from the directory containing the source code you defined for this chapter, run the following command:
phpunit tests
You should see the following output:
To demonstrate the use of a autoloading via a bootstrap file, create a new tests_with_autoload directory. In this folder, define a bootstrap.php file with the code shown in step 5. Create two directories in tests_with_autoload: Demo and Simple.
From the directory containing the source code for this chapter, copy the file (discussed in step 12 of the previous recipe) into tests_with_autoload/Demo/Demo.php. After the opening <?php tag, add this line:
namespace Demo;
Next, copy the SimpleTest.php file to tests_with_autoload/Simple/ClassTest.php. (Notice the filename change!). You will need to change the first few lines to the following:
<?php
namespace Simple;
use Demo\Demo;
use PHPUnit\Framework\TestCase;
class ClassTest extends TestCase
{
protected $demo;
public function setup()
{
$this->demo = new Demo();
}
// etc.After that, create a tests_with_autoload/phpunit.xml file that pulls everything together:
<phpunit bootstrap="bootstrap.php">
<testsuites>
<testsuite name="visitor">
<directory>Simple</directory>
</testsuite>
</testsuites>
</phpunit>Finally, change to the directory that contains the code for this chapter. You can now run a unit test that incorporates a bootstrap file, along with autoloading and namespaces, as follows:
phpunit -c tests_with_autoload/phpunit.xml
The output should appear as follows:
Part of the testing and debugging process involves incorporating realistic test data. In some cases, especially when testing database access and producing benchmarks, large amounts of test data are needed. One way in which this can be accomplished is to incorporate a process of scraping data from websites, and then putting the data together in realistic, yet random, combinations to be inserted into a database.
\n", which gives us this:prospects table. Here is the SQL statement used to create this table:CREATE TABLE 'prospects' (
'id' int(11) NOT NULL AUTO_INCREMENT,
'first_name' varchar(128) NOT NULL,
'last_name' varchar(128) NOT NULL,
'address' varchar(256) DEFAULT NULL,
'city' varchar(64) DEFAULT NULL,
'state_province' varchar(32) DEFAULT NULL,
'postal_code' char(16) NOT NULL,
'phone' varchar(16) NOT NULL,
'country' char(2) NOT NULL,
'email' varchar(250) NOT NULL,
'status' char(8) DEFAULT NULL,
'budget' decimal(10,2) DEFAULT NULL,
'last_updated' datetime DEFAULT NULL,
PRIMARY KEY ('id'),
UNIQUE KEY 'UNIQ_35730C06E7927C74' ('email')
) ENGINE=InnoDB DEFAULT CHARSET=utf8;id, which is auto-generated:namespace Application\Test;
use PDO;
use Exception;
use DateTime;
use DateInterval;
use PDOException;
use SplFileObject;
use InvalidArgumentsException;
use Application\Database\Connection;
class FakeData
{
// data generation methods here
}const MAX_LOOKUPS = 10; const SOURCE_FILE = 'file'; const SOURCE_TABLE = 'table'; const SOURCE_METHOD = 'method'; const SOURCE_CALLBACK = 'callback'; const FILE_TYPE_CSV = 'csv'; const FILE_TYPE_TXT = 'txt'; const ERROR_DB = 'ERROR: unable to read source table'; const ERROR_FILE = 'ERROR: file not found'; const ERROR_COUNT = 'ERROR: unable to ascertain count or ID column missing'; const ERROR_UPLOAD = 'ERROR: unable to upload file'; const ERROR_LOOKUP = 'ERROR: unable to find any IDs in the source table'; protected $connection; protected $mapping; protected $files; protected $tables;
protected $alpha = 'ABCDEFGHIJKLMNOPQRSTUVWXYZ'; protected $street1 = ['Amber','Blue','Bright','Broad','Burning', 'Cinder','Clear','Dewy','Dusty','Easy']; // etc. protected $street2 = ['Anchor','Apple','Autumn','Barn','Beacon', 'Bear','Berry','Blossom','Bluff','Cider','Cloud']; // etc. protected $street3 = ['Acres','Arbor','Avenue','Bank','Bend', 'Canyon','Circle','Street']; protected $email1 = ['northern','southern','eastern','western', 'fast','midland','central']; protected $email2 = ['telecom','telco','net','connect']; protected $email3 = ['com','net'];
Connection object, used for database access, an array of mappings to the fake data:public function __construct(Connection $conn, array $mapping)
{
$this->connection = $conn;
$this->mapping = $mapping;
}public function getAddress($entry)
{
return random_int(1,999)
. ' ' . $this->street1[array_rand($this->street1)]
. ' ' . $this->street2[array_rand($this->street2)]
. ' ' . $this->street3[array_rand($this->street3)];
}public function getPostalCode($entry, $pattern = 1)
{
return $this->alpha[random_int(0,25)]
. $this->alpha[random_int(0,25)]
. random_int(1, 99)
. ' '
. random_int(1, 9)
. $this->alpha[random_int(0,25)]
. $this->alpha[random_int(0,25)];
}$entry array, with parameters, and use those parameters to create the name portion of the address:public function getEmail($entry, $params = NULL)
{
$first = $entry[$params[0]] ?? $this->alpha[random_int(0,25)];
$last = $entry[$params[1]] ?? $this->alpha[random_int(0,25)];
return $first[0] . '.' . $last
. '@'
. $this->email1[array_rand($this->email1)]
. $this->email2[array_rand($this->email2)]
. '.'
. $this->email3[array_rand($this->email3)];
}$entry array, with parameters. The parameters would be an array where the first value is a start date. The second parameter would be the maximum number of days to subtract from the start date. This effectively lets you return a random date from a range. Note that we use DateTime::sub() to subtract a random number of days. sub() requires a DateInterval instance, which we build using P, the random number of days, and then 'D':public function getDate($entry, $params)
{
list($fromDate, $maxDays) = $params;
$date = new DateTime($fromDate);
$date->sub(new DateInterval('P' . random_int(0, $maxDays) . 'D'));
return $date->format('Y-m-d H:i:s');
}public function getEntryFromFile($name, $type)
{
if (empty($this->files[$name])) {
$this->pullFileData($name, $type);
}
return $this->files[$name][
random_int(0, count($this->files[$name]))];
}Exception if the specified file is not found. The file type is identified as one of our class constants: FILE_TYPE_TEXT or FILE_TYPE_CSV. Depending on the type, we use either fgetcsv() or fgets():public function pullFileData($name, $type)
{
if (!file_exists($name)) {
throw new Exception(self::ERROR_FILE);
}
$fileObj = new SplFileObject($name, 'r');
if ($type == self::FILE_TYPE_CSV) {
while ($data = $fileObj->fgetcsv()) {
$this->files[$name][] = trim($data);
}
} else {
while ($data = $fileObj->fgets()) {
$this->files[$name][] = trim($data);
}
}public function getEntryFromTable($tableName, $idColumn, $mapping)
{
$entry = array();
try {
if (empty($this->tables[$tableName])) {
$sql = 'SELECT ' . $idColumn . ' FROM ' . $tableName
. ' ORDER BY ' . $idColumn . ' ASC LIMIT 1';
$stmt = $this->connection->pdo->query($sql);
$this->tables[$tableName]['first'] =
$stmt->fetchColumn();
$sql = 'SELECT ' . $idColumn . ' FROM ' . $tableName
. ' ORDER BY ' . $idColumn . ' DESC LIMIT 1';
$stmt = $this->connection->pdo->query($sql);
$this->tables[$tableName]['last'] =
$stmt->fetchColumn();
}$result = FALSE; $count = self::MAX_LOOKUPS; $sql = 'SELECT * FROM ' . $tableName . ' WHERE ' . $idColumn . ' = ?'; $stmt = $this->connection->pdo->prepare($sql);
do...while loop. The reason for this is that we need to run the query at least once to achieve results. Only if we do not arrive at a result do we continue with the loop. We generate a random number between the lowest ID and the highest ID, and then use this in a parameter in the query. Notice that we also decrement a counter to prevent an endless loop. This is in case the IDs are not sequential, in which case we could accidentally generate an ID that does not exist. If we exceed the maximum attempts, still with no results, we throw an Exception:do {
$id = random_int($this->tables[$tableName]['first'],
$this->tables[$tableName]['last']);
$stmt->execute([$id]);
$result = $stmt->fetch(PDO::FETCH_ASSOC);
} while ($count-- && !$result);
if (!$result) {
error_log(__METHOD__ . ':' . self::ERROR_LOOKUP);
throw new Exception(self::ERROR_LOOKUP);
}
} catch (PDOException $e) {
error_log(__METHOD__ . ':' . $e->getMessage());
throw new Exception(self::ERROR_DB);
}foreach ($mapping as $key => $value) {
$entry[$value] = $result[$key] ?? NULL;
}
return $entry;
}getRandomEntry() method, which generates a single array of fake data. We loop through $mapping one entry at a time and examine the various parameters:public function getRandomEntry()
{
$entry = array();
foreach ($this->mapping as $key => $value) {
if (isset($value['source'])) {
switch ($value['source']) {source parameter is used to implement what effectively serves as a Strategy Pattern. We support four different possibilities for source, all defined as class constants. The first one is SOURCE_FILE. In this case, we use the getEntryFromFile() method discussed previously: case self::SOURCE_FILE :
$entry[$key] = $this->getEntryFromFile(
$value['name'], $value['type']);
break;$mapping array: case self::SOURCE_CALLBACK :
$entry[$key] = $value['name']();
break;SOURCE_TABLE option uses the database table defined in $mapping as a lookup. Note that getEntryFromTable(), discussed previously, is able to return an array of values, which means we need to use array_merge() to consolidate the results: case self::SOURCE_TABLE :
$result = $this->getEntryFromTable(
$value['name'],$value['idCol'],$value['mapping']);
$entry = array_merge($entry, $result);
break;SOURCE_METHOD option, which is also the default, uses a method already included with this class. We check to see whether parameters are included, and, if so, add those to the method call. Note the use of {} to influence interpolation. If we made a $this->$value['name']() PHP 7 call, due to the Abstract Syntax Tree (AST) rewrite, it would interpolate like this, ${$this->$value}['name'](), which is not what we want: case self::SOURCE_METHOD :
default :
if (!empty($value['params'])) {
$entry[$key] = $this->{$value['name']}(
$entry, $value['params']);
} else {
$entry[$key] = $this->{$value['name']}($entry);
}
}
}
}
return $entry;
}getRandomEntry() to produce multiple lines of fake data. We also add an option to insert to a destination table. If this option is enabled, we set up a prepared statement to insert, and also check to see whether we need to truncate any data currently in this table:public function generateData(
$howMany, $destTableName = NULL, $truncateDestTable = FALSE)
{
try {
if ($destTableName) {
$sql = 'INSERT INTO ' . $destTableName
. ' (' . implode(',', array_keys($this->mapping))
. ') '. ' VALUES ' . ' (:'
. implode(',:', array_keys($this->mapping)) . ')';
$stmt = $this->connection->pdo->prepare($sql);
if ($truncateDestTable) {
$sql = 'DELETE FROM ' . $destTableName;
$this->connection->pdo->query($sql);
}
}
} catch (PDOException $e) {
error_log(__METHOD__ . ':' . $e->getMessage());
throw new Exception(self::ERROR_COUNT);
}getRandomEntry(). If a database insert is requested, we execute the prepared statement in a try/catch block. In any event, we turn this method into a generator using the yield keyword:for ($x = 0; $x < $howMany; $x++) {
$entry = $this->getRandomEntry();
if ($insert) {
try {
$stmt->execute($entry);
} catch (PDOException $e) {
error_log(__METHOD__ . ':' . $e->getMessage());
throw new Exception(self::ERROR_DB);
}
}
yield $entry;
}
}The first thing to do is to ensure you have the data ready for random data generation. In this recipe, we will presume that the destination table is prospects, which has the following SQL database definition shown in step 7.
As a data source for names, you could create text files for first names and surnames. In this illustration, we will reference the data/files directory, and the files first_names.txt and surnames.txt. For city, state or province, postal code, and country, it might be useful to download the data from a source such as http://www.geonames.org/, and upload to a world_city_data table. For the remaining fields, such as address, e-mail, status, and so on, you could either use methods built into FakeData, or define callbacks.
Next, be sure to define Application\Test\FakeData, adding the content discussed in steps 8 to 29. After you have finished, create a calling program called chap_13_fake_data.php, which sets up autoloading and uses the appropriate classes. You should also define constants that match the path to the database configuration, and names files:
<?php
define('DB_CONFIG_FILE', __DIR__ . '/../config/db.config.php');
define('FIRST_NAME_FILE', __DIR__ . '/../data/files/first_names.txt');
define('LAST_NAME_FILE', __DIR__ . '/../data/files/surnames.txt');
require __DIR__ . '/../Application/Autoload/Loader.php';
Application\Autoload\Loader::init(__DIR__ . '/..');
use Application\Test\FakeData;
use Application\Database\Connection;Next, define a mapping array that uses the column names in the destination table (prospects) as a key. You need to then define sub-keys for source, name, and any other parameters that are required. For starters, 'first_name' and 'last_name' will both use a file as a source, 'name' points to the name of the file, and 'type' indicates a file type of text:
$mapping = [ 'first_name' => ['source' => FakeData::SOURCE_FILE, 'name' => FIRST_NAME_FILE, 'type' => FakeData::FILE_TYPE_TXT], 'last_name' => ['source' => FakeData::SOURCE_FILE, 'name' => LAST_NAME_FILE, 'type' => FakeData::FILE_TYPE_TXT],
The 'address', 'email', and 'last_updated' all use built-in methods as a data source. The last two also define parameters to be passed:
'address' => ['source' => FakeData::SOURCE_METHOD,
'name' => 'getAddress'],
'email' => ['source' => FakeData::SOURCE_METHOD,
'name' => 'getEmail',
'params' => ['first_name','last_name']],
'last_updated' => ['source' => FakeData::SOURCE_METHOD,
'name' => 'getDate',
'params' => [date('Y-m-d'), 365*5]]The 'phone', 'status' and 'budget' could all use callbacks to provide fake data:
'phone' => ['source' => FakeData::SOURCE_CALLBACK,
'name' => function () {
return sprintf('%3d-%3d-%4d', random_int(101,999),
random_int(101,999), random_int(0,9999)); }],
'status' => ['source' => FakeData::SOURCE_CALLBACK,
'name' => function () { $status = ['BEG','INT','ADV'];
return $status[rand(0,2)]; }],
'budget' => ['source' => FakeData::SOURCE_CALLBACK,
'name' => function() { return random_int(0, 99999)
+ (random_int(0, 99) * .01); }]And finally, 'city' draws its data from a lookup table, which also gives you data for the fields listed in the 'mapping' parameter. You can then leave those keys undefined. Notice that you should also specify the column representing the primary key for the table:
'city' => ['source' => FakeData::SOURCE_TABLE, 'name' => 'world_city_data', 'idCol' => 'id', 'mapping' => [ 'city' => 'city', 'state_province' => 'state_province', 'postal_code_prefix' => 'postal_code', 'iso2' => 'country'] ], 'state_province'=> [], 'postal_code' => [], 'country' => [], ];
You can then define the destination table, a Connection instance, and create the FakeData instance. A foreach() loop will suffice to display a given number of entries:
$destTableName = 'prospects';
$conn = new Connection(include DB_CONFIG_FILE);
$fake = new FakeData($conn, $mapping);
foreach ($fake->generateData(10) as $row) {
echo implode(':', $row) . PHP_EOL;
}The output, for 10 rows, would look something like this:
Here is a summary of websites with various lists of data that could be of use when generating test data:
|
Type of Data |
URL |
Notes |
|---|---|---|
|
Names | ||
|
http://www.babynamewizard.com/international-names-lists-popular-names-from-around-the-world | ||
|
Raw Name Lists | ||
|
US male first names | ||
|
US female first names | ||
|
US male first names | ||
|
Last Names |
US surnames from census | |
|
http://surname.sofeminine.co.uk/w/surnames/most-common-surnames-in-great-britain.html | ||
|
List of US surnames in the form of a PHP array | ||
|
Dutch surnames | ||
|
International surnames; just change the last letter(s) to get a list of names starting with that letter(s) | ||
|
Cities |
World cities | |
|
Postal Codes |
US only; includes cities, postal codes, latitude and longitude | |
|
International; city names, postal codes, EVERYTHING!; free download |
Up until PHP 7, in order to override php.ini settings for secure session management, you had to use a series of ini_set() commands. This approach is extremely annoying in that you also needed to know which settings were available, and being able to re-use the same settings in other applications was difficult. As of PHP 7, however, you can supply an array of parameters to the session_start() command, which immediately sets those values.
Application\Security\SessOptions class, which will hold session parameters and also have the ability to start the session. We also define a class constant in case invalid session options are passed:namespace Application\Security;
use ReflectionClass;
use InvalidArgumentsException;
class SessOptions
{
const ERROR_PARAMS = 'ERROR: invalid session options';php.ini session directives (documented at http://php.net/manual/en/session.configuration.php). We are specifically looking for directives that, in the Changeable column, are marked PHP_INI_ALL. Such directives can be overridden at runtime, and are thus available as arguments to session_start():const SESS_OP_NAME = 'name'; const SESS_OP_LAZY_WRITE = 'lazy_write'; // AVAILABLE // SINCE PHP 7.0.0. const SESS_OP_SAVE_PATH = 'save_path'; const SESS_OP_SAVE_HANDLER = 'save_handler'; // etc.
php.ini session settings as an argument. We use ReflectionClass to get a list of class constants, and run the $options argument through a loop to confirm the setting is allowed. Also note the use of array_flip(), which flips keys and values, so that the actual values for our class constants form the array key, and the name of the class constant becomes the value:protected $options;
protected $allowed;
public function __construct(array $options)
{
$reflect = new ReflectionClass(get_class($this));
$this->allowed = $reflect->getConstants();
$this->allowed = array_flip($this->allowed);
unset($this->allowed[self::ERROR_PARAMS]);
foreach ($options as $key => $value) {
if(!isset($this->allowed[$key])) {
error_log(__METHOD__ . ':' . self::ERROR_PARAMS);
throw new InvalidArgumentsException(
self::ERROR_PARAMS);
}
}
$this->options = $options;
}public function getAllowed()
{
return $this->allowed;
}
public function start()
{
session_start($this->options);
}Place all the code discussed in this recipe into a SessOptions.php file in the Application\Security directory. You can then define a calling program called chap_13_session_options.php to test the new class, which sets up autoloading and uses the class:
<?php require __DIR__ . '/../Application/Autoload/Loader.php'; Application\Autoload\Loader::init(__DIR__ . '/..'); use Application\Security\SessOptions;
Next, define an array that uses the class constants as keys, with values as desired to manage the session. Note that in the example shown here, session information is stored in a subdirectory, session, which you need to create:
$options = [ SessOptions::SESS_OP_USE_ONLY_COOKIES => 1, SessOptions::SESS_OP_COOKIE_LIFETIME => 300, SessOptions::SESS_OP_COOKIE_HTTPONLY => 1, SessOptions::SESS_OP_NAME => 'UNLIKELYSOURCE', SessOptions::SESS_OP_SAVE_PATH => __DIR__ . '/session' ];
You can now create the SessOptions instance and run start() to start the session. You could use phpinfo() here to show some information on the session:
$sessOpt = new SessOptions($options); $sessOpt->start(); $_SESSION['test'] = 'TEST'; phpinfo(INFO_VARIABLES);
If you look for information on cookies using your browser's developer tools, you will note the name is set to UNLIKELYSOURCE and the expiration time is 5 minutes from now:
If you do a scan of the session directory, you will see that the session information has been stored there:
php.ini directives, see this summary: http://php.net/manual/en/session.configuration.phpIn this appendix, we will cover the following topics:
In order to work with PSR-7 requests and responses, we first need to define a series of value objects. These are classes that represent logical objects used in web-based activities such as URIs, file uploads, and streaming request or response bodies.
The source code for the PSR-7 interfaces is available as a Composer package. It is considered a best practice to use Composer to manage external software, including PSR-7 interfaces.
|
Interface |
Extends |
Notes |
What the methods handle |
|---|---|---|---|
|
|
Defines methods common to HTTP messages |
Headers, message body (that is, content), and protocol | |
|
|
|
Represents requests generated by a client |
The URI, HTTP method, and the request target |
|
|
|
Represents a request coming to a server from a client |
Server and query parameters, cookies, uploaded files, and the parsed body |
|
|
|
Represents a response from the server to client |
HTTP status code and reason |
|
|
Represents the data stream |
Streaming behavior such as seek, tell, read, write, and so on | |
|
|
Represents the URI |
Scheme (that is, HTTP, HTTPS), host, port, username, password (that is, for FTP), query parameters, path, and fragment | |
|
|
Deals with uploaded files |
File size, media type, moving the file, and filename |
namespace Application\MiddleWare;
class Constants
{
const HEADER_HOST = 'Host'; // host header
const HEADER_CONTENT_TYPE = 'Content-Type';
const HEADER_CONTENT_LENGTH = 'Content-Length';
const METHOD_GET = 'get';
const METHOD_POST = 'post';
const METHOD_PUT = 'put';
const METHOD_DELETE = 'delete';
const HTTP_METHODS = ['get','put','post','delete'];
const STANDARD_PORTS = [
'ftp' => 21, 'ssh' => 22, 'http' => 80, 'https' => 443
];
const CONTENT_TYPE_FORM_ENCODED =
'application/x-www-form-urlencoded';
const CONTENT_TYPE_MULTI_FORM = 'multipart/form-data';
const CONTENT_TYPE_JSON = 'application/json';
const CONTENT_TYPE_HAL_JSON = 'application/hal+json';
const DEFAULT_STATUS_CODE = 200;
const DEFAULT_BODY_STREAM = 'php://input';
const DEFAULT_REQUEST_TARGET = '/';
const MODE_READ = 'r';
const MODE_WRITE = 'w';
// NOTE: not all error constants are shown to conserve space
const ERROR_BAD = 'ERROR: ';
const ERROR_UNKNOWN = 'ERROR: unknown';
// NOTE: not all status codes are shown here!
const STATUS_CODES = [
200 => 'OK',
301 => 'Moved Permanently',
302 => 'Found',
401 => 'Unauthorized',
404 => 'Not Found',
405 => 'Method Not Allowed',
418 => 'I_m A Teapot',
500 => 'Internal Server Error',
];
}A complete list of HTTP status codes can be found here: https://tools.ietf.org/html/rfc7231#section-6.1.
parse_url() function:namespace Application\MiddleWare;
use InvalidArgumentException;
use Psr\Http\Message\UriInterface;
class Uri implements UriInterface
{
protected $uriString;
protected $uriParts = array();
public function __construct($uriString)
{
$this->uriParts = parse_url($uriString);
if (!$this->uriParts) {
throw new InvalidArgumentException(
Constants::ERROR_INVALID_URI);
}
$this->uriString = $uriString;
}URI stands for Uniform Resource Indicator. This is what you would see at the top of your browser when making a request. For more information on what comprises a URI, have a look at http://tools.ietf.org/html/rfc3986.
public function getScheme()
{
return strtolower($this->uriParts['scheme']) ?? '';
}public function getAuthority()
{
$val = '';
if (!empty($this->getUserInfo()))
$val .= $this->getUserInfo() . '@';
$val .= $this->uriParts['host'] ?? '';
if (!empty($this->uriParts['port']))
$val .= ':' . $this->uriParts['port'];
return $val;
}ftp://username:password@website.com:/path:public function getUserInfo()
{
if (empty($this->uriParts['user'])) {
return '';
}
$val = $this->uriParts['user'];
if (!empty($this->uriParts['pass']))
$val .= ':' . $this->uriParts['pass'];
return $val;
}public function getHost()
{
if (empty($this->uriParts['host'])) {
return '';
}
return strtolower($this->uriParts['host']);
}STANDARD_PORTS constant, the return value is NULL, according to the requirements of PSR-7:public function getPort()
{
if (empty($this->uriParts['port'])) {
return NULL;
} else {
if ($this->getScheme()) {
if ($this->uriParts['port'] ==
Constants::STANDARD_PORTS[$this->getScheme()]) {
return NULL;
}
}
return (int) $this->uriParts['port'];
}
}rawurlencode() PHP function as it is compliant with RFC 3986. We cannot just encode the entire path, however, as the path separator (that is, /) would also get encoded! Accordingly, we need to first break it up using explode(), encode the parts, and then reassemble it:public function getPath()
{
if (empty($this->urlParts['path'])) {
return '';
}
return implode('/', array_map("rawurlencode", explode('/', $this->urlParts['path'])));
}query string (that is, from $_GET). These too must be URL-encoded. First, we define getQueryParams(), which breaks the query string into an associative array. You will note the reset option in case we wish to refresh the query parameters. We then define getQuery(), which takes the array and produces a proper URL-encoded string:public function getQueryParams($reset = FALSE)
{
if ($this->queryParams && !$reset) {
return $this->queryParams;
}
$this->queryParams = [];
if (!empty($this->uriParts['query'])) {
foreach (explode('&', $this->uriParts['query']) as $keyPair) {
list($param,$value) = explode('=',$keyPair);
$this->queryParams[$param] = $value;
}
}
return $this->queryParams;
}
public function getQuery()
{
if (!$this->getQueryParams()) {
return '';
}
$output = '';
foreach ($this->getQueryParams() as $key => $value) {
$output .= rawurlencode($key) . '='
. rawurlencode($value) . '&';
}
return substr($output, 0, -1);
}fragment (that is, a # in the URI), and any part following it:public function getFragment()
{
if (empty($this->urlParts['fragment'])) {
return '';
}
return rawurlencode($this->urlParts['fragment']);
}withXXX() methods, which match the getXXX() methods described above. These methods are designed to add, replace, or remove properties associated with the request class (scheme, authority, user info, and so on). In addition, these methods return the current instance that allows us to use these methods in a series of successive calls (often referred to as the fluent interface). We start with withScheme():public function withScheme($scheme)
{
if (empty($scheme) && $this->getScheme()) {
unset($this->uriParts['scheme']);
} else {
if (isset(STANDARD_PORTS[strtolower($scheme)])) {
$this->uriParts['scheme'] = $scheme;
} else {
throw new InvalidArgumentException(Constants::ERROR_BAD . __METHOD__);
}
}
return $this;
}withQuery() method resets the query parameters array. withHost(), withPort(), withPath(), and withFragment() use the same logic, but are not shown to conserve space:public function withUserInfo($user, $password = null)
{
if (empty($user) && $this->getUserInfo()) {
unset($this->uriParts['user']);
} else {
$this->urlParts['user'] = $user;
if ($password) {
$this->urlParts['pass'] = $password;
}
}
return $this;
}
// Not shown: withHost(),withPort(),withPath(),withFragment()
public function withQuery($query)
{
if (empty($query) && $this->getQuery()) {
unset($this->uriParts['query']);
} else {
$this->uriParts['query'] = $query;
}
// reset query params array
$this->getQueryParams(TRUE);
return $this;
}Application\MiddleWare\Uri class with __toString(), which, when the object is used in a string context, returns a proper URI, assembled from $uriParts. We also define a convenience method, getUriString(), that simply calls __toString():public function __toString()
{
$uri = ($this->getScheme())
? $this->getScheme() . '://' : '';authority URI part is present, we add it. authority includes the user information, host, and port. Otherwise, we just append host and port:if ($this->getAuthority()) {
$uri .= $this->getAuthority();
} else {
$uri .= ($this->getHost()) ? $this->getHost() : '';
$uri .= ($this->getPort())
? ':' . $this->getPort() : '';
}path, we first check whether the first character is /. If not, we need to add this separator. We then add query and fragment, if present:$path = $this->getPath();
if ($path) {
if ($path[0] != '/') {
$uri .= '/' . $path;
} else {
$uri .= $path;
}
}
$uri .= ($this->getQuery())
? '?' . $this->getQuery() : '';
$uri .= ($this->getFragment())
? '#' . $this->getFragment() : '';
return $uri;
}
public function getUriString()
{
return $this->__toString();
}
}Streams sub-system, so this is a natural fit. PSR-7 formalizes this by way of Psr\Http\Message\StreamInterface that defines such methods as read(), write(), seek(), and so on. We now present Application\MiddleWare\Stream that we can use to represent the body of incoming or outgoing requests and/or responses:namespace Application\MiddleWare;
use SplFileInfo;
use Throwable;
use RuntimeException;
use Psr\Http\Message\StreamInterface;
class Stream implements StreamInterface
{
protected $stream;
protected $metadata;
protected $info;fopen() command. We then use stream_get_meta_data() to get information on the stream. For other details, we create an SplFileInfo instance:public function __construct($input, $mode = self::MODE_READ)
{
$this->stream = fopen($input, $mode);
$this->metadata = stream_get_meta_data($this->stream);
$this->info = new SplFileInfo($input);
}SplFileInfo instance:public function getStream()
{
return $this->stream;
}
public function getInfo()
{
return $this->info;
}public function read($length)
{
if (!fread($this->stream, $length)) {
throw new RuntimeException(self::ERROR_BAD . __METHOD__);
}
}
public function write($string)
{
if (!fwrite($this->stream, $string)) {
throw new RuntimeException(self::ERROR_BAD . __METHOD__);
}
}
public function rewind()
{
if (!rewind($this->stream)) {
throw new RuntimeException(self::ERROR_BAD . __METHOD__);
}
}
public function eof()
{
return eof($this->stream);
}
public function tell()
{
try {
return ftell($this->stream);
} catch (Throwable $e) {
throw new RuntimeException(self::ERROR_BAD . __METHOD__);
}
}
public function seek($offset, $whence = SEEK_SET)
{
try {
fseek($this->stream, $offset, $whence);
} catch (Throwable $e) {
throw new RuntimeException(self::ERROR_BAD . __METHOD__);
}
}
public function close()
{
if ($this->stream) {
fclose($this->stream);
}
}
public function detach()
{
return $this->close();
}public function getMetadata($key = null)
{
if ($key) {
return $this->metadata[$key] ?? NULL;
} else {
return $this->metadata;
}
}
public function getSize()
{
return $this->info->getSize();
}
public function isSeekable()
{
return boolval($this->metadata['seekable']);
}
public function isWritable()
{
return $this->stream->isWritable();
}
public function isReadable()
{
return $this->info->isReadable();
}getContents() and __toString() in order to dump the contents of the stream:public function __toString()
{
$this->rewind();
return $this->getContents();
}
public function getContents()
{
ob_start();
if (!fpassthru($this->stream)) {
throw new RuntimeException(self::ERROR_BAD . __METHOD__);
}
return ob_get_clean();
}
}Stream class shown previously is TextStream that is designed for situations where the body is a string (that is, an array encoded as JSON) rather than a file. As we need to make absolutely certain that the incoming $input value is of the string data type, we invoke PHP 7 strict types just after the opening tag. We also identify a $pos property (that is, position) that will emulate a file pointer, but instead point to a position within the string:<?php
declare(strict_types=1);
namespace Application\MiddleWare;
use Throwable;
use RuntimeException;
use SplFileInfo;
use Psr\Http\Message\StreamInterface;
class TextStream implements StreamInterface
{
protected $stream;
protected $pos = 0;$stream property is the input string:public function __construct(string $input)
{
$this->stream = $input;
}
public function getStream()
{
return $this->stream;
}
public function getInfo()
{
return NULL;
}
public function getContents()
{
return $this->stream;
}
public function __toString()
{
return $this->getContents();
}
public function getSize()
{
return strlen($this->stream);
}
public function close()
{
// do nothing: how can you "close" string???
}
public function detach()
{
return $this->close(); // that is, do nothing!
}tell(), eof(), seek(), and so on, work with $pos:public function tell()
{
return $this->pos;
}
public function eof()
{
return ($this->pos == strlen($this->stream));
}
public function isSeekable()
{
return TRUE;
}
public function seek($offset, $whence = NULL)
{
if ($offset < $this->getSize()) {
$this->pos = $offset;
} else {
throw new RuntimeException(
Constants::ERROR_BAD . __METHOD__);
}
}
public function rewind()
{
$this->pos = 0;
}
public function isWritable()
{
return TRUE;
}read() and write() methods work with $pos and substrings:public function write($string)
{
$temp = substr($this->stream, 0, $this->pos);
$this->stream = $temp . $string;
$this->pos = strlen($this->stream);
}
public function isReadable()
{
return TRUE;
}
public function read($length)
{
return substr($this->stream, $this->pos, $length);
}
public function getMetadata($key = null)
{
return NULL;
}
}Application\MiddleWare\UploadedFile. As with the other classes, we first define properties that represent aspects of a file upload:namespace Application\MiddleWare;
use RuntimeException;
use InvalidArgumentException;
use Psr\Http\Message\UploadedFileInterface;
class UploadedFile implements UploadedFileInterface
{
protected $field; // original name of file upload field
protected $info; // $_FILES[$field]
protected $randomize;
protected $movedName = '';$_FILES. We add the last parameter to signal whether or not we want the class to generate a new random filename once the uploaded file is confirmed:public function __construct($field, array $info, $randomize = FALSE)
{
$this->field = $field;
$this->info = $info;
$this->randomize = $randomize;
}Stream class instance for the temporary or moved file:public function getStream()
{
if (!$this->stream) {
if ($this->movedName) {
$this->stream = new Stream($this->movedName);
} else {
$this->stream = new Stream($info['tmp_name']);
}
}
return $this->stream;
}moveTo() method performs the actual file movement. Note the extensive series of safety checks to help prevent an injection attack. If randomize is not enabled, we use the original user-supplied filename:public function moveTo($targetPath)
{
if ($this->moved) {
throw new Exception(Constants::ERROR_MOVE_DONE);
}
if (!file_exists($targetPath)) {
throw new InvalidArgumentException(Constants::ERROR_BAD_DIR);
}
$tempFile = $this->info['tmp_name'] ?? FALSE;
if (!$tempFile || !file_exists($tempFile)) {
throw new Exception(Constants::ERROR_BAD_FILE);
}
if (!is_uploaded_file($tempFile)) {
throw new Exception(Constants::ERROR_FILE_NOT);
}
if ($this->randomize) {
$final = bin2hex(random_bytes(8)) . '.txt';
} else {
$final = $this->info['name'];
}
$final = $targetPath . '/' . $final;
$final = str_replace('//', '/', $final);
if (!move_uploaded_file($tempFile, $final)) {
throw new RuntimeException(Constants::ERROR_MOVE_UNABLE);
}
$this->movedName = $final;
return TRUE;
}$_FILES from the $info property. Please note that the return values from getClientFilename() and getClientMediaType() should be considered untrusted, as they originate from the outside. We also add a method to return the moved filename:public function getMovedName()
{
return $this->movedName ?? NULL;
}
public function getSize()
{
return $this->info['size'] ?? NULL;
}
public function getError()
{
if (!$this->moved) {
return UPLOAD_ERR_OK;
}
return $this->info['error'];
}
public function getClientFilename()
{
return $this->info['name'] ?? NULL;
}
public function getClientMediaType()
{
return $this->info['type'] ?? NULL;
}
}First of all, go to https://github.com/php-fig/http-message/tree/master/src, the GitHub repository for the PSR-7 interfaces, and download them. Create a directory called Psr/Http/Message in /path/to/source and places the files there. Alternatively, you can visit https://packagist.org/packages/psr/http-message and install the source code using Composer. (For instructions on how to obtain and use
Composer, you can visit https://getcomposer.org/.)
Then, go ahead and define the classes discussed previously, summarized in this table:
|
Class |
Steps discussed in |
|---|---|
|
|
2 |
|
|
3 to 16 |
|
|
17 to 22 |
|
|
23 to 26 |
|
|
27 to 31 |
Next, define a chap_09_middleware_value_objects_uri.php calling program that implements autoloading and uses the appropriate classes. Please note that if you use Composer, unless otherwise instructed, it will create a folder called vendor. Composer also adds its own autoloader, which you are free to use here:
<?php require __DIR__ . '/../Application/Autoload/Loader.php'; Application\Autoload\Loader::init(__DIR__ . '/..'); use Application\MiddleWare\Uri;
You can then create a Uri instance and use the with methods to add parameters. You can then echo the Uri instance directly as __toString() is defined:
$uri = new Uri();
$uri->withScheme('https')
->withHost('localhost')
->withPort('8080')
->withPath('chap_09_middleware_value_objects_uri.php')
->withQuery('param=TEST');
echo $uri;Here is the expected result:
Next, create a directory called uploads from /path/to/source/for/this/chapter. Go ahead and define another calling program, chap_09_middleware_value_objects_file_upload.php, that sets up autoloading and uses the appropriate classes:
<?php
define('TARGET_DIR', __DIR__ . '/uploads');
require __DIR__ . '/../Application/Autoload/Loader.php';
Application\Autoload\Loader::init(__DIR__ . '/..');
use Application\MiddleWare\UploadedFile;Inside a try...catch block, check to see whether any files were uploaded. If so, loop through $_FILES and create UploadedFile instances where tmp_name is set. You can then use the moveTo() method to move the files to TARGET_DIR:
try {
$message = '';
$uploadedFiles = array();
if (isset($_FILES)) {
foreach ($_FILES as $key => $info) {
if ($info['tmp_name']) {
$uploadedFiles[$key] = new UploadedFile($key, $info, TRUE);
$uploadedFiles[$key]->moveTo(TARGET_DIR);
}
}
}
} catch (Throwable $e) {
$message = $e->getMessage();
}
?>In the view logic, display a simple file upload form. You could also use phpinfo() to display information about what was uploaded:
<form name="search" method="post" enctype="<?= Constants::CONTENT_TYPE_MULTI_FORM ?>">
<table class="display" cellspacing="0" width="100%">
<tr><th>Upload 1</th><td><input type="file" name="upload_1" /></td></tr>
<tr><th>Upload 2</th><td><input type="file" name="upload_2" /></td></tr>
<tr><th>Upload 3</th><td><input type="file" name="upload_3" /></td></tr>
<tr><th> </th><td><input type="submit" /></td></tr>
</table>
</form>
<?= ($message) ? '<h1>' . $message . '</h1>' : ''; ?>Next, if there were any uploaded files, you can display information on each one. You can also use getStream() followed by getContents() to display each file (assuming you're using short text files):
<?php if ($uploadedFiles) : ?>
<table class="display" cellspacing="0" width="100%">
<tr>
<th>Filename</th><th>Size</th>
<th>Moved Filename</th><th>Text</th>
</tr>
<?php foreach ($uploadedFiles as $obj) : ?>
<?php if ($obj->getMovedName()) : ?>
<tr>
<td><?= htmlspecialchars($obj->getClientFilename()) ?></td>
<td><?= $obj->getSize() ?></td>
<td><?= $obj->getMovedName() ?></td>
<td><?= $obj->getStream()->getContents() ?></td>
</tr>
<?php endif; ?>
<?php endforeach; ?>
</table>
<?php endif; ?>
<?php phpinfo(INFO_VARIABLES); ?>Here is how the output might appear:
One of the key characteristics of PSR-7 middleware is the use of Request and Response classes. When applied, this enables different blocks of software to perform together without sharing any specific knowledge between them. In this context, a request class should encompass all aspects of the original user request, including such items as browser settings, the original URL requested, parameters passed, and so forth.
Uri, Stream, and UploadedFile value objects, as described in the previous recipe.Application\MiddleWare\Message class. This class consumes Stream and Uri and implements Psr\Http\Message\MessageInterface. We first define properties for the key value objects, including those representing the message body (that is, a StreamInterface instance), version, and HTTP headers:namespace Application\MiddleWare;
use Psr\Http\Message\ {
MessageInterface,
StreamInterface,
UriInterface
};
class Message implements MessageInterface
{
protected $body;
protected $version;
protected $httpHeaders = array();getBody() method that represents a StreamInterface instance. A companion method, withBody(), returns the current Message instance and allows us to overwrite the current value of body:public function getBody()
{
if (!$this->body) {
$this->body = new Stream(self::DEFAULT_BODY_STREAM);
}
return $this->body;
}
public function withBody(StreamInterface $body)
{
if (!$body->isReadable()) {
throw new InvalidArgumentException(self::ERROR_BODY_UNREADABLE);
}
$this->body = $body;
return $this;
}findHeader() method (not directly defined by MessageInterface) that locates a header using stripos():protected function findHeader($name)
{
$found = FALSE;
foreach (array_keys($this->getHeaders()) as $header) {
if (stripos($header, $name) !== FALSE) {
$found = $header;
break;
}
}
return $found;
}$httpHeaders property. This property is assumed to be an associative array where the key is the header, and the value is the string representing the header value. If there is more than one value, additional values separated by commas are appended to the string. There is an excellent apache_request_headers() PHP function from the Apache extension that produces headers if they are not already available in $httpHeaders:protected function getHttpHeaders()
{
if (!$this->httpHeaders) {
if (function_exists('apache_request_headers')) {
$this->httpHeaders = apache_request_headers();
} else {
$this->httpHeaders = $this->altApacheReqHeaders();
}
}
return $this->httpHeaders;
}apache_request_headers() is not available (that is, the Apache extension is not enabled), we provide an alternative, altApacheReqHeaders():protected function altApacheReqHeaders()
{
$headers = array();
foreach ($_SERVER as $key => $value) {
if (stripos($key, 'HTTP_') !== FALSE) {
$headerKey = str_ireplace('HTTP_', '', $key);
$headers[$this->explodeHeader($headerKey)] = $value;
} elseif (stripos($key, 'CONTENT_') !== FALSE) {
$headers[$this->explodeHeader($key)] = $value;
}
}
return $headers;
}
protected function explodeHeader($header)
{
$headerParts = explode('_', $header);
$headerKey = ucwords(implode(' ', strtolower($headerParts)));
return str_replace(' ', '-', $headerKey);
}getHeaders() (required in PSR-7) is now a trivial loop through the $httpHeaders property produced by the getHttpHeaders() method discussed in step 4:public function getHeaders()
{
foreach ($this->getHttpHeaders() as $key => $value) {
header($key . ': ' . $value);
}
}with methods designed to overwrite or replace headers. Since there can be many headers, we also have a method that adds to the existing set of headers. The withoutHeader() method is used to remove a header instance. Notice the consistent use of findHeader(), mentioned in the previous step, to allow for case-insensitive handling of headers:public function withHeader($name, $value)
{
$found = $this->findHeader($name);
if ($found) {
$this->httpHeaders[$found] = $value;
} else {
$this->httpHeaders[$name] = $value;
}
return $this;
}
public function withAddedHeader($name, $value)
{
$found = $this->findHeader($name);
if ($found) {
$this->httpHeaders[$found] .= $value;
} else {
$this->httpHeaders[$name] = $value;
}
return $this;
}
public function withoutHeader($name)
{
$found = $this->findHeader($name);
if ($found) {
unset($this->httpHeaders[$found]);
}
return $this;
}public function hasHeader($name)
{
return boolval($this->findHeader($name));
}
public function getHeaderLine($name)
{
$found = $this->findHeader($name);
if ($found) {
return $this->httpHeaders[$found];
} else {
return '';
}
}
public function getHeader($name)
{
$line = $this->getHeaderLine($name);
if ($line) {
return explode(',', $line);
} else {
return array();
}
}getHeadersAsString that produces a single header string with the headers separated by \r\n for direct use with PHP stream contexts:public function getHeadersAsString()
{
$output = '';
$headers = $this->getHeaders();
if ($headers && is_array($headers)) {
foreach ($headers as $key => $value) {
if ($output) {
$output .= "\r\n" . $key . ': ' . $value;
} else {
$output .= $key . ': ' . $value;
}
}
}
return $output;
}Message class, we now turn our attention to version handling. According to PSR-7, the return value for the protocol version (that is, HTTP/1.1) should only be the numerical part. For this reason, we also provide onlyVersion() that strips off any non-digit character, allowing periods:public function getProtocolVersion()
{
if (!$this->version) {
$this->version = $this->onlyVersion($_SERVER['SERVER_PROTOCOL']);
}
return $this->version;
}
public function withProtocolVersion($version)
{
$this->version = $this->onlyVersion($version);
return $this;
}
protected function onlyVersion($version)
{
if (!empty($version)) {
return preg_replace('/[^0-9\.]/', '', $version);
} else {
return NULL;
}
}
}Request class. It must be noted here, however, that we need to consider both out-bound as well as in-bound requests. That is to say, we need a class to represent an outgoing request a client will make to a server, as well as a request received from a client by a server. Accordingly, we provide Application\MiddleWare\Request (requests a client will make to a server), and Application\MiddleWare\ServerRequest (requests received from a client by a server). The good news is that most of our work has already been done: notice that our Request class extends Message. We also provide properties to represent the URI and HTTP method:namespace Application\MiddleWare;
use InvalidArgumentException;
use Psr\Http\Message\ { RequestInterface, StreamInterface, UriInterface };
class Request extends Message implements RequestInterface
{
protected $uri;
protected $method; // HTTP method
protected $uriObj; // Psr\Http\Message\UriInterface instanceNULL, but we leave open the possibility of defining the appropriate arguments right away. We use the inherited onlyVersion() method to sanitize the version. We also define checkMethod() to make sure any method supplied is on our list of supported HTTP methods, defined as a constant array in Constants:public function __construct($uri = NULL,
$method = NULL,
StreamInterface $body = NULL,
$headers = NULL,
$version = NULL)
{
$this->uri = $uri;
$this->body = $body;
$this->method = $this->checkMethod($method);
$this->httpHeaders = $headers;
$this->version = $this->onlyVersion($version);
}
protected function checkMethod($method)
{
if (!$method === NULL) {
if (!in_array(strtolower($method), Constants::HTTP_METHODS)) {
throw new InvalidArgumentException(Constants::ERROR_HTTP_METHOD);
}
}
return $method;
}Uri class has methods that will parse this into its component parts, hence our provision of the $uriObj property. In the case of withRequestTarget(), notice that we run getUri() that performs the aforementioned parsing process:public function getRequestTarget()
{
return $this->uri ?? Constants::DEFAULT_REQUEST_TARGET;
}
public function withRequestTarget($requestTarget)
{
$this->uri = $requestTarget;
$this->getUri();
return $this;
}get and with methods, which represent the HTTP method, reveal no surprises. We use checkMethod(), used in the constructor as well, to ensure the method matches those we plan to support:public function getMethod()
{
return $this->method;
}
public function withMethod($method)
{
$this->method = $this->checkMethod($method);
return $this;
}get and with method for the URI. As mentioned in step 14, we retain the original request string in the $uri property and the newly parsed Uri instance in $uriObj. Note the extra flag to preserve any existing Host header:public function getUri()
{
if (!$this->uriObj) {
$this->uriObj = new Uri($this->uri);
}
return $this->uriObj;
}
public function withUri(UriInterface $uri, $preserveHost = false)
{
if ($preserveHost) {
$found = $this->findHeader(Constants::HEADER_HOST);
if (!$found && $uri->getHost()) {
$this->httpHeaders[Constants::HEADER_HOST] = $uri->getHost();
}
} elseif ($uri->getHost()) {
$this->httpHeaders[Constants::HEADER_HOST] = $uri->getHost();
}
$this->uri = $uri->__toString();
return $this;
}
}ServerRequest class extends Request and provides additional functionality to retrieve information of interest to a server handling an incoming request. We start by defining properties that will represent incoming data read from the various PHP $_ super-globals (that is, $_SERVER, $_POST, and so on):namespace Application\MiddleWare;
use Psr\Http\Message\ { ServerRequestInterface, UploadedFileInterface } ;
class ServerRequest extends Request implements ServerRequestInterface
{
protected $serverParams;
protected $cookies;
protected $queryParams;
protected $contentType;
protected $parsedBody;
protected $attributes;
protected $method;
protected $uploadedFileInfo;
protected $uploadedFileObjs;public function getServerParams()
{
if (!$this->serverParams) {
$this->serverParams = $_SERVER;
}
return $this->serverParams;
}
// getCookieParams() reads $_COOKIE
// getQueryParams() reads $_GET
// getUploadedFileInfo() reads $_FILES
public function getRequestMethod()
{
$method = $this->getServerParams()['REQUEST_METHOD'] ?? '';
$this->method = strtolower($method);
return $this->method;
}
public function getContentType()
{
if (!$this->contentType) {
$this->contentType = $this->getServerParams()['CONTENT_TYPE'] ?? '';
$this->contentType = strtolower($this->contentType);
}
return $this->contentType;
}UploadedFile objects (presented in the previous recipe), we also define a method that takes $uploadedFileInfo and creates UploadedFile objects:public function getUploadedFiles()
{
if (!$this->uploadedFileObjs) {
foreach ($this->getUploadedFileInfo() as $field => $value) {
$this->uploadedFileObjs[$field] = new UploadedFile($field, $value);
}
}
return $this->uploadedFileObjs;
}with methods that add or overwrite properties and return the new instance:public function withCookieParams(array $cookies)
{
array_merge($this->getCookieParams(), $cookies);
return $this;
}
public function withQueryParams(array $query)
{
array_merge($this->getQueryParams(), $query);
return $this;
}
public function withUploadedFiles(array $uploadedFiles)
{
if (!count($uploadedFiles)) {
throw new InvalidArgumentException(Constant::ERROR_NO_UPLOADED_FILES);
}
foreach ($uploadedFiles as $fileObj) {
if (!$fileObj instanceof UploadedFileInterface) {
throw new InvalidArgumentException(Constant::ERROR_INVALID_UPLOADED);
}
}
$this->uploadedFileObjs = $uploadedFiles;
}getParsedBody() and its accompanying with method. The PSR-7 recommendations are quite specific when it comes to form posting. Note the series of if statements that check the Content-Type header as well as the method:public function getParsedBody()
{
if (!$this->parsedBody) {
if (($this->getContentType() == Constants::CONTENT_TYPE_FORM_ENCODED
|| $this->getContentType() == Constants::CONTENT_TYPE_MULTI_FORM)
&& $this->getRequestMethod() == Constants::METHOD_POST)
{
$this->parsedBody = $_POST;
} elseif ($this->getContentType() == Constants::CONTENT_TYPE_JSON
|| $this->getContentType() == Constants::CONTENT_TYPE_HAL_JSON)
{
ini_set("allow_url_fopen", true);
$this->parsedBody = json_decode(file_get_contents('php://input'));
} elseif (!empty($_REQUEST)) {
$this->parsedBody = $_REQUEST;
} else {
ini_set("allow_url_fopen", true);
$this->parsedBody = file_get_contents('php://input');
}
}
return $this->parsedBody;
}
public function withParsedBody($data)
{
$this->parsedBody = $data;
return $this;
}withoutAttributes() that allows you to remove attributes at will:public function getAttributes()
{
return $this->attributes;
}
public function getAttribute($name, $default = NULL)
{
return $this->attributes[$name] ?? $default;
}
public function withAttribute($name, $value)
{
$this->attributes[$name] = $value;
return $this;
}
public function withoutAttribute($name)
{
if (isset($this->attributes[$name])) {
unset($this->attributes[$name]);
}
return $this;
}
}initialize(), which is not in PSR-7, but is extremely convenient:public function initialize()
{
$this->getServerParams();
$this->getCookieParams();
$this->getQueryParams();
$this->getUploadedFiles;
$this->getRequestMethod();
$this->getContentType();
$this->getParsedBody();
return $this;
}First, be sure to complete the preceding recipe, as the Message and Request classes consume Uri, Stream, and UploadedFile value objects. After that, go ahead and define the classes summarized in the following table:
|
Class |
Steps they are discussed in |
|---|---|
|
|
2 to 9 |
|
|
10 to 14 |
|
|
15 to 20 |
After that, you can define a server program, chap_09_middleware_server.php, which sets up autoloading and uses the appropriate classes. This script will pull the incoming request into a ServerRequest instance, initialize it, and then use var_dump() to show what information was received:
<?php require __DIR__ . '/../Application/Autoload/Loader.php'; Application\Autoload\Loader::init(__DIR__ . '/..'); use Application\MiddleWare\ServerRequest; $request = new ServerRequest(); $request->initialize(); echo '<pre>', var_dump($request), '</pre>';
To run the server program, first change to the /path/to/source/for/this/chapter folder. You can then run the following command:
php -S localhost:8080 chap_09_middleware_server.php'
As for the client, first create a calling program, chap_09_middleware_request.php, that sets up autoloading, uses the appropriate classes, and defines the target server and a local text file:
<?php
define('READ_FILE', __DIR__ . '/gettysburg.txt');
define('TEST_SERVER', 'http://localhost:8080');
require __DIR__ . '/../Application/Autoload/Loader.php';
Application\Autoload\Loader::init(__DIR__ . '/..');
use Application\MiddleWare\ { Request, Stream, Constants };Next, you can create a Stream instance using the text as a source. This will become the body of a new Request, which, in this case, mirrors what might be expected for a form posting:
$body = new Stream(READ_FILE);
You can then directly build a Request instance, supplying parameters as appropriate:
$request = new Request(
TEST_SERVER,
Constants::METHOD_POST,
$body,
[Constants::HEADER_CONTENT_TYPE => Constants::CONTENT_TYPE_FORM_ENCODED,Constants::HEADER_CONTENT_LENGTH => $body->getSize()]
);Alternatively, you can use the fluent interface syntax to produce exactly the same results:
$uriObj = new Uri(TEST_SERVER);
$request = new Request();
$request->withRequestTarget(TEST_SERVER)
->withMethod(Constants::METHOD_POST)
->withBody($body)
->withHeader(Constants::HEADER_CONTENT_TYPE, Constants::CONTENT_TYPE_FORM_ENCODED)
->withAddedHeader(Constants::HEADER_CONTENT_LENGTH, $body->getSize());You can then set up a cURL resource to simulate a form posting, where the data parameter is the contents of the text file. You can follow that with curl_init(), curl_exec(), and so on, echoing the results:
$data = http_build_query(['data' => $request->getBody()->getContents()]);
$defaults = array(
CURLOPT_URL => $request->getUri()->getUriString(),
CURLOPT_POST => true,
CURLOPT_POSTFIELDS => $data,
);
$ch = curl_init();
curl_setopt_array($ch, $defaults);
$response = curl_exec($ch);
curl_close($ch);Here is how the direct output might appear:
The Response class represents outbound information returned to whatever entity made the original request. HTTP headers play an important role in this context as we need to know that format is requested by the client, usually in the incoming Accept header. We then need to set the appropriate Content-Type header in the Response class to match that format. Otherwise, the actual body of the response will be HTML, JSON, or whatever else has been requested (and delivered).
Response class is actually much easier to implement than the Request class as we are only concerned with returning the response from the server to the client. Additionally, it extends our Application\MiddleWare\Message class where most of the work has been done. So, all that remains to be done is to define an Application\MiddleWare\Response class. As you will note, the only unique property is $statusCode:namespace Application\MiddleWare;
use Psr\Http\Message\ { Constants, ResponseInterface, StreamInterface };
class Response extends Message implements ResponseInterface
{
protected $statusCode;Response instance with all parts intact. We use methods from Message and constants from the Constants class to verify the arguments:public function __construct($statusCode = NULL,
StreamInterface $body = NULL,
$headers = NULL,
$version = NULL)
{
$this->body = $body;
$this->status['code'] = $statusCode ?? Constants::DEFAULT_STATUS_CODE;
$this->status['reason'] = Constants::STATUS_CODES[$statusCode] ?? '';
$this->httpHeaders = $headers;
$this->version = $this->onlyVersion($version);
if ($statusCode) $this->setStatusCode();
}http_response_code(), available from PHP 5.4 onwards. As this work is on PHP 7, we are safe in the knowledge that this method exists:public function setStatusCode()
{
http_response_code($this->getStatusCode());
}public function getStatusCode()
{
return $this->status['code'];
}with method that sets the status code and returns the current instance. Note the use of STATUS_CODES to confirm its existence:public function withStatus($statusCode, $reasonPhrase = '')
{
if (!isset(Constants::STATUS_CODES[$statusCode])) {
throw new InvalidArgumentException(Constants::ERROR_INVALID_STATUS);
}
$this->status['code'] = $statusCode;
$this->status['reason'] = ($reasonPhrase) ? Constants::STATUS_CODES[$statusCode] : NULL;
$this->setStatusCode();
return $this;
}?? that returns the first non-null item out of three possible choices:public function getReasonPhrase()
{
return $this->status['reason']
?? Constants::STATUS_CODES[$this->status['code']]
?? '';
}
}First of all, be sure to define the classes discussed in the previous two recipes. After that, you can create another simple server program, chap_09_middleware_server_with_response.php, which sets up autoloading and uses the appropriate classes:
<?php
require __DIR__ . '/../Application/Autoload/Loader.php';
Application\Autoload\Loader::init(__DIR__ . '/..');
use Application\MiddleWare\ { Constants, ServerRequest, Response, Stream };You can then define an array with key/value pairs, where the value points to a text file in the current directory to be used as content:
$data = [ 1 => 'churchill.txt', 2 => 'gettysburg.txt', 3 => 'star_trek.txt' ];
Next, inside a try...catch block, you can initialize some variables, initialize the server request, and set up a temporary filename:
try {
$body['text'] = 'Initial State';
$request = new ServerRequest();
$request->initialize();
$tempFile = bin2hex(random_bytes(8)) . '.txt';
$code = 200;After that, check to see whether the method is GET or POST. If it's GET, check to see whether an id parameter was passed. If so, return the body of the matching text file. Otherwise, return a list of text files:
if ($request->getMethod() == Constants::METHOD_GET) {
$id = $request->getQueryParams()['id'] ?? NULL;
$id = (int) $id;
if ($id && $id <= count($data)) {
$body['text'] = file_get_contents(
__DIR__ . '/' . $data[$id]);
} else {
$body['text'] = $data;
}Otherwise, return a response indicating a success code 204 and the size of the request body received:
} elseif ($request->getMethod() == Constants::METHOD_POST) {
$size = $request->getBody()->getSize();
$body['text'] = $size . ' bytes of data received';
if ($size) {
$code = 201;
} else {
$code = 204;
}
}You can then catch any exceptions and report them with a status code of 500:
} catch (Exception $e) {
$code = 500;
$body['text'] = 'ERROR: ' . $e->getMessage();
}The response needs to be wrapped in a stream, so you can write the body out to the temp file and create it as Stream. You can also set the Content-Type header to application/json and run getHeaders(), which outputs the current set of headers. After that, echo the body of the response. For this illustration, you could also dump the Response instance to confirm it was constructed correctly:
try {
file_put_contents($tempFile, json_encode($body));
$body = new Stream($tempFile);
$header[Constants::HEADER_CONTENT_TYPE] = 'application/json';
$response = new Response($code, $body, $header);
$response->getHeaders();
echo $response->getBody()->getContents() . PHP_EOL;
var_dump($response);To wrap things up, catch any errors or exceptions using Throwable, and don't forget to delete the temp file:
} catch (Throwable $e) {
echo $e->getMessage();
} finally {
unlink($tempFile);
}To test, it's just a matter of opening a terminal window, changing to the /path/to/source/for/this/chapter directory, and running the following command:
php -S localhost:8080
From a browser, you can then call this program, adding an id parameter. You might consider opening the developer tools to monitor the response header. Here is an example of the expected output. Note the content type of application/json:
|
Framework |
Website |
Notes |
|---|---|---|
|
Slim |
http://www.slimframework.com/docs/concepts/value-objects.html | |
|
Laravel/Lumen | ||
|
Zend Framework 3/Expressive |
https://framework.zend.com/blog/2016-06-28-zend-framework-3.html or https://zendframework.github.io/zend-expressive/ respectively |
High PSR-7 compliance Also Diactoros, and Straigility |
|
Zend Framework 2 | ||
|
Symfony | ||
|
Joomla | ||
|
Cake PHP |
PSR-7 support is in the roadmap and will use the bridge approach |
|
Middleware |
Website |
Notes |
|---|---|---|
|
Guzzle | ||
|
Relay |
Dispatcher | |
|
Radar |
Action/domain/responder skeleton | |
|
NegotiationMiddleware | ||
|
psr7-csrf-middleware |
https://packagist.org/packages/schnittstabil/psr7-csrf-middleware | |
|
oauth2-server |
http://alexbilbie.com/2016/04/league-oauth2-server-version-5-is-out | |
|
zend-diactoros |
PHP 7 has finally been released. For a long time, the PHP community was talking about it and has still not stopped. The main improvement in PHP 7 is its performance. For a long time, the PHP community faced performance issues in large-scale applications. Even some small applications with high traffic faced performance issues. Server resources were increased, but it did not help much because in the end the bottleneck was PHP itself. Different caching techniques were used, such as APC, and this helped a little. However, the community still needed a version of PHP that could boost the application's performance at its peak. And this is where PHPNG comes in.
PHPNG stands for PHP next generation. It is a completely separate branch and is mainly targeted for performance. Some people thought that PHPNG is JIT (Just In Time) compilation, but in reality, PHPNG is based on a refactored Zend Engine, which was highly optimized for performance. PHPNG is used as a base for PHP 7 development, and according to the official PHP wiki page, the PHPNG branch is now merged into the master branch.
Before starting to build an application, the development environment should be finalized and configured. In this chapter, we will discuss setting up the development environment on different systems, such as Windows and different flavors of Linux.
We will cover the following topics:
All other environments can be skipped, and we can set up the environment that we will use.
There are many tools available that have Apache, PHP, and MySQL bundled for Windows, provide easy installation, and are very easy to use. Most of these tools already provide support for PHP 7 with Apache, such as through XAMPP, WAMPP, and EasyPHP. EasyPHP is the only one that also provides support for NGINX and provides easy steps to changes webserver from NGINX to Apache or Apache to Nginx.
Any of the three tools can be used, but we require more control over every element of our web server tools, so we will also install NGINX, PHP 7, and MySQL individually and then connect them together.
NGINX Windows binaries can be downloaded from http://nginx.org/en/download.html. We recommend using a stable version, though there is no problem with using a mainline version. PHP Windows binaries can be downloaded from http://windows.php.net/download/. Download either 32-bit or 64-bit binaries of the non-thread safe version according to your system.
Perform the following steps:
.ini files, php.ini-development and php.ini-production. Rename either one of them to php.ini. PHP will be using this configuration file.php-cgi –b 127.0.0.1:9000
The –b option starts PHP and binds to the path for external FastCGI servers. The preceding command binds PHP to loop back the 127.0.0.1 IP on port 9000. Now, PHP is accessible on this path.
nginx_folder/conf/nginx.conf file. The first thing to do is to add root and index to the server block, as follows:server {
root html;
index index.php index.html index.htm;
nginx.conf file, uncomment the following location block for PHP:location ~ \.php$ {
fastcgi_pass 127.0.0.1:9000;
fastcgi_param SCRIPT_FILENAME complete_path_webroot_folder$fastcgi_script_name;
include fastcgi_params;
}Note the fastcgi_param option. The highlighted complete_path_webroot_folder path should be the absolute path to the HTML directory inside the nginx folder. Let's say that your NGINX is placed at the D:\nginx path; then, the absolute path to the HTML folder will be D:\nginx\html. However, for the preceding fastcgi_param option, \ should be replaced by /.
nginx –s restart
info.php file in webroot and enter the following code in it:<?php phpinfo(); ?>
On Windows and Mac OS X, we recommend that you use a virtual machine installed with all the tools on a Linux flavor to get the best performance out of the server. It is easy to manage everything in Linux. There are vagrant boxes available that have everything ready to use. Also, a custom virtual machine configuration with all the tools, including NGINX, Apache, PHP 7, Ubuntu, Debian, or CentOS, and other great ones, can be made at https://puphpet.com, which is an easy-to-use GUI. Another nice tool is Laravel Homestead, which is a Vagrant box with great tools.
Ubuntu is derived from Debian, so the process is the same for both Ubuntu and Debian. We will use Debian 8 Jessie and Ubuntu 14.04 Server LTS. The same process can be applied to desktop versions for both.
First, add the repositories for both Debian and Ubuntu.
As of the time we're writing this book, Debian does not provide an official repository for PHP 7. So, for Debian, we will use dotdeb repositories to install NGINX and PHP 7. Perform the following steps:
/etc/apt/sources.list file and add the following two lines at the end of the file:deb http://packages.dotdeb.org jessie all deb-src http://packages.dotdeb.org jessie all
wget https://www.dotdeb.org/dotdeb.gpg sudo apt-key add dotdeb.gpg sudo apt-get update
The first two commands will add dotdeb repo to Debian and the last command will refresh the cache for sources.
As of the time of writing this book, Ubuntu also does not provide PHP 7 in their official repos, so we will use a third-party repo for the PHP 7 installation. Perform the following steps:
sudo add-apt-repository ppa:ondrej/php sudo apt-get update
sudo apt-get install nginx
The following is a list of three useful NGINX commands:
service nginx start: This starts the NGINX serverservice nginx restart: This restarts the NGINX serverservice nginx stop: This stops the NGINX server
sudo apt-get install php7.0 php7.0-fpm php7.0-mysql php7.0-mcrypt php7.0-cli
This will install PHP 7 along with the other modules mentioned. Also, we installed PHP Cli for the command-line purpose. To verify whether PHP 7 is properly installed, issue the following command in the terminal:
php –v
/etc/nginx/sites-available/default to /etc/nginx/sites-available/www.packt.com.conf using the following command in the terminal:cd /etc/nginx/sites-available sudo cp default www.packt.com.conf sudo ln –s /etc/nginx /sites-available/www.packt.com.conf /etc/ nginx/sites-enabled/www.packt.com.conf
First, we copied the default configuration file, created another virtual host configuration file, www.packt.com.conf, and then created a symbolic link file to this virtual host file in the sites-enabled folder.
/etc/nginx/sites-available/www.packt.com.conf file and add or edit the highlighted code, as shown here:server {
server_name your_ip:80;
root /var/www/html;
index index.php index.html index.htm;
location ~ \.php$ {
fastcgi_pass unix:/var/run/php/php7.0-fpm.sock;
fastcgi_index index.php;
include fastcgi_params;
}
}The preceding configuration is not a complete configuration file. We copied only those configuration options that are important and that we may want to change.
In the preceding code, our webroot path is /var/www/html, where our PHP files and other application files will be placed. In the index config option, add index.php so that if no file is provided in the URL, NGINX can look for and parse index.php.
We added a location block for PHP that includes a fastcgi_pass option, which has a path to the PHP7 FPM socket. Here, our PHP runs on a Unix socket, which is faster than that of TCP/IP.
info.php file at the root of the webroot folder and place the following code in it:<?php phpinfo(); ?>
server_ip/info.php, and if you see a PHP configuration page, then congratulations! PHP and NGINX are both properly configured.Now, let's install Percona Server. Percona Server is a fork of MySQL and is optimized for high performance. We will read more about Percona Server in Chapter 3, Increasing PHP 7 Application Performance. Now, let's install Percona Server on Debian/Ubuntu via the following steps:
sudo wget https://repo.percona.com/apt/percona-release_0.1-3.$(lsb_release -sc)_all.deb sudo dpkg -i percona-release_0.1-3.$(lsb_release -sc)_all.deb
The first command will download the repo packages from the Percona repo. The second command will install the downloaded packages and will create a percona-release.list file at /etc/apt/sources.list.d/percona-release.list.
sudo apt-get update
sudo apt-get install percona-server-5.5
The installation process will start. It will take a while to download it.
During the installation, the password for the root user will be asked, as shown in the following screenshot:
It is optional but recommended to enter the password. After entering the password, re-enter the password on the next screen. The installation process will continue.
mysql –-version
It will display the version of Percona Server. As mentioned before, Percona Server is a fork of MySQL, so all the same MySQL commands, queries, and settings can be used.
CentOS is a fork of Red Hat Enterprise Linux (RHEL) and stands for Community Enterprise Operating System. It is a widely used OS on servers specially used by hosting companies to provide shared hosting.
Let's start by configuring CentOS for our development environment. Perform the following steps:
sudo rpm -Uvh http://nginx.org/packages/centos/7/noarch/RPMS/nginx-release-centos-7-0.el7.ngx.noarch.rpm
This will add the NGINX repo to CentOS.
sudo yum --showduplicates list Nginx
This will show you the latest stable releases. In our case, it displays NGINX 1.8.0 and NGINX 1.8.1.
sudo yum install Nginx
This will install NGINX.
systemctl enable Nginx.service
systemctl start Nginx.service
To check which version of NGINX is installed, issue the following command in the terminal:
Nginx –v
On our server, the NGINX version installed is 1.8.1.
Now, our web server is ready.
rpm -Uvh https://dl.fedoraproject.org/pub/epel/epel-release-latest-7.noarch.rpm rpm -Uvh https://mirror.webtatic.com/yum/el7/webtatic-release.rpm
sudo yum –showduplicates list php70w
In our case, PHP 7.0.3 is available to install.
sudo yum install php70w php70w-common php70w-cli php70w-fpm php70w-mysql php70w-opcache php70w-mcrypt
sudo yum search php70w-
We will see a long list of all the available modules for PHP 7.
sudo yum install php70w-gd
This will install the gd module. Multiple modules can be installed using the same command and separating each module by a space, as we did in the initial installation of PHP.
Now, to check which version of PHP is installed, issue the following command:
php –v
In our case, PHP 7.0.3 is installed.
sudo systemctl start php-fpm sudo systemctl restart php-fpm sudo systemctl stop php-fpm
/etc/Nginx/conf.d/default.conf using either vi, nano, or any other editor of your choice. Now, make sure that two options are set in the server block, as follows:server {
listen 80;
server_name localhost;
root /usr/share/nginx/html;
index index.php index.html index.htm;
The root option indicates the web document root where our website source code files will be placed. Index indicates the default files that will be loaded along with extensions. If any of these files are found, they will be executed by default, regardless of any file mentioned in the URLs.
location ~ \.php$ {
try_files $uri =404;
fastcgi_split_path_info ^(.+\.php)(/.+)$;
fastcgi_pass 127.0.0.1:9000;
fastcgi_index index.php;
fastcgi_param SCRIPT_FILENAME$document_root$fastcgi_script_name;
include fastcgi_params;
}The preceding block is the most important configuration as it enables NGINX to communicate with PHP. The line fastcgi_pass 127.0.0.1:9000 tells NGINX that PHP FPM can be accessed on the 127.0.0.1 loopback IP on port 9000. The rest of the details are the same as those we discussed for Debian and Ubuntu.
info.php with the following contents:<?php phpinfo(); ?>
After saving the file, type http://server_ip/info.php or http://hostname/info.php, and we will get a page with complete information about PHP. If you see this page, congratulations! PHP runs alongside NGINX.
sudo yum install http://www.percona.com/downloads/percona-release/redhat/0.1-3/percona-release-0.1-3.noarch.rpm
After the repo installation is completed, a message will be displayed stating the completion of the installation.
sudo yum search percona
sudo yum install Percona-Server-server-55
The installation process will start. The rest of the process is the same as for Debian/Ubuntu.
Vagrant is a tool used by developers for development environments. Vagrant provides an easy command-line interface to set up virtual machines with all the tools required. Vagrant uses boxes called Vagrant Boxes that can have a Linux operating system and other tools according to this box. Vagrant supports both Oracle VM VirtualBox and VMware. For the purpose of this book, we will use VirtualBox, which we assume is installed on your machine as well.
Vagrant has several boxes for PHP 7, including Laravel Homestead and Rasmus PHP7dev. So, let's get started by configuring the Rasmus PHP7dev box on Windows and Mac OS X.
We assume that both VirutalBox and Vagrant are installed on our machine. VirtualBox can be downloaded from https://www.virtualbox.org/wiki/Downloads, and Vagrant can be downloaded from https://www.vagrantup.com/downloads.html for different platforms. Details about Rasmus PHP7dev VagrantBox can be found at https://github.com/rlerdorf/php7dev.
Perform the following steps:
php7 directory in our D drive. Then, open the command line in this specific folder directly by holding the Shift key, right-clicking, and then selecting Open command window here.
vagrant box add rasmus/php7dev
It will start downloading the Vagrant box, as shown in the following screenshot:
vagrant init rasmus/php7dev
This will start adding the box to VirtualBox and configuring it. When the process is completed, it will display a message, as in the following screenshot:
vagrant up
This process will take a little bit of time. When it is completed, your box is ready and running and can be used.
php7dev directory and issue the following command:
vagrant ssh
It will connect us with the virtual machines through SSH.
In Windows, if SSH in not installed or not configured in the PATH variable, PuTTY can be used. It can be downloaded from http://www.chiark.greenend.org.uk/~sgtatham/putty/download.html. For PuTTY, the host will be 127.0.0.1, and the port will be 2222. Vagrant is both the username and password for SSH.
sudo apt-get update sudo apt-get upgrade
This will update the core system, NGINX, MySQL, PHP 7, and other installed tools if new versions are available.
sudo ifconfig
This will display some details. Find out the IPv4 details there and take the IP of the box.
In this chapter, we configured different environments for the purpose of development. We installed NGINX and PHP 7 on the windows machine. We also configured Debian/Ubuntu and installed NGINX, PHP, and Percona Server 5.5. Then, we configured CentOS and installed NGINX, PHP, and Percona Server 5.5. Lastly, we discussed how to configure Vagrant Box on a Windows machine.
In the next chapter, we will study new features in PHP 7, such as type hints, namespace groupings and declarations, the Spaceship operator, and other features.
PHP 7 has introduced new features that can help programmers write high-performing and effective code. Also, some old-fashioned features are completely removed, and PHP 7 will throw an error if used. Most of the fatal errors are now exceptions, so PHP won't show an ugly fatal error message any more; instead, it will go through an exception with the available details.
In this chapter, we will cover the following topics:
PHP 7 introduced a few new OOP features that will enable developers to write clean and effective code. In this section, we will discuss these features.
Prior to PHP 7, there was no need to declare the data type of the arguments passed to a function or class method. Also, there was no need to mention the return data type. Any data type can be passed to and returned from a function or method. This is one of the huge problems in PHP, in which it is not always clear which data types should be passed or received from a function or method. To fix this problem, PHP 7 introduced type hints. As of now, two type hints are introduced: scalar and return type hints. These are discussed in the following sections.
Type hints is a feature in both OOP and procedural PHP because it can be used for both procedural functions and object methods.
PHP 7 made it possible to use scalar type hints for integers, floats, strings, and Booleans for both functions and methods. Let's have a look at the following example:
class Person
{
public function age(int $age)
{
return $age;
}
public function name(string $name)
{
return $name;
}
public function isAlive(bool $alive)
{
return $alive;
}
}
$person = new Person();
echo $person->name('Altaf Hussain');
echo $person->age(30);
echo $person->isAlive(TRUE);In the preceding code, we created a Person class. We have three methods, and each method receives different arguments whose data types are defined with them, as is highlighted in the preceding code. If you run the preceding code, it will work fine as we will pass the desired data types for each method.
Age can be a float, such as 30.5 years; so, if we pass a float number to the age method, it will still work, as follows:
echo $person->age(30.5);
Why is that? It is because, by default, scalar type hints are nonrestrictive. This means that we can pass float numbers to a method that expects an integer number.
To make it more restrictive, the following single-line code can be placed at the top of the file:
declare(strict_types = 1);
Now, if we pass a float number to the age function, we will get an Uncaught Type Error, which is a fatal error that tells us that Person::age must be of the int type given the float. Similar errors will be generated if we pass a string to a method that is not of the string type. Consider the following example:
echo $person->isAlive('true');The preceding code will generate the fatal error as the string is passed to it.
Another important feature of PHP 7 is the ability to define the return data type for a function or method. It behaves the same way scalar type hints behave. Let's modify our Person class a little to understand return type hints, as follows:
class Person
{
public function age(float $age) : string
{
return 'Age is '.$age;
}
public function name(string $name) : string
{
return $name;
}
public function isAlive(bool $alive) : string
{
return ($alive) ? 'Yes' : 'No';
}
}The changes in the class are highlighted. The return type is defined using the: data-type syntax. It does not matter if the return type is the same as the scalar type. These can be different as long as they match their respective data types.
Now, let's try an example with the object return type. Consider the previous Person class and add a getAddress method to it. Also, we will add a new class, Address, to the same file, as shown in the following code:
class Address { public function getAddress() { return ['street' => 'Street 1', 'country' => 'Pak']; } } class Person { public function age(float $age) : string { return 'Age is '.$age; } public function name(string $name) : string { return $name; } public function isAlive(bool $alive) : string { return ($alive) ? 'Yes' : 'No'; } public function getAddress() : Address { return new Address(); } }
The additional code added to the Person class and the new Address class is highlighted. Now, if we call the getAddress method of the Person class, it will work perfectly and won't throw an error. However, let's suppose that we change the return statement, as follows:
public function getAddress() : Address
{
return ['street' => 'Street 1', 'country' => 'Pak'];
}In this case, the preceding method will throw an uncaught exception similar to the following:
Fatal error: Uncaught TypeError: Return value of Person::getAddress() must be an instance of Address, array returned
This is because we return an array instead of an Address object. Now, the question is: why use type hints? The big advantage of using type hints is that it will always avoid accidentally passing or returning wrong and unexpected data to methods or functions.
As can be seen in the preceding examples, this makes the code clear, and by looking at the declarations of the methods, one can exactly know which data types should be passed to each of the methods and what kind of data is returned by looking into the code of each method or comment, if any.
In a very large codebase, classes are divided into namespaces, which makes them easy to manage and work with. However, if there are too many classes in a namespace and we need to use 10 of them, then we have to type the complete use statement for all these classes.
For example, we have a Publishers/Packt namespace and the classes Book, Ebook, Video, and Presentation. Also, we have a functions.php file, which has our normal functions and is in the same Publishers/Packt namespace. Another file, constants.php, has the constant values required for the application and is in the same namespace. The code for each class and the functions.php and constants.php files is as follows:
//book.php
namespace Publishers\Packt;
class Book
{
public function get() : string
{
return get_class();
}
}Now, the code for the Ebook class is as follows:
//ebook.php
namespace Publishers\Packt;
class Ebook
{
public function get() : string
{
return get_class();
}
}The code for the Video class is as follows:
//presentation.php
namespace Publishers\Packt;
class Video
{
public function get() : string
{
return get_class();
}
}Similarly, the code for the presentation class is as follows:
//presentation.php
namespace Publishers\Packt;
class Presentation
{
public function get() : string
{
return get_class();
}
}All the four classes have the same methods, which return the classes' names using the PHP built-in get_class() function.
Now, add the following two functions to the functions.php file:
//functions.php
namespace Publishers\Packt;
function getBook() : string
{
return 'PHP 7';
}
function saveBook(string $book) : string
{
return $book.' is saved';
}Now, let's add the following code to the constants.php file:
//constants.php namespace Publishers/Packt; const COUNT = 10; const KEY = '123DGHtiop09847'; const URL = 'https://www.Packtpub.com/';
The code in both functions.php and constants.php is self-explanatory. Note that each file has a namespace Publishers/Packt line at the top, which makes these classes, functions, and constants belong to this namespace.
Now, there are three ways to use the classes, functions, and constants. Let's consider each one.
Take a look at the following code:
//Instantiate objects for each class in namespace
$book = new Publishers\Packt\Book();
$ebook = new Publishers\Packt\Ebook();
$video = new Publishers\Packt\Video();
$presentation = new Publishers\Packt\Presentation();
//Use functions in namespace
echo Publishers/Packt/getBook();
echo Publishers/Packt/saveBook('PHP 7 High Performance');
//Use constants
echo Publishers\Packt\COUNT;
echo Publishers\Packt\KEY;In the preceding code, we used namespace names directly while creating objects or using functions and constants. The code looks fine, but it is cluttered. Namespace is everywhere, and if we have lots of namespaces, it will look very ugly, and the readability will be affected.
Now, let's rewrite the preceding code to make it more readable, as follows:
use Publishers\Packt\Book;
use Publishers\Packt\Ebook;
use Publishers\Packt\Video;
use Publishers\Packt\Presentation;
use function Publishers\Packt\getBook;
use function Publishers\Packt\saveBook;
use const Publishers\Packt\COUNT;
use const Publishers\Packt\KEY;
$book = new Book();
$ebook = new Ebook(();
$video = new Video();
$pres = new Presentation();
echo getBook();
echo saveBook('PHP 7 High Performance');
echo COUNT;
echo KEY;In the preceding code, at the top, we used PHP statements for specific classes, functions, and constants in a namespace. However, we still wrote duplicate lines of code for each class, function, and/or constant. This may lead to us have lots of use statements at the top of the file, and the overall verbosity would not be good.
To fix this problem, PHP 7 introduced group use declaration. There are three types of group use declarations:
Consider that we have different types of features in a namespace, as we have classes, functions, and contacts in a namespace. In non mixed group use declarations, we declare them separately using a use statement. To better understand it, take a look at the following code:
use Publishers\Packt\{ Book, Ebook, Video, Presentation };
use function Publishers\Packt\{ getBook, saveBook };
use const Publishers\Packt\{ COUNT, KEY };We have three types of features in a namespace: class, functions, and constants. So, we have used separate group use declaration statements to use them. The code is now looking more cleaner, organized, and readable and doesn't require too much duplicate typing.
In this declaration, we combine all types into a single use statement. Take a look at the following code:
use Publishers\Packt\{
Book,
Ebook,
Video,
Presentation,
function getBook,
function saveBook,
const COUNT,
const KEY
};To understand the compound namespace declaration, we will consider the following criteria.
Let's say we have a Book class in the Publishers\Packt\Paper namespace. Also, we have an Ebook class in the Publishers\Packt\Electronic namespace. The Video and Presentation classes are in the Publishers\Packt\Media namespace. So, to use these classes, we will use the code, as follows:
use Publishers\Packt\Paper\Book;
use Publishers\Packt\Electronic\Ebook;
use Publishers\Packt\Media\{Video,Presentation};In the compound namespace declaration, we can use the preceding namespaces as follows:
use Publishers\Packt\{
Paper\Book,
Electronic\Ebook,
Media\Video,
Media\Presentation
};It is more elegant and clear, and it doesn't require extra typing if the namespace names are long.
An anonymous class is a class that is declared and instantiated at the same time. It does not have a name and can have the full features of a normal class. These classes are useful when a single one-time small task is required to be performed and there is no need to write a full-blown class for it.
The syntax of this class is the same as that of the named classes, but only the name of the class is missing, as shown in the following syntax:
new class(argument) { definition };Let's look at a basic and very simple example of an anonymous class, as follows:
$name = new class() {
public function __construct()
{
echo 'Altaf Hussain';
}
};The preceding code will just display the output as Altaf Hussain.
Arguments can also be passed to the anonymous class constructor, as shown in the following code:
$name = new class('Altaf Hussain') {
public function __construct(string $name)
{
echo $name;
}
};This will give us the same output as the first example.
Anonymous classes can extend other classes and have the same parent-child classes functioning as normal named classes. Let's have another example; take a look at the following:
class Packt
{
protected $number;
public function __construct()
{
echo 'I am parent constructor';
}
public function getNumber() : float
{
return $this->number;
}
}
$number = new class(5) extends packt
{
public function __construct(float $number)
{
parent::__construct();
$this->number = $number;
}
};
echo $number->getNumber();The preceding code will display I am parent constructor and 5. As can be seen, we extended the Packt class the way we extend named classes. Also, we can access the public and protected properties and methods within the anonymous class and public properties and methods using anonymous class objects.
Anonymous classes can implement interfaces too, the same as named classes. Let's create an interface first. Run the following:
interface Publishers
{
public function __construct(string $name, string $address);
public function getName();
public function getAddress();
}Now, let's modify our Packt class as follows. We added the highlighted code:
class Packt
{
protected $number;
protected $name;
protected $address;
public function …
}The rest of the code is same as the first Packt class. Now, let's create our anonymous class, which will implement the Publishers interface created in the previous code and extend the new Packt class, as follows:
$info = new class('Altaf Hussain', 'Islamabad, Pakistan')extends packt implements Publishers
{
public function __construct(string $name, string $address)
{
$this->name = $name;
$this->address = $address;
}
public function getName() : string
{
return $this->name;
}
public function getAddress() : string
{
return $this->address;
}
}
echo $info->getName(). ' '.$info->getAddress();The preceding code is self-explanatory and will output Altaf Hussain along with the address.
It is possible to use anonymous classes within another class, as shown here:
class Math
{
public $first_number = 10;
public $second_number = 20;
public function add() : float
{
return $this->first_number + $this->second_number;
}
public function multiply_sum()
{
return new class() extends Math
{
public function multiply(float $third_number) : float
{
return $this->add() * $third_number;
}
};
}
}
$math = new Math();
echo $math->multiply_sum()->multiply(2);The preceding code will return 60. How does this happen? The Math class has a multiply_sum method that returns the object of an anonymous class. This anonymous class is extended from the Math class and has a multiply method. So, our echo statement can be divided into two parts: the first is $math->multiply_sum(), which returns the object of the anonymous class, and the second is ->multiply(2), in which we chained this object to call the anonymous class's multiply method along with an argument of the value 2.
In the preceding case, the Math class can be called the outer class, and the anonymous class can be called the inner class. However, remember that it is not required for the inner class to extend the outer class. In the preceding example, we extended it just to ensure that the inner classes could have access to the outer classes' properties and methods by extending the outer classes.
Back in PHP 4, the constructor of a class has the same name method as that of the class. It is still used and is valid until PHP's 5.6 version. However, now, in PHP 7, it is deprecated. Let's have an example, as shown here:
class Packt
{
public function packt()
{
echo 'I am an old style constructor';
}
}
$packt = new Packt();The preceding code will display the output I am an old style constructor with a deprecated message, as follows:
Deprecated: Methods with the same name as their class will not be constructors in a future version of PHP; Packt has a deprecated constructor in…
However, the old style constructor is still called. Now, let's add the PHP __construct method to our class, as follows:
class Packt
{
public function __construct()
{
echo 'I am default constructor';
}
public function packt()
{
echo 'I am just a normal class method';
}
}
$packt = new Packt();
$packt->packt();In the preceding code, when we instantiated the object of the class, the normal __construct constructor was called. The packt()method isn't considered a normal class method.
PHP 7 introduced a base interface that can be base for every object that can use the throw statement. In PHP, exceptions and errors can occur. Previously, exceptions could be handled, but it was not possible to handle errors, and thus, any fatal error caused the complete application or a part of the application to halt. To make errors (the most fatal errors) catchable as well, PHP 7 introduced the throwable interface, which is implemented by both the exception and error.
We all know exceptions, so in this topic, we will only discuss errors, which can handle the ugly, fatal errors.
Almost all fatal errors can now throw an error instance, and similarly to exceptions, error instances can be caught using the try/catch block. Let's have a simple example:
function iHaveError($object)
{
return $object->iDontExist();
{
//Call the function
iHaveError(null);
echo "I am still running";If the preceding code is executed, a fatal error will be displayed, the application will be halted, and the echo statement won't be executed in the end.
Now, let's place the function call in the try/catch block, as follows:
try
{
iHaveError(null);
} catch(Error $e)
{
//Either display the error message or log the error message
echo $e->getMessage();
}
echo 'I am still running';Now, if the preceding code is executed, the catch body will be executed, and after this, the rest of the application will continue running. In the preceding case, the echo statement will be executed.
In most cases, the error instance will be thrown for the most fatal errors, but for some errors, a subinstance of error will be thrown, such as TypeError, DivisionByZeroError, ParseError, and so on.
Now, let's take a look at a DivisionByZeroError exception in the following example:
try
{
$a = 20;
$division = $a / 20;
} catch(DivisionByZeroError $e)
{
echo $e->getMessage();
}Before PHP 7, the preceding code would have issued a warning about the division by zero. However, now in PHP 7, it will throw a DivisionByZeroError, which can be handled.
PHP 7 introduced two interested operators. These operators can help write less and cleaner code, so the final code will be more readable as compared to the traditional operators in use. Let's have a look at them.
The Spaceship or Combined Comparison operator is useful to compare values (strings, integers, floats, and so on), arrays, and objects. This operator is just a wrapper and performs the same tasks as the three comparison operators ==, <, and >. This operator can also be used to write clean and less code for callback functions for usort, uasort, and uksort. This operator works as follows:
Let's take a look at a few examples by comparing integers, strings, objects, and arrays and note the result:
$int1 = 1; $int2 = 2; $int3 = 1; echo $int1 <=> $int3; //Returns 0 echo '<br>'; echo $int1 <=> $int2; //Returns -1 echo '<br>'; echo $int2 <=> $int3; //Returns 1
Run the preceding code, and you will have an output similar to the following:
0 -1 1
In the first comparison, in which we compare $int1 and $int3, both are equal, so it will return 0. In the second comparison, in which $int1 and $int2 are compared, it will return -1 because the right operand ($int2) in greater than the left operand ($int1). Finally, the third comparison will return 1 as the left operand ($int2) is greater than the right operand ($int3).
The preceding is a simple example in which we compared integers. We can check strings, objects, and arrays in the same way, and they are compared the same standard PHP way.
Some examples for the <=> operator can be found at https://wiki.php.net/rfc/combined-comparison-operator. This is an RFC publication that has more useful details about its usage.
This operator can be more useful in sorting arrays. Take a look at the following code:
Function normal_sort($a, $b) : int
{
if( $a == $b )
return 0;
if( $a < $b )
return -1;
return 1;
}
function space_sort($a, $b) : int
{
return $a <=> $b;
}
$normalArray = [1,34,56,67,98,45];
//Sort the array in asc
usort($normalArray, 'normal_sort');
foreach($normalArray as $k => $v)
{
echo $k.' => '.$v.'<br>';
}
$spaceArray = [1,34,56,67,98,45];
//Sort it by spaceship operator
usort($spaceArray, 'space_sort');
foreach($spaceArray as $key => $value)
{
echo $key.' => '.$value.'<br>';
}In the preceding code, we used two functions to sort the two different arrays with the same values. The $normalArray array is sorted by the normal_sort function, in which the normal_sort function uses if statements to compare the values. The second array $spaceArray has the same values as $normalArray, but this array is sorted by the space_sort function, which uses the Spaceship operator. The final result for both array sorts is the same, but the code in the callback functions is different. The normal_sort function has if statements and multiple lines of code, while the space_sort function has a single line of code—that's it! The space_sort function code is clearer and does not require multiple if statements.
We all know ternary operators, and we use them most of the time. Ternary operators are just a single-line replacement for if-else statements. For example, consider the following code:
$post = ($_POST['title']) ? $_POST['title'] : NULL;
If $_POST['title'] exists, then the $post variable will be assigned its value; otherwise, NULL will be assigned. However, if $_POST or $_POST['title'] does not exist or is null, then PHP will issue a notice of Undefined index. To fix this notice, we need to use the isset function, as follows:
$post = isset($_POST['title']) ? $_POST['title'] : NULL;
Mostly, it will seem fine, but it becomes very nasty when we have to check for values in multiple places, especially when using PHP as a templating language.
In PHP 7, the coalescence operator is introduced, which is simple and returns the value of its first operand (left operand) if it exists and is not null. Otherwise, it returns its second operand (right operand). Consider the following example:
$post = $_POST['title'] ?? NULL;
This example is exactly similar to the preceding code. The coalesce operator checks whether $_POST['title'] exists. If it does, the operator returns it; otherwise, it returns NULL.
Another great feature of this operator is that it can be chained. Here's an example:
$title = $_POST['title'] ?? $_GET['title'] ?? 'No POST or GET';
According to the definition, it will first check whether the first operand exists and return it; if it does not exist, it will return the second operand. Now, if there is another coalesce operator used on the second operand, the same rule will be applied, and the value on the left operand will be returned if it exists. Otherwise, the value of the right operand will be returned.
So, the preceding code is the same as the following:
If(isset($_POST['title'])) $title = $_POST['title']; elseif(isset($_GET['title'])) $title = $_GET['title']; else $title = 'No POST or GET';
As can be noted in the preceding examples, the coalesce operator can help write clean, concise, and less code.
Most of the time, we may face a situation in which the method, variable, or classes names are stored in other variables. Take a look at the following example:
$objects['class']->name;
In the preceding code, first, $objects['class'] will be interpreted, and after this, the property name will be interpreted. As shown in the preceding example, variables are normally evaluated from left to right.
Now, consider the following scenario:
$first = ['name' => 'second']; $second = 'Howdy'; echo $$first['name'];
In PHP 5.x, this code would be executed, and the output would be Howdy. However, this is not inconsistent with the left-to-right expression evaluation. This is because $$first should be evaluated first and then the index name, but in the preceding case, it is evaluated as ${$first['name']}. It is clear that the variable syntax is not consistent and may create confusion. To avoid this inconsistency, PHP 7 introduced a new syntax called uniform variable syntax. Without using this syntax, the preceding example will bring it into notice, and the desired results won't be produced. To make it work in PHP 7, the curly brackets should be added, as follows:
echo ${$first['name']};Now, let's have another example, as follows:
class Packt
{
public $title = 'PHP 7';
public $publisher = 'Packt Publisher';
public function getTitle() : string
{
return $this->title;
}
public function getPublisher() : string
{
return $this->publisher;
}
}
$mthods = ['title' => 'getTitle', 'publisher' => 'getPublisher'];
$object = new Packt();
echo 'Book '.$object->$methods['title']().' is published by '.$object->$methods['publisher']();If the preceding code is executed in PHP 5.x, it will work fine and output our desired result. However, if we execute this code in PHP 7, it will give a fatal error. The error will be at the last line of the code, which is highlighted. PHP 7 will first try to evaluate $object->$method. After this, it will try to evaluate ['title']; and so on; this is not correct.
To make it work in PHP 7, the curly brackets should be added, as in the following code:
echo 'Book '.$object->{$methods['title']}().' is published by '.$object->{$methods['publisher']}();
After making the changes mentioned before, we will get our desired output.
PHP 7 also introduced some other new features with small changes, such as new syntax for array constants, multiple default cases in switch statement, options array in session_start, and so on. Let's have a look at these too.
Starting with PHP 5.6, constant arrays can be initialized using the const keyword, as follows:
const STORES = ['en', 'fr', 'ar'];
Now, starting with PHP 7, constant arrays can be initialized using the define function, as follows:
define('STORES', ['en', 'fr', 'ar']);Prior to PHP 7, multiple default cases in a switch statement were allowed. Check out the following example:
switch(true)
{
default:
echo 'I am first one';
break;
default:
echo 'I am second one';
}Before PHP 7, the preceding code was allowed, but in PHP 7, this will result in a fatal error similar to the following:
Fatal error: Switch statements may only contain one default clause in…
Before PHP 7, whenever we needed to start a session, we just used the session_start() function. This function did not take any arguments, and all the settings defined in php.ini were used. Now, starting with PHP 7, an optional array for options can be passed, which will override the session settings in the php.ini file.
A simple example is as follows:
session_start([ 'cookie_lifetime' => 3600, 'read_and_close' => true ]);
As can be seen in the preceding example, it is possible to override the php.ini settings for a session easily.
It is common practice to serialize and unserialize objects. However, the PHP unserialize() function was not secure because it did not have any filtering options and could unserialize objects of any type. PHP 7 introduced filtering in this function. The default filtering option is to unserialize objects of all classes or types. Its basic working is as follows:
$result = unserialize($object, ['allowed_classes' => ['Packt', 'Books', 'Ebooks']]);
In this chapter, we discussed new OOP features, such as type hints, anonymous classes, the throwable interface, group use declaration for namespaces, and two important new operators, the Spaceship or Combined Comparison operator and the null Coalesce operator. Also, we discussed the uniform variable syntax and a few other new features, such as new syntax for the contact array definition, options array for the session_start() function, and removal of multiple default cases in the switch statement.
In the next chapter, we will discuss how to improve the application's performance. We will discuss Apache and NGINX and different settings for them to improve performance.
We will discuss different settings for PHP to improve its performance. The Google page speed module, CSS/JavaScript combining and compression, CDN, and so on will also be discussed.
PHP 7 has been completely rewritten from the ground up based on the PHP Next Generation (phpng or PHPNG) targeting performance. However, there are always more ways to improve the performance of the application, including writing high performance code, using best practices, web server optimizations, caching, and so on. In this chapter, we will discuss such optimizations listed as follows:
There are too many HTTP server software available, and each one has its pros and cons. The two most popular HTTP servers used are NGINX and Apache. Let's have a look at both of them and note which one is better for our needs.
Apache is the most widely used HTTP server and is loved by most administrators. It is selected by administrators because of its flexibility, widespread support, power, and modules for most of the interpreted languages, such as PHP. As Apache can process a vast number of interpreted languages, it does not need to communicate with other software to fulfill the request. Apache can process requests in prefork (the processes are spawned across thread), worker (threads are spawned across processes), and event-driven (same as worker process, but it sets dedicated threads for keep-alive connections and separate threads for active connections); thus, it provides much more flexibility.
As discussed earlier, each request will be processed by a single thread or process, so Apache consumes too many resources. When it comes to high-traffic applications, Apache may slow down the application as it does not provide good support for concurrent processing.
NGINX was built to solve the concurrency problems with high-traffic applications. NGINX provides asynchronous, event-driven, and nonblocking request handling. As requests are processed asynchronously, NGINX does not wait for a request to be completed to block the resource.
NGINX creates worker processes, and each individual worker process can handle thousands of connections. So, a few processes can handle high traffic at once.
NGINX does not provide any built-in support for any interpreted languages. It relies on external resources for this. This is also good because the processing is made outside NGINX, and NGINX only processes the connections and requests. Mostly, NGINX is considered faster than Apache. In some situations, such as with static content (serving images, .css and .js files, and so on), this can be true, but in current high performance servers, Apache is not the problem; PHP is the bottleneck.
As mentioned before, we will use NGINX for this book.
Each HTTP server provides certain features that can be used to optimize request handling and serving content. In this section, we will share some techniques for both Apache and NGINX that can be used to optimize the web server and provide the best performance and scalability. Mostly, when these optimizations are applied, a restart for Apache or NGINX is required.
Mostly, static files, such as images, .css, .js, and fonts don't change frequently. So, it is best practice to cache these static files on the end user machine. For this purpose, the web server adds special headers to the response, which tells the user browser to cache the static content for a certain amount of time. The following is the configuration code for both Apache and NGINX.
Let's have a look at the Apache configuration to cache the following static content:
<FilesMatch "\.(ico|jpg|jpeg|png|gif|css|js|woff)$"> Header set Cache-Control "max-age=604800, public" Apache Configuration </FileMatch> Should be </FilesMatch> </FileMatch>
In the preceding code that has to be placed in a .htaccess file, we used the Apache FilesMatch directive to match the extensions of files. If a desired extension file is requested, Apache sets the headers to cache control for seven days. The browser then caches these static files for seven days.
The following configuration can be placed in /etc/nginx/sites-available/your-virtual-host-conf-file:
Location ~* .(ico|jpg|jpeg|png|gif|css|js|woff)$ {
Expires 7d;
}In the preceding code, we used the NGINX Location block with a case-insensitive modifier (~*) to set Expires for seven days. This code will set the cache-control header for seven days for all the defined file types.
After making these settings, the response headers for a request will be as follows:
In the preceding figure, it can be clearly seen that the .js file is loaded from cache. Its cache-control header is set to seven days or 604,800 seconds. The expiry date can also be noted clearly in the expires headers. After the expiry date, the browser will load this .js file from the server and cache it again for the duration defined in the cache-control headers.
In HTTP persistent connection, or HTTP keep-alive, a single TCP/IP connection is used for multiple requests or responses. It has a huge performance improvement over the normal connection as it uses only a single connection instead of opening and closing connections for each and every single request or response. Some of the benefits of the HTTP keep-alive are as follows:
Besides these benefits, there are some side effects of keep-alive. Every server has a concurrency limit, and when this concurrency limit is reached or consumed, there can be a huge degradation in the application's performance. To overcome this issue, a time-out is defined for each connection, after which the HTTP keep-alive connection is closed automatically. Now, let's enable HTTP keep-alive on both Apache and NGINX.
In Apache, keep-alive can be enabled in two ways. You can enable it either in the .htaccess file or in the Apache config file.
To enable it in the .htaccess file, place the following configuration in the .htaccess file:
<ifModule mod_headers.c> Header set Connection keep-alive </ifModule>
In the preceding configuration, we set the Connection header to keep-alive in the .htaccess file. As the .htaccess configuration overrides the configuration in the config files, this will override whatever configuration is made for keep-alive in the Apache config file.
To enable the keep-alive connection in the Apache config file, we have to modify three configuration options. Search for the following configuration and set the values to the ones in the example:
KeepAlive On MaxKeepAliveRequests 100 KeepAliveTimeout 100
In the preceding configuration, we turned on the keep-alive configuration by setting the value of KeepAlive to On.
The next is MaxKeepAliveRequests, which defines the maximum number of keep-alive connections to the web server at the time. A value of 100 is the default in Apache, and it can be changed according to the requirements. For high performance, this value should be kept high. If set to 0, it will allow unlimited keep-alive connections, which is not recommended.
The last configuration is KeepAliveTimeout, which is set to 100 seconds. This defines the number of seconds to wait for the next request from the same client on the same TCP connection. If no request is made, then the connection is closed.
HTTP keep-alive is part of the http_core module and is enabled by default. In the NGINX configuration file, we can edit a few options, such as timeout. Open the nginx config file, edit the following configuration options, and set its values to the following:
keepalive_requests 100 keepalive_timeout 100
The keepalive_requests config defines the maximum number of requests a single client can make on a single HTTP keep-alive connection.
The keepalive_timeout config is the number of seconds that the server needs to wait for the next request until it closes the keep-alive connection.
Content compression provides a way to reduce the contents' size delivered by the HTTP server. Both Apache and NGINX provide support for GZIP compression, and similarly, most modern browsers support GZIP. When the GZIP compression is enabled, the HTTP server sends compressed HTML, CSS, JavaScript, and images that are small in size. This way, the contents are loaded fast.
A web server only compresses content via GZIP when the browser sends information about itself that it supports GZIP compression. Usually, a browser sends such information in Request headers.
The following are codes for both Apache and NGINX to enable GZIP compression.
The following code can be placed in the .htaccess file:
<IfModule mod_deflate.c>
SetOutputFilter DEFLATE
#Add filters to different content types
AddOutputFilterByType DEFLATE text/html text/plain text/xml text/css text/javascript application/javascript
#Don't compress images
SetEnvIfNoCase Request_URI \.(?:gif|jpe?g|png)$ no-gzip dont-
vary
</IfModule>In the preceding code, we used the Apache deflate module to enable compression. We used filter by type to compress only certain types of files, such as .html, plain text, .xml, .css, and .js. Also, before ending the module, we set a case to not compress the images because compressing images can cause image quality degradation.
As mentioned previously, you have to place the following code in your virtual host conf file for NGINX:
gzip on; gzip_vary on; gzip_types text/plain text/xml text/css text/javascript application/x-javascript; gzip_com_level 4;
In the preceding code, GZIP compression is activated by the gzip on; line. The gzip_vary on; line is used to enable varying headers. The gzip_types line is used to define the types of files to be compressed. Any file types can be added depending on the requirements. The gzip_com_level 4; line is used to set the compression level, but be careful with this value; you don't want to set it too high. Its range is from 1 to 9, so keep it in the middle.
Now, let's check whether the compression really works. In the following screenshot, the request is sent to a server that does not have GZIP compression enabled. The size of the final HTML page downloaded or transferred is 59 KB:
After enabling GZIP compression on the web server, the size of the transferred HTML page is reduced up to 9.95 KB, as shown in the following screenshot:
Also, it can be noted that the time to load the contents is also reduced. So, the smaller the size of your contents, the faster the page will load.
Apache uses the mod_php module for PHP. This way, the PHP interpreter is integrated to Apache, and all processing is done by this Apache module, which eats up more server hardware resources. It is possible to use PHP-FPM with Apache, which uses the FastCGI protocol and runs in a separate process. This enables Apache to worry about HTTP request handlings, and the PHP processing is made by the PHP-FPM.
NGINX, on the other hand, does not provide any built-in support or any support by module for PHP processing. So, with NGINX, PHP is always used in a separate service.
Now, let's take a look at what happens when PHP runs as a separate service: the web server does not know how to process the dynamic content request and forwards the request to another external service, which reduces the processing load on the web server.
Both Apache and NGINX come with lots of modules built into them. In most cases, you won't need some of these modules. It is good practice to disable these modules.
It is good practice to make a list of the modules that are enabled, disable those modules one by one, and restart the server. After this, check whether your application is working or not. If it works, go ahead; otherwise, enable the module(s) after which the application stopped working properly again.
This is because you may see that a certain module may not be required, but some other useful module depends on this module. So, it's best practice it to make a list and enable or disable the modules, as stated before.
To list all the modules that are loaded for Apache, issue the following command in the terminal:
sudo apachectl –M
This command will list all the loaded modules, as can be seen in the following screenshot:
Now, analyze all the loaded modules, check whether they are needed for the application, and disable them, as follows.
Open up the Apache config file and find the section where all the modules are loaded. A sample is included here:
LoadModule access_compat_module modules/mod_access_compat.so LoadModule actions_module modules/mod_actions.so LoadModule alias_module modules/mod_alias.so LoadModule allowmethods_module modules/mod_allowmethods.so LoadModule asis_module modules/mod_asis.so LoadModule auth_basic_module modules/mod_auth_basic.so #LoadModule auth_digest_module modules/mod_auth_digest.so #LoadModule auth_form_module modules/mod_auth_form.so #LoadModule authn_anon_module modules/mod_authn_anon.so
The modules that have a # sign in front of them are not loaded. So, to disable a module in the complete list, just place a # sign. The # sign will comment out the line, and the module won't be loaded anymore.
To check which modules NGINX is compiled with, issue the following command in the terminal:
sudo Nginx –V
This will list complete information about the NGINX installation, including the version and modules with which NGINX is compiled. Have a look at the following screenshot:
Normally, NGINX enables only those modules that are required for NGINX to work. To enable any other module that is compiled with NGINX installed, we can place a little configuration for it in the nginx.conf file, but there is no single way to disable any NGINX module. So, it is good to search for this specific module and take a look at the module page on the NGINX website. There, we can find information about this specific module, and if available, we can find information about how to disable and configure this module.
Each web server comes with its own optimum settings for general use. However, these settings may be not optimum for your current server hardware. The biggest problem on the web server hardware is the RAM. The more RAM the server has, the more the web server will be able to handle requests.
NGINX provides two variables to adjust the resources, which are worker_processes and worker_connections. The worker_processes settings decide how many NGINX processes should run.
Now, how many worker_processes resources should we use? This depends on the server. Usually, it is one worker processes per processor core. So, if your server processor has four cores, this value can be set to 4.
The value of worker_connections shows the number of connections per worker_processes setting per second. Simply speaking, worker_connections tells NGINX how many simultaneous requests can be handled by NGINX. The value of worker_connections depends on the system processor core. To find out the core's limitations on a Linux system (Debian/Ubuntu), issue the following command in the terminal:
Ulimit –n
This command will show you a number that should be used for worker_connections.
Now, let's say that our processor has four cores, and each core's limitation is 512. Then, we can set the values for these two variables in the NGINX main configuration file. On Debian/Ubuntu, it is located at /etc/nginx/nginx.conf.
Now, find out these two variables and set them as follows:
Worker_processes 4; Worker_connections 512
The preceding values can be high, specially worker_connections, because server processor cores have high limitations.
Content Delivery Network is used to host static media files, such as images, .css and .js files, and audio and video files. These files are stored on a geographical network whose servers are located in different locations. Then, these files are served to requests from a specific server, depending on the request location.
CDN provides the following features:
So, how do you use CDN in your application? In best practice, if your application has high traffic, creating different subdomains at your CDN for each content type is the best. For example, a separate domain for CSS and JavaScript files, a subdomain for images, and another separate subdomain for audio/videos files can be created. This way, the browser will send parallel requests for each content type. Let's say, we have the following URLs for each content type:
Now, most open source applications provide settings at their admin control panel to set up CDN URLs, but in case you happened to use an open source framework or a custom-build application, you can define your own setting for CDN by placing the previous URLs either in the database or in a configuration file loaded globally.
For our example, we will place the preceding URLs in a config file and create three constants for them, as follows:
Constant('CSS_JS_URL', 'http://css-js.yourcdn.com/');
Constant('IMAGES_URL', 'http://images.yourcdn.com/');
Constant('MEDiA_URL', 'http://css-js.yourcdn.com/');If we need to load a CSS file, it can be loaded as follows:
<script type="text/javascript" src="<?php echo CSS_JS_URL ?>js/file.js"></script>
For a JavaScript file, it can be loaded as follows:
<link rel="stylesheet" type="text/css" href="<?php echo CSS_JS_URL ?>css/file.css" />
If we load images, we can use the previous way in the src attribute of the img tag, as follows:
<img src="<?php echo IMAGES_URL ?>images/image.png" />
In the preceding examples, if we don't need to use CDN or want to change the CDN URLs, it will be easy to change in just one place.
Most famous JavaScript libraries and templating engines host their static resources on their own personal CDN. Google hosts query libraries, fonts, and other JavaScript libraries on its own CDN, which can be used directly in applications.
Sometimes, we may not want to use CDN or be able to afford them. For this, we can use a technique called domain sharing. Using domain sharding, we can create subdomains or point out other domains to our resources' directories on the same server and application. The technique is the same as discussed earlier; the only difference is that we direct other domains or subdomains to our media, CSS, JavaScript, and image directories ourselves.
This may seem be fine, but it won't provide us with CDN's best performance. This is because CDN decides the geographical availability of content depending on the customer's location, extensive caching, and files optimization on the fly.
Every web application has CSS and JavaScript files. Nowadays, it is common that most applications have lots of CSS and JavaScript files to make the application attractive and interactive. Each CSS and JavaScript file needs a browser to send a request to the server to fetch the file. So, the more the CSS and JavaScript files you have, the more requests the browser will need to send, thus affecting its performance.
Each file has a content size, and it takes time for the browser to download it. For example, if we have 10 CSS files of 10 KB each and 10 JavaScript files of 50 KB each, the total content size of the CSS files is 100 KB, and for JavaScript it is 500 KB—600 KB for both types of files. This is too much, and the browser will take time to download them.
Performance plays a vital role in web applications. Even Google counts performance in its indexing. Don't think of a file that has a few KBs and takes a 1 ms to download because when it comes to performance, each millisecond is counted. The best thing is to optimize, compress, and cache everything.
In this section, we will discuss two ways to optimize our CSS and JS, which are as follows:
In the merging process, we can merge all the CSS files into a single file, and the same process is carried out with JavaScript files, thus creating a single file for CSS and JavaScript. If we have 10 files for CSS, the browser sends 10 requests for all these files. However, if we merge them in a single file, the browser will send only one request, and thus, the time taken for nine requests is saved.
In the minifying process, all the empty lines, comments, and extra spaces are removed from the CSS and JavaScript files. This way, the size of the file is reduced, and the file loads fast.
For example, let's say you have the following CSS code in a file:
.header {
width: 1000px;
height: auto;
padding: 10px
}
/* move container to left */
.float-left {
float: left;
}
/* Move container to right */
.float-right {
float: right;
}After minifying the file, we will have CSS code similar to the following:
.header{width:100px;height:auto;padding:10px}.float-left{float:left}.float-right{float:right}Similarly for JavaScript, let's consider that we have the following code in a JavaScript file:
/* Alert on page load */
$(document).ready(function() {
alert("Page is loaded");
});
/* add three numbers */
function addNumbers(a, b, c) {
return a + b + c;
}Now, if the preceding file is minified, we will have the following code:
$(document).ready(function(){alert("Page is loaded")});function addNumbers(a,b,c){return a+b+c;}It can be noted in the preceding examples that all the unnecessary white spaces and new lines are removed. Also, it places the complete file code in one single line. All code comments are removed. This way, the file size is reduced, which helps the file be loaded fast. Also, this file will consume less bandwidth, which is useful if the server resources are limited.
Most open source applications, such as Magento, Drupal, and WordPress, provide either built-in support or support the application by third-party plugins/modules. Here, we won't cover how to merge CSS or JavaScript files in these applications, but we will discuss a few tools that can merge CSS and JavaScript files.
Minify is a set of libraries completely written in PHP. Minify supports both merging and minifying for both CSS and JavaScript files. Its code is completely object-oriented and namespaced, so it can be embedded into any current or proprietary framework.
The Minify homepage is located at http://minifier.org. It is also hosted on GitHub at https://github.com/matthiasmullie/minify. It is important to note that the Minify library uses a path converter library, which is written by the same author. The path converter library can be downloaded from https://github.com/matthiasmullie/path-converter. Download this library and place it in the same folder as the minify libraries.
Now, let's create a small project that we will use to minify and merge CSS and JavaScript files. The folder structure of the project will be as in the following screenshot:
In the preceding screenshot, the complete project structure is shown. The project name is minify. The css folder has all of our CSS files, including the minified or merged ones. Similarly, the js folder has all our JavaScript files, including the minified or merged ones. The libs folder has the Minify library along with the Converter library. Index.php has our main code to minify and merge CSS and JavaScript files.
So, let's start by minifying our CSS and JavaScript files using the following code in index.php:
include('libs/Converter.php');
include('libs/Minify.php');
include('libs/CSS.php');
include('libs/JS.php');
include('libs/Exception.php');
use MatthiasMullie\Minify;
/* Minify CSS */
$cssSourcePath = 'css/styles.css';
$cssOutputPath = 'css/styles.min.css';
$cssMinifier = new Minify\CSS($cssSourcePath);
$cssMinifier->minify($cssOutputPath);
/* Minify JS */
$jsSourcePath = 'js/app.js';
$jsOutputPath = 'js/app.min.js';
$jsMinifier = new Minify\JS($jsSourcePath);
$jsMinifier->minify($jsOutputPath);The preceding code is simple. First, we included all our required libraries. Then, in the Minify CSS block, we created two path variables: $cssSourcePath, which has the path to the CSS file that we need to minify, and $cssOutputPath, which has path to the minified CSS file that will be generated.
After this, we instantiated an object of the CSS.php class and passed the CSS file that we need to minify. Finally, we called the minify method of the CSS class and passed the output path along with the filename, which will generate the required file for us.
The same explanation goes for the JS minifying process.
If we run the preceding PHP code, all the files are in place, and everything goes fine, then two new filenames will be created: styles.min.css and app.min.js. These are the new minified versions of their original files.
Now, let's use Minify to merge multiple CSS and JavaScript files. First, add some CSS and JavaScript files to the respective folders in the project. After this, we just need to add a little code to the current code. In the following code, I will skip including all the libraries, but these files have to be loaded whenever you need to use Minify:
/* Minify CSS */ $cssSourcePath = 'css/styles.css'; $cssOutputPath = 'css/styles.min.merged.css'; $cssMinifier = new Minify\CSS($cssSourcePath); $cssMinifier->add('css/style.css'); $cssMinifier->add('css/forms.js'); $cssMinifier->minify($cssOutputPath); /* Minify JS */ $jsSourcePath = 'js/app.js'; $jsOutputPath = 'js/app.min.merged.js'; $jsMinifier = new Minify\JS($jsSourcePath); $jsMinifier->add('js/checkout.js'); $jsMinifier->minify($jsOutputPath);
Now, take a look at the highlighted code. In the CSS part, we saved the minified and merged file as style.min.merged.css, but naming is not important; it is all up to our own choice.
Now, we will simply use the add method of the $cssMinifier and $jsMinifier objects to add new files and then call minify. This causes all the additional files to be merged in the initial file and then minified, thus generating a single merged and minified file.
According to its official website, Grunt is a JavaScript task runner. It automates certain repetitive tasks so that you don't have to work repeatedly. It is an awesome tool and is widely used among web programmers.
Installing Grunt is very easy. Here, we will install it on MAC OS X, and the same method is used for most Linux systems, such as Debian and Ubuntu.
If Node.js and npm are installed on your machine, just fire up the following command in your terminal:
sudo npm install –g grunt
This will install Grunt CLI. If everything goes fine, then the following command will show you the version the of Grunt CLI:
grunt –version
The output of the preceding command is grunt-cli v0.1.13; as of writing this book, this version is available.
Grunt provides you with a command-line, which enables you to run a Grunt command. A Grunt project requires two files in your project file tree. One is package.json, which is used by npm and lists Grunt and the Grunt plugins that the project needs as DevDependencies.
The second file is the GruntFile, which is stored as GruntFile.js or GruntFile.coffee and is used to configure and define Grunt tasks and load Grunt plugins.
Now, we will use the same preceding project, but our folder structure will be as follows:
Now, open the terminal in your project root and issue the following command:
sudo npm init
This will generate the package.json file by asking a few questions. Now, open the package.json file and modify it so that the contents of the final package.json files look similar to the following:
{
"name" : "grunt" //Name of the project
"version : "1.0.0" //Version of the project
"description" : "Minify and Merge JS and CSS file",
"main" : "index.js",
"DevDependencies" : {
"grunt" : "0.4.1", //Version of Grunt
//Concat plugin version used to merge css and js files
"grunt-contrib-concat" : "0.1.3"
//CSS minifying plugin
"grunt-contrib-cssmin" : "0.6.1",
//Uglify plugin used to minify JS files.
"grunt-contrib-uglify" : "0.2.0"
},
"author" : "Altaf Hussain",
"license" : ""
}I added comments to different parts of the package.json file so that it is easy to understand. Note that for the final file, we will remove the comments from this file.
It can be seen that in the DevDependencies section, we added three Grunt plugins used for different tasks.
The next step is to add GruntFile. Let's create a file called GruntFile.js in our project root similar to the package.json file. Place the following contents in GruntFile:
module.exports = function(grunt) {
/*Load the package.json file*/
pkg: grunt.file.readJSON('package.json'),
/*Define Tasks*/
grunt.initConfig({
concat: {
css: {
src: [
'css/*' //Load all files in CSS folder
],
dest: 'dest/combined.css' //Destination of the final combined file.
}, //End of CSS
js: {
src: [
'js/*' //Load all files in js folder
],
dest: 'dest/combined.js' //Destination of the final combined file.
}, //End of js
}, //End of concat
cssmin: {
css: {
src : 'dest/combined.css',
dest : 'dest/combined.min.css'
}
},//End of cssmin
uglify: {
js: {
files: {
'dest/combined.min.js' : ['dest/combined.js'] // destination Path : [src path]
}
}
} //End of uglify
}); //End of initConfig
grunt.loadNpmTasks('grunt-contrib-concat');
grunt.loadNpmTasks('grunt-contrib-uglify');
grunt.loadNpmTasks('grunt-contrib-cssmin');
grunt.registerTask('default', ['concat:css', 'concat:js', 'cssmin:css', 'uglify:js']);
}; //End of module.exportsThe preceding code is simple and self-explanatory, and the comments are added whenever needed. At the top, we loaded our package.json file, and after this, we defined different tasks along with their src and destination files. Remember that every task's src and destination syntax is different, and it depends on the plugin. After initConfig block, we loaded different plugins and npm tasks and then registered them with GRUNT.
Now, let's run our tasks.
First, let's combine CSS and JavaScript files and store them in their respective destinations defined in our tasks list in GruntFile via the following command:
grunt concat
After running the preceding command in your terminal, if you see a message such as Done, without errors, then the task is completed successfully.
In the same way, let's minify our css file using the following command:
grunt cssmin
Then, we will minify our JavaScript file using the following command:
grunt uglify
Now, it may seem like a lot of work to use Grunt, but it provides some other features that can make a developer's life easy. For example, what if you need to change your JavaScript and CSS files? Should you run all the preceding commands again? No, Grunt provides a watch plugin, which activates and executes all the files in the destination paths in the tasks, and if any changes occur, it runs the tasks automatically.
For a more detailed learning, take a look at Grunt's official website at http://gruntjs.com/.
In full page caching, the complete page of the website is stored in a cache, and for the next requests, this cached page is served. Full page cache is more effective if your website content does not change too often; for example, on a blog with simple posts, new posts are added on a weekly basis. In this case, the cache can be cleared after new posts are added.
What if you have a website that has pages with dynamic parts, such as an e-commerce website? In this case, a complete page caching will create problems because the page is always different for each request; as a user is logged in, he/she may add products to the shopping cart and so on. In this case, using full page caching may not be that easy.
Most popular platforms provide either built-in support for full page cache or through plugins and modules. In this case, the plugin or module takes care of the dynamic blocks of the page for each request.
Varnish, as mentioned on its official website, makes your website fly; and this is true! Varnish is an open source web application accelerator that runs in front of your web server software. It has to be configured on port 80 so that each request comes to it.
Now, the Varnish configuration file (called VCL files with the .vcl extenstion) has a definition for backends. A backend is the web server (Apache or NGINX) configured on another port (let's say 8080). Multiple backends can be defined, and Varnish will take care of the load balancing too.
When a request comes to Varnish, it checks whether the data for this request in available at its cache or not. If it finds the data in its cache, this cached data is returned to the request, and no request is sent to the web server or backend. If Varnish does not find any data in its cache, it sends a request to the web server and requests the data. When it receives data from the web server, it first caches this data and then sends it back to the request.
As it is clear in the preceding discussion, if Varnish finds the data in the cache, there is no need for a request to the web server and, therefore, for processing in there, and the response is sent back very fast.
Varnish also provides features such as load balancing and health checks. Also, Varnish has no support for SSL and cookies. If Varnish receives cookies from the web server or backend, this page is not cached. There are different ways to overcome these issues easily.
We've done enough theory; now, let's install Varnish on a Debian/Ubuntu server via the following steps:
sources.list file. Place the following line in the file:deb https://repo.varnish-cache.org/debian/ Jessie varnish-4.1
sudo apt-get update
sudo apt-get install varnish
/etc/default/varnish and change it so that it looks similar to the following code: DAEMON_OPS="-a :80 \
-T localhost:6082 \
-f /etc/varnish/default.vcl \
-S /etc/varnish/secret \
-s malloc,256m"
sudo service varnish restart
80. Let's make NGINX run on port 8080. Edit the NGINX vhost file for the application and change the listen port from 80 to 8080, as follows:listen 8080;
sudo service nginx restart
8080. Edit the Varnish VCL file located at /etc/varnish/default.vcl, as follows: backend default {
.host = "127.0.0.1";
.port = "8080";
}In the preceding configuration, our backend host is located at the same server on which Varnish runs, so we entered the local IP. We can also enter a localhost in this case. However, if our backend runs on a remote host or another server, the IP of this server should be entered.
Now, we are done with Varnish and web server configuration. Restart both Varnish and NGINX. Open your browser and enter the IP or hostname of the server. The first response may seem slow, which is because Varnish is fetching data from the backend and then caching it, but other subsequent responses will be extremely fast, as Varnish cached them and is now sending back the cached data without communicating with the backend.
Varnish provides a tool in which we can easily monitor the Varnish cache status. It is a real-time tool and updates its contents in real time. It is called varnishstat. To start varnishstat, just issue the following command in the terminal:
varnishstat
The preceding command will display a session similar to the following screenshot:
As can be seen in the preceding screenshot, it displays very useful information, such as the running time and the number of requests made at the beginning, cache hits, cache misses, all backends, backend reusages, and so on. We can use this information to tune Varnish for its best performance.
A complete Varnish configuration is out of the scope of this book, but a good documentation can be found on the Varnish official website at https://www.varnish-cache.org.
We discussed too many topics on increasing the performance of our application. Now, let's discuss the scalability and availability of our application. With time, the traffic on our application can increase to thousands of users at a time. If our application runs on a single server, the performance will be hugely effected. Also, it is not a good idea to keep the application running at a single point because in case this server goes down, our complete application will be down.
To make our application more scalable and better in availability, we can use an infrastructure setup in which we can host our application on multiple servers. Also, we can host different parts of the application on different servers. To better understand, take a look at the following diagram:
This is a very basic design for the infrastructure. Let's talk about its different parts and what operations will be performed by each part and server.
It is possible that only the Load Balancer (LB) will be connected to the public Internet, and the rest of the parts can be connected to each through a private network in a Rack. If a Rack is available, this will be very good because all the communication between all the servers will be on a private network and therefore secure.
In the preceding diagram, we have two web servers. There can be as many web servers as needed, and they can be easily connected to LB. The web servers will host our actual application, and the application will run on NGINX or Apache and PHP 7. All the performance tunings we will discuss in this chapter can be used on these web servers. Also, it is not necessary that these servers should be listening at port 80. It is good that our web server should listen at another port to avoid any public access using browsers.
The database server is mainly used for the database where the MySQL or Percona Server can be installed. However, one of the problems in the infrastructure setup is to store session data in a single place. For this purpose, we can also install the Redis server on the database server, which will handle our application's session data.
The preceding infrastructure design is not a final or perfect design. It is just to give the idea of a multiserver application hosting. It has room for a lot of improvement, such as adding another local balancer, more web servers, and servers for the database cluster.
The first part is the load balancer (LB). The purpose of the load balancer is to divide the traffic among the web servers according to the load on each web server.
For the load balancer, we can use HAProxy, which is widely used for this purpose. Also, HAProxy checks the health of each web server, and if a web server is down, it automatically redirects the traffic of this down web server to other available web servers. For this purpose, only LB will be listening at port 80.
We don't want to place a load on our available web servers (in our case, two web servers) of encrypting and decrypting the SSL communication, so we will use the HAProxy server to terminate SSL there. When our LB receives a request with SSL, it will terminate SSL and send a normal request to one of the web servers. When it receives a response, HAProxy will encrypt the response and send it back to the client. This way, instead of using both the servers for SSL encryption/decryption, only a single LB server will be used for this purpose.
In the preceding infrastructure, we placed a load balancer in front of our web servers, which balance load on each server, check the health of each server, and terminate SSL. We will install HAProxy and configure it to achieve all the configurations mentioned before.
We will install HAProxy on Debian/Ubuntu. As of writing this book, HAProxy 1.6 is the latest stable version available. Perform the following steps to install HAProxy:
sudo apt-get update
sudo apt-get install haproxy
This will install HAProxy on the system.
haproxy -v
If the output is as in the preceding screenshot, then congratulations! HAProxy is installed successfully.
Now, it's time to use HAProxy. For this purpose, we have the following three servers:
The Web1 and Web2 servers are also called backend servers. First, let's configure the LB or frontend server to listen at port 80.
Open the haproxy.cfg file located at /etc/haproxy/ and add the following lines at the end of the file:
frontend http bind *:80 mode http default_backend web-backends
In the preceding code, we set HAProxy to listen at the HTTP port 80 on any IP address, either the local loopback IP 127.0.0.1 or the public IP. Then, we set the default backend.
Now, we will add two backend servers. In the same file, at the end, place the following code:
backend web-backend mode http balance roundrobin option forwardfor server web1 10.211.55.2:8080 check server web2 10.211.55.3:8080 check
In the preceding configuration, we added two servers into the web backend. The reference name for the backend is web-backend, which is used in the frontend configuration too. As we know, both our web servers listen at port 8080, so we mentioned that it is the definition of each web server. Also, we used check at the end of the definition of each web server, which tells HAProxy to check the server's health.
Now, restart HAProxy by issuing the following command in the terminal:
sudo service haproxy restart
Now, enter the IP or hostname of the LB server in the browser, and our web application page will be displayed either from Web1 or Web2.
Now, disable any of the web servers and then reload the page again. The application will still work fine, because HAProxy automatically detected that one of web servers is down and redirected the traffic to the second web server.
HAProxy also provides a stats page, which is browser-based. It provides complete monitoring information about the LB and all the backends. To enable stats, open haprox.cfg, and place the following code at the end of the file:
listen stats *:1434 stats enable stats uri /haproxy-stats stats auth phpuser:packtPassword
The stats are enabled at port 1434, which can be set to any port. The URL of the page is stats uri. It can be set to any URL. The auth section is for basic HTTP authentication. Save the file and restart HAProxy. Now, open the browser and enter the URL, such as 10.211.55.1:1434/haproxy-stats. The stats page will be displayed as follows:
In the preceding screenshot, each backend web server can be seen, including frontend information.
Also, if a web server is down, HAProxy stats will highlight the row for this web server, as can be seen in the following screenshot:
For our test, we stopped NGINX at our Web2 server and refreshed the stats page, and the Web2 server row in the backend section was highlighted.
To terminate SSL using HAProxy, it is pretty simple. To terminate SSL using HAProxy, we will just add the SSL port 443 binding along with the SSL certificate file location. Open the haproxy.cfg file, edit the frontend block, and add the highlighted code in it, as in the following block:
frontend http
bind *:80
bind *:443 ssl crt /etc/ssl/www.domain.crt
mode http
default_backend web-backendsNow, HAProxy also listens at 443, and when an SSL request is sent to it, it processes it there and terminates it so that no HTTPS requests are sent to backend servers. This way, the load of SSL encryption/decryption is removed from the web servers and is managed by the HAProxy server only. As SSL is terminated at the HAProxy server, there is no need for web servers to listen at port 443, as regular requests from HAProxy server are sent to the backend.
In this chapter, we discussed several topics starting from NGINX and Apache to Varnish. We discussed how we can optimize our web server's software settings for the best performance. Also, we discussed CDNs and how to use them in our customer applications. We discussed two ways to optimize JavaScript and CSS files for the best performance. We briefly discussed full page cache and Varnish installation and configuration. At the end, we discussed multiserver hosting or infrastructure setup for our application to be scalable and the best in availability.
In next chapter, we will look into the ways of increasing the performance of our database. We will discuss several topics, including the Percona Server, different storage engines for the database, query caching, Redis, and Memcached.
Databases play a key role in dynamic websites. All incoming and outgoing data is stored in a database. So, if the database for a PHP application is not well designed and optimized, it will effect the application's performance tremendously. In this chapter, we will look into the ways of optimizing our PHP application's database. The following topics will be covered in this chapter:
MySQL is the most commonly used Relational Database Management System (RDMS) for the Web. It is open source and has a free community version. It provides all those features that can be provided by an enterprise-level database.
The default settings provided with the MySQL installation may not be so good for performance, and there are always ways to fine-tune these settings to get an improved performance. Also, remember that your database design plays a big role in performance. A poorly designed database will have an effect on the overall performance.
In this section, we will discuss how to improve the MySQL database's performance.
We will modify the MySQL configuration's my.cnf file. This file is located in different places in different operating systems. Also, if you are using XAMPP, WAMP, or any other cross-platform web server solution stack package on Windows, this file will be located in the respective folder. Whenever my.cnf is mentioned, it is assumed that the file is open no matter which OS is used.
Query caching is an important performance feature of MySQL. It caches SELECT queries along with the resulting dataset. When an identical SELECT query occurs, MySQL fetches the data from memory so that the query is executed faster and thus reduces the load on the database.
To check whether query cache is enabled on a MySQL server or not, issue the following command in your MySQL command line:
SHOW VARIABLES LIKE 'have_query_cache';
The preceding command will display the following output:
The previous result set shows that query cache is enabled. If query cache is disabled, the value will be NO.
To enable query caching, open up the my.cnf file and add the following lines. If these lines are there and are commented, just uncomment them:
query_cache_type = 1 query_cache_size = 128MB query_cache_limit = 1MB
Save the my.cnf file and restart the MySQL server. Let's discuss what the preceding three configurations mean:
query_cache_type: This plays a little confusing role.query_cache_type is set to 1 and query_cache_size is 0, then no memory is allocated, and query cache is disabled.If query_cache_size is greater than 0, then query cache is enabled, memory is allocated, and all queries that do not exceed the query_cache_limit value or use the SQL_NO_CACHE option are cached.
query_cache_type value is 0 and query_cache_size is 0, then no memory is allocated, and cache is disabled.If query_cache_size is greater than 0, then memory is allocated, but nothing is cached—that is, cache is disabled.
query_cache_size: query_cache_size: This indicates how much memory will be allocated. Some think that the more memory is used, the better it will be, but this is just a misunderstanding. It all depends on the database size, query types and ratios between read and writes, hardware, database traffic, and other factors. A good value for query_cache_size is between 100 MB and 200 MB; then, you can monitor the performance and other variables on which query cache depends, as mentioned, and adjust the size. We have used 128MB for a medium traffic Magento website and it is working perfectly. Set this value to 0 to disable query cache.query_cache_limit: This defines the maximum size of a query dataset to be cached. If a query dataset's size is larger than this value, it isn't cached. The value of this configuration can be guessed by finding out the largest SELECT query and the size of its returned dataset.Storage engines (or table types) are a part of core MySQL and are responsible for handling operations on tables. MySQL provides several storage engines, and the two most widely used are MyISAM and InnoDB. Both these storage engines have their own pros and cons, but InnoDB is always prioritized. MySQL started using InnoDB as the default storage engine, starting from 5.5.
MySQL provides some other storage engines that have their own purposes. During the database design process, which table should use which storage engine can be decided. A complete list of storage engines for MySQL 5.6 can be found at http://dev.mysql.com/doc/refman/5.6/en/storage-engines.html.
A storage engine can be set at database level, which is then used as the default storage engine for each newly created table. Note that the storage engine is the table's base, and different tables can have different storage engines in a single database. What if we have a table already created and want to change its storage engine? It is easy. Let's say that our table name is pkt_users, its storage engine is MyISAM, and we want to change it to InnoDB; we will use the following MySQL command:
ALTER TABLE pkt_users ENGINE=INNODB;
This will change the storage engine value of the table to INNODB.
Now, let's discuss the difference between the two most widely used storage engines: MyISAM and InnoDB.
A brief list of features that are or are not supported by MyISAM is as follows:
SELECT statement.COMMIT and ROLLBACK. If a query on a table is executed, it is executed, and there is no coming back.A brief list of features that are or are not supported by InnoDB is as follows:
SELECT, DELETE, or UPDATE operations, and during these operations, other data in this table can be manipulated.In the following sections, we will discuss some more performance features that are related to InnoDB. Values for the following configuration are set in the my.cnf file.
This setting defines how much memory should be used for InnoDB data and the indices loaded into memory. For a dedicated MySQL server, the recommended value is 50-80% of the installed memory on the server. If this value is set too high, there will be no memory left for the operating system and other subsystems of MySQL, such as transaction logs. So, let's open our my.cnf file, search for innodb_buffer_pool_size, and set the value between the recommended value (that is, 50-80%) of our RAM.
This feature is not that widely used. It enables multiple buffer pool instances to work together to reduce the chances of memory contentions on a 64-bit system and with a large value for innodb_buffer_pool_size.
There are different choices on which the value for innodb_buffer_pool_instances are calculated. One way is to use one instance per GB of innodb_buffer_pool_size. So, if the value of innodb_bufer_pool_size is 16 GB, we will set innodb_buffer_pool_instances to 16.
According to the Percona website, Percona is a free, fully compatible, enhanced, open source, and drop-in replacement for MySQL that provides superior performance, scalability, and instrumentation.
Percona is a fork of MySQL with enhanced features for performance. All the features available in MySQL are available in Percona. Percona uses an enhanced storage engine called XtraDB. According to the Percona website, it is an enhanced version of the InnoDB storage engine for MySQL that has more features, faster performance, and better scalability on modern hardware. Percona XtraDB uses memory more efficiently in high-load environments.
As mentioned earlier, XtraDB is a fork of InnoDB, so all the features available in InnoDB are available in XtraDB.
Percona is only available for Linux systems. It is not available for Windows as of now. In this book, we will install Percona Server on Debian 8. The process is same for both Ubuntu and Debian.
To install the Percona Server on other Linux flavors, check out the Percona installation manual at https://www.percona.com/doc/percona-server/5.5/installation.html. As of now, they provide instructions for Debian, Ubuntu, CentOS, and RHEL. They also provide instructions to install the Percona Server from sources and Git.
Now, let's install the Percona Server through the following steps:
sudo nano /etc/apt/sources.list
If prompted for a password, enter your Debian password. The file will be opened.
sources.list file:deb http://repo.percona.com/apt jessie main deb-src http://repo.percona.com/apt jessie main
sudo apt-get update
sudo apt-get install percona-server-server-5.5
There is always a need to monitor the performance of database servers. For this purpose, there are many tools available that make it easy to monitor MySQL servers and performance. Most of them are open source and free, and some provide a GUI. The command-line tools are more powerful and the best to use, though it takes a little time to understand and get used to them. We will discuss a few here.
This is the most famous, web-based, open source, and free tool available to manage MySQL databases. Despite managing a MySQL server, it also provides some good tools to monitor a MySQL server. If we log in to phpMyAdmin and then click on the Status tab at the top, we will see the following screen:
The Server tab shows us basic data about the MySQL server, such as when it started, how much traffic is handled from the last start, information about connections, and so on.
The next is Query Statistics. This section provides full stats about all of the queries executed. It also provides a pie chart, which visualizes the percentage of each query type, as shown in the following screenshot.
If we carefully look at the chart, we can see that we have 54% of the SELECT queries running. If we use some kind of cache, such as Memcached or Redis, these SELECT queries should not be this high. So, this graph and statistics information provides us with a mean to analyze our cache systems.
The next option is All Status Variables, which lists all of the MySQL variables and their current values. In this list, one can easily find out how MySQL is configured. In the following screenshot, our query cache variables and their values are shown:
The next option that phpMyAdmin provides is Monitor. This is a very powerful tool that displays the server resources and their usages in real time in a graphical way.
As shown in the preceding screenshot, we can see Questions, Connections/Processes, System CPU Usage, Traffic, System Memory, and System swap in a nice graphical interface.
The last important section is Advisor. This gives us advice regarding the settings for performance. It gives you as many details as possible so that the MySQL server can be tuned for performance. A small section from the advisor section is shown in the following screenshot:
If all these advices are applied, some performance can be gained.
This is a desktop application from MySQL and is fully equipped with tools to manage and monitor the MySQL server. It provides us with a dashboard for performance in which all the data related to the server can be seen in a beautiful and graphical way, as shown in the screenshot that follows:
All the tools mentioned before are good and provide some visual information about our database server. However, they are not good enough to show us some more useful information or provide more features that can make our lives easy. For this purpose, another command-line toolkit is available, which is called Percona Toolkit.
Percona Toolkit is a set of more than 30 command-line tools, which includes those used to do an analysis of slow queries, archive, optimize indices and many more.
Percona Toolkit is free and open source and is available under GPL. Most of its tools run on Linux/Unix-based systems, but some can run on Windows too. An installation guide can be found at https://www.percona.com/doc/percona-toolkit/2.2/installation.html. A complete set of tools can be found at https://www.percona.com/doc/percona-toolkit/2.2/index.html.
Now, let's discuss a few tools in the subsections to follow.
This tool analyzes queries from slow, general, and binary log files. It generates a sophisticated report about the queries. Let's run this tool for slow queries using the following command:
Pt-query-digest /var/log/mysql/mysql-slow.log
After entering the preceding command in the terminal, we will see a long report. Here, we will discuss a short part of the report, as shown in the following screenshot:
In the preceding screenshot, slow queries are listed with the slowest at the top. The first query, which is a SELECT query, takes the most time, which is about 12% of the total time. The second query, which is also a SELECT query, takes 11.5% of the total time. From this report, we can see which queries are slow so that we can optimize them for the best performance.
Also, pt-query-digest displays information for each query, as shown in the following screenshot. In the screenshot, data about the first query is mentioned, including the total timing; percentage (pct) of time; min, max, and average time; bytes sent; and some other parameters:
This tool finds duplicate indices and duplicate foreign keys either in a set of specified tables or in a complete database. Let's execute this tool again in a large database using the following command in the terminal:
Pt-duplicate-key-checker –user packt –password dbPassword –database packt_pub
When executed, the following output is printed:
At the end of the report, a summary of the indices is displayed, which is self-explanatory. Also, this tool prints out an ALTER query for each duplicate index that can be executed as a MySQL query to fix the index, as follows:
Pt-variable-advisor
This tool displays MySQL config information and advice for each query. This is a good tool that can help us set up MySQL configurations properly. We can execute this tool by running the following command:
Pt-variable-advisor –user packt –password DbPassword localhost
After execution, the following output will be displayed:
There are many other tools provided by Percona Toolkit that are out of the scope of this book. However, the documentation at https://www.percona.com/doc/percona-toolkit/2.2/index.html is very helpful and easy to understand. It provides complete details for each tool, including its description and risks, how to execute it, and other options if there are any. This documentation is worth reading if you wish to understand any tool in Percona Toolkit.
Percona XtraDB Cluster provides a high-performance cluster environment that can help easily configure and manage a database on multiple servers. It enables databases to communicate with each other using the binary logs. The cluster environment helps divide the load among different database servers and provides safety from failure in case a server is down.
To set up the cluster, we need the following servers:
As we already have the Percona repository in our sources, let's start by installing and configuring Percona XtraDB Cluster, also called PXC. Perform the following steps:
apt-get install percona-xtradb-cluster-56
The installation will start similarly to a normal Percona Server installation. During the installation, the password for a root user will be also asked.
CREATE USER 'sstpackt'@'localhost' IDENTIFIED BY 'sstuserpassword'; GRANT RELOAD, LOCK TABLES, REPLICATION CLIENT ON *.* TO 'sstpackt'@'localhost'; FLUSH PRIVILEGES;
The first query creates a user with the username sstpackt and password sstuserpassword. The username and password can be anything, but a good and strong password is recommended. The second query sets proper privileges to our new user, including locking tables and replication. The third query refreshes the privileges.
/etc/mysql/my.cnf. Then, place the following configuration in the mysqld block:#Add the galera library wsrep_provider=/usr/lib/libgalera_smm.so #Add cluster nodes addresses wsrep_cluster_address=gcomm://10.211.55.1,10.211.55.2,10.211.55.3 #The binlog format should be ROW. It is required for galera to work properly binlog_format=ROW #default storage engine for mysql will be InnoDB default_storage_engine=InnoDB #The InnoDB auto increment lock mode should be 2, and it is required for galera innodb_autoinc_lock_mode=2 #Node 1 address wsrep_node_address=10.211.55.1 #SST method wsrep_sst_method=xtrabackup #Authentication for SST method. Use the same user name and password created in above step 2 wsrep_sst_auth="sstpackt:sstuserpassword" #Give the cluster a name wsrep_cluster_name=packt_cluster
Save the file after adding the preceding configuration.
/etc/init.d/mysql bootstrap-pxc
This will bootstrap the first node. Bootstrapping means getting the initial cluster up and running and defining which node has the correct information and which one all the other nodes should sync to. As Node1 is our initial cluster node and we created a new user here, we have to only bootstrap Node1.
SST stands for State Snapshot Transfer. It is responsible for copying full data from one node to another. It is only used when a new node is added to the cluster and this node has to get complete initial data from an existing node. Three SST methods are available in Percona XtraDB Cluster, mysqldump, rsync, and xtrabackup.
SHOW STATUS LIKE '%wsrep%';
A very long list will be displayed. A few of them are shown in the following screenshot:
wsrep_node_address, which should be the IP address of the node. Edit the my.cnf configuration file for all the nodes and place the node address in wsrep_node_address.
/etc/init.d/mysql start
Now each node can be verified by repeating step 7.
To verify whether the cluster is working fine, create a database in one node and add some tables and data into the tables. After this, check other nodes for the newly created database, tables, and the data entered in each table. We will have all this data synced to each node.
Redis is an open source, in-memory key-value data store that is widely used for database caching. According to the Redis website (www.Redis.io), Redis supports data structures such as strings, hashes, lists, sets, and sorted lists. Also, Redis supports replication and transactions.
Redis installation instructions can be found at http://redis.io/topics/quickstart.
To check whether Redis is working fine on your server or not, start the Redis server instance by running the following command in the terminal:
redis server
Then issue the following command in a different terminal window:
redis-cli ping
If the output of the preceding command is as follows, the Redis server is ready to be run:
Redis provides a command line, which provides some useful commands. There are two ways to execute commands on the Redis server. You can either use the previous method or just type redis-cli and hit Enter; we will be presented with the Redis command line, where we can then just type the Redis commands that will be executed.
By default, Redis uses the IP 127.0.0.1 and port 6379. Remote connections are not allowed, though remote connections can be enabled. Redis stores data that is already created in the database. Database names are integer numbers, such as 0, 1, 2, and so on.
We won't go in much detail about Redis here, but we will discuss a few commands that are worth noting. Note that all these commands can be either executed in the previous way, or we can just enter the redis-cli command window and type the commands without typing redis-cli. Also, the following commands can be executed directly in PHP, which makes it possible to clear out the cache directly from our PHP application:
SELECT: This command changes the current database. By default, redis-cli will be opened at database 0. So, if we want to go to database 1, we will run the following command:
SELECT 1
FLUSHDB: This command flushes the current database. All keys or data from the current database will be deleted.FLUSHALL: This command flushes all the databases, no matter which database it is executed in.KEYS: This command lists all the keys in the current database matching a pattern. The following command lists all the keys in the current database.
KEYS *
Now, it's time for some action in PHP with Redis.
As of writing this topic, PHP 7 does not have built-in support for Redis yet. For this book's purpose, we compiled the PHPRedis module for PHP 7, and it works very nicely. The module can be found at https://github.com/phpredis/phpredis.
As mentioned before, by default, the Redis server runs on the IP 127.0.0.1 and port 6379. So, to make a connection, we will use these details. Take a look at the following code:
$redisObject = new Redis();
if( !$redisObject->connect('127.0.0.1', 6379))
die("Can't connect to Redis Server");In the first line, we instantiated a Redis object by the name of redisObject, which is then used in the second line to connect to the Redis server. The host is the local IP address 127.0.0.1, and the port is 6379. The connect() method returns TRUE if the connection is successful; otherwise, it returns FALSE.
Now, we are connected to our Redis server. Let's save some data in the Redis database. For our example, we want to store some string data in the Redis database. The code is as follows:
//Use same code as above for connection.
//Save Data in to Redis database.
$rdisObject->set('packt_title', 'Packt Publishing');
//Lets get our data from database
echo $redisObject->get('packt_title');The set method stores data into the current Redis database and takes two arguments: a key and a value. A key can be any unique name, and a value is what we need to store. So, our key is packt_title, and the value is Packt Publishing. The default database is always set to 0 (zero) unless explicitly set otherwise. So, the preceding set method will save our data to database 0 with the packt_title key.
Now, the get method is used to fetch data from the current database. It takes the key as the argument. So, the output of the preceding code will be our saved string data Packt Publishing.
Now, what about arrays or a set of data coming from the database? We can store them in several ways in Redis. Let's first try the normal strings way, as shown here:
//Use same connection code as above.
/* This $array can come from anywhere, either it is coming from database or user entered form data or an array defined in code */
$array = ['PHP 5.4', PHP 5.5, 'PHP 5.6', PHP 7.0];
//Json encode the array
$encoded = json_encode($array);
//Select redis database 1
$redisObj->select(1);
//store it in redis database 1
$redisObject->set('my_array', $encoded);
//Now lets fetch it
$data = $redisObject->get('my_array');
//Decode it to array
$decoded = json_decode($data, true);
print_r($decoded); The output of the preceding code will be the same array. For testing purposes, we can comment out the set method and check whether the get method fetches the data or not. Remember that in the preceding code, we stored the array as a json string, then fetched it as a json string, and decoded it to the array. This is because we used the methods that are available for the string datatype, and it is not possible to store arrays in the string datatype.
Also, we used the select method to select another database and use it instead of 0. This data will be stored in database 1 and can't be fetched if we are at database 0.
Redis management tools provide an easy way to manage Redis databases. These tools provide features so that every key can be checked and a cache can be cleared easily. One default tool comes with Redis, called Redis-cli, and we discussed it earlier. Now, let's discuss a visual tool that is great and easy to use, called Redis Desktop Manage (RDM). A screenshot of the main window of RDM looks like the following screenshot:
RDM provides the following features:
There are some other tools that can be used, but RDM and Redis-cli are the best and easiest to use.
According to the Memcached official website, it's a free, open source, high performance, and distributed memory object caching system. Memcached is an in-memory key-value store that can store datasets from a database or API calls.
Similarly to Redis, Memcached also helps a lot in speeding up a website. It stores the data (strings or objects) in the memory. This allows us to reduce the communication with outside resources, such as databases and or APIs.
Now, let's play a little with Memcachd in PHP. Take a look at the following code:
//Instantiate Memcached Object
$memCached = new Memcached();
//Add server
$memCached->addServer('127.0.0.1', 11211);
//Lets get some data
$data = $memCached->get('packt_title');
//Check if data is available
if($data)
{
echo $data;
}
else
{
/*No data is found. Fetch your data from any where and add to memcached */
$memCached->set('packt_title', 'Packt Publishing');
}The preceding code is a very simple example of using Memcached. The comments are written with each line of code and are self-explanatory. After instantiating a Memcached object, we have to add a Memcached server. By default, the Memcached server server runs on the localhost IP, which is 127.0.0.1, and on the port 11211. After this, we checked for some data using a key, and if it is available, we can process it (in this case, we displayed it. It can be returned, or whatever processing is required can be carried out.). If the data is not available, we can just add it. Please note that the data can come from a remote server API or from the database.
In this chapter, we covered MySQL and the Percona Server. Also, we discussed in detail query caching and other MySQL configuration options for performance in detail. We mentioned different storage engines, such as MyISAM, InnoDB, and Percona XtraDB. We also configured Percona XtraDB Cluster on three nodes. We discussed different monitoring tools, such as PhpMyAdmin monitoring tools, MySQL workbench performance monitoring, and Percona Toolkit. We also discussed Redis and Memcached caching for PHP and MySQL.
In the next chapter, we will discuss benchmarking and different tools. We will use XDebug, Apache JMeter, ApacheBench, and Siege to benchmark different open source systems, such as WordPress, Magento, Drupal, and different versions of PHP, and compare their performance with PHP 7.
During development, every developer faces problems, and it becomes unclear what is really going on here and why the problem is generated. Most the time, these issues can be logical or with the data. It is always hard to find such issues. Debugging is a process to find such issues and problems and fix them. Similarly, we often need to know how many resources a script consumes, including memory consumption, CPU, and how much time it takes to execute.
In this chapter, we will cover the following topics:
Xdebug is an extension for PHP that provides both debugging and profiling information for PHP scripts. Xdebug displays a full-stake trace information for errors, including function names, line numbers, and filenames. Also, it provides the ability to debug scripts interactively using different IDEs, such as Sublime Text, Eclipse, PHP Storm, and Zend Studio.
To check whether Xdebug is installed and enabled on our PHP installation, we need to check the phpinfo() details. On the phpinfo details page, search for Xdebug, and you should see details similar to the following screenshot:
This means that our PHP installation has Xdebug installed. Now, we need to configure Xdebug. Either the Xdebug configuration will be in the php.ini file, or it will have its separate .ini file. At our installation, we will have a separate 20-xdebug.ini file placed at the /etc/php/7.0/fpm/conf.d/ path.
For the purpose of this book, we will use the Homestead Vagrant box from Laravel. It provides complete tools on the Ubuntu 14.04 LTS installation, including PHP7 with Xdebug, NGINX, and MySQL. For the purpose of development, this Vagrant box is a perfect solution. More information can be found at https://laravel.com/docs/5.1/homestead.
Now, open the 20-xdebug.ini file and place the following configuration in it:
zend_extension = xdebug.so xdebug.remote_enable = on xdebug.remote_connect_back = on xdebug.idekey = "vagrant"
The preceding are the minimum configurations we should use that enable remote debugging and set an IDE key. Now, restart PHP by issuing the following command in the terminal:
sudo service php-fpm7.0 restart
Now we are ready to debug some code.
The Sublime Text editor has a plugin that can be used to debug PHP code with Xdebug. First, let's install the xdebug package for Sublime Text.
First, go to Tools | Command Pallet. A popup similar to the following will be displayed:
Select Package Control: Install Package, and a popup similar to the following screenshot will be displayed:
Type in xdebug, and the Xdebug Client package will be displayed. Click on it and wait for a while until it is installed.
Now, create a project in Sublime Text and save it. Open the Sublime Text project file and insert the following code in it:
{
"folders":
[
{
"follow_symlinks": true,
"path": "."
}
],
"settings": {
"xdebug": {
"path_mapping": {
"full_path_on_remote_host" : "full_path_on_local_host"
},
"url" : http://url-of-application.com/,
"super_globals" : true,
"close_on_stop" : true,
}
}
}The highlighted code is important, and it has to be entered for Xdebug. Path mapping is the most important part. It should have a full path to the root of the application on the remote host and a full path to the root of the application on the localhost.
Now, let's start debugging. Create a file at the project's root, name it index.php, and place the following code in it:
$a = [1,2,3,4,5]; $b = [4,5,6,7,8]; $c = array_merge($a, $b);
Now, right-click on a line in the editor and select Xdebug. Then, click on Add/Remove Breakpoint. Let's add a few breakpoints as shown in the following screenshot:
When a breakpoint is added to a line, a filled circle will be displayed on the left-hand side near the line number, as can be seen in the preceding screenshot.
Now we are ready to debug our PHP code. Navigate to Tools | Xdebug | Start Debugging (Launch in Browser). A browser window will open the application along with a Sublime Text debug session parameter. The browser windows will be in the loading state because as soon as the first breakpoint is reached, the execution stops. The browser window will be similar to the following:
Some new small windows will also open in the Sublime Text editor that will display debugging information along with all the variables available, as in the following screenshot:
In the preceding screenshot, our $a, $b, and $c arrays are uninitialized because the execution cursor is at Line 22, and it has stopped there. Also, all server variables, cookies, environment variables, request data, and POST and GET data can be seen here. This way, we can debug all kind of variables, arrays, and objects and check what data each variable, object, or array holds at a certain point. This gives us the possibility to find out the errors that are very hard to detect without debugging.
Now, let's move the execution cursor ahead. Right-click in the editor code section and go to Xdebug | Step Into. The cursor will move ahead, and the variables data may change according to the next line. This can be noted in the following screenshot:
Debugging can be stopped by clicking on Tools | Xdebug | Stop Debugging.
Eclipse is the most free and powerful IDE widely used. It supports almost all major programming languages, including PHP. We will discuss how to configure Eclipse to use Xdebug to debug.
First, open the project in Eclipse. Then, click on the down arrow to the right of the small bug icon in the tool bar, as shown in the following screenshot:
After this, click on the Debug Configuration menu, and the following windows will open:
Select PHP Web Application on left panel and then click on the Add New icon in the top-left corner. This will add a new configuration, as shown in the preceding screenshot. Give the configuration a name. Now, we need to add a PHP server to our configuration. Click on the New button on the right-hand side panel, and the following window will open:
We will enter the server name as PHP Server. The server name can be anything as long as it is user-friendly and can be recognized for later use. In the Base URL field, enter the complete URL of the application. Document Root should be the local path of the root of the application. After entering all the valid data, click on the Next button, and we will see the following window:
Select XDebug in the Debugger drop-down list and leave rest of the fields as they are. Click on the Next button, and we will have the path mapping window. It is very important to map the correct local path to the correct remote path. Click on the Add button, and we will have the following window:
Enter the full path to the document root of the application on the remote server. Then, select Path in File System and enter the local path of the application's document root. Click on OK and then click on the Finish button in the path mapping window. Then, click on Finish in the next window to complete adding a PHP server.
Now, our configuration is ready. First, we will add some breakpoints to our PHP file by clicking on the line number bar and a small blue dot will appear there, as shown in the following screenshot. Now, click on the small bug icon on the tool bar, select Debug As, and then click on PHP Web Application. The debug process will start, and a window will be opened in the browser. It will be in the loading state, same as we saw in Sublime Text debugging. Also, the Debug perspective will be opened in Eclipse, as shown here:
When we click on the small (X)= icon in the right-hand side bar, we will see all the variables there. Also, it is possible to edit any variable data, even the element values of any array, object properties, and cookie data. The modified data will be retained for the current debug session.
To step into the next line, we will just press F5, and the execution cursor will be moved to the next line. To step out to the next breakpoint, we will press F6.
Profiling gives us information about the cost of each script or task executed in an application. It helps to provide information about how much time a task takes, and hence we can optimize our code to consume less time.
Xdebug has a profiler that is disabled by default. To enable the profiler, open the configuration file and place the following two lines in it:
xdebug.profiler_enable=on xdebug.profiler_output_dir=/var/xdebug/profiler/
The first line enables the profiler. The second line, where we defined the output directory for the profiler file, is important. In this directory, Xdebug will store the output file when the profiler is executed. The output file is stored with a name, such as cachegrind.out.id. This file contains all the profile data in a simple text format.
Now, we are set to profile a simple installation of the Laravel application home page. The installation is a fresh and clean one. Now, let's open the application in a browser and append ?XDEBUG_PROFILE=on at the end, as shown here:
http://application_url.com?XDEBUG_PROFILE=on
After this page is loaded, a cachegrind file will be generated at the specified location. Now, when we open the file in a text editor, we will just see some text data.
The cachegrind file can be opened with different tools. One of the tools for Windows is WinCacheGrind. For Mac, we have qcachegrind. Any of these applications will view the file data in such a way that we will see all the data in an interactive form that can be easily analyzed. Also, PHP Storm has a nice analyzer for cachegrind. For this topic, we used PHP Storm IDE.
After opening the file in PHP Storm, we will get a window similar to the following screenshot:
As shown in the preceding screenshot, we have execution statistics in the upper pane that shows the time (in ms) taken by each called script individually along with the number of times it is called. In the lower pane, we have the callees that called this script.
We can analyze which script takes more time, and we can optimize this script to reduce its execution time. Also, we can find out whether, at a certain point, we need to call a specific script or not. If not, then we can remove this call.
PHP DebugBar is another awesome tool that displays a nice and full information bar at the bottom of the page. It can display custom messages added for the purposes of debugging and full request information including $_COOKIE, $_SERVER, $_POST, and $_GET arrays along with the data if any of them have. Besides that, PHP DebugBar displays details about exceptions if there are any, database queries executed, and their details. Also it displays the memory taken by the script and the time the page is loaded in.
According to the PHP Debug website, DebugBar integrates easily in any application project and displays debugging and profiling data from any part of the application.
Its installation is easy. You can either download the complete source code, place it somewhere in your application, and set up the autoloader to load all the classes, or use composer to install it. We will use composer as it is the easy and clean way to install it.
Composer is a nice tool for PHP to manage the dependencies of a project. It is written in PHP and is freely available from https://getcomposer.org/. We assume that composer is installed on your machine.
In your project's composer.json file, place the following code in the required section:
"maximebf/debugbar" : ">=1.10.0"
Save the file and then issue the following command:
composer update
The Composer will start updating the dependencies and install composer. Also, it will generate the autoloader file and/or the other dependencies required for DebugBar.
After it is installed, the project tree for the DebugBar can be as follows:
The directories' structure may be a little bit different, but normally, it will be as we previously noted. The src directory has the complete source code for DebugBar. The vendor directory has some third-party modules or PHP tools that may or may not be required. Also, note that the vendor folder has the autoloader to autoload all the classes.
Let's check our installation now to see whether it is working or not. Create a new file in your project root and name it index.php. After this, place the following code in it:
<?php
require "vendor/autoloader.php";
use Debugbar\StandardDebugBar;
$debugger = new StandardDebugBar();
$debugbarRenderer = $debugbar->getJavascriptRenderer();
//Add some messages
$debugbar['messages']->addMessage('PHP 7 by Packt');
$debugbar['messages']->addMessage('Written by Altaf Hussain');
?>
<html>
<head>
<?php echo $debugbarRenderer->renderHead(); ?>
</head>
<title>Welcome to Debug Bar</title>
<body>
<h1>Welcome to Debug Bar</h1>
<!—- display debug bar here -->
<?php echo $debugbarRenderer->render(); ?>
</body>
</html>In the preceding code, we first included our autoloader, which is generated by composer for us to autoload all the classes. Then, we used the DebugBar\StandardDebugbar namespace. After this, we instantiated two objects: StandardDebugBar and getJavascriptRenderer. The StandardDebugBar object is an array of objects that has objects for different collectors, such as message collectors and others. The getJavascriptRenderer object is responsible for placing the required JavaScript and CSS code at the header and displaying the bar at the bottom of the page.
We used the $debugbar object to add messages to the message collector. Collectors are responsible for collecting data from different sources, such as databases, HTTP requests, messages, and others.
In the head section of the HTML code, we used the renderHead method of $debugbarRenderer to place the required JavaScript and CSS code. After this, just before the end of the <body> block, we used the render method of the same object to display the debug bar.
Now, load the application in the browser, and if you notice a bar at the bottom of the browser as in the following screenshot, then congrats! DebugBar is properly installed and is working fine.
On the right-hand side, we have the memory consumed by our application and the time it is loaded in.
If we click on the Messages tab, we will see the messages we added, as shown in the following screenshot:
DebugBar provides data collectors, which are used to collect data from different sources. These are called base collectors, and some of the data collectors are as follows:
$_SERVER, $_POST, $_GET, and othersAlso, there are some collectors that provide the ability to collect data from third-party frameworks such as Twig, Swift Mailer, Doctrine, and others. These collectors are called bridge collectors. PHP DebugBar can be easily integrated into famous PHP frameworks such as Laravel and Zend Framework 2 too.
A complete discussion of PHP DebugBar is not possible in this book. Therefore, only a simple introduction is provided here. PHP DebugBar has a nice documentation that provides complete details with examples. The documentation can be found at http://phpdebugbar.com/docs/readme.html.
In this chapter, we discussed different tools to debug a PHP application. We used Xdebug, Sublime Text 3, and Eclipse to debug our applications. Then, we used the Xdebug profiler to profile an application to find out the execution statistics. Finally, we discussed PHP DebugBar to debug an application.
In the next chapter, we will discuss load testing tools, which we can use to place load or virtual visitors on our application in order to load test it, and find out how much load our application can bear, and how it affects the performance.
After an application is developed, tested, debugged and then profiled, it is time to bring it to production. However, before going to production, it is best practice to stress/load test the application. This test will give us an approximate result of how many requests at a certain time can be handled by our server running the application. Using these results, we can optimize the application, web server, database, and our caching tools to get a better result and process more requests.
In this chapter, we will load test different open source tools on both PHP 5.6 and PHP 7 and compare these applications' performance for both versions of PHP.
We will cover the following topics:
Apache JMeter is a graphical and open source tool used to load test a server's performance. JMeter is completely written in Java, so it is compatible with all operating systems that have Java installed. JMeter has a complete set of extensive tools for every kind of load testing, from static content to dynamic resources and web services.
Its installation is simple. We need to download it from the JMeter website and then just run the application. As mentioned before, it will require Java to be installed on the machine.
JMeter can test FTP servers, mail servers, database servers, queries, and more. In this book, we can't cover all these topics, so we will only load test web servers. Apache JMeter's list of features can be found at http://jmeter.apache.org/.
When we run the application at first, we will see the following window:
To run any kind of test, you need to first create a test plan. A test plan has all the components required to execute this test. By default, JMeter has a test plan called Test Plan. Let's name it to our own plan, Packt Publisher Test Plan, as shown in the following screenshot:
Now, save the test plan, and JMeter we will create a .jmx file. Save it in an appropriate place.
The next step is to add a thread group. A thread group defines some basic properties for the test plan, which can be common among all types of tests. To add a thread group, right-click on the plan in the left panel, then navigate to Add | Threads (Users) | Thread Group. The following window will be displayed:
The thread group has the following important properties:
Now, we will need to add the HTTP request defaults. Right-click on Packt Thread Group and then go to Add | Config Element | HTTP Request Defaults. A window similar to the following will appear:
In the preceding window, we have to just enter the URL of the application or the IP address. If the web server uses cookies, we can add HTTP Cookie Manager too, in which we can add user-defined cookies with all the data, such as the name, value, domain, path, and so on.
Next, we will add an HTTP request by right-clicking and navigating to Packt Thread Group | Add | Sampler | HTTP Request, and the following window will appear:
The important field here is Path. We want to run the test only against the home page, so for this HTTP request, we will just add a slash (/) in the Path field. If we want to test another path, such as "Contact us", we will need to add another HTTP request sampler, as in the preceding screenshot. Then, in the path, we will add path/contact-us.
The HTTP Request sampler can be used to test forms too, where POST requests can be sent to the URL by selecting the POST method in the Method field. Also, file upload can be simulated.
The next step is to add some listeners. Listeners provide some powerful views to display results. The results can be displayed in a table view and different kinds of graphs can be saved in a file. For this thread group, we will add three listeners: View Results in Table, Response Time Graph, and Graph Results. Each listener view displays a different kind of data. Add all the preceding listeners by right-clicking on Packt Thread Group and then navigating to Add | Listeners. We will have a complete list of all the available listeners. Add all the three listeners one by one. Our final Packt Publisher Test Plan panel on the left-hand side of JMeter will look similar to the following:
Now, we are ready to run our test plan by clicking on the Start button in the upper tool bar, as shown in the following screenshot:
As soon as we click on the Start button (the green arrow pointing to the right-hand side), JMeter will start our test plan. Now, if we click on the View Results in Table listener on the left panel, we will see data for each request in a table, as shown in the following screenshot:
The preceding screenshot shows some interesting data, such as sample time, status, bytes, and latency.
Sample time is the number of milliseconds in which the server served the complete request. Status is the status of the request. It can be either a success, warning, or error. Bytes is the number of bytes received for the request. Latency is the number of milliseconds in which JMeter received the initial response from the server.
Now, if we click on Response Time Graph, we will see a visual graph for the response time, which is similar to the one that follows:
Now, if we click on Graph Results, we will see the response time data along with graphs for average, median, deviation, and throughput graphs, as shown in the following graph:
Apache JMeter provides very powerful tools to load test our web servers by simulating users. It can provide us with data regarding the amount of load that makes our web server's response slow, and using this data, we can optimize our web server and application.
ApacheBench (ab) is also provided by Apache and is a command-line tool. It is a lovely tool for command line lovers. This tool is normally installed on most Linux flavors by default. Also, it is installed with Apache, so if you have Apache installed, you will probably have ab installed too.
The basic syntax for an ab command is as follows:
ab –n <Number_Requests> -c <Concurrency> <Address>:<Port><Path>
Let's discuss what each part of the preceding command means:
n: This is the number of requests for test.c: This is concurrency, which is the number of simultaneous requests at a time.Address: This is either the application URL or IP address of the web server.Port: This is the port number at which the application is running.Path: This is the web path of the application that we can use to test. A slash (/) is used for the home page.Now, let's conduct a test using the ab tool by issuing the following command:
ab –n 500 –c 10 packtpub.com/
As the default port for the web server is 80, it is not required to mention it. Note the slash at the end; this is required to place it there because it is the path's part.
After executing the preceding command, we will have an output that looks similar to the following:
We can see some useful information here, including the number of requests per second, which is 490.3; the total time taken for the test, which is 1.020 seconds; the shortest request, which is 20 ms; and the longest request, which is 52 ms.
The server load limit can be found by increasing the number of requests and concurrency level and checking the web server's performance.
Siege is another command-line open source tool to test load and performance. Siege is an HTTP/FTP load tester and benchmarking utility. It is designed for developers and administrators to measure the performance of their applications under load. It can send a configurable number of simultaneous requests to a server and those requests that place the server under a siege.
Its installation is simple and easy. For Linux and Mac OS X, first download Siege by issuing the following command in the terminal:
wget http://download.joedog.org/siege/siege-3.1.4.tar.gz
It will download the Siege TAR compressed file. Now, uncompress it by issuing the following command:
tar –xvf siege-3.1.4.tar.gz
Now, all the files will be in the siege-3.1.4 folder. Build and install it by issuing the following commands one by one in the terminal:
cd siege-3.1.4 ./configure make make install
Now, Siege is installed. To confirm this, issue the following command to check the Siege version:
siege –V
If it displays the version with some other information, then Siege is installed successfully.
Now, let's have a load test. A basic load test can be executed by running the following command:
siege some_url_or_ip
Siege will then start the test. We have to enter the application URL or server IP that we want to load test. To stop the test, press Ctrl + C, and we will have an output similar to the following:
In the preceding screenshot we can see Transactions, Response time, and Transaction rate along with Longest transaction and Shortest transaction.
By default, Siege creates 15 concurrent users. This can be changed by using the –c option, which is done by making the following alteration in the command:
siege url_or_ip –c 100
However, Siege has a limitation for the concurrent users, which may be different for each OS. This can be set in the Siege configuration file. To find out the config file location and concurrent user limit, issue the following command in terminal:
siege -C
A list of the configuration options will be displayed. Also the resource file or config file location will be displayed. Open that file and find the config concurrent and set its value to an appropriate required value.
Another important feature of Siege is that a file that has all the URLs that need to be tested can be used. The file should have a single URL in each line. The –f flag is used with Siege as follows:
siege -f /path/to/url/file.txt –c 120
Siege will load the file and start load testing each URL.
Another interesting feature of Siege is the internet mode, which can be entered using the –i flag in the following command:
siege –if path_to_urls_file –c 120
In the internet mode, each URL is hit randomly and mimics a real-life situation, in which it can't be predicted which URL will be hit.
Siege has lots of useful flags and features. A detailed list can be found in the official documentation at https://www.joedog.org/siege-manual/.
We studied three tools in this chapter to load test. Now, it is time to load test some real-world applications. In this section, we will test Magento 2, Drupal 8, and WordPress 4. All these open source tools will have their default data.
We have three VPS configured with NGINX as the web server. One VPS has PHP 5.5-FPM, the second has PHP 5.6-FPM, and the third has PHP 7-FPM installed. The hardware specs for all the three VPS are same, and all applications we will test will have the same data and the same versions.
This way, we will benchmark these applications with PHP 5.5, PHP 5.6, and PHP 7 and take a look at how fast these applications can run on different versions of PHP.
Magento 2 is installed on all VPS, and all the caches are enabled for Magento. PHP OPcache is also enabled. After running the tests, we got an average result for all the three Magento 2 installations, as shown in the following graphs:
In the preceding chart, the vertical line, or Y-axis, shows the transactions per second. As can be seen in the charts, Magento 2 on PHP 7 has 29 transactions per second, while the same Magento 2 installation on the same hardware with PHP 5.6 has 12 transactions per second. Also, on PHP 5.5, the same Magento installation has 9 transactions per second. So, in this case, Magento runs about 241% faster on PHP 7 than PHP 5.6 and about 320% faster than in PHP 5.5. This is a very huge improvement of PHP 7 on both PHP 5.6 and PHP 5.5.
WordPress is installed on all of the three VPS. Unfortunately, there is no default cache embedded into WordPress, and we will not install any third-party modules, so no cache is used. The results are still good, as can be seen in the following graphs. PHP OPcache is enabled.
As can be seen in the preceding graph, WordPress runs 135% faster in PHP 7 than in PHP 5.6 and 182% faster than in PHP 5.5.
We used the same VPS for PHP 5.5, PHP 5.6, and PHP 7. The default Drupal 8 cache is enabled. After load testing the default home of Drupal 8, we got the following results:
The preceding graph shows that Drupal 8 runs 178% faster in PHP 7 than in PHP 5.6 and 205% faster than in PHP 5.5.
In the preceding graphs, all these values are approximate values. If a low-power hardware is used, then smaller values will be generated. If we use a more powerful multiprocessor-dedicated server with the web server and database optimizations, we will get higher values. The point to consider is that we will always get better performance for PHP 7 than PHP 5.6.
A combined graph is shown here, which displays the performance improvements for different applications in PHP 7 over PHP 5.5 and PHP 5.6:
In this chapter, we discussed a few load testing and benchmarking tools, such as JMeter, ApacheBench (ab), and Siege. We used each tool to load test, and discussed the output and what it means. Finally, we load tested three famous open source applications, Magento 2, WordPress 4, and Drupal 8, and created graphs for each application's transactions per second in both PHP 7 and PHP 5.6.
In the next chapter, we will discuss best practices for PHP development. These practices are not limited only to PHP and can be used for any programming language.
So far, we discussed performance-related topics. Now, in this chapter, we will study best practices in PHP applications' development and deployment. This is a vast topic, but we will cover it briefly. PHP provides all levels of programmers with the ability to write quality code easily and quickly. However, when the application advances to a more complex nature, we forget to follow the best practices. To produce a high performance PHP application, it is necessary to keep in mind the performance at every line of the code.
We will cover the following topics:
There are too many coding styles out there, such as PSR-0, PSR-1, PSR-2, PSR-3, and so on. Programmers can use different standards as they want, but it is necessary to follow a standard that is already used in the libraries or a framework in use to make the code more readable. For example, Laravel uses the PSR-1 and PSR-4 coding standards, so if we are developing in Laravel, we should follow these coding standards. Some PHP frameworks, such as Yii 2 and Zend Framework 2, follow the PSR-2 coding standards. However, none of these frameworks stick to a single standard; most of them follow a mixed standard according to their requirements.
The important point is to follow the standard that is used in the libraries used in the application. An organization can also use its own coding standards for internal purposes. It is not a requirement for coding; it is a requirement for readability and producing quality code that others can understand.
PHP Framework Interop Group (PHP-FIG) is a group whose members defined coding standards for PHP. Full details about PSR standards can be found on their website at http://www.php-fig.org/.
Instead of discussing a specific coding standard, let's discuss best practices in coding styles for PHP:
class Foo
{
…
…
…
}public function phpBook($arg1, $arg2, $arg3)
{
…
…
…
}extends and implements keywords must be on the same line as the class declaration. Here's an example:namespace Packt\Videos;
use Packt\Books;
use Packt\Presentations;
class PacktClass extends VideosClass implements BaseClass
{
…
…
…
}class PacktClass
{
public $books;
private $electronicBooks;
…
…
…
}abstract keyword, it must come before the class keyword for classes, and the final keyword must come before the method's visibility in the case of methods. On the other hand, the static keyword must come after the method visibility. Take a look at this example:abstract class PacktClass
{
final public static function favoriteBooks()
{
…
…
…
}
}true and false keywords. Constants must be declared and used in capital case.if ($book == "PHP 7") {
…
…
…
} else {
…
…
…
}for ($h = 0; $h < 10; $h++) {
…
…
…
}
foreach ($books as $key => $value) {
…
…
…
}
while ($book) {
…
…
…
}For the purpose of this book, I did not follow the rule of the opening brace being on the same line as the control structure declaration and always used it on the next line of the declaration. I did not find it clearer; it is a personal choice, and anybody can follow the standards mentioned here.
Standards are good to follow as they make the code more readable and professional. However, never try to invent your own new standards; always follow those that are already invented and followed by the community.
Test-driven development is the process of testing every aspect of the application during development. Either the tests are defined before development and then development is made to pass these tests, or the classes and libraries are built and then tested. Testing the application is very important, and launching an application without tests is like jumping from a 30-floor-high building without a parachute.
PHP does not provide any built-in features to test, but there are other test frameworks that can be used for this purpose. One of most widely used frameworks or libraries is PHPUnit. It is a very powerful tool and provides lots of features. Now, let's have a look at it.
The installation of PHPUnit is easy. Just download it and place it in your project root so that it can be accessed from the command line.
PHPUnit installation and basic details, including features and examples, can be found at https://phpunit.de/.
Let's have a simple example. We have a Book class, as follows:
class Book
{
public $title;
public function __construct($title)
{
$this->title = $title;
}
public function getBook()
{
return $this->title;
}
}This is an example of a simple class that initializes the title property when the class is instantiated. When the getBook method is called, it returns the title of the book.
Now, we want to make a test in which we will check whether the getBook method returns PHP 7 as a title. So, perform the following steps to create the test:
tests directory at your project's root. Create a BookTest.php file in the tests directory.BookTest.php file:include (__DIR__.'/../Book.php');
class BookTest extends PHPUnit_Framework_TestCase
{
public function testBookClass()
{
$expected = 'PHP 7';
$book = new Book('PHP 7');
$actual = $book->getBook();
$this->assertEquals($expected, $book);
}
}BookTest, which extends the PHPUnit_Framework_TestCase class. We can name our test class whatever we want. However, the name should be easily recognizable so that we know this is written for the class that needs to be tested.testBookClass. We are also free to select whatever name we want to give to this method, but it should start with the word test. If not, PHPUnit will not execute the method and will issue a warning—in our case, for the preceding test class—that no tests were found.In the testBookClass method, we created an object of the Book class and passed PHP 7 as our title. Then, we fetched the title using the getBook method of the Book class. The important part is the last line of the testBookClass method, which performs the assertion and checks whether the data returned from getBook is the desired data or not.
php phpunit.phar tests/BookTest.php
When the command is executed, we will have an output similar to the following screenshot:
Our test is executed successfully as it met the criteria defined in our test.
PHP to the Book class, as shown in the following code:public function testBookClass()
{
$book = new Book('PHP');
$title = $book->getBook();
$this->assertEquals('PHP 7', $book);
}Book class returns PHP, so it does not pass our test. After executing this test, we will have a failure, as shown in the following screenshot:As seen in the preceding screenshot, we expected PHP 7, and we got an actual result of PHP 7. The – sign shows the expected value, and the + sign shows the actual value.
In the previous topic, we discussed how we can perform tests on our libraries. We only discussed a simple basic test. PHPUnit is not limited to these simple tests, but covering PHPUnit completely is out of the scope of this book. A very nice book on PHPUnit is PHPUnit Essentials, published by Packt Publishing.
A design pattern solves a specific problem. It is not a tool; it is just a description or template that describes how to solve a specific problem. Design patterns are important, and they play a good role in writing clean and clear code.
One of the most widely used design patterns in the PHP community is the Model View Controller (MVC) pattern. Most PHP frameworks are built upon this pattern. MVC advises you to keep the business logic and data operations (that is, the model) separate from the presentation (the view). Controllers just play the role of a middleman between models and views and make the communication between them possible. There is no direct communication between models and views. If a view needs any kind of data, it sends a request to the controller. The controller knows how to operate on this request and, if needed, make a call to the model to perform any operation on the data (fetch, insert, validate, delete, and so on). Then at last, the controller sends a response to the view.
In best practices, fat models and skinny controllers are used. This means that controllers are only used to take a specific action on a request and nothing else. Even in some modern frameworks, the validation is moved out of the controllers and is performed at the model level. These models perform all the operations on the data. In modern frameworks, models are considered as a layer, which can have multiple parts, such as the business logic, Create Read Update Delete (CRUD) database operations, data mapper pattern and services, and so on. So, a full load of models and controllers is just sitting there and enjoying the lazy work load.
Another widely used design pattern is the factory design pattern. This pattern simply creates objects that are needed to be used. Another good pattern is the observer pattern, in which an object calls different observers on a specific event or task on it. This is mainly used for event handling. Yet another widely used pattern is the singleton pattern, which is used when there is a requirement that only a single object of a class be used throughout the application's execution. A singleton object can't be serialized and cloned.
In service-oriented architecture, the application's components provide services to each other on a defined protocol. Each component is loosely coupled with each other, and the only way of communication between them is through the services they provide.
In PHP, Symfony provides the best way to have SOA as it is mainly an HTTP-centric framework. Symfony is the most mature, well-tested collection of libraries that are widely used by other PHP frameworks, such as Zend Framework, Yii, Laravel, and others.
Let's consider a scenario where we have a backend and a frontend for a website and a mobile application. Normally, in most applications, the backend and frontend run on the same code base and on a single access point, and an API or web service is built for mobile applications to communicate with this backend. It is good, but we need great. So, for high performance and scalable applications, the separate components run independently of each other. If they need to communicate with each other, they communicate through the web services.
Web services are the central communication point between the frontend and backend and between the backend and mobile applications. The backend is the main hub of data and any other business logic. It can be standalone and built using any programming language, such as PHP. The frontend can be built using normal HTML/CSS, AngularJS, Node.js, jQuery, or any other technology for the frontend. Similarly, mobile apps can be native or built on cross-platform technologies. The backend doesn't care what the frontend and mobile apps are built on.
This may seem difficult for a small, single-page application in which only a few things are happening, but this is not the case. The classes are easy to handle, and the code is always clear. Also, the classes separate the application logic from the views. This make things more logical. In the earlier days when structure code was used and a bunch of functions had to be created either in the view files or in a separate file, this would have been too easy. However, when applications got more complex, it got more difficult to handle.
Always try to create loosely coupled classes to make them more reusable in other applications. Also, always perform a single task in each method of the class.
We all know about frameworks, and they are not essential to a programmer's life. There are lots of frameworks, and each framework has its own superiority over other frameworks in some features. All frameworks are good, but what make a framework not suitable for an application are the application's requirements.
Let's say that we want to build an enterprise-level CRM application, which framework will suit us best? This is the most important, confusing, and time-wasting question. First, we need to know the complete requirements for the CRM application, usage capacity, features, data security, and performance.
Version controller system provides the flexibility to properly maintain code, changes, and versions of the application. Using VCS, a complete team can work together on an application, and they can pull other team members' changes and their own changes to the system without any big troubles. In case of a disaster, VCS provides the ability to fall back to an old, more stable version of the application.
Oh wait! Are we talking about VCS? Did we mention Git? Nope! So, let's start with Git.
Git is a powerful tool. It monitors changes in each file in a branch, and when pushed to a remote branch, only the changed files are uploaded. Git keeps a history of the file changes and provides you with the ability to compare the changed files.
A very informative and good book on Git is Git Essentials published by Packt Publishing. Also, an official and free book about Git can be found at https://git-scm.com/book/en/v2.
FTP is obsolete. It is not feasible for today, it makes things slow, and a normal FTP connection is insecure. It is hard for a team to deploy their changes using FTP because it creates huge conflicts in their code and this may cause problems, while uploading changes and can override each other's changes.
Using a Git versioning system, such as GitHub, GitLab, and Bitbucket, we can make our deployment automatic. Different developers use different setups for automatic deployments, and it all depends on their own choice and ease. The general rules of using automatic deployments are to make them easy for a team and to not use FTP.
The following is a general flowchart for a deployment setup:
As shown in the preceding flowchart, we have two servers: the staging or testing the server and production server. On the staging server, we have an exact copy of the website to test new features and others, and the production server has our live website.
Now, we have a repository that has two main branches: the master branch and the production branch. The master branch is used for development and testing purposes, and the production branch is used for final production features. Note that the production branch should only accept merging, and it should not accept commits so that the production environment is completely safe.
Now, let's say that we want to add a customer registration feature to our application. We will perform the following steps:
customer-registration.customer-registration branch and while verifying on the local development server, merge this branch to the local master branch.Continuous Integration (CI) is a technique in which all the members of a team have to integrate their code into a shared repository, and then each check by the team member is verified by automatic builds to catch errors and problems in the early stages.
There are several tools that are used for CI for PHP; some of these are PHPCI, Jenkins, Travis CI, and others.
In this chapter, we discussed a few best practices, including coding standards and styles, PHP frameworks, design patterns, Git, and deployment. Also, we discussed the PHPUnit framework to test classes and libraries against tests. Also, we discussed Service-oriented design, which plays a major role in creating APIs for applications.
In this book, we studied setting up development environments, including Linux servers, specifically Debian and Ubuntu, and we also discussed Vagrant. The new features of PHP are also listed with sample codes. You read in detail about the tools that we can use to improve the performance of an application and a database. Also, we discussed debugging and stress or load testing our applications and some best practices of writing quality code.
We mostly summarized the tools and techniques with simple examples to introduce the reader to these tools and techniques. There is a good chance that each tool and technique has its own book written for a more advanced usage. We recommend you follow up on these tools and techniques and conduct more research for their advance usage. Good luck Php-ing!
We covered many things in this book, starting with new features in PHP 7 and ending with the best techniques in programming. In each chapter, we used and talked about some tools, but due to the finite length of chapters and the book, we did not go too much in detail for these tools. In this appendix, we will discuss three of these tools in much more detail. The tools we will to discuss are as follows:
So, let's start.
Composer is a dependency management tool for PHP that enables us to define dependencies for a PHP application, and Composer installs/updates them. Composer is completely written in PHP and is an application in the PHP Archive (PHAR) format.
Composer downloads dependencies from https://packagist.org/. Any dependency for an application can be installed through Composer as long as it is available on Packagist. Also, complete applications can be installed through Composer if they are available at Packagist.
Composer is a command line tool and can be installed globally in the operating system, or the composer.phar file can be placed in the root of the application and then executed from the command line. For Windows, an executable setup file is provided, which can be used to install Composer globally. For this book, we will follow the instructions for Debian/Ubuntu globally. Perform the following steps:
installer and can only be executed with PHP once installed via the following code:
Wget https://getcomposer.org/installer
Php install --install-dir=/usr/local/bin --filename=composer
This command will download Composer and will install it in the /usr/local/bin directory with the file name composer. Now, we will be able to run Composer globally.
Composer --version
If the Composer version is displayed, then Composer is successfully installed globally.
Now, Composer is installed successfully and is working; it's time to use it.
To use Composer in our project, we will need a composer.json file. This file contains all the dependencies required for the project and some other metadata. Composer uses this file to install and update different libraries.
Let's assume that our application needs to log different information in different ways. For this, we can use the monolog library. First, we will create a composer.json file in the root of our application and add the following code to it:
{
"require": {
"monolog/monolog": "1.0.*"
}
}After saving the file, execute the following command to install the dependencies of the application:
Composer install
This command will download the dependencies and place them in the vendor directory, as can be seen in the following screenshot:
As can be seen in the preceding screenshot, monolog version 1.0.2 is downloaded, and a vendor directory is created. The monolog library is placed in this directory. Also, if a package has to autoload information, then Composer places the library in the Composer autoloader, which is also placed in the vendor directory. So, any new libraries or dependencies will be autoloaded automatically during the application's execution.
Also a new file can be seen, which is composer.lock. When Composer downloads and installs any dependencies, the exact version and other information is written to this file to lock the application to this specific version of dependencies. This ensures that all the team members or whoever wants to set up the application will use the exact same version of the dependencies, and thus, it will reduce the chances of using different versions of dependencies.
Nowadays, Composer is widely used for package management. Big open source projects such as Magento, Zend Framework, Laravel, Yii, and many others are easily available for installation through Composer. We will install some of these in the next appendix using Composer.
Git is the most widely used version control system. According to the Git official website, it is a distributed version control system capable of handling everything from small- to large-sized projects with speed and efficiency.
Git is available for all major operating systems. For Windows, an executable setup file is provided that can be used to install Git and use it in the command line. On OS X, Git comes already installed, but if it is not found, it can be downloaded from their official website. To install Git on Debian/Ubuntu, just issue the following command in the terminal:
sudo apt-get install git
After installation, issue the following command to check whether it is properly installed:
git –version
Then, we will see the current installed version of Git.
For a better understanding of Git, we will start with a test project. Our test project name is packt-git. For this project, we also created a GitHub repository named packt-git, where will push our project files.
First, we will initialize Git in our project by issuing the following command:
git init
The preceding command will initialize an empty Git repository in our project root directory, and the head will be kept on the master branch, which is the default branch for every Git repository. It will create a hidden .git directory that will contain all the information about the repository. Next, we will add a remote repository that we will create on GitHub. I created a test repository at GitHub that has the URL https://github.com/altafhussain10/packt-git.git.
Now, issue the following command to add the GitHub repository to our empty repository:
git remote add origin https://github.com/altafhussain10/packt-git.git
Now, create a README.md file at your project root and add some content to it. The README.md file is used to display the repository information and other details about the repository at Git. This file is also used to display instructions regarding how to use the repository and/or the project for which this repository is created.
Now, issue the following command to see the status of our Git repository:
git status
This command will display the status of the repository, as can be seen in the following screenshot:
As can be seen in the preceding screenshot, we have an untracked file in our repository that is not committed yet. First, we will add the files to be tracked by issuing the following command in the terminal:
git add README.md
The git add command updates the index using the current contents found in the working tree. This command adds all the changes made to the path. There are some options that can be used to add some specific changes. The previous command we used will only add the README.md file to the track in the repository. So, if we want to track all the files, then we will use the following command:
git add
This will start tracking all the files in the current working directory or at the root of the current branch. Now, if we want to track some specific files, such as all files with the .php extension, then we can use it as follows:
git add '*.php'
This will add all the files with the .php extension to track.
Next, we will commit changes or additions to our repository using the following command:
git commit –m "Initial Commit"
The git commit command commits all the changes to the local repository. The -m flag specifies any log message to commit. Remember that the changes are only committed to the local repository.
Now, we will push the changes to our remote repository using the following command:
git push –u origin master
The preceding command will push all the changes from the local repository to the remote repository or origin. The -u flag is used to set the upstream, and it links our local repo to our remote central repo. As we pushed our changes for the first time, we have to use the -u option. After this, we can just use the following command:
git push
This will push all the changes to the main repository of the current branch at which we are.
New branches are always required during development. If any kind of changes are required, it is good to create a new branch for these changes. Then, make all the changes on this branch and finally commit, merge, and push them to the remote origin.
To better understand this, let's suppose we want to fix an issue in the login page. The issue is about validation errors. We will name our new branch login_validation_errors_fix. It is good practice to give a more understandable name to branches. Also, we would like to create this new branch from the master branch head. This means that we want the new branch to inherit all the data from the master branch. So, if we are not at the master branch, we have to use the following command to switch to the master branch:
git checkout master
The preceding command will switch us to the master branch no matter which branch we are at. To create the branch, issue the following command in the terminal:
git branch login_validation_errors_fix
Now, our new branch is created from the master branch head, so all the changes should be made to this new branch. After all the changes and fixes are done, we have to commit the changes to the local and remote repositories. Note that we did not create the new branch in our remote repository. Now, let's commit the changes using the following command:
git commit -a -m "Login validation errors fix"
Note that we did not use git add to add the changes or new additions. To automatically commit our changes, we used the -a option in commit, which will add all the files automatically. If git add is used, then there is no need to use the -a option in commit. Now, our changes are committed to the local repository. We will need to push the changes to the remote origin. Issue the following command in the terminal:
git push -u origin login_validation_errors_fix
The preceding command will create a new branch at the remote repository, set the tracking of the same local branch to the remote branch, and push all the changes to it.
Now, we want to merge the changes with our master branch. First, we need to switch to our master branch using the following command:
git checkout master
Next, we will issue the following commands to merge our new branch login_validation_errors_fix with the master branch:
git checkout master git merge login_validation_errors_fix git push
It is important to switch to the branch to which we want to merge our new branch. After this, we need to use the git merge branch_to_merge syntax to merge this branch with the current branch. Finally, we can just push to the remote origin. Now, if we take a look at our remote repository, we will see the new branch and also the changes in our master branch.
Sometimes, we need to work on a project that is hosted on a repository. For this, we will first clone this repository, which will download the complete repository to our local system, and then create a local repository for this remote repository. The rest of the working is the same as we discussed before. To clone a repository, we should first know the remote repository web address. Let's say that we want to clone the PHPUnit repository. If we go to the GitHub repository for PHPUnit, we will see the web address of the repository at the upper right-hand side, as shown in the screenshot that follows:
The URL just after the HTTPS button is the web address for this repository. Copy this URL and use the following command to clone this repository:
git clone https://github.com/sebastianbergmann/phpunit.git
This will start downloading the repository. After it is completed, we will have a PHPUnit folder that will have the repository and all its files. Now, all the operations mentioned in the preceding topics can be performed.
One of the most powerful features of Git is webhooks. Webhooks are events that are fired when a specific action occurs on the repository. If an event or hook for the Push request is made, then this hook will be fired every time a push is made to this repository.
To add a webhook to a repository, click on the Settings link for the repository in the upper right-hand side. In the new page, on the left-hand side, we will have a Webhooks and Services link. Click on it, and we will see a page similar to the following one:
As can be seen in the preceding screenshot, we have to enter a payload URL, which will be called every time our selected event is fired. In Content type, we will select the data format in which the payload will be sent to our URL. In the events section, we can select whether we want only push events or all the events; we can select multiple events for which we want this hook to be fired. After saving this hook, it will be fired every time the selected event occurs.
Webhooks are mostly used for deployment. When the changes are pushed and if there is a webhook for the push event, the specific URL is called. Then, this URL executes some command to download the changes and processes them on the local server and places them at the appropriate place. Also, webhooks are used for continues integration and to deploy to cloud services.
There are several tools that can be used to manage Git repositories. GitHub provides its own tool called GitHub Desktop that can be used to manage GitHub repositories. This can be used to create new repositories, see the history, and push, pull, and clone repositories. It provides every feature that we can use in the command line. The screenshot that follows shows our test packt-git repository:
GitHub Desktop can be downloaded from https://desktop.github.com/ and is available for Mac and Windows only. Also, GitHub Desktop can be only used with GitHub unless some hacks are used to make it work with other repositories, such as GitLab or Bitbucket.
Another powerful tool is SourceTree. SourceTree can be used with GitHub, GitLab, and Bitbucket easily. It provides complete features to manage repositories, pull, push, commit, merge, and other actions. SourceTree provides a very powerful and beautiful graph tool for the branches and commits. The following is a screenshot for SourceTree that is used to connect with our packt-git test repository:
Besides the previous two nice tools, every development IDE provides version control systems with full support and also provides features such as different colors for modified and newly added files.
Git is a powerful tool; it can't be covered in this appendix. There are several books available, but Git Book is a very good place to start. This can be downloaded in different formats from https://git-scm.com/book/en/v2 or can be read online.
We studied Grunt in Chapter 3, Improving PHP 7 Application Performance. We only used it to merge CSS and JavaScript files and minify them. However, Grunt is not used only for this purpose. It is a JavaScript task runner, which can run tasks either by watching specific files for changes or by manually running tasks. We studied how we can run tasks manually, so now we will study how to use grunt watch to run specific tasks when some changes are made.
Grunt watch is useful and saves a lot of time because it runs the specific tasks automatically instead of running the tasks manually every time we change something.
Let's recall our examples from Chapter 3, Improving PHP 7 Application Performance. We used Grunt to combine and compress CSS and JavaScript files. For this purpose, we created four tasks. One task was combining all CSS files, the second task was combining all JavaScript files, the third task was compressing the CSS files, and the fourth task was compressing all JavaScript files. It will be very time consuming if we run all these tasks manually every time we make some changes. Grunt provides a feature called watch that watches different destinations for file changes, and if any change occurs, it executes the tasks that are defined in the watch.
First, check whether the grunt watch module is installed or not. Check the node_modules directory and see whether there is another directory with the name grunt-contrib-watch. If this directory is there, then watch is already installed. If the directory is not there, then just issue the following command in the terminal at the project root directory where GruntFile.js is located:
npm install grunt-contrib-watch
The preceding command will install Grunt watch and the grunt-contrib-watch directory will be available with the watch module.
Now, we will modify this GruntFile.js file to add the watch module, which will monitor all the files in our defined directories, and if any changes occur, it will run these tasks automatically. This will save a lot of time in manually executing these tasks again and again. Look at the following code; the highlighted code is the modified section:
module.exports = function(grunt) {
/*Load the package.json file*/
pkg: grunt.file.readJSON('package.json'),
/*Define Tasks*/
grunt.initConfig({
concat: {
css: {
src: [
'css/*' //Load all files in CSS folder
],
dest: 'dest/combined.css' //Destination of the final combined file.
},//End of CSS
js: {
src: [
'js/*' //Load all files in js folder
],
dest: 'dest/combined.js' //Destination of the final combined file.
}, //End of js
}, //End of concat
cssmin: {
css: {
src : 'dest/combined.css',
dest : 'dest/combined.min.css'
}
}, //End of cssmin
uglify: {
js: {
files: {
'dest/combined.min.js' : ['dest/combined.js']//destination Path : [src path]
}
}
}, //End of uglify
//The watch starts here
watch: {
mywatch: {
files: ['css/*', 'js/*', 'dist/*'],
tasks: ['concat', 'cssmin', 'uglify']
},
},
}); //End of initConfig
grunt.loadNpmTasks('grunt-contrib-watch'); //Include watch module
grunt.loadNpmTasks('grunt-contrib-concat');
grunt.loadNpmTasks('grunt-contrib-uglify');
grunt.loadNpmTasks('grunt-contrib-cssmin');
grunt.registerTask('default', ['concat:css', 'concat:js', 'cssmin:css', 'uglify:js']);
}; //End of module.exportsIn preceding highlighted code, we added a watch block. The mywatch title can be any name. The files block is required, and it takes an array of the source paths. The Grunt watch watches for changes in these destinations and executes the tasks that are defined in the tasks block. Also, the tasks that are mentioned in the tasks block are already created in GruntFile.js. Also, we have to load the watch module using grunt.loadNpmTasks.
Now, open the terminal at the root of the project where GruntFile.js is located and run the following command:
grunt watch
Grunt will start watching the source files for changes. Now, modify any file in the paths defined in the files block in GruntFile.js and save the file. As soon as the file is saved, the tasks will be executed and the output for the tasks will be displayed in the terminal. A sample output can be seen in the following screenshot:
It is possible to watch as many tasks as required in the watch block, but these tasks should be present in GruntFile.js.
In this appendix, we discussed Composer and how to use it to install and update packages. Also, we discussed Git in detail, including pushing, pulling, committing, creating branches, and merging different branches. Also, we discussed Git hooks. Lastly, we discussed Grunt watch and created a watch that executed four tasks whenever any changes occurred in the files paths defined in GruntFile.js.
We covered the names of some of the frameworks in different chapters, but we did not discuss them. In today's world, we don't invent the wheel again; we build upon the tools that are already built, tested, and widely used. So, as best practice, if there is nothing available to fulfill the requirements, we can build it using a framework that suits the requirements best.
We will cover the following topics:
Model View Controller (MVC) is a design pattern widely used in different programming languages. Most PHP frameworks use this design pattern. This pattern divides the application into three layers: Model, View, and Controller. Each one of these has separate tasks, and they are all interconnected. There are different visual representations for MVC, but an overall and simple representation can be seen in the following diagram:
Now, let's discuss each part of the MVC design pattern.
The model layer is the backbone of the application and handles the data logic. Mostly, it is considered that model is responsible for CRUD operations on a database, which may or may not be true. As we mentioned previously, model is responsible for the data logic, which means that data validation operations can also be performed here. In simple words, models provide an abstraction for the data. The remaining application layers don't know or care how and from where the data comes or how an operation is performed on data. It is the model's responsibility to take care of all data logic.
In today's complex framework structures, the overall MVC structure is changed, and not only do models handle data operations, but also, every other application logic is handled by models. The method followed is fat models and slim controllers, which means keep all the application logic in models and the controllers as clean as possible.
Views are what is visible to end users. All data related to this user and public is displayed in the views, so views can be called the visual representation of the models. Views need data to display. It asks for some specific data or action from the controller. Views do not know or want to know from where the controller gets this data; it just asks the controller to get it. Controller knows who to ask for this specific data and communicates with the specific model. It means that views do not have any direct link to models. However, in the earlier diagram, we linked model to view directly. This is because in the advanced systems nowadays, views can directly take data from models. For example, Magento controllers can't send data back to views. For the data (that is, to get data directly from the database) and/or to communicate with models, views communicate with blocks and helper classes. In modern practices, views can be connected to models directly.
Controllers respond to actions performed by a user in the views and respond to the view. For example, a user fills a form and submits it. Here, the controller comes in the middle and starts taking action on the submission of the form. Now, the controller will first check whether the user is allowed to make this request or not. Then, the controller will take the appropriate action, such as communicating with the model or any other operation. In a simple analogy, the controller is the middle man between views and models. As we mentioned before in the models section, controllers should be slim. So, mostly, controllers are only used to handle the requests and communicate with models and views. All kinds of data operations are performed in models.
The MVC design pattern's sole job is to separate the responsibilities of different parts in an application. So, models are used to manage the application data. Controllers are used to take actions on user inputs, and views are responsible for the visual representation of data. As we mentioned before, MVC separates the responsibilities of each part, so it does not matter whether it accesses the model from controllers or views; the only thing that matters is that views and controllers should not be used to perform operations on data, as it is the model's responsibility, and controllers should not be used to view any kind of data by the end user as this is the view's responsibility.
Laravel is one of the most popular PHP frameworks, and according to the Laravel official website, it is a framework for Web Artisans. Laravel is beautiful, powerful, and has tons of features that can enable developers to write efficient and quality code. The Laravel official documentation is well written and very easy to understand. So, let's play a little with Laravel.
Installation is very easy and simple. Let's use Composer to install Laravel. We discussed Composer in Appendix A. Issue the following command in the terminal to install and create a project in Laravel:
composer create-project --prefer-dist laravel/laravel packt
If Composer is not installed globally on the system, place composer.phar in a directory where Laravel should be installed and issue the following command in the terminal at the root of this directory:
php composer.phar create-project --prefer-dist laravel/laravel packt
Now, Laravel will be downloaded, and a new project with the name packt will be created. Also, Composer will download and install all the dependencies for the project.
Open the browser and head to the project's URL, and we will be welcomed with a nice simple page saying Laravel 5.
Laravel provides tons of features, and we will only discuss a few here.
Laravel provides powerful routing. Routes can be grouped, and prefixes, namespaces, and middleware can be defined for route groups. Also, Laravel supports all HTTP methods, including POST, GET, DELETE, PUT, OPTIONS, and PATCH. All the routes are defined in the routes.php file in the application's app folder. Take a look at the following example:
Route::group(['prefix' => 'customer', 'namespace' => 'Customer', 'middleware' => 'web'], function() {
Route::get('/', 'CustomerController@index');
Route::post('save', 'CustomerController@save');
Route::delete('delete/{id}', 'CustomerController@delete');
});In the preceding snippet, we created a new routes group. This will be only used when the URL has a prefixed customer. For example, if a URL is similar to domain.com/customer, this group will be used. We also used a customer namespace. Namespacing allows us to use standard PHP namespaces and divide our files in subfolders. In the preceding example, all customer controllers can be placed in the Customer subfolder in the Controllers directory, and the controller will be created as follows:
namespace App\Http\Controllers\Customer
use App\Http\{
Controllers\Controller,
Requests,
};
use Illuminate\Http\Request;
Class CustomerController extends Controller
{
…
…
}So, namespacing a route group enables us to place our controller files in subfolders, which are easy to manage. Also, we used the web middleware. Middleware provides a way to filter the request before entering the application, which enables us to use it to check whether a user is logged in or not, the CSRF protection, or whether there are any other actions that can be performed in a middleware and need to be performed before the request is sent to application. Laravel comes with a few middleware, including web, api, auth, and so on.
If a route is defined as GET, no POST request can be sent to this route. It is very convenient, which enables us to not worry about the request method filtering. However, HTML forms do not support the HTTP methods like DELETE, PATCH, and PUT. For this, Laravel provides method spoofing, in which a hidden form field with name _method and the value of the HTTP method is used to make this request possible. For example, in our routes group, to make the request possible to delete a route, we need a form similar to the following:
<form action="/customer/delete" method="post">
{{ method_field('DELETE') }}
{{ csrf_field() }}
</form>When the preceding form is submitted, it will work, and the delete route will be used. Also, we created a CSRF hidden field, which is used for CSRF protection.
Laravel routing is very interesting, and it is a big topic. More in-depth detail can be found at https://laravel.com/docs/5.2/routing.
Eloquent ORM provides active records to interact with the database. To use Eloquent ORM, we have to just extend our models from the Eloquent model. Let's have a look at a simple user model, as follows:
namespace App;
use Illuminate\Database\Eloquent\Model;
class user extends Model
{
//protected $table = 'customer';
//protected $primaryKey = 'id_customer';
…
…
}That's it; we have a model that can handle all the CRUD operations now. Note that we commented the $table property and did the same for $primaryKey. This is because Laravel uses a plural name of the class to look for the table unless the table is defined with the protected $table property. In our case, Laravel will look for table name users and use it. However, if we want to use a table named customers, we can just uncomment the line, as follows:
protected $table = 'customers';
Similarly, Laravel thinks that a table will have a primary key with the column name id. However, if another column is needed, we can override the default primary key, as follows:
protected $primaryKey = 'id_customer';
Eloquent models also make it easy for timestamps. By default, if the table has the created_at and updated_at fields, then these two dates will be generated automatically and saved. If no timestamps are required, these can be disabled, as follows:
protected $timestamps = false;
Saving data to the table is easy. The table columns are used as properties of the models, so if our customer table has columns such as name, email, phone, and so on, we can set them as follows in our customer controller, mentioned in the routing section:
namespace App\Http\Controllers\Customer
use App\Http\{
Controllers\Controller,
Requests,
};
use Illuminate\Http\Request;
use App\Customer
Class CustomerController extends Controller
{
public function save(Request $request)
{
$customer = new Customer();
$customer->name = $request->name;
$customer->email = $request->email;
$customer->phone = $request->phone;
$customer->save();
}
}In the preceding example, we added the save action to our controller. Now, if a POST or GET request is made along the form data, Laravel assigns all the form-submitted data to a Request object as properties with the same names as that of the form fields. Then, using this request object, we can access all the data submitted by the form either using POST or GET. After assigning all the data to model properties (the same names as those of table columns), we can just call the save method. Now, our model does not have any save method, but its parent class, which is the Eloquent model, has this method defined. However, we can override this save method in our model class in case we need some other features in this method.
Fetching data from the Eloquent model is also easy. Let's try an example. Add a new action to the customer controller, as follows:
public function index()
{
$customers = Customer::all();
}We used the all() static method in the model, which is basically defined in the Eloquent model, which, in turn, fetches all the data in our customers table. Now, if we want to get a single customer by the primary key, we can use the find($id) method, as follows:
$customer = Customer::find(3);
This will fetch the customer with the ID 3.
Updating is simple, and the same save() method is used, as shown here:
$customer = Customer::find(3); $customer->name = 'Altaf Hussain'; $customer->save();
This will update the customer with the ID 3. First, we loaded the customer, then we assigned new data to its properties, and then we called the same save() method. Deleting the model is simple and easy and can be done as follows:
$customer = Customer::find(3); $customer->delete();
We first loaded the customer with the ID 3, and then we called the delete method, which will delete the customer with the ID 3.
Laravel's Eloquent models are very powerful and provide lots of features. These are well explained in the documentation at https://laravel.com/docs/5.2/eloquent. The Laravel database section is also worth reading and can be found at https://laravel.com/docs/5.2/database.
Artisan is the command-line interface provided with Laravel, and it has some nice commands that can be used for quicker operations. It has lots of commands, and a full list can be seen using the following command:
php artisan list
This will list all the options and commands available.
Some of the basic commands are as follows:
make:controller: This command creates a new controller in the Controllers folder. The command can be used as follows:
php artisan make:controller MyController
If a namespaced controller is required, as it happened before with the Customer namespace, it can be done as follows:
php artisan make:controller Customer/CustomerController
This command will create CustomerController in the Customer folder. If the Customer folder is not available, it will create the folder as well.
make:model: This creates a new model in the app folder. The syntax is the same as the make:controller command, as follows:
php artisan make:model Customer
For the namespaced models, it can be used as follows:
php artisan make:model Customer/Customer
This will create the Customer model in the Customer folder and use the Customer namespace for it.
make:event: This creates a new event class in the Events folder. It can be used as follows:
php artisan make:event MyEvent
make:listener: This command creates a new listener for an event. This can be used as follows:
php artisan make:listener MyListener --event MyEvent
The preceding command will create a new listener for our MyEvent event. We have to always mention the event for which we need to create a listener using the --event option.
make:migration: This command creates a new migration in the database/migrations folder.php artisan migrate: This runs all the available migrations that are not executed.php artisan optimize: This command optimizes the framework for better performance.php artisan down: This puts the application in maintenance mode.php artisan up: This command brings the application back live from the maintenance mode.php artisan cache:clear: This command clears the application cache.php artisan db:seed: This command seeds the database with records.php artisan view:clear: This clears all the compiled view files.More detail about the Artisan console or Artisan CLI can be found in the documentation at https://laravel.com/docs/5.2/homestead.
Migrations is another powerful feature in Laravel. In migrations, we define the database schemas—whether it creates tables, removes tables, or adds/updates columns in the tables. Migrations are very convenient in deployment and act as version control for the database. Let's create a migration for our customer table that is not available in the database yet. To create a migration, issue the following command in the terminal:
php artisan make:migration create_custmer_table
A new file in the database/migrations folder will be created with the filename create_customer_table prefixed with the current date and a unique ID. The class is created as CreateCustomerTable. This is a class as follows:
use Illuminate\Database\Schema\Blueprint;
use Illuminate\Database\Migrations\Migration;
class CreateCustomerTable extends Migrations
{
//Run the migrations
public function up()
{
//schemas defined here
}
public function down()
{
//Reverse migrations
}
}The class will have two public methods: up() and down(). The up() method should have all the new schemas for the table(s). The down() method is responsible for reversing the executed migration. Now, lets add the customers table schema to the up() method, as follows:
public function up()
{
Schema::create('customers', function (Blueprint $table)
{
$table->increments('id', 11);
$table->string('name', 250)
$table->string('email', 50);
$table->string('phone', 20);
$table->timestamps();
});
}
public function down()
{
Schema::drop('customers');
}In the up() method, we defined the schema and table name. Columns for the table are individually defined, including the column size. The increments() method defines the autoincrement column, which, in our case, is the id column. Next, we created three string columns for name, email, and phone. Then, we used the timestamps() method, which creates the created_at and updated_at timestamp columns. In the down() method, we just used the drop() method of the Schema class to drop out the customers table. Now, we need to run our migrations using the following command:
php artisan migrate
The preceding command will not only run our migration but will also run all those migrations that are not executed yet. When a migration is executed, Laravel stores the migration name in a table called migrations, from where Laravel decides which migrations it has to execute and which to skip.
Now, if we need to roll back the latest executed migration, we can use the following command:
php artisan migrate:rollback
This will roll back to the last batch of migrations. To roll back all the migrations of the application, we can use the reset command, as follows:
php artisan migrate:reset
This will roll back the complete application migrations.
Migrations make it easy for deployment because we won't need to upload the database schemas every time we create some new changes in the tables or database. We will just create the migrations and upload all the files, and after this, we will just execute the migration command, and all the schemas will be updated.
Laravel comes with its own template language called Blade. Also, Blade template files support plain PHP code. Blade template files are compiled to plain PHP files and are cached until they are changed. Blade also supports layouts. For example, the following is our master page layout in Blade, placed in the resources/views/layout folder with the name master.blade.php. Take a look at the following code:
<!DOCTYPE html>
<html>
<head>
<title>@yield('title')</title>
</head>
<body>
@section('sidebar')
Our main sidebar
@show
<div class="contents">
@yield('content')
</div>
</body>
</html>In the preceding example, we had a section for the sidebar that defines a content section. Also, we had @yield, which displays the contents of a section. Now, if we want to use this layout, we will need to extend it in the child template files. Let's create the customers.blade.php file in the resources/views/ folder and place the following code in it:
@extend('layouts.master')
@section('title', 'All Customers')
@section('sidebar')
This will be our side bar contents
@endsection
@section('contents')
These will be our main contents of the page
@endsectionAs can be seen in the preceding code, we extended the master layout and then placed contents in every section of the master layout. Also, it is possible to include different templates in another template. For example, let's have two files, sidebar.blade.php and menu.blade.php, in the resources/views/includes folder. Then, we can include these files in any template, as follows:
@include(includes.menu) @include(includes.sidebar)
We used @include to include a template. The dot (.) indicates a folder separation. We can easily send data to Blade templates or views from our controllers or routers. We have to just pass the data as an array to a view, as follows:
return view('customers', ['count => 5]);Now, count is available in our customers view file and can be accessed as follows:
Total Number of Customers: {{ count }}Yes, Blade uses double curly braces to echo a variable. For control structures and loops, let's have another example. Let's send data to the customers view, as follows:
return view('customers', ['customers' => $allCustomers]);Now, our customers view file will be similar to the following if we want to display all the customers data:
…
…
@if (count($customers) > 0)
{{ count($customers) }} found. <br />
@foreach ($customers as $customer)
{{ $customer->name }} {{ $customer->email }} {{ $customer->phone }} <br>
@endforeach
@else
Now customers found.
@endif;
…
…All the preceding syntax looks familiar as it is almost the same as plain PHP. However, to display a variable, we have to use double curly braces {{}}.
A nice and easy-to-read documentation for Blade templates can be found at https://laravel.com/docs/5.2/blade.
We only discussed a few basic features in the previous section. Laravel has tons of other features, such as Authentication and Authorization, which provide an easy way to authenticate and authorize users. Also, Laravel provides a powerful caching system, which supports file-based cache, the Memcached, and Redis cache. Laravel also provides events and listeners for these events, which is very convenient when we want to perform a specific action and when a specific event occurs. Laravel supports localization, which enables us to use localized contents and multiple languages. Laravel also supports task scheduling and queues, in which we schedule some tasks to run at a specific time and queue some tasks to be run when their turn arrives.
Lumen is a micro-framework provided by Laravel. Lumen is mainly intended to create stateless APIs and has a minimal set of features of Laravel. Also, Lumen is compatible with Laravel, which means that if we just copy our Lumen application to Laravel, it will work fine. The installation is simple. Just use the following Composer command to create a Lumen project, and it will download all the dependencies, including Lumen:
composer create-project --prefer-dist laravel/lumen api
The preceding command will download Lumen and then create our API application. After this, rename .env.example as .env. Also, create a 32-characters-long app key and place it in the .env file. Now, the basic application is ready to use and create APIs.
Lumen is almost the same as Laravel, but some Laravel features are not included by default. More details can be found at https://lumen.laravel.com/docs/5.2.
Apigility is built and developed by Zend in Zend Framework 2. Apigility provides an easy to use GUI to create and manage APIs. It is very easy to use and is capable of creating complex APIs. Let's start by installing Apigility using Composer. Issue the following command in the terminal:
composer create-project -sdev zfcampus/zf-apigility-skeleton packt
The preceding command will download Apigility and its dependencies, including Zend Framework 2, and will set up our project named packt. Now, issue the following command to enable the development mode so that we can have access to the GUI:
php public/index.php development enable
Now, open the URL as yourdomain.com/packt/public, and we will see a beautiful GUI, as shown in the following screenshot:
Now, let's create our first API. We will call this API "books", which will return a list of books. Click on the New API button, as shown in the preceding picture, and a popup will be displayed. In the text box, enter books as the API name and click on Create button; the new API will be created. When the API is created, we will be presented with the following screen:
Apigility provides easy ways to set other properties for the API, such as versioning and authentication. Now, let's create an RPC service by clicking on the New Service button in the left sidebar. Also, we can click on the Create a new one link in the RPC section in the preceding screenshot. We will be presented with the following screen:
As shown in the preceding screenshot, we created an RPC service named get in the books API. The route URI entered is /books/get, which will be used to call this RPC service. When we click on the Create service button, the API creation successful message will be displayed, and also, the following screen will be displayed:
As can be seen in the preceding screenshot, the allowed HTTP method for this service is only GET. Let's keep this as it is, but we can select all or any of them. Also, we want to keep Content Negotiation Selector as Json, and our service will accept/receive all the content in the JSON format. Also, we can select different media types and content types.
Next, we should add some fields to our service that will be used. Click on the Fields tab, and we will see the Fields screen. Click on the New Field button, and we will be presented with the following popup:
As can be seen in the preceding screenshot, we can set all the properties for a field, such as the Name, Description, whether it is required or not, and some other settings, including an error message if the validation fails. After we created two fields, title and author, we will have a screen similar to the following:
As can be seen in the preceding screen, we can add validators and filters to each individual field too.
The next topic is documentation. When we click on the Documentation tab, we will see the following screen:
Here, we will document our service, add some description, and also can generate the response body for documentation purposes. This is very important as it will enable others to better understand our APIs and services.
Now, we need to get the all the books from somewhere. It can be either from the database or from another service or any other source. However, for now, we will just use an array of books for test purposes. If we click on the Source tab, we will find that our code for the service is placed at module/books/src/books/V1/Rpc/Get/GetController.php. Apigility created a module for our API books and then placed all the source code in this module in different folders according to the version of our API, which is V1 by default. We can add more versions, such as V2 and V3, to our APIs. Now, if we open the GetController file, we will find some code and an action called getAction according to our route URI. The code is as follows, and the highlighted code is the one we added:
namespace books\V1\Rpc\Get; use Zend\Mvc\Controller\AbstractActionController; use ZF\ContentNegotiation\ViewModel; class GetController extends AbstractActionController { public function getAction() { $books = [ 'success' => [ [ 'title' => 'PHP 7 High Performance', 'author' => 'Altaf Hussain' ], [ 'title' => 'Magento 2', 'author' => 'Packt Publisher' ], ] ]; return new ViewModel($books); } }
In the preceding code, we used ContentNegotiation\ViewModel, which is responsible for responding with the data in the format that we selected in the service setup, which is JSON in our case. Then, we created a simple $books array with the fieldnames we created for the service and assigned our values to them. Then, we returned them using the ViewModel object, which handles the response data conversion to JSON.
Now, let's test our API. As our service can accept GET requests, we will just type our URL in the browser with the books/get URI, and we will see the JSON response. It is best to check the API with tools such as RestClient or Postman for Google Chrome, which provides an easy-to-use interface to make different types of requests to APIs. We tested it with Postman and got the response shown in the following screenshot:
Also note that we set our service to accept only GET requests. So, if we send a request other than GET, we will get an HTTP Status code 405 methods not allowed error.
Apigility is very powerful and provides tons of features, such as RESTFul APIs, HTTP authentication, database connected services with easy-to-create DB connectors, and a selection of tables for a service. While using Apigility, we need not worry about the API, service structure security, and other things, as Apigility does this for us. We need to only concentrate on the business logic of the APIs and services.
Apigility can't be covered completely in this Appendix. Apigility has lots of features that can be covered in a complete book. Apigility's official documentation at https://apigility.org/documentation is a good place to get started and read more about this.
In this Appendix, we discussed the basics of the MVC design pattern. We also discussed the Laravel framework and some of its good features. We introduced you to the Laravel-based micro-framework, Lumen. At the end, we had a small introduction to Apigility and created a test API and web service.
In IT, things get obsolete in a very short time span. It is always required to study upgraded tools and find new ways and techniques for the best approaches in programming. Therefore, one should not stop after completing this book and start studying new topics and also the topics that are not covered completely in this book. Until this point, you will have the knowledge that you can use to set up high-performance environments for high-performance applications. We wish you good luck and success in PHP-ing!
It has been more than two decades now since the birth of PHP. Originally created by Rasmus Lerdorf in 1994, the PHP acronym initially stood for Personal Home Page. Back then, PHP was merely a few Common Gateway Interface (CGI) programs in C, used to power a simple web page.
Though PHP was not intended to be a new programming language, the idea caught on. During the late nineties Zeev Suraski and Andi Gutmans, co-founders of Zend Technologies, continued the work on PHP by rewriting its entire parser, giving birth to PHP 3. The PHP language name acronym now stood for PHP: Hypertext Preprocessor.
PHP positions itself among the top ten programming languages in the world. According to TIOBE, the software quality company, it currently holds sixth place. For the last decade, especially since the release of PHP 5 in July 2004, PHP has been recognized as the popular solution for building web applications.
Though PHP still presents itself as a scripting language, it's safe to say that as of PHP 5 it is far more than that. Some of the world web's most popular platforms like WordPress, Drupal, Magento, and PrestaShop are built in PHP. It is projects like these that played a role in further raising the popularity of PHP. Some of them stretch the boundaries of PHP by implementing complex OOP (Object Oriented Programming) design patterns found in other programming languages like Java, C#, and their frameworks.
Even though PHP 5 had decent OOP support, lots of things were still left to be dreamed of. Work on PHP 6 was planned to give more support for the PHP Unicode strings. Sadly, its development came to a halt and PHP 6 was canceled in 2010.
That same year, Facebook announced its HipHop compiler. Their compiler was converting PHP code into C++ code. The C++ code was further compiled into native machine code via a C++ compiler. This concept brought major performance improvements for PHP. However, this approach was not very practical, because it took too long to compile PHP scripts all the way to native machine code.
Shortly after, Dmitry Stogov, Zend Technologies Chief Performance Engineer, announced a project called PHPNG, which became the basis for the next PHP version, PHP 7.
In Dec 2015, PHP 7 was released, bringing numerous improvements and new features:
In this chapter, we will look at the following topics:
PHP 7 comes with quite a big list of changes. These changes affect both the PHP interpreter and the various extensions and libraries. Though most of the PHP 5 code will continue to operate normally on the PHP 7 interpreter, it is worth getting up to speed with the newly available features.
Moving forward, we will look into some of these features and the benefits they provide.
Scalar type hints are not an entirely new feature in PHP. With the introduction of PHP 5.0 we were given the ability to type hint classes and interfaces. PHP 5.1 extended this by introducing array type hinting. Later on, with PHP 5.4, we were additionally given the ability to type hint callable. Finally, PHP 7 introduced scalar type hints. Extending the type hints to scalars makes this probably one of the most exciting features added to PHP 7.
The following scalar type hints are now available:
By default, PHP 7 works in weak type-checking mode, and will attempt to convert to the specified type without complaint. We can control this mode using the strict_typesdeclare() directive.
The declare(strict_types=1); directive must be the first statement in a file, or else it will generate a compiler error. It only affects the specific file it is used in, and does not affect other included files. The directive is entirely compile-time and cannot be controlled at runtime:
declare(strict_types=0); //weak type-checking declare(strict_types=1); // strict type-checking
Let's assume the following simple function that accepts hinted scalar types.
function hint (int $A, float $B, string $C, bool $D)
{
var_dump($A, $B, $C, $D);
}The weak type-checking rules for the new scalar type declarations are mostly the same as those of extensions and built-in PHP functions. Because of this automated conversion we might unknowingly lose data when passing it into a function. One simple example is passing a float into a function that requires an int; in which case conversion would simply strip away decimals.
Assuming the weak type-checking is on, as by default, the following can be observed:
hint(2, 4.6, 'false', true); /* int(2) float(4.6) string(5) "false" bool(true) */ hint(2.4, 4, true, 8); /* int(2) float(4) string(1) "1" bool(true) */
We can see that the first function call passes on parameters as they are hinted. The second function call does not pass the exact types of parameters but still the function manages to execute as parameters go through conversion.
Assuming the weak type-checking is off, by using the declare(strict_types=1); directive, the following can be observed:
hint(2.4, 4, true, 8);
Fatal error: Uncaught TypeError: Argument 1 passed to hint() must be of the type integer, float given, called in php7.php on line 16 and defined in php7.php:8 Stack trace: #0 php7.php(16): hint(2.4, 4, true, 8) #1 {main} thrown in php7.php on line 8The function call broke on the first argument resulting in the \TypeError exception. The strict_types=1 directive does not allow any type juggling. The parameter has to be of the same type, as hinted by the function definition.
In addition to type hinting, we can also type hint the return values. All of the type hints that can be applied to function parameters can be applied to function return values. This also implies to the weak type-checking rules.
To add a return type hint, simply follow the parameter list with a colon and the return type, as shown in the following example:
function divide(int $A, int $B) : int
{
return $A / $B;
}The preceding function definition says that the divide function expects two parameters of the int type, and is supposed to return a parameter of the int type.
Assuming the weak type-checking is on, as by default, the following can be observed:
var_dump(divide(10, 2)); // int(5) var_dump(divide(10, 3)); // int(3)
Though the actual result of divide(10, 3)should be a float, the return type hint triggers conversion into an integer.
Assuming the weak type-checking is off, by using the declare(strict_types=1); directive, the following can be observed:
int(5)
Fatal error: Uncaught TypeError: Return value of divide() must be of the type integer, float returned in php7.php:10 Stack trace: #0php7.php(14): divide(10, 3) #1 {main} thrown in php7.php on line 10With the strict_types=1 directive in place, the divide(10, 3) fails with the \TypeError exception.
With the addition of anonymous classes, PHP objects gained closure-like capabilities. We can now instantiate objects through nameless classes, which brings us closer to object literal syntax found in other languages. Let's take a look at the following simple example:
$object = new class {
public function hello($message) {
return "Hello $message";
}
};
echo$object->hello('PHP');The preceding example shows an $object variable storing a reference to an instance of an anonymous class. The more likely usage would be to directly pass the new class to a function parameter, without storing it as a variable, as shown here:
$helper->sayHello(new class {
public function hello($message) {
return "Hello $message";
}
});Similar to any normal class, anonymous classes can pass arguments through to their constructors, extend other classes, implement interfaces, and use traits:
class TheClass {}
interface TheInterface {}
trait TheTrait {}
$object = new class('A', 'B', 'C') extends TheClass implements TheInterface {
use TheTrait;
public $A;
private $B;
protected $C;
public function __construct($A, $B, $C)
{
$this->A = $A;
$this->B = $B;
$this->C = $C;
}
};
var_dump($object);The above example would output:
object(class@anonymous)#1 (3) { ["A"]=> string(1) "A"["B":"class@anonymous":private]=> string(1) "B"["C":protected]=> string(1) "C" }The internal name of an anonymous class is generated with a unique reference based on its address.
There is no definitive answer as to when to use anonymous classes. It depends almost entirely on the application we are building, and the objects, depending on their perspective and usage.
Some of the benefits of using anonymous classes are as follows:
Anonymous classes, or rather objects instantiated from anonymous classes, cannot be serialized. Trying to serialize them results in a fatal error as follows:
Fatal error: Uncaught Exception: Serialization of 'class@anonymous' is not allowed in php7.php:29 Stack trace: #0 php7.php(29): serialize(Object(class@anonymous)) #1 {main} thrown in php7.php on line 29Nesting an anonymous class does not give it access to private or protected methods and properties of the outer class. In order to use the outer class protected methods and properties, the anonymous class can extend the outer class. Ignoring methods, private or protected properties of the outer class can be used in the anonymous class if passed through its constructor:
class Outer
{
private $prop = 1;
protected $prop2 = 2;
protected function outerFunc1()
{
return 3;
}
public function outerFunc2()
{
return new class($this->prop) extends Outer
{
private $prop3;
public function __construct($prop)
{
$this->prop3 = $prop;
}
public function innerFunc1()
{
return $this->prop2 + $this->prop3 + $this->outerFunc1();
}
};
}
}
echo (new Outer)->outerFunc2()->innerFunc1(); //6Though we labeled them as anonymous classes, they are not really anonymous in terms of the internal name the PHP engine assigns to objects instantiated from these classes. The internal name of an anonymous class is generated with a unique reference based on its address.
The statement get_class(new class{}); would result in something like class@anonymous/php7.php0x7f33c22381c8, where 0x7f33c22381c8 is the internal address. If we were to define the exact same anonymous class elsewhere in the code, its class name would be different as it would have a different memory address assigned. The resulting object in that case might have the same property values, which means they will be equal (==) but not identical (===).
PHP introduced the Closure class in the 5.3 version. Closure class is used to represent anonymous functions. Anonymous functions, implemented in PHP 5.3, yield objects of this type. As of PHP 5.4, the Closure class got several methods (bind, bindTo) that allow further control of the anonymous function after it has been created. These methods basically duplicate the Closure with a specific bound object and class scope. PHP 7 introduced the call method on a Closure class. The call method does not duplicate the closure, it temporarily binds the closure to new this ($newThis), and calls it with any given parameters. It then returns the return value of the closure.
The call function signature looks like the following:
function call ($newThis, ...$parameters) {}
$newThis is the object to bind the closure for the duration of the call. The parameters, which will be given as $parameters to the closure are optional, meaning zero or more.
Let's take a look at the following example of a simple Customer class and a $greeting closure:
class Customer {
private $firstname;
private $lastname;
public function __construct($firstname, $lastname)
{
$this->firstname = $firstname;
$this->lastname = $lastname;
}
}
$customer = new Customer('John', 'Doe');
$greeting = function ($message) {
return "$message $this->firstname $this->lastname!";
};
echo $greeting->call($customer, 'Hello');
Within the actual $greeting closure, there is no $this, it does not exist until the actual binding occurs. We could easily confirm this by directly calling a closure like $greeting('Hello');. However, we assume $this will come in to existence when we bind the closure to a given object instance via its call function. In which case, $this within the closure becomes $this of the customer object instance. The preceding example shows binding of $customer to the closure using a call method call. The resulting output displays Hello John Doe!
Generators provide a simple way to implement iterators without the overhead of implementing a class that implements the Iterator interface. They allow us to write code which uses foreach to iterate over a set of data without needing to build an array in memory. This eliminates the exceeds memory limit errors. They were not new to PHP, as they were added in PHP 5.5.
However, PHP 7 brings several new improvements to generators, one of which is generator delegation.
Generator delegation allows a generator to yield other generators, arrays, or objects that implement the Traversable interface. In another words, we might say that generator delegation is yielding subgenerators.
Let's take a look at the following example with three generator type functions:
function gen1() {
yield '1';
yield '2';
yield '3';
}
function gen2() {
yield '4';
yield '5';
yield '6';
}
function gen3() {
yield '7';
yield '8';
yield from gen1();
yield '9';
yield from gen2();
yield '10';
}
// output of the below code: 123
foreach (gen1() as $number) {
echo $number;
}
//output of the below code: 78123945610
foreach (gen3() as $number) {
echo $number;
}Yielding other generators requires using the yield from <expression> syntax.
Prior to PHP 7, generator functions were not able to return expressions. The inability of generator functions to specify return values limited their usefulness for multitasking in co-routine contexts.
PHP 7 made it possible for generators to return expressions. We can now call $generator->getReturn() to retrieve the return expression. Calling $generator->getReturn() when the generator has not yet returned, or has thrown an uncaught exception, will throw an exception.
If the generator has no return expression defined and has completed yielding, null is returned.
Let's take a look at the following example:
function gen() {
yield 'A';
yield 'B';
yield 'C';
return 'gen-return';
}
$generator = gen();
//output of the below code: object(Generator)#1 (0) { }
var_dump($generator);
// output of the below code: Fatal error
// var_dump($generator->getReturn());
// output of the below code: ABC
foreach ($generator as $letter) {
echo $letter;
}
// string(10) "gen-return"
var_dump($generator->getReturn());Looking at the gen() function definition and its return expression, one might expect the value of the $generator variable to be equal to the gen-return string. However, this is not the case, as the $generator variable becomes the instance of the \Generator class. Calling the getReturn() method on the generator while it is still open (not iterated over) will result in a fatal error.
If the code is structured in such a way that it is not obvious if the generator has been closed, we can use the valid method to check, before fetching the return value:
if ($generator->valid() === false) {
var_dump($generator->getReturn());
}In PHP 5 we had the ternary operator which tests a value and then returns the second element if that value is true, or third element if that value is false, as shown in the following code block:
$check = (5 > 3) ? 'Correct!' : 'Faulty!'; // Correct! $check = (5 < 3) ? 'Correct!' : 'Faulty!'; // Faulty!
While processing user-provided data in web-centered languages such as PHP, it is common to check for variable existence. If a variable doesn't exist, then set it to some default value. A ternary operator makes this easy for us, as shown here:
$role = isset($_GET['role']) ? $_GET['role'] : 'guest';
However, easy is not always quick or elegant. With that in mind, PHP 7 set out to resolve one of the most common usage patterns, by introducing the null coalesce operator(??).
The null coalesce operator enables us to write even shorter expressions, as in the following code block:
$role = $_GET['role'] ??'guest';The coalesce operator(??) is added right after the $_GET['role'] variable, which returns the result of its first operand if it exists and is not NULL, or else its second operand. This means the $_GET['role'] ?? 'guest' is completely safe and will not raise an E_NOTICE.
We can also nest the coalesce operator:
$A = null; // or not set $B = 10; echo $A ?? 20; // 20 echo $A ?? $B ?? 30; // 10
Reading from left to right, the first value which exists and is not null is the value that will be returned. The benefit of this construct is that it enables a clean and effective way to achieve safe fallback to the desired value.
The code bundle for the book is also hosted on GitHub at https://github.com/PacktPublishing/Modular-Programming-with-PHP7. We also have other code bundles from our rich catalog of books and videos available at https://github.com/PacktPublishing/. Check them out!
The three-way comparison operator, also known as the Spaceship operator, was introduced in PHP 7. Its syntax goes as follows:
(expr) <=> (expr)
The operator returns 0 if both operands are equal, 1 if the left is greater, and -1 if the right is greater.
It uses the same comparison rules as other existing comparison operators: <, <=, ==, >=, and >:
operator<=> equivalent $a < $b($a <=> $b) === -1 $a <= $b($a <=> $b) === -1 || ($a <=> $b) === 0 $a == $b($a <=> $b) === 0 $a != $b($a <=> $b) !== 0 $a >= $b($a <=> $b) === 1 || ($a <=> $b) === 0 $a > $b($a <=> $b) === 1
The following are some examples of Spaceship operator behavior:
// Floats echo 1.5 <=> 1.5; // 0 echo 1.5 <=> 2.5; // -1 echo 2.5 <=> 1.5; // 1 // Strings echo "a"<=>"a"; // 0 echo "a"<=>"b"; // -1 echo "b"<=>"a"; // 1 echo "a"<=>"aa"; // -1 echo "zz"<=>"aa"; // 1 // Arrays echo [] <=> []; // 0 echo [1, 2, 3] <=> [1, 2, 3]; // 0 echo [1, 2, 3] <=> []; // 1 echo [1, 2, 3] <=> [1, 2, 1]; // 1 echo [1, 2, 3] <=> [1, 2, 4]; // -1 // Objects $a = (object) ["a" =>"b"]; $b = (object) ["a" =>"b"]; echo $a <=> $b; // 0 $a = (object) ["a" =>"b"]; $b = (object) ["a" =>"c"]; echo $a <=> $b; // -1 $a = (object) ["a" =>"c"]; $b = (object) ["a" =>"b"]; echo $a <=> $b; // 1 // only values are compared $a = (object) ["a" =>"b"]; $b = (object) ["b" =>"b"]; echo $a <=> $b; // 0
One practical use case for this operator is for writing callbacks used in sorting functions like usort, uasort, and uksort:
$letters = ['D', 'B', 'A', 'C', 'E'];
usort($letters, function($a, $b) {
return $a <=> $b;
});
var_dump($letters);
// array(5) { [0]=> string(1) "A" [1]=> string(1) "B" [2]=>string(1) "C" [3]=> string(1) "D" [4]=> string(1) "E" }Though PHP 5 introduced the exception model, overall errors and error handling remained somewhat unpolished. Basically PHP had two error handling systems. Traditional errors still popped out and were not handled by try…catch blocks.
Take the following E_RECOVERABLE_ERROR as an example:
class Address
{
private $customer;
public function __construct(Customer $customer)
{
$this->customer = $customer;
}
}
$customer = new stdClass();
try {
$address = new Address($customer);
} catch (\Exception $e) {
echo 'handling';
} finally {
echo 'cleanup';
}The try…catch block has no effect here, as the error is not interpreted as an exception, rather a catchable fatal error:
Catchable fatal error: Argument 1 passed to Address::__construct() must be an instance of Customer, instance of stdClass given, called in script.php on line 15 and defined in script.php on line 6.
A possible workaround involves setting a user-defined error handler by using the set_error_handler function as follows:
set_error_handler(function($code, $message) {
throw new \Exception($message, $code);
});The error handler, as written above, would now transform every error into an exception, therefore making it catchable with try…catch blocks.
PHP 7 made fatal and catchable fatal errors part of engine exceptions, therefore catchable with try…catch blocks. This excludes warnings and notices which still do not pass through the exception system, which makes sense for backward compatibility reasons.
It also introduced a new exception hierarchy via the \Throwable interface. \Exception and \Error implement the \Throwable interface.
Standard PHP fatal and catchable fatal are now thrown as \Error exceptions, though they will continue to trigger traditional fatal error if they are uncaught.
Throughout our application we must use \Exception and \Error, as we cannot implement the \Throwable interface directly. We could, however, use the following block to catch all errors, regardless of whether it is the \Exception or \Error type:
try {
// statements
} catch (\Throwable $t) {
// handling
} finally {
// cleanup
}The ParseError is a nice PHP 7 addition to error handling. We can now handle parse errors triggered by eval(), include and require statements, as well as those thrown by \ParseError exceptions. It extends \Error, which in turn implements a \Throwable interface.
The following is an example of a broken PHP file, because of a missing "," inbetween between array items:
<?php $config = [ 'host' =>'localhost' 'user' =>'john' ]; return $config;
The following is an example of a file including config.php:
<?php
try {
include 'config.php';
} catch (\ParseError $e) {
// handle broken file case
}We can now safely catch possible parse errors.
The dirname function has been with us since PHP 4. It's probably one of the most often used functions in PHP. Up until PHP 7, this function only accepted the path parameter. With PHP 7, the new levels parameter was added.
Let's take a look at the following example:
// would echo '/var/www/html/app/etc'
echo dirname('/var/www/html/app/etc/config/');
// would echo '/var/www/html/app/etc'
echo dirname('/var/www/html/app/etc/config.php');
// would echo '/var/www/html/app'
echo dirname('/var/www/html/app/etc/config.php', 2);
// would echo '/var/www/html'
echo dirname('/var/www/html/app/etc/config.php', 3);By assigning the levels value, we indicate how many levels to go up from the assigned path value. Though small, the addition of the levels parameter will certainly make it easier to write some of the code that deals with paths.
The intdiv is a new integer division function introduced in PHP 7. The function accepts dividend and divisor as parameters and returns the integer quotient of their division, as shown here by the function description:
int intdiv(int $dividend, int $divisor)
Let's take a look at the following few examples:
intdiv(5, 3); // int(1) intdiv(-5, 3); // int(-1) intdiv(5, -2); // int(-2) intdiv(-5, -2); // int(2) intdiv(PHP_INT_MAX, PHP_INT_MAX); // int(1) intdiv(PHP_INT_MIN, PHP_INT_MIN); // int(1) // following two throw error intdiv(PHP_INT_MIN, -1); // ArithmeticError intdiv(1, 0); // DivisionByZeroError
If the dividend is PHP_INT_MIN and the divisor is -1, then an ArithmeticError exception is thrown. If the divisor is 0, then the DivisionByZeroError exception is thrown.
Prior to PHP 7, constants defined with define() could only contain scalar expressions, but not arrays. As of PHP 5.6, it is possible to define an array constant by using const keywords, and as of PHP 7, array constants can also be defined using define():
// the define() example
define('FRAMEWORK', [
'version' => 1.2,
'licence' =>'enterprise'
]);
echo FRAMEWORK['version']; // 1.2
echo FRAMEWORK['licence']; // enterprise
// the class const example
class App {
const FRAMEWORK = [
'version' => 1.2,
'licence' =>'enterprise'
];
}
echo App::FRAMEWORK['version']; // 1.2
echo App::FRAMEWORK['licence']; // enterpriseConstants may not be redefined or undefined once they have been set.
To make PHP's parser more complete for various variable dereferences, PHP 7 introduced a uniform variable syntax. With uniform variable syntax all variables are evaluated from left to right.
Unlike various functions, keywords, or settings being removed, changes in semantics like this one can be quite impacting for the existing code base. The following code demonstrates the syntax, its old meaning and new:
// Syntax
$$foo['bar']['baz']
// PHP 5.x:
// Using a multidimensional array value as variable name
${$foo['bar']['baz']}
// PHP 7:
// Accessing a multidimensional array within a variable-variable
($$foo)['bar']['baz']
// Syntax
$foo->$bar['baz']
// PHP 5.x:
// Using an array value as a property name
$foo->{$bar['baz']}
// PHP 7:
// Accessing an array within a variable-property
($foo->$bar)['baz']
// Syntax
$foo->$bar['baz']()
// PHP 5.x:
// Using an array value as a method name
$foo->{$bar['baz']}()
// PHP 7:
// Calling a closure within an array in a variable-property
($foo->$bar)['baz']()
// Syntax
Foo::$bar['baz']()
// PHP 5.x:
// Using an array value as a static method name
Foo::{$bar['baz']}()
// PHP 7:
// Calling a closure within an array in a static variable
(Foo::$bar)['baz']()Aside from previously rewritten examples of old-to-new syntax, there are now a few newly supported syntax combinations.
PHP 7 now supports nested double colons,::, and following is an example of it:
// Access a static property on a string class name // or object inside an array $foo['bar']::$baz; // Access a static property on a string class name or object // returned by a static method call on a string class name // or object $foo::bar()::$baz; // Call a static method on a string class or object returned by // an instance method call $foo->bar()::baz();
We can also nest methods and function calls—or any callables—by doubling up on parentheses as shown in the following code examples:
// Call a callable returned by a function foo()(); // Call a callable returned by an instance method $foo->bar()(); // Call a callable returned by a static method Foo::bar()(); // Call a callable return another callable $foo()();
Furthermore, we can now dereference any valid expression enclosed with parentheses:
// Access an array key
(expression)['foo'];
// Access a property
(expression)->foo;
// Call a method
(expression)->foo();
// Access a static property
(expression)::$foo;
// Call a static method
(expression)::foo();
// Call a callable
(expression)();
// Access a character
(expression){0};PHP 7 introduced two new CSPRNG functions. CSPRNG is an acronym for cryptographically secure pseudo-random number generator.
The first, random_bytes, generates an arbitrary length string of cryptographic random bytes that are suitable for cryptographic use, such as when generating salts, keys, or initialization vectors. The function accepts only one (length) parameter, representing the length of the random string that should be returned in bytes. It returns a string containing the requested number of cryptographically secure random bytes, or, optionally, it throws an exception if an appropriate source of randomness cannot be found.
The following is an example of random_bytes usage:
$bytes = random_bytes(5);
The second, random_int, generates cryptographic random integers that are suitable for use where unbiased results are critical, such as when shuffling a deck of cards for a poker game. The function accepts two (min, max) parameters, representing the lowest value to be returned (must be PHP_INT_MIN or higher) and the highest value to be returned (must be less than or equal to PHP_INT_MAX). It returns a cryptographically secure random integer in the range min to max (inclusive).
The following is an example of random_int usage:
$int = random_int(1, 10); $int = random_int(PHP_INT_MIN, 500); $int = random_int(20, PHP_INT_MAX); $int = random_int(PHP_INT_MIN, PHP_INT_MAX);
Serialized data can include objects. These objects can further include functions like destructors, __toString, and __call. In order to increase security when unserializing objects on unstructured data, PHP 7 introduced the optional options parameter to the existing unserialize function.
The options parameter is of type array that currently only accepts the allowed_classes key.
The allowed_classes can have one of three values:
true: This is a default value and allows all objects just as beforefalse: Here no objects allowedThe following is an example of using the allowed_classes option:
class Customer{
public function __construct(){
echo '__construct';
}
public function __destruct(){
echo '__destruct';
}
public function __toString(){
echo '__toString';
return '__toString';
}
public function __call($name, $arguments) {
echo '__call';
}
}
$customer = new Customer();
$s = serialize($customer); // triggers: __construct, __destruct
$u = unserialize($s); // triggers: __destruct
echo get_class($u); // Customer
$u = unserialize($s, ['allowed_classes'=>false]); // does not trigger anything
echo get_class($u); // __PHP_Incomplete_ClassWe can see that the object of that class which is not accepted is instantiated as __PHP_Incomplete_Class.
According to the http://php.net/manual/en/reserved.keywords.php list, PHP has over 60 reserved keywords. These make up for language constructs, like names for properties, methods, constants within classes, interfaces, and traits.
Sometimes these reserved words end up clashing with user defined API declarations.
To resolve the issue, PHP 7.0 introduced the context sensitive lexer. With the context sensitive lexer, we may now use keywords for property, function, and constant names within our code.
The following are a few practical examples related to the impact of context sensitive lexer:
class ReportPool {
public function include(Report $report) {
//
}
}
$reportPool = new ReportPool();
$reportPool->include(new Report());
class Collection extends \ArrayAccess, \Countable, \IteratorAggregate {
public function forEach(callable $callback) {
//
}
public function list() {
//
}
public static function new(array $items) {
return new self($items);
}
}
Collection::new(['var1', 'var2'])
->forEach(function($index, $item){ /* ... */ })
->list();The only exception being the class keyword, which remains reserved in class constant context, as shown here:
class Customer {
const class = 'Retail'; // Fatal error
}The group use declarations are introduced in PHP 7 as a way to cut verbosities when importing multiple classes from a common namespace. They enable shorthand syntax as follows:
use Library\Group1\Group2\{ ClassA, ClassB, ClassC as Classy };Let's take a look at the following examples where class names within the same namespace are group used:
// Current use syntax
use Doctrine\Common\Collections\Expr\Comparison;
use Doctrine\Common\Collections\Expr\Value;
use Doctrine\Common\Collections\Expr\CompositeExpression;
// Group use syntax
use Doctrine\Common\Collections\Expr\{ Comparison, Value, CompositeExpression };We can also use the group use declarations on part of namespaces, as shown in the following example:
// Current use syntax
use Symfony\Component\Console\Helper\Table;
use Symfony\Component\Console\Input\ArrayInput;
use Symfony\Component\Console\Output\NullOutput;
use Symfony\Component\Console\Question\Question;
use Symfony\Component\Console\Input\InputInterface;
use Symfony\Component\Console\Output\OutputInterface;
use Symfony\Component\Console\Question\ChoiceQuestion as Choice;
use Symfony\Component\Console\Question\ConfirmationQuestion;
// Group use syntax
use Symfony\Component\Console\{
Helper\Table,
Input\ArrayInput,
Input\InputInterface,
Output\NullOutput,
Output\OutputInterface,
Question\Question,
Question\ChoiceQuestion as Choice,
Question\ConfirmationQuestion,
};We can further use group use for importing functions and constants as shown in the following lines of code:
use Framework\Component\{
SubComponent\ClassA,
function OtherComponent\someFunction,
const OtherComponent\SOME_CONSTANT
};Unicode, and UTF-8 in particular, have grown increasingly popular in PHP applications.
PHP 7 adds the new escape sequence for double-quoted strings and heredocs, with the syntax as follows:
\u{code-point}It produces the UTF-8 encoding of a Unicode code point, specified with hexadecimal digits. It is worth noting that the length of the code-point within curly braces is arbitrary. This means that we can use \u{FF} or the more traditional \u{00FF}.
The following is a simple listing of the four most traded currencies, their symbols, and their UTF-8 code points:
Euro€U+20AC Japanese Yen¥U+00A5 Pound sterling£U+00A3 Australian dollar$U+0024
Some of these symbols usually exist directly on a keyboard, so it's easy to write them down as shown here:
echo "the € currency"; echo "the ¥ currency"; echo "the £ currency"; echo "the $ currency";
However, the majority of other symbols are not as easily accessible via the keyboard as single keystrokes, and therefore need to be written in the form of code-points, shown as follows:
echo "the \u{1F632} face";
echo "the \u{1F609} face";
echo "the \u{1F60F} face";In older versions of PHP, the resulting output of preceding statements would be the following:
the \u{1F632} face
the \u{1F609} face
the \u{1F60F} faceThis obviously did not parse code-points, as it was outputting them literally.
PHP 7 introduced Unicode code-point escape sequence syntax to string literals, making previous statements result in the following output:
the 😉 face the 😉 face the 😉 face
Assertions is a debug feature, used to check the given assertion and take appropriate action if its result is false. They have been part of PHP for years, ever since PHP 4.
Assertions differ from error handling in a way that assertions cover for impossible cases, whereas errors are possible and need to be handled.
Using assertions as a general-purpose error handling mechanism should be avoided. Assertions do not allow for recovery from errors. Assertion failure will normally halt the execution of a program.
With modern debugging tools like Xdebug, not many developers use assertions for debugging.
Assertions can be easily enabled and disabled using the assert_options function or the assert.active INI setting.
To use assertions, we pass in either an expression or a string as shown in the following function signature:
// PHP 5 bool assert ( mixed $assertion [, string $description ] ) // PHP 7 bool assert ( mixed $assertion [, Throwable $exception ] )
These two signatures differ in the second parameter. PHP 7 can accept either string $description or $exception.
If the expression result or the result of evaluating the string evaluates to false, then a warning is raised. If the second parameter is passed as $exception, then an exception will be thrown instead of failure.
In regards to php.ini configuration options, the assert function has been expanded to allow for so-called zero-cost assertions:
zend.assertions = 1 // Enable zend.assertions = 0 // Disable zend.assertions = -1 // Zero-cost
With zero-cost settings, assertions have zero impact on performance and execution as they are not compiled.
Finally, the Boolean assert.exception option was added to the INI setting. Setting it to true, results in AssertionError exceptions for the failed assertions.
In PHP 5, list() assigns the values starting with the right-most parameter. In PHP 7, list() starts with the left-most parameter. Basically, values are now assigned to variables in the order they are defined.
However, this only affects the case where list() is being used in conjunction with the array [] operator, as discussed in the following code block:
<?php list($color1, $color2, $color3) = ['green', 'yellow', 'blue']; var_dump($color1, $color2, $color3); list($colors[], $colors[], $colors[]) = ['green', 'yellow', 'blue']; var_dump($colors);
Output of the preceding code in PHP 5 would result in the following:
string(5) "green"
string(6) "yellow"
string(4) "blue"
array(3) {
[0]=> string(5) "blue"
[1]=> string(6) "yellow"
[2]=> string(4) "green"
}Output of the preceding code in PHP 7 would result in the following:
string(5) "green"
string(6) "yellow"
string(4) "blue"
array(3) {
[0]=> string(5) "green"
[1]=> string(6) "yellow"
[2]=> string(4) "blue"
}The order of assignment might change again in the future, so we should not rely heavily on it.
Prior to PHP 7, the session_start() function did not directly accept any configuration options. Any configuration options we wanted to set on the session, needed to come from php.ini:
// PHP 5
ini_set('session.name', 'THEAPP');
ini_set('session.cookie_lifetime', 3600);
ini_set('session.cookie_httponly', 1);
session_start();
// PHP 7
session_start([
'name' =>'THEAPP',
'cookie_lifetime' => 3600,
'cookie_httponly' => 1
]);Driven by the goal of performance optimization, a new lazy_write runtime configuration was added in PHP 7. When lazy_write is set to 1, the session data is only rewritten if it changes. This is the default behavior:
session_start([ 'name' =>'THEAPP', 'cookie_lifetime' => 3600, 'cookie_httponly' => 1, 'lazy_write' => 1 ]);
While changes listed here might not look impressive at first, being able to override session options directly via the session_start function gives certain flexibility to our code.
Globally accepted, major versions of software have the luxury of breaking backward compatibility. Ideally, not much, but in order to keep the software moving forward, some old ideas need to be left behind. These changes don't come overnight. Certain features are first flagged as deprecated to warn developers that it will be removed in future versions of the language. Sometimes this period of deprecation takes years.
Throughout PHP 5.x, a number of features have been marked as deprecated, and in PHP 7.0, they have all been removed.
The POSIX-compatible regular expressions have been deprecated in PHP 5.3, and now completely removed in PHP 7.
The following functions are no longer available for use:
ereg_replaceeregeregi_replaceeregisplitsplitisql_regcaseWe should instead use Perl Compatible Regular Expressions (PCRE). The http://php.net/manual/en/book.pcre.php is a great source of documentation for these functions.
The mysql extension, which had been deprecated in PHP 5.5, has now been removed. None of the mysql_* functions are available anymore. We should instead use the mysqli extension. The good thing is that moving from mysql to mysqli functions is mostly simple, as when adding i to our code, the mysql_* function calls and passes the database handle (returned by mysqli_connect) as the first parameter. The http://php.net/manual/en/book.mysqli.php is a great source of documentation for these functions.
The PHP script and ASP tags are no longer available:
<!-- PHP script tag example --> <script language="php"> // Code here </script> <!-- PHP ASP tag example --> <% // Code here %> <%=$varToEcho; %>
Application frameworks are a collection of functions, classes, configurations, and conventions all designed to support the development of web applications, services, and APIs. Some applications are embracing an API first approach, whereas server-side REST and SOAP APIs are built via PHP, and client side in other technologies like JavaScript.
When building a web application, we usually have three obvious choices:
In a nutshell, frameworks are here to make it easier and quicker for us to build our software. A great deal of programming languages out there have popular frameworks. PHP is no exception to this.
Given the popularity of PHP as a go-to web programming language, it is no surprise that dozens of frameworks have sprouted over the years. Choosing the "right" framework is a daunting task, even so more for fresh starters. What is right for one project or a team might not be right for another.
However, there are some general, high level segments each modern framework should encompass. These account for:
While it's perfectly alright to code an entire web application in pure PHP without using any framework, the majority of today's projects do use frameworks.
The benefits of using frameworks outweigh the purity of doing it all from scratch. Frameworks are usually well supported and documented, which makes it easier for teams to catch up with libraries, project structure, conventions, and other things.
When it comes to PHP frameworks, it is worth pointing out a few popular ones:
This is by no means a complete or even a popularity sorted list.
Laravel is released under an MIT license, and can be downloaded from https://laravel.com/.
Aside from the usual routing, controllers, requests, responses, views, and (blade) templates, out of the box Laravel provides a large amount of additional services such as authentication, cache, events, localization, and many others.
Another neat feature of Laravel, is Artisan, the command line tool, that provides a number of useful commands that we can use during development. Artisan can further be extended by writing our own console commands.
Laravel has a pretty active and vibrant community. Its documentation is simple and clear, which makes it easy for newcomers to get started. Furthermore, there is also https://laracasts.com, which extends out beyond Laravel in terms of documentation and other content. Laracasts is a web service providing a series of expert screencasts, some of which are free.
All of these features make Laravel a choice worth evaluating when it comes to the selection of a framework.
Symfony is released under an MIT license, and can be downloaded from http://symfony.com.
Over time, Symfony introduced the concept of Long-term Support(LTS) releases. This release process has been adopted as of Symfony 2.2, and strictly followed as of Symfony 2.4. The standard version of Symfony is maintained for eight months. Long-term Support versions are supported for three years.
One other interesting thing about new releases is the time-based release model. All of the new versions of Symfony releases come out every six months: one in May and one in November.
Symfony has great community support via mailing lists, IRC, and StackOverflow. Furthermore, SensioLabs professional support provides a full range of solutions from consulting, training, coaching, to certification.
Lots of Symfony components are used in other web applications and frameworks, such as Laravel, Silex, Drupal 8, Sylius, and others.
What made Symfony such a popular framework is its interoperability. The idea of "Don't lock yourself up within Symfony!" made it popular with developers as it allowed for building applications that precisely meet our needs.
By embracing the "don't reinvent the wheel" philosophy, Symfony itself makes heavy use of existing PHP open-source projects as part of the framework, including:
Depending on our project needs, we can choose to use a full-stack Symfony framework, the Silex micro-framework, or simply some of the components individually.
Out of the box, Symfony provides a lot of structural ground for new web applications. It does so via its bundle system. Bundles are sort of like micro-applications inside our main application. Within them, the entire app is nicely structured into models, controllers, templates, configuration files, and other building blocks. Being able to fully separate logic from different domains helps us to keep a clean separation of concerns and autonomously develop every single feature of our domain.
Symfony is one of the PHP pioneers when it comes to embracing the dependency injection across the framework, allowing it to achieve decoupled components and to keep high flexibility of code.
Documented, modular, highly flexible, performant, supported, those are the attributes that make Symfony a choice worth evaluating.
Zend Framework is released under a new BSD license, and can be downloaded from http://framework.zend.com.
Zend Framework features include:
Aside from a free Zend Framework, Zend Technologies Ltd provides its own commercial version of a PHP stack called Zend Server, and Zend Studio IDE that includes features specifically to integrate with Zend Framework. While Zend Framework is perfectly fine running on any PHP stack, Zend Server is advertised as an optimized solution for running Zend Framework applications.
By its architectural design, Zend Framework is merely a collection of classes. There is no strictly imposed structure our application needs to follow. This is one of the features that makes it so appealing to a certain range of developers. We could either utilize Zend MVC components to create a fully-functional Zend Framework project, or we can simply load the components we need.
The so called full-stack frameworks impose structure, ORM implementations, code-generation, and other fixed things onto your projects. Zend Framework, on the other hand, with its decoupled nature, classifies for a glue type of framework. We can easily glue it to an existing application, or use it to build a new one.
The latest versions of Zend Framework follow the SOLID object oriented design principle. The so called "use-at-will" design allows developers to use whichever components they want.
Though the main driving force behind Zend Framework is Zend Technologies, many other companies have contributed significant features to the framework.
Furthermore, Zend Technologies provides excellent Zend Certified PHP Engineer certifications. Quality community, official company support, education, hosting, and development tools make the Zend Framework choice worth evaluating.
CodeIgniter is released under an MIT license, and can be downloaded from https://www.codeigniter.com.
CodeIgniter prides itself in being lightweight. The core system requires only a handful of small libraries, which is not always the case with other frameworks.
The framework uses the simple Model-View-Control approach, allowing for clean separation between logic and presentation. The View layer does not impose any special template language, so it uses native PHP out of the box.
Here are some of the outstanding features of CodeIgniter:
CodeIgniter has an active community gathered around http://forum.codeigniter.com.
Small footprint, flexibility, exceptional performance, near-zero configuration, and thorough documentation are what makes this framework choice worth evaluating.
CakePHP is released under an MIT license, and can be downloaded from http://cakephp.org.
The CakePHP framework was greatly inspired by Ruby on Rails, using many of its concepts. It values conventions over configuration.
It comes with "batteries included". Most of the things we need for modern web applications are already built-in. Translations, database access, caching, validation, authentication, and much more are all built-in.
Security is another big part of the CakePHP philosophy. CakePHP comes with built-in tools for input validation, CSRF protection, form tampering protection, SQL injection prevention, and XSS prevention, helping us to secure our application.
CakePHP supports a variety of database storage engines, such as MySQL, PostgreSQL, Microsoft SQL Server, and SQLite. The built-in CRUD feature is very handy for database interaction.
It counts on a big community behind it. It also has a big list of plugins, available at http://plugins.cakephp.org.
CakePHP provides a certification exam, whereby developers are tested in their knowledge of the CakePHP framework, MVC principles, and standards used within CakePHP. Certification is geared towards real world scenarios and intimate CakePHP specifics.
Commercial support, consultation, code review, performance analysis, security audits, and even development services are provided by the Cake Development Corporation http://www.cakedc.com. The Cake Development Corporation is the commercial entity behind the framework, established in 2007 by Larry Masters, a founder of CakePHP.
Slim is released under an MIT license, and can be downloaded from http://www.slimframework.com.
While frameworks with the "batteries included" mindset provide robust libraries, directory structures, and configurations, micro frameworks get us started with a few lines of code.
Micro frameworks usually lack even the basic framework features such as:
This limits their use, but also makes them a great tool for rapid prototyping.
Slim supports any PSR-7 HTTP message implementation. An HTTP message is either a request from a client to a server or a response from a server to a client. Slim functions like a dispatcher that receives an HTTP request, invokes an appropriate callback routine, and returns an HTTP response.
The good thing about Slim is that it plays nicely with middleware. The middleware is basically a callable that accepts three arguments:
\Psr\Http\Message\ServerRequestInterface: The PSR7 request object\Psr\Http\Message\ResponseInterface: The PSR7 response objectcallable: The next middleware callableMiddlewares are free to manipulate request and response objects, as long as they return an instance of \Psr\Http\Message\ResponseInterface. Furthermore, each middleware needs to invoke the next middleware and pass it to request and response objects as arguments.
This simple concept gives Slim the power of extensibility, through various possible third party middlewares.
Even though Slim provides good documentation, a vibrant community, and the project is being actively developed to date, its usage is limited. Micro frameworks are hardly a choice for robust enterprise applications. Still, they have their place in development.
Yii is released under a BSD License, and can be downloaded from http://www.yiiframework.com.
Yii's focus on performance optimization makes it a perfect choice for almost any type of project, including the enterprise type of applications.
Some of the outstanding Yii features include:
One of the neat features of Yii is a tool called Gii. It's an extension that provides a web-based code generator. We can use Gii's graphical interface to quickly set up generate models, forms, modules, CRUD, and so on. There is also a command line version of Gii for those who prefer consoles over GUI.
Yii's architecture allows it to play nicely with third-party code, like PEAR libraries, Zend Framework, and the like. It adopts the MVC architecture, allowing for clean separation of concerns.
Yii provides an impressive library of extensions available at http://www.yiiframework.com/extensions. The majority of extensions are distributed as composer packages. They empower us with accelerated development. We can easily package our code as extensions and share it with others. This makes Yii even more interesting for modular application development.
Official documentation is quite comprehensive. There are also several books available.
Rich documentation, a vibrant community, active releases, performance optimization, security emphasis, feature richness, and flexibility make Yii a choice worth evaluating.
Phalcon is released under a BSD License, and can be downloaded from https://phalconphp.com.
Phalcon was originally released in 2012, by Andres Gutierrez and collaborators. The goal of the project was to find a new approach to traditional web application frameworks written in PHP. This new approach came in the form of C language extensions. The entire Phalcon framework is developed as a C extension.
The benefits of C-based frameworks lies in the fact that an entire PHP extension is loaded during runtime. This greatly reduces I/O operations massively since there is no need to load .php files any more. Furthermore, compiled C language code executes faster than PHP bytecode. Since C extensions are loaded together with PHP one time during the web server daemon start process, their memory footprint is small. The downside of C-based frameworks is that the code is compiled, so we cannot easily debug it and patch it as we would with PHP classes.
Low-level architecture and optimizations make Phalcon one of the lowest overheads for MVC-based applications.
Phalcon is a full-stack, loosely coupled framework. While it does provide full MVC structure to our application, it also allows us to use its objects as glue components based on the needs of our application. We can choose if we want to create a full blown MVC application, or the minimal style micro application. Micro applications are suitable to implement small applications, APIs, and prototypes in a practical way.
All of the frameworks we mentioned so far enable some form of extensions, where we can add new libraries or entire packages to a framework. Since Phalcon is a C-code framework, contributions to the framework doesn't come in the form of PHP code. On the other hand, writing and compiling C language code can be somewhat challenging for an average PHP developer.
Zephir project http://zephir-lang.com addresses these challenges by introducing high-level Zephir language. Zephir is designed to ease the creation and maintainability of C extensions for PHP with a focus on type and memory safety.
When communicating with databases, Phalcon uses Phalcon Query Language, PhalconQL, or simply PHQL for short. PHQL is a high-level, object-oriented SQL dialect that allows us to write queries using SQL-like language that works with objects instead of tables.
View templates are handled by Volt, Phalcon's own templating engine. It is highly integrated with other components, and can be used independently in our applications.
Phalcon is pretty easy to pick up. Its documentation covers both the MVC and micro applications style of using a framework, with practical examples. The framework itself is rich enough to support the structure and libraries we need for most of today's applications. On top of that, there is an official Phalcon website called Phalconist https://phalconist.com which provides additional resources to framework.
Though there is no official company behind it, no certifications, no commercial support, and similar enterprise looking things, Phalcon does a great job of positioning itself as a choice worth evaluating even with a robust enterprise application development.
Looking back on the release of PHP 5 and its support to OOP programming, we can see the enormous positive impact it had on the PHP ecosystem. A large number of frameworks and libraries have sprawled out, offering enterprise level solutions to web application development.
The release of PHP 7 is likely to be another leap forward for the PHP ecosystem. Though none of the new features are revolutionary as such, as they can be found in other programming languages from years ago, they impact PHP greatly. We are yet to see how its new features will reshape existing and future frameworks and the way we write applications.
The introduction of more advanced errors to exceptions handling, scalar type hints, and function return type hints will surely bring much awaited stability to applications and frameworks using them. The speed improvements compared to PHP 5.6 are significant enough to cut down the hosting costs for higher load sites. Thankfully, the PHP development team minimized backward incomparability changes, so they should not stand in the way of swift PHP 7 adoption.
Choosing the right framework is all but an easy task. What classifies a framework as an enterprise class framework is more than just collection of classes. It has an entire ecosystem around it.
One should never be driven by hype when evaluating a framework for a project. Questions like the following should be taken into consideration:
There are a number of established PHP frameworks and libraries out there, so the choice is all but easy. Most of these frameworks and libraries are still to fully catch up with the latest features added in PHP 7.
Moving forward, in the next chapter, we will look into common design patterns and how to integrate them in PHP.
There are a handful of things that make a great software developer. Knowledge and usage of design patterns is one of them. Design patterns empower developers to communicate using well-known names for various software interactions. Whether someone is a PHP, Python, C#, Ruby, or any other language developer, design patterns provide language agnostic solutions for frequently occurring software problems.
The concept of design patterns emerged in 1994 as part of the Elements of Reusable Object-Oriented Software book. Detailing 23 different design patterns, the book was written by four authors Erich Gamma, Richard Helm, Ralph Johnson, and John Vlissides. The authors are often referred to as the Gang of Four (GoF), and the presented design patterns are sometimes referred to as GoF design patterns. In Today, more than two decades later, designing software that is extensible, reusable, maintainable, and adaptable is near to impossible without embracing design patterns as part of implementation.
There are three types of design patterns which we will cover in this chapter:
Throughout this chapter we will not go deep into the theory of each of them, as that alone is an entire book's worth of material. Moving forward, we will focus more on simple PHP implementation examples for each of the patterns, just so we get a more visual sense of things.
Creational patterns, as the name suggests, create objects for us, so we do not have to instantiate them directly. Implementing creation patterns gives our application a level of flexibility, where the application itself can decide what objects to instantiate at a given time. The following is a list of patterns we categorize as creational patterns:
See https://en.wikipedia.org/wiki/Creational_pattern for more information about creational design patterns.
Building portable applications requires a great level of dependencies encapsulation. The abstract factory facilitates this by abstracting the creation of families of related or dependent objects. Clients never create these platform objects directly, the factory does it for them, making it possible to interchange concrete implementations without changing the code that uses them, even at runtime.
The following is an example of possible abstract factory pattern implementation:
interface Button {
public function render();
}
interface GUIFactory {
public function createButton();
}
class SubmitButton implements Button {
public function render() {
echo 'Render Submit Button';
}
}
class ResetButton implements Button {
public function render() {
echo 'Render Reset Button';
}
}
class SubmitFactory implements GUIFactory {
public function createButton() {
return new SubmitButton();
}
}
class ResetFactory implements GUIFactory {
public function createButton() {
return new ResetButton();
}
}
// Client
$submitFactory = new SubmitFactory();
$button = $submitFactory->createButton();
$button->render();
$resetFactory = new ResetFactory();
$button = $resetFactory->createButton();
$button->render();We started off by creating an interface Button, which is later implemented by our SubmitButton and ResetButton concrete classes. GUIFactory and ResetFactory implement the GUIFactory interface, which specifies the createButton method. The client then simply instantiates factories and calls for createButton, which returns a proper button instance that we call the render method.
The builder pattern separates the construction of a complex object from its representation, making it possible for the same construction process to create different representations. While some creational patterns construct a product in one call, builder pattern does it step by step under the control of the director.
The following is an example of builder pattern implementation:
class Car {
public function getWheels() {
/* implementation... */
}
public function setWheels($wheels) {
/* implementation... */
}
public function getColour($colour) {
/* implementation... */
}
public function setColour() {
/* implementation... */
}
}
interface CarBuilderInterface {
public function setColour($colour);
public function setWheels($wheels);
public function getResult();
}
class CarBuilder implements CarBuilderInterface {
private $car;
public function __construct() {
$this->car = new Car();
}
public function setColour($colour) {
$this->car->setColour($colour);
return $this;
}
public function setWheels($wheels) {
$this->car->setWheels($wheels);
return $this;
}
public function getResult() {
return $this->car;
}
}
class CarBuildDirector {
private $builder;
public function __construct(CarBuilder $builder) {
$this->builder = $builder;
}
public function build() {
$this->builder->setColour('Red');
$this->builder->setWheels(4);
return $this;
}
public function getCar() {
return $this->builder->getResult();
}
}
// Client
$carBuilder = new CarBuilder();
$carBuildDirector = new CarBuildDirector($carBuilder);
$car = $carBuildDirector->build()->getCar();We started off by creating a concrete Car class with several methods defining some base characteristics of a car. We then created a CarBuilderInterface that will control some of those characteristics and get the final result (car). The concrete class CarBuilder then implemented the CarBuilderInterface, followed by the concrete CarBuildDirector class, which defined build and the getCar method. The client then simply instantiated a new instance of CarBuilder, passing it as a constructor parameter to a new instance of CarBuildDirector. Finally, we called the build and getCar methods of CarBuildDirector to get the actual car Car instance.
The factory method pattern deals with the problem of creating objects without having to specify the exact class of the object that will be created.
The following is an example of factory method pattern implementation:
interface Product {
public function getType();
}
interface ProductFactory {
public function makeProduct();
}
class SimpleProduct implements Product {
public function getType() {
return 'SimpleProduct';
}
}
class SimpleProductFactory implements ProductFactory {
public function makeProduct() {
return new SimpleProduct();
}
}
/* Client */
$factory = new SimpleProductFactory();
$product = $factory->makeProduct();
echo $product->getType(); //outputs: SimpleProductWe started off by creating a ProductFactory and Product interfaces. The SimpleProductFactory implements the ProductFactory and returns the new product instance via its makeProduct method. The SimpleProduct class implements Product, and returns the product type. Finally, the client creates the instance of SimpleProductFactory, calling the makeProduct method on it. The makeProduct returns the instance of the Product, whose getType method returns the SimpleProduct string.
The prototype pattern replicates other objects by use of cloning. What this means is that we are not using the new keyword to instantiate new objects. PHP provides a clone keyword which makes a shallow copy of an object, thus providing pretty much straight forward prototype pattern implementation. Shallow copy does not copy references, only values to the new object. We can further utilize the magic __clone method on our class in order to implement more robust clone behavior.
The following is an example of prototype pattern implementation:
class User {
public $name;
public $email;
}
class Employee extends User {
public function __construct() {
$this->name = 'Johhn Doe';
$this->email = 'john.doe@fake.mail';
}
public function info() {
return sprintf('%s, %s', $this->name, $this->email);
}
public function __clone() {
/* additional changes for (after)clone behavior? */
}
}
$employee = new Employee();
echo $employee->info();
$director = clone $employee;
$director->name = 'Jane Doe';
$director->email = 'jane.doe@fake.mail';
echo $director->info(); //outputs: Jane Doe, jane.doe@fake.mailWe started off by creating a simple User class. The Employee then extends the User, while setting name and email in its constructor. The client then instantiates the Employee via the new keyword, and clones it into the director variable. The $director variable is now a new instance, one made not by the new keyword, but with cloning, using the clone keyword. Changing name and email on $director, does not affect $employee.
The purpose of singleton pattern is to restrict instantiation of class to a single object. It is implemented by creating a method within the class that creates a new instance of that class if one does not exist. If an object instance already exists, the method simply returns a reference to an existing object.
The following is an example of singleton pattern implementation:
class Logger {
private static $instance;
public static function getInstance() {
if (!isset(self::$instance)) {
self::$instance = new self;
}
return self::$instance;
}
public function logNotice($msg) {
return 'logNotice: ' . $msg;
}
public function logWarning($msg) {
return 'logWarning: ' . $msg;
}
public function logError($msg) {
return 'logError: ' . $msg;
}
}
// Client
echo Logger::getInstance()->logNotice('test-notice');
echo Logger::getInstance()->logWarning('test-warning');
echo Logger::getInstance()->logError('test-error');
// Outputs:
// logNotice: test-notice
// logWarning: test-warning
// logError: test-errorWe started off by creating a Logger class with a static $instance member, and the getInstance method that always returns a single instance of the class. Then we added a few sample methods to demonstrate the client executing various methods on a single instance.
Structural patterns deal with class and object composition. Using interfaces or abstract classes and methods, they define ways to compose objects, which in turn obtain new functionality. The following is a list of patterns we categorize as structural patterns:
See https://en.wikipedia.org/wiki/Structural_pattern for more information about structural design patterns.
The adapter pattern allows the interface of an existing class to be used from another interface, basically, helping two incompatible interfaces to work together by converting the interface of one class into an interface expected by another class.
The following is an example of adapter pattern implementation:
class Stripe {
public function capturePayment($amount) {
/* Implementation... */
}
public function authorizeOnlyPayment($amount) {
/* Implementation... */
}
public function cancelAmount($amount) {
/* Implementation... */
}
}
interface PaymentService {
public function capture($amount);
public function authorize($amount);
public function cancel($amount);
}
class StripePaymentServiceAdapter implements PaymentService {
private $stripe;
public function __construct(Stripe $stripe) {
$this->stripe = $stripe;
}
public function capture($amount) {
$this->stripe->capturePayment($amount);
}
public function authorize($amount) {
$this->stripe->authorizeOnlyPayment($amount);
}
public function cancel($amount) {
$this->stripe->cancelAmount($amount);
}
}
// Client
$stripe = new StripePaymentServiceAdapter(new Stripe());
$stripe->authorize(49.99);
$stripe->capture(19.99);
$stripe->cancel(9.99);We started off by creating a concrete Stripe class. We then defined the PaymentService interface with some basic payment handling methods. The StripePaymentServiceAdapter implements the PaymentService interface, providing concrete implementation of payment handling methods. Finally, the client instantiates the StripePaymentServiceAdapter and executes the payment handling methods.
The bridge pattern is used when we want to decouple a class or abstraction from its implementation, allowing them both to change independently. This is useful when the class and its implementation vary often.
The following is an example of bridge pattern implementation:
interface MailerInterface {
public function setSender(MessagingInterface $sender);
public function send($body);
}
abstract class Mailer implements MailerInterface {
protected $sender;
public function setSender(MessagingInterface $sender) {
$this->sender = $sender;
}
}
class PHPMailer extends Mailer {
public function send($body) {
$body .= "\n\n Sent from a phpmailer.";
return $this->sender->send($body);
}
}
class SwiftMailer extends Mailer {
public function send($body) {
$body .= "\n\n Sent from a SwiftMailer.";
return $this->sender->send($body);
}
}
interface MessagingInterface {
public function send($body);
}
class TextMessage implements MessagingInterface {
public function send($body) {
echo 'TextMessage > send > $body: ' . $body;
}
}
class HtmlMessage implements MessagingInterface {
public function send($body) {
echo 'HtmlMessage > send > $body: ' . $body;
}
}
// Client
$phpmailer = new PHPMailer();
$phpmailer->setSender(new TextMessage());
$phpmailer->send('Hi!');
$swiftMailer = new SwiftMailer();
$swiftMailer->setSender(new HtmlMessage());
$swiftMailer->send('Hello!');We started off by creating a MailerInterface. The concrete Mailer class then implements the MailerInterface, providing a base class for PHPMailer and SwiftMailer. We then define the MessagingInterface, which gets implemented by the TextMessage and HtmlMessage classes. Finally, the client instantiates PHPMailer and SwiftMailer, passing on instances of TextMessage and HtmlMessage prior to calling the send method.
The composite pattern is about treating the hierarchy of objects as a single object, through a common interface. Where the objects are composed into three structures and the client is oblivious to changes in the underlying structure because it only consumes the common interface.
The following is an example of composite pattern implementation:
interface Graphic {
public function draw();
}
class CompositeGraphic implements Graphic {
private $graphics = array();
public function add($graphic) {
$objId = spl_object_hash($graphic);
$this->graphics[$objId] = $graphic;
}
public function remove($graphic) {
$objId = spl_object_hash($graphic);
unset($this->graphics[$objId]);
}
public function draw() {
foreach ($this->graphics as $graphic) {
$graphic->draw();
}
}
}
class Circle implements Graphic {
public function draw()
{
echo 'draw-circle';
}
}
class Square implements Graphic {
public function draw() {
echo 'draw-square';
}
}
class Triangle implements Graphic {
public function draw() {
echo 'draw-triangle';
}
}
$circle = new Circle();
$square = new Square();
$triangle = new Triangle();
$compositeObj1 = new CompositeGraphic();
$compositeObj1->add($circle);
$compositeObj1->add($triangle);
$compositeObj1->draw();
$compositeObj2 = new CompositeGraphic();
$compositeObj2->add($circle);
$compositeObj2->add($square);
$compositeObj2->add($triangle);
$compositeObj2->remove($circle);
$compositeObj2->draw();We started off by creating a Graphic interface. We then created the CompositeGraphic, Circle, Square, and Triangle, all of which implement the Graphic interface. Aside from just implementing the draw method from the Graphic interface, the CompositeGraphic adds two more methods, used to track internal collection of graphics added to it. The client then instantiates all of these Graphic classes, adding them all to the CompositeGraphic, which then calls the draw method.
The decorator pattern allows behavior to be added to an individual object instance, without affecting the behavior of other instances of the same class. We can define multiple decorators, where each adds new functionality.
The following is an example of decorator pattern implementation:
interface LoggerInterface {
public function log($message);
}
class Logger implements LoggerInterface {
public function log($message) {
file_put_contents('app.log', $message, FILE_APPEND);
}
}
abstract class LoggerDecorator implements LoggerInterface {
protected $logger;
public function __construct(Logger $logger) {
$this->logger = $logger;
}
abstract public function log($message);
}
class ErrorLoggerDecorator extends LoggerDecorator {
public function log($message) {
$this->logger->log('ERROR: ' . $message);
}
}
class WarningLoggerDecorator extends LoggerDecorator {
public function log($message) {
$this->logger->log('WARNING: ' . $message);
}
}
class NoticeLoggerDecorator extends LoggerDecorator {
public function log($message) {
$this->logger->log('NOTICE: ' . $message);
}
}
$logger = new Logger();
$logger->log('Resource not found.');
$logger = new Logger();
$logger = new ErrorLoggerDecorator($logger);
$logger->log('Invalid user role.');
$logger = new Logger();
$logger = new WarningLoggerDecorator($logger);
$logger->log('Missing address parameters.');
$logger = new Logger();
$logger = new NoticeLoggerDecorator($logger);
$logger->log('Incorrect type provided.');We started off by creating a LoggerInterface, with a simple log method. We then defined Logger and LoggerDecorator, both of which implement the LoggerInterface. Followed by ErrorLoggerDecorator, WarningLoggerDecorator, and NoticeLoggerDecorator which implement the LoggerDecorator. Finally, the client part instantiates the logger three times, passing it different decorators.
The facade pattern is used when we want to simplify the complexities of large systems through a simpler interface. It does so by providing convenient methods for most common tasks, through a single wrapper class used by a client.
The following is an example of facade pattern implementation:
class Product {
public function getQty() {
// Implementation
}
}
class QuickOrderFacade {
private $product = null;
private $orderQty = null;
public function __construct($product, $orderQty) {
$this->product = $product;
$this->orderQty = $orderQty;
}
public function generateOrder() {
if ($this->qtyCheck()) {
$this->addToCart();
$this->calculateShipping();
$this->applyDiscount();
$this->placeOrder();
}
}
private function addToCart() {
// Implementation...
}
private function qtyCheck() {
if ($this->product->getQty() > $this->orderQty) {
return true;
} else {
return true;
}
}
private function calculateShipping() {
// Implementation...
}
private function applyDiscount() {
// Implementation...
}
private function placeOrder() {
// Implementation...
}
}
// Client
$order = new QuickOrderFacade(new Product(), $qty);
$order->generateOrder();We started off by creating a Product class, with a single getQty method. We then created a QuickOrderFacade class that accepts product instance and quantity via a constructor and further provides the generateOrder method that aggregates all of the order generating actions. Finally, the client instantiates the product, which it passes onto the instance of QuickOrderFacade, calling the generateOrder on it.
The flyweight pattern is about performance and resource reduction, sharing as much data as possible between similar objects. What this means is that instances of a class which are identical are shared in an implementation. This works best when a large number of same class instances are expected to be created.
The following is an example of flyweight pattern implementation:
interface Shape {
public function draw();
}
class Circle implements Shape {
private $colour;
private $radius;
public function __construct($colour) {
$this->colour = $colour;
}
public function draw() {
echo sprintf('Colour %s, radius %s.', $this->colour, $this->radius);
}
public function setRadius($radius) {
$this->radius = $radius;
}
}
class ShapeFactory {
private $circleMap;
public function getCircle($colour) {
if (!isset($this->circleMap[$colour])) {
$circle = new Circle($colour);
$this->circleMap[$colour] = $circle;
}
return $this->circleMap[$colour];
}
}
// Client
$shapeFactory = new ShapeFactory();
$circle = $shapeFactory->getCircle('yellow');
$circle->setRadius(10);
$circle->draw();
$shapeFactory = new ShapeFactory();
$circle = $shapeFactory->getCircle('orange');
$circle->setRadius(15);
$circle->draw();
$shapeFactory = new ShapeFactory();
$circle = $shapeFactory->getCircle('yellow');
$circle->setRadius(20);
$circle->draw();We started off by creating a Shape interface, with a single draw method. We then defined the Circle class implementing the Shape interface, followed by the ShapeFactory class. Within the ShapeFactory, the getCircle method returns an instance of a new Circle, based on the color option. Finally, the client instantiates several ShapeFactory objects, passing in different colors to the getCircle method call.
The proxy design pattern functions as an interface to an original object behind the scenes. It can act as a simple forwarding wrapper or even provide additional functionality around the object it wraps. Examples of extra added functionality might be lazy loading or caching that might compensate for resource intense operations of an original object.
The following is an example of proxy pattern implementation:
interface ImageInterface {
public function draw();
}
class Image implements ImageInterface {
private $file;
public function __construct($file) {
$this->file = $file;
sleep(5); // Imagine resource intensive image load
}
public function draw() {
echo 'image: ' . $this->file;
}
}
class ProxyImage implements ImageInterface {
private $image = null;
private $file;
public function __construct($file) {
$this->file = $file;
}
public function draw() {
if (is_null($this->image)) {
$this->image = new Image($this->file);
}
$this->image->draw();
}
}
// Client
$image = new Image('image.png'); // 5 seconds
$image->draw();
$image = new ProxyImage('image.png'); // 0 seconds
$image->draw();We started off by creating an ImageInterface, with a single draw method. We then defined the Image and ProxyImage classes, both of which extend the ImageInterface. Within the __construct of the Image class, we simulated the resource intense operation with the sleep method call. Finally, the client instantiates both Image and ProxyImage, showing the execution time difference between the two.
Behavioral patterns tackle the challenge of communication between various objects. They describe how different objects and classes send messages to each other to make things happen. The following is a list of patterns we categorize as behavioral patterns:
The chain of responsibility pattern decouples the sender of a request from its receiver, by enabling more than one object to handle requests, in a chain manner. Various types of handling objects can be added dynamically to the chain. Using a recursive composition chain allows for an unlimited number of handling objects.
The following is an example of chain of responsibility pattern implementation:
abstract class SocialNotifier {
private $notifyNext = null;
public function notifyNext(SocialNotifier $notifier) {
$this->notifyNext = $notifier;
return $this->notifyNext;
}
final public function push($message) {
$this->publish($message);
if ($this->notifyNext !== null) {
$this->notifyNext->push($message);
}
}
abstract protected function publish($message);
}
class TwitterSocialNotifier extends SocialNotifier {
public function publish($message) {
// Implementation...
}
}
class FacebookSocialNotifier extends SocialNotifier {
protected function publish($message) {
// Implementation...
}
}
class PinterestSocialNotifier extends SocialNotifier {
protected function publish($message) {
// Implementation...
}
}
// Client
$notifier = new TwitterSocialNotifier();
$notifier->notifyNext(new FacebookSocialNotifier())
->notifyNext(new PinterestSocialNotifier());
$notifier->push('Awesome new product available!');We started off by creating an abstract SocialNotifier class with the abstract method publish, notifyNext, and push method implementations. We then defined TwitterSocialNotifier, FacebookSocialNotifier, and PinterestSocialNotifier, all of which extend the abstract SocialNotifier. The client starts by instantiating the TwitterSocialNotifier, followed by two notifyNext calls, passing it instances of two other notifier types before it calls the final push method.
The command pattern decouples the object that executes certain operations from objects that know how to use it. It does so by encapsulating all of the relevant information needed for later execution of a certain action. This implies information about object, method name, and method parameters.
The following is an example of command pattern implementation:
interface LightBulbCommand {
public function execute();
}
class LightBulbControl {
public function turnOn() {
echo 'LightBulb turnOn';
}
public function turnOff() {
echo 'LightBulb turnOff';
}
}
class TurnOnLightBulb implements LightBulbCommand {
private $lightBulbControl;
public function __construct(LightBulbControl $lightBulbControl) {
$this->lightBulbControl = $lightBulbControl;
}
public function execute() {
$this->lightBulbControl->turnOn();
}
}
class TurnOffLightBulb implements LightBulbCommand {
private $lightBulbControl;
public function __construct(LightBulbControl $lightBulbControl) {
$this->lightBulbControl = $lightBulbControl;
}
public function execute() {
$this->lightBulbControl->turnOff();
}
}
// Client
$command = new TurnOffLightBulb(new LightBulbControl());
$command->execute();We started off by creating a LightBulbCommand interface. We then defined the LightBulbControl class that provides two simple turnOn / turnOff methods. Then we defined the TurnOnLightBulb and TurnOffLightBulb classes which implement the LightBulbCommand interface. Finally, the client is instantiating the TurnOffLightBulb object with an instance of LightBulbControl, and calling the execute method on it.
The interpreter pattern specifies how to evaluate language grammar or expressions. We define a representation for language grammar along with an interpreter. Representation of language grammar uses composite class hierarchy, where rules are mapped to classes. The interpreter then uses the representation to interpret expressions in the language.
The following is an example of interpreter pattern implementation:
interface MathExpression
{
public function interpret(array $values);
}
class Variable implements MathExpression {
private $char;
public function __construct($char) {
$this->char = $char;
}
public function interpret(array $values) {
return $values[$this->char];
}
}
class Literal implements MathExpression {
private $value;
public function __construct($value) {
$this->value = $value;
}
public function interpret(array $values) {
return $this->value;
}
}
class Sum implements MathExpression {
private $x;
private $y;
public function __construct(MathExpression $x, MathExpression $y) {
$this->x = $x;
$this->y = $y;
}
public function interpret(array $values) {
return $this->x->interpret($values) + $this->y->interpret($values);
}
}
class Product implements MathExpression {
private $x;
private $y;
public function __construct(MathExpression $x, MathExpression $y) {
$this->x = $x;
$this->y = $y;
}
public function interpret(array $values) {
return $this->x->interpret($values) * $this->y->interpret($values);
}
}
// Client
$expression = new Product(
new Literal(5),
new Sum(
new Variable('c'),
new Literal(2)
)
);
echo $expression->interpret(array('c' => 3)); // 25We started off by creating a MathExpression interface, with a single interpret method. We then add Variable, Literal, Sum, and Product classes, all of which implement the MathExpression interface. The client then instantiates from the Product class, passing it instances of Literal and Sum, finishing with an interpret method call.
The iterator pattern is used to traverse a container and access its elements. In other words, one class becomes able to traverse the elements of another class. The PHP has a native support for the iterator as part of built in \Iterator and \IteratorAggregate interfaces.
The following is an example of iterator pattern implementation:
class ProductIterator implements \Iterator {
private $position = 0;
private $productsCollection;
public function __construct(ProductCollection $productsCollection) {
$this->productsCollection = $productsCollection;
}
public function current() {
return $this->productsCollection->getProduct($this->position);
}
public function key() {
return $this->position;
}
public function next() {
$this->position++;
}
public function rewind() {
$this->position = 0;
}
public function valid() {
return !is_null($this->productsCollection->getProduct($this->position));
}
}
class ProductCollection implements \IteratorAggregate {
private $products = array();
public function getIterator() {
return new ProductIterator($this);
}
public function addProduct($string) {
$this->products[] = $string;
}
public function getProduct($key) {
if (isset($this->products[$key])) {
return $this->products[$key];
}
return null;
}
public function isEmpty() {
return empty($products);
}
}
$products = new ProductCollection();
$products->addProduct('T-Shirt Red');
$products->addProduct('T-Shirt Blue');
$products->addProduct('T-Shirt Green');
$products->addProduct('T-Shirt Yellow');
foreach ($products as $product) {
var_dump($product);
}We started off by creating a ProductIterator which implements the standard PHP \Iterator interface. We then added the ProductCollection which implements the standard PHP \IteratorAggregate interface. The client creates an instance of ProductCollection, stacking values into it via the addProduct method call and loops through the entire collection.
The more classes we have in our software, the more complex their communication becomes. The mediator pattern addresses this complexity by encapsulating it into a mediator object. Objects no longer communicate directly, but rather through a mediator object, therefore lowering the overall coupling.
The following is an example of mediator pattern implementation:
interface MediatorInterface {
public function fight();
public function talk();
public function registerA(ColleagueA $a);
public function registerB(ColleagueB $b);
}
class ConcreteMediator implements MediatorInterface {
protected $talk; // ColleagueA
protected $fight; // ColleagueB
public function registerA(ColleagueA $a) {
$this->talk = $a;
}
public function registerB(ColleagueB $b) {
$this->fight = $b;
}
public function fight() {
echo 'fighting...';
}
public function talk() {
echo 'talking...';
}
}
abstract class Colleague {
protected $mediator; // MediatorInterface
public abstract function doSomething();
}
class ColleagueA extends Colleague {
public function __construct(MediatorInterface $mediator) {
$this->mediator = $mediator;
$this->mediator->registerA($this);
}
public function doSomething() {
$this->mediator->talk();
}
}
class ColleagueB extends Colleague {
public function __construct(MediatorInterface $mediator) {
$this->mediator = $mediator;
$this->mediator->registerB($this);
}
public function doSomething() {
$this->mediator->fight();
}
}
// Client
$mediator = new ConcreteMediator();
$talkColleague = new ColleagueA($mediator);
$fightColleague = new ColleagueB($mediator);
$talkColleague->doSomething();
$fightColleague->doSomething();We started off by creating a MediatorInterface with several methods, implemented by the ConcreteMediator class. We then defined the abstract class Colleague to force the doSomething method implementation on the following ColleagueA and ColleagueB classes. The client instantiates the ConcreteMediator first, and passes its instance to the instances of ColleagueA and ColleagueB, upon which it calls the doSomething method.
The memento pattern provides the object restore functionality. Implementation is done through three different objects; originator, caretaker, and a memento, where the originator is the one preserving the internal state required for a later restore.
The following is an example of memento pattern implementation:
class Memento {
private $state;
public function __construct($state) {
$this->state = $state;
}
public function getState() {
return $this->state;
}
}
class Originator {
private $state;
public function setState($state) {
return $this->state = $state;
}
public function getState() {
return $this->state;
}
public function saveToMemento() {
return new Memento($this->state);
}
public function restoreFromMemento(Memento $memento) {
$this->state = $memento->getState();
}
}
// Client - Caretaker
$savedStates = array();
$originator = new Originator();
$originator->setState('new');
$originator->setState('pending');
$savedStates[] = $originator->saveToMemento();
$originator->setState('processing');
$savedStates[] = $originator->saveToMemento();
$originator->setState('complete');
$originator->restoreFromMemento($savedStates[1]);
echo $originator->getState(); // processingWe started off by creating a Memento class, which will provide the a current state of the object through the getState method. We then defined the Originator class that pushed the state to Memento. Finally, the client takes the role of caretaker by instantiating Originator, juggling among its few states, saving and restoring them from memento.
The observer pattern implements a one-too-many dependency between objects. The object that holds the list of dependencies is called subject, while the dependents are called observers. When the subject object changes state, all of the dependents are notified and updated automatically.
The following is an example of observer pattern implementation:
class Customer implements \SplSubject {
protected $data = array();
protected $observers = array();
public function attach(\SplObserver $observer) {
$this->observers[] = $observer;
}
public function detach(\SplObserver $observer) {
$index = array_search($observer, $this->observers);
if ($index !== false) {
unset($this->observers[$index]);
}
}
public function notify() {
foreach ($this->observers as $observer) {
$observer->update($this);
echo 'observer updated';
}
}
public function __set($name, $value) {
$this->data[$name] = $value;
// notify the observers, that user has been updated
$this->notify();
}
}
class CustomerObserver implements \SplObserver {
public function update(\SplSubject $subject) {
/* Implementation... */
}
}
// Client
$user = new Customer();
$customerObserver = new CustomerObserver();
$user->attach($customerObserver);
$user->name = 'John Doe';
$user->email = 'john.doe@fake.mail';We started off by creating a Customer class which implements the standard PHP \SplSubject interface. We then defined the CustomerObserver class which implements the standard PHP \SplObserver interface. Finally, the client instantiates the Customer and CustomerObserver objects and attaches the CustomerObserver objects to Customer. Any changes to name and email properties are then caught by the observer.
The state pattern encapsulates the varying behavior for the same object based on its internal state, making an object appear as if it has changed its class.
The following is an example of state pattern implementation:
interface Statelike {
public function writeName(StateContext $context, $name);
}
class StateLowerCase implements Statelike {
public function writeName(StateContext $context, $name) {
echo strtolower($name);
$context->setState(new StateMultipleUpperCase());
}
}
class StateMultipleUpperCase implements Statelike {
private $count = 0;
public function writeName(StateContext $context, $name) {
$this->count++;
echo strtoupper($name);
/* Change state after two invocations */
if ($this->count > 1) {
$context->setState(new StateLowerCase());
}
}
}
class StateContext {
private $state;
public function setState(Statelike $state) {
$this->state = $state;
}
public function writeName($name) {
$this->state->writeName($this, $name);
}
}
// Client
$stateContext = new StateContext();
$stateContext->setState(new StateLowerCase());
$stateContext->writeName('Monday');
$stateContext->writeName('Tuesday');
$stateContext->writeName('Wednesday');
$stateContext->writeName('Thursday');
$stateContext->writeName('Friday');
$stateContext->writeName('Saturday');
$stateContext->writeName('Sunday');We started off by creating a Statelike interface, followed by StateLowerCase and StateMultipleUpperCase which implement that interface. The StateMultipleUpperCase has a bit of counting logic added to its writeName, so it kicks off the new state after two invocations. We then defined the StateContext class, which we will use to switch contexts. Finally, the client instantiates the StateContext, and passes an instance of StateLowerCase to it through the setState method, followed by several writeName methods.
The strategy pattern defines a family of algorithms, each of which is encapsulated and made interchangeable with other members within that family.
The following is an example of strategy pattern implementation:
interface PaymentStrategy {
public function pay($amount);
}
class StripePayment implements PaymentStrategy {
public function pay($amount) {
echo 'StripePayment...';
}
}
class PayPalPayment implements PaymentStrategy {
public function pay($amount) {
echo 'PayPalPayment...';
}
}
class Checkout {
private $amount = 0;
public function __construct($amount = 0) {
$this->amount = $amount;
}
public function capturePayment() {
if ($this->amount > 99.99) {
$payment = new PayPalPayment();
} else {
$payment = new StripePayment();
}
$payment->pay($this->amount);
}
}
$checkout = new Checkout(49.99);
$checkout->capturePayment(); // StripePayment...
$checkout = new Checkout(199.99);
$checkout->capturePayment(); // PayPalPayment...We started off by creating a PaymentStrategy interface followed with concrete classes StripePayment and PayPalPayment which implement it. We then defined the Checkout class with a bit of decision making logic within the capturePayment method. Finally, the client instantiates the Checkout, passing a certain amount through its constructor. Based on the amount, the Checkout internally triggers one or another payment when capturePayment is called.
The template design pattern defines the program skeleton of an algorithm in a method. It lets us, via use of class overriding, redefine certain steps of an algorithm without really changing the algorithm's structure.
The following is an example of template pattern implementation:
abstract class Game {
private $playersCount;
abstract function initializeGame();
abstract function makePlay($player);
abstract function endOfGame();
abstract function printWinner();
public function playOneGame($playersCount)
{
$this->playersCount = $playersCount;
$this->initializeGame();
$j = 0;
while (!$this->endOfGame()) {
$this->makePlay($j);
$j = ($j + 1) % $playersCount;
}
$this->printWinner();
}
}
class Monopoly extends Game {
public function initializeGame() {
// Implementation...
}
public function makePlay($player) {
// Implementation...
}
public function endOfGame() {
// Implementation...
}
public function printWinner() {
// Implementation...
}
}
class Chess extends Game {
public function initializeGame() {
// Implementation...
}
public function makePlay($player) {
// Implementation...
}
public function endOfGame() {
// Implementation...
}
public function printWinner() {
// Implementation...
}
}
$game = new Chess();
$game->playOneGame(2);
$game = new Monopoly();
$game->playOneGame(4);We started off by creating an abstract Game class that provides all of the actual abstract methods encapsulating the game-play. We then defined the Monopoly and Chess classes, both of which extend from the Game class, implementing game specific method game-play for each. The client simply instantiates the Monopoly and Chess objects, calling the playOneGame method on each.
The visitor design pattern is a way of separating an algorithm from an object structure on which it operates. As a result, we are able to add new operations to existing object structures without actually modifying those structures.
The following is an example of visitor pattern implementation:
interface RoleVisitorInterface {
public function visitUser(User $role);
public function visitGroup(Group $role);
}
class RolePrintVisitor implements RoleVisitorInterface {
public function visitGroup(Group $role) {
echo 'Role: ' . $role->getName();
}
public function visitUser(User $role) {
echo 'Role: ' . $role->getName();
}
}
abstract class Role {
public function accept(RoleVisitorInterface $visitor) {
$klass = get_called_class();
preg_match('#([^\\\\]+)$#', $klass, $extract);
$visitingMethod = 'visit' . $extract[1];
if (!method_exists(__NAMESPACE__ . '\RoleVisitorInterface', $visitingMethod)) {
throw new \InvalidArgumentException("The visitor you provide cannot visit a $klass instance");
}
call_user_func(array($visitor, $visitingMethod), $this);
}
}
class User extends Role {
protected $name;
public function __construct($name) {
$this->name = (string)$name;
}
public function getName() {
return 'User ' . $this->name;
}
}
class Group extends Role {
protected $name;
public function __construct($name) {
$this->name = (string)$name;
}
public function getName() {
return 'Group: ' . $this->name;
}
}
$group = new Group('my group');
$user = new User('my user');
$visitor = new RolePrintVisitor;
$group->accept($visitor);
$user->accept($visitor);We started off by creating a RoleVisitorInterface, followed by RolePrintVisitor which implements the RoleVisitorInterface itself. We then defined the abstract class Role, with an accept method taking in the RoleVisitorInterface parameter type. We further defined the concrete User and Group classes, both of which extend from Role. The client instantiates User, Group, and the RolePrintVisitor; passing in the visitor to the accept method call of User and Group instances.
Design patterns are a common, high-level language for developers. They enable a short-hand way of communicating application design among team members. Understanding how to recognize and implement design patterns shifts our focus to business requirement solving, rather than tinkering with how to glue our solution together on a code level.
Coding, like most hand-crafted disciplines, is one of those where you get what you pay for. While implementing a number of design patterns takes a certain amount of time, lack of doing so on a larger project will likely catch up with us in the future, one way or another. Similar to the "use a framework or not" debate, implementing the right design patterns affects extensibility, re-usability, adaptability, and maintainability of our code. Therefore, making it more future proof.
Moving forward, in the next chapter, we will look into the SOLID design principles and the role they play in software development processes.
Building modular software requires strong knowledge of the class design. There are numerous guidelines out there, addressing the way we name our classes, number of variables they should have, what the size of methods should be, and so on. The PHP ecosystem managed to pack these into official PSR standard, more precisely PSR-1: Basic Coding Standard and PSR-2: Coding Style Guide. These are all general programming guidelines that keep our code readable, understandable, and maintainable.
Aside from programming guidelines, there are more specific design principles that we can apply during the class design. Ones that address the notions of low coupling, high cohesion, and strong encapsulation. We call them SOLID design principles, a term coined by Robert Cecil Martin in the early 2000s.
SOLID is an acronym for the following five principles:
Over a decade old, the idea of SOLID principles is far from obsolete, as they are at the heart of good class design. Throughout this chapter, we will look into each of these principles, getting to understand them by observing some of the obvious violations that break them.
In this chapter, we will be covering the following topics:
The single responsibility principle deals with classes that try to do too much. The responsibility in this context refers to reason to change. As per the Robert C. Martin definition:
"A class should have only one reason to change."
The following is an example of a class that violates the SRP:
class Ticket {
const SEVERITY_LOW = 'low';
const SEVERITY_HIGH = 'high';
// ...
protected $title;
protected $severity;
protected $status;
protected $conn;
public function __construct(\PDO $conn) {
$this->conn = $conn;
}
public function setTitle($title) {
$this->title = $title;
}
public function setSeverity($severity) {
$this->severity = $severity;
}
public function setStatus($status) {
$this->status = $status;
}
private function validate() {
// Implementation...
}
public function save() {
if ($this->validate()) {
// Implementation...
}
}
}
// Client
$conn = new PDO(/* ... */);
$ticket = new Ticket($conn);
$ticket->setTitle('Checkout not working!');
$ticket->setStatus(Ticket::STATUS_OPEN);
$ticket->setSeverity(Ticket::SEVERITY_HIGH);
$ticket->save();The Ticket class deals with validation and saving of the ticket entity to the database. These two responsibilities are its two reasons to change. Whenever the requirements change regarding the ticket validation, or regarding the saving of the ticket, the Ticket class will have to be modified. To address the SRP violation here, we can use the assisting classes and interfaces to split the responsibilities.
The following is an example of refactored implementation, which complies with SRP:
interface KeyValuePersistentMembers {
public function toArray();
}
class Ticket implements KeyValuePersistentMembers {
const STATUS_OPEN = 'open';
const SEVERITY_HIGH = 'high';
//...
protected $title;
protected $severity;
protected $status;
public function setTitle($title) {
$this->title = $title;
}
public function setSeverity($severity) {
$this->severity = $severity;
}
public function setStatus($status) {
$this->status = $status;
}
public function toArray() {
// Implementation...
}
}
class EntityManager {
protected $conn;
public function __construct(\PDO $conn) {
$this->conn = $conn;
}
public function save(KeyValuePersistentMembers $entity)
{
// Implementation...
}
}
class Validator {
public function validate(KeyValuePersistentMembers $entity) {
// Implementation...
}
}
// Client
$conn = new PDO(/* ... */);
$ticket = new Ticket();
$ticket->setTitle('Payment not working!');
$ticket->setStatus(Ticket::STATUS_OPEN);
$ticket->setSeverity(Ticket::SEVERITY_HIGH);
$validator = new Validator();
if ($validator->validate($ticket)) {
$entityManager = new EntityManager($conn);
$entityManager->save($ticket);
}Here we introduced a simple KeyValuePersistentMembers interface with a single toArray method, which is then used with both EntityManager and Validator classes, both of which take on a single responsibility now. The Ticket class became a simple data holding model, whereas client now controls instantiation, validation, and save as three different steps. While this is certainly no universal formula of how to separate responsibilities, it does provide a simple and clear example of how to approach it.
Designing with the single responsibilities principle in mind yields smaller classes with greater readability and easier to test code.
The open/closed principle states that a class should be open for extension but closed for modification, as per the definition found on Wikipedia:
"software entities (classes, modules, functions, etc.) should be open for extension, but closed for modification"
The open for extension part means that we should design our classes so that new functionality can be added if needed. The closed for modification part means that this new functionality should fit in without modifying the original class. The class should only be modified in case of a bug fix, not for adding new functionality.
The following is an example of a class that violates the open/closed principle:
class CsvExporter {
public function export($data) {
// Implementation...
}
}
class XmlExporter {
public function export($data) {
// Implementation...
}
}
class GenericExporter {
public function exportToFormat($data, $format) {
if ('csv' === $format) {
$exporter = new CsvExporter();
} elseif ('xml' === $format) {
$exporter = new XmlExporter();
} else {
throw new \Exception('Unknown export format!');
}
return $exporter->export($data);
}
}Here we have two concrete classes, CsvExporter and XmlExporter, each with a single responsibility. Then we have a GenericExporter with its exportToFormat method that actually triggers the export function on a proper instance type. The problem here is that we cannot add a new type of exporter to the mix without modifying the GenericExporter class. To put it in other words, GenericExporter is not open for extension and closed for modification.
The following is an example of refactored implementation, which complies with OCP:
interface ExporterFactoryInterface {
public function buildForFormat($format);
}
interface ExporterInterface {
public function export($data);
}
class CsvExporter implements ExporterInterface {
public function export($data) {
// Implementation...
}
}
class XmlExporter implements ExporterInterface {
public function export($data) {
// Implementation...
}
}
class ExporterFactory implements ExporterFactoryInterface {
private $factories = array();
public function addExporterFactory($format, callable $factory) {
$this->factories[$format] = $factory;
}
public function buildForFormat($format) {
$factory = $this->factories[$format];
$exporter = $factory(); // the factory is a callable
return $exporter;
}
}
class GenericExporter {
private $exporterFactory;
public function __construct(ExporterFactoryInterface $exporterFactory) {
$this->exporterFactory = $exporterFactory;
}
public function exportToFormat($data, $format) {
$exporter = $this->exporterFactory->buildForFormat($format);
return $exporter->export($data);
}
}
// Client
$exporterFactory = new ExporterFactory();
$exporterFactory->addExporterFactory(
'xml',
function () {
return new XmlExporter();
}
);
$exporterFactory->addExporterFactory(
'csv',
function () {
return new CsvExporter();
}
);
$data = array(/* ... some export data ... */);
$genericExporter = new GenericExporter($exporterFactory);
$csvEncodedData = $genericExporter->exportToFormat($data, 'csv');Here we added two interfaces, ExporterFactoryInterface and ExporterInterface. We then modified the CsvExporter and XmlExporter to implement that interface. The ExporterFactory was added, implementing the ExporterFactoryInterface. Its main role is defined by the buildForFormat method, which returns the exporter as a callback function. Finally, the GenericExporter was rewritten to accept the ExporterFactoryInterface via its constructor, and its exportToFormat method now builds the exporter by use of an exporter factory and calls the execute method on it.
The client itself has taken a more robust role now, by first instantiating the ExporterFactory and adding two exporters to it, which it then passed onto GenericExporter. Adding a new export format to GenericExporter now, no longer requires modifying it, therefore making it open for extension and closed for modification. Again, this is by no means a universal formula, rather a concept of possible approach towards satisfying the OCP.
The Liskov substitution principle talks about inheritance. It specifies how we should design our classes so that client dependencies can be replaced by subclasses without the client seeing the difference, as per the definition found on Wikipedia:
"objects in a program should be replaceable with instances of their subtypes without altering the correctness of that program"
While there might be some specific functionality added to the subclass, it has to conform to the same behavior as its base class. Otherwise the Liskov principle is violated.
When it comes to PHP and sub-classing, we have to look beyond simple concrete classes and differentiate: concrete class, abstract class, and interface. Each of the three can be put in the context of a base class, while everything extending or implementing it can be looked at as a derived class.
The following is an example of LSP violation, where the derived class does not have an implementation for all methods:
interface User {
public function getEmail();
public function getName();
public function getAge();
}
class Employee implements User {
public function getEmail() {
// Implementation...
}
public function getAge() {
// Implementation...
}
}Here we see an employee class which does not implement the getName method enforced by the interface. We could have easily used an abstract class instead of the interface and abstract method type for the getName method, the effect would have been the same. Luckily, the PHP would throw an error in this case, warning us that we haven't really implemented the interface fully.
The following is an example of Liskov principle violation, where different derived classes return things of different types:
class UsersCollection implements \Iterator {
// Implementation...
}
interface UserList {
public function getUsers();
}
class Emloyees implements UserList {
public function getUsers() {
$users = new UsersCollection();
//...
return $users;
}
}
class Directors implements UserList {
public function getUsers() {
$users = array();
//...
return $users;
}
}Here we see a simple example of an edge case. Calling getUsers on both derived classes will return a result we can loop through. However, PHP developers tend to use the count method often on array structures, and using it on Employees instances the getUsers result will not work. This is because the Employees class returns UsersCollection which implements Iterator, not the actual array structure. Since UsersCollection does not implement Countable, we cannot use count on it, which leads to potential bugs down the line.
We can further spot LSP violations in cases where the derived class behaves less permissively with regard to method arguments. These can usually be spotted by use of the instance of type operator, as shown in the following example:
interface LoggerProcessor {
public function log(LoggerInterface $logger);
}
class XmlLogger implements LoggerInterface {
// Implementation...
}
class JsonLogger implements LoggerInterface {
// Implementation...
}
class FileLogger implements LoggerInterface {
// Implementation...
}
class Processor implements LoggerProcessor {
public function log(LoggerInterface $logger) {
if ($logger instanceof XmlLogger) {
throw new \Exception('This processor does not work with XmlLogger');
} else {
// Implementation...
}
}
}Here, the derived class Processor puts restrictions on method arguments, while it should accept everything conforming to the LoggerInterface. By being less permissive, it alters the behavior implied by the base class, in this case LoggerInterface.
The outlined examples are merely a fragment of what constitutes a violation of LSP. To satisfy the principle, we need to make sure that derived classes do not, in any way, alter the behavior imposed by the base class.
The Interface Segregation Principle states that clients should only implement interfaces they actually use. They should not be forced to implement interfaces they do not use. As per the definition found on Wikipedia:
"many client-specific interfaces are better than one general-purpose interface"
What this means is that we should split large and fat interfaces into several small and lighter ones, segregating it so that smaller interfaces are based on groups of methods, each serving one specific functionality.
Let's take a look at the following leaky abstraction that violates the ISP:
interface Appliance {
public function powerOn();
public function powerOff();
public function bake();
public function mix();
public function wash();
}
class Oven implements Appliance {
public function powerOn() { /* Implement ... */ }
public function powerOff() { /* Implement ... */ }
public function bake() { /* Implement... */ }
public function mix() { /* Nothing to implement ... */ }
public function wash() { /* Cannot implement... */ }
}
class Mixer implements Appliance {
public function powerOn() { /* Implement... */ }
public function powerOff() { /* Implement... */ }
public function bake() { /* Cannot implement... */ }
public function mix() { /* Implement... */ }
public function wash() { /* Cannot implement... */ }
}
class WashingMachine implements Appliance {
public function powerOn() { /* Implement... */ }
public function powerOff() { /* Implement... */ }
public function bake() { /* Cannot implement... */ }
public function mix() { /* Cannot implement... */ }
public function wash() { /* Implement... */ }
}Here we have an interface setting requirements for several appliance related methods. Then we have several classes implementing that interface. The problem is quite obvious; not all appliances can be squeezed into the same interface. It makes no sense for a washing machine to be forced to implement bake and mix methods. These methods need to be split each into its own interface. That way concrete appliance classes get to implement only the methods that actually make sense.
The dependency inversion principle states that entities should depend on abstractions and not on concretions. That is, a high level module should not depend on a low level module, rather the abstraction. As per the definition found on Wikipedia:
"One should depend upon abstractions. Do not depend upon concretions."
This principle is important as it plays a major role in decoupling our software.
The following is an example of a class that violates the DIP:
class Mailer {
// Implementation...
}
class NotifySubscriber {
public function notify($emailTo) {
$mailer = new Mailer();
$mailer->send('Thank you for...', $emailTo);
}
}Here we can see a notify method within the NotifySubscriber class coding in a dependency towards the Mailer class. This makes for tightly coupled code, which is what we are trying to avoid. To rectify the problem, we can pass the dependency through the class constructor, or possibly via some other method. Furthermore, we should move away from concrete class dependency towards an abstracted one, as shown in the rectified example shown here:
interface MailerInterface {
// Implementation...
}
class Mailer implements MailerInterface {
// Implementation...
}
class NotifySubscriber {
private $mailer;
public function __construct(MailerInterface $mailer) {
$this->mailer = $mailer;
}
public function notify($emailTo) {
$this->mailer->send('Thank you for...', $emailTo);
}
}Here we see a dependency being injected through the constructor. The injection is abstracted by a type hinting interface, and the actual concrete class. This makes our code loosely coupled. The DIP can be used anytime a class needs to call a method of another class, or shall we say send a message to it.
When it comes to modular development, extensibility is something to constantly think about. Writing a code that locks itself in will likely result in a future failure to integrate it with other projects or libraries. While SOLID design principles might look like an overreach for some of the parts, actively applying these principles is likely to result in components that are easy to maintain and extend over time.
Embracing the SOLID principles for class design prepares our code for future changes. It does so by localizing and minimizing these changes within our classes, so any integration using it does not feel the significant impact of the change.
Moving forward, in the next chapter, we will look into defining our application specification which we will build across all other chapters.
Building a software application from the ground up requires diverse skills, as it involves more than just writing down a code. Writing down functional requirements and sketching out a wireframe are often among the first steps in the process, especially if we are working on a client project. These steps are usually done by someone other than the developer, as they require certain insight into client business case, user behavior, and the like. Being part of a larger development team means that we, as developers, usually get requirements, designs, and wireframes then start coding against them. Delivering projects by oneself, makes it tempting to skip these steps and get our hands started with code alone. More often than not, this is an unproductive approach. Laying down functional requirements and a few wireframes is a skill worth knowing and following, even if one is just a developer.
Later in this chapter, we will go over a high-level application requirement, alongside a rough wireframe.
In this chapter, we will be covering the following topics:
We need to build a simple, but responsive web shop application. In order to do so, we need to lay out some basic requirements. The types of requirements we are interested in at the moment are those that touch upon interactions between a user and a system. The two most common techniques to specify requirements in regards to user usage are use case and user story. The user stories are a less formal yet descriptive enough way to outline these requirements. Using user stories, we encapsulate the customer and store manager actions as mentioned here.
A customer should be able to do the following:
A store manager should be able to do the following:
title, price, sku, url-key, description, qty, category, and image)title, url-key, description, and image)User stories are a convenient high-level way of writing down application requirements. Especially useful as an agile mode of development.
With user stories laid out, let's shift our focus to actual wireframing. For reasons we will get into later on, our wireframing efforts will be focused around the customer perspective.
There are numerous wireframing tools out there, both free and commercial. Some commercial tools like https://ninjamock.com, which we will use for our examples, still provide a free plan. This can be very handy for personal projects, as it saves us a lot of time.
The starting point of every web application is its home page. The following wireframe illustrates our web shop app's homepage:
Here we can see a few sections determining the page structure. The header is comprised of a logo, category menu, and user menu. The requirements don't say anything about category structure, and we are building a simple web shop app, so we are going to stick to a flat category structure, without any sub-categories. The user menu will initially show Register and Login links, until the user is actually logged in, in which case the menu will change as shown in following wireframes. The content area is filled with best sellers and on sale items, each of which have an image, title, price, and Add to Cart button defined. The footer area contains links to mostly static content pages, and a Contact Us page.
The following wireframe illustrates our web shop app's category page:
The header and footer areas remain conceptually the same across the entire site. The content area has now changed to list products within any given category. Individual product areas are rendered in the same manner as it is on the home page. Category names and images are rendered above the product list. The width of a category image gives some hints as to what type of images we should be preparing and uploading onto our categories.
The following wireframe illustrates our web shop app's product page:
The content area here now changes to list individual product information. We can see a large image placeholder, title, sku, stock status, price, quantity field, Add to Cart button, and product description being rendered. The IN STOCK message is to be displayed when an item is available for purchase and OUT OF STOCK when an item is no longer available. This is to be related to the product quantity attribute. We also need to keep in mind the "See the product image with a big view (zoom)" requirement, where clicking on an image would zoom into it.
The following wireframe illustrates our web shop app's register page:
The content area here now changes to render a registration form. There are many ways that we can implement the registration system. More often than not, the minimal amount of information is asked on a registration screen, as we want to get the user in as quickly as possible. However, let's proceed as if we are trying to get more complete user information right here on the registration screen. We ask not just for an e-mail and password, but for entire address information as well.
The following wireframe illustrates our web shop app's login page:
The content area here now changes to render a customer login and forgotten password form. We provide the user with Email and Password fields in case of login, or just an Email field in case of a password reset action.
The following wireframe illustrates our web shop app's customer account page:
The content area here now changes to render the customer account area, visible only to logged in customers. Here we see a screen with two main pieces of information. The customer information being one, and order history being the other. The customer can change their e-mail, password, and other address information from this screen. Furthermore, the customer can view, cancel, and print all of their previous orders. The My Orders table lists orders top to bottom, from newest to oldest. Though not specified by the user stories, the order cancelation should work only on pending orders. This is something that we will touch upon in more detail later on.
This is also the first screen that shows the state of the user menu when the user is logged in. We can see a dropdown showing the user's full name, My Account, and Sign Out links. Right next to it, we have the Cart (%s) link, which is to list exact quantities in a cart.
The following wireframe illustrates our web shop app's checkout cart page:
The content area here now changes to render the cart in its current state. If the customer has added any products to the cart, they are to be listed here. Each item should list the product title, individual price, quantity added, and subtotal. The customer should be able to change quantities and press the Update Cart button to update the state of the cart. If 0 is provided as the quantity, clicking the Update Cart button will remove such an item from the cart. Cart quantities should at all time reflect the state of the header menu Cart (%s) link. The right-hand side of a screen shows a quick summary of current order total value, alongside a big, clear Go to Checkout button.
The following wireframe illustrates our web shop app's checkout cart shipping page:
The content area here now changes to render the first step of a checkout process, the shipping information collection. This screen should not be accessible for non-logged in customers. The customer can provide us with their address details here, alongside a shipping method selection. The shipping method area lists several shipping methods. On the right hand side, the collapsible order summary section is shown, listing current items in the cart. Below it, we have the cart subtotal value and a big clear Next button. The Next button should trigger only when all of the required information is provided, in which case it should take us to payment information on the checkout cart payment page.
The following wireframe illustrates our web shop app's checkout cart payment page:
The content area here now changes to render the second step of a checkout process, the payment information collection. This screen should not be accessible for non-logged in customers. The customer is presented with a list of available payment methods. For the simplicity of the application, we will focus only on flat/fixed payments, nothing robust such as PayPal or Stripe. On the right-hand side of the screen, we can see a collapsible Order summary section, listing current items in the cart. Below it, we have the order totals section, individually listing Cart Subtotal, Standard Delivery, Order Total, and a big clear Place Order button. The Place Order button should trigger only when all of the required information is provided, in which case it should take us to the checkout success page.
The following wireframe illustrates our web shop app's checkout success page:
The content area here now changes to output the checkout successful message. Clearly this page is only visible to logged in customers that just finished the checkout process. The order number is clickable and links to the My Account area, focusing on the exact order. By reaching this screen, both the customer and store manager should receive a notification email, as per the Get email notification after order has been placed and Be notified if the new sales order has been created requirements.
With this, we conclude our customer facing wireframes.
In regards to store manager user story requirements, we will simply define a landing administration interface for now, as shown in the following screenshot:
Using the framework later on, we will get a complete auto-generated CRUD interface for the multiple Add New and List & Manage links. The access to this interface and its links will be controlled by the framework's security component, since this user will not be a customer or any user in the database as such.
Furthermore, throughout the following chapters, we will split our application into several modules. In such a setup, each module will take ownership of individual functionalities, taking care of customer, catalog, checkout, and other requirements.
Once the requirements and wireframes are set, we can focus our attention to the selection of a technology stack. In Chapter 1, Ecosystem Overview we glossed over several of the most popular PHP frameworks, pointing out their strengths. Choosing the right one in this case, is more of a matter of preference, as application requirements for the most part can be easily met by be met any one of those frameworks. Our choice, however, falls to Symfony. Aside from PHP frameworks, we still need a CSS framework to deliver some structure, styling, and responsiveness within the browser on the client side. Since the focus of this book is on PHP technologies, let's just say we chose the Foundation CSS framework for that task.
The Symfony framework makes a nice choice for our application. It is an enterprise level framework that has been around for years, and is extremely well documented and supported. It can be downloaded from the official http://symfony.com page as shown here:
The benefits of using Symfony as part of our technology stack are numerous. The framework provides robust and well documented:
These are essential features required by our application. The ORM in particular, plays a major role in rapid application development. Having to worry less about coding, every aspect of CRUD can boost the speed of development by a factor or two. The great thing about Symfony in this regard is that it allows for automatic generation of entities and CRUD actions around them by executing two simple commands such as the following:
php bin/console doctrine:generate:entity php app/console generate:doctrine:crud
By doing so, Symfony generates entity models and necessary controllers that empower us to perform the following operations:
Basically, we get a minimal store manager interface for free. This alone covers most of the CRUD related requirements set for the store manager role. We can then easily modify the generated templates to further integrate the remaining functionality.
On top of that, security components provide authentication and authorization that we can use to satisfy the customer and store manager logins. So a store manager will be a fixed, pre-created user attached to Symfony's firewall, the only one having access to CRUD controller actions.
Backed by the company Zurb, the Foundation framework makes a great choice for a modern responsive web application. We might say it is an enterprise level framework, providing a collection of HTML, CSS, and JavaScript that we can build upon. It can be downloaded from the official http://foundation.zurb.com page as shown here:
Foundation comes in three flavors:
We are interested in the sites version. Aside from general styling, Foundation for sites provides a great deal of controls, navigational elements, containers, media elements, and plugins. These will be particularly useful in our application, for things like header menus, category product listings, responsive cart tables, and so on.
Foundation is built as a mobile-first framework, where we code for small screens first and larger screens then inherit those styles. Its default 12-column grid system enables us to create powerful multi-device layouts quickly and easily.
We will use Foundation simply to provide structure, some basic styling, and responsiveness to our application, without writing a single line of CSS on our own. This alone should make our application visually pleasing enough to work with both on mobile and desktop screens, while still focusing the majority of our coding skills around backend things.
Aside from providing robust functionality, the company behind Foundation also provides premium technical support. Though we will not need it as part of this book, these sorts of things establish confidence when choosing application frameworks.
Creating web applications can be a tedious and time consuming task, web shops probably being one of the most robust and intensive type of application out there, as they encompass a great deal of features. There are many components involved in delivering the final product; from database, server side (PHP) code to client side (HTML, CSS, and JavaScript) code. In this chapter, we started off by defining some basic user stories which in turn defined high-level application requirements for our small web shop. Adding wireframes to the mix helped us to visualize the customer facing interface, while the store manager interface is to be provided out of the box by the framework.
We further glossed over two of the most popular frameworks that support modular application design. We turned our attention to Symfony as server side technology and Foundation as a client side responsive framework.
Moving forward, in the next chapter, we will take a more in-depth look into Symfony. As well as being a set of reusable components, Symfony is also one of the most robust and popular full-stack PHP frameworks. Therefore, it is an interesting choice for rapid web application development.
Full-stack frameworks like Symfony help ease the process of building modular applications by providing all of the necessary components, from user interface to data store. This enables a much rapid cycle of delivering individual bits and pieces of application as it grows. We will experience this later on by segmenting our application in several smaller modules, or bundles in Symfony terminology.
Moving forward we will install Symfony, create a blank project, and start looking into individual framework features essential for building modular application:
Installing Symfony is pretty straightforward. We can use the following command to install Symfony on Linux or Mac OS X:
sudo curl -LsS https://symfony.com/installer -o /usr/local/bin/symfony sudo chmod a+x /usr/local/bin/symfony
We can use the following command to install Symfony on Windows:
c:\> php -r "file_put_contents('symfony', file_get_contents('https://symfony.com/installer'));"
Once the command is executed, we can simply move the newly created symfony file to our project directory and execute it further as symfony, or php symfony in Windows.
This should trigger an output shown as follows:
Preceding response indicates we have successfully setup Symfony and are now ready to start creating new projects.
Now that we have a Symfony installer all setup, let's go ahead and create a new blank project. We do so by simply executing a symfony new test-app command, as shown in the following command line instance:
Here we are creating a new project, called test-app. We can see that the Symfony installer is downloading the latest Symfony framework from the internet, alongside outputting a brief instruction on how to run the built in PHP server via Symfony console application. The whole process might take up to a few minutes.
The structure of newly created test-app directory occurs similar to the following one:
There are numerous files and directories created here for us. Our interest, however, is focused on app and src directories. The app directory is where the site wide application configuration resides. Here we can find configuration for database, routing, security, and other services. Also, this is where default layout and template file reside, as shown in the following screenshot:
The src directory on the other hand contains already modularized code in form of the base AppBundle module, as in the following screenshot:
We are going to speak about the role of these files in more details later as we progress. For now, its worth nothing that pointing our browser to this project would make DefaultController.php the one to actually render the output.
Symfony framework comes with a built-in console tool that we can trigger by simply executing the following command within our project root directory:
php bin/console
By doing so, an extensive list of available commands is shown on screen, sectioned into the following groups:
assetscacheconfigdebugdoctrinegeneratelintormroutersecurityserverswiftmailertranslationThese empower us with various functionalities. Our special interest moving forward is going to be around doctrine and generate commands. The doctrine command, more specifically doctrine:generate:crud, generates a CRUD based on an existing Doctrine entity. Furthermore, the doctrine:generate:entity command generates a new Doctrine entity inside an existing bundle. These can be extremely handy for cases where we want a quick and easy entity creation, alongside the entire CRUD around it. Similarly, generate:doctrine:entity and generate:doctrine:crud do the same thing.
Before we go ahead and test these commands, we need to make sure we have our database configuration parameters in place so that Symfony can see and talk to our database. To do so, we need to set appropriate values in app/config/parameters.yml file.
For the purpose of this section, let's go ahead and create a simple Customer entity within the default AppBundle bundle, with entire CRUD around it, assuming the following properties on Customer entity: firstname, lastname, and e-mail. We start by running the php bin/console generate:doctrine:entity command from within the project root directory, which results in the following output:
Here we first provided AppBundle:Customer as entity name and confirmed the use of annotations as configuration format.
Finally, we are asked to start adding the fields to our entity. Typing in the first name and hitting enter moves us through a series of short questions about our field type, length, nullable, and unique states, as shown in the following screenshot:
We should now have two classes generated for our Customer entity. Via the help of Symfony and Doctrine, these classes are put in context of Object Relational Mapper (ORM), as they link the Customer entity with the proper database table. However, we haven't yet instructed Symfony to actually create the table for our entity. To do so, we execute the following command:
php bin/console doctrine:schema:update --force
This should produce the output as shown in the following screenshot:
If we now take a look at the database, we should see a customer table with all the proper columns created with SQL create dsyntax as follows:
CREATE TABLE `customer` ( `id` int(11) NOT NULL AUTO_INCREMENT, `firstname` varchar(255) COLLATE utf8_unicode_ci NOT NULL, `lastname` varchar(255) COLLATE utf8_unicode_ci NOT NULL, `email` varchar(255) COLLATE utf8_unicode_ci NOT NULL, PRIMARY KEY (`id`), UNIQUE KEY `UNIQ_81398E09E7927C74` (`email`) ) ENGINE=InnoDB DEFAULT CHARSET=utf8 COLLATE=utf8_unicode_ci;
At this point, we still do not have an actual CRUD functionality in place. We simply have an ORM empowered Customer entity class and appropriate database table behind it. The following command will generate the actual CRUD controllers and templates for us:
php bin/console generate:doctrine:crud
This should produce the following interactive output:
By providing the fully classified entity name AppBundle:Customer, generator proceeds with a series of additional inputs, from generating write actions, type of configuration to read, to prefix of route, as shown in the following screenshot:
Once done, we should be able to access our Customer CRUD actions by simply opening a URL like http://test.app/customer/ (assuming test.app is the host we set for our example) as shown:
If we click on the Create a new entry link, we will be redirected to the /customer/new/ URL, as shown in the following screenshot:
Here we can enter the actual values for our Customer entity and click Create button in order to persist it into the database customer table. After adding a few entities, the initial /customer/ URL is now able to list them all, as shown in the following screenshot:
Here we see links to show and edit actions. The show action is what we might consider the customer facing action, whereas the edit action is the administrator facing action. Clicking on the edit action, takes us to the URL of the form /customer/1/edit/, whereas number 1 in this case is the ID of customer entity in database:
Here we can change the property values and click Edit to persist them back into the database, or we can click on the Delete button to remove the entity from the database.
If we were to create a new entity with an already existing e-mail, which is flagged as a unique field, the system would throw a generic error as such the following one:
This is merely default system behavior, and as we progress further we will look into making this more user friendly. By now, we have seen how powerful Symfony's console is. With a few simple commands, we were able to create our entity and its entire CRUD actions. There is plenty more the console is capable of. We can even create our own console commands as we can implement any type of logic. However, for the purpose of our needs, current implementation will suffice for a moment.
Controllers play a major role in web applications by being at the forefront of any application output. They are the endpoints, the code that executes behind each URL. In a more technical manner, we can say the controller is any callable (a function, method on an object, or a closure) that takes the HTTP request and returns an HTTP response. The response is not bound to a single format like HTML, it can be anything from XML, JSON, CSV, image, redirect, error, and so on.
Let's take a look at the previously created (partial) src/AppBundle/Controller/CustomerController.php file, more precisely its newAction method:
/**
* Creates a new Customer entity.
*
* @Route("/new", name="customer_new")
* @Method({"GET", "POST"})
*/
public function newAction(Request $request)
{
//...
return $this->render('customer/new.html.twig', array(
'customer' => $customer,
'form' => $form->createView(),
));
}If we ignore the actual data retrieval part (//…), there are three important things to note in this little example:
@Route: this is the Symfony's annotation way of specifying HTTP endpoint, the URL we will use to access this. The first "/new" parameter states the actual endpoint, the second name="customer_new" parameter sets the name for this route that we can then use as an alias in URL generation functions in templates and so on. It is worth noting, that this builds upon the @Route("/customer") annotation set on the actual CustomerController class where the method is defined, thus making for the full URL to be something like http://test.app/customer/new.@Method: This takes the name of one or more HTTP methods. This means that the newAction method will trigger only if the HTTP requests match the previously defined @Route and are of one or more HTTP method types defined in @Method.$this->render: This returns the Response object. The $this->render calls the render function of the Symfony\Bundle\FrameworkBundle\Controller\Controller class, which instantiates new Response(), sets its content, and returns the whole instance of that object.Now let's take a look at the editAction method within our controller, as partially shown in the following code block:
/**
* Displays a form to edit an existing Customer entity.
*
* @Route("/{id}/edit", name="customer_edit")
* @Method({"GET", "POST"})
*/
public function editAction(Request $request, Customer $customer)
{
//...
}Here we see a route that accepts a singe ID, marked as {id} within the first @Route annotation parameter. The body of the method (excluded here), does not contain any direct reference to fetching the id parameter. We can see that the editAction function accepts two parameters, one being Request, the other being Customer. But how does the method know to accept the Customer object? This is where Symfony's @ParamConverter annotation comes into play. It calls converters to convert the request parameters to objects.
The great thing about @ParamConverter annotation is that we can use it explicitly or implicitly. That is, if we do not add @ParamConverter annotation but add type hinting to the method parameter, Symfony is going to try and load the object for us. This is the exact case we have in our example above, as we did not explicitly type the @ParamConverter annotation.
Terminology wise, controllers are often exchanged for routing. However, they are not the same thing.
In the shortest terms, routing is about linking the controllers with URLs entered in browser. Todays modern web applications need nice URLs. This means moving away from URLs like /index.php?product_id=23 to something like /catalog/product/t-shirt. This is where routing comes in to play.
Symfony has a powerful routing mechanism that enables us to do the following:
The way routing works in Symfony is that all of the requests come through app.php. Then, the Symfony core asks the router to inspect the request. The router then matches the incoming URL to a specific route and returns information about the route. This information, among other things, includes the controller that should be executed. Finally, the Symfony kernel executes the controller, which returns a response object.
All of the application routes are loaded from a single routing configuration file, usually app/config/routing.yml file, as shown by our test app:
app: resource: "@AppBundle/Controller/" type: annotation
The app is simply one of many possible entries. Its resource value points to AppBundle controller directory, and type is set to annotation which means that the class annotations will be read to specify exact routes.
We can define a route with several variations. One of them is shown in the following block:
// Basic Route Configuration
/**
* @Route("/")
*/
public function homeAction()
{
// ...
}
// Routing with Placeholders
/**
* @Route("/catalog/product/{sku}")
*/
public function showAction($sku)
{
// ...
}
// >>Required<< and Optional Placeholders
/**
* @Route("/catalog/product/{id}")
*/
public function indexAction($id)
{
// ...
}
// Required and >>Optional<< Placeholders
/**
* @Route("/catalog/product/{id}", defaults={"id" = 1})
*/
public function indexAction($id)
{
// ...
}The preceding examples show several ways we can define our route. The interesting one is the case with required and optional parameter. If we think about it, removing ID from the latest example will match the example before it with sku. The Symfony router will always choose the first matching route it finds. We can solve the problem by adding regular expression requirements attributed on @Route annotation as follows:
@Route(
"/catalog/product/{id}",
defaults={"id": 1},
requirements={"id": "\d+"}
)There is more to be said about controllers and routing, as we will see once we start building our application.
Previously we said that controllers accept request and return response. The response, however, can often be any content type. The production of actual content is something controllers delegate to the templating engine. The templating engine then has the capability to turn the response into HTML, JSON, XML, CSV, LaTeX, or any other text-based content type.
In the old days, programmers mixed PHP with HTML into the so called PHP templates (.php and .phtml). Though still used with some platforms, this kind of approach is considered insecure and lacking in many aspects. One of which was cramming business logic into template files.
To address these shortcomings, Symfony packs its own templating language called Twig. Unlike PHP, Twig is meant to strictly express presentation and not to thinker about program logic. We cannot execute any of the PHP code within the Twig. And the Twig code is nothing more than an HTML with a few special syntax types.
Twig defines three types of special syntax:
{{ ... }}: This outputs variable or the result of an expression to the template.{% ... %}: This tag controls the logic of the template (if and for loops, and others).{# ... #}: It is the equivalent of the PHP /* comment */ syntax. The Comments content isn't included in the rendered page.Filters are another nice feature of Twig. They act like chained method calls upon a variable value, modifying the content before it is outputted, as follows:
<h1>{{ title|upper }}</h1>
{{ filter upper }}
<h1>{{ title }}</h1>
{% endfilter %}
<h1>{{ title|lower|escape }}</h1>
{% filter lower|escape %}
<h1>{{ title }}</h1>
{% endfilter %}It also supports functions listed as follows:
{{ random(['phone', 'tablet', 'laptop']) }}The preceding random function call would return one random value from within the array. With all the built-in list of filters and functions, Twig also allows for writing our own if needed.
Similar to PHP class inheritance, Twig also supports template and layout inheritance. Let's take a quick look back at the the app/Resources/views/customer/index.html.twig file as follows:
{% extends 'base.html.twig' %}
{% block body %}
<h1>Customer list</h1>
…
{% endblock %}Here we see a customer index.html.twig template using the extends tag to extend a template from another one, in this case base.html.twig found in app/Resources/views/ directory with content as follows:
<!DOCTYPE html>
<html>
<head>
<meta charset="UTF-8" />
<title>{% block title %}Welcome!{% endblock %}</title>
{% block stylesheets%}{% endblock %}
<link rel="icon" type="image/x-icon"href="{{ asset('favicon.ico') }}" />
</head>
<body>
{% block body %}{% endblock %}
{% block javascripts%}{% endblock %}
</body>
</html>Here we see several block tags: title, stylesheets, body, and javascripts. We can declare as many blocks as we want here and name them any way we like. This makes the extend tag a key to template inheritance. It tells the Twig to first evaluate the base template, which sets the layout and defines blocks, after which the child template like customer/index.html.twig fills in the content of these blocks.
Templates live in two locations:
app/Resources/views/bundle-directory/Resources/views/What this means is in order to render/extend app/Resources/views/base.html.twig we would use base.html.twig within our template file, and to render/extend app/Resources/views/customer/index.html.twig we would use the customer/index.html.twig path.
When used with templates that reside in bundles, we have to reference them slightly differently. In this case, the bundle:directory:filename string syntax is used. Take the FoggylineCatalogBundle:Product:index.html.twig path for example. This would be a full path to use one of the bundles template file. Here the FoggylineCatalogBundle is a bundle name, Product is a name of a directory within that bundle Resources/views directory, and index.html.twig is the name of the actual template within the Product directory.
Each template filename has two extensions that first specify the format and then the engine for that template; such as *.html.twig, *.html.php, and*.css.twig.
We will get into more details regarding these templates once we move onto building our app.
Sign up, sign in, add to cart, checkout, all of these and more are actions that make use of HTML forms in web shop applications and beyond. Building forms is one of the most common tasks for developers. One that often takes time to do it right.
Symfony has a form component through which we can build HTML forms in an OO way. The component itself is also a standalone library that can be used independently of Symfony.
Let's take a look at the content of the src/AppBundle/Entity/Customer.php file, our Customer entity class that was auto-generated for us when we defined it via console:
class Customer {
private $id;
private $firstname;
private $lastname;
private $email;
public function getId() {
return $this->id;
}
public function setFirstname($firstname) {
$this->firstname = $firstname;
return $this;
}
public function getFirstname() {
return $this->firstname;
}
public function setLastname($lastname) {
$this->lastname = $lastname;
return $this;
}
public function getLastname() {
return $this->lastname;
}
public function setEmail($email) {
$this->email = $email;
return $this;
}
public function getEmail() {
return $this->email;
}
}Here we have a plain PHP class, which does not extend anything nor is in any other way linked to Symfony. It represents a single customer entity, for which it sets and gets the data. With the entity class in place, we would like to render a form that will pick up all of the relevant data used by our class. This is where the Form component comes in place.
When we used the CRUD generator via console earlier, it created the Form class for our Customer entity within the src/AppBundle/Form/CustomerType.php file with content as follows:
namespace AppBundle\Form;
use Symfony\Component\Form\AbstractType;
use Symfony\Component\Form\FormBuilderInterface;
use Symfony\Component\OptionsResolver\OptionsResolver;
class CustomerType extends AbstractType
{
public function buildForm(FormBuilderInterface $builder, array $options) {
$builder
->add('firstname')
->add('lastname')
->add('email')
;
}
public function configureOptions(OptionsResolver $resolver) {
$resolver->setDefaults(array(
'data_class' =>'AppBundle\Entity\Customer'
));
}
}We can see the simplicity behind the form component comes down to the following:
Symfony\Component\Form\AbstractType classdata_class configuration which points to our Customer entity.The form builder object is the one doing the heavy lifting here. It does not take much for it to create a form. With the form class in place, let's take a look at the controller action in charge of feeding the template with the form. In this case, we will focus on newAction within the src/AppBundle/Controller/CustomerController.php file, with content shown as follows:
$customer = new Customer();
$form = $this->createForm('AppBundle\Form\CustomerType', $customer);
$form->handleRequest($request);
if ($form->isSubmitted() && $form->isValid()) {
$em = $this->getDoctrine()->getManager();
$em->persist($customer);
$em->flush();
return $this->redirectToRoute('customer_show', array('id' =>$customer->getId()));
}
return $this->render('customer/new.html.twig', array(
'customer' => $customer,
'form' => $form->createView(),
));The preceding code first instantiates the Customer entity class. The $this->createForm(…) is actually calling $this->container->get('form.factory')->create(…), passing it our form class name and instance of customer object. We then have the isSubmitted and isValid check, to see if this is a GET or valid POST request. Based on that check, the code either returns to customer listing or sets the form and customer instance to be used with the template customer/new.html.twig. We will speak more about the actual validation later on.
Finally, lets take a look at the actual template found in the app/Resources/views/customer/new.html.twig file:
{% extends 'base.html.twig' %}
{% block body %}
<h1>Customer creation</h1>
{{ form_start(form) }}
{{ form_widget(form) }}
<input type="submit" value="Create" />
{{ form_end(form) }}
<ul>
<li>
<a href="{{ path('customer_index') }}">Back to the list</a>
</li>
</ul>
{% endblock %}Here we see extends and block tags, alongside some form of related functions. Symfony adds several form rendering function to Twig as follows:
form(view, variables)form_start(view, variables)form_end(view, variables)form_label(view, label, variables)form_errors(view)form_widget(view, variables)form_row(view, variables)form_rest(view, variables)Most of our application forms will be auto-generated like this one, so we are able to get a fully functional CRUD without going too deep into the rest of form functionality.
In order to keep up with modern demands, today's frameworks and applications require a flexible configuration system. Symfony fulfils this role nicely through its robust configuration files and environments concept.
The default Symfony configuration file config.yml is located under the app/config/ directory, with (partial) content sectioned as follows:
imports:
- { resource: parameters.yml }
- { resource: security.yml }
- { resource: services.yml }
framework:
…
# Twig Configuration
twig:
…
# Doctrine Configuration
doctrine:
…
# Swiftmailer Configuration
swiftmailer:
…The top-level entries like framework, twig, doctrine, and swiftmailer define the configuration of an individual bundle.
Optionally, the configuration file can be of XML or PHP format (config.xml or config.php). While YAML is simple and readable, XML is more powerful, whereas PHP is powerful but less readable.
We can use the console tool to dump the entire configuration as shown here:
php bin/console config:dump-reference FrameworkBundle
The preceding example lists the config file for core FrameworkBundle. We can use the same command to show possible configurations for any bundle that implements container extension, something we will look into later on.
Symfony has a nice implementation of environment concept. Looking into the app/config directory, we can see that default Symfony project actually starts with three different environments:
config_dev.ymlconfig_prod.ymlconfig_test.ymlEach application can run in various environments. Each environment shares the same code, but different configuration. Whereas dev environment might make use of extensive logging, a prod environment might make use of extensive caching.
The way these environments get triggered is via the front controller file, as in the following partial examples:
# web/app.php
…
$kernel = new AppKernel('prod', false);
…
# web/app_dev.php
…
$kernel = new AppKernel('dev', true);
…The test environment is missing here, as it is used only when running automated tests and cannot be accessed directly via a browser.
The app/AppKernel.php file is the one that actually loads the configuration, whether it is YAML, XML, or PHP as shown in the following code fragment:
public function registerContainerConfiguration(LoaderInterface $loader)
{
$loader->load($this->getRootDir().'/config/config_'.$this->getEnvironment().'.yml');
}The environments follow the same concept, whereas each environment imports the base configuration file and then modifies its values to suit the needs of the specific environment.
Most of the popular frameworks and platforms support some form of modules, plugins, extensions or bundles. For most of the time, the difference really lies just in the naming, while the concept of extensibility and modularity is the same. With Symfony, these modular blocks are called bundles.
Bundles are a first-class citizen in Symfony, as they support all of the operations available to other components. Everything in Symfony is a bundle, even the core framework. Bundles enable us to build modularized applications, whereas the entire code for a given feature is contained within a single directory.
A single bundle holds all its PHP files, templates, style sheets, JavaScript files, tests, and anything else in one root directory.
When we first setup our test app, it created an AppBundle for us, under the src directory. As we moved forward with the auto-generated CRUD, we saw our bundle getting all sorts of directories and files.
For a bundle to be noticed by Symfony, it needs to be added to the app/AppKernel.php file, with the registerBundles method as shown here:
public function registerBundles()
{
$bundles = [
new Symfony\Bundle\FrameworkBundle\FrameworkBundle(),
new Symfony\Bundle\SecurityBundle\SecurityBundle(),
new Symfony\Bundle\TwigBundle\TwigBundle(),
new Symfony\Bundle\SwiftmailerBundle\SwiftmailerBundle(),
new Doctrine\Bundle\DoctrineBundle\DoctrineBundle(),
//…
new AppBundle\AppBundle(),
];
//…
return $bundles;
}Creating a new bundle is as simple as creating a single PHP file. Let's go ahead and create an src/TestBundle/TestBundle.php file with content that looks like:
namespace TestBundle;
use Symfony\Component\HttpKernel\Bundle\Bundle;
class TestBundle extends Bundle
{
…
}Once the file is in place, all we need to do is to register it via the registerBundles method of the app/AppKernel.php file as shown here:
class AppKernel extends Kernel {
//…
public function registerBundles() {
$bundles = [
// …
new TestBundle\TestBundle(),
// …
];
return $bundles;
}
//…
}An even easier way to create a bundle would be to just run a console command as follows:
php bin/console generate:bundle --namespace=Foggyline/TestBundle
This would trigger a series of questions about bundle that in the end results in bundle creation that looks like the following screenshot:
Once the process is complete, a new bundle with several directories and files is created as shown in the following screenshot:
Bundle generator was kind enough to create controller, dependency injection extension extension, routing, prepare services configuration, templates, and even tests. Since we chose to share our bundle, Symfony opted for XML as default configuration format. The dependency extension simply means we can access our bundle configuration by using foggyline_test as the root element in Symfony's main config.yml. The actual foggyline_test element is defined within the DependencyInjection/Configuration.php file.
Databases are the backbone of almost every web application. Every time we need to store or retrieve data, we do so with the help of databases. The challenge in the modern OOP world is to abstract the database so that our PHP code is database agnostic. MySQL is probably the most known database in the PHP world. PHP itself has a great support for working with MySQL, whether it is via the mysqli_* extension or via PDO. However, both approaches are MySQL specific, to o close to database. Doctrine solves this problem by introducing a level of abstraction, enabling us to work with PHP objects that represent tables, rows, and their relations in MySQL.
Doctrine is completely decoupled from Symfony, so using it is completely optional. The great thing about it, however, is that the Symfony console provides great auto-generated CRUD based on Doctrine ORM, as we saw in previous examples when creating Customer entity.
As soon as we created the project, Symfony provided us with an auto-generated app/config/parameters.yml file. This is the file in which we, among other things, provide database access information as shown in the following example:
parameters: database_host: 127.0.0.1 database_port: null database_name: symfony database_user: root database_password: mysql
Once we configure proper parameters, we can use console generation features.
It is worth noting that parameters within this file are merely a convention, as app/config/config.yml is pulling them under doctrine dbal configuration like the one shown here:
doctrine: dbal: driver: pdo_mysql host: "%database_host%" port: "%database_port%" dbname: "%database_name%" user: "%database_user%" password: "%database_password%" charset: UTF8
The Symfony console tool allows us to drop and create a database based on this config, which comes in handy during development, as shown in the following code block:
php bin/console doctrine:database:drop --force php bin/console doctrine:database:create
We saw previously how the console tool enables us to create entities and their mapping into database tables. This will suffice for our needs throughout this book. Once we have them created, we need to be able to perform CRUD operations on them. If we gloss over the auto-generated CRUD controller src/AppBundle/Controller/CustomerController.php file, we can the CRUD related code as follows:
// Fetch all entities
$customers = $em->getRepository('AppBundle:Customer')->findAll();
// Persist single entity (existing or new)
$em = $this->getDoctrine()->getManager();
$em->persist($customer);
$em->flush();
// Delete single entity
$em = $this->getDoctrine()->getManager();
$em->remove($customer);
$em->flush();There is a lot more to be said about Doctrine, which is far out of the scope of this book. More information can be found at the official page (http://www.doctrine-project.org).
Nowadays testing has become an integral part of every modern web application. Usually the term testing implies unit and functional testing. Unit testing is about testing our PHP classes. Every single PHP class is considered to be a unit, thus the name unit test. Functional tests on the other hand test various layers of our application, usually concentrated on testing the functionality overall, like the sign in or sign up process.
The PHP ecosystem has a great unit testing framework called PHPUnit, available for download at https://phpunit.de. It enables us to write primarily unit, but also functional type tests. The great thing about Symfony is that it comes with built in support for PHPUnit.
Before we can start running Symfony's tests, we need to make sure we have PHPUnit installed and available as console command. When executed, PHPUnit automatically tries to pick up and read testing configuration from phpunit.xml or phpunit.xml.dist within the current working directory, if available. By default Symfony comes with a phpunit.xml.dist file in its root folder, thus making it possible for the phpunit command to pick up its test configuration.
The following is a partial example of a default phpunit.xml.dist file:
<phpunit … >
<php>
<ini name="error_reporting" value="-1" />
<server name="KERNEL_DIR" value="app/" />
</php>
<testsuites>
<testsuite name="Project Test Suite">
<directory>tests</directory>
</testsuite>
</testsuites>
<filter>
<whitelist>
<directory>src</directory>
<exclude>
<directory>src/*Bundle/Resources</directory>
<directory>src/*/*Bundle/Resources</directory>
<directory>src/*/Bundle/*Bundle/Resources</directory>
</exclude>
</whitelist>
</filter>
</phpunit>The testsuites element defines the directory tests, in which all of our tests are located. The filter element with its children is used to configure the whitelist for the code coverage reporting. The php element with its children is used to configure PHP settings, constants, and global variables.
Running a phpunit command against a default project like ours would result in output like the following:
Note that bundle tests are not automatically picked up. Our src/AppBundle/Tests/Controller/CustomerControllerTest.php file, which was created for us automatically when we used auto-generated CRUD, was not executed. Not because its content is commented out by default, but because the bundle test directory isn't visible to phpunit. To make it execute, we need to extend the phpunit.xml.dist file by adding to directory testsuite as follows:
<testsuites>
<testsuite name="Project Test Suite">
<directory>tests</directory>
<directory>src/AppBundle/Tests</directory>
</testsuite>
</testsuites>Depending on how we build our application, we might want to add all of our bundles to the testsuite list, even if we plan on distributing bundles independently.
There is plenty more to be said about testing. We will do so bit by bit as we progress through further chapters and cover the needs of individual bundles. For the moment, it is suffice to know how to trigger tests and how to add new locations to testing configuration.
Validation plays an essential role in modern applications. When talking about web applications, we can say we differentiate between two main types of validation; form data and persisted data validation. Taking input from a user via a web form should be validated, the same as any persisting data that goes into a database.
Symfony excels here by providing a Validation component based on JSR 303 Bean Validation drafted and available at http://beanvalidation.org/1.0/spec/. If we look back at our app/config/config.yml, under the framework root element, we can see that the validation service is turned on by default:
framework:
validation:{ enable_annotations: true }We can access the validation service from any controller class by simply calling it via the $this->get('validator') expression, as shown in the following example:
$customer = new Customer();
$validator = $this->get('validator');
$errors = $validator->validate($customer);
if (count($errors) > 0) {
// Handle error state
}
// Handle valid stateThe problem with the example above is that validation would never return any errors. The reason for this is that we do not have any assertions set on our class. The console auto-generated CRUD did not really define any constraints on our Customer class. We can confirm that by trying to add a new customer and typing in any text in the e-mail field, as we can see the e-mail wont be validated.
Let's go ahead and edit the src/AppBundle/Entity/Customer.php file by adding the @Assert\Email function to the $email property like the one shown here:
//…
use Symfony\Component\Validator\Constraints as Assert;
//…
class Customer
{
//…
/**
* @var string
*
* @ORM\Column(name="email", type="string", length=255, unique=true)
* @Assert\Email(
* checkMX = true,
* message = "Email '{{ value }}' is invalid.",
* )
*/
private $email;
//…
}The great thing about assertions constraints is that they accept parameters just as functions. We can therefore fine-tune individual constraints to our specific needs. If we now try to skip or add a faulty e-mail address, we would get a message like Email "john@gmail.test" is invalid.
There are numerous constraints available, for the full list we can consult the http://symfony.com/doc/current/book/validation.html page.
Constraints can be applied to a class property or a public getter method. While the property constraints are most common and easy to use, the getter method constraints allow us to specify more complex validation rules.
Let's take look at the newAction method of an src/AppBundle/Controller/CustomerController.php file as follows:
$customer = new Customer();
$form = $this->createForm('AppBundle\Form\CustomerType', $customer);
$form->handleRequest($request);
if ($form->isSubmitted() && $form->isValid()) {
// …Here we see an instance of a CustomerType form being bind to the Customer instance. The actual GET or POST request data is passed to an instance of a form via the handleRequest method. The form is now able to understand entity validation constraints and respond properly via its isValid method call. What this means is that we do not have to manually validate by using the validation service ourselves, the forms can do it for us.
We will continue to expand on validation features as we progress through individual bundles.
Throughout this chapter we touched on some important functionality, which makes Symfony so great. Controllers, templates, Doctrine, ORM, forms, and validation make for a complete solution from data presentation and persistence. We have seen the flexibility and power behind each of the components. The bundle system takes it a step further by wrapping these into individual mini applications, or modules. We are now able to take full control of incoming HTTP requests, manipulate the data store, and present data to the user, all of this within a single bundle.
Moving forward, in the next chapter, we will utilize the insights and knowledge gained throughout the previous chapters to finally start building our modular application according to the requirements.
Up until now we have familiarized ourselves with the latest changes in PHP 7, design patterns, design principles, and popular PHP frameworks. We also took a more detailed look into Symfony as our framework of choice moving forward. We have now finally reached a point where we can start building our modular application. Building modular applications with Symfony is done via the bundles mechanism. Terminology-wise, from this point on, we will consider bundle and module to be the same thing.
In this chapter we will be covering the following topics with respect to the core module:
Looking back in Chapter 4, Requirement Specification for Modular Web Shop App, and the wireframes presented there, we can outline some of the requirements this module will have. The core module is going to be used to set general, application-wide features, as follows:
We start by creating an entirely new Symfony project, running the following console command:
symfony new shop
This creates a new shop directory with all of the required files needed to run our application in the browser. Among these files and directories is the src/AppBundle directory, which is actually our core module. Before we can run our application in the browser, we need to map the newly created shop directory to a hostname, let's say shop.app, so we can access it in the browser via http://shop.app URL. Once this is done, if we open http://shop.app, we should see Welcome to Symfony 3.1.0 screen as shown here:
Though we have no need for the database just yet, other modules we will develop later on will assume database connection, so it's worth setting it up right from the start. We do so by configuring app/config/parameters.yml with proper database connection parameters.
We then download Foundation for Sites from http://foundation.zurb.com/sites.html. Once downloaded, we need to unpack it and copy over the /js and /css directories into the Symfony /web directory as shown in the following screenshot:
With Foundation CSS and JavaScript files in place, we edit the app/Resources/views/base.html.twig file as follows:
<!doctype html>
<html class="no-js"lang="en">
<head>
<meta charset="utf-8"/>
<meta http-equiv="x-ua-compatible" content="ie=edge">
<meta name="viewport" content="width=device-width, initial-scale=1.0"/>
<title>{% block title %}Welcome!{% endblock %}</title>
<link rel="stylesheet"href="{{ asset('css/foundation.css') }}"/>
{% block stylesheets%}{% endblock %}
</head>
<body>
<!-- START BODY -->
<!-- TOP-MENU -->
<!-- SYSTEM-WIDE-MESSAGES -->
<!-- PER-PAGE-BODY -->
<!-- FOOTER -->
<!-- START BODY -->
<script src="{{ asset('js/vendor/jquery.js') }}"></script>
<script src="{{ asset('js/vendor/what-input.js') }}"></script>
<script src="{{ asset('js/vendor/foundation.js') }}"></script>
<script>
$(document).foundation();
</script>
{% block javascripts%}{% endblock %}
</body>
</html>Here we are setting the entire head and before body end areas, with all the necessary CSS and JavaScript loading. The Twigs asset tag helps us with building URL paths, where we simply pass on the URL path itself and it builds a complete URL for us. In regard to the actual body of the page, there are several things to consider here. How are we going to build category, customer, and checkout menus? At this point we do not have any of these modules, and neither do we want to make them mandatory for our core module. So how do we solve the challenge of accounting for something that is not there yet?
What we can do for category, customer, and checkout menus is to define global Twig variables for each of those menu items that will then be used to render the menu. These variables will be filed via proper services. Since the core bundle is not aware of future catalog, customer, and checkout modules, we will initially create a few dummy services and hook them to global Twig variables. Later on, when we develop catalog, customer, and checkout modules, those modules will override the appropriate services, thus providing the right values for into menus.
This approach might not fit ideally with the notion of modular application, but it will suffice for our needs, as we are not hard-coding any dependencies as such.
We start off by adding the following entry into the app/config/config.yml file:
twig: # ... globals: category_menu: '@category_menu' customer_menu: '@customer_menu' checkout_menu: '@checkout_menu' products_bestsellers: '@bestsellers' products_onsale: '@onsale'
The category_menu_items, customer_menu_items, checkout_menu_items, products_bestsellers, and products_onsale variables become global Twig variables that we can use in any Twig template as shown in the following example:
<ul>
{% for category in category_menu.getItems() %}
<li>{{ category.name }}</li>
{% endfor %}
</ul>The @ character in the Twig global variable config is used to denote a beginning of the service name. This is the service that will provide a value object for our Twig variable. Next, we go ahead and create the actual category_menu, customer_menu, checkout_menu, bestsellers, and onsale services by modifying app/config/services.yml as follows:
services: category_menu: class: AppBundle\Service\Menu\Category customer_menu: class: AppBundle\Service\Menu\Customer checkout_menu: class: AppBundle\Service\Menu\Checkout bestsellers: class: AppBundle\Service\Menu\BestSellers onsale: class: AppBundle\Service\Menu\OnSale
Furthermore, we create each of the listed service classes under the src/AppBundle/Service/Menu/ directory. We start with the src/AppBundle/Service/Menu/Bestsellers.php file with the following content:
namespace AppBundle\Service\Menu;
class BestSellers {
public function getItems() {
// Note, this can be arranged as per some "Product"interface, so to know what dummy data to return
return array(
ay('path' =>'iphone', 'name' =>'iPhone', 'img' =>'/img/missing-image.png', 'price' => 49.99, 'add_to_cart_url' =>'#'),
array('path' =>'lg', 'name' =>'LG', 'img' =>
'/img/missing-image.png', 'price' => 19.99, 'add_to_cart_url' =>'#'),
array('path' =>'samsung', 'name' =>'Samsung', 'img'=>'/img/missing-image.png', 'price' => 29.99, 'add_to_cart_url' =>'#'),
array('path' =>'lumia', 'name' =>'Lumia', 'img' =>'/img/missing-image.png', 'price' => 19.99, 'add_to_cart_url' =>'#'),
array('path' =>'edge', 'name' =>'Edge', 'img' =>'/img/missing-image.png', 'price' => 39.99, 'add_to_cart_url' =>'#'),
);
}
}We then add the src/AppBundle/Service/Menu/Category.php file with content as follows:
class Category {
public function getItems() {
return array(
array('path' =>'women', 'label' =>'Women'),
array('path' =>'men', 'label' =>'Men'),
array('path' =>'sport', 'label' =>'Sport'),
);
}
}Following this, we add the src/AppBundle/Service/Menu/Checkout.php file with content as shown here:
class Checkout
{
public function getItems()
{
// Initial dummy menu
return array(
array('path' =>'cart', 'label' =>'Cart (3)'),
array('path' =>'checkout', 'label' =>'Checkout'),
);
}
}Once this is done, we will go on and add the following content to the src/AppBundle/Service/Menu/Customer.php file:
class Customer
{
public function getItems()
{
// Initial dummy menu
return array(
array('path' =>'account', 'label' =>'John Doe'),
array('path' =>'logout', 'label' =>'Logout'),
);
}
}We then add the src/AppBundle/Service/Menu/OnSale.php file with the following content:
class OnSale
{
public function getItems()
{
// Note, this can be arranged as per some "Product" interface, so to know what dummy data to return
return array(
array('path' =>'iphone', 'name' =>'iPhone', 'img' =>'/img/missing-image.png', 'price' => 19.99, 'add_to_cart_url' =>'#'),
array('path' =>'lg', 'name' =>'LG', 'img' =>'/img/missing-image.png', 'price' => 29.99, 'add_to_cart_url' =>'#'),
array('path' =>'samsung', 'name' =>'Samsung', 'img'=>'/img/missing-image.png', 'price' => 39.99, 'add_to_cart_url' =>'#'),
array('path' =>'lumia', 'name' =>'Lumia', 'img' =>'/img/missing-image.png', 'price' => 49.99, 'add_to_cart_url' =>'#'),
array('path' =>'edge', 'name' =>'Edge', 'img' =>'/img/missing-image.png', 'price' => 69.99, 'add_to_cart_url' =>'#'),
;
}
}We have now defined five global Twig variables that will be used to build our application menus. Even though variables are now hooked to a dummy service that returns nothing more than a dummy array, we have effectively decoupled menu items into other soon-to-be built modules. When we get to building our category, customer, and checkout modules later on, we will simply write a service override and properly fill the menu items array with real items. This would be the ideal situation.
We can now go back to our app/Resources/views/base.html.twig file and replace <!-- TOP-MENU --> from the preceding code with the following:
<div class="title-bar" data-responsive-toggle="appMenu" data-hide-for="medium">
<button class="menu-icon" type="button" data-toggle></button>
<div class="title-bar-title">Menu</div>
</div>
<div class="top-bar" id="appMenu">
<div class="top-bar-left">
{# category_menu is global twig var filled from service, and later overriden by another module service #}
<ul class="menu">
<li><a href="{{ path('homepage') }}">HOME</a></li>
{% block category_menu %}
{% for link in category_menu.getItems() %}
<li><a href="{{ link.path }}">{{ link.label }}</li></a>
{% endfor %}
{% endblock %}
</ul>
</div>
<div class="top-bar-right">
<ul class="menu">
{# customer_menu is global twig var filled from service, and later overriden by another module service #}
{% block customer_menu %}
{% for link in customer_menu.getItems() %}
<li><a href="{{ link.path }}">{{ link.label }}</li></a>
{% endfor %}
{% endblock %}
{# checkout_menu is global twig var filled from service, and later overriden by another module service #}
{% block checkout_menu %}
{% for link in checkout_menu.getItems() %}
<li><a href="{{ link.path }}">{{ link.label }}</li></a>
{% endfor %}
{% endblock %}
</ul>
</div>
</div>We can then replace <!-- SYSTEM-WIDE-MESSAGES --> with the following:
<div class="row column">
{% for flash_message in app.session.flashBag.get('alert') %}
<div class="alert callout">
{{ flash_message }}
</div>
{% endfor %}
{% for flash_message in app.session.flashBag.get('warning') %}
<div class="warning callout">
{{ flash_message }}
</div>
{% endfor %}
{% for flash_message in app.session.flashBag.get('success') %}
<div class="success callout">
{{ flash_message }}
</div>
{% endfor %}
</div>We replace <!-- PER-PAGE-BODY --> with the following:
<div class="row column">
{% block body %}{% endblock %}
</div>We replace <!-- FOOTER --> with the following:
<div class="row column">
<ul class="menu">
<li><a href="{{ path('about') }}">About Us</a></li>
<li><a href="{{ path('customer_service') }}">Customer Service</a></li>
<li><a href="{{ path('privacy_cookie') }}">Privacy and Cookie Policy</a></li>
<li><a href="{{ path('orders_returns') }}">Orders and Returns</a></li>
<li><a href="{{ path('contact') }}">Contact Us</a></li>
</ul>
</div>Now we can go ahead and edit the src/AppBundle/Controller/DefaultController.php file and add the following code to it:
/**
* @Route("/", name="homepage")
*/
public function indexAction(Request $request)
{
return $this->render('AppBundle:default:index.html.twig');
}
/**
* @Route("/about", name="about")
*/
public function aboutAction()
{
return $this->render('AppBundle:default:about.html.twig');
}
/**
* @Route("/customer-service", name="customer_service")
*/
public function customerServiceAction()
{
return $this->render('AppBundle:default:customer-service.html.twig');
}
/**
* @Route("/orders-and-returns", name="orders_returns")
*/
public function ordersAndReturnsAction()
{
return $this->render('AppBundle:default:orders-returns.html.twig');
}
/**
* @Route("/privacy-and-cookie-policy", name="privacy_cookie")
*/
public function privacyAndCookiePolicyAction()
{
return $this->render('AppBundle:default:privacy-cookie.html.twig');
}All of the used template files (about.html.twig, customer-service.html.twig, orders-returns.html.twig, privacy-cookie.html.twig) residing within the src/AppBundle/Resources/views/default directory can be similarly defined as follows:
{% extends 'base.html.twig' %}
{% block body %}
<div class="row">
<h1>About Us</h1>
</div>
<div class="row">
<p>Loremipsum dolor sit amet, consecteturadipiscingelit...</p>
</div>
{% endblock %}Here we are merely wrapping header and content into the div elements with the row class, just to give it some structure. The result should be pages similar to those shown here:
The Contact Us page requires a different approach as it will contain a form. To build a form we use Symfony's Form component by adding the following to the src/AppBundle/Controller/DefaultController.php file:
/**
* @Route("/contact", name="contact")
*/
public function contactAction(Request $request) {
// Build a form, with validation rules in place
$form = $this->createFormBuilder()
->add('name', TextType::class, array(
'constraints' => new NotBlank()
))
->add('email', EmailType::class, array(
'constraints' => new Email()
))
->add('message', TextareaType::class, array(
'constraints' => new Length(array('min' => 3))
))
->add('save', SubmitType::class, array(
'label' =>'Reach Out!',
'attr' => array('class' =>'button'),
))
->getForm();
// Check if this is a POST type request and if so, handle form
if ($request->isMethod('POST')) {
$form->handleRequest($request);
if ($form->isSubmitted() && $form->isValid()) {
$this->addFlash(
'success',
'Your form has been submitted. Thank you.'
);
// todo: Send an email out...
return $this->redirect($this->generateUrl('contact'));
}
}
// Render "contact us" page
return $this->render('AppBundle:default:contact.html.twig', array(
'form' => $form->createView()
));
}Here we started off by building a form via form builder. The add methods accept both field definitions and field constraints upon which validation can be based. We then added a check for the HTTP POST method, in case of which we feed the form with request parameters and run validation against it.
With the contactAction method in place, we still need a template file to actually render the form. We do so by adding the src/AppBundle/Resources/views/default/contact.html.twig file with content that follows:
{% extends 'base.html.twig' %}
{% block body %}
<div class="row">
<h1>Contact Us</h1>
</div>
<div class="row">
{{ form_start(form) }}
{{ form_widget(form) }}
{{ form_end(form) }}
</div>
{% endblock %}Based on these few tags, Twig handles the form rendering for us. The resulting browser output is a page as shown in the following:
We are almost there with getting all of our pages ready. One thing is missing, though, the body area of our home page. Unlike other pages with static content, this one is actually dynamic, as it lists bestsellers and products on sale. This data is expected to come from other modules, which are not available yet. Still, this does not mean we cannot prepare dummy placeholders for them. Let's go ahead and edit the app/Resources/views/default/index.html.twig file as follows:
{% extends 'base.html.twig' %}
{% block body %}
<!--products_bestsellers -->
<!--products_onsale -->
{% endblock %}Now we need to replace <!-- products_bestsellers --> with the following:
{% if products_bestsellers %}
<h2 class="text-center">Best Sellers</h2>
<div class="row products_bestsellers text-center small-up-1 medium-up-3 large-up-5" data-equalizer data-equalize-by- row="true">
{% for product in products_bestsellers.getItems() %}
<div class="column product">
<img src="{{ asset(product.img) }}" alt="missing image"/>
<a href="{{ product.path }}">{{ product.name }}</a>
<div>${{ product.price }}</div>
<div><a class="small button"href="{{ product.add_to_cart_url }}">Add to Cart</a></div>
</div>
{% endfor %}
</div>
{% endif %}Now we need to replace <!-- products_onsale -->with the following:
{% if products_onsale %}
<h2 class="text-center">On Sale</h2>
<div class="row products_onsale text-center small-up-1 medium-up-3 large-up-5" data-equalizer data-equalize-by-row="true">
{% for product in products_onsale.getItems() %}
<div class="column product">
<img src="{{ asset(product.img) }}" alt="missing image"/>
<a href="{{ product.path }}">{{ product.name }}</a>
<div>${{ product.price }}</div>
<div><a class="small button"href="{{ product.add_to_cart_url }}">Add to Cart</a></div>
</div>
{% endfor %}
</div>
{% endif %}The http://dummyimage.com enables us to create a placeholder images for our app.
At this point we should be seeing the home page as shown here:
What we are trying to achieve as part of our applicationwide security is to set some basic protection against future customers or any other user being able to access and use future auto-generated CRUD controllers. We do so by modifying the app/config/security.yml file. There are several components to the security.yml file we need to address: Firewalls, access control, providers, and encoders. If we observe the auto-generated CRUD from the previous test app, it becomes clear that we need to protect the following from customer access:
GET|POST /newGET|POST /{id}/editDELETE /{id}In another words, everything that has /new and /edit in the URL, and everything that is of DELETE method, needs to be protected from the customer. With that in mind, we will use Symfony security features to create an in-memory user of role ROLE_ADMIN. We will then create an access control list that allows only ROLE_ADMIN to access the resources we just mentioned, and a firewall that triggers an HTTP basic authentication login form when we try to access these resources.
Using an in-memory provider means hard-coding users in our security.yml file. For purposes of our application, we will do so for the admin type of users. The actual password, however, does not need to be hard-coded. Assuming we will use 1L6lllW9zXg0 for the password, let's jump to the console and type in the following command:
php bin/console security:encode-password
This will produce an output as follows.
We can now edit security.yml by adding an in-memory provider and copy-paste the generated encoded password into it, as shown here:
security:
providers:
in_memory:
memory:
users:
john:
password: $2y$12$DFozWehwPkp14sVXr7.IbusW8ugvmZs9dQMExlggtyEa/TxZUStnO
roles: 'ROLE_ADMIN'Here we defined a user john of role ROLE_ADMIN with an encoded 1L6lllW9zXg0 password.
Once we have the providers in place, we can go ahead and add encoders to our security.yml file. Otherwise Symfony would not know what to make of the current password assigned to john user:
security:
encoders:
Symfony\Component\Security\Core\User\User:
algorithm: bcrypt
cost: 12Then we add the firewall as follows:
security:
firewalls:
guard_new_edit:
pattern: /(new)|(edit)
methods: [GET, POST]
anonymous: ~
http_basic: ~
guard_delete:
pattern: /
methods: [DELETE]
anonymous: ~
http_basic: ~The guard_new_edit and guard_delete names are freely given names to our two application firewalls. The guard_new_edit firewall will be intercepting all GET and POST requests to any route containing the /new or /edit string in its URL. The guard_delete firewall will be intercepting any HTTP DELETE method on any URL. Once these firewalls kick in, they will show an HTTP basic authentication form, and only allow access if the user is logged in.
Then we add the access control list as follows:
security:
access_control:
# protect any possible auto-generated CRUD actions from everyone's access
- { path: /new, roles: ROLE_ADMIN }
- { path: /edit, roles: ROLE_ADMIN }
- { path: /, roles: ROLE_ADMIN, methods: [DELETE] }With these entries in place, an one who tries to access any URL with any of the patterns defined under access_control will be presented with the browser login as shown here:
The only user that can login is john with the password 1L6lllW9zXg0. Once authenticated, the user can access all the CRUD links. This should be enough for our simple application.
Before we start writing our functional tests, we need to edit the phpunit.xml.dist file by adding our bundle Tests directory to the testsuite paths, as follows:
<testsuites>
<testsuite name="Project Test Suite">
<-- ... other elements ... -->
<directory>src/AppBundle/Tests</directory>
<-- ... other elements ... -->
</testsuite>
</testsuites>Our functional tests will cover only one controller, since we have no other. We start off by creating a src/AppBundle/Tests/Controller/DefaultControllerTest.php file with content as follows:
namespace AppBundle\Tests\Controller;
use Symfony\Bundle\FrameworkBundle\Test\WebTestCase;
class DefaultControllerTest extends WebTestCase
{
//…
}The next step is to test each and every one of our controller actions. At the very least we should test if the page content is being outputted properly.
To get an auto-complete in our IDE we can download the PHPUnitphar file from the official site here https://phpunit.de. Once downloaded, we can simply add it to the root of our project, so that IDE, like PHPStorm, picks it up. This makes it easy to follow up on all those $this->assert method calls and their parameters.
The first thing we want to test is our home page. We do so by adding the following to the body of the DefaultControllerTest class.
public function testHomepage()
{
// @var \Symfony\Bundle\FrameworkBundle\Client
$client = static::createClient();
/** @var \Symfony\Component\DomCrawler\Crawler */
$crawler = $client->request('GET', '/');
// Check if homepage loads OK
$this->assertEquals(200, $client->getResponse()->getStatusCode());
// Check if top bar left menu is present
$this->assertNotEmpty($crawler->filter('.top-bar-left li')->count());
// Check if top bar right menu is present
$this->assertNotEmpty($crawler->filter('.top-bar-right li')->count());
// Check if footer is present
$this->assertNotEmpty($crawler->filter('.footer li')->children()->count());
}Here we are checking several things at once. We are checking with the page loads OK, with HTTP 200 status. Then we are grabbing the left and right menu and counting their the items to see if they have any. If all of the individual checks pass, the testHomepage test is considered to have passed.
We further test all of the static pages by adding the following to the DefaultControllerTest class:
public function testStaticPages()
{
// @var \Symfony\Bundle\FrameworkBundle\Client
$client = static::createClient();
/** @var \Symfony\Component\DomCrawler\Crawler */
// Test About Us page
$crawler = $client->request('GET', '/about');
$this->assertEquals(200, $client->getResponse()->getStatusCode());
$this->assertContains('About Us', $crawler->filter('h1')->text());
// Test Customer Service page
$crawler = $client->request('GET', '/customer-service');
$this->assertEquals(200, $client->getResponse()->getStatusCode());
$this->assertContains('Customer Service', $crawler->filter('h1')->text());
// Test Privacy and Cookie Policy page
$crawler = $client->request('GET', '/privacy-and-cookie-policy');
$this->assertEquals(200, $client->getResponse()->getStatusCode());
$this->assertContains('Privacy and Cookie Policy', $crawler->filter('h1')->text());
// Test Orders and Returns page
$crawler = $client->request('GET', '/orders-and-returns');
$this->assertEquals(200, $client->getResponse()->getStatusCode());
$this->assertContains('Orders and Returns', $crawler->filter('h1')->text());
// Test Contact Us page
$crawler = $client->request('GET', '/contact');
$this->assertEquals(200, $client->getResponse()->getStatusCode());
$this->assertContains('Contact Us', $crawler->filter('h1')->text());
}Here we are running the same assertEquals and assertContains functions for all of our pages. We are merely trying to confirm that each page is loaded with HTTP 200, and that the proper value is returned for the page title, that is to say, the h1 element.
Finally, we address the form submission test which we perform by adding the following into the DefaultControllerTest class:
public function testContactFormSubmit()
{
// @var \Symfony\Bundle\FrameworkBundle\Client
$client = static::createClient();
/** @var \Symfony\Component\DomCrawler\Crawler */
$crawler = $client->request('GET', '/contact');
// Find a button labeled as "Reach Out!"
$form = $crawler->selectButton('Reach Out!')->form();
// Note this does not validate form, it merely tests against submission and response page
$crawler = $client->submit($form);
$this->assertEquals(200, $client->getResponse()->getStatusCode());
}Here we are grabbing the form element through its Reach Out! submit button. Once the form is fetched, we trigger the submit method on the client passing it the instance from element. It is worth noting that the actual form validation is not being tested here. Even so, the submitted form should result in an HTTP 200 status.
These tests are conclusive. We can write them to be much more robust if we wanted to, as there are numerous elements we can test against.
In this chapter we have built our first module, or bundle in Symfony terminology. The module itself is not really loosely coupled, as it relies on some of the things within the app directory, such as the app/Resources/views/base.html.twig layout template. We can get away with this when it comes to core modules, as they are merely a foundation we are setting up for rest of the modules.
Moving forward, in the next chapter, we will build a catalog module. This will be the basis of our web shop application.
The catalog module is an essential part of every web shop application. At the very basic level, it is responsible for the management and display of categories and products. It is a foundation for later modules, such as checkout, that add the actual sales capabilities to our web shop application.
The more robust catalog features might include mass product imports, product exports, multi-warehouse inventory management, private members categories, and so on. These however, are out of the scope of this chapter.
In this chapter, we will be covering following topics:
Following the high level application requirements, defined in Chapter 4, Requirement Specification for Modular Web Shop App, our module will have several entities and other specific features implemented.
Following is a list of required module entities:
The Category entity includes the following properties and their data types:
id: integer, auto-incrementtitle: stringurl_key: string, uniquedescription: textimage: stringThe Product entity includes the following properties:
id: integer, auto-incrementcategory_id: integer, foreign key that references the category table ID columntitle: stringprice: decimalsku: string, uniqueurl_key: string, uniquedescription: textqty: integerimage: stringonsale: booleanAside from just adding these entities and their CRUD pages, we also need to override the core module services responsible for building the category menu and on sale items.
The module has no firm dependencies on any other module. The Symfony framework service layer enables us to code modules in such a way that, most of the time, there is no need for a dependency between them. While the module does override a service defined in the core module, the module itself is not dependent on it, as nothing will break if the overriding service is missing.
We start off by creating a new module called Foggyline\CatalogBundle. We do so with the help of the console, by running the command as follows:
php bin/console generate:bundle --namespace=Foggyline/CatalogBundle
The command triggers an interactive process that asks us several questions along the way, as shown in the following screenshot:
Once done, the following structure is generated for us:
If we now take a look at the app/AppKernel.php file, we would see the following line under the registerBundles method:
new Foggyline\CatalogBundle\FoggylineCatalogBundle()
Similarly, the app/config/routing.yml has the following route definition added to it:
foggyline_catalog: resource: "@FoggylineCatalogBundle/Resources/config/routing.xml" prefix: /
Here we need to change prefix: / into prefix: /catalog/, so we don't collide with core module routes. Leaving it as prefix: / would simply overrun our core AppBundle and output Hello World! from the src/Foggyline/CatalogBundle/Resources/views/Default/index.html.twig template to the browser at this point. We want to keep things nice and separated. What this means is that the module does not define the root route for itself.
Let's go ahead and create a Category entity. We do so by using the console, as shown here:
php bin/console generate:doctrine:entity
This creates the Entity/Category.php and Repository/CategoryRepository.php files within the src/Foggyline/CatalogBundle/ directory. After this, we need to update the database, so it pulls in the Category entity, as shown in the following command line instance:
php bin/console doctrine:schema:update --force
This results in a screen that looks similar to the following screenshot:
With entity in place, we are ready to generate its CRUD. We do so by using the following command:
php bin/console generate:doctrine:crud
This results with interactive output as shown here:
This results in src/Foggyline/CatalogBundle/Controller/CategoryController.php being created. It also adds an entry to our app/config/routing.yml file as follows:
foggyline_catalog_category: resource: "@FoggylineCatalogBundle/Controller/CategoryController.php" type: annotation
Furthermore, the view files are created under the app/Resources/views/category/ directory, which is not what we might expect. We want them under our module src/Foggyline/CatalogBundle/Resources/views/Default/category/ directory, so we need to copy them over. Additionally, we need to modify all of the $this->render calls within our CategoryController by appending the FoggylineCatalogBundle:default: string to each of the template paths.
Next, we go ahead and create the Product entity by using the interactive generator as discussed earlier:
php bin/console generate:doctrine:entity
We follow the interactive generator, respecting the minimum of the following attributes: title, price, sku, url_key, description, qty, category, and image. Aside from price and qty, which are of types decimal and integer, all other attributes are of type string. Furthermore, sku and url_key are flagged as unique. This creates the Entity/Product.php and Repository/ProductRepository.php files within the src/Foggyline/CatalogBundle/ directory.
Similar to what we have done for the Category view templates, we need to do for the Product view templates. That is, copy them over from the app/Resources/views/product/ directory to src/Foggyline/CatalogBundle/Resources/views/Default/product/ and update all of the $this->render calls within our ProductController by appending the FoggylineCatalogBundle:default: string to each of the template paths.
At this point, we won't rush updating the schema, as we want to add proper relations to our code. Each product should be able to have a relation to a single Category entity. To achieve this, we need to edit Category.php and Product.php from within the src/Foggyline/CatalogBundle/Entity/ directory, as follows:
// src/Foggyline/CatalogBundle/Entity/Category.php
/**
* @ORM\OneToMany(targetEntity="Product", mappedBy="category")
*/
private $products;
public function __construct()
{
$this->products = new \Doctrine\Common\Collections\ArrayCollection();
}
// src/Foggyline/CatalogBundle/Entity/Product.php
/**
* @ORM\ManyToOne(targetEntity="Category", inversedBy="products")
* @ORM\JoinColumn(name="category_id", referencedColumnName="id")
*/
private $category;We further need to edit the Category.php file by adding the __toString method implementation to it, as follows:
public function __toString()
{
return $this->getTitle();
}The reason we are doing so is that, later on, our Product-editing form would know what labels to list under the Category selection, otherwise the system would throw the following error:
Catchable Fatal Error: Object of class Foggyline\CatalogBundle\Entity\Category could not be converted to string
With the above changes in place, we can now run the schema update, as follows:
php bin/console doctrine:schema:update --force
If we now take a look at our database, the CREATE command syntax for our product table looks like the following:
CREATE TABLE `product` ( `id` int(11) NOT NULL AUTO_INCREMENT, `category_id` int(11) DEFAULT NULL, `title` varchar(255) COLLATE utf8_unicode_ci NOT NULL, `price` decimal(10,2) NOT NULL, `sku` varchar(255) COLLATE utf8_unicode_ci NOT NULL, `url_key` varchar(255) COLLATE utf8_unicode_ci NOT NULL, `description` longtext COLLATE utf8_unicode_ci, `qty` int(11) NOT NULL, `image` varchar(255) COLLATE utf8_unicode_ci DEFAULT NULL, PRIMARY KEY (`id`), UNIQUE KEY `UNIQ_D34A04ADF9038C4` (`sku`), UNIQUE KEY `UNIQ_D34A04ADDFAB7B3B` (`url_key`), KEY `IDX_D34A04AD12469DE2` (`category_id`), CONSTRAINT `FK_D34A04AD12469DE2` FOREIGN KEY (`category_id`) REFERENCES `category` (`id`) ) ENGINE=InnoDB DEFAULT CHARSET=utf8 COLLATE=utf8_unicode_ci;
We can see two unique keys and one foreign key restraint defined, as per the entries provided to our interactive entity generator. Now we are ready to generate the CRUD for our Product entity. To do so, we run the generate:doctrine:crud command and follow the interactive generator as shown here:
At this point, if we access either /category/new/ or /product/new/ URL, the image field is just a simple input text field, not the actual image upload we would like. To make it into an image upload field, we need to edit the $image property of Category.php and Product.php as follows:
//…
use Symfony\Component\Validator\Constraints as Assert;
//…
class [Category|Product]
{
//…
/**
* @var string
*
* @ORM\Column(name="image", type="string", length=255, nullable=true)
* @Assert\File(mimeTypes={ "image/png", "image/jpeg" }, mimeTypesMessage="Please upload the PNG or JPEG image file.")
*/
private $image;
//…
}As soon as we do so, the input fields turn into the file upload fields, as shown here:
Next, we will go ahead and implement the upload functionality into the forms.
We do so by first defining the service that will handle the actual upload. Service is defined by adding the following entry into the src/Foggyline/CatalogBundle/Resources/config/services.xml file, under the services element:
<service id="foggyline_catalog.image_uploader" class="Foggyline\CatalogBundle\Service\ImageUploader"> <argument>%foggyline_catalog_images_directory%</argument> </service>
The %foggyline_catalog_images_directory% argument value is the name of a parameter the we will soon define.
We then create the src/Foggyline/CatalogBundle/Service/ImageUploader.php file with content as follows:
namespace Foggyline\CatalogBundle\Service;
use Symfony\Component\HttpFoundation\File\UploadedFile;
class ImageUploader
{
private $targetDir;
public function __construct($targetDir)
{
$this->targetDir = $targetDir;
}
public function upload(UploadedFile $file)
{
$fileName = md5(uniqid()) . '.' . $file->guessExtension();
$file->move($this->targetDir, $fileName);
return $fileName;
}
}We then create our own parameters.yml file within the src/Foggyline/CatalogBundle/Resources/config directory with content as follows:
parameters: foggyline_catalog_images_directory: "%kernel.root_dir%/../web/uploads/foggyline_catalog_images"
This is the parameter our service expects to find. It can easily be overridden with the same entry under app/config/parameters.yml if needed.
In order for our bundle to see the parameters.yml file, we still need to edit the FoggylineCatalogExtension.php file within the src/Foggyline/CatalogBundle/DependencyInjection/ directory, by adding the following loader to the end of the load method:
$loader = new Loader\YamlFileLoader($container, new FileLocator(__DIR__.'/../Resources/config'));
$loader->load('parameters.yml');At this point, our Symfony module is able to read its parameters.yml, thus making it possible for the defined service to pickup the proper value for its argument. All that is left is to adjust the code for our new and edit forms, attaching the upload functionality to them. Since both forms are the same, the following is a Category example that equally applies to the Product form as well:
public function newAction(Request $request) {
// ...
if ($form->isSubmitted() && $form->isValid()) {
/* @var $image \Symfony\Component\HttpFoundation\File\UploadedFile */
if ($image = $category->getImage()) {
$name = $this->get('foggyline_catalog.image_uploader')->upload($image);
$category->setImage($name);
}
$em = $this->getDoctrine()->getManager();
// ...
}
// ...
}
public function editAction(Request $request, Category $category) {
$existingImage = $category->getImage();
if ($existingImage) {
$category->setImage(
new File($this->getParameter('foggyline_catalog_images_directory') . '/' . $existingImage)
);
}
$deleteForm = $this->createDeleteForm($category);
// ...
if ($editForm->isSubmitted() && $editForm->isValid()) {
/* @var $image \Symfony\Component\HttpFoundation\File\UploadedFile */
if ($image = $category->getImage()) {
$name = $this->get('foggyline_catalog.image_uploader')->upload($image);
$category->setImage($name);
} elseif ($existingImage) {
$category->setImage($existingImage);
}
$em = $this->getDoctrine()->getManager();
// ...
}
// ...
}Both the new and edit forms should now be able to handle file uploads.
Now let's go ahead and address the category menu and the on-sale items. Back when we were building the core module, we defined the global variables under the twig:global section of the app/config/config.yml file. These variables were pointing to services defined in the app/config/services.yml file. In order for us to change the content of the category menu and the on sale items, we need to override those services.
We start off by adding the following two service definitions under the src/Foggyline/CatalogBundle/Resources/config/services.xml file:
<service id="foggyline_catalog.category_menu" class="Foggyline\CatalogBundle\Service\Menu\Category"> <argument type="service" id="doctrine.orm.entity_manager" /> <argument type="service" id="router" /> </service> <service id="foggyline_catalog.onsale" class="Foggyline\CatalogBundle\Service\Menu\OnSale"> <argument type="service" id="doctrine.orm.entity_manager" /> <argument type="service" id="router" /> </service>
Both of the services accept the Doctrine ORM entity manager and router service arguments, as we will need to use those internally.
We then create the actual Category and OnSale service classes within the src/Foggyline/CatalogBundle/Service/Menu/ directory as follows:
//Category.php
namespace Foggyline\CatalogBundle\Service\Menu;
class Category
{
private $em;
private $router;
public function __construct(
\Doctrine\ORM\EntityManager $entityManager,
\Symfony\Bundle\FrameworkBundle\Routing\Router $router
)
{
$this->em = $entityManager;
$this->router = $router;
}
public function getItems()
{
$categories = array();
$_categories = $this->em->getRepository('FoggylineCatalogBundle:Category')->findAll();
foreach ($_categories as $_category) {
/* @var $_category \Foggyline\CatalogBundle\Entity\Category */
$categories[] = array(
'path' => $this->router->generate('category_show', array('id' => $_category->getId())),
'label' => $_category->getTitle(),
);
}
return $categories;
}
}
//OnSale.php
namespace Foggyline\CatalogBundle\Service\Menu;
class OnSale
{
private $em;
private $router;
public function __construct(\Doctrine\ORM\EntityManager $entityManager, $router)
{
$this->em = $entityManager;
$this->router = $router;
}
public function getItems()
{
$products = array();
$_products = $this->em->getRepository('FoggylineCatalogBundle:Product')->findBy(
array('onsale' => true),
null,
5
);
foreach ($_products as $_product) {
/* @var $_product \Foggyline\CatalogBundle\Entity\Product */
$products[] = array(
'path' => $this->router->generate('product_show', array('id' => $_product->getId())),
'name' => $_product->getTitle(),
'image' => $_product->getImage(),
'price' => $_product->getPrice(),
'id' => $_product->getId(),
);
}
return $products;
}
}This alone won't trigger the override of the core module services. Within the src/Foggyline/CatalogBundle/DependencyInjection/Compiler/ directory we need to create an OverrideServiceCompilerPass class that implements the CompilerPassInterface. Within its process method, we can then change the definition of the service, as follows:
namespace Foggyline\CatalogBundle\DependencyInjection\Compiler;
use Symfony\Component\DependencyInjection\Compiler\CompilerPassInterface;
use Symfony\Component\DependencyInjection\ContainerBuilder;
class OverrideServiceCompilerPass implements CompilerPassInterface
{
public function process(ContainerBuilder $container)
{
// Override the core module 'category_menu' service
$container->removeDefinition('category_menu');
$container->setDefinition('category_menu', $container->getDefinition('foggyline_catalog.category_menu'));
// Override the core module 'onsale' service
$container->removeDefinition('onsale');
$container->setDefinition('onsale', $container->getDefinition('foggyline_catalog.onsale'));
}
}Finally, we need to edit the build method of the src/Foggyline/CatalogBundle/FoggylineCatalogBundle.php file in order to add this compiler pass as shown here:
public function build(ContainerBuilder $container)
{
parent::build($container);
$container->addCompilerPass(new \Foggyline\CatalogBundle\DependencyInjection\Compiler\OverrideServiceCompilerPass());
}Now our Category and OnSale services should override the ones defined in the core module, thus providing the right values for the header Category menu and On Sale section of the homepage.
The auto-generated CRUD made a Category page for us with the layout as follows:
This is significantly different from the Category page defined under Chapter 4, Requirement Specification for Modular Web Shop App. We therefore need to make amends to our Category Show page, by modifying the show.html.twig file within the src/Foggyline/CatalogBundle/Resources/views/Default/category/ directory. We do so by replacing the entire content of body block with code as follows:
<div class="row">
<div class="small-12 large-12 columns text-center">
<h1>{{ category.title }}</h1>
<p>{{ category.description }}</p>
</div>
</div>
<div class="row">
<img src="{{ asset('uploads/foggyline_catalog_images/' ~ category.image) }}"/>
</div>
{% set products = category.getProducts() %}
{% if products %}
<div class="row products_onsale text-center small-up-1 medium-up-3 large-up-5" data-equalizer data-equalize-by-row="true">
{% for product in products %}
<div class="column product">
<img src="{{ asset('uploads/foggyline_catalog_images/' ~ product.image) }}"
alt="missing image"/>
<a href="{{ path('product_show', {'id': product.id}) }}">{{ product.title }}</a>
<div>${{ product.price }}</div>
<div><a class="small button" href="{{ path('product_show', {'id': product.id}) }}">View</a></div>
</div>
{% endfor %}
</div>
{% else %}
<div class="row">
<p>There are no products assigned to this category.</p>
</div>
{% endif %}
{% if is_granted('ROLE_ADMIN') %}
<ul>
<li>
<a href="{{ path('category_edit', { 'id': category.id }) }}">Edit</a>
</li>
<li>
{{ form_start(delete_form) }}
<input type="submit" value="Delete">
form_end(delete_form) }}
</li>
</ul>
{% endif %}The body is now sectioned into three areas. First, we are addressing the category title and description output. We are then fetching and looping through the list of products assigned to category, rendering each individual product. Finally, we are using the is_granted Twig extension to check if the current user role is ROLE_ADMIN, in which case we show the Edit and Delete links for the category.
The auto-generated CRUD made a Product page for us with the layout as follows:
This differs from the Product page defined under Chapter 4, Requirement Specification for Modular Web Shop App. To rectify the problem, we need to make amends to our Product Show page, by modifying the show.html.twig file within the src/Foggyline/CatalogBundle/Resources/views/Default/product/ directory. We do so by replacing entire content of body block with code as follows:
<div class="row">
<div class="small-12 large-6 columns">
<img class="thumbnail" src="{{ asset('uploads/foggyline_catalog_images/' ~ product.image) }}"/>
</div>
<div class="small-12 large-6 columns">
<h1>{{ product.title }}</h1>
<div>SKU: {{ product.sku }}</div>
{% if product.qty %}
<div>IN STOCK</div>
{% else %}
<div>OUT OF STOCK</div>
{% endif %}
<div>$ {{ product.price }}</div>
<form action="{{ add_to_cart_url.getAddToCartUrl
(product.id) }}" method="get">
<div class="input-group">
<span class="input-group-label">Qty</span>
<input class="input-group-field" type="number">
<div class="input-group-button">
<input type="submit" class="button" value="Add to Cart">
</div>
</div>
</form>
</div>
</div>
<div class="row">
<p>{{ product.description }}</p>
</div>
{% if is_granted('ROLE_ADMIN') %}
<ul>
<li>
<a href="{{ path('product_edit', { 'id': product.id }) }}">Edit</a>
</li>
<li>
{{ form_start(delete_form) }}
<input type="submit" value="Delete">
{{ form_end(delete_form) }}
</li>
</ul>
{% endif %}The body is now sectioned into two main areas. First, we are addressing the product image, title, stock status, and add to cart output. The add to cart form uses the add_to_cart_url service to provide the right link. This service is defined under the core module and, at this point, only provides a dummy link. Later on, when we get to the checkout module, we will implement an override for this service and inject the right add to cart link. We then output the description section. Finally, we use the is_granted Twig extension, like we did on the Category example, to determine if the user can access the Edit and Delete links for a product.
We now have several class files that are not related to the controllers, meaning we can run unit tests against them. Still, we won't be going after a full code coverage as part of this book, rather focus on some of the little-big things, like using containers within our test classes.
We start of by adding the following line under the testsuites element of our phpunit.xml.dist file:
<directory>src/Foggyline/CatalogBundle/Tests</directory>
With that in place, running the phpunit command from the root of our shop should pick up any test we have defined under the src/Foggyline/CatalogBundle/Tests/ directory.
Now let's go ahead and create a test for our Category service menu. We do so by creating an src/Foggyline/CatalogBundle/Tests/Service/Menu/CategoryTest.php file with the following content:
namespace Foggyline\CatalogBundle\Tests\Service\Menu;
use Symfony\Bundle\FrameworkBundle\Test\KernelTestCase;
use Foggyline\CatalogBundle\Service\Menu\Category;
class CategoryTest extends KernelTestCase
{
private $container;
private $em;
private $router;
public function setUp()
{
static::bootKernel();
$this->container = static::$kernel->getContainer();
$this->em = $this->container->get('doctrine.orm.entity_manager');
$this->router = $this->container->get('router');
}
public function testGetItems()
{
$service = new Category($this->em, $this->router);
$this->assertNotEmpty($service->getItems());
}
protected function tearDown()
{
$this->em->close();
unset($this->em, $this->router);
}
}The preceding example shows the usage of the setUp and tearDown method calls, which are analogous in behavior to the PHP's __construct and __destruct methods. We use the setUp method to set the entity manager and router service that we can use through out the rest of the class. The tearDown method is merely a clean up. Now if we run the phpunit command, we should see our test being picked up and executed alongside other tests.
We can even target this class specifically by executing a phpunit command with the full class path, as shown here:
phpunit src/Foggyline/CatalogBundle/Tests/Service/Menu/CategoryTest.php
Similarly to what we did for CategoryTest, we can go ahead and create OnSaleTest; the only difference between the two being the class name.
The great thing about the auto-generate CRUD tool is that it generates even the functional tests for us. More specifically, in this case, it generated the CategoryControllerTest.php and ProductControllerTest.php files within the src/Foggyline/CatalogBundle/Tests/Controller/ directory.
If we look into these two files, we can see that they both have a single testCompleteScenario method defined, which is entirely commented out. Let's go ahead and change the CategoryControllerTest.php content as follows:
// Create a new client to browse the application
$client = static::createClient(
array(), array(
'PHP_AUTH_USER' => 'john',
'PHP_AUTH_PW' => '1L6lllW9zXg0',
)
);
// Create a new entry in the database
$crawler = $client->request('GET', '/category/');
$this->assertEquals(200, $client->getResponse()->getStatusCode(), "Unexpected HTTP status code for GET /product/");
$crawler = $client->click($crawler->selectLink('Create a new entry')->link());
// Fill in the form and submit it
$form = $crawler->selectButton('Create')->form(array(
'category[title]' => 'Test',
'category[urlKey]' => 'Test urlKey',
'category[description]' => 'Test description',
));
$client->submit($form);
$crawler = $client->followRedirect();
// Check data in the show view
$this->assertGreaterThan(0, $crawler->filter('h1:contains("Test")')->count(), 'Missing element h1:contains("Test")');
// Edit the entity
$crawler = $client->click($crawler->selectLink('Edit')->link());
$form = $crawler->selectButton('Edit')->form(array(
'category[title]' => 'Foo',
'category[urlKey]' => 'Foo urlKey',
'category[description]' => 'Foo description',
));
$client->submit($form);
$crawler = $client->followRedirect();
// Check the element contains an attribute with value equals "Foo"
$this->assertGreaterThan(0, $crawler->filter('[value="Foo"]')->count(), 'Missing element [value="Foo"]');
// Delete the entity
$client->submit($crawler->selectButton('Delete')->form());
$crawler = $client->followRedirect();
// Check the entity has been delete on the list
$this->assertNotRegExp('/Foo title/', $client->getResponse()->getContent());We started off by setting PHP_AUTH_USER and PHP_AUTH_PW as parameters for the createClient method. This is because our /new and /edit routes are protected by the core module security. These settings allow us to pass the basic HTTP authentication along the request. We then tested if the category listing page can be accessed and if its Create a new entry link can be clicked. Furthermore, both the create and edit forms were tested, along with their results.
All that remains is to repeat the approach we just used for CategoryControllerTest.php with ProductControllerTest.php. We simply need to change a few labels within the ProductControllerTest class file to match the product routes and expected results.
Running the phpunit command now should successfully execute our tests.
Throughout this chapter we have built a miniature, but functional, catalog module. It allowed us to create, edit, and delete categories and products. By adding a few custom lines of code on top of the auto-generated CRUD, we were able to achieve image upload functionality for both categories and products. We also saw how to override the core module service, by simply removing the existing service definition and providing a new one. In regard to tests, we saw how we can pass the authentication along our requests to test for protected routes.
Moving forward, in the next chapter, we will build a customer module.
The customer module provides a basis for further sales functionality of our web shop. At the very basic level, it is responsible for register, login, management and display of relevant customer information. It is a requirement for the later sales module, that adds the actual sales capabilities to our web shop application.
In this chapter we will be covering following topics:
Following the high level application requirements, defined under Chapter 4, Requirement Specification for Modular Web Shop App, our module will have a single Customer entity defined.
The Customer entity includes the following properties:
id: integer, auto-incrementemail: string, uniqueusername: string, unique, needed for login systempassword: stringfirst_name: stringlast_name: stringcompany: stringphone_number: stringcountry: stringstate: stringcity: stringpostcode: stringstreet: stringThroughout this chapter, aside from just adding the Customer entity and its CRUD pages, we also need to address the creation of login, register, forgot your password pages, as well as override a core module service responsible for building a customer menu.
We start of by creating a new module called Foggyline\CustomerBundle. We do so with the help of console, by running the command as follows:
php bin/console generate:bundle --namespace=Foggyline/CustomerBundle
The command triggers an interactive process asking us several questions along the way, as shown in the following screenshot:
Once done, the following structure is generated for us:
If we now take a look at the app/AppKernel.php file, we would see the following line under the registerBundles method:
new Foggyline\CustomerBundle\FoggylineCustomerBundle()
Similarly, the app/config/routing.yml directory has the following route definition added to it:
foggyline_customer: resource: "@FoggylineCustomerBundle/Resources/config/routing.xml" prefix: /
Here we need to change prefix: / into prefix: /customer/, so we don't collide with core module routes. Leaving it as prefix: / would simply overrun our core AppBundle and output Hello World! from the src/Foggyline/CustomerBundle/Resources/views/Default/index.html.twig template to the browser at this point. We want to keep things nice and separated. What this means is that the module does not define root route for itself.
Let's go ahead and create a Customer entity. We do so by using the console, as shown here:
php bin/console generate:doctrine:entity
This command triggers the interactive generator, where we need to provide entity properties. Once done, the generator creates the Entity/Customer.php and Repository/CustomerRepository.php files within the src/Foggyline/CustomerBundle/ directory. After this, we need to update the database, so it pulls in the Customer entity, by running the following command:
php bin/console doctrine:schema:update --force
This results in a screen as shown in the following screenshot:
With entity in place, we are ready to generate its CRUD. We do so by using the following command:
php bin/console generate:doctrine:crud
This results in an interactive output as shown here:
This results in the src/Foggyline/CustomerBundle/Controller/CustomerController.php directory being created. It also adds an entry to our app/config/routing.yml file as follows:
foggyline_customer_customer: resource: "@FoggylineCustomerBundle/Controller/CustomerController.php" type: annotation
Again, the view files were created under the app/Resources/views/customer/ directory, which is not what we might expect. We want them under our module src/Foggyline/CustomerBundle/Resources/views/Default/customer/ directory, so we need to copy them over. Additionally, we need to modify all of the $this->render calls within our CustomerController by appending the FoggylineCustomerBundle:default: string to each of the template path.
Before we proceed further with the actual changes within our module, let's imagine our module requirements mandate a certain security configuration in order to make it work. These requirements state that we need to apply several changes to the app/config/security.yml file. We first edit the providers element by adding to it the following entry:
foggyline_customer:
entity:
class: FoggylineCustomerBundle:Customer
property: usernameThis effectively defines our Customer class as a security provider, whereas the username element is the property storing user identity.
We then define the encoder type under the encoders element, as follows:
Foggyline\CustomerBundle\Entity\Customer: algorithm: bcrypt cost: 12
This tells Symfony to use the bcrypt algorithm with a value of 12 for algorithmic cost while encrypting our password. This way our passwords won't end up in clear text when saved in the database.
We then go ahead and define a new firewall entry under the firewalls element, as follows:
foggyline_customer:
anonymous: ~
provider: foggyline_customer
form_login:
login_path: foggyline_customer_login
check_path: foggyline_customer_login
default_target_path: customer_account
logout:
path: /customer/logout
target: /There is quite a lot going on here. Our firewall uses the anonymous: ~ definition to denote that it does not really need a user to be logged in to see certain pages. By default, all Symfony users are authenticated as anonymous, as shown in the following screenshot, on the Developer toolbar:
The form_login definition takes three properties. The login_path and the check_path point to our custom route foggyline_customer_login. When the security system initiates the authentication process, it will redirect the user to the foggyline_customer_login route, where we will soon implement needed controller logic and view templates in order to handle the login form. Once logged in, the default_target_path determines where the user will be redirected to.
Finally, we reuse the Symfony anonymous user feature in order to exclude certain pages from being forbidden. We want our non-authenticated customer to be able to access login, register, and forgotten password pages. To make that possible, we add the following entries under the access_control element:
- { path: customer/login, roles: IS_AUTHENTICATED_ANONYMOUSLY }
- { path: customer/register, roles: IS_AUTHENTICATED_ANONYMOUSLY }
- { path: customer/forgotten_password, roles: IS_AUTHENTICATED_ANONYMOUSLY }
- { path: customer/account, roles: ROLE_USER }
- { path: customer/logout, roles: ROLE_USER }
- { path: customer/, roles: ROLE_ADMIN }It is worth noting that this approach to handling security between module and base application is by far the ideal one. This is merely one possible example of how we can achieve what is needed for this module to make it functional.
With the preceding security.yml additions in place, we are now ready to actually start implementing the registration process. First we edit the Customer entity within the src/Foggyline/CustomerBundle/Entity/ directory, by making it implement the Symfony\Component\Security\Core\User\UserInterface, \Serializable. This implies implementation of the following methods:
public function getSalt()
{
return null;
}
public function getRoles()
{
return array('ROLE_USER');
}
public function eraseCredentials()
{
}
public function serialize()
{
return serialize(array(
$this->id,
$this->username,
$this->password
));
}
public function unserialize($serialized)
{
list (
$this->id,
$this->username,
$this->password,
) = unserialize($serialized);
}Even though all of the passwords need to be hashed with salt, the getSalt function in this case is irrelevant since bcrypt does this internally. The getRoles function is the important bit. We can return one or more roles that individual customers will have. To make things simple, we will only assign one ROLE_USER role to each of our customers. But this can easily be made much more robust, so that the roles are stored in the database as well. The eraseCredentials function is merely a cleanup method, which we left blank.
Since the user object is first unserialized, serialized, and saved to a session per each request, we implement the \Serializable interface. The actual implementation of serialize and unserialize can include only a fraction of customer properties, as we do not need to store everything in the session.
Before we go ahead and start implementing the register, login, forgot your password, and other bits, let's go ahead and define the needed services we are going to use later on.
We will create an orders service which will be used to fill in the data available under the My Account page. Later on, other modules can override this service and inject real customer orders. To define an orders service, we edit the src/Foggyline/CustomerBundle/Resources/config/services.xml file by adding the following under the services element:
<service id="foggyline_customer.customer_orders" class="Foggyline\CustomerBundle\Service\CustomerOrders"> </service>
Then, we go ahead and create the src/Foggyline/CustomerBundle/Service/CustomerOrders.php directory with content as follows:
namespace Foggyline\CustomerBundle\Service;
class CustomerOrders
{
public function getOrders()
{
return array(
array(
'id' => '0000000001',
'date' => '23/06/2016 18:45',
'ship_to' => 'John Doe',
'order_total' => 49.99,
'status' => 'Processing',
'actions' => array(
array(
'label' => 'Cancel',
'path' => '#'
),
array(
'label' => 'Print',
'path' => '#'
)
)
),
);
}
}The getOrders method simply returns some dummy data here. We can easily make it return an empty array. Ideally, we would want this to return a collection of certain types of element that conform to some specific interface.
In the previous module we defined a customer service that filled in the Customer menu with some dummy data. Now we will create an overriding service that fills the menu with actual customer data, depending on customer login status. To define a customer menu service, we edit the src/Foggyline/CustomerBundle/Resources/config/services.xml file by adding the following under the services element:
<service id="foggyline_customer.customer_menu" class="Foggyline\CustomerBundle\Service\Menu\CustomerMenu"> <argument type="service" id="security.token_storage"/> <argument type="service" id="router"/> </service>
Here we are injecting the token_storage and router objects into our service, as we will need them to construct the menu based on the login state of a customer.
We then go ahead and create the src/Foggyline/CustomerBundle/Service/Menu/CustomerMenu.php directory with content as follows:
namespace Foggyline\CustomerBundle\Service\Menu;
class CustomerMenu
{
private $token;
private $router;
public function __construct(
$tokenStorage,
\Symfony\Bundle\FrameworkBundle\Routing\Router $router
)
{
$this->token = $tokenStorage->getToken();
$this->router = $router;
}
public function getItems()
{
$items = array();
$user = $this->token->getUser();
if ($user instanceof \Foggyline\CustomerBundle\Entity\Customer) {
// customer authentication
$items[] = array(
'path' => $this->router->generate('customer_account'),
'label' => $user->getFirstName() . ' ' . $user->getLastName(),
);
$items[] = array(
'path' => $this->router->generate('customer_logout'),
'label' => 'Logout',
);
} else {
$items[] = array(
'path' => $this->router->generate('foggyline_customer_login'),
'label' => 'Login',
);
$items[] = array(
'path' => $this->router->generate('foggyline_customer_register'),
'label' => 'Register',
);
}
return $items;
}
}Here we see a menu being constructed based on user login state. This way a customer gets to see the Logout link when logged in, or Login when not logged in.
We then add the src/Foggyline/CustomerBundle/DependencyInjection/Compiler/OverrideServiceCompilerPass.php directory with content as follows:
namespace Foggyline\CustomerBundle\DependencyInjection\Compiler;
use Symfony\Component\DependencyInjection\Compiler\CompilerPassInterface;
use Symfony\Component\DependencyInjection\ContainerBuilder;
class OverrideServiceCompilerPass implements CompilerPassInterface
{
public function process(ContainerBuilder $container)
{
// Override the core module 'onsale' service
$container->removeDefinition('customer_menu');
$container->setDefinition('customer_menu', $container->getDefinition('foggyline_customer.customer_menu'));
}
}Here we are doing the actual customer_menu service override. However, this won't kick in until we edit the src/Foggyline/CustomerBundle/FoggylineCustomerBundle.php directory, by adding the build method to it as follows:
namespace Foggyline\CustomerBundle;
use Symfony\Component\HttpKernel\Bundle\Bundle;
use Symfony\Component\DependencyInjection\ContainerBuilder;
use Foggyline\CustomerBundle\DependencyInjection\Compiler\OverrideServiceCompilerPass;
class FoggylineCustomerBundle extends Bundle
{
public function build(ContainerBuilder $container)
{
parent::build($container);;
$container->addCompilerPass(new OverrideServiceCompilerPass());
}
}The addCompilerPass method call accepts the instance of our OverrideServiceCompilerPass, ensuring our service override will kick in.
To implement a register page, we first modify the src/Foggyline/CustomerBundle/Controller/CustomerController.php file as follows:
/**
* @Route("/register", name="foggyline_customer_register")
*/
public function registerAction(Request $request)
{
// 1) build the form
$user = new Customer();
$form = $this->createForm(CustomerType::class, $user);
// 2) handle the submit (will only happen on POST)
$form->handleRequest($request);
if ($form->isSubmitted() && $form->isValid()) {
// 3) Encode the password (you could also do this via Doctrine listener)
$password = $this->get('security.password_encoder')
->encodePassword($user, $user->getPlainPassword());
$user->setPassword($password);
// 4) save the User!
$em = $this->getDoctrine()->getManager();
$em->persist($user);
$em->flush();
// ... do any other work - like sending them an email, etc
// maybe set a "flash" success message for the user
return $this->redirectToRoute('customer_account');
}
return $this->render(
'FoggylineCustomerBundle:default:customer/register.html.twig',
array('form' => $form->createView())
);
}The register page uses a standard auto-generated Customer CRUD form, simply pointing it to the src/Foggyline/CustomerBundle/Resources/views/Default/customer/register.html.twig template file with content as follows:
{% extends 'base.html.twig' %}
{% block body %}
{{ form_start(form) }}
{{ form_widget(form) }}
<button type="submit">Register!</button>
{{ form_end(form) }}
{% endblock %}Once these two files are in place, our register functionality should be working.
We will implement the login page on its own /customer/login URL, thus we edit the CustomerController.php file by adding the loginAction function as follows:
/**
* Creates a new Customer entity.
*
* @Route("/login", name="foggyline_customer_login")
*/
public function loginAction(Request $request)
{
$authenticationUtils = $this->get('security.authentication_utils');
// get the login error if there is one
$error = $authenticationUtils->getLastAuthenticationError();
// last username entered by the user
$lastUsername = $authenticationUtils->getLastUsername();
return $this->render(
'FoggylineCustomerBundle:default:customer/login.html.twig',
array(
// last username entered by the user
'last_username' => $lastUsername,
'error' => $error,
)
);
}Here we are simply checking if the user already tried to login, and if it did we are passing that info to the template, along with the potential errors. We then edit the src/Foggyline/CustomerBundle/Resources/views/Default/customer/login.html.twig file with content as follows:
{% extends 'base.html.twig' %}
{% block body %}
{% if error %}
<div>{{ error.messageKey|trans(error.messageData, 'security') }}</div>
{% endif %}
<form action="{{ path('foggyline_customer_login') }}" method="post">
<label for="username">Username:</label>
<input type="text" id="username" name="_username" value="{{ last_username }}"/>
<label for="password">Password:</label>
<input type="password" id="password" name="_password"/>
<button type="submit">login</button>
</form>
<div class="row">
<a href="{{ path('customer_forgotten_password') }}">Forgot your password?</a>
</div>
{% endblock %}Once logged in, the user will be redirected to the /customer/account page. We create this page by adding the accountAction method to the CustomerController.php file as follows:
/**
* Finds and displays a Customer entity.
*
* @Route("/account", name="customer_account")
* @Method({"GET", "POST"})
*/
public function accountAction(Request $request)
{
if (!$this->get('security.authorization_checker')->isGranted('ROLE_USER')) {
throw $this->createAccessDeniedException();
}
if ($customer = $this->getUser()) {
$editForm = $this->createForm('Foggyline\CustomerBundle\Form\CustomerType', $customer, array( 'action' => $this->generateUrl('customer_account')));
$editForm->handleRequest($request);
if ($editForm->isSubmitted() && $editForm->isValid()) {
$em = $this->getDoctrine()->getManager();
$em->persist($customer);
$em->flush();
$this->addFlash('success', 'Account updated.');
return $this->redirectToRoute('customer_account');
}
return $this->render('FoggylineCustomerBundle:default:customer/account.html.twig', array(
'customer' => $customer,
'form' => $editForm->createView(),
'customer_orders' => $this->get('foggyline_customer.customer_orders')->getOrders()
));
} else {
$this->addFlash('notice', 'Only logged in customers can access account page.');
return $this->redirectToRoute('foggyline_customer_login');
}
}Using $this->getUser() we are checking if logged in user is set, and if so, passing its info to the template. We then edit the src/Foggyline/CustomerBundle/Resources/views/Default/customer/account.html.twig file with content as follows:
{% extends 'base.html.twig' %}
{% block body %}
<h1>My Account</h1>
{{ form_start(form) }}
<div class="row">
<div class="medium-6 columns">
{{ form_row(form.email) }}
{{ form_row(form.username) }}
{{ form_row(form.plainPassword.first) }}
{{ form_row(form.plainPassword.second) }}
{{ form_row(form.firstName) }}
{{ form_row(form.lastName) }}
{{ form_row(form.company) }}
{{ form_row(form.phoneNumber) }}
</div>
<div class="medium-6 columns">
{{ form_row(form.country) }}
{{ form_row(form.state) }}
{{ form_row(form.city) }}
{{ form_row(form.postcode) }}
{{ form_row(form.street) }}
<button type="submit">Save</button>
</div>
</div>
{{ form_end(form) }}
<!-- customer_orders -->
{% endblock %}With this we address the actual customer information section of the My Account page. In its current state, this page should render an Edit form as shown in the following screenshot, enabling us to edit all of our customer information:
We then address the <!-- customer_orders -->, by replacing it with the following bits:
{% block customer_orders %}
<h2>My Orders</h2>
<div class="row">
<table>
<thead>
<tr>
<th width="200">Order Id</th>
<th>Date</th>
<th width="150">Ship To</th>
<th width="150">Order Total</th>
<th width="150">Status</th>
<th width="150">Actions</th>
</tr>
</thead>
<tbody>
{% for order in customer_orders %}
<tr>
<td>{{ order.id }}</td>
<td>{{ order.date }}</td>
<td>{{ order.ship_to }}</td>
<td>{{ order.order_total }}</td>
<td>{{ order.status }}</td>
<td>
<div class="small button-group">
{% for action in order.actions %}
<a class="button" href="{{ action.path }}">{{ action.label }}</a>
{% endfor %}
</div>
</td>
</tr>
{% endfor %}
/tbody>
</table>
</div>
{% endblock %}This should now render the My Orders section of the My Account page as shown here:
This is just dummy data coming from service defined in a src/Foggyline/CustomerBundle/Resources/config/services.xml. In a later chapter, when we get to the sales module, we will make sure it overrides the foggyline_customer.customer_orders service in order to insert real customer data here.
One of the changes we did to security.yml when defining our firewall, was configuring the logout path, which we pointed to /customer/logout. The implementation of that path is done within the CustomerController.php file as follows:
/**
* @Route("/logout", name="customer_logout")
*/
public function logoutAction()
{
}Note, the logoutAction method is actually empty. There is no implementation as such. Implementation is not needed, as Symfony intercepts the request and processes the logout for us. We did, however, need to define this route as we referenced it from our system.xml file.
The forgotten password feature is going to be implemented as a separate page. We edit the CustomerController.php file by adding the forgottenPasswordAction function to it as follows:
/**
* @Route("/forgotten_password", name="customer_forgotten_password")
* @Method({"GET", "POST"})
*/
public function forgottenPasswordAction(Request $request)
{
// Build a form, with validation rules in place
$form = $this->createFormBuilder()
->add('email', EmailType::class, array(
'constraints' => new Email()
))
->add('save', SubmitType::class, array(
'label' => 'Reset!',
'attr' => array('class' => 'button'),
))
->getForm();
// Check if this is a POST type request and if so, handle form
if ($request->isMethod('POST')) {
$form->handleRequest($request);
if ($form->isSubmitted() && $form->isValid()) {
$this->addFlash('success', 'Please check your email for reset password.');
// todo: Send an email out to website admin or something...
return $this->redirect($this->generateUrl('foggyline_customer_login'));
}
}
// Render "contact us" page
return $this->render('FoggylineCustomerBundle:default:customer/forgotten_password.html.twig', array(
'form' => $form->createView()
));
}Here we merely check if the HTTP request is GET or POST, then either send an e-mail or load the template. For the sake of simplicity, we haven't really implemented the actual e-mail sending. This is something that needs to be tackled outside of this book. The rendered template is pointing to the src/Foggyline/CustomerBundle/Resources/views/Default/customer/ forgotten_password.html.twig file with content as follows:
{% extends 'base.html.twig' %}
{% block body %}
<div class="row">
<h1>Forgotten Password</h1>
</div>
<div class="row">
{{ form_start(form) }}
{{ form_widget(form) }}
{{ form_end(form) }}
</div>
{% endblock %}Aside from the auto-generated Customer entity and its CRUD controller, there are only two custom service classes that we created as part of this module. Since we are not going after full code coverage, we will merely cover CustomerOrders and CustomerMenu service classes as part of the unit testing.
We start off by adding the following line under the testsuites element of our phpunit.xml.dist file:
<directory>src/Foggyline/CustomerBundle/Tests</directory>
With that in place, running the phpunit command from the root of our shop should pick up any test we have defined under the src/Foggyline/CustomerBundle/Tests/ directory.
Now let's go ahead and create a test for our CustomerOrders service. We do so by creating a src/Foggyline/CustomerBundle/Tests/Service/CustomerOrders.php file with content as follows:
namespace Foggyline\CustomerBundle\Tests\Service;
use Symfony\Bundle\FrameworkBundle\Test\KernelTestCase;
class CustomerOrders extends KernelTestCase
{
private $container;
public function setUp()
{
static::bootKernel();
$this->container = static::$kernel->getContainer();
}
public function testGetItemsViaService()
{
$orders = $this->container->get('foggyline_customer.customer_orders');
$this->assertNotEmpty($orders->getOrders());
}
public function testGetItemsViaClass()
{
$orders = new \Foggyline\CustomerBundle\Service\CustomerOrders();
$this->assertNotEmpty($orders->getOrders());
}
}Here we have two tests in total, one instantiating the class through the service and the other directly. We are using the setUp method merely to set the container property which we then reuse in the testGetItemsViaService method.
Next, we create the CustomerMenu test within the directory as follows:
namespace Foggyline\CustomerBundle\Tests\Service\Menu;
use Symfony\Bundle\FrameworkBundle\Test\KernelTestCase;
class CustomerMenu extends KernelTestCase
{
private $container;
private $tokenStorage;
private $router;
public function setUp()
{
static::bootKernel();
$this->container = static::$kernel->getContainer();
$this->tokenStorage = $this->container->get('security.token_storage');
$this->router = $this->container->get('router');
}
public function testGetItemsViaService()
{
$menu = $this->container->get('foggyline_customer.customer_menu');
$this->assertNotEmpty($menu->getItems());
}
public function testGetItemsViaClass()
{
$menu = new \Foggyline\CustomerBundle\Service\Menu\CustomerMenu(
$this->tokenStorage,
$this->router
);
$this->assertNotEmpty($menu->getItems());
}
}Now, if we run the phpunit command, we should see our test being picked up and executed alongside other tests. We can even target these two tests specifically by executing a phpunit command with full class path, as shown here:
phpunit src/Foggyline/CustomerBundle/Tests/Service/CustomerOrders.php phpunit src/Foggyline/CustomerBundle/Tests/Service/Menu/CustomerMenu.php
The auto-generate CRUD tool generated the CustomerControllerTest.php file for us within the src/Foggyline/CustomerBundle/Tests/Controller/ directory. In the previous chapter we showed how to pass an authentication parameter to static::createClient in order to make it simulate user logging. However, that is not the same login as our customers will be using. We are no longer using a basic HTTP authentication, rather a full blown login form.
In order to address the login form testing, let's go ahead and edit the src/Foggyline/CustomerBundle/Tests/Controller/CustomerControllerTest.php file as follows:
namespace Foggyline\CustomerBundle\Tests\Controller;
use Symfony\Bundle\FrameworkBundle\Test\WebTestCase;
use Symfony\Component\BrowserKit\Cookie;
use Symfony\Component\Security\Core\Authentication\Token\UsernamePasswordToken;
class CustomerControllerTest extends WebTestCase
{
private $client = null;
public function setUp()
{
$this->client = static::createClient();
}
public function testMyAccountAccess()
{
$this->logIn();
$crawler = $this->client->request('GET', '/customer/account');
$this->assertTrue($this->client->getResponse()->
isSuccessful());
$this->assertGreaterThan(0, $crawler->filter('html:contains("My Account")')->count());
}
private function logIn()
{
$session = $this->client->getContainer()->get('session');
$firewall = 'foggyline_customer'; // firewall name
$em = $this->client->getContainer()->get('doctrine')->getManager();
$user = $em->getRepository('FoggylineCustomerBundle:Customer')->findOneByUsername('john@test.loc');
$token = new UsernamePasswordToken($user, null, $firewall, array('ROLE_USER'));
$session->set('_security_' . $firewall, serialize($token));
$session->save();
$cookie = new Cookie($session->getName(), $session->getId());
$this->client->getCookieJar()->set($cookie);
}
}Here we first created the logIn method, whose purpose is to simulate the login, by setting up the proper token value into the session, and passing on that session ID to the client via a cookie. We then created the testMyAccountAccess method, which first calls the logIn method and then checks if the crawler was able to access the My Account page. The great thing about this approach is that we did not have to code in the user password, only its username.
Now, let's go ahead and address the customer registration form, by adding the following to the CustomerControllerTest:
public function testRegisterForm()
{
$crawler = $this->client->request('GET', '/customer/register');
$uniqid = uniqid();
$form = $crawler->selectButton('Register!')->form(array(
'customer[email]' => 'john_' . $uniqid . '@test.loc',
'customer[username]' => 'john_' . $uniqid,
'customer[plainPassword][first]' => 'pass123',
'customer[plainPassword][second]' => 'pass123',
'customer[firstName]' => 'John',
'customer[lastName]' => 'Doe',
'customer[company]' => 'Foggyline',
'customer[phoneNumber]' => '00 385 111 222 333',
'customer[country]' => 'HR',
'customer[state]' => 'Osijek',
'customer[city]' => 'Osijek',
'customer[postcode]' => '31000',
'customer[street]' => 'The Yellow Street',
));
$this->client->submit($form);
$crawler = $this->client->followRedirect();
//var_dump($this->client->getResponse()->getContent());
$this->assertGreaterThan(0, $crawler->filter('html:contains("customer/login")')->count());
}We have already seen a test similar to this one in the previous chapter. Here we are merely opening a customer/register page, then finding a button with Register! label, so we can fetch the entire form through it. We then set all of the required form data, and simulate the form submit. If successful, we observe for the redirect body and assert against value expected in it.
Running the phpunit command now should successfully execute our tests.
Throughout this chapter we built a miniature but functional customer module. The module assumed a certain level of setup done on our security.yml file, which can be covered as part of module documentation if we were to redistribute it. These changes included defining our own custom firewall, with a custom security provider. The security provider pointed to our customer class, which in turn was built in a way that complies to the Symfony UserInterface. We then built a register, login, and forgot your password form. Though each comes with a minimal set of functionalities, we saw how simple it is to build a fully custom register and login system.
Furthermore, we applied some forward thinking, by using the specially defined service to set up the My Orders section under the My Account page. This is by far the ideal way of doing it, and it serves a purpose, as we will later override this service cleanly from the sales module.
Moving forward, in the next chapter, we will build a payment module.
The payment module provides a basis for further sales functionality in our web shop. It will enable us to actually choose a payment method when we reach the checkout process of the upcoming sales module. The payment methods can generally be of various types. Some can be static, like Check Money and Cash on Delivery, while others can be regular credit cards like Visa, MasterCard, American Express, Discover, and Switch/Solo. Throughout this chapter we will address both types.
In this chapter, we will be looking into the following topics:
Our application requirements, defined under Chapter 4, Requirement Specification for Modular Web Shop App, do not really say anything about the type of payment method we need to implement. Thus, for the purpose of this chapter, we will develop two payment methods: a card payment and a check money payment. In regards to the credit card payment, we will not be connecting to a real payment processor, but everything else will be done as if we are working with a credit card.
Ideally, we want this done by an interface, similar to the following:
namespace Foggyline\SalesBundle\Interface;
interface Payment
{
function authorize();
function capture();
function cancel();
}This would then impose the requirement of having the SalesBundle module, which we still haven't developed. We will therefore proceed with our payment methods using a simple Symfony controller class that provides its own way to address the following features:
authorize();capture();cancel();The authorize method is used for cases where we merely want to authorize the transaction, without actually executing it. The result is a transaction ID that our future SalesBundle module can store and reuse for further capture and cancel actions. The capture method takes us a step further by first executing the authorize action and then capturing the funds. The cancel method performs the cancelation based on a previously stored authorization token.
We will expose our payment methods through tagged Symfony services. The tagging of a service is a nice feature which enables us to view the container and all of the services tagged with the same tag, which is something we can use to fetch all of the paymentmethod services. The tag naming has to follow a certain pattern, which we impose on ourselves as application creators. With that in mind, we will tag each payment service with a name,payment_method.
Later on, the SalesBundle module will fetch and use all of the services tagged with payment_method and then use them internally to generate a list of available payment methods that you can work with.
We start off by creating a new module called Foggyline\PaymentBundle. We do so with the help of the console by running the following command:
php bin/console generate:bundle --namespace=Foggyline/PaymentBundle
The command triggers an interactive process which asks us several questions along the way, shown as follows:
Once done, files app/AppKernel.php and app/config/routing.yml are modified automatically. The registerBundles method of an AppKernel class has been added to the following line under the $bundles array:
new Foggyline\PaymentBundle\FoggylinePaymentBundle(),
The routing.yml has been updated with the following entry:
foggyline_payment: resource: "@FoggylinePaymentBundle/Resources/config/routing.xml" prefix: /
In order to avoid colliding with the core application code, we need to change the prefix: / to prefix: /payment/.
Even though we won't be storing any credit cards in our database as part of this chapter, we want to reuse the Symfony auto-generate CRUD feature in order for it to provide us with a credit card model and form. Let's go ahead and create a Card entity. We will do so by using the console, shown as follows:
php bin/console generate:doctrine:entity
The command triggers the interactive generator, providing it with FoggylinePaymentBundle:Card for an entity shortcut, where we also need to provide entity properties. We want to model our Card entity with the following fields:
card_type: stringcard_number: stringexpiry_date: datesecurity_code: stringOnce done, the generator creates Entity/Card.php and Repository/CardRepository.php within the src/Foggyline/PaymentBundle/ directory. We can now update the database so it pulls in the Card entity, shown as follows:
php bin/console doctrine:schema:update --force
With the entity in place, we are ready to generate its CRUD. We will do so by using the following command:
php bin/console generate:doctrine:crud
This results in a src/Foggyline/PaymentBundle/Controller/CardController.php file being created. It also adds an entry to our app/config/routing.yml file, as follows:
foggyline_payment_card: resource: "@FoggylinePaymentBundle/Controller/CardController.php" type: annotation
Again, the view files were created under the app/Resources/views/card/ directory. Since we won't actually be doing any CRUD related actions around cards as such, we can go ahead and delete all of the generated view files, as well as the entire body of the CardController class. At this point, we should have our Card entity, CardType form, and empty CardController class.
The card payment service is going to provide the relevant information our future sales module will need for its checkout process. Its role is to provide the payment method label, code, and processing URLs of an order, such as authorize, capture, and cancel.
We will start by defining the following service under the services element of the src/Foggyline/PaymentBundle/Resources/config/services.xml file:
<service id="foggyline_payment.card_payment"class="Foggyline\PaymentBundle\Service\CardPayment"> <argument type="service" id="form.factory"/> <argument type="service" id="router"/> <tag name="payment_method"/> </service>
This service accepts two arguments: one being form.factory and the other being router. form.factory that will be used within service to create a form view for the CardType form. The tag is a crucial element here, as our SalesBundle module will be looking for payment methods based on the payment_method tag assigned to the service.
We now need to create the actual service class within the src/Foggyline/PaymentBundle/Service/CardPayment.php file as follows:
namespace Foggyline\PaymentBundle\Service;
use Foggyline\PaymentBundle\Entity\Card;
class CardPayment
{
private $formFactory;
private $router;
public function __construct(
$formFactory,
\Symfony\Bundle\FrameworkBundle\Routing\Router $router
)
{
$this->formFactory = $formFactory;
$this->router = $router;
}
public function getInfo()
{
$card = new Card();
$form = $this->formFactory->create('Foggyline\PaymentBundle\Form\CardType', $card);
return array(
'payment' => array(
'title' =>'Foggyline Card Payment',
'code' =>'card_payment',
'url_authorize' => $this->router->generate('foggyline_payment_card_authorize'),
'url_capture' => $this->router->generate('foggyline_payment_card_capture'),
'url_cancel' => $this->router->generate('foggyline_payment_card_cancel'),
'form' => $form->createView()
)
);
}
}The getInfo method is what's going to provide the necessary information to our future SalesBundle module in order for it to construct the payment step of the checkout process. We are passing on three different types of URLs here: authorize, capture, and cancel. These routes do not exist just yet, as we will create them soon. The idea is that we will shift the payment actions and process to the actual payment method. Our future SalesBundle module will merely be doing an AJAX POST
to these payment URLs, and will expect either a success or error JSON response. A success response should yield some sort of transaction ID and an error response should yield a label message to show to the user.
We will edit the src/Foggyline/PaymentBundle/Resources/config/routing.xml file by adding the following route definitions to it:
<route id="foggyline_payment_card_authorize" path="/card/authorize"> <default key="_controller">FoggylinePaymentBundle:Card:authorize</default> </route> <route id="foggyline_payment_card_capture" path="/card/capture"> <default key="_controller">FoggylinePaymentBundle:Card:capture</default> </route> <route id="foggyline_payment_card_cancel" path="/card/cancel"> <default key="_controller">FoggylinePaymentBundle:Card:cancel</default> </route>
We will then edit the body of the CardController class by adding the following to it:
public function authorizeAction(Request $request)
{
$transaction = md5(time() . uniqid()); // Just a dummy string, simulating some transaction id, if any
if ($transaction) {
return new JsonResponse(array(
'success' => $transaction
));
}
return new JsonResponse(array(
'error' =>'Error occurred while processing Card payment.'
));
}
public function captureAction(Request $request)
{
$transaction = md5(time() . uniqid()); // Just a dummy string, simulating some transaction id, if any
if ($transaction) {
return new JsonResponse(array(
'success' => $transaction
));
}
return new JsonResponse(array(
'error' =>'Error occurred while processing Card payment.'
));
}
public function cancelAction(Request $request)
{
$transaction = md5(time() . uniqid()); // Just a dummy string, simulating some transaction id, if any
if ($transaction) {
return new JsonResponse(array(
'success' => $transaction
));
}
return new JsonResponse(array(
'error' =>'Error occurred while processing Card payment.'
));
}We should now be able to access URLs like /app_dev.php/payment/card/authorize and see the output of authorizeAction. Implementations given here are dummy ones. For the purpose of this chapter ,we are not going to connect to a real payment processing API. What is important for us to know is that the sales module will, during its checkout process, render any possible form view pushed through the ['payment']['form'] key of the getInfo method of a payment_method tagged service. Meaning, the checkout process should show a credit card form under card payment. The behavior of checking out will be coded such that if payment with a form is selected and the Place Order button is clicked, that payment form will prevent the checkout process from proceeding until the payment form is submitted to either authorize or capture the URL defined in the payment itself. We will touch upon this some more when we get to the SalesBundle module.
Aside from the credit card payment method, let's go ahead and define one more static payment, called Check Money.
We will start by defining the following service under the services element of the src/Foggyline/PaymentBundle/Resources/config/services.xml file:
<service id="foggyline_payment.check_money"class="Foggyline\PaymentBundle\Service\CheckMoneyPayment"> <argument type="service" id="router"/> <tag name="payment_method"/> </service>
The service defined here accepts only one router argument. The tag name is the same as with the card payment service.
We will then create the src/Foggyline/PaymentBundle/Service/CheckMoneyPayment.php file, with content as follows:
namespace Foggyline\PaymentBundle\Service;
class CheckMoneyPayment
{
private $router;
public function __construct(
\Symfony\Bundle\FrameworkBundle\Routing\Router $router
)
{
$this->router = $router;
}
public function getInfo()
{
return array(
'payment' => array(
'title' =>'Foggyline Check Money Payment',
'code' =>'check_money',
'url_authorize' => $this->router->generate('foggyline_payment_check_money_authorize'),
'url_capture' => $this->router->generate('foggyline_payment_check_money_capture'),
'url_cancel' => $this->router->generate('foggyline_payment_check_money_cancel'),
//'form' =>''
)
);
}
}Unlike a card payment, the check money payment has no form key defined under the getInfo method. This is because there are no credit card entries for it to define. It is just going to be a static payment method. However, we still need to define the authorize, capture, and cancel URLs, even though their implementation might be nothing more than just a simple JSON response with success or error keys.
Once the check money payment service is in place, we can go ahead and create the necessary routes for it. We will start by adding the following route definitions to the src/Foggyline/PaymentBundle/Resources/config/routing.xml file:
<route id="foggyline_payment_check_money_authorize"path="/check_money/authorize"> <default key="_controller">FoggylinePaymentBundle:CheckMoney:authorize</default> </route> <route id="foggyline_payment_check_money_capture"path="/check_money/capture"> <default key="_controller">FoggylinePaymentBundle:CheckMoney:capture</default> </route> <route id="foggyline_payment_check_money_cancel"path="/check_money/cancel"> <default key="_controller">FoggylinePaymentBundle:CheckMoney:cancel</default> </route>
We will then create the src/Foggyline/PaymentBundle/Controller/CheckMoneyController.php file, with content as follows:
namespace Foggyline\PaymentBundle\Controller;
use Symfony\Component\HttpFoundation\JsonResponse;
use Symfony\Component\HttpFoundation\Request;
use Symfony\Bundle\FrameworkBundle\Controller\Controller;
class CheckMoneyController extends Controller
{
public function authorizeAction(Request $request)
{
$transaction = md5(time() . uniqid());
return new JsonResponse(array(
'success' => $transaction
));
}
public function captureAction(Request $request)
{
$transaction = md5(time() . uniqid());
return new JsonResponse(array(
'success' => $transaction
));
}
public function cancelAction(Request $request)
{
$transaction = md5(time() . uniqid());
return new JsonResponse(array(
'success' => $transaction
));
}
}Similar to a card payment, here we added a simple dummy implementation of the authorize, capture, and cancel methods. The method responses will feed into the SalesBundle module later on. We can easily implement more robust functionality from within these methods, but that is out of the scope of this chapter.
Our FoggylinePaymentBundle module is really simple. It provides only two payment methods: card and check money. It does so via two simple service classes. Since we are not going after full code coverage tests, we will only cover the CardPayment and CheckMoneyPayment service classes as part of unit testing.
We will start off by adding the following line under the testsuites element of our phpunit.xml.dist file:
<directory>src/Foggyline/PaymentBundle/Tests</directory>
With that in place, running the phpunit command from the root of our shop should pick up any test we have defined under the src/Foggyline/PaymentBundle/Tests/ directory.
Now, let's go ahead and create a test for our CardPayment service. We will do so by creating a src/Foggyline/PaymentBundle/Tests/Service/CardPaymentTest.php file, with content as follows:
namespace Foggyline\PaymentBundle\Tests\Service;
use Symfony\Bundle\FrameworkBundle\Test\KernelTestCase;
class CardPaymentTest extends KernelTestCase
{
private $container;
private $formFactory;
private $router;
public function setUp()
{
static::bootKernel();
$this->container = static::$kernel->getContainer();
$this->formFactory = $this->container->get('form.factory');
$this->router = $this->container->get('router');
}
public function testGetInfoViaService()
{
$payment = $this->container->get('foggyline_payment.card_payment');
$info = $payment->getInfo();
$this->assertNotEmpty($info);
$this->assertNotEmpty($info['payment']['form']);
}
public function testGetInfoViaClass()
{
$payment = new \Foggyline\PaymentBundle\Service\CardPayment(
$this->formFactory,
$this->router
);
$info = $payment->getInfo();
$this->assertNotEmpty($info);
$this->assertNotEmpty($info['payment']['form']);
}
}Here, we are running two simple tests to see if we can instantiate a service, either via a container or directly, and simply call its getInfo method. The method is expected to return a response that contains the ['payment']['form'] key.
Now, let's go ahead and create a test for our CheckMoneyPayment service. We will do so by creating a src/Foggyline/PaymentBundle/Tests/Service/CheckMoneyPaymentTest.php file, with content as follows:
namespace Foggyline\PaymentBundle\Tests\Service;
use Symfony\Bundle\FrameworkBundle\Test\KernelTestCase;
class CheckMoneyPaymentTest extends KernelTestCase
{
private $container;
private $router;
public function setUp()
{
static::bootKernel();
$this->container = static::$kernel->getContainer();
$this->router = $this->container->get('router');
}
public function testGetInfoViaService()
{
$payment = $this->container->get('foggyline_payment.check_money');
$info = $payment->getInfo();
$this->assertNotEmpty($info);
}
public function testGetInfoViaClass()
{
$payment = new \Foggyline\PaymentBundle\Service\CheckMoneyPayment(
$this->router
);
$info = $payment->getInfo();
$this->assertNotEmpty($info);
}
}Similarly, here we also have two simple tests: one fetching the payment method via a container, and the other directly via a class. The difference being that we are not checking for the presence of a form key under the getInfo method response.
Our module has two controller classes that we want to test for responses. We want to make sure that the authorize, capture, and cancel methods of the CardController and CheckMoneyController classes are working.
We first create asrc/Foggyline/PaymentBundle/Tests/Controller/CardControllerTest.php file, with content as follows:
namespace Foggyline\PaymentBundle\Tests\Controller;
use Symfony\Bundle\FrameworkBundle\Test\WebTestCase;
class CardControllerTest extends WebTestCase
{
private $client;
private $router;
public function setUp()
{
$this->client = static::createClient();
$this->router = $this->client->getContainer()->get('router');
}
public function testAuthorizeAction()
{
$this->client->request('GET', $this->router->generate('foggyline_payment_card_authorize'));
$this->assertTests();
}
public function testCaptureAction()
{
$this->client->request('GET', $this->router->generate('foggyline_payment_card_capture'));
$this->assertTests();
}
public function testCancelAction()
{
$this->client->request('GET', $this->router->generate('foggyline_payment_card_cancel'));
$this->assertTests();
}
private function assertTests()
{
$this->assertSame(200, $this->client->getResponse()->getStatusCode());
$this->assertSame('application/json', $this->client->getResponse()->headers->get('Content-Type'));
$this->assertContains('success', $this->client->getResponse()->getContent());
$this->assertNotEmpty($this->client->getResponse()->getContent());
}
}We then create src/Foggyline/PaymentBundle/Tests/Controller/CheckMoneyControllerTest.php, with content as follows:
namespace Foggyline\PaymentBundle\Tests\Controller;
use Symfony\Bundle\FrameworkBundle\Test\WebTestCase;
class CheckMoneyControllerTest extends WebTestCase
{
private $client;
private $router;
public function setUp()
{
$this->client = static::createClient();
$this->router = $this->client->getContainer()->get('router');
}
public function testAuthorizeAction()
{
$this->client->request('GET', $this->router->generate('foggyline_payment_check_money_authorize'));
$this->assertTests();
}
public function testCaptureAction()
{
$this->client->request('GET', $this->router->generate('foggyline_payment_check_money_capture'));
$this->assertTests();
}
public function testCancelAction()
{
$this->client->request('GET', $this->router->generate('foggyline_payment_check_money_cancel'));
$this->assertTests();
}
private function assertTests()
{
$this->assertSame(200, $this->client->getResponse()->getStatusCode());
$this->assertSame('application/json', $this->client->getResponse()->headers->get('Content-Type'));
$this->assertContains('success', $this->client->getResponse()->getContent());
$this->assertNotEmpty($this->client->getResponse()->getContent());
}
}Both tests are nearly identical. They contain a test for each of the authorize, capture, and cancel methods. Since our methods are implemented with a fixed success JSON response, there are no surprises here. However, we can easily play around with it by extending our payment methods into something more robust.
Throughout this chapter we have built a payment module with two payment methods. The card payment method is made so that it is simulating payment with the credit cards involved. For that reason, it includes a form as part of its getInfo method. The check money payment, on the other hand, is simulating a static payment method - one that does not include any form of credit card. Both methods are implemented as dummy methods, meaning they are not actually communicating to any external payment processor.
The idea was to create a minimal structure that showcases how one can develop a simple payment module for further customization. We did so by exposing each payment method via a tagged service. Using the payment_method tag was a matter of consensus, since we are the ones building the full application so we get to choose how we will implement this in the sales module.By using the same tag name for each payment method, we effectively created conditions for the future sales module to pick all of the payments methods and render them under its checkout process.
Moving forward, in the next chapter we will build a shipment module.
The shipment module, alongside the payment module, provides a basis for further sales functionality in our web shop. It will enable us to choose the shipment method when we reach the checkout process of the upcoming sales module. Similar to payment, shipment can be sort of static and dynamic. Whereas static might imply a fixed pricing value, or even a calculated one by some simple conditions, dynamic usually implies a connection to external API services.
Throughout this chapter, we will touch base with both types and see how we can set up a basic structure for implementing the shipment module.
In this chapter, we will be covering the following topics of the shipment module:
Application requirements, defined under Chapter 4, Requirement Specification for Modular Web Shop App, do not give us any specifics as to what type of shipment we need to implement. Thus, for the purpose of this chapter, we will develop two shipment methods: dynamic rate shipment and flat rate shipment. Dynamic rate shipment is used as a way of connecting the shipment method to a real shipment processor, such as UPS, FedEx, and so on. It will not, however, actually connect to any of the external APIs.
Ideally, we want this done by an interface similar to the following:
namespace Foggyline\SalesBundle\Interface;
interface Shipment
{
function getInfo($street, $city, $country, $postcode, $amount, $qty);
function process($street, $city, $country, $postcode, $amount, $qty);
}The getInfo method can then be used to fetch the available delivery options for the given order information, while the process method would then process the selected delivery option. For example, we might have an API return "same day delivery ($9.99)",= and "standard delivery ($4.99)" as delivery options under the dynamic rate shipment method.
Having such a shipment interface would then impose the requirement of having the SalesBundle module, which we still haven't developed. We will therefore proceed with our shipment methods, using a Symfony controller for handling the process method and a service for handling the getInfo method.
Similarly, as we did with the payment method in the previous chapter, we will expose our getInfo method through tagged Symfony services. The tag we will be using for shipment methods is shipment_method. Later on, during the checkout process, the SalesBundle module will fetch all of the services tagged with shipment_method and use them internally for a list of available shipment methods to work with.
We are building the module the other way round. That is, we are building it before we know anything about the SalesBundle module, which is the only module that will be using it. With that in mind, the shipment module has no firm dependencies on any other module. However, it might have been more convenient to build the SalesBundle module first and then expose a few interfaces that the shipment module might use.
We will start off by creating a new module called Foggyline\ShipmentBundle. We will do so with the help of the console by running the following command:
php bin/console generate:bundle --namespace=Foggyline/ShipmentBundle
The command triggers an interactive process, which asks us several questions along the way, shown as follows:
Once done, files app/AppKernel.php and app/config/routing.yml are modified automatically. The registerBundles method of an AppKernel class has been added to the following line under the $bundles array:
new Foggyline\PaymentBundle\FoggylineShipmentBundle(),
The routing.yml file has been updated with the following entry:
foggyline_payment: resource: "@FoggylineShipmentBundle/Resources/config/routing.xml" prefix: /
In order to avoid colliding with the core application code, we need to change prefix: /into prefix: /shipment/.
The flat rate shipment service is going to provide the fixed shipment method that our sales module is going to use for its checkout process. Its role is to provide the shipment method labels, code, delivery options, and processing URLs.
We will start by defining the following service under the services element of the src/Foggyline/ShipmentBundle/Resources/config/services.xml file:
<service id="foggyline_shipment.dynamicrate_shipment"class="Foggyline\ShipmentBundle\Service\DynamicRateShipment"> <argument type="service" id="router"/> <tag name="shipment_method"/> </service>
This service accepts only one argument: the router. The tagname value is set to shipment_method, as our SalesBundle module will be looking for shipment methods based on the shipment_method tag assigned to the service.
We will now create the actual service class, within the src/Foggyline/ShipmentBundle/Service/FlatRateShipment.php file as follows:
namespace Foggyline\ShipmentBundle\Service;
class FlatRateShipment
{
private $router;
public function __construct(
\Symfony\Bundle\FrameworkBundle\Routing\Router $router
)
{
$this->router = $router;
}
public function getInfo($street, $city, $country, $postcode, $amount, $qty)
{
return array(
'shipment' => array(
'title' =>'Foggyline FlatRate Shipment',
'code' =>'flat_rate',
'delivery_options' => array(
'title' =>'Fixed',
'code' =>'fixed',
'price' => 9.99
),
'url_process' => $this->router->generate('foggyline_shipment_flat_rate_process'),
)
;
}
}The getInfo method is what's going to provide the necessary information to our future SalesBundle module in order for it to construct the shipment step of the checkout process. It accepts a series of arguments:$street, $city, $country, $postcode, $amount, and $qty. We can consider these to be part of some unified shipment interface. delivery_options in this case returns a single, fixed value. url_process is the URL to which we will be inserting our selected shipment method. Our future SalesBundle module will then merely be doing an AJAX POST to this URL, expecting either a success or error JSON response, which is quite similar to what we imagined doing with payment methods.
We edit the src/Foggyline/ShipmentBundle/Resources/config/routing.xml file by adding the following route definitions to it:
<route id="foggyline_shipment_flat_rate_process"path="/flat_rate/process"> <default key="_controller">FoggylineShipmentBundle:FlatRate:process </default> </route>
We then create a src/Foggyline/ShipmentBundle/Controller/FlatRateController.php. file with content as follows:
namespace Foggyline\ShipmentBundle\Controller;
use Symfony\Component\HttpFoundation\JsonResponse;
use Symfony\Component\HttpFoundation\Request;
use Symfony\Bundle\FrameworkBundle\Controller\Controller;
class FlatRateController extends Controller
{
public function processAction(Request $request)
{
// Simulating some transaction id, if any
$transaction = md5(time() . uniqid());
return new JsonResponse(array(
'success' => $transaction
));
}
}We should now be able to access a URL, like /app_dev.php/shipment/flat_rate/process, and see the output of processAction. Implementations given here are dummy ones. What is important for us to know is that the sales module will, during its checkout process, render any possible delivery_options pushed through the getInfo method of a shipment_method tagged service. Meaning, the checkout process should show flat rate shipment as an option. The behavior of checking out will be coded such that if a shipment method is not selected, it will prevent the checkout process from going any further. We will touch upon this some more when we get to the SalesBundle module.
Aside from the flat rate shipment method, let's go ahead and define one more dynamic shipment, called Dynamic Rate.
We will start by defining the following service under the services element of the src/Foggyline/ShipmentBundle/Resources/config/services.xml file:
<service id="foggyline_shipment.dynamicrate_shipment"class="Foggyline\ShipmentBundle\Service\DynamicRateShipment"> <argument type="service" id="router"/> <tag name="shipment_method"/> </service>
The service defined here accepts only one router argument. The tag name property is the same as with the flat rate shipment service.
We will then create the src/Foggyline/ShipmentBundle/Service/DynamicRateShipment.php file, with content as follows:
namespace Foggyline\ShipmentBundle\Service;
class DynamicRateShipment
{
private $router;
public function __construct(
\Symfony\Bundle\FrameworkBundle\Routing\Router $router
)
{
$this->router = $router;
}
public function getInfo($street, $city, $country, $postcode, $amount, $qty)
{
return array(
'shipment' => array(
'title' =>'Foggyline DynamicRate Shipment',
'code' =>'dynamic_rate_shipment',
'delivery_options' => $this->getDeliveryOptions($street, $city, $country, $postcode, $amount, $qty),
'url_process' => $this->router->generate('foggyline_shipment_dynamic_rate_process'),
)
);
}
public function getDeliveryOptions($street, $city, $country, $postcode, $amount, $qty)
{
// Imagine we are hitting the API with: $street, $city, $country, $postcode, $amount, $qty
return array(
array(
'title' =>'Same day delivery',
'code' =>'dynamic_rate_sdd',
'price' => 9.99
),
array(
'title' =>'Standard delivery',
'code' =>'dynamic_rate_sd',
'price' => 4.99
),
);
}
}Unlike the flat rate shipment, here the delivery_options key of the getInfo method is constructed with the response of the getDeliveryOptions method. The method is internal to the service and is not imagined as exposed or to be looked at as part of an interface. We can easily imagine doing some API calls within it, in order to fetch calculated rates for our dynamic shipment method.
Once the dynamic rates shipment service is in place, we can go ahead and create the necessary route for it. We will start by adding the following route definition to the src/Foggyline/ShipmentBundle/Resources/config/routing.xml file:
<route id="foggyline_shipment_dynamic_rate_process" path="/dynamic_rate/process"> <default key="_controller">FoggylineShipmentBundle:DynamicRate:process </default> </route>
We will then create the src/Foggyline/ShipmentBundle/Controller/DynamicRateController.php file, with content as follows:
namespace Foggyline\ShipmentBundle\Controller;
use Foggyline\ShipmentBundle\Entity\DynamicRate;
use Symfony\Component\HttpFoundation\JsonResponse;
use Symfony\Component\HttpFoundation\Request;
use Symfony\Bundle\FrameworkBundle\Controller\Controller;
use Symfony\Component\Form\Extension\Core\Type\ChoiceType;
class DynamicRateController extends Controller
{
public function processAction(Request $request)
{
// Just a dummy string, simulating some transaction id
$transaction = md5(time() . uniqid());
if ($transaction) {
return new JsonResponse(array(
'success' => $transaction
));
}
return new JsonResponse(array(
'error' =>'Error occurred while processing DynamicRate shipment.'
));
}
}Similar to the flat rate shipment, here we have added a simple dummy implementation of the process and method. The incoming $request should contain the same info as the service getInfo method, meaning, it should have the following arguments available: $street, $city, $country, $postcode, $amount, and $qty. The method responses will feed into the SalesBundle module later on. We can easily implement more robust functionality from within these methods, but that is out of the scope of this chapter.
The FoggylineShipmentBundle module is quite simple. By providing only two simple services and two simple controllers, it's easy to test.
We will start off by adding the following line under the testsuites element of our phpunit.xml.dist file:
<directory>src/Foggyline/ShipmentBundle/Tests</directory>
With that in place, running the phpunit command from root of our shop should pick up any test we have defined under the src/Foggyline/ShipmentBundle/Tests/ directory.
Now, let's go ahead and create a test for our FlatRateShipment service. We will do so by creating a src/Foggyline/ShipmentBundle/Tests/Service/FlatRateShipmentTest.php file, with content as follows:
namespace Foggyline\ShipmentBundle\Tests\Service;
use Symfony\Bundle\FrameworkBundle\Test\KernelTestCase;
class FlatRateShipmentTest extends KernelTestCase
{
private $container;
private $router;
private $street = 'Masonic Hill Road';
private $city = 'Little Rock';
private $country = 'US';
private $postcode = 'AR 72201';
private $amount = 199.99;
private $qty = 7;
public function setUp()
{
static::bootKernel();
$this->container = static::$kernel->getContainer();
$this->router = $this->container->get('router');
}
public function testGetInfoViaService()
{
$shipment = $this->container->get('foggyline_shipment.flat_rate');
$info = $shipment->getInfo(
$this->street, $this->city, $this->country, $this->postcode, $this->amount, $this->qty
);
$this->validateGetInfoResponse($info);
}
public function testGetInfoViaClass()
{
$shipment = new \Foggyline\ShipmentBundle\Service\FlatRateShipment($this->router);
$info = $shipment->getInfo(
$this->street, $this->city, $this->country, $this->postcode, $this->amount, $this->qty
);
$this->validateGetInfoResponse($info);
}
public function validateGetInfoResponse($info)
{
$this->assertNotEmpty($info);
$this->assertNotEmpty($info['shipment']['title']);
$this->assertNotEmpty($info['shipment']['code']);
$this->assertNotEmpty($info['shipment']['delivery_options']);
$this->assertNotEmpty($info['shipment']['url_process']);
}
}Two simple tests are being run here. One checks if we can instantiate a service via a container, and the other checks if we can do so directly. Once instantiated, we simply call the getInfo method of a service, passing it a dummy address and order information. Although we are not actually using this data within the getInfo method, we need to pass something along otherwise the test will fail. The method is expected to return a response that contains several keys under the shipment key, most notably title, code, delivery_options, and url_process.
Now, let's go ahead and create a test for our DynamicRateShipment service. We will do so by creating a src/Foggyline/ShipmentBundle/Tests/Service/DynamicRateShipmentTest.php file, with content as follows:
namespace Foggyline\ShipmentBundle\Tests\Service;
use Symfony\Bundle\FrameworkBundle\Test\KernelTestCase;
class DynamicRateShipmentTest extends KernelTestCase
{
private $container;
private $router;
private $street = 'Masonic Hill Road';
private $city = 'Little Rock';
private $country = 'US';
private $postcode = 'AR 72201';
private $amount = 199.99;
private $qty = 7;
public function setUp()
{
static::bootKernel();
$this->container = static::$kernel->getContainer();
$this->router = $this->container->get('router');
}
public function testGetInfoViaService()
{
$shipment = $this->container->get('foggyline_shipment.dynamicrate_shipment');
$info = $shipment->getInfo(
$this->street, $this->city, $this->country, $this->postcode, $this->amount, $this->qty
);
$this->validateGetInfoResponse($info);
}
public function testGetInfoViaClass()
{
$shipment = new \Foggyline\ShipmentBundle\Service\DynamicRateShipment($this->router);
$info = $shipment->getInfo(
$this->street, $this->city, $this->country, $this->postcode, $this->amount, $this->qty
);
$this->validateGetInfoResponse($info);
}
public function validateGetInfoResponse($info)
{
$this->assertNotEmpty($info);
$this->assertNotEmpty($info['shipment']['title']);
$this->assertNotEmpty($info['shipment']['code']);
// Could happen that dynamic rate has none?!
//$this->assertNotEmpty($info['shipment']['delivery_options']);
$this->assertNotEmpty($info['shipment']['url_process']);
}
}This test is nearly identical to that of the FlatRateShipment service. Here, we also have two simple tests: one fetching the payment method via a container, and the other directly via a class. The difference being that we are no longer asserting the presence of delivery_options not being empty. This is because a real API request might not return any options for delivery, depending on the given address and order information.
Our entire module has only two controller classes that we want to test for responses. We want to make sure that the process method of the FlatRateController and DynamicRateController classes are accessible and working.
We will first create an src/Foggyline/ShipmentBundle/Tests/Controller/FlatRateControllerTest.php file, with content as follows:
namespace Foggyline\ShipmentBundle\Tests\Controller;
use Symfony\Bundle\FrameworkBundle\Test\WebTestCase;
class FlatRateControllerTest extends WebTestCase
{
private $client;
private $router;
public function setUp()
{
$this->client = static::createClient();
$this->router = $this->client->getContainer()->get('router');
}
public function testProcessAction()
{
$this->client->request('GET', $this->router->generate('foggyline_shipment_flat_rate_process'));
$this->assertSame(200, $this->client->getResponse()->getStatusCode());
$this->assertSame('application/json', $this->client->getResponse()->headers->get('Content-Type'));
$this->assertContains('success', $this->client->getResponse()->getContent());
$this->assertNotEmpty($this->client->getResponse()->getContent());
}
}We will then create a src/Foggyline/ShipmentBundle/Tests/Controller/DynamicRateControllerTest.php file, with content as follows:
namespace Foggyline\ShipmentBundle\Tests\Controller;
use Symfony\Bundle\FrameworkBundle\Test\WebTestCase;
class DynamicRateControllerTest extends WebTestCase
{
private $client;
private $router;
public function setUp()
{
$this->client = static::createClient();
$this->router = $this->client->getContainer()->get('router');
}
public function testProcessAction()
{
$this->client->request('GET', $this->router->generate('foggyline_shipment_dynamic_rate_process'));
$this->assertSame(200, $this->client->getResponse()->getStatusCode());
$this->assertSame('application/json', $this->client->getResponse()->headers->get('Content-Type'));
$this->assertContains('success', $this->client->getResponse()->getContent());
$this->assertNotEmpty($this->client->getResponse()->getContent());
}
}Both tests are nearly identical. They contain a test for a single process action method. As it is coded now, the controller process action simply returns a fixed success JSON response. We can easily extend it to return more than just a fixed response and can accompany that change with a more robust functional test.
Throughout this chapter we have built a shipment module with two shipment methods. Each shipment method provided the available delivery options. The flat rate shipment method has only one fixed value under its delivery options, whereas the dynamic rate method gets its values from the getDeliveryOptions method. We can easily embed a real shipping API as part of getDeliveryOptions in order to provide truly dynamic shipping options.
Obviously, we lack the official interfaces here, as we did with payment methods. However, this is something we can always come back to and refactor in our application as we finalize the final module.
Similar to the payment methods, the idea here was to create a minimal structure that showcases how one can develop a simple shipment module for further customization. Using the shipment_methodservice tag, we effectively exposed the shipment methods for the future sales module.
Moving forward, in the next chapter, we will build a sales module, which will finally make use of our payment and shipment modules.
The Sales module is the final one in the series of modules we will build in order to deliver a simple yet functional web shop application. We will do so by adding the cart and the checkout features on top of the catalog. The checkout itself will finally make use of the shipping and payment services defined throughout the previous chapters. The overall focus here will be on absolute basics, since the real shopping cart application would take a far more robust approach. However, understanding how to tie it all together in a simple way is the first step toward opening up a door for more robust web shop application implementations later on.
In this chapter, we will be covering the following topics of the Sales module:
Application requirements, defined in Chapter 4, Requirement Specification for Modular Web Shop App, give us some wireframes relating to the cart and checkout. Based on these wireframes, we can speculate about what type of entities we need to create in order to deliver on functionality.
The following is a list of required module entities:
The Cart entity includes the following properties and their data types:
id: integer, auto-incrementcustomer_id: stringcreated_at: datetimemodified_at: datetimeThe Cart Item entity includes the following properties:
id: integer, auto-incrementcart_id: integer, foreign key that references the category table id columnproduct_id: integer, foreign key that references product table id columnqty: stringunit_price: decimalcreated_at: datetimemodified_at: datetimeThe Order entity includes the following properties:
id: integer, auto-incrementcustomer_id: integer, foreign key that references the customer table id columnitems_price: decimalshipment_price: decimaltotal_price: decimalstatus: stringcustomer_email: stringcustomer_first_name: stringcustomer_last_name: stringaddress_first_name: stringaddress_last_name: stringaddress_country: stringaddress_state: stringaddress_city: stringaddress_postcode: stringaddress_street: stringaddress_telephone: stringpayment_method: stringshipment_method: stringcreated_at: datetimemodified_at: datetimeThe Order Item entity includes the following properties:
id: integer, auto-incrementsales_order_id: integer, foreign key that references the order table id columnproduct_id: integer, foreign key that references product table id columntitle: stringqty: intunit_price: decimaltotal_price: decimalcreated_at: datetimemodified_at: datetimeAside from just adding these entities and their CRUD pages, we also need to override a core module service responsible for building the category menu and on-sale items.
We start by creating a new module called Foggyline\SalesBundle. We do so with the help of the console, by running the command as follows:
php bin/console generate:bundle --namespace=Foggyline/SalesBundle
The command triggers an interactive process, asking us several questions along the way, as shown here:
Once done, the app/AppKernel.php and app/config/routing.yml files get modified automatically. The registerBundles method of an AppKernel class has been added to the following line under the $bundles array:
new Foggyline\PaymentBundle\FoggylineSalesBundle(),
The routing.yml file has been updated with the following entry:
foggyline_payment: resource: "@FoggylineSalesBundle/Resources/config/routing.xml" prefix: /
In order to avoid collision with the core application code, we need to change prefix: / into prefix: /sales/.
Let's go ahead and create a Cart entity. We do so by using the console, as shown here:
php bin/console generate:doctrine:entity
This triggers the interactive generator as shown in the following sreenshot:
This creates the Entity/Cart.php and Repository/CartRepository.php files within the src/Foggyline/SalesBundle/ directory. After this, we need to update the database, so it pulls in the Cart entity, by running the following command:
php bin/console doctrine:schema:update --force
With the Cart entity in place, we can go ahead and generate the CartItem entity.
Let's go ahead and create a CartItem entity. We do so by using the now well-known console command:
php bin/console generate:doctrine:entity
This triggers the interactive generator as shown in the following screenshot:
This creates Entity/CartItem.php and Repository/CartItemRepository.php within the src/Foggyline/SalesBundle/ directory. Once the auto generate has done its work, we need to go back and edit the CartItem entity to update the cart field relation as follows:
/** * @ORM\ManyToOne(targetEntity="Cart", inversedBy="items") * @ORM\JoinColumn(name="cart_id", referencedColumnName="id") */ private $cart;
Here, we have defined the so-called bidirectional one-to-many association. The foreign key in a one-to-many association is being defined on the many side, which in this case is the CartItem entity. The bidirectional mapping requires the mappedBy attribute on the OneToMany association and the inversedBy attribute on the ManyToOne association. The OneToMany side in this case is the Cart entity, so we go back to the src/Foggyline/SalesBundle/Entity/Cart.php file and add the following to it:
/**
* @ORM\OneToMany(targetEntity="CartItem", mappedBy="cart")
*/
private $items;
public function __construct() {
$this->items = new \Doctrine\Common\Collections\ArrayCollection();
}We then need to update the database, so it pulls in the CartItem entity, by running the following command:
php bin/console doctrine:schema:update --force
With the CartItem entity in place, we can go ahead and generate the Order entity.
Let's go ahead and create an Order entity. We do so by using the console, as shown here:
php bin/console generate:doctrine:entity
If we tried to provide FoggylineSalesBundle:Order as an entity shortcut name, the generated output would throw an error as shown in the following screenshot:
Instead, we will use SensioGeneratorBundle:SalesOrder for the entity shortcut name, and follow the generator through as shown here:
This is followed by the rest of the customer-information-related fields. To get a better idea, look at the following screenshot:
This is followed by the rest of the order-address-related fields as shown here:
It is worth noting that normally we would like to extract the address information in its own table, that is make it its own entity. However, to keep things simple, we will proceed by keeping it as part of the SalesOrder entity.
Once done, this creates Entity/SalesOrder.php and Repository/SalesOrderRepository.php files within the src/Foggyline/SalesBundle/ directory. After this, we need to update the database, so it pulls in the SalesOrder entity, by running the following command:
php bin/console doctrine:schema:update --force
With the SalesOrder entity in place, we can go ahead and generate the SalesOrderItem entity.
Let's go ahead and create a SalesOrderItem entity. We start the code generator by using the following console command:
php bin/console generate:doctrine:entity
When asked for the entity shortcut name, we provide FoggylineSalesBundle:SalesOrderItem, and then follow the generator field definitions as shown in the following screenshot:
This creates Entity/SalesOrderItem.php and Repository/SalesOrderItemRepository.php files within the src/Foggyline/SalesBundle/ directory. Once the auto-generate has done its work, we need to go back and edit the SalesOrderItem entity to update the SalesOrder field relation as follows:
/** * @ORM\ManyToOne(targetEntity="SalesOrder", inversedBy="items") * @ORM\JoinColumn(name="sales_order_id", referencedColumnName="id") */ private $salesOrder; /** * @ORM\OneToOne(targetEntity="Foggyline\CatalogBundle\Entity\Product") * @ORM\JoinColumn(name="product_id", referencedColumnName="id") */ private $product;
Here, we have defined two types of relations. The first one, relating to $salesOrder, is the bidirectional one-to-many association, which we saw in the Cart and CartItem entities. The second one, relating to $product, is the unidirectional one-to-one association. The reference is said to be unidirectional because CartItem references Product, while Product won't be referencing CartItem, as we do not want to change something that is part of another module.
We still need to go back to the src/Foggyline/SalesBundle/Entity/SalesOrder.php file and add the following to it:
/**
* @ORM\OneToMany(targetEntity="SalesOrderItem", mappedBy="salesOrder")
*/
private $items;
public function __construct() {
$this->items = new \Doctrine\Common\Collections\ArrayCollection();
}We then need to update the database, so it pulls in the SalesOrderItem entity, by running the following command:
php bin/console doctrine:schema:update --force
With the SalesOrderItem entity in place, we can go ahead and start building the cart and checkout pages.
The add_to_cart_url service was originally declared in FoggylineCustomerBundle with dummy data. This is because we needed a way to build Add to Cart URLs on products before sales functionality was available. While certainly not ideal, it is one possible way of doing it.
Now we are going to override that service with the one declared in our Sales module in order to provide correct Add to Cart URLs. We start off by defining the service within src/Foggyline/SalesBundle/Resources/config/services.xml, by adding the following service element under the services as follows:
<service id="foggyline_sales.add_to_cart_url" class="Foggyline\SalesBundle\Service\AddToCartUrl"> <argument type="service" id="doctrine.orm.entity_manager"/> <argument type="service" id="router"/> </service>
We then create src/Foggyline/SalesBundle/Service/AddToCartUrl.php with content as follows:
namespace Foggyline\SalesBundle\Service;
class AddToCartUrl
{
private $em;
private $router;
public function __construct(
\Doctrine\ORM\EntityManager $entityManager,
\Symfony\Bundle\FrameworkBundle\Routing\Router $router
)
{
$this->em = $entityManager;
$this->router = $router;
}
public function getAddToCartUrl($productId)
{
return $this->router->generate('foggyline_sales_cart_add', array('id' => $productId));
}
}The router service here expects the route named foggyline_sales_cart_add, which still does not exist. We create the route by adding the following entry under the routes element of the src/Foggyline/SalesBundle/Resources/config/routing.xml file as follows:
<route id="foggyline_sales_cart_add" path="/cart/add/{id}">
<default key="_controller">FoggylineSalesBundle:Cart:add</default>
</route>Route definition expects to find the addAction function within the cart controller in the src/Foggyline/SalesBundle/Controller/CartController.php file, which we define as follows:
namespace Foggyline\SalesBundle\Controller;
use Symfony\Component\HttpFoundation\Request;
use Symfony\Bundle\FrameworkBundle\Controller\Controller;
class CartController extends Controller
{
public function addAction($id)
{
if ($customer = $this->getUser()) {
$em = $this->getDoctrine()->getManager();
$now = new \DateTime();
$product = $em->getRepository('FoggylineCatalogBundle:Product')->find($id);
// Grab the cart for current user
$cart = $em->getRepository('FoggylineSalesBundle:Cart')->findOneBy(array('customer' => $customer));
// If there is no cart, create one
if (!$cart) {
$cart = new \Foggyline\SalesBundle\Entity\Cart();
$cart->setCustomer($customer);
$cart->setCreatedAt($now);
$cart->setModifiedAt($now);
} else {
$cart->setModifiedAt($now);
}
$em->persist($cart);
$em->flush();
// Grab the possibly existing cart item
// But, lets find it directly
$cartItem = $em->getRepository('FoggylineSalesBundle:CartItem')->findOneBy(array('cart' => $cart, 'product' => $product));
if ($cartItem) {
// Cart item exists, update it
$cartItem->setQty($cartItem->getQty() + 1);
$cartItem->setModifiedAt($now);
} else {
// Cart item does not exist, add new one
$cartItem = new \Foggyline\SalesBundle\Entity\CartItem();
$cartItem->setCart($cart);
$cartItem->setProduct($product);
$cartItem->setQty(1);
$cartItem->setUnitPrice($product->getPrice());
$cartItem->setCreatedAt($now);
$cartItem->setModifiedAt($now);
}
$em->persist($cartItem);
$em->flush();
$this->addFlash('success', sprintf('%s successfully added to cart', $product->getTitle()));
return $this->redirectToRoute('foggyline_sales_cart');
} else {
$this->addFlash('warning', 'Only logged in users can add to cart.');
return $this->redirect('/');
}
}
}There is quite a bit of logic going on here in the addAction method. We are first checking whether the current user already has a cart entry in the database; if not, we create a new one. We then add or update the existing cart item.
In order for our new add_to_cart service to actually override the one from the Customermodule, we still need to add a compiler. We do so by defining the src/Foggyline/SalesBundle/DependencyInjection/Compiler/OverrideServiceCompilerPass.phpfile with content as follows:
namespace Foggyline\SalesBundle\DependencyInjection\Compiler;
use Symfony\Component\DependencyInjection\Compiler\CompilerPassInterface;
use Symfony\Component\DependencyInjection\ContainerBuilder;
use Symfony\Component\DependencyInjection\Definition;
class OverrideServiceCompilerPass implements CompilerPassInterface
{
public function process(ContainerBuilder $container)
{
// Override 'add_to_cart_url' service
$container->removeDefinition('add_to_cart_url');
$container->setDefinition('add_to_cart_url', $container->getDefinition('foggyline_sales.add_to_cart_url'));
// Override 'checkout_menu' service
// Override 'foggyline_customer.customer_orders' service
// Override 'bestsellers' service
// Pickup/parse 'shipment_method' services
// Pickup/parse 'payment_method' services
}
}Later on, we will add the rest of the overrides to this file. In order to tie things up for the moment, and make the add_to_cart service override kick in, we need to register the compiler pass within the build method of our src/Foggyline/SalesBundle/FoggylineSalesBundle.php file as follows:
public function build(ContainerBuilder $container)
{
parent::build($container);;
$container->addCompilerPass(new OverrideServiceCompilerPass());
}The override should now be in effect, and our Sales module should now be providing valid Add to Cart links.
The checkout menu service defined in the Customer module has a simple purpose which is to provide a link to the cart and the first step of the checkout process. Since the Sales module was unknown at the time, the Customer module provided a dummy link, which we will now override.
We start by adding the following service entry under the services element of the src/Foggyline/SalesBundle/Resources/config/services.xml file as follows:
<service id="foggyline_sales.checkout_menu" class="Foggyline\SalesBundle\Service\CheckoutMenu"> <argument type="service" id="doctrine.orm.entity_manager"/> <argument type="service" id="security.token_storage"/> <argument type="service" id="router"/> </service>
We then add the src/Foggyline/SalesBundle/Service/CheckoutMenu.php file with content as follows:
namespace Foggyline\SalesBundle\Service;
class CheckoutMenu
{
private $em;
private $token;
private $router;
public function __construct(
\Doctrine\ORM\EntityManager $entityManager,
$tokenStorage,
\Symfony\Bundle\FrameworkBundle\Routing\Router $router
)
{
$this->em = $entityManager;
$this->token = $tokenStorage->getToken();
$this->router = $router;
}
public function getItems()
{
if ($this->token
&& $this->token->getUser() instanceof \Foggyline\CustomerBundle\Entity\Customer
) {
$customer = $this->token->getUser();
$cart = $this->em->getRepository('FoggylineSalesBundle:Cart')->findOneBy(array('customer' => $customer));
if ($cart) {
return array(
array('path' => $this->router->generate('foggyline_sales_cart'), 'label' =>sprintf('Cart (%s)', count($cart->getItems()))),
array('path' => $this->router->generate('foggyline_sales_checkout'), 'label' =>'Checkout'),
);
}
}
return array();
}
}The service expects two routes, foggyline_sales_cart and foggyline_sales_checkout, so we need to amend the src/Foggyline/SalesBundle/Resources/config/routing.xml by file adding the following route definitions to it:
<route id="foggyline_sales_cart" path="/cart/"> <default key="_controller">FoggylineSalesBundle:Cart:index</default> </route> <route id="foggyline_sales_checkout" path="/checkout/"> <default key="_controller">FoggylineSalesBundle:Checkout:index</default> </route>
The newly added routes expect the cart and checkout controller. The cart controller is already in place, so we just need to add the indexAction to it. At this point, let's just add an empty one as follows:
public function indexAction(Request $request)
{
}Similarly, let's create a src/Foggyline/SalesBundle/Controller/CheckoutController.php file with content as follows:
namespace Foggyline\SalesBundle\Controller;
use Symfony\Component\HttpFoundation\Request;
use Symfony\Bundle\FrameworkBundle\Controller\Controller;
use Symfony\Component\Form\Extension\Core\Type\TextType;
use Symfony\Component\Form\Extension\Core\Type\CountryType;
class CheckoutController extends Controller
{
public function indexAction()
{
}
}Later on, we will revert back to these two indexAction methods and add proper method body implementations.
To conclude the service override, we now amend the previously created src/Foggyline/SalesBundle/DependencyInjection/Compiler/OverrideServiceCompilerPass.php file, by replacing the // Override 'checkout_menu' service comment with the following:
$container->removeDefinition('checkout_menu');
$container->setDefinition('checkout_menu', $container->getDefinition('foggyline_sales.checkout_menu'));Our newly defined service should now override the one defined in the Customer module, thus providing the right checkout and cart (with items in the cart count) URL.
The foggyline_customer.customer_orders service was to provide a collection of previously created orders for currently logged-in customers. The Customer module defined a dummy service for this purpose, just so we can move forward with building up the My Orders section under My Account page. We now need to override this service, making it return proper orders.
We start by adding the following service element under the services of the src/Foggyline/SalesBundle/Resources/config/services.xml file as follows:
<service id="foggyline_sales.customer_orders" class="Foggyline\SalesBundle\Service\CustomerOrders"> <argument type="service" id="doctrine.orm.entity_manager"/> <argument type="service" id="security.token_storage"/> <argument type="service" id="router"/> </service>
We then add the src/Foggyline/SalesBundle/Service/CustomerOrders.php file with content as follows:
namespace Foggyline\SalesBundle\Service;
class CustomerOrders
{
private $em;
private $token;
private $router;
public function __construct(
\Doctrine\ORM\EntityManager $entityManager,
$tokenStorage,
\Symfony\Bundle\FrameworkBundle\Routing\Router $router
)
{
$this->em = $entityManager;
$this->token = $tokenStorage->getToken();
$this->router = $router;
}
public function getOrders()
{
$orders = array();
if ($this->token
&& $this->token->getUser() instanceof \Foggyline\CustomerBundle\Entity\Customer
) {
$salesOrders = $this->em->getRepository('FoggylineSalesBundle:SalesOrder')
->findBy(array('customer' => $this->token->getUser()));
foreach ($salesOrders as $salesOrder) {
$orders[] = array(
'id' => $salesOrder->getId(),
'date' => $salesOrder->getCreatedAt()->format('d/m/Y H:i:s'),
'ship_to' => $salesOrder->getAddressFirstName() . '' . $salesOrder->getAddressLastName(),
' 'order_total' => $salesOrder->getTotalPrice(),
'status' => $salesOrder->getStatus(),
'actions' => array(
array(
'label' =>'Cancel',
'path' => $this->router->generate('foggyline_sales_order_cancel', array('id' => $salesOrder->getId()))
),
array(
'label' =>'Print',
'path' => $this->router->generate('foggyline_sales_order_print', array('id' => $salesOrder->getId()))
)
)
);
}
}
return $orders;
}
}The route generate method expects to find two routes, foggyline_sales_order_cancel and foggyline_sales_order_print, which are not yet created.
Let's go ahead and create them by adding the following under the route element of the src/Foggyline/SalesBundle/Resources/config/routing.xml file:
<route id="foggyline_sales_order_cancel"path="/order/cancel/{id}">
<default key="_controller">FoggylineSalesBundle:SalesOrder:cancel</default>
</route>
<route id="foggyline_sales_order_print" path="/order/print/{id}">
<default key="_controller">FoggylineSalesBundle:SalesOrder:print</default>
</route>The routes definition, in turn, expects SalesOrderController to be defined. Since our application will require an admin user to be able to list and edit the orders, we will use the following Symfony command to auto-generate the CRUD for our Sales Orderentity:
php bin/console generate:doctrine:crud
When asked for the entity shortcut name, we simply provide FoggylineSalesBundle:SalesOrder and proceed, allowing for creation of write actions. At this point, several files have been created for us, as well as a few entries outside of the Sales bundle. One of these entries is the route definition within the app/config/routing.yml file, as follows:
foggyline_sales_sales_order: resource: "@FoggylineSalesBundle/Controller/SalesOrderController.php" type: annotation
We should already have a foggyline_sales entry in there as well. The difference being that foggyline_sales points to our router.xml file and the newly created foggyline_sales_sales_order points to the exact newly created SalesOrderController. For the sake of simplicity, we can keep them both.
The auto-generator also created a salesorder directory under the app/Resources/views/ directory, which we need to move over into our bundle as the src/Foggyline/SalesBundle/Resources/views/Default/salesorder/ directory.
We can now address our print and cancel actions by adding the following into the src/Foggyline/SalesBundle/Controller/SalesOrderController.php file as follows:
public function cancelAction($id)
{
if ($customer = $this->getUser()) {
$em = $this->getDoctrine()->getManager();
$salesOrder = $em->getRepository('FoggylineSalesBundle:SalesOrder')
->findOneBy(array('customer' => $customer, 'id' => $id));
if ($salesOrder->getStatus() != \Foggyline\SalesBundle\Entity\SalesOrder::STATUS_COMPLETE) {
$salesOrder->setStatus(\Foggyline\SalesBundle\Entity\SalesOrder::STATUS_CANCELED);
$em->persist($salesOrder);
$em->flush();
}
}
return $this->redirectToRoute('customer_account');
}
public function printAction($id)
{
if ($customer = $this->getUser()) {
$em = $this->getDoctrine()->getManager();
$salesOrder = $em->getRepository('FoggylineSalesBundle:SalesOrder')
->findOneBy(array('customer' => $customer, 'id' =>$id));
return $this->render('FoggylineSalesBundle:default:salesorder/print.html.twig', array(
'salesOrder' => $salesOrder,
'customer' => $customer
));
}
return $this->redirectToRoute('customer_account');
}The cancelAction method merely checks whether the order in question belongs to the currently logged-in customer; if so, a change of order status is allowed. The printAction method merely loads the order if it belongs to the currently logged-in customer, and passes it on to a print.html.twig template.
We then create the src/Foggyline/SalesBundle/Resources/views/Default/salesorder/print.html.twig template with content as follows:
{% block body %}
<h1>Printing Order #{{ salesOrder.id }}</h1>
{#<p>Just a dummy Twig dump of entire variable</p>#}
{{ dump(salesOrder) }}
{% endblock %}Obviously, this is just a simplified output, which we can further customize to our needs. The important bit is that we have passed along the order object to our template, and can now extract any piece of information needed from it.
Finally, we replace the // Override 'foggyline_customer.customer_orders' service comment within the src/Foggyline/SalesBundle/DependencyInjection/Compiler/OverrideServiceCompilerPass.php file with code as follows:
$container->removeDefinition('foggyline_customer.customer_orders');
$container->setDefinition('foggyline_customer.customer_orders', $container->getDefinition('foggyline_sales.customer_orders'));This will make the service override kick in, and pull in all of the changes we just made.
The bestsellers service defined in the Customer module was supposed to provide dummy data for the bestsellers feature shown on the homepage. The idea is to showcase five of the bestselling products in the store. The Sales module now needs to override this service in order to provide the right implementation, where actual sold product quantities will affect the content of the bestsellers shown.
We start off by adding the following definition under the service element of the src/Foggyline/SalesBundle/Resources/config/services.xml file:
<service id="foggyline_sales.bestsellers" class="Foggyline\SalesBundle\Service\BestSellers"> <argument type="service" id="doctrine.orm.entity_manager"/> <argument type="service" id="router"/> </service>
We then define the src/Foggyline/SalesBundle/Service/BestSellers.php file with content as follows:
namespace Foggyline\SalesBundle\Service;
class BestSellers
{
private $em;
private $router;
public function __construct(
\Doctrine\ORM\EntityManager $entityManager,
\Symfony\Bundle\FrameworkBundle\Routing\Router $router
)
{
$this->em = $entityManager;
$this->router = $router;
}
public function getItems()
{
$products = array();
$salesOrderItem = $this->em->getRepository('FoggylineSalesBundle:SalesOrderItem');
$_products = $salesOrderItem->getBestsellers();
foreach ($_products as $_product) {
$products[] = array(
'path' => $this->router->generate('product_show', array('id' => $_product->getId())),
'name' => $_product->getTitle(),
'img' => $_product->getImage(),
'price' => $_product->getPrice(),
'id' => $_product->getId(),
);
}
return $products;
}
}Here, we are fetching the instance of the SalesOrderItemRepository class and calling the getBestsellers method on it. This method still has not been defined. We do so by adding it to file src/Foggyline/SalesBundle/Repository/SalesOrderItemRepository.php file as follows:
public function getBestsellers()
{
$products = array();
$query = $this->_em->createQuery('SELECT IDENTITY(t.product), SUM(t.qty) AS HIDDEN q
FROM Foggyline\SalesBundle\Entity\SalesOrderItem t
GROUP BY t.product ORDER BY q DESC')
->setMaxResults(5);
$_products = $query->getResult();
foreach ($_products as $_product) {
$products[] = $this->_em->getRepository('FoggylineCatalogBundle:Product')
->find(current($_product));
}
return $products;
}Here, we are using Doctrine Query Language (DQL) in order to build a list of the five bestselling products. Finally, we need to replace the // Override 'bestsellers' service comment from within the src/Foggyline/SalesBundle/DependencyInjection/Compiler/OverrideServiceCompilerPass.php file with code as follows:
$container->removeDefinition('bestsellers');
$container->setDefinition('bestsellers', $container->getDefinition('foggyline_sales.bestsellers'));By overriding the bestsellers service, we are exposing the actual sales-based list of bestselling products for other modules to fetch.
The cart page is where the customer gets to see a list of products added to the cart via Add to Cart buttons, from either the homepage, a category page, or a product page. We previously created CartController and an empty indexAction function. Now let's go ahead and edit the indexAction function as follows:
public function indexAction()
{
if ($customer = $this->getUser()) {
$em = $this->getDoctrine()->getManager();
$cart = $em->getRepository('FoggylineSalesBundle:Cart')->findOneBy(array('customer' => $customer));
$items = $cart->getItems();
$total = null;
foreach ($items as $item) {
$total += floatval($item->getQty() * $item->getUnitPrice());
}
return $this->render('FoggylineSalesBundle:default:cart/index.html.twig', array(
'customer' => $customer,
'items' => $items,
'total' => $total,
));
} else {
$this->addFlash('warning', 'Only logged in customers can access cart page.');
return $this->redirectToRoute('foggyline_customer_login');
}
}Here, we are checking whether the user is logged in; if they are, we are showing them the cart with all their items. The non-logged-in user is redirected to a customer login URL. The indexAction function is expecting the src/Foggyline/SalesBundle/Resources/views/Default/cart/index.html.twig file, whose content we define as follows:
{% extends 'base.html.twig' %}
{% block body %}
<h1>Shopping Cart</h1>
<div class="row">
<div class="large-8 columns">
<form action="{{ path('foggyline_sales_cart_update') }}"method="post">
<table>
<thead>
<tr>
<th>Item</th>
<th>Price</th>
<th>Qty</th>
<th>Subtotal</th>
</tr>
</thead>
<tbody>
{% for item in items %}
<tr>
<td>{{ item.product.title }}</td>
<td>{{ item.unitPrice }}</td>
<td><input name="item[{{ item.id }}]" value="{{ item.qty }}"/></td>
<td>{{ item.qty * item.unitPrice }}</td>
</tr>
{% endfor %}
</tbody>
</table>
<button type="submit" class="button">Update Cart</button>
</form>
</div>
<div class="large-4 columns">
<div>Order Total: {{ total }}</div>
<div><a href="{{ path('foggyline_sales_checkout') }}"class="button">Go to Checkout</a></div>
</div>
</div>
{% endblock %}When rendered, the template will show quantity input elements under each added product, alongside the Update Cart button. The Update Cart button submits the form, whose action is pointing to the foggyline_sales_cart_update route.
Let's go ahead and create foggyline_sales_cart_update, by adding the following entry under the route element of the src/Foggyline/SalesBundle/Resources/config/routing.xml file as follows:
<route id="foggyline_sales_cart_update" path="/cart/update"> <default key="_controller">FoggylineSalesBundle:Cart:update</default> </route>
The newly defined route expects to find an updateAction function under the src/Foggyline/SalesBundle/Controller/CartController.php file, which we add as follows:
public function updateAction(Request $request)
{
$items = $request->get('item');
$em = $this->getDoctrine()->getManager();
foreach ($items as $_id => $_qty) {
$cartItem = $em->getRepository('FoggylineSalesBundle:CartItem')->find($_id);
if (intval($_qty) > 0) {
$cartItem->setQty($_qty);
$em->persist($cartItem);
} else {
$em->remove($cartItem);
}
}
// Persist to database
$em->flush();
$this->addFlash('success', 'Cart updated.');
return $this->redirectToRoute('foggyline_sales_cart');
}To remove a product from the cart, we simply insert 0 as the quantity value and click the Update Cart button. This completes our simple cart page.
In order to move from cart to checkout, we need to sort out payment and shipment services. The previous Payment and Shipment modules exposed some of their Payment and Shipment services, which we now need to aggregate into a single Payment and Shipment service that our checkout process will use.
We start by replacing the previously added // Pickup/parse 'payment_method' services comment under the src/Foggyline/SalesBundle/DependencyInjection/Compiler/OverrideServiceCompilerPass.php file with code as follows:
$container->getDefinition('foggyline_sales.payment')
->addArgument(
array_keys($container->findTaggedServiceIds('payment_method'))
);The findTaggedServiceIds method returns a key-value list of all the services tagged with payment_method, which we then pass on as argument to our foggyline_sales.payment service. This is the only way to fetch the list of services in Symfony during the compilation time.
We then edit the src/Foggyline/SalesBundle/Resources/config/services.xml file by adding the following under the service element:
<service id="foggyline_sales.payment" class="Foggyline\SalesBundle\Service\Payment"> <argument type="service" id="service_container"/> </service>
Finally, we create the Payment class under the src/Foggyline/SalesBundle/Service/Payment.php file as follows:
namespace Foggyline\SalesBundle\Service;
class Payment
{
private $container;
private $methods;
public function __construct($container, $methods)
{
$this->container = $container;
$this->methods = $methods;
}
public function getAvailableMethods()
{
$methods = array();
foreach ($this->methods as $_method) {
$methods[] = $this->container->get($_method);
}
return $methods;
}
}In compliance with the service definition in the services.xml file, our service accepts two parameters, one being $container and the second one being $methods. The $methods argument is passed during compilation time, where we are able to fetch a list of all the payment_method tagged services. This effectively means our getAvailableMethods is now capable of returning all payment_method tagged services, from any module.
The Shipment service is implemented much like the Payment service. The overall idea is similar, with merely a few differences along the way. We start by replacing the previously added // Pickup/parse shipment_method' services comment under the src/Foggyline/SalesBundle/DependencyInjection/Compiler/OverrideServiceCompilerPass.php file with code as follows:
$container->getDefinition('foggyline_sales.shipment')
->addArgument(
array_keys($container->findTaggedServiceIds('shipment_method'))
);We then edit the src/Foggyline/SalesBundle/Resources/config/services.xml file by adding the following under the service element:
<service id="foggyline_sales.shipment"class="Foggyline\SalesBundle\Service\Payment"> <argument type="service" id="service_container"/> </service>
Finally, we create the Shipment class under the src/Foggyline/SalesBundle/Service/Shipment.php file as follows:
namespace Foggyline\SalesBundle\Service;
class Shipment
{
private $container;
private $methods;
public function __construct($container, $methods)
{
$this->container = $container;
$this->methods = $methods;
}
public function getAvailableMethods()
{
$methods = array();
foreach ($this->methods as $_method) {
$methods[] = $this->container->get($_method);
}
return $methods;
}
}We are now able to fetch all the Payment and Shipment services via our unified Payment and Shipment service, thus making the checkout process easy.
The checkout page will be constructed out of two checkout steps, the first one being shipment information gathering, and the second one being payment information gathering.
We start off with a shipment step, by changing our src/Foggyline/SalesBundle/Controller/CheckoutController.php file and its indexAction as follows:
public function indexAction()
{
if ($customer = $this->getUser()) {
$form = $this->getAddressForm();
$em = $this->getDoctrine()->getManager();
$cart = $em->getRepository('FoggylineSalesBundle:Cart')->findOneBy(array('customer' => $customer));
$items = $cart->getItems();
$total = null;
foreach ($items as $item) {
$total += floatval($item->getQty() * $item->getUnitPrice());
}
return $this->render('FoggylineSalesBundle:default:checkout/index.html.twig', array(
'customer' => $customer,
'items' => $items,
'cart_subtotal' => $total,
'shipping_address_form' => $form->createView(),
'shipping_methods' => $this->get('foggyline_sales.shipment')->getAvailableMethods()
));
} else {
$this->addFlash('warning', 'Only logged in customers can access checkout page.');
return $this->redirectToRoute('foggyline_customer_login');
}
}
private function getAddressForm()
{
return $this->createFormBuilder()
->add('address_first_name', TextType::class)
->add('address_last_name', TextType::class)
->add('company', TextType::class)
->add('address_telephone', TextType::class)
->add('address_country', CountryType::class)
->add('address_state', TextType::class)
->add('address_city', TextType::class)
->add('address_postcode', TextType::class)
->add('address_street', TextType::class)
->getForm();
}Here, we are fetching the currently logged-in customer cart and passing it onto a checkout/index.html.twig template, alongside several other variables needed for the shipment step. The getAddressForm method simply builds an address form for us. There is also a call toward our newly created the foggyline_sales.shipment service, which enables us to fetch a list of all available shipment methods.
We then create src/Foggyline/SalesBundle/Resources/views/Default/checkout/index.html.twig with content as follows:
{% extends 'base.html.twig' %}
{% block body %}
<h1>Checkout</h1>
<div class="row">
<div class="large-8 columns">
<form action="{{ path('foggyline_sales_checkout_payment') }}" method="post" id="shipping_form">
<fieldset>
<legend>Shipping Address</legend>
{{ form_widget(shipping_address_form) }}
</fieldset>
<fieldset>
<legend>Shipping Methods</legend>
<ul>
{% for method in shipping_methods %}
{% set shipment = method.getInfo('street', 'city', 'country', 'postcode', 'amount', 'qty')['shipment'] %}
<li>
<label>{{ shipment.title }}</label>
<ul>
{% for delivery_option in shipment.delivery_options %}
<li>
<input type="radio" name="shipment_method"
value="{{ shipment.code }}____{{ delivery_option.code }}____{{ delivery_option.price }}"> {{ delivery_option.title }}
({{ delivery_option.price }})
<br>
</li>
{% endfor %}
</ul>
</li>
{% endfor %}
</ul>
</fieldset>
</form>
</div>
<div class="large-4 columns">
{% include 'FoggylineSalesBundle:default:checkout/order_sumarry.html.twig'
%}
<div>Cart Subtotal: {{ cart_subtotal }}</div>
<div><a id="shipping_form_submit" href="#" class="button">Next</a>
</div>
</div>
</div>
<script type="text/javascript">
var form = document.getElementById('shipping_form');
document.getElementById('shipping_form_submit').addEventListener('click', function () {
form.submit();
});
</script>
{% endblock %}The template lists all of the address-related form fields, alongside available shipment methods. The JavaScript part handles the Next button click, which basically submits the form to the foggyline_sales_checkout_payment route.
We then define the foggyline_sales_checkout_payment route by adding the following entry under the routes element of the src/Foggyline/SalesBundle/Resources/config/routing.xml file:
<route id="foggyline_sales_checkout_payment" path="/checkout/payment"> <default key="_controller">FoggylineSalesBundle:Checkout:payment</default> </route>
The route entry expects to find a paymentAction within CheckoutController, which we define as follows:
public function paymentAction(Request $request)
{
$addressForm = $this->getAddressForm();
$addressForm->handleRequest($request);
if ($addressForm->isSubmitted() && $addressForm->isValid() && $customer = $this->getUser()) {
$em = $this->getDoctrine()->getManager();
$cart = $em->getRepository('FoggylineSalesBundle:Cart')->findOneBy(array('customer' => $customer));
$items = $cart->getItems();
$cartSubtotal = null;
foreach ($items as $item) {
$cartSubtotal += floatval($item->getQty() * $item->getUnitPrice());
}
$shipmentMethod = $_POST['shipment_method'];
$shipmentMethod = explode('____', $shipmentMethod);
$shipmentMethodCode = $shipmentMethod[0];
$shipmentMethodDeliveryCode = $shipmentMethod[1];
$shipmentMethodDeliveryPrice = $shipmentMethod[2];
// Store relevant info into session
$checkoutInfo = $addressForm->getData();
$checkoutInfo['shipment_method'] = $shipmentMethodCode . '____' . $shipmentMethodDeliveryCode;
$checkoutInfo['shipment_price'] = $shipmentMethodDeliveryPrice;
$checkoutInfo['items_price'] = $cartSubtotal;
$checkoutInfo['total_price'] = $cartSubtotal + $shipmentMethodDeliveryPrice;
$this->get('session')->set('checkoutInfo', $checkoutInfo);
return $this->render('FoggylineSalesBundle:default:checkout/payment.html.twig', array(
'customer' => $customer,
'items' => $items,
'cart_subtotal' => $cartSubtotal,
'delivery_subtotal' => $shipmentMethodDeliveryPrice,
'delivery_label' =>'Delivery Label Here',
'order_total' => $cartSubtotal + $shipmentMethodDeliveryPrice,
'payment_methods' => $this->get('foggyline_sales.payment')->getAvailableMethods()
));
} else {
$this->addFlash('warning', 'Only logged in customers can access checkout page.');
return $this->redirectToRoute('foggyline_customer_login');
}
}The preceding code fetches the submission made from the shipment step of the checkout process, stores the relevant values into the session, fetches the variables required for the payment step and renders back the checkout/payment.html.twig template.
We define the src/Foggyline/SalesBundle/Resources/views/Default/checkout/payment.html.twig file with content as follows:
{% extends 'base.html.twig' %}
{% block body %}
<h1>Checkout</h1>
<div class="row">
<div class="large-8 columns">
<form action="{{ path('foggyline_sales_checkout_process') }}"method="post" id="payment_form">
<fieldset>
<legend>Payment Methods</legend>
<ul>
{% for method in payment_methods %}
{% set payment = method.getInfo()['payment'] %}
<li>
<input type="radio" name="payment_method"
value="{{ payment.code }}"> {{ payment.title }}
{% if payment['form'] is defined %}
<div id="{{ payment.code }}_form">
{{ form_widget(payment['form']) }}
</div>
{% endif %}
</li>
{% endfor %}
</ul>
</fieldset>
</form>
</div>
<div class="large-4 columns">
{% include 'FoggylineSalesBundle:default:checkout/order_sumarry.html.twig' %}
<div>Cart Subtotal: {{ cart_subtotal }}</div>
<div>{{ delivery_label }}: {{ delivery_subtotal }}</div>
<div>Order Total: {{ order_total }}</div>
<div><a id="payment_form_submit" href="#" class="button">Place Order</a>
</div>
</div>
</div>
<script type="text/javascript">
var form = document.getElementById('payment_form');
document.getElementById('payment_form_submit').addEventListener('click', function () {
form.submit();
});
</script>
{% endblock %}Similar to the shipment step, we have a rendering of available payment methods here, alongside a Place Order button which is handled by JavaScript as the button is located outside of the submission form. Once an order is placed, the POST submission is made onto the foggyline_sales_checkout_process route, which we defined under the routes element of the src/Foggyline/SalesBundle/Resources/config/routing.xml file as follows:
<route id="foggyline_sales_checkout_process"path="/checkout/process"> <default key="_controller">FoggylineSalesBundle:Checkout:process</default> </route>
The route points to the processAction function within CheckoutController, which we define as follows:
public function processAction()
{
if ($customer = $this->getUser()) {
$em = $this->getDoctrine()->getManager();
// Merge all the checkout info, for SalesOrder
$checkoutInfo = $this->get('session')->get('checkoutInfo');
$now = new \DateTime();
// Create Sales Order
$salesOrder = new \Foggyline\SalesBundle\Entity\SalesOrder();
$salesOrder->setCustomer($customer);
$salesOrder->setItemsPrice($checkoutInfo['items_price']);
$salesOrder->setShipmentPrice
($checkoutInfo['shipment_price']);
$salesOrder->setTotalPrice($checkoutInfo['total_price']);
$salesOrder->setPaymentMethod($_POST['payment_method']);
$salesOrder->setShipmentMethod($checkoutInfo['shipment_method']);
$salesOrder->setCreatedAt($now);
$salesOrder->setModifiedAt($now);
$salesOrder->setCustomerEmail($customer->getEmail());
$salesOrder->setCustomerFirstName($customer->getFirstName());
$salesOrder->setCustomerLastName($customer->getLastName());
$salesOrder->setAddressFirstName($checkoutInfo['address_first_name']);
$salesOrder->setAddressLastName($checkoutInfo['address_last_name']);
$salesOrder->setAddressCountry($checkoutInfo['address_country']);
$salesOrder->setAddressState($checkoutInfo['address_state']);
$salesOrder->setAddressCity($checkoutInfo['address_city']);
$salesOrder->setAddressPostcode($checkoutInfo['address_postcode']);
$salesOrder->setAddressStreet($checkoutInfo['address_street']);
$salesOrder->setAddressTelephone($checkoutInfo['address_telephone']);
$salesOrder->setStatus(\Foggyline\SalesBundle\Entity\SalesOrder::STATUS_PROCESSING);
$em->persist($salesOrder);
$em->flush();
// Foreach cart item, create order item, and delete cart item
$cart = $em->getRepository('FoggylineSalesBundle:Cart')->findOneBy(array('customer' => $customer));
$items = $cart->getItems();
foreach ($items as $item) {
$orderItem = new \Foggyline\SalesBundle\Entity\SalesOrderItem();
$orderItem->setSalesOrder($salesOrder);
$orderItem->setTitle($item->getProduct()->getTitle());
$orderItem->setQty($item->getQty());
$orderItem->setUnitPrice($item->getUnitPrice());
$orderItem->setTotalPrice($item->getQty() * $item->getUnitPrice());
$orderItem->setModifiedAt($now);
$orderItem->setCreatedAt($now);
$orderItem->setProduct($item->getProduct());
$em->persist($orderItem);
$em->remove($item);
}
$em->remove($cart);
$em->flush();
$this->get('session')->set('last_order', $salesOrder->getId());
return $this->redirectToRoute('foggyline_sales_checkout_success');
} else {
$this->addFlash('warning', 'Only logged in customers can access checkout page.');
return $this->redirectToRoute('foggyline_customer_login');
}
}Once the POST submission hits the controller, a new order with all of the related items gets created. At the same time, the cart and cart items are cleared. Finally, the customer is redirected to the order success page.
The order success page has an important role in full-blown web shop applications. This is where we get to thank the customer for their purchase and possibly present some more related or cross-related shopping options, alongside some optional discounts. Though our application is simple, it's worth building a simple order success page.
We start by adding the following route definition under the routes element of the src/Foggyline/SalesBundle/Resources/config/routing.xml file:
<route id="foggyline_sales_checkout_success" path="/checkout/success"> <default key="_controller">FoggylineSalesBundle:Checkout:success</default> </route>
The route points to a successAction function within CheckoutController, which we define as follows:
public function successAction()
{
return $this->render('FoggylineSalesBundle:default:checkout/success.html.twig', array(
'last_order' => $this->get('session')->get('last_order')
));
}Here, we are simply fetching the last created order ID for the currently logged-in customer and passing the full order object to the src/Foggyline/SalesBundle/Resources/views/Default/checkout/success.html.twig template as follows:
{% extends 'base.html.twig' %}
{% block body %}
<h1>Checkout Success</h1>
<div class="row">
<p>Thank you for placing your order #{{ last_order }}.</p>
<p>You can see order details <a href="{{ path('customer_account') }}">here</a>.</p>
</div>
{% endblock %}With this, we finalize the entire checkout process for our web shop. Though it is an absolutely simplistic one, it sets the foundation for more robust implementations.
Now that we have finalized the checkout Sales module, let's revert quickly to our core module, AppBundle. As per our application requirements, let's go ahead and create a simple store manager dashboard.
We start by adding the src/AppBundle/Controller/StoreManagerController.php file with content as follows:
namespace AppBundle\Controller;
use Sensio\Bundle\FrameworkExtraBundle\Configuration\Route;
use Symfony\Bundle\FrameworkBundle\Controller\Controller;
class StoreManagerController extends Controller
{
/**
* @Route("/store_manager", name="store_manager")
*/
public function indexAction()
{
return $this->render('AppBundle:default:store_manager.html.twig');
}
}The indexAction function simply returns the src/AppBundle/Resources/views/default/store_manager.html.twig file, whose content we define as follows:
{% extends 'base.html.twig' %}
{% block body %}
<h1>Store Manager</h1>
<div class="row">
<div class="large-6 columns">
<div class="stacked button-group">
<a href="{{ path('category_new') }}" class="button">Add new Category</a>
<a href="{{ path('product_new') }}" class="button">Add new Product</a>
<a href="{{ path('customer_new') }}" class="button">Add new Customer</a>
</div>
</div>
<div class="large-6 columns">
<div class="stacked button-group">
<a href="{{ path('category_index') }}" class="button">List & Manage Categories</a>
<a href="{{ path('product_index') }}" class="button">List & Manage Products</a>
<a href="{{ path('customer_index') }}" class="button">List & Manage Customers</a>
<a href="{{ path('salesorder_index') }}" class="button">List & Manage Orders</a>
</div>
</div>
</div>
{% endblock %}The template merely renders the category, product, customer, and order management links. The actual access to these links is controlled by the firewall, as explained in previous chapters.
The Sales module is far more robust than any of the previous modules. There are several things we can unit test. However, we won't be covering full unit testing as part of this chapter. We will simply turn our attention to a single unit test, the one for the CustomerOrders service.
We start off by adding the following line under the testsuites element of our phpunit.xml.dist file:
<directory>src/Foggyline/SalesBundle/Tests</directory>
With that in place, running the phpunit command from the root of our shop should pick up any test we have defined under the src/Foggyline/SalesBundle/Tests/ directory.
Now, let's go ahead and create a test for our CustomerOrders service. We do so by defining the src/Foggyline/SalesBundle/Tests/Service/CustomerOrdersTest.php file with content as follows:
namespace Foggyline\SalesBundle\Test\Service;
use Symfony\Bundle\FrameworkBundle\Test\KernelTestCase;
use Symfony\Component\Security\Core\Authentication\Token\UsernamePasswordToken;
class CustomerOrdersTest extends KernelTestCase
{
private $container;
public function setUp()
{
static::bootKernel();
$this->container = static::$kernel->getContainer();
}
public function testGetOrders()
{
$firewall = 'foggyline_customer';
$em = $this->container->get('doctrine.orm.entity_manager');
$user = $em->getRepository('FoggylineCustomerBundle:Customer')->findOneByUsername
('ajzele@gmail.com');
$token = new UsernamePasswordToken($user, null, $firewall, array('ROLE_USER'));
$tokenStorage = $this->container->get('security.token_storage');
$tokenStorage->setToken($token);
$orders = new \Foggyline\SalesBundle\Service\CustomerOrders(
$em,
$tokenStorage,
$this->container->get('router')
);
$this->assertNotEmpty($orders->getOrders());
}
}Here, we are using the UsernamePasswordToken function in order to simulate a customer login. The password token is then passed on to the CustomerOrders service. The CustomerOrders service then internally checks whether token storage has a token assigned, flagging it as a logged-in user and returning the list of its orders. Being able to simulate customer login is essential for any other tests we might be writing for our sales module.
Similar to unit testing, we will only focus on a single functional test, as doing anything more robust would be out of the scope of this chapter. We will write a simple code that adds a product to the cart and accesses the checkout page. In order to add an item to the cart, here we also need to simulate the user login.
We write the src/Foggyline/SalesBundle/Tests/Controller/CartControllerTest.php test as follows:
namespace Foggyline\SalesBundle\Tests\Controller;
use Symfony\Bundle\FrameworkBundle\Test\WebTestCase;
use Symfony\Component\BrowserKit\Cookie;
use Symfony\Component\Security\Core\Authentication\Token\UsernamePasswordToken;
class CartControllerTest extends WebTestCase
{
private $client = null;
public function setUp()
{
$this->client = static::createClient();
}
public function testAddToCartAndAccessCheckout()
{
$this->logIn();
$crawler = $this->client->request('GET', '/');
$crawler = $this->client->click($crawler->selectLink('Add to Cart')->link());
$crawler = $this->client->followRedirect();
$this->assertTrue($this->client->getResponse()->isSuccessful());
$this->assertGreaterThan(0, $crawler->filter('html:contains("added to cart")')->count());
$crawler = $this->client->request('GET', '/sales/cart/');
$crawler = $this->client->click($crawler->selectLink('Go to Checkout')->link());
$this->assertTrue($this->client->getResponse()->isSuccessful());
$this->assertGreaterThan(0, $crawler->filter('html:contains("Checkout")')->count());
}
private function logIn()
{
$session = $this->client->getContainer()->get('session');
$firewall = 'foggyline_customer'; // firewall name
$em = $this->client->getContainer()->get('doctrine')->getManager();
$user = $em->getRepository('FoggylineCustomerBundle:Customer')->findOneByUsername('ajzele@gmail.com');
$token = new UsernamePasswordToken($user, null, $firewall, array('ROLE_USER'));
$session->set('_security_' . $firewall, serialize($token));
$session->save();
$cookie = new Cookie($session->getName(), $session->getId());
$this->client->getCookieJar()->set($cookie);
}
}Once run, the test will simulate the customer login, add an item to the cart, and try to access the checkout page. Depending on the actual customers we have in our database, we might need to change the customer e-mail provided in the preceding test.
Running the phpunit command now should successfully execute our tests.
In this chapter, we built a simple yet functional Sales module. With just four simple entities (Cart, CartItem, SalesOrder, and SalesOrderItem), we managed to implement simple cart and checkout features. By doing so, we empowered customers to actually make a purchase, instead of just browsing the product catalog. The sales module made use of the payment and shipment services defined in previous chapters. While the payment and shipment services are implemented as imaginary, dummy ones, they do provide a basic skeleton that we can use for real payment and shipment API implementations.
Furthermore, in this chapter, we addressed the admin dashboard, by making a simple interface that merely aggregates a few of the existing CRUD interfaces. Access to the dashboard and the management links is protected by entries in app/config/security.yml, and allowed only for ROLE_ADMIN.
Together, the modules written so far make up a simplified application. Writing robust web shop applications would normally include tens of other features found in modern e-commerce platforms such as Magento. These include multiple language, currency, and website support; robust category, product, and product inventory management; shopping cart and catalog sales rules; and many others. Modularizing our application makes development and maintenance processes easier.
Moving forward, in the final chapter, we will look into distributing our modules.
Throughout a few of the previous chapters, we built a simple web shop application in a modular manner. Each of the modules play a special role in handling individual bits and pieces, which add to the overall application. The application itself, though written in modular, was kept in a Git single version control repository. It would be a far cleaner separation if each of the modules was provided in its own repository. This way, we will be able to keep the different module developments as completely different projects while still being able to use them together. As we move forward, we will see how we can achieve this via GIT and Composer in two different manners.
In this chapter, we will cover the following tools and services:
Originally started by Linus Torvalds, Git version control is currently one of the most popular version control systems. Overall speed and efficiency with large projects, alongside a great branching system, has made it popular among developers.
Learning about Git version control itself is out of the scope of this book, for which recommended reading is the Pro Git book.
The Pro Git book, written by Scott Chacon and Ben Straub, and published by Apress, is available for free at https://git-scm.com/book/en/v2.
One neat feature of Git, which we are interested in as part of this chapter, is its submodules. They enable us to slice larger modular projects, such as our web shop app, into a series of smaller submodules, whereas each submodule is a Git repository on its own.
Within three years of Git's appearance, GitHub emerged. GitHub is basically a web service built on top of the Git version control system. It enables developers to easily post their code online, where others can simply clone their repository and use their code. Creating an account on GitHub is free and can be done by following instructions on their official homepage (https://github.com).
Currently, our application is structured as per the following image:
What we want to do is to split it into six different Git repositories, as follows:
corecatalogcustomerpaymentsalesshipmentThe core repository is to contain everything except the content of the src/Foggyline directory.
Assuming we created an empty core repository on GitHub, and our local all-in-one app is currently held in the shop directory, we initialize the following commands on our computer:
cp -R shop core-repository rm -Rfcore-repository/.git/ rm -Rfcore-repository/src/Foggyline/* touch core-repository/src/Foggyline/.gitkeep cd core-repository git init git remote add origin git@github.com:<user>/<core-repository>.git git add --all git commit -m "Initial commit of core application" git push origin master
At this point, we merely pushed the core application part of our all-in-one web shop app into the core repository on GitHub. The src/Foggyline/ directory does not contain any modules in it.
Now, let's go back to GitHub and create an appropriate empty repository for each of the five modules, that is, catalog, customer, payment, sales, and shipment. We can now execute a set of console commands for each of the modules, as shown in the following CatalogBundle example:
cp -R shop/src/Foggyline/CatalogBundle catalog-repository cd catalog-repository git init git remote add origin git@github.com:<user>/<catalog-repository>.git git add --all git commit -m "Initial commit of catalog module" git push origin master
Once all of the five modules are pushed to a repository, we can finally treat them as submodules, as shown here:
cd core-repository git submodule add git@github.com:<user>/<catalog-repository>.git src/Foggyline/CatalogBundle git submodule add git@github.com:<user>/<customer-repository>.git src/Foggyline/CustomerBundle git submodule add git@github.com:<user>/<payment-repository>.git src/Foggyline/PaymentBundle git submodule add git@github.com:<user>/<sales-repository>.git src/Foggyline/SalesBundle git submodule add git@github.com:<user>/<shipment-repository>.git src/Foggyline/ShipmentBundle
If we were to run the ls-al command within the core repository directory now, we should be able to see a .gitmodules file in there with the following content:
[submodule "src/Foggyline/CatalogBundle"] path = src/Foggyline/CatalogBundle url = git@github.com:<user>/<catalog-repository>.git [submodule "src/Foggyline/CustomerBundle"] path = src/Foggyline/CustomerBundle url = git@github.com:<user>/<customer-repository>.git [submodule "src/Foggyline/PaymentBundle"] path = src/Foggyline/PaymentBundle url = git@github.com:<user>/<payment-repository>.git [submodule "src/Foggyline/SalesBundle"] path = src/Foggyline/SalesBundle url = git@github.com:<user>/<sales-repository>.git [submodule "src/Foggyline/ShipmentBundle"] path = src/Foggyline/ShipmentBundle url = git@github.com:<user>/<shipment-repository>.git
The .gitmodules file, basically, contains the list of all of the submodules added to our core project, that is, core application. We should commit and push this file to the core repository now. Assuming that the .gitmodules file is pushed to the core repository, we can easily delete all directories created so far and initiate the project with one simple command, as follows:
git clone --recursive git@github.com:<user>/<core-repository>.git
The --recursive argument to the git clone command automatically initializes and updates each submodule in the repository based on the .gitmodules file.
Composer is a dependency management tool for PHP. By default, it does not install anything global but rather on a per-project basis. We can use it to redistribute our project in order to define which libraries and packages it needs for it to be successfully executed. Using Composer is quite simple. All it creating is to create a composer.json file in the root directory of our project with similar content, as follows:
{
"require": {
"twig/twig": "~1.0"
}
}If we were to create the preceding composer.json file in some empty directory and execute the composer install command within that directory, Composer will pickup the composer.json file and install the defined dependencies for our project. The actual install action implies on downloading the required code from a remote repository to our machine. In doing so, the install command creates the composer.lock file, which writes a list of the exact versions of dependencies installed.
We can also simply execute the command twig/twig:~1.0 that a Composer requires, which does the same thing but with a different approach. It does not require us to write a composer.json file, and if one exists, it will update it.
Learning about Composer itself is out of the scope of this book, for which the recommended official documentation is available at https://getcomposer.org/doc.
Composer allows packaging and formal dependency management, making it a great choice to slice our all-in-one modular application into a series of Composer packages. These packages need a repository.
The main repository, when it comes to Composer packages, is Packagist (https://packagist.org). It is a web service that we can access through our browser, open an account on for free, and start submitting our packages to the repository. We can also use it to search through already existing packages.
Packagist is generally used for free open source packages, though we can attach privateGitHub and BitBucket repositories to it in the same manner, the only difference being that the private repositories require SSH keys in order to work.
There are more convenient commercial installations of the Composer packager, such as Toran Proxy (https://toranproxy.com). This allows easier hosting of private packages, higher bandwidth for faster package installations, and commercial support.
Up to this point, we sliced our applications into six different Git repositories, one for core application and the remaining five for each module (catalog, customer, payment, sales, and shipment) individually. Now, let's take the final step and see how we can move away from the Git submodules to the Composer packages.
Assuming we created an account on https://packagist.org and successfully logged in, we will start by clicking on the Submit button, which should land us on a screen similar to the following screenshot:
Here, we need to provide a link to our existing Git, SVN, or Mercurial (HG) repository. The preceding example provides a link (https://github.com/ajzele/B05460_CatalogBundle) to the Git repository. Before we press the Check button, we will need to make sure that our repository has a composer.json file defined in its root, otherwise an error similar to the one shown in the following screenshot will be thrown.
We will then create the composer.json file for our CatalogBundle with the following content:
{
"name": "foggyline/catalogbundle",
"version" : "1.0.0",
"type": "library",
"description": "Just a test module for web shop application.",
"keywords": [
"catalog"
],
"homepage": "https://github.com/ajzele/B05460_CatalogBundle",
"license": "MIT",
"authors": [
{
"name": "Branko Ajzele",
"email": "ajzele@gmail.com",
"homepage": "http://foggyline.net",
"role": "Developer"
}
],
"minimum-stability": "dev",
"prefer-stable": true,
"autoload": {
"psr-0": {
"Foggyline\\CatalogBundle\\": ""
}
},
"target-dir": "Foggyline/CatalogBundle"
}There are quite a lot of attributes here, all of which are fully documented over on the https://getcomposer.org/doc/04-schema.md page.
With the preceding composer.json file in place, running the composer install command on console will pull in the code under the vendor/foggyline/catalogbundle directory, making for a full path of our bundle file under vendor/foggyline/catalogbundle/Foggyline/CatalogBundle/FoggylineCatalogBundle.php.
Once we add the preceding composer.json file to our Git repository, we can go back to Packagist and proceed with clicking the Check button, which should result in a screen similar to the following screenshot:
Finally, when we click the Submit button, a screen similar to the following screenshot should appear:
Our package is now added to Packagist, and running the following command on console will install it to into the project:
composer require foggyline/catalogbundle:dev-master
Similarly, we can just add the proper entry to the existing project's composer.json file, as shown in the following code block:
{
"require": {
"foggyline/catalogbundle": "dev-master"
},
}Now that we know how to slice out the application across several Git repositories and Composer packages, we need to do the same for the remaining modules within the src/Foggyline/ directory, as only those modules will be registered as the Composer packages.
During the sales module development, we noticed that it depends on several other modules, such as catalog and customer. We can use the require attribute of the composer.json file to outline this dependency.
Once all of the Git repositories for the src/Foggyline/ modules are updated with the proper composer.json definitions, we can go back to our core application repository and update the require attribute in its composer.json file, as follows:
{
"require": {
// ...
"foggyline/catalogbundle": "dev-master"
"foggyline/customerbundle": "dev-master"
"foggyline/paymentbundle": "dev-master"
"foggyline/salesbundle": "dev-master"
"foggyline/shipmentbundle": "dev-master"
// ...
},
}The difference between using submodules and packages might not be that obvious at this point. However, packages, unlike submodules, allow versioning. Though all of our packages are pulled in from dev-master, we could have easily targeted specific versions of packages, if any.
Throughout this chapter, we took a quick look at Git and Composer and how we can integrate and distribute our modules via GitHub and Packagist as their respectful services. Publishing packages under Packagist has been shown to be a pretty straightforward and easy process. All it took was a public link to the version control system repository and a composer.json file definition within the root of our project.
Writing our own applications from ground up does not necessarily mean we need to use the Git submodules or the Composer packages, as presented in this chapter. The Symfony application, on its own, is structured modularly via bundles. The version control system, when used on a Symfony project, is supposed to save only our code, which means all of the Symfony libraries and other dependencies are to be pulled in via Composer when the project is being set. The examples shown in this chapter merely show what can be accomplished if we are after writing modular components that are to be shared with others. As an example, if we were really working on a robust catalog module, others interested in coding their own web shop might find it interesting to require and use it in their project.
This book started by looking into the current state of the PHP ecosystem. We then touched upon design patterns and principles, as a foundation of professional programming. Then we moved onto writing a brief, more visual, specification for our web shop application. Finally, we split our application into core and several other smaller modules, which we then coded following the specification. Along the way, we familiarized ourselves with some of the most commonly used Symfony features. The overall application we wrote is far from being robust. It is a web shop in its simplest form, which leaves much to be desired on a feature side. However, the concepts applied showcase how easy and quick it can be to write modular applications in PHP.