Table of Contents for
Mastering phpMyAdmin 3.4 for Effective MySQL Management
 Mastering phpMyAdmin 3.4 for Effective MySQL Management
Published by
Packt Publishing, 2012
Mastering phpMyAdmin 3.4 for Effective MySQL Management
Published by
Packt Publishing, 2012
- Cover
- Mastering phpMyAdmin 3.4 for Effective MySQL Management
- Mastering phpMyAdmin 3.4 for Effective MySQL Management
- Credits
- About the Author
- About the Reviewers
- www.PacktPub.com
- Preface
- What you need for this book
- Who this book is for
- Conventions
- Reader feedback
- Customer support
- 1. Getting Started with phpMyAdmin
- What is phpMyAdmin?
- Installing phpMyAdmin
- Configuring phpMyAdmin
- Installing phpMyAdmin configuration storage
- Upgrading phpMyAdmin
- Summary
- 2. Configuring Authentication and Security
- Securing phpMyAdmin
- Summary
- 3. Over Viewing the Interface
- Customizing general settings
- Character sets and collations
- Navigation panel
- Main panel
- User preferences
- Query window
- Summary
- 4. Creating and Browsing Tables
- Creating our first table
- Inserting data manually
- Browse mode
- Profiling queries
- Creating an additional table
- Summary
- 5. Changing Data and Structure
- Changing table structure
- Summary
- 6. Exporting Structure and Data (Backup)
- Exporting a database
- Exporting a table
- Exporting selectively
- Exporting multiple databases
- Saving the export file on the server
- Memory limits
- Summary
- 7. Importing Structure and Data
- Importing SQL files
- Importing CSV files
- Importing other formats
- Reading files from a web server upload directory
- Displaying an upload progress bar
- Summary
- 8. Searching Data
- Performing a complete database search
- Stopping an errant query
- Summary
- 9. Performing Table and Database Operations
- Changing table attributes
- Emptying or deleting a table
- Renaming, moving, and copying tables
- Performing other table operations
- Multi-table operations
- Database operations
- Summary
- 10. Benefiting from the Relational System
- Defining relations with the relation view
- Defining relations with the Designer
- Benefiting from the defined relations
- Column commenting
- Summary
- 11. Entering SQL Statements
- The Query window
- Multi-statement queries
- Pretty printing (syntax highlighting)
- The SQL Validator
- Summary
- 12. Generating Multi-table Queries
- Exploring column criteria
- Generating automatic joins (internal relations)
- Executing the query
- The visual builder
- Summary
- 13. Synchronizing Data and Supporting Replication
- Supporting MySQL replication
- Summary
- 14. Using Query Bookmarks
- Creating bookmarks
- Recalling bookmarks from the bookmarks list
- Passing a parameter to a bookmark
- Summary
- 15. Documenting the System
- Generating relational schemas
- Summary
- 16. Transforming Data using MIME
- Enabling transformations
- Examples of transformations
- Summary
- 17. Supporting Features Added in MySQL 5
- Supporting routines—stored procedures and functions
- Executing code with triggers
- Using information_schema
- Partitioning
- Exploring the event scheduler
- Summary
- 18. Tracking Changes
- Prerequisites
- Principles
- Initiating tracking for one table
- Testing the tracking mechanism
- Determining tracking status
- Structure snapshot
- Exporting a version
- Creating a new version
- Deleting tracking information
- Summary
- 19. Administrating the MySQL Server
- Database information
- Server information
- Summary
- A. Troubleshooting and Support
- Seeking support
- Contributing to the project
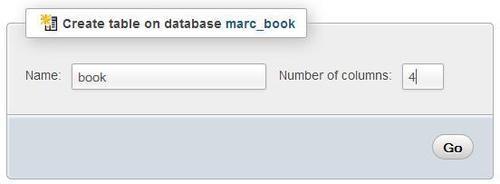
Now that we have a new database, it's time to create a table in it. The example table we will create is named book.
Before creating a table, we should plan the information we want to store. This is usually done during database design. In our case, a simple analysis leads us to the following book-related data we want to keep:
- International Standard Book Number (ISBN)
- Title
- Number of pages
- Author identification
For now, it is not important to have the complete list of columns for our book table. We will modify it by prototyping the structure now and refining it later. At the end of the chapter, we will add a second table, author, containing information about each author.
We have chosen our table name and we know the number of columns. We enter this information in the Create table dialog and click on Go to start creating the table. At this point, it does not matter if the number of columns is exactly known, as a subsequent panel will permit us to add columns while creating the table.
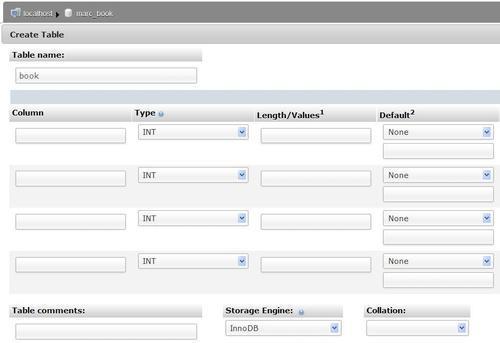
We then see a panel specifying column information. As we asked for four columns, we get four input rows. Each row refers to information specific to one column. The following screenshot represents the left side of this panel:
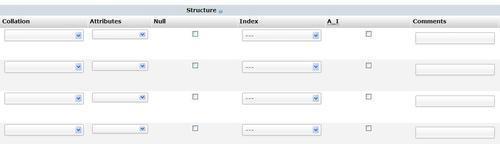
And the next one represents the right side:
The MySQL documentation explains valid characters for the table and column names (if we search for "Legal names"). This may vary depending on the MySQL version. Usually, any character that is allowed in a file name (except the dot and the slash) is acceptable in a table name, and the length of the name must not exceed 64 characters. The 64-character limit exists for column names as well, but we can use any character.
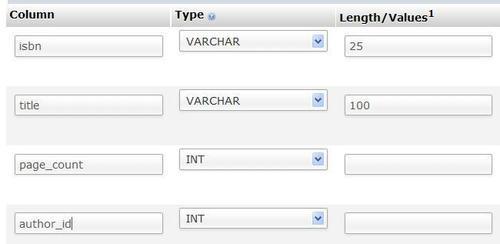
We enter our column names under the Column column. Each column has a type, and the most commonly used types are located at the beginning of the drop-down list.
The VARCHAR (variable character) type is widely used when the column content is alphanumeric, because the contents will occupy only the space needed for it. This type requires a maximum length, which we specify. If we forget to do so, a small pop-up message reminds us later when we save. For the page count and the author identification, we have chosen INT type (integer), as depicted in the following screenshot:
There are other attributes for columns, but we will leave them empty in this example. You might notice the Add 1 column(s) dialog at the bottom of the screen. We can use it to add some columns to this table-creation panel by entering the appropriate value and hitting Go. The number of input rows would change according to the new number of columns, leaving intact the information already entered about the first four columns. Before saving the page, let us define some keys.
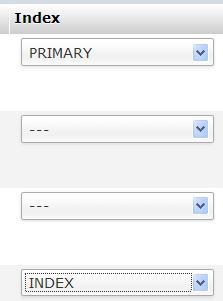
A table should normally have a primary key (a column with unique content that represents each row). Having a primary key is recommended for row identification, better performance, and possible cross-table relations. A good value here is the ISBN; so, in the Index dialog we select PRIMARY for the isbn column. Other possibilities for index type include INDEX, UNIQUE, and FULLTEXT (more on this in Chapter 5).
Note
Index management (also referred to as Key management) can be done at initial table creation, or later in the Structure page of Table view.
To improve the speed of the queries that we will make by author_id, we should add an index on this column. The right part of our screen now looks as shown in the following screenshot:
At this point, we could pick a different Storage Engine from the corresponding drop-down menu. However, for the time being, we will just accept the default storage engine.
Now we are ready to create the table by clicking on Save. If all goes well, the next screen confirms that the table has been created; we are now in the Structure page of the current database.

Of the various links shown for the book table, some are not active, because it would not make sense to browse or search a table if there are no rows in it.