
In this chapter, you are going focus on one specific file format for export: the MP4 video. So far in Photoshop, you have been working with static images, except for the GIF animation. However, while you can do some creative things with GIF animation frames, you cannot add audio to your animation, and GIF animations often have a posterized appearance when photographs such as a JPEG files are added as layers. Since you cannot animate a JPEG file, the choice is to create a video for your website.
This chapter explores the basic tools that are found in the Video Timeline panel. If you have used programs like Premiere Pro or After Effects, some of these video features might be familiar to you, and you can use what you know here in Photoshop CC. If you’ve never used those programs, that’s OK; either way, you will be able to create a video that you can share with your clients on their websites.
Note
This chapter does not have any actual projects. If you have RAW video of your own, make sure that it is in a MOV, AVI, or MP4 format for decent quality. However, you can use the files in the Chapter 7 folder if you do not have any file examples of your own to practice opening and viewing for this lesson. They are at https://github.com/Apress/graphics-multimedia-web-adobe-creative-cloud .
In Chapter 6, you looked at how to create an animation using frames.
Convert a frame animation to the Video Timeline with the icon on the lower left of the timeline
Video Setup Tips
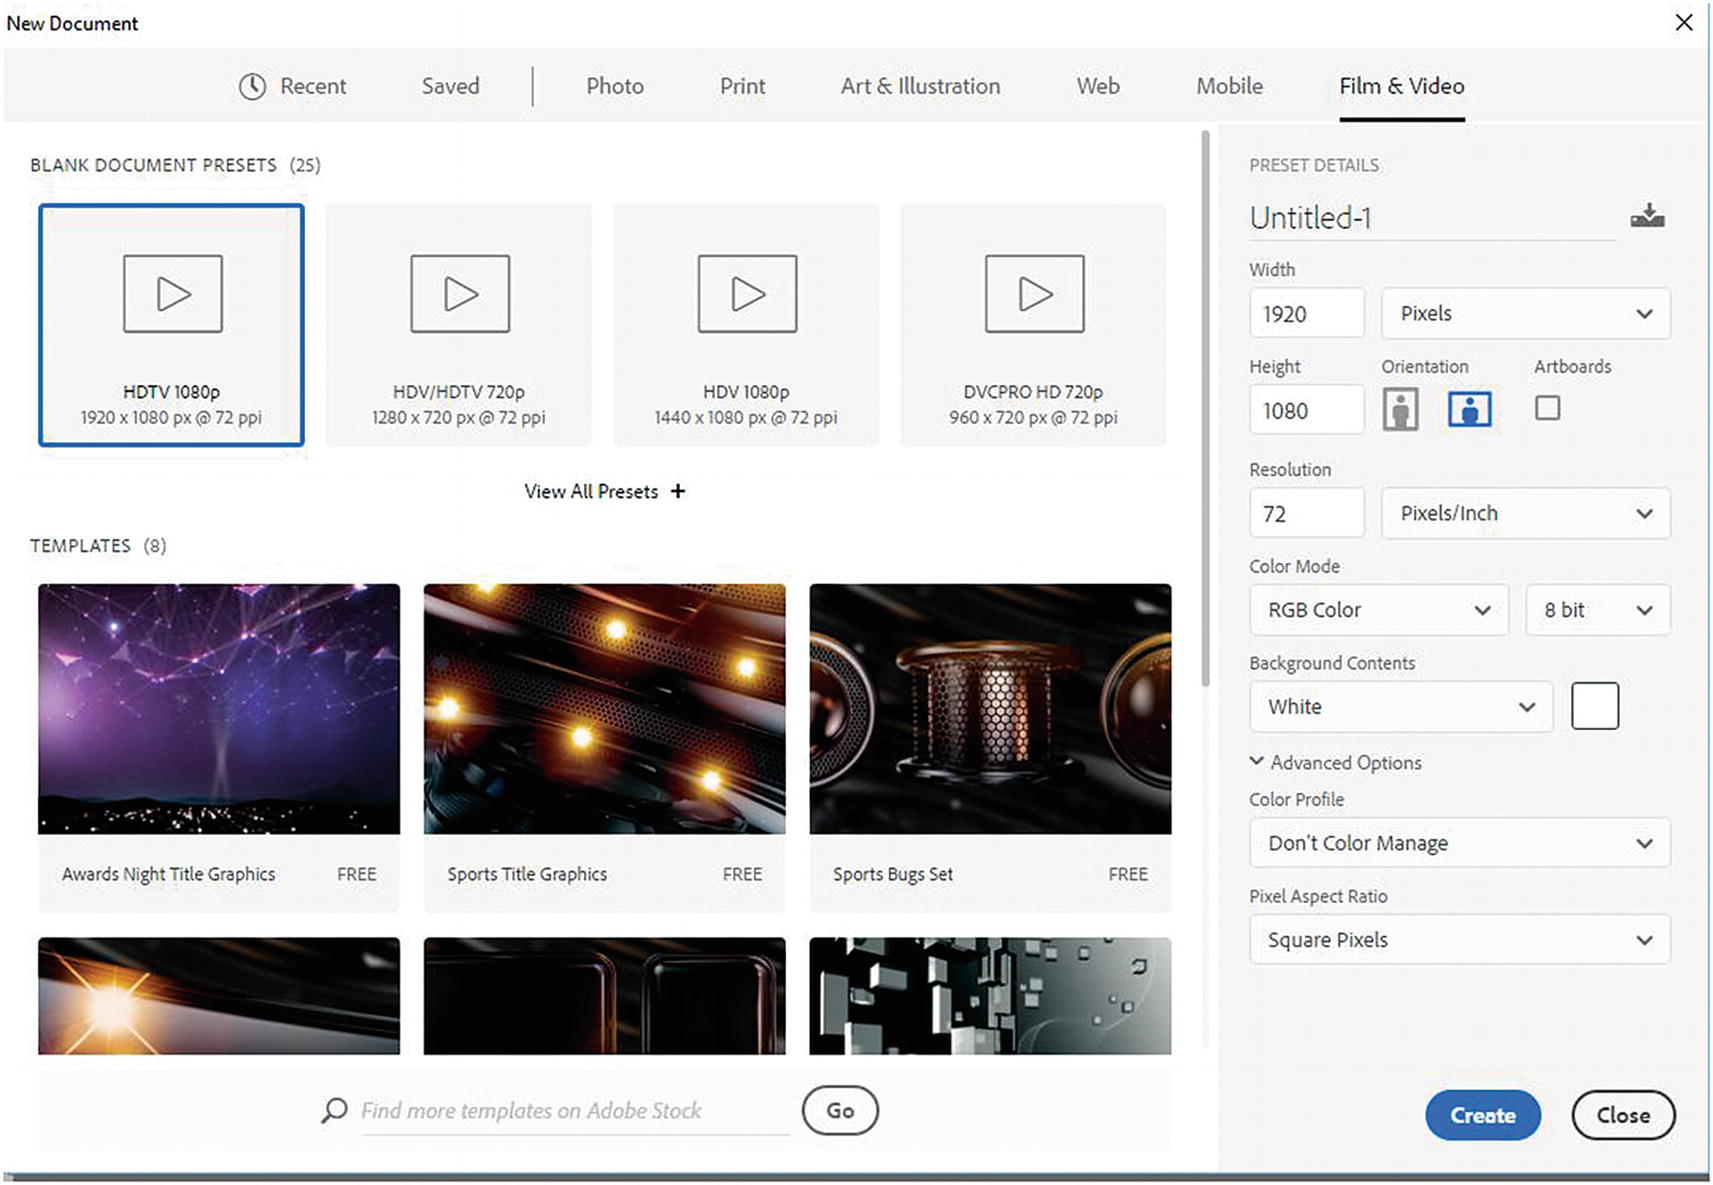
Choosing the correct file size for your video
View All Presets shows you more options.
Make sure that you have a camera that can shoot at a decent resolution so that your images are clear for the viewer. Canon digital cameras can shoot in high definition and are great if you are on a budget and can’t afford additional movie equipment or a professional camcorder. Some tablets and smartphones can also shoot adequate video for a website. Just remember, higher quality video means that you can use the footage for other non-web projects later. To be sure of the quality, run a few test videos to see what your video looks like under the conditions you will be shooting in. Review the video portion of your camera’s manual if you need to adjust settings or lens focus.
Shoot in landscape view, not in portrait view, especially when you are using a smartphone.
Bring a tripod to keep your video stable, but for action shots, a steady hand (make sure the image stabilization setting is on) while panning and zooming may be just fine.
Look for repetitive actions if you missed the action the first time you filmed it, or have a co-worker film the same action with their camera from another angle.
Make sure that your audio is clear if it is part of the video when you use your digital camera. You may have to record the audio separately if you are doing narration. Smartphones often have audio recording apps that you can use for recording your voice or music in a quiet room. Later, you can convert these files to an MP3 format and add it to your video.
Before you start shooting, plan a storyboard or sketch out your scenes for your video. What is the story you are trying to tell your viewers? It’s OK to shoot extra footage, but you need to have a direction and goal for your storyline that will fit the time frame you intend. You want to account for time for things like the intro scene, voice over to match the action, and end credits.
If you are shooting footage in a public area or a client’s workplace, make sure that you have their permission to shoot video in that location and that the people acting in the video are OK with you shooting their action or voices. Get a media release (this might include a generic form they can download or you email to them). Get a signature that you have as a record.
Always bring along an extra set of batteries for your camera. Video recording takes up more power than taking a still picture.
Make sure that the end credits acknowledge all who contributed to the video or any audio that you did not create yourself.
Make sure that you have adequate storage space on your computer and external drive so that you can work with your edited footage and your computer does not crash.
As a novice, be realistic in your goals when it comes to creating your first video. You will not become Steven Spielberg overnight, so keep your effects simple until you have the time to master your skills. You can find special effects in the world around you, such as fire, steam, and smoke, which are difficult to create even in Photoshop.
Listen for sounds in your immediate environment that you can record and use for other projects. If you can’t create your own background music, or don’t have a contact who can, visit this website for more resources: https://creativecommons.org/about/program-areas/arts-culture/arts-culture-resources/legalmusicforvideos/ .
Have fun and enjoy the process of shooting video; look for creative ways to tell the story through the lens.
To build a web video, I chose my size based on the size of most of my footage. My smaller Canon camera shot at 640×480 with a resolution of 72 dpi. Some of my footage was originally in AVI at 30 frames per second (fps) and some in MOV format at 24 fps (a second Canon camera at 1920×1800), but I converted to the same file format, size ratio, and 30 fps using Adobe Media Encoder (see Part 5). I also removed the audio from the videos. You do not have to do these steps before bringing your files into Photoshop CC because you can open MOV and AVI files and work with them right away.
Photoshop CC accepts the following RAW video formats: .264, .3gp, 3gpp, .avc, .avi, .f4v, .flv, .mov, .mp4, .mpe, .mpeg, .mpg, .mts, .mxf, .r3d, .ts, .vob, .wm, and .wmv.
Tip
If the audio in your video does not relate to the story, and you want to add your own music and narration over top, then it is a good idea to remove the audio with Media Encoder before you create your video in Photoshop. Refer to the “Video Setup Tips” section in this chapter for a link to Creative Commons.
In addition, film from different cameras or video files from clients may not have the same ratio scale as your set video area. In my case, the MOV video files did not fit the same scale as the AVI format. I also have files that were created in the animation program, Animate CC, and had to be formatted in Media Encoder before being added to Photoshop CC. You’ll look at how to adjust these properties and crop in Media Encoder in Part 5.
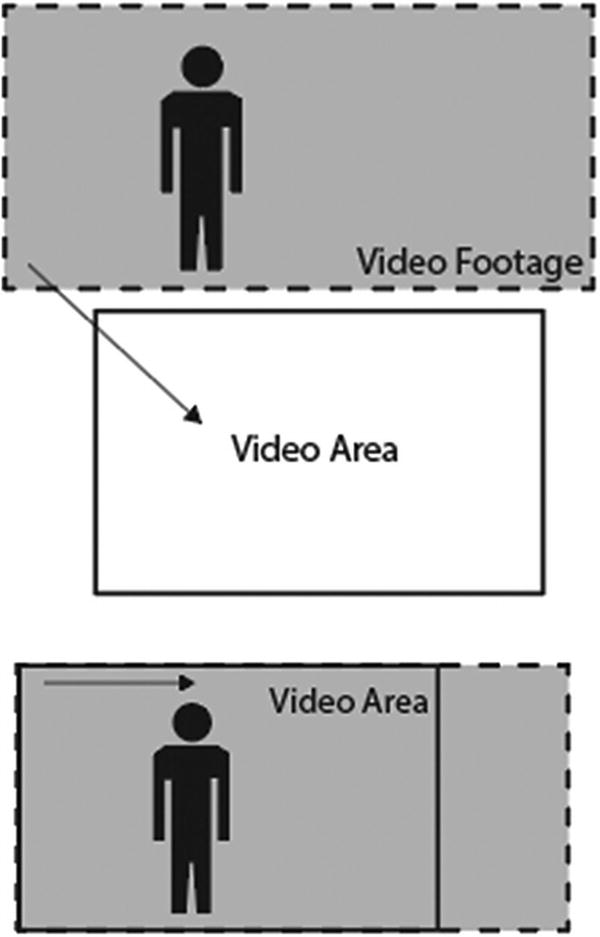
When the footage area is larger than the video area, you can always move the video layer to center the action without leaving a gap on the sides
Once you have all your video ready, you can begin. I spent time reviewing my footage and made a rough timeline with notes in Excel so that I could judge what footage to use for the timeline and in what order— basically, I created a verbal storyboard. It saves time if you must replace or add footage. While you can use Photoshop to do some trimming for you, using Media Encoder CC (see Part 5) to remove large unnecessary parts saves me time when working in Photoshop. You can use the files in the video footage folder for this chapter if you don’t have any to practice with. For now, just use this chapter to understand the basics of the Video Timeline tool. You will create a basic video in Chapter 9 and put it into Dreamweaver in Part 6.
Video Timeline

Click Create Video Timeline to begin creating your video and scale the Timeline panel to fit your screen area
You can scale the Timeline panel by dragging its sides and bottom when the white arrow-shaped icon appears.
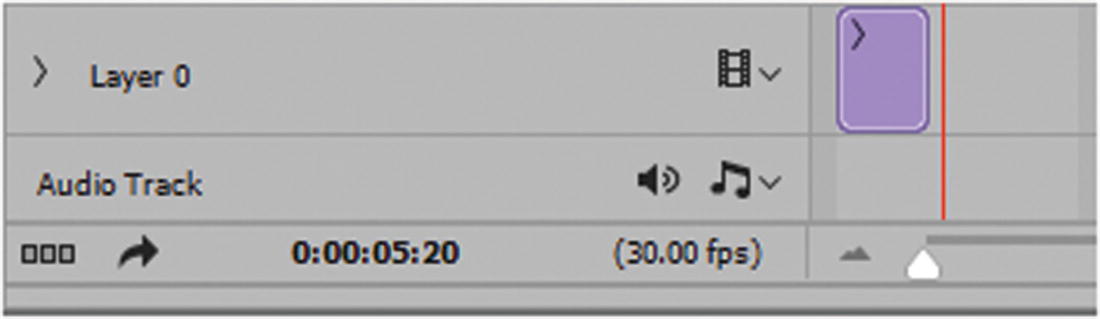
How the timeline appears when you start a new file and currently have added no video. The background layer becomes layer 0.
You’ll notice that the Video Timeline layout and menu is different than the frame animation you saw in Chapter 6.
Note
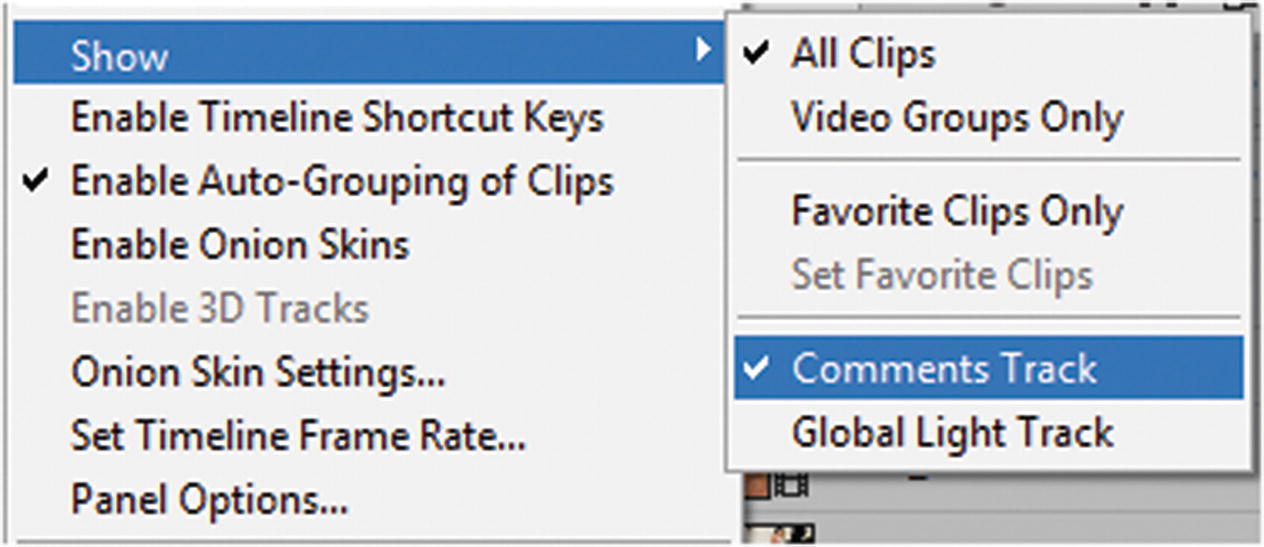
If you do not see the comments and global lighting options, you can turn them on in the Timeline menu in Show ➤ Comments Track and Show ➤ Global Lighting Track. You’ll look at what these are later in the chapter. Refer to Figure 7-6.
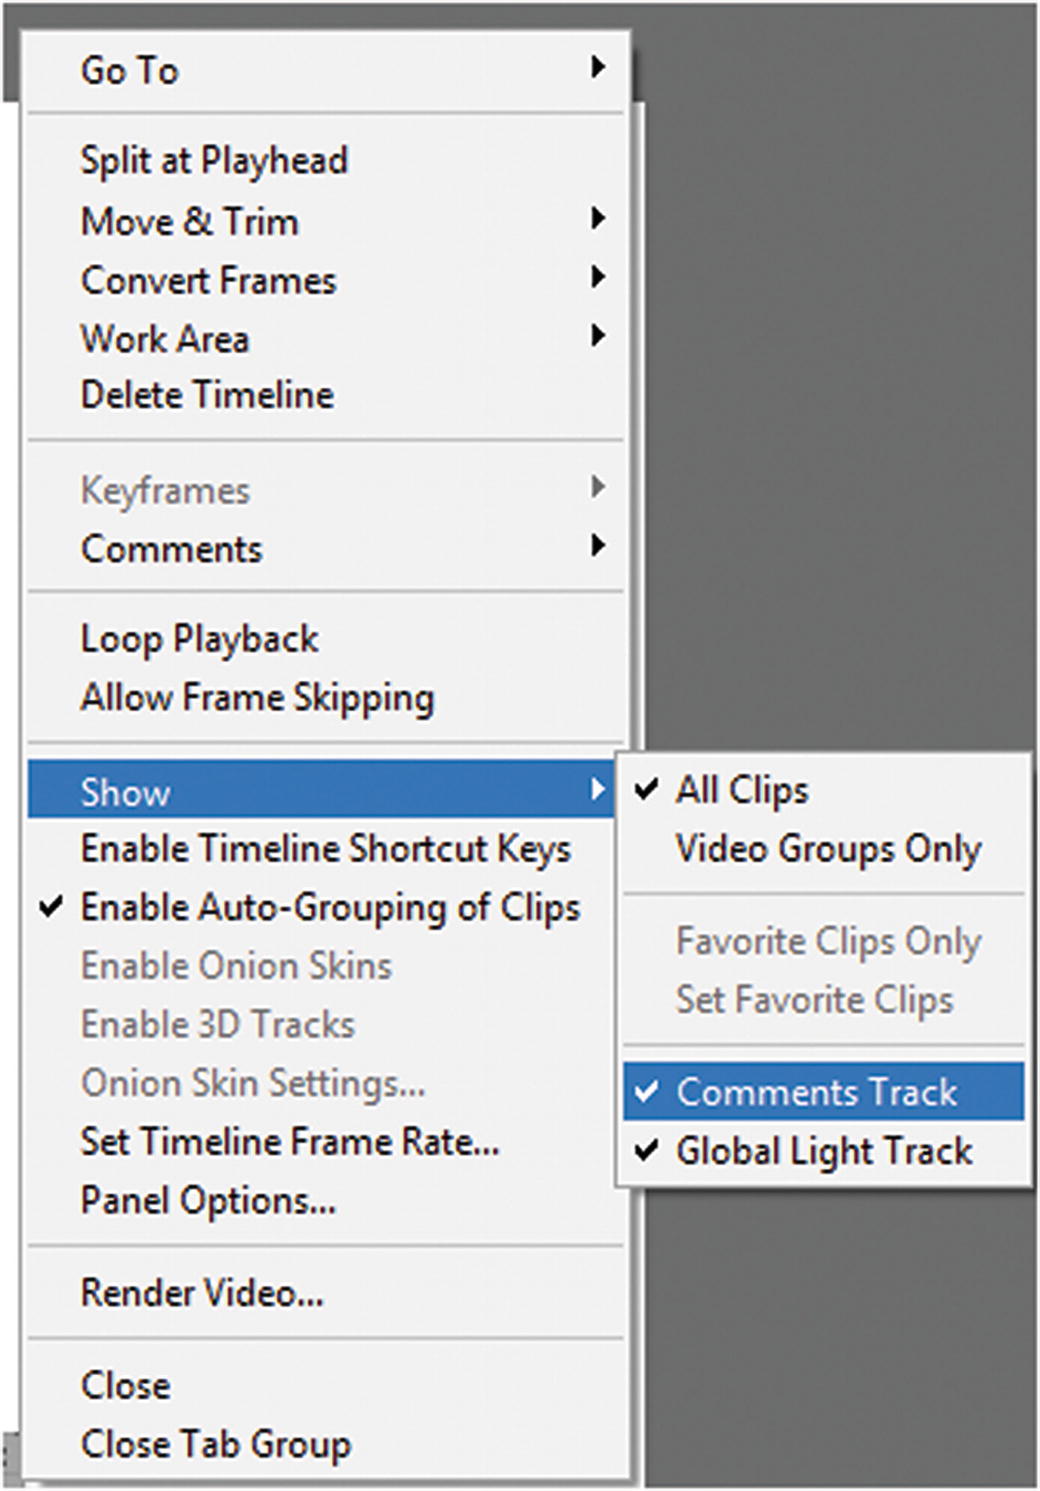
The Timeline menu, where you can add comments and global lighting to the timeline
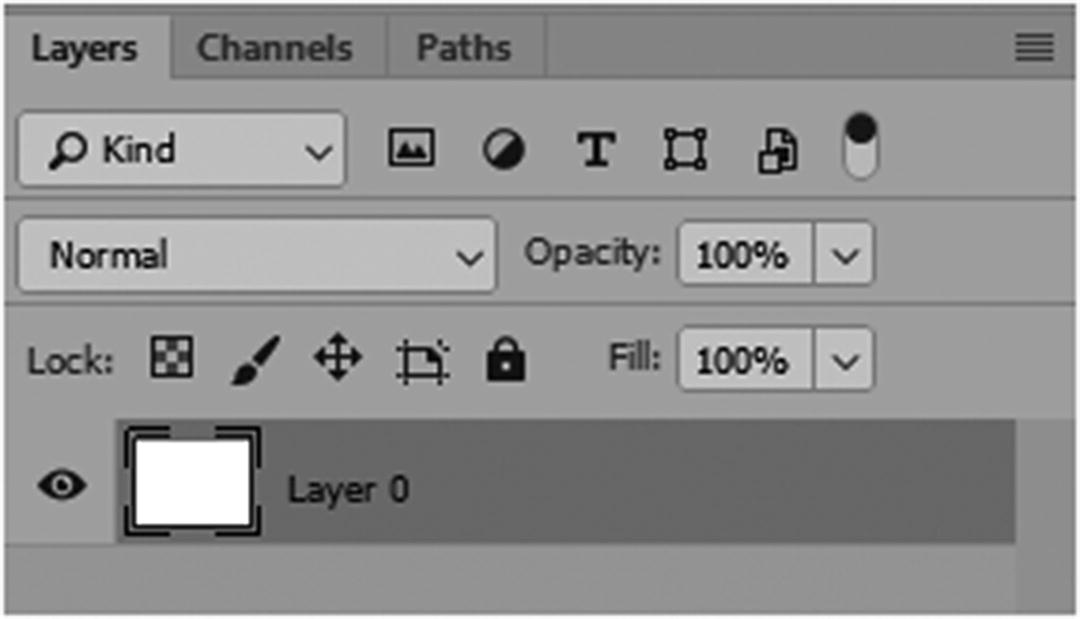
The Layers panel with one layer that was formerly the background is now layer 0
If you rename the layer, it changes in the Timeline panel.
The background layer becomes layer 0 when you convert to a video timeline. This way, even the background layer is editable and can be adjusted in various scenes as required.
Caution
You can revert to a frame animation with the Convert to Frame Animation icon (see Figure 7-8), but be aware that certain changes that you make may not be preserved during transition, such as audio or some effects; so do any changes on a copy of the original.
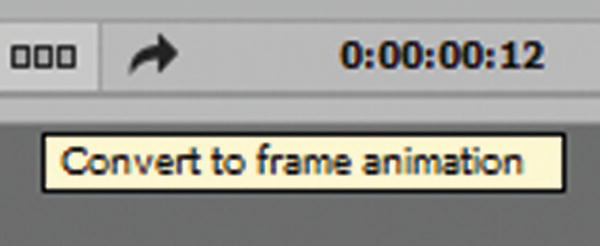
The Convert to Frame Animation button allows you to return to a frame animation
As mentioned, if you have ever worked with Premiere Pro CC, After Effects CC, or even Animate CC, the arrangement of the timeline will look familiar to you.
Let’s take some time to look at the features of this part of the Timeline panel.
Currently, our file 640×480 at 72 dpi has no video in it; only one layer.
Layers in the Timeline
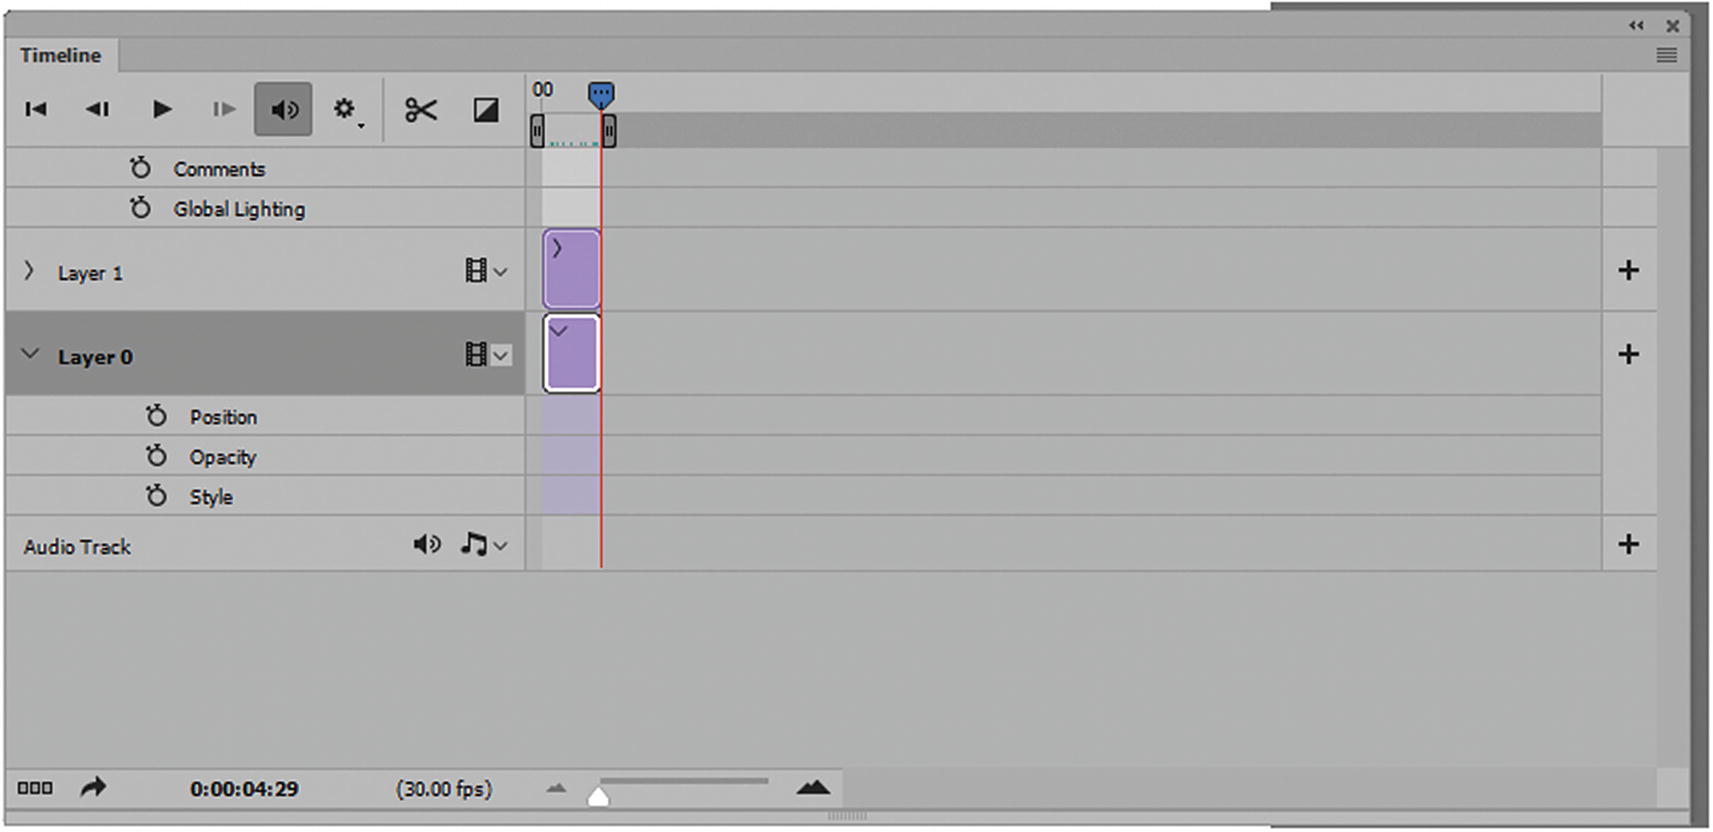
How layers appear in the Timeline panel
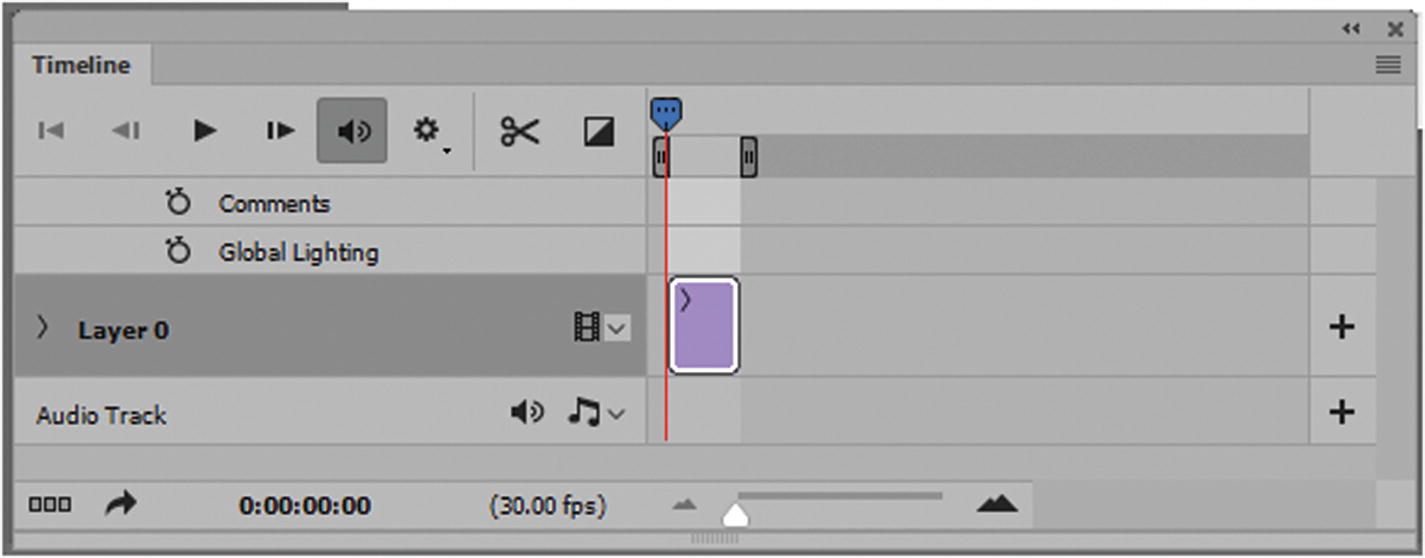
Depending on where the blue playhead is located, the track (layer) starts at that location expanding the timeline.
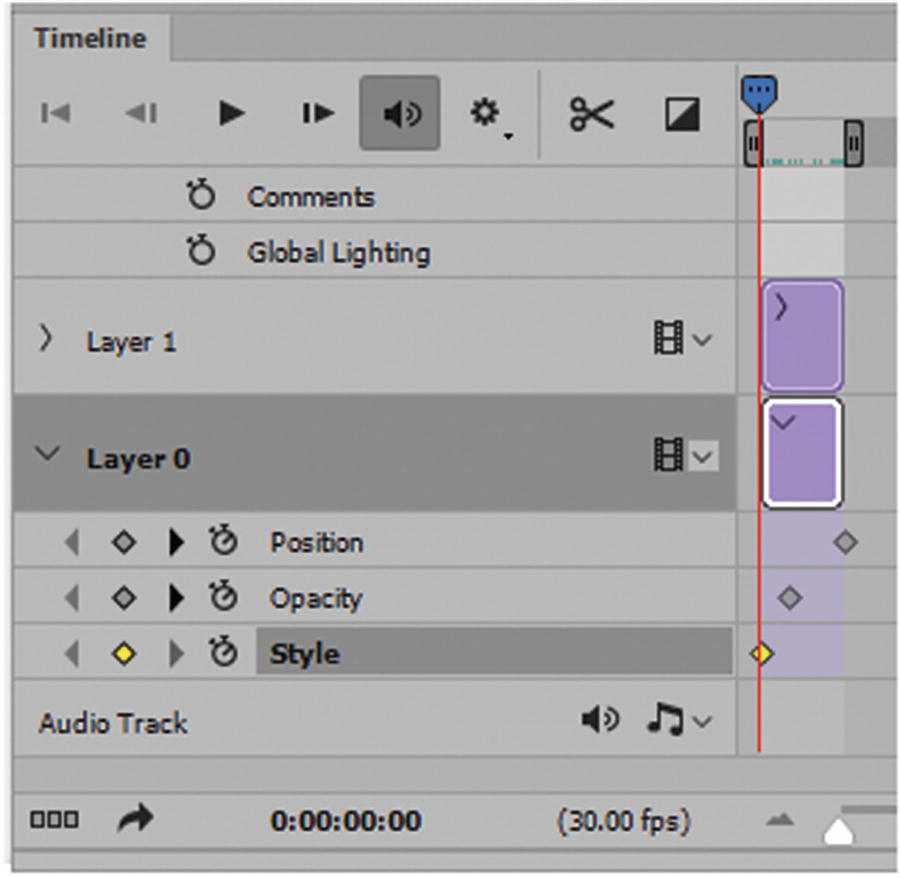
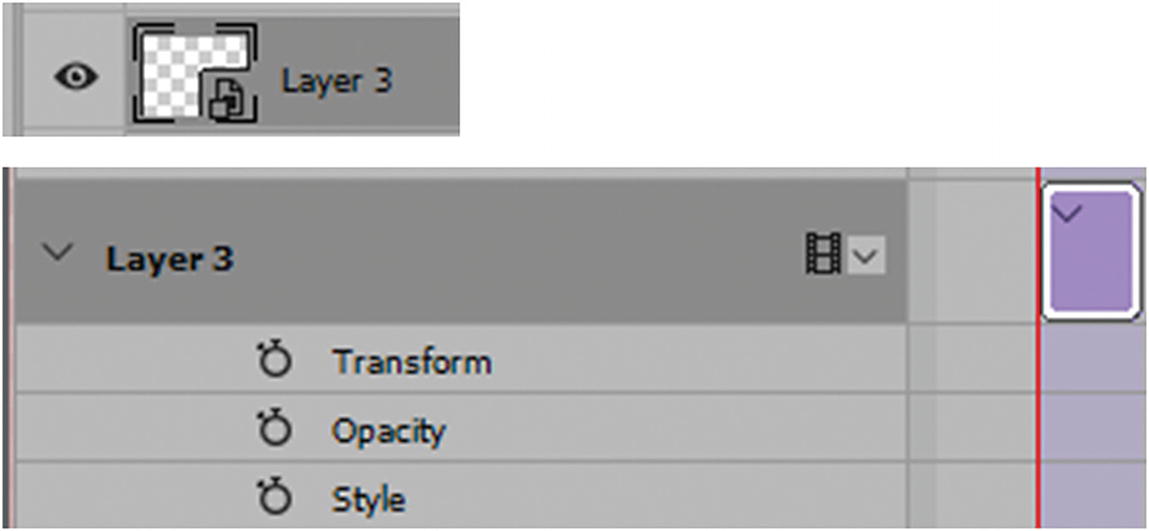
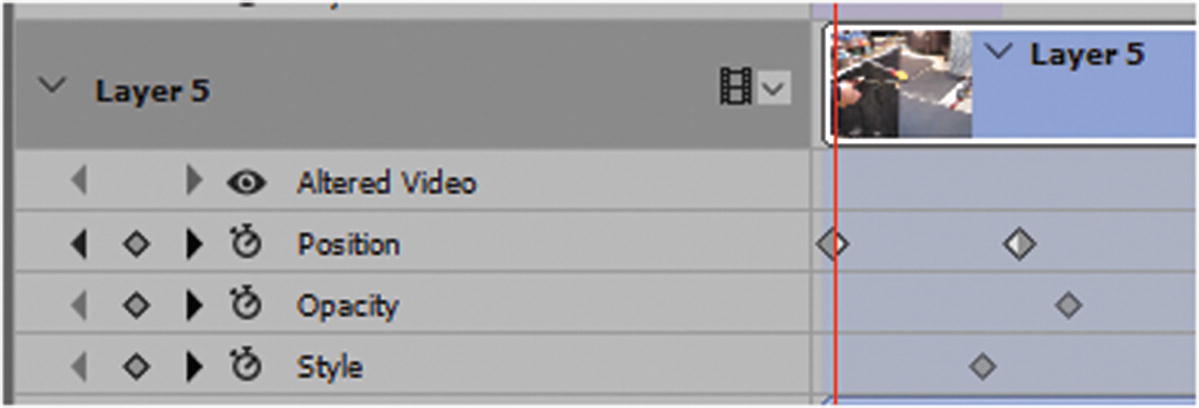
Adding keyframes to the timeline
Keyframes are a point of transition. By opening the layer’s options using the arrow and the blue scrubber playhead, you can then set a keyframe point where various transitions happen. For example, if you set a keyframe for a layer and then make an opacity change from that key point to the next or the end of the video, that change will happen. You should at least have two keyframes as a starting point, and then an ending point so that the transition works correctly.
Note
You cannot transform a layer with keyframes. You see how to do that with Smart Objects shortly.
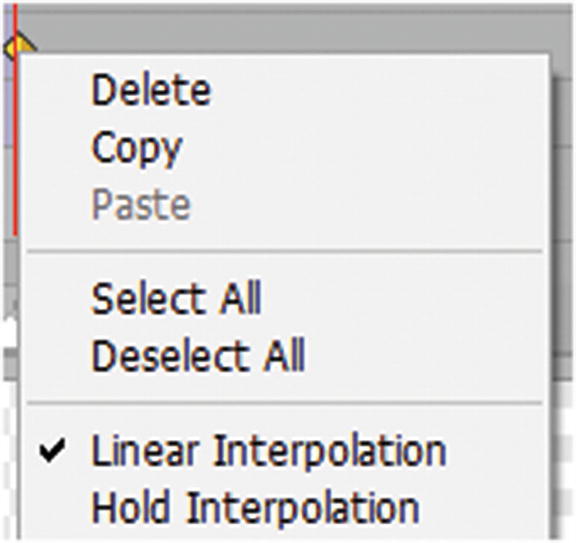
The keyframe selected is currently linear
Note
Interpolation is also known as tweening. It is the process of filling in unknown values between two known values. Examples would be the morphing of a red object on the left into a blue object on the right. In digital video and film, interpolation usually means generating new values between two keyframes; you saw an example of tweening in the frame animation timeline in Chapter 6.
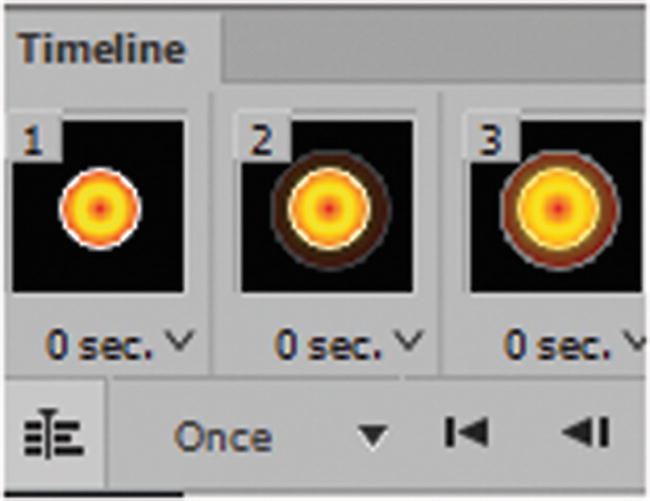
Linear (diamond shape) : Evenly changes the animated property from one keyframe to another. (The one exception is the Layer Mask Position property, which switches between enabled and disabled states abruptly.) In Figure 7-12, it may appear as yellow or gray, depending on if it is selected or not, or if an actual transition is preset, if not the diamond appears smaller.
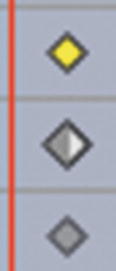
Various linear keyframes in different states
Hold (square shape) : Maintains the current property setting. This interpolation method is useful for strobe effects, or when you want layers to appear or disappear suddenly. A red or yellow arrow can also be a hold if found with a linear interpolation combination, as seen in Figure 7-13.

Various hold interpolation keyframes in different states
Using the clock to add or remove keyframes from the track
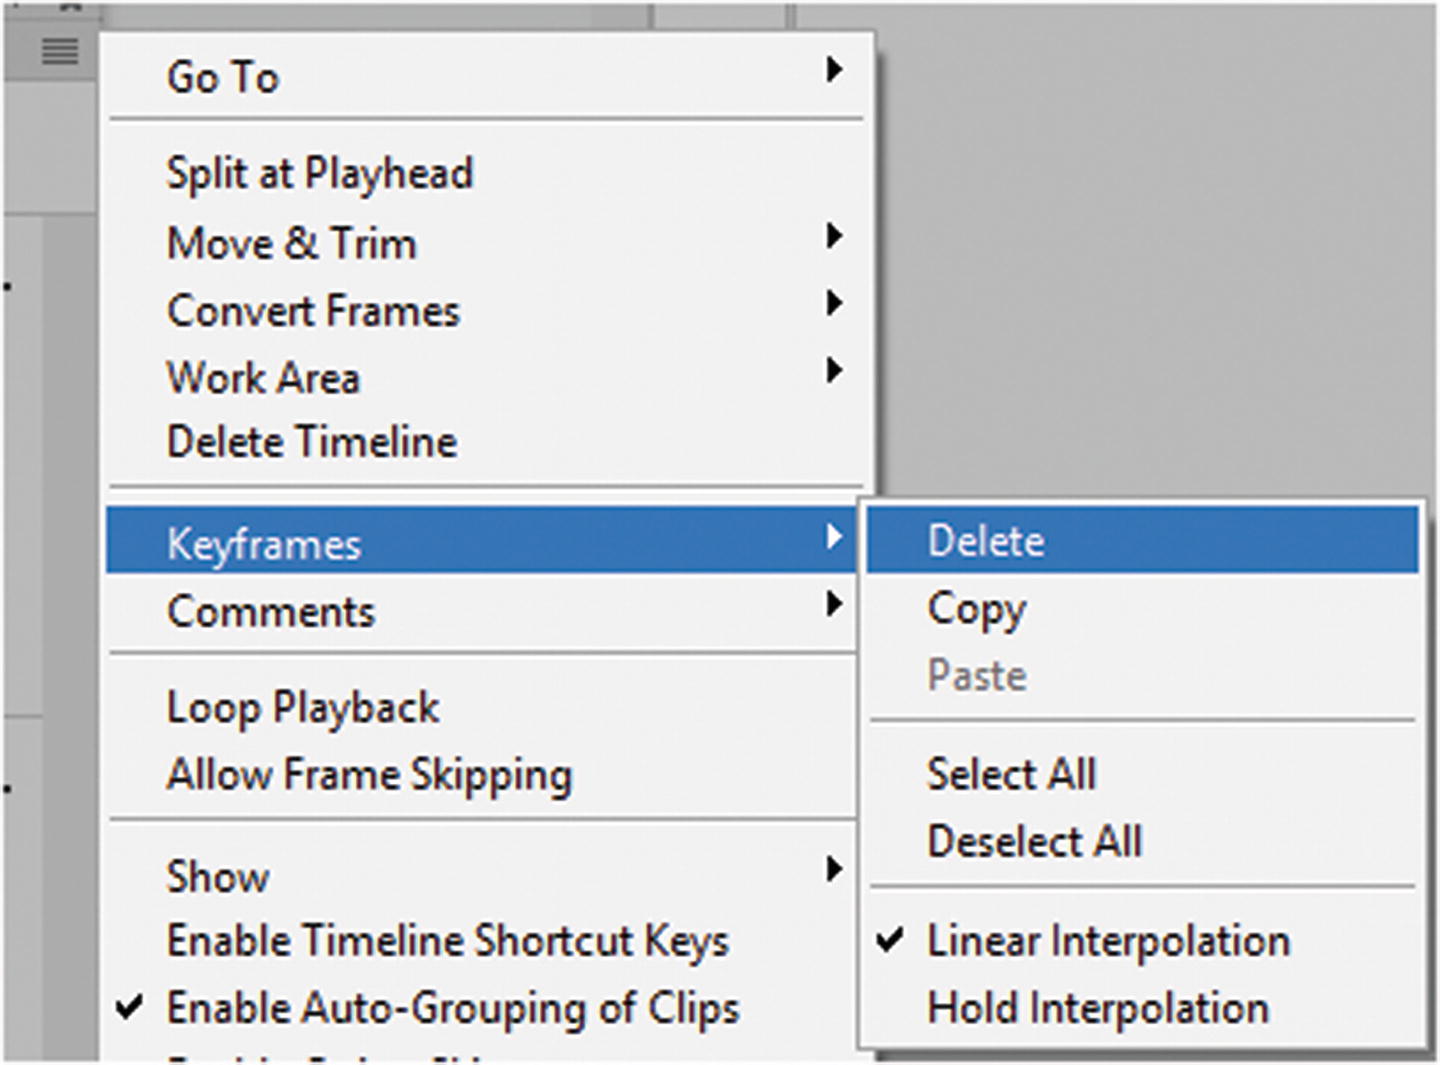
The Timeline menu allows you to add or remove keyframes
While selected as a diamond shape keyframe, the interpolation is linear interpolation, but you can switch it to hold interpolation, which is a square. For now, leave them at the default linear.
Animation of a keyframe requires that you have at least two keyframes to animate that property; otherwise, any changes made last for the entire layer video clip.
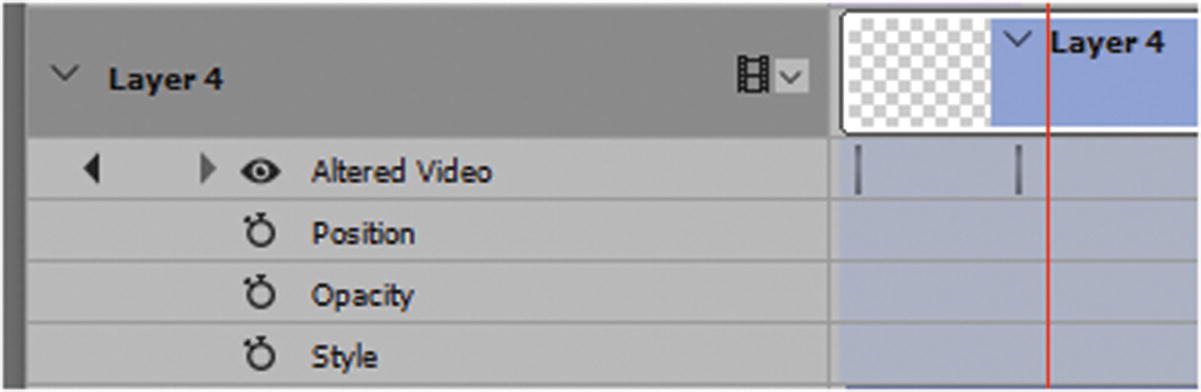
If a property is not turned on, it contains no keyframes.
If you click, a keyframe with your mouse and drag, you can move the keyframe to a new location on the video clip timeline.
Other Layer Properties
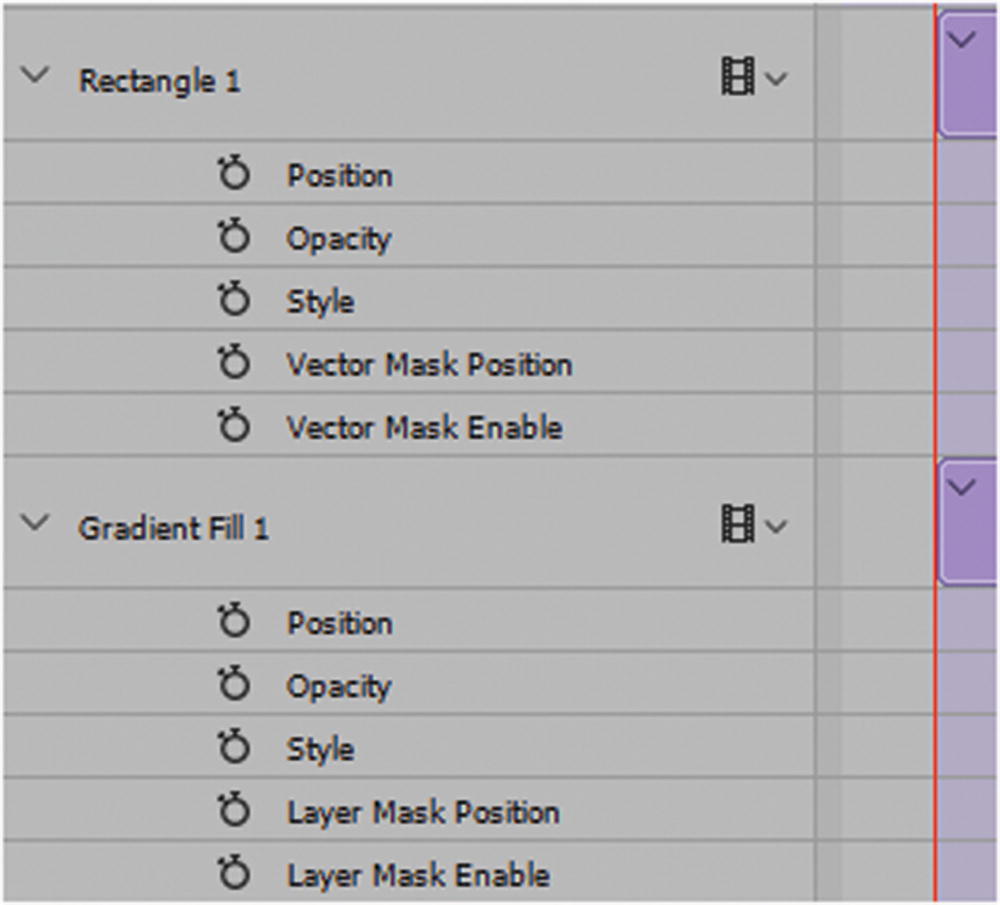
Additional properties for vector and adjustment layers
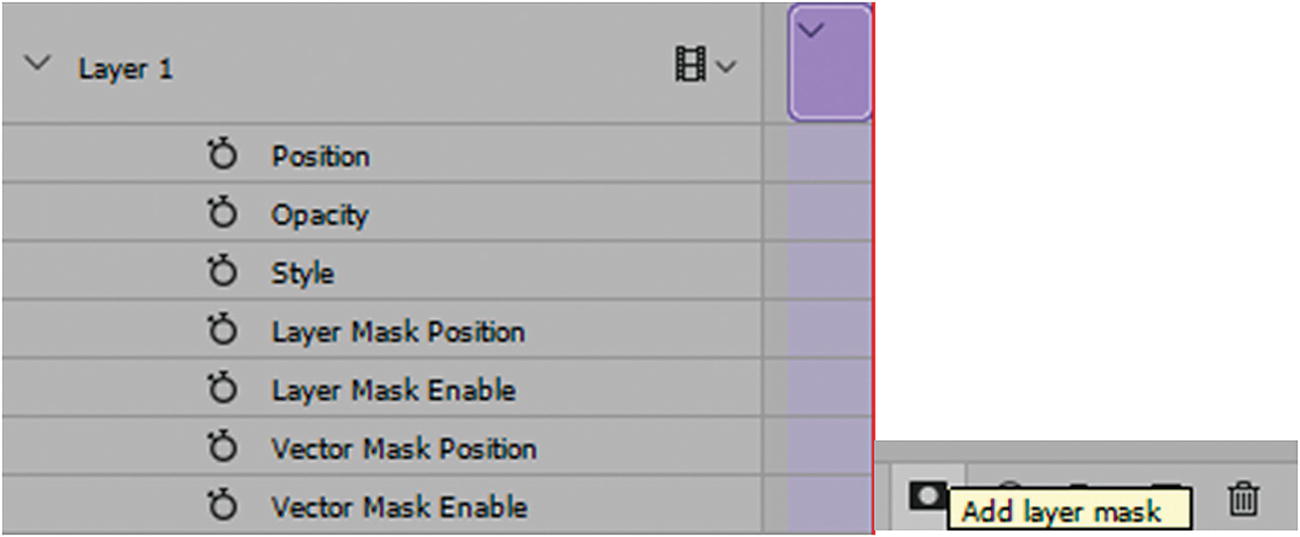
Adding vector and layer masks to a layer in the Layers panel gives you access to the properties for the track
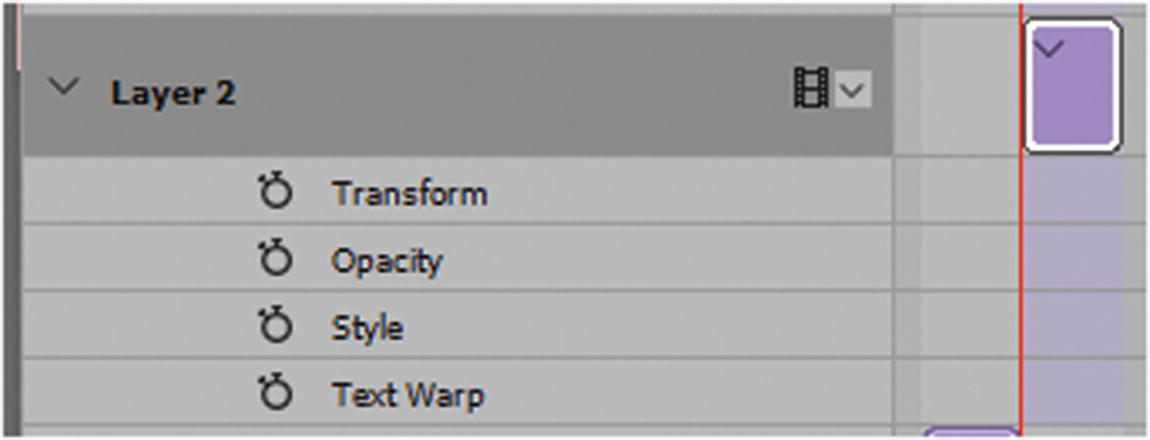
Type layers have the Transform and Text Warp properties
Note
With the type, you have access to the Transform properties, but the with the layers, so far, you cannot. If you want to transform a non-video layer (purple) or even a video layer (blue) you need to make into a Smart Object (also purple).
Smart Object Layers
The layer is now a Smart Object, and you have access to the Transform properties
Transform and position are the same. When clicked, a Smart Object opens a PSB file that can have a timeline within it, as well as other layers blending and masks.
Tip
if you are going to transform a mask, make sure that it is inside a Smart Object for the animation; otherwise, it might not scale accurately during the transform.
Adding Video Layers
At this point, you might want to import a video or add other photos to your Layers panel.
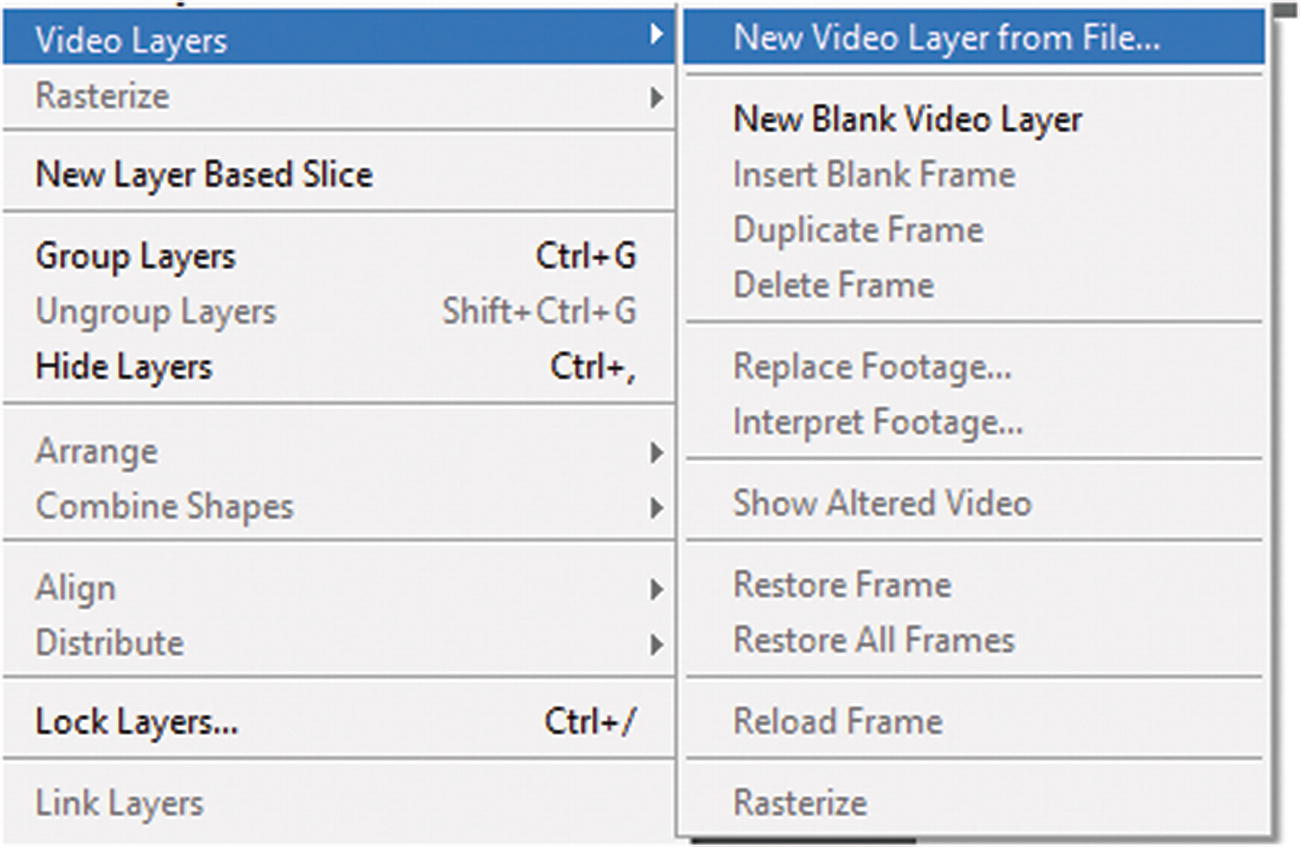
Import a video layer
Locate a video file like an AVI, MOV, or MP4 or any graphic image sequence (image1.jpeg, image2.jpg, and so on) listed in the format options.
New Blank Video Layer: Adds a new layer to your Layers panel and to the Video Timeline panel. The layers (video or non-video) in the timeline are also known as tracks . A blank video layer can act as a placeholder until you are able to add the actual track.
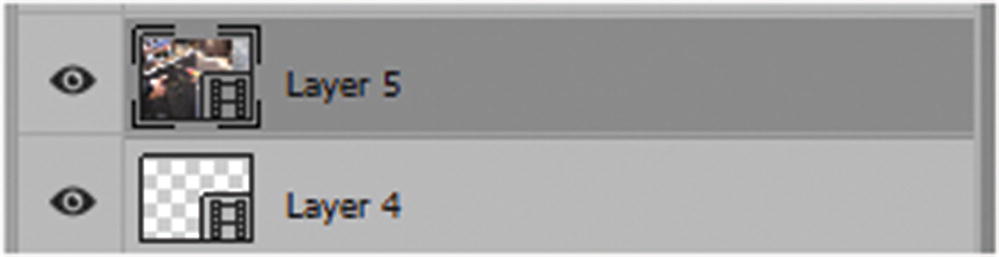

A blank video layer and a video layer can be added to the Timeline panel and the Layers panel
You can tell that it is a video layer because it has a little Film icon on the preview of the layers’ thumbnail image. Video layers, whether they contain content or not, are blue with a play arrow. A non-video layer is purple with a play arrow, except for fills and adjustment layers.

Alter the speed and duration for the track
Alter the duration of a track while in the timeline
Note
This removal does not affect the original footage, and you can always pull it back to the original size to reset it.
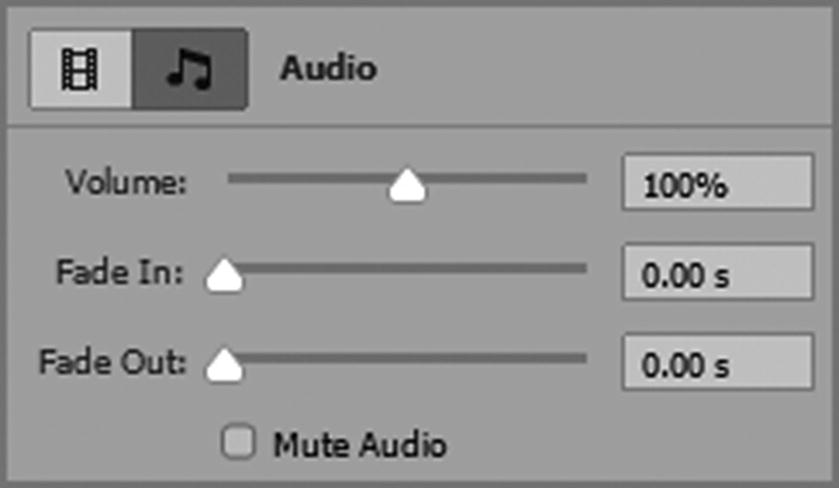
Alter the audio for your video track
Properties of a video track
Properties of an altered blank video track
For more information on how to paint an altered video layer with the Clone stamp, Pattern stamp, Healing brush, or Spot Healing brush, visit https://helpx.adobe.com/photoshop/using/painting-frames-video-layers.html .
The brush only paints one frame at a time, so if you have mass areas of video that need coverage, you need to determine the best workflow to efficiently accomplish these changes. Perhaps a Smart Object is a better solution for areas that change little, such as an annoying glare in the corner of the frame.
To restore an altered video track, choose Layer ➤ Video Layers ➤ Restore Frame (while highlighted frame is selected using the playhead and mouse arrow) or Layers ➤ Video Layer ➤ Restore All Frames.
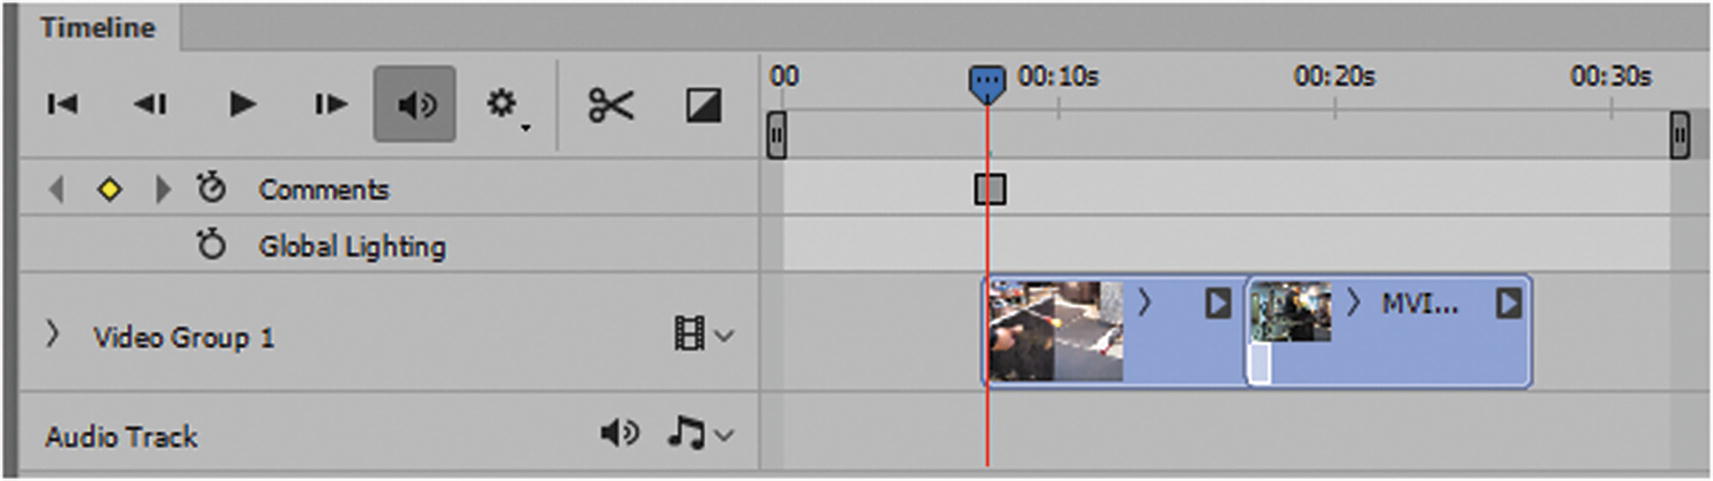
Video Groups
Videos play one after the other in a video track
Note
If you discover that you put the wrong video into the video layer, you can always select that layer track (white outline) and choose Layer ➤ Video Layers ➤ Replace Footage. Find the correct video and click Open, which automatically updates that layer with the correct video. Also, since the video is linked, if the original video is removed after the PSD file is closed from the folder, a warning icon or message will appear, as seen in Figure 7-28. You can also use the Replace Footage option to relink the video.
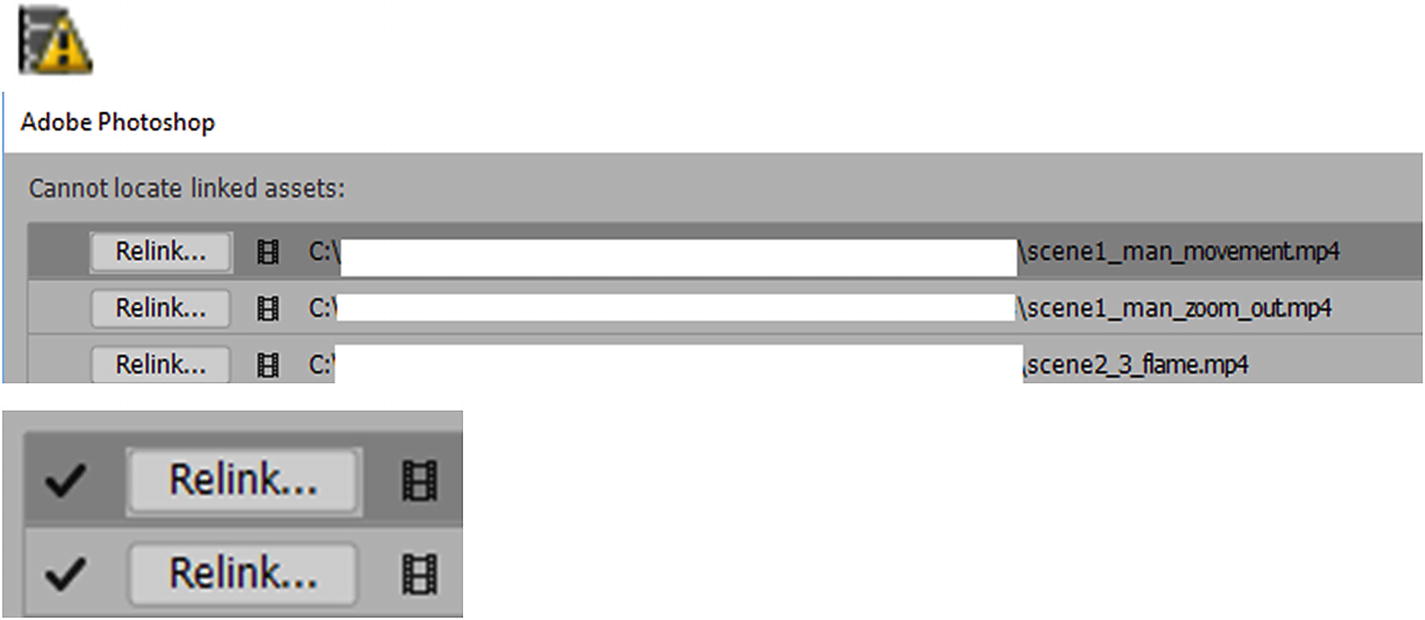
Video link is broken and you need to updated it
When one video is relinked, if other missing links are found in the same folder, they automatically relink. To confirm, click OK in the dialog box.
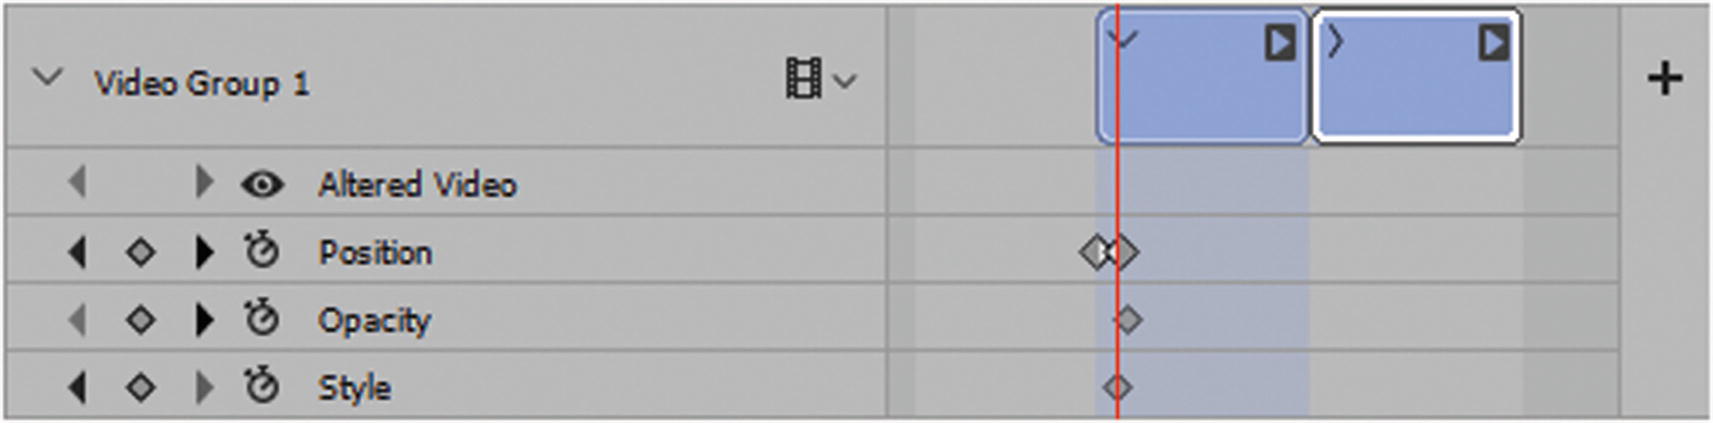
Video layers and non-video layers can be part of the same video group if you plan one to lead into the other without a transitional break.
Using Layers That Are Not Part of a Video Group

Moving a video from one group to another
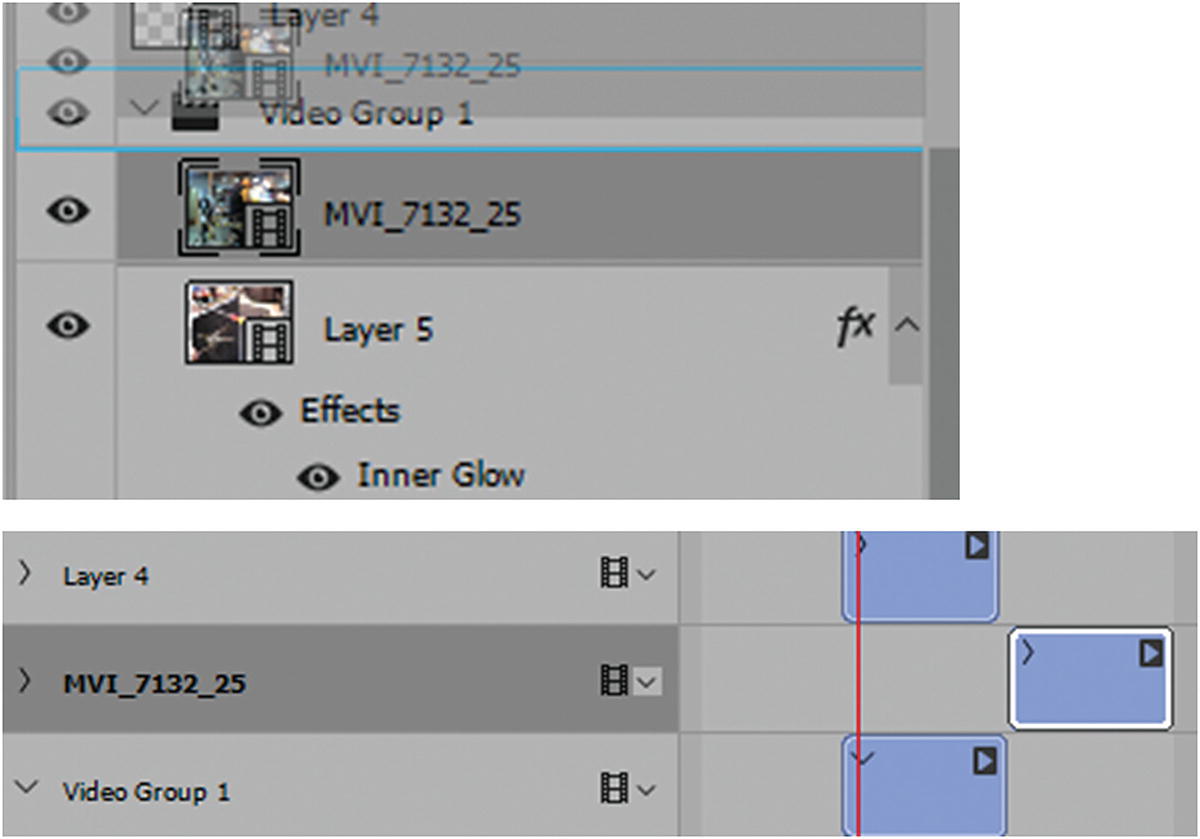
Moving a video out of a group so that it is on its own layer in the timeline
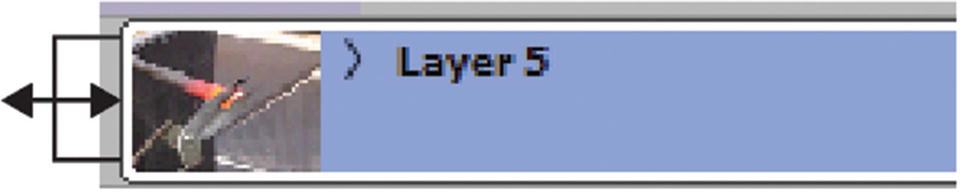
Remember, only when a movie clip is selected (white outline) can you alter its properties. Clicking blank areas in the timeline where the movie clip is not playing leaves properties like blends, opacities, and fills unavailable.
Convert Video Layers to Smart Objects
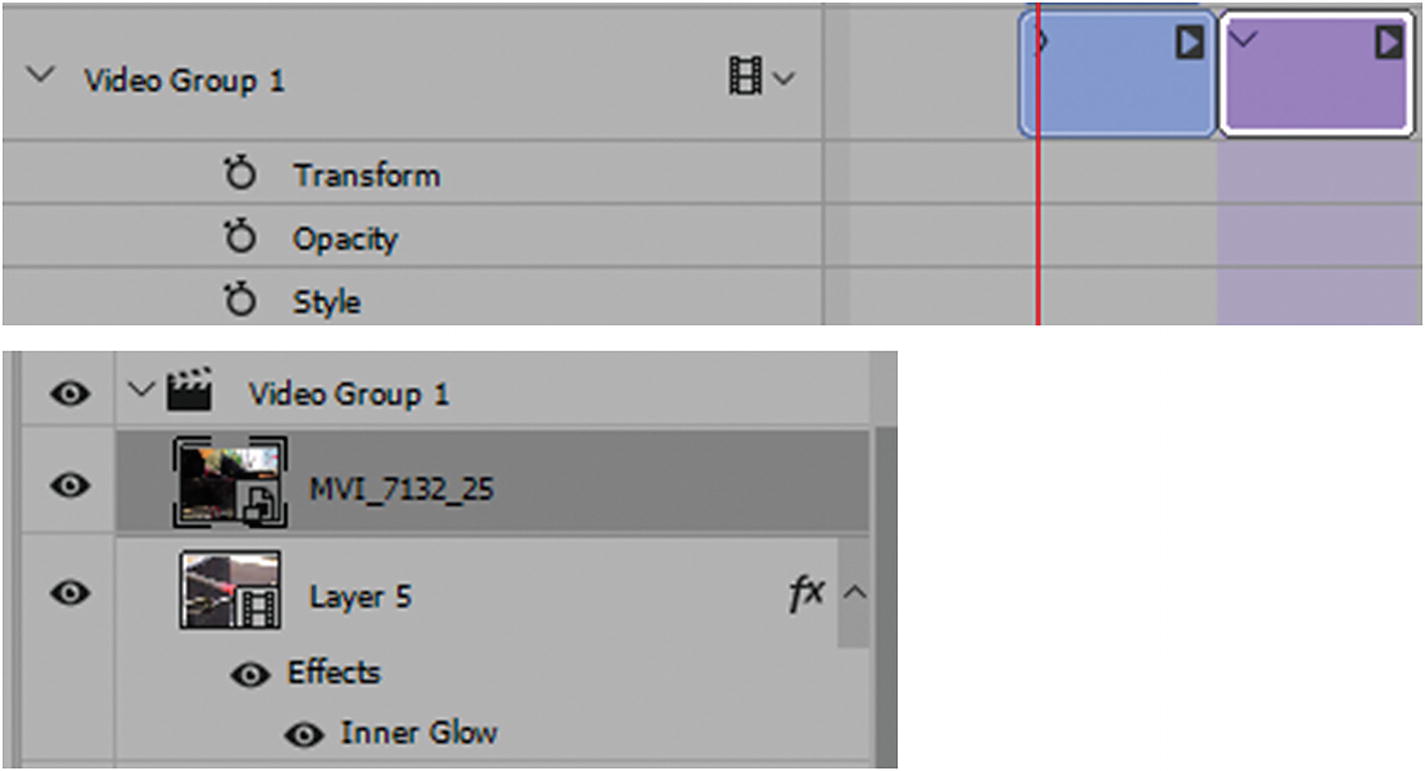
The video becomes a Smart Object, but can still be on the same track
You can still edit the video by double clicking it in the Layers panel, this bring up a PSB file that you can alter and then save changes and close. The alterations will be reflected in the Layers panel and Timeline panel.
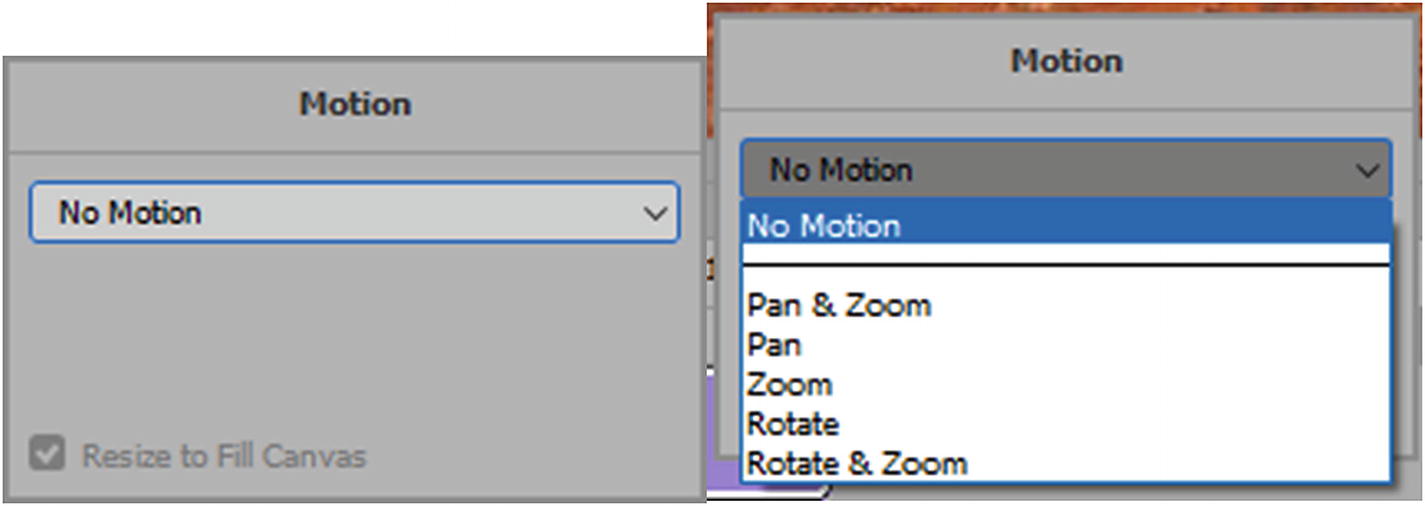
Adding motion to a Smart Object layer in the timeline
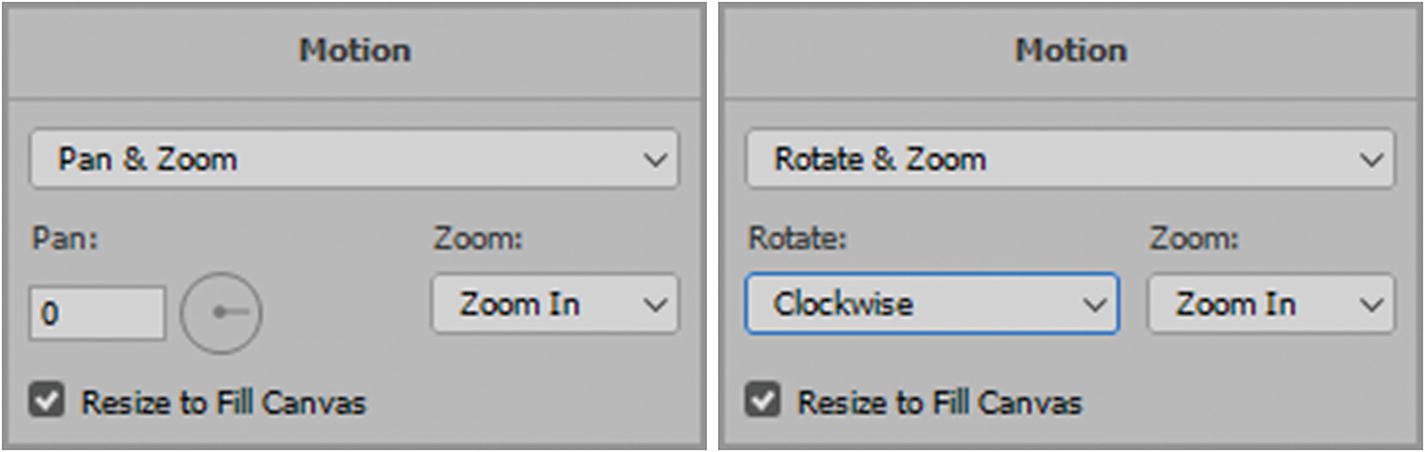
Motion choices for your Smart Object
If you don’t want to use the preset motion settings, you can use keyframes to alter the point of zoom, pan, or rotation. To do this when you are over a selected Smart Object with the blue handle playhead, use the menu option Edit ➤ Free Transform to alter the width and height of the Smart Object for the current keyframe that will appear as a transform in the timeline panel.
Note
Once the video clip is converted to a Smart Object, it cannot be returned to a video clip unless you undo the video change right away in the History panel (see Figure 7-34) or delete that layer from the Layers panel and add a new video.
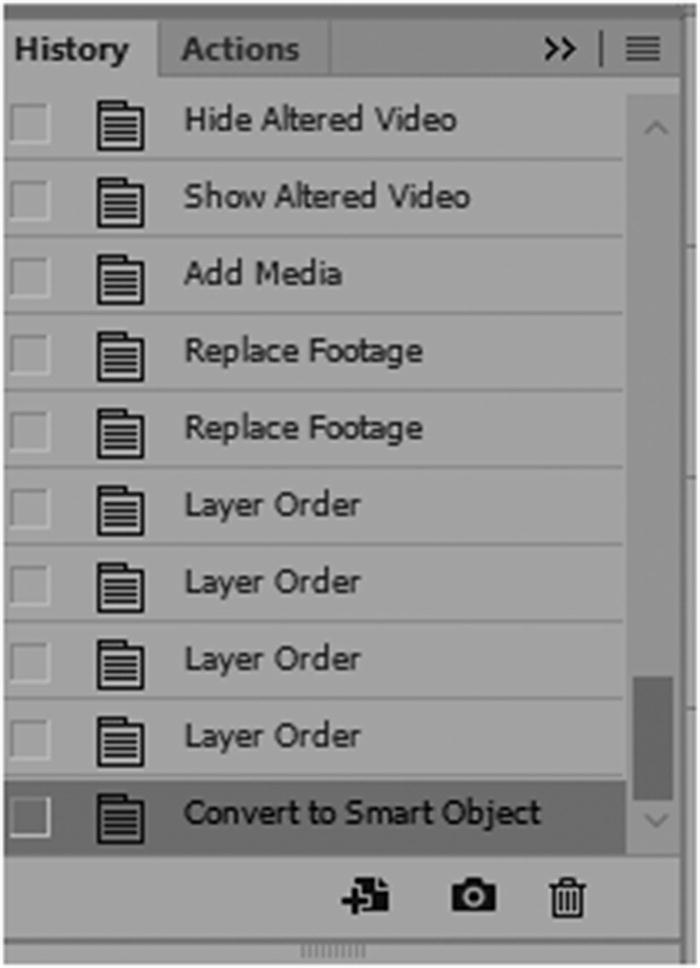
Undo a Smart Object video layer right away in the History panel if you want it to return to being a video before making further changes
Delete Timeline
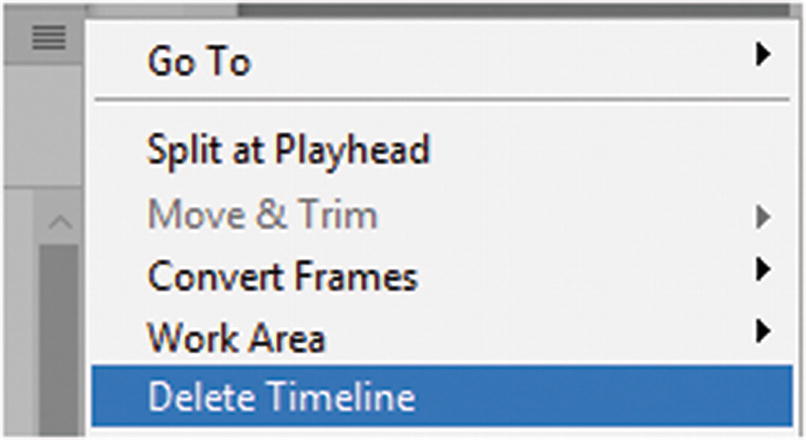
Delete the entire timeline to start over again
Delete Track
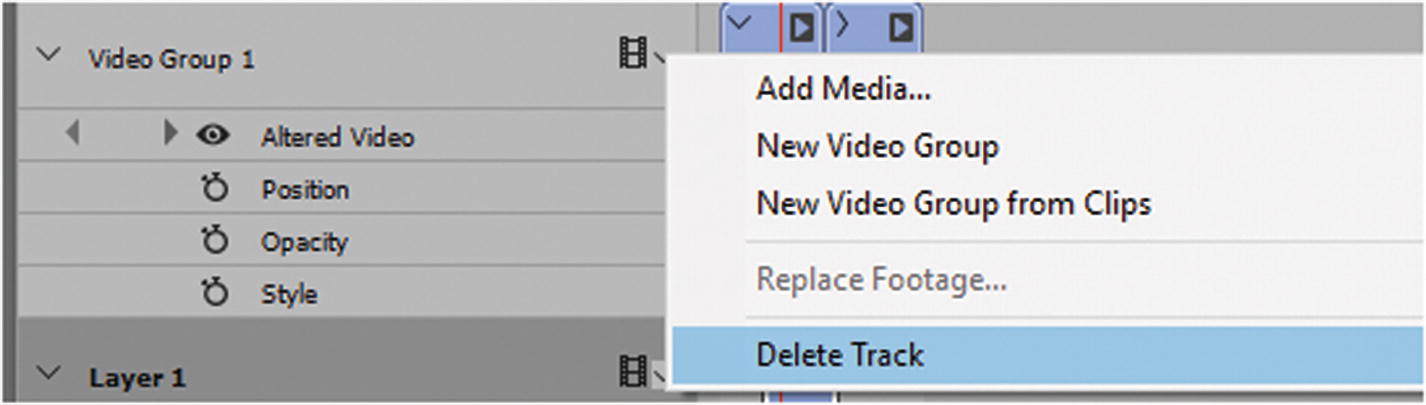
Delete the entire track
This removes the movie layers from the Layers panel as well.
Select Transition and Drag to Apply
Fade in or fade out to create a transition between video or Smart Objects
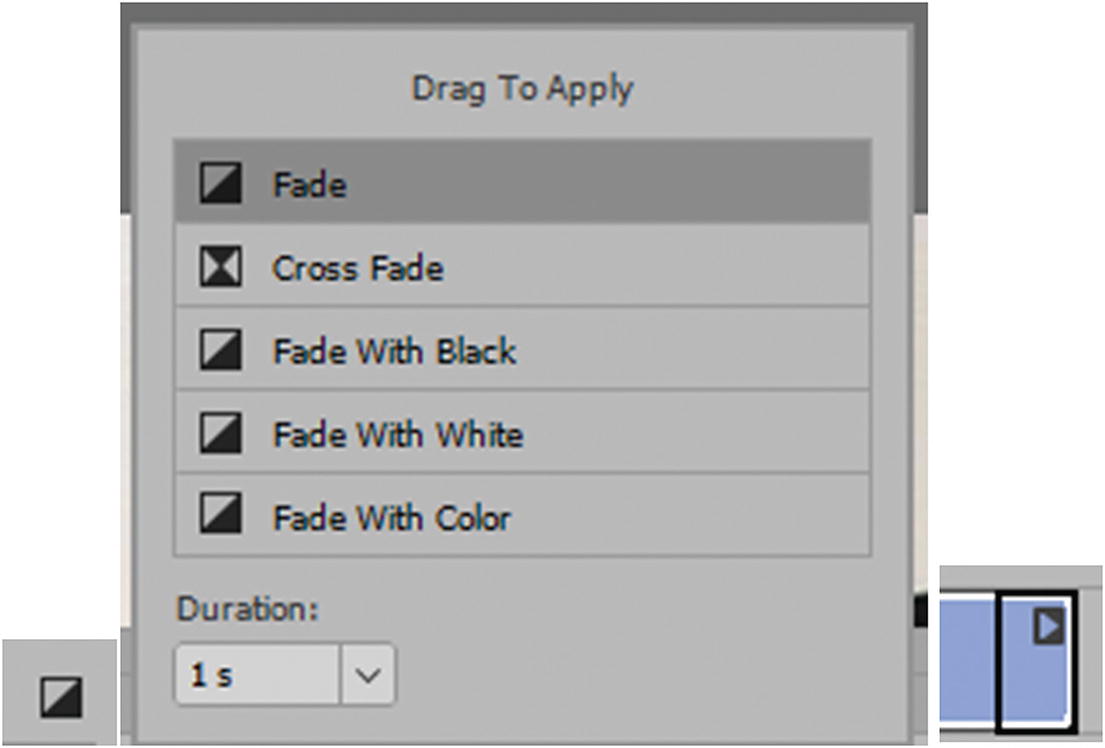
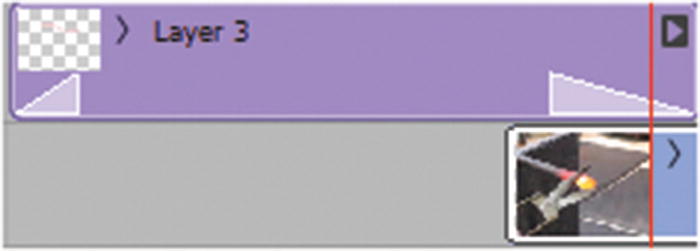
Choose a transition and drag it onto the track either at the start or the end

Drag the white transition fade on the video clip to shorten or lengthen it
Fade: Causes the fade to be a gradual opacity change that makes the upper clip slowly disappear, revealing the lower clip; it can fade in or out, depending on where it is placed on the video track. Cross Fade: Works when two videos are in the same track group; then, you can overlap them. This takes up less space if you have many clips to cross fade. Refer to Figure 7-40.
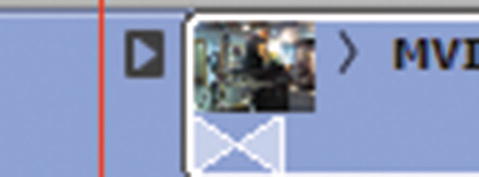
Example of a cross fade
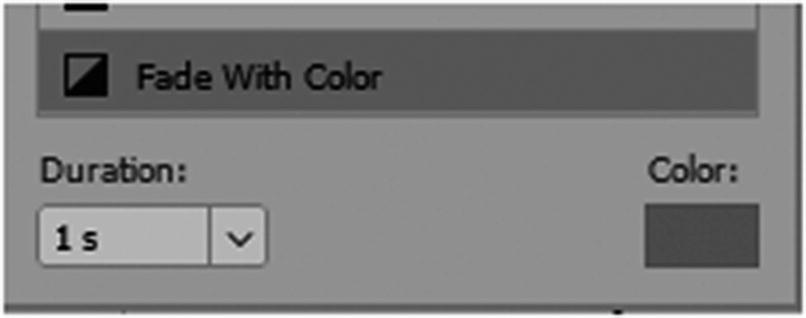
Choose Fade With Color for a specific color
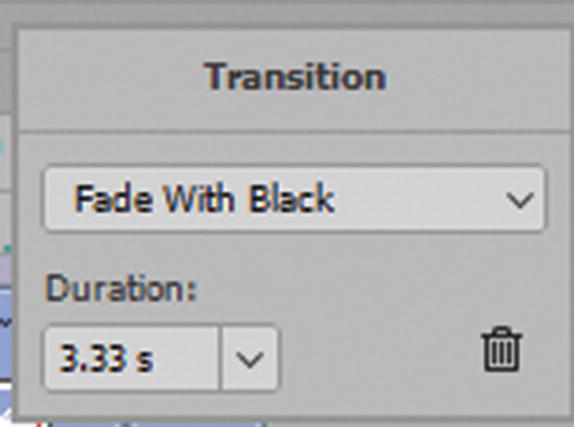
Edit or remove the transition
Split Video Clips
Split the Playhead: Scissor icon or found in the timeline’s menu in the Video Timeline panel. Splits the video into two parts in the timeline when you place the playhead at the point you want to split. In Figure 7-43, the video appears on two layers in the Layers panel and as two parts in the Video Timeline.
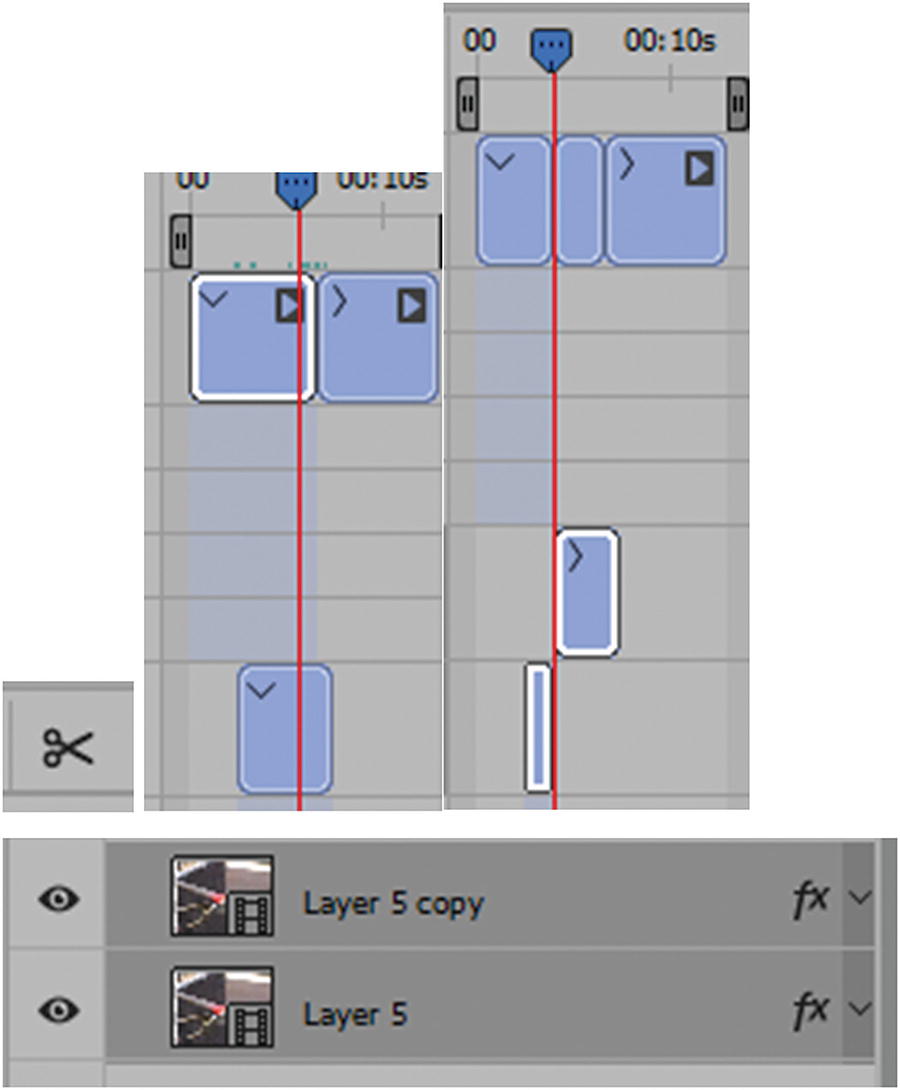
Splitting the video into two parts
You can then drag the split video to another location ion the timeline, and even collapse or expand it on either end to repeat or remove more footage.
Note
You must be on a select area (white outline) of a video for this to work.
Trim Movie
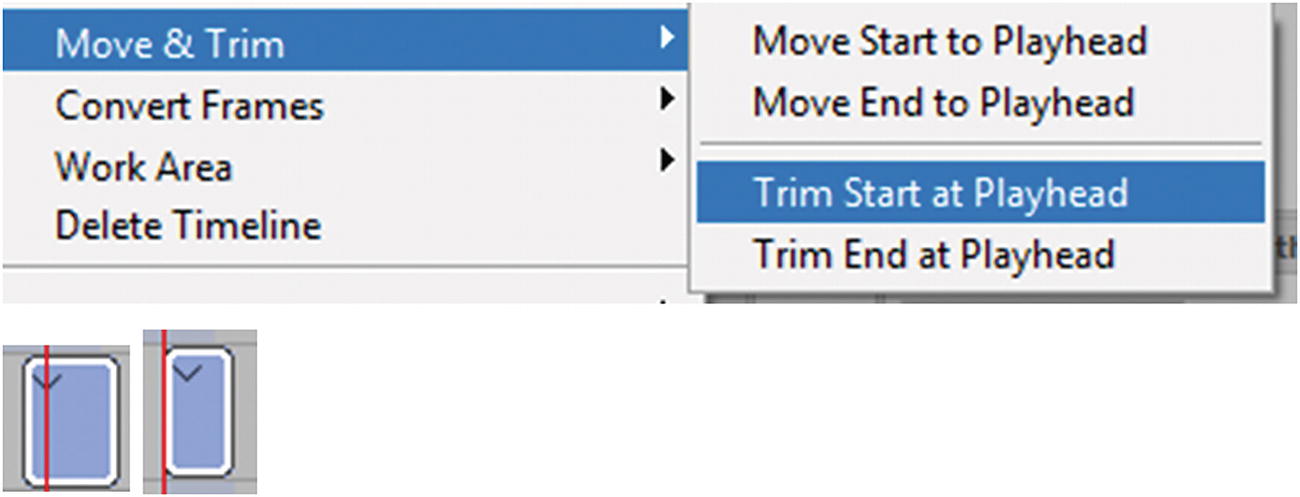
Trimming using the playhead
This shaves off part of the movie at this point. Move Start to Playhead and Move End to Playhead allow you to align a track to a specific point in the timeline using the playhead; this is easier than dragging the track.
Convert Frames
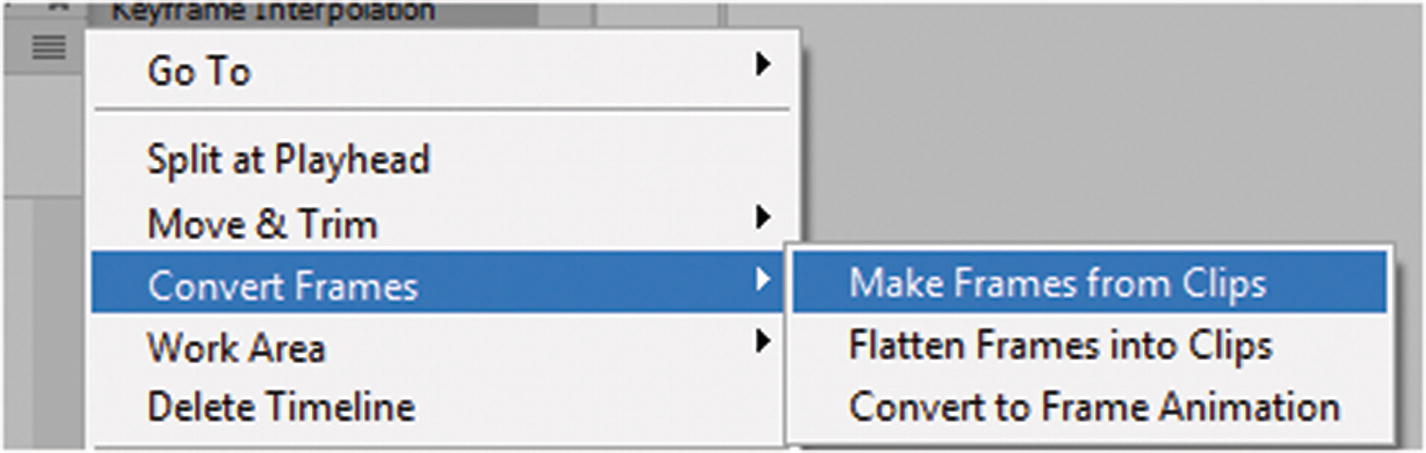
Convert Frames options
Make Frames from Clips: Make the movie frames single clips on the timeline from separate layers. This only works if the video is first flattened into clips.
Flatten Frames into Clips: This makes all the frames separate layers for clips in the Layers panel. And then as separate layers in the timeline, you can drag selected frames and order them onto one layer in the timeline as a video group to create a frame-by-frame animation. This is useful if you need to alter each frame to add or remove something from the scene. Examples are a floating orb or some item that added by creating a drawing first.
Convert to Frame Animation: This converts back to the animation timeline; in doing so, you lose important data. If you do this by accident, make sure to hit Cancel in the warning box, or go back in your History panel to before this setting, as seen in Figure 7-46.
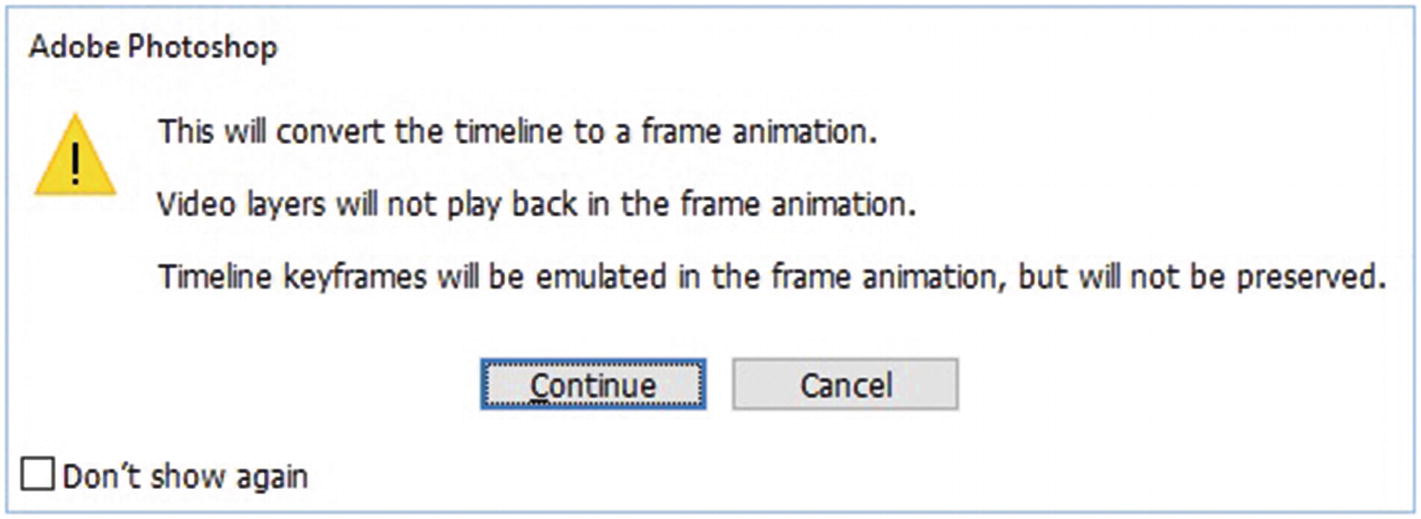
Warning for converting the timeline to a frame animation
Video and 3D Graphics
3D object or camera position: Use the 3D position or camera tools to move the model or 3D camera over a duration of time. Photoshop can tween frames between position or camera movements to create smooth motion effects.
3D render settings: Alter render modes with the ability to tween transitions between some render modes. For example, change gradually from vertices mode to wireframe to simulate the sketching-in of a model’s structure.
3D cross section: Rotate an intersecting plane to display a changing cross section over time. Change cross section settings between frames to highlight different model areas during an animation.
In high-quality animations, you can render each animation frame using the Render options in the Render Video dialog box (see the “Rendering the Video” section in this chapter).
Tip
You can create examples of faux 3D using a 2D photo, known as a 2.5D Parallax Effect, by cutting out the people or objects from the photo image, then fill in the gaps with the stamp tool where the people were. When the foreground object is separated from the background layer this gives the appearance when movement is added that the people or objects are alive and gives depth, bringing the scene to life. You often see this effect used in historical documentary videos where black-and-white pictures that are then colorized of an event when no video footage at that time was available. For more information on 3D, visit https://helpx.adobe.com/photoshop/using/creating-3d-objects-animations-photoshop.html#create_3d_animations_ . For a basic example of 2.5D Parallax, check out my example in the Chapter 7 folder.
Interpret Footage
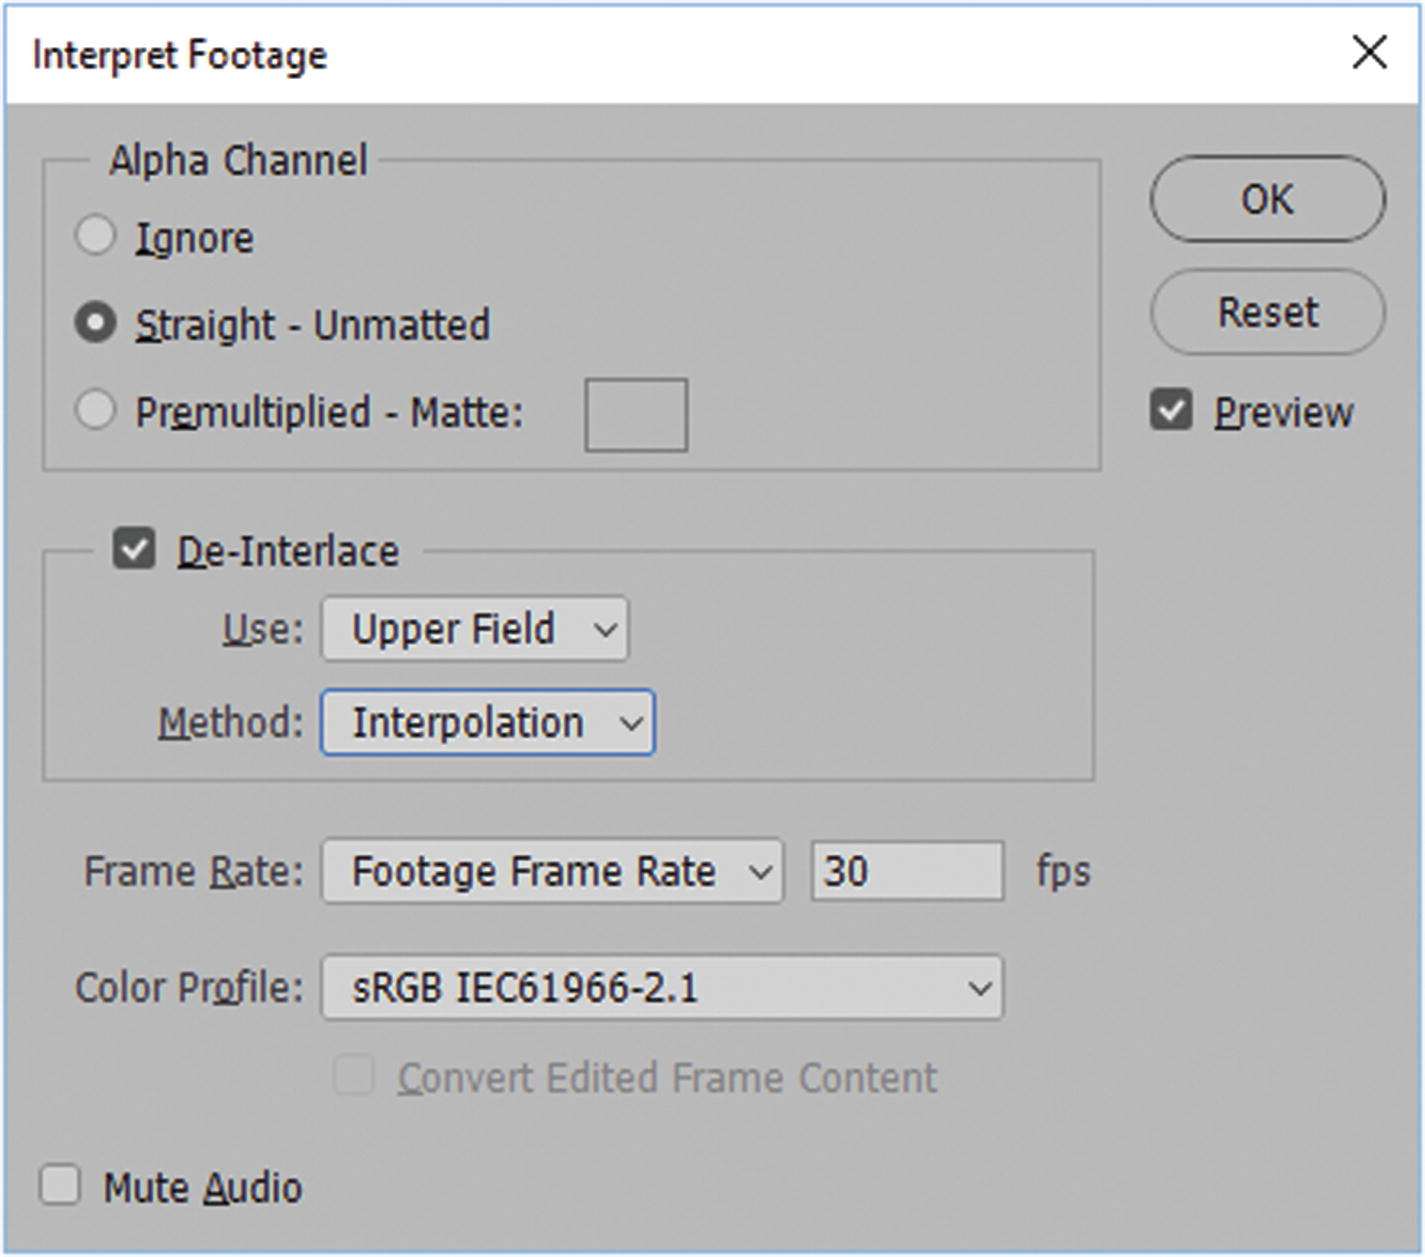
Interpret imported video footage
Alpha Channel
An example of an alpha channel is what you see when actors stand in front of a green or blue screen. The green background is not recognized as part of the scene; it is replaced by a different background that is digitally inserted later. If the imported video contains no alpha channel, this area is unavailable and ignored.
If an alpha channel is used in an image, there are two common representations available: straight (unassociated or unmatted) alpha, and premultiplied (associated or matted) alpha. When Premultiplied-Matte is selected, you can specify the matte color with which the channels are premultiplied or blended.
If an incorrect alpha color is chosen, ghosting or halos around objects can occur. When choosing the correct matte color, make sure to preview first. Blue or green are the common colors to use when shooting subjects who will be superimposed on a background or video footage. For more information, visit https://en.wikipedia.org/wiki/Alpha_compositing and https://helpx.adobe.com/photoshop/using/importing-video-files-image-sequences.html .
De-Interlace
This feature affects how the video renders. Sometimes it can affect the quality of the video with scaling or blurring, so it is important to preview and test your video to get the optimum quality. Interlacing is a technique developed for transmitting television signals using limited bandwidth. In an interlaced system, only half the number of horizontal lines or fields for each video frame is transmitted at a time.
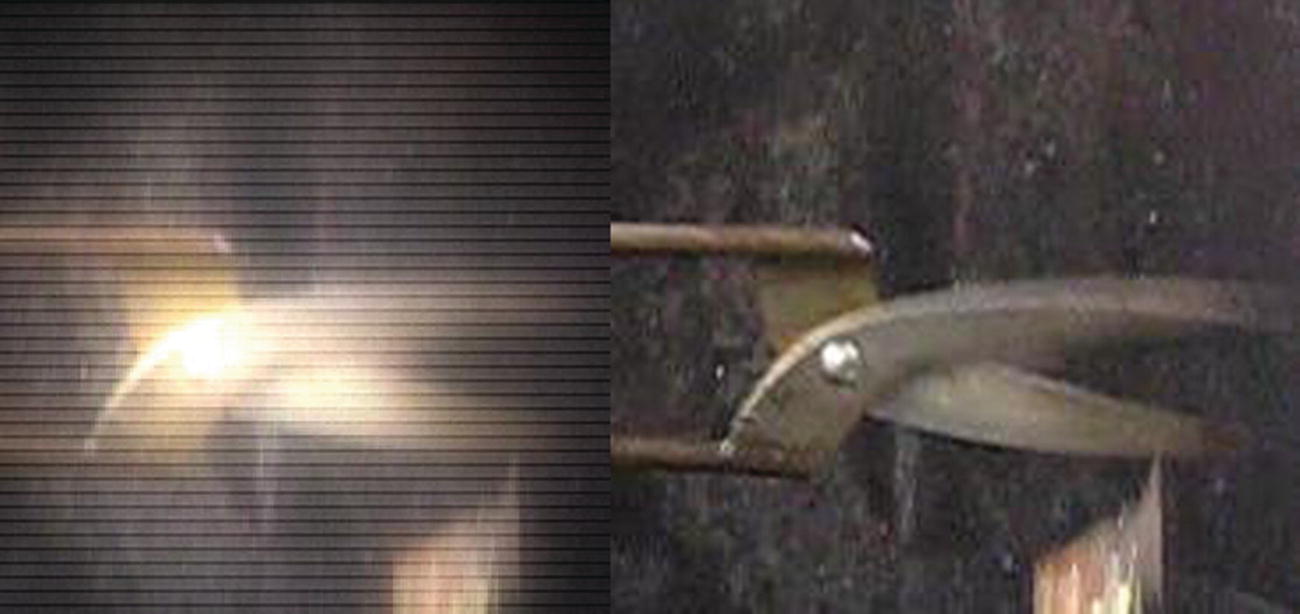
How interlace(left) and de-interlaced footage might appear
For more information on de-interlacing, visit https://en.wikipedia.org/wiki/Deinterlacing and https://helpx.adobe.com/premiere-pro/using/interlacing-field-order.html .
Frame Rate
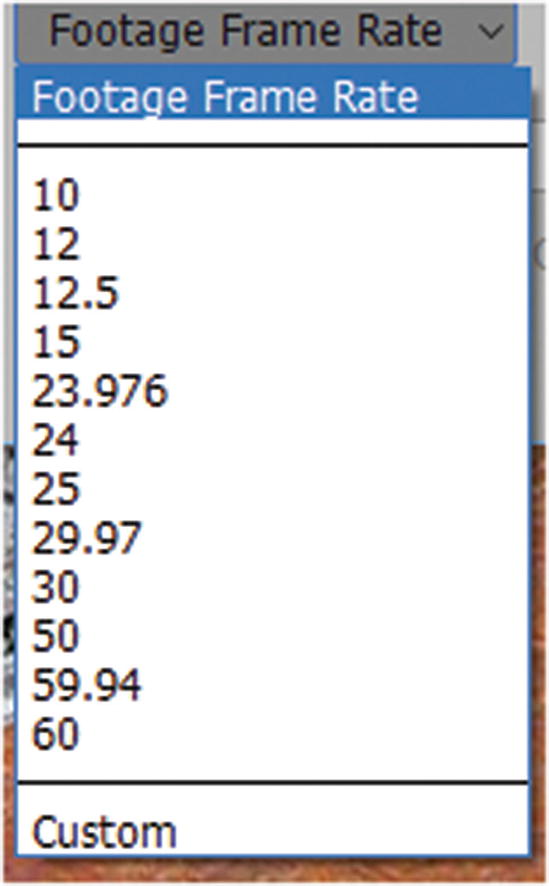
Frame rate options
Other Settings
Color Profile color-manages the frames or images in a video layer.
Mute Audio turns off the sound in the video. If you don’t mute the audio here, you can always change it in the timeline (as you saw earlier when you looked at track settings).
Playing and Previewing Video

Play settings

Turn sound on or off
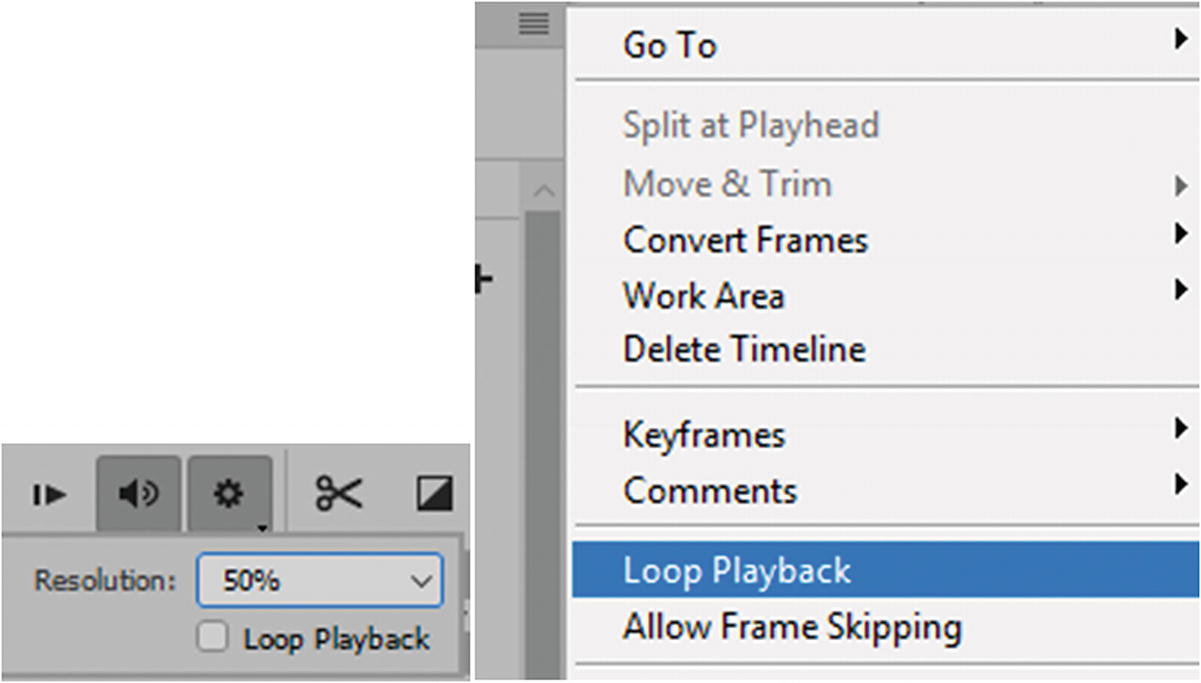
Set preview resolution and loop playback in the Widget icon
Note
Allow Frame Skipping (see Figure 7-52) refers to skipping uncashed frames (not fully loaded in to Random Access Memory (RAM)) to achieve real-time playback. If you find that your video still skips with this setting selected, it may mean that either Photoshop does not have enough RAM and or your computer requires more RAM.
Working with the Timeline and Playhead
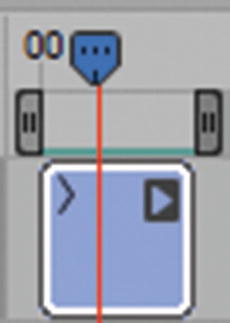
Drag the timeline handles to lengthen or shorten the video overall
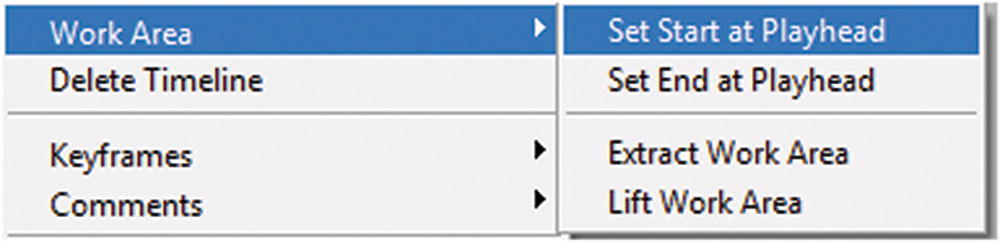
Adjust when the video starts and ends using Work Area settings in the timeline
Note
Extract Work Area allows you to remove an area from a video or blank video keyframe split it onto two lines. Use the beginning and ending handles to set the duration that you want to remove. The playhead must be within the handles. Then choose Work Area ➤ Extract Work Area, as seen in Figure 7-55.
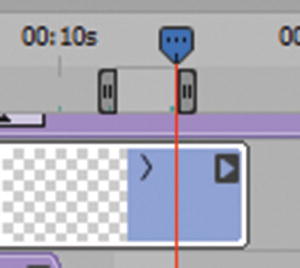
Extract a work area is very similar to split video clips
Note
Now that the area is extracted, the remainder is divided on two layers.
Lift Work Area: Works on the same principle as Extract Area except rather than compress the video layers after removing, it leaves a gap in the area that was removed, as seen in Figure 7-56.
Lift a work area is very similar to split video clips
Both appear to work best with Smart Object and blank video layers. You want to move the gray handles back to the start and the end of the video so that all the tracks can play.
Continue Working with the Playhead to Edit Video
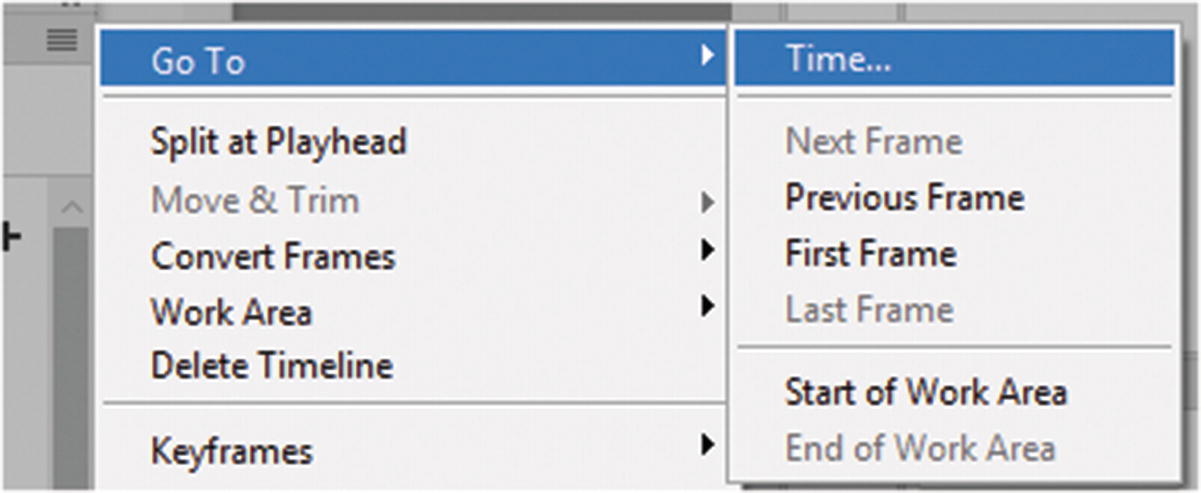
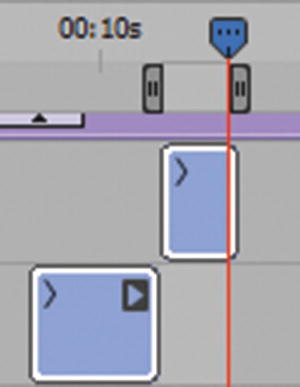
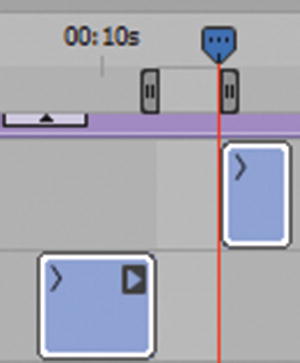
Use the Timeline menu to navigate to a specific point in the timeline
If you want to add more keyframes to your video timeline, you need to add a longer video. While on a blank or altered video layer choose Layer ➤ Video Layer ➤ Insert Blank Frame. Or drag the timeline portion of that layer forward to make the timeline longer by using the prong icon.
Likewise, you can use Layer ➤ Video Layer ➤ Delete Frame from a blank or altered video layer, or drag the tracks timeline portion backward to make the timeline shorter.

Frames can be duplicated in blank altered video layers that contain content
Other options are Layer ➤ Video Layers, Restore Frame, Restore All Frames, and Reload Frames.
Adjust Frame Rate
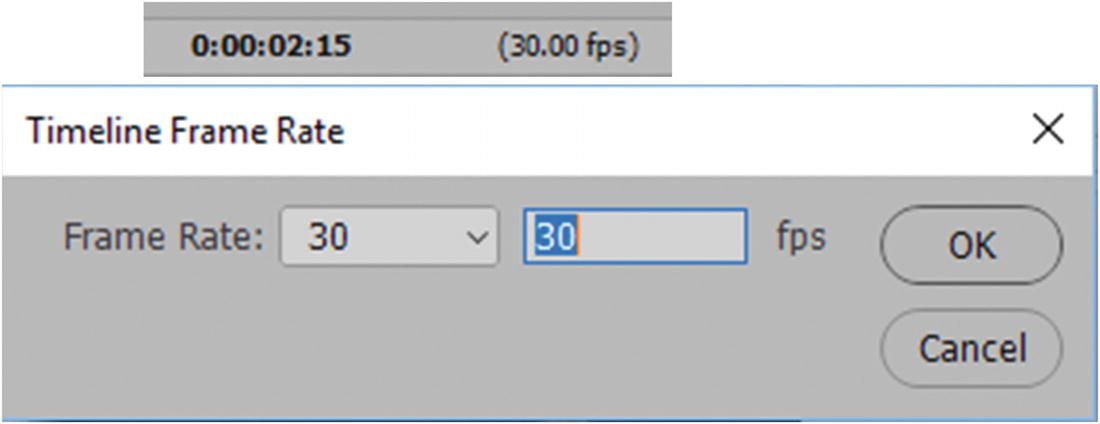
Adjust the timeline frame rate for the video

Zoom in or out in the timeline to look at tracks
Adding Comments

Adding comments
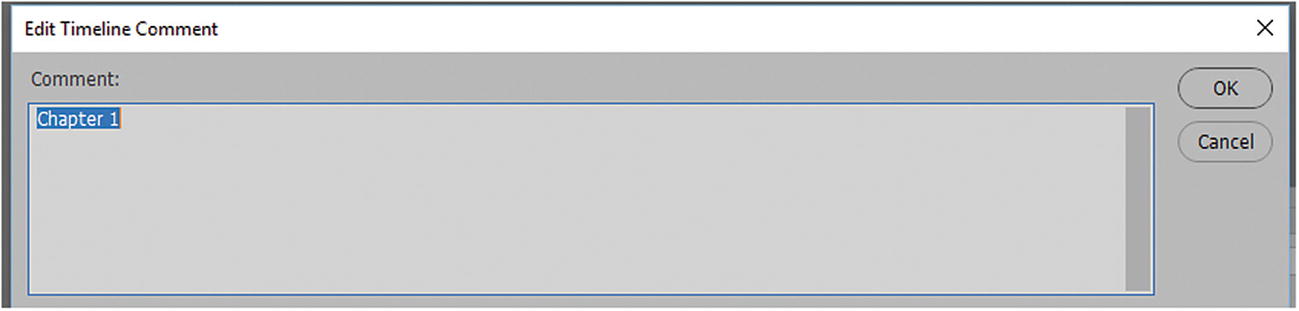
Adding comments to your video
Click OK to save the comment.
You can also choose to export all comments as HTML or text, if required for other work.
Viewing the comments track
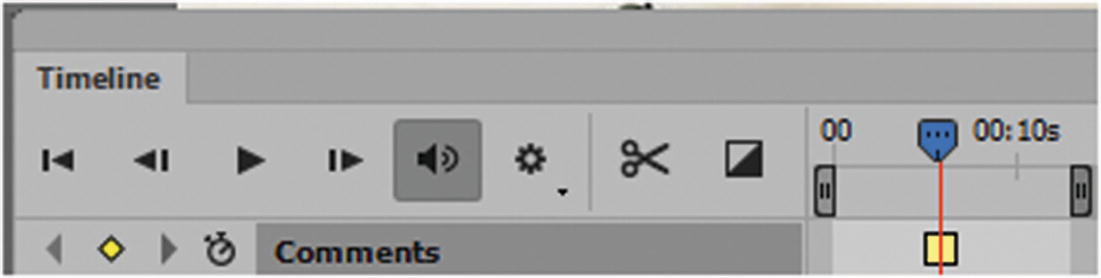
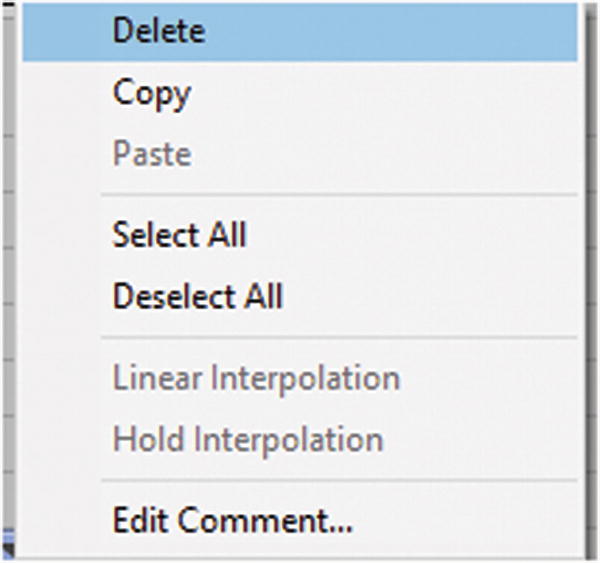
The keyframe (yellow square) in the Comments Track can be edited or deleted
Hide or Show Tracks

Hide or show certain clips in the timeline
Hide or show select clips in the timeline
Favorite Clips Only: To show only a select subset of layers, first set them as favorites in the Timeline panel.
Set Favorite Clips: Select one or more layer tracks from the Timeline panel, then choose Show ➤ Set Favorite Layers from the menu.
Global Light Track: Displays keyframes where you set and change the master lighting angle for layer effects, or styles such as Drop Shadow, Inner Shadow, and Bevel and Emboss. Refer to Figure 7-67.
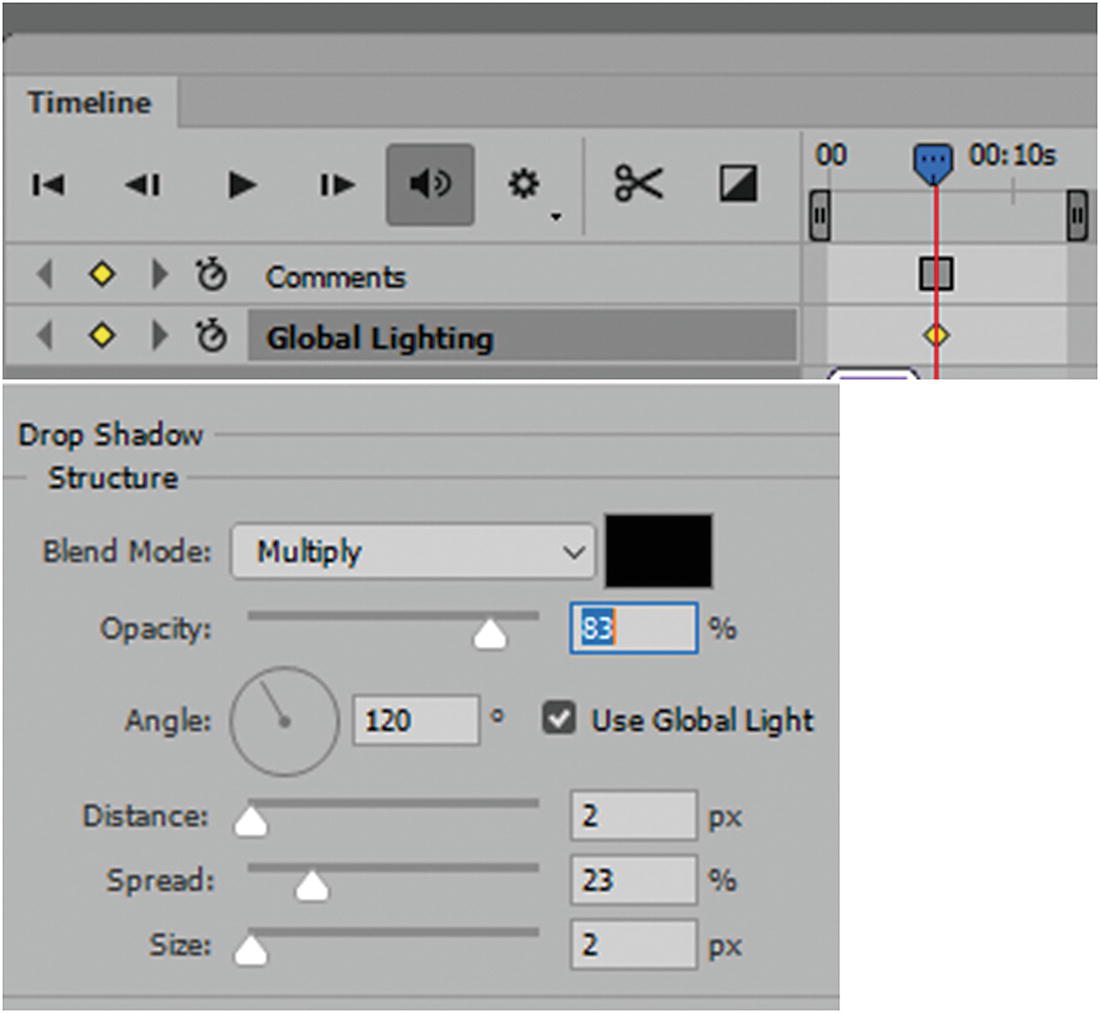
Different layers may have global lighting that you want to control in one keyframe to keep consistent with other layers with the same FX settings
Other Settings in the Timeline Menu

Additional timeline menu settings
Enable Timeline Shortcut Keys : If you have created shortcut key from Edit ➤ Keyboard Shortcuts (see Figure 7-69), you could use them when this selection is checked.
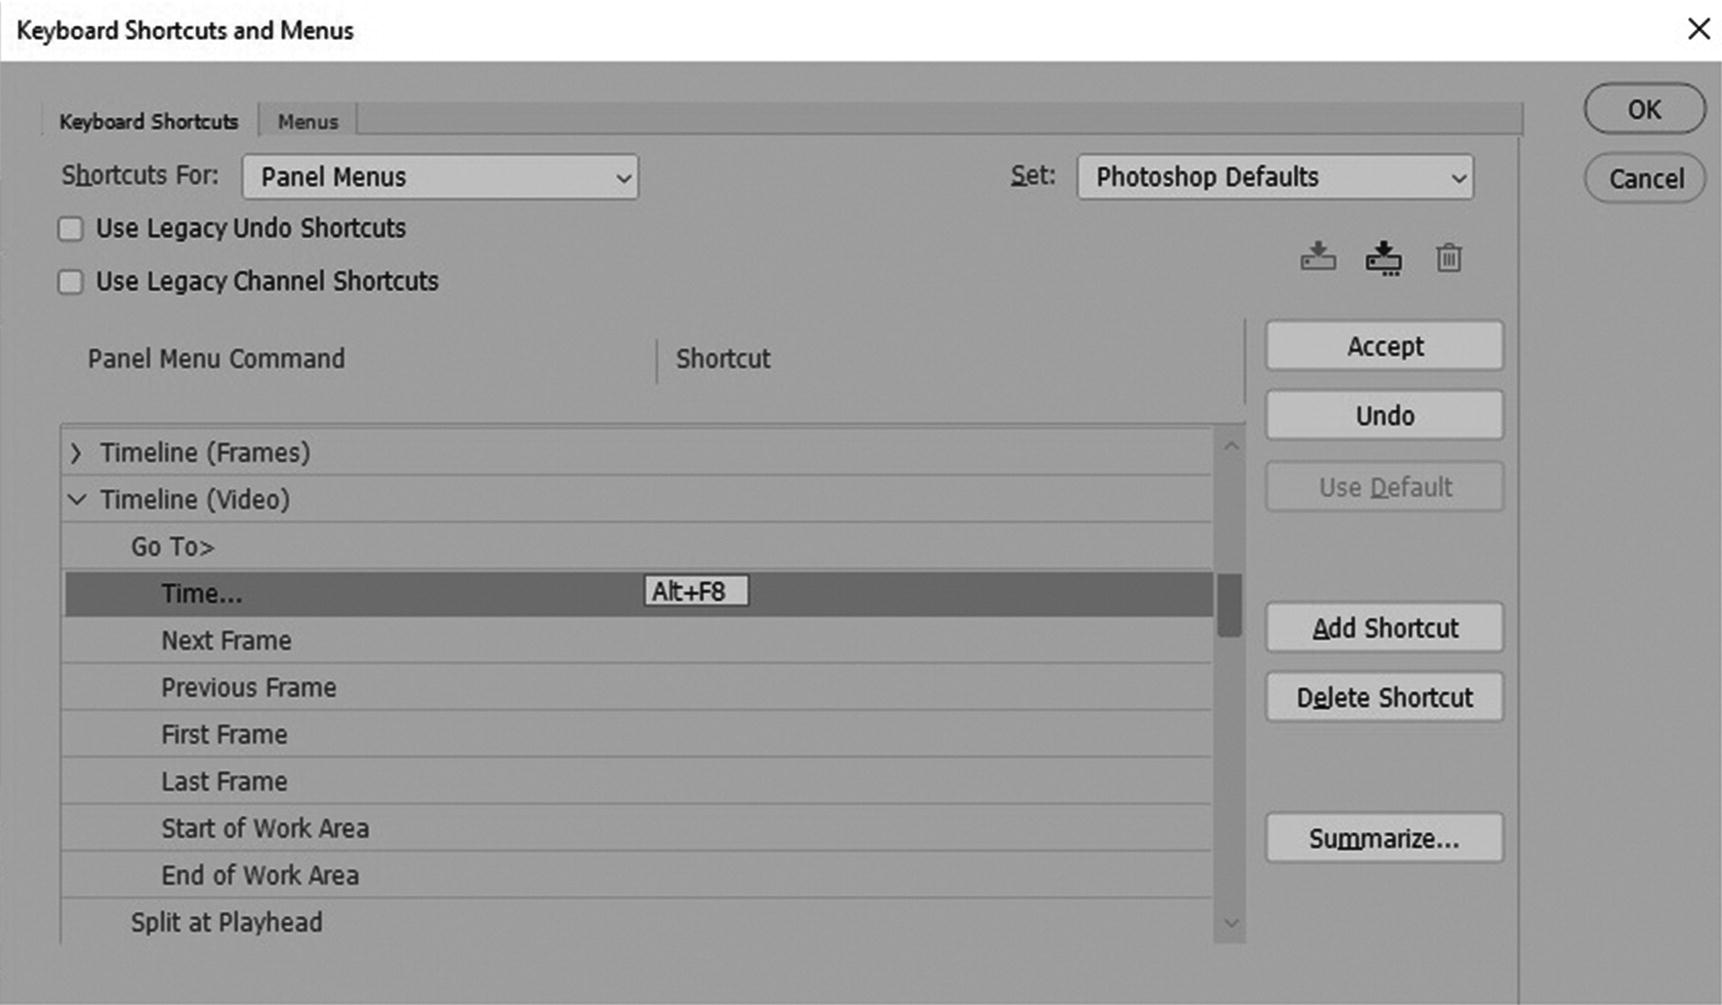
Keyboard shortcuts
Enable Auto-Grouping of Clips : This is set as default and allows the movie clips to be grouped together.
Enable Onion Skins : Use this feature if you are creating a type of hand-drawn stop motion animation. This makes the video slightly blurry so that you can see how different layers interact. It does not affect the actual video; it is only to help you preview the video during editing. If you need to adjust the options, go to Onion Skin Options.
Enable 3D Tracks : If the layers contain 3D graphics, this area is enabled; otherwise, it is unavailable. For more information, refer to the “Video and 3D Graphics” section in this chapter.
Onion Skin Options : If you have enabled onion skinning, you see whatever settings you applied here, as seen in Figure 7-70.
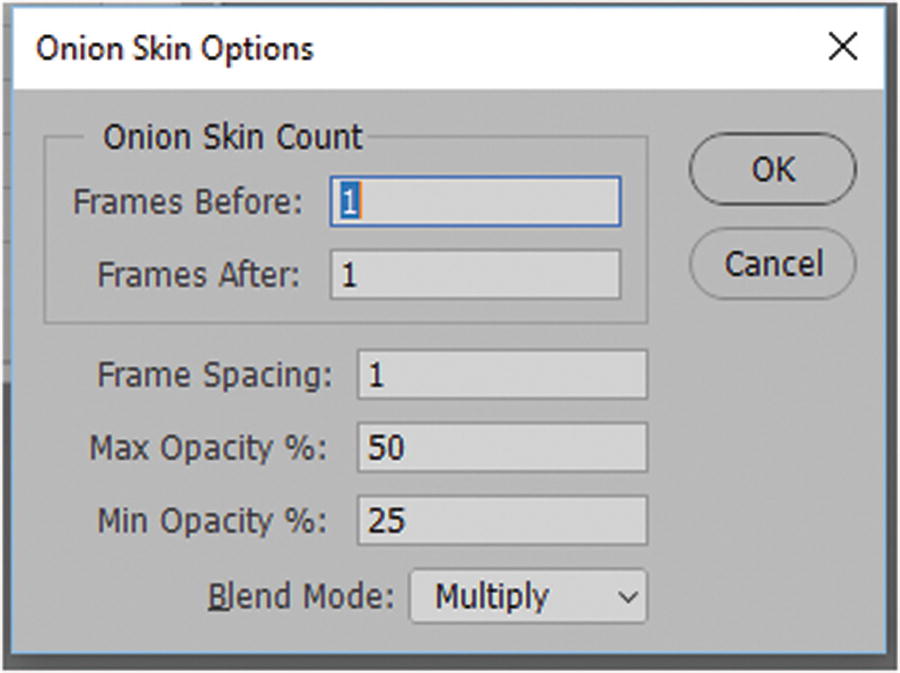
Onion Skin Options dialog box
Onion Skin Count : Refers to the number of previous and forward frames displayed in the preview. You can enter the Frames Before (previous frames) and Frames After (forward frames) values in the text boxes.
Frame Spacing : The number of frames between the displayed frames. For example, a value of 1 displays consecutive frames, and a value of 2 displays strokes that are two frames apart.
Max Opacity: Enter a percentage of opacity for the frames immediately before and after the current time.
Min Opacity: Enter a percentage of opacity for the last frames of the before and after sets of onion-skin frames.
Blend Mode : Sets the appearance of the areas where the frames overlap. Multiply is the default but you can set it to Normal, Screen, or Difference for previewing.
Set Timeline Frame Rate: Sets the frame rate for the movie. Refer to Figure 7-59 for a visual example.
Animation Panel Options : This controls the way that you view the timeline icons at small or large sizes. You can also set this for the animation timeline. Refer to Figure 7-71.
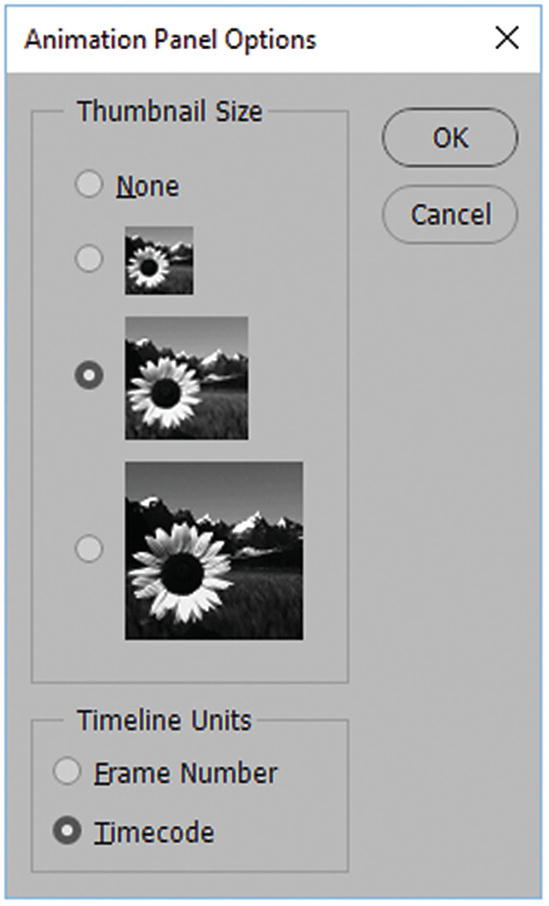
Options for the Timeline panel and set units
Adding Background Audio
The area in the timeline to add the audio track
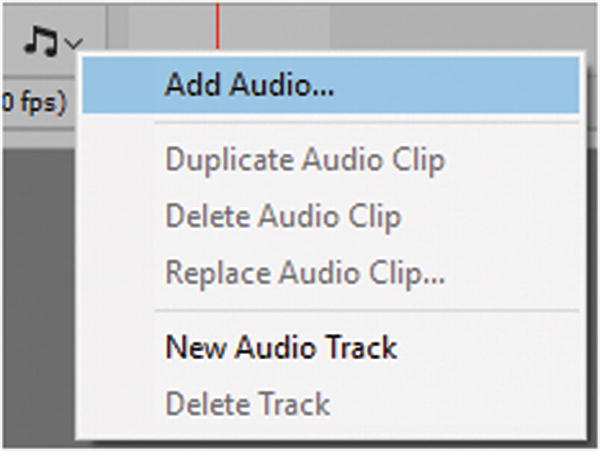
Add an audio track
You could also click the plus (+) symbol on the right of the Video Timeline panel audio track.

Sound added to an audio track
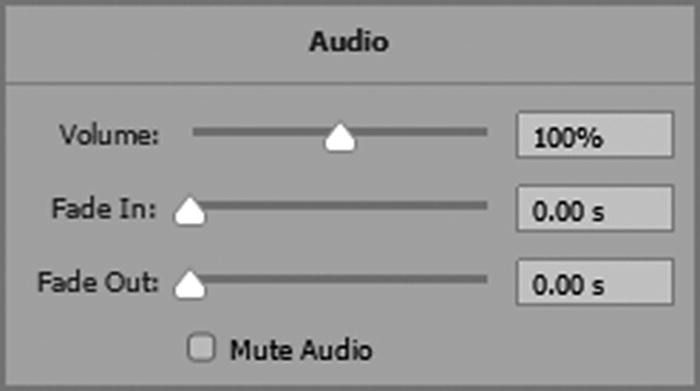
Adjust the audio track
Note
If you have more than one track or your audio is spread out, you need to drag the track to the location. Unlike layers, sounds do not appear in the Layers panel; if you decide to add a sound between two other sounds, you may need to spend more time organizing and adjusting your sound order. If you need to edit your audio, use a program like Adobe Audition CC first.
Rendering the Video
Click to bring up the Render Video dialog box
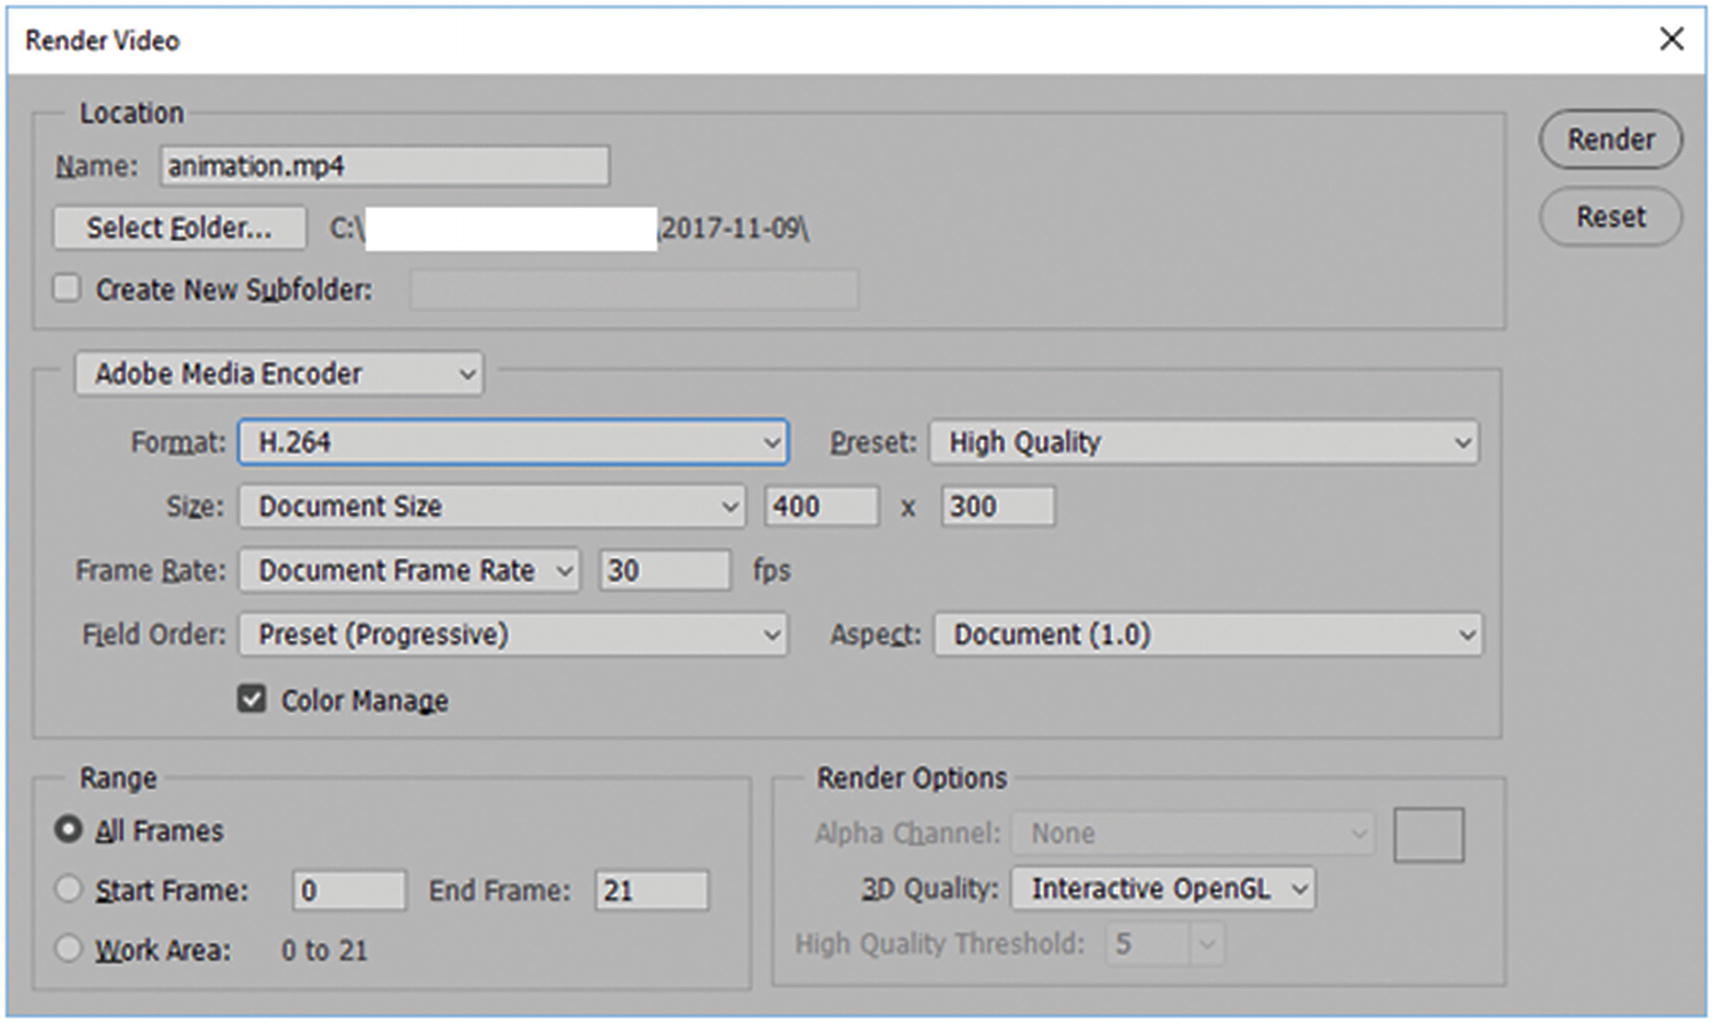
Render to create your MP4 file
Caution
If your video is small (like the examples in this chapter), rendering your file on the main computer drive is fine. However, if you plan to render a large video file, as I show in Chapter 9, I recommend saving. Larger renderings take time and have the potential of crashing, or at the very least, slowing down your computer.
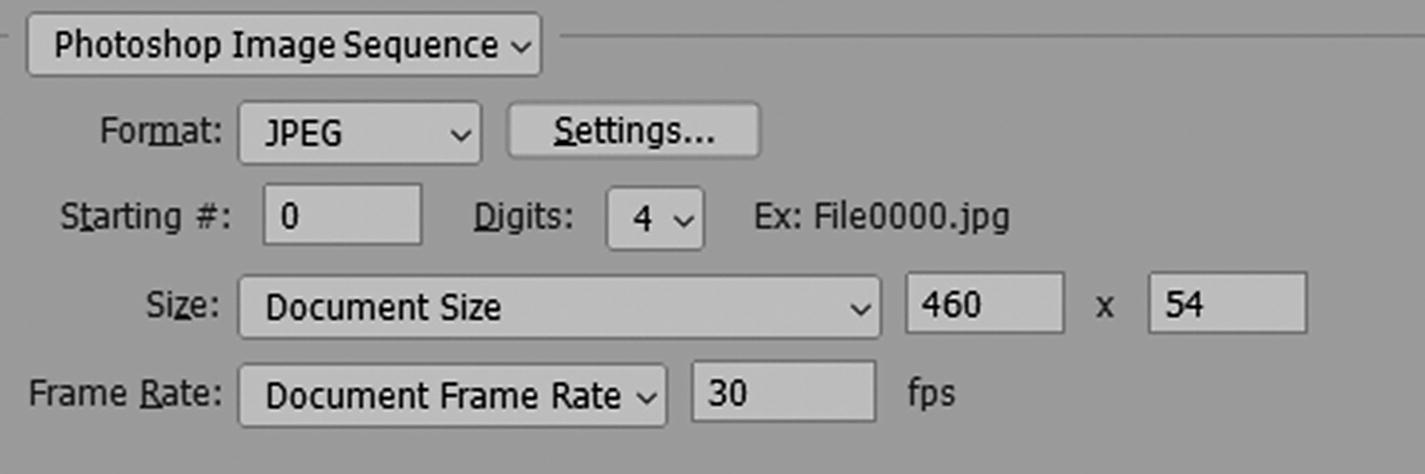
Photoshop Image Sequence setting for render
Remember, if you choose image sequence, it will produce a lot of individual frames; so it may be best to select a range rather than all in your render settings.
Saving the Original File
Your RAW video file can be saved as a PSD so that you can go back and alter it at any time. Just make sure to keep your video files in the same folder so that the link does not break.
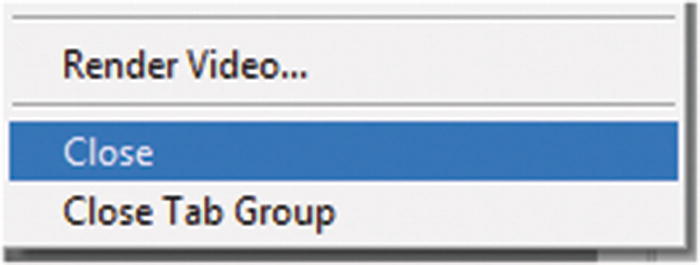
Close the Timeline panel when not in use
Summary
This chapter explored how to work with Video Timeline panel tools for the web and how to render an MP4 file. You’ll practice this again in Chapter 9, but in the next chapter, you take a short detour to see which miscellaneous tools Photoshop has to offer for web design.