
In this chapter, you are going to explore some of the many ways that are available to you to export your images for the web using Photoshop. Adobe has a variety of ways to do this; some of the options appear to overlap, so at times, it can get confusing to know which options are best for your project.
Note
This chapter does not have any actual projects; however, you can use the files in the Chapter 4 folder to practice opening and viewing for this lesson. They are at https://github.com/Apress/graphics-multimedia-web-adobe-creative-cloud .
Export Options Available in Photoshop CC Under the File menu. (For more information, go to the section listed above each file.)
File Format | (Option 1) File ➤ Save As | (Option 2) File ➤ Export ➤ Quick Export as PNG* | (Option 3) File ➤ Export ➤ Export As | (Option 4) File ➤ Export ➤ Save For Web (Legacy) |
|---|---|---|---|---|
Bitmap (.bmp) | ✓ | |||
WBMP or Wireless Bitmap (.wmb, .wbmp) | ✓ | |||
JPEG (.jpg, .jpeg, .jpe) | ✓ | ✓(when Export preferences are altered) | ✓ | ✓ |
PNG (8 and 24)(.png) | ✓ | ✓(default) | ✓ | ✓ |
GIF (static and animated) (.gif) | ✓(static) | ✓(static, when Export preferences are altered) | ✓(static) | ✓(static and animated) |
SVG(.svg) | ✓(when Export preferences are altered) | ✓ | ||
Photoshop PDF (.pdf) | ✓ |
Note
One file type not discussed in Chapter 1 was WBMP or Wireless Bitmap (.wmb, wbmp). WBMP images are monochrome (black and white) so that the image size is kept to a minimum. A black pixel is denoted by 0 and a white pixel is denoted by 1. For colored images, Wireless Application Protocol (WAP) supports the PNG format. This type of graphic is used in mobile computing devices.
As you can see, Photoshop CC offers at least four ways to save your files for the web. Later in this chapter, we will look at a few more hidden export features.
For now, let’s look at the four main options; refer to Table 4-1 if you need to compare information.
Option 1: File ➤ Save As…
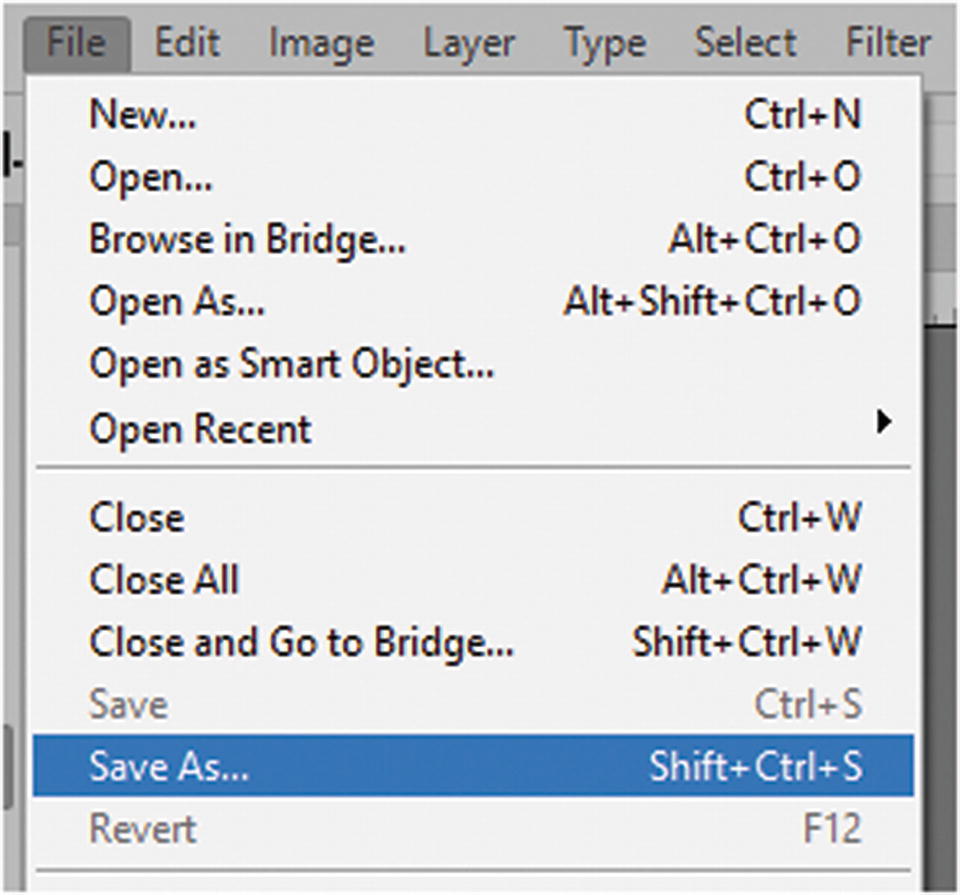
Photoshop allows you to save a copy of your artwork in another format using File ➤ Save As
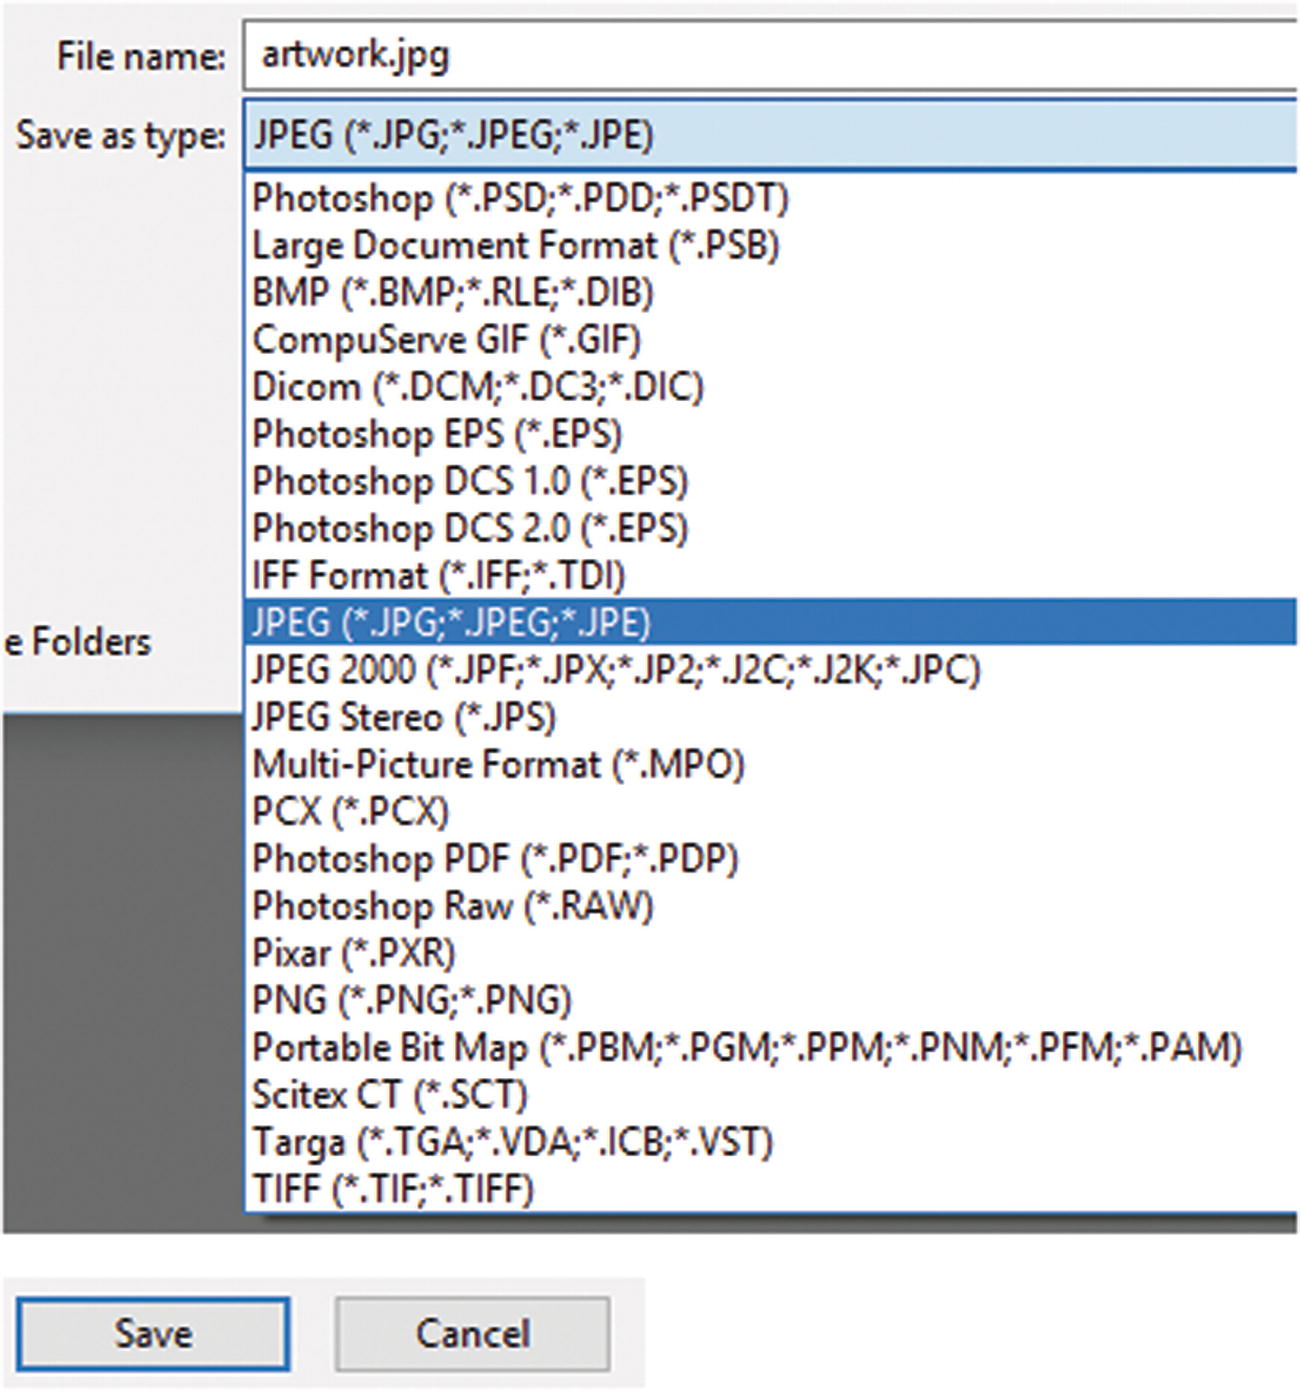
The options found in File ➤ Save As in the Save as type drop-down menu
However, as you see in Figure 4-2, you can’t adjust or preview initial settings for that file until you click the Save button. Depending on the file format, only then are you able to click the preview check box in that particular file format’s dialog box. Whatever format type you choose, you can’t switch to another file format to compare both of your options at the same time.
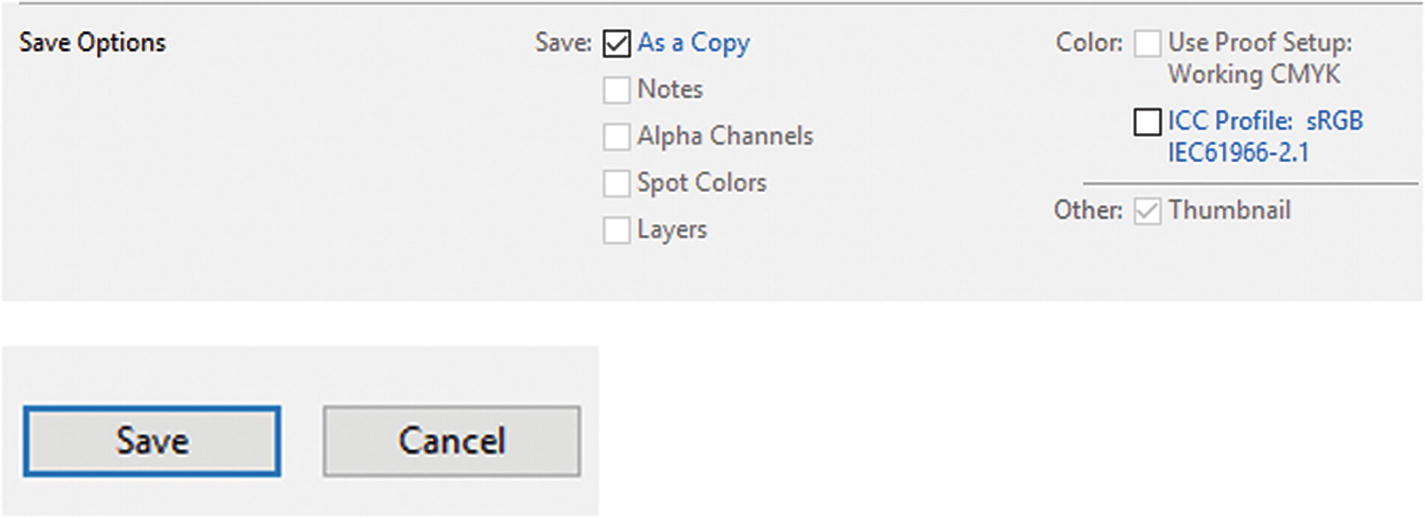
Before you save a file, you can save as a copy to prevent the file from being overwritten, as well as choose a color profile if it has not already been set
Note
You may get a Warning button (see Figure 4-4) if your file contains layers. If you click it, it states that the file must be saved as a copy, which flattens that copy.
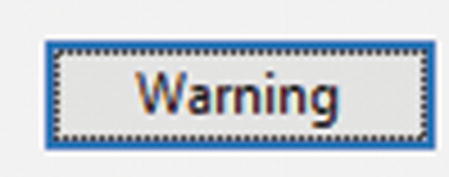
Click the Warning button if you are worried that your file may have issues before you save
Next are some settings that may appear for each web file format when you click the Save button.
Bitmap (BMP)
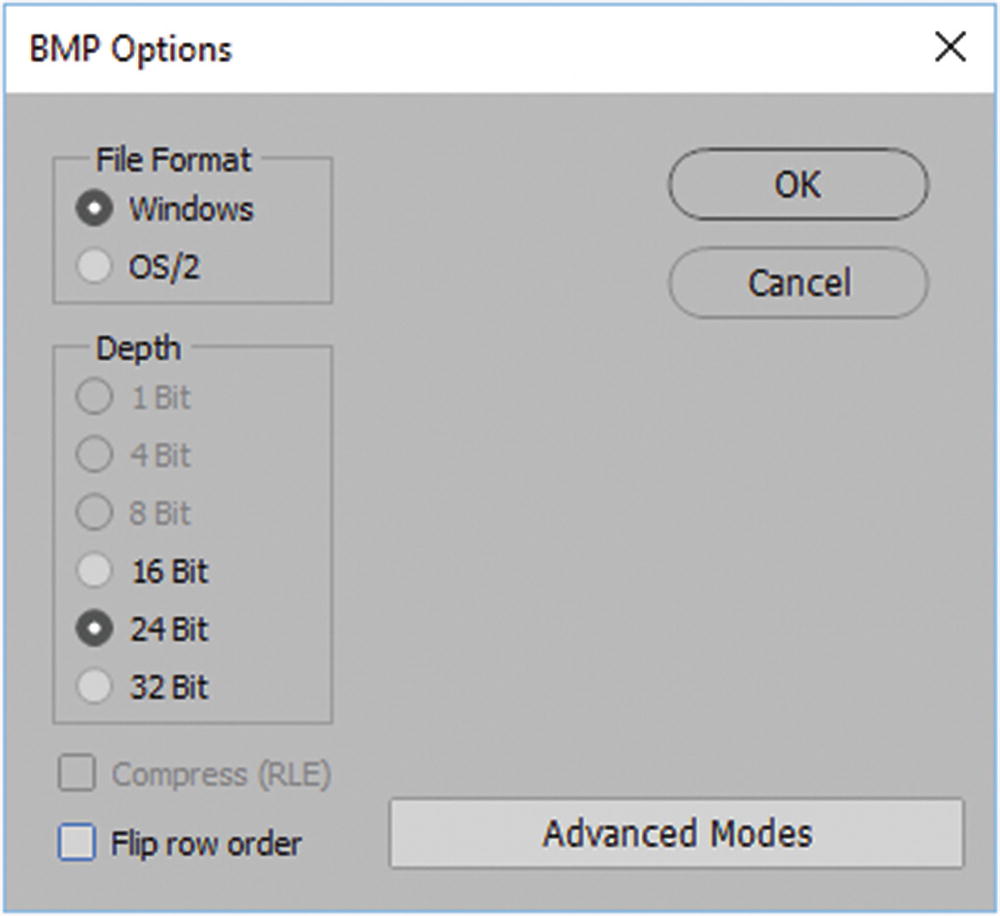
BMP Options dialog box Basic Modes, use lower toggle button to see advanced modes
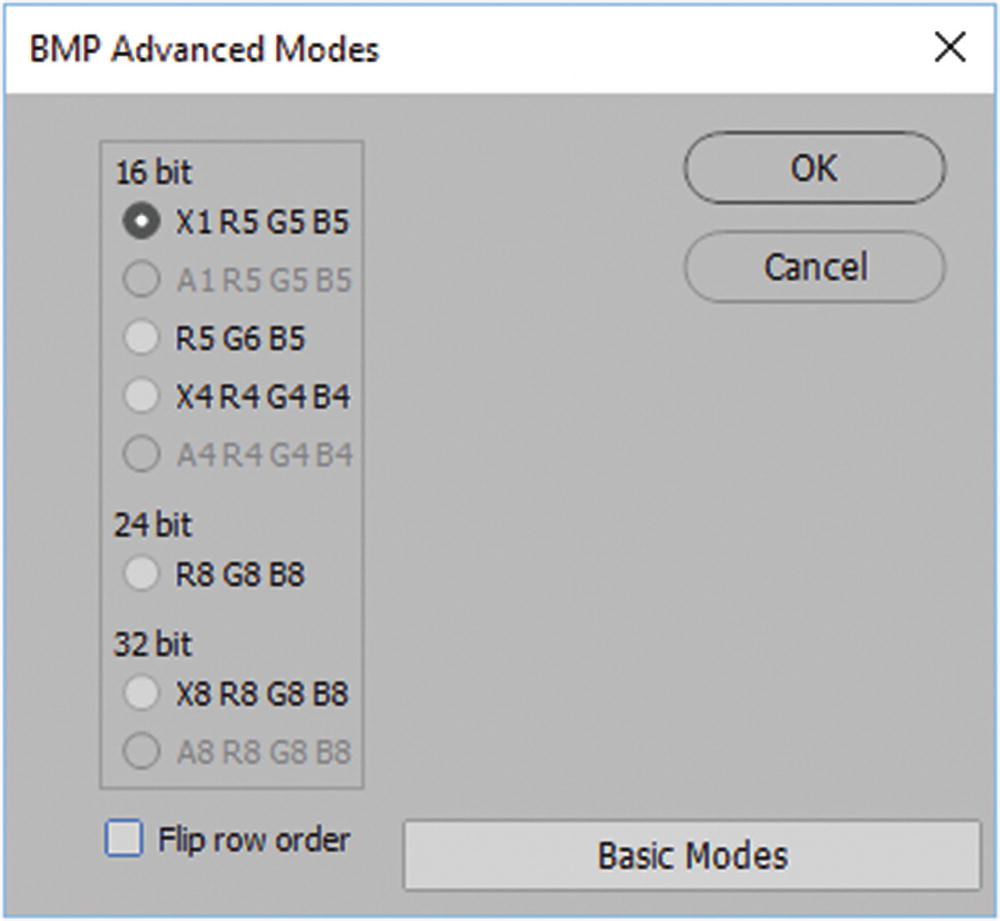
BMP Options dialog box Advanced Modes use lower toggle button to return to basic modes
The BMP file options have a toggle that you can use to set in either Basic Modes or Advanced Modes. In Basic Modes, you can set the file format to Windows or OS/2. You can also adjust the bit depth to 16, 24, or 32. Note that because I used the .bmp file extension, Compress (RLE) is unavailable. The “Flip row order” box refers to how the encoding is written, either from bottom to top or in reverse. According to Adobe, “Advanced Modes are most relevant to game programmers and others using DirectX.”
JPEG
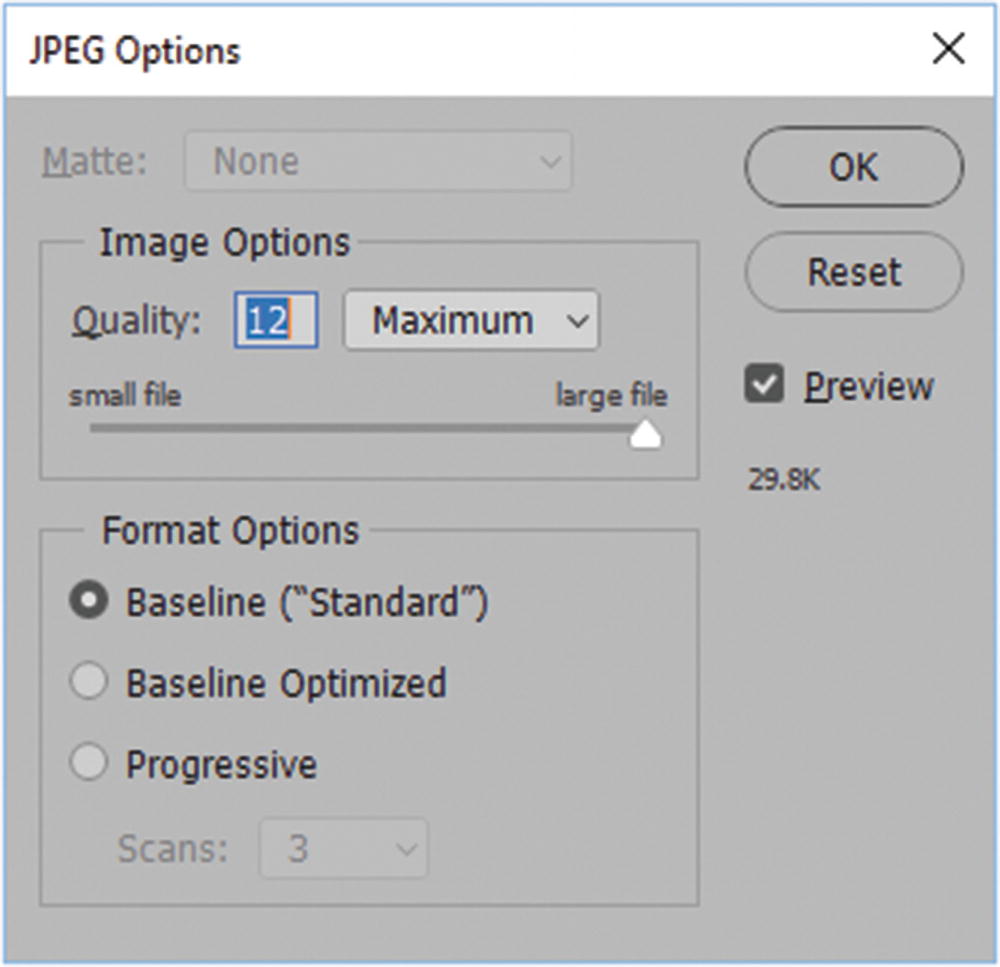
Options in the JPEG Options dialog box
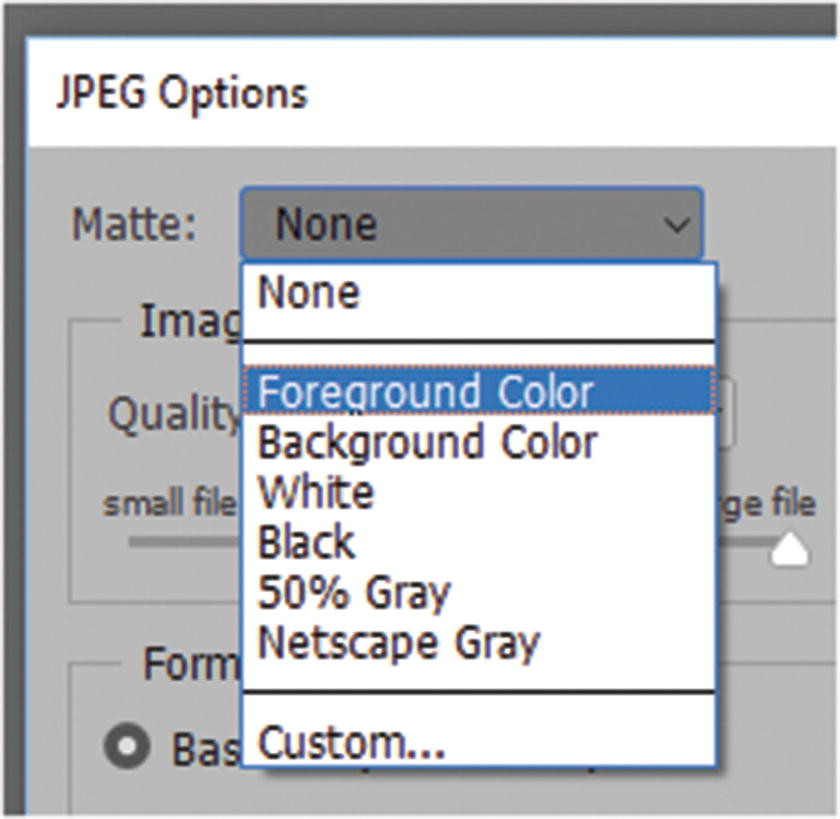
Matte color options when available
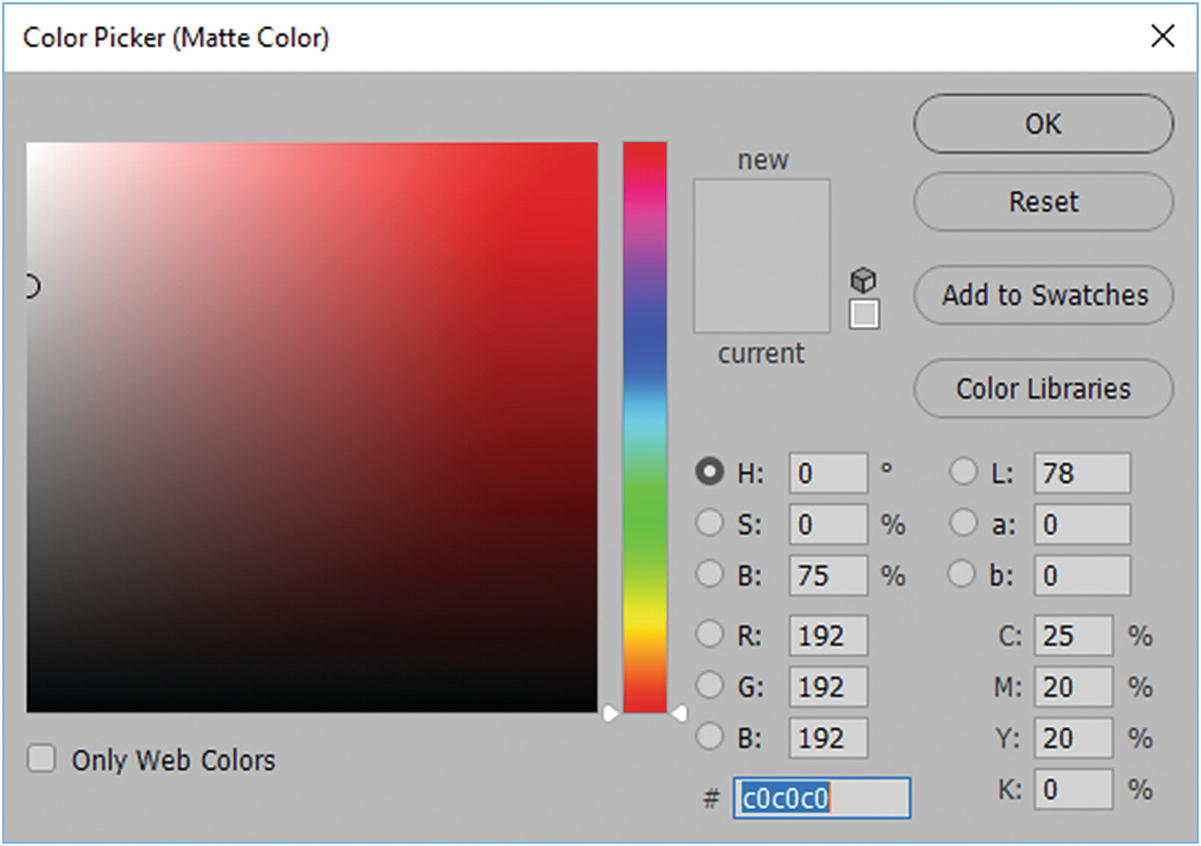
Choose a custom color using the Color Picker
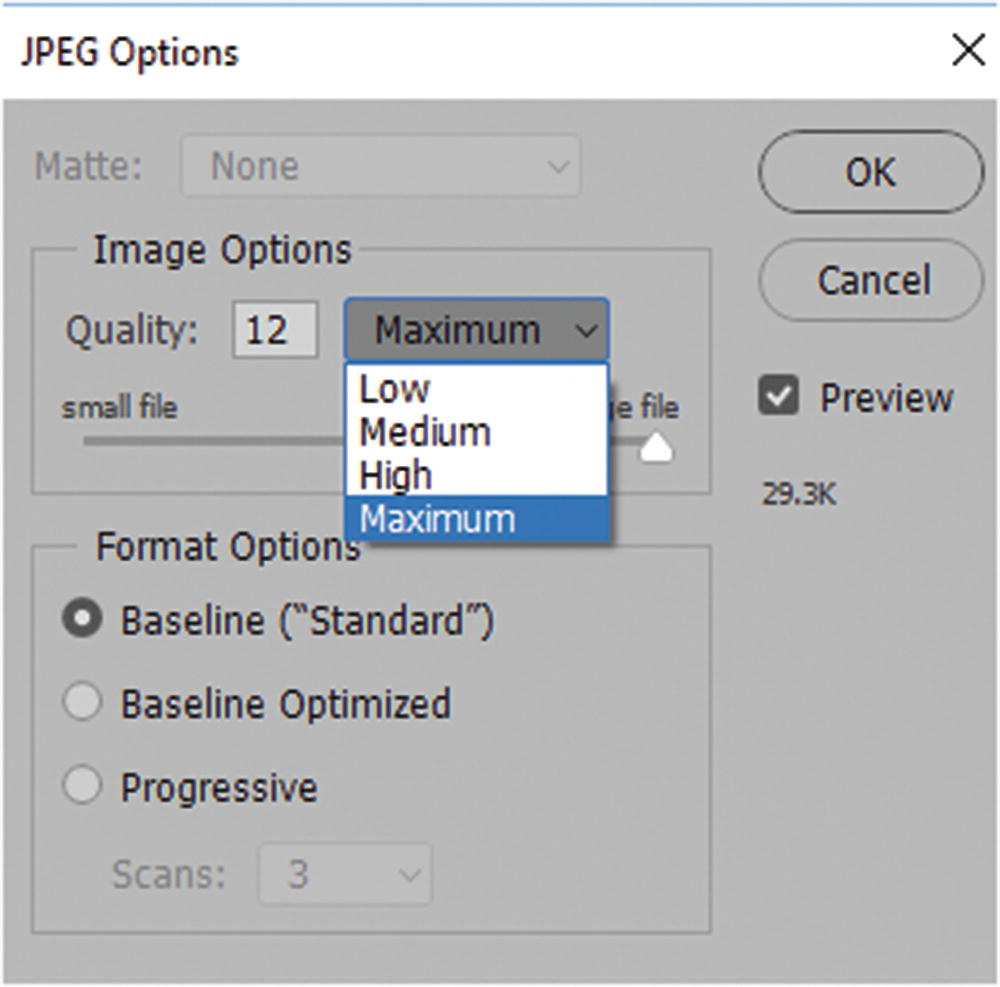
Choose an image quality setting
The number 0 results in a low, grainy image, while a high number like 12 results in a larger image with maximum quality. The size of the file can be seen in the Preview setting.
Baseline (“Standard”): Recognized by most web browsers and good for photos that need decent quality. It is supported by all browsers.
Baseline Optimized: Similar to standard but compresses the file a little more. Depending on the image, the quality is indistinguishable from baseline standard.
Progressive: Creates an image that displays gradually as it downloads. It appears as if the image is rendered as scan lines (like in the days of the old-fashioned tube TVs). At first, the browser quickly shows a reduced quality image of half the scan lines while it resolves the complete image. You can set between three and five scans to take place in this setting: however, with a fast Internet connection, this setting is not used as often.
Note
According to Adobe, some browsers do not support progressive JPEGs, so if you want to use this setting, run a test first.
PNG
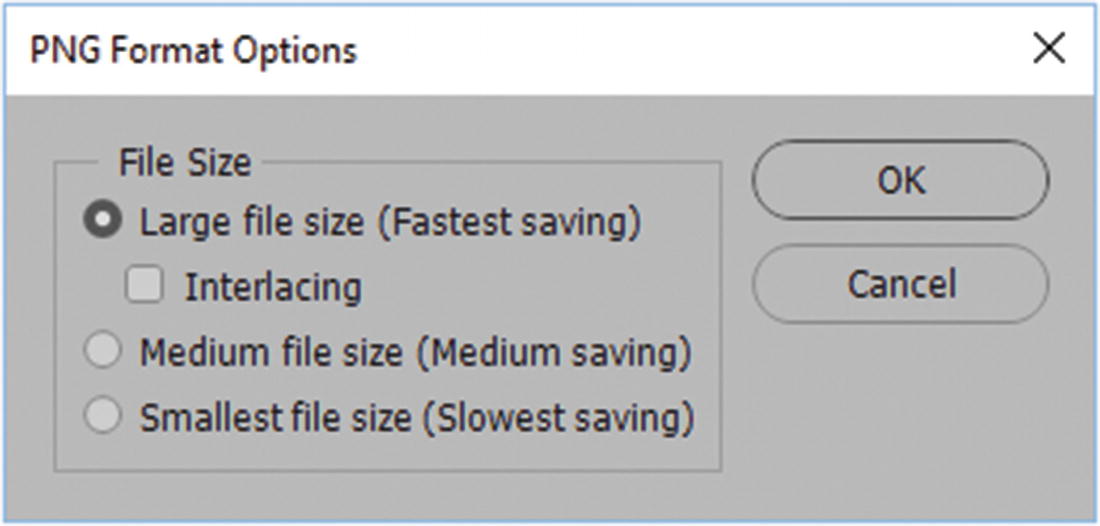
PNG Format Options dialog box for File ➤ Save As
Large file size (Fastest saving): Less compression is applied, so it saves faster.
Interlacing: Similar to the Progressive option in the JPEG setting. The image loads in parts, gradually becoming clearer with each scan.
Medium file size (Medium saving): Some compression is applied, so it saves more slowly than large.
Smallest file size (Slowest saving): More compression is applied to the file and it may take longer to save.
Unlike the JPEG dialog box, you won’t know how small your file will be until after it is saved.
CompuServe GIF
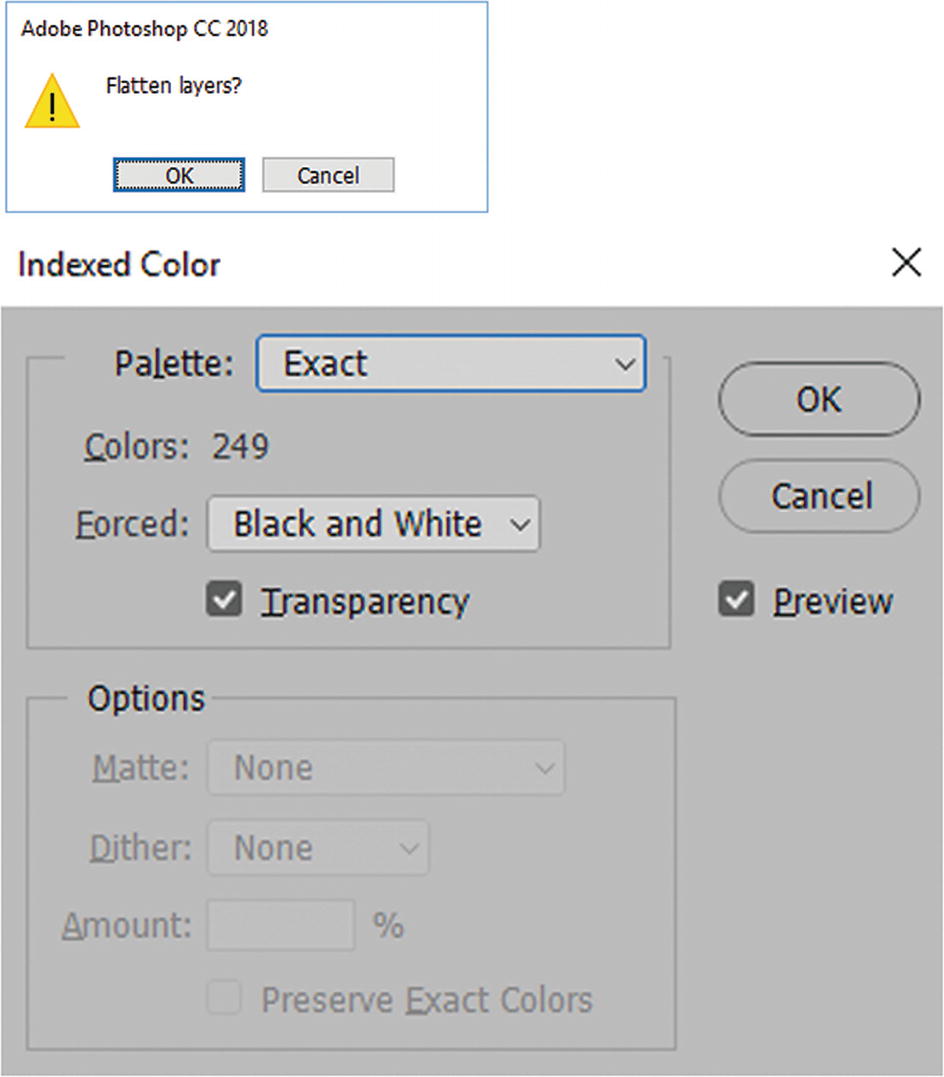
Index color options as seen in the Indexed Color dialog box
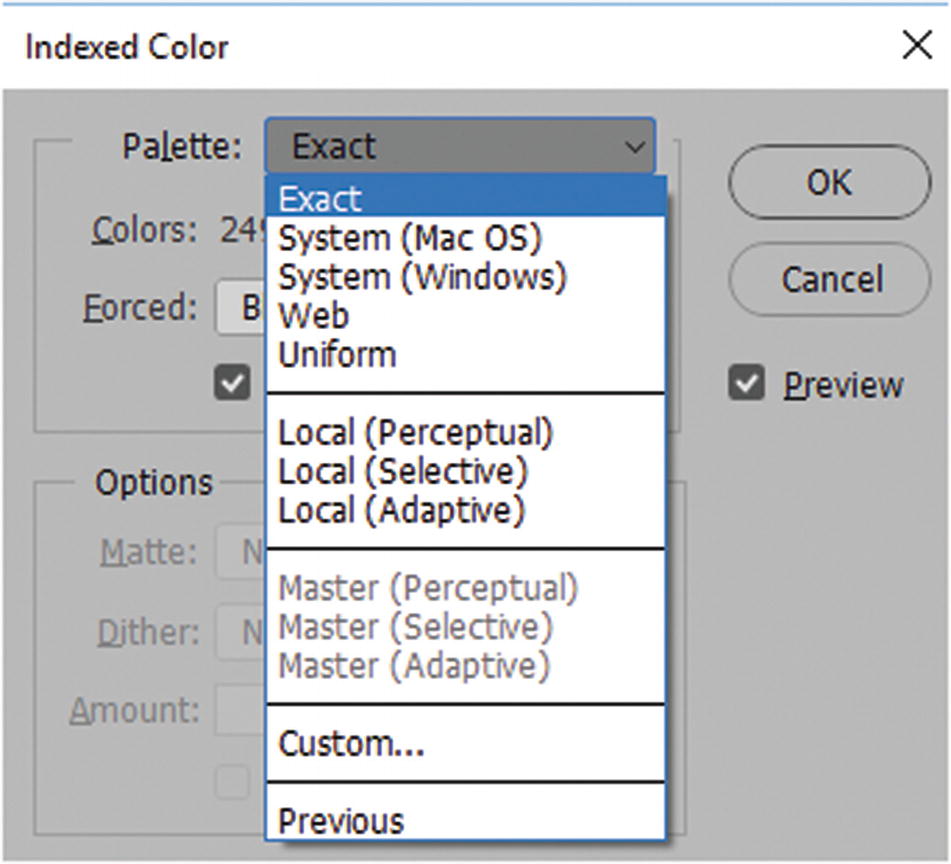
Choose an option from the Palette drop-down menu
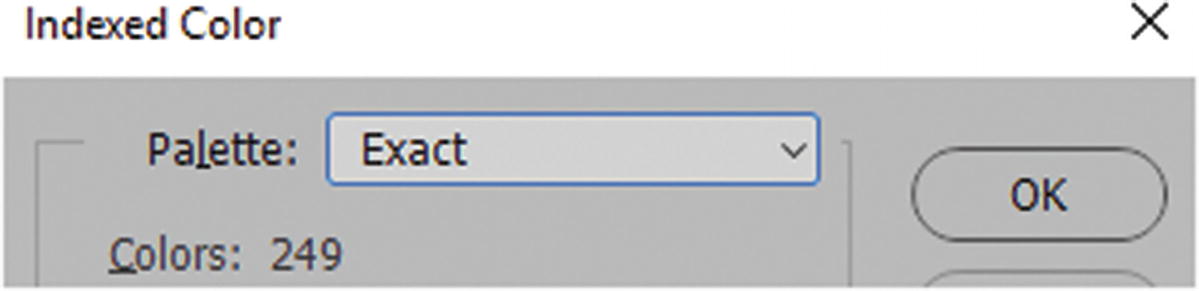
Exact: Shows the current number of colors. Some files will have less than 256 colors.
System (Mac OS): 256 colors for a macOS system palette.
System(Windows): 256 colors for a Windows system palette.
Web: 216 colors, also known as Restrictive. This compensates between Mac and PC computer monitors. If your image does not have 216 colors, the number of colors may be lower.
Uninform: Type your own setting into the Colors area.
Local (Perceptual): Creates a custom pallet of color that gives priority to the colors that the human eye has greater sensitivity to, or that are more pleasing. (Master refers to a master palette that you may have created earlier).
Local (Selective): Similar to Perceptual, but also favors the broad range of continuous colors and the preservation of colors on the web. This usually produces an image with the greatest color integrity.
Local (Adaptive): Samples colors that appear most commonly in the image. Images with a majority of red have a greater concentration of red shades.
Custom: Allows you to create a custom pallet in the Color Table dialog box at Image ➤ Mode ➤ Color Table, as you can see in Figure 4-14.
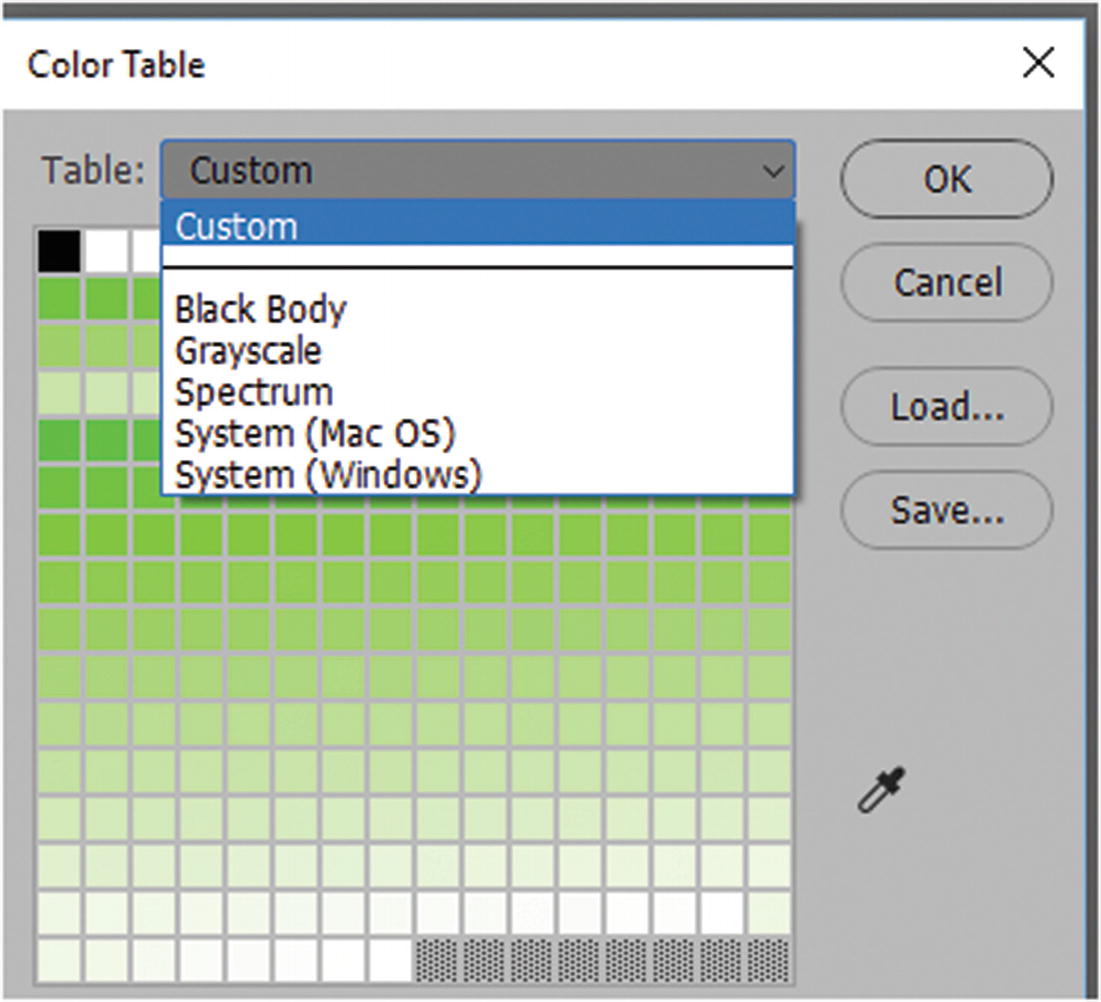
A color table with different options appears when you choose Custom from the Indexed Color Palette
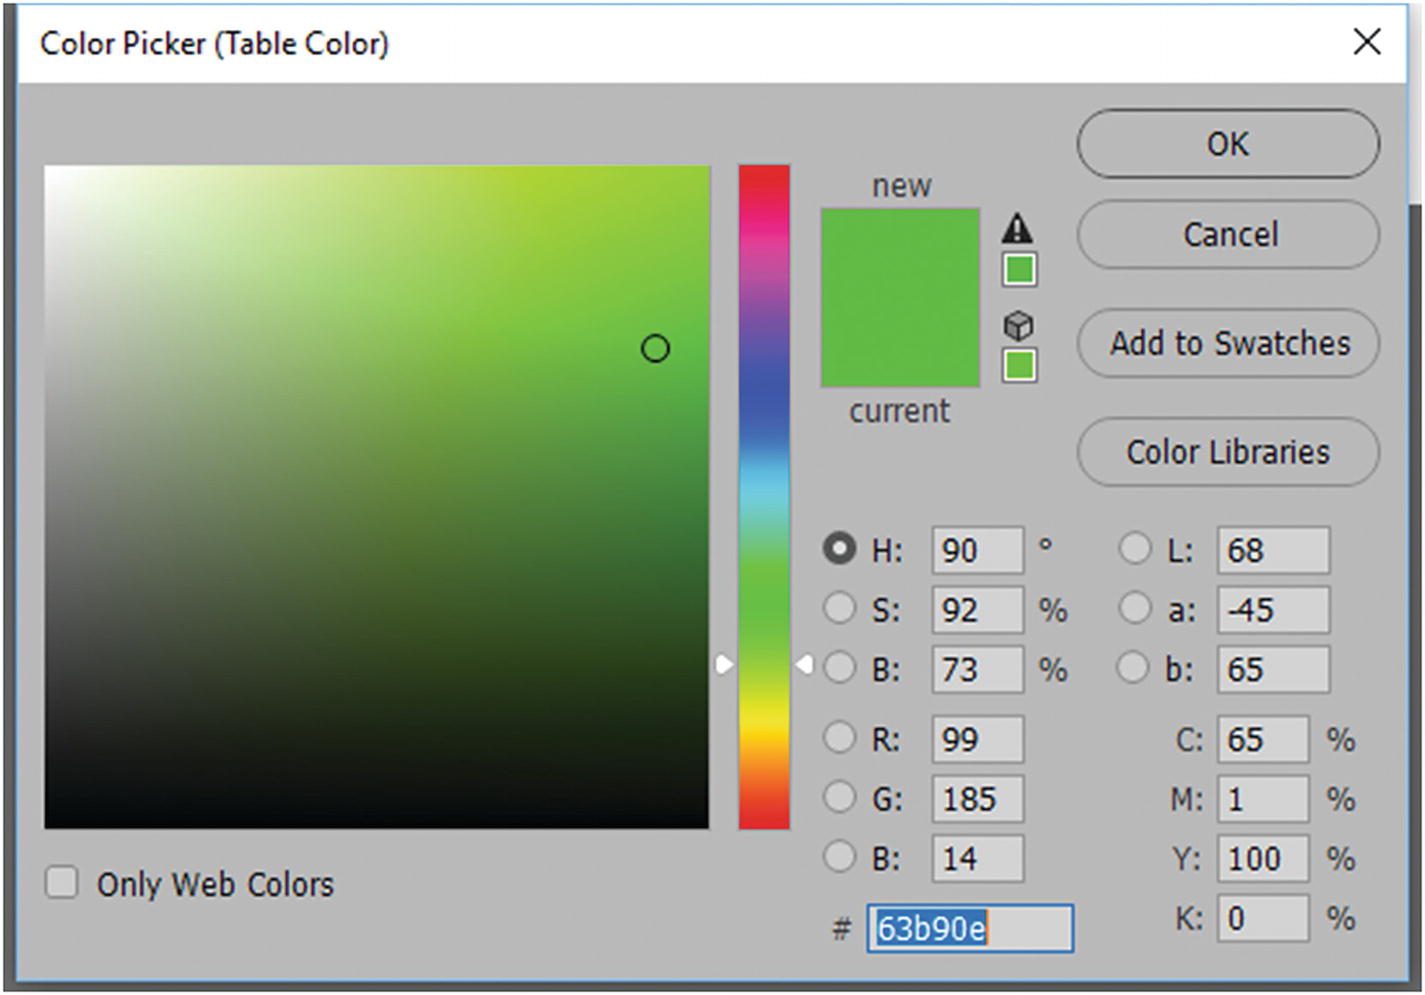
Accessing the color picker from the Color Picker (Table Color) dialog box
The Color Table’s Eyedropper tool (on the right in Figure 4-14) allows you to sample colors.
Previous: A custom pallet from a previous conversion.
Colors: Determines the exact number of colors in the image, as seen in Figure 4-16.
The exact number of colors in the GIF image
Forced: This includes specified colors to be included in the conversion, such as black and white, primaries (red, green, blue, cyan, magenta, yellow, black and white), Web (216 web safe color), or your own custom colors that you can sample using the Color Picker when you click a color, as seen in Figure 4-17.
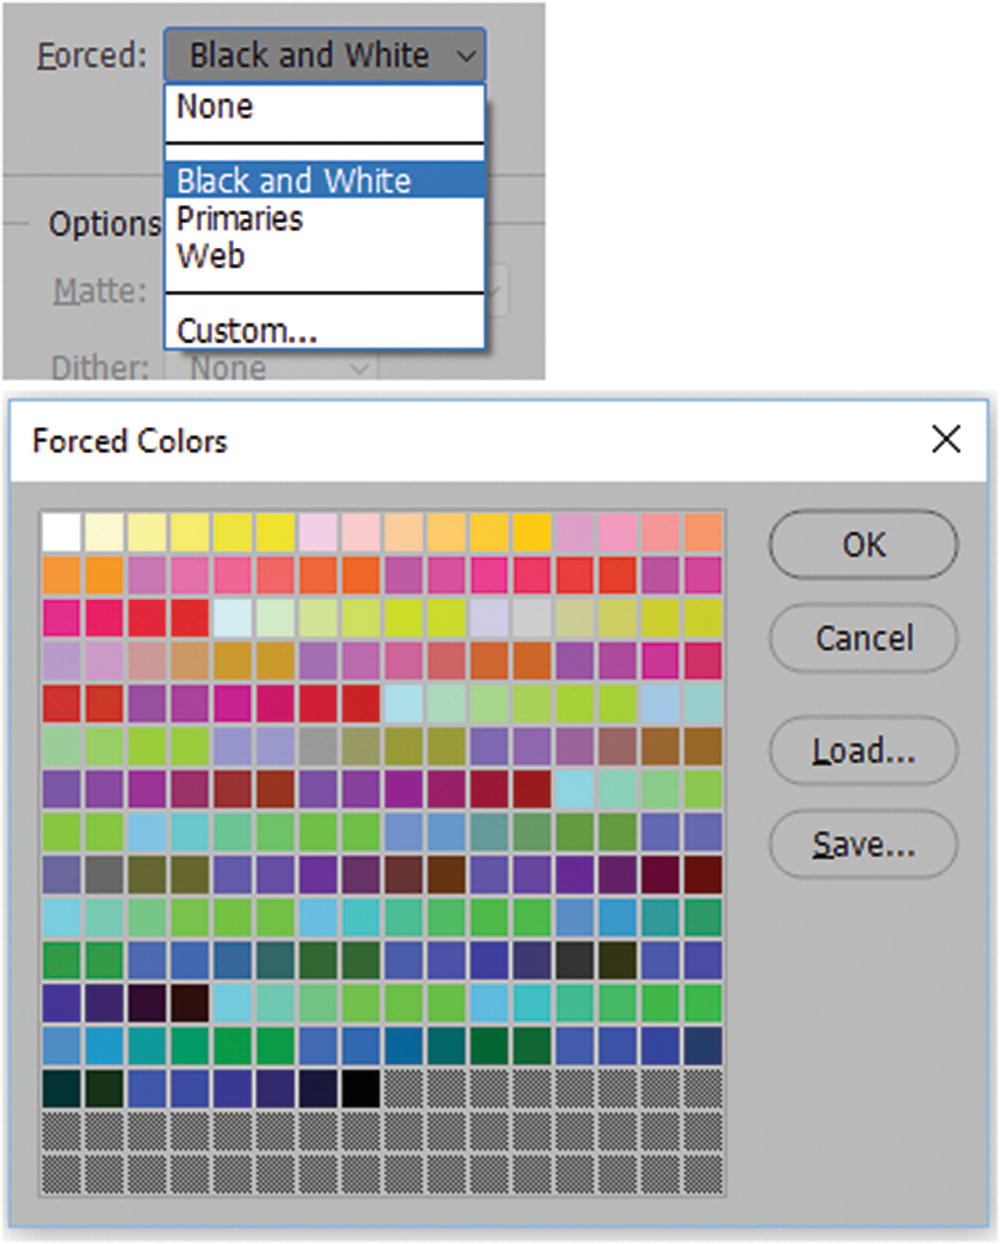
Forcing specific colors in the GIF image
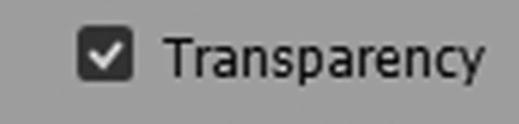
Choose Transparency if you want your GIF image to have a transparent background
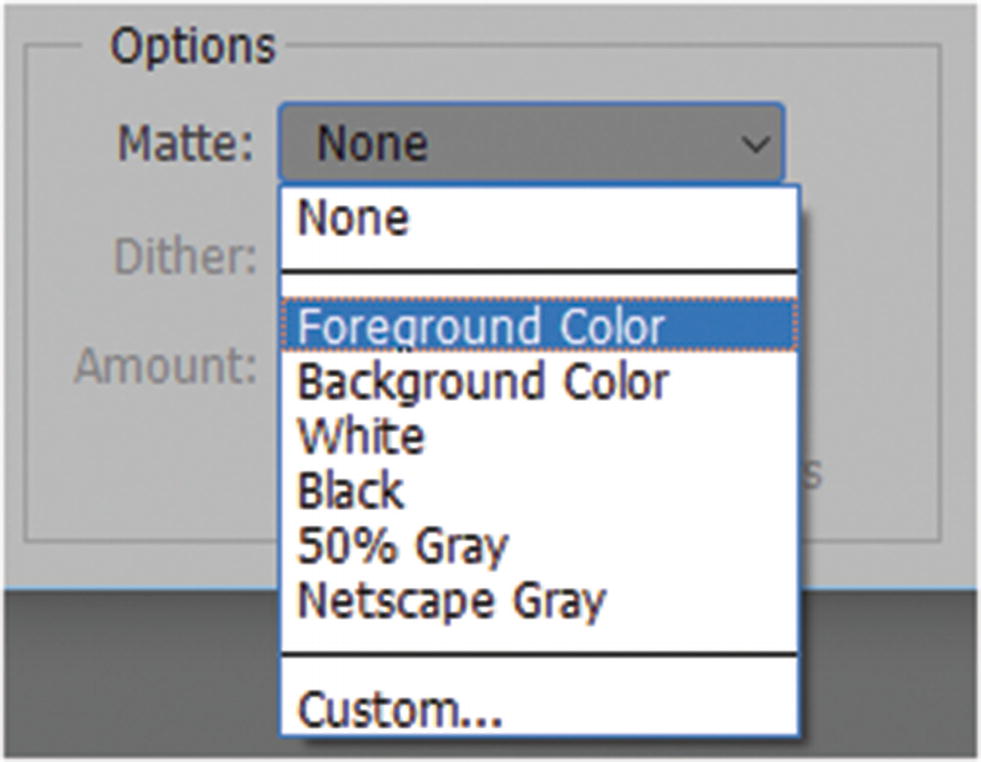
This Matte drop-down menu can only be accessed if your background is transparent and your file has more than one layer
Custom: Brings up the color picker so you can choose your own color. The custom color or any Matte option will then blend into the area where the transparency once was.
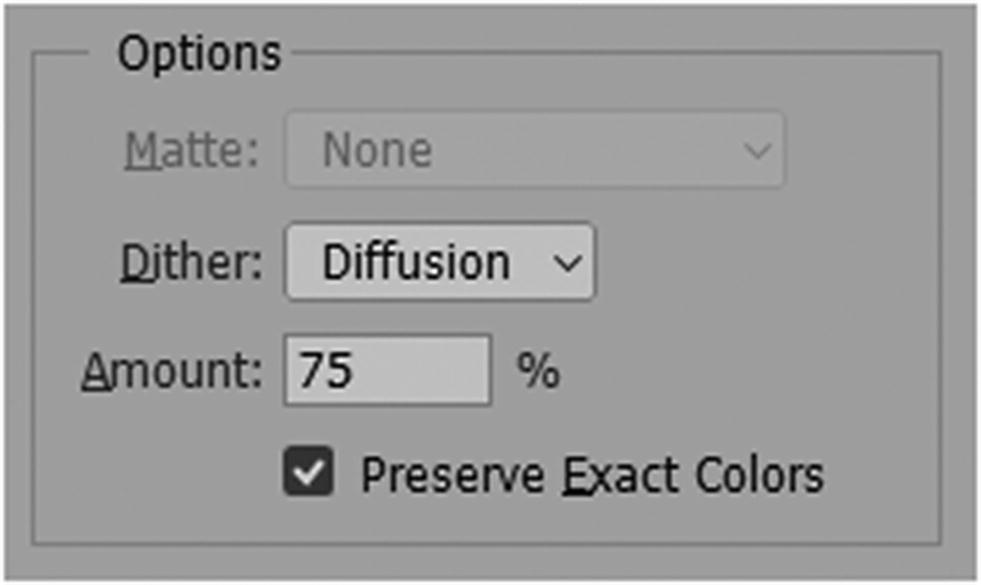
Dither: When you reduce the number of colors, the image may not blend well. You can use the options shown in Figure 4-20 to adjust this.

Options for setting the amount of dither
None: The default for no dither.
Diffusion: A random structure dither that is good for preserving delicate details and text in logos.
Pattern: A halftone-like square pattern.
Noise: Reduces the edge pattern if you are working with edges if you plan to slice your image for an HTML background with a <div> tag or within a table. (You will look at slices in Chapter 5.)
Amount: You can adjust the amount of dither by percentage. Refer to Figure 4-21.
Preserve Exact Colors: This preserves the colors in the table from dithering.
Options for setting the dither by percentage to refine the amount
Photoshop PDF
The Acrobat Pro DC and Acrobat Distiller icons; to create a PDF, these two programs should be installed on your computer
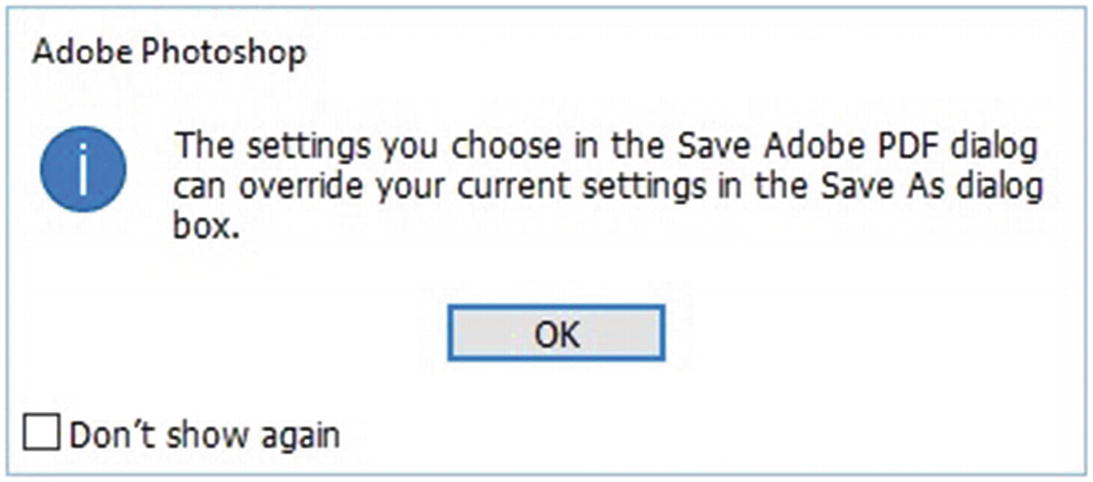
The Photoshop alert you may receive when you choose to create a PDF
Click OK and continue to the next dialog box. If you have used a program like Adobe InDesign CC, you will find the export setting familiar.
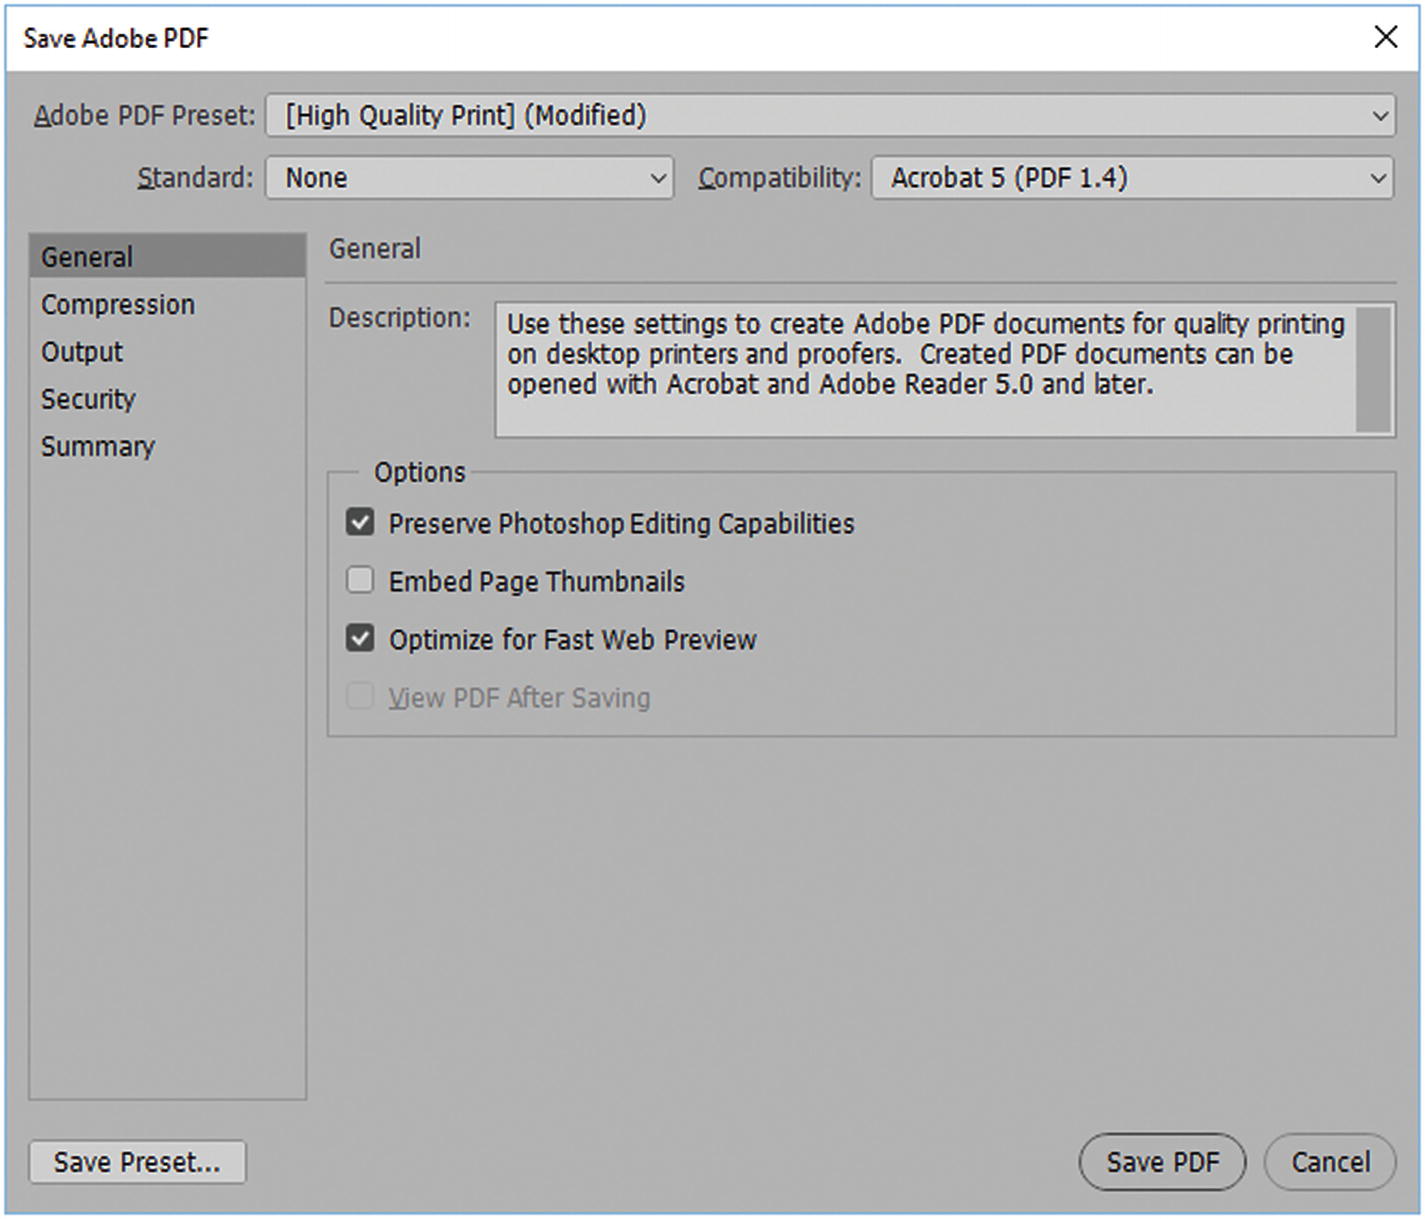
Setting for the Save Adobe PDF dialog box
General: The main settings that allow you to preserve the file should you want to edit it again in Photoshop, embed a thumbnail, optimize for fast web preview, or view the PDF after saving.
Compression: Distinct options for down sampling images and adjusting image quality within the PDF. Refer to Figure 4-25.
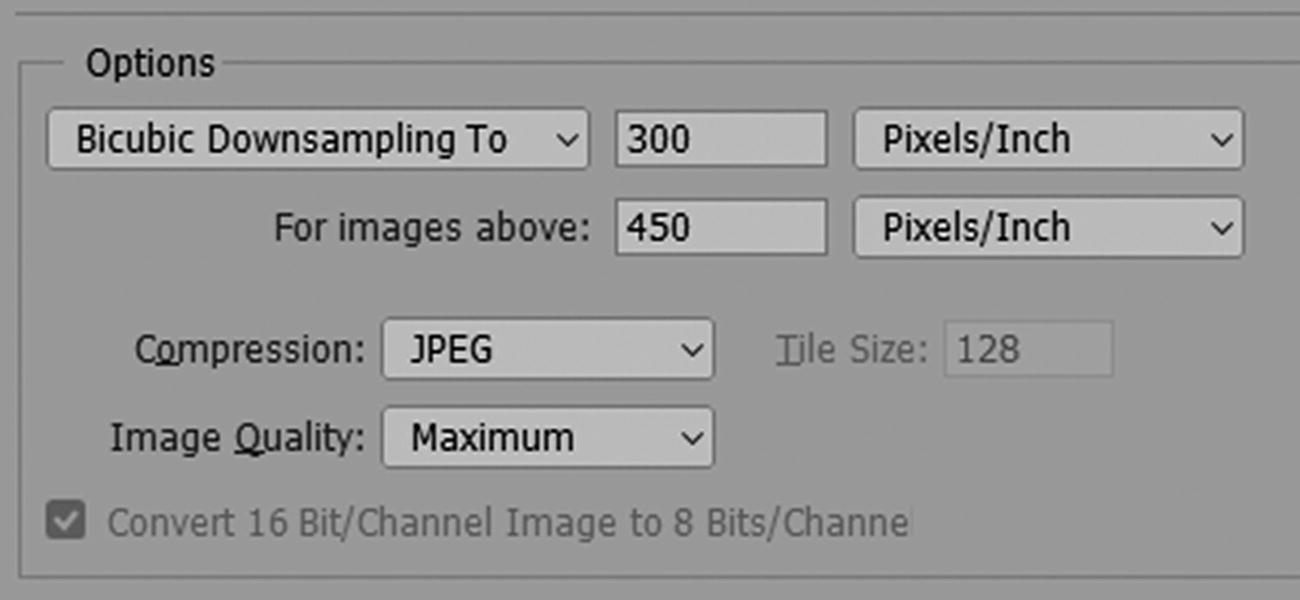
Compression options for the Save Adobe PDF dialog box
Output: Deals with color and file conversion, as seen in Figure 4-26.
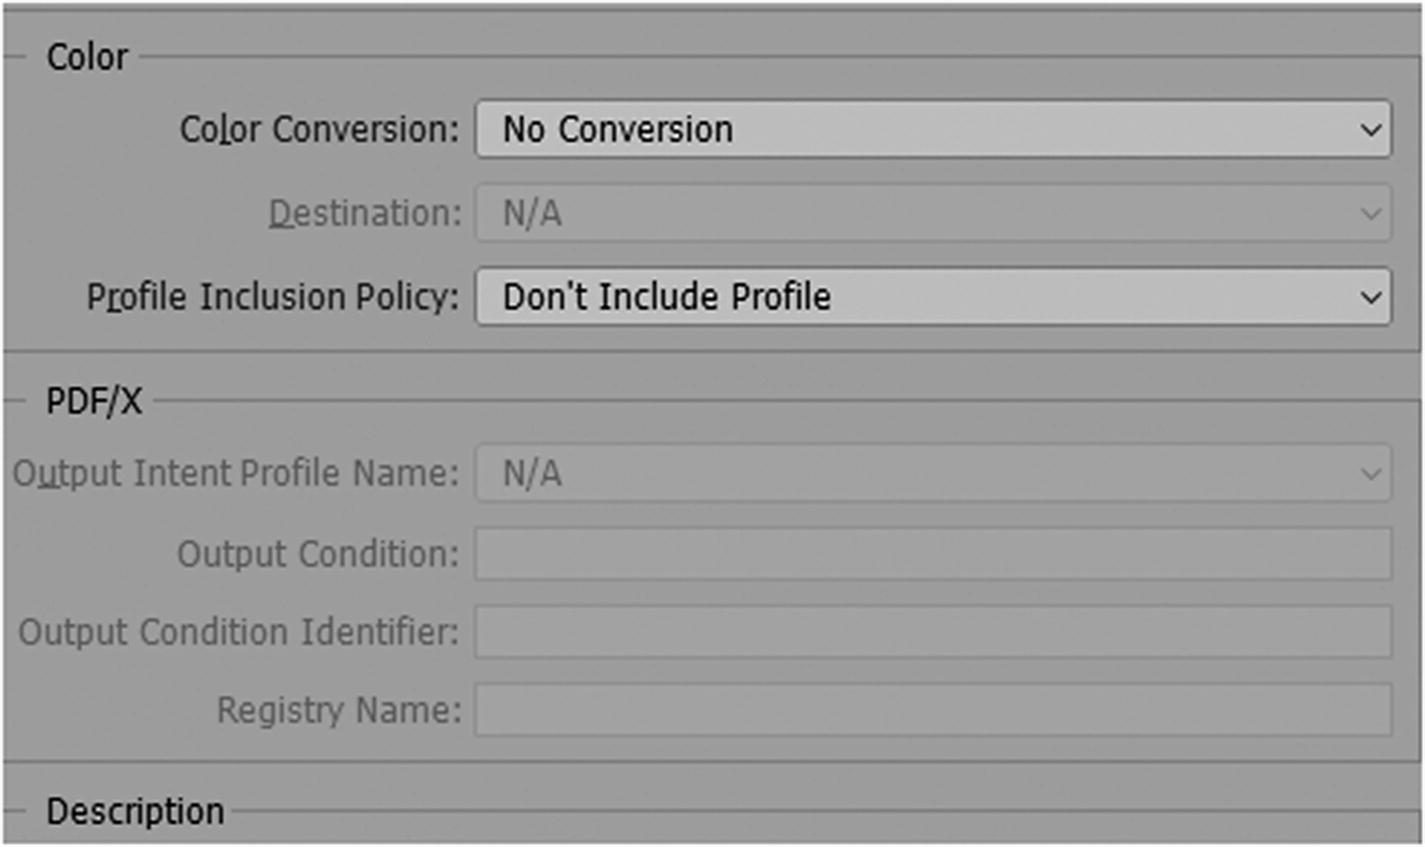
Output options for the Save Adobe PDF dialog box
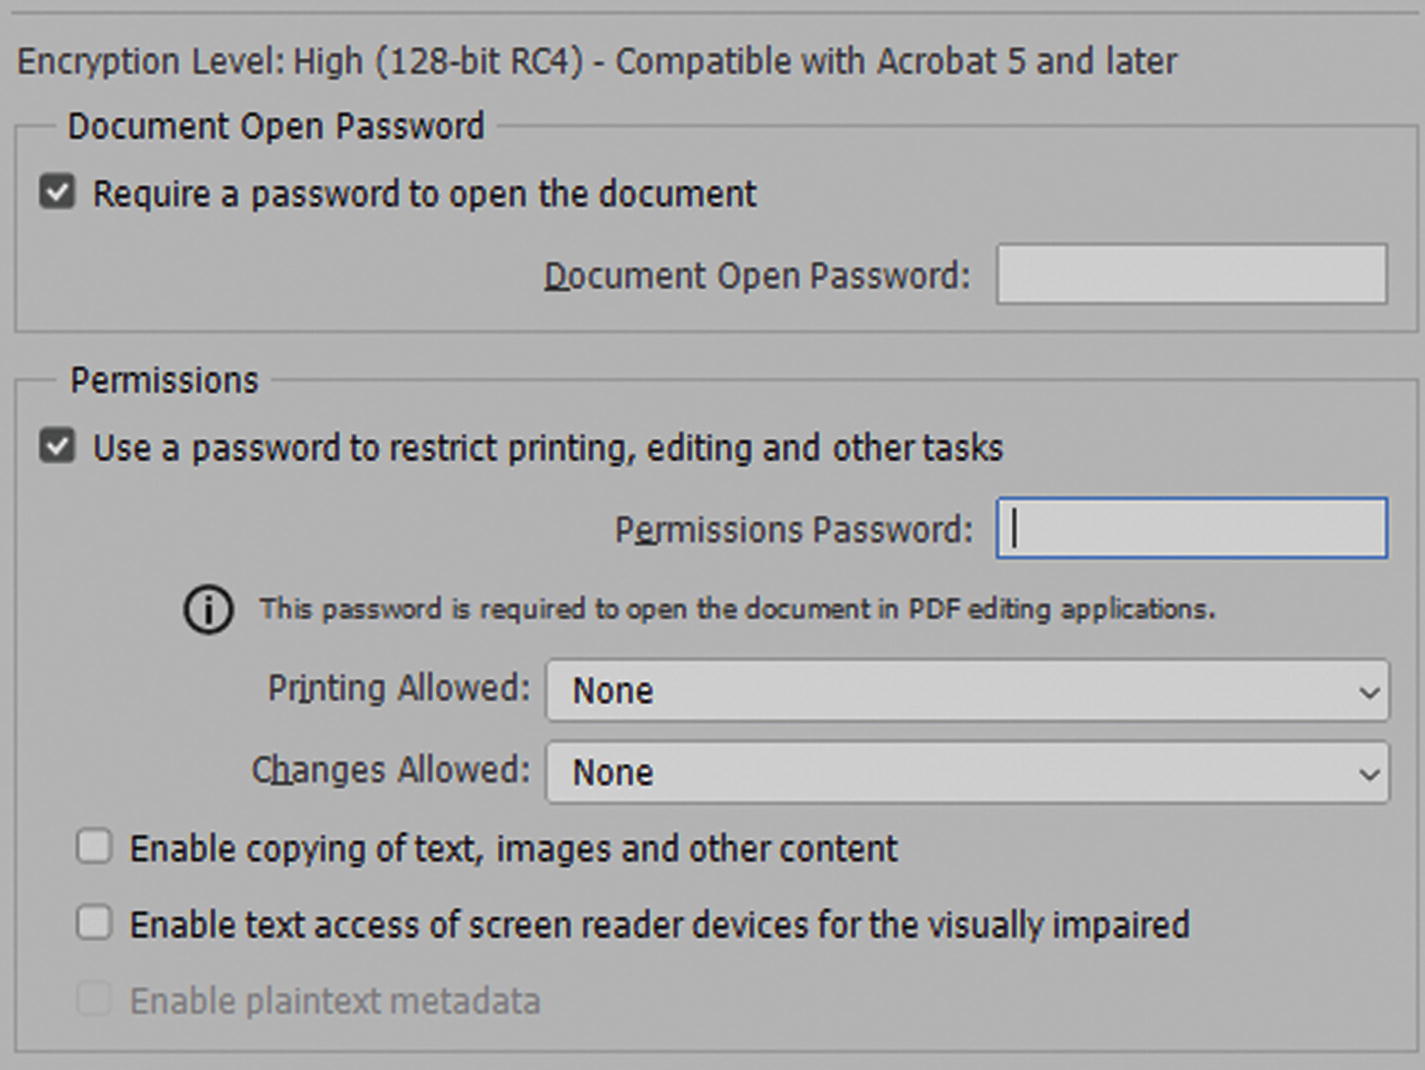
Security options for the Save Adobe PDF dialog box
Summary: Lists all the settings and any warnings that may need to be corrected before pressing OK. Refer to Figure 4-28.
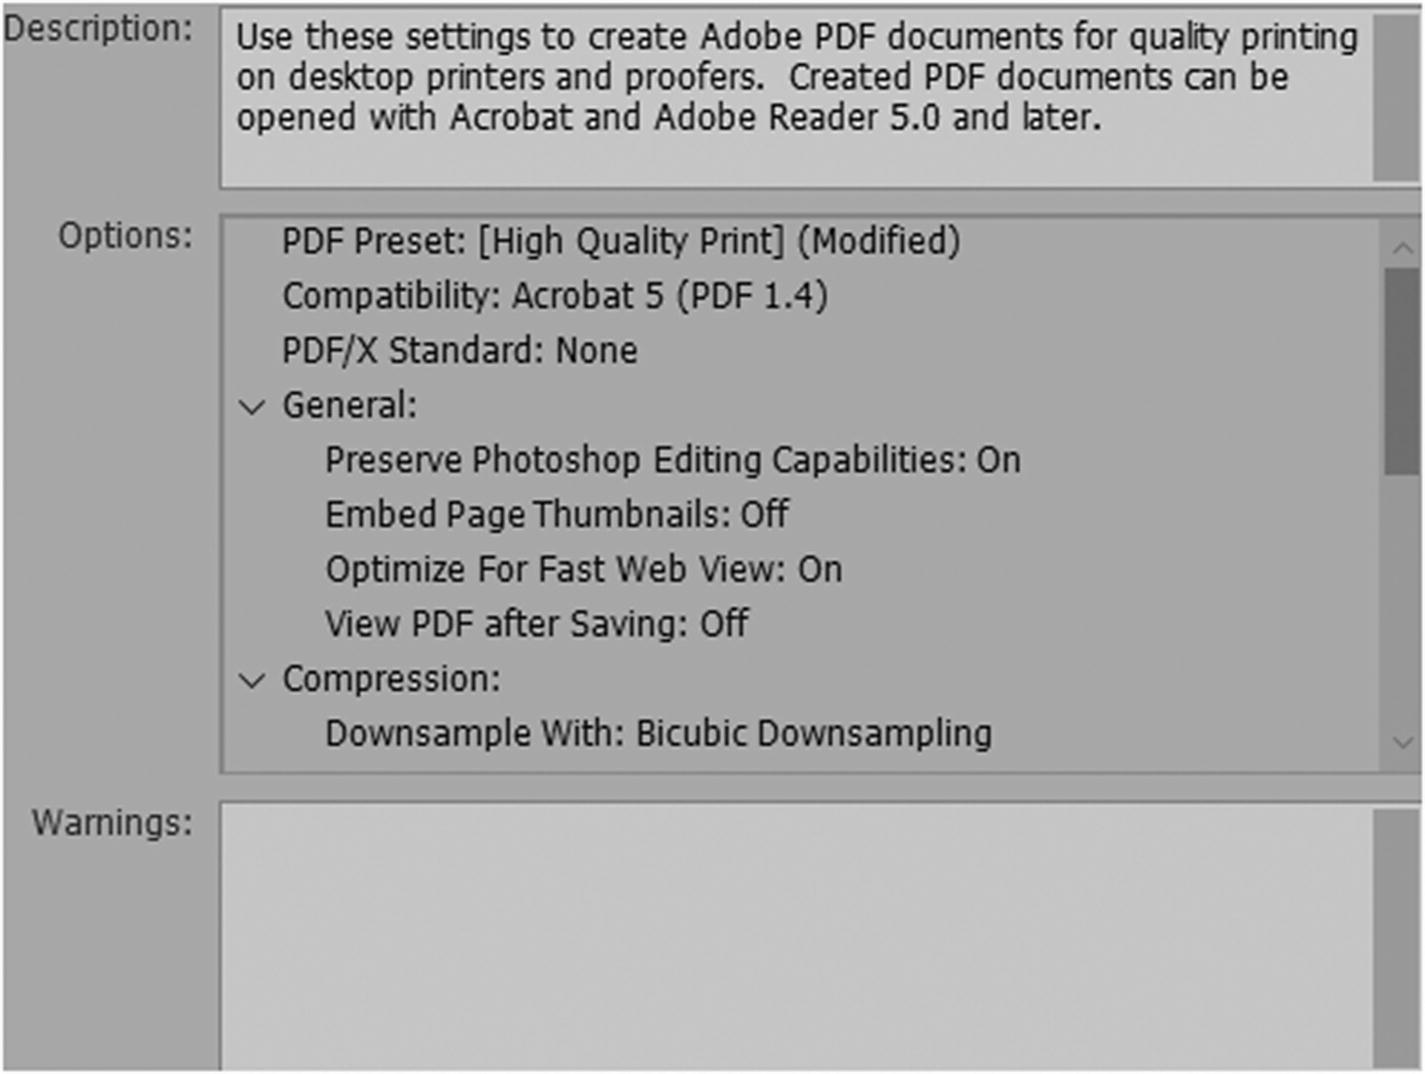
Summary options for the Save Adobe PDF dialog box
Once you have set your settings, click the Save PDF button in the bottom right of the dialog box (see Figure 4-24). A PDF is created, which you can view in Adobe Acrobat Pro DC or Reader.
Option 2: File ➤ Export ➤ Quick Export as PNG
You can use this option if you want to save a PNG file quickly without going through a dialog box: File ➤ Export ➤ Quick Export as PNG.
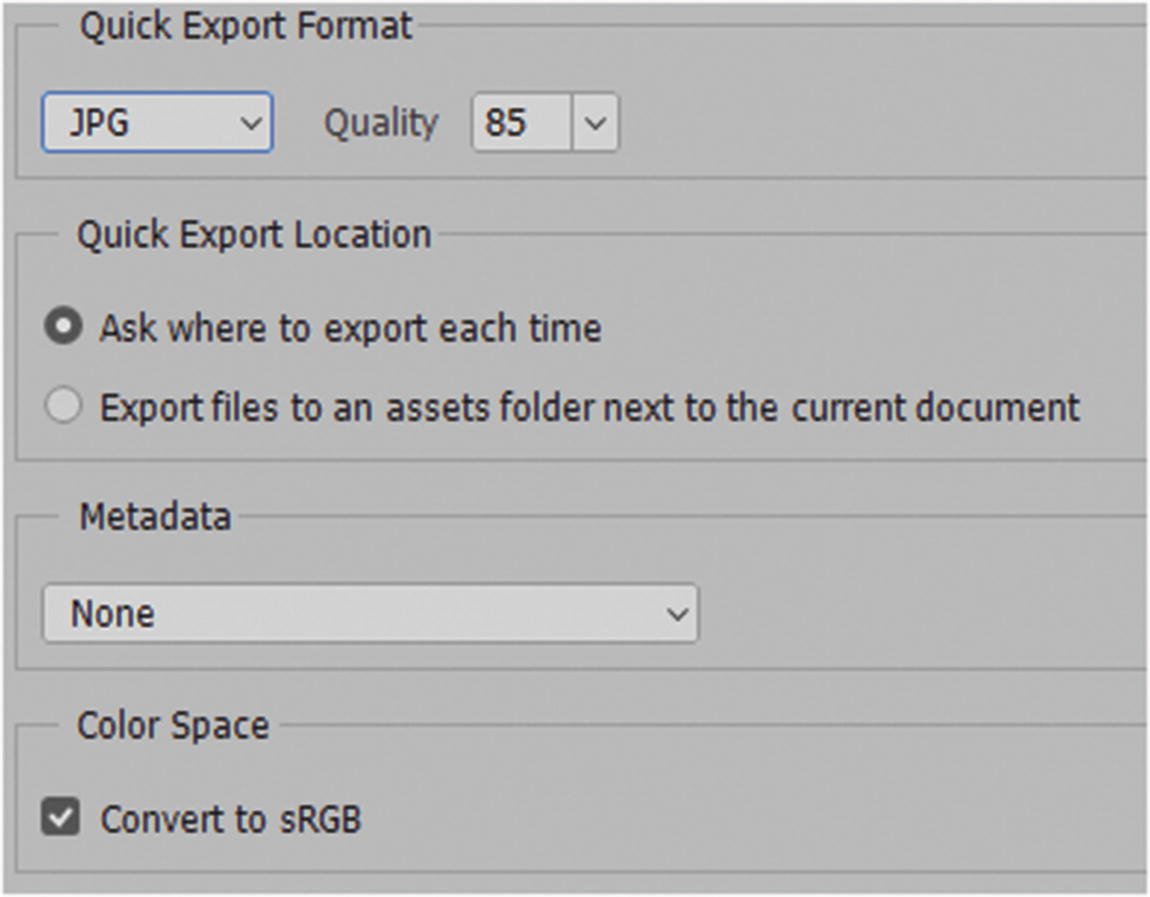
This option is only for PNG files. You cannot save the file in any other settings, and it only saves the file as a .png. Personally, I don’t like this because it does not provide a dialog box to choose settings if each image is slightly different.
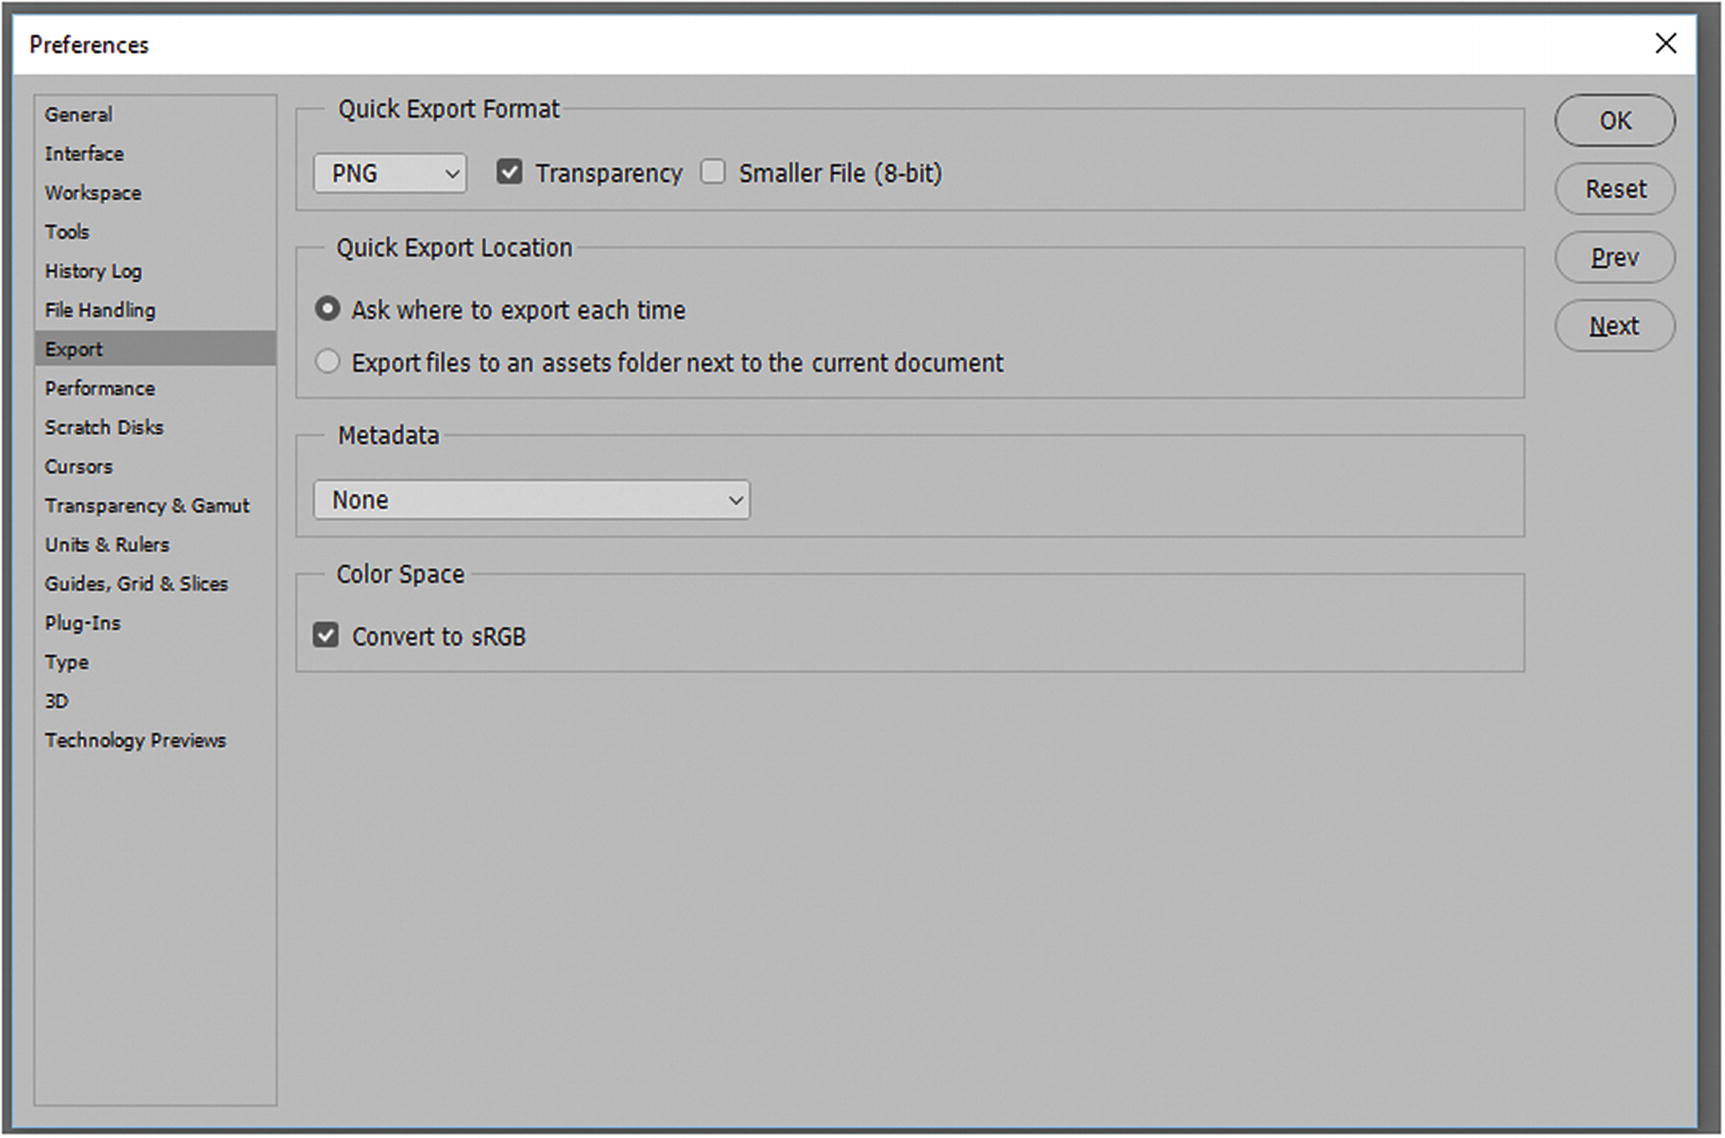
PNG preferences in the Quick Export Format option
Unlike in Option 1, however, you can choose if the PNG is transparent or not. Also, you can set the file to a smaller 8 bit or leave it at the larger size. Other options include the export location, metadata, and color space of sRGB. Click OK if you want to save the preference changes.
Note
If you find you work more with JPEGs, GIFs, or SVGs, you can change the quick export to one of those options and it will reflect in the Quick Export instead of PNG. However, you can only use them one at a time. I find the options a bit limiting when working with more than one file type.
JPEG
JPEG preferences for the Quick Export Format option
GIF
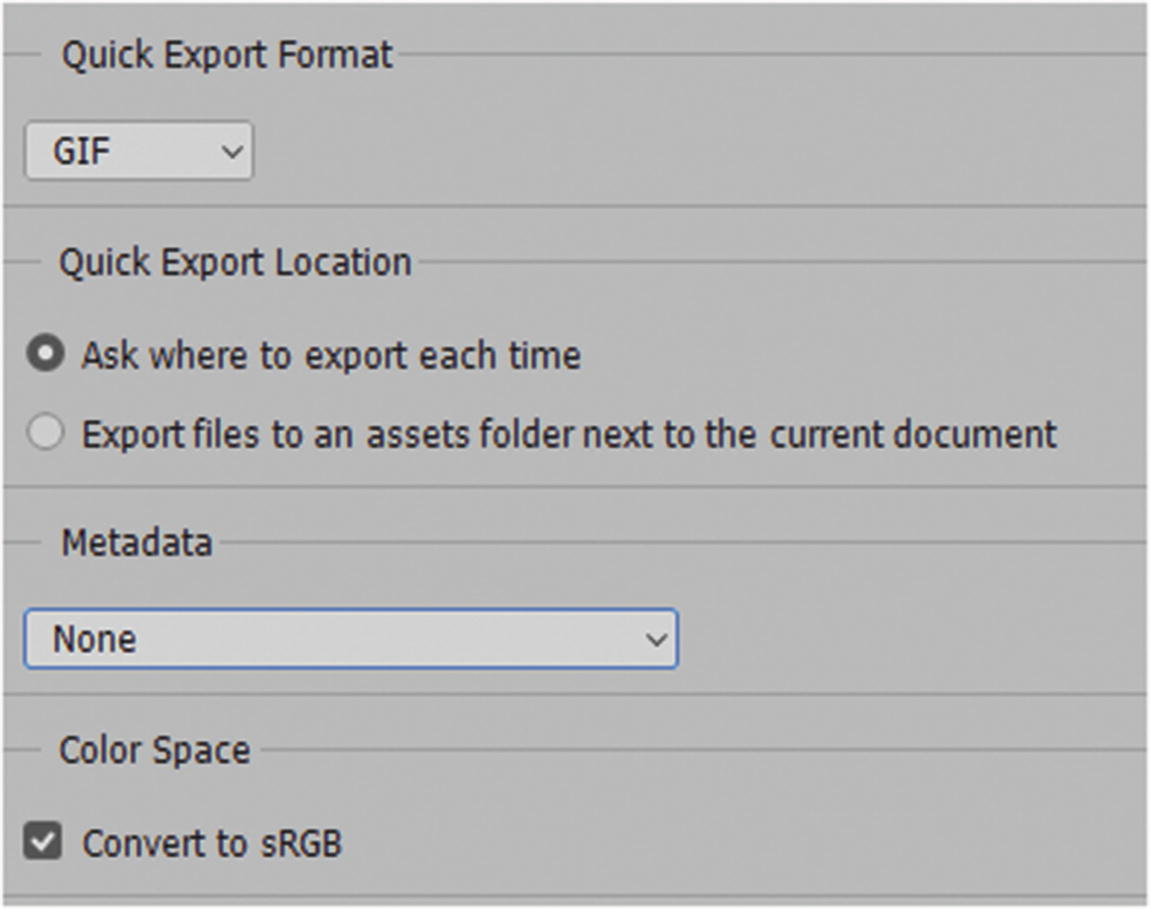
GIF Preferences for the Quick Export Format option. You cannot set transparency here.
SVG
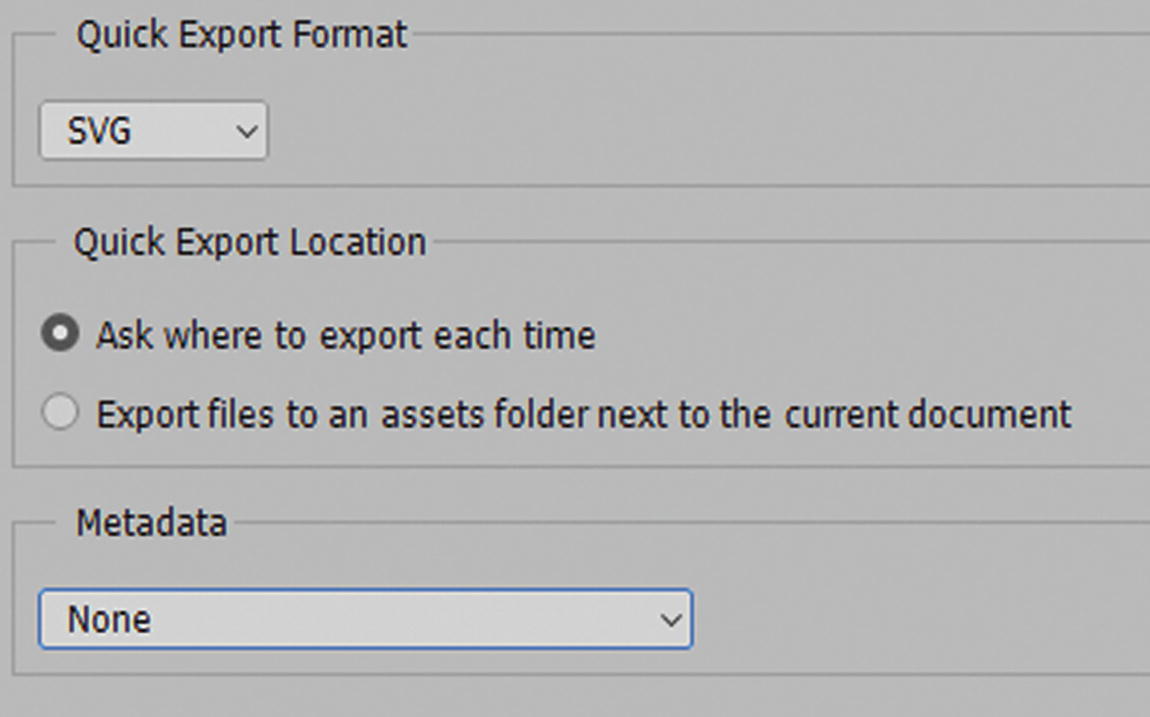
SVG Preferences for the Quick Export Format option
Quick Export Format is quick, but not always the best because it does not give all the options to format the images, or the option to preview your changes.
Options 3: File ➤ Export ➤ Export As…
The next option to look at is the Export As dialog box. This example allows you to control and preview your settings at the same time. As you can see, many of the options that are within the Export Preference settings can be found here. You can create several images with different scaling sizes and unique suffix names.
PNG
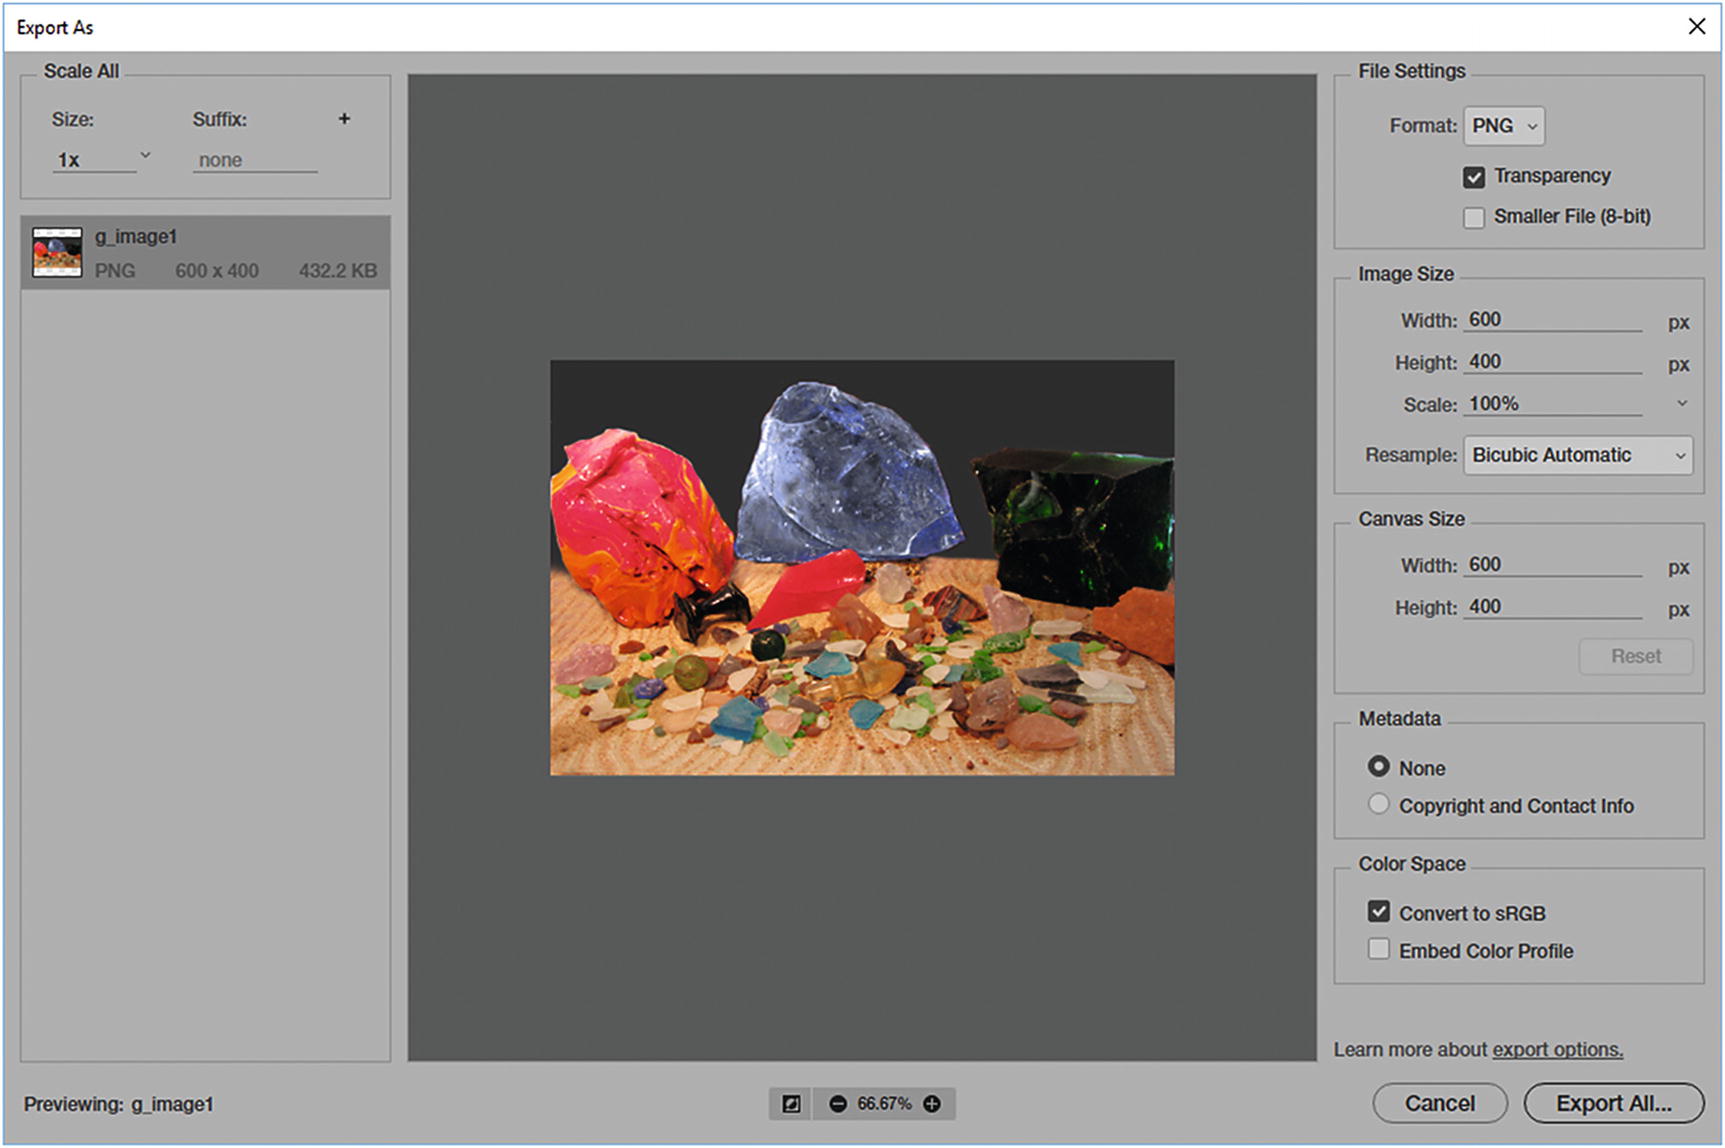
PNG settings in the Export As dialog box
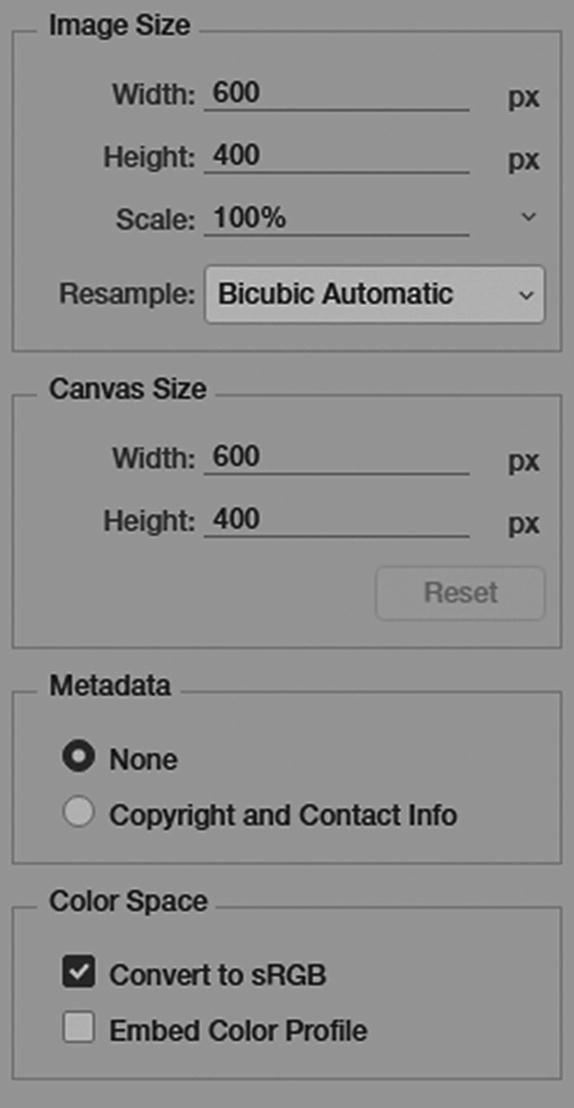
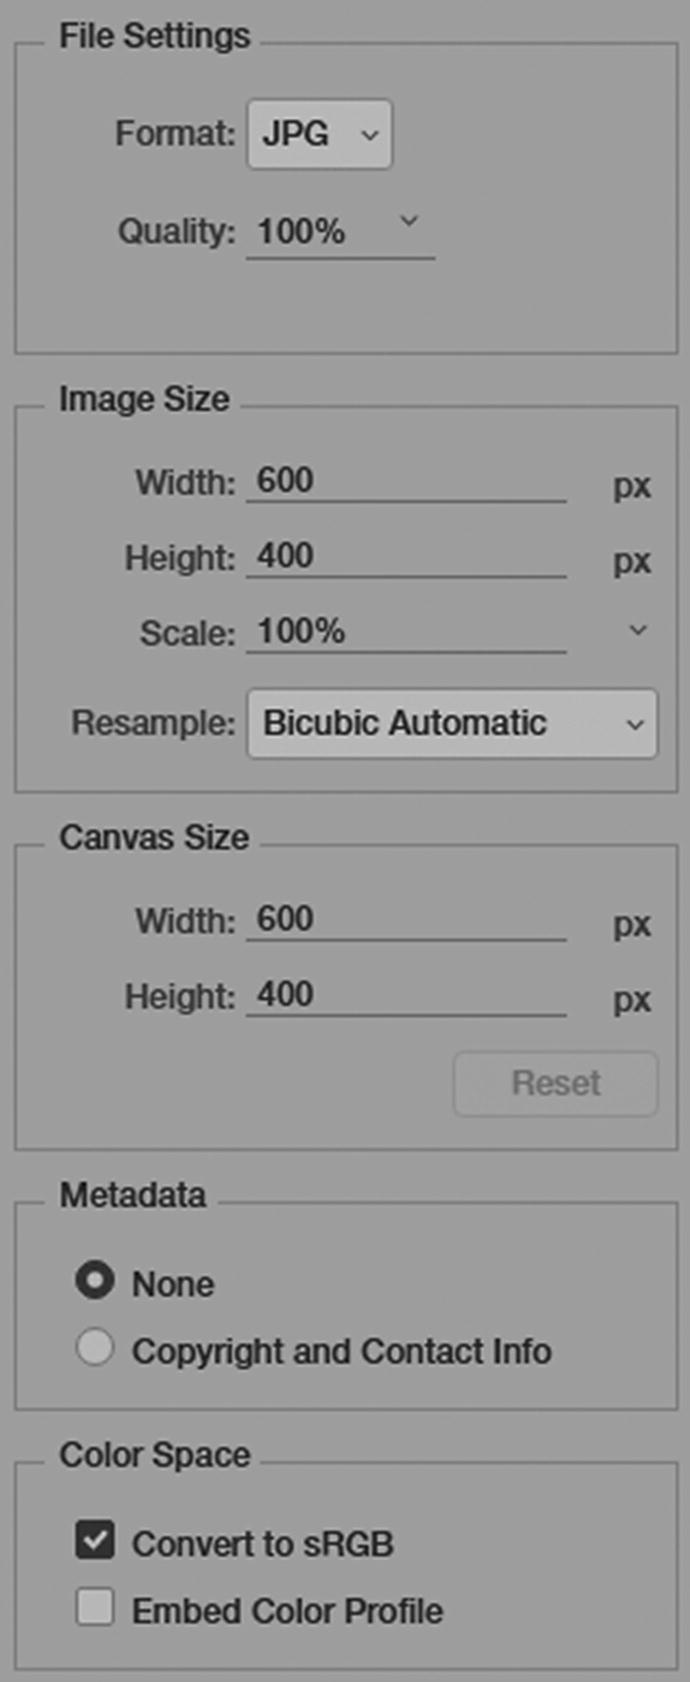
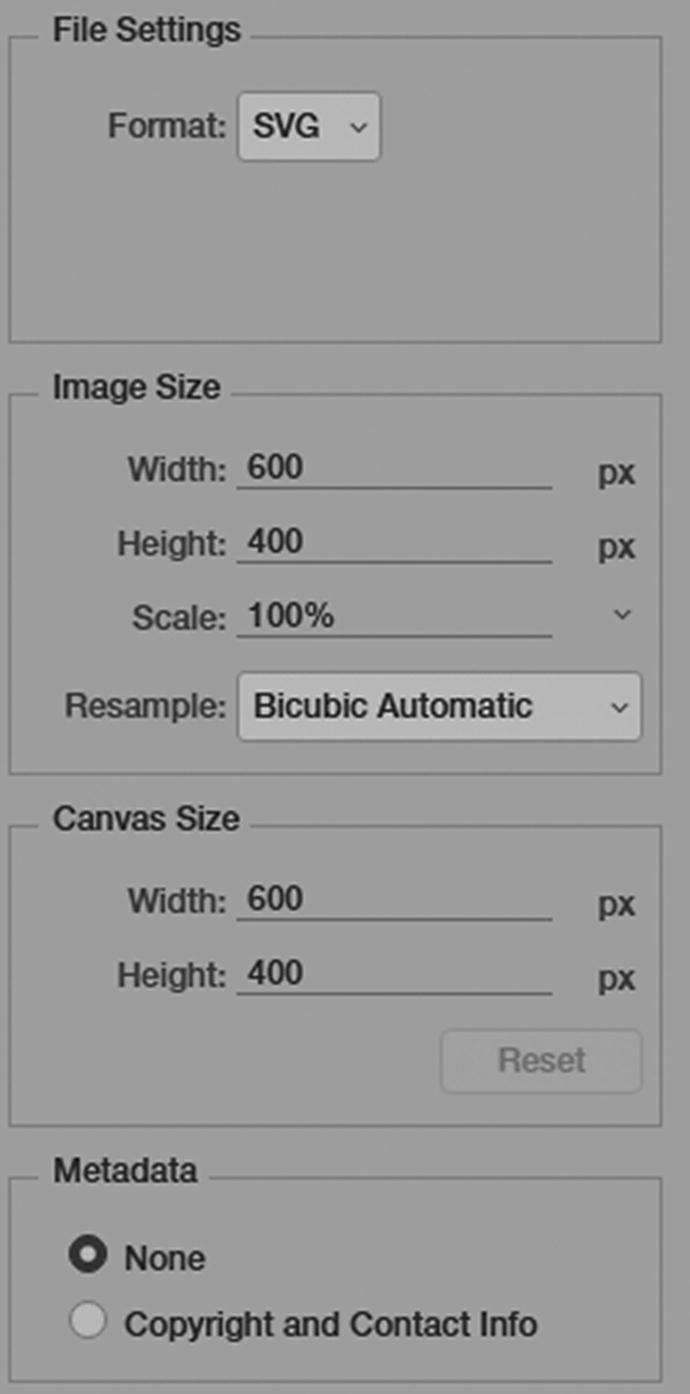
File Settings: Format: PNG or select another from the menu, set transparency, and set a smaller file size.
Image Size: You can scale the original size of the image by width, height, and percentage, and the way that the pixels resample. Refer to Figure 4-34.
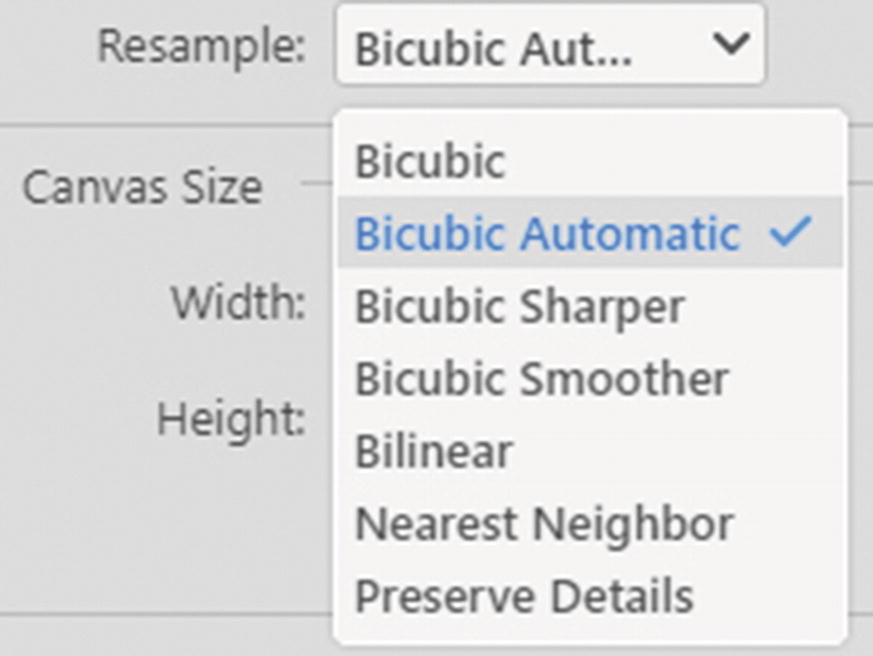
Image resample options in the drop-down in the Export As dialog box
Bicubic: Examines the values of surrounding pixels. Using complex calculations, Bicubic produces smoother tonal gradations than Nearest Neighbor or Bilinear.
Bicubic Automatic: Chooses the resampling method based on the document type and whether the document is scaling up or down.
Bicubic Sharper: Reduces the size of an image based on bicubic interpolation with enhanced sharpening. This option maintains the detail in a resampled image. If Bicubic Sharper over-sharpens some areas of an image, try using Bicubic.
Bicubic Smoother: Produces smoother results when enlarging images based on bicubic interpolation.
Bilinear: Adds pixels by averaging the color values of surrounding pixels. It produces medium-quality results.
Nearest Neighbor: A fast but less-precise method that replicates the pixels in an image. Used with illustrations containing edges that are not anti-aliased to preserve hard edges and produce a smaller file. It has been known to produce jagged effects, which becomes apparent when you distort or scale an image or perform multiple manipulations on a selection of the graphic.
Preserve Details: A type of noise reduction for smoothing out noise as you upscale the image.
Examples of PNG settings in the Export As dialog box
JPEG
Examples of JPEG settings in the Export As dialog box
GIF
Examples of GIF settings in the Export As dialog box
SVG
Examples of SVG settings in the Export As dialog box
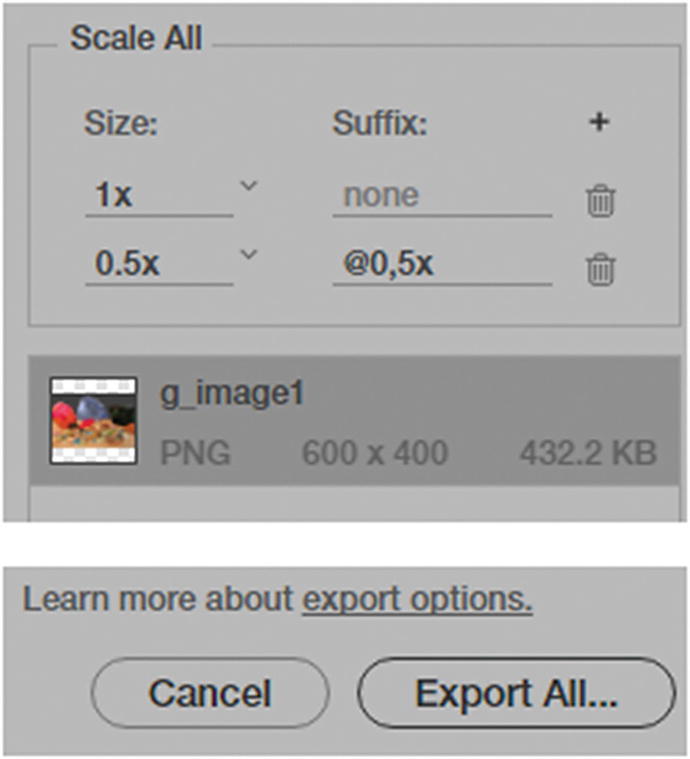
Add sizes and then choose Export All to save the new web files
Option 3’s File ➤ Export ➤ Export As has a better preview option than Option 1’s File ➤ Save As, but it does not allow you access certain matte and transparency options that you might need for some image projects. Is there a way to have it all for your raster images?
Option 4: File ➤ Export ➤ Save for Web (Legacy)
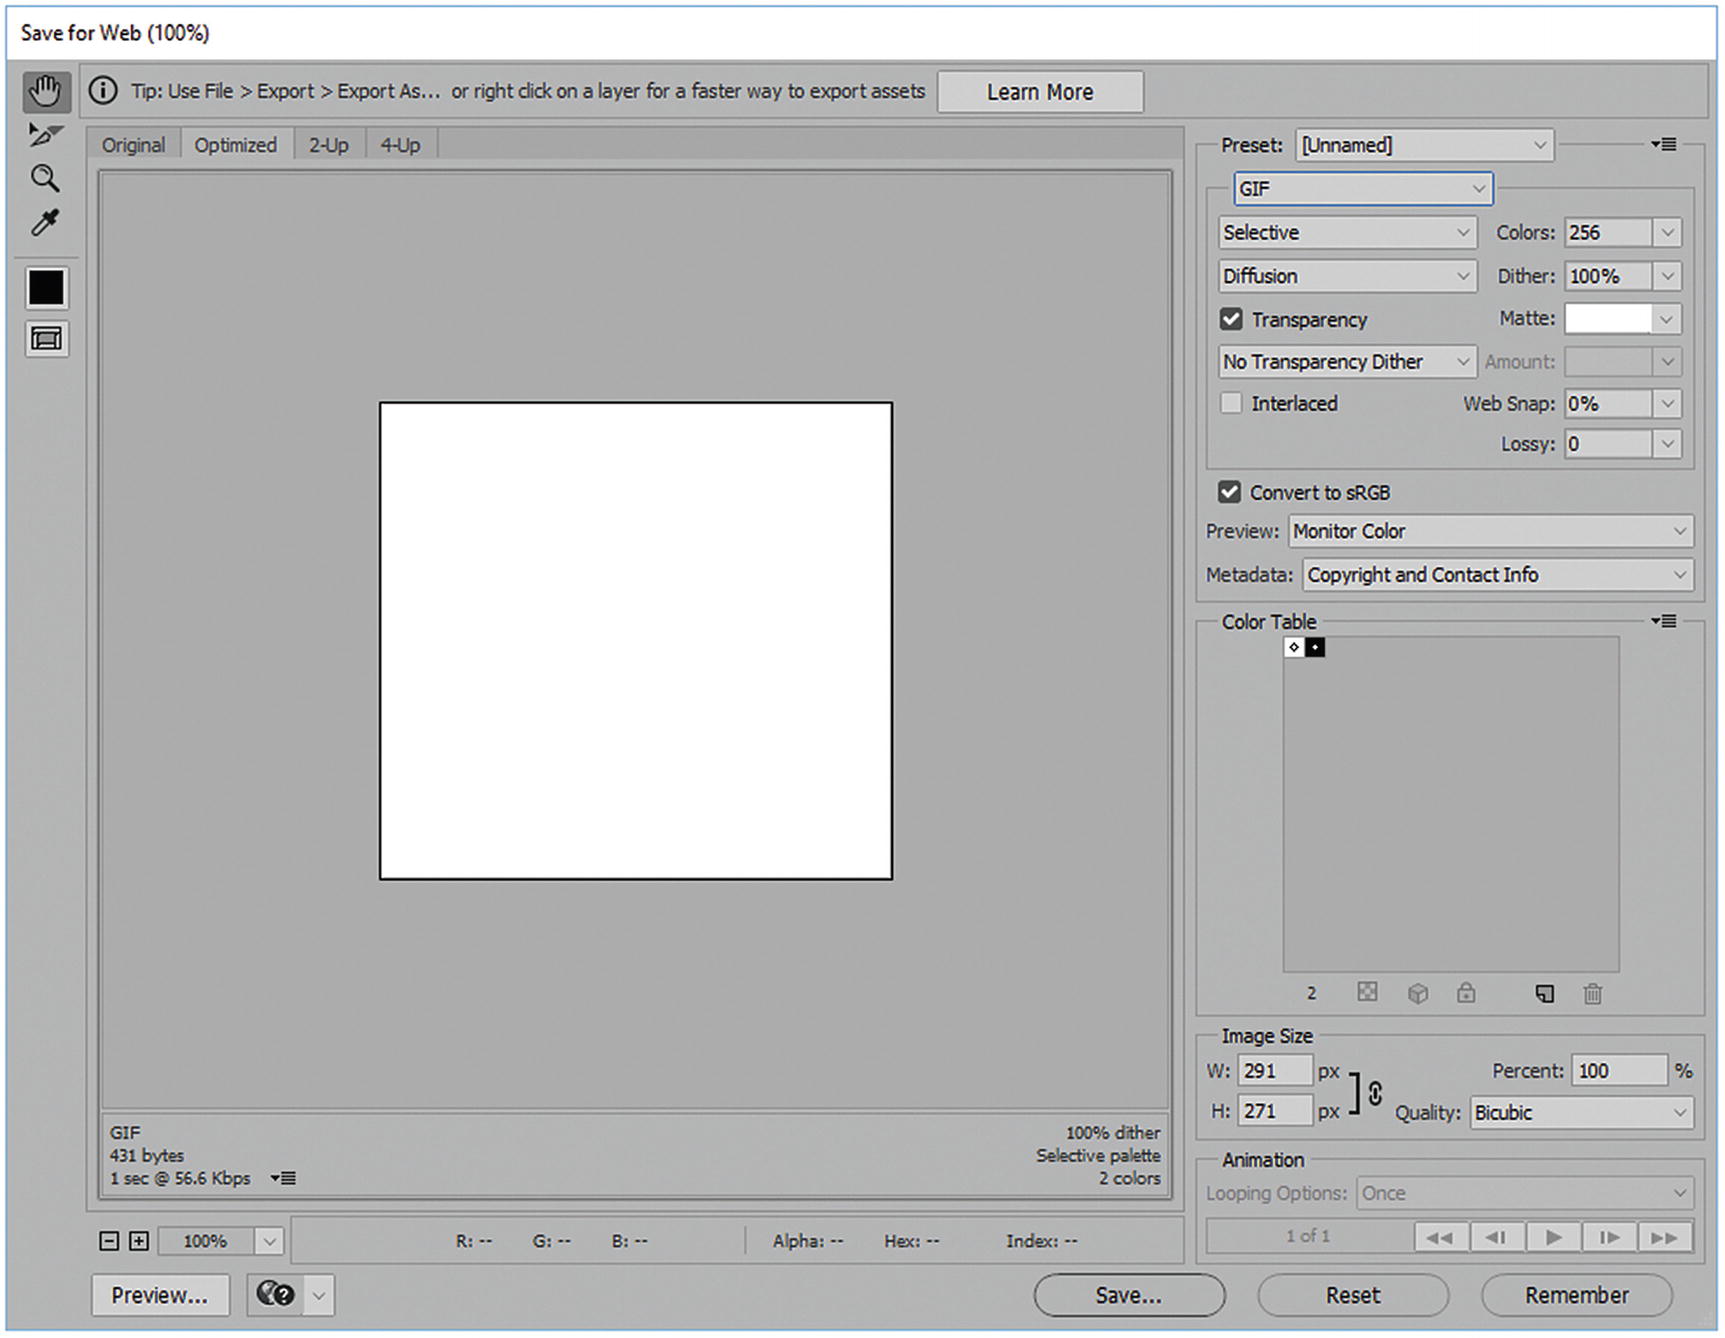
The Save for Web (Legacy) dialog box
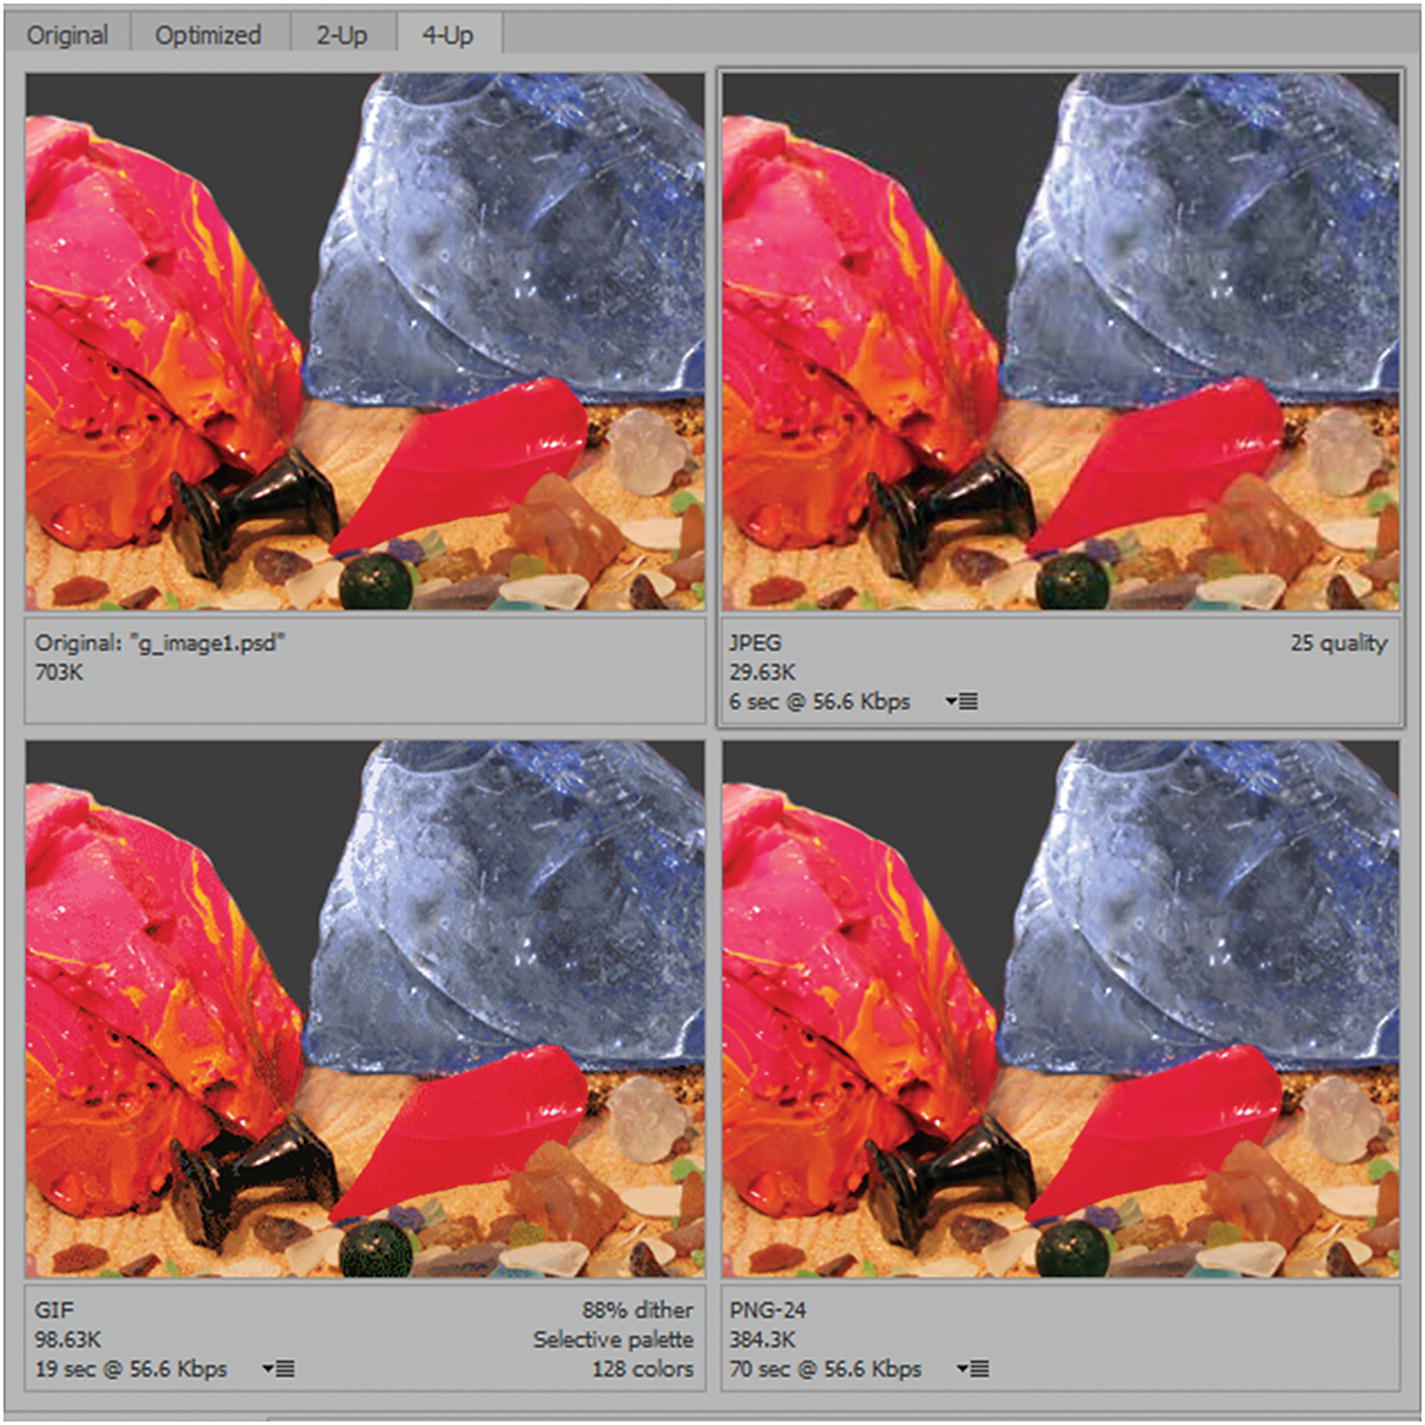
The Save for Web (Legacy) dialog box lets you view four settings at once: Original, JPEG, GIF and PNG
The Hand tool (H) allows you to move to the different selections and moving all image previews in the tabs at the same time.
The Slice Select tool (C) allows you to select slices in an image and edit them if you created any earlier using the slice tool. You’ll look more at this tool later in Chapter 5.
The magnifying glass, or Zoom tool (Z), allows you to Zoom in on an area so that you can compare all images and their colors in that area at the same time.
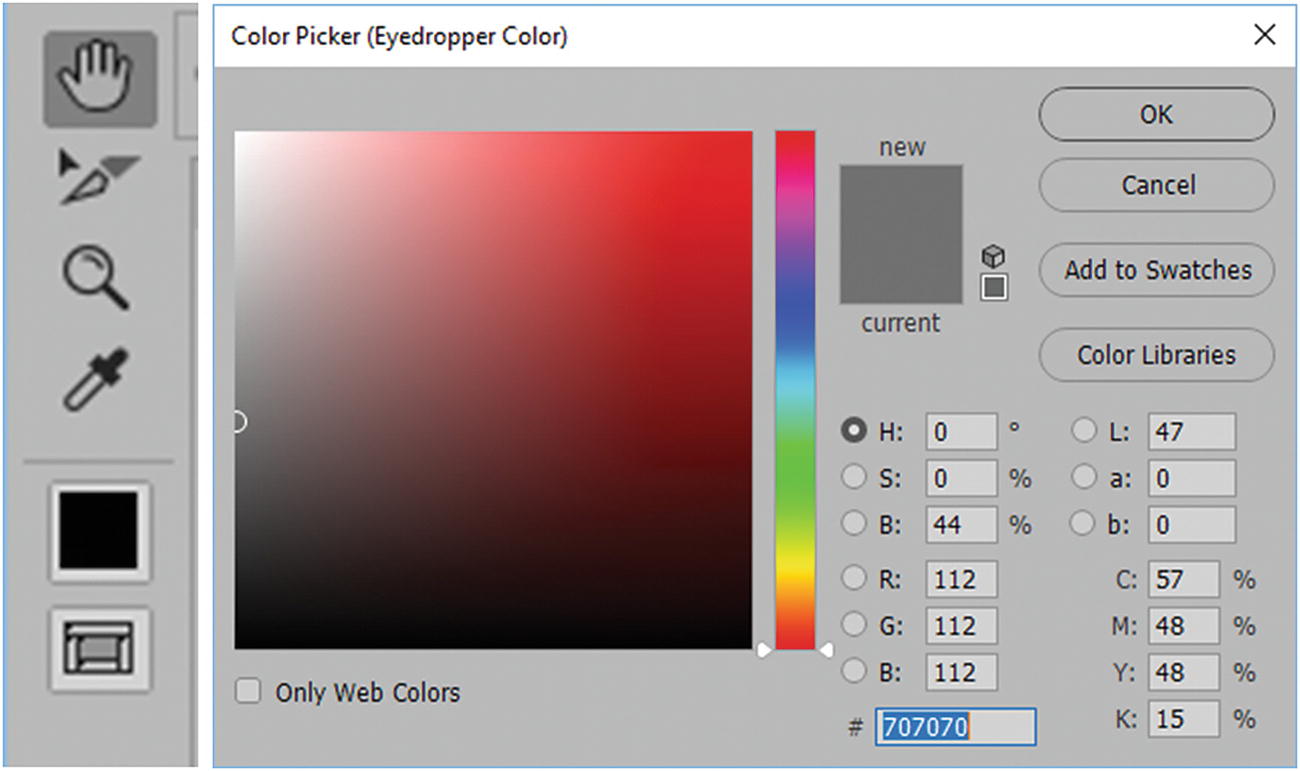
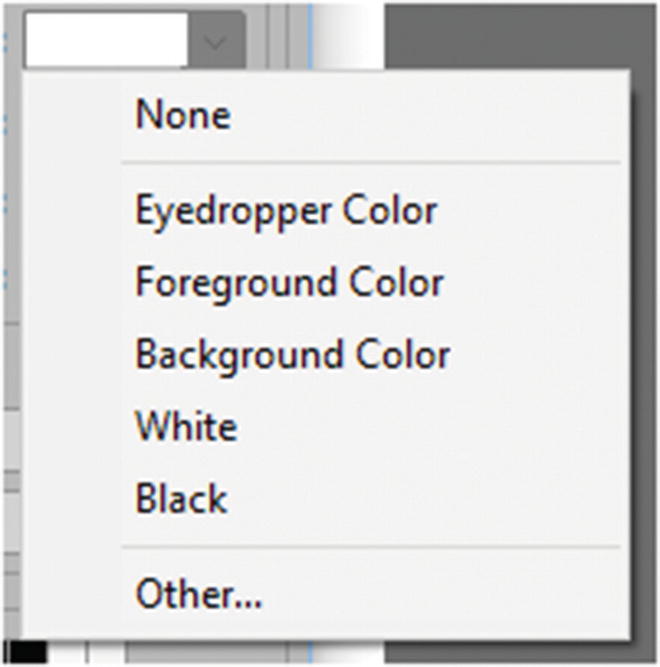
The Eyedropper tool (I) allows you to select a color in the image and then check it in the Eyedropper Color pallet. Once you know the color, you can then use this color for a pallet background color, or add it to swatches, or check Color Libraries.
The last tool is Toggle Slices Visibility (Q), where you can turn the slices preview on or off as you preview an image.
The Save for Web (Legacy) tools to work with your image file
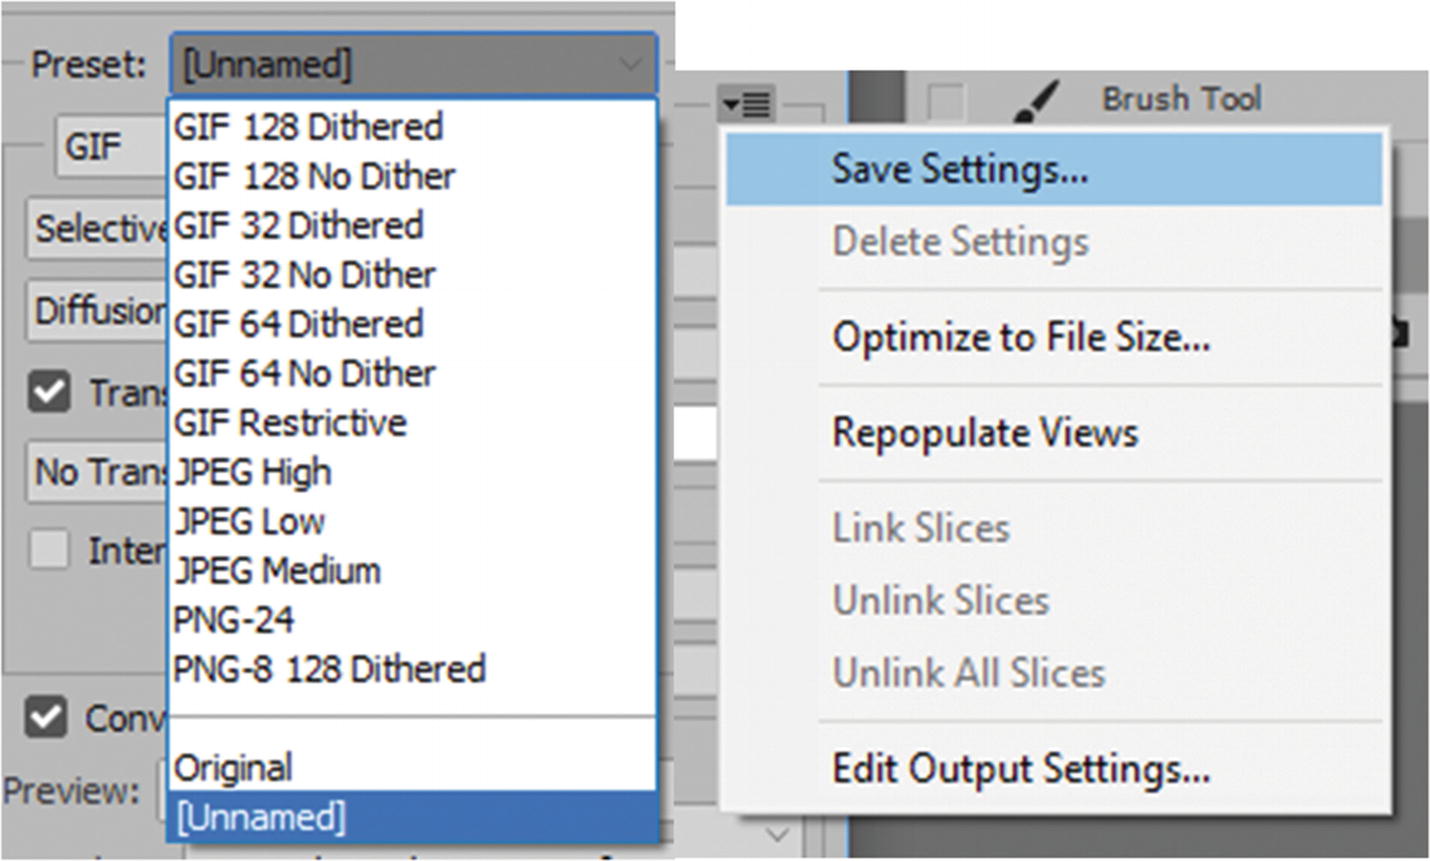
There are many presets you can choose from or you can create your own
In the menu, you can save settings and optimize file size, as well as link and unlink slices.
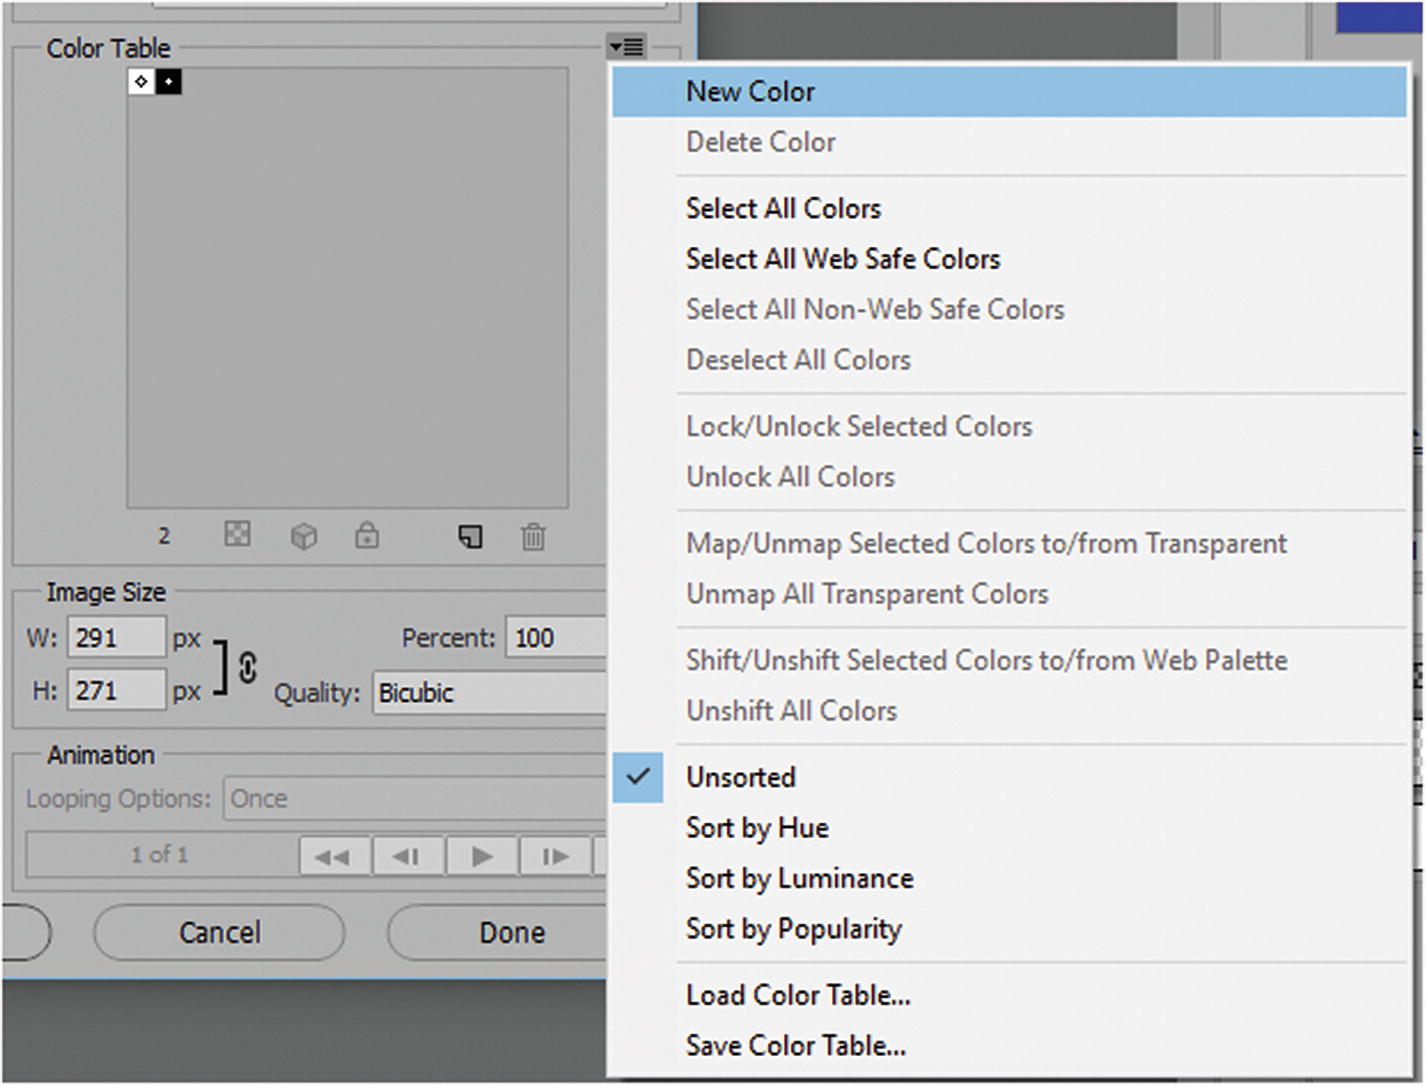
The Save for Web dialog box allows you to sort colors for some files for optimum quality
Let’s now look at the file formats that we can work with for the web, and review some of their options.
GIF
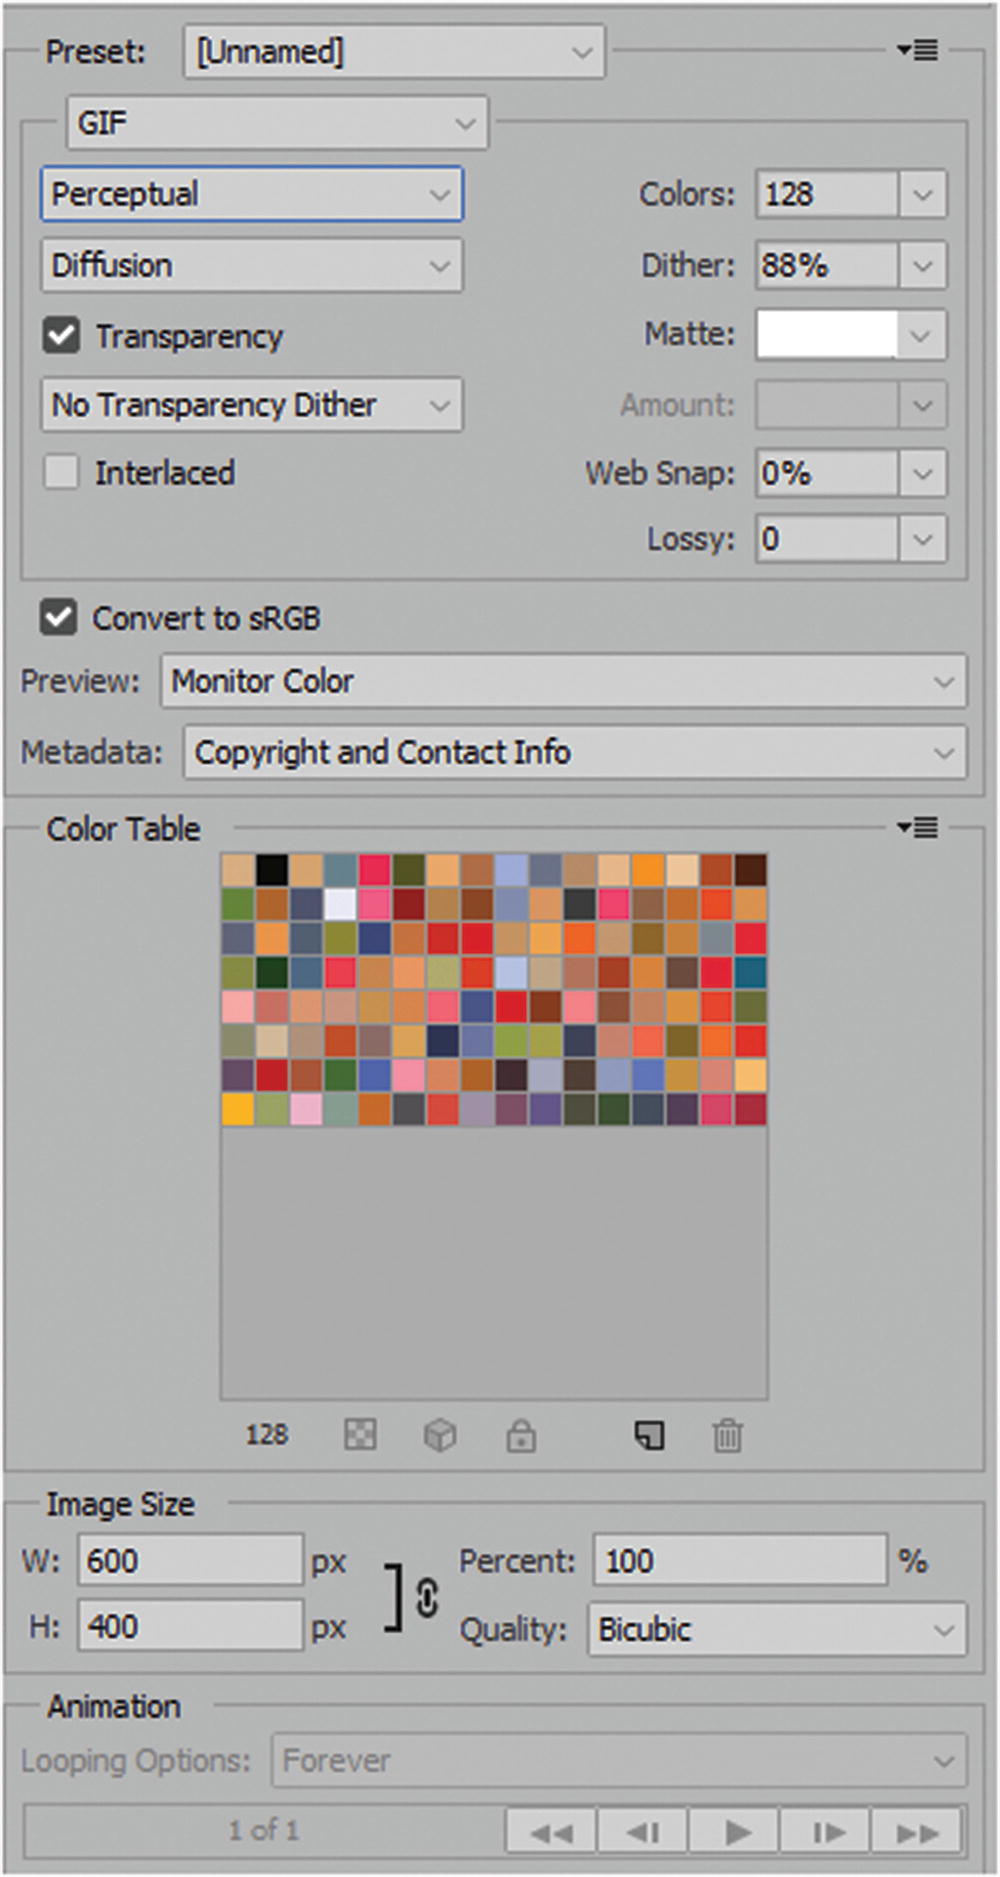
The Save for Web (Legacy) dialog box setting for a static GIF file
Perceptual: Creates a custom palette of color that gives priority to the colors that the human eye has greater sensitivity to, or that are most pleasing.
Selective: Similar to Perceptual, but also favors the broad range of continuous colors and the preservation of colors on the web. It usually produces an image with the greatest color integrity.
Adaptive: Samples colors that appear most commonly in the image. Images with a majority of red have a greater concentration of red shades.
Restrictive (Web: 216 colors): Compensates between Mac and PC computer monitors. If your image does not have 216 colors, they are removed. Sets Colors to Auto.
Custom: You can create a custom pallet in the Color Table dialog box. Sets Colors to Auto.
Black and White: Sets the colors to black and white. Sets Colors to Auto.
Grayscale: All the shades of gray. Sets Colors to Auto.
System (Mac OS): There are 256 colors for a macOS system palette. Sets Colors to Auto. The color table differs by operating system.
System(Windows): There are 256 colors for a Windows OS system palette. Sets Colors to Auto. The color table differs by operating system.
No dither: The default for no dither or none.
Diffusion: A random structure dither that is good for preserving minute details and text in logos.
Pattern: A halftone-like square pattern.
Noise: This reduces the edge pattern if you plan to slice up your image for an HTML background with <div> tag or within a table. (You will look at slices later in chapter 5.)
- Dither: You can adjust the amount of dither by percentage. Check whether you want transparency and then choose the type of dither, which is like the other dither setting but for transparent sections in the Specify transparency Dither Algorithm drop-down menu.
No Transparency Dither
Diffusion Transparency Dither
Pattern Transparency Dither
Noise Transparency Dither
Amount: You can adjust the amount of transparency dither by percentage. If you are not using a transparent background, set a matte color that fills in the transparent area, which can be the same as the background color for your site or whatever color you choose. Do this in Other, which brings up the color picker. Refer to Figure 4-46.
The Save for Web (Legacy) dialog box setting for matte color background
Interlaced: Similar to the Progressive option in the JPEG setting. The image loads in parts, gradually becoming clearer with each scan.
Web Snap: Snaps close colors to web pallet based on tolerance.
Lossy: Controls the amount of file compression for that specific file format.
Covert to sRGB: Makes sure the file is in the correct sRGB setting.
Preview: Displays how the colors appear in monitors or screens.
Metadata: Sets information on the file, such as copyright and contact information.
Color Table: Shows which colors are currently in the table. You can edit these settings.
Image Size: Allows you to adjust the size of the image using pixels in a uniform proportions (linked), separately (unlink), or by percentage, and sets the quality.
Nearest Neighbor: A fast but less-precise method that replicates the pixels in an image. Used with illustrations containing edges that are not anti-aliased to preserve hard edges and produce a smaller file. It has been known to produce jagged effects, which becomes apparent when you distort or scale an image, or perform multiple manipulations on a selection of the graphic.
Bilinear: Adds pixels by averaging the color values of surrounding pixels. It produces medium-quality results.
Bicubic: Exams of the values of surrounding pixels. Using complex calculations, Bicubic produces smoother tonal gradations than Nearest Neighbor or Bilinear.
Bicubic Smoother: For enlarging images based on Bicubic interpolation but designed to produce smoother results.
Bicubic Sharper: Reduces the size of an image based on bicubic interpolation with enhanced sharpening. This option maintains the detail in a resampled image. If Bicubic Sharper over sharpens some areas of an image, try using Bicubic.
You can also preview a GIF animation and choose the amount of time it loops. We look at this setting in more detail in Chapter 6.
JPEG
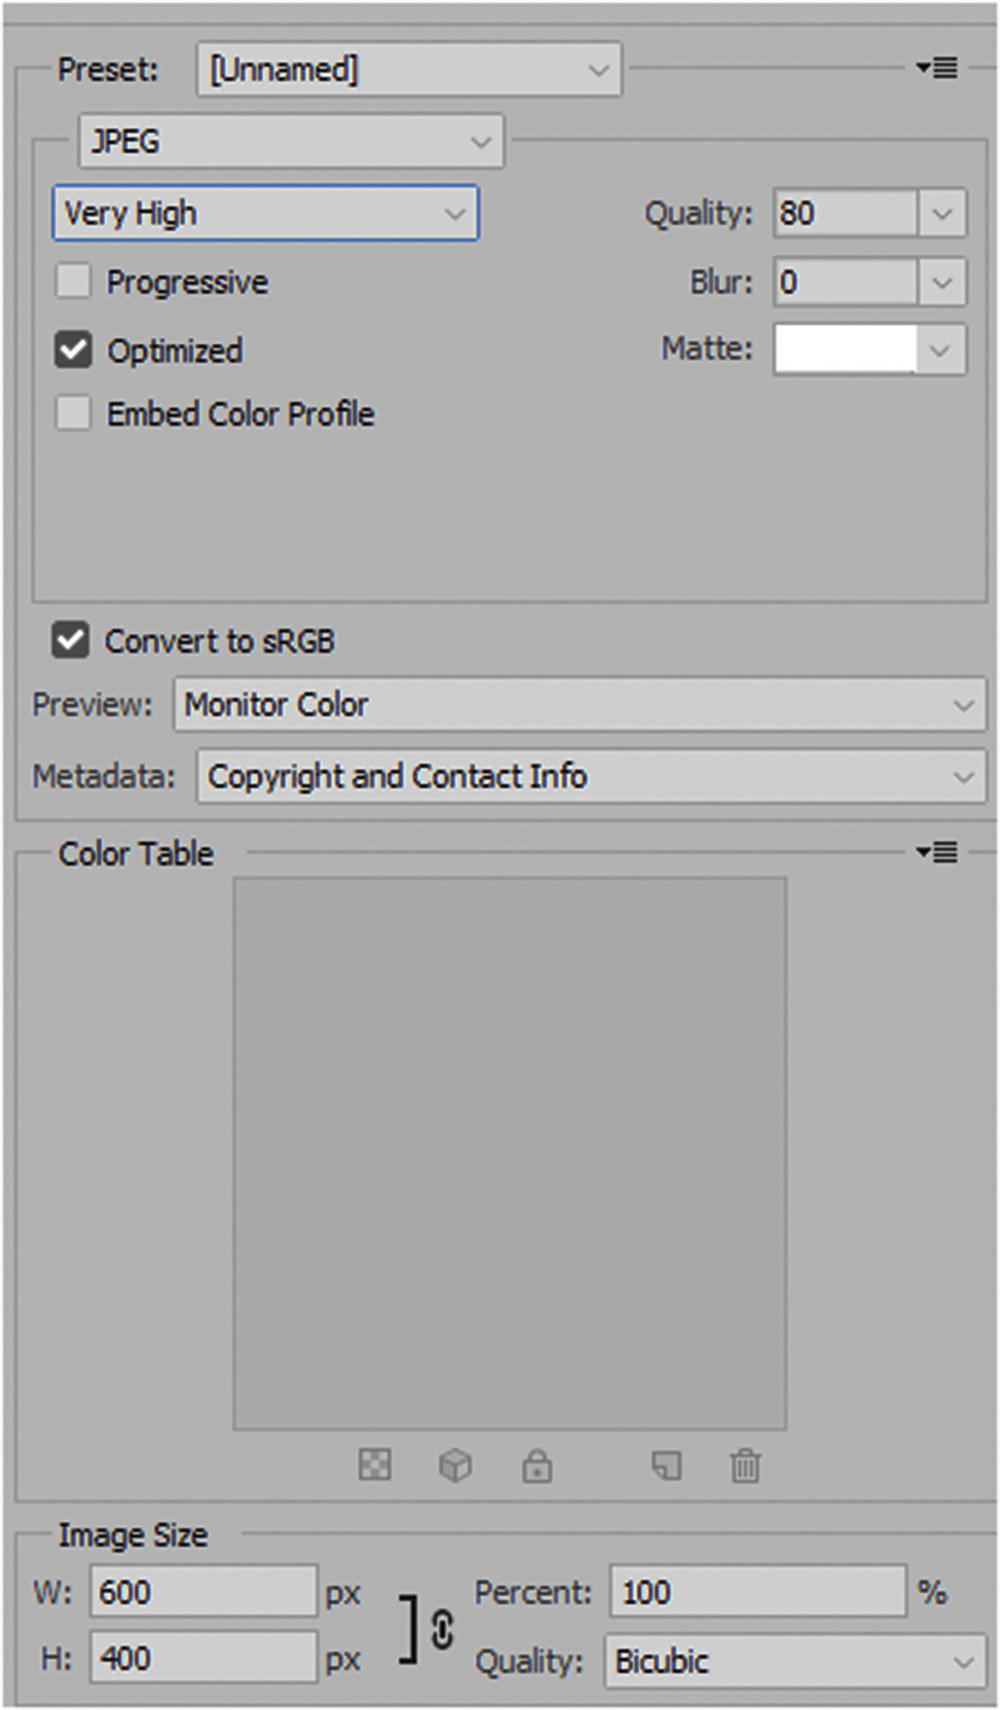
The Save for Web (Legacy) dialog box JPEG setting

The Save for Web dialog box setting JPEG quality control
Progressive: Refers to how the quality becomes greater with multiple passes or scans.
Blur: Can be adjusted to reduce artifacts or graininess in a photograph, though the image may not appear as sharp and clear as it was before.
Matte: Since JPEGs cannot have transparency, adding a matte background to match your website’s solid background is an appropriate choice in an area you would normally consider transparent.
Embed Color Profile: Allows you to include color information with the file (ICC Profile).
As with GIFs, you can make sure they are set to sRGB, view a preview, and set the metadata. You cannot use the Color Table because the file is in RGB and not indexed. Digital Photos in the JPEG format use many more colors, so there would be too much color information to include in a color table.
Like the GIF files, you can also adjust the size and quality of the image with various settings.
PNG-8
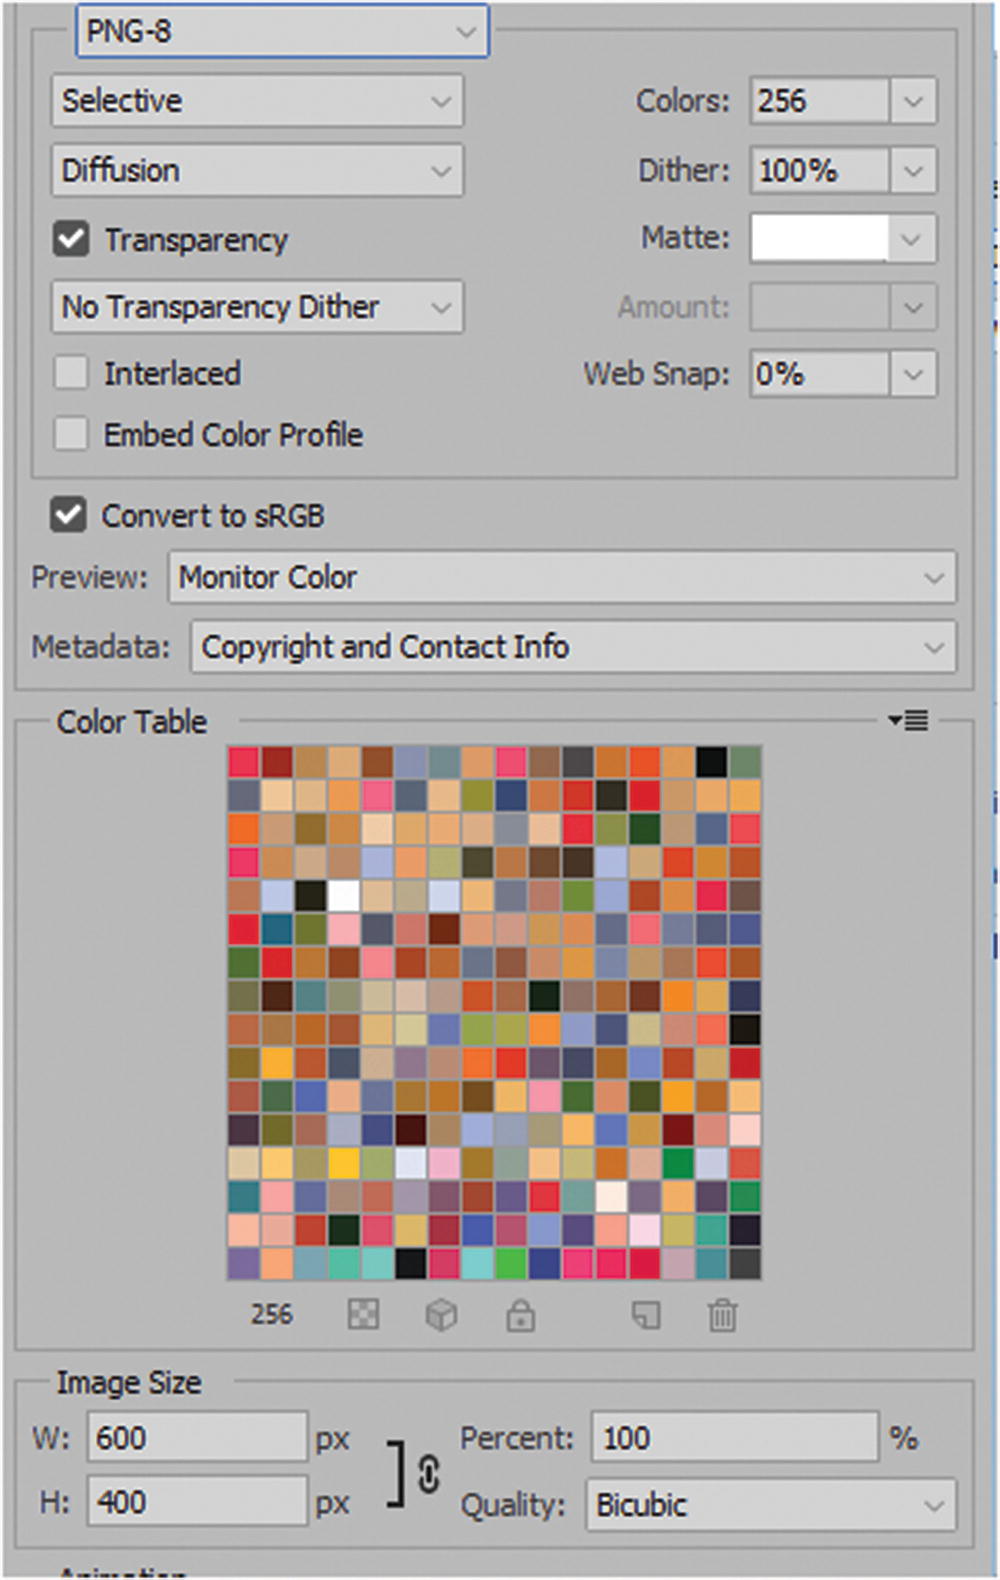
The Save for Web (Legacy) dialog box setting PNG-8
Embed Color Profile: Allows you to include color information with the file (ICC Profile).
Note
Unlike GIFs, you cannot set lossy compression, and you must use the other settings to reduce the file size. Like GIFs and JPEGs, you can adjust the image size and its quality with the settings in the lower right.
PNG-24

The Save for Web (Legacy) dialog box setting PNG-24
PNG-24 files can contain varying degrees of transparency (0–100%) that you built in your original file. Matte is not available if transparency is checked, since it blends into the web background.
As with the PNG-8, you can embed the color profile, preview, and add metadata. Because PNG-24 uses a large number of colors, like a JPEG, you cannot use the color table to check the colors. Like the other formats, you can still use the Image Size area to adjust the size and quality.
WMBP
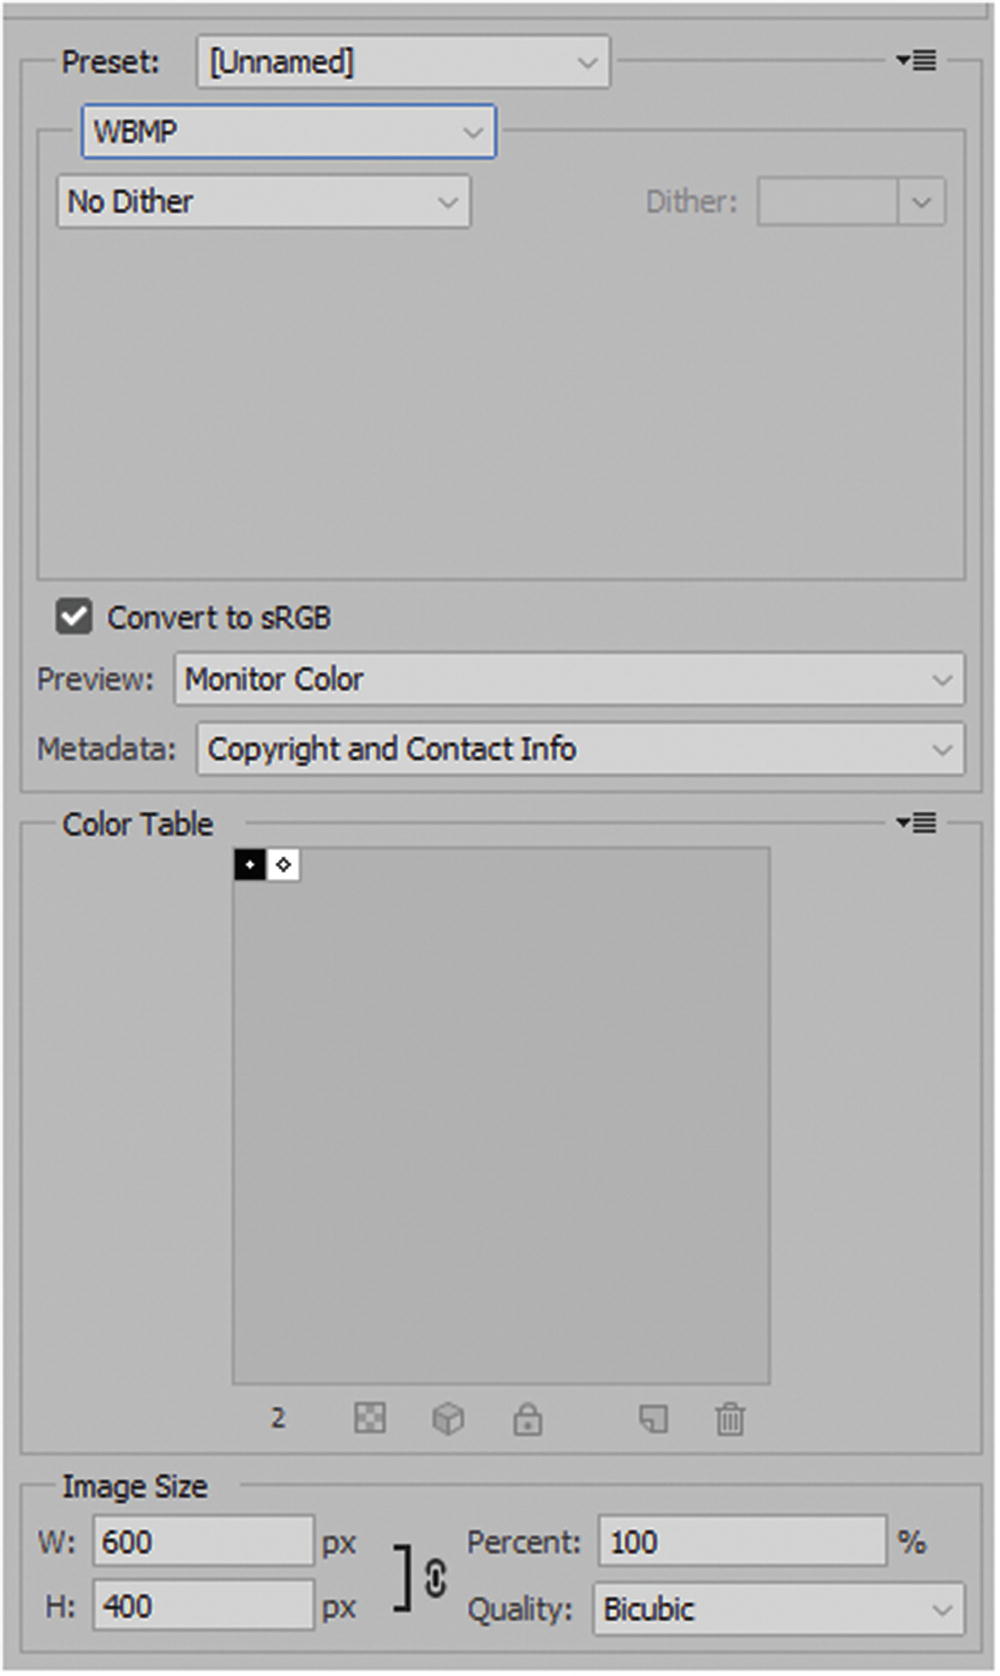
The Save for Web (Legacy) dialog box setting WBMP
There are few similar settings that you can adjust, such as dither, but since it is black and white, the image can look very grainy and low quality.

When you have completed the setting for your images, you can either preview or save them
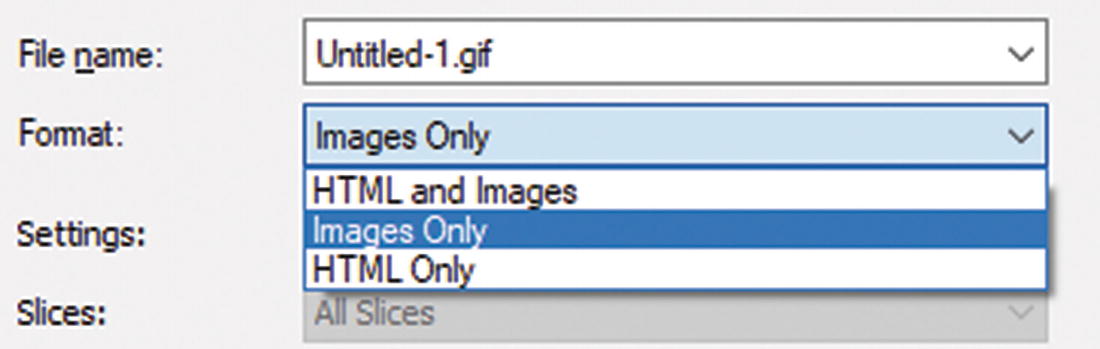
Options when you save your image
HTML and Images: This is an option if you are working with slices and you want to keep the shape of the page as you have in Photoshop. You could bring this file into Adobe Dreamweaver and continue to edit the layout.
Images Only: Best if you are only working with single images and will add them to Dreamweaver wherever they are required.
HTML Only: Use the basic layout you created and exclude the images. I don’t use this option often because I prefer to create my layout using Dreamweaver; however, if you’re working in a group, check with your team what method they prefer for their workflow.
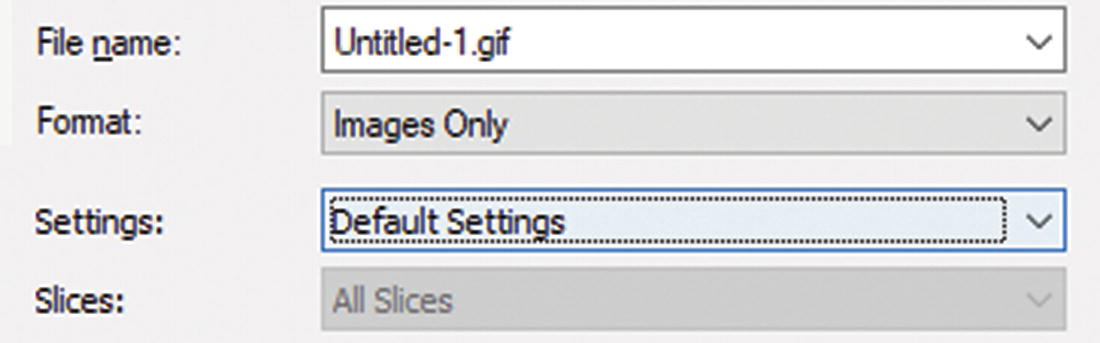
Settings: I usually leave the settings at default. However, you can choose custom, background image, XHTML, or more advanced custom settings. Refer to Figure 4-54.
Options for when you save your image and default or custom settings
If your file has slices, you can choose to export all the slices or only the User(created) or Slices (user and auto) that were selected. You’ll look at slices in Chapter 5.
Additional Options That You Can Use to Export Files for the Web
Depending on how you have built your original file, it may contain one of the items discussed in the following sections.
Artboards
You can either create an artboard when you start a file (File ➤ New) or while building it. In the Layers panel, in the upper-side menu, choose New Artboard. You can then use the Properties panel to modify it further.
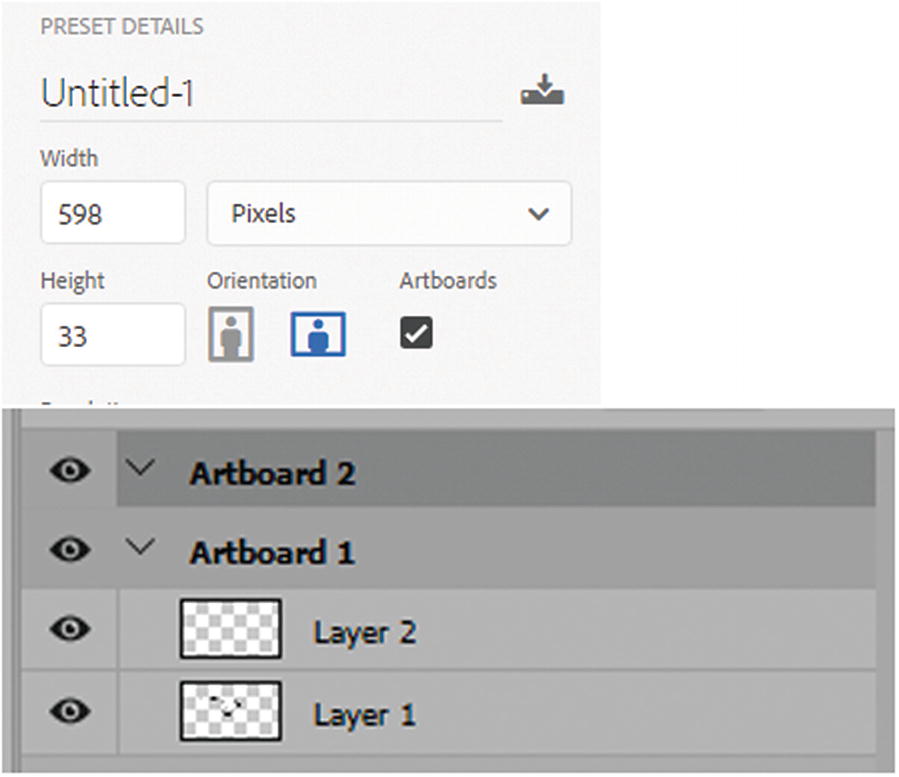
How multiple artboards could appear in the Layer panel if the option is checked when you create a new document
To Export you your artboards, you can choose File ➤ Export ➤ Export As (all artboards will be exported in the file).
The web files that you can export include BMP, JPEG, PDF, PNG-8, and PNG-24; you cannot export as a GIF or SVG using this option.
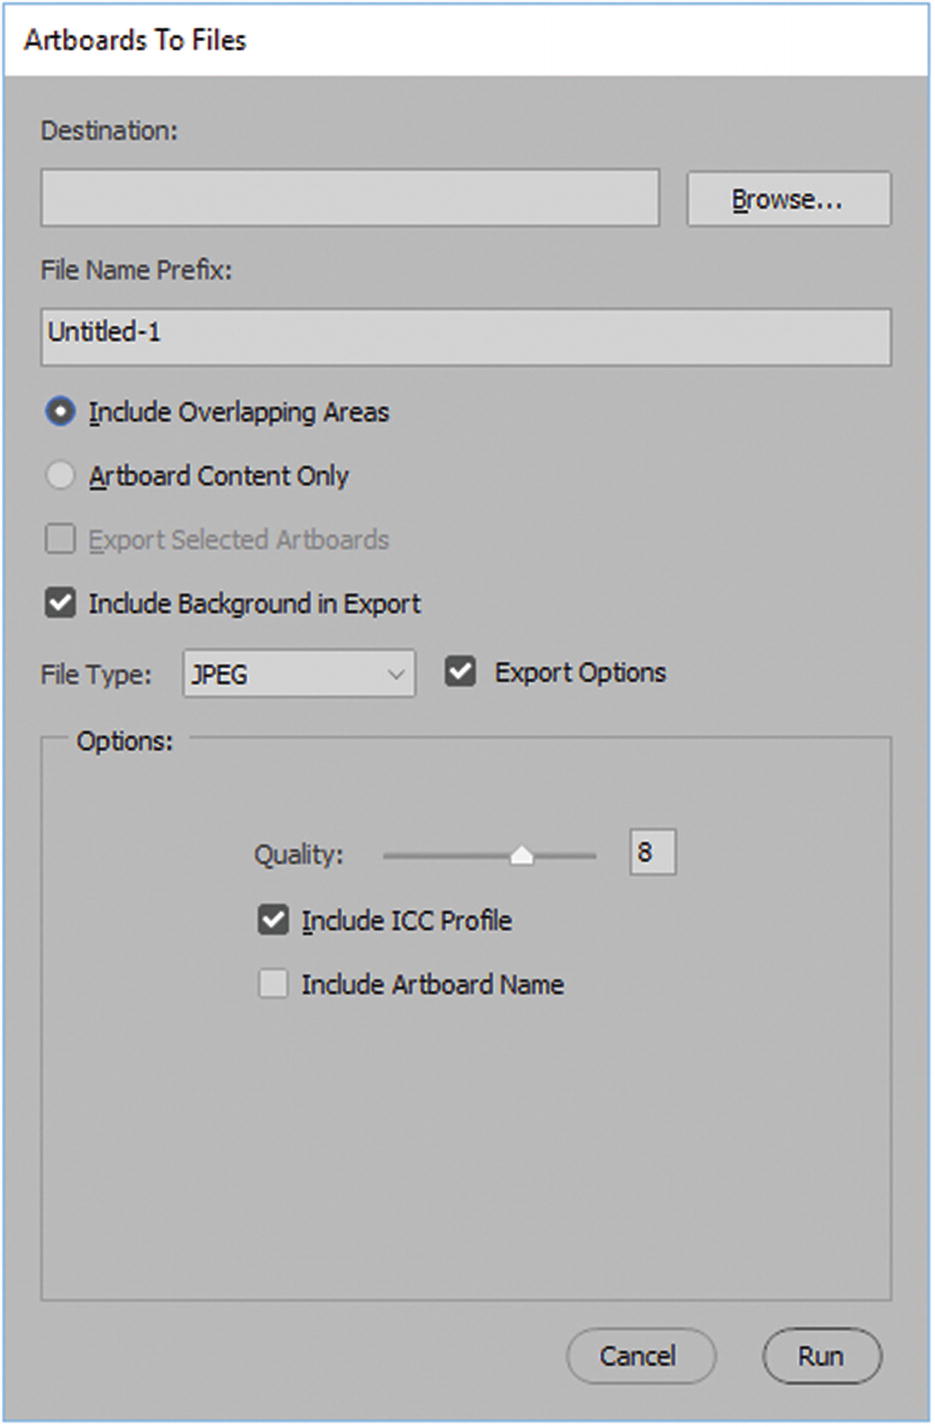
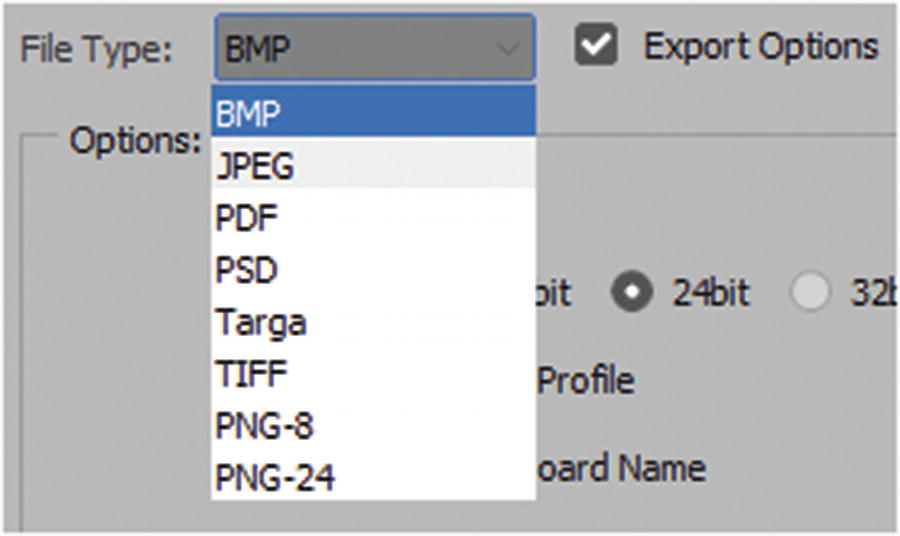
Options for the Artboards To Files dialog box
Note
Artboards To PDF has the exact same layout; however, you can only choose a PDF file type.
When you have adjusted the settings , click the Run button so that you can save the files.
For more information on working with artboards, check out
Layer Comps
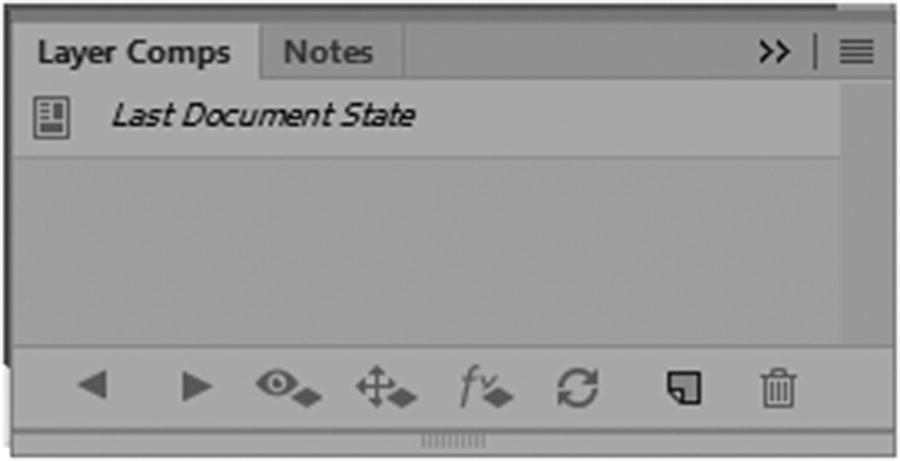
The Layer Comps panel

The layer comps settings are similar to artboards
However, as you can see, some options for export are limited, and you cannot export as a GIF or SVG using this option.
Note
To export a layer comp as a PDF, the file must be saved first. The History panel has an item similar to Layer Comps called Snapshot (camera icon). Snapshots cannot be saved once the file is saved closed. If you want to save a snapshot rather than a layer comp, you can use the Create New Document from the current state icon. Refer to Figure 4-59.
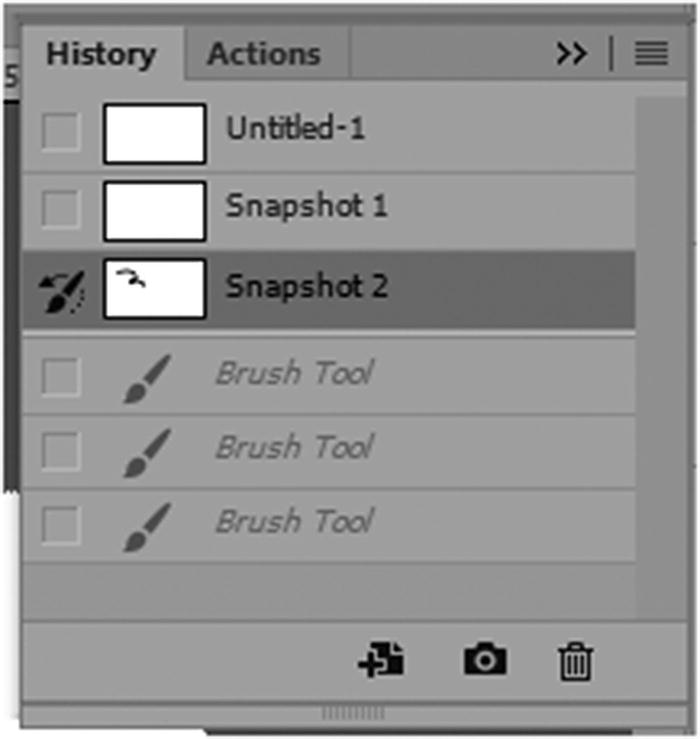
Example of using a snapshot in the History panel
For more information on layer comps , refer to https://helpx.adobe.com/ca/photoshop/using/layer-comps.html .
Layers
Most .PSD or Photoshop documents contain one or more layers. If you can’t find your Layers panel, look under Window menu ➤ Layers.
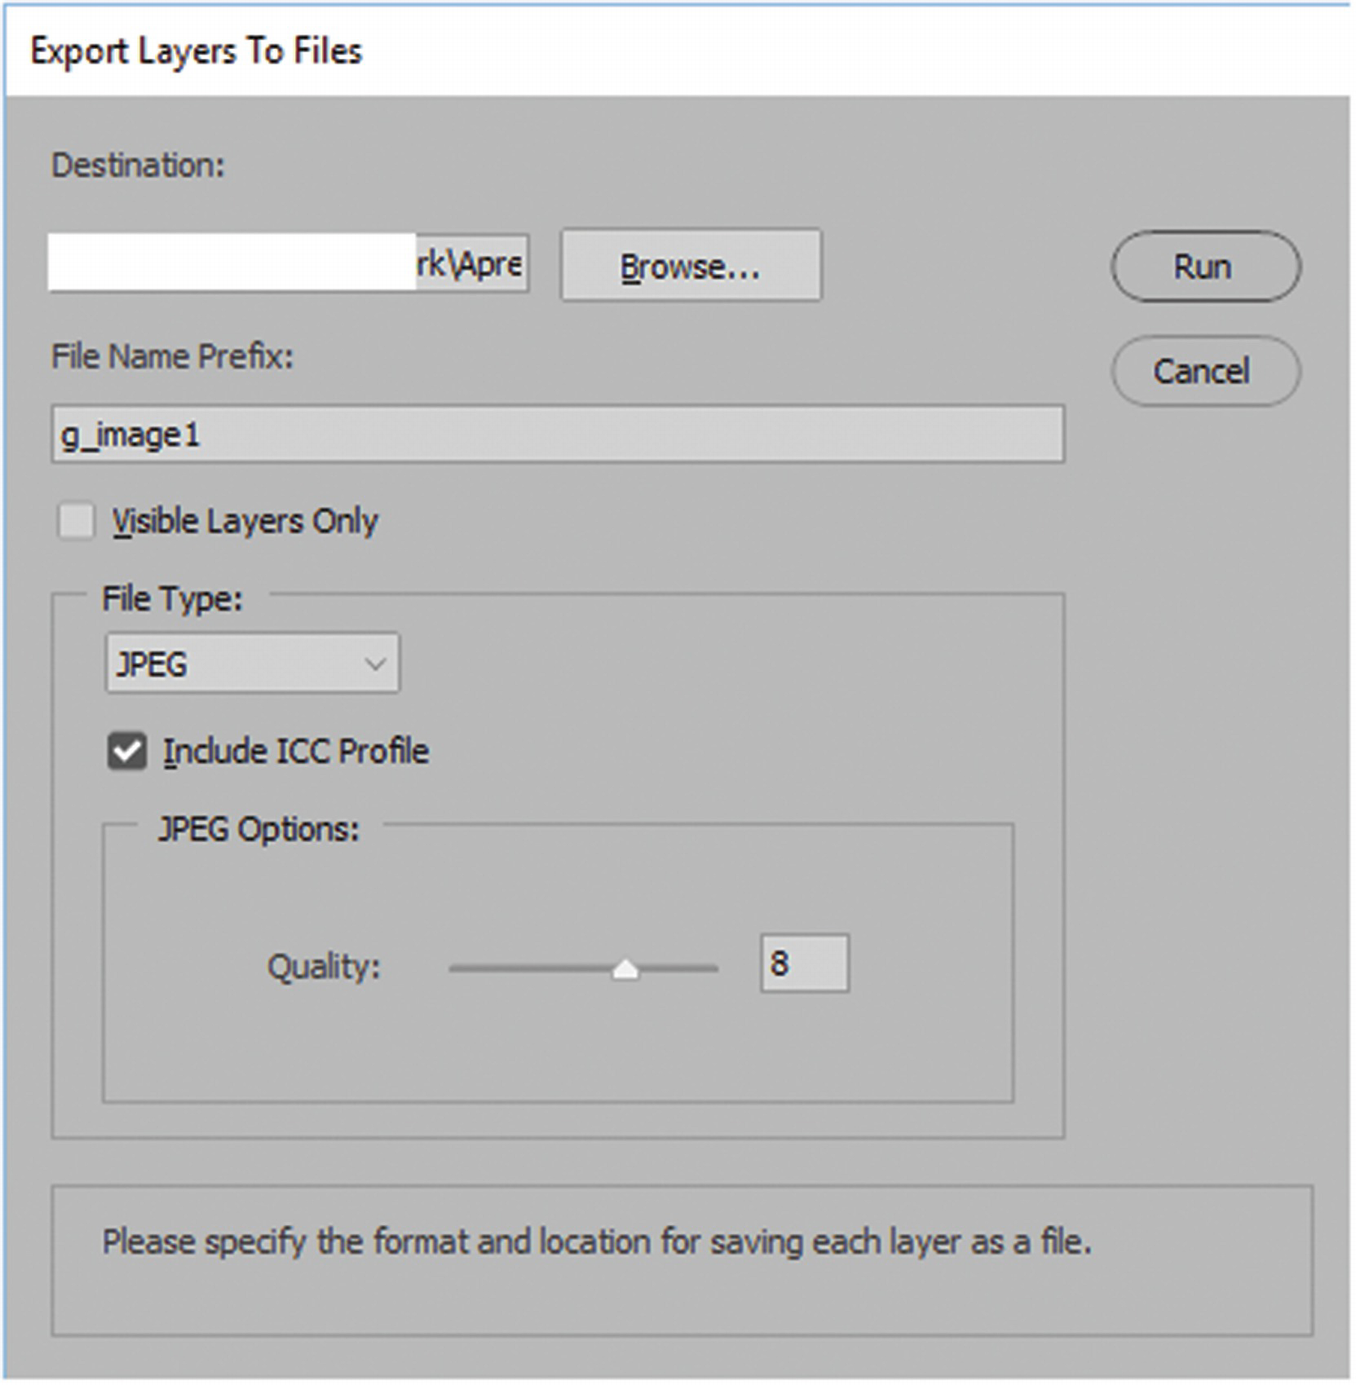
Export Layers To Files
As you can see, some options for export are limited, and you cannot export as a GIF or SVG using this option .
Note
A final option available for exporting options is File ➤ Generate ➤ Image ➤ Assets. You can use this with the Layers panel to further generate images that are JPEG, PNG, or GIF. To do this, you have to name each layer in a specific way, which can get quite complicated. If this is an option you are interested in, for more information visit https://helpx.adobe.com/photoshop/using/generate-assets-layers.html .
Summary
This chapter covered a lot of ground as it relates to exporting images in the correct file formats. Depending upon your workflow, you may prefer some options over others; the choice is up to you. In the next chapter, you look at some of the tools used in Photoshop CC to speed up automation in exporting and slicing images.