Table of Contents for
Graphics and Multimedia for the Web with Adobe Creative Cloud: Navigating the Adobe Software Landscape

Version ebook / Retour

Cover image for bash Cookbook, 2nd Edition Graphics and Multimedia for the Web with Adobe Creative Cloud: Navigating the Adobe Software Landscape by Jennifer Harder Published by Apress, 2018
  1. Navigation
  2. Cover
  3. Front Matter
  4. Part I. Welcome to the Adobe Creative Cloud. Where Should You Begin?
  5. 1. Entering the Software Maze or Labyrinth
  6. Part II. Working with Photoshop to Create Web Graphics and Animations
  7. 2. Getting Started
  8. 3. Color Choices: CMYK, RGB, Grayscale, and Index
  9. 4. Saving or Exporting Your Files for the Web
  10. 5. Actions to Speed up File Conversion and Slicing Tools
  11. 6. Tools for Animation
  12. 7. Tools for Video
  13. 8. Other Miscellaneous Items in Photoshop That You Can Use for Web Design
  14. 9. Putting It into Practice with Photoshop CC
  15. Part III. Working with Illustrator to Create Web Graphics
  16. 10. Getting Started with Illustrator CC
  17. 11. Color Choices: CMYK, RGB, and Grayscale
  18. 12. Saving or Exporting Your Files for the Web
  19. 13. Actions to Speed up File Conversion and Slicing Tools
  20. 14. Tools for Animation and Video
  21. 15. Other Miscellaneous Items in Illustrator That You Can Use for Web Design
  22. 16. Putting It into Practice with Illustrator CC
  23. Part IV. Working with Animate to Create Animations, Movies, and HTML5 Canvas
  24. 17. Getting Started with Animate CC
  25. 18. Color Choices: RGB
  26. 19. Importing Your Artwork
  27. 20. Import Your Audio and Video
  28. 21. Working with the Timeline Panel
  29. 22. Exporting Your Files to the Web
  30. 23. Other Miscellaneous Items in Animate that You Can Use for Web Design
  31. 24. Putting It into Practice with Animate CC
  32. Part V. Working with Media Encoder to Create Audio and Video Files
  33. 25. Getting Started with Media Encoder
  34. 26. Working with Your RAW Video Files (AVI and MOV)
  35. 27. Working with Your RAW Video Files and Converting Them to Audio
  36. 28. Working with Your RAW Video Files and Converting Them to an Image Sequence
  37. 29. Putting It into Practice with Media Encoder CC
  38. Part VI. Working with Dreamweaver: Adding Images, Animations, and Multimedia to HTML5 Pages
  39. 30. Getting Started with Dreamweaver CC
  40. 31. Working with Images and Tags
  41. 32. Working with CSS
  42. 33. Working with Images for Mobile Web Design
  43. 34. What Is JavaScript?
  44. 35. Working with Bootstrap, Templates, Library Items, and the Assets Panel
  45. 36. Working with Video, Audio, and Animations
  46. 37. Additional Options to Apply Images in Dreamweaver
  47. 38. Final Testing, Getting Ready to Upload Your Site
  48. 39. Putting It into Practice with Dreamweaver CC
  49. Part VII. Further Dreamweaver Integration with Other Adobe Products for Websites
  50. 40. What Other Programs That Are Part of Adobe Creative Cloud Can I Use to Display My Graphics or Multimedia Online?
  51. Back Matter
© Jennifer Harder 2018
Jennifer HarderGraphics and Multimedia for the Web with Adobe Creative Cloudhttps://doi.org/10.1007/978-1-4842-3823-3_29

29. Putting It into Practice with Media Encoder CC

Jennifer Harder1 
(1)
Delta, BC, Canada
 

In this chapter, you review how to export video files (AVI and MOV) and create an MP4 file. In the second project, you practice extracting sound from a video file and converting it to MP3 and WAV formats.

Note

This chapter has actual projects, which are in two folders. You can use the files in the Chapter 29 folder to practice opening and viewing for this lesson. They are at https://github.com/Apress/graphics-multimedia-web-adobe-creative-cloud .

In this “Putting it into Practice” chapter, you export video and audio for the Hot Glass Tango website, which tells the story (through images, animations, video, and audio) of how handmade glass items are created. The video and audio that you create in this chapter is used to complete the website in Part 6.

Create a Video MP4 File

Taking off from Chapter 24, you are working with the following ten MOV files:
  • scene1_man_zoom_out_r2.mov

  • scene1_man_movement.mov

  • scene2_3_flame.mov

  • scene4_5_swing.mov

  • scene6_end.mov

  • scene6_end_fade.mov

  • scene7_credit.mov

  • scene7_credit_fade.mov

  • MVI_1361.mov is used later in another video project

  • MVI_7052.avi is used later in another gallery project

These files are found in the ME_video folder. Remember to keep a backup copy of these originals if you need to practice with them again.

In Media Encoder, make sure to add these 10 files the Queue panel with the plus (+) icon, and make sure that their format settings are H.264. Refer to Figure 29-1.
../images/466782_1_En_29_Chapter/466782_1_En_29_Fig1_HTML.jpg
Figure 29-1

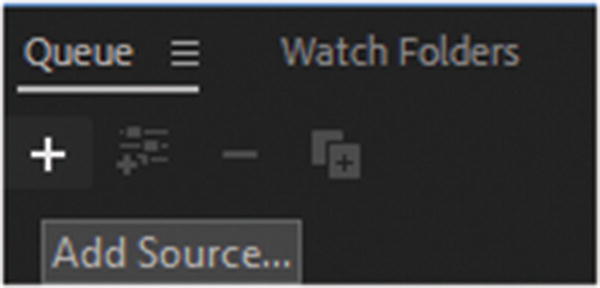
Add your files one at a time using the add source icon

Likewise, if you have any other files from earlier chapters that are not part of this project, select them and use the minus (–) to remove them for now. When Adobe’s alert asks if you are sure you want to remove the selected items and their settings from the Queue, choose Yes. Refer to Figure 29-2.
../images/466782_1_En_29_Chapter/466782_1_En_29_Fig2_HTML.jpg
Figure 29-2

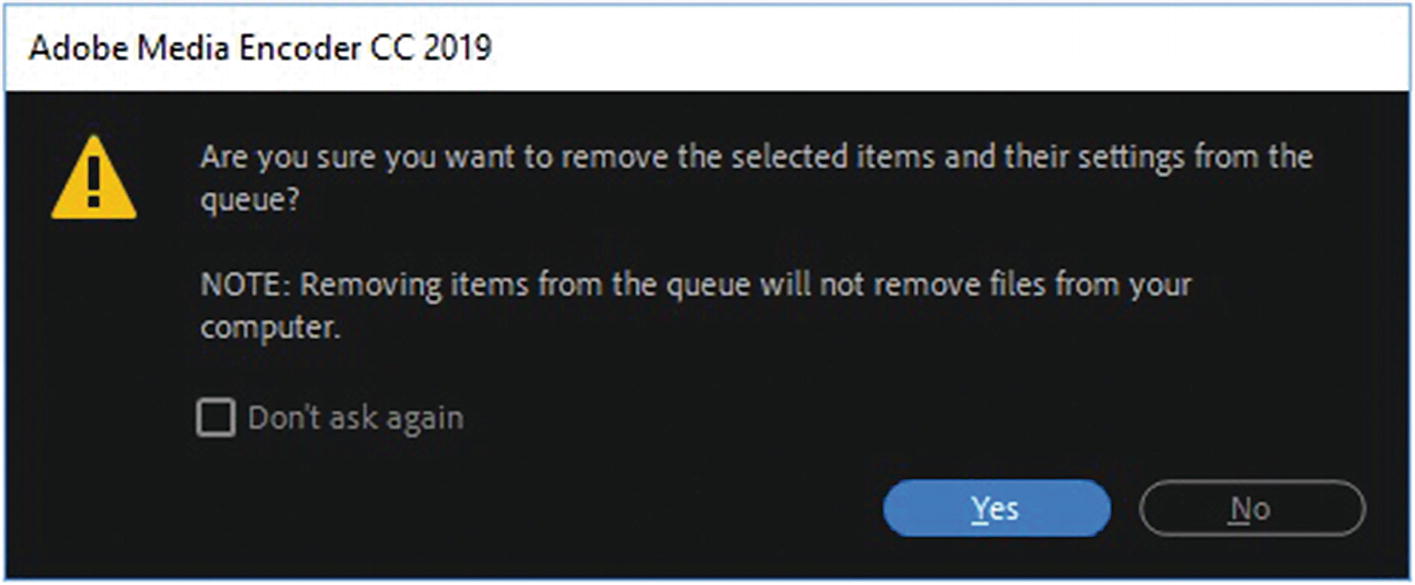
Remove your unwanted files from the Queue panel

Your Queue panel should look something like what’s seen in Figure 29-3. None of the files is stitched together; however, your Output File column will probably be different from mine.
../images/466782_1_En_29_Chapter/466782_1_En_29_Fig3_HTML.jpg
Figure 29-3

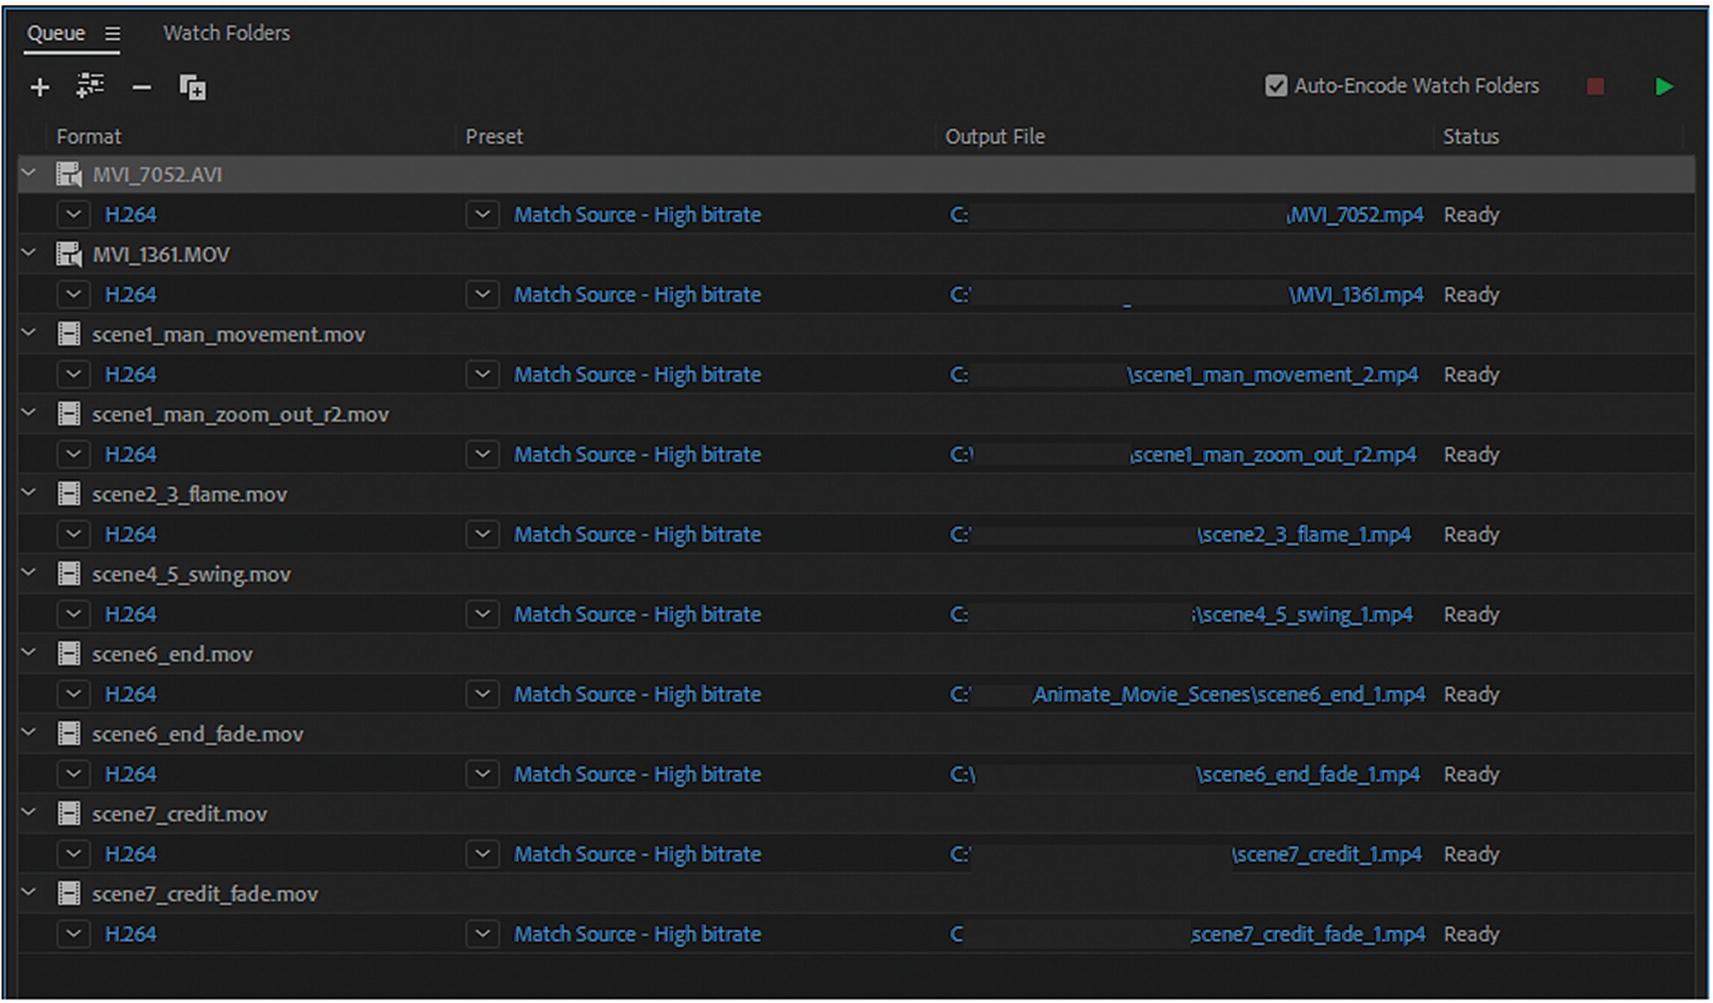
Your ten files in the Queue panel

Click each output link and find a folder that you would like to output the file to. Rendering a large number files on a drive can cause some computers to labor or crash. A good idea is to work with your files on an external drive. The files I have presented are relatively small, so they should be OK if you want to work off your own computer’s drive; it’s up to you.

In the scene1_man_zoom_out_r2.mov file, click the Format column’s H.264 link to enter the Export Settings dialog box for that file. Refer to Figure 29-4.
../images/466782_1_En_29_Chapter/466782_1_En_29_Fig4_HTML.jpg
Figure 29-4

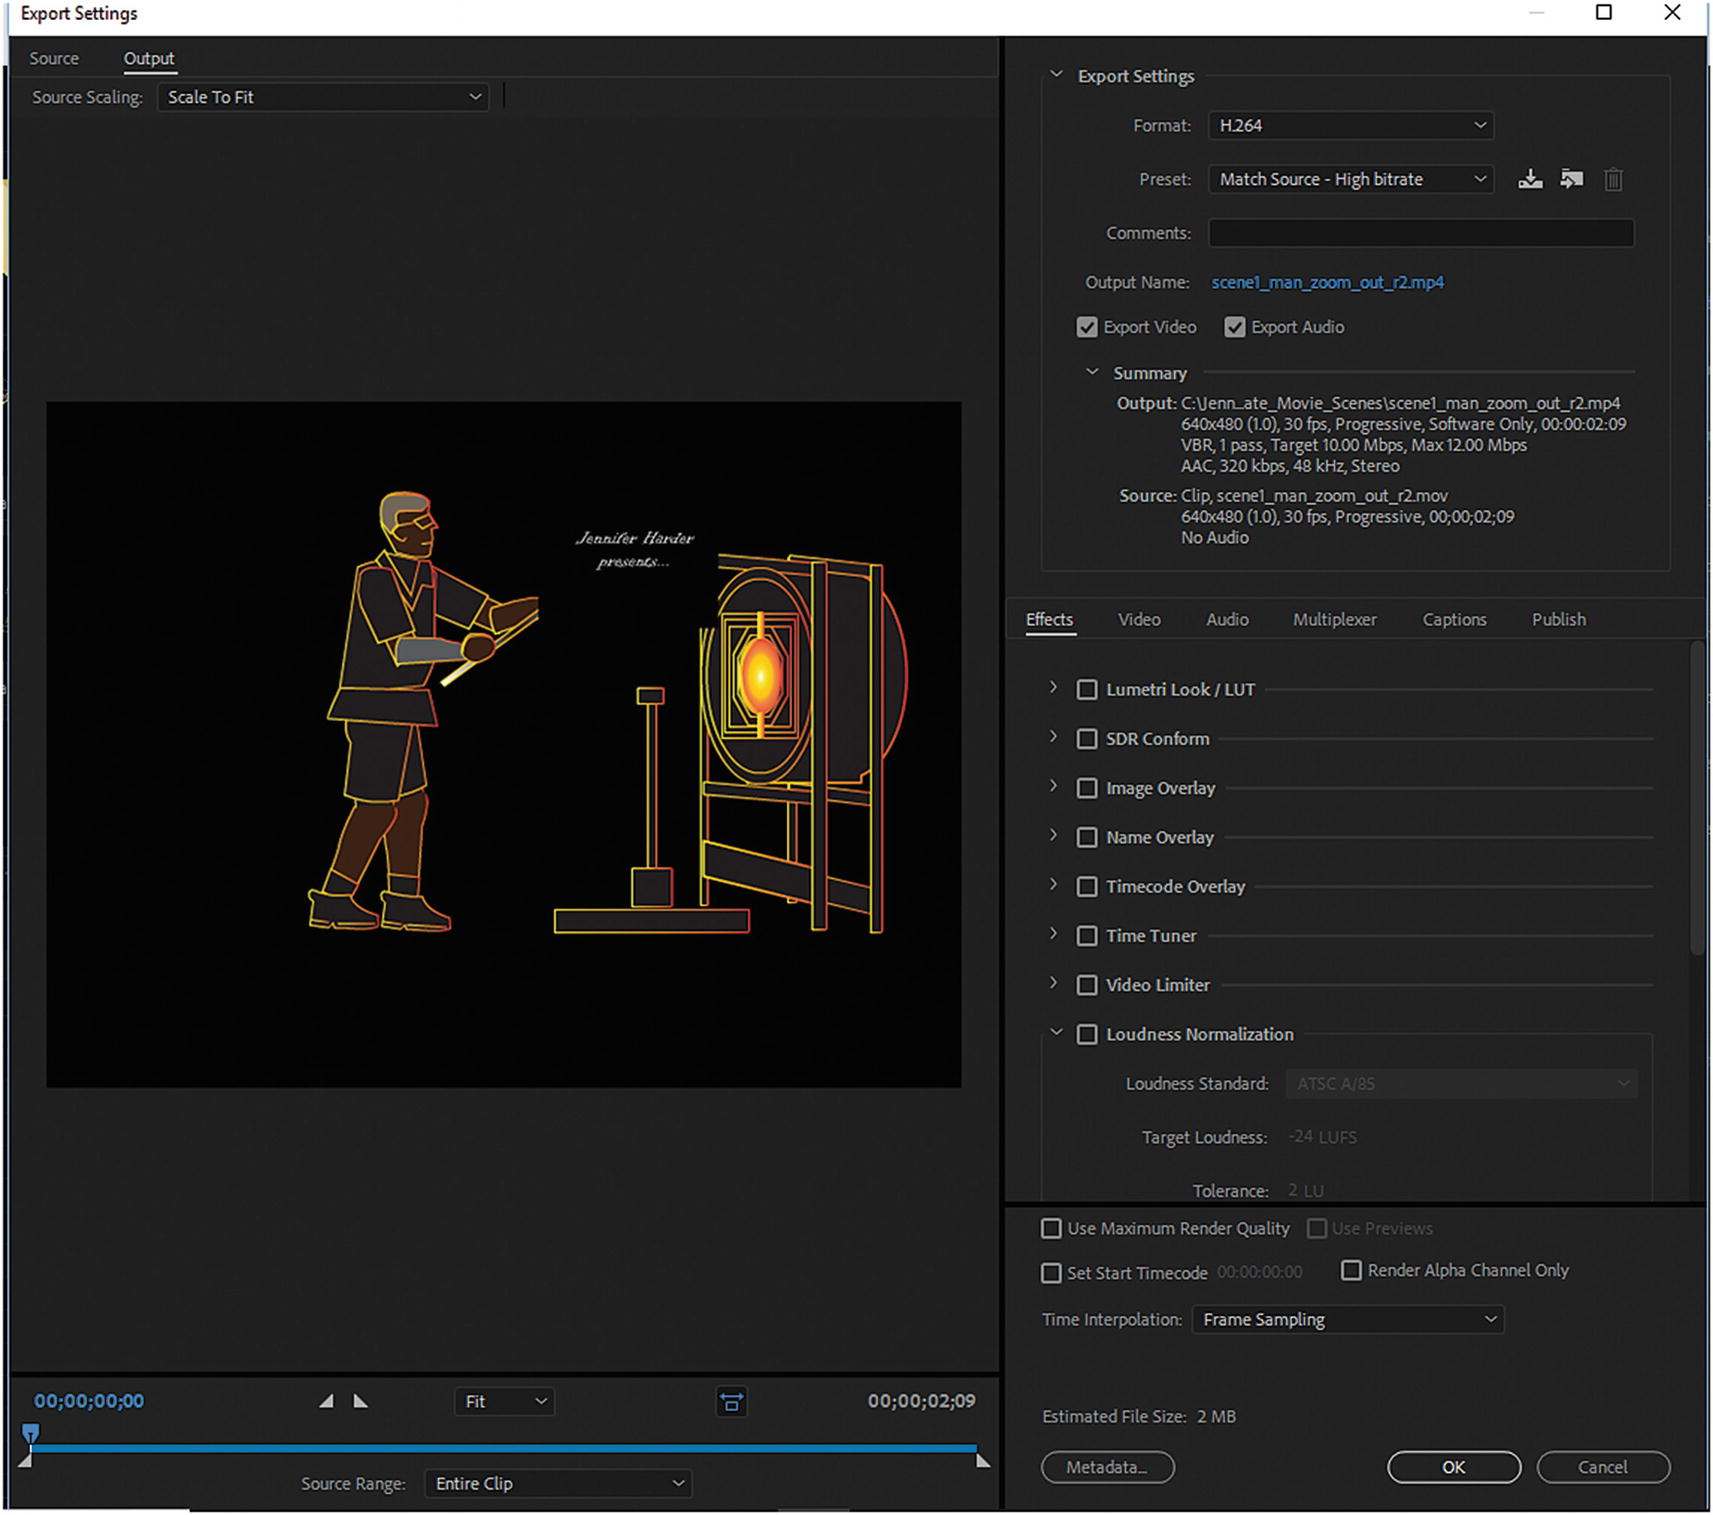
Edit your output file in the Export Settings dialog box

There is very little editing that needs to be done to this file. It is already set at preset Match Source - High bit rate. The correct dimensions are 640×480, and from the Source summary you can see it is running at 30 fps. That is because this animation will be part of the introduction for a Photoshop video called Hot Glass Tango. These animations never contained any audio, so you can uncheck Export Audio, but it will make a trivial difference to the final export size. Refer to Figure 29-5.
../images/466782_1_En_29_Chapter/466782_1_En_29_Fig5_HTML.jpg
Figure 29-5

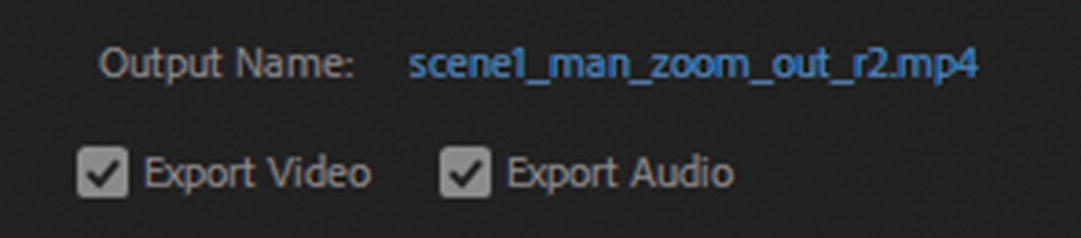
Choose whether to export the audio or not

The one area that you want to adjust is making a minor clip at the beginning of the video to remove an odd camera angle that remains when Animate converted the FLA file to a MOV file. Refer to Figure 29-6.
../images/466782_1_En_29_Chapter/466782_1_En_29_Fig6_HTML.jpg
Figure 29-6

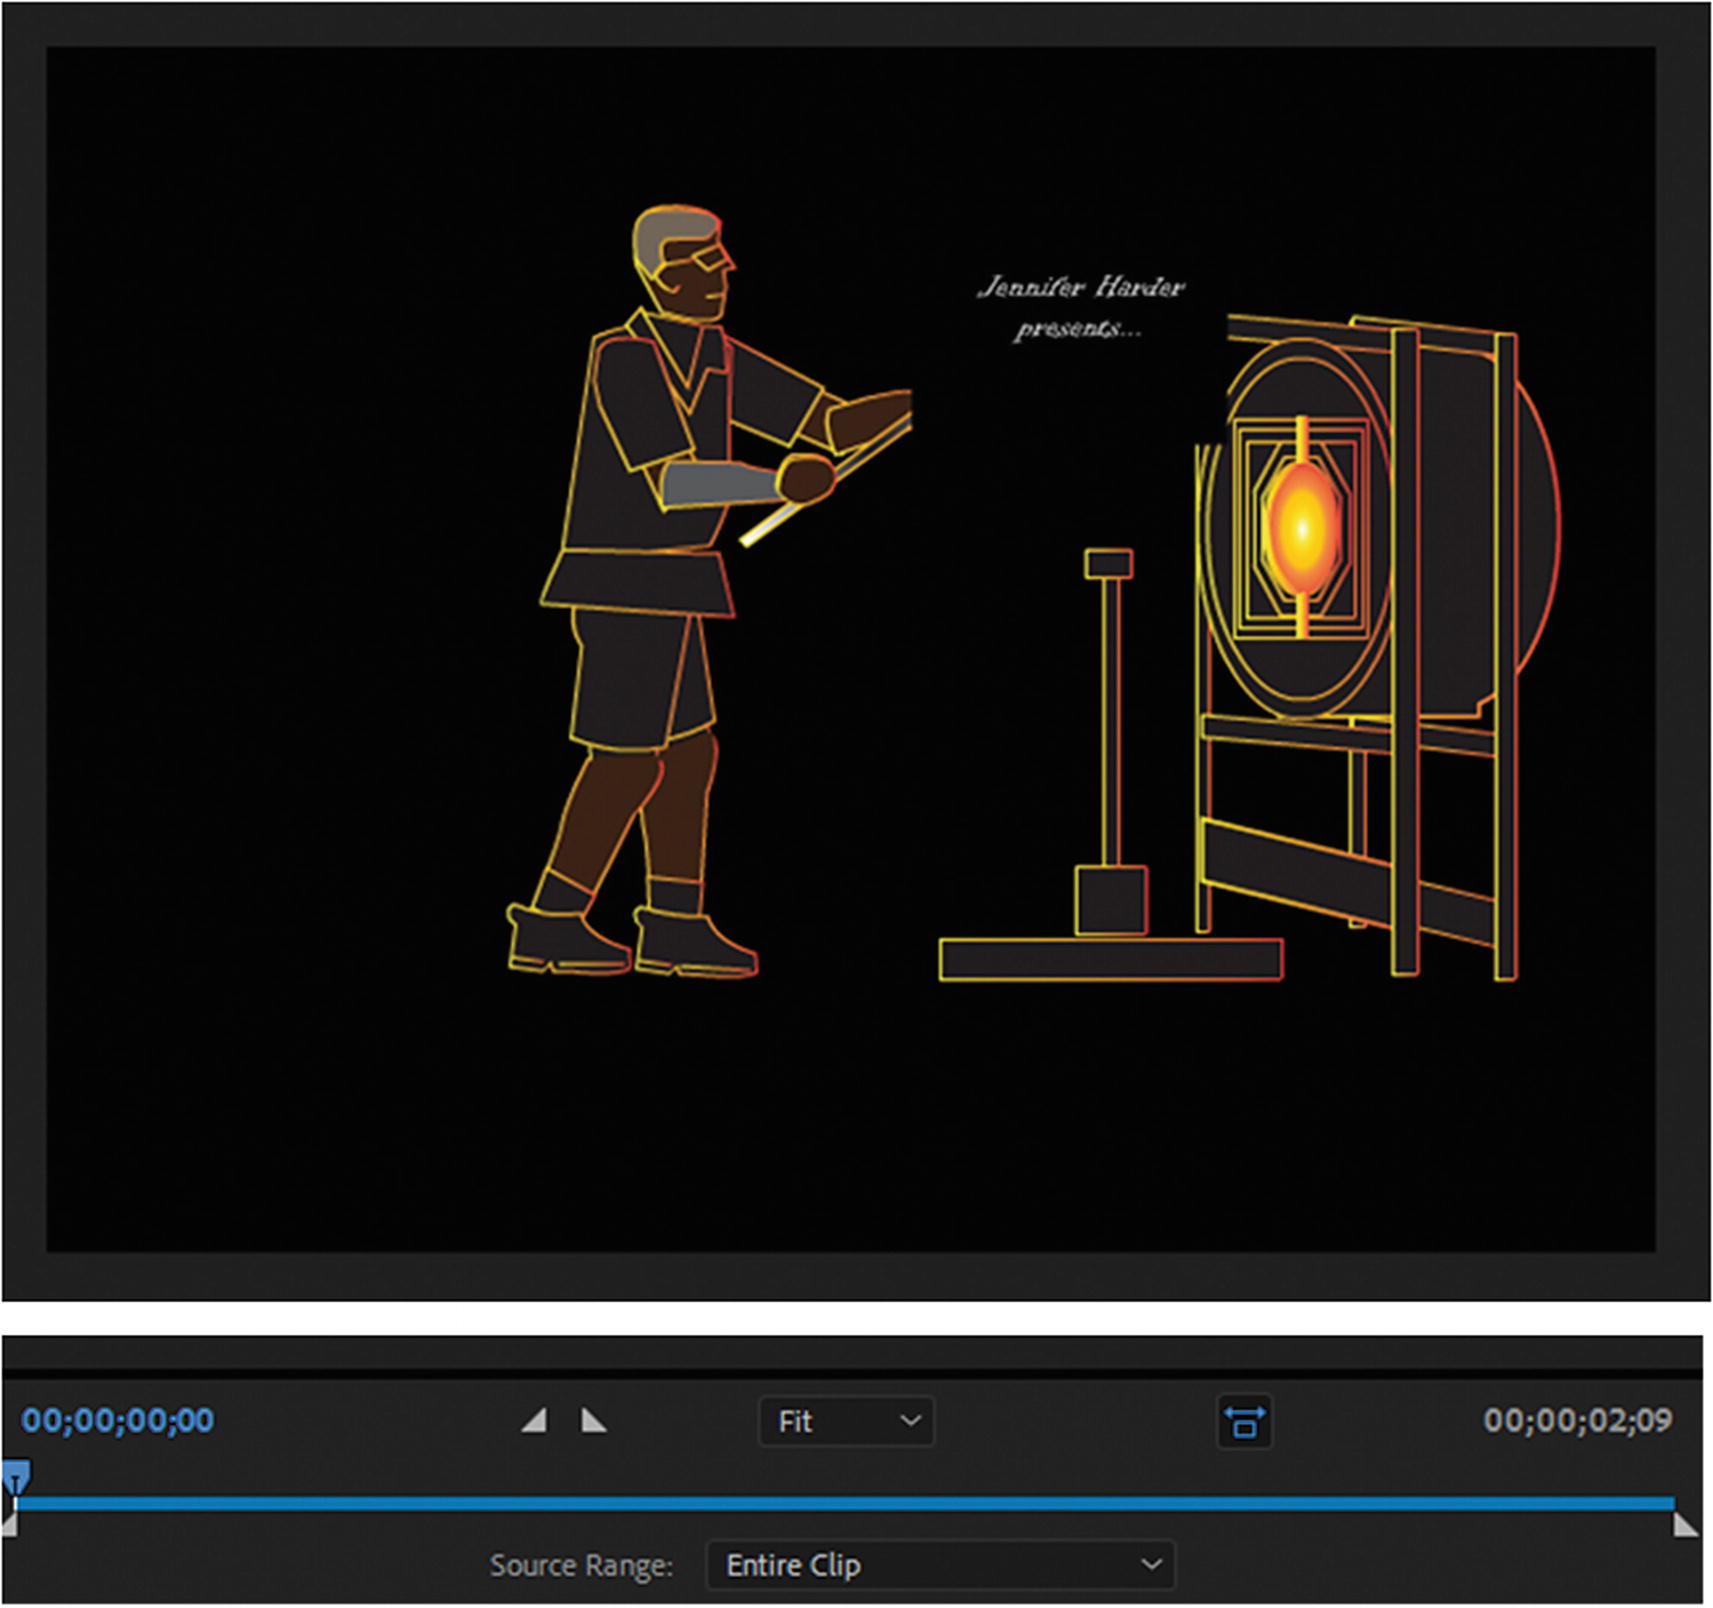
The entire clip needs some editing before export

The first frame looks rather odd. So, you need to move the left clip point inward by at least a fraction so that it does not register on the start time. To figure this out, move the blue playhead slowly toward the right until you see the frame seen in Figure 29-7.
../images/466782_1_En_29_Chapter/466782_1_En_29_Fig7_HTML.jpg
Figure 29-7

Moving the playhead to find the correct starting point of the animation clip

Now drag the left set point to the same location to clip it from that point, and remove any footage beforehand. Refer to Figure 29-8.
../images/466782_1_En_29_Chapter/466782_1_En_29_Fig8_HTML.jpg
Figure 29-8

Moving the left stop so that it cuts out the first frame

Remember to use the preview screen as your guide if you are unsure of the correct point. Your end time the on left has removed about a frame; 00:00:02:09 is now 00:00:02:08 (hours: minutes: seconds: frames). The Source Range changes from Entire Clip to Custom.

If you want, you can drag the playhead to the end, but you do not need to adjust the right set point because the frames for the rest of the animation are good.

When you are done, click OK to exit the Export Settings dialog box and confirm your changes. Refer to Figure 29-9.
../images/466782_1_En_29_Chapter/466782_1_En_29_Fig9_HTML.jpg
Figure 29-9

Click OK to confirm your changes

Media Encoder saves your changes, and you can go back to this area any time to adjust your set points before your export.

Note

If you find that the right set point has moved, reset your point using Source Range and choosing Entire Clip, and then move your left point again. Refer to Figure 28-8.

Repeat the steps for the seven files (.mov) in the Queue panel, as listed in Table 29-1.
Table 29-1

Adjustments to MOV File Times

File

Original Time

New Export Time

scene1_man_movement.mov

00:00:03:29

00:00:03:28

scene2_3_flame.mov

00:00:02:04

00:00:02:04 less than frame

scene4_5_swing.mov

00:00:02:12

00:00:02:11

scene6_end.mov

00:00:02:17

00:00:02:17 no frame change

scene6_end_fade.mov

00:00:01:29

00:00:01:28

scene7_credit.mov

00:00:02:24

00:00:02:23

scene7_credit_fade.mov

00:00:01:29

00:00:01:28

In all cases, the main area you need to adjust is the left set point marker to fix the first camera angle. Usually, it is no more than a frame or less off the left. Use these images as your guides. Refer to Figure 29-10.
../images/466782_1_En_29_Chapter/466782_1_En_29_Fig10_HTML.jpg
Figure 29-10

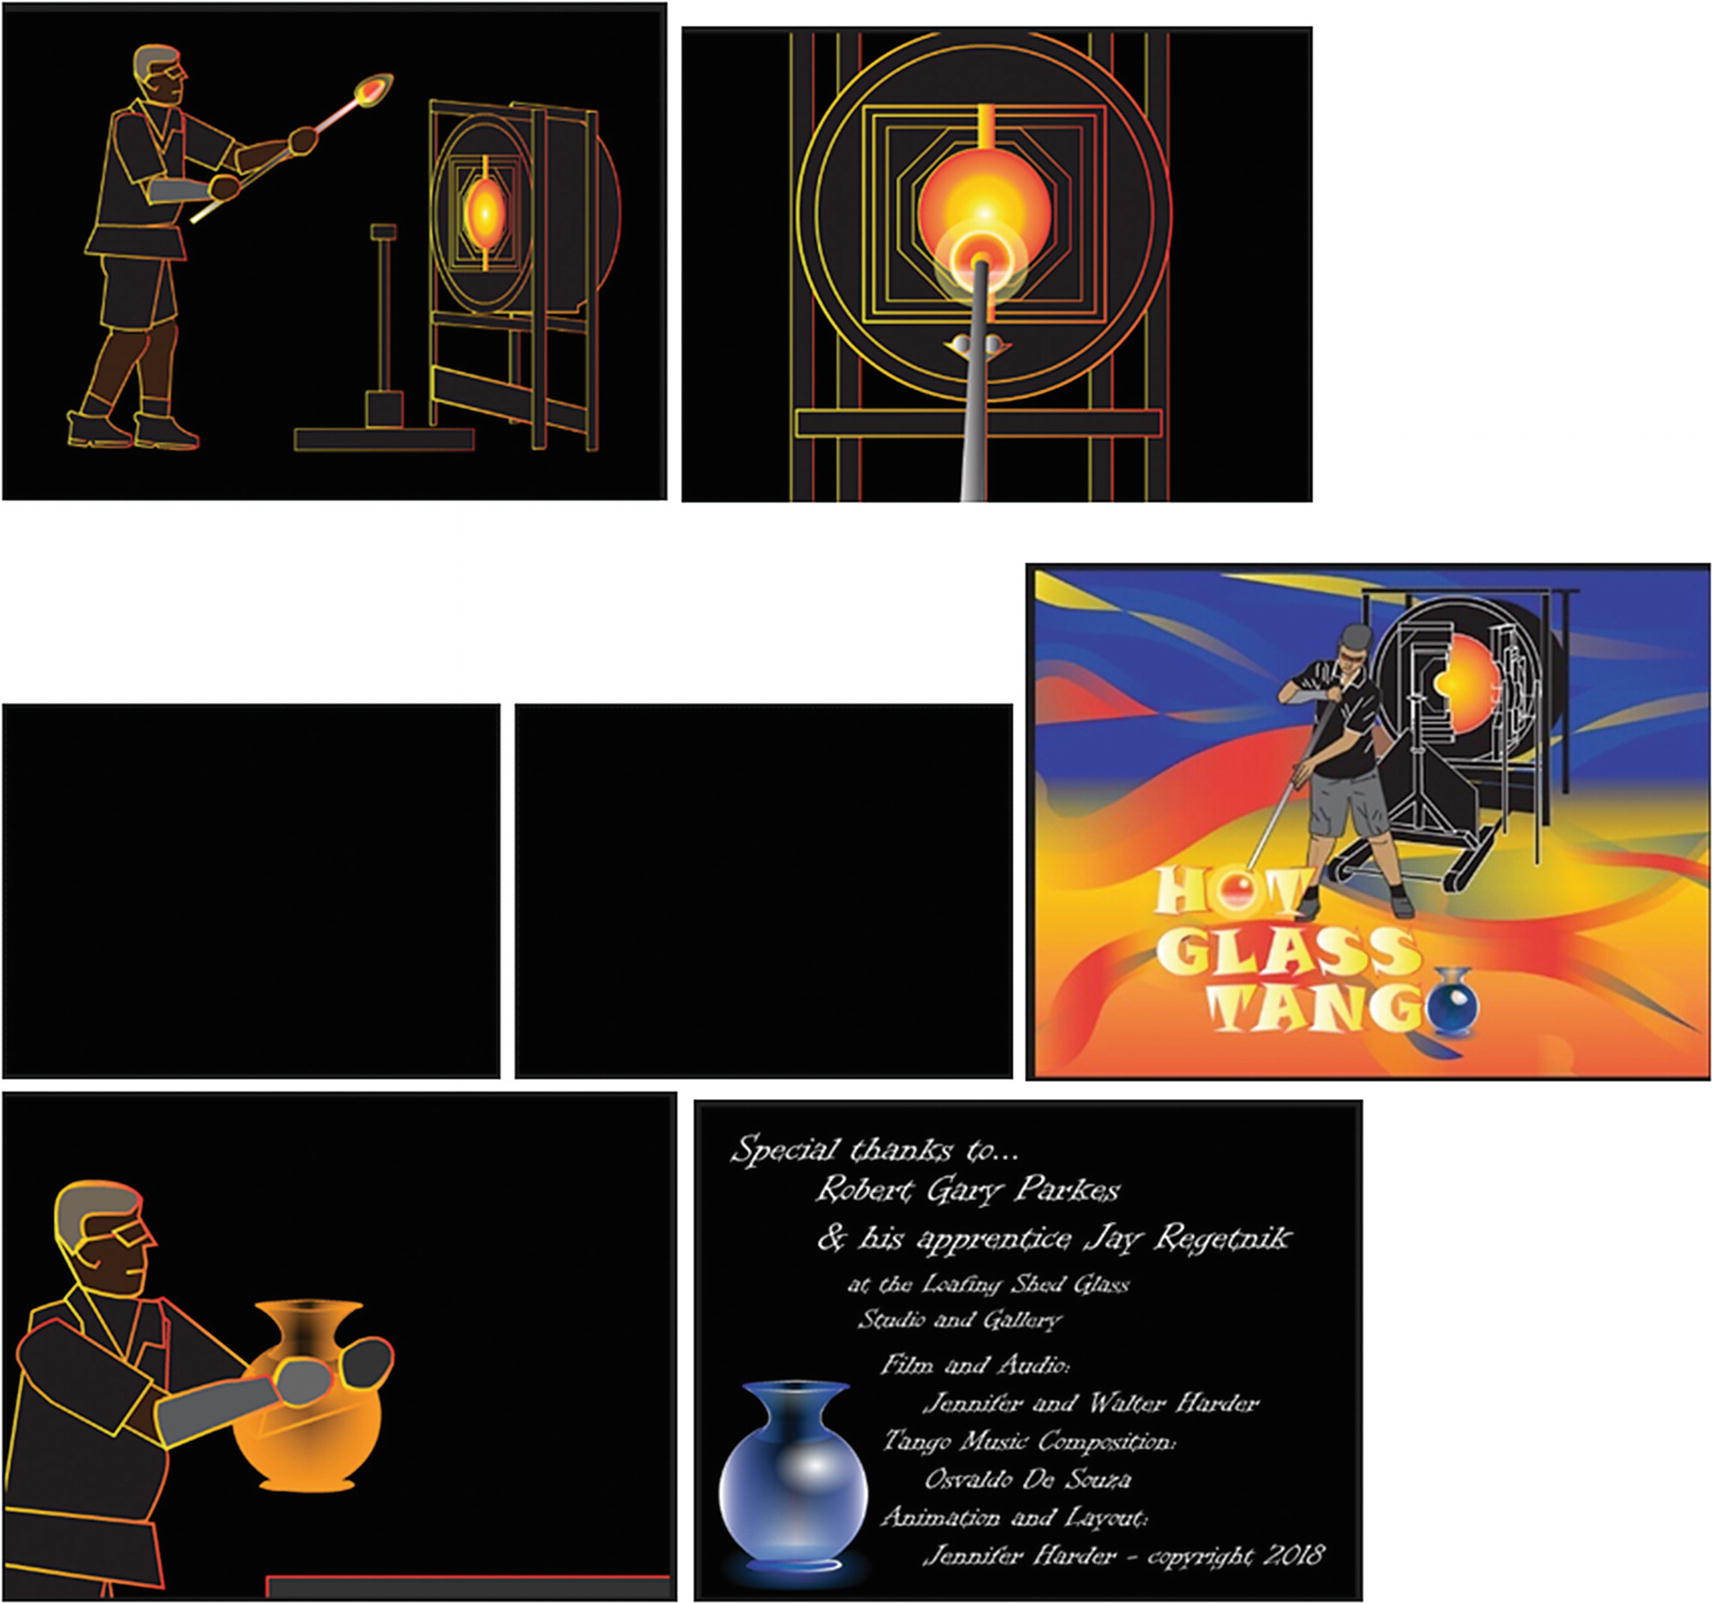
Guide images on where to set the left clip; note that some clips start on a black background so what you are seeing is correct for those video clips.

Now let’s look at the MVI_7052.avi file. If you play this file in your computer’s media player, you notice that it has audio in it. All the camera video footage files that I used in Part 2 were originally either MOV or AVI. They all contained audio. However, this audio was not relevant to the storyline, so rather than import directly into Photoshop, I first converted them to an MP4 file in Media Encoder and removed the audio before I exported them. This AVI file has audio that you are now going to remove before exporting. Click the H.264 under the name of the file to enter its Export Settings dialog box. Refer to Figure 29-11.
../images/466782_1_En_29_Chapter/466782_1_En_29_Fig11_HTML.jpg
Figure 29-11

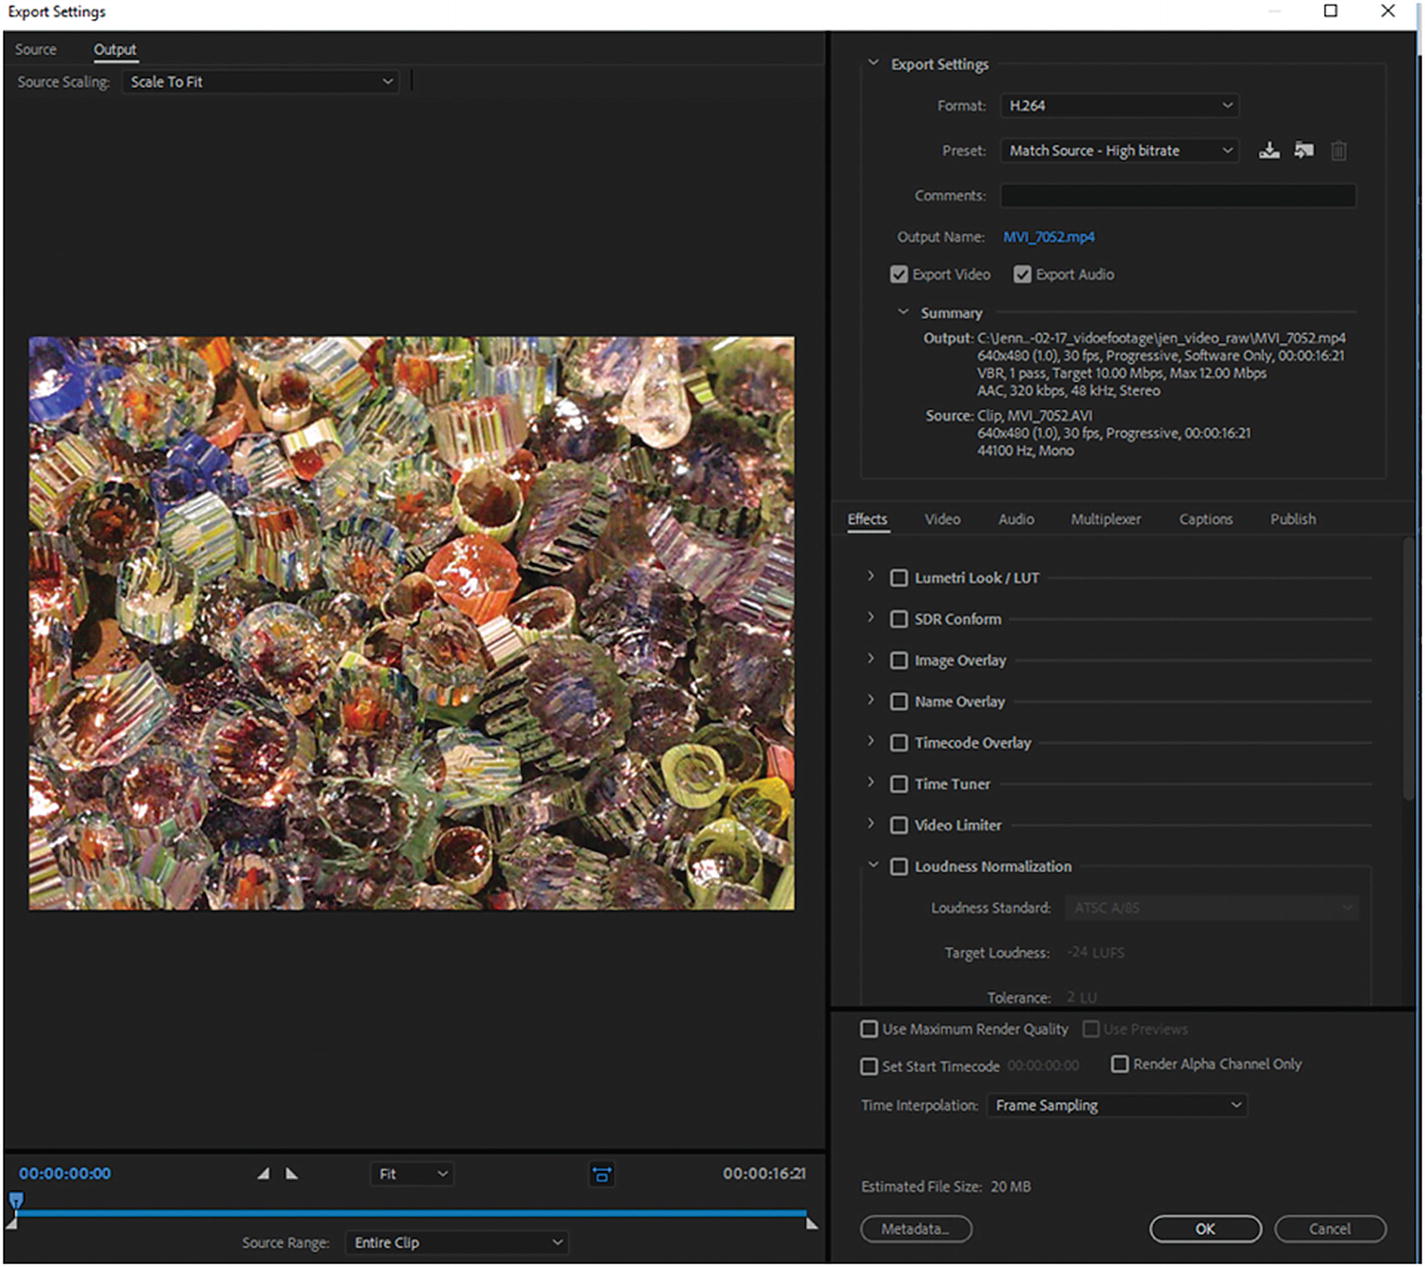
Preview of an AVI video of glass canes

The entire video clip is a little over 16 seconds long. For practice, you may want to clip this down to 5 seconds. I leave that decision to you.

The next setting you need to adjust is on the right of the preview; you need to uncheck Export Audio. This sets the preset to custom, but everything else remains the same. Refer to Figure 29-12.
../images/466782_1_En_29_Chapter/466782_1_En_29_Fig12_HTML.jpg
Figure 29-12

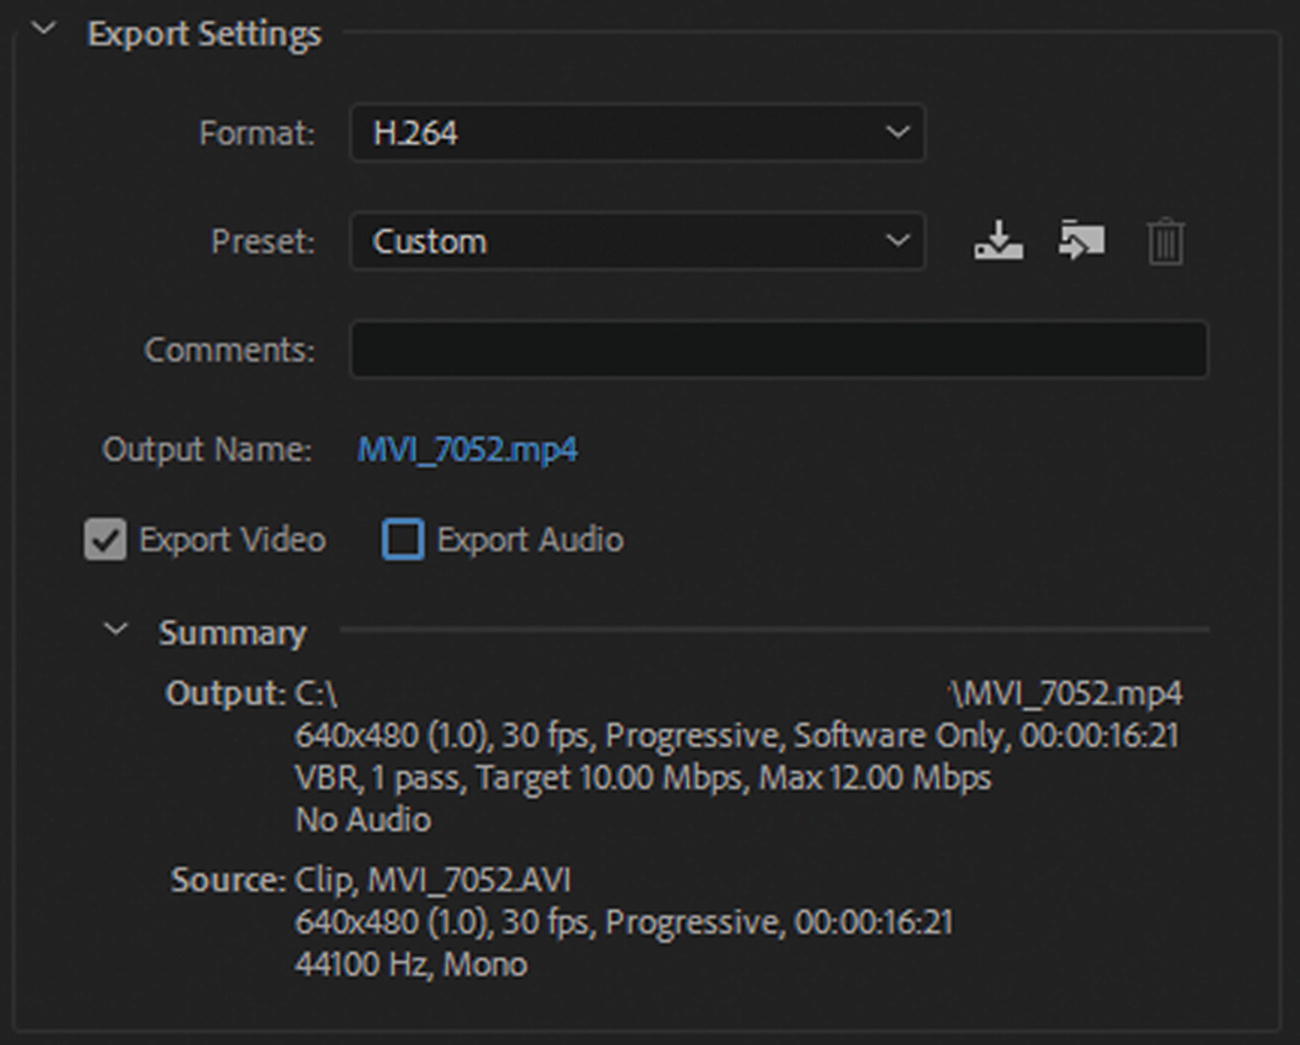
Settings for the current AVI file

This file is 640×480; it runs at 30 fps. With the removal of audio, any additional clipping made to the video reduces its file size further. Click OK to confirm changes and return to the Queue panel. Refer to Figure 29-13.
../images/466782_1_En_29_Chapter/466782_1_En_29_Fig13_HTML.jpg
Figure 29-13

Click OK to confirm your settings

Finally, let’s look at the MVI_1361.MOV file. This time, you are working with a MOV file that was shot using a Canon camera, and not created in Animate. When you click the H.264 icon to enter the Export Settings dialog box, the dimensions of the file are different than the others. You need to make some changes so that this file conforms with the size and frame rate of the others if you want to use them together for your project. I referred to this in Chapter 7. In an ideal set up, make sure that any cameras you shoot video with are running in the same frame rate and ratio dimensions. This introduces fewer issues into your workflow, especially when combining your film. Refer to Figure 29-14.
../images/466782_1_En_29_Chapter/466782_1_En_29_Fig14_HTML.jpg
Figure 29-14

Adjusting the formatting for the MOV video file

As you may have discovered, however, you don’t always get ideal footage from clients, so be prepared to find work-arounds.

The entire video clip is about 28 seconds, but if you want to make it about 15 seconds, I leave that up to you.

On the right, uncheck Export Audio. This sets the preset to custom. as seen in Figure 29-15.
../images/466782_1_En_29_Chapter/466782_1_En_29_Fig15_HTML.jpg
Figure 29-15

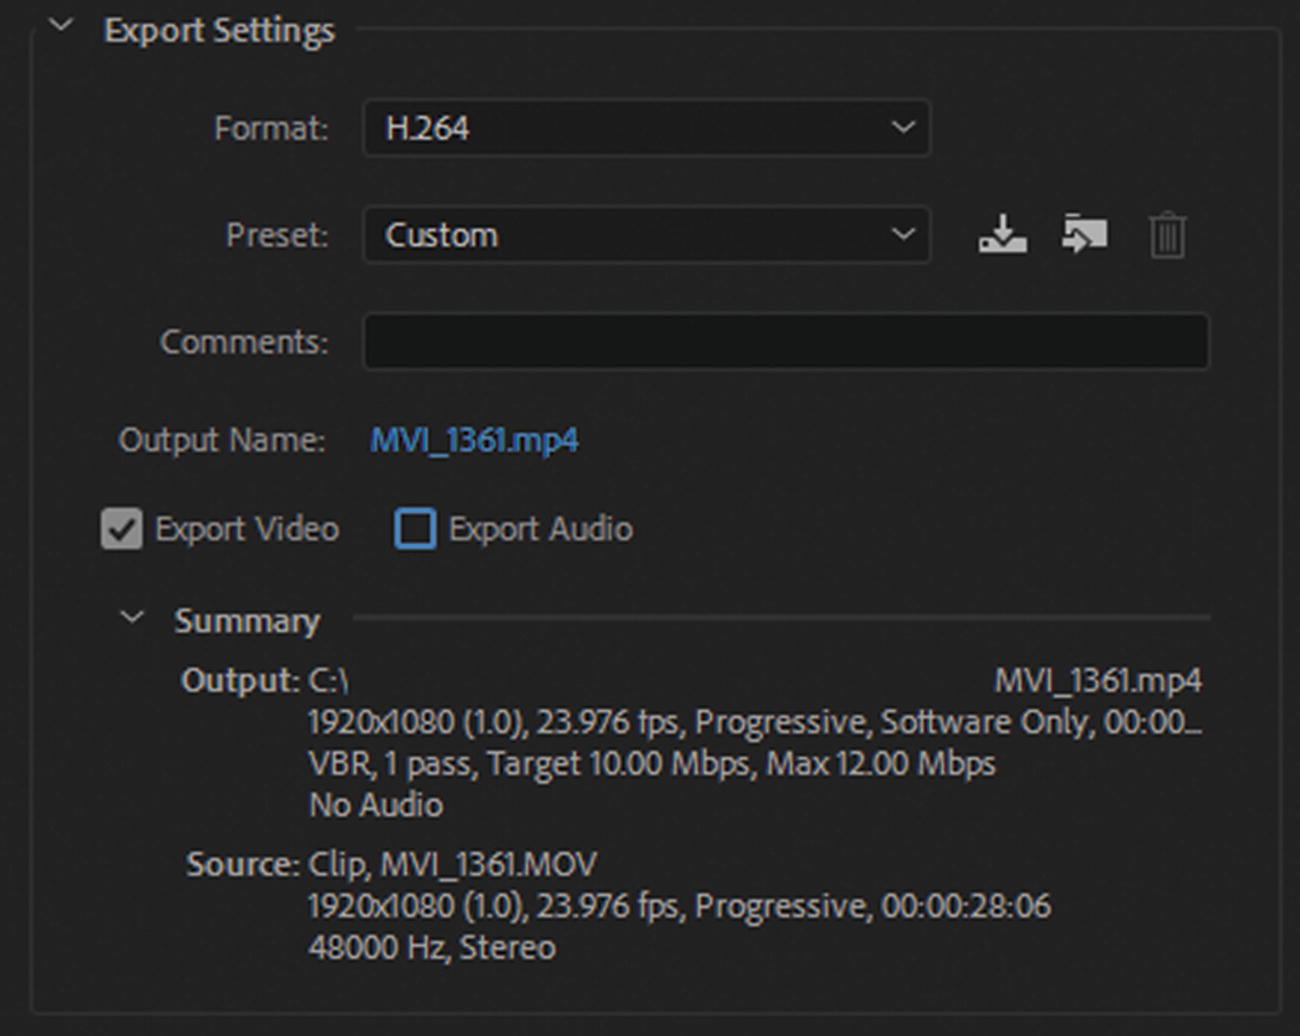
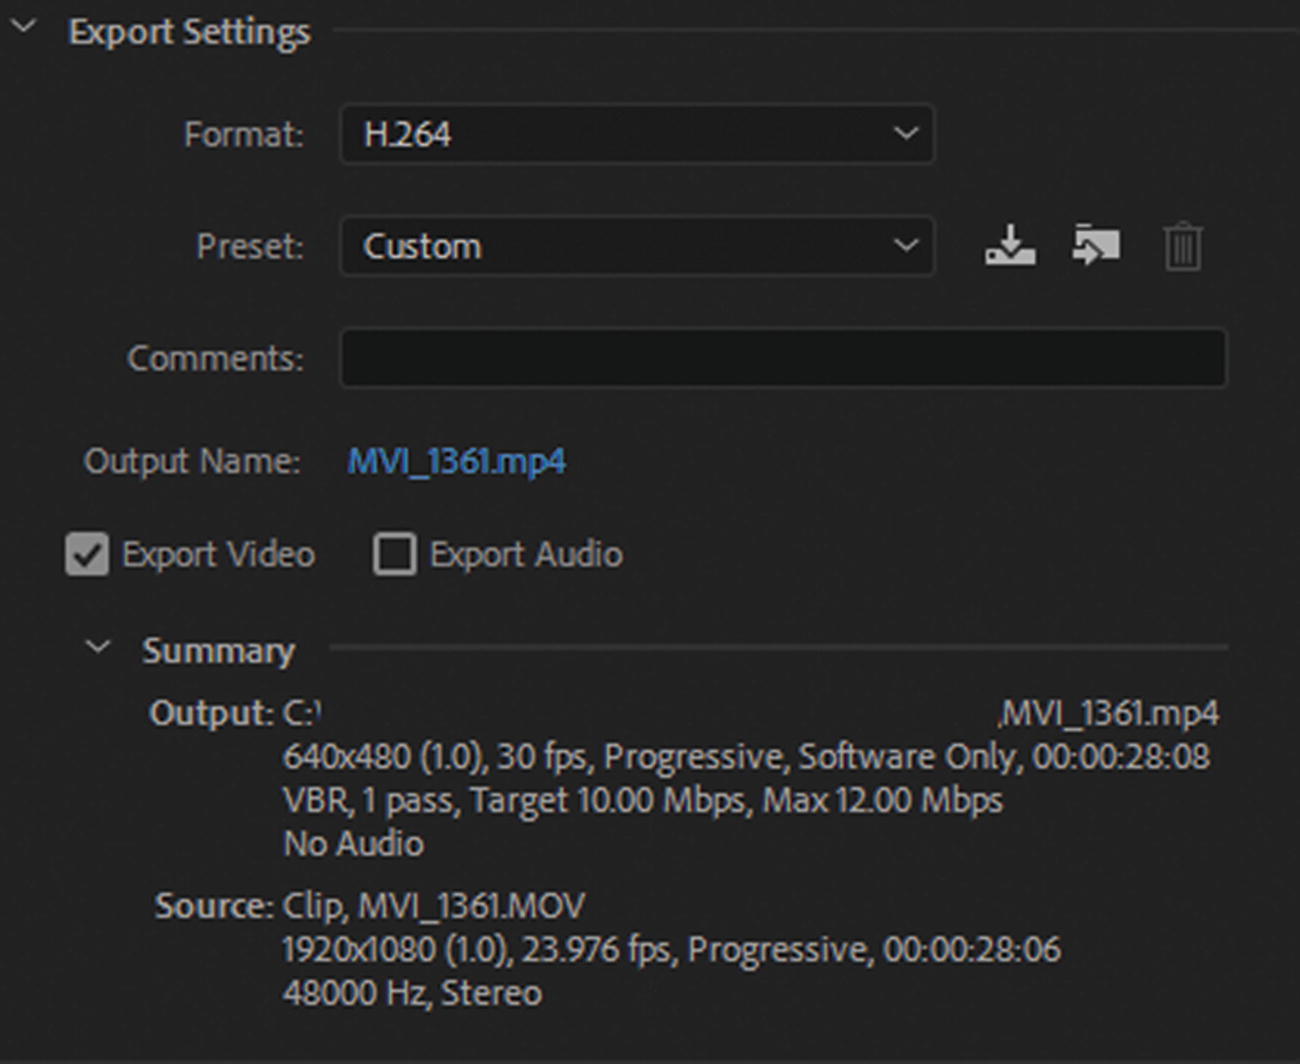
Export setings and summary for the file

Review the Summary settings. Two things stand out. The current dimensions are 1920×1080, and the frames rate is set at 23.976, which is close to 24 fps.

Your goal for this part of the project is to make sure the dimensions are 640×480 and that the video runs at 30 fps.

Click on the Video Tab, so that you can start adjusting the Basic Video Settings. Some of the areas you saw in Chapter 26 are grayed out for now. Refer to Figure 29-16.
../images/466782_1_En_29_Chapter/466782_1_En_29_Fig16_HTML.jpg
Figure 29-16

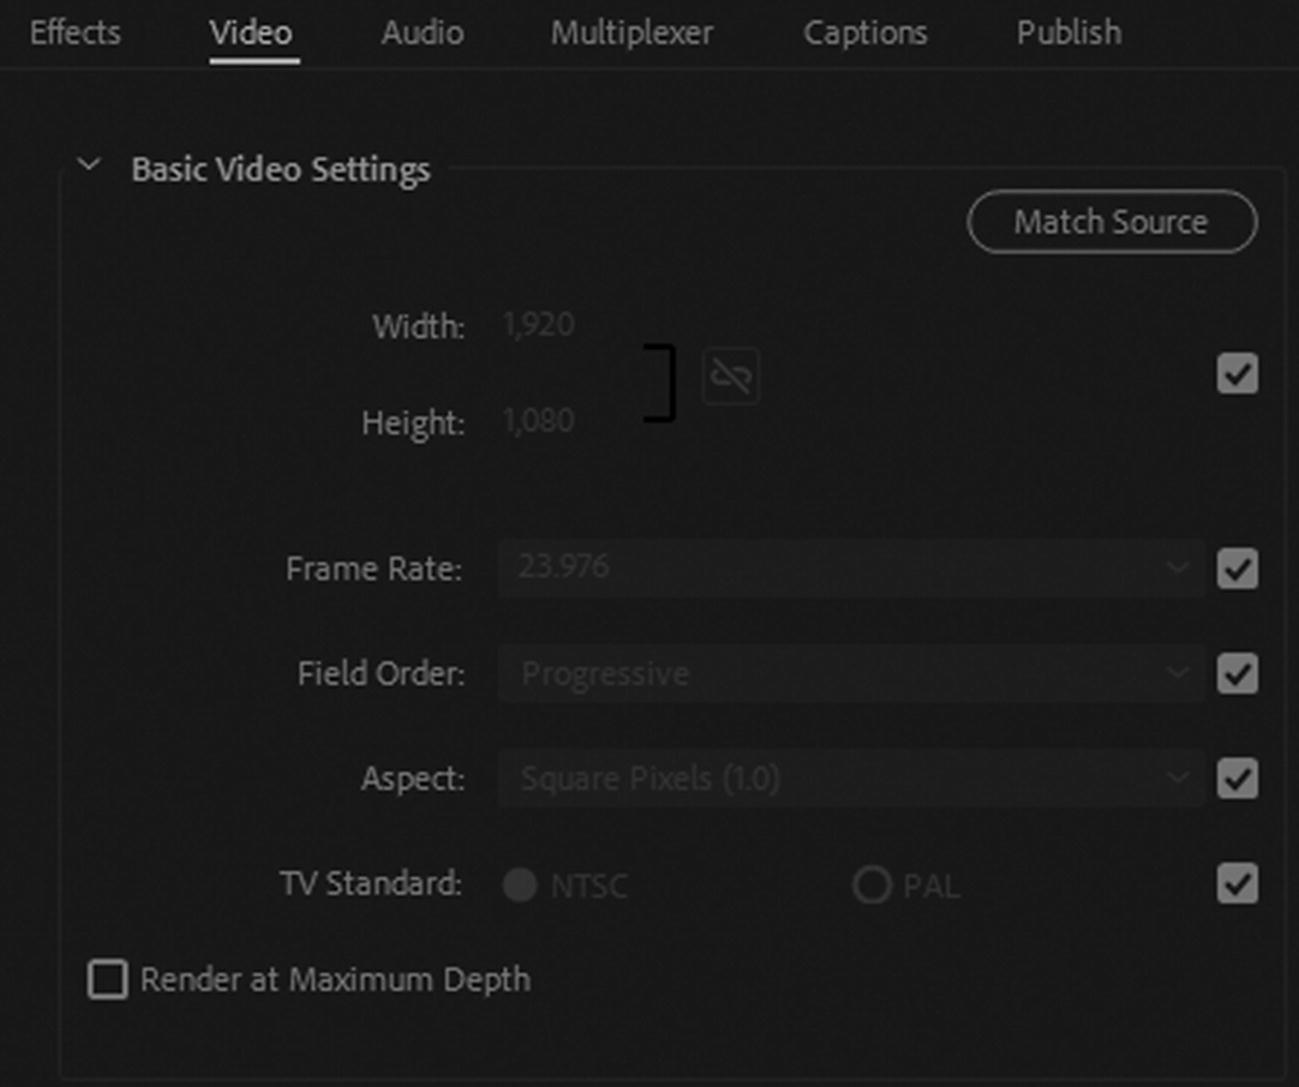
Video Tab for Basic Video Settings

First, uncheck width and height on the right so that you can access the numbers as seen in Figure 29-17.
../images/466782_1_En_29_Chapter/466782_1_En_29_Fig17_HTML.jpg
Figure 29-17

Width and Height settings

Make sure to keep the width and height linked and enter 480 in the height. This keeps the ratio roughly at 4:3 standard aspect and makes the width 852. The video is not distorted. Refer to Figure 29-18.
../images/466782_1_En_29_Chapter/466782_1_En_29_Fig18_HTML.jpg
Figure 29-18

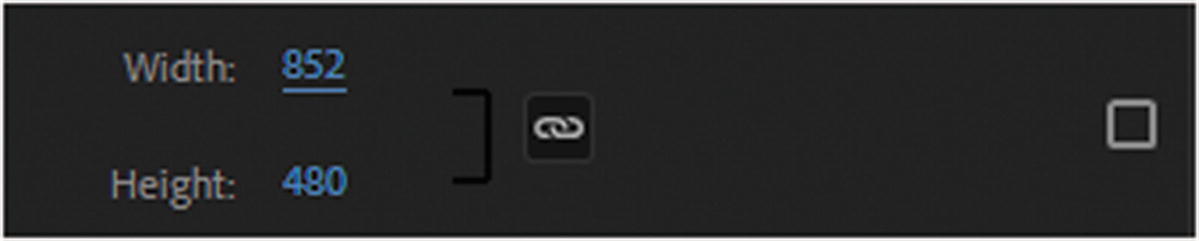
Width and Height settings are currently scaled and proportionate

More information on aspect ratio and standard size is at https://en.wikipedia.org/wiki/Aspect_ratio_(image) .

If you know that you are going to use this file in Photoshop (see Part 2), I recommend that you do not make any further changes to the width, because you can always use that extra width to move your video around and center it in the final 640×480 video. Likewise, for Photoshop, you could leave the video at its original size and make it a Smart Object that could be scaled to suit your needs.

This footage is going directly on to the web, so you need to make sure that its width is 640 to conform with the other AVI video. You’ll adjust that in moment. For now, let’s deal with the frame rate.

Uncheck the Frame Rate option. Refer to Figure 29-19.
../images/466782_1_En_29_Chapter/466782_1_En_29_Fig19_HTML.jpg
Figure 29-19

Uncheck the Frame Rate to access this area

From the Frame Rate drop-down menu, choose 30, as seen in Figure 29-20.
../images/466782_1_En_29_Chapter/466782_1_En_29_Fig20_HTML.jpg
Figure 29-20

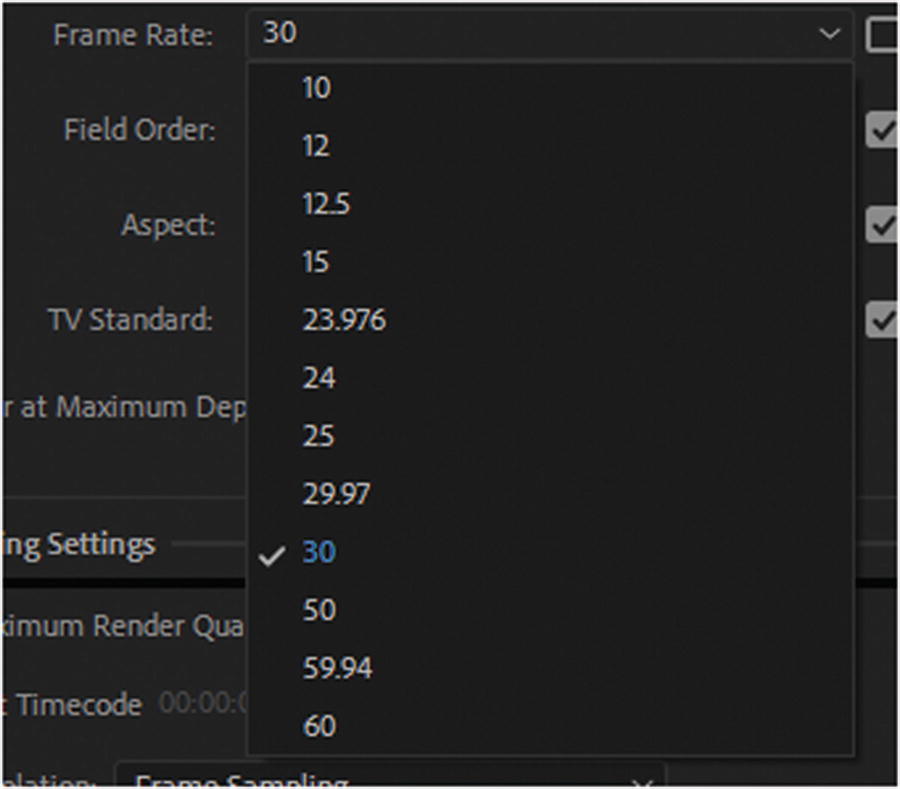
Set a new frame rate for this video

Now let’s deal with the width dimension issue. Go back to Width and height in the Video tab and unlink them. Change the width to 640, which chops off some of the left and right sides of the video preview. Refer to Figure 29-21.
../images/466782_1_En_29_Chapter/466782_1_En_29_Fig21_HTML.jpg
Figure 29-21

Unlink the width and height

This leaves a black edge at the top and bottom, which you don’t want. Refer to Figure 29-22.
../images/466782_1_En_29_Chapter/466782_1_En_29_Fig22_HTML.jpg
Figure 29-22

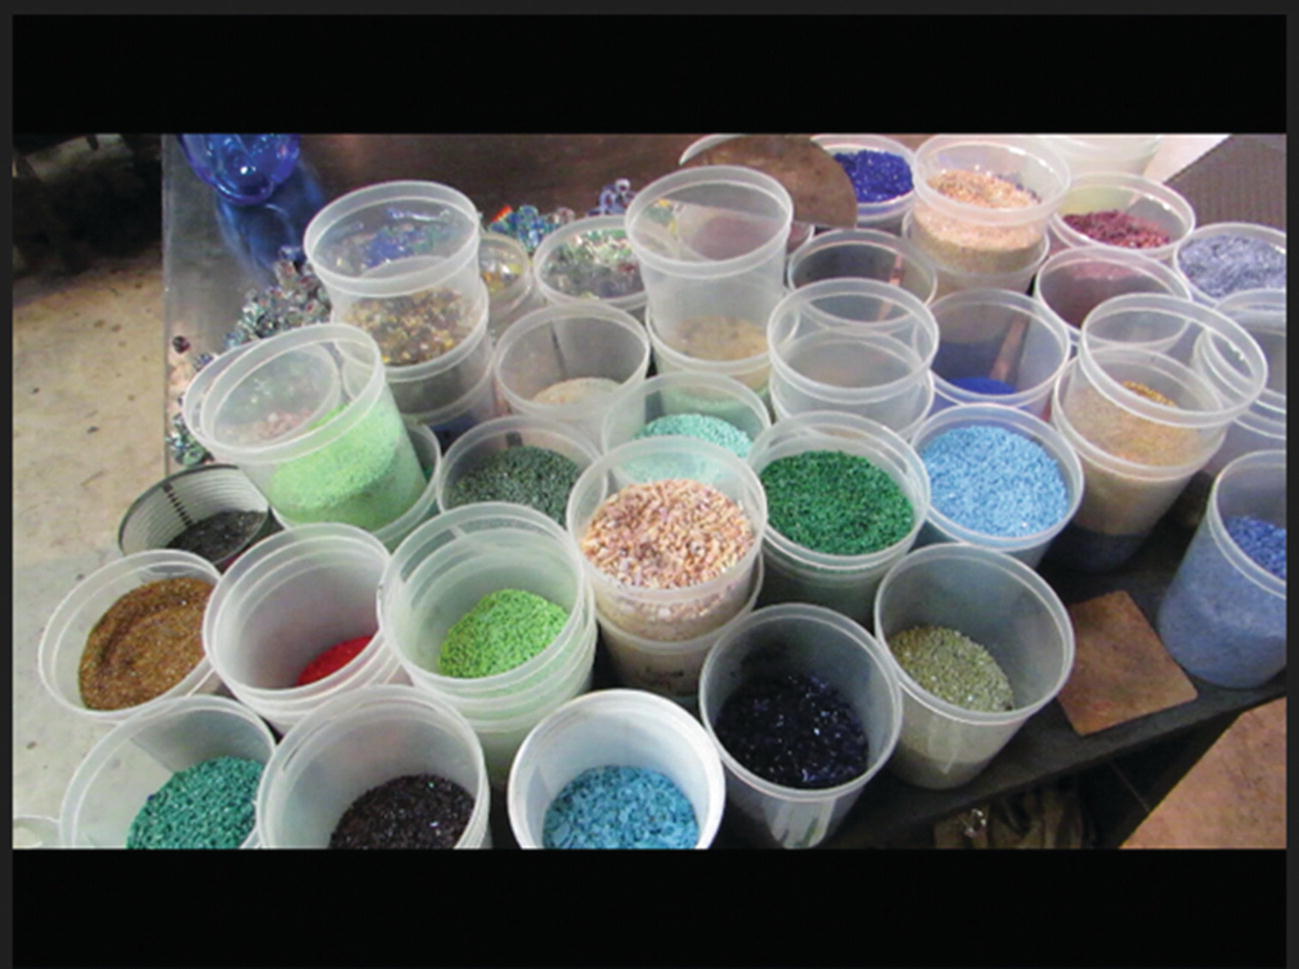
Currently, the preview image as black area at the top and bottom

So, in the output Tab on the upper left changes the source scaling from Scale To Fit to Scale To Fill. Refer to Figure 29-23.
../images/466782_1_En_29_Chapter/466782_1_En_29_Fig23_HTML.jpg
Figure 29-23

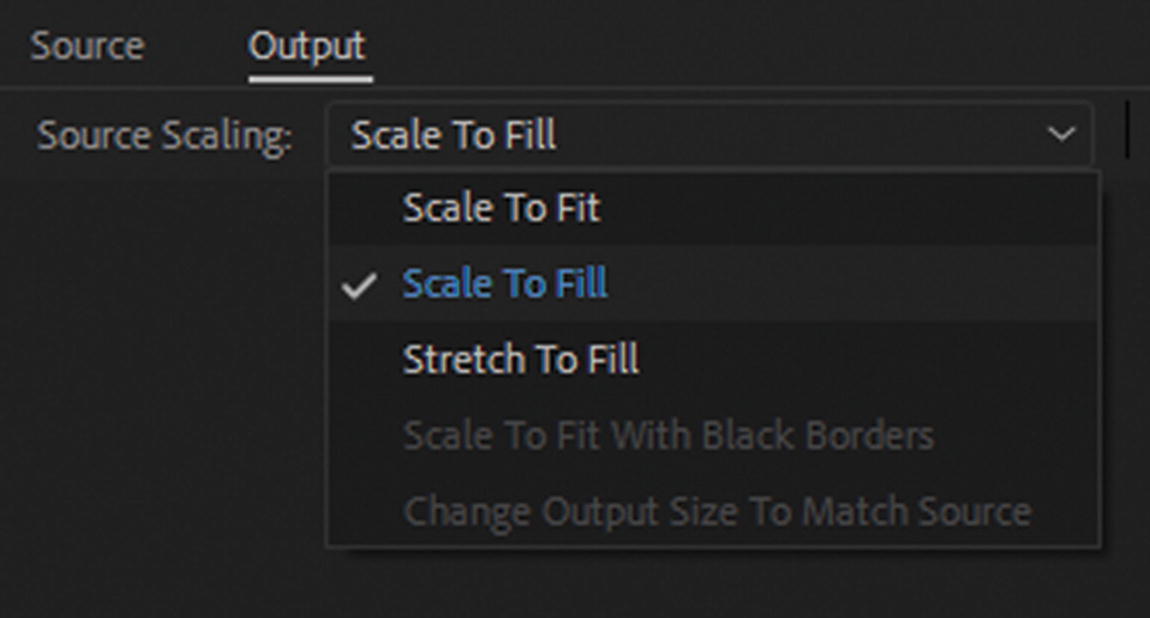
Change your source scaling settings

This looks much better. Refer to Figure 29-24.
../images/466782_1_En_29_Chapter/466782_1_En_29_Fig24_HTML.jpg
Figure 29-24

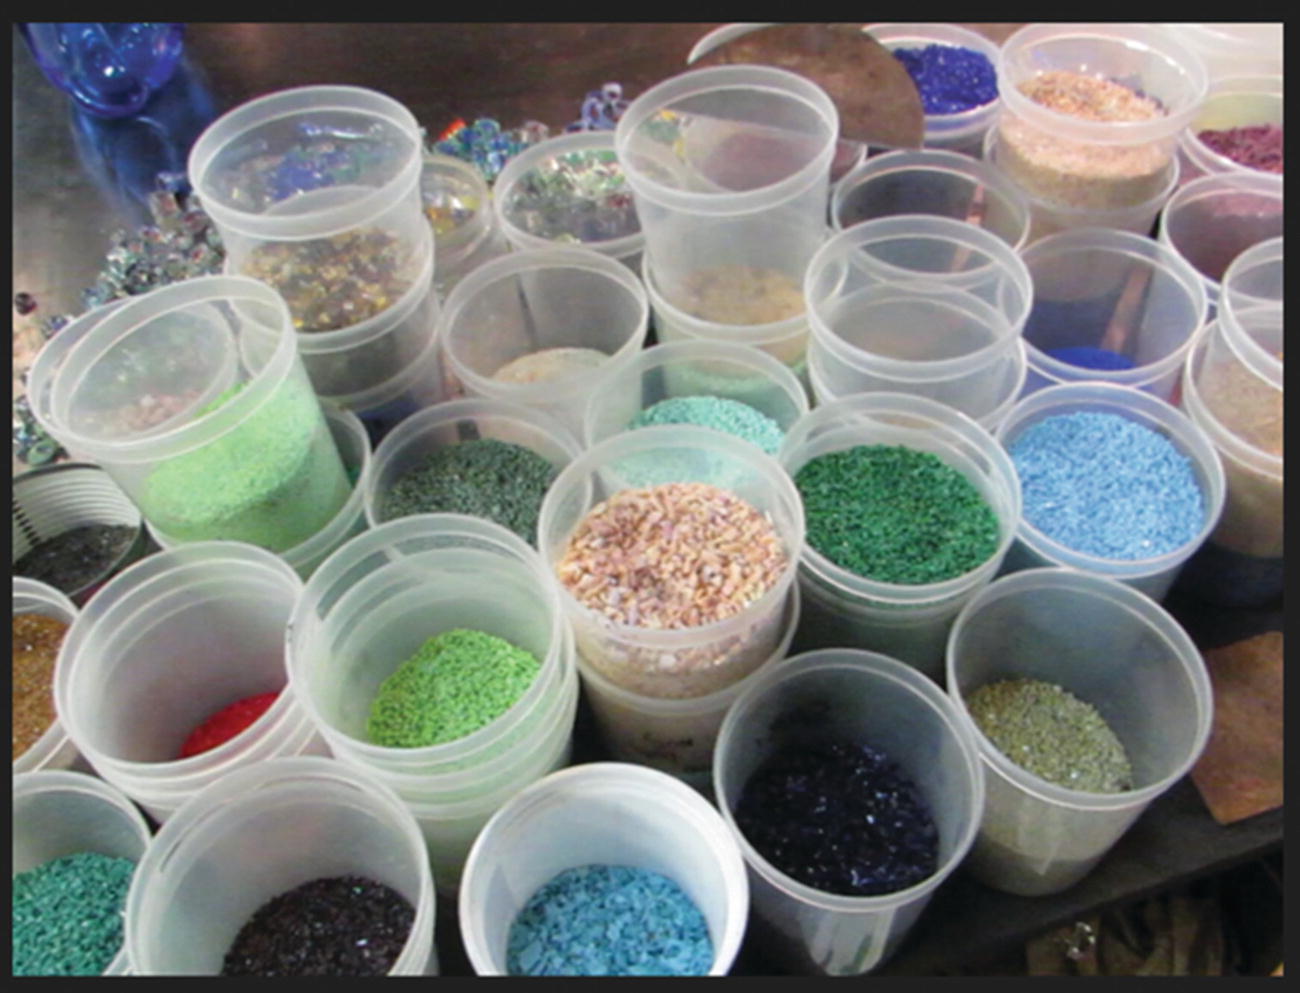
The final preview image with scaling adjusted

In some video, this may cause a minor distortion, but this is a good work-around for a tight deadline.

Do not use Stretch To Fill because it distorts the picture.

The Export Settings and Summary for output are now correct for this project, as seen in Figure 29-25.
../images/466782_1_En_29_Chapter/466782_1_En_29_Fig25_HTML.jpg
Figure 29-25

New output settings in the Summary

Keep these steps in mind if you ever receive a piece of footage that does not match the footage size dimension or frame rate of your other video file. It is best to scale down a high-definition video file. Avoid and never scale upward, as this reduces quality. Ideally, you want the best possible video display. Also, a minor adjustment of a few frames from 24 to 30 should not impact the quality of your file. Remember to always keep a copy of the original footage in case you need to reset the settings or use it in another program.

At this point, you can click OK to exit and confirm the Export Settings in the dialog box. Refer to Figure 29-26.
../images/466782_1_En_29_Chapter/466782_1_En_29_Fig26_HTML.jpg
Figure 29-26

Confirm the setting for your video

You have no more adjustments to make; you are ready to export your files to MP4. If you have not already, make sure that you have set the correct Output File folder for each video.

When you are ready, click the green Start Queue button on the upper right of the Queue panel. Refer to Figure 29-27.
../images/466782_1_En_29_Chapter/466782_1_En_29_Fig27_HTML.jpg
Figure 29-27

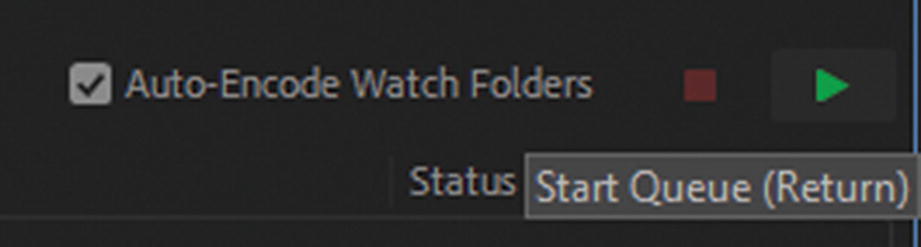
Start the Queue to begin export

Allow time for the files to render, as seen in Figure 29-28.
../images/466782_1_En_29_Chapter/466782_1_En_29_Fig28_HTML.jpg
Figure 29-28

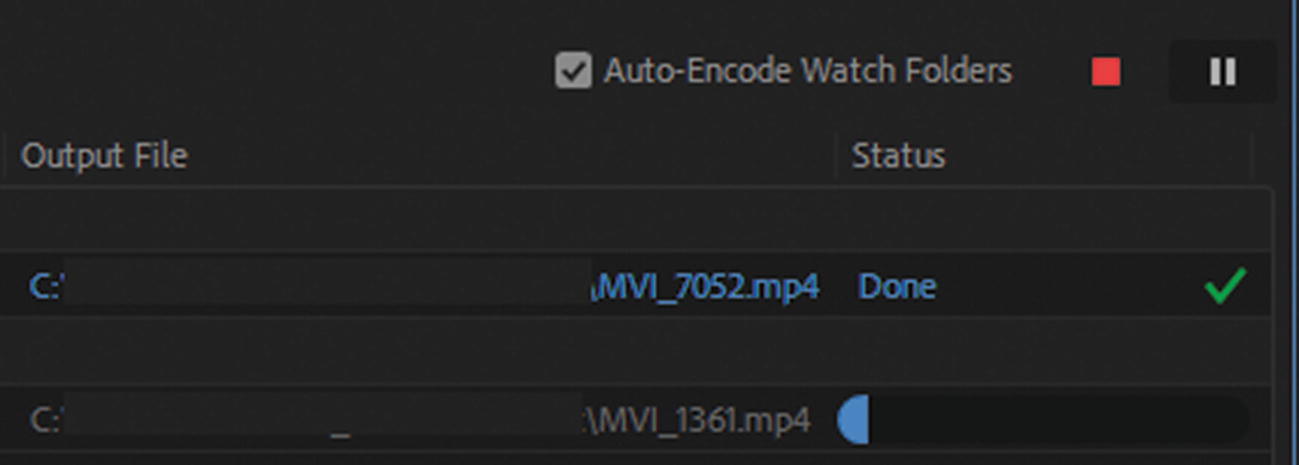
One file has completed rendering, and you are now seeing the second in progress

A green check appears when you are done, and a progress bar appears as each file is exporting and rendering. At the same time, you see some action in the Encoding panel as the file previews and completes. Refer to Figure 29-29.
../images/466782_1_En_29_Chapter/466782_1_En_29_Fig29_HTML.jpg
Figure 29-29

The Encoding panel is previewing through the file as it renders and exports

You can press the red Stop square if you need to stop the rendering and abort your projects.

Also, if you realize you made a mistake, after rendering, click the file format and choose Reset Status. Refer to Figure 29-30.
../images/466782_1_En_29_Chapter/466782_1_En_29_Fig30_HTML.jpg
Figure 29-30

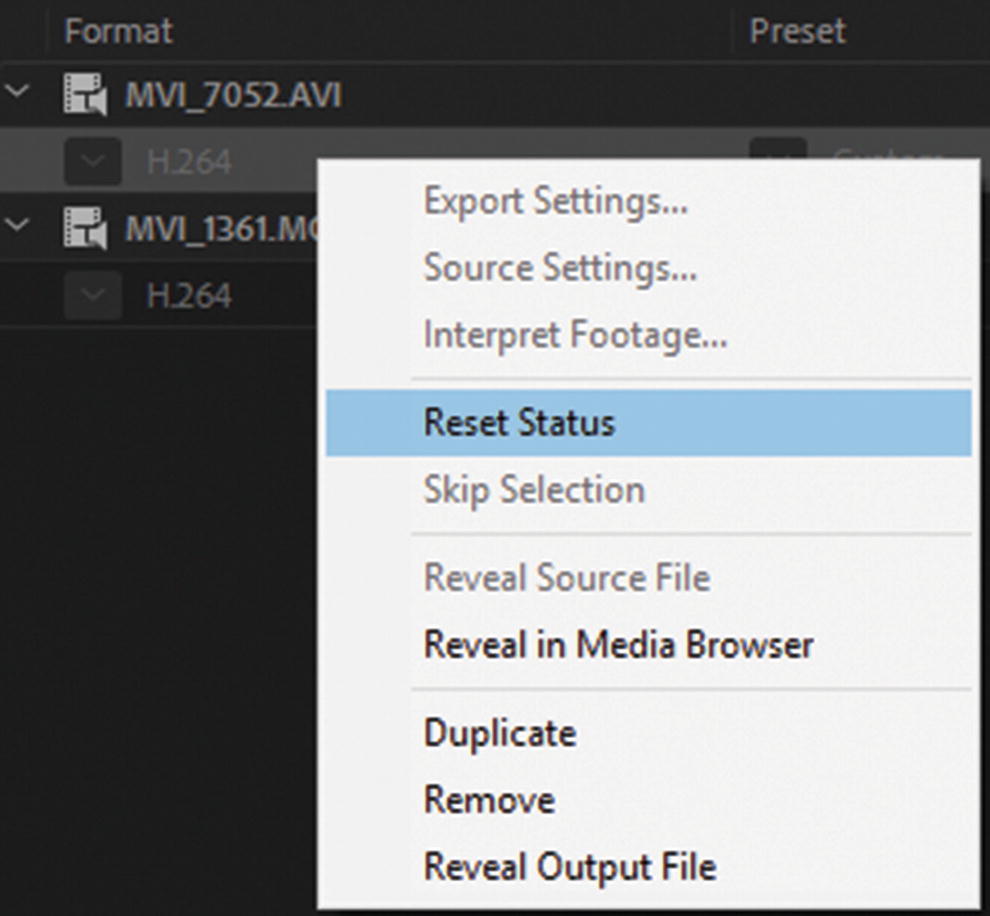
Reset the status of your file to ready if you need to export it again

Reset the file to ready so that you can render and overwrite the earlier MP4. If you don’t want to overwrite, make sure to give the file a new name in the Output File column, such as mvi_7052_2.mp4.

There may be times when you want to export the audio with the video in your projects. Be aware that there are occasions where file formats even with the Export Audio checked and all indications that the render was successful, the audio does not play in the final MP4 file. This could be due to several factors.
  • There was some sort of corruption in the original file (.mov or .avi). Discover if you can extract the audio separately or not.

  • There could be a bug in a recent version of Media Encoder that mutes the audio tracks on output. You know this is the issue if a few days before an update you had no issues. Check the Adobe forums to see if anyone else is currently having this issue. For example, in the case of a file from Premiere Pro, sometimes a corrupt or empty audio track may have been left in the file. This can cause the problem in the audio in these tracks. A solution would be deleting older tracks, importing fresh audio tracks and outputting again into Media Encoder to see if the issue has been corrected.

  • You are using the same version of Media Encoder as your colleagues, but the audio imports successfully on their machines, but not yours. This could be an issue if you are using different video or audio drivers on your machine than your colleagues (refer to Chapter 25). Media Encoder only uses what is available on your machine, so that driver may be fine converting an MOV’s audio to MP4 but not an AVI’s. If you run into this issue, check with your company’s IT department to see what they might recommend, and continue to run tests on different platforms and computers.

You have completed the first project, and you are ready to move on to the second project. At this point, you can remove any files from the Queue panel (–).

Create an Audio MP3 File and a WAV File

In the empty source panel, add the AVI file from the ME_sounds_vid folder. You find MVI_7229.avi and (.THM), which does not and cannot export into Media Encoder. That’s OK only work with the AVI. Refer to Figure 29-31.
../images/466782_1_En_29_Chapter/466782_1_En_29_Fig31_HTML.jpg
Figure 29-31

Add a new file to the Queue panel

This is simply a video that is the duration of the sound, so that I could capture the audio. I put my camera microphone near the object creating the sound, and then pointed the camera near some cloth, since I was not intending to capture any actual action.

Alternatively, you may want to capture sound using your smartphone, as I did in Chapter 27, with the 3GA files. However, there may be times when you want to capture action and sound together, and then use the sound from that footage in another area of the video or for J-cuts and L-cuts, as you learned about in Part 2.

Change the format to MP3 from the drop-down menu. Refer to Figure 29-32.
../images/466782_1_En_29_Chapter/466782_1_En_29_Fig32_HTML.jpg
Figure 29-32

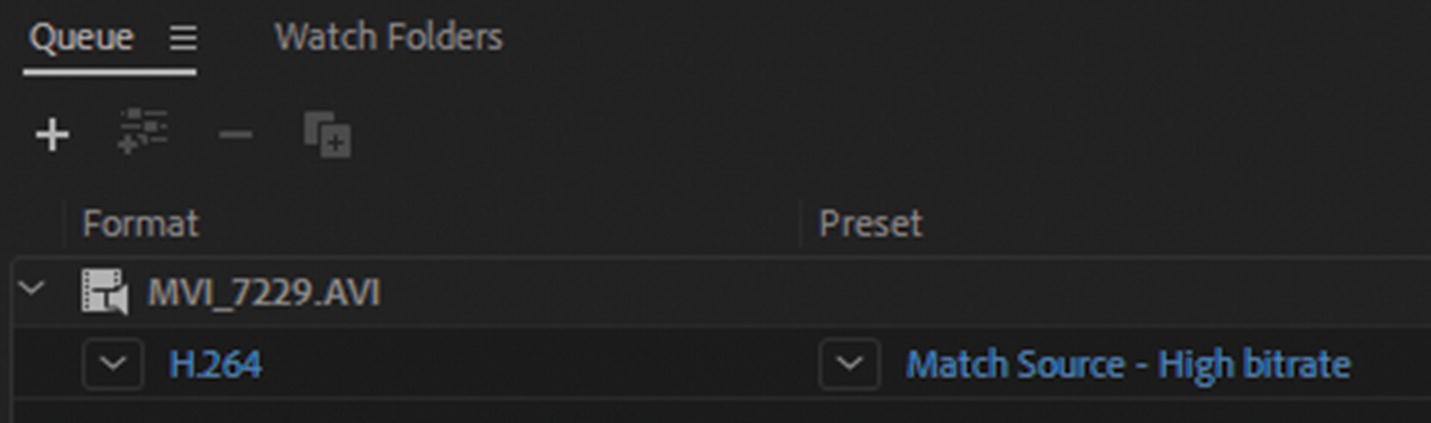
Changing the format of the video to MP3

Now right-click the selected file and choose to duplicate, as seen in Figure 29-33.
../images/466782_1_En_29_Chapter/466782_1_En_29_Fig33_HTML.jpg
Figure 29-33

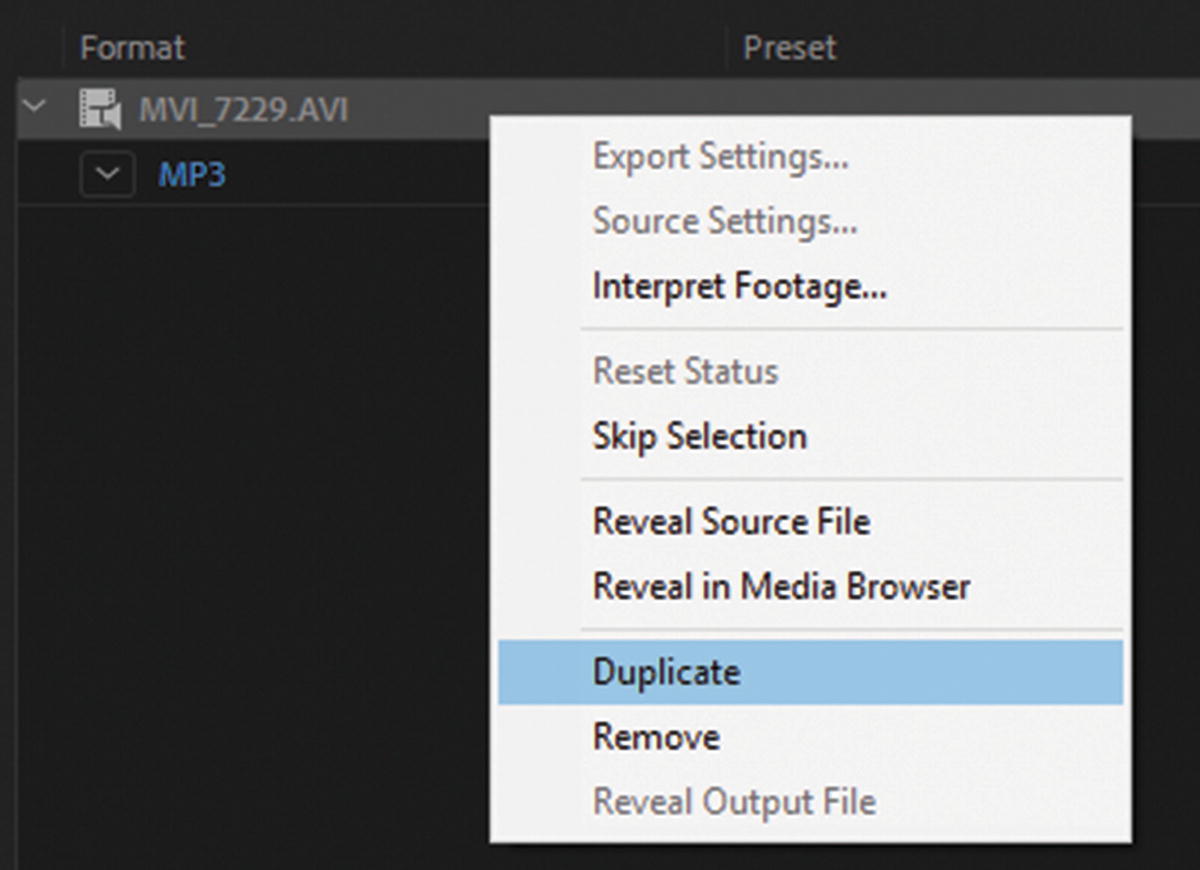
Create a duplicate of the video whose format you want to change

Change the duplicate to Waveform Audio, as seen in Figure 29-34.
../images/466782_1_En_29_Chapter/466782_1_En_29_Fig34_HTML.jpg
Figure 29-34

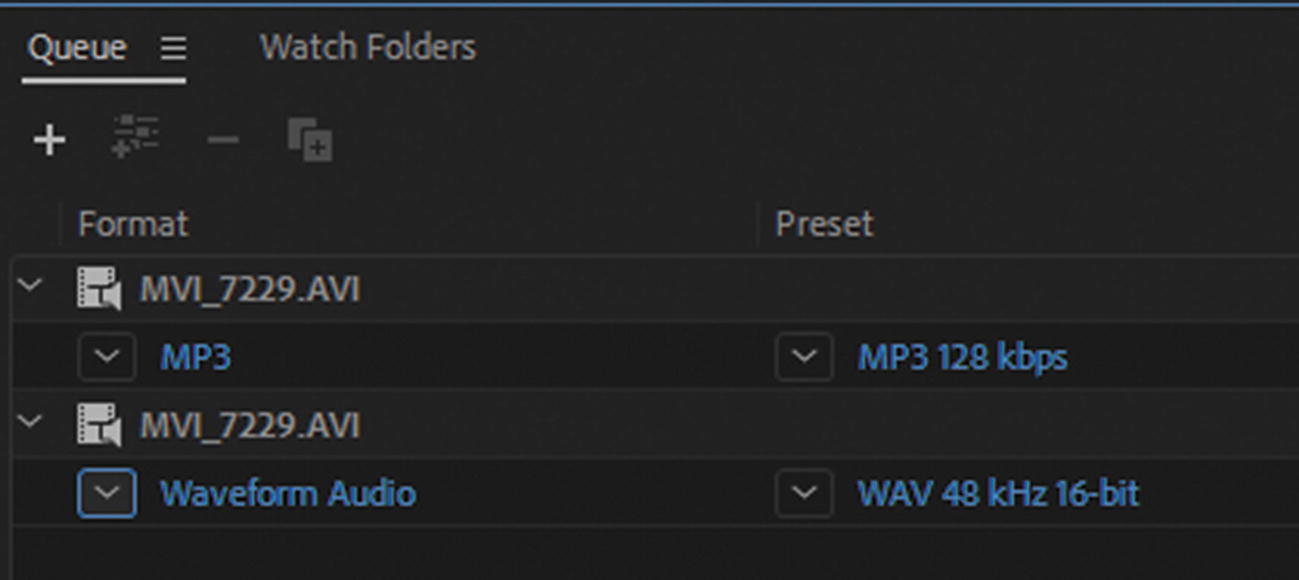
There are now two formats of the same audio

Set a location for the two output files. The files are quite small, so you may not need to render to an external drive; your own computer’s drive should be OK.

Click on the MP3 icon to go into the Export Settings dialog box. Refer to Figure 29-35.
../images/466782_1_En_29_Chapter/466782_1_En_29_Fig35_HTML.jpg
Figure 29-35

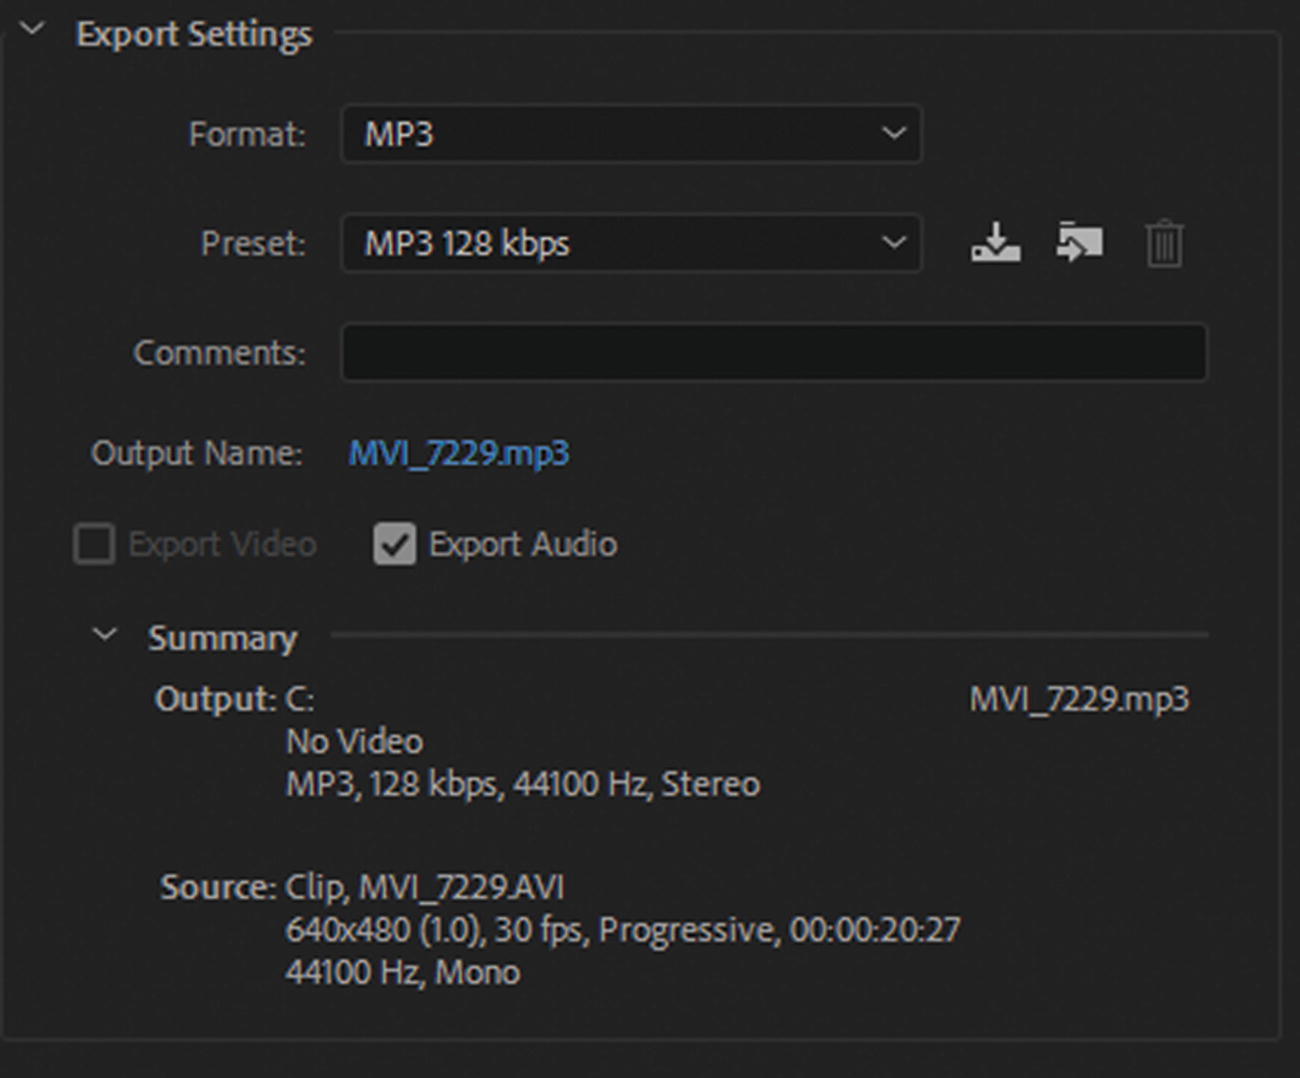
Review the export settings for the MP3 file

There you find that only Export Audio is available.

The duration of the audio is about 20 seconds.

Going down to the preview area, drag the left and right set point in by about a second (hours: minutes: seconds: frames) on each side. The sound does not start until at least a second in, and then trails off at the end. Unfortunately, you can’t preview sound in Media Encoder, but you can use your computer’s media player to give you an idea of where the sound starts and stops. Refer to Figure 29-36.
../images/466782_1_En_29_Chapter/466782_1_En_29_Fig36_HTML.jpg
Figure 29-36

Set the points as to what audio you want in the export

When you are done, click OK to exit the Export Settings dialog box and return to the Queue panel. Refer to Figure 29-37.
../images/466782_1_En_29_Chapter/466782_1_En_29_Fig37_HTML.jpg
Figure 29-37

Confirm the settings by clicking OK to return to the Queue panel

Then repeat these steps for the WAV file.

In the lower left of the Export Settings dialog box (see Figure 29-37), notice that the WAV file does not show the Estimated File Size. Nevertheless, the file is still small, but at least more than a megabyte larger than the MP3. Refer to Figure 29-38 for settings.
../images/466782_1_En_29_Chapter/466782_1_En_29_Fig38_HTML.jpg
Figure 29-38

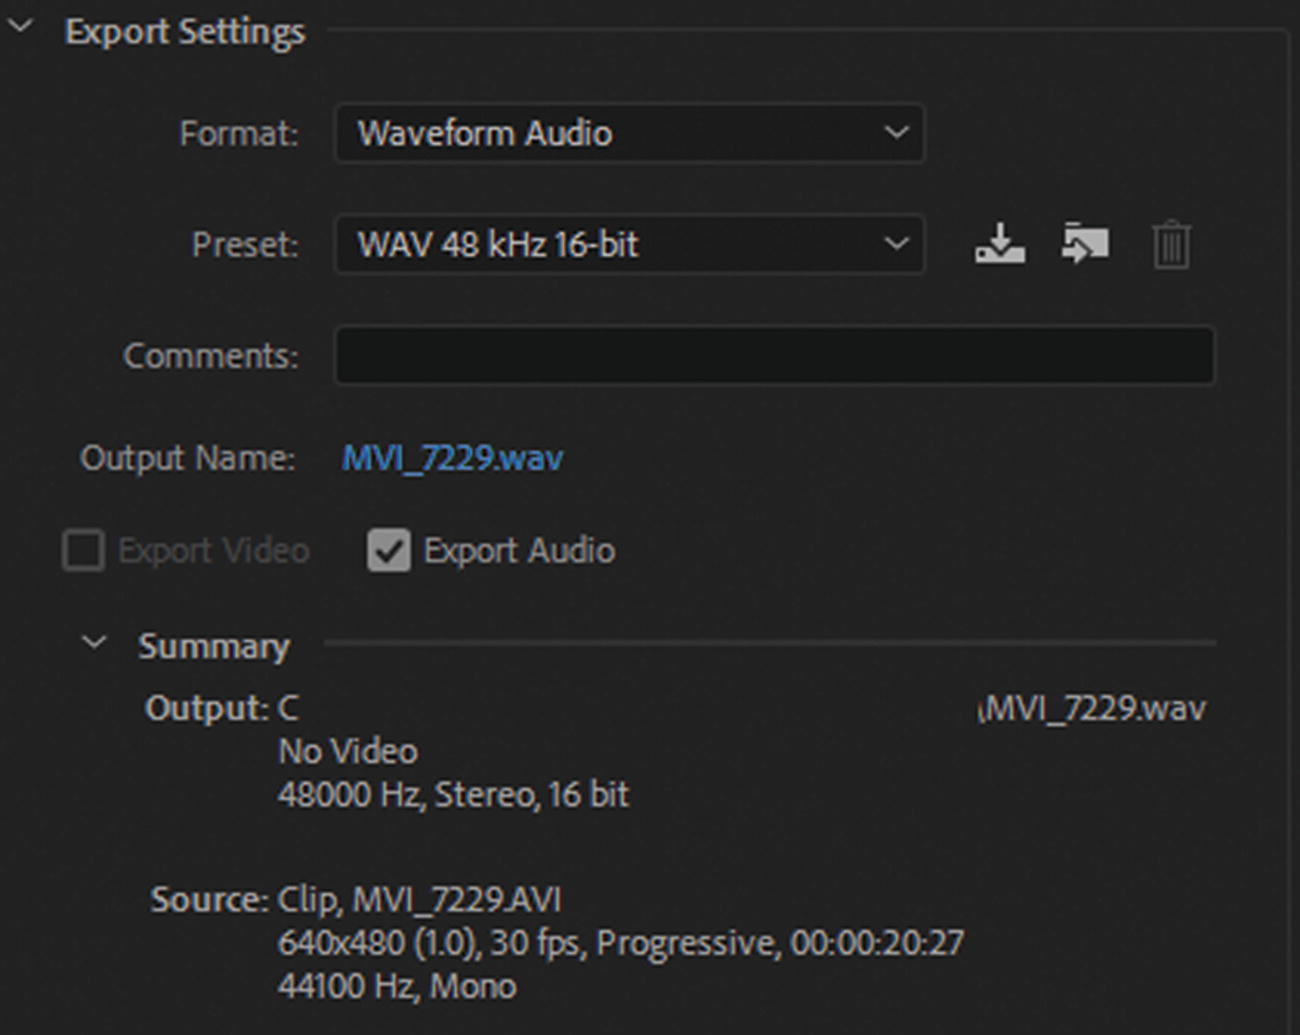
Settings for the Waveform Audio file

When done, click OK to return to the Queue panel.

When you are ready, click the green arrow to start the queue; each audio file should export to the selected output folder. Refer to Figure 29-39.
../images/466782_1_En_29_Chapter/466782_1_En_29_Fig39_HTML.jpg
Figure 29-39

When each file is rendered, the status is done

Once complete, you can go to that folder and check the audio in your computer’s media player to see if you extracted the correct amount of sound. If you discover that you made a mistake, right-click the selected file and choose Reset Status, and adjust before you export again. Refer to Figure 29-40.
../images/466782_1_En_29_Chapter/466782_1_En_29_Fig40_HTML.jpg
Figure 29-40

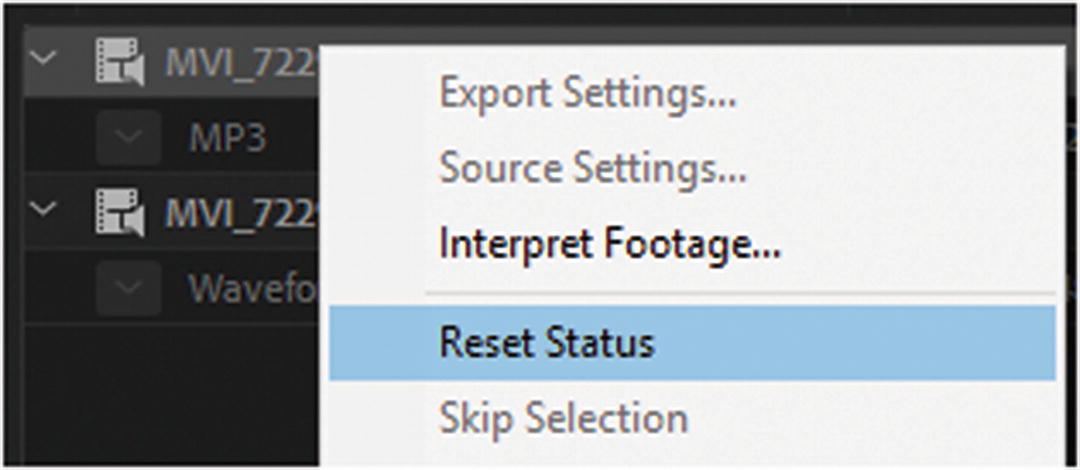
Reset the status for those files you want to re-export in the Queue panel

Remember, if you don’t want to overwrite an audio file, give the file a new name in the Output File column before you export.

If you have an MOV file or another video format, you can try extracting the sound from that file. Also, if you have any audio files that you want to convert to either MP3 or WAV, try doing that now.

When you are done, if you have a lot of audio, organize your new files into folders on your drive, like MP3 or WAV.

You can now close Media Encoder without making any further changes and File ➤ Exit the program. You have completed the second project, and you are ready to move to Part 6 to work with Dreamweaver.

Summary

In this chapter, you reviewed how to create video and audio for the Hot Glass Tango website. This chapter concludes your study of Media Encoder CC. Make sure to review any areas of Part 5 that you don’t understand so that you feel comfortable working with your own files in Media Encoder.

In Part 6, you journey to the center of the software maze: Adobe Dreamweaver CC. You’ll discover how it can be used create a mobile website with your images, animations, audio, and video files.