
In this chapter, you review exporting images for a webpage site, and you look at a few more scripts to add to an SVG file to create an informational map.
Note
This chapter has actual projects that are in two folders. You can use the files in the Chapter 16 folder to practice opening and viewing for this lesson. They are at https://github.com/Apress/graphics-multimedia-web-adobe-creative-cloud .
In this chapter you will be export some images for a website known as Hot Glass Tango, which tells the story (through images, animation, video, and audio) of how handmade glass items are created. The multimedia items that you create in this chapter will be used to finish the final website in Part 6.
Exporting Images for an Instructional Webpage
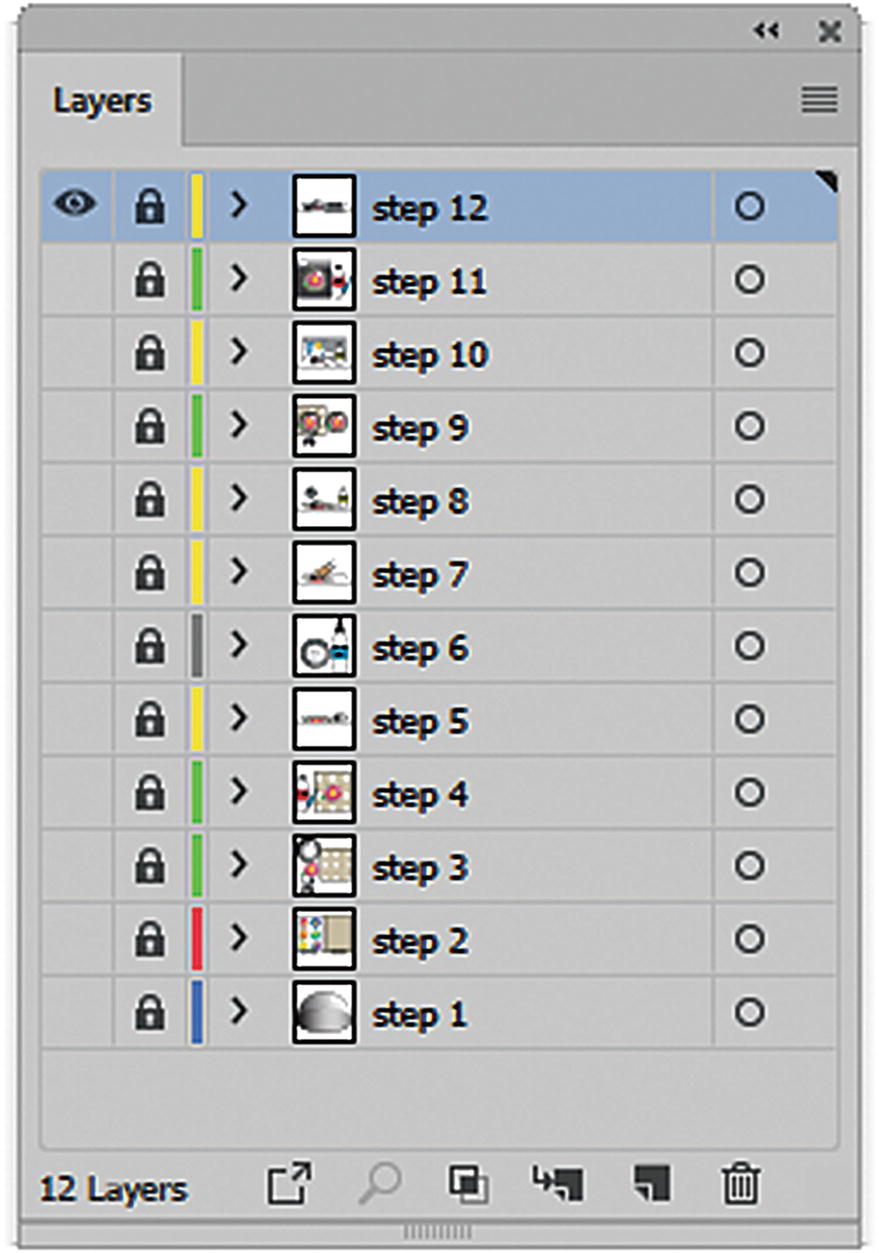
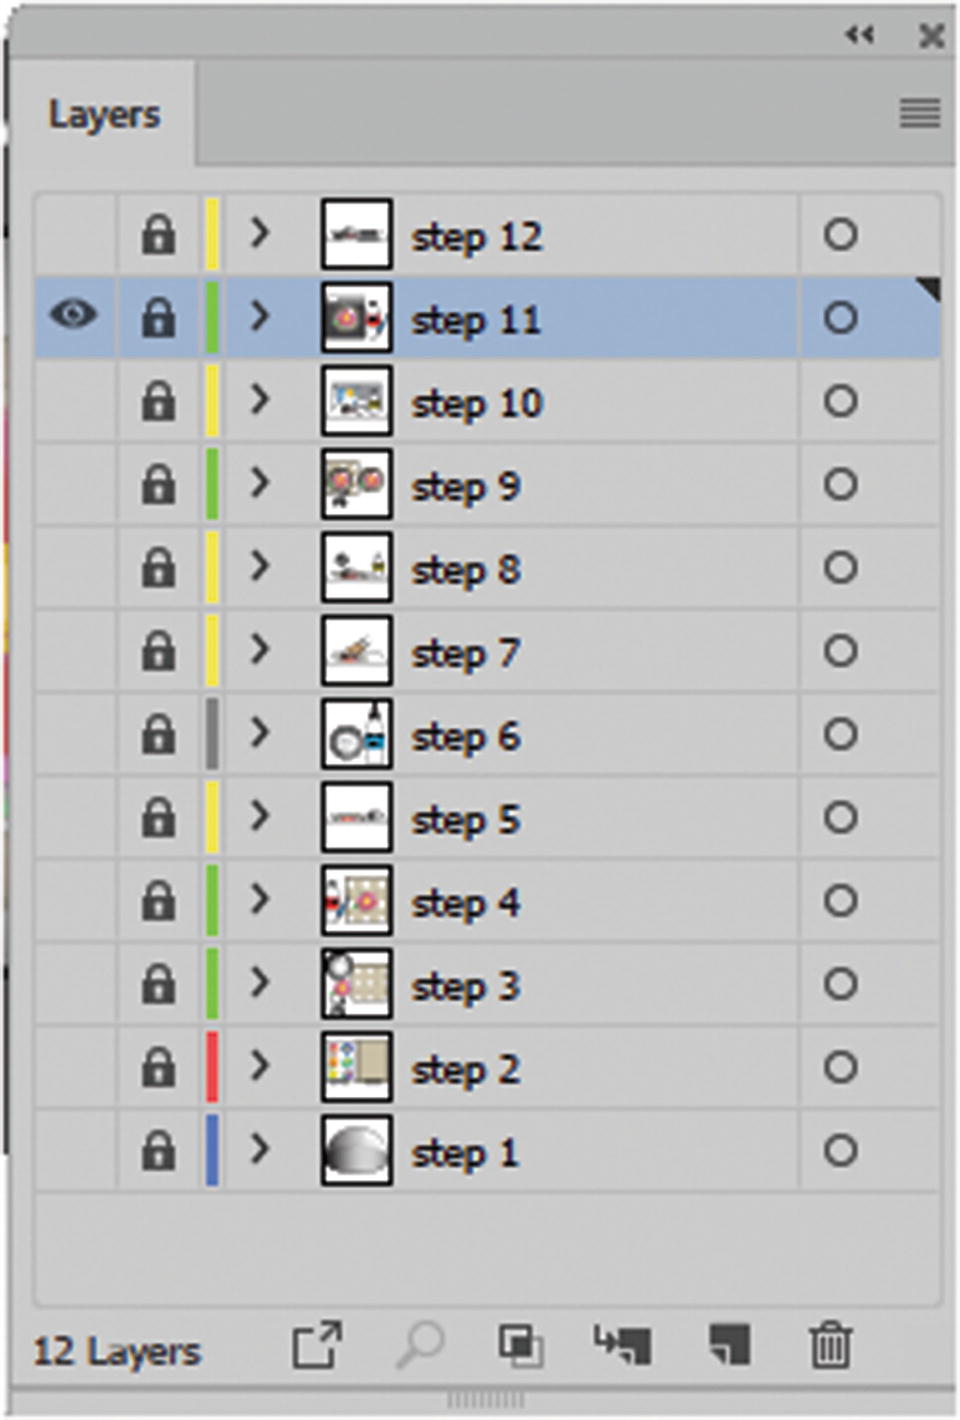
A layer for each step in the how-to project in the Layers panel

Step 12 is the visible layer on the artboard
Now I want to export each layer as a transparent GIF image.
The only way that you can create a GIF image in Illustrator is to use File ➤ Export ➤ Save for Web (Legacy). If you are going to create PNG or JPG files, use the Asset Export panel, as discussed in Chapter 12.
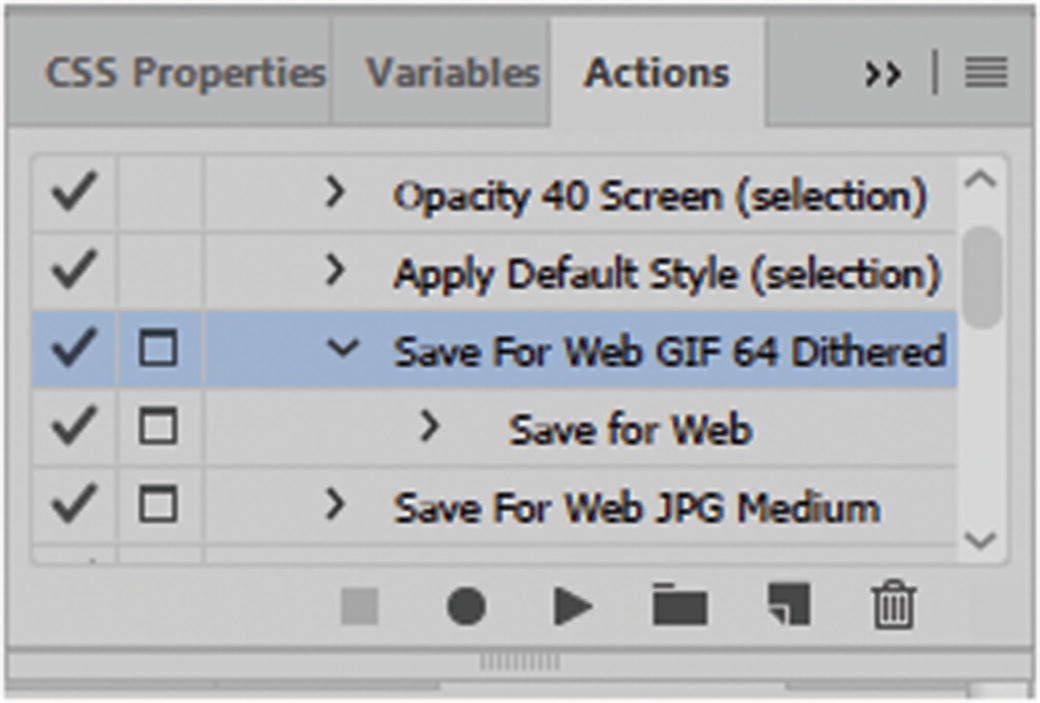
The prebuilt action maybe too low res, so you may need to create a custom action
Create a Custom Action
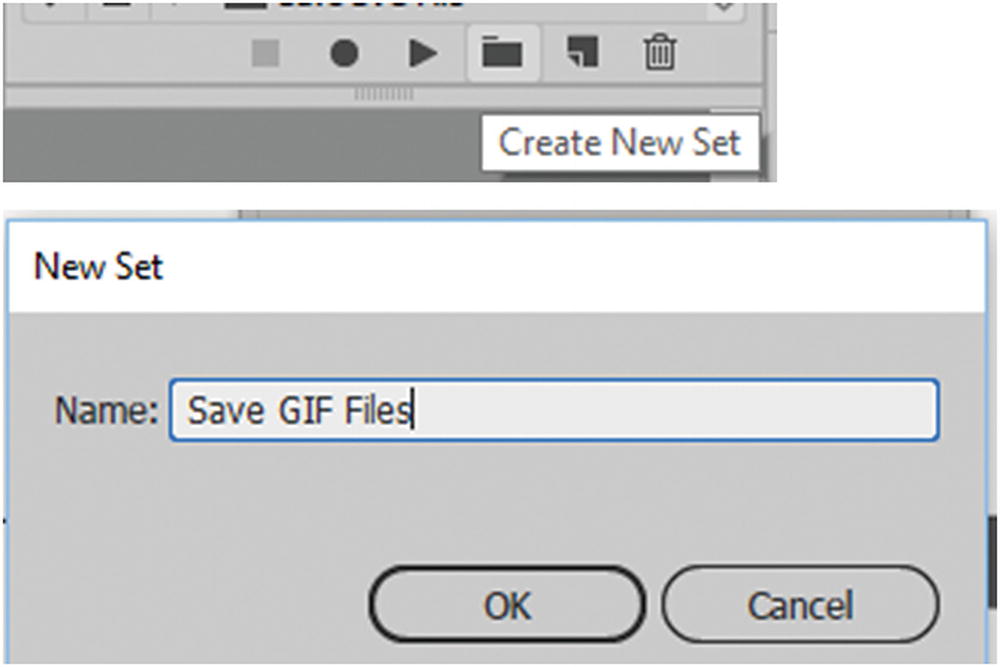
Create a new action set
Click OK to confirm, and it is added to the Actions panel.
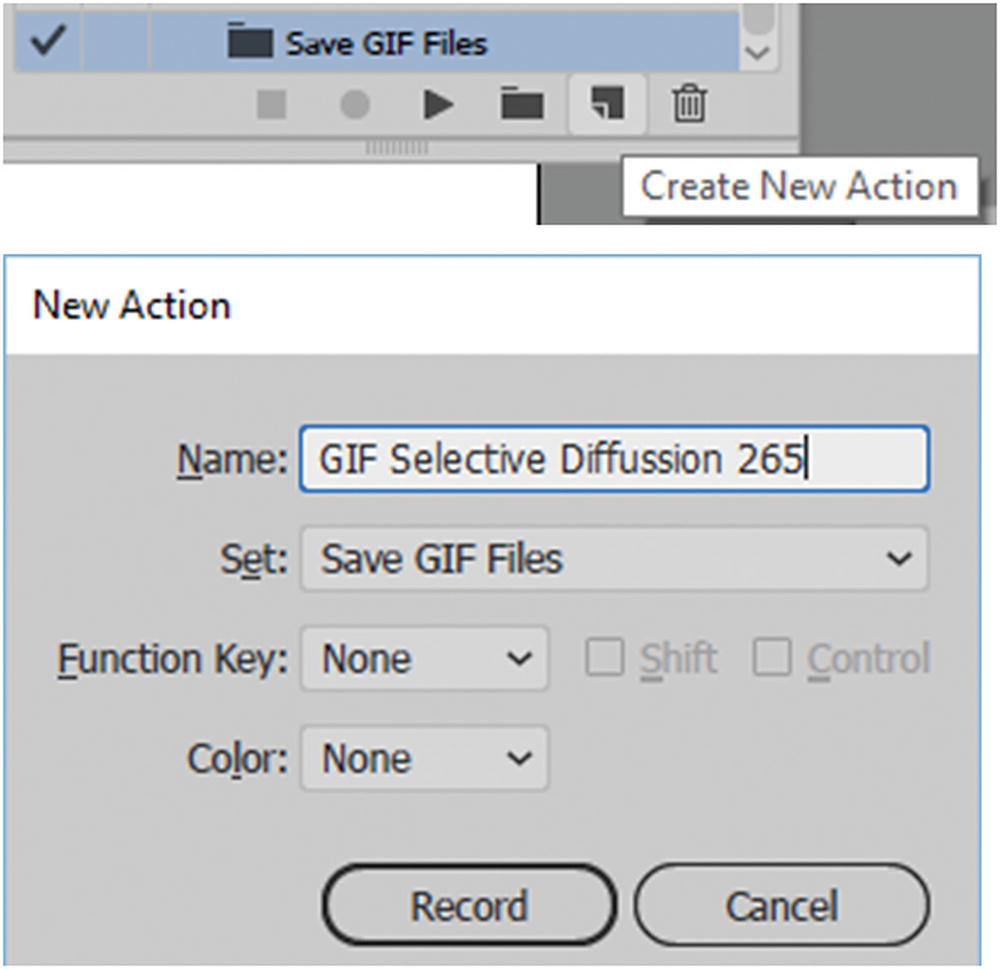
Create a new action for your GIF files
This should allow you to keep all the gradients looking clean and crisp and allow for transparency. This is a good option should you want to change the background in your website to another color later and not have a white box around your illustrations.
Click Record to start the action.
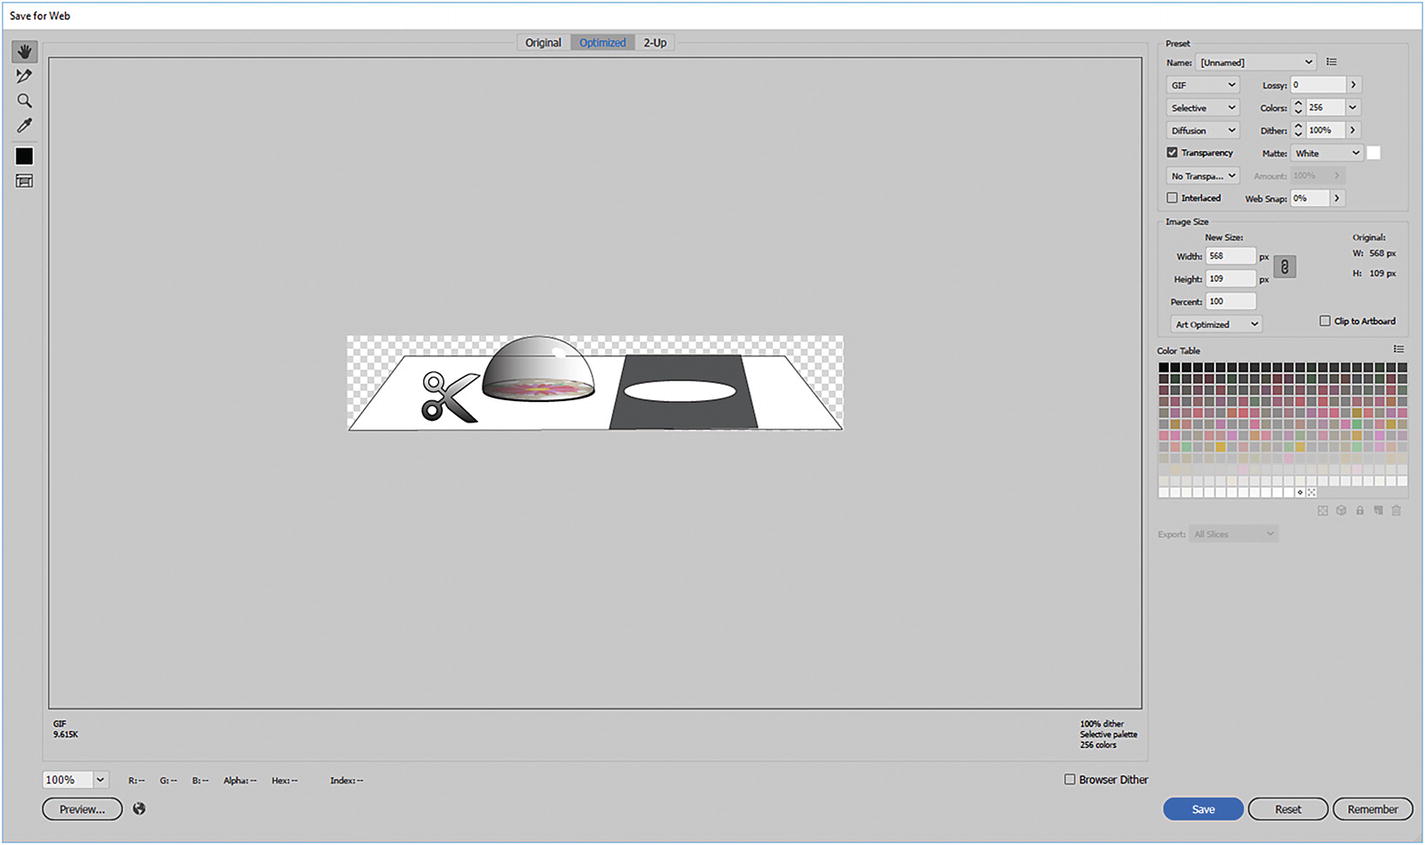
The image in the Save for Web (Legacy) dialog box
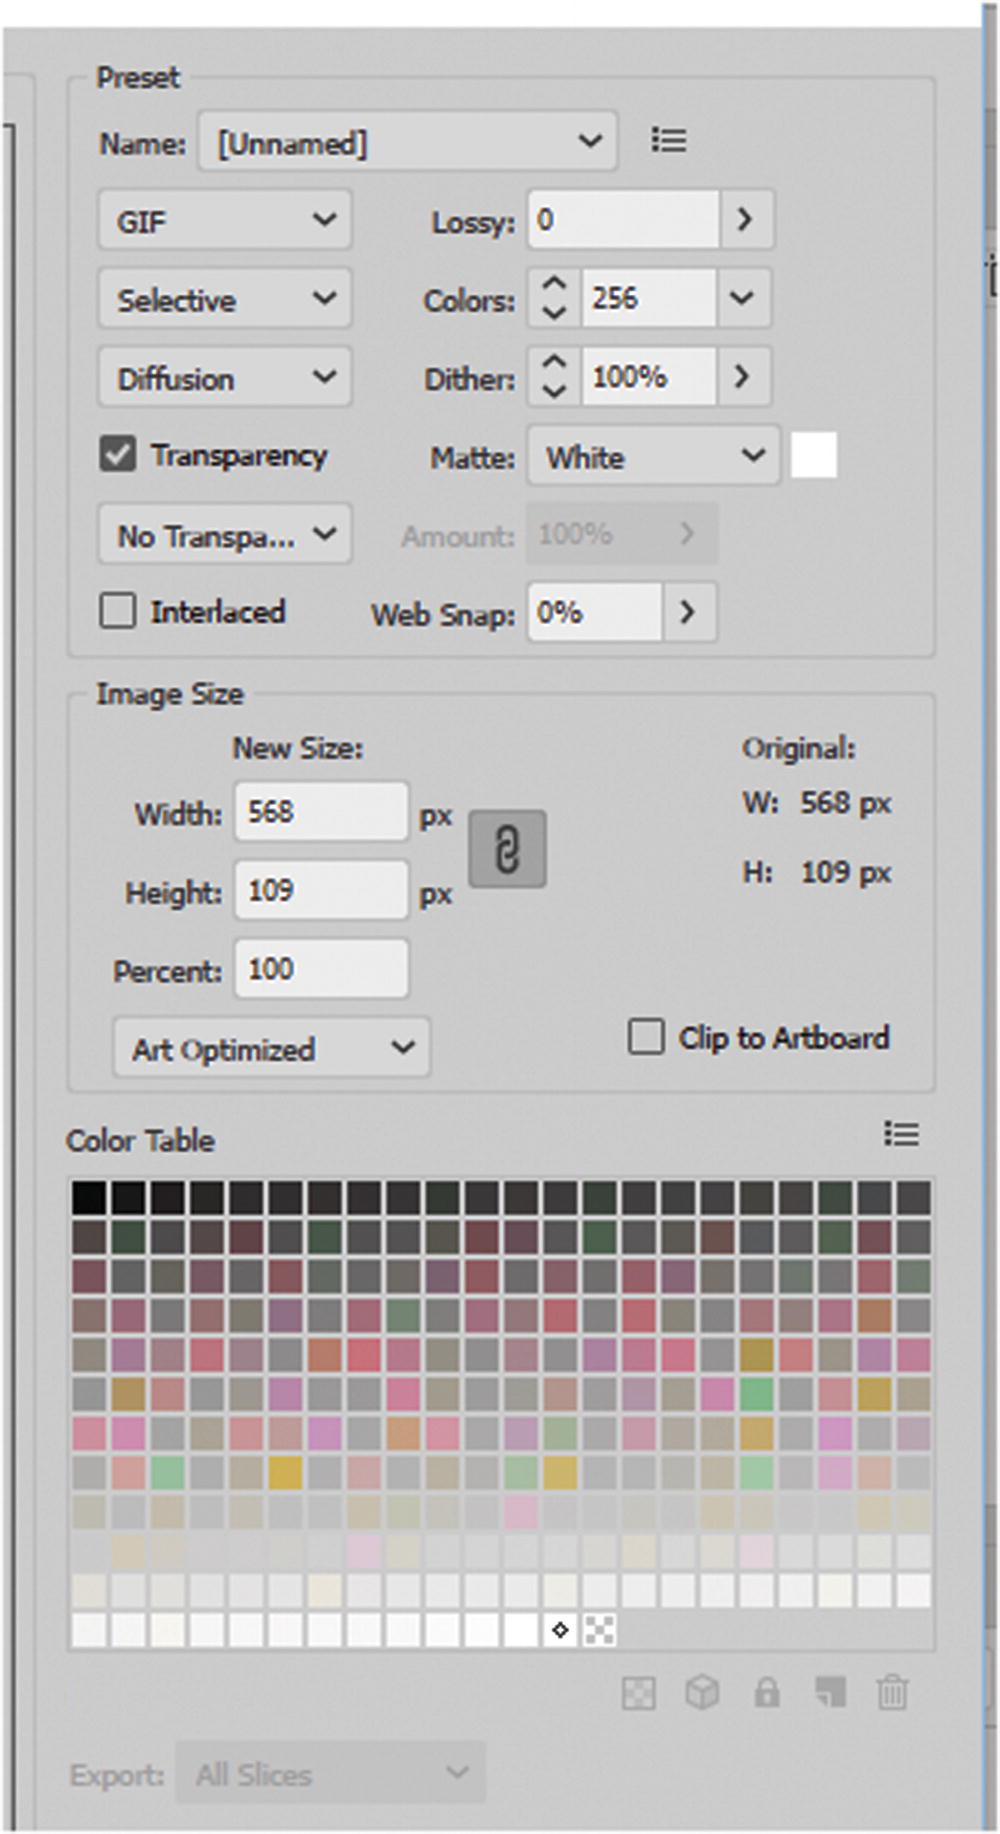
GIF settings in the Save for Web (Legacy) dialog box
GIF Lossy: 0
Selective Colors: 256
Diffusion Dither: 100%
Check: Transparency Matte: White
No Transparency Dither
Uncheck: Interlaced
Web Snap: 0%
Leave Width and Height at the default
Choose Art Optimized
Clip to Artboard: uncheck
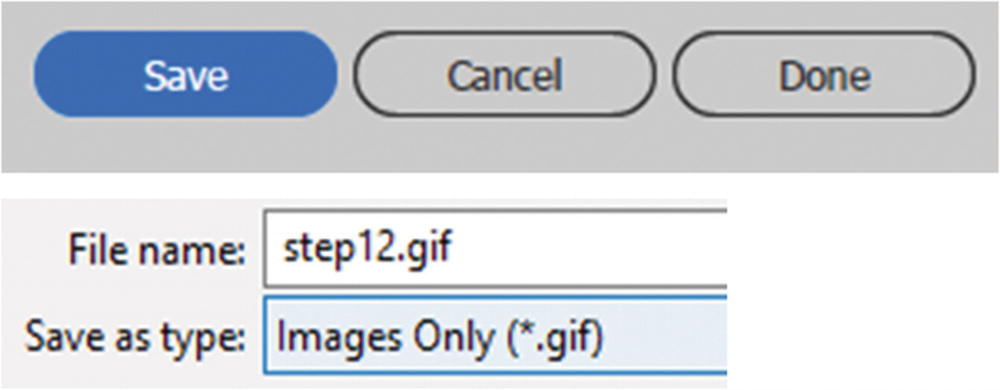
Save your GIF file in a folder
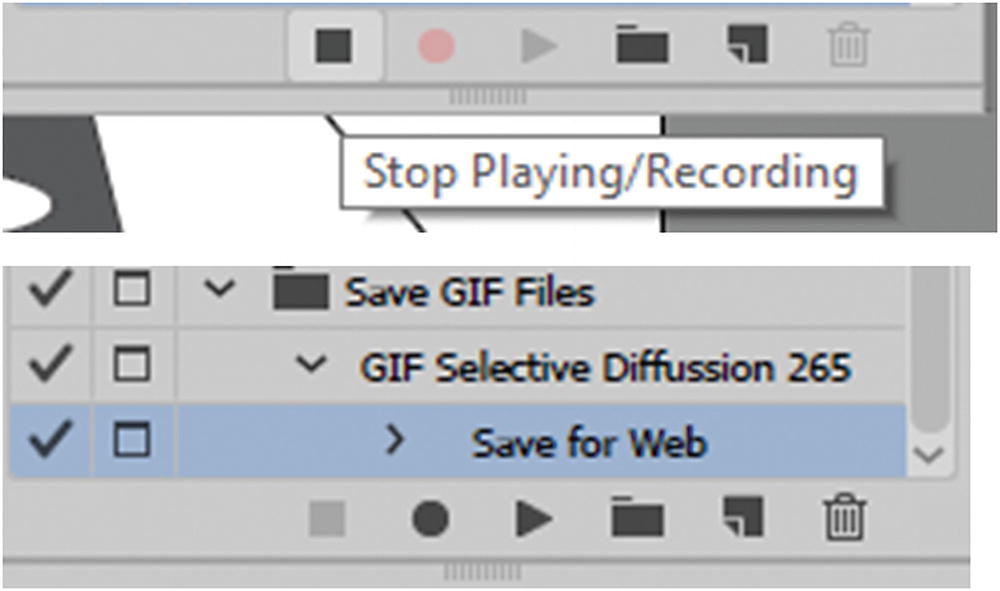
Stop recording your actions in the Actions panel
You have now completed the action. Make sure that the Toggle dialog icon is on in the action so that the window will open.
Turn on the next layer’s visibility in the Actions panel so that you can export only its artwork
With the new layer selected, return to your Actions panel and play the GIF Selective Diffusion 256 action again.

How the preview of the gif image appears om the Save for Web dialog box
Click the Save button and save step11.gif in your folder.
Repeat these steps for the remaining 10 images. You should have 12 images in total that you can use for your website.
You can close the AI file without saving changes. You have completed the first project.
Note
In Part 6, examples these gif files may have slightly different names, but you can always rename the file that you create in this lesson to match mine later.
Next, you look at how to create an informational map using SVG.
Exporting an SVG File
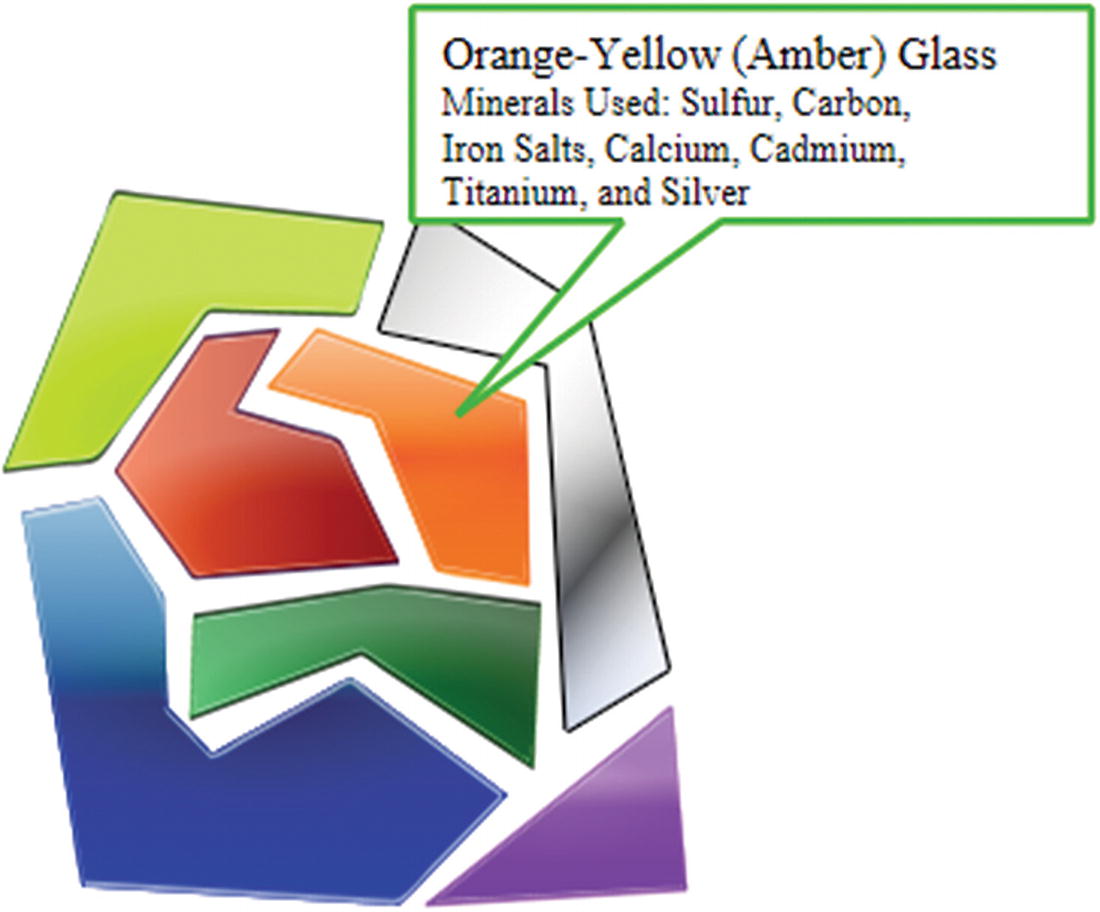
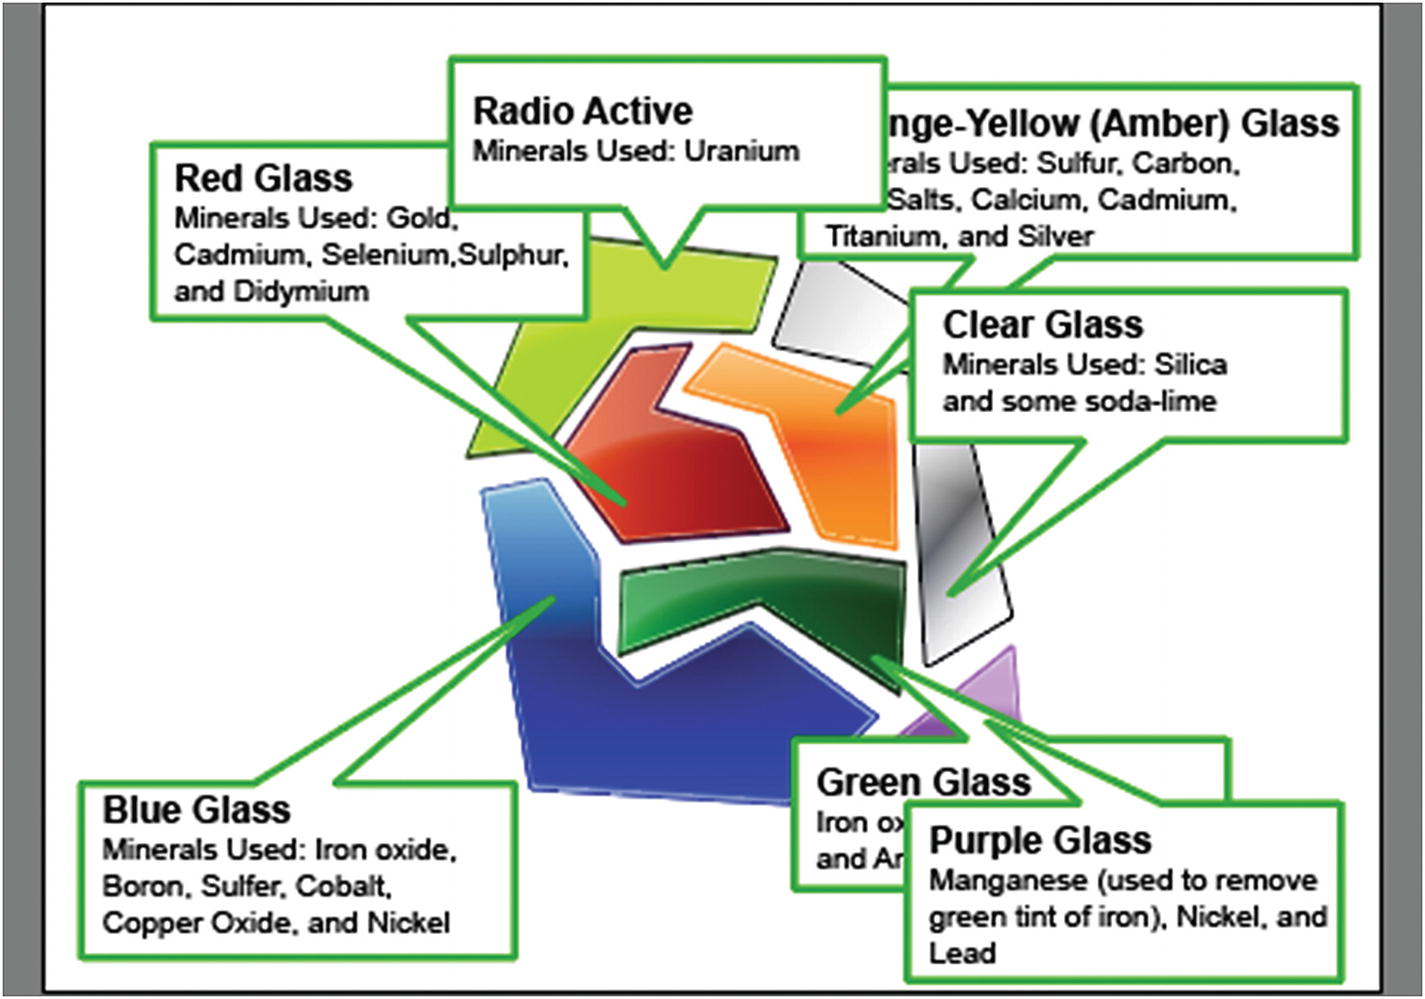
When you hover over the broken glass shapes, you can determine what each piece is made of
When you hover over each colored shape of glass, you discover what that color is composed of. This technique could be very useful for a project where you want information in distinct parts of a map to guide people, or parts of an organ, like an ear, or to dissect a flower. There are many possibilities.
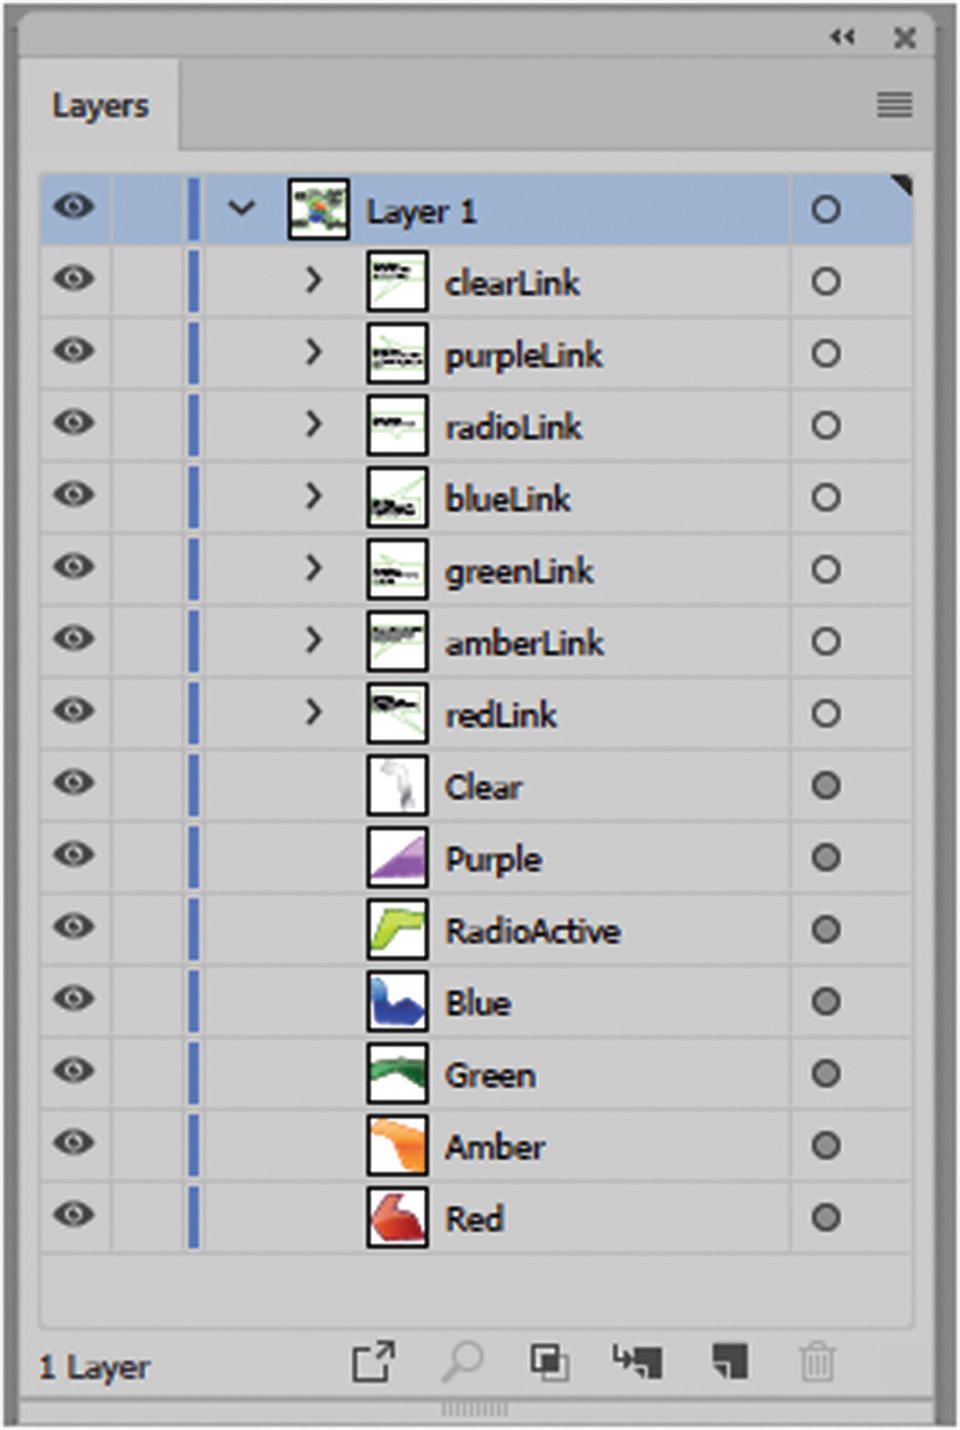
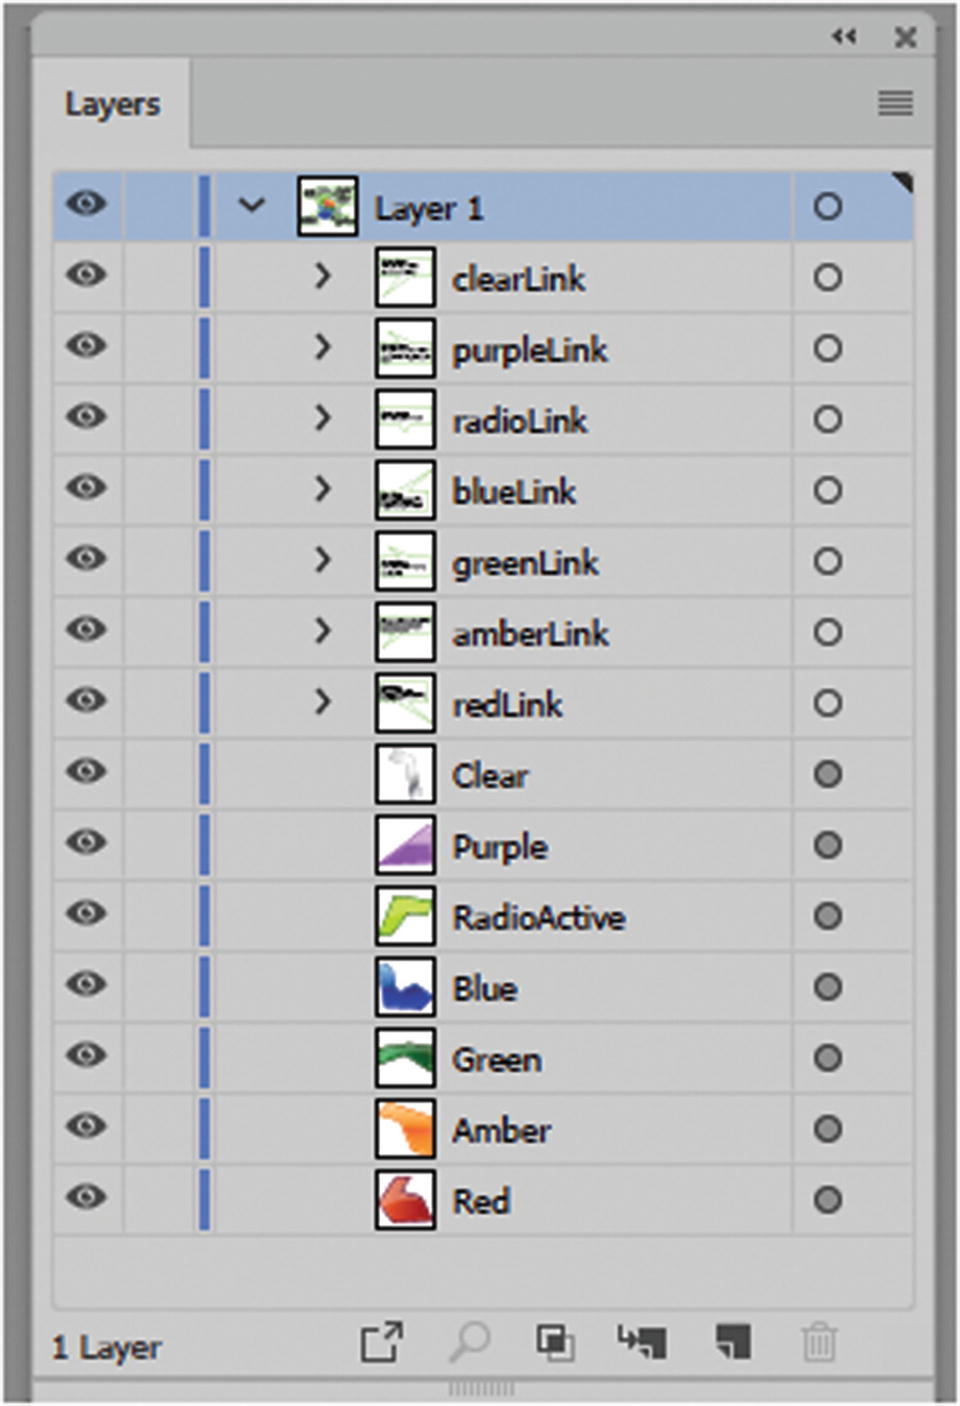
The Layers panel with each sublayer named and organized
How the sublayers currently appear on the artboard
I gave my layers and sublayers one-word names, and I made sure that I knew which text link went with which colored glass piece. When you choose longer names, you can write them with letters and numbers (e.g., object1, object2) or with what scripters call camel code (e.g., redLink, greenLink), in which one letter is capitalized so that you see a break in the word. Do not use dashes (-), underscores ( _ ), or spaces in your names because this causes the SVG interactivity links to fail.
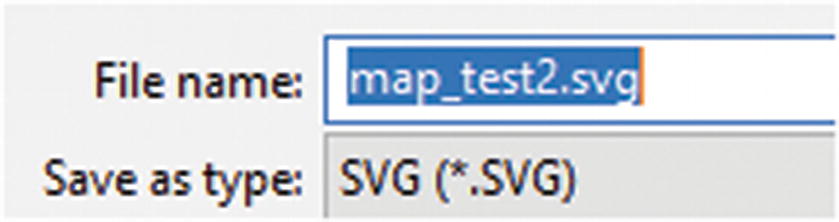
Save your file as an SVG
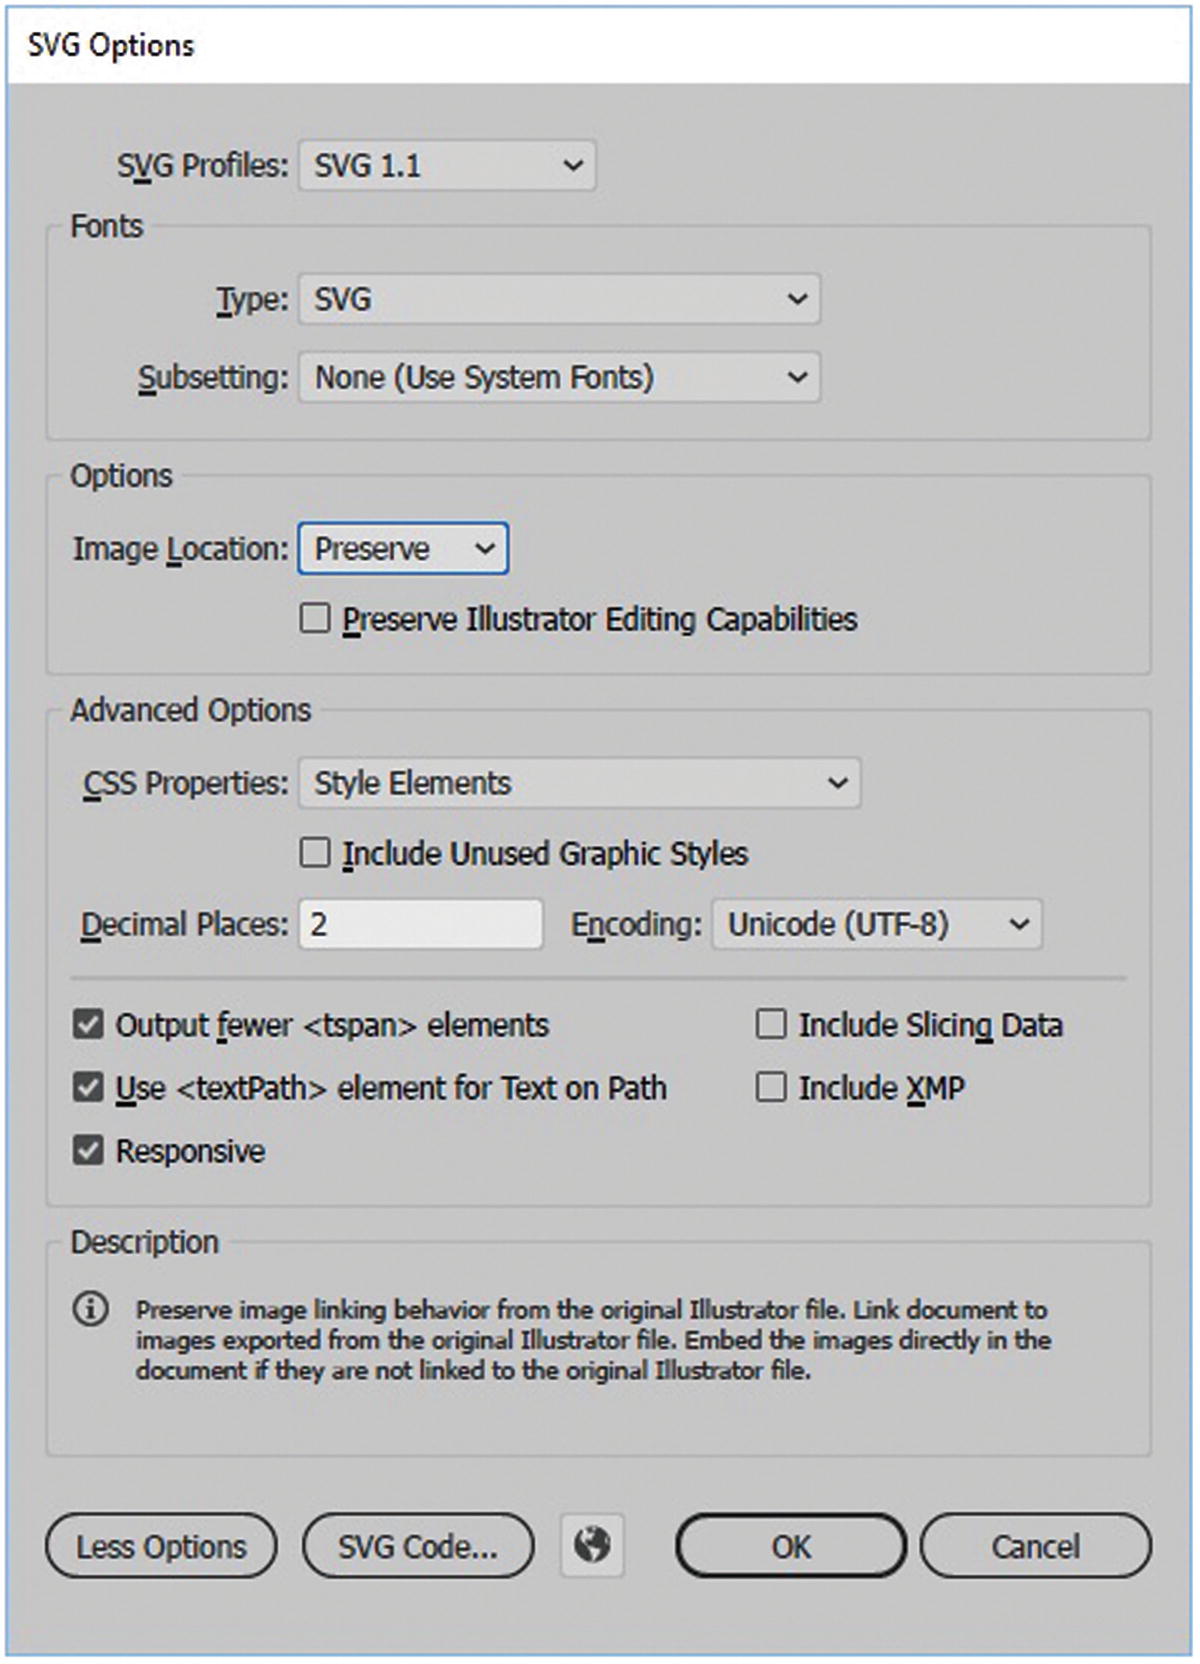
Settings in the SVG Options dialog box
SVG Profiles: SVG 1.1
Type: SVG
Subsetting: None (Use System fonts)
Image Location Choose either embed or preserve from the menu. In my original settings I chose embed.
Preserve Illustrator Editing Capabilities: unchecked
CSS Properties: Style Elements
Uncheck Include Unused Graphic Styles
Decimal Places: 2
Encoding: Unicode (UTF-8)
Output fewer <tspan> elements: check
Use <textPath> element for Text on a Path: check
Check: Responsive.
Leave the other two setting unchecked.
When done, click OK to save your file.
If the newly created SVG file map_test.svg is not in Illustrator, choose File ➤ Open and locate the file.
You can close my original AI file without saving changes.
The Layers panel as viewed in the SVG File
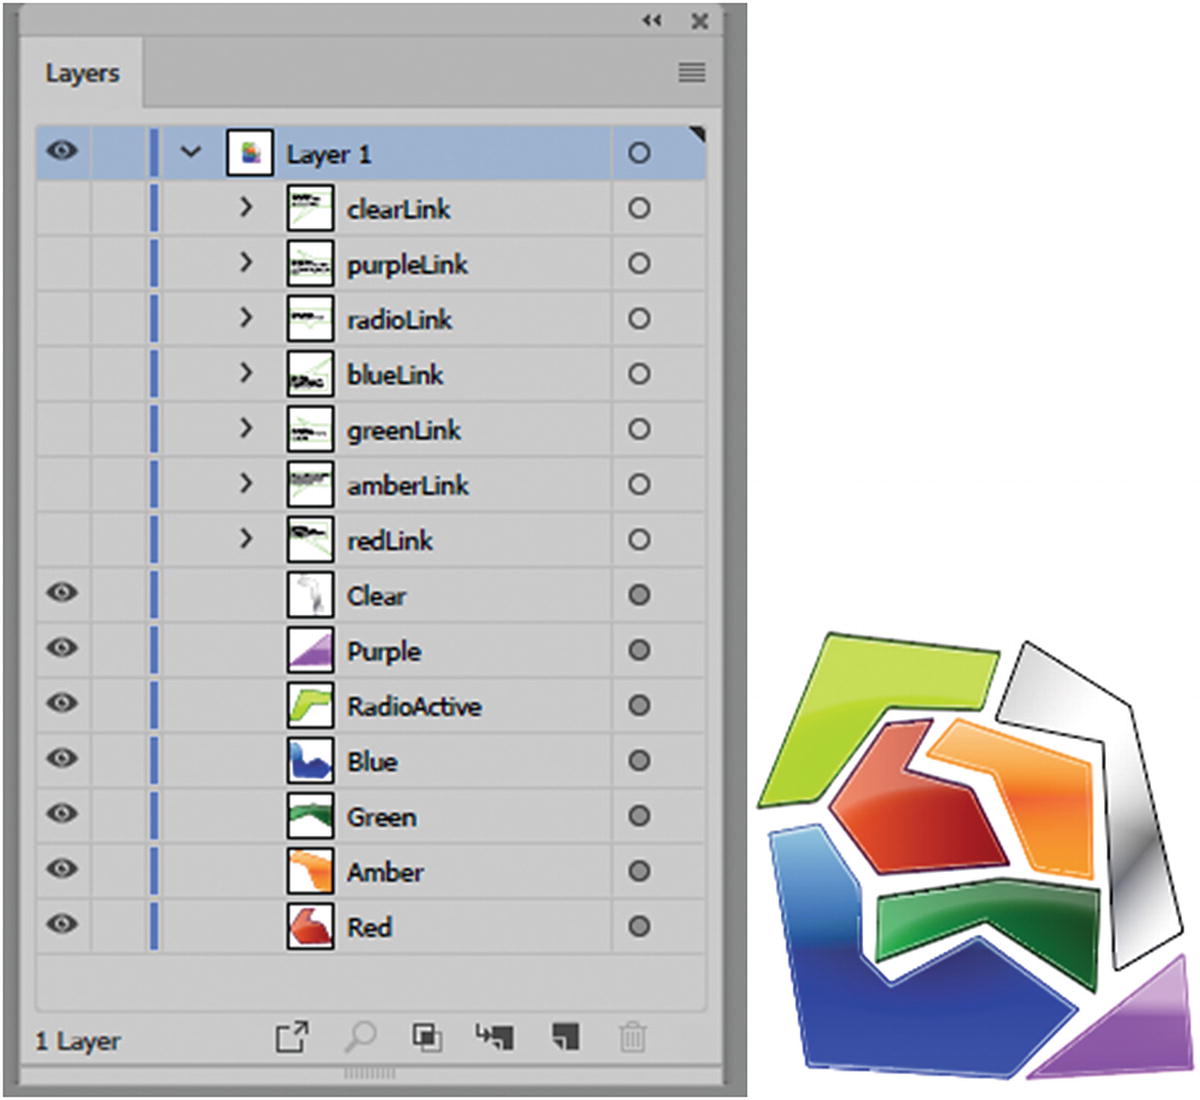
The text link layers visibility is turned off and the artboard appears less cluttered
Make sure to save the SVG file at this point.
Note
When converted to an SVG, an AI file does not always retain the JavaScript if you enter it into the SVG Interactivity panel. Save the file as an SVG and then open the SVG. For my workflow, I find it better to enter the JavaScript only into the SVG file; that way, if I need to use the original AI file for other projects, the objects shapes are clean of extra code, which might be accidently copied into other AI files. Also, filters do not always convert correctly in the SVG file, so you may need to alter your graphics slightly if certain colors don’t convert as expected.
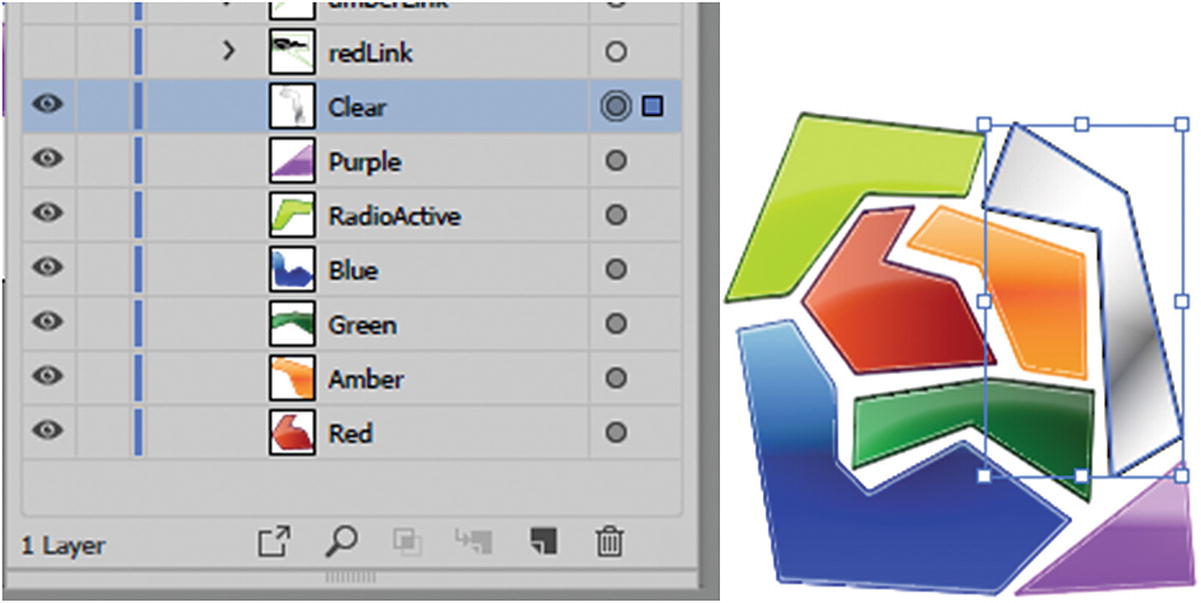
With the clear sublayer targeted, you can now add SVG interactivity to the object
Now go to the SVG Interactivity panel.
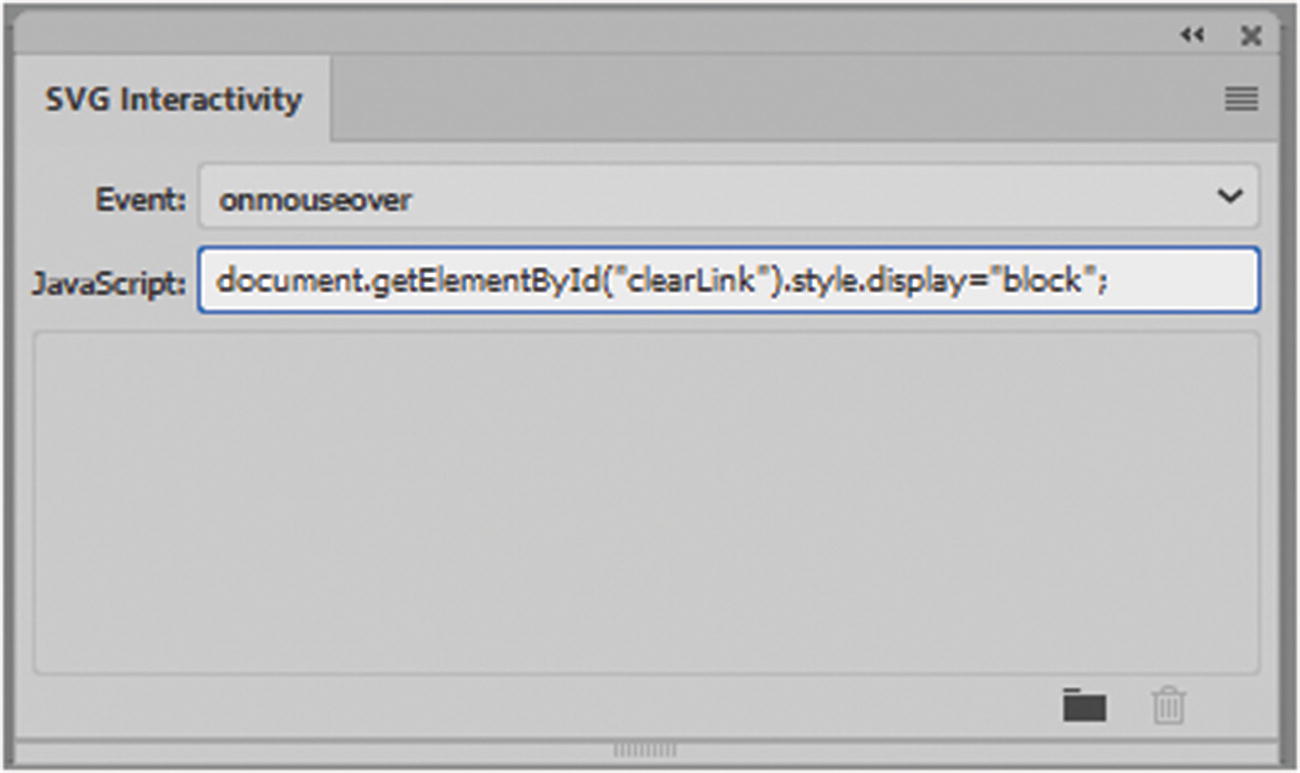
Add your JavaScript code for an object to the SVG Interactivity panel
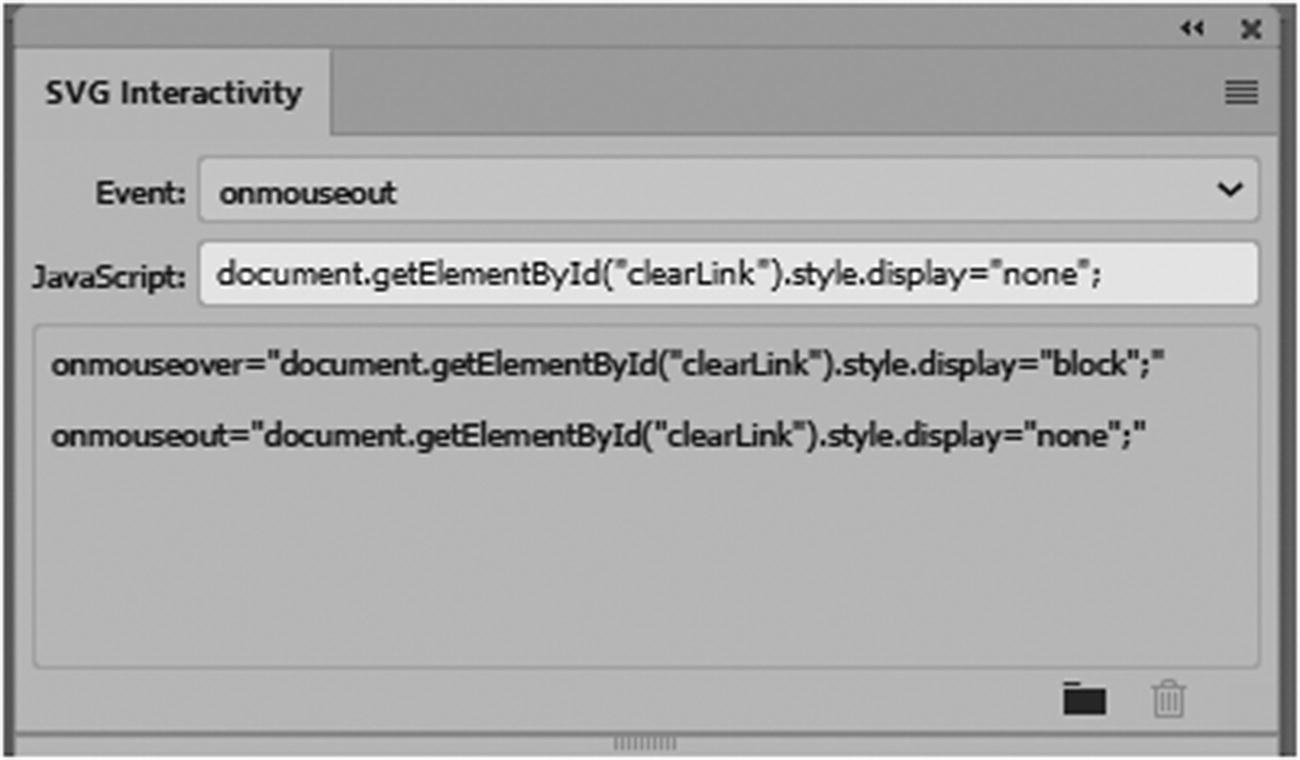
Add your JavaScript code for an object to the SVG Interactivity panel
Click in the lower gray area to confirm it into the SVG Interactivity panel, and save your SVG file.
When you changed the object’s color to show or hide, you set the "clearLink" text to show when the mouse hovers over the "block" object. To hide this, it is set "none" when the mouse moves away from the object.
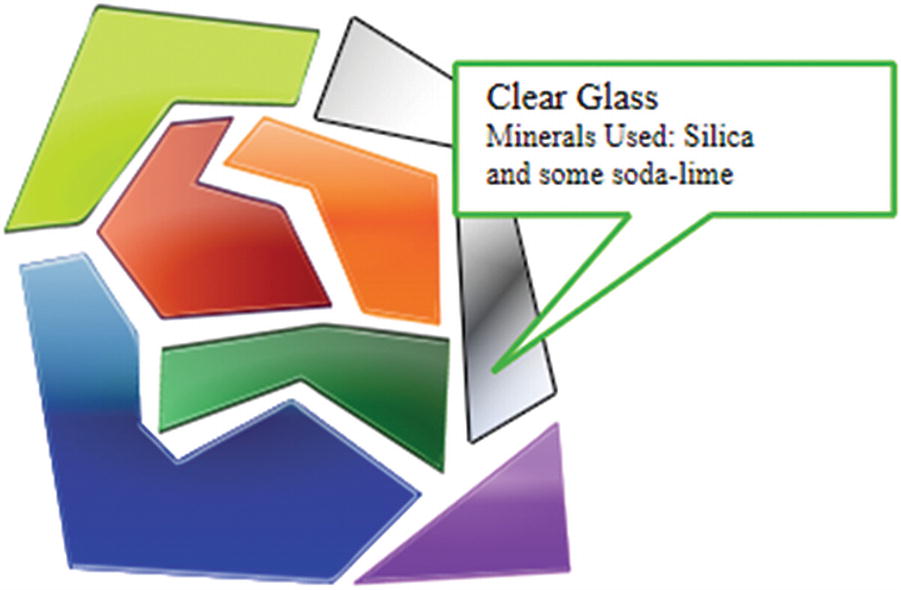
In the browser, when you hover over the clear glass, a message appears; it hides when you move away from the object
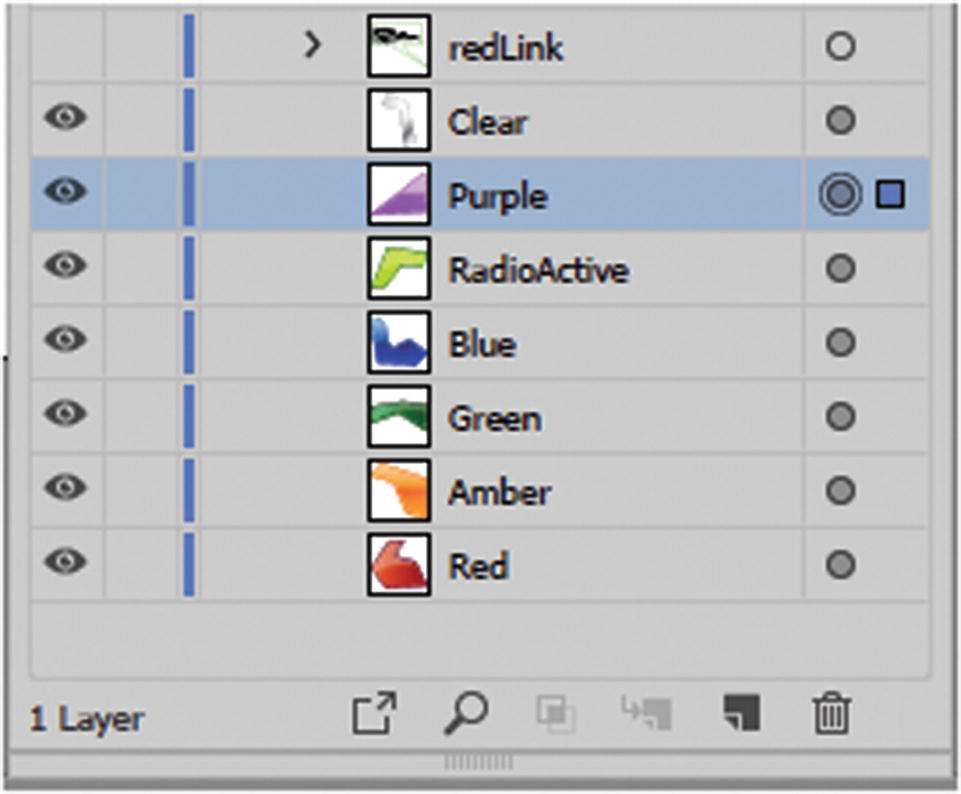
Always select the target for a layer so that it will be linked correctly in the SVG Interactivity panel
Only then should you start adding your JavaScript to the SVG Interactivity panel.
The Remaining Code for Each Sublayer
Target Color | Event | JavaScript |
|---|---|---|
Purple | onmouseover onmouseout | document.getElementById("purpleLink").style.display="block"; document.getElementById("purpleLink").style.display="none"; |
RadioActive | onmouseover onmouseout | document.getElementById("radioLink").style.display="block"; document.getElementById("radioLink").style.display="none"; |
Blue | onmouseover onmouseout | document.getElementById("blueLink").style.display="block"; document.getElementById("blueLink").style.display="none"; |
Green | onmouseover onmouseout | document.getElementById("greenLink").style.display="block"; document.getElementById("greenLink").style.display="none"; |
Amber | onmouseover onmouseout | document.getElementById("amberLink").style.display="block"; document.getElementById("amberLink").style.display="none"; |
Red | onmouseover onmouseout | document.getElementById("redLink").style.display="block"; document.getElementById("redLink").style.display="none"; |
Once you have entered the code, make sure to save your file and test it in the browser. You may have to go back to Illustrator to make changes and save, and then refresh the browser.
As you can see, you don’t have to know a lot of JavaScript to find creative ways to work with Illustrator’s SVG Interactivity panel.
File ➤ Close any open files and then File ➤ Exit Illustrator. This concludes our Illustrator projects for Part 3.
Note
If your own project has a lot of sublayers, and you find that some shapes are not hiding when the file opens in the browser and only disappear after being hovered over once, make sure to check your layer order in the SVG file. Sometimes a layer’s eye needs to remain on and all of its sublayers’ eyes need to be turned off, as seen in Figure 16-24.
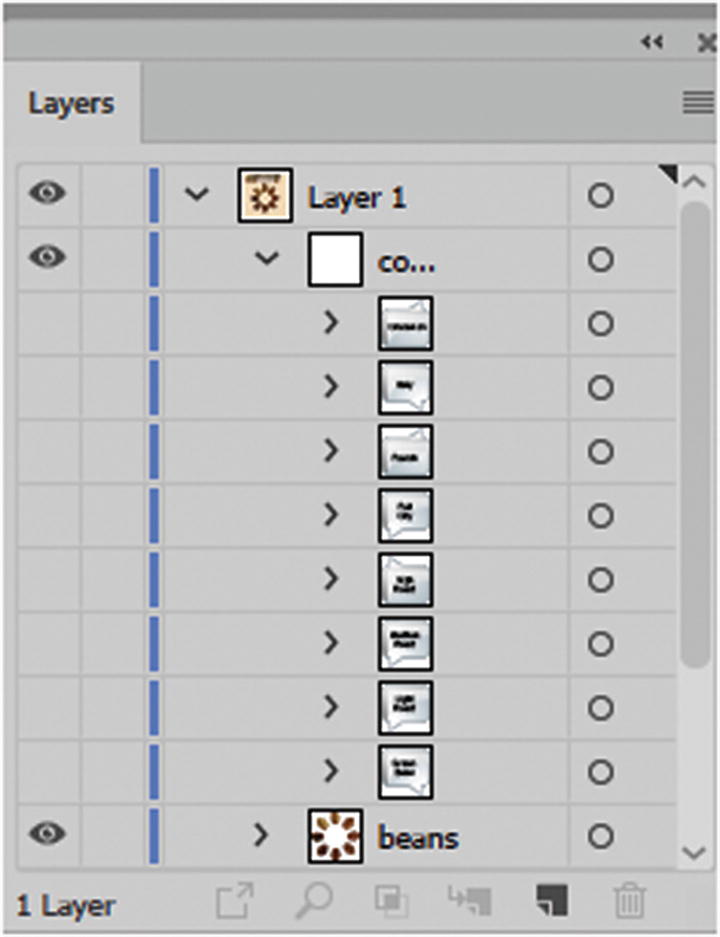
Check your layer order if you notice that your SVG file does not respond correctly in the browser
Summary
In this chapter, you reviewed how to create images for a webpage and work with an interactive informational map from an SVG file. This chapter concludes your study of Illustrator. Make sure to review any areas of Part 3 that you don’t understand so that you feel comfortable working with your own graphics in Illustrator.
In Part 4, you journey to the next junction point in the software maze: Adobe Animate CC. You’ll discover how it creates animations, movies, and HTML5 canvases.