
In this chapter, you look at how to import your graphics from Photoshop and Illustrator into Animate. You’ll also look at how to edit the graphics within Animate if the import of certain effects is not as successful as you hoped.
Note
This chapter does not have any actual projects; however, you can use the files in the Chapter 19 folder to practice opening and viewing for this lesson. They are at https://github.com/Apress/graphics-multimedia-web-adobe-creative-cloud .
As you saw in Chapter 18, a graphic could be imported into the Color panel via the Library panel. While it’s easy to draw most basic shapes in Animate, I find that to create professional-looking shapes and human bodies, it’s much easier to draw and organize them in Photoshop or Illustrator. For this reason, you may want to use these same objects for print or in other areas of your website; so keeping the originals in an (.ai) or (.psd) format is an innovative idea.
In the process of creating your objects, you may have added some effects to these objects that you want to visually retain after import, and in some cases, still be able to edit in Animate. Let’s look at how you can import these files, along with their effects, into Animate.
Importing Files to the Stage or Library Panels
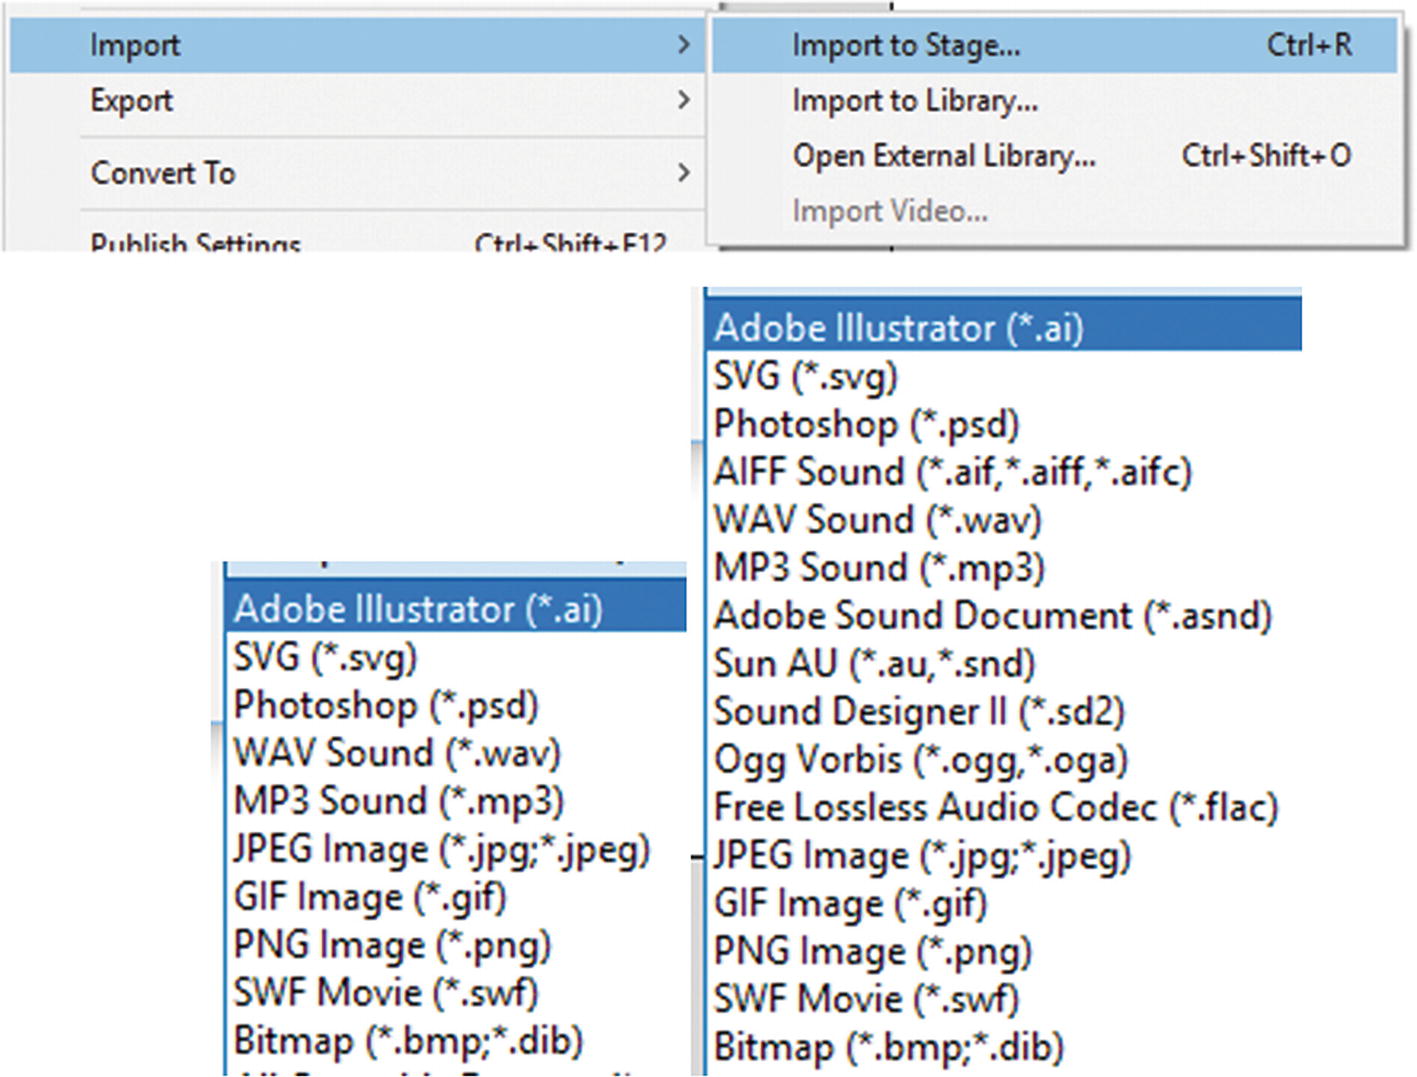
Possible file formats you can import into Animate CC. You may have additional options depending on what software is installed on your computer.
If you’re not familiar with these file formats, review them in Chapter 1.
Note
If you have QuickTime 4 or higher installed on your computer, you can also import TIFF files. More information on this is at https://helpx.adobe.com/animate/using/placing-artwork.html .
Import to Stage imports the artwork directly on the Canvas stage and the Library panel. Import to Library places the files into the Library panel only. If you don’t plan to use your images right away on the stage in the current key frames, then Import to Library is the option to choose.
Import an Image Sequence
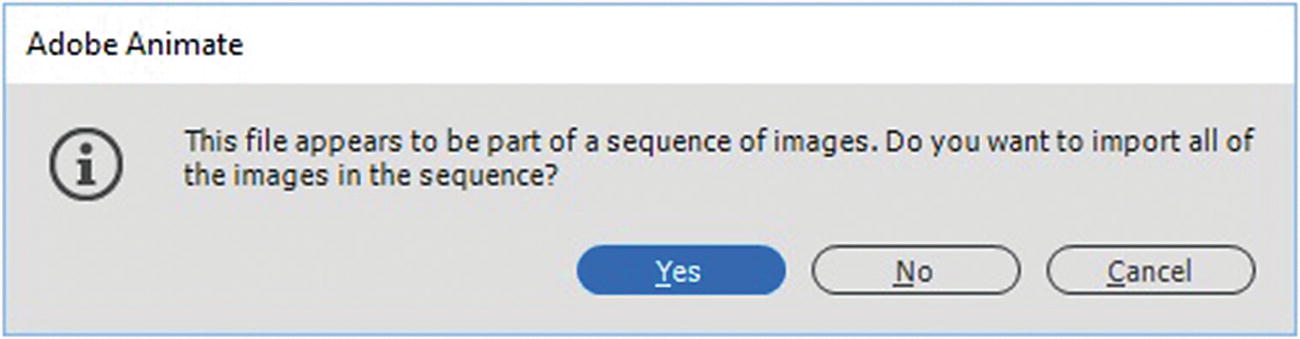
An info alert will ask if you want to import all images in a sequence
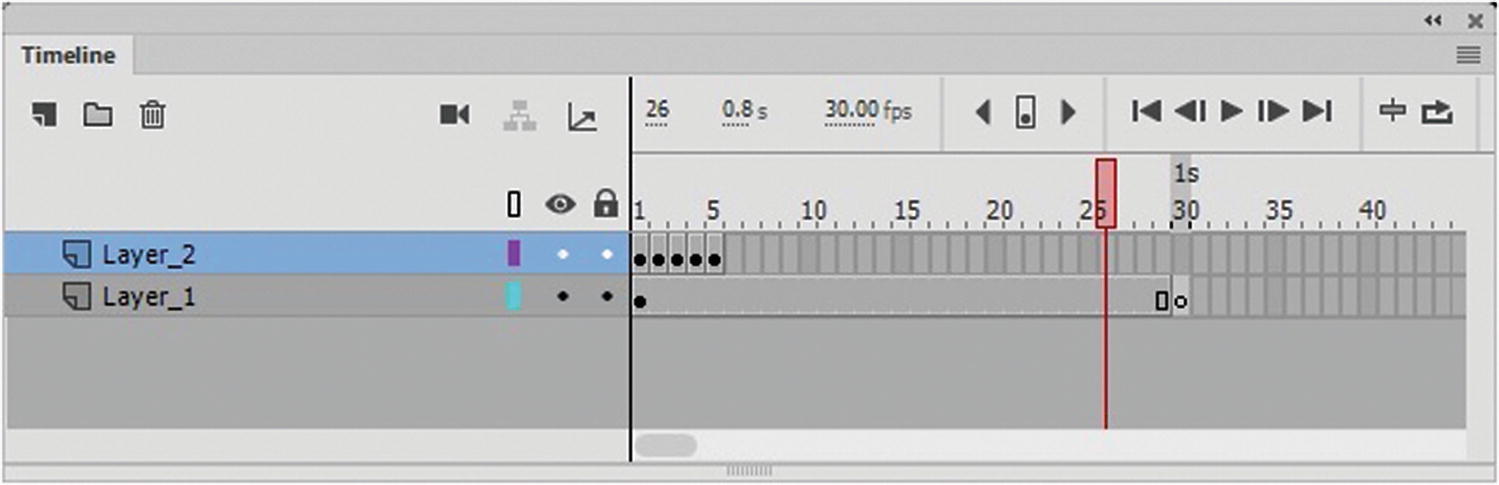
Add your image sequence to the timeline on a layer
Export Images from an External Library
Sometimes you may want to grab images from another FLA file’s library. You can do this using File ➤ Import ➤ Open External Library.
Note
With HTML5 Canvas, the Option to File ➤ Import ➤ Import Video is not available; only for ActionScript 3.0. While you can import WAV and MP3 audio via the Import to Stage or Import to Library, there is another way to add video to your HTML5 Canvas: the Components and Component parameters panels, which I discuss in Chapter 20.
Importing Illustrator and Photoshop Files with Their Elements or Effects Intact
Let’s take a short detour back to Photoshop CC and Illustrator CC to talk about what kinds of effects might be applied to objects or layers in these programs and how it relates to Animate.
Photoshop CC Blending Modes
If you have built a file in Photoshop CC with various layers, you might want to retain or keep certain blending modes that you have applied to your layers and shapes so that you don’t have to adjust them again in Animate. For this section, refer to the blending_effects_animate.psd file.
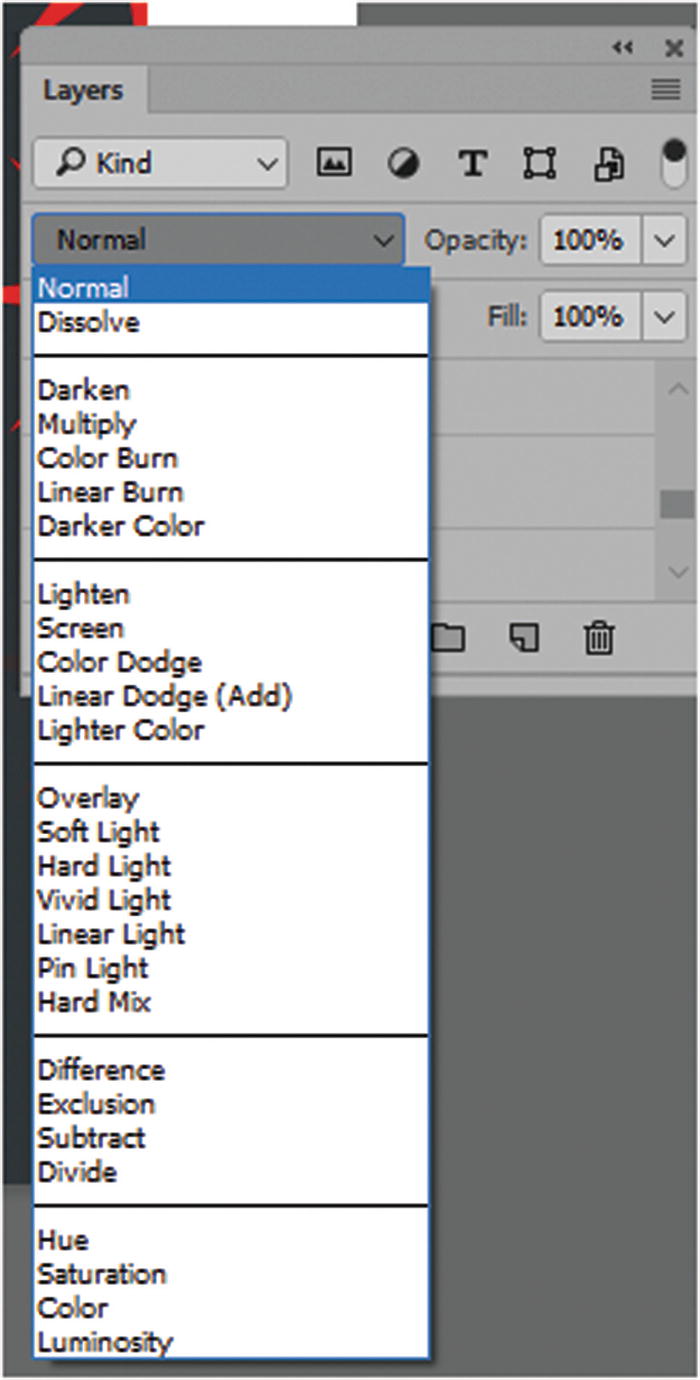
Blend modes in Photoshop CC
Blend color: The color applied to the blend mode of the layer (normal, lighten, darken).
Opacity: The degree of transparency or alpha applied to the blend mode.
Base color: The color of pixels on the layer beneath the above blend’s color layer.
Result color: The result of the blend’s effect on the base color layer when the colors are combined.

Each layer has a different blending mode applied
Photoshop Blending Modes
Normal -default | Color Dodge | Pin Light |
|---|---|---|
Dissolve | Linear Dodge(Add) | Hard Mix |
Darken | Lighter Color | Difference |
Multiply | Overlay | Exclusion |
Color Burn | Soft Light | Subtract |
Linear Burn | Hard Light | Divide |
Darker Color | Vivid Light | Hue |
Lighten | Linear Light | Saturation |
Color | Luminosity |
For more detailed information on these blending modes, visit https://helpx.adobe.com/photoshop/using/blending-modes.html .
If you are not sure how to use blending modes in Photoshop, make sure to read Adobe Photoshop CC Classroom in a Book by Andrew Faulkner and Conrad Chavez (Adobe Press, 2017) to review this area.
Note
Two blends that are not in this list are Behind and Clear. These only appear as modes for painting tools and have nothing to do with the blending mode effects in the Layers panel. Refer to Figure 19-6.
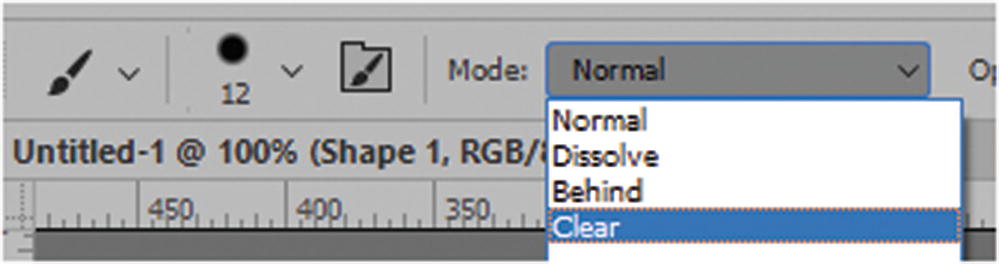
Additional blending modes for paint brushes only
Behind: Edits or paints only on the transparent part of a layer. This mode works only in layers with Lock Transparency deselected. It is like painting on the back of transparent areas on a sheet of acetate.
Clear: Edits or paints each pixel and makes it transparent. This mode is available for the Shape tools (when fill region is selected), Paint Bucket tool, Brush tool, Pencil tool, Fill command, and Stroke command. You must be in a layer with Lock Transparency deselected to use this mode.
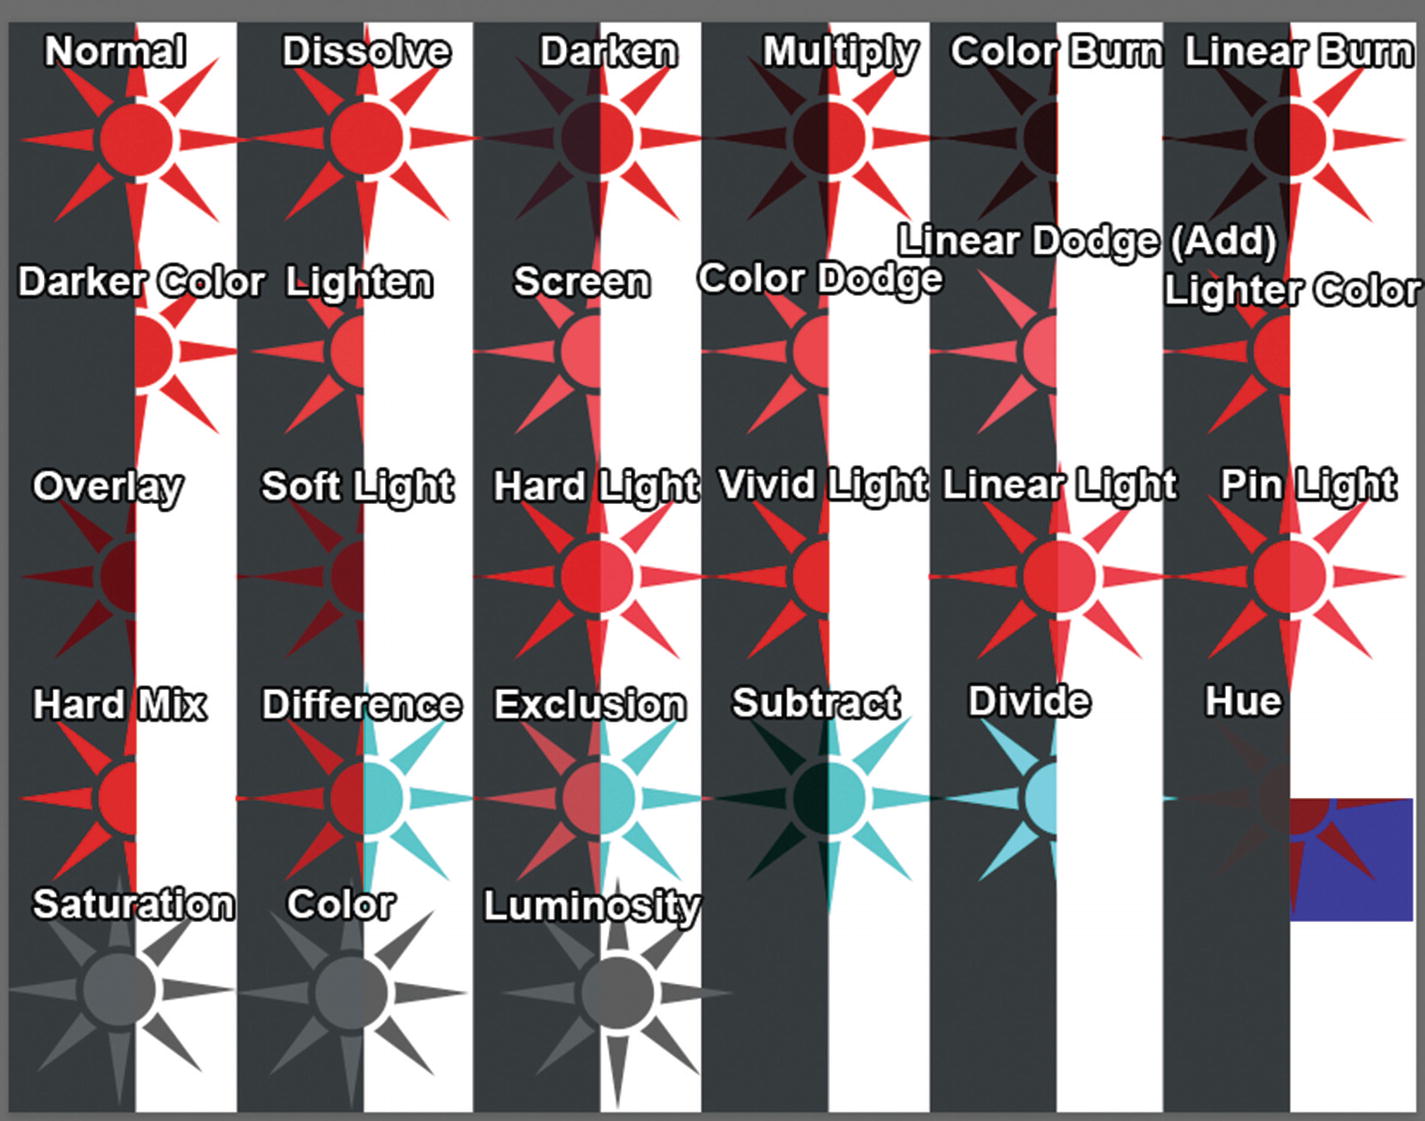
How the red suns appear in the Photoshop file
Photoshop CC Layer Styles FX
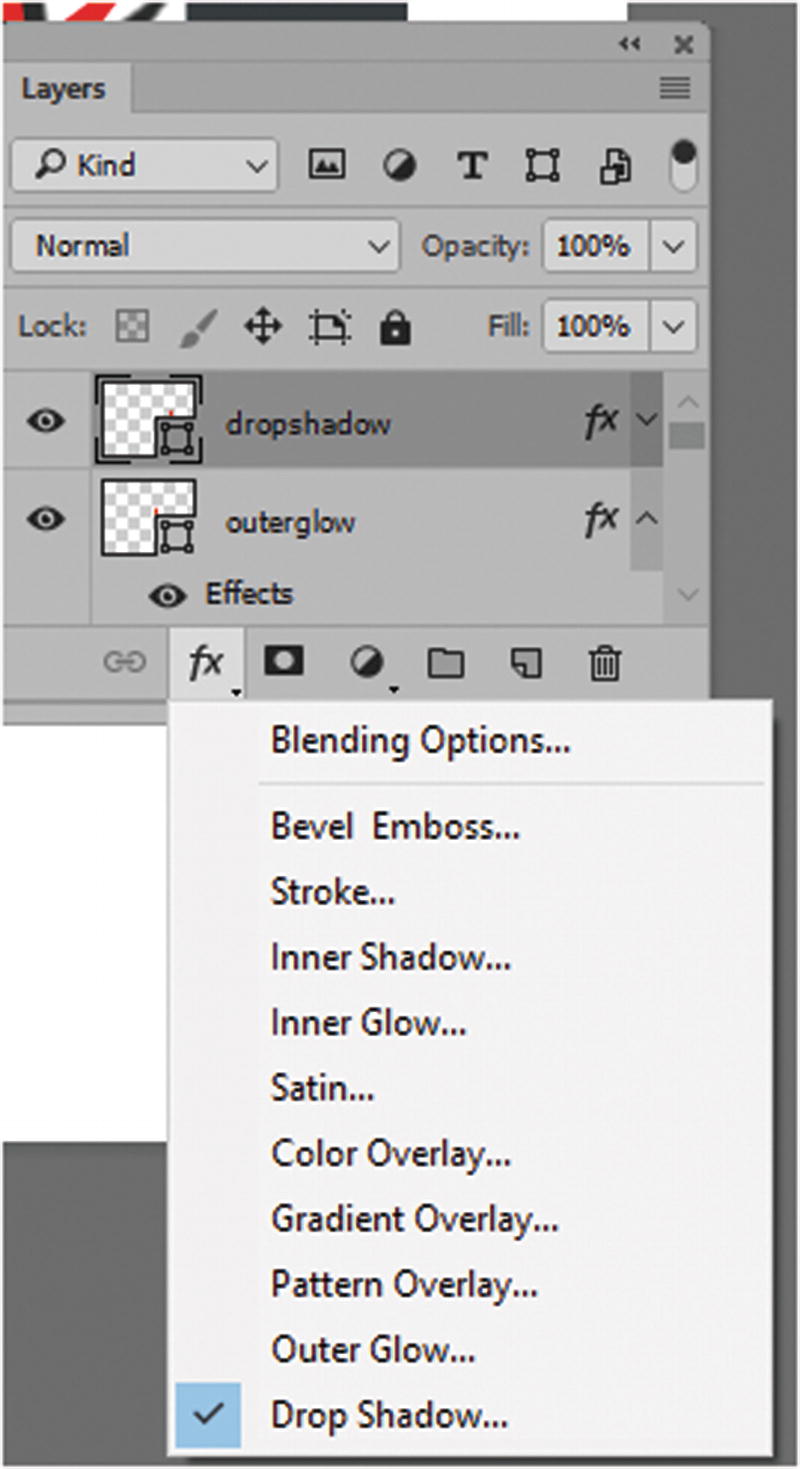
Applying effects or FX to a layer in Photoshop
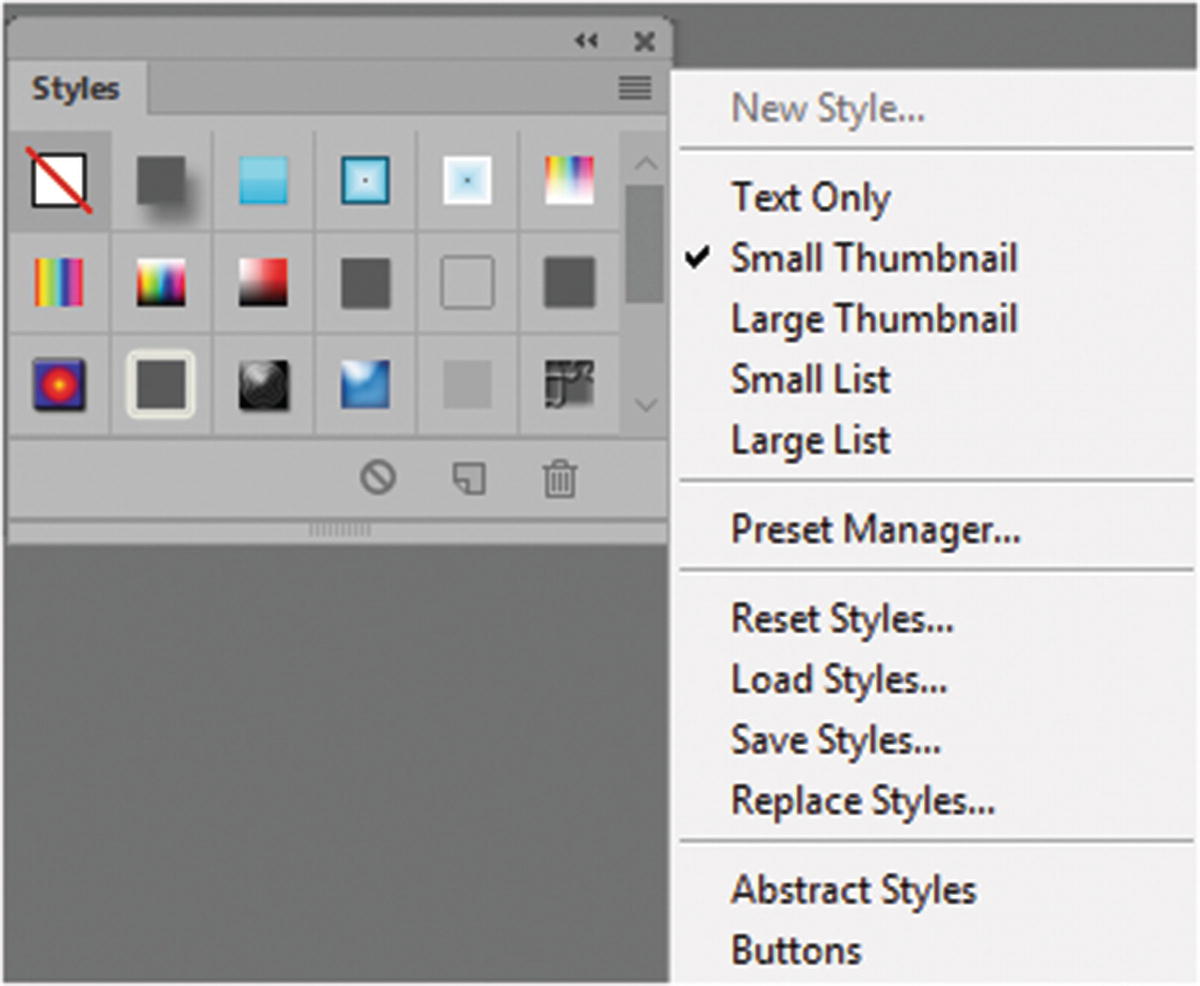
The Styles panel has many prebuilt styles that you can apply to layers in Photoshop
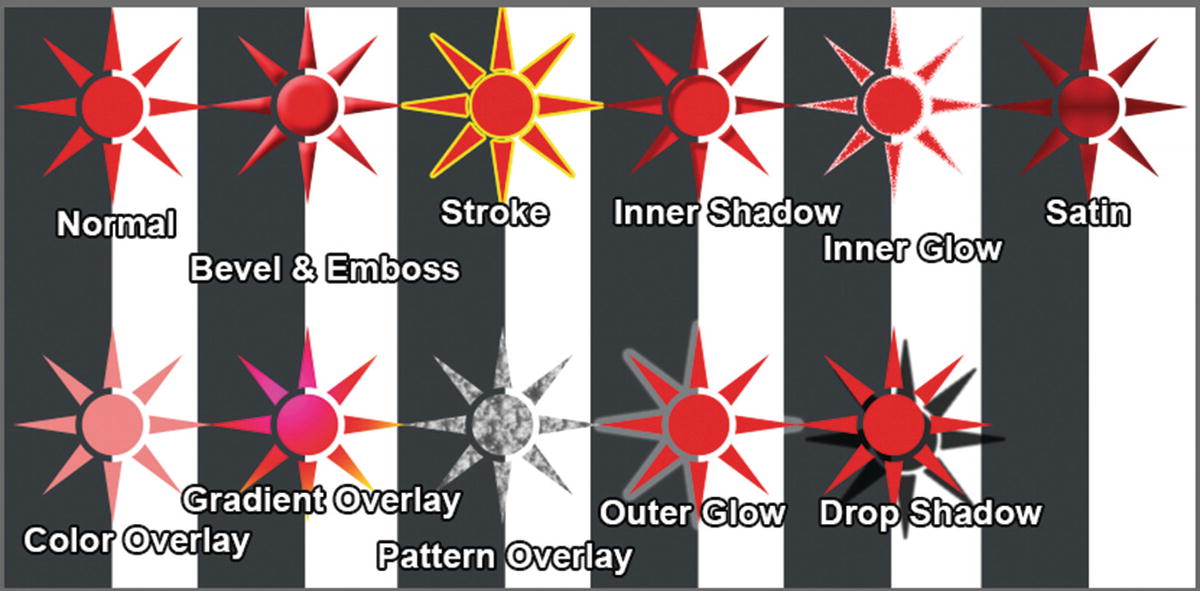
Each shape as a different effect (FX) applied to it
Illustrator CC Blending Modes
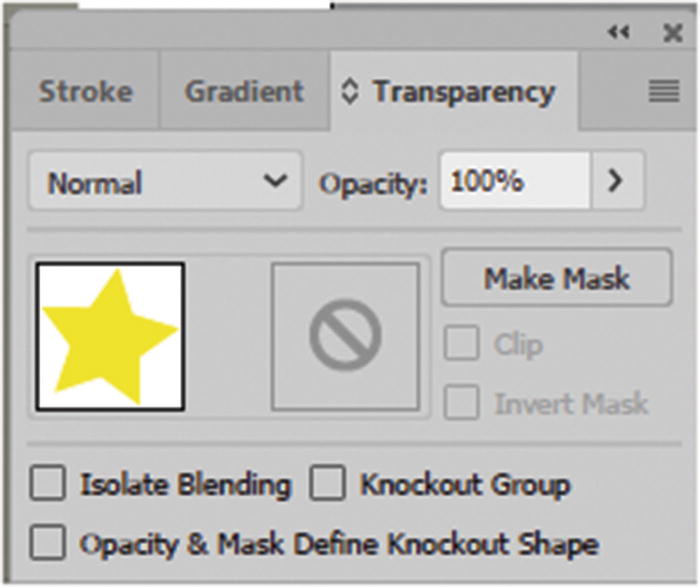
Add a blend mode to an object in Illustrator
There are only 16 blend options in Illustrator. This is due to how Illustrator handles the blending of vector images. If you need access to Photoshop’s blending options, you can always copy your Illustrator vector object as a Smart Object into Photoshop and use those blending modes instead.
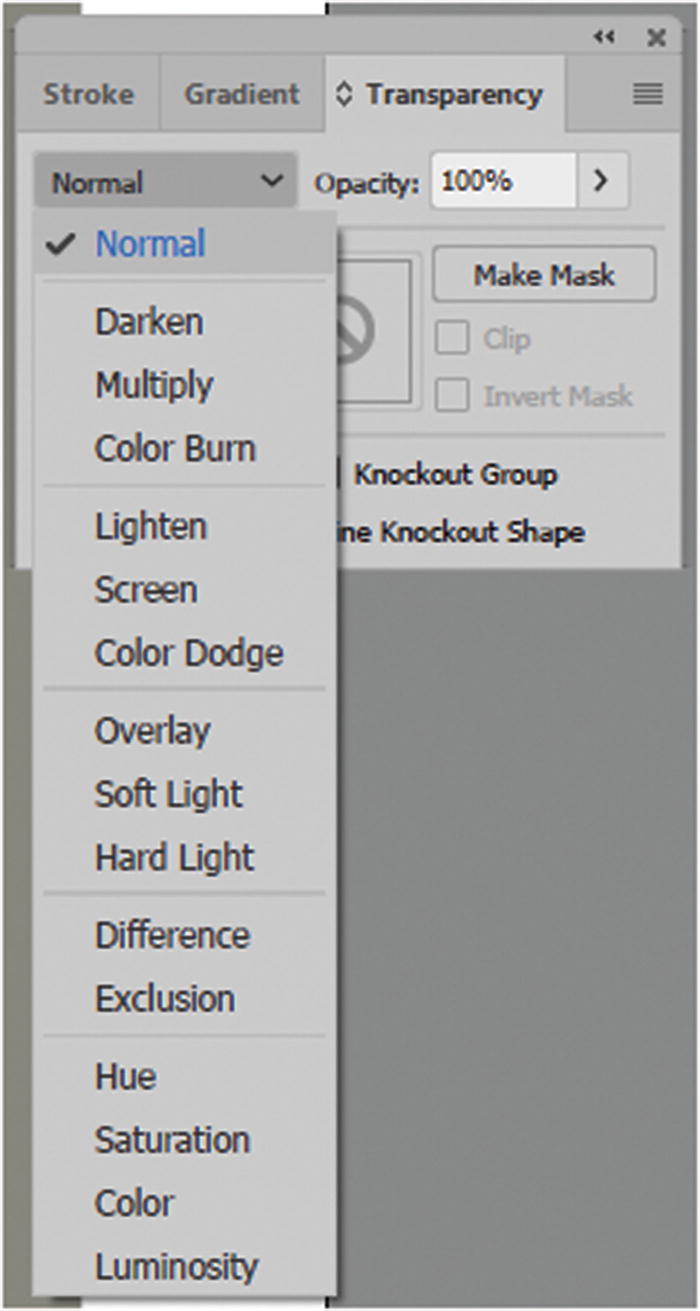
The drop-down menu for the blend mode options
Illustator Blending Modes
Normal -default | Soft Light |
|---|---|
Darken | Hard Light |
Multiply | Difference |
Color Burn | Exclusion |
Lighten | Hue |
Screen | Saturation |
Color Dodge | Color |
Overlay | Luminosity |
For more details on these Illustrator blending modes, visit https://helpx.adobe.com/illustrator/using/transparency-blending-modes.html .
Also refer to Adobe Illustrator CC Classroom in a Book by Brian Wood (Adobe Press, 2017) if you are unsure how to use these modes effectively.
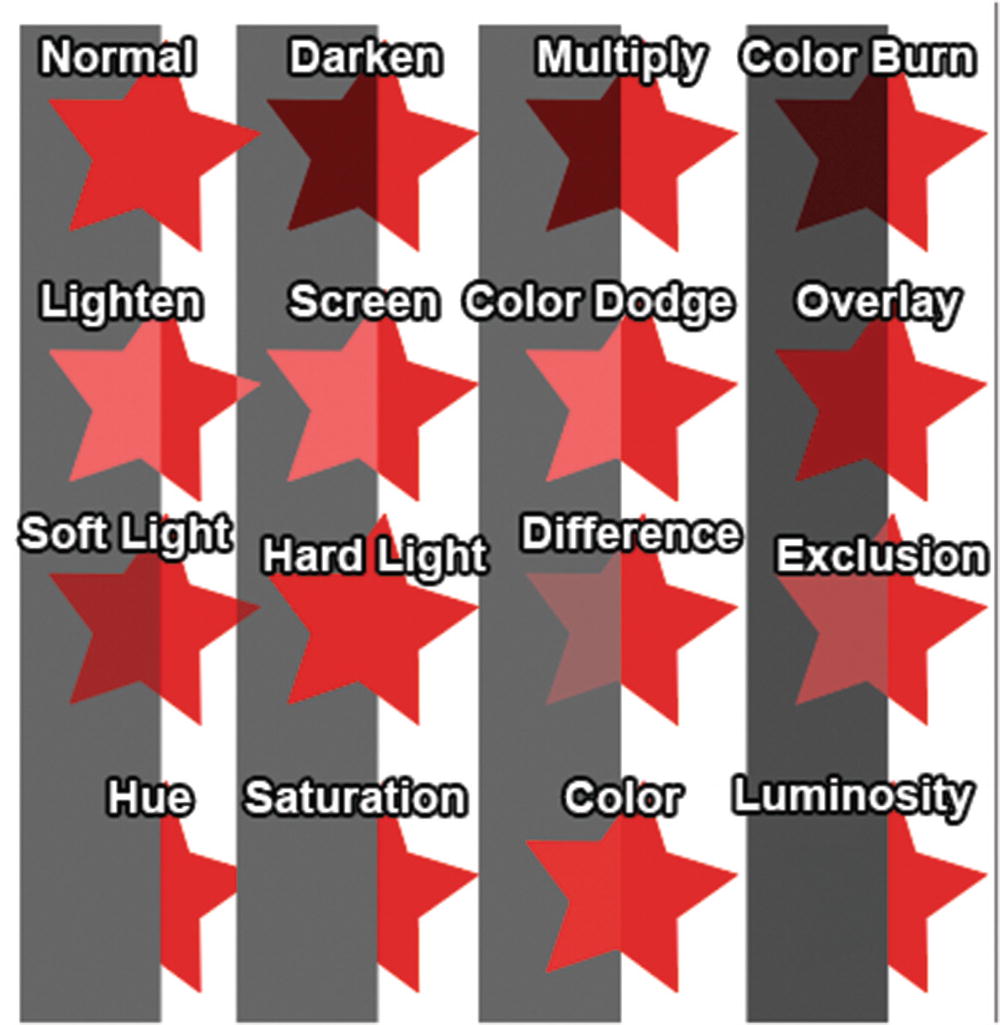
Different blend modes effect how each star appears on the background
Illustrator CC Effects FX

There are many effects that are similar to the ones found in Photoshop in Illustrator’s Effect menu
You saw in Chapters 11 and 15 that these could be edited in the Appearance panel.
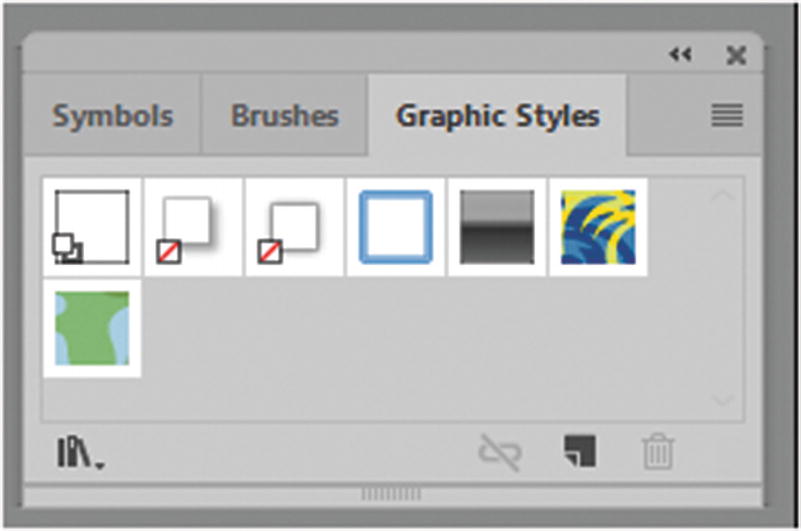
The Graphic Styles panel can store many prebuilt styles
You can add your own effects using the Appearance panel in the FX icon, as seen in Chapter 15.
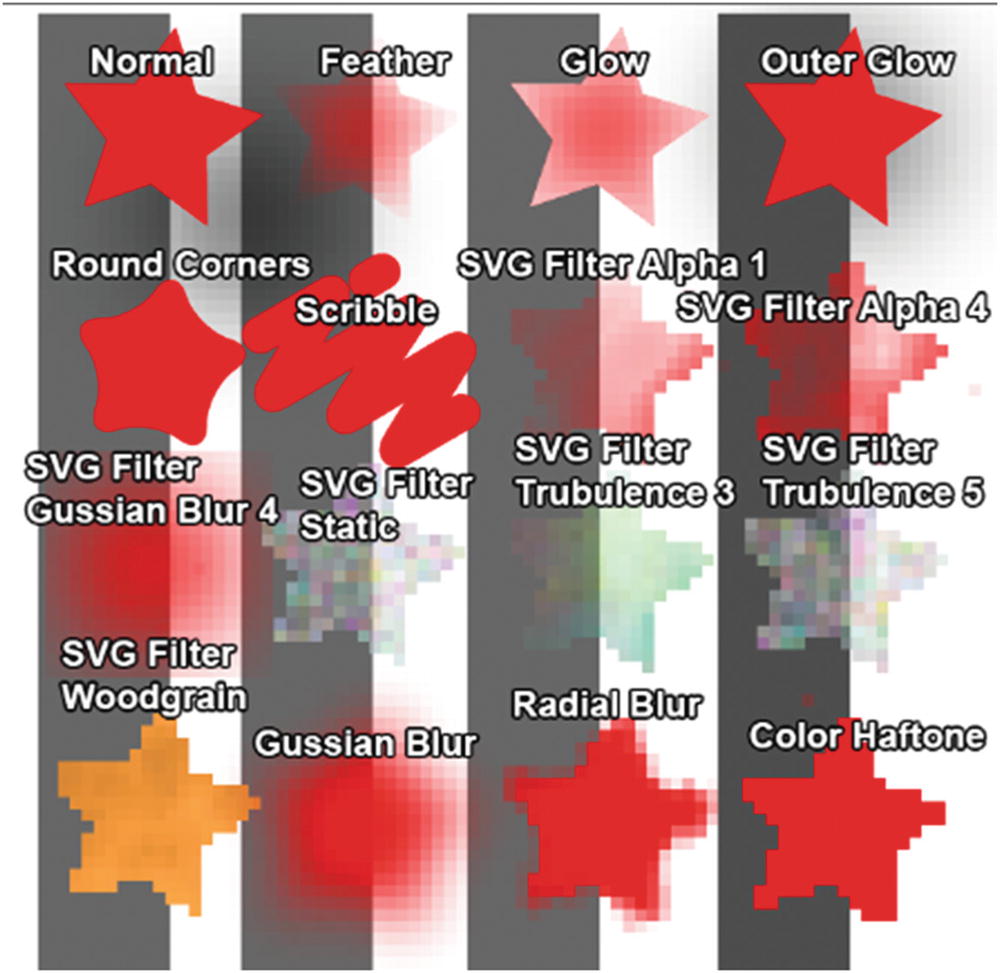
Applying effects (FX) in Illustrator to shapes
Importing into Adobe Animate
Now that you know more about blend modes and effects, let’s import these effects and filter from a Photoshop (.psd) file and an Illustrator (.ai) file.
If you have Photoshop or Illustrator open after you saved the files, you can now close those programs and return to Adobe Animate to start importing.

Show Advanced Options button for import
Hide Advanced Options button for import
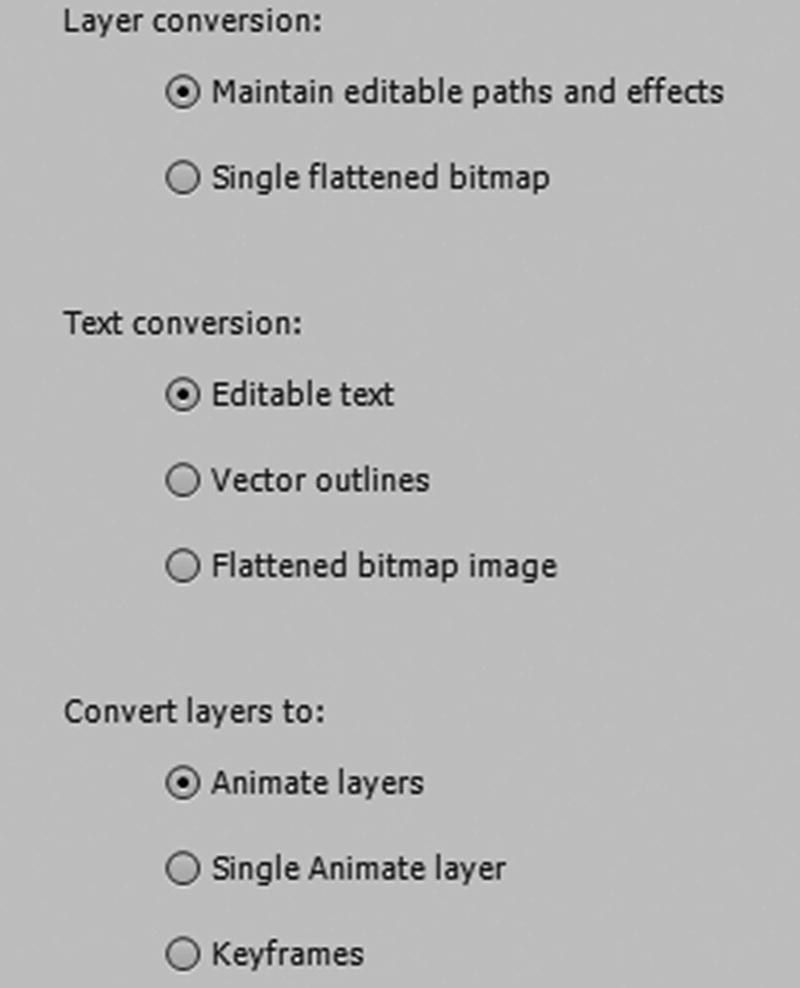
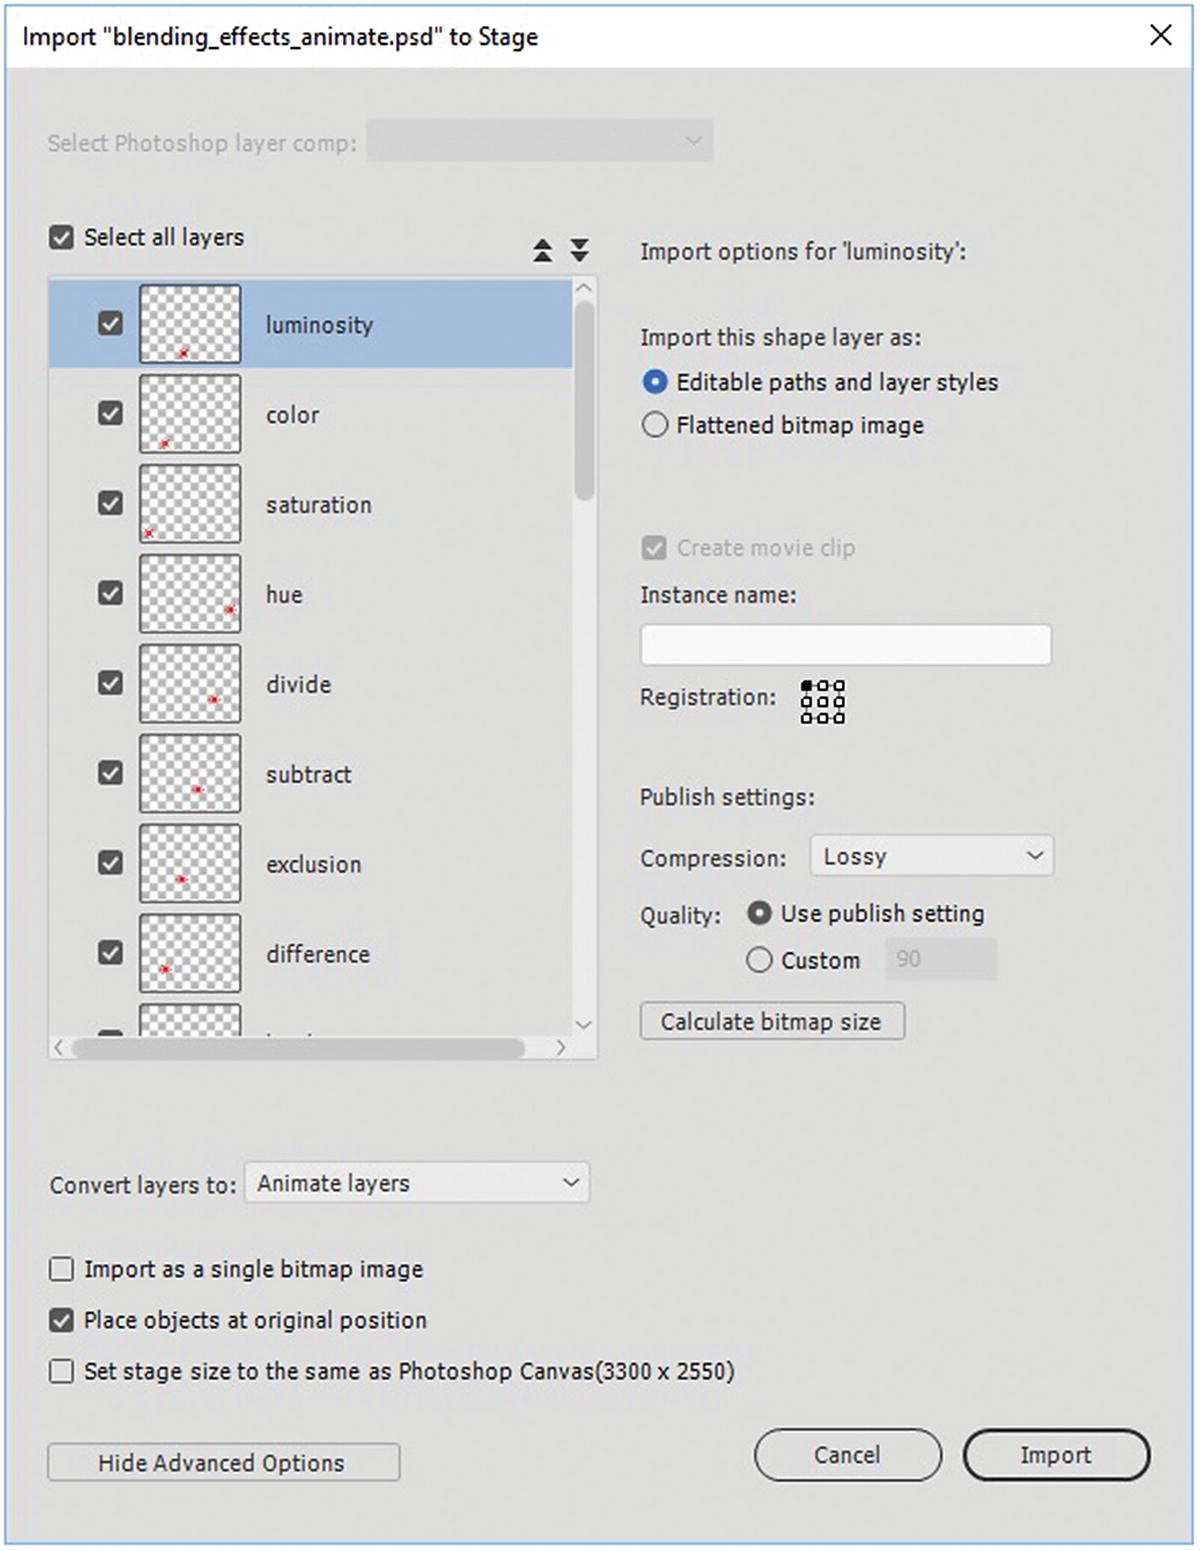
Basic import setting for all imported layers
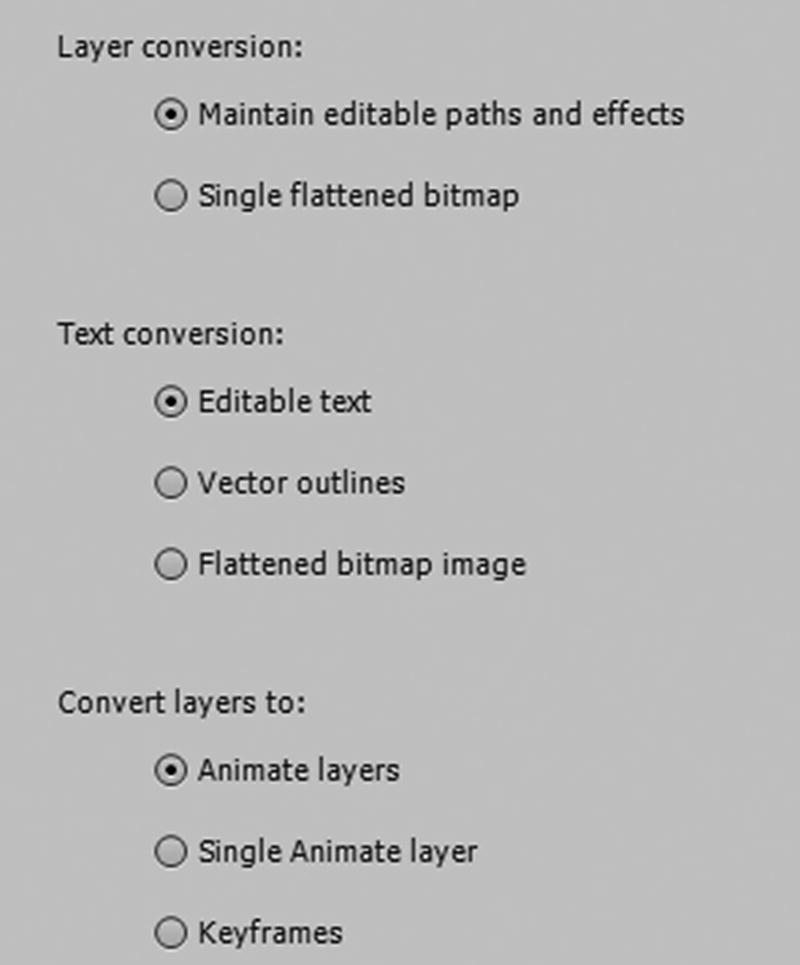
No matter which option you use, for this lesson, you want to make sure that you maintain editable paths and effects, and do not flatten, that any text remains editable and does not become an outline or a bitmap image, and that each item is set to individual Animate layers rather than a single layer or keyframe for an image sequence.
For now, stay on the Advanced settings option.
Photoshop PSD Import of File
When a Photoshop file only has one layer comp, then the layer comp option is unavailable
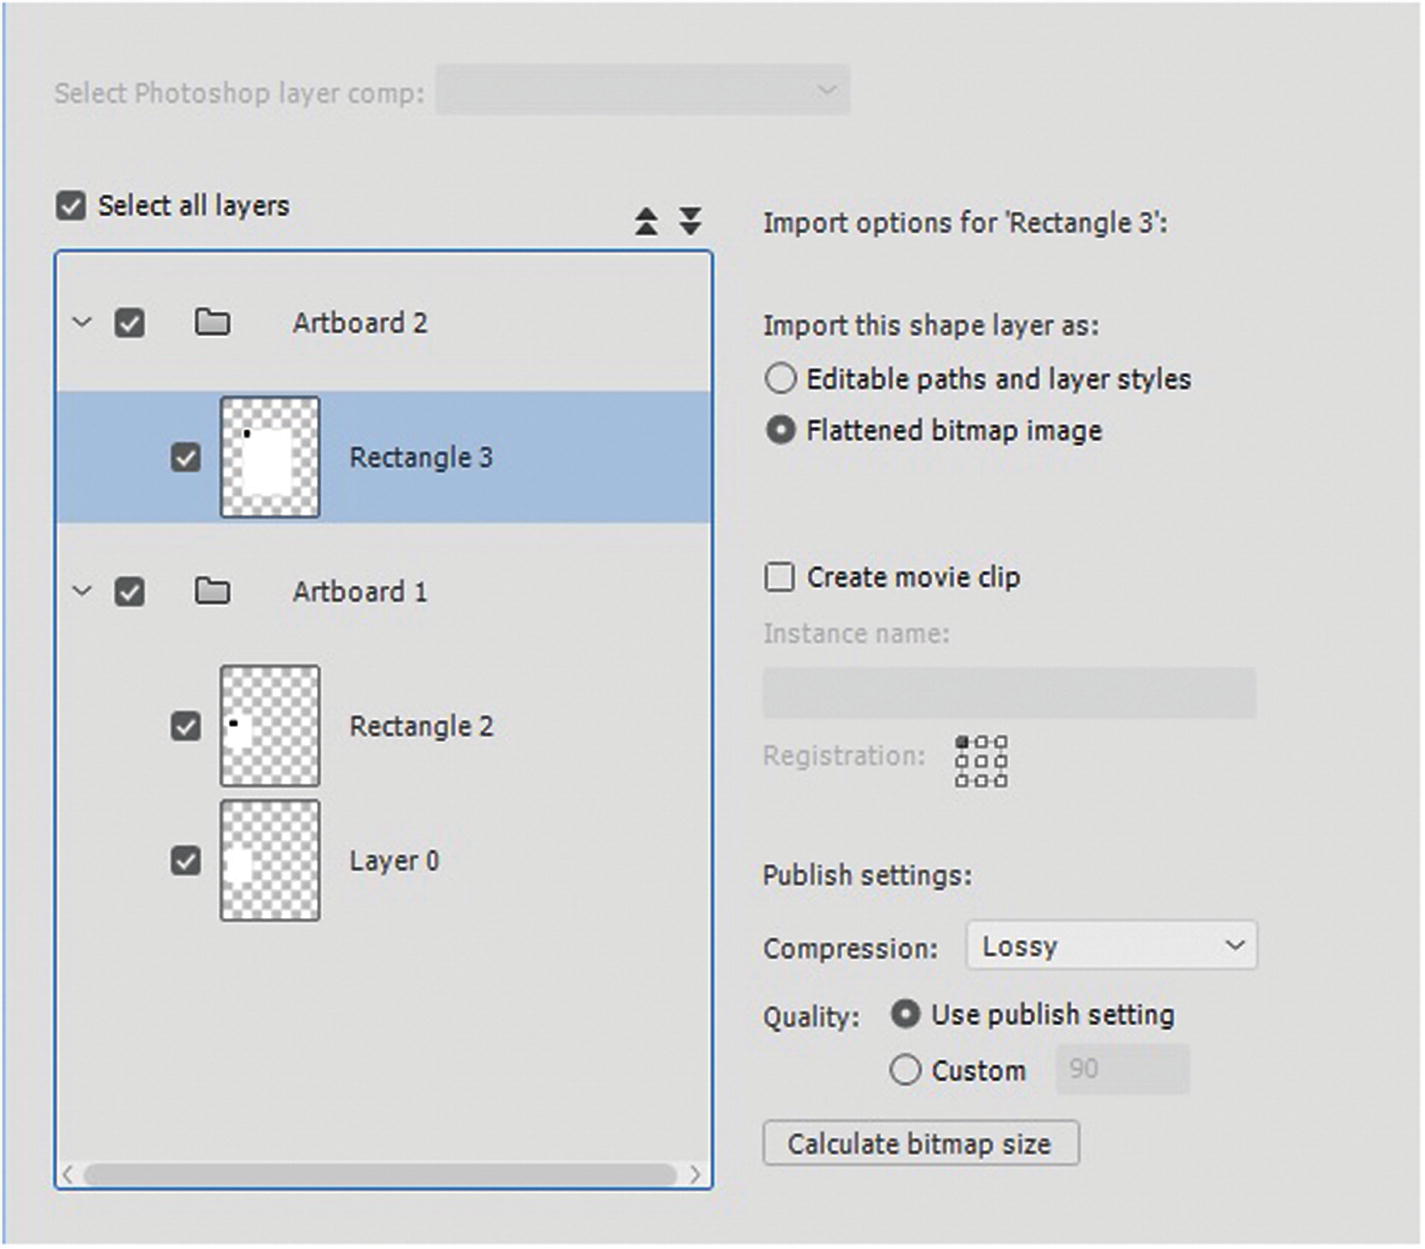
If your file contains artboards, this is how they will appear in Animate’s Import panel
Whether you have one artboard or two, the settings you choose in Animate will affect which layers you plan to import.
If there are folders or artboards in your file, the up and down double arrows above the preview allow you to expand and collapse all folders at once. Refer to Figure 19-20.
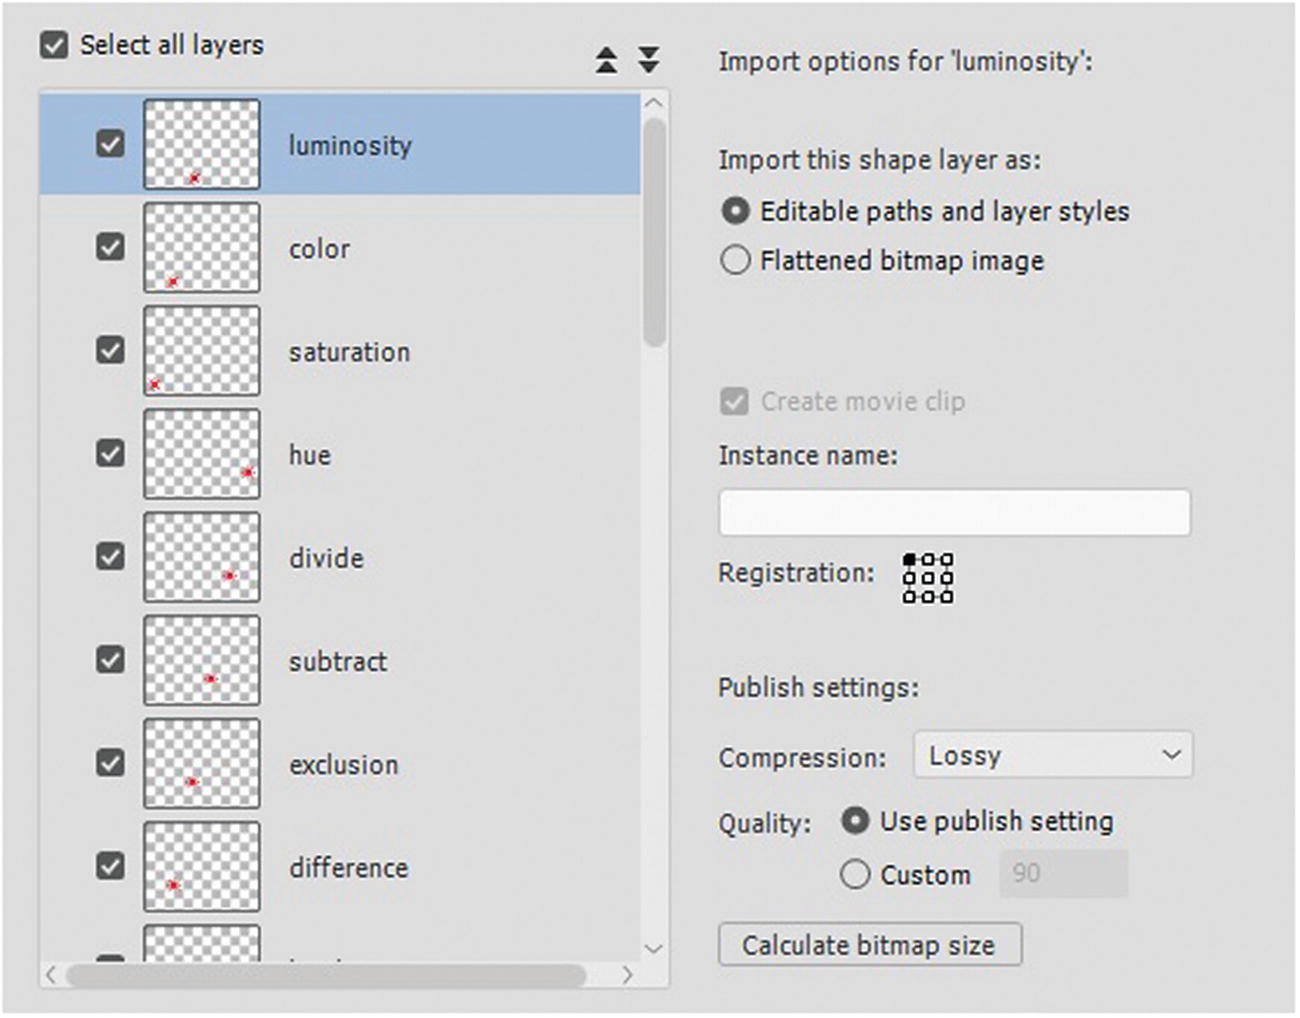
All layers have been selected
For example, you may have created a background in Photoshop that was only for testing how an object appeared on a certain color. You may not plan to use that background as part of the animation, so uncheck it.
Animate gives you two options on how to import a shape layer.
Editable paths and layer styles: This ensures that any paths (vector shapes drawn with the pen tool) or layer styles that you have created in Photoshop will import and you can still edit them within Animate. However, be aware that this is dependent on two conditions: the type of FLA format you chose (ActionScript 3.0 or HTML5 Canvas) and whether Animate supports that layer style. You’ll look at this shortly.
Note
Animate cannot import Photoshop Smart Objects as editable objects because they contain raster and vector elements. So, to retain the visual attributes of these Smart Objects, you must rasterize them and import them as bitmaps. You cannot import adjustment layers such as levels or invert and these must be applied and rasterize together with the layer you are altering in Photoshop. Also, HTML5 Canvas FLA can only import the first frame of a video’s layers in a PSD file. If you need more frames of the video to be in your Animate file, you have to flatten the frames into clips in Photoshop or import the video into a video component, as you will see in Chapter 20.
Flattened bitmap image: Rather than flatten your artwork in Photoshop, you can allow Animate to flatten the artwork. This is a good option if you find that Animate is not supporting the layer styles; however, this will cause that style to be uneditable in Animate, so always run a test to make sure you choose the right option.
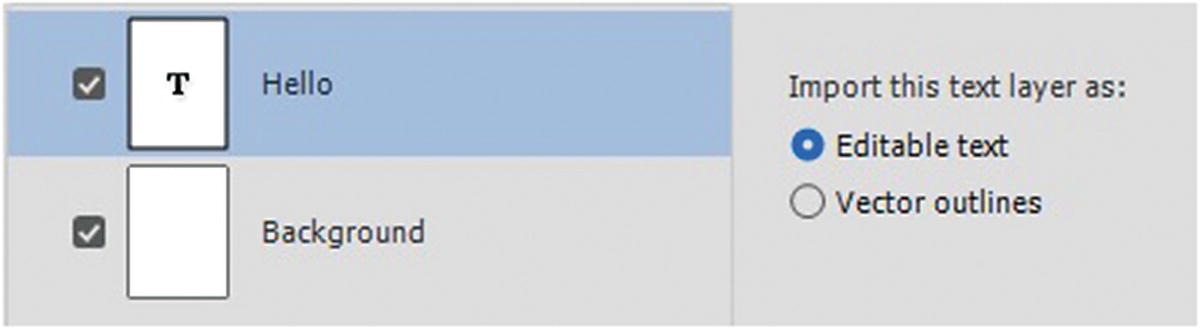
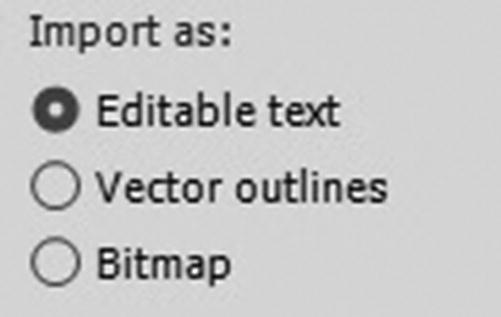
Choose the Import options for your text layer
Vector outlines: The text has an editable shape that you can scale, but you can’t retype the letters.
Flatten bitmap image: This option is removed in the 2019 version. The text becomes a bitmap graphic and can’t be accurately altered, as you would a vector or editable text layer; however, the basic shape and any applied effect on the font are retained to preserve the way it appeared in Photoshop.
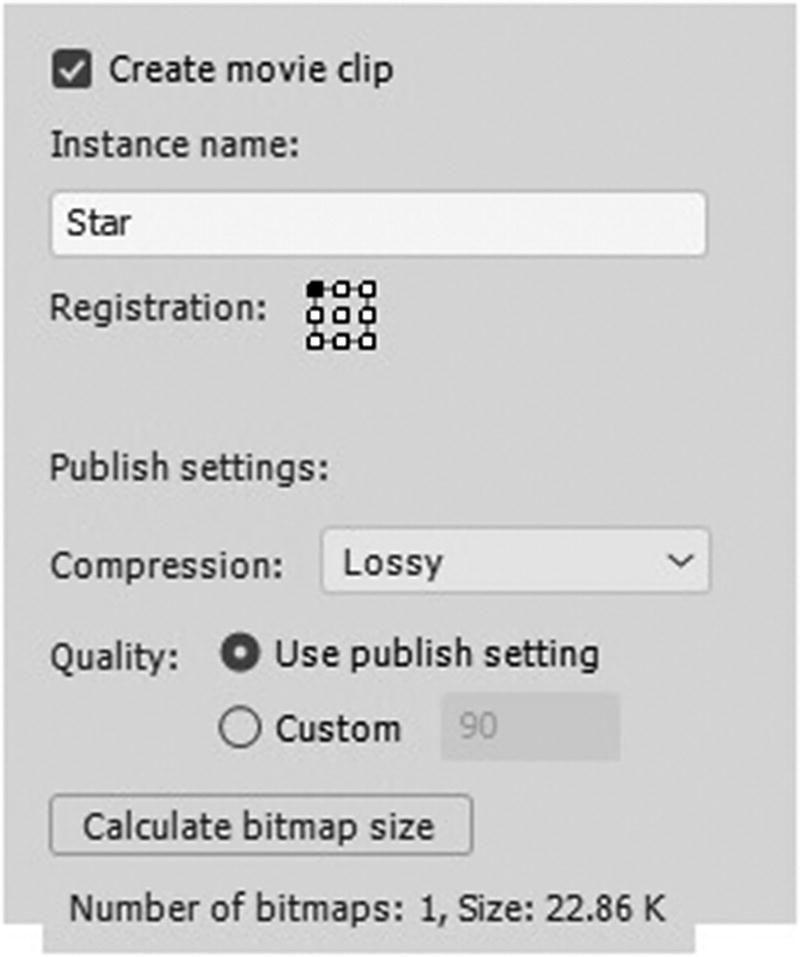
You can set a name for each layer as a movie clip symbol for the stage
Like the exporting of a graphic, you can set the quality of the import or publish settings. Compression can be lossy (compression of JPEG format) or lossless (no compression or a GIF or PNG format), and you can set a custom quality for the size. If you are worried the graphic may be too large, click the Calculate Bitmap Size button, which gives the file size. By Shift-clicking two or more layers in the preview, you calculate the file size of these bitmap shapes or layers collectively. You can then decide how these layers are converted and distributed.

Decide how you want your Photoshop layers to convert
Animate layers: Puts each graphic on its own layer. This is good if each item is to move separately in the keyframes.
Single Animate layer: If all the layers are part of one background, then they appear on one layer and not separately.
Keyframes: Puts each layer on its own keyframe. This is good for stop-frame animations where one character needs multiple keyframes to create a movement, such as jumping or running.
Import as a single bitmap image: Ensures that all the layers import as one bitmap. If you don’t want this to happen, leave it unchecked.
Place objects at original position: Ensures that the shapes remain in the same place or coordinates that they were in Photoshop in relation to the other layers, regardless of the size of the Animate stage.
Set stage size the same as Photoshop Canvas (# X #): Increases or decreases the size of your Animate stage or canvas to match whatever size the Photoshop canvas is. With multiple artboards of varying sizes from Photoshop, Animate chooses one size for all the layers and not the different artboard sizes. If you don’t want your Animate stage to change, leave this box unchecked; some shapes will appear outside the canvas until you drag them to a different location.

Click the Import button so that the layers can import to the stage

The Output file gives a warning message if certain effects do not apply in the Animate file
If these effects do not retain simply, Edit ➤ Undo right away to remove the graphic from the stage and Library panel, and then re-import those layers as bitmaps. Alternatively, you may be able to reapply some settings using Animate, as you will see shortly.
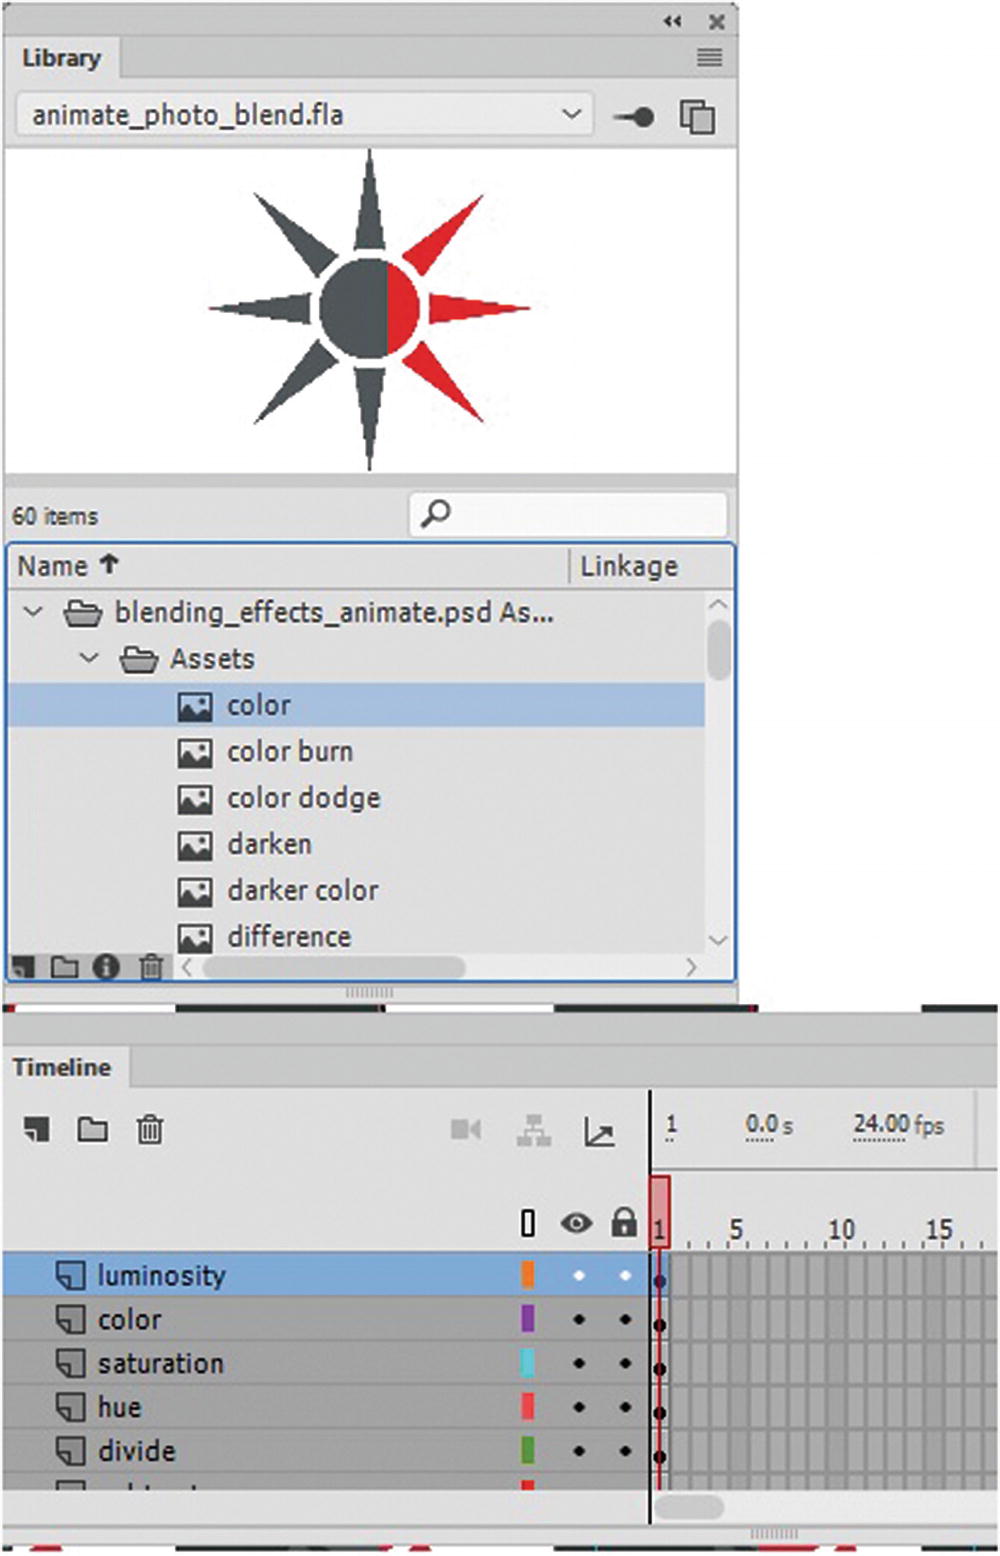
Each of the layers were imported into the Library and Timeline panels appearing on the stage
Important Tip
Photoshop CC does a better job of scaling your images than Animate, so if your images are too large on the stage, make sure to scale it to the correct size in Photoshop before you import.
Illustrator AI Import
Importing an Illustrator (.ai) file to the stage is very similar to importing a Photoshop (.psd) file; however, there are a few key differences. Use the blendmode_stars.ai and blendmoded_stars2.ai files for this example.
Basic import setting for all Illustrator layers
Select Illustrator Artboard: If your file has more than one artboard, you can choose the artboard from the drop-down menu that you want to import the objects from. Refer to Figure 19-30.
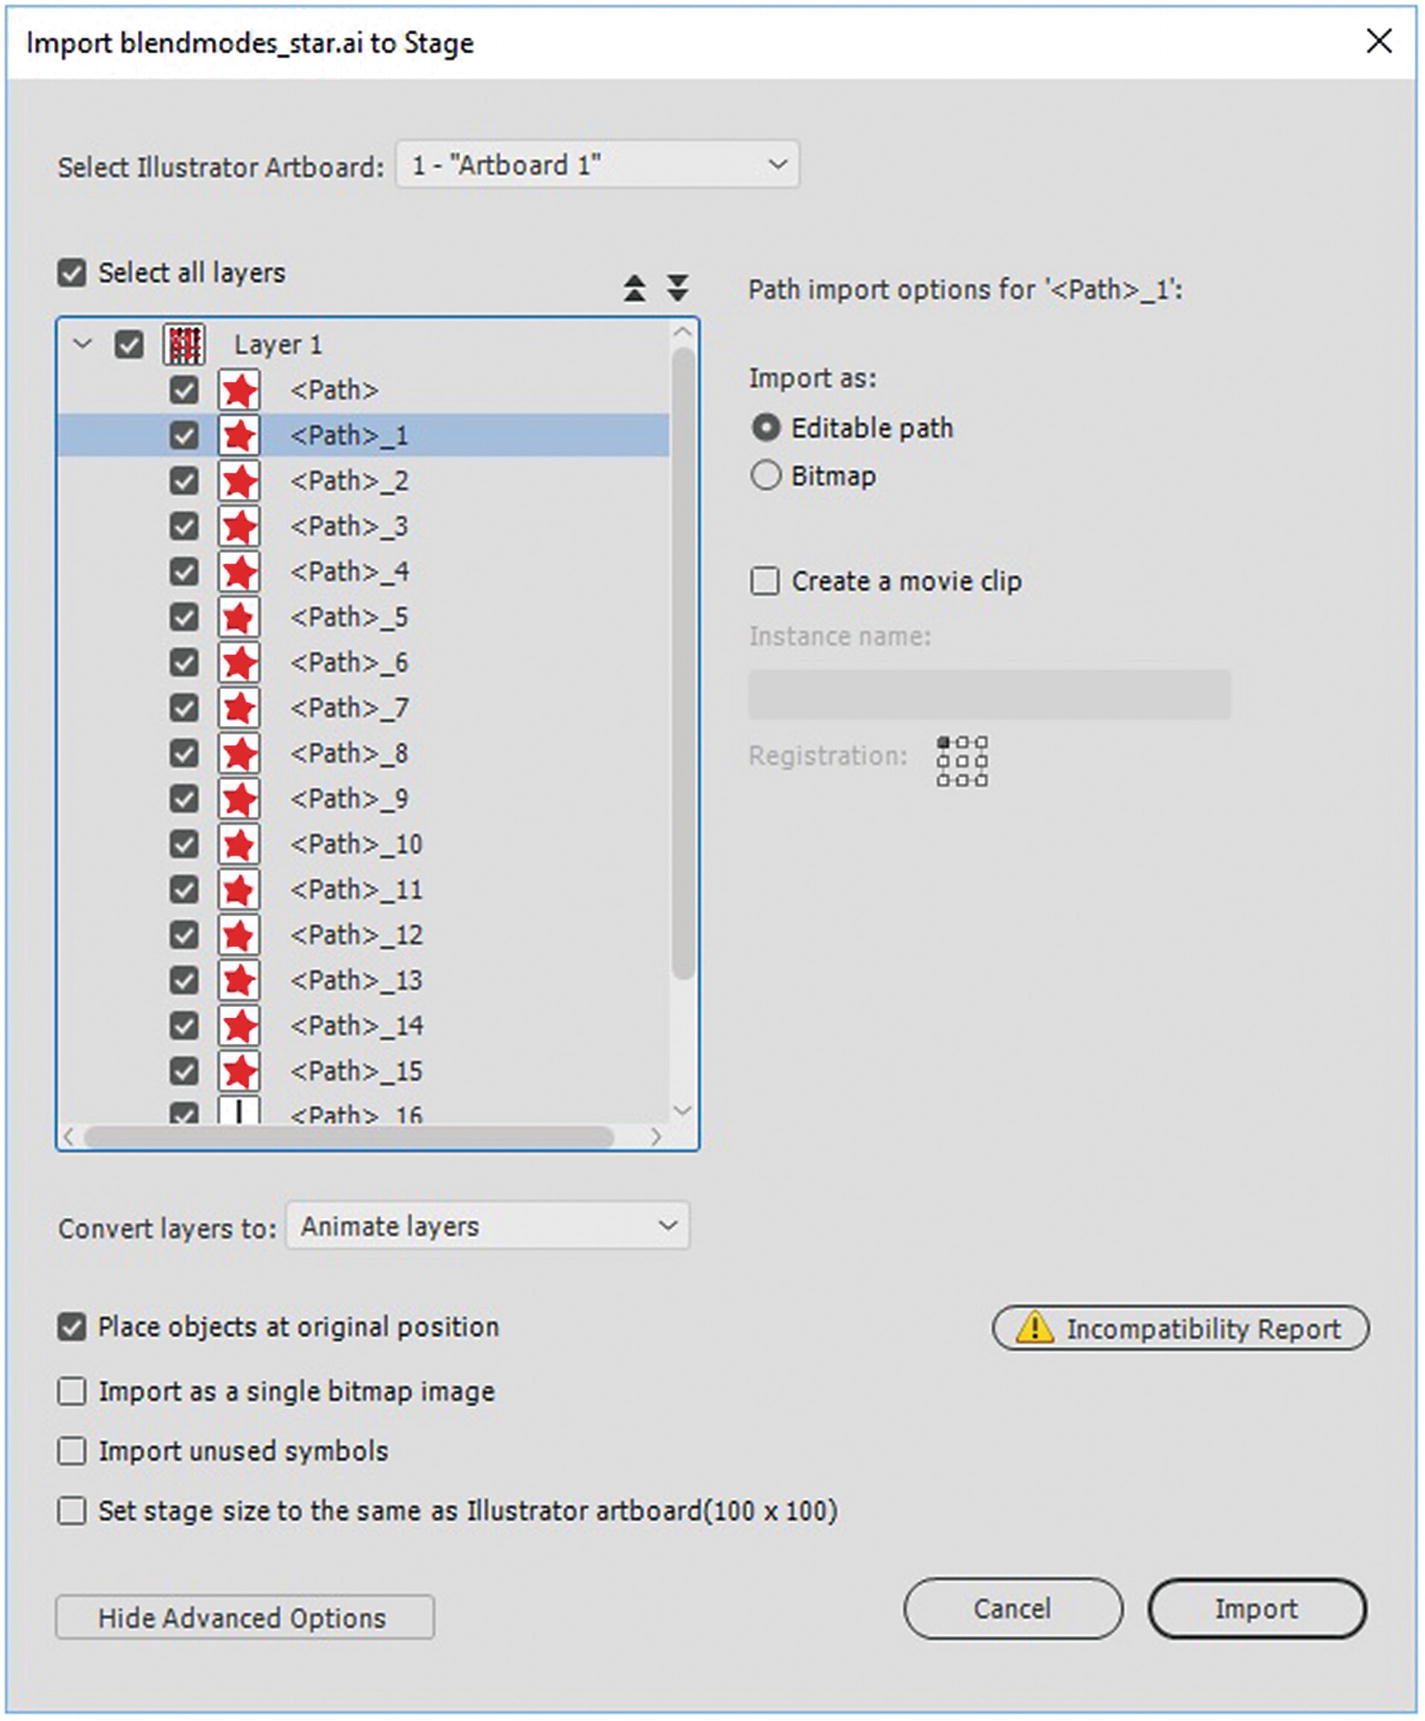
Import all layers and sublayers to the stage
As with Photoshop PSD import, you can select all layers or chose the layer that you want to alter.
Import as: Allows you to set the settings for each object you plan to import.
Editable Path: The path or shape remains editable. Illustrator symbols import as Animate symbols if on a layer. Clipping masks, transparency, pattern strokes, and fills are preserved.
Bitmap: The shape is changed to a bitmap image.
Choose how you want you Illustrator files’ text to import

Set a name for your movie clip
However, you cannot alter the quality of the image as you could with the Photoshop (import) because you are working with vectors, and not bitmap shapes.
Animate layers: Puts each graphic on its own layer. This is good if each item is to move separately in the keyframes; however, be aware that all sublayers import as one layer, so make sure to put each object on its own layer, or only import to the Library panel if you don’t want the sublayers to appear together. Refer to Figure 19-33.
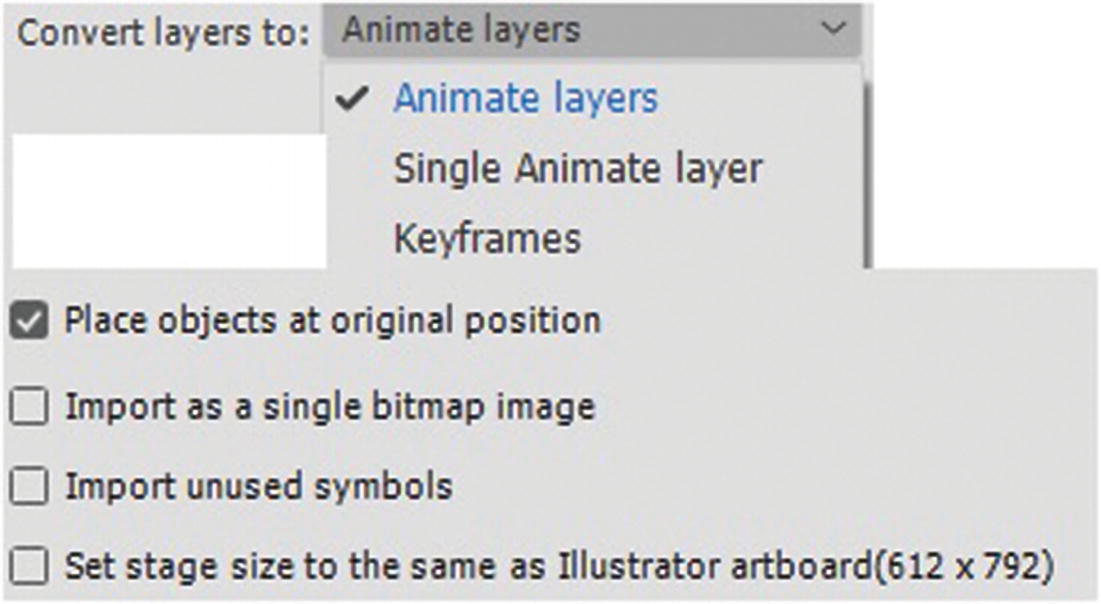
Convert Illustrator layers on import
Single Animate layer: If all the layers are part of one background, then they appear on one layer, and not separately.
Keyframes: Puts each layer on its own keyframe. This is good for stop-frame animations where one character needs multiple keyframes to create a movement, such as jumping or running.
Place objects at original position: Ensures that the shapes remain in the same place in relation to the other Illustrator layers as they appeared in Illustrator regardless of the size of the Animate stage.
Import as a single bitmap image: Ensures that all the layers import as one bitmap. If you don’t want this to happen, leave it unchecked.
Import unused symbols: Imports the unused symbols.
Set stage size the same as Illustrator Artboard (# X #): Increases or decreases the size of your Animate stage or canvas to match the size of the Illustrator artboard. If you don’t want your Animate stage to change, leave this box unchecked.
Choose Import to import your Illustrator layers
Note
Before import, the dialog box will generate an incompatibility report. You can review this for issues before you import your Illustrator layers or choose to ignore and import the layers. Check “apply recommended import settings” and Click OK to Exit and the warning will disappear. Refer to Figure 19-35.
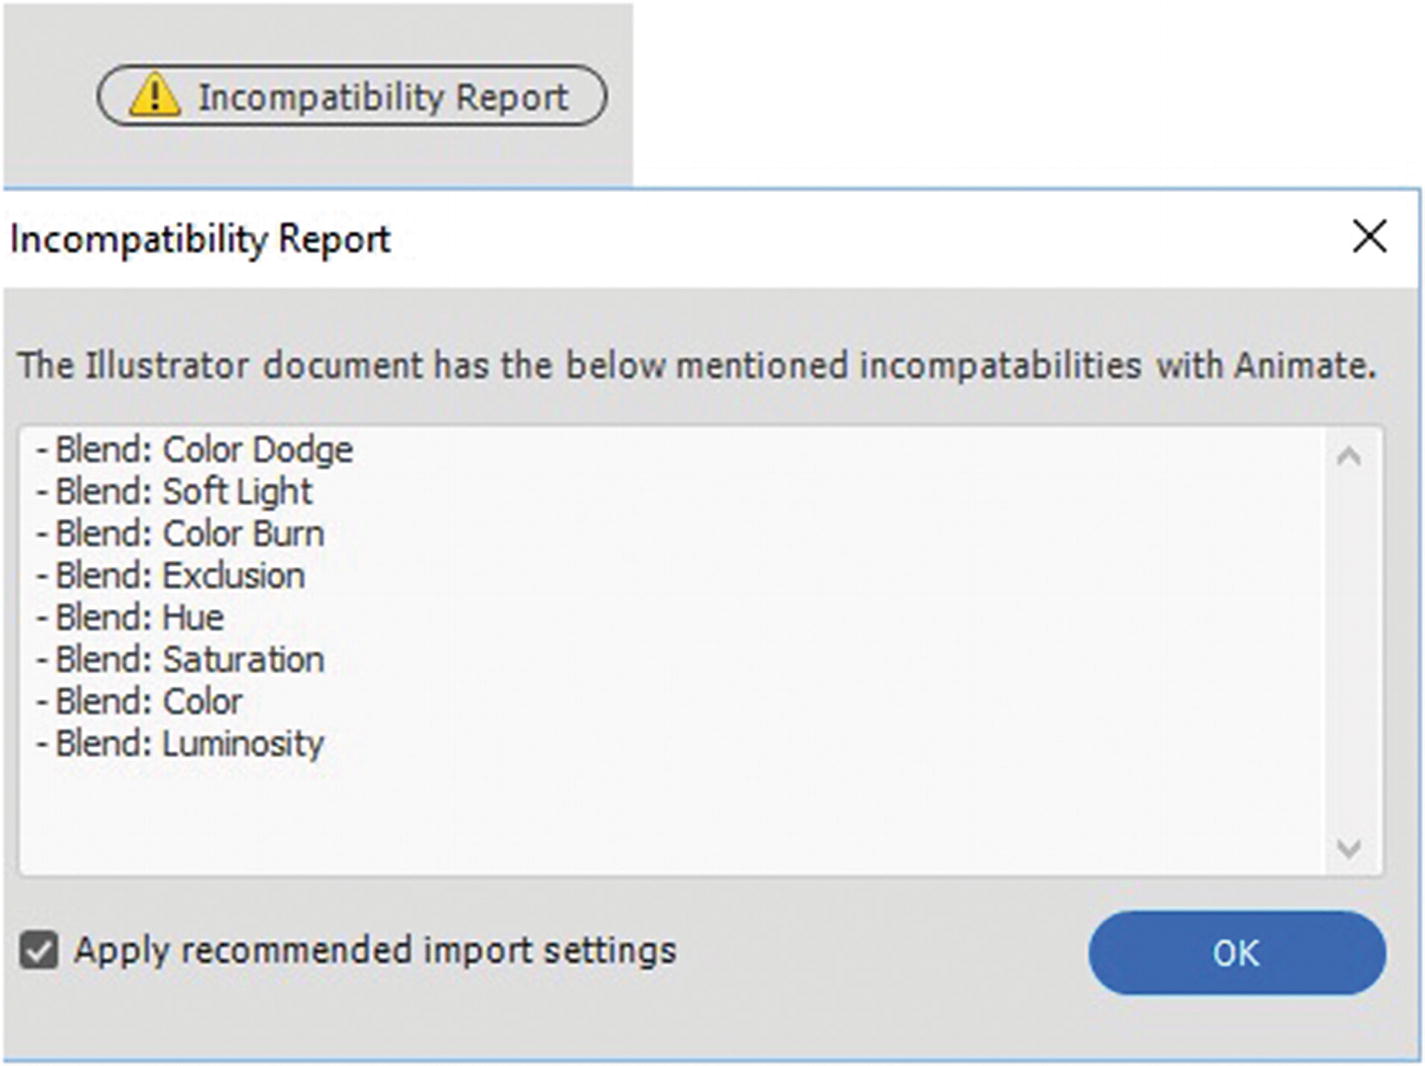
Review the Incompatibility Report for issues with blends or effects
As with Photoshop, upon clicking Import, you may discover a warning in the Output panel about some effects not being applied. If these effects do not retain, simply Edit ➤ Undo right away to remove the items from the stage and Library panel, and import these layers again as a bitmap. Alternatively, you may be able to reapply some settings using Animate, as you will see shortly.
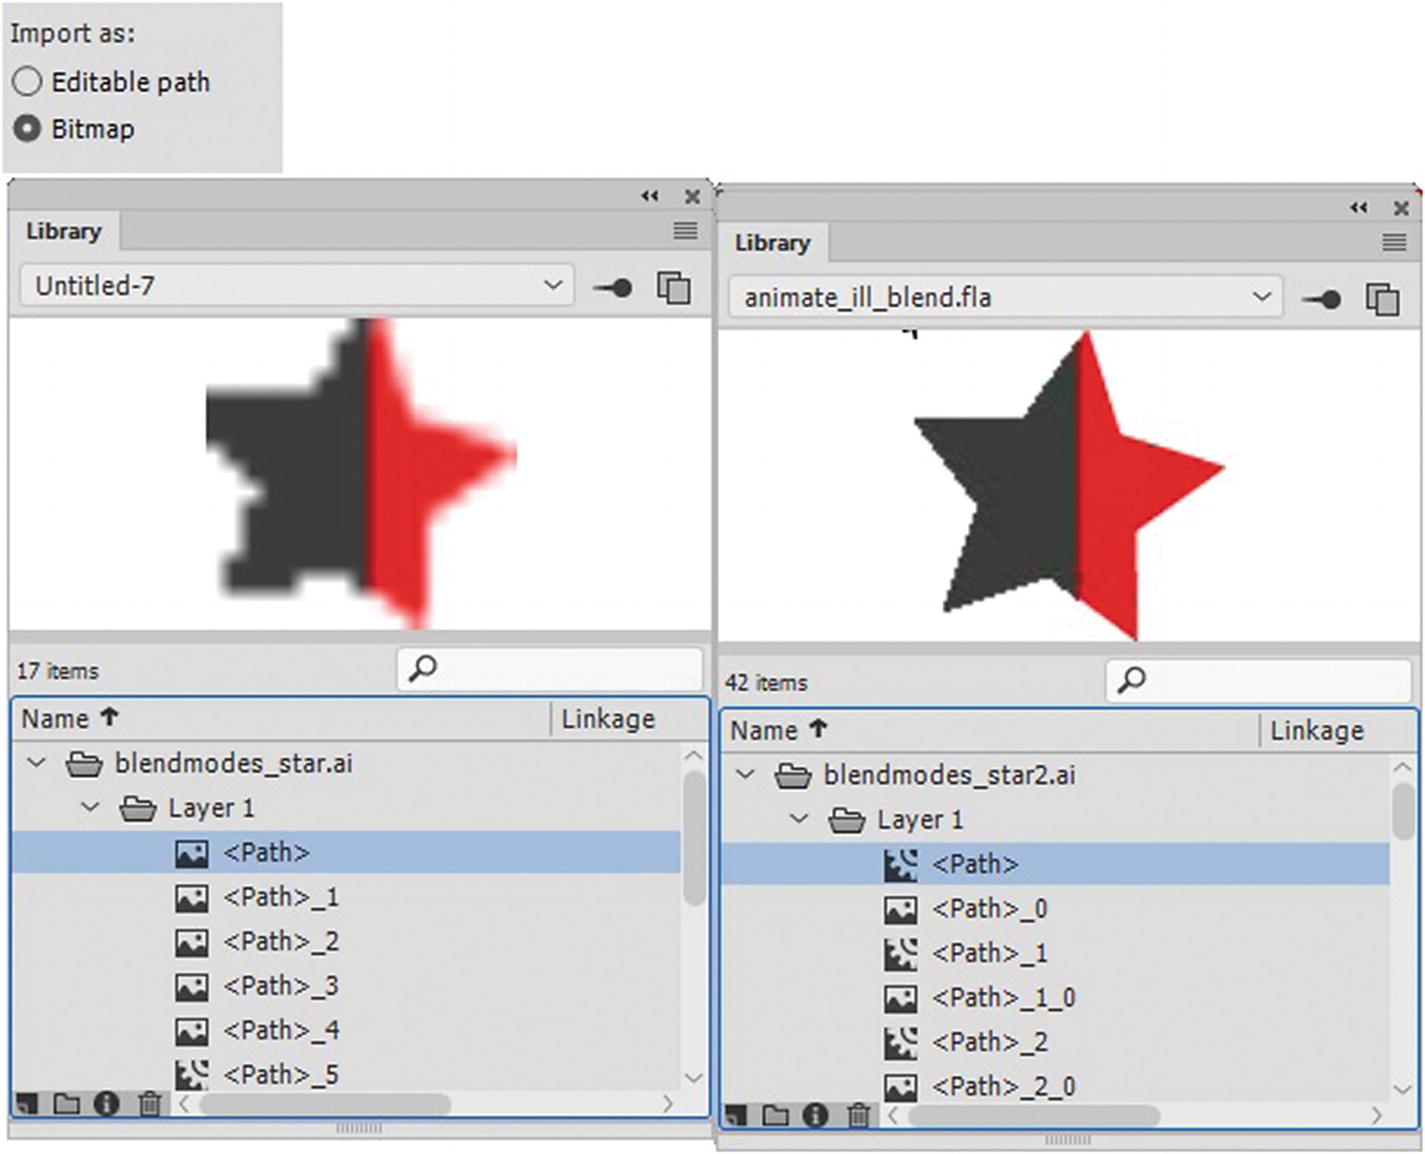
If the Illstrator objects you import as a bitmap are too small in Illustrator, they may appear too low resolution
In the HTML5 Canvas file, if you find that the resolution is too low upon import, make the shape a bit larger in a new Illustrator file. Illustrator imports at the size that the shape is on its artboard so if it is very small it may be very blurry. By increasing the size of the shape in a new file before importing, you get a better resolution of the effect that you are making into a bitmap. You can always scale the symbol down in Animate later without affecting the bitmaps quality. Refer to the animate_ill_blend.fla file.
Note
If you only have one shape that you want to quickly paste into an Animate layer rather than import, while in Illustrator with a shape selected you can Edit ➤ Copy and then in Animate choose from the menu Edit ➤ Paste in Center, this will add the shape directly into an FLA file onto the stage into the current keyframe. In some cases, you may find that this method preserves some blend settings; however, you have the option to either import a shape or a grouped object as a bitmap or keep the AI Importer preferences; either way, you have to make the pasted object a symbol to add it to the Library panel. Refer to Figure 19-37.
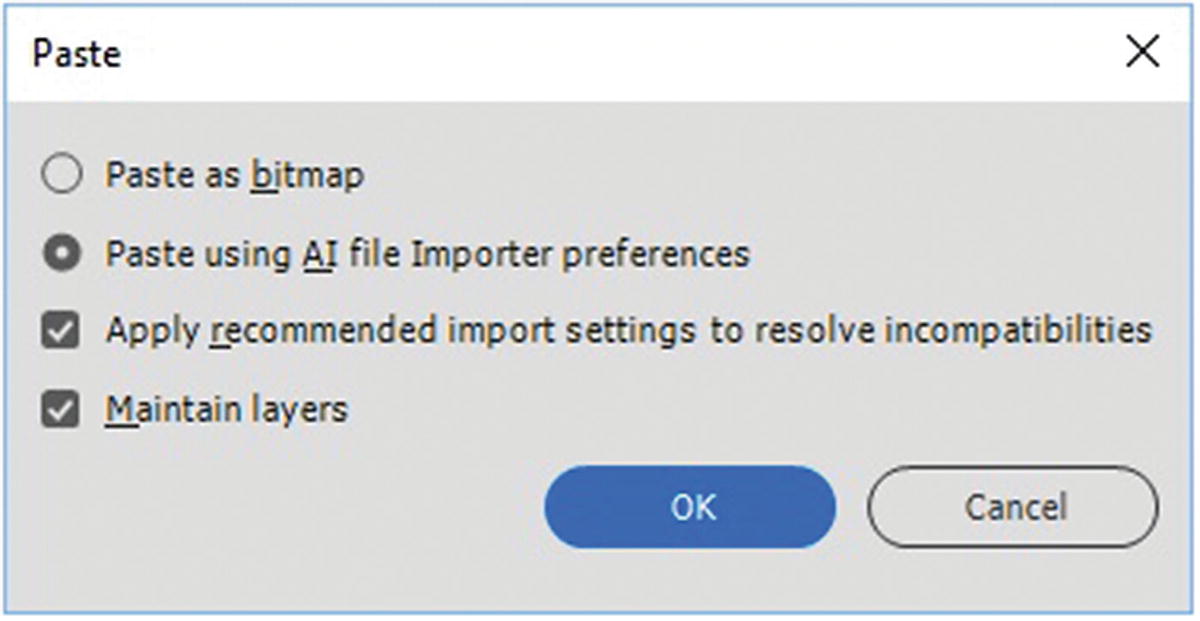
You can paste Illustrator objects directly into Animate
Whether you import into an ActionScript 3.0 or HTML5 Canvas FLA file, if your Photoshop or Illustrator files have no effects applied to them when you import, leave them as editable, as this preserves the best quality of that graphic.
Animate CC Effects
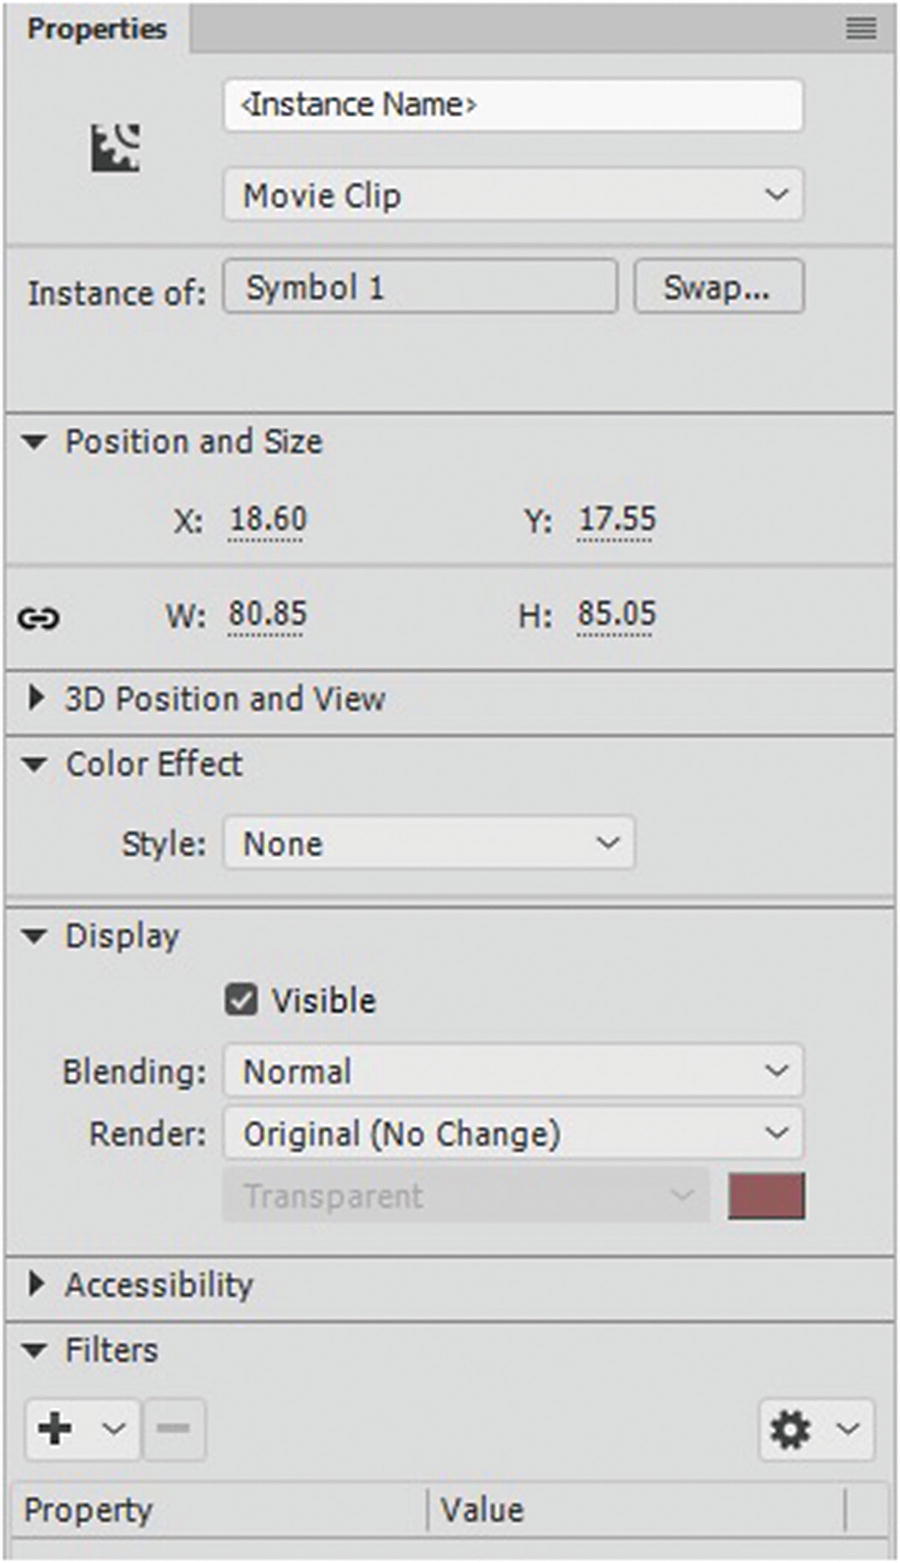
For movie clip symbols, the Properties panel allows you to adjust the effects of the symbol
Note
If you are using an ActionScript 3.0 FLA file, you have access to all of these options; however, with an HTML5 Canvas FLA, some JavaScript has not caught up yet to some blending modes and filters, so they are not available in this format. If you need to retain these effects from your Photoshop or Illustrator files, make sure to rasterize the artwork as a bitmap as mentioned in the “Illustrator AI Import” section of this chapter.
Working with Symbols
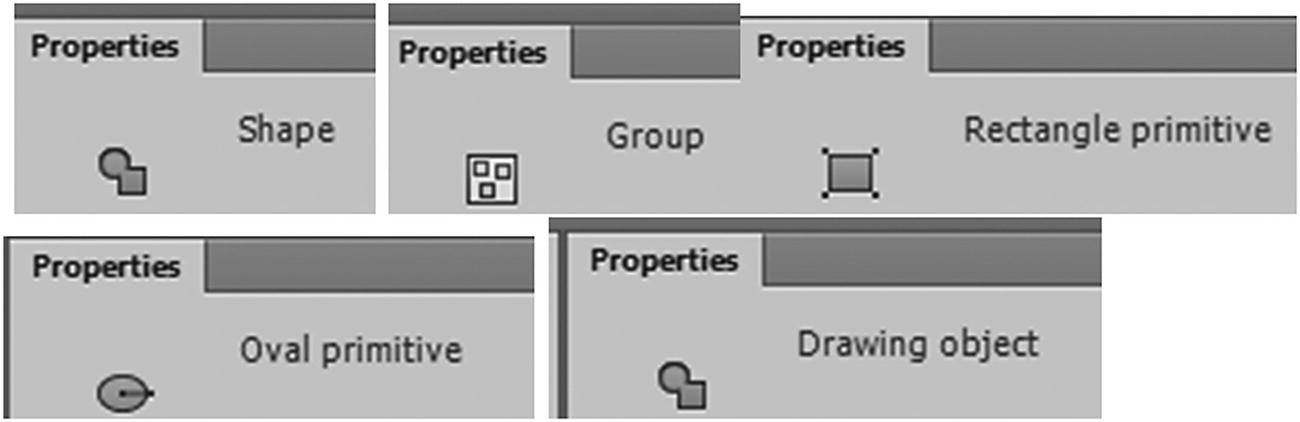
These shapes or primiatives cannot have color effects applied to them
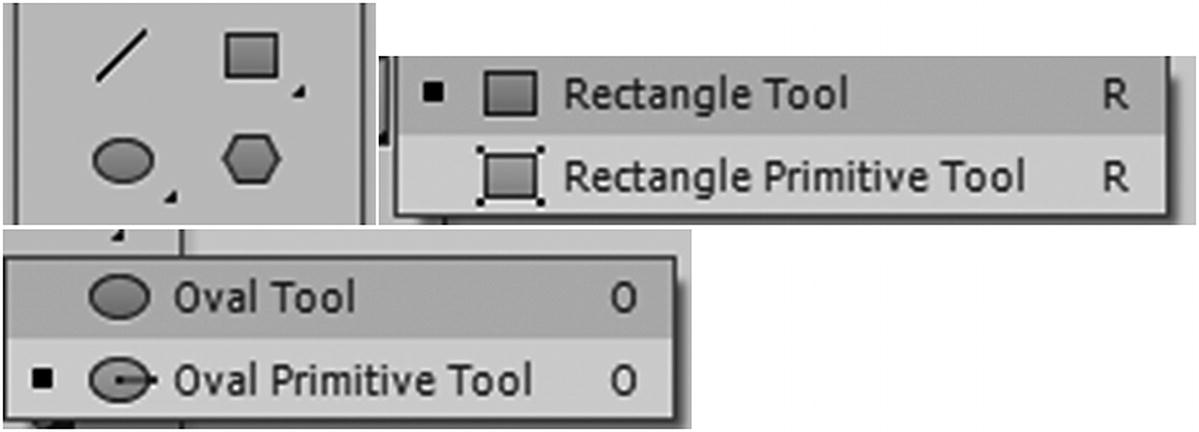
Tools used to create shapes and primitives
Note
These shapes follow a type of edit hierarchy of least to most destructive. Primitives are like Smart Objects and maintain some editing options in the Properties panel. They can then be downgraded to a drawing object via the Properties panel (see Figure 19-41); this is how an object acts in Illustrator that keeps its stroke attached. The drawing object is then downgraded to a shape using break apart icon where parts or sections become detached. A shape can be upgraded to a drawing object, but not a primitive. Primitives, objects, and shapes can be grouped with Modify ➤ Group or Ungroup for easier movement on stage. Regardless, none of these are symbols.

Primatives can become objects or broken appart using the Properties panel
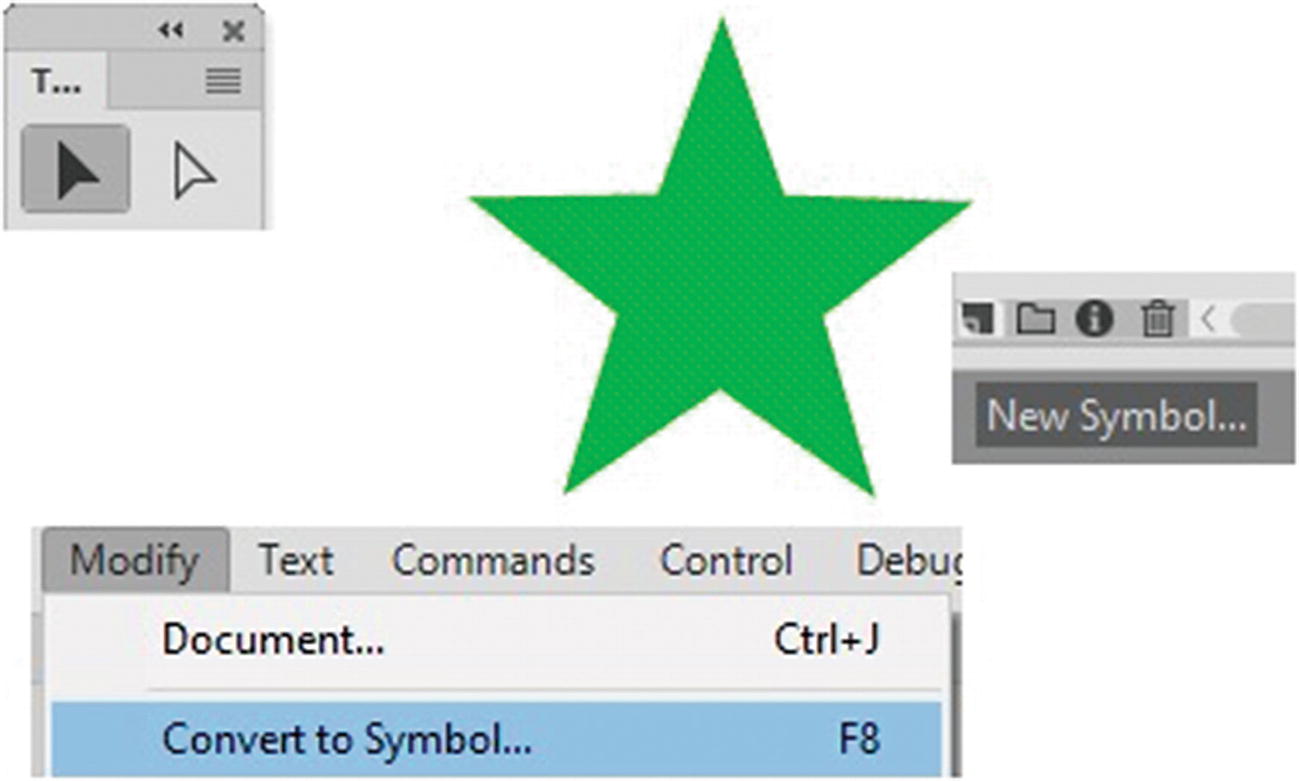
Convert a shape to a symbol or create a new blank symbol
Tip
If the Selection tool(V) touches the inside of the shape it will select only the fill and you can drag it away from the Stroke. The Subselection tool(A) can only select points on an object, but it will not separate the fill from the stroke, so they move together as fills and strokes do in Illustrator or like a drawing object.

Give your symbol a name and a type
Note
The Advanced tab options are only available to ActionScript 3.0 FLA files, not HTML5 Canvas FLA files. We are using ActionScript 3.0 only for creating videos (.mov), not SWF files, so this Advanced area is not relevant to the chapter.
Movie clip: A graphic or contains nested animation.
Button: Creates animated buttons.
Graphic: Used for backgrounds or symbols that don’t require movement on the stage. They can also be used in the Frame Picker panel, as you will see in Chapter 21. Refer to Figure 19-44 to see how the three different symbols appear in the library.
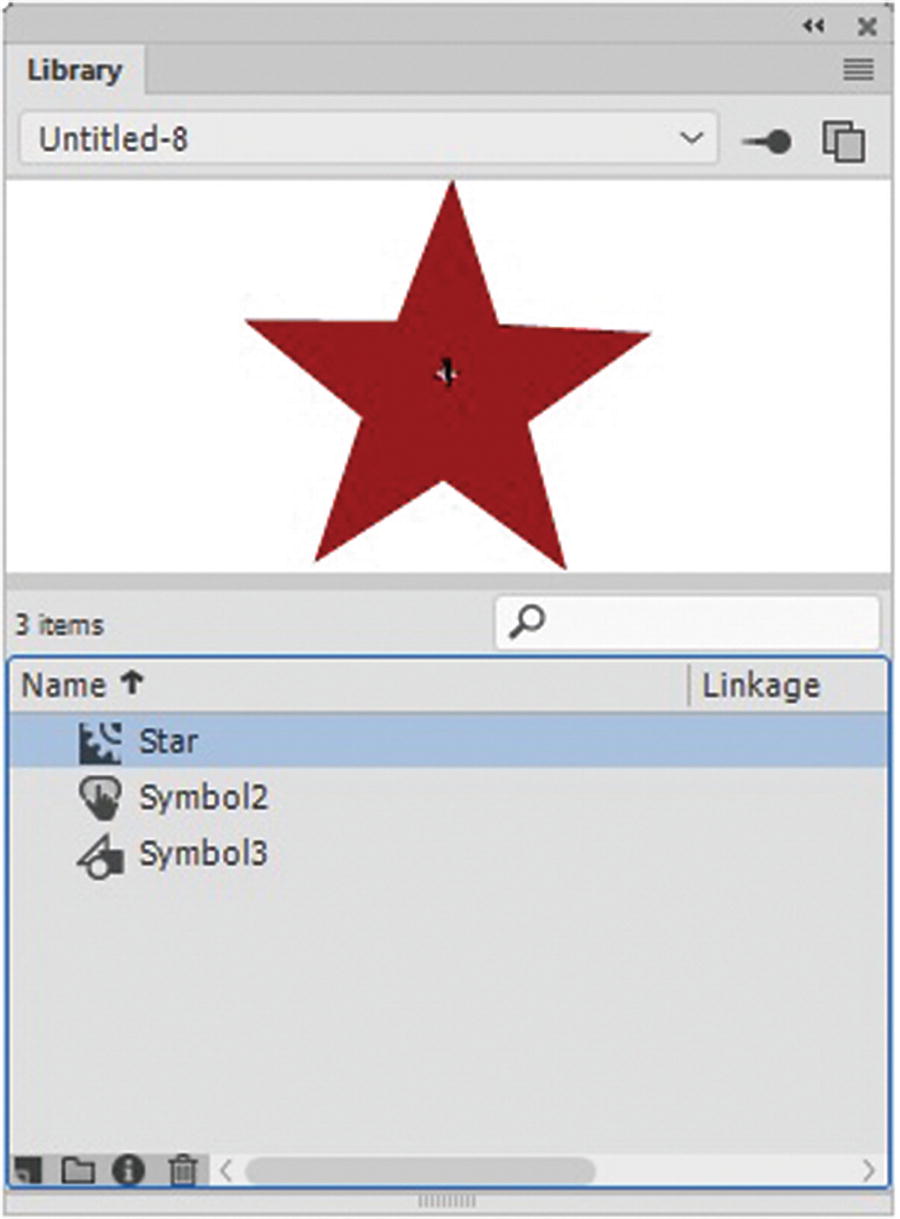
Movie clip, graphic, and button symbols in the library
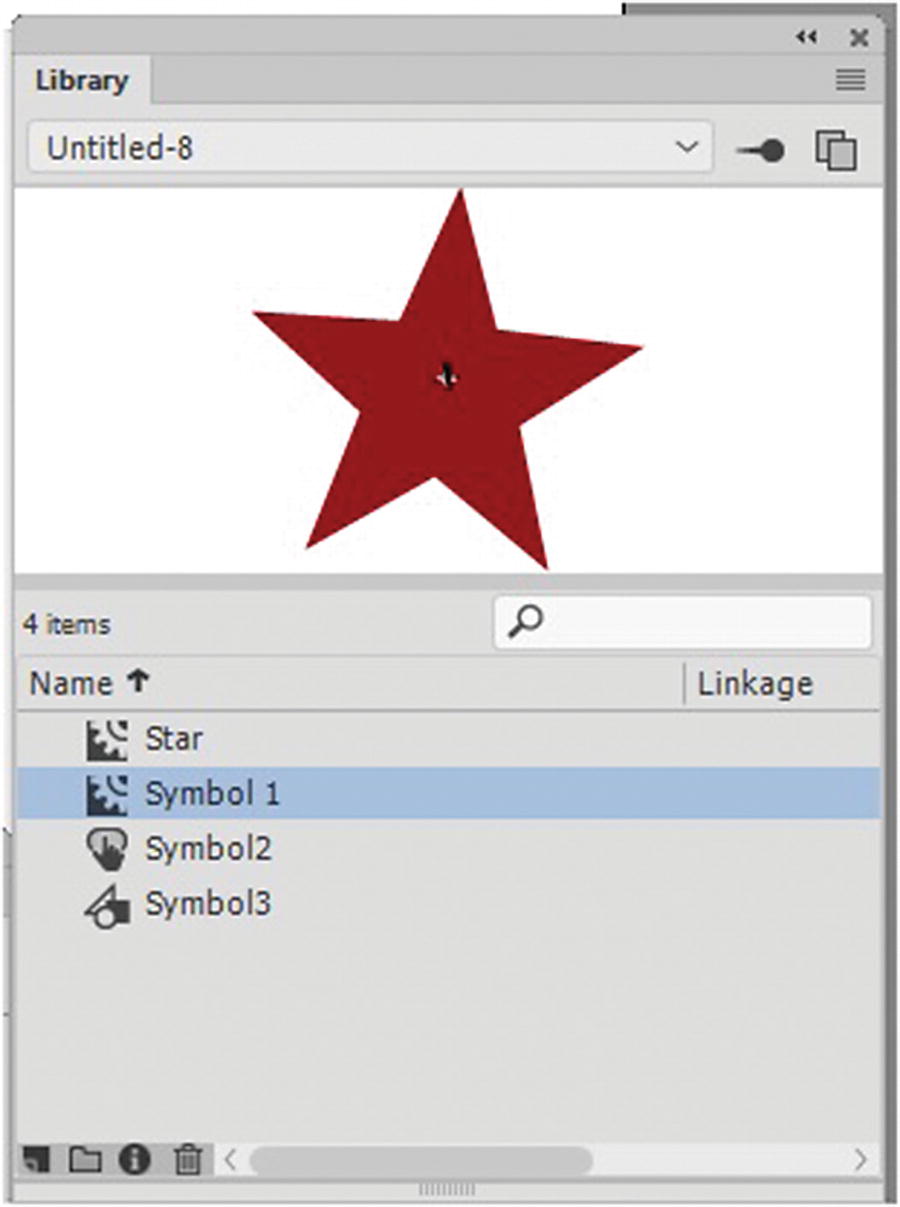
Adding another movie clip to the library

Entering shape editing mode
To exit the symbol editing mode and return to outside symbols, simply click the arrow on the left until you are back to the main stage.
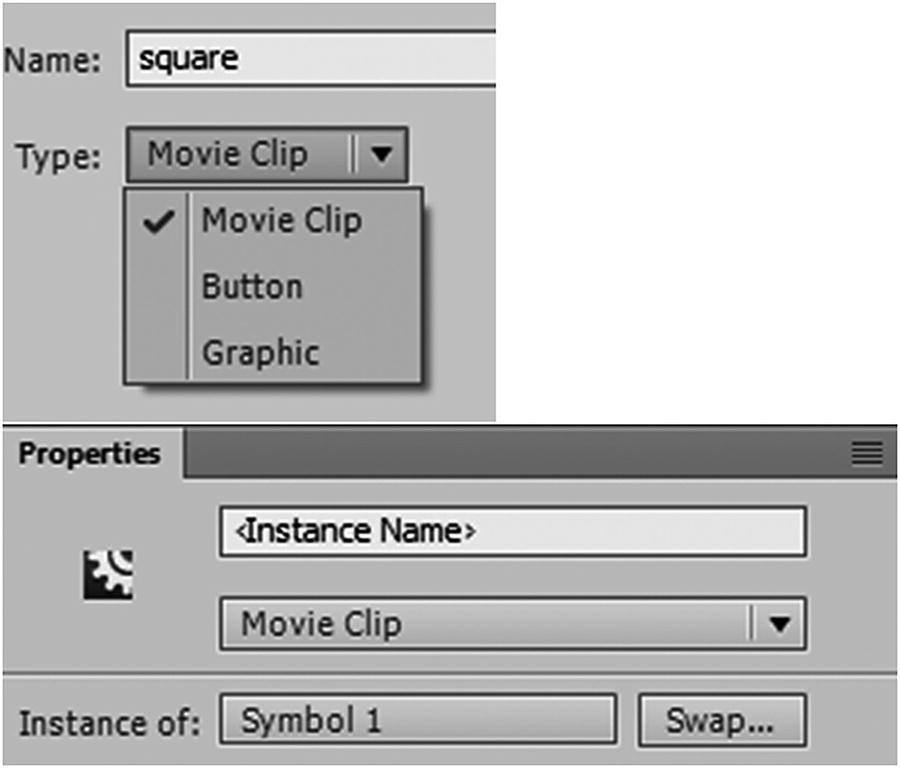
Alter your symbols’ properties either via the Library or Properties panels
With the symbol selected, you can apply the color effects or drag additional symbols from the Library panel onto the stage and alter them as well.
Color Effect Tab
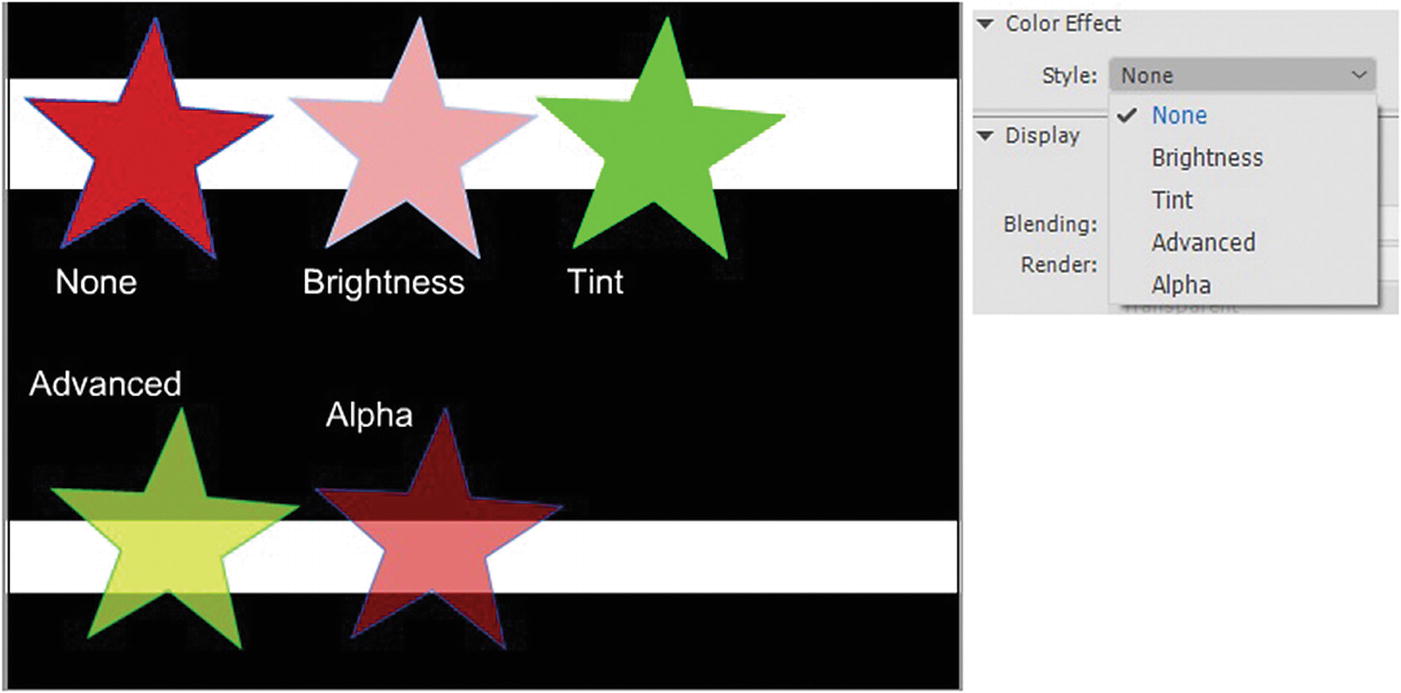
Color effects alter the color and opacity of a symbol
None: The default with no effect applied.
Brightness: Allows you to alter how light or dark a clip appears. Darker colors are a negative percentage and lighter colors are a positive percentage. If you find the resultant color appears too white or black, keep your slider somewhere in the middle range and do not set to either extreme. This does not affect the movie clips transparency or alpha. Refer to Figure 19-49.
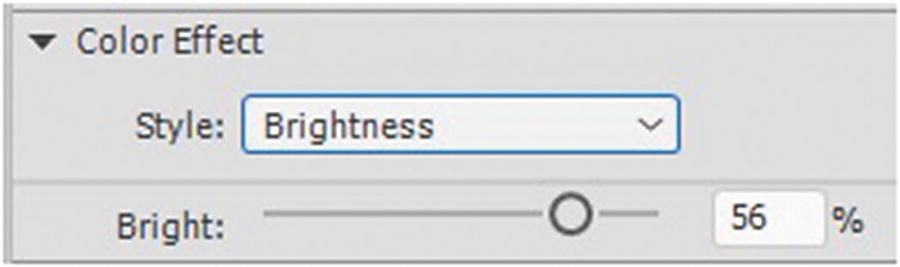
Alter the brightness of a symbol with color effect
Tint: Allows you to adjust the color of the object and its red, green, and blue color channels. You can give the original color a slight tint or make it a totally new color by adjusting the sliders or choosing from the color pallet on the upper right. Refer to Figure 19-50.

Alter the tint of a symbol with color effect
Advanced: Allows you to adjust transparency (alpha) as well as the RGB color channels. By dragging and holding your mouse over the numbers, you can alter the range and color of the movie clip symbol. Refer to Figure 19-51.
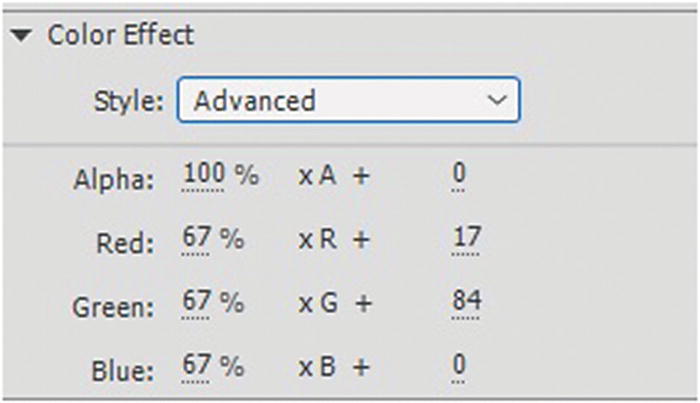
Alter the advanced color of a symbol with Color Effect
Alpha: Only affects the transparency of the movie clip symbol, but not its color, as seen in Figure 19-52.
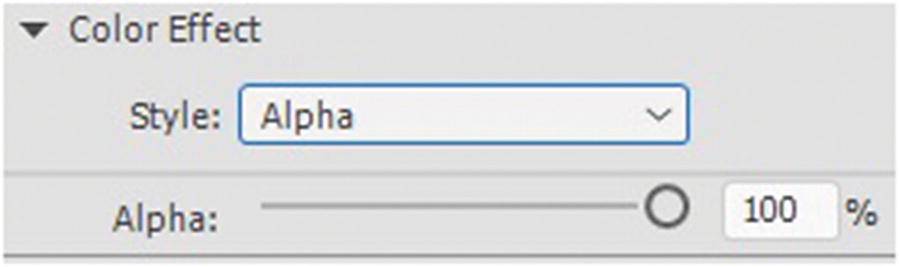
Alter the alpha of a symbol with color effect
You can apply these color effects by selecting your symbol and using the Selection tool (V) from the Tools panel to choose the blending mode from the drop-down menu.
Display Tab
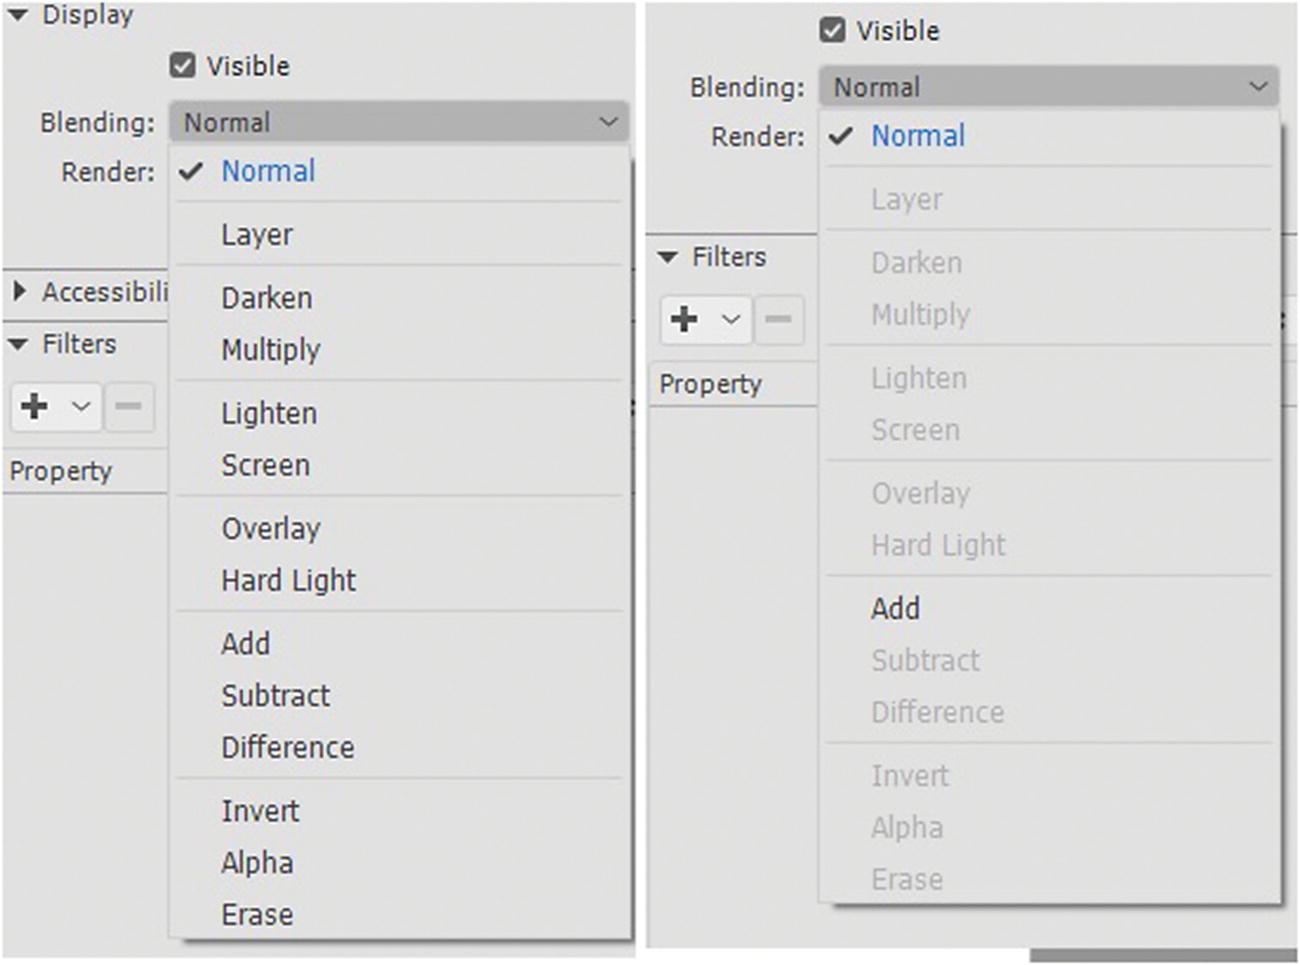
Blending options for AS3, on the right for HTML5 Canvas
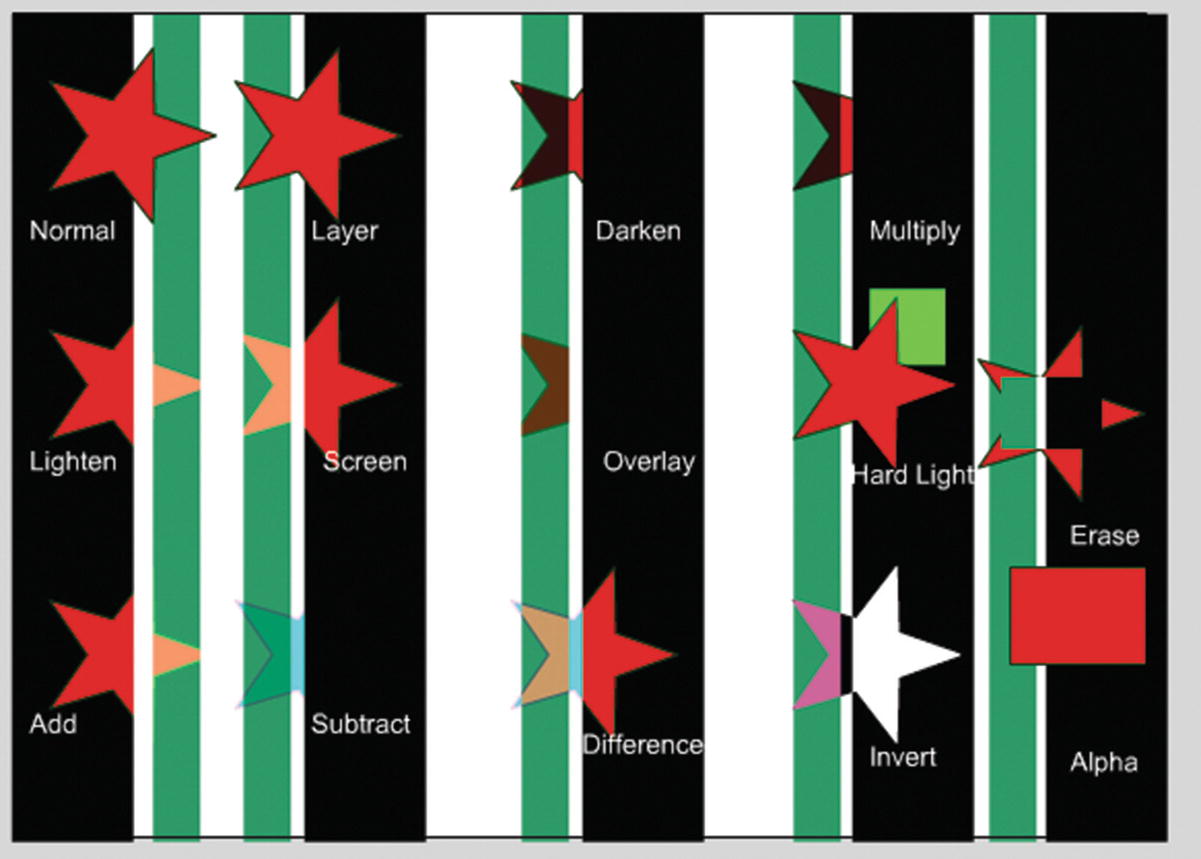
The stars have different blend effects applied
Normal: Default values; no interaction with the base colors.
Layer: Lets you stack movie clips on top of each other without affecting their color.
Darken: Only areas lighter than the blend color are replaced. Darker areas do not change.
Multiply: Multiplies base by blend color; this creates darker colors.
Lighten: Only areas darker than the blend color are replaced. Lighter areas do not change.
Screen: Multiplies the inverse of the blend color by the base color; this gives a bleached effect.
Overlay: Depending on the base color, the effect multiplies or screens.
Hard Light: Depending on the blend color, the effect, multiplies or screens; this gives a spotlight effect.
Add: Creates an animated lightening dissolve or disappearance effect between two images.
Subtract: Creates an animated darkening dissolve or effects disappearance between two images.
Difference: Subtracts either the blend color from the base color or the base color from the blend color; it all depends on which has the greater brightness value. Like how a film color negative appears.
Invert: Opposite of the base color; for example, black is white and white is black.
The final two blends are often confusing to most designers who first use them, because they rely on a parent and child setup.
Nested Movie Clips
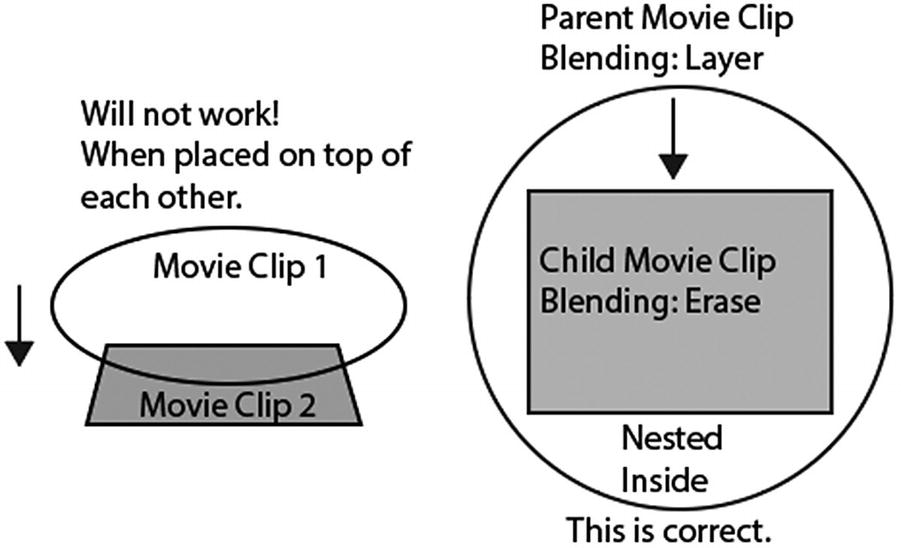
Working with nested movie clip symbols
The outer movie clip is called the parent, and for the following filters to work, rather than leaving it as the default blending of normal, you need to set the parent to layer. Then you need to double-click the “parent” movie clip to enter it. Inside this movie clip, you create another movie clip symbol, which becomes the “child.” It is nested within the “parent” or rests upon the inner shape. Because this setup is based on hierarchy, any modifications made to the parent affects the child. You can apply either a blend of Alpha or Erase to the child movie clip. Since a child rests within the parent, it appears as though the filter is not working correctly. Only until you exit the parent movie clip will the blending appear correct with the child that is nested within. Refer to Figure 19-56.
Alpha: Applies an alpha mask, making the object invisible although still on stage.
Erase: Like alpha, removes all base color pixels, including those in the background image. Acts like a mask layer.

The movie clip symbol has a blend of layer applied to the outer parent. Erase is applied to the nested child within as it rests upon the inner shape.
Note
Only apply these blends to “child” or nested movie clips if you want them to operate correctly.
For more information on blending modes in animate, visit https://helpx.adobe.com/animate/using/applying-blend-modes.html .
Comparing the Blending Effects of Three Adobe Programs: Photoshop, Illustrator, and Animate
Blending Effect | Photoshop CC | Illustrator CC | Animate CC ActionScript 3.0 | Animate CCHTML 5 Canvas |
|---|---|---|---|---|
Normal | ✓ | ✓ | ✓ | ✓ |
Layer | ✓ | |||
Darken | ✓ | ✓ | ✓ | |
Multiply | ✓ | ✓ | ✓ | |
Lighten | ✓ | ✓ | ✓ | |
Screen | ✓ | ✓ | ✓ | |
Overlay | ✓ | ✓ | ✓ | |
Hard Light | ✓ | ✓ | ✓ | |
Add (Linear Dodge) | ✓* | ✓ | ✓ | |
Subtract | ✓* | ✓ | ||
Difference | ✓ | ✓ | ✓ | |
Invert | ✓* as a separate adjustment layer which cannot be imported | ✓ | ||
Alpha | ✓ | |||
Erase | ✓ | |||
Dissolve | ✓ | |||
Color Burn | ✓ | |||
Linear Burn | ✓ | |||
Darker Color | ✓ | |||
Color Dodge | ✓ | ✓ | ||
Lighter Color | ✓ | |||
Soft Light | ✓ | ✓ | ||
Vivid Light | ✓ | |||
Linear Light | ✓ | |||
Pin Light | ✓ | |||
Hard Mix | ✓ | |||
Exclusion | ✓ | ✓ | ||
Divide | ✓ | |||
Hue | ✓ | ✓ | ||
Saturation | ✓ | ✓ | ||
Color | ✓ | ✓ | ||
Luminosity | ✓ | ✓ |

Note
During import conversion of a PSD document to an ActionScript 3.0 FLA, I have noticed that Animate seems to have trouble recognizing Linear Dodge (Add) and Subtract, and outputs them either as Normal or some other filter. In the AI document, there is no equivalent to Linear Dodge (Add) or Subtract. If you find this happening to your file, you need to reset it using the Animate CC blending drop-down menu.
You can apply these blending modes by selecting your movie clip with the Selection tool (V) and choosing the blending mode from the drop-down menu.
Display Render
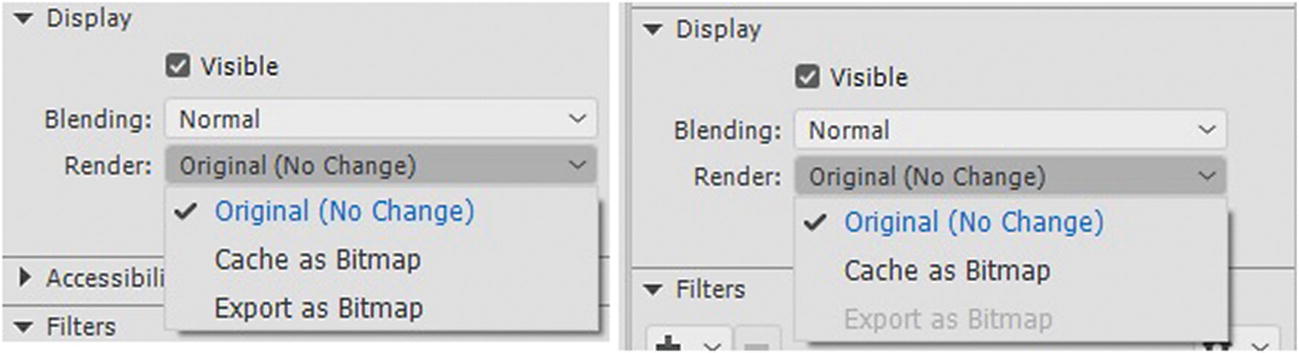
Alter the render setting of a symbol, HTML5 Canvas(right) has fewer options than ActionScript 3.0
Note
Unlike ActionScript 3.0 FLA, an HTML5 Canvas FLA can only render Cache as Bitmap, but not Export as Bitmap. Either one may help the animation run smoother because vector art is more processor intensive than a bitmap. As a rule, the setting should be applied to movie clip symbols that don’t have an enteral timeline animation and don’t size adjust or rotate frequently.
In the HTML5 Canvas FLA, you have no control over the smoothing or compression settings applied to the exported bitmap images.
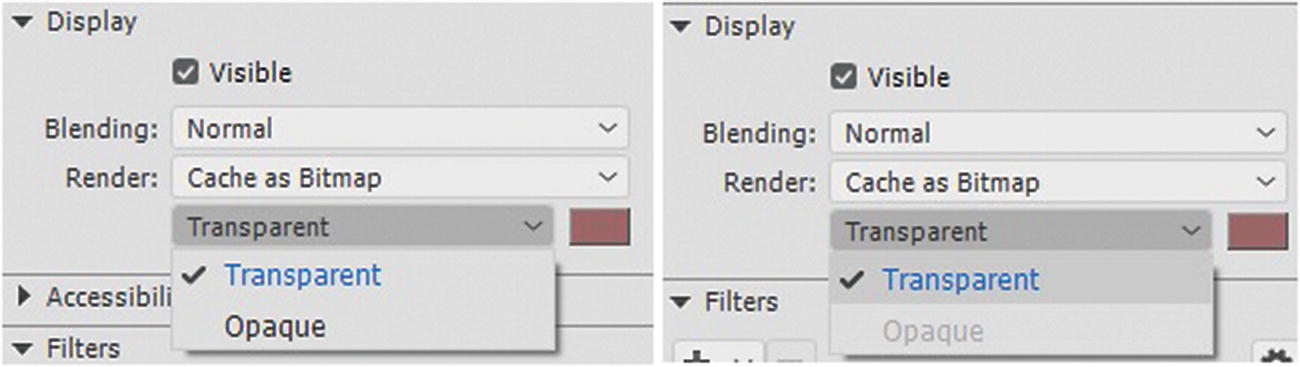
Alter the color display settings of a symbol, HTML5 Canvas(right) has fewer options than ActionScript 3.0
Filters Tab
Filters can be used in a variety of ways to enhance animated symbols on the stage along with the animation Timeline panel.
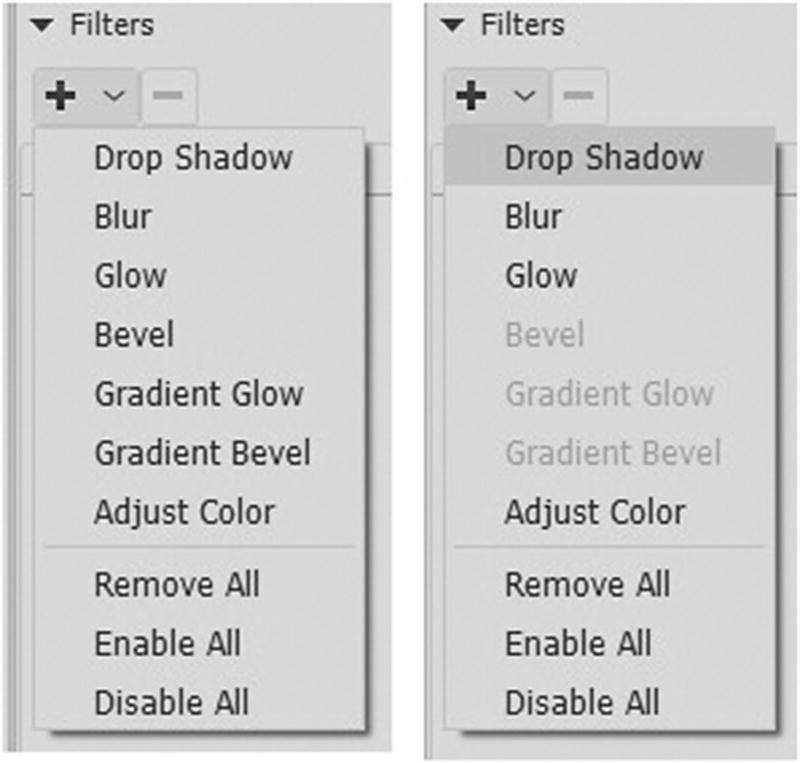
Filter options for ActionScript 3.0(left) and HTML5 Canvas (right)
Although Animate does not copy exact filters into this tab when you import a PSD or AI, it does maintain such things as the basic paths and blending modes within the movie clip symbol and tries to render them as accurately as possible. If you find that it is not rendering accurately, you can always import as a bitmap or apply these filters within Animate to a movie clip with no previous filters applied.
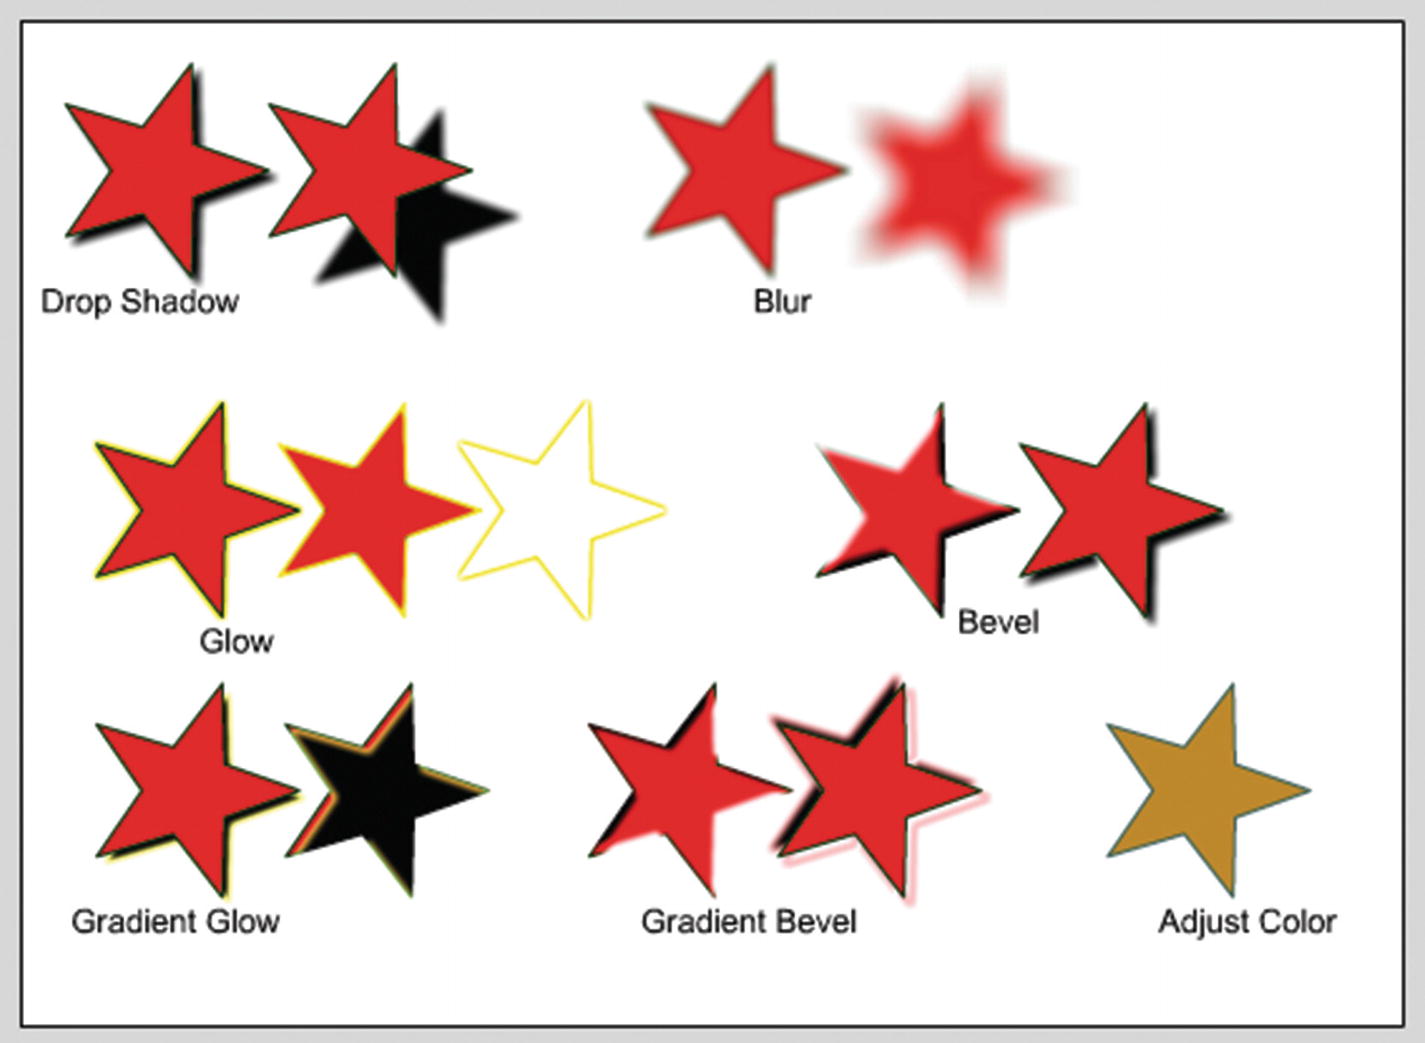
Filters that you can apply in Animate to symbols
Drop Shadow: Simulates the look of a movie clip casting a shadow onto a surface. Refer to Figure 19-61 for settings.
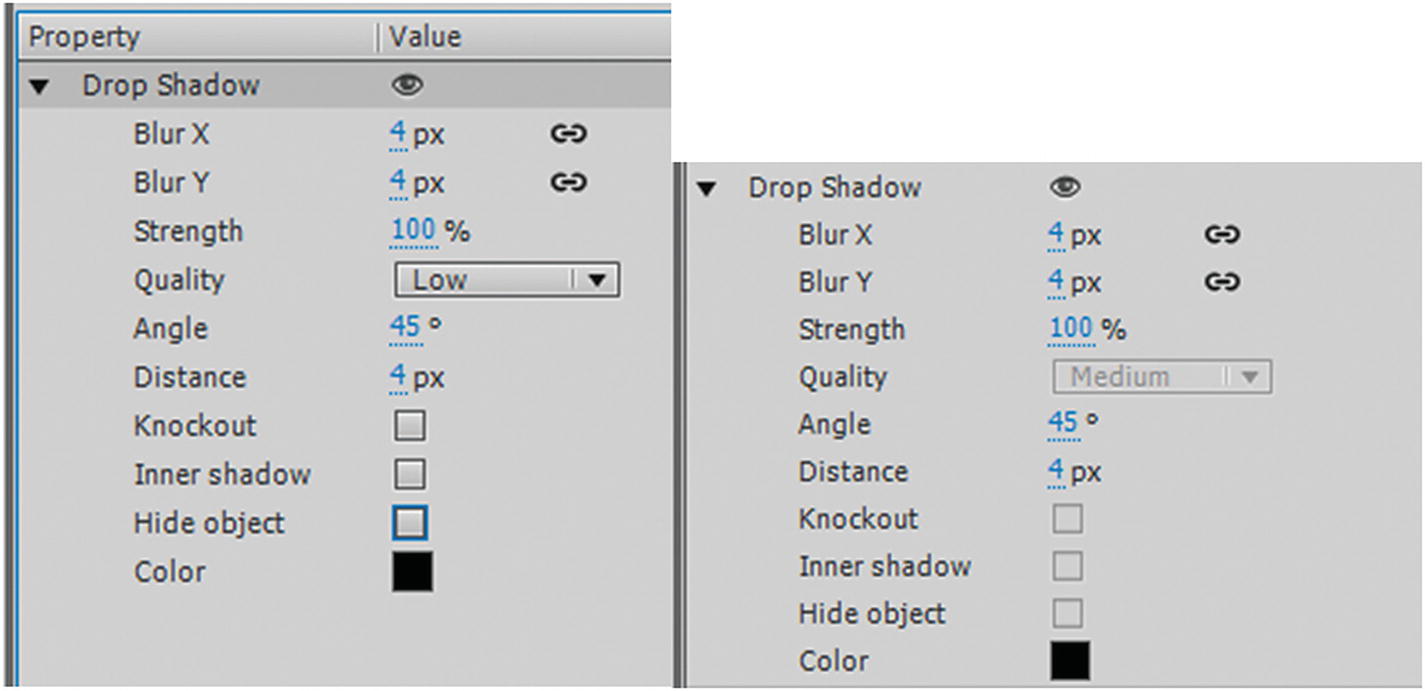
Drop Shadow filter settings for AS3 and Canvas
Blur X and Y: Sets the coordinates of the blur shadow spread in pixels; they can be linked or unlinked.
Strength: Sets the intensity of the shadow 0%–100%.
Quality: Low, medium or high; how accurately it appears.
Angle: The angle or the shadow in degrees, or which side it appears on.
Distance: The number of pixels it appears from the object.
Knockout: Removes or masks the inner fill of the movie clip leaving only the shadow.
Inner shadow: Puts the shadow within the movie clip, and not outside.
Hide object: Reveals only the shadow behind, and not the movie clip
Color: You can choose the color of the shadow.
Note
Some options of drop shadow are not available for an HTML5 Canvas FLA file.
Blur: Softens the edges and details of objects. Applying a blur to a movie clip can make it appear as if it is behind other objects or make a movie clip appear to be in motion. Refer to Figure 19-62 for settings. As with the drop shadow, you can adjust the spread using the x and y coordinates to adjust the quality.
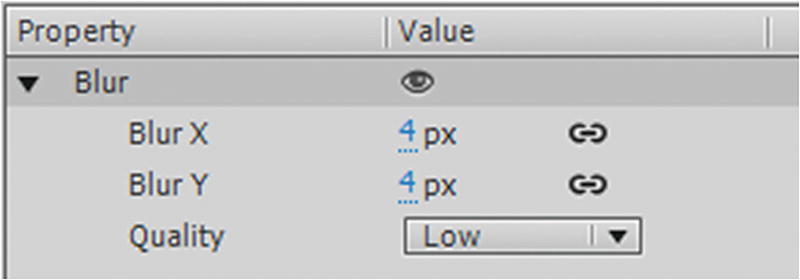
Blur filter settings for AS3 and Canvas
Glow: Lets you apply a color around the edges of a movie clip symbol. Refer to Figure 19-63 for settings. As with the drop shadow, you can adjust the strength, quality, color, knockout, and spread with the x and y coordinates. Inner glow is like inner shadow in that the glow is now inside the movie clip rather than the outside.
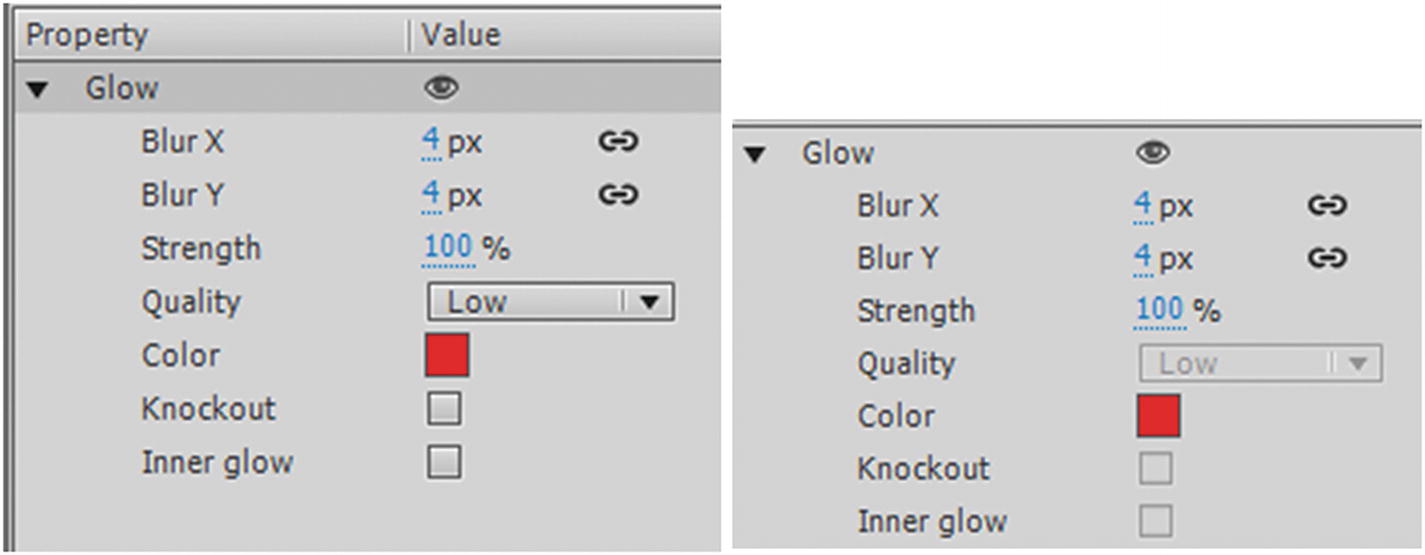
Glow filter settings for AS3 and Canvas
Note
Some options of glow are not available to HTML5 Canvas FLA file.
Bevel (Action Script 3.0 FLA only)
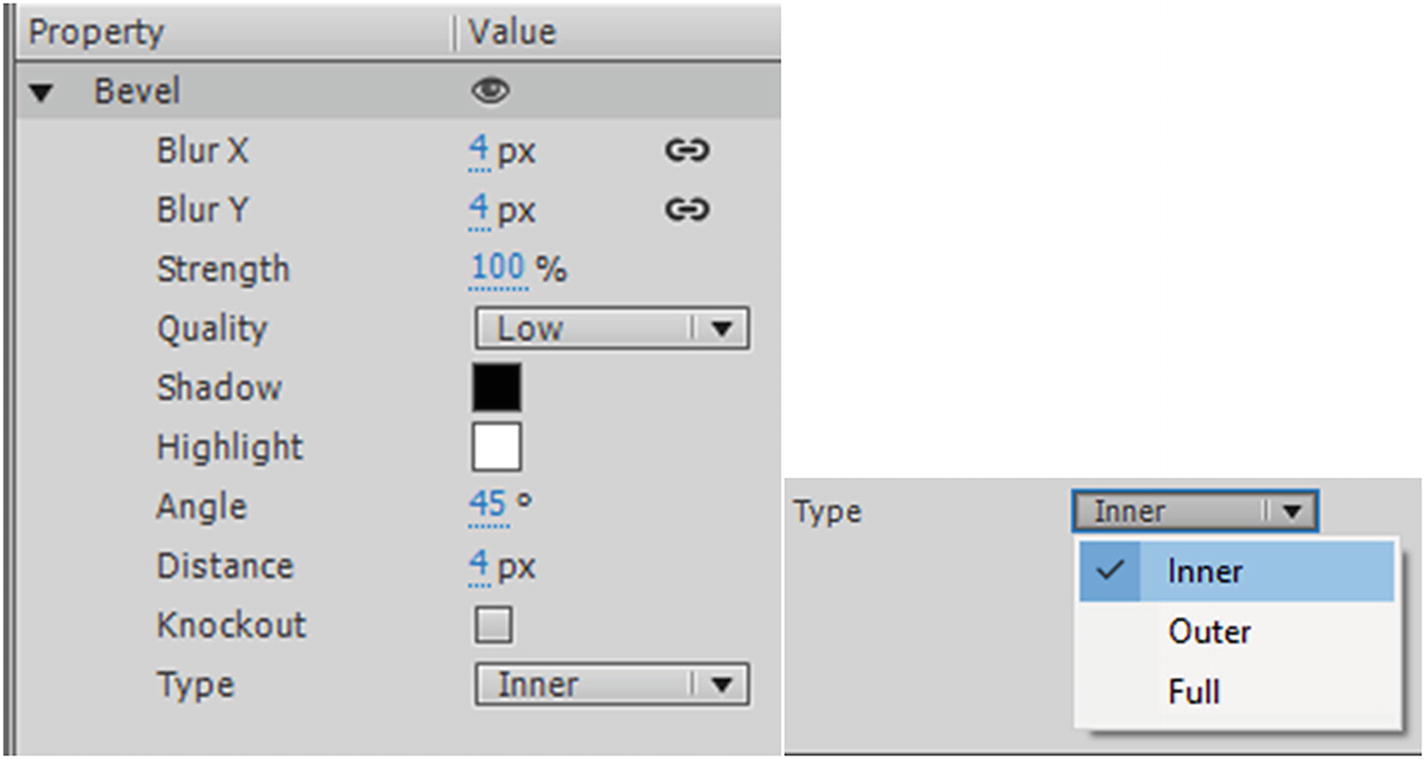
Bevel filter settings for AS3 only
As with the drop shadow, you can adjust the spread using the x and y coordinates, strength, quality, color (now divided into shadow and highlight), angle of bevel, distance of bevel, and knockout. Type is like inner shadow in that the bevel can be inside, outside, or fully on the movie clip.
Gradient Glow (Action Script 3.0 FLA only)
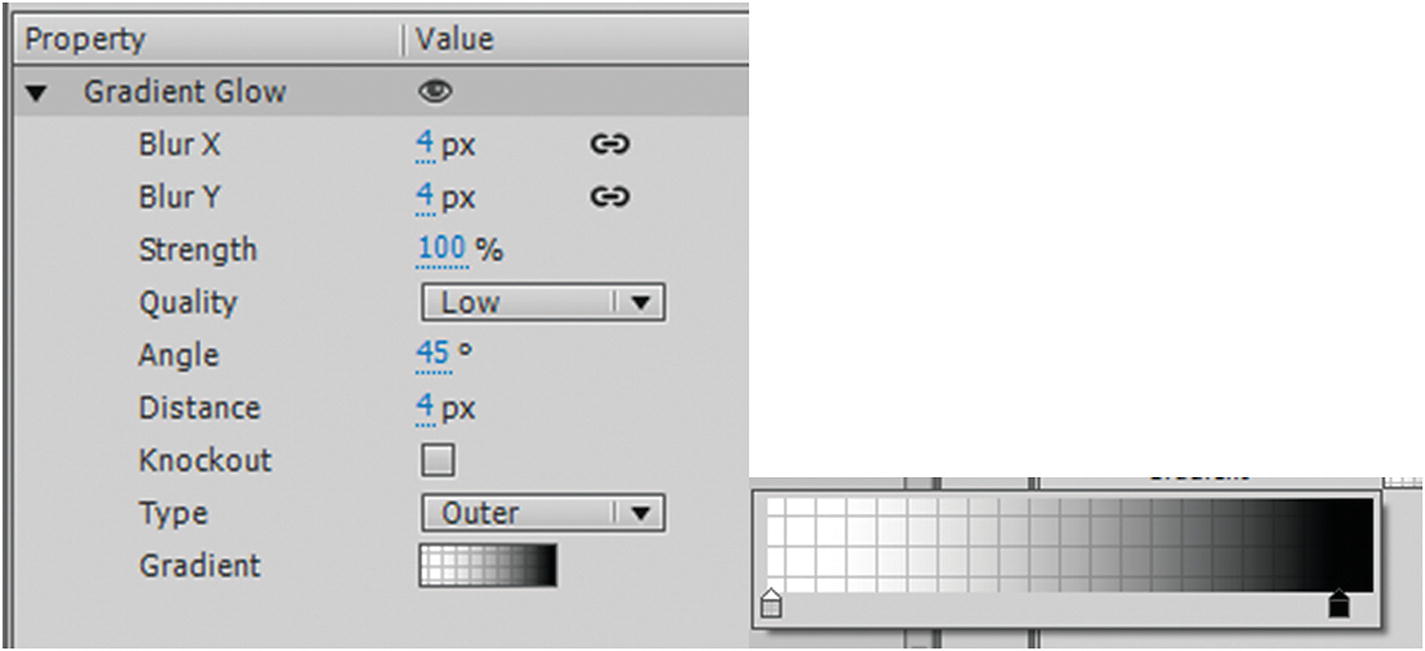
Gradient glow filter settings for AS3 only
As with the drop shadow, you can adjust the spread using the x and y coordinates, strength, adjust the quality, angle of glow, distance of bevel and knockout. Type is like inner shadow in that the gradient glow can be inside, outside or full on the movie clip. The gradient replaces the color property.
Gradient Bevel (Action Script 3.0 FLA only)
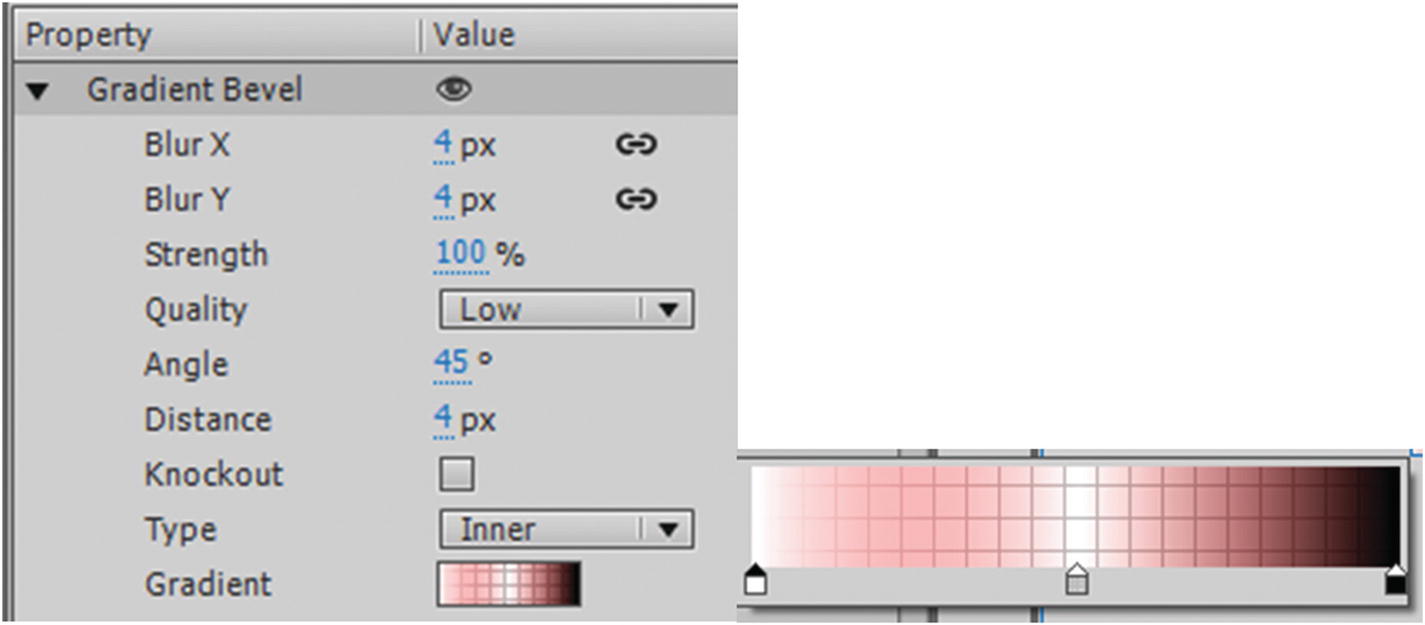
Gradient Bevel filter settings for AS3 only
As with the drop shadow you can adjust the spread using the x and y coordinates, strength, adjust the quality, angle of bevel, distance of bevel and knockout. Type is like inner shadow in that the bevel can be inside, outside or full on the movie clip. The gradient replaces the color property.
Adjust Color

Adjust Color filter settings for AS3 and Canvas
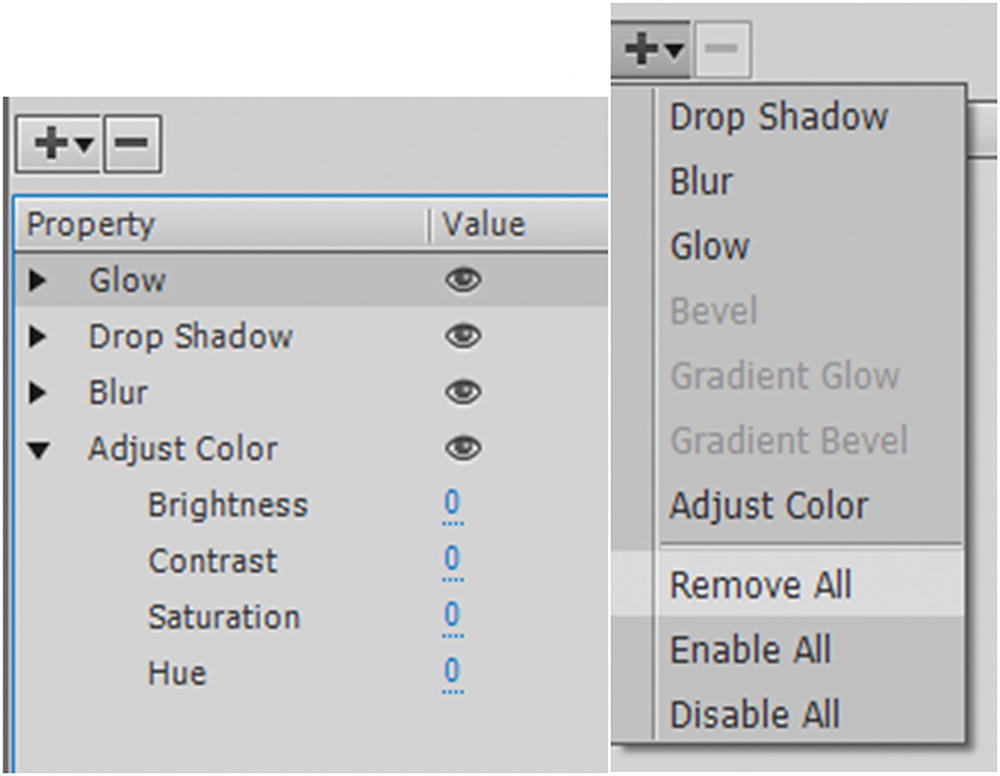
Add as many filters as you require to your symbol
You can enable or disable all filters from the plus (+) drop-down menu or use the Eye icon to turn them on or off one at a time.
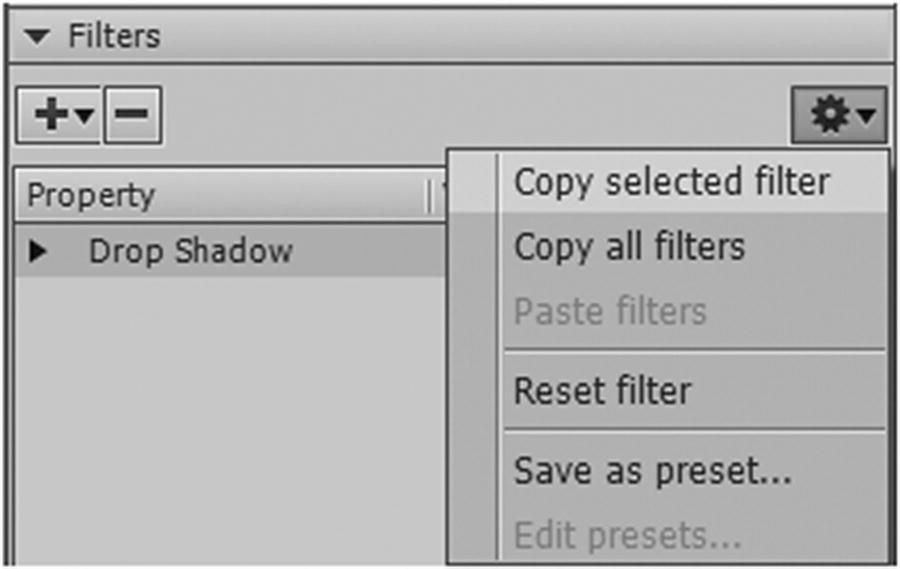
Save settings for your filter for other projects as a preset or reset the current filter
Import Other Graphic File Formats
It should be noted that BMP, JPG, PNG, and GIF files import directly to the stage and Library panel with no extra dialog boxes, so you do not need worry about any extra details regarding these formats for now, other than that you can apply the Animate effects to them when they are made into symbols, as you would with shapes.
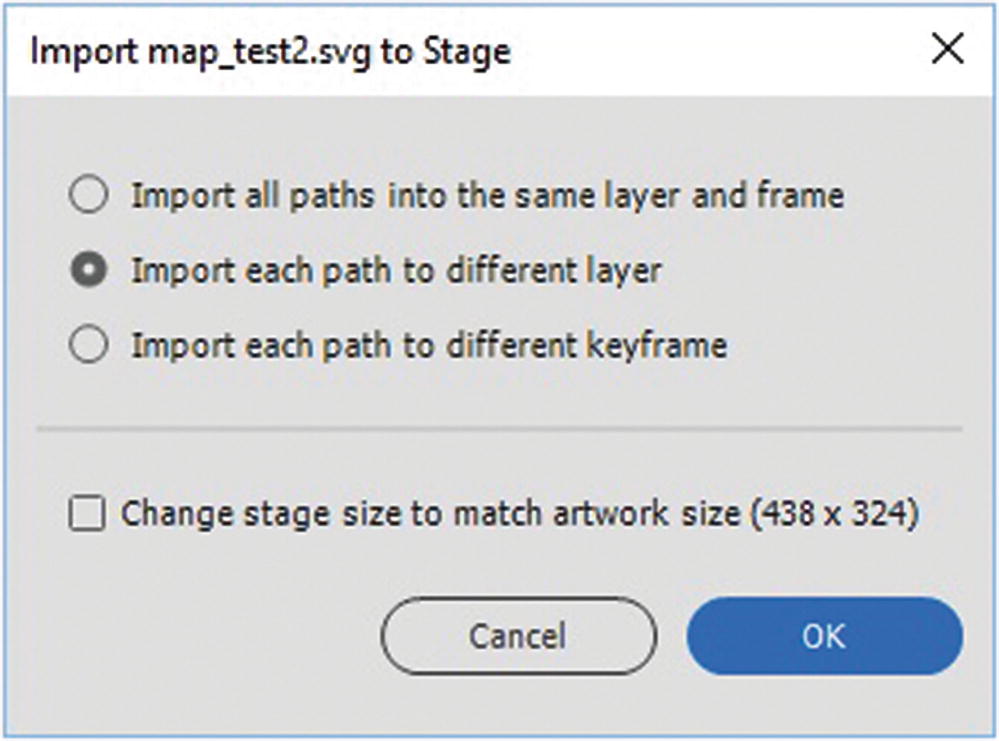
The SVG Import options
Once you have chosen your SVG import setting, click OK, and it is added to the stage; however, you still need to make the graphic into a symbol to add it to the Library panel.
Summary
In this chapter, you looked at several ways to import artwork that comes from Photoshop and Illustrator. You then compared the filters and effects that are retained by Animate, and saw how to keep the basic look of the properties that do not remain editable in HTML5 Canvas. Then you saw how to apply the filters that Animate offers when applied to symbols. Finally, you saw that graphics like JPG, PNG, and SVG could be imported into Animate as well.
In the next chapter, you look at how to import audio and video into your Animate FLA files.