
In this chapter, you review the Timeline panel and some old and new panels that work with the Timeline panel to assist you in creating and enhancing your animations before you export them.
Note
This chapter does not have any actual projects; however, you can use the files in the Chapter 21 folder to practice opening and viewing for this lesson. They are at https://github.com/Apress/graphics-multimedia-web-adobe-creative-cloud .
Working with the Timeline Panel

The Timeline panel with one layer that currently has blank keyframes
A Review of Layers
While the focus of this book is to learn how to get your files web-ready, let’s take a moment to compare this Timeline panel and its frames with the video timeline presented in Photoshop CC.
Open the scene6_timeline_example.fla file to follow along. You will use similar files for the Hot Glass Tango website in Chapter 24.
Note
For a more in-depth review of layers, I recommend Adobe Animate CC Classroom in a Book, but this chapter presents a basic review.
The Animate timeline is a combination of the Timeline and Layers panels that you see in Photoshop, but they are not separate. They interact with whatever is on the stage. If you need to hide or store something off the stage, save it as a symbol (graphic, movie, button), audio, or component in the library, and only place it on the stage in the correct timeline frames when required.
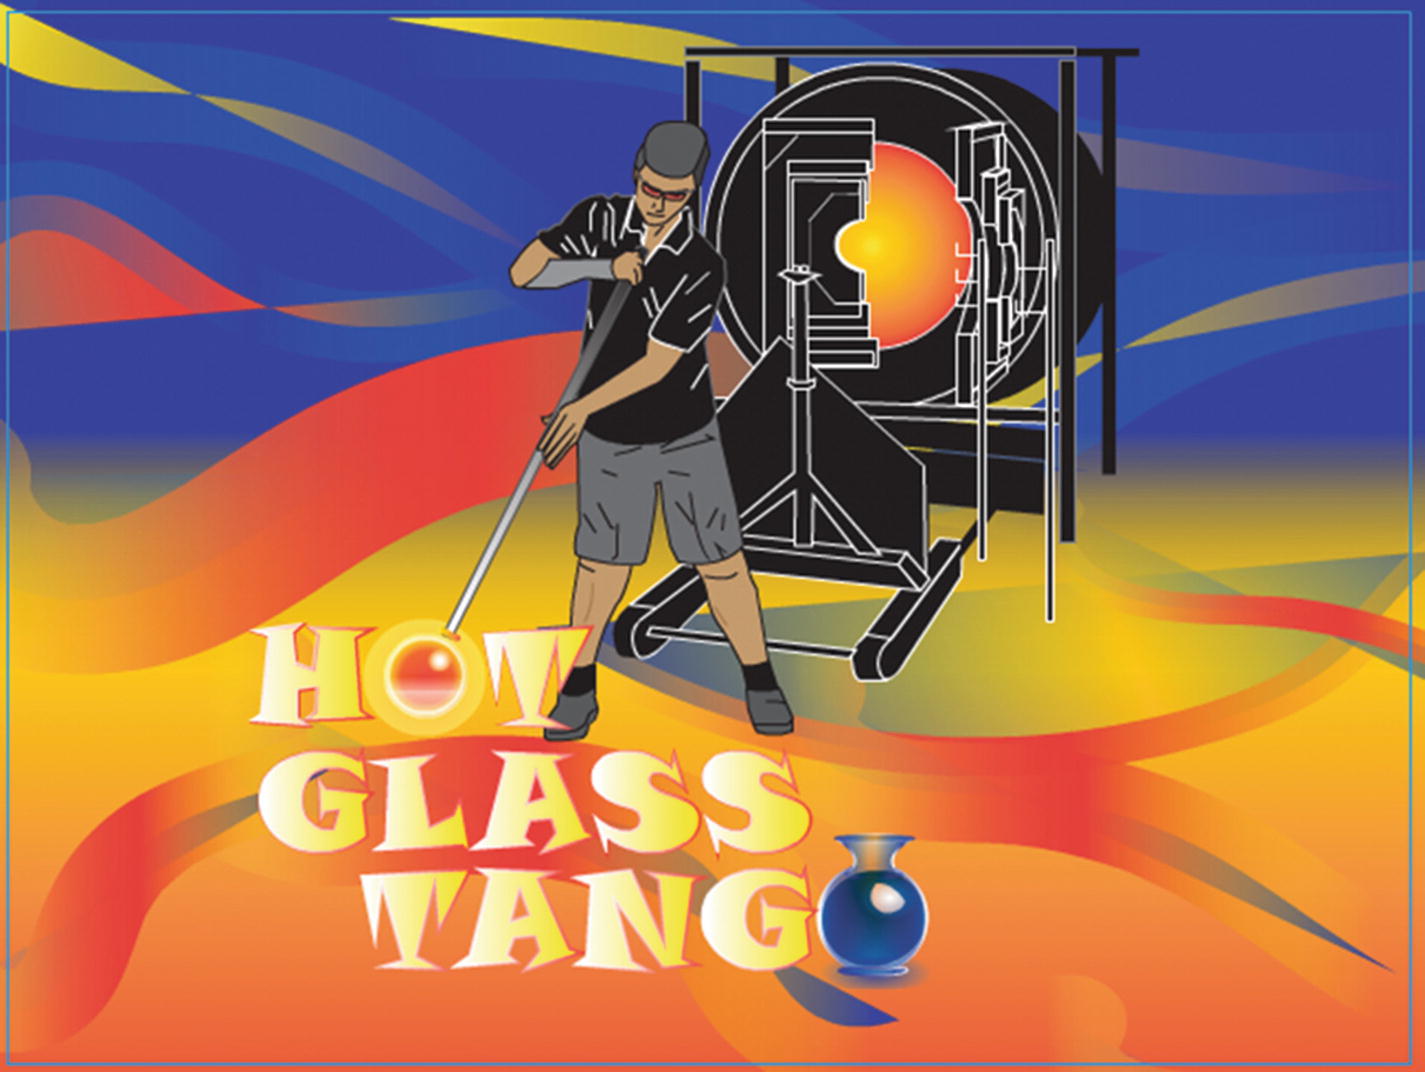
A scene from the intro of Hot Glass Tango
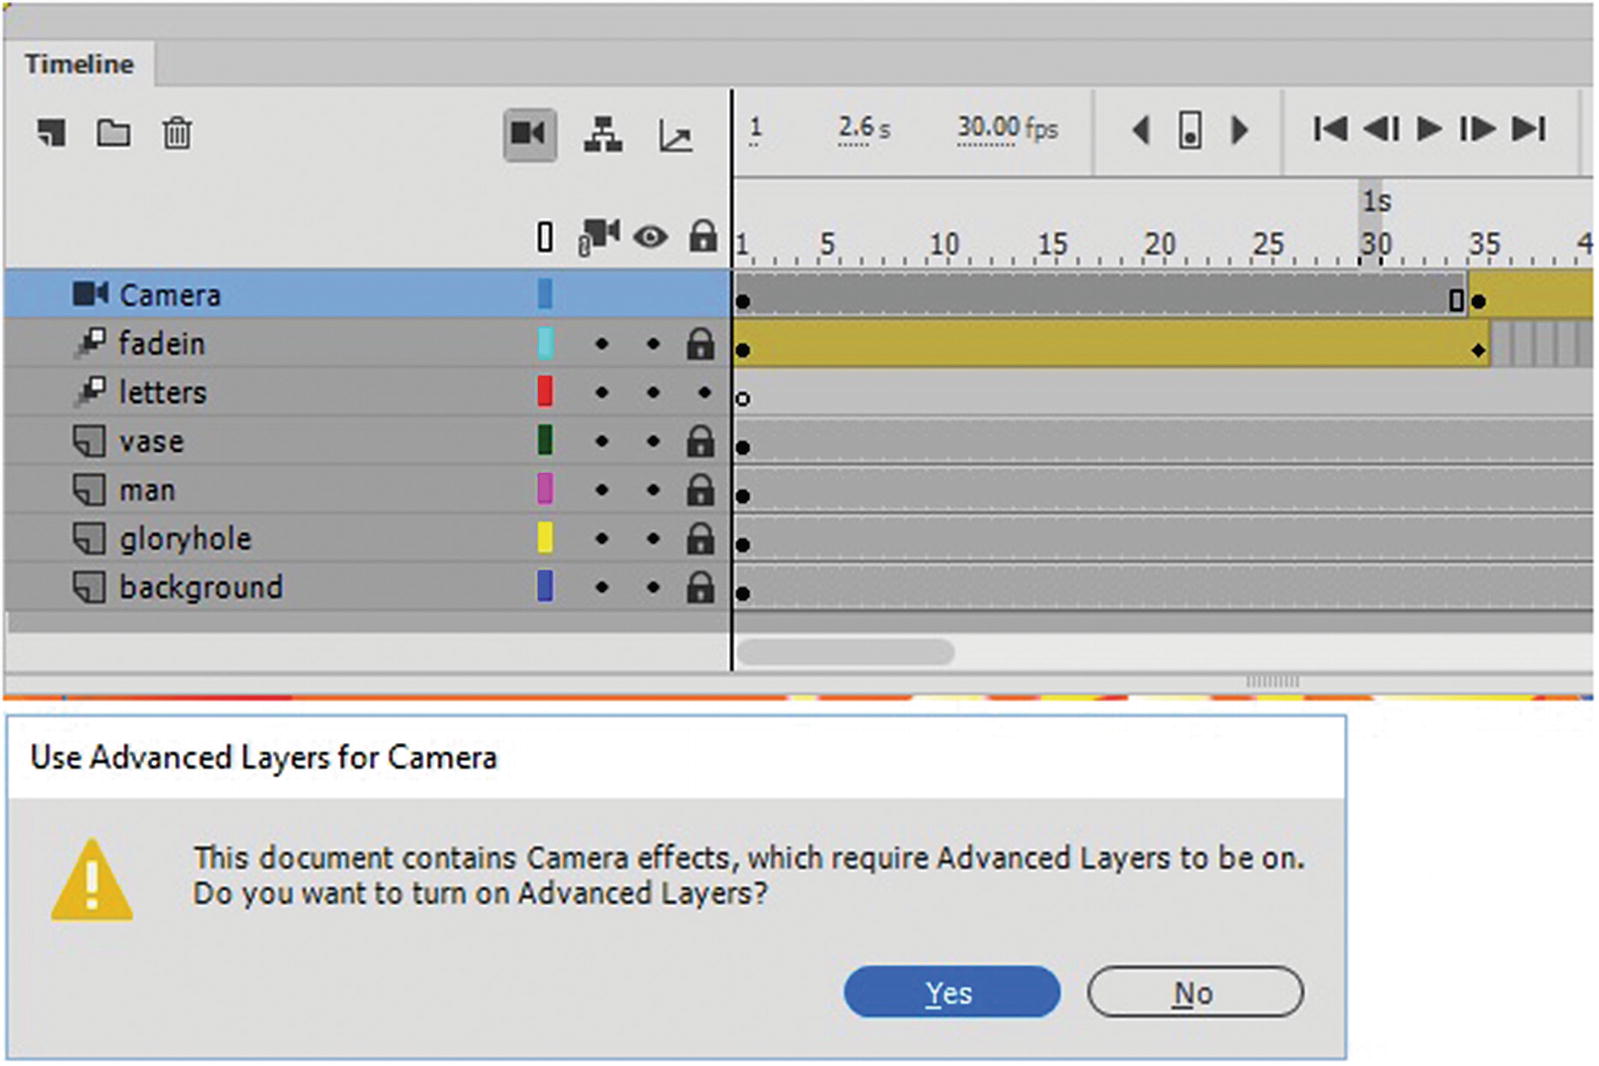
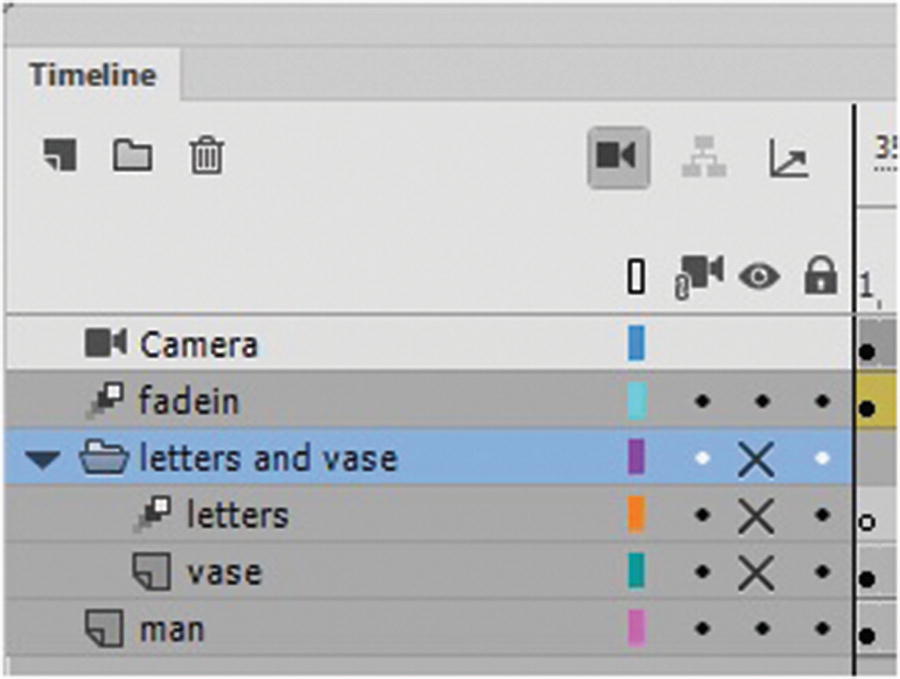
The Timeline panel and layer order. The symbols in front are higher than the background. Advanced Camera layer is in use.
Note
In this case, sound is below all the layers. That is OK because the sound never appears on the stage and is only background noise. It could be above all layers, but it does not interact with the movement in anyway. In this case, I put it at the bottom of the layers so that it would look like you saw it in the Photoshop Video Timeline panel in Chapter 7, where the sound track is always at the bottom of the list.
New Layers
Create a new layer in the Timeline panel
Folders
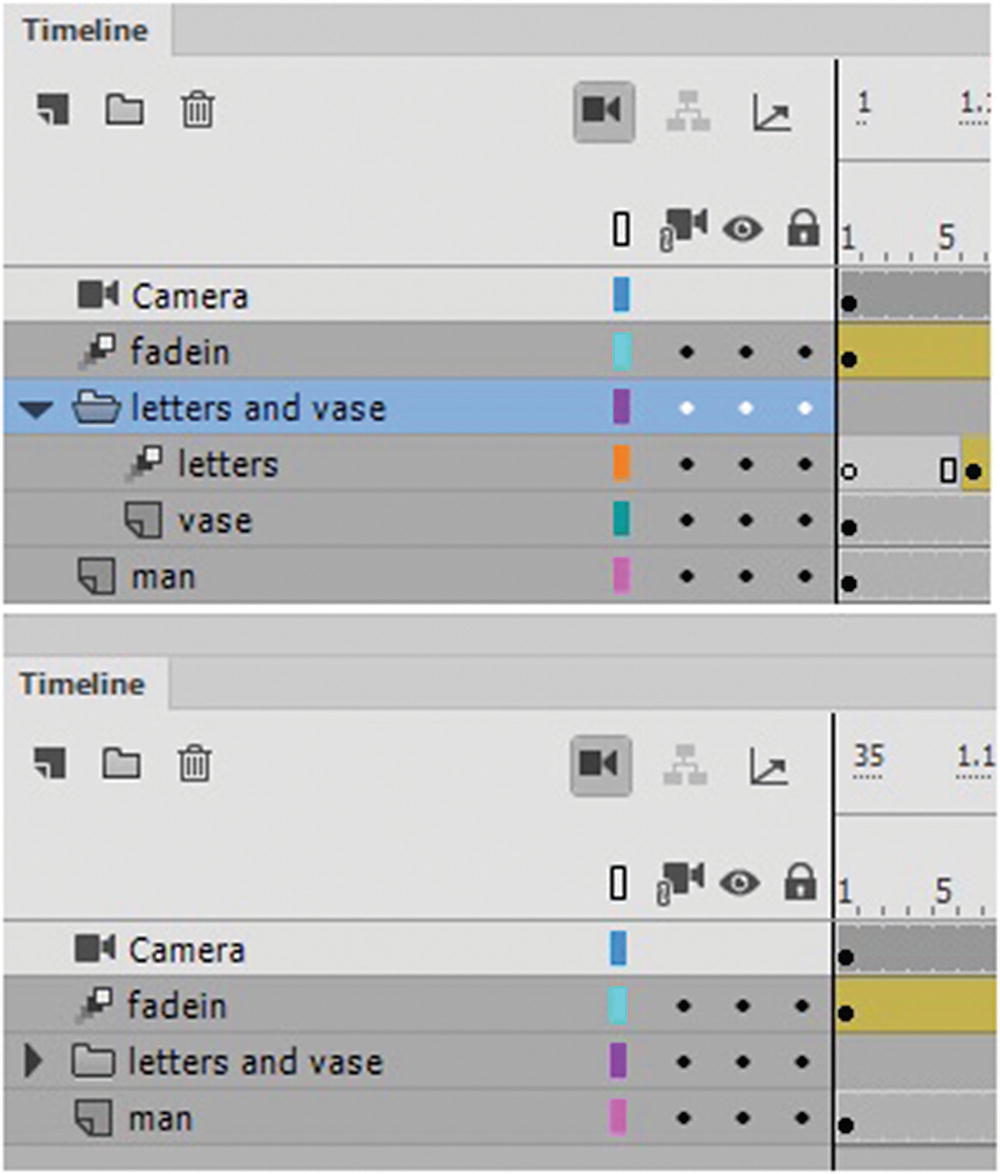
A folder can store many layers if you want to keep them separate and organized
For my example, I kept them separate because there are not a lot of layers in the file, but you can practice creating a folder, as seen in Figure 21-5. Just make sure to keep the layers in the folder in the same order as shown here. Then you can drag the files out of the folder and delete the folder. Just don’t delete the layers.
Hide and Show Layers and Folder
Turn a layer on or off
This is good when you are checking to see what kind of objects are behind the current layer or for scrubbing the timeline with the playhead to compare movements between two layers, as you will see shortly.
Lock Layers and Folders
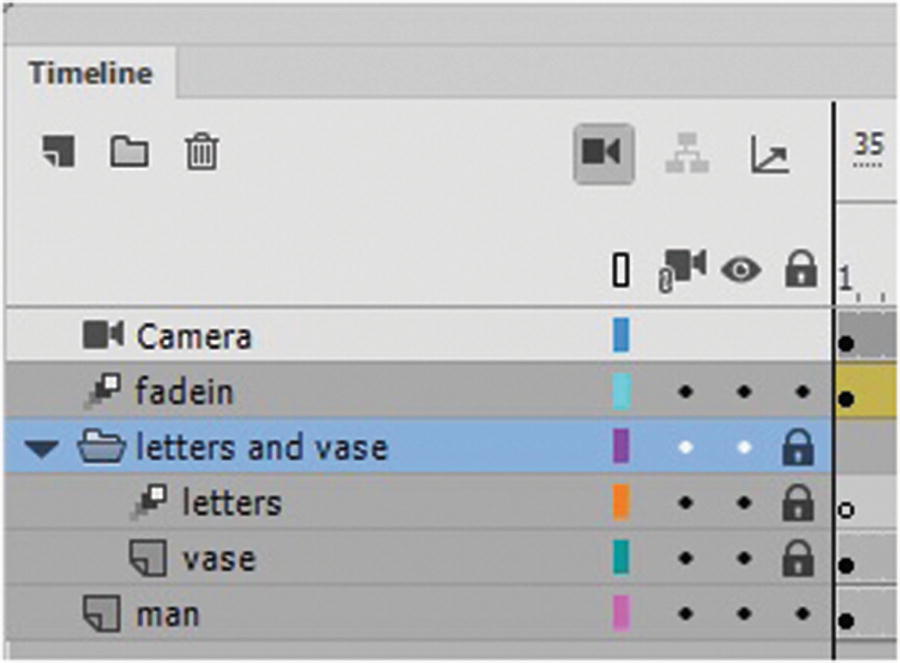
Lock a layer to prevent movement on the stage
Layer Outlines
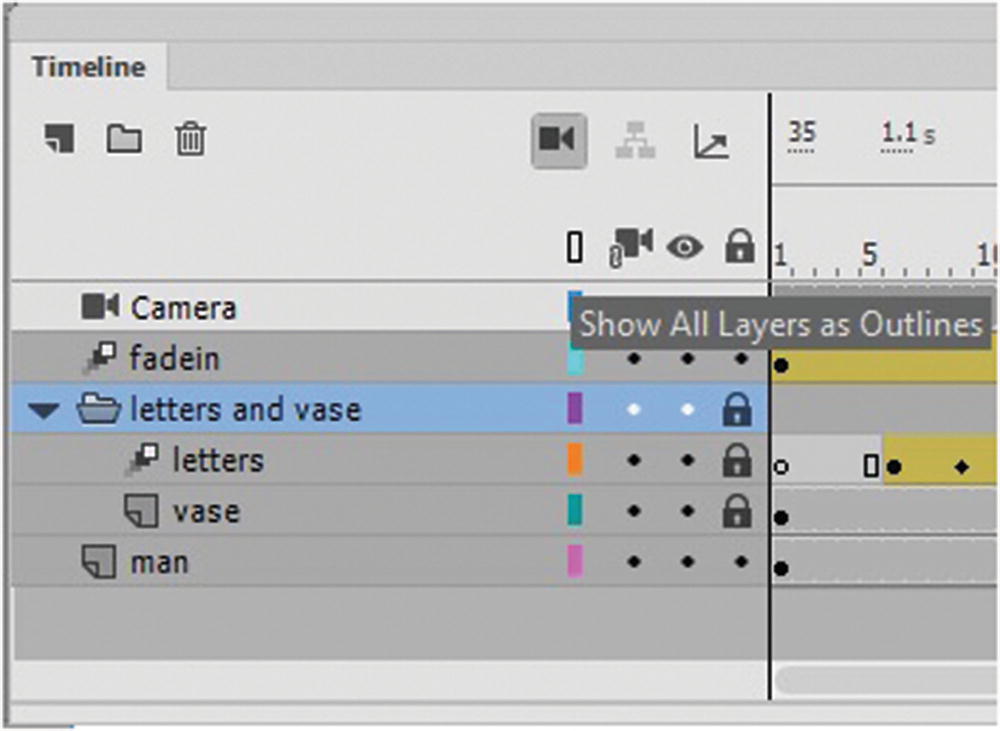
Click the regtangle so that the shapes on the stage will appear as outlines
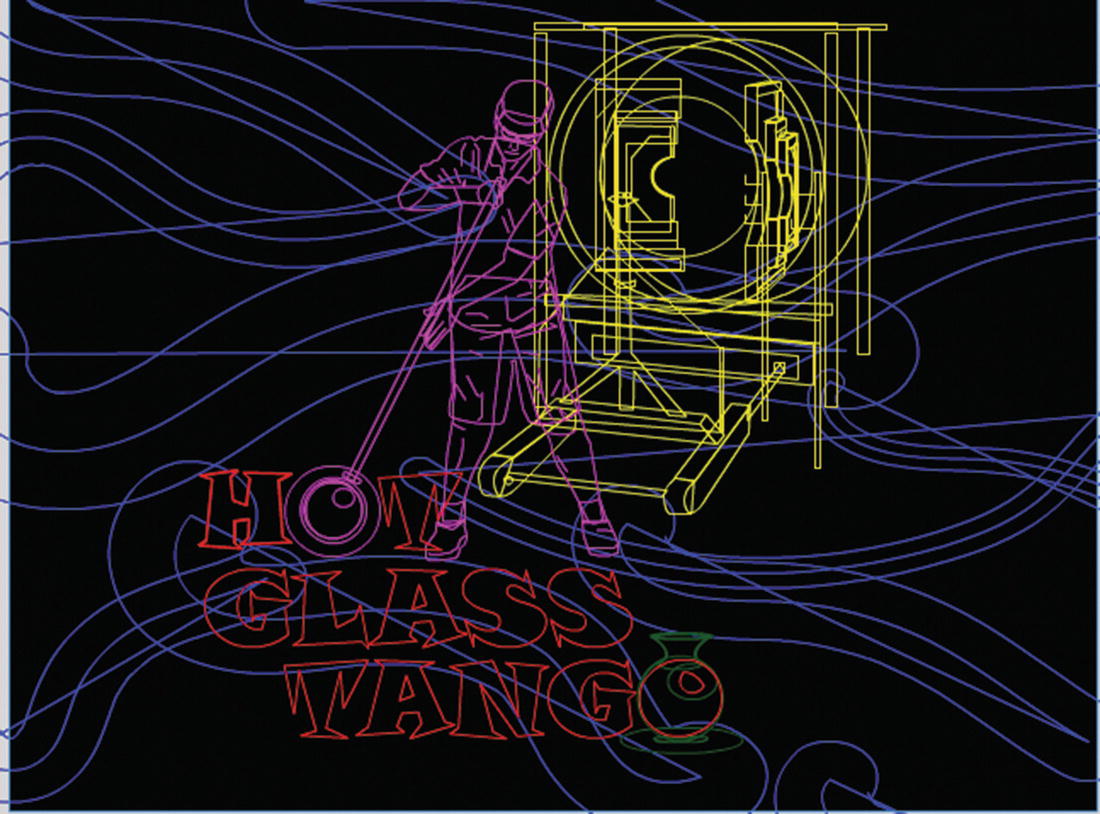
The outline preview in Animate
Click the Outline icon in the layer again to remove the outline color and return it to the state shown in Figure 21-2.
Advanced Layer Settings
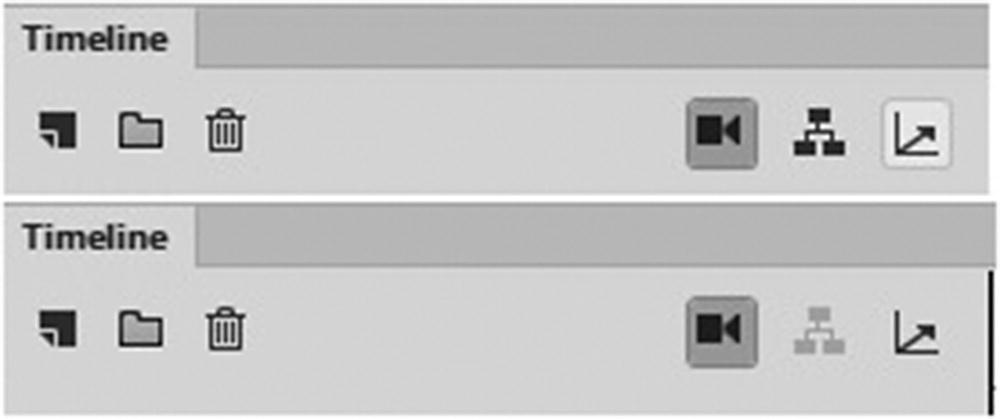
Control the Advanced Layers setting by turning them on or off
This is an advanced layer setting like camera, parenting and layer depth are used in certain types of animations where you are trying to create a camera zoom, a flying toward or away motion for 2D visuals, or locking on to a horizon point with the camera. As you approach different objects that are at varying distances, you arrive at some faster than others. You can see examples of this at https://helpx.adobe.com/ca/animate/using/timeline-layers.html and https://helpx.adobe.com/animate/using/working-with-camera-in-animate-cc.html#parallax-effect .

The Use Advanced Layers alert
If you do not want to use Advanced Layers, click NO. Click Yes to activate the advanced layers which includes camera effects for layers, layer parenting and the layer depth option. Note that your layer names in the Timeline panel may alter slightly with an added underscore ( _ ) for names with a spaces so that they can work with the Layer Depth panel and other advanced settings.
Layer Depth Panel
Any shape that is on a layer turns into a symbol so that you can work with Z-depth or the camera layer, as you will look at later.
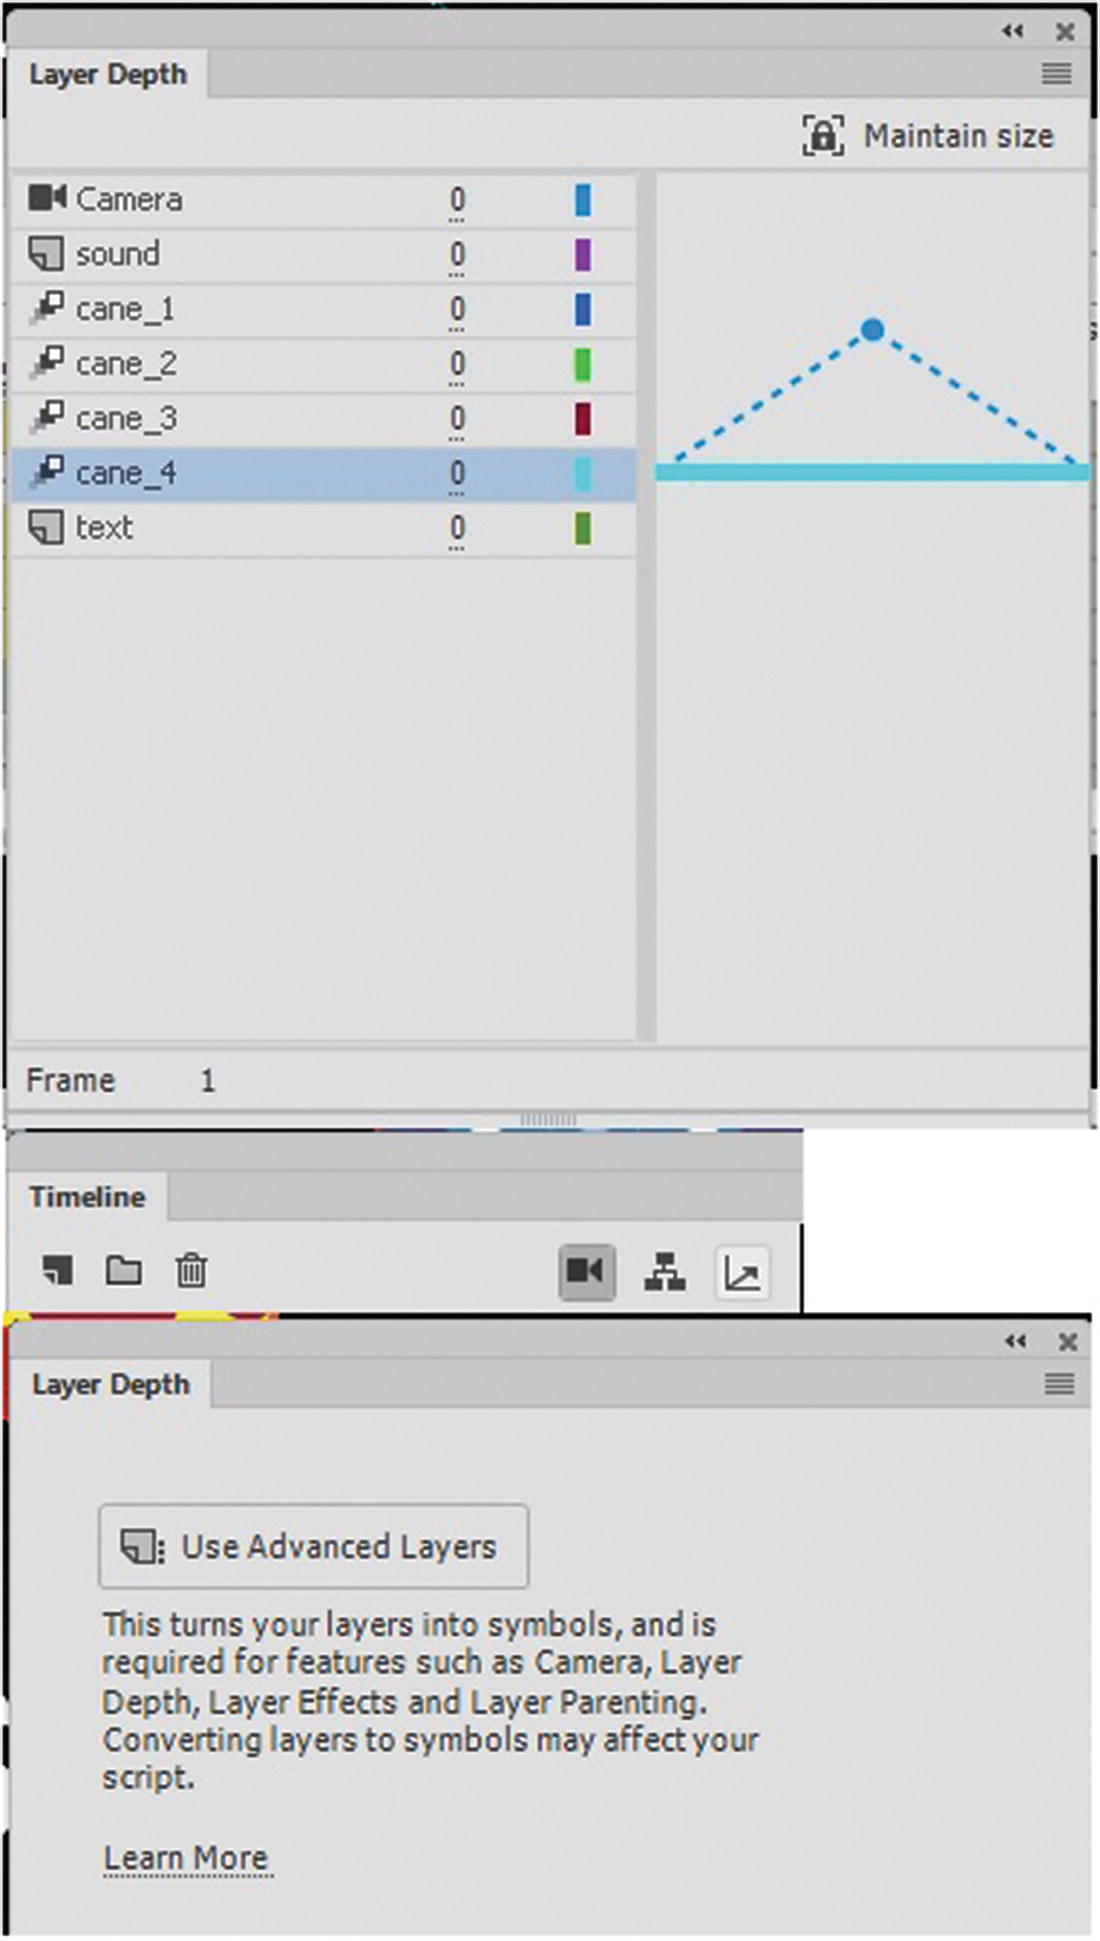
The Layer Depth panel with no layer’s depths altered in frame 1 (Below)The Layer depth panel when no advanced setting are on
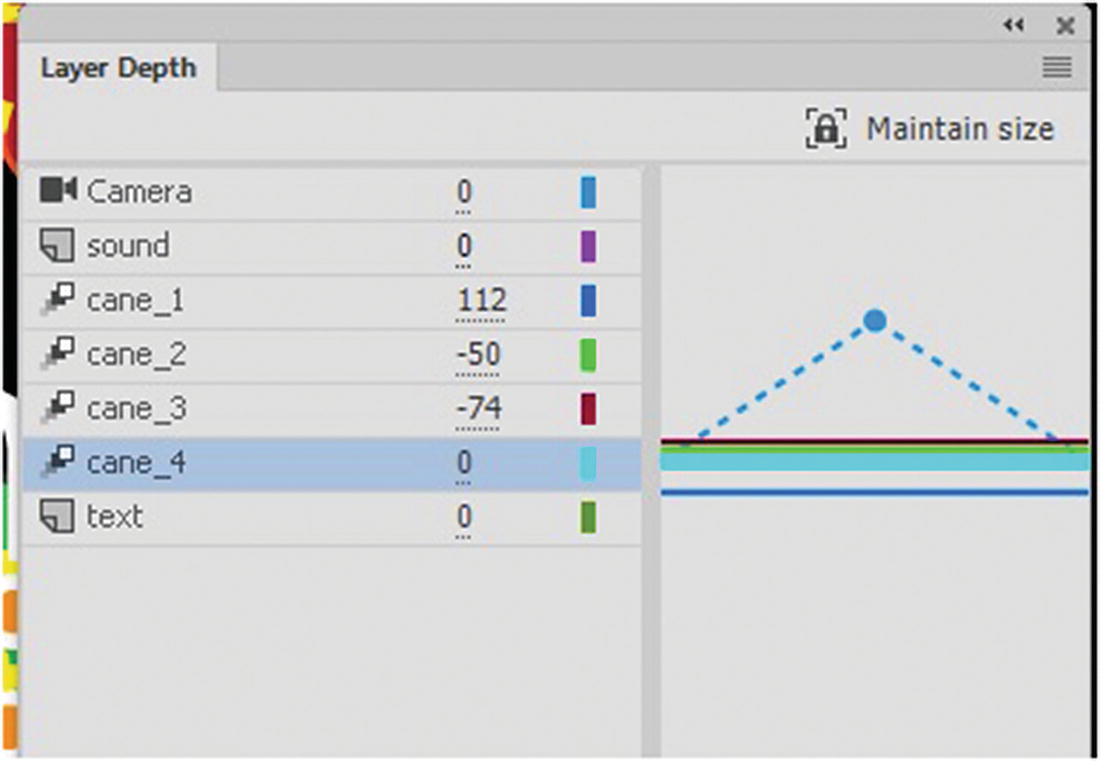
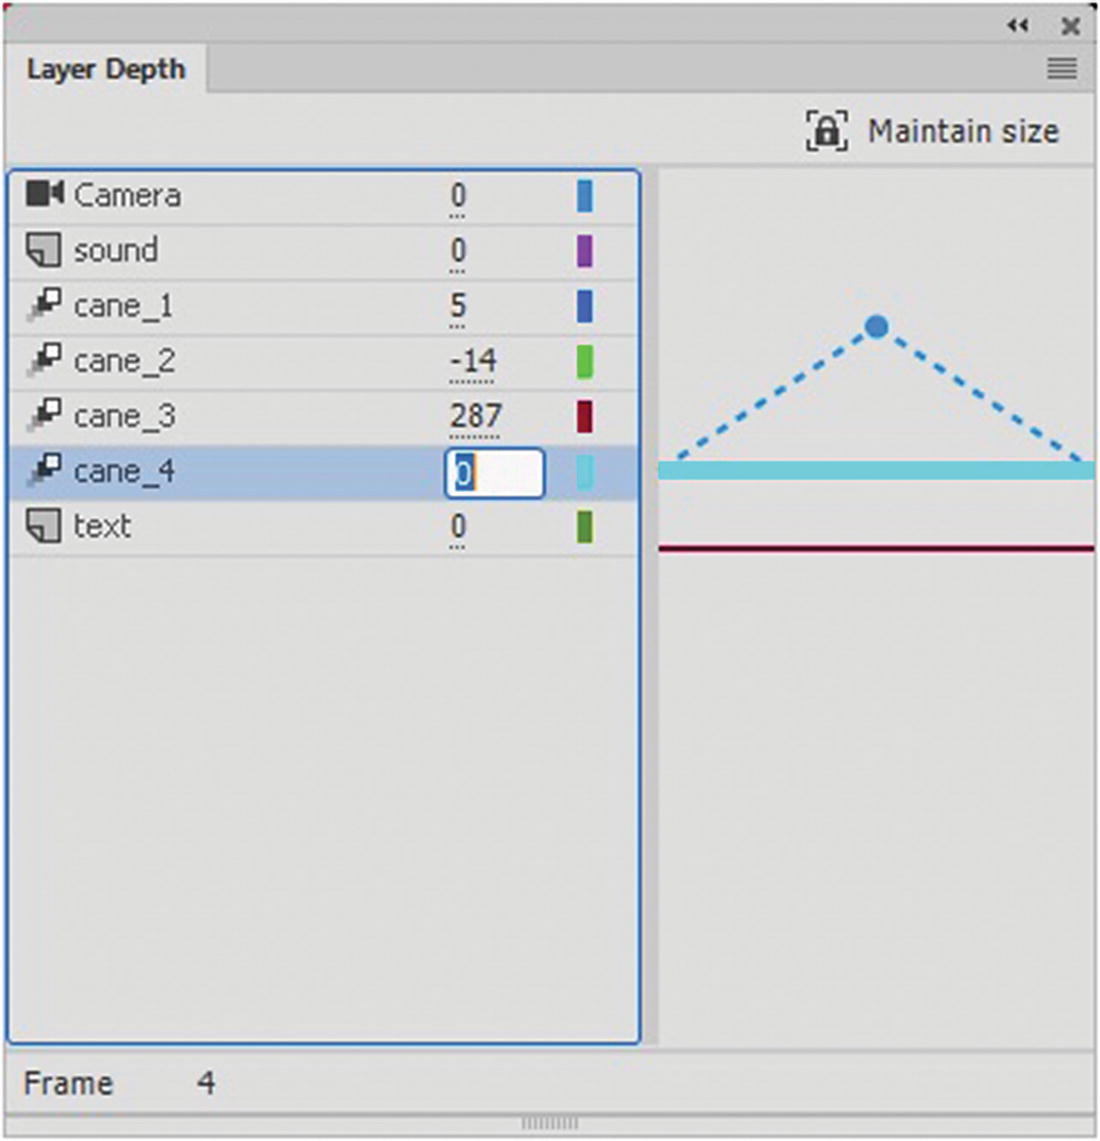
Adding depth to one or more layers

Symbols from a lower layer now overlap an upper layer
This adds keyframes to the motion tween, depending on where you are in the timeline. Depending on the depth at each keyframe, it will appear as though symbols that were once behind on one layer are now moving in front of another symbol on another layer.
Deactivate Advanced Layers
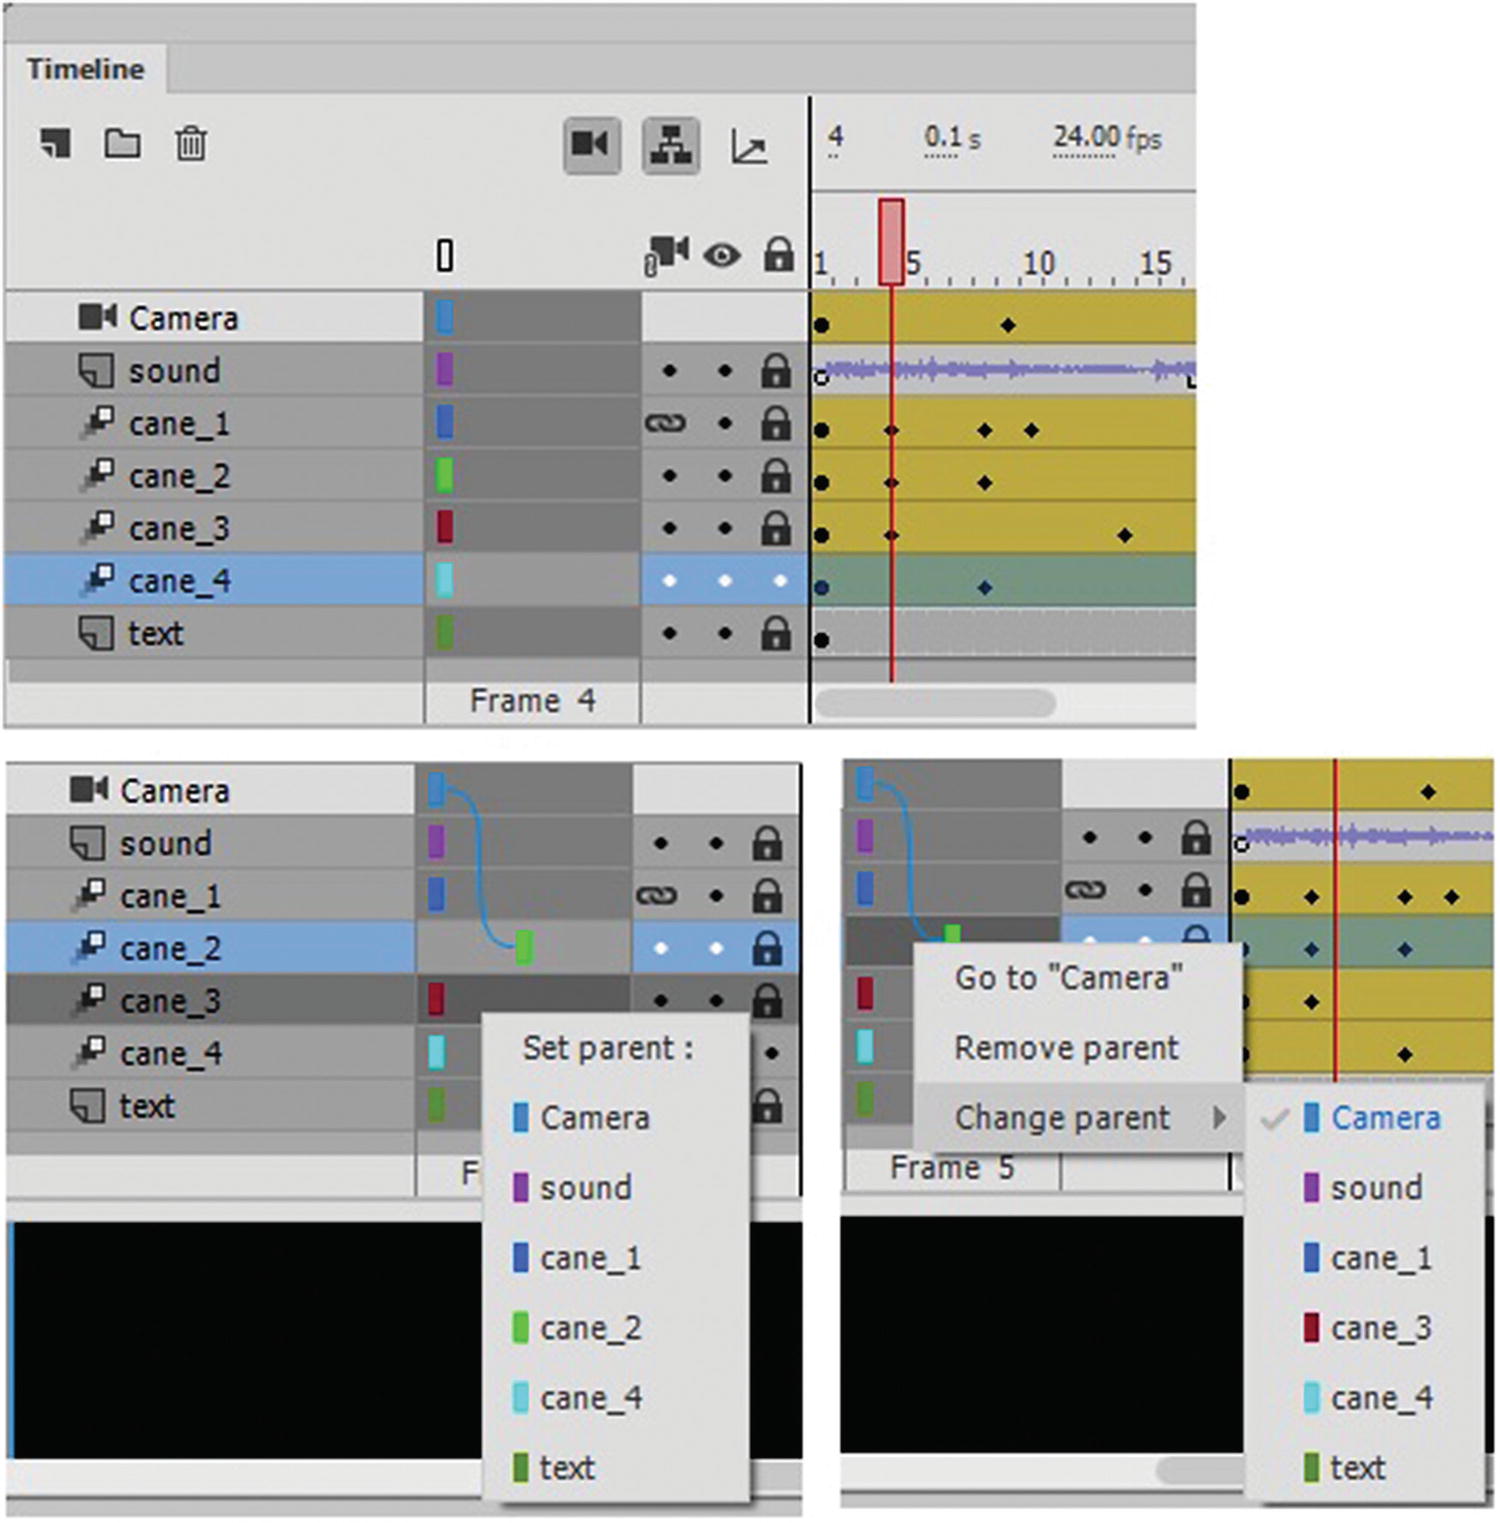
Layer parenting as it acts with the Layer Depth panel
Whether you plan to use advanced layers or not, make sure that you save you objects as symbols (as you saw in Chapter 20) before beginning your animation project.
Note
When you work with layer depth, it is good practice to make sure each layer outline is a distinct color so that you can easily select it in the panel. Layers with the same color can be confusing to work with, and you might add a motion keyframe to the wrong layer. I show you how to adjust the outline color in the next section.
Layer Types
As in Photoshop CC, there are several types of layers.
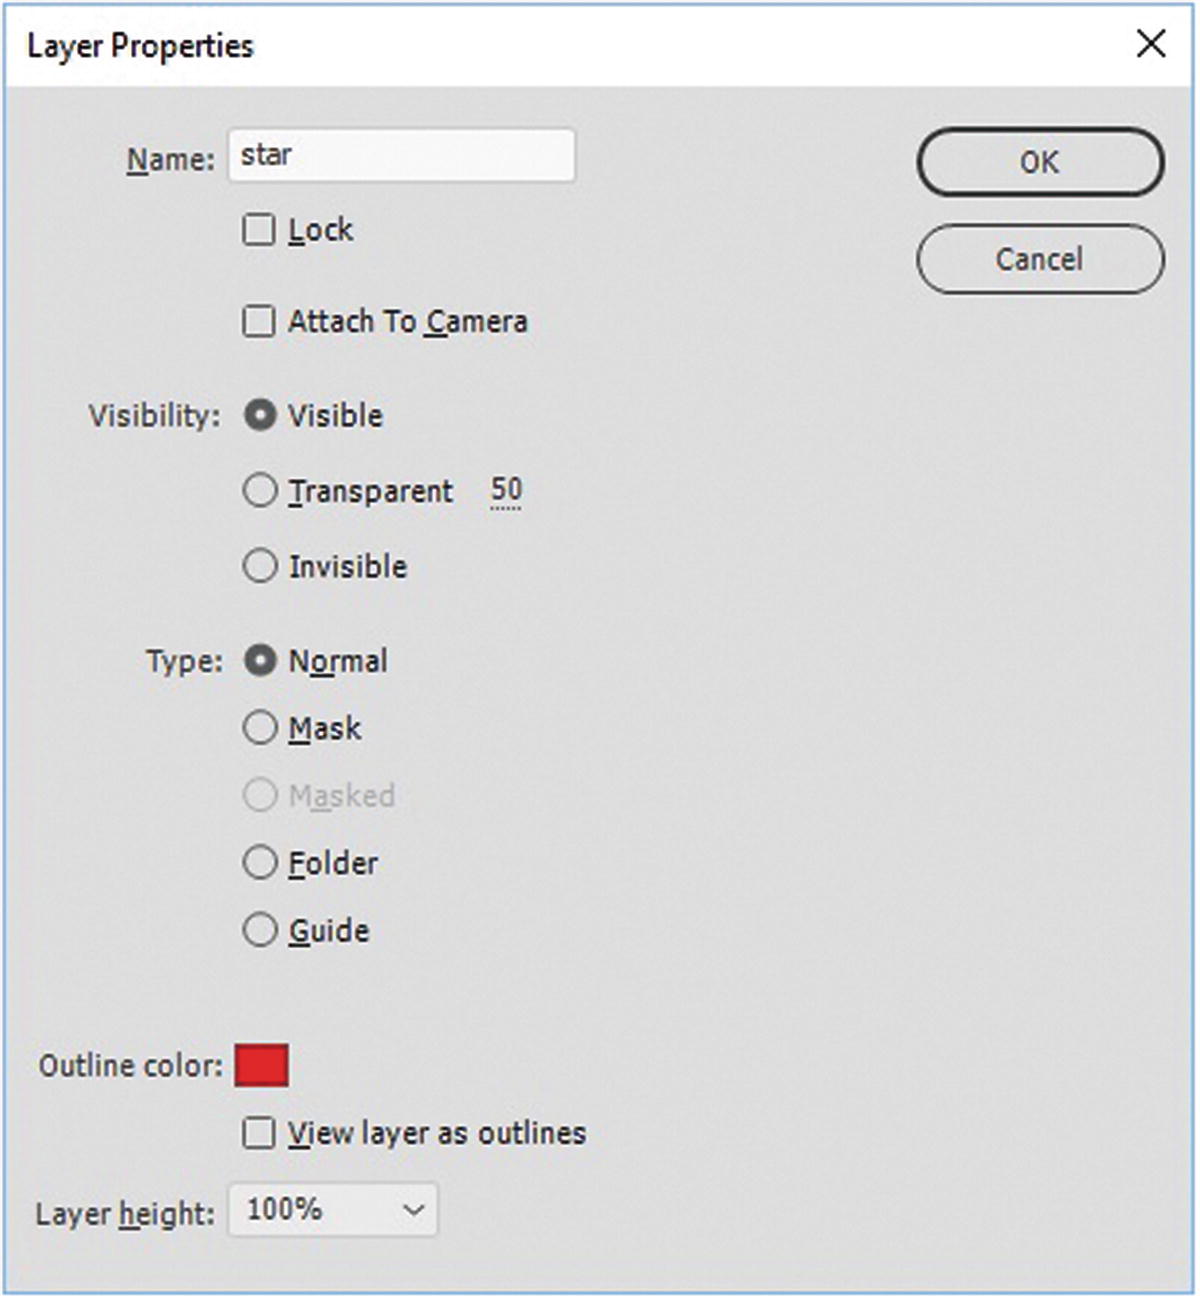
The Layer Properties dialog box
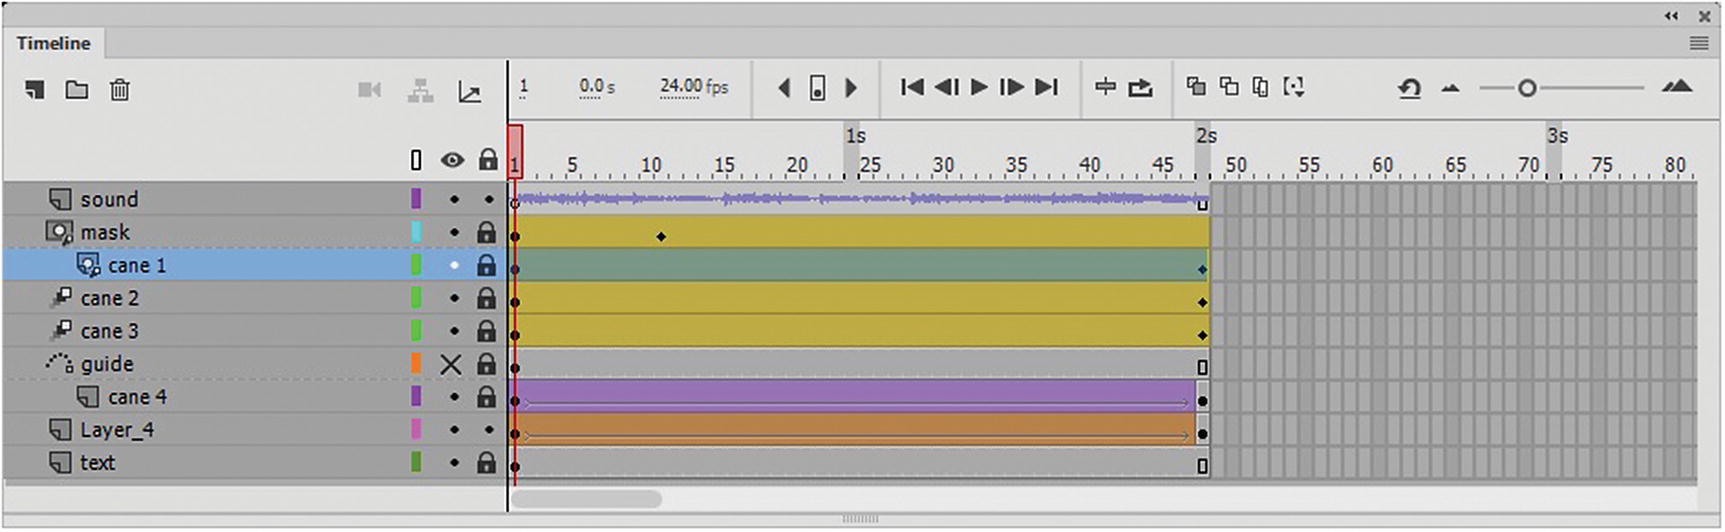
- Mask: As with a layer in Photoshop, a layer in Animate can have a linked mask. It can only be applied to it the layer that is linked to a mask layer and both layers are locked. The mask shape itself acts as a window to the masked layer below. Refer to Figure 21-18.
 Figure 21-18
Creating a masked layer in the Timeline panel
Masked: This is the layer below the mask; otherwise, it is a normal layer. Both mask and masked layers can have motion tweens applied to them; if they are symbols, the tween appears as part of the mask or masked icon. Shape and Classic tweens can appear with the Mask icon.
Folder: You can change the newly created layer to a folder, or a new folder to a layer after you name it.
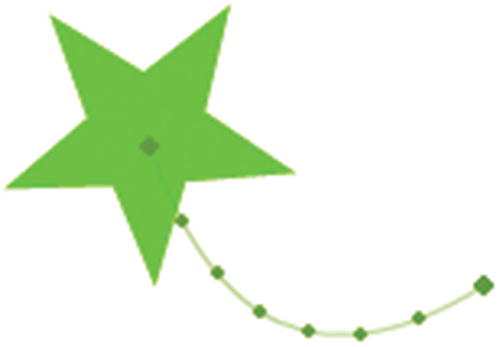
- Guide: The guide layer often contains a guide line or shape drawn with the Pencil tool (Shift-Y) or Paint Brush tool (B) that is used in combination with a symbol on another layer that has a classic tween to control its movement. The symbol on that layer is then considered guided. The guide layer should be turned off if you don’t want the guide shape visible. Refer to Figure 21-19.
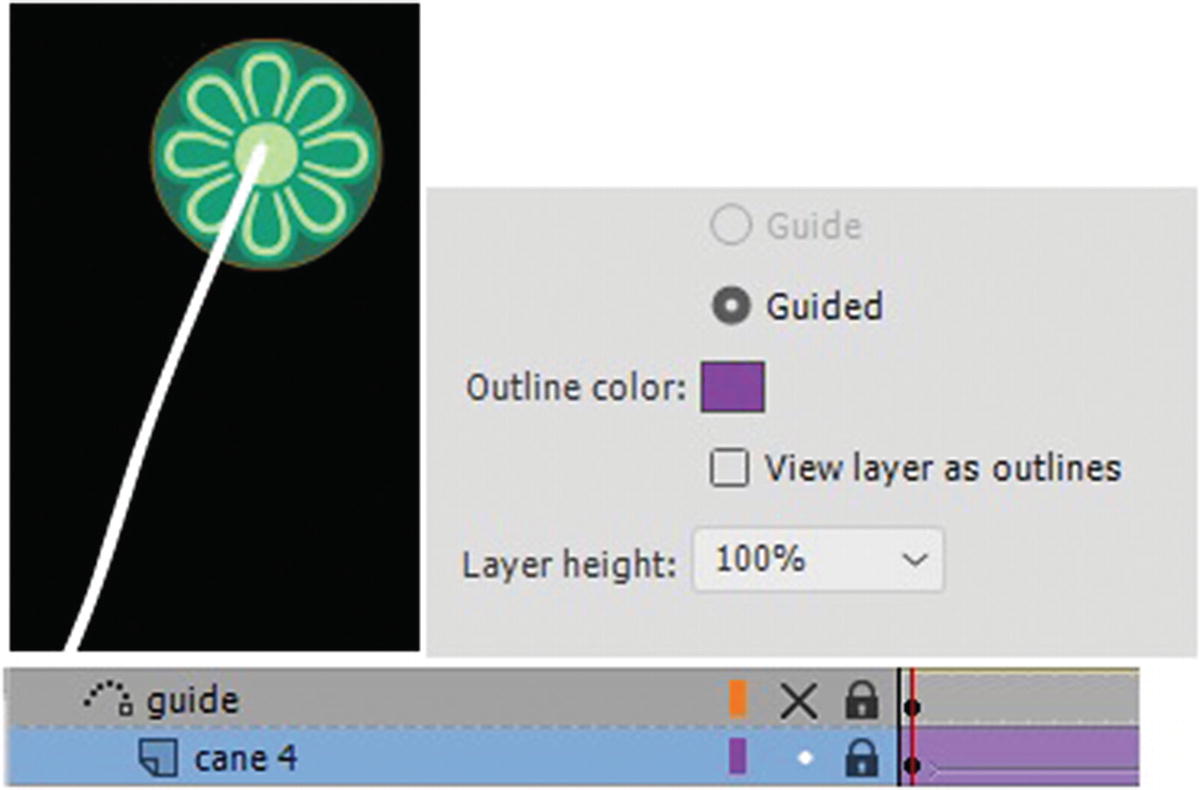 Figure 21-19
A created line acts as a guide to the symbol in a Classic tween
Guided: Only appears as an option if the guide layer is connected and linked below.
You can also choose a different outline color and a layer height from the properties; this increases the size of the layer in the timeline by 100%, 200% or 300%, so it is easier to select, but it has nothing to do with layer order or how a symbol on the layer appears on the stage.
- Camera (for zoom and camera angles): You can access this type of layer by clicking the Camera icon in the Timeline panel and then using the Camera tool (C) in the Tools panel. The same icon removes or hides the camera layer. Refer to the spinning_advanced_layers.fla file to see this layer in action as you move the playhead on the timeline. Refer to Figure 21-20.
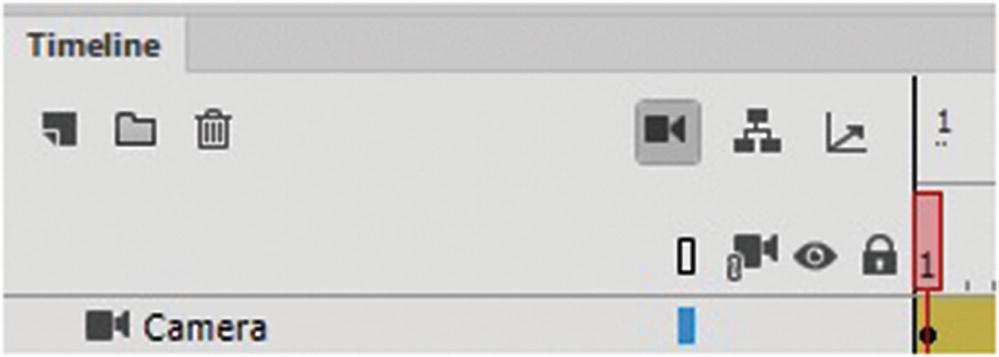 Figure 21-20
Add or remove a camera layer
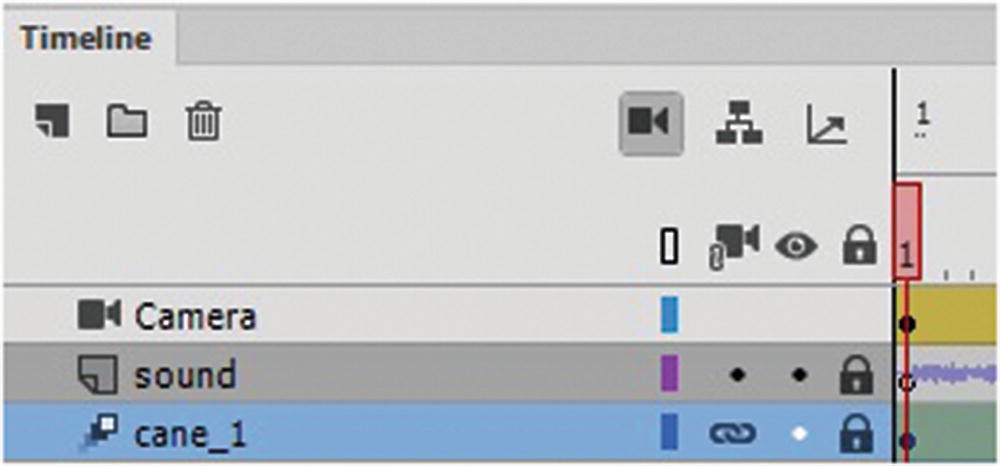
A camera layer is added to the Timeline panel and a layer is linked to the camera
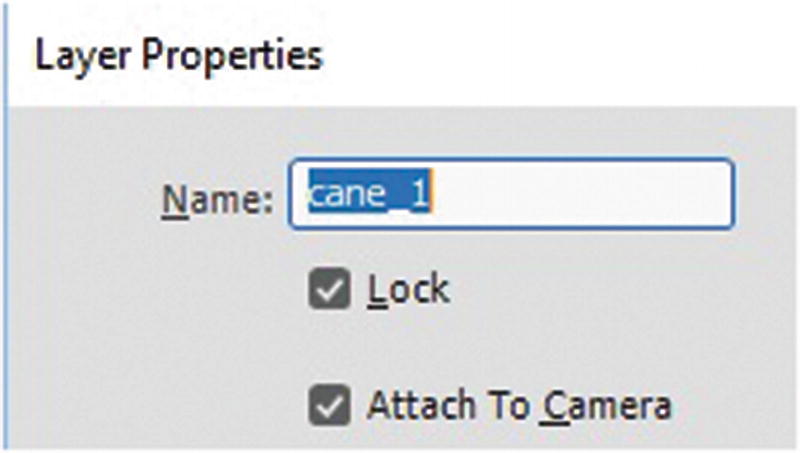
Attach to Camera is checked in the Layer Properties dialog box
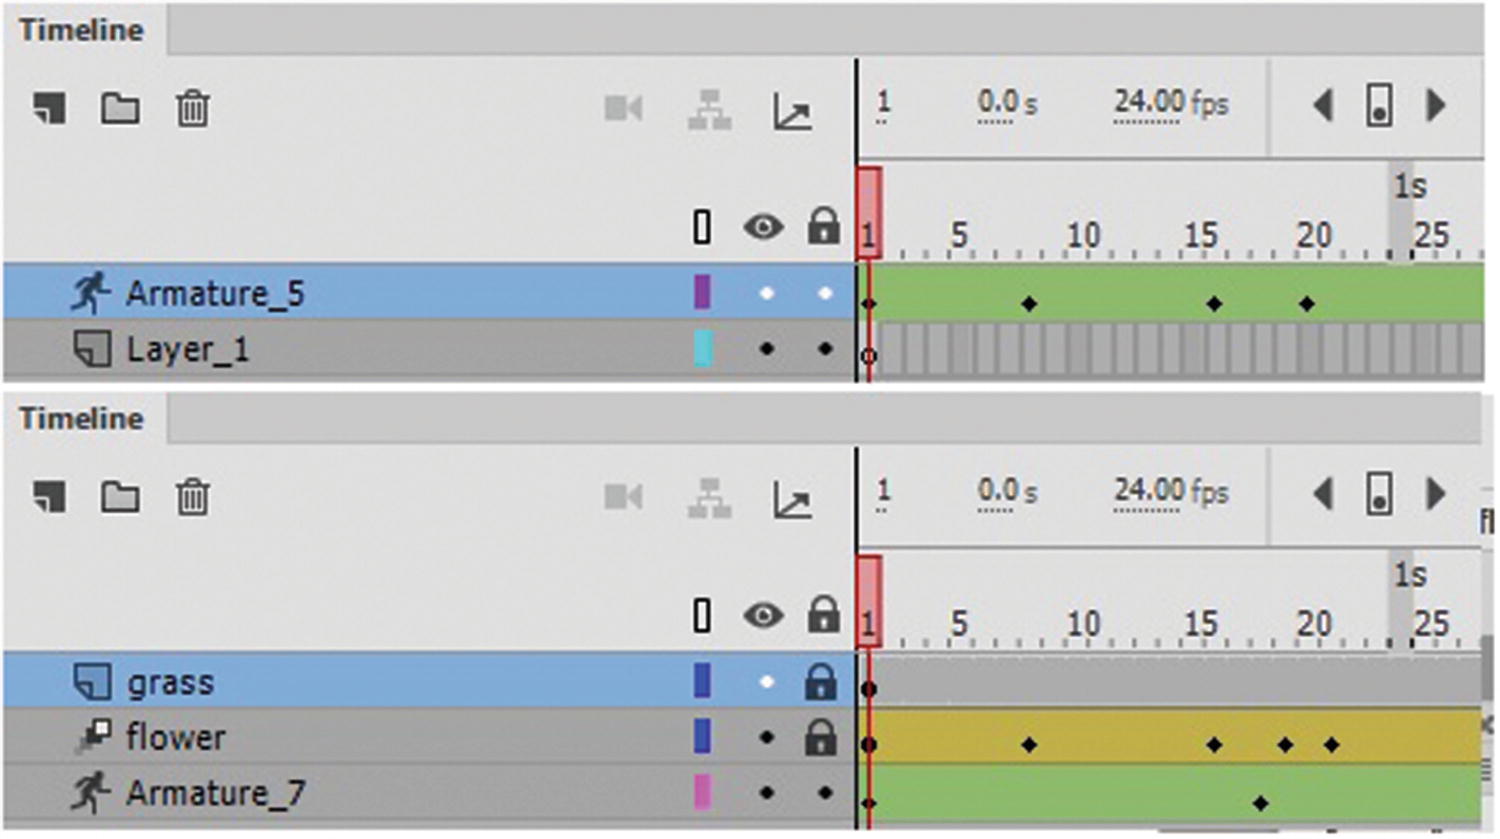
- Armature bone : Used when creating movement with the Bone tool when two or more bones are attached. Armatures are great for character running movements, but they are difficult to master. If you want to learn how to create a basic character, I recommend Adobe Animate CC Classroom in a Book, which demonstrates basic walking movements. You’ll look at the Bone tool briefly in this chapter and see some examples in Chapter 24. Refer to Figure 21-23.
 Figure 21-23
The armature layer
Audio: Unless used in a button symbols, audio should be stored on a normal layer or layers by itself so if it is accidently deleted, it does not disrupt the animation by removing parts of it.
The Parts of the Timeline
Parts in the Timeline panel
Move to different keyframes in the timeline
Use the playhead to move along the timeline
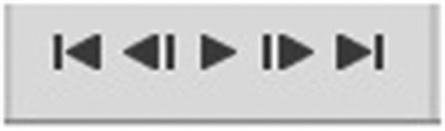
Preview the timeline
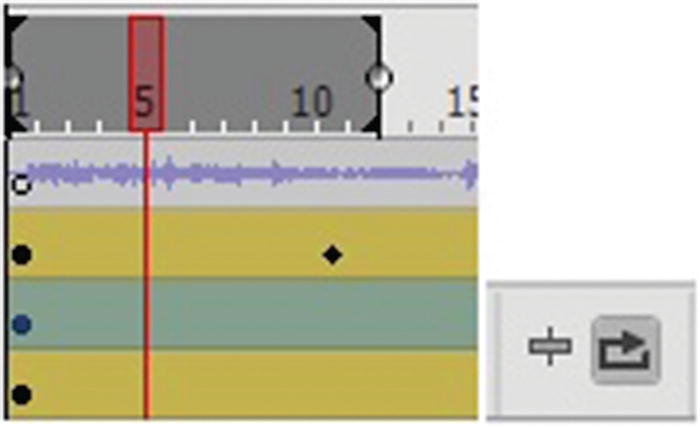
Loop a section of frames to preview them
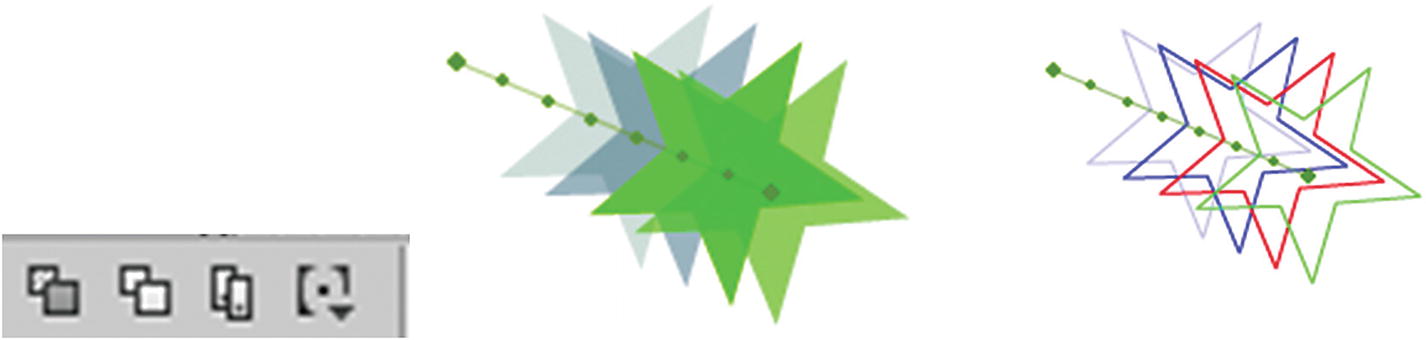
Preview several frames’ movements using onion skins and outlines
Edit the motion of the frames
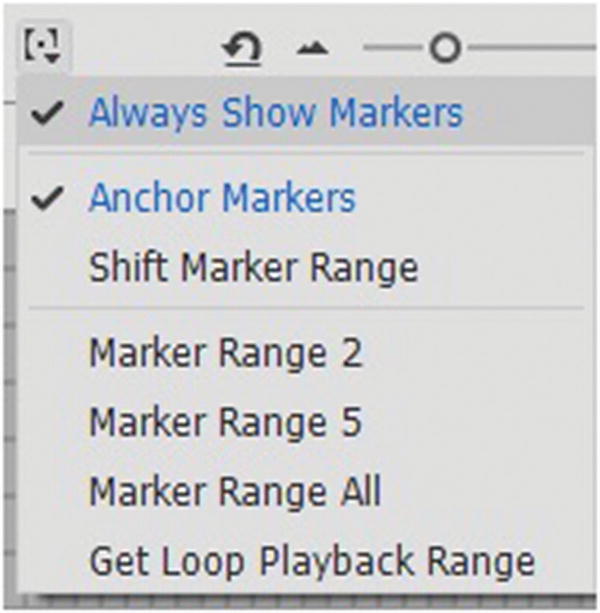
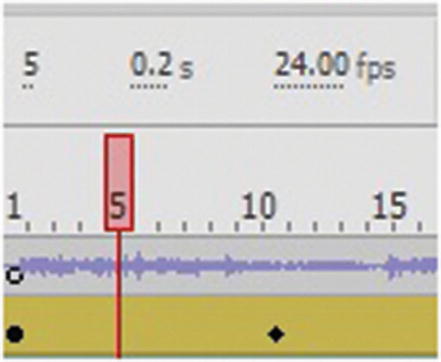
Adjust the marker range in the Timeline panel
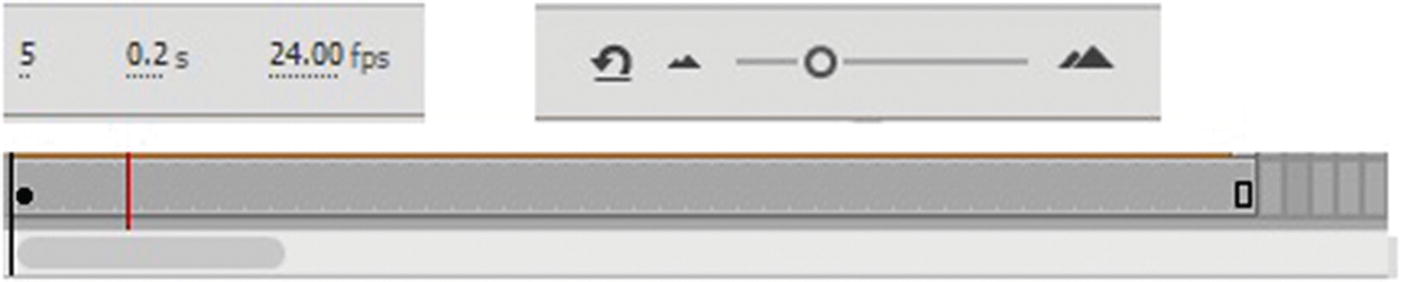
Use these areas of the Timeline panel to navigate the frames
Note
Most web animations play at about 12 to 24 frames per second. Some developers recommend increasing your frame rate to 30 or 60 fps (video quality) to make the animation run smoother; however, this can put more strain on the CPU and browser, so run some tests first. Most Canvas animations can run at 24 fps. I recommend for the web a maximum of 30 if you are going to incorporate scenes into a video in Photoshop. If specifically for gaming, then 60 might be better for smother movements. Either way, before you start an animation, always set the rate first because with complex animation, this can be difficult to adjust once you have created many keyframes and layers.
Frames Types
There are several distinct types of animation frames that can be created within an animation. They often relate to the layer type that was chosen.
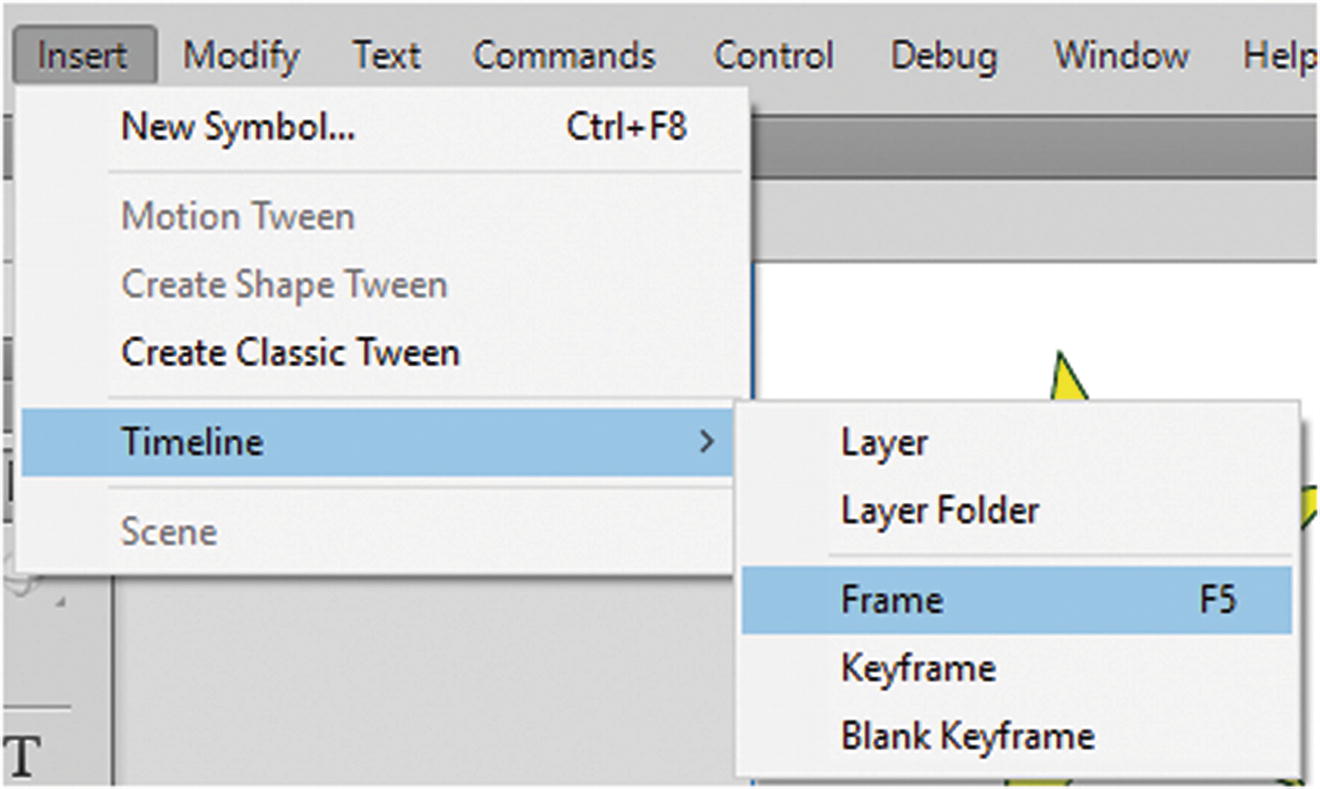
Choose a frame type
- Blank keyframe : A single frame that has no content on the stage. They are gray in color with an outline dot. Refer to Figure 21-34.
 Figure 21-34
A blank keyframe
- Blank frame : If there are multiple frames in one section that contain no content, they are often gray and start with an outline dot and then end with an outline rectangle. Refer to Figure 21-35.
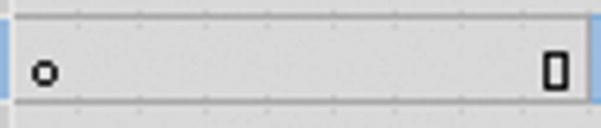 Figure 21-35
Blank frames
- Keyframe with content: Dark gray in color and have a filled dot because there is content on the stage for this frame in the layer. When multiple filled keyframes are beside each other, this is often a sign that this may be a stop-motion animation or multiple images from a video, such as an image sequence. Refer to Figure 21-36.
 Figure 21-36
A keyframe with content

Split frames into frame-by frame animations
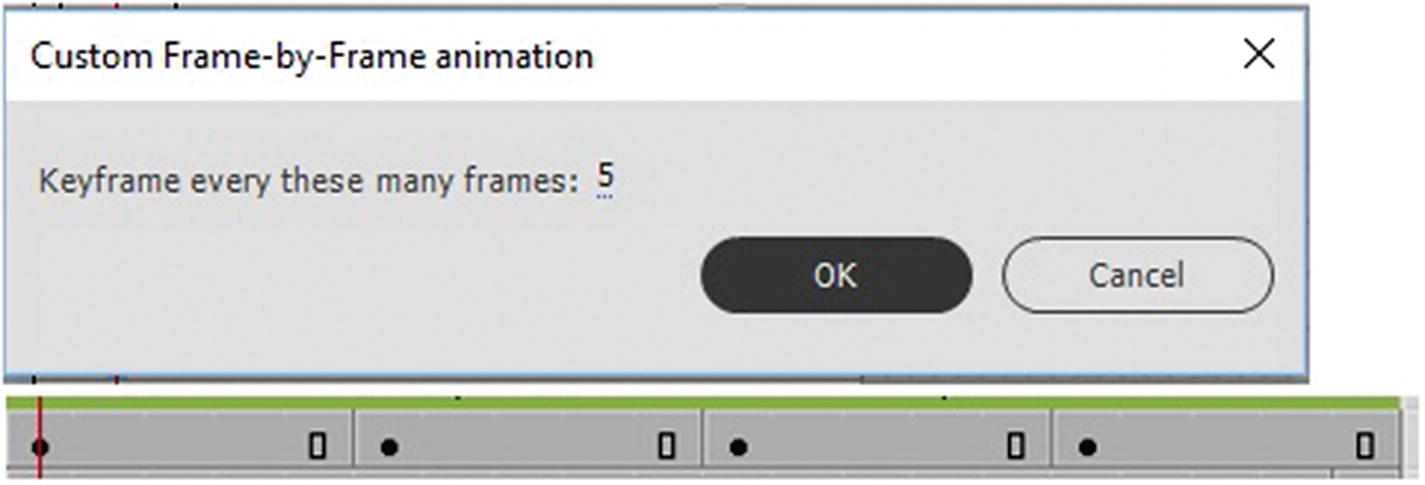
Frames spit with a keyyframe every five frames
Frames with content: If there are multiple frames in one section that contain content and no movement, they are dark gray and start with a solid dot and end with a rectangular outline. It may be one long keyframe throughout the animation or broken by another keyframe that contains a different symbol on the stage. Refer to Figure 21-39.

Multiple keyframes with content
Tweens
Classic tween : The frame shows up purple with an arrow. This indicates movement of a shape or symbol from one spot to the next keyframe, which in this case is static. For a Classic tween to act like a Motion tween it requires a guide layer. And the tween becomes guided. HTML5 Canvas’s Output panel recommends using Classic tweens for simple movements, but at publication, it knows how to convert a basic Motion tween into a Classic tween when required for the animation to run smoothly. Refer to Figure 21-40.
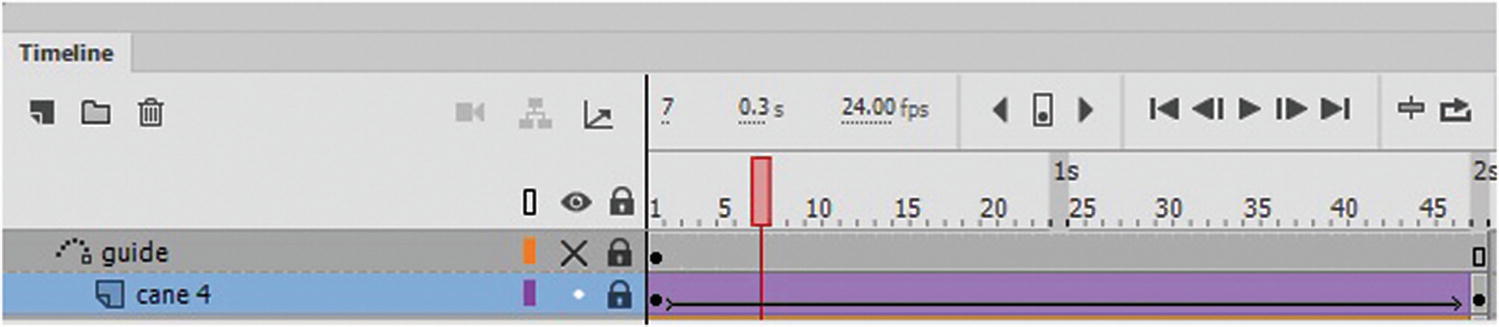
The classic tween in the timeline
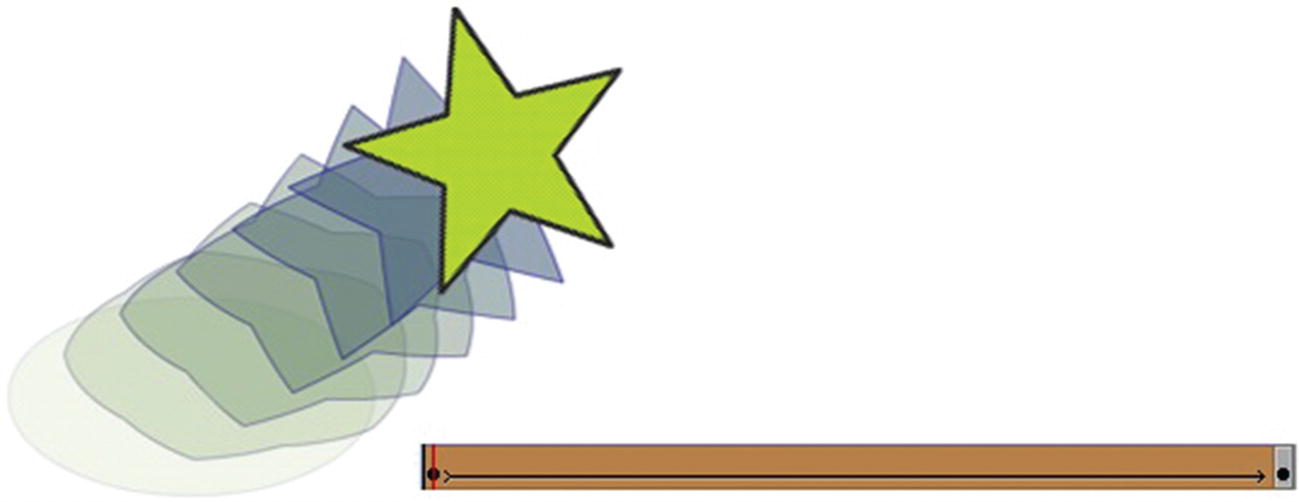
Motion tween: More advanced than a Classic tween. Symbols using this tween can transform and move along in a variety of ways across the stage. Motion tweens may have multiple keyframes within the motion that show up in the golden area. Refer to Figure 21-41.
The Motion tween
Shape tween: The morphing of a shape to another. A symbol cannot morph, but it can contain a shape tween. A orange bar with an arrow is used for this tween. While a symbol on a Motion tween can scale in size or rotate, its basic shape cannot alter as it does with a Shape tween. Refer to Figure 21-42.
The Shape tween
Camera tween : A golden color and can contain the Motions tweens of zoom and moving left or right. Refer to Figure 21-43.
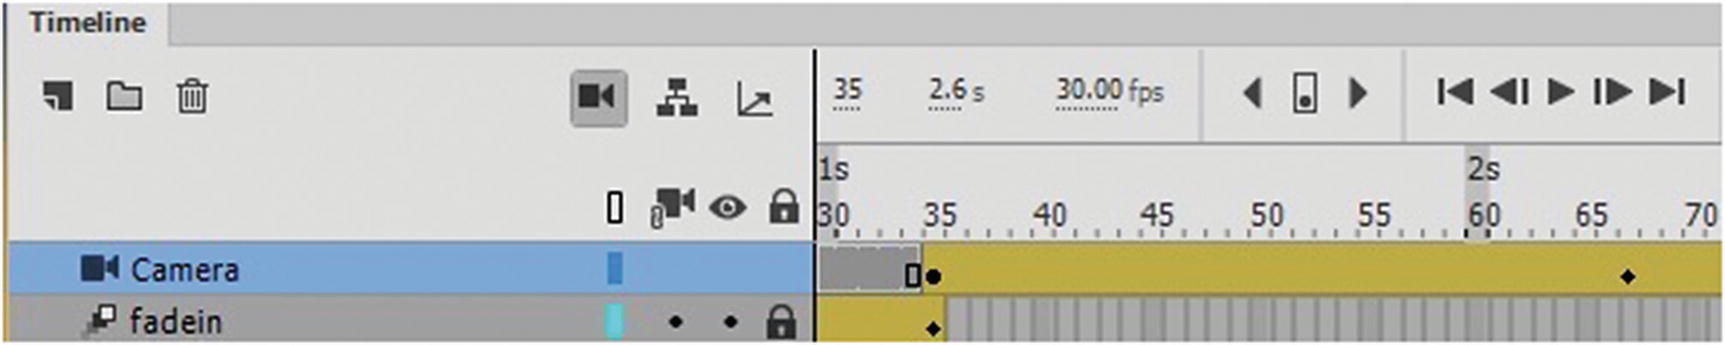
The Camera tween
Armature tweens: They are green and contain the main points of movement, called poses. Refer to Figure 21-44.

The Armature tween
3D tween: This can only be used in ActionScript 3.0 FLA files. With a Motion tween it allows you to work with the 3D tools. Crosshairs appear when you select a keyframe and chose 3D Tween. You’ll look at 3D in Chapter 23 to morph your symbol in the Z-path. You can get out of a 3D tween by selecting the keyframe and unchecking 3D tween. Refer to Figure 21-45.
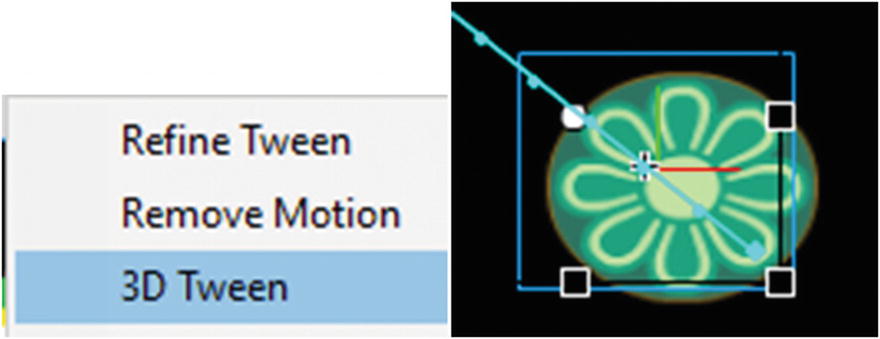
Adding a 3D tween to the Motion tween
With any layer that contains a tween, you can right-click it and choose to remove.
Other Frame Types
Audio frames : Show the audio previewed in the timeline with jagged lines representing the sound. Refer to Figure 21-46.

The sound frame
Comment frames : Labeling frames that are blank frames keeps thoughts organized. For example, knowing which video, sound, or action is playing on the preceding frames. Also, you call a name rather than frame numbers when creating certain complex JavaScript actions on an HTML5 Canvas timeline. The comments can be added when a frame is selected, and then entered into the Frame Properties panel. Refer to Figure 21-47.
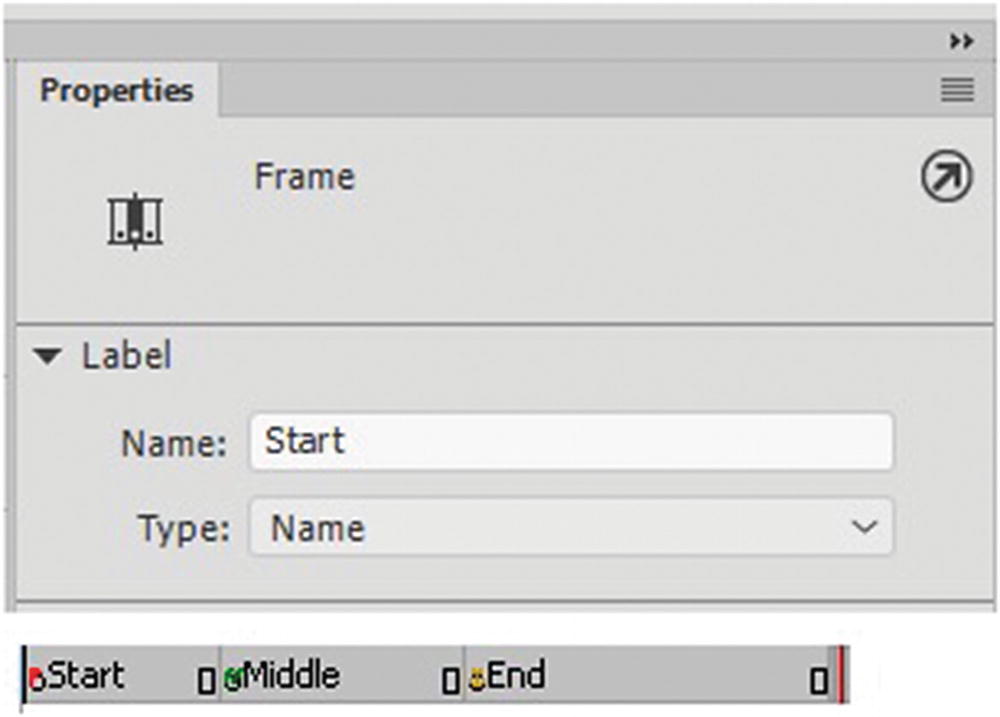
Adding comments to blank frames to keep your video or animation organized
A little red flag appears when a frame is labeled as a name.
A green // is a comment
A yellow anchor is an anchor type.
Actions Panel

The Actions panel where you can add JavaScript
You don’t have to label frames or actions for simple animations; however, the Output panel may report a warning if you do not label frames in certain JavaScript code instances.
Further Information on Frames
Any frame when selected in its entirety can be moved by dragging when the cursor changes to a double-sided arrow to shrink or expand the frame.
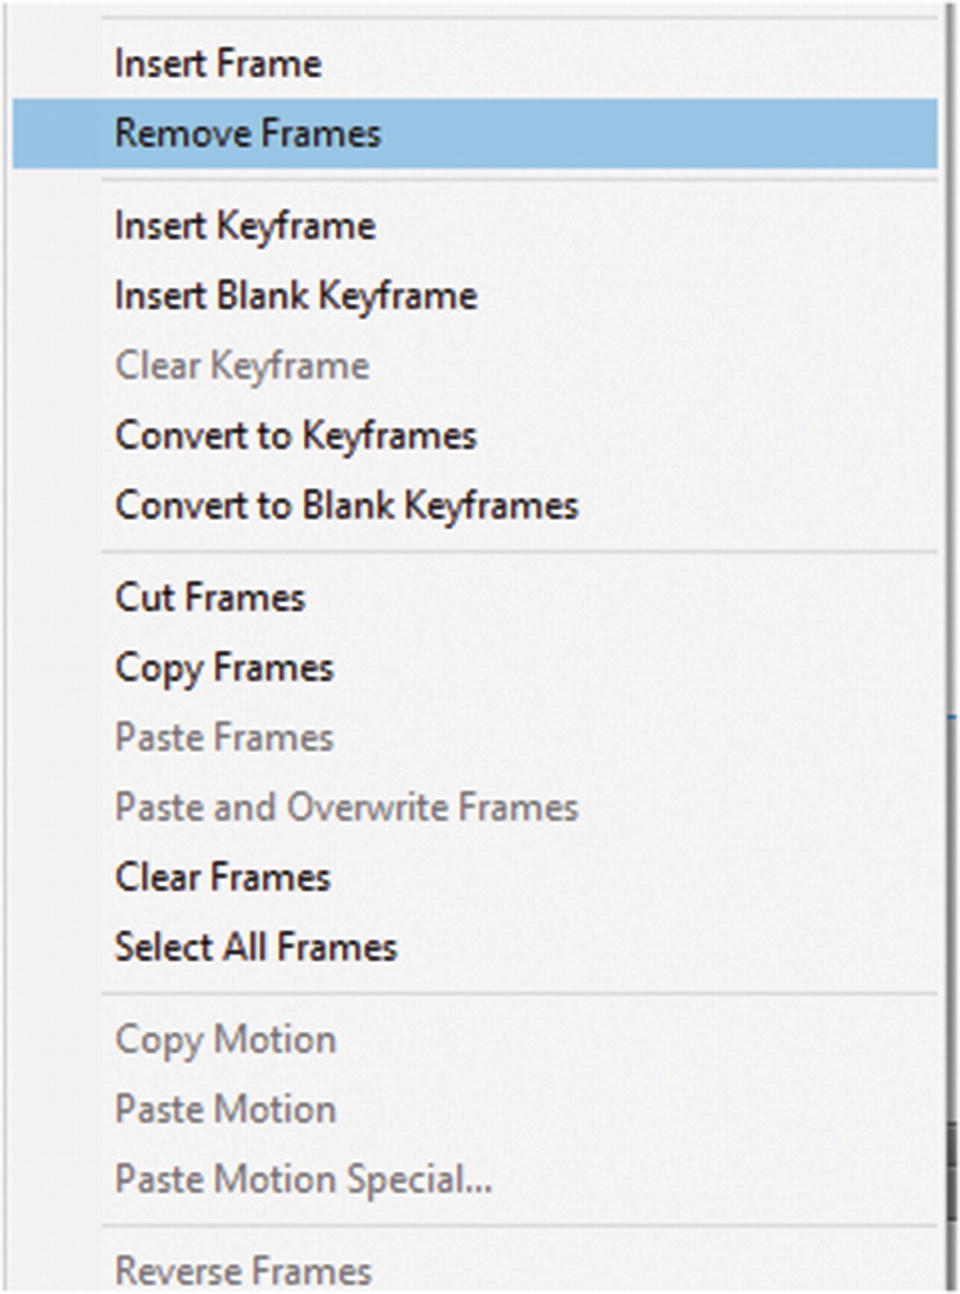
Options from the Frames pop-up menu
They can also be cleared without deletion of the actual layer. You can access these options from either the pop-up menu when you right-click a point in the frame.
Depending on the type of keyframe or tween, different information appears in the Properties menu that you can edit, as you see next.
More Information About Shape Tweening
Unlike Classic and Motion tweens, a Shape tween cannot be made up of symbols. It can be made of primitives, drawing objects, shapes, and grouped shapes, which you saw in Chapter 19.
Sometimes the shape does not morph as you would expect, so to control a complex shape, you need to use your Properties panel as well as Shape hints (Modify ➤ Shape ➤ Add Shape Hint).
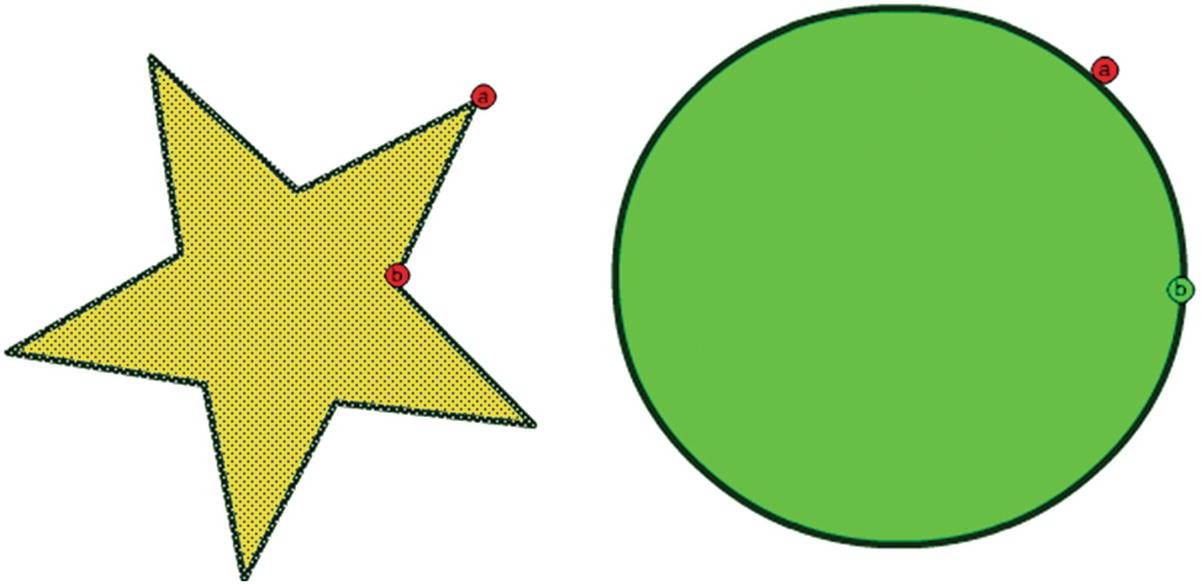
Adding shape hints to a Shape tween
Hints allow you to mark object points that you want to morph in a specific direction so that the shape tween does not appear as a tangled mess, and each transition remains smooth and recognizable.
To view them, when you return to the shape, choose View ➤ Show Shape Hints.
The hints must have a corresponding hint at the end of the tween.
Shape hints are yellow in a starting keyframe, green in an ending keyframe, and red when not on a curve.
For best results when tweening shapes, follow these guidelines: In complex shape tweening, create intermediate shapes and tween them instead of just defining a starting and ending shape. Shape tweening is a lot like using the blend tool in Illustrator CC, you can use this tool to create your transitory shapes and then break these symbols apart in animate to use as your transition shapes.
Make sure that shape hints are logical; for example, if you’re using three shape hints for a triangle, they must be in the same order on the original triangle and on the triangle shape to be tweened. The order cannot be ABC in the first keyframe and then ACB in the second.
Shape hints work best if you place them beginning at the top-left corner of the shape and move counterclockwise.
You can right-click a shape hint to remove it. Or choose Modify ➤ Shape ➤ Remove All Hints.
Easing for Classic, Shape, and Motion Tweens
For symbols and shapes to have realistic movements on the Timeline panel, you can use a type of timing known as easing. Easing can be applied to different types of tweens; however, the settings often appear different for each type in the Properties panel and Timeline panel. This next section shows how to locate and edit the easing for each type of tween.
Shape Tween Easing
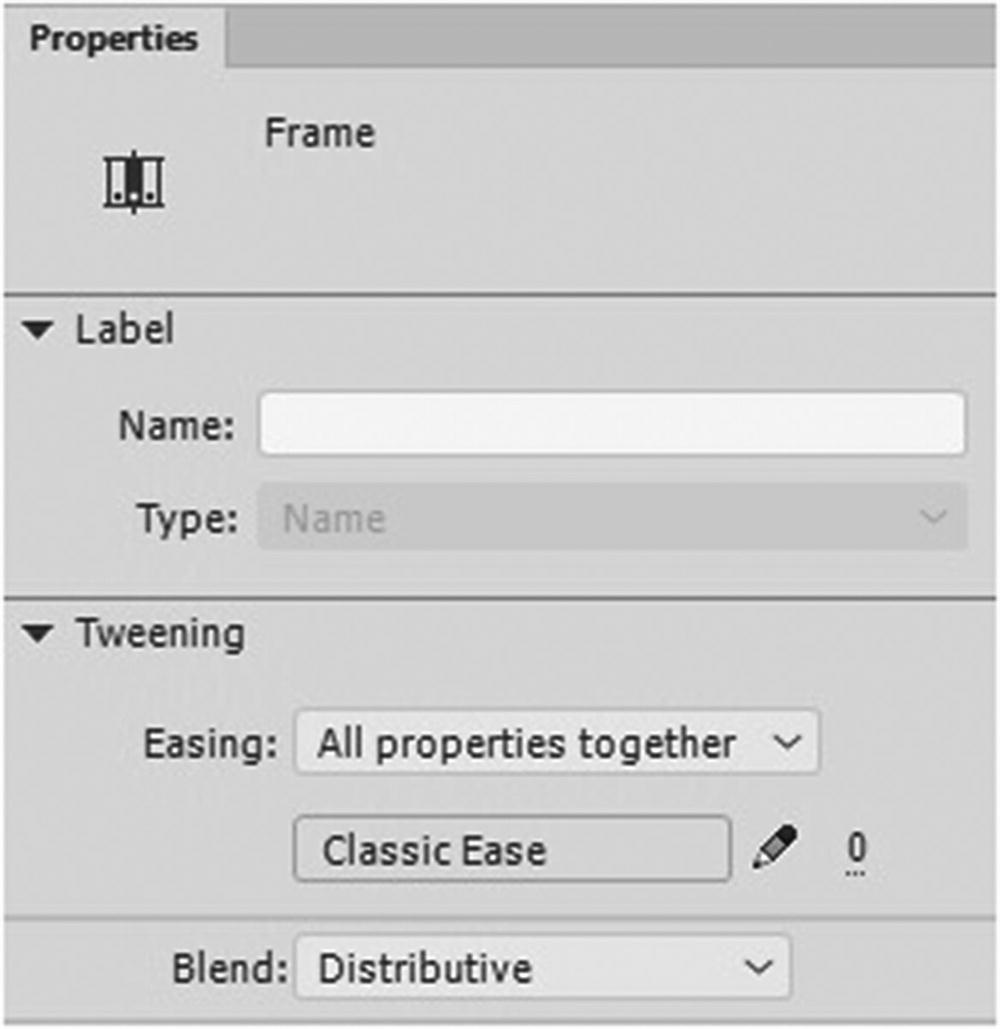
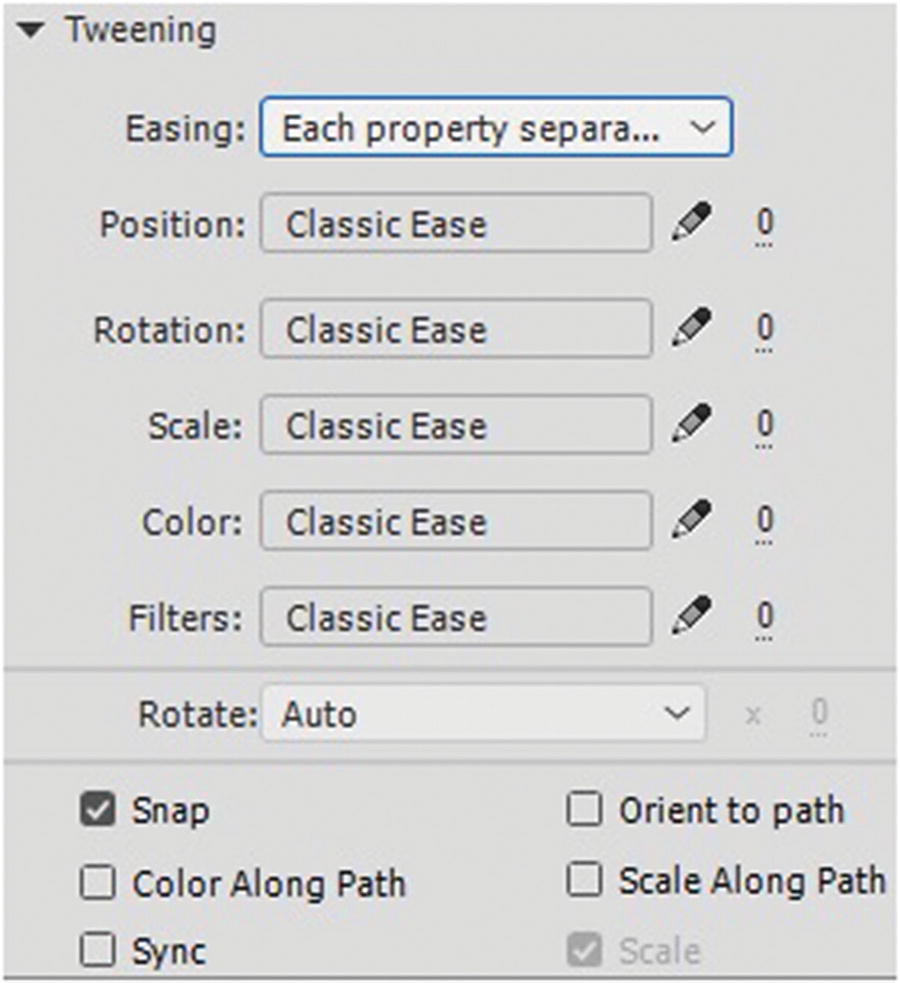
Properties panel for Shape tweening
Easing: You can choose all properties together or each property separately from the drop-down menu.
Ease in (–) or Ease out (+)?
Easing adds a gradual speed up or slow down to an animation’s beginning or end.
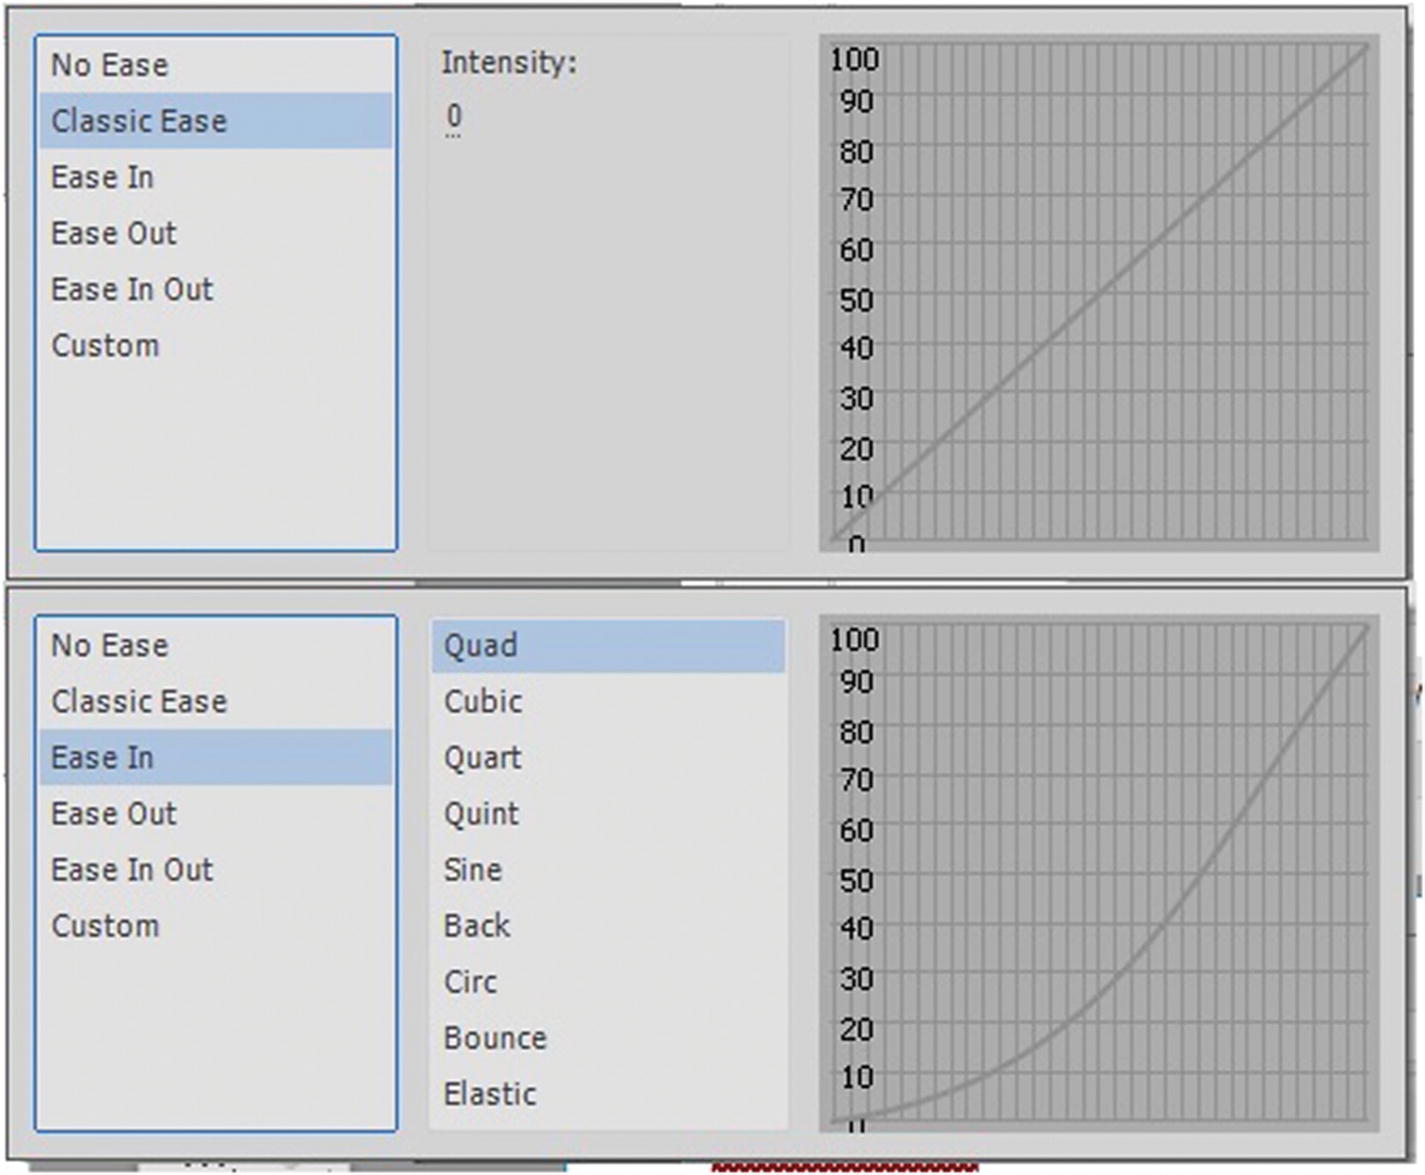
Adding an ease to a shape
Classic ease: Allows you to set your own intensity, while ease in or out has other settings you can choose from when you double-click the options, as seen in Figure 21-52.
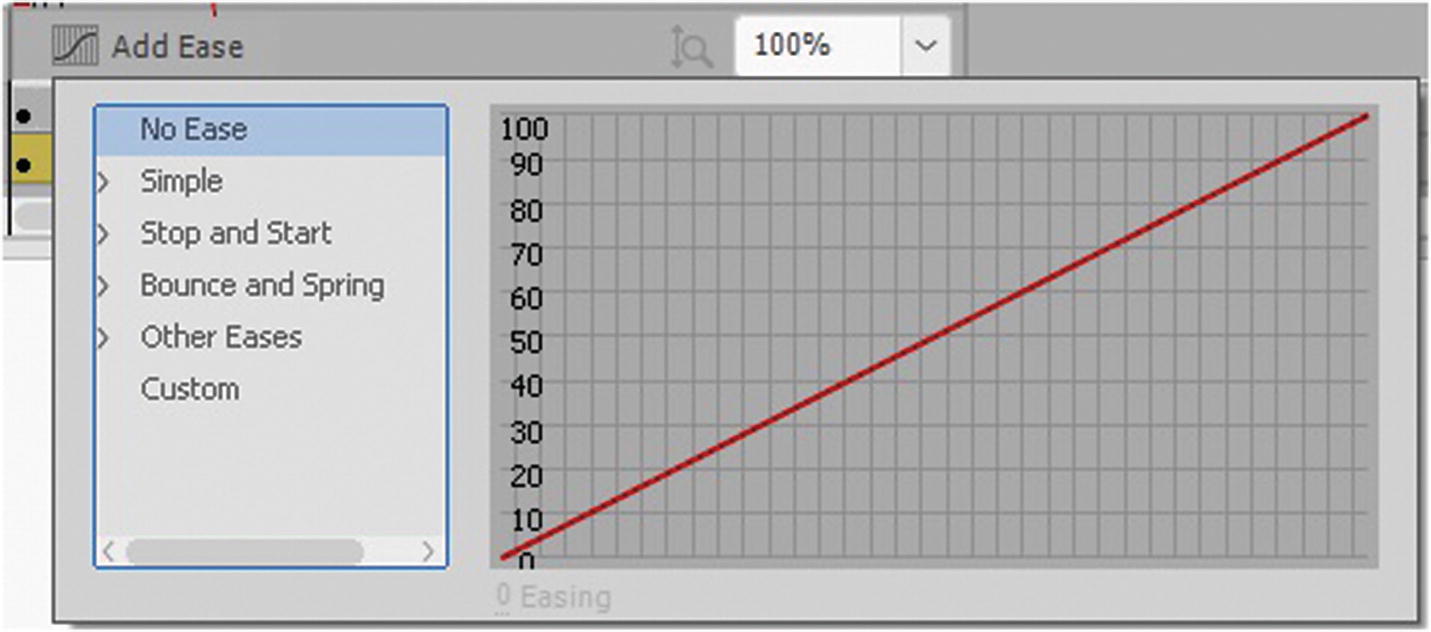
- Custom ease: Clicking the Word or Pencil icons allows you to create, save, and apply your own custom ease. You can preview it with the Play and Stop buttons. Refer to Figure 21-53.
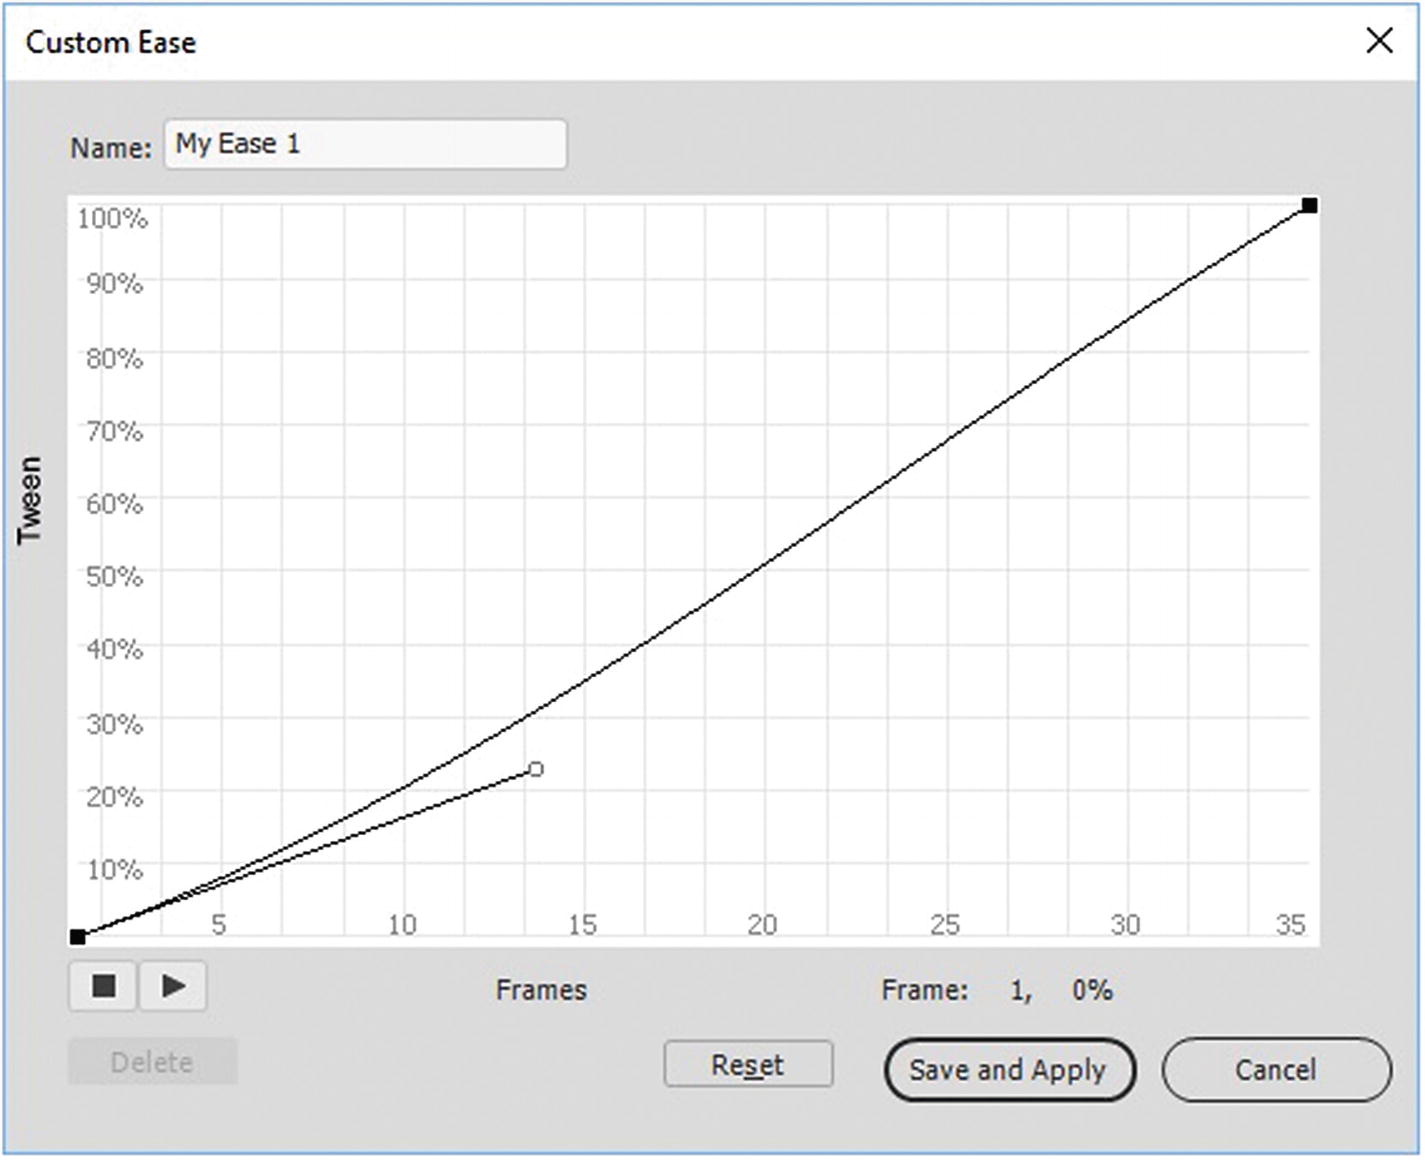 Figure 21-53
Creating a custom ease
Blend: Set to distributive or angular using the drop-down menu in Figure 21-51.
Classic Tween Easing
Clasic tweening ease tween in the Properties panel
Remember Classic tweens need a guide layer and a guided layer, or they’ll just move in a straight direction. You are affecting the guided layer that the symbol is on.
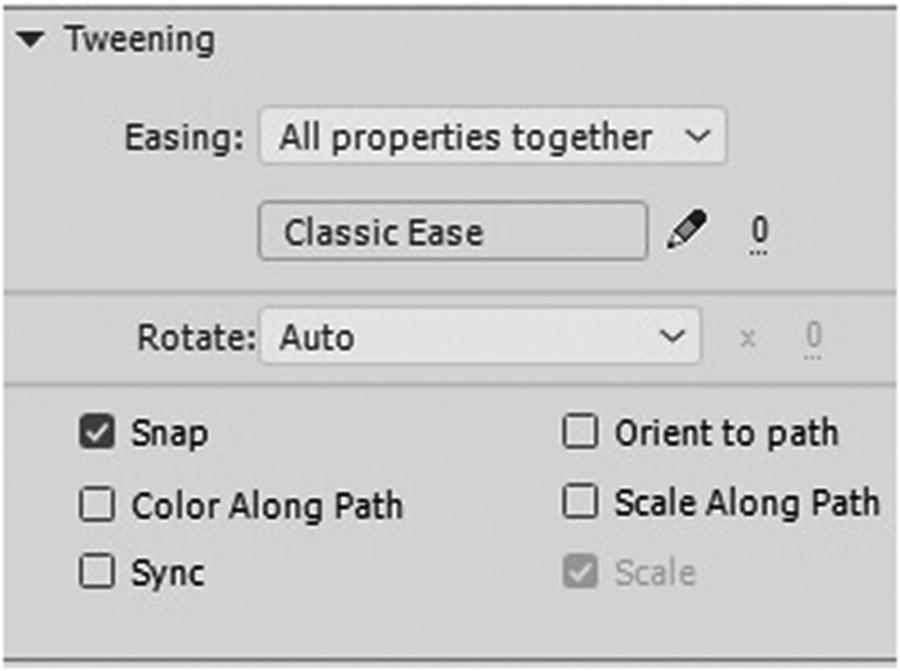
Tweening settings for the Classic tween in the Properties panel
Snap: Snaps to guide
Orient to path: Path rotation
Color Along Path: Change color transformation as per path color
Scale Along Path: Change scale as per with of path
Sync: Sync Symbols
Scale: Scale shape
Motion and Camera Tween Easing
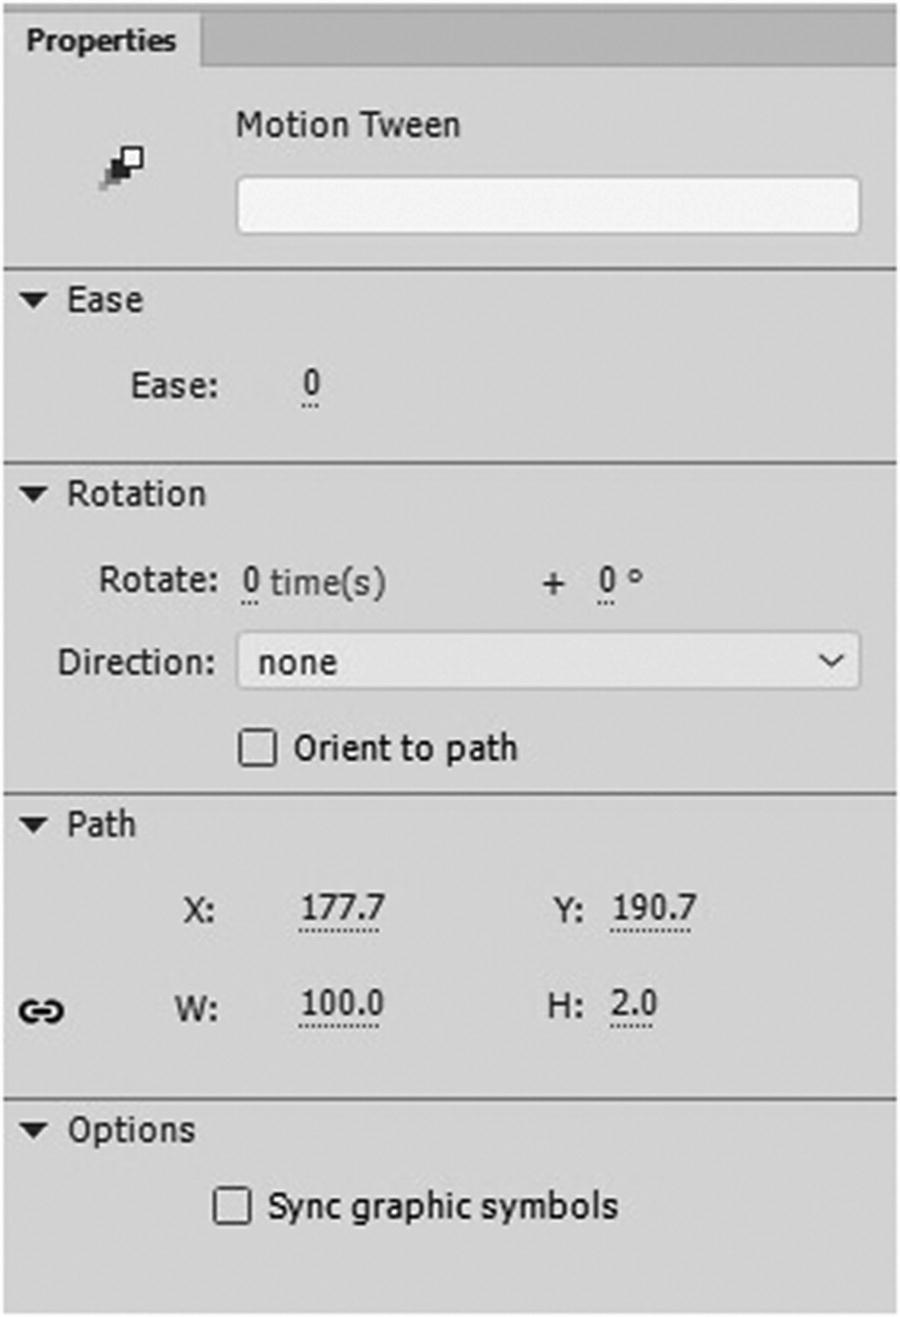
Motion tween settings in the Propreties panel
They allow you to create complex tween movements very easily. Both of their Property panels are identical, since both involve the movement of symbols.
As before, you can set the ease in the Properties menu; however, to set a custom or preset ease you need to look in a different location in the timeline, which you will in a moment.
Like with the Classic tween you can set the times of the rotation and the direction clockwise and counter-clockwise, but you can also additionally rotate in degrees. You also can orient to Path and Sync graphic symbols in the Options tab.
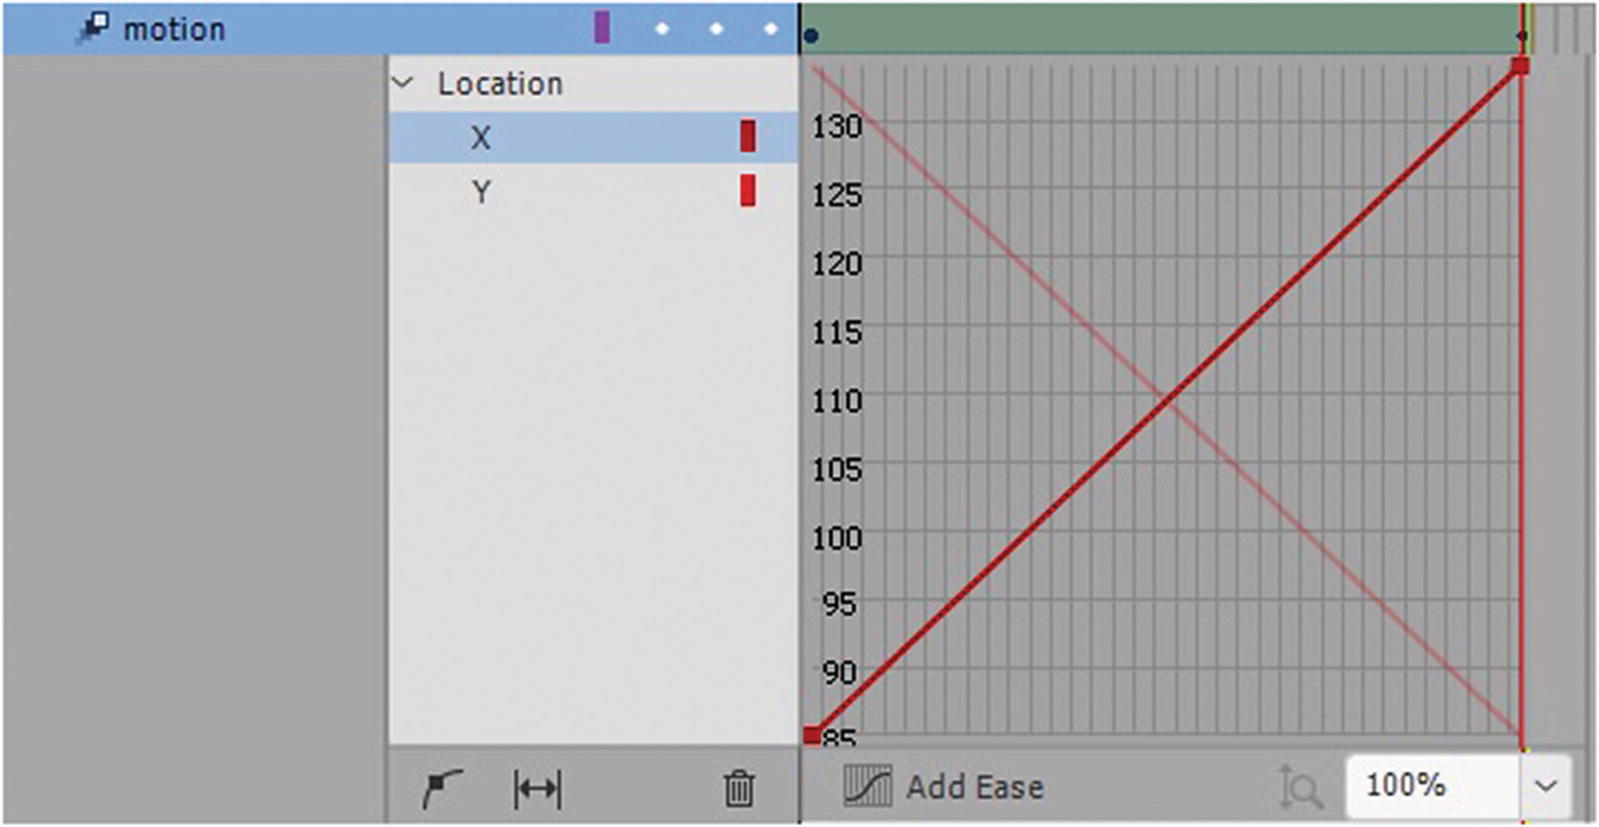
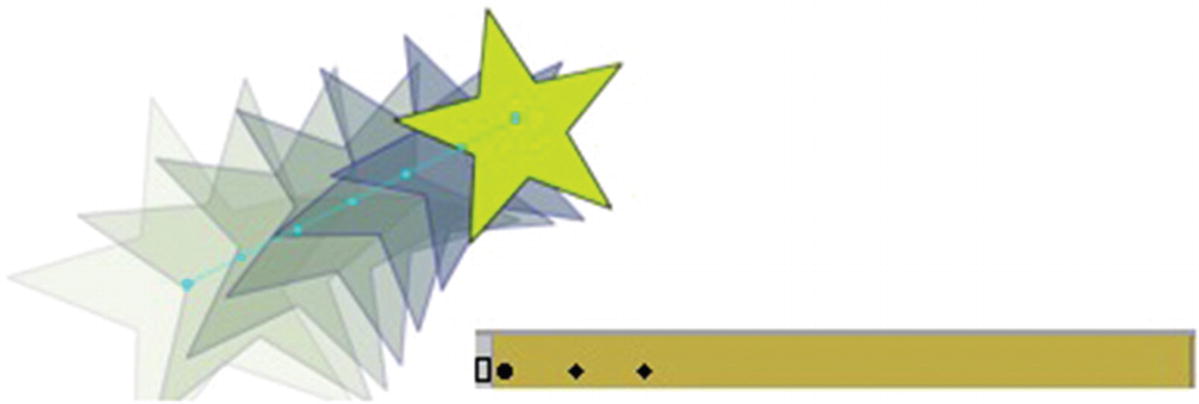
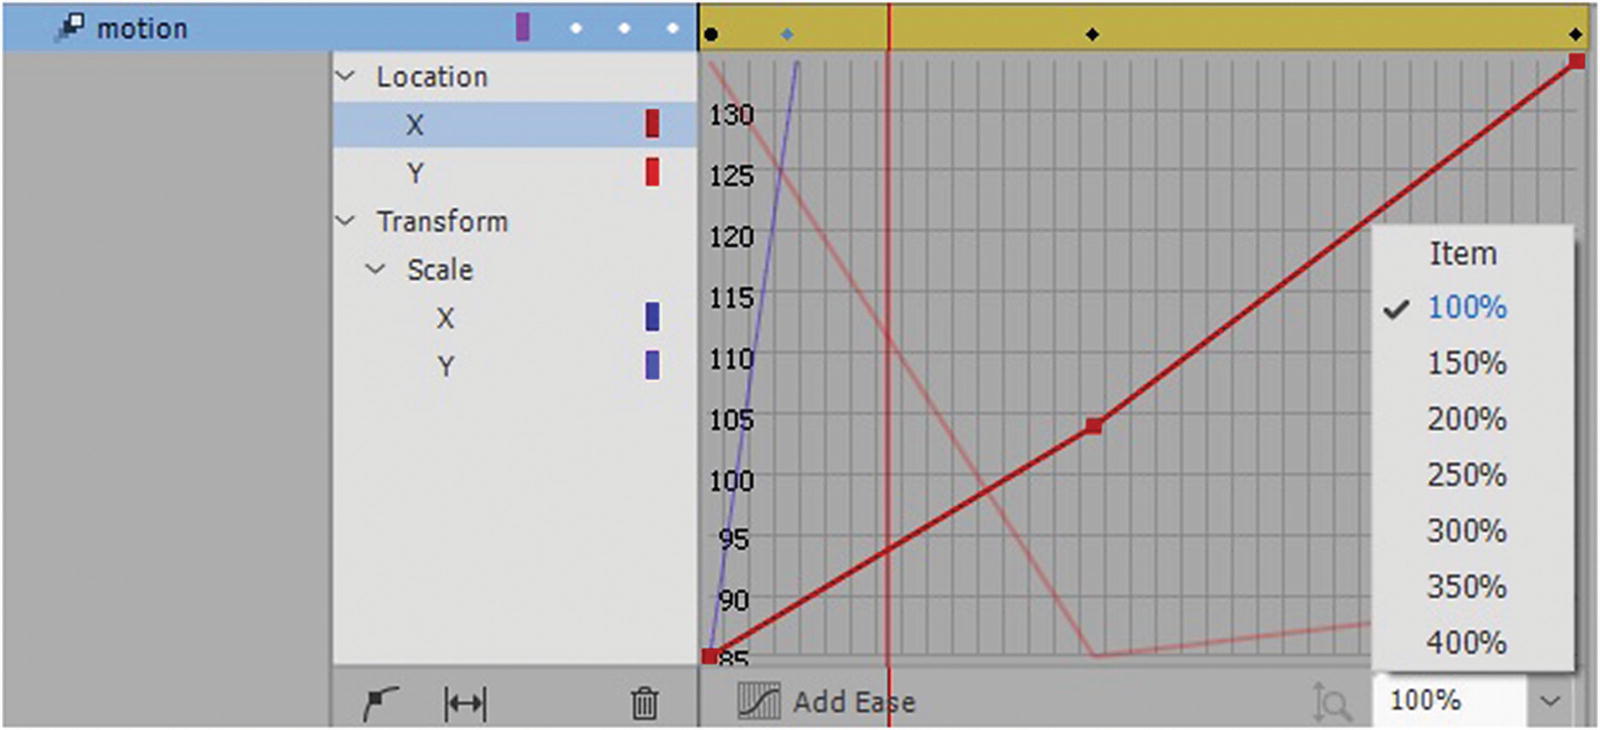
Adjust the easing of a Motion tween
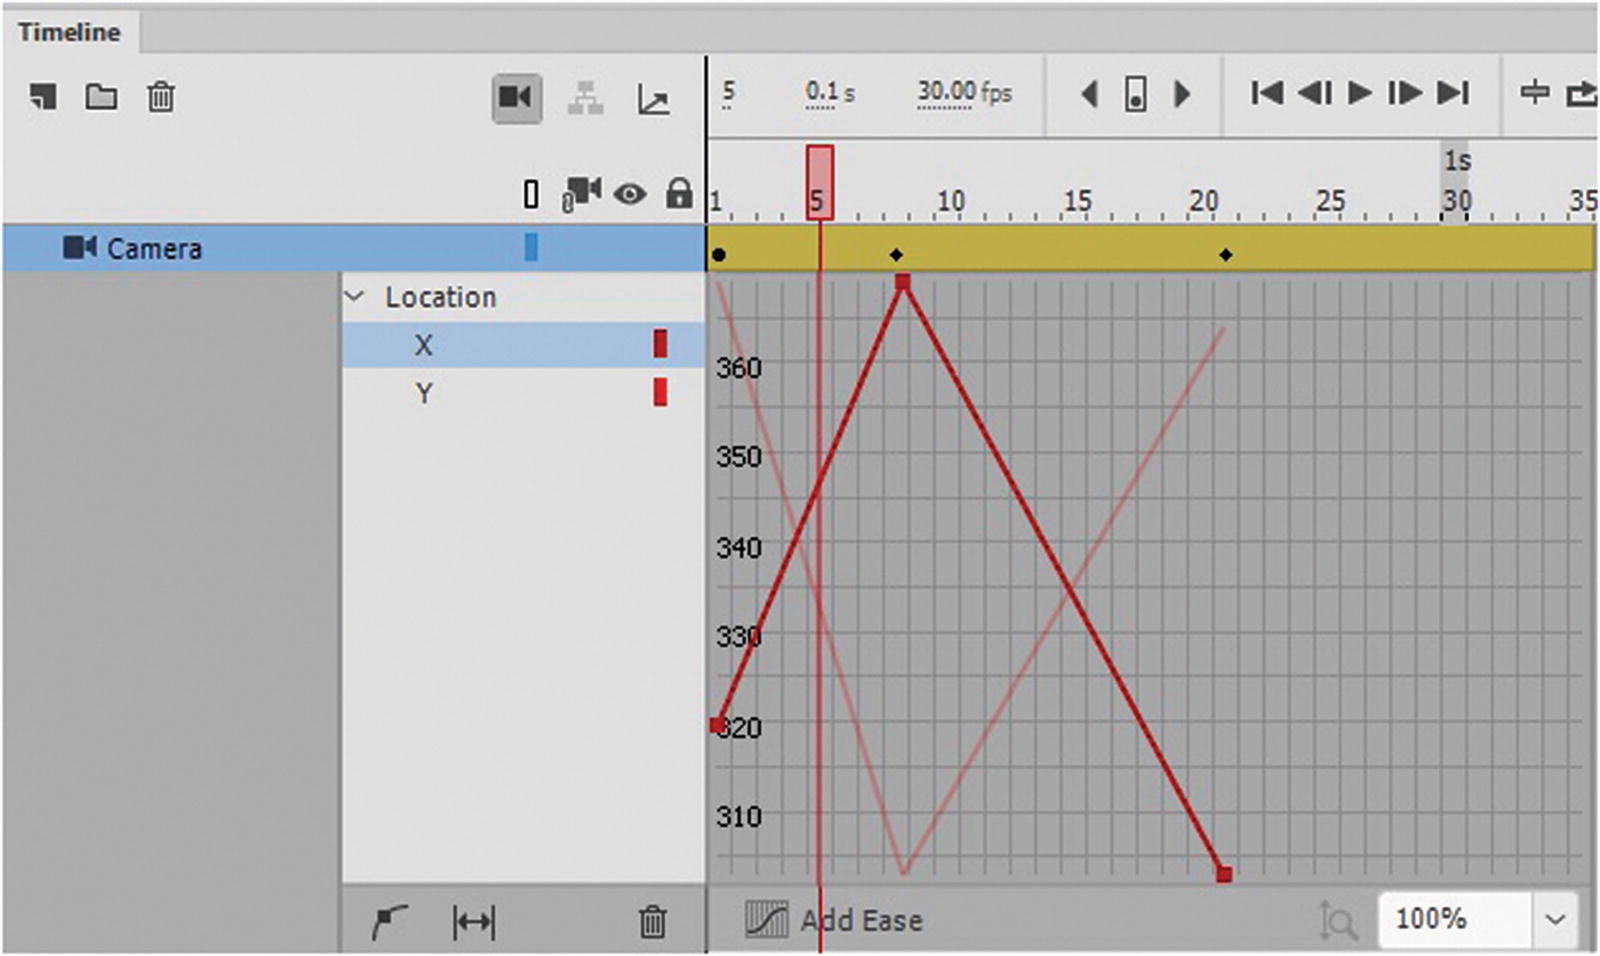
Adjust the easing of a Camera tween
The X and Y indicate where on the stage the symbol is moving. X controls the horizontal and Y the vertical movements. By moving the control or anchor points, you can change which frame the movements happen on, and isolate and keyframe movement you want to alter. To collapse the layer, double-click the frame or right-click and uncheck refine tween from the pop-up menu.
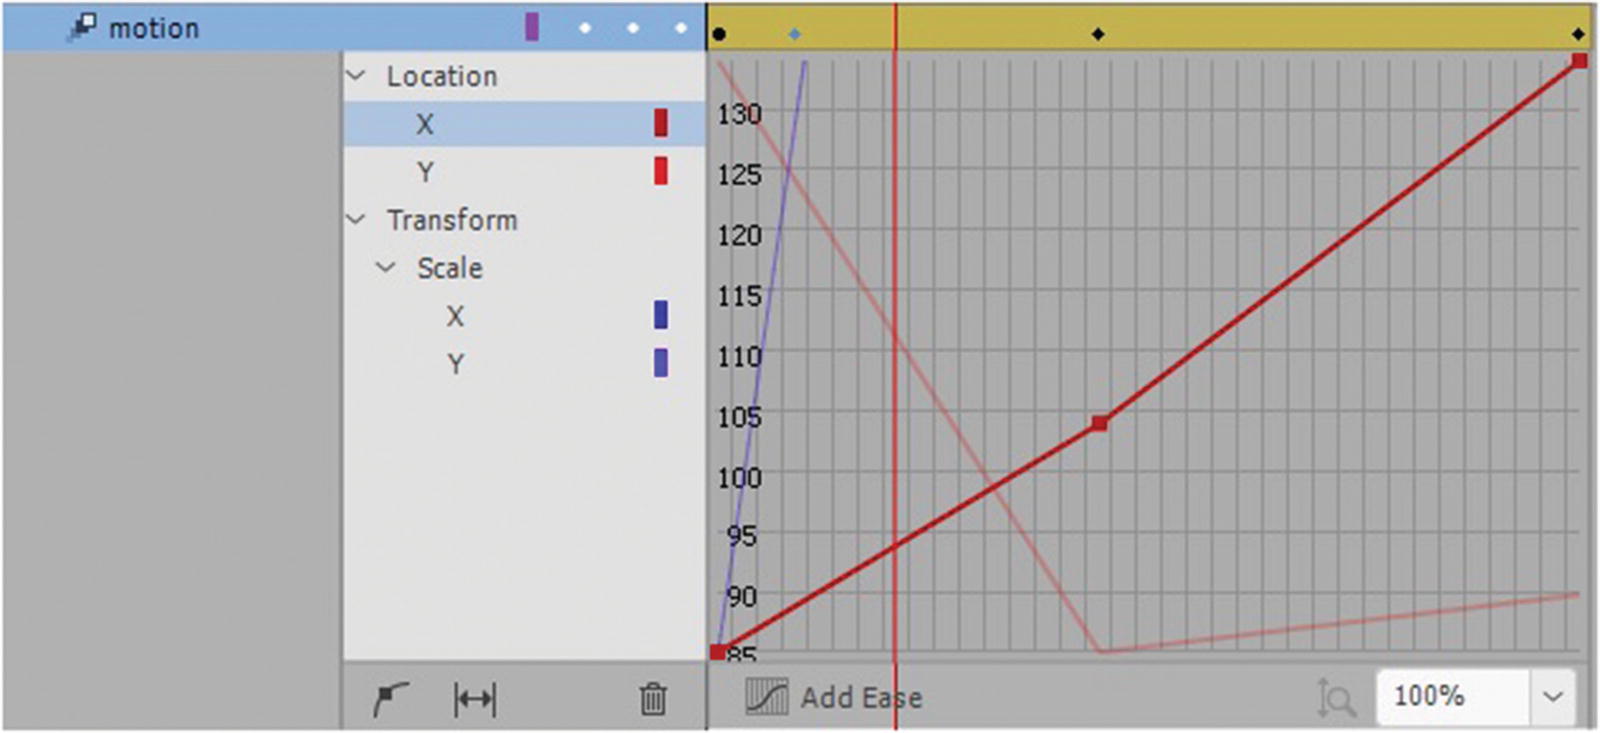
Control the movent and scale of a tween
You can also add additional points to the graph, trash/remove points, or expand the graph to view it better.
Add other custom eases from the list
Clicking the triangles reveals more suboptions.
Remember that if you add an ease here, it may affect or reset the ease that was added in the Properties panel.
Adjusting an ease
Motion Presets Panel
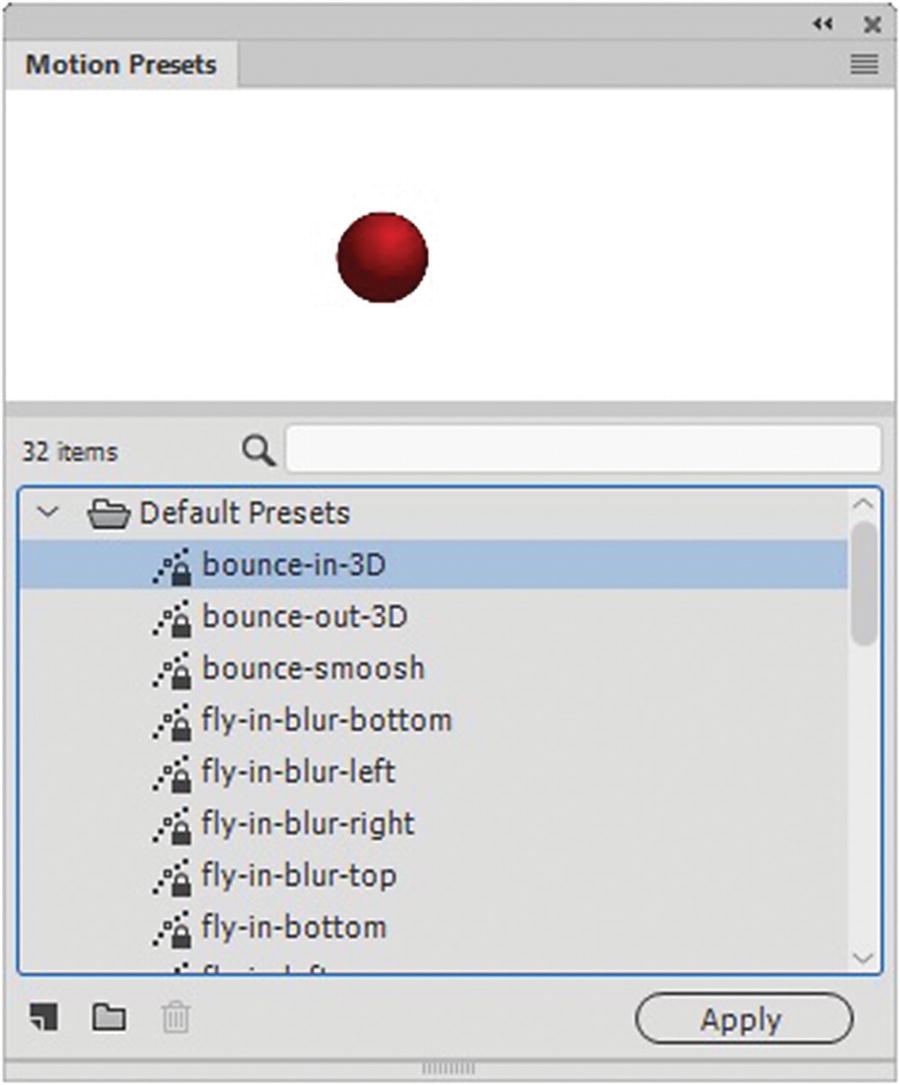
The Motion Presets panel
Select your symbol on the stage and click Apply in the panel. You will receive a warning that this will override the old motions. Click OK to override the old setting. To undo, you need to select Edit ➤ Undo right away to revert to your original settings.
Camera Tool
The Camera tool (C) in the Tools menu acts very much like a motion tween and most of the custom easing that you apply to a motion tween you can also apply to camera frames to simulate the movement of a real camera.
In this case, the main scene layer can remain stationary or contain movement while the camera moves.
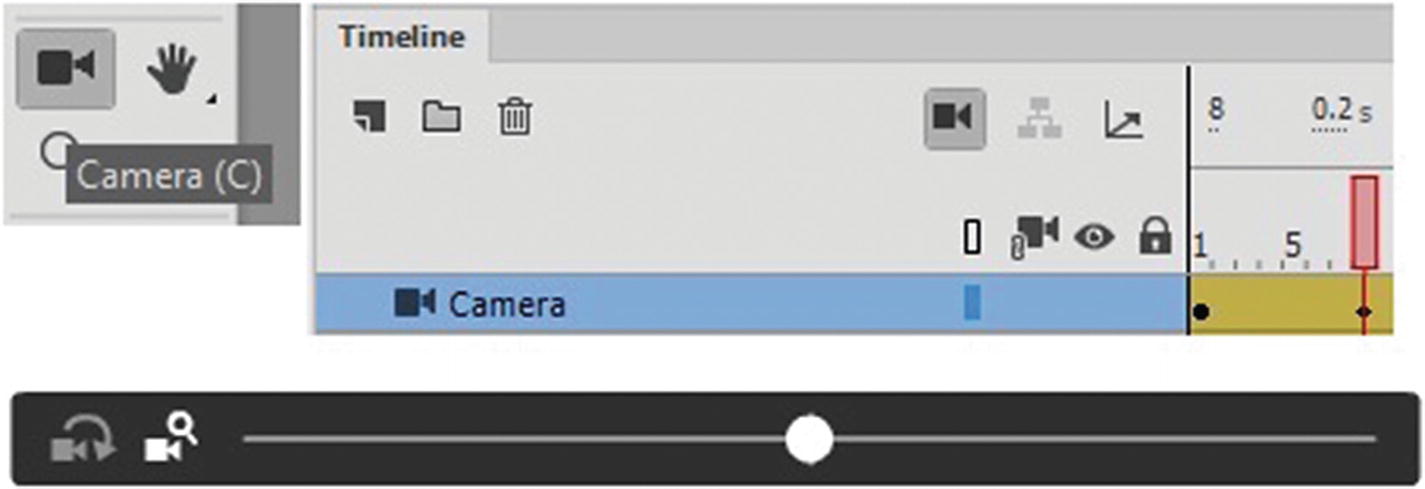
Camera tool and how it appears on the stage and in the Timeline panel
Note
You do not have to have all Advanced Layers on to use the Camera tool only the camera tool icon in the Timeline panel. If you discover your camera controller disappears, go to the Workspace tab and choose Reset Essentials. This should bring it back on screen when using the Camera tool, though you may have to rearrange your other tools again, as you did in Chapter 17.
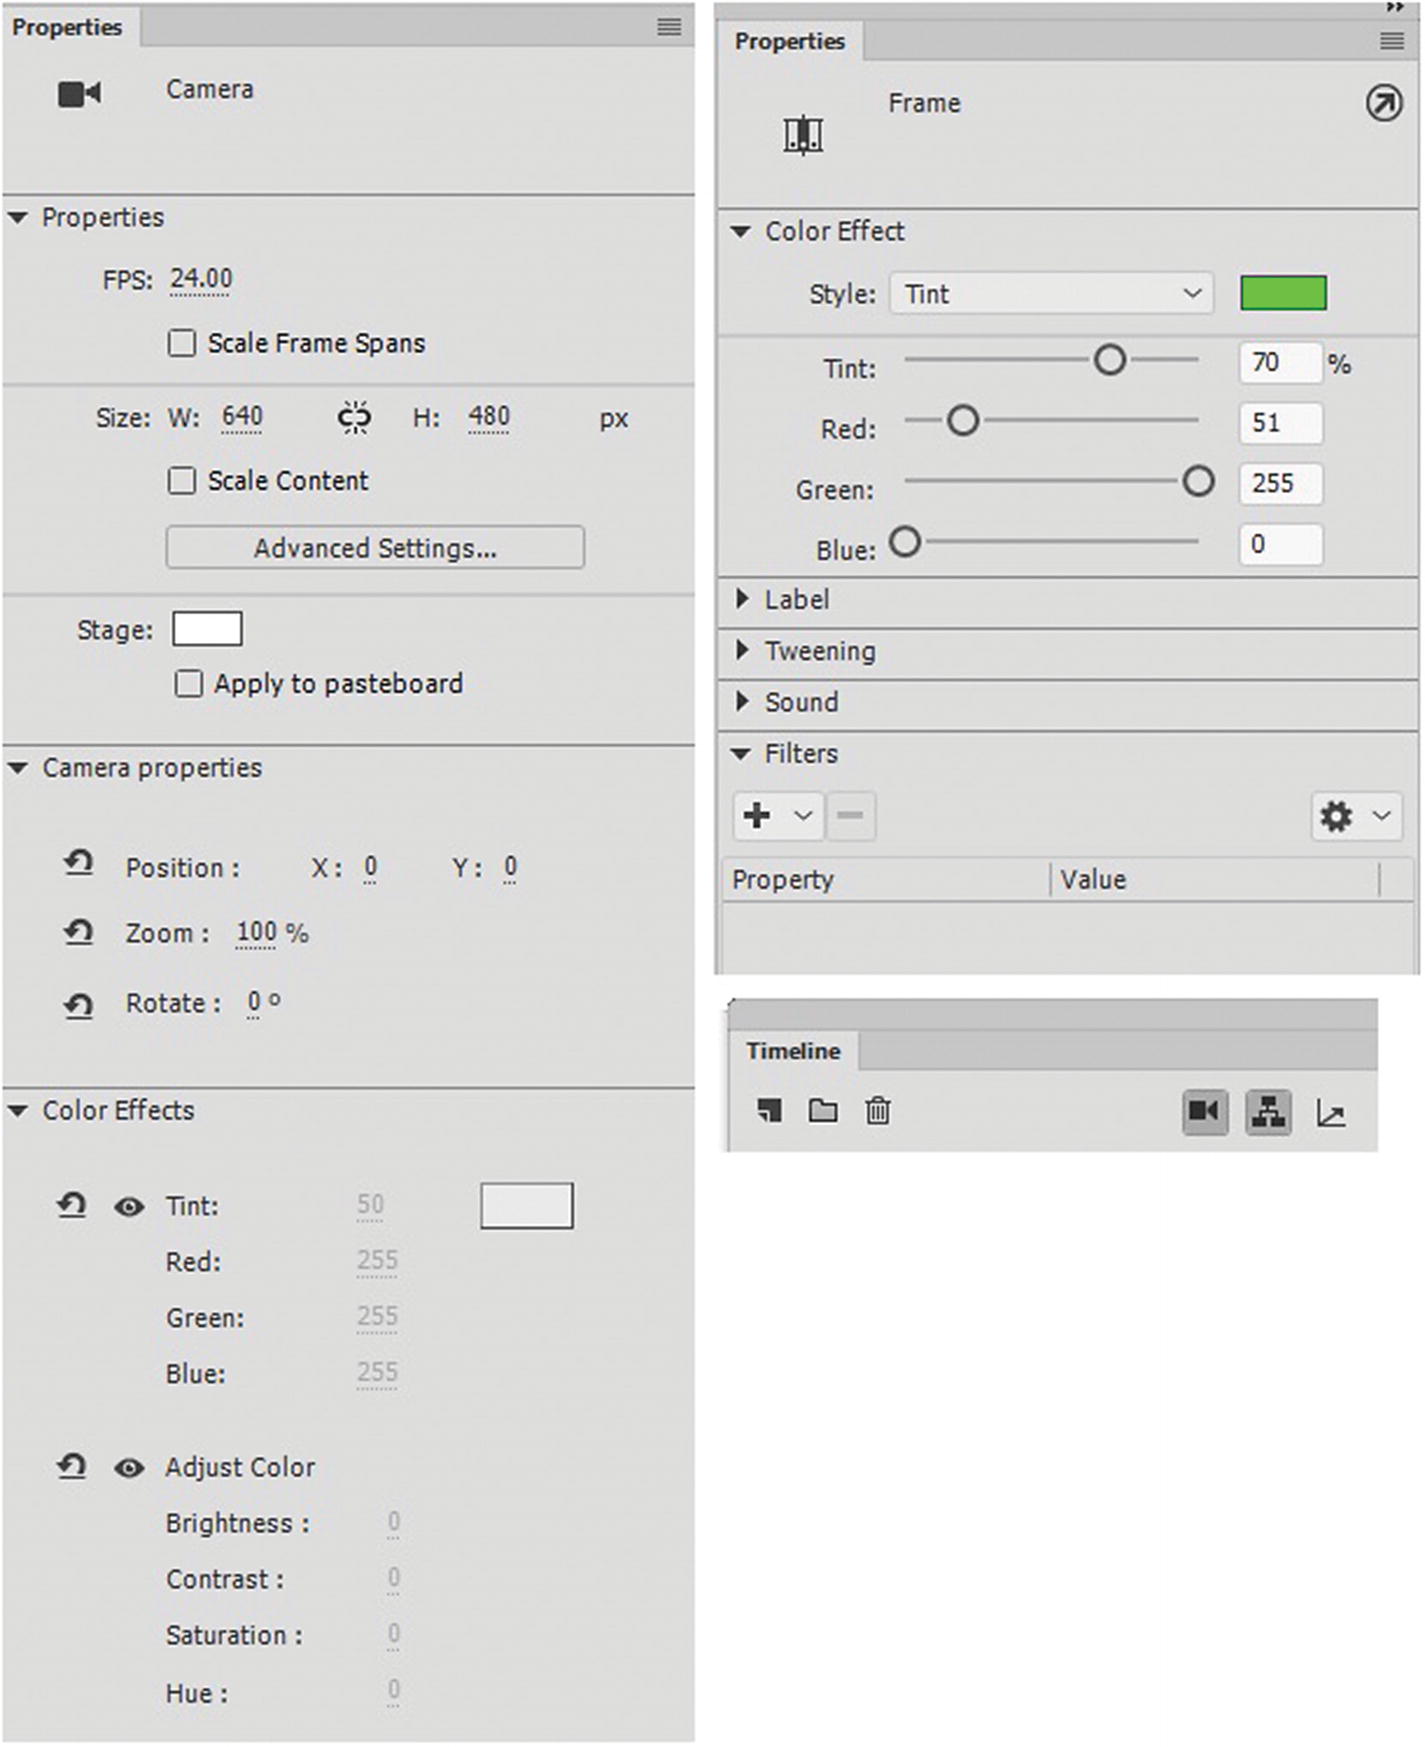
Settings in the Properties menu) for the camera and new layer effects
Camera properties can adjust the position (panning), zoom, and rotation of the camera.
Color Effects are like the color effects for working on individual symbols; however, in this case, the tint effects the whole screen. Also in regards to color, it should be noted that in version CC 2019 in ActionScript 3.0 file you can now add layer color effects and filters to non-tween, shape and classic tween frames that can interact with your Camera layer. If this is an effect, you want for an HTML5 Canvas animation, test it an ActionScript 3.0 FLA file to see what it does try to export the frames as individual GIFs or JPEGs, and then add them as keyframes into your HTML5 Canvas file; otherwise, you may need to do this work in Photoshop CC.
Another alternative is to create a layer that is covered by a black, white, or colored square Movie Clip symbol. If you adjust the alpha of this symbol and add a Motion tween, you can give similar effects of fading in or out. Refer to the scene6_timeline_example.fla file, which could be converted to HTML5 Canvas, and the symbol scene fade-in layer Motion tween effect would work similar to a camera color) effects.
Bone Tools
Bone Tool and Armature Easing
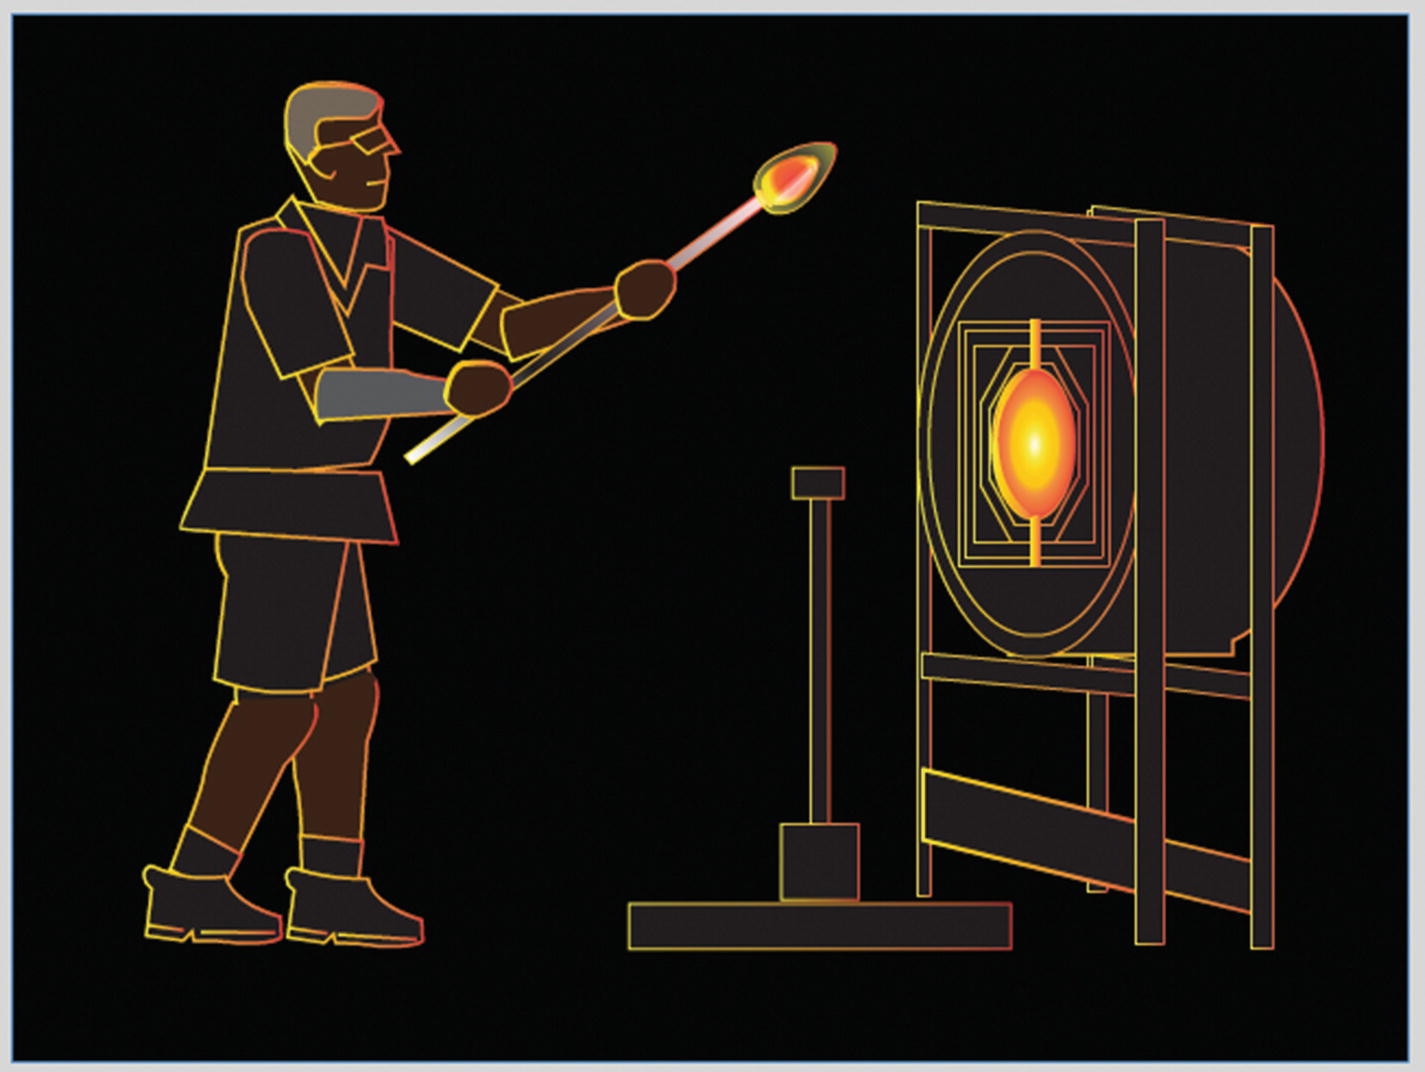
The animation of the glass worker uses the Bone tool to move his body
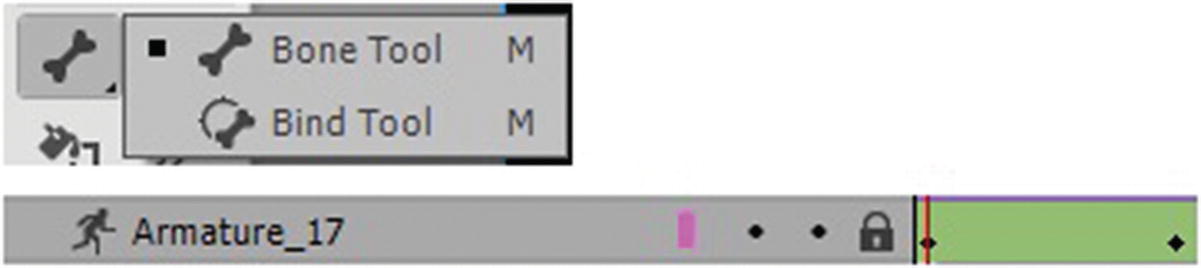
The Bone and Armature tools
It is like a Motion tween in some ways, but there are distinct differences.
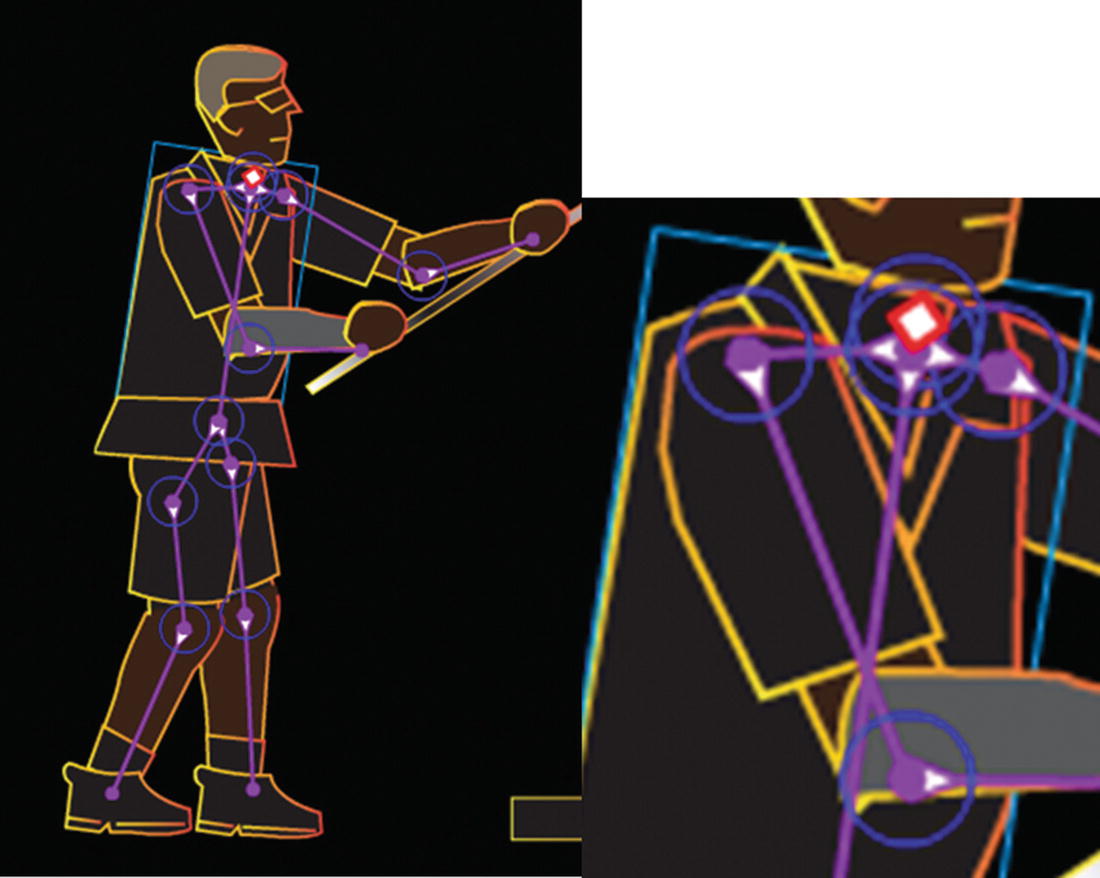
Adding of armature points to a figure
They can also be multiple joints added to a shape within a symbol.
Tip
If you go into a symbol (nested armature) to adjust the bones make sure that it is broken apart as a shape within the symbol before using the Bone tool. Animate does not like to have the tool applied to a grouped shape (fill and stroke grouped); in some instances, this slows down or crashes the program. Outside the symbol, it is OK to apply the armature, even if it has a stroke.
The Bone tool is probably one of the most complicated tools in Animate CC. It requires many hours of practice to master.
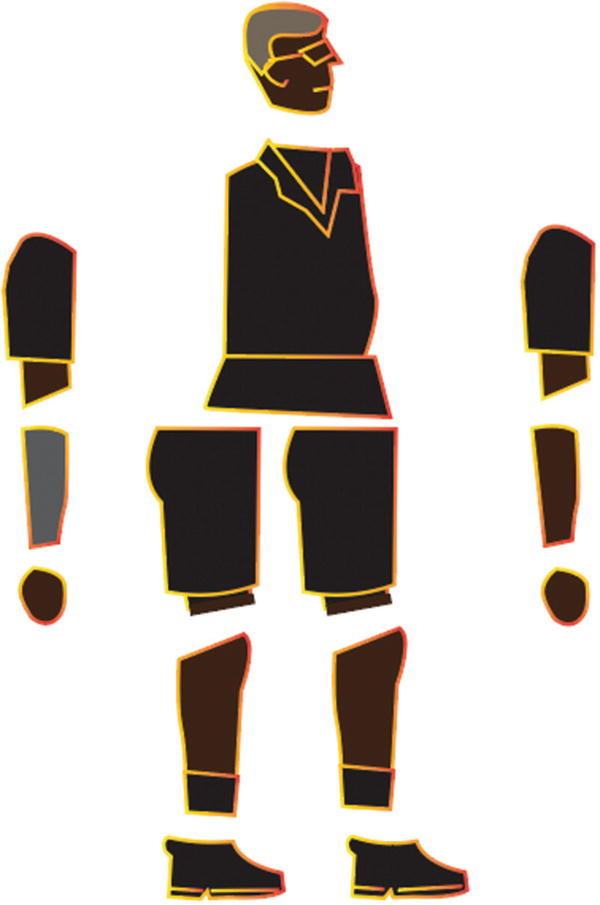
Parts of the body that I designed in Illustrator
In Illustrator, save each shape by dragging it into the Symbols panel, but make sure they are on their own layer while on stage. Then in Animate, you can select File ➤ Import ➤ Import to library; then, they are in the Library panel ready for you to drag onto the stage.
- Or select the shape in Illustrator and choose Edit ➤ Copy. In Animate, choose Edit ➤ Paste in Center and choose to paste as AI Importer preferences. Once the group or shape is on the stage, you can then convert to a movie clip or symbols and add it to the Library panel. Refer to Figure 21-69.
 Figure 21-69
Adding your shapes to the stage and then to the Library panel
Then when all the symbols are on the stage use the Bone tool to drag and connect your joints. All the joints are on the one armature layer and not separate layers. Once you have joined all the armature symbols, you cannot add or paste additional symbols to the armature layer. You must add the new symbol to a new layer, and then use the Bone tool to connect it to become part of the armature layer.
Joints can be modified with the Selection tool (V) and mouse drag Alt/Option or Ctrl keys and Modify ➤ Arrange to move the armature symbols forwards and backwards so they overlap correctly.
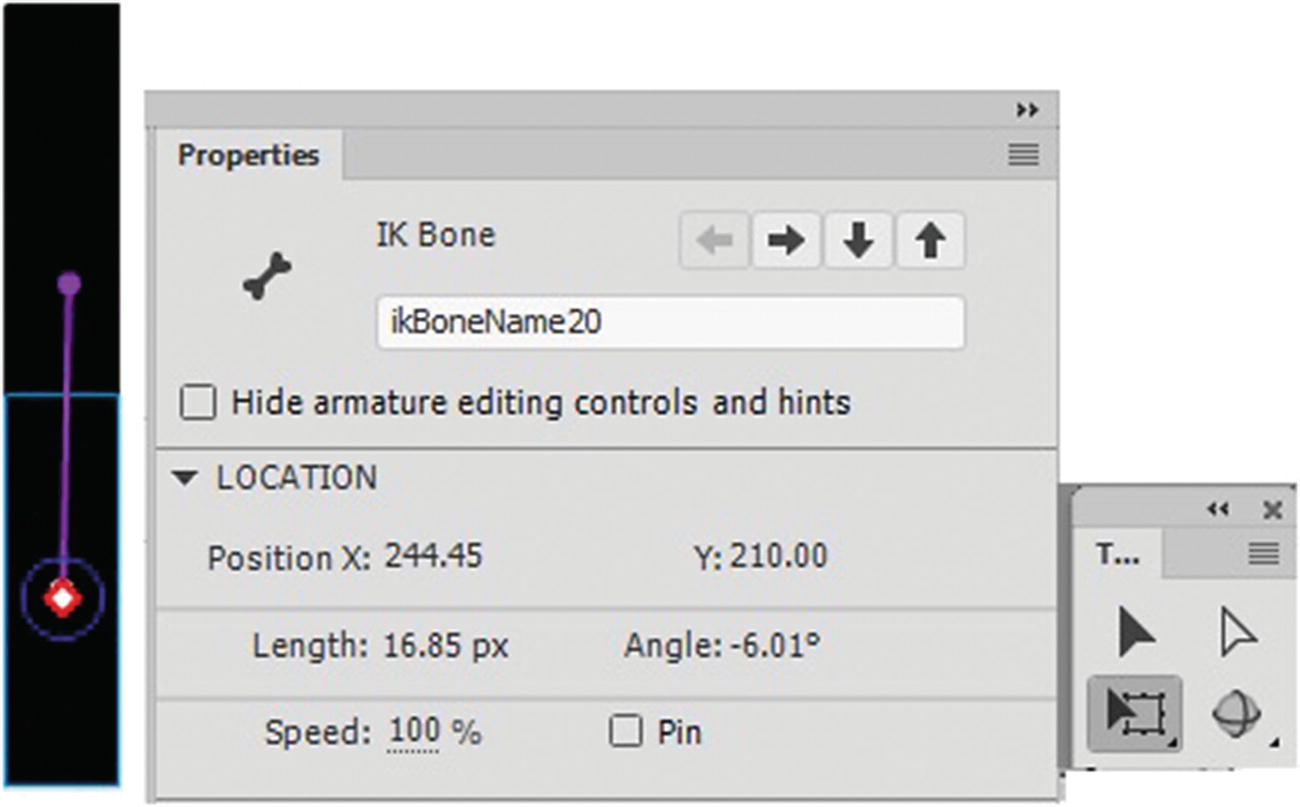
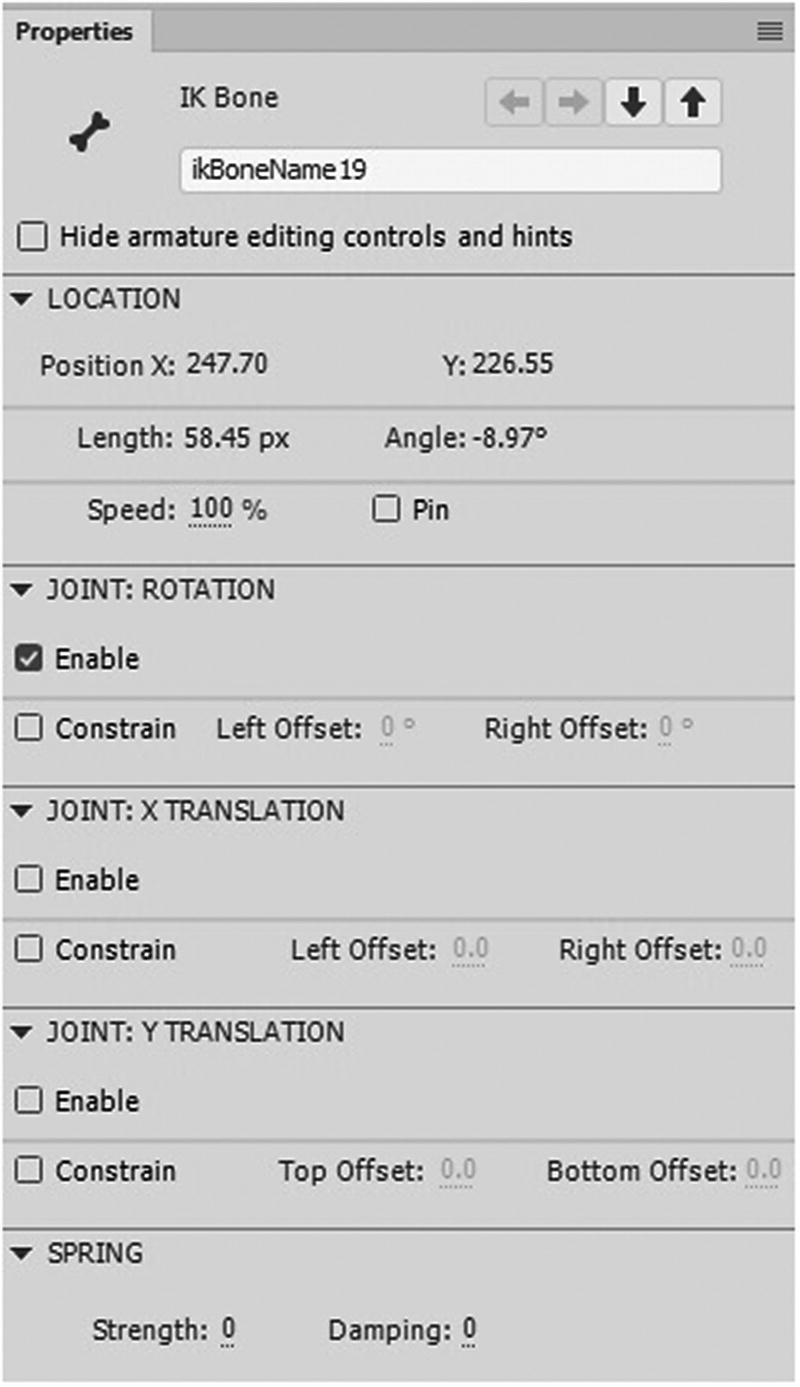
Move around the bones using the Properties panel and the Tools panel to control the movement and placement of joints
Joint movement can also be constrained at each point (IK Bone) so that the movement is more realistic, such as the knee or arm joint only moving in one direction, or pinned to the stage to keep the bone from moving. The Free Transform tool (Q) allows you to adjust the location points of the IK bones on each shape when you select the point on the symbol.
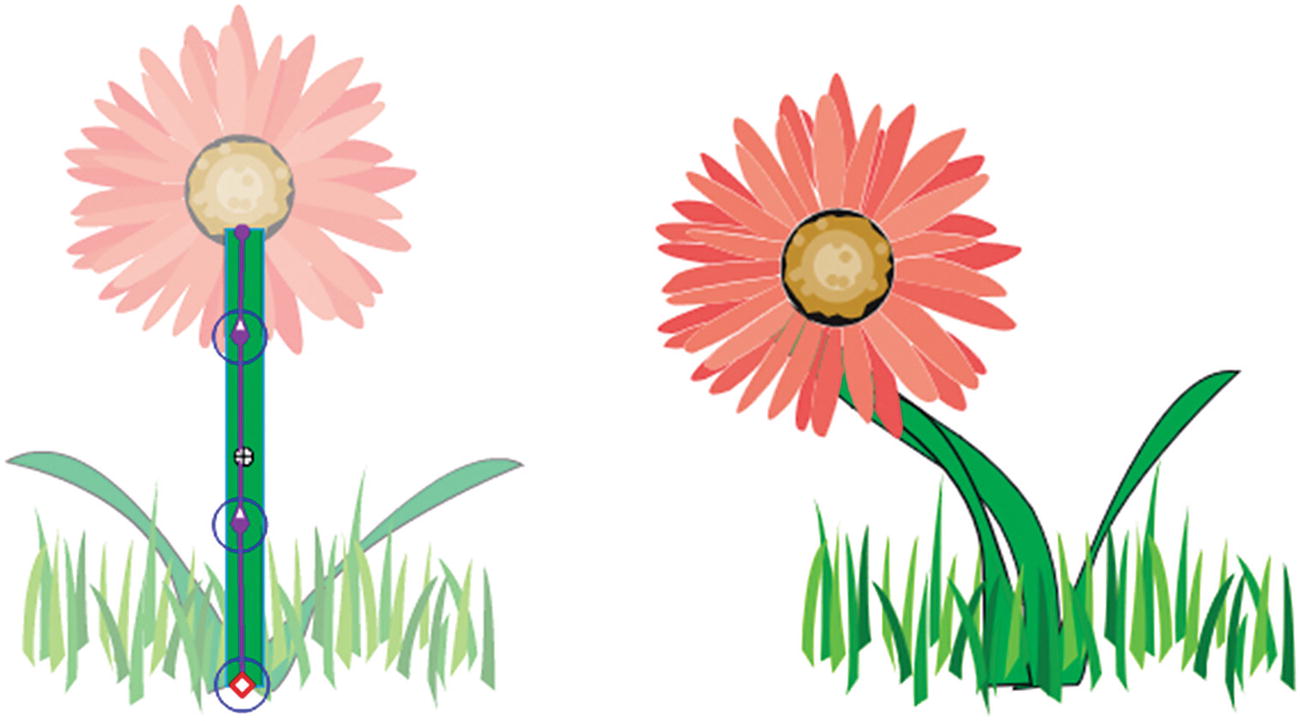
The flower stock bends
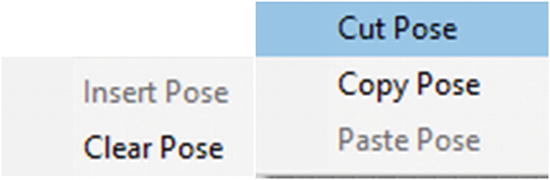
Copy and cut poses along the armature’s timeline
The nested armature and armature on the main stage
You see more about exporting in Chapter 22.
The Bind Tool
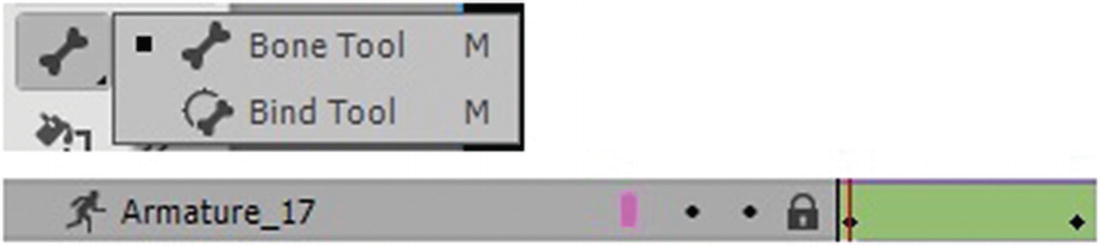
The Bind tool in the Tools panel can also be used with the armature layer in the Timeline panel
In this way, you can control how the stroke distorts when each bone moves for better results. This technique is useful when the stroke of a shape does not distort as you want when the armature moves, as you can see in the flower stock example.

The Bone tool options for easing in the Properties panel
The easing options can be accessed in the Type drop-down menu. They range from slow to fastest.
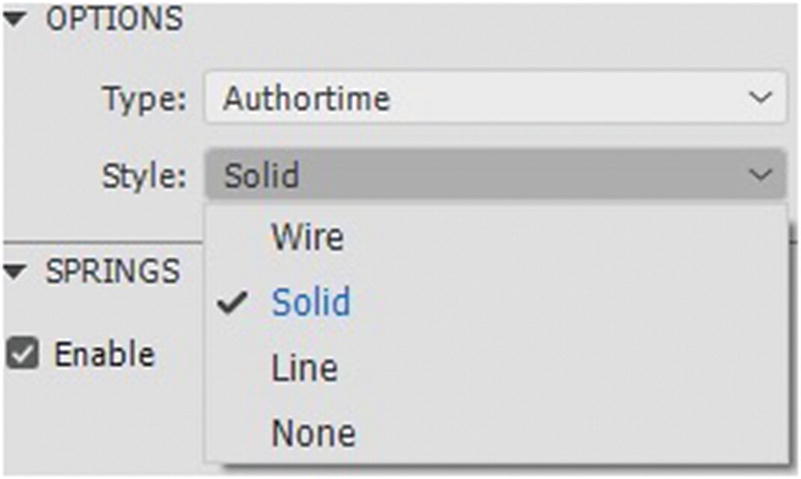
Armature styles for bones
Unlike other motion layers, the armature layer does not allow you to control advanced settings when you double-click it. So, you must control the settings for each bone in the Properties panel for location, rotation, and translation.
Set the spring for each bone joint
For more information on working on the Bone tool, make sure to review Adobe Animate CC Classroom in a Book by Russell Chum and to visit https://helpx.adobe.com/animate/using/bone-tool-animation.html . You might also find the short article, “Mysteries of the Bone Tool” by Joseph Labrecque to be helpful (see https://theblog.adobe.com/mysteries-of-the-bone-tool/ ).
Frame Picker Panel
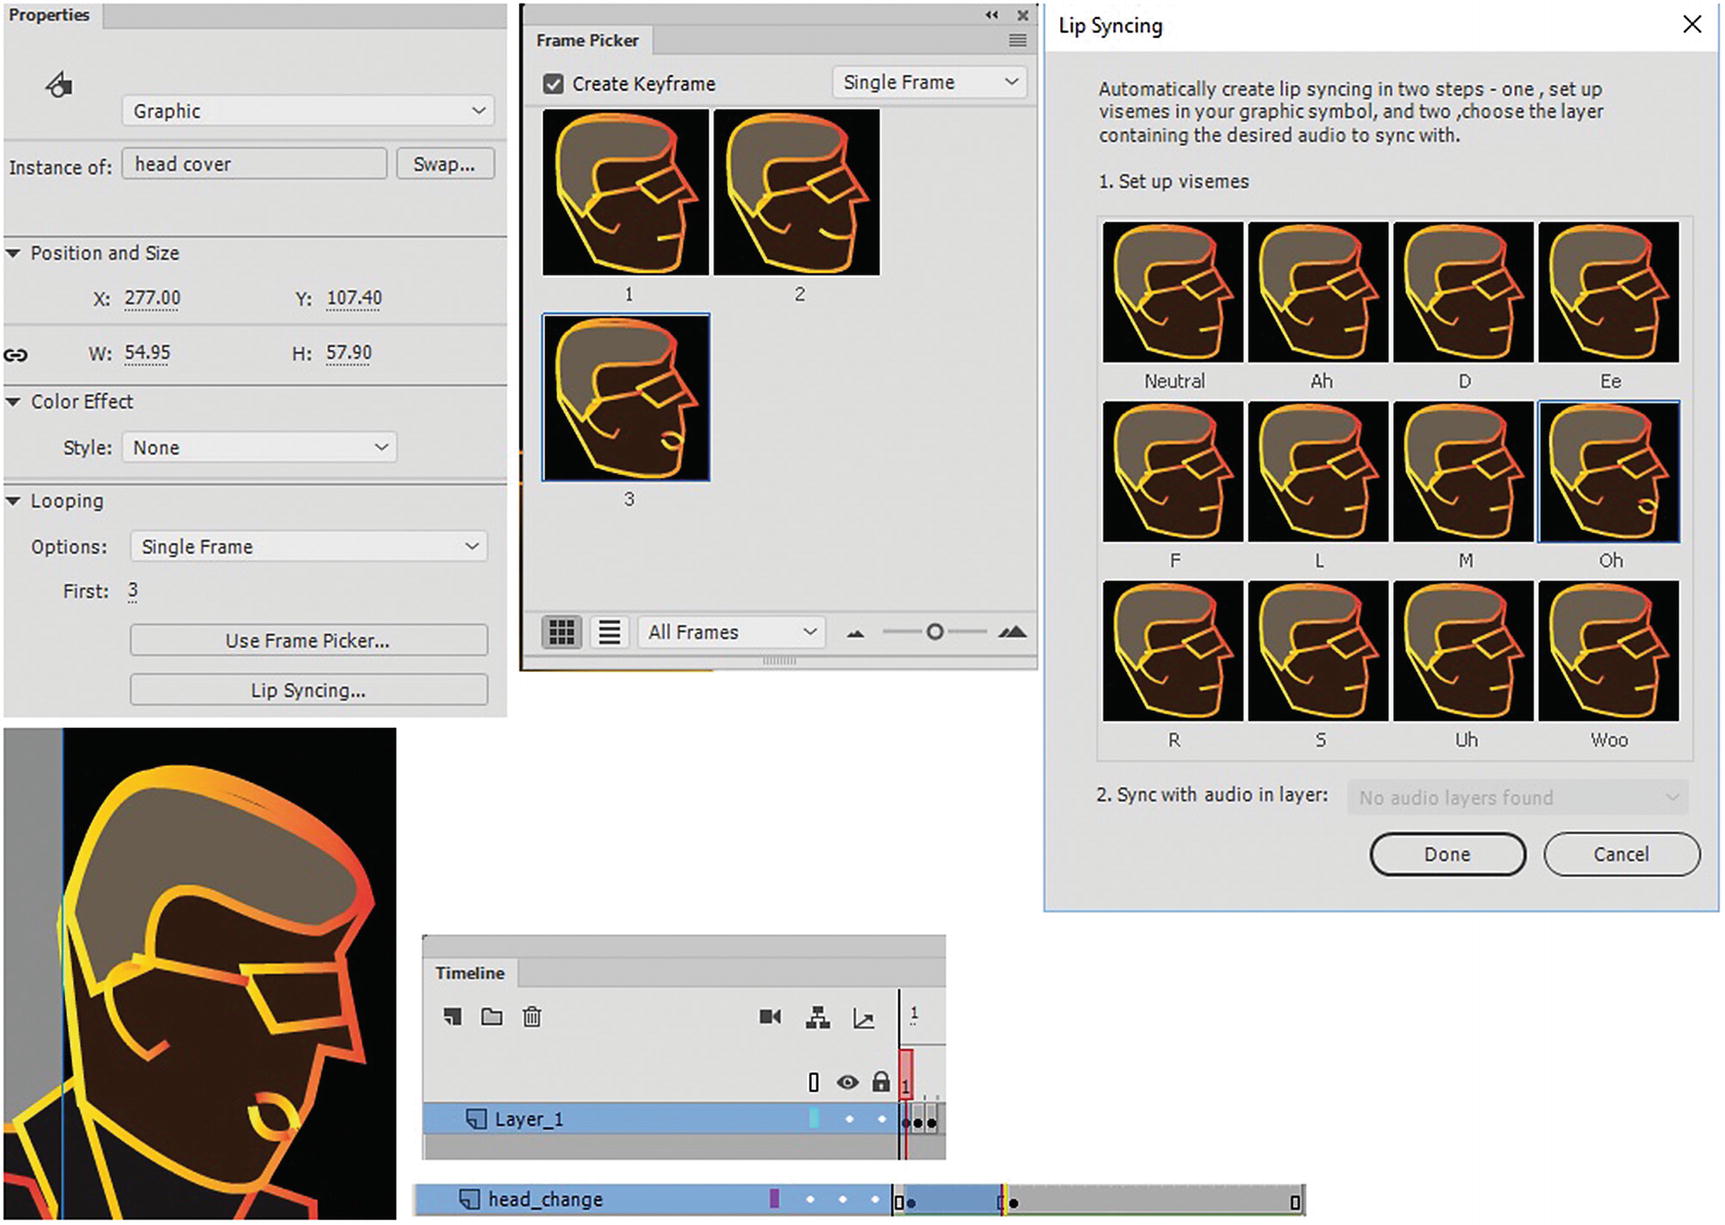
Using the frame picker and the graphic symbol, you can change the face reactions of your character if the graphic contains different keyframes, mouth movements can also be controlled with lip syncing
These are good for talking characters , where different frames switch during looping to create mouth movements for each syllable of a word.
Scene Panel
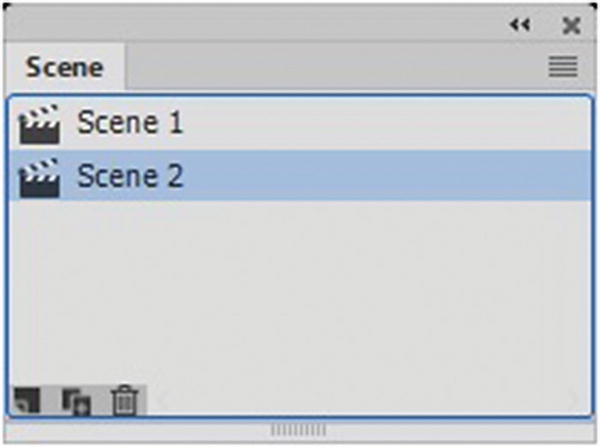
The Scene panel
Scenes basically are a new stage each time. A new scene is a blank stage each time; however, the items in the Library panel remain the same, so you can reuse symbols for new scenes.
Summary
In this chapter, you reviewed the Timeline panel and how layers and frames interact. You also looked at some of the tools (bone and camera) and related panels (frame picker and layer depth) that you can use to enhance your animation before it is exported. Remember, don’t expect to master the Bone tool and armature layer overnight; keep experimenting with it and learn how it operates.
In the next chapter, you are going to look at several options for exporting part or all of your animations and video.