Table of Contents for
Node.js 8 the Right Way
 Node.js 8 the Right Way
Published by
Pragmatic Bookshelf, 2018
Node.js 8 the Right Way
Published by
Pragmatic Bookshelf, 2018
- Title Page
- Node.js 8 the Right Way
- Node.js 8 the Right Way
- Node.js 8 the Right Way
- Node.js 8 the Right Way
- Acknowledgments
- Preface
- Why Node.js the Right Way?
- What’s in This Book
- What This Book Is Not
- Code Examples and Conventions
- Online Resources
- Part I. Getting Up to Speed on Node.js 8
- 1. Getting Started
- Thinking Beyond the web
- Node.js’s Niche
- How Node.js Applications Work
- Aspects of Node.js Development
- Installing Node.js
- 2. Wrangling the File System
- Programming for the Node.js Event Loop
- Spawning a Child Process
- Capturing Data from an EventEmitter
- Reading and Writing Files Asynchronously
- The Two Phases of a Node.js Program
- Wrapping Up
- 3. Networking with Sockets
- Listening for Socket Connections
- Implementing a Messaging Protocol
- Creating Socket Client Connections
- Testing Network Application Functionality
- Extending Core Classes in Custom Modules
- Developing Unit Tests with Mocha
- Wrapping Up
- 4. Connecting Robust Microservices
- Installing ØMQ
- Publishing and Subscribing to Messages
- Responding to Requests
- Routing and Dealing Messages
- Clustering Node.js Processes
- Pushing and Pulling Messages
- Wrapping Up
- Node.js 8 the Right Way
- Part II. Working with Data
- 5. Transforming Data and Testing Continuously
- Procuring External Data
- Behavior-Driven Development with Mocha and Chai
- Extracting Data from XML with Cheerio
- Processing Data Files Sequentially
- Debugging Tests with Chrome DevTools
- Wrapping Up
- 6. Commanding Databases
- Introducing Elasticsearch
- Creating a Command-Line Program in Node.js with Commander
- Using request to Fetch JSON over HTTP
- Shaping JSON with jq
- Inserting Elasticsearch Documents in Bulk
- Implementing an Elasticsearch Query Command
- Wrapping Up
- Node.js 8 the Right Way
- Part III. Creating an Application from the Ground Up
- 7. Developing RESTful Web Services
- Advantages of Express
- Serving APIs with Express
- Writing Modular Express Services
- Keeping Services Running with nodemon
- Adding Search APIs
- Simplifying Code Flows with Promises
- Manipulating Documents RESTfully
- Emulating Synchronous Style with async and await
- Providing an Async Handler Function to Express
- Wrapping Up
- 8. Creating a Beautiful User Experience
- Getting Started with webpack
- Generating Your First webpack Bundle
- Sprucing Up Your UI with Bootstrap
- Bringing in Bootstrap JavaScript and jQuery
- Transpiling with TypeScript
- Templating HTML with Handlebars
- Implementing hashChange Navigation
- Listing Objects in a View
- Saving Data with a Form
- Wrapping Up
- 9. Fortifying Your Application
- Setting Up the Initial Project
- Managing User Sessions in Express
- Adding Authentication UI Elements
- Setting Up Passport
- Authenticating with Facebook, Twitter, and Google
- Composing an Express Router
- Bringing in the Book Bundle UI
- Serving in Production
- Wrapping Up
- Node.js 8 the Right Way
- 10. BONUS: Developing Flows with Node-RED
- Setting Up Node-RED
- Securing Node-RED
- Developing a Node-RED Flow
- Creating HTTP APIs with Node-RED
- Handling Errors in Node-RED Flows
- Wrapping Up
- A1. Setting Up Angular
- A2. Setting Up React
- Node.js 8 the Right Way
Authenticating with Facebook, Twitter, and Google
At this point, your full-stack JavaScript application has Passport in place for managing the authentication for user sessions. We’re now ready to plug into various authentication providers, allowing users to sign in with their external accounts.
Authentication mechanisms in Passport are called Strategies. To support each provider, you’ll need to install and configure the npm module for the provider, which includes a Strategy class that plugs into Passport.
The steps are as follows:
- Create an app with the provider.
- Add the app’s identifier and secret information to your config.
- Install the Passport Strategy for that provider.
- Configure the Strategy instance in your server.js file.
First we’ll go through these steps to set up authentication with Facebook, then with Twitter, and finally with Google. Since the setup for each provider involves a certain amount of boilerplate, we’ll spend more time describing the Facebook authentication setup steps than the others.
Once you’re done setting up Facebook, you have the option of skipping ahead to Composing an Express Router. Having one authentication mechanism working is sufficient to develop the authenticated book-bundle APIs in the rest of the chapter. Let’s begin!
Creating Your Facebook App
For your users to sign in with Facebook, you’ll need to make a Facebook app. And to do that, you’ll need a registered Facebook developer account.
If you don’t yet have a Facebook developer account, you can register at the Facebook Developers page.[95]
Once you have an account, head to the Facebook Apps page and click the + Add a New App button.[96] Set the display name to b4-dev, then click Create App ID to continue. After you satisfy a captcha, it’ll create your app and take you to it.
When you get to your app, click the Settings link in the menu on the left sidebar. At the bottom click the + Add Platform button and select Website from the options—this will add a Website section to the page. Set the site URL to http://b4.example.com:60900. Finally, click Save Changes. When you’re done, it should look like this:
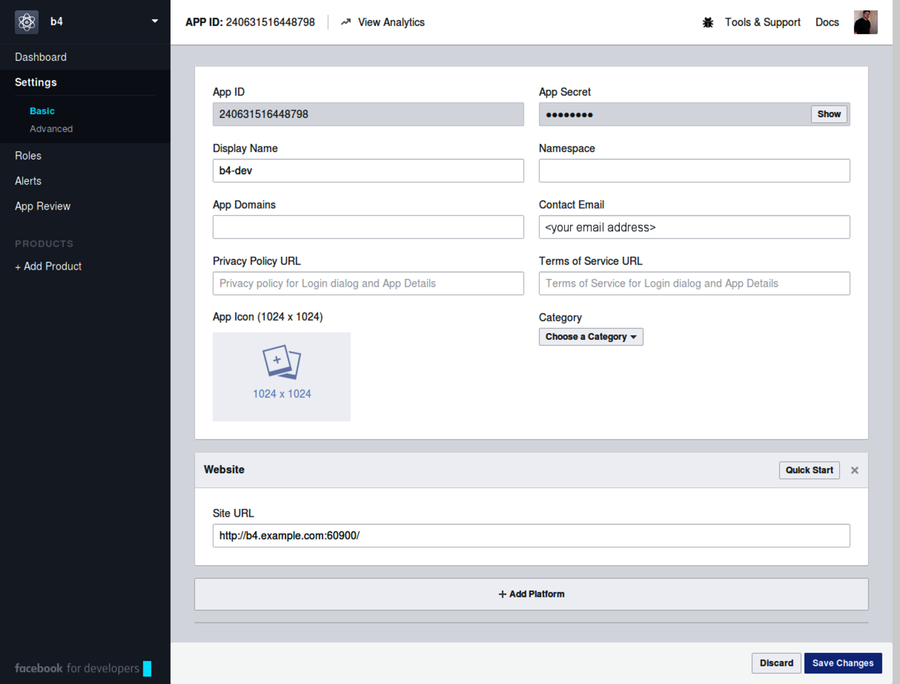
You need two pieces of information from this page in order to use the app for authentication: the app ID and the app secret. The app ID is readily visible, but you have to click the Show button to see the app secret.
Open your development.config.json for editing and add an auth section as follows:
| | "auth": { |
| | "facebook": { |
| | "appID": "<your Facebook App ID>", |
| | "appSecret": "<your Facebook App Secret>" |
| | } |
| | } |
Make sure to set the appId and appSecret values to those for your own project, then save the file.
Keep your app secret safe! Anyone with this string is able to perform user actions as though they were your app.
Adding the Facebook Strategy to Passport
Now that you have your Facebook app created and you’ve recorded the appID and appSecret in your config, it’s time to install and configure the Passport Facebook npm module. This module includes a Strategy class for handling the details of connecting to Facebook for authentication.
Start by installing the module with npm:
| | $ npm install --save -E passport-facebook@2.1.1 |
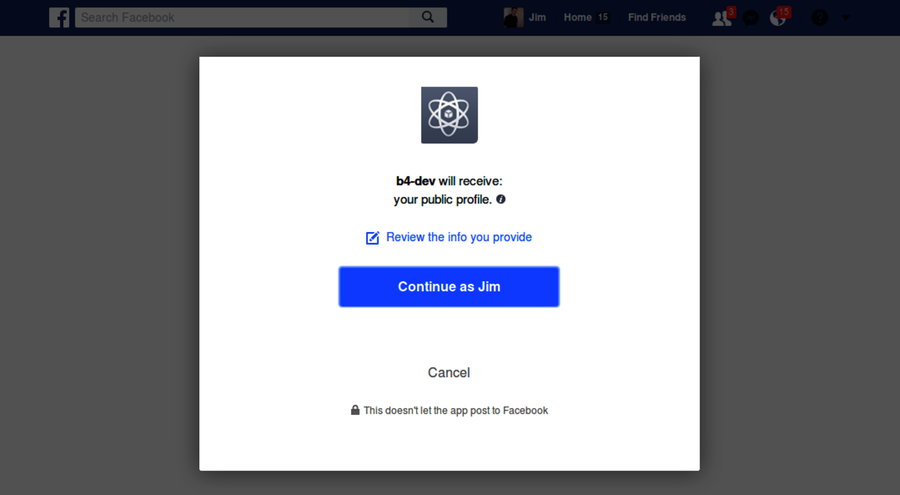
To use the Facebook Strategy for authenticating with Passport, we need to set up two Express routes. The first route is /auth/facebook. When users visit this route by clicking the Sign In with Facebook button on the Welcome screen, they’ll get redirected to a Facebook sign-in page. If everything goes according to plan, that’ll look something like this:
The second Express route we need is /auth/facebook/callback, which is where Facebook will redirect users once they have signed in. Passport is quite flexible when it comes to exactly what these routes are, in addition to other behavior associated with the authentication process. You have a lot of choices, but that means you have to perform a lot of configuration. The code I will show you next is the minimum amount to get going—your own projects’ needs may vary.
Open your server.js for editing, and find the Passport Authentication section you added earlier. Immediately below that, insert the following:
| | const FacebookStrategy = require('passport-facebook').Strategy; |
| | passport.use(new FacebookStrategy({ |
| | clientID: nconf.get('auth:facebook:appID'), |
| | clientSecret: nconf.get('auth:facebook:appSecret'), |
| | callbackURL: new URL('/auth/facebook/callback', serviceUrl).href, |
| | }, (accessToken, refreshToken, profile, done) => done(null, profile))); |
This code is a little dense, but it’s mostly boilerplate. First, we pull in the Strategy class as FacebookStrategy. Calling passport.use takes two arguments. One is a configured Strategy instance and the other is a callback function to be used to resolve the user object from the Facebook profile information. Let’s go over each briefly.
To configure the FacebookStrategy instance, we pass it three values. The clientID and clientSecret values are the app ID and app secret for your Facebook app. The callbackURL is a fully qualified URL that points to the /auth/facebook/callback route. Here we’re using the URL class to construct such a string using the serviceUrl as a base.
Check out the user-resolving callback function—passport.use’s second argument. Since we’re not storing per-user data, the profile really is all we need, so we call done immediately with it. Your own applications may need to do something fancier here, like reach out to a database to retrieve user information.
Note that the profile object here is exactly the input to the serializeUser callback function that you gave to Passport. In your own applications, you may end up doing something more complex to resolve the user after Facebook sign-in. If you do, make sure you also update your Passport serialization code since these profile objects must match.
Let’s look at an example. Recall the serializeUser method from before:
| | passport.serializeUser((profile, done) => done(null, { |
| | id: profile.id, |
| | provider: profile.provider, |
| | })); |
Notice how the callback function takes a provider object and expects it to have both an id and a provider property. Now consider the final callback function parameter to the FacebookStrategy constructor, which resolves the successful sign-in token to a user’s profile object:
| | (accessToken, refreshToken, profile, done) => done(null, profile) |
When you call done, behind the scenes Passport and Express will take the profile object here and make sure it gets passed to your serializeUser callback function. So while you have the flexibility to implement more complex profile objects, it’s up to you to ensure that the way those objects are handled is consistent in both places. For more info on how you can configure the Facebook Strategy, including an example of how you can store richer profile information in a separate database, see Passport’s documentation page.[97]
Now that Passport is configured to use the Facebook Strategy, we can finally add the Express routes. Append this code right after the passport.use call:
| | app.get('/auth/facebook', passport.authenticate('facebook')); |
| | app.get('/auth/facebook/callback', passport.authenticate('facebook', { |
| | successRedirect: '/', |
| | failureRedirect: '/', |
| | })); |
When users hit the /auth/facebook route, it will redirect them to Facebook to sign in. When they’ve finished, Facebook will send them to /auth/facebook/callback. This may be a successful sign-in, or it could have failed for any reason. Depending on which, Passport will redirect the user to either the successRedirect or the failureRedirect.
Because B4 is a single-page application, we send the user to the web root (/) irrespective of whether the sign-in was successful. Once we add the session code to the front end, the Handlebars templates will show the correct content to the user based on whether he signed in successfully.
After you save these additions to the server.js file, nodemon should restart the service successfully. If not, stop here and troubleshoot. Remember that you can peek at the b4-final implementation in the code downloads that accompany this book.
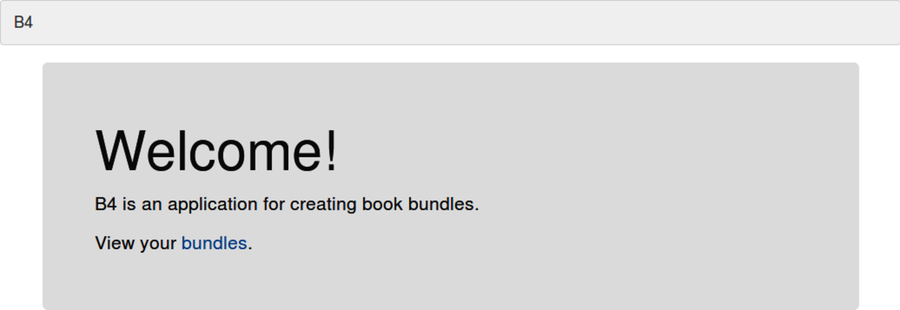
Facebook authentication should now be all set up from end to end. To test it, navigate to your B4 application at http://b4.example.com:60900. Click the Sign In with Facebook button, then sign in. If all goes according to plan, it should redirect you back to B4, which ought to look like the figure.
If so, great, but don’t get discouraged if you see the old Welcome page. I’ve seen this be a little flaky, so if it still shows the sign-in buttons, try clicking again.
If it’s not working for you, then you need to figure out whether it’s a Facebook authentication problem or a code problem. The first place to investigate is the .json file for your session in your sessions directory. When Passport succeeds in authenticating with Facebook, that file should look something like this:
| | $ cat sessions/*.json | jq '.' |
| | { |
| | "cookie": { |
| | "originalMaxAge": null, |
| | "expires": null, |
| | "httpOnly": true, |
| | "path": "/" |
| | }, |
| | "__lastAccess": 1500116410607, |
| | "passport": { |
| | "user": { |
| | "id": "10155505203238200", |
| | "provider": "facebook" |
| | } |
| | } |
| | } |
If the Facebook authentication failed, then the passport section would be missing. If the passport section is there, then you may have a code problem that you need to troubleshoot. The logs in your nodemon terminal may also help.
Another benefit to having session data right in these JSON files is that you can sign users out by deleting them. When you delete a session’s json file in the sessions directory, it invalidates the session and the user must sign in again.
Once you have Facebook authentication confirmed as working, you can either skip forward to Composing an Express Router, or continue to the next section to set up authentication with Twitter.
Authenticating with Twitter
In this section, you’ll follow steps similar to those for setting up Facebook authentication. You’ll create a Twitter app, add the identifier and secret to your config, install the Twitter Passport module, and configure the Strategy in server.js.
To create a Twitter app, start by opening a browser tab to the Twitter Apps page.[98] Then click the Create New App button. In the New App form, fill in these details of the B4 application:
- Name—b4-dev
- Description—Better Book Bundle Builder
- Website—http://b4.example.com:60900
- Callback URL—http://b4.example.com:60900/auth/twitter/callback
Click the Create Your Twitter Application button. When Twitter finishes making your app, it’ll forward you to the Details page of your new app. From there, navigate to the Settings tab. It should look like this:
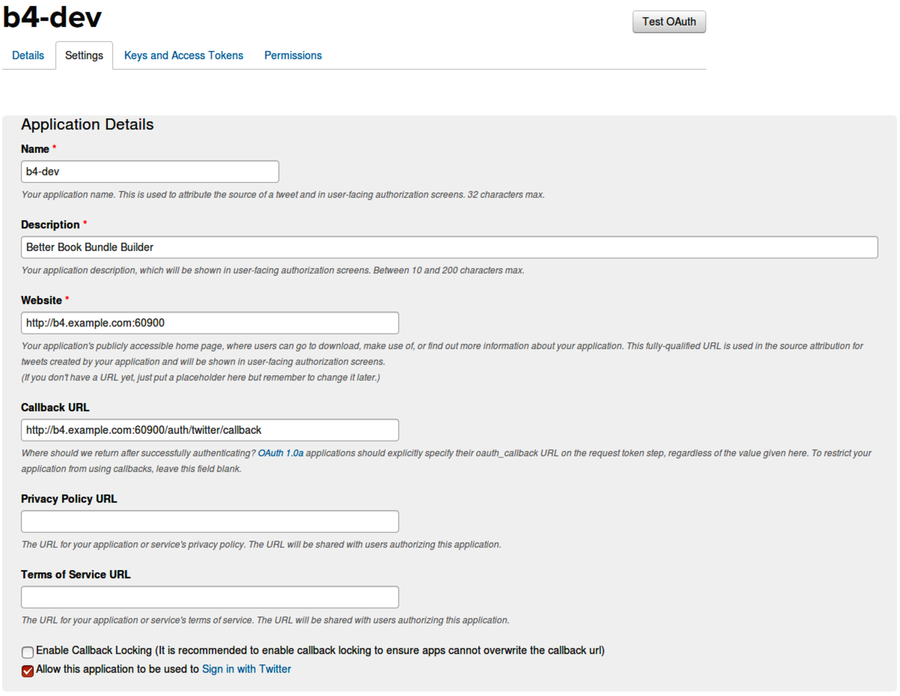
Make sure the check box at the bottom labeled Allow this application to be used to sign in with Twitter is checked.
Next, navigate to the Keys and Access Tokens tab. You’ll need the consumer key and consumer secret. Open your development.config.json file for editing, then add a twitter section to auth with your consumer key and consumer secret, like this:
| | "twitter": { |
| | "consumerKey": "<your Consumer Key>", |
| | "consumerSecret": "<your Consumer Secret>" |
| | } |
Save this file. Next, install the Twitter Passport module with npm.
| | $ npm install --save -E passport-twitter@1.0.4 |
Now, open your server.js file for editing. Navigate to the Facebook settings you added in the previous section, then append the following code.
| | const TwitterStrategy = require('passport-twitter').Strategy; |
| | passport.use(new TwitterStrategy({ |
| | consumerKey: nconf.get('auth:twitter:consumerKey'), |
| | consumerSecret: nconf.get('auth:twitter:consumerSecret'), |
| | callbackURL: new URL('/auth/twitter/callback', serviceUrl).href, |
| | }, (accessToken, tokenSecret, profile, done) => done(null, profile))); |
| | |
| | app.get('/auth/twitter', passport.authenticate('twitter')); |
| | app.get('/auth/twitter/callback', passport.authenticate('twitter', { |
| | successRedirect: '/', |
| | failureRedirect: '/', |
| | })); |
This code is nearly identical to the FacebookStrategy code from earlier. We construct a TwitterStrategy and tell Passport to use it with the consumer key and consumer secret from the config file. The profile that this Strategy creates includes the id and provider that we need.
Also, just like with the Facebook setup, we need two routes. The /auth/twitter route forwards users to Twitter, where they can sign in, and the /auth/twitter/callback route is where Twitter sends users afterward.
After you save the server.js file, nodemon should pick up the change. In your browser tab with the B4 application loaded, you can now try out the Sign In with Twitter button. When you click it the first time, you should see a page like the figure.
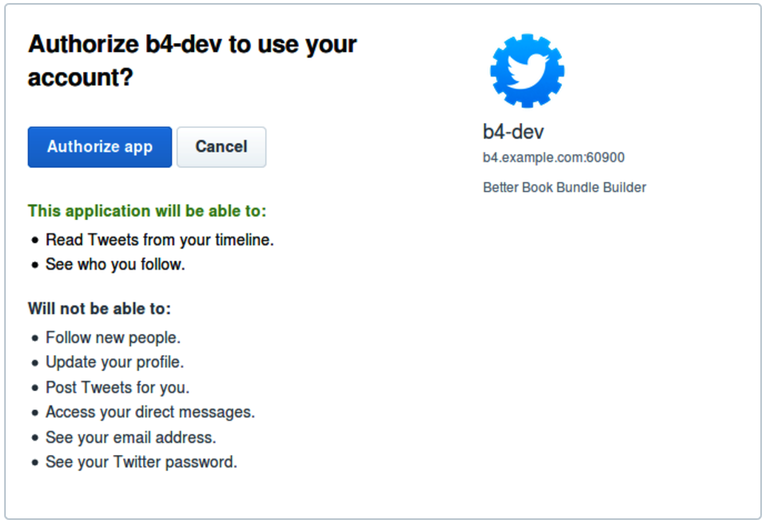
After you click the Authorize button, Twitter will redirect you back to the B4 application, where you should now be signed in. If not, it may be because you were still signed in with Facebook. Remember that you can sign out by visiting the /auth/signout route or by deleting the json file in the sessions directory.
If you run into trouble with Twitter, it might help to review the Passport Twitter documentation.[99]
Now let’s move on to the third and final authentication provider we’ll be covering, Google.
Authenticating with Google
The steps for setting up Google authentication are similar to those for Facebook and Twitter. You need to create an app, add the identifier and secret to your config, install the Passport Google module, and configure the Strategy.
To begin, go to the Google Cloud Platform page.[100] Sign in if you haven’t already, then click the Console button to launch the Google Cloud Platform Console. Expand the side menu if it’s not showing and choose IAM & Admin > Manage resources.
From the Manage Resources page, click the Create Project button. In the form that follows, for project name enter b4-dev, then click Create. When Google Cloud is finished making your project, make sure it’s selected in the drop-down menu at the top of the page.
Next you’ll need to enable some APIs. From the side menu, choose APIs & Services > Dashboard, then click the blue + Enable APIs and Services button at the top of the page. Scroll down and find the social APIs, then click Google+ API. This brings you to a screen describing how the Google+ API can be used for authentication, which is what we want.
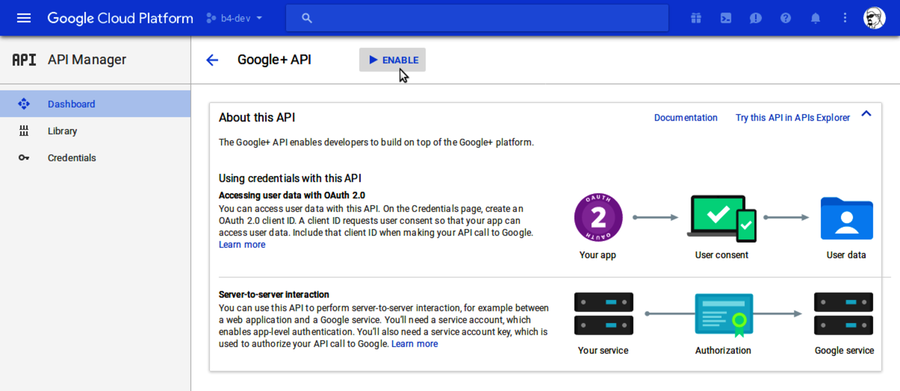
Toward the top of the page, click the Enable button to turn on the Google+ API.
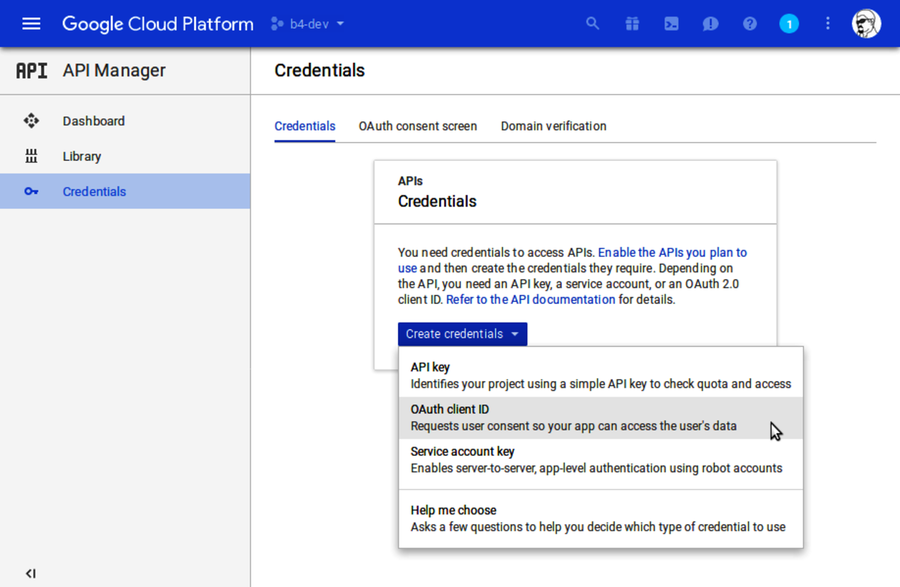
Next, we need to set up OAuth credentials. From the navigation bar on the left, select API Manager > Credentials. Click the Create Credentials drop-down menu and select OAuth Client ID.
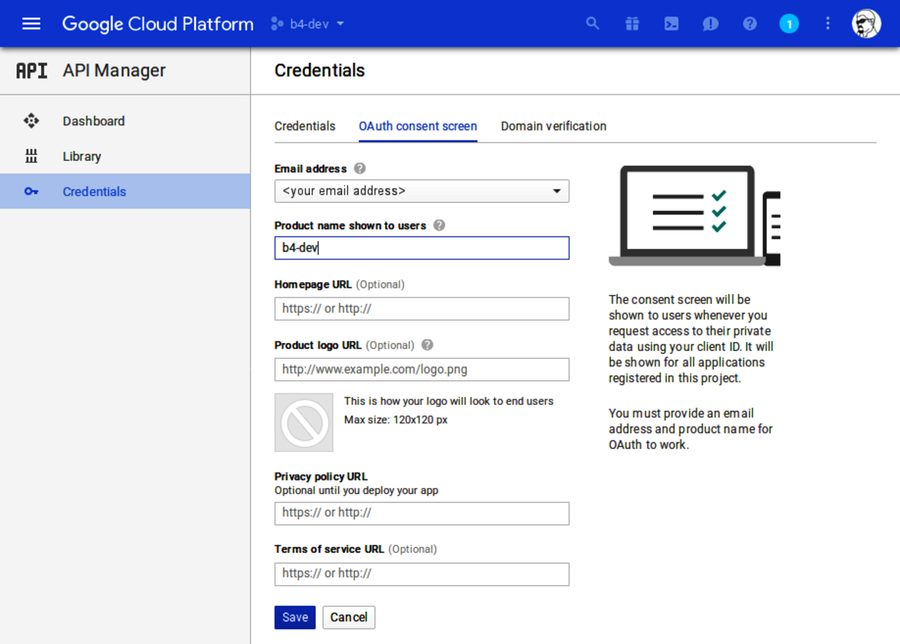
On the following screen, you may see a warning stating that you need to set up the OAuth consent screen. If so, click the link to set that up, and enter b4-dev for the product name shown to users.
Once you save the consent-screen settings, you should be on the Create Client ID page, which asks you to choose an application type. Click the radio button next to Web Application, then click Create. This will expand to show you more options.
You can leave Name set to the default and ignore Authorized JavaScript Origins. However, you must fill out Authorized Redirect URIs. In the box, enter http://b4.example.com:60900/auth/google/callback. Then click Create as shown in the figure.
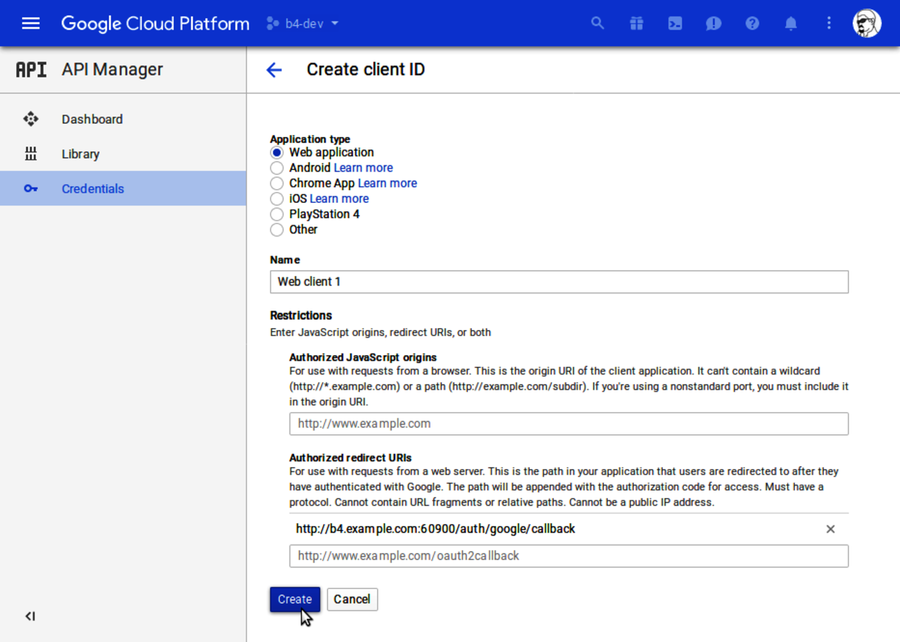
Be careful specifying your redirect URI. If there’s any mismatch, then authentication will not work!
When your OAuth client is ready for use, the page will show a pop-up dialog with your client ID and client secret. You’ll need these two values to connect to the service.
Open your development.config.json for editing, and add a new Google section as follows:
| | "google": { |
| | "clientID": "<your Client ID>", |
| | "clientSecret": "<your Client Secret>" |
| | } |
I’ve noticed that sometimes when copying the client ID and client secret, leading and trailing whitespace characters are included. Make sure to remove these when setting up your development.config.json file.
Save the file. Next, install the Passport Google module via npm.
| | $ npm install --save -E passport-google-oauth20@1.0.0 |
With that installed, all that’s left is to configure the Strategy. Open your server.js, scroll down to the Twitter configuration part, and insert the following after it:
| | const GoogleStrategy = require('passport-google-oauth20').Strategy; |
| | passport.use(new GoogleStrategy({ |
| | clientID: nconf.get('auth:google:clientID'), |
| | clientSecret: nconf.get('auth:google:clientSecret'), |
| | callbackURL: new URL('/auth/google/callback', serviceUrl).href, |
| » | scope: 'https://www.googleapis.com/auth/plus.login', |
| | }, (accessToken, refreshToken, profile, done) => done(null, profile))); |
| | |
| | app.get('/auth/google', |
| » | passport.authenticate('google', {scope: ['email', 'profile']})); |
| | app.get('/auth/google/callback', passport.authenticate('google', { |
| | successRedirect: '/', |
| | failureRedirect: '/', |
| | })); |
Like Twitter and Facebook before, this code configures the provider Strategy by reading configuration settings from nconf. One difference, though, is that the Google Strategy requires a scope parameter. In this case, the scope is the Google+ API.
In addition, the configuration for the /auth/google route requires its own scope configuration. We don’t need much for the user to sign in, so all we request is the email and profile scopes. When users authenticate, they’ll be informed of what information your app is requesting.
For more help on how to use Google’s OAuth for authentication with Node.js, see the Authenticating Users section of Google’s Node.js Getting Started page.[101] You might also want to review Passport’s Google Strategy documentation.[102]
Once you have your desired authentication mechanisms confirmed working, it’s time to add in some more of the B4 functionality. This will combine the API and UI elements from the last two chapters while introducing an Express class called a Router for encapsulating routes. We’ll start with the back-end API services, then fill in the UI.