Table of Contents for
Node.js 8 the Right Way
 Node.js 8 the Right Way
Published by
Pragmatic Bookshelf, 2018
Node.js 8 the Right Way
Published by
Pragmatic Bookshelf, 2018
- Title Page
- Node.js 8 the Right Way
- Node.js 8 the Right Way
- Node.js 8 the Right Way
- Node.js 8 the Right Way
- Acknowledgments
- Preface
- Why Node.js the Right Way?
- What’s in This Book
- What This Book Is Not
- Code Examples and Conventions
- Online Resources
- Part I. Getting Up to Speed on Node.js 8
- 1. Getting Started
- Thinking Beyond the web
- Node.js’s Niche
- How Node.js Applications Work
- Aspects of Node.js Development
- Installing Node.js
- 2. Wrangling the File System
- Programming for the Node.js Event Loop
- Spawning a Child Process
- Capturing Data from an EventEmitter
- Reading and Writing Files Asynchronously
- The Two Phases of a Node.js Program
- Wrapping Up
- 3. Networking with Sockets
- Listening for Socket Connections
- Implementing a Messaging Protocol
- Creating Socket Client Connections
- Testing Network Application Functionality
- Extending Core Classes in Custom Modules
- Developing Unit Tests with Mocha
- Wrapping Up
- 4. Connecting Robust Microservices
- Installing ØMQ
- Publishing and Subscribing to Messages
- Responding to Requests
- Routing and Dealing Messages
- Clustering Node.js Processes
- Pushing and Pulling Messages
- Wrapping Up
- Node.js 8 the Right Way
- Part II. Working with Data
- 5. Transforming Data and Testing Continuously
- Procuring External Data
- Behavior-Driven Development with Mocha and Chai
- Extracting Data from XML with Cheerio
- Processing Data Files Sequentially
- Debugging Tests with Chrome DevTools
- Wrapping Up
- 6. Commanding Databases
- Introducing Elasticsearch
- Creating a Command-Line Program in Node.js with Commander
- Using request to Fetch JSON over HTTP
- Shaping JSON with jq
- Inserting Elasticsearch Documents in Bulk
- Implementing an Elasticsearch Query Command
- Wrapping Up
- Node.js 8 the Right Way
- Part III. Creating an Application from the Ground Up
- 7. Developing RESTful Web Services
- Advantages of Express
- Serving APIs with Express
- Writing Modular Express Services
- Keeping Services Running with nodemon
- Adding Search APIs
- Simplifying Code Flows with Promises
- Manipulating Documents RESTfully
- Emulating Synchronous Style with async and await
- Providing an Async Handler Function to Express
- Wrapping Up
- 8. Creating a Beautiful User Experience
- Getting Started with webpack
- Generating Your First webpack Bundle
- Sprucing Up Your UI with Bootstrap
- Bringing in Bootstrap JavaScript and jQuery
- Transpiling with TypeScript
- Templating HTML with Handlebars
- Implementing hashChange Navigation
- Listing Objects in a View
- Saving Data with a Form
- Wrapping Up
- 9. Fortifying Your Application
- Setting Up the Initial Project
- Managing User Sessions in Express
- Adding Authentication UI Elements
- Setting Up Passport
- Authenticating with Facebook, Twitter, and Google
- Composing an Express Router
- Bringing in the Book Bundle UI
- Serving in Production
- Wrapping Up
- Node.js 8 the Right Way
- 10. BONUS: Developing Flows with Node-RED
- Setting Up Node-RED
- Securing Node-RED
- Developing a Node-RED Flow
- Creating HTTP APIs with Node-RED
- Handling Errors in Node-RED Flows
- Wrapping Up
- A1. Setting Up Angular
- A2. Setting Up React
- Node.js 8 the Right Way
Setting Up the Initial Project
Rather than write everything from scratch, you’ll want to rely more on the code download that accompanies this book than in previous chapters. In the fortify directory, you’ll find three subdirectories:
-
b4-initial—You should copy this directory to a local directory called b4.
-
b4—This represents the project as it should be at the end of the chapter. No peeking!
-
b4-final—This includes everything in b4 plus more functionality—the ability to add books to bundles, book title autocomplete, etc.
The b4-initial project that you’ll be building on combines the Express framework and the webpack compilation of the last two chapters. Here’s a file listing of that directory:
| | $ tree -F --dirsfirst b4-initial/ |
| | b4-initial/ |
| | ├── app/ |
| | │ ├── index.ts |
| | │ └── templates.ts |
| | ├── development.config.json |
| | ├── package.json |
| | ├── server.js |
| | ├── tsconfig.json |
| | └── webpack.config.js |
| | |
| | 1 directory, 7 files |
The app directory contains an index.ts and a templates.ts file, just like in the last chapter. These files have some minor differences from their predecessors that will make sense as you make changes during this chapter.
The tsconfig.json is identical to the last chapter’s version, and the webpack.config.js is quite similar except that it uses Node.js’s path module for OS-specific file-path manipulations.
development.config.json contains the configuration settings for running the project in development mode. It has Elasticsearch connection settings and a serviceURL string, which we’ll discuss shortly.
The package.json file describes the project, and server.js pulls it all together. We’ll dive into the server.js file in a bit.
To get started, copy the b4-initial into your own working directory called b4. Now open a terminal to your new b4 directory.
The first thing to do is run npm install to get all the dependencies.
| | $ npm install |
And then you can start the server with npm start:
| | $ npm start |
You can leave this running for the rest of the chapter, until we get to the part about running in production. As you make changes, nodemon will pick them up, recompile the webpack assets, and restart the server.
Next let’s dive into server.js, which is core to the work you’ll be doing in this chapter.
Reviewing the server.js File
The server.js file is the backbone that holds the project together. It pulls in all the modules and configures Express and related middleware.
Let’s take a quick peek at this important file before we start adding to it. Here it is:
| 1: | 'use strict'; |
| - | const pkg = require('./package.json'); |
| - | const {URL} = require('url'); |
| - | const path = require('path'); |
| 5: | |
| - | // nconf configuration. |
| - | const nconf = require('nconf'); |
| - | nconf |
| - | .argv() |
| 10: | .env('__') |
| - | .defaults({'NODE_ENV': 'development'}); |
| - | |
| - | const NODE_ENV = nconf.get('NODE_ENV'); |
| - | const isDev = NODE_ENV === 'development'; |
| 15: | nconf |
| - | .defaults({'conf': path.join(__dirname, `${NODE_ENV}.config.json`)}) |
| - | .file(nconf.get('conf')); |
| - | |
| - | const serviceUrl = new URL(nconf.get('serviceUrl')); |
| 20: | const servicePort = |
| - | serviceUrl.port || (serviceUrl.protocol === 'https:' ? 443 : 80); |
| - | |
| - | // Express and middleware. |
| - | const express = require('express'); |
| 25: | const morgan = require('morgan'); |
| - | |
| - | const app = express(); |
| - | |
| - | app.use(morgan('dev')); |
| 30: | |
| - | app.get('/api/version', (req, res) => res.status(200).json(pkg.version)); |
| - | |
| - | // Serve webpack assets. |
| - | if (isDev) { |
| 35: | const webpack = require('webpack'); |
| - | const webpackMiddleware = require('webpack-dev-middleware'); |
| - | const webpackConfig = require('./webpack.config.js'); |
| - | app.use(webpackMiddleware(webpack(webpackConfig), { |
| - | publicPath: '/', |
| 40: | stats: {colors: true}, |
| - | })); |
| - | } else { |
| - | app.use(express.static('dist')); |
| - | } |
| 45: | |
| - | app.listen(servicePort, () => console.log('Ready.')); |
Much of this should look familiar to you, so I won’t go over all of it. But there are a few parts you should pay some attention to.
First, check out the part about NODE_ENV around line 13. This environment variable is widely used to indicate whether a Node.js program is running in production mode. Here we pull it from nconf, with the default set to development.
Next, on line 19, observe the serviceUrl constant. This is a URL instance implemented in the Node.js core module url and adhering to the URLinterface web standard.[86] [87] We’ll use URL instances to construct URLs relative to the main service URL throughout.
Lastly, take a look at the webpack-dev-middleware part beginning on line 34. The webpack-dev-middleware module serves webpack assets directly from memory through Express.[88] When we’re in dev mode, we’ll serve them this way, but in production mode we want to serve static files from the dist directory. This directory doesn’t yet exist, but will once you invoke npm run build, which is configured in the package.json to execute webpack.
Take a minute to familiarize yourself with this file since you’ll be building on top of it throughout the chapter. When you’re ready, there’s one more bit of setup: your localhost alias.
Configuring a localhost Alias
When developing services locally, it’s typical to rely on localhost at IP address 127.0.0.1. We’ve been doing it all along in this book.
Unfortunately, this is a problem for authentication using OAuth, which we’ll be doing later in this chapter. To be clear, nothing in OAuth specifically prohibits using localhost, but the three providers we’ll be using have mutually incompatible rules around allowable domain names for development.
Facebook’s app-configuration page allows you to use localhost for website URLs but prohibits 127.0.0.1. Twitter allows you to use 127.0.0.1 but disallows localhost. For its part, Google authentication is OK with both localhost and 127.0.0.1, but otherwise requires hostnames to end in a legitimate top-level domain (TLD).
We need a hostname that all three services will allow and that we can point to 127.0.0.1 for local development. For this, I’ve chosen b4.example.com. The .com suffix satisfies Google’s TLD requirement, and the example.com second-level domain is reserved by IANA for illustrative purposes, so it can’t create an accidental collision.
To point b4.example.com to 127.0.0.1, you need to add an entry to your operating system’s hosts file. On Mac OS X and Linux, you can find this file at /etc/hosts. On Windows, it’s at \WINDOWS\system32\drivers\etc\hosts.
Open your hosts file in a text editor (this generally requires root privileges), then add the following line:
| | 127.0.0.1 b4.example.com |
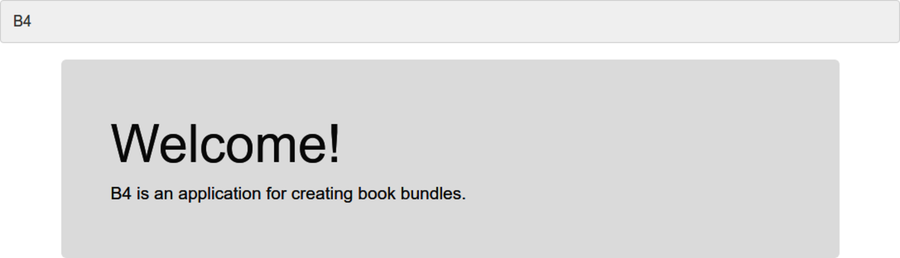
After you have saved the file, any requests you make to b4.example.com will go to your loopback interface, IP address 127.0.0.1. Try it out by opening http://b4.example.com:60900 in a browser. It should look like the figure.
If so, great! Now you’re ready to start developing. Let’s start by adding support for persistent sessions.