Table of Contents for
Packet Tracer Network Simulator
 Packet Tracer Network Simulator
Published by
Packt Publishing, 2014
Packet Tracer Network Simulator
Published by
Packt Publishing, 2014
- Cover
- Table of Contents
- Packet Tracer Network Simulator
- Packet Tracer Network Simulator
- Credits
- About the Author
- About the Reviewers
- www.PacktPub.com
- Preface
- Who this book is for
- Conventions
- Reader feedback
- Customer support
- 1. Getting Started with Packet Tracer
- Installing Packet Tracer
- Interface overview
- Creating a simple topology
- Summary
- 2. Network Devices
- Customizing devices with modules
- Emulating WAN
- Accessing the CLI
- Summary
- 3. Generic IP End Devices
- Servers
- Other end devices
- Configuring end devices
- Summary
- 4. Creating a Network Topology
- Testing connectivity with PDUs
- Using the simulation mode
- Clustering a topology
- Summary
- 5. Navigating and Modifying the Physical Workspace
- Moving devices physically
- Managing cables and distances
- Customizing icons and backgrounds
- Summary
- 6. Configuring Routing with the CLI
- Dynamic routing protocols
- The Routing table
- Load sharing
- Summary
- 7. Border Gateway Protocol (BGP)
- BGP versus dynamic routing protocols
- Configuring BGP in Packet Tracer
- Summary
- 8. IPv6 on Packet Tracer
- IPv6 static and dynamic routing
- Using both IPv4 and IPv6
- Summary
- 9. Setting Up a Wireless Network
- Wireless networks and physical workspaces
- Summary
- 10. Configuring VLANs and Trunks
- InterVLAN routing with routers and layer 3 switches
- Switch-to-switch trunk links
- Analyzing broadcasts in the simulation mode
- Summary
- 11. Creating Packet Tracer Assessments
- The initial network
- The answer network
- Testing the activity
- Summary
- Index
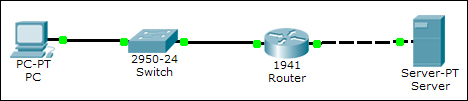
Now let's move on to creating the answer network. Open the Answer Network section and import the file that we previously saved. We will now finish this network setup. This is the finished network you'd want the end users to create. Click on Show Answer Network and you'll be taken to the logical view with the same four devices again. Our finished network will look like the following figure:
We'll be using the following IP address settings:
- PC: The addresses assigned are as follows:
- IP address:
10.10.0.2 - Subnet Mask:
255.255.255.0 - Gateway:
10.10.0.1
- IP address:
- Router: The settings configured are as follows:
- GigabitEthernet0/0:
10.10.0.1(Connected to the switch) - GigabitEthernet0/1:
30.10.0.1(Connected to the server)
- GigabitEthernet0/0:
- Server: The addresses assigned are as follows:
- IP address:
30.10.0.10 - Subnet Mask:
255.255.255.0 - Gateway:
30.10.0.1
- IP address:
After assigning IP addresses to the PC and server, do the same to the router.
R1(config)#int g0/0
R1(config-if)#ip add 10.10.0.1 255.255.255.0
R1(config-if)#no shut
R1(config-if)#int g0/1
R1(config-if)#ip add 30.10.0.1 255.255.255.0
R1(config-if)#no shut
Now, we'll configure extended ACL on the router so that only ICMP (Internet Control Message Protocol) and HTTP traffic is allowed.
R1(config)#ip access-list extended 100
R1(config-ext-nacl)#permit icmp any host 30.10.0.10
R1(config-ext-nacl)#permit tcp any host 30.10.0.10 eq www
R1(config)#int g0/0
R1(config-if)#ip access-group 100 in
Test if things work correctly by opening the PC and pinging the server. Then try to test the connectivity using the ftp command from the PC to the server IP address.
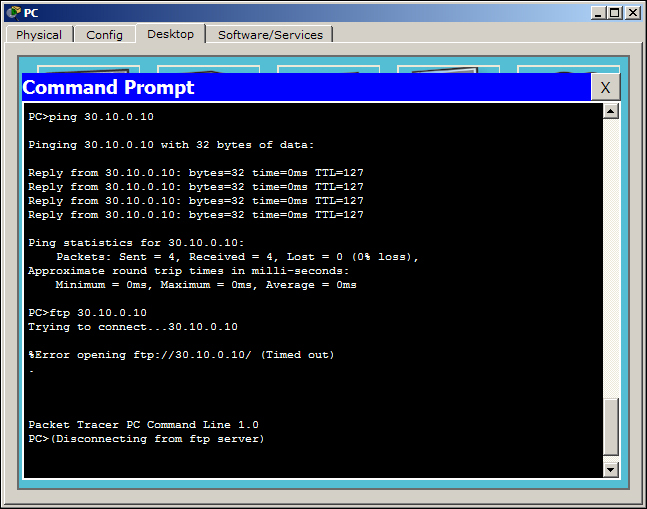
The FTP connection fails as expected (as shown in the previous figure). Now open the Web Browser utility and see if the web server is accessible. To incorporate it into our assessment, we need to test the same with PDUs.
- Create a simple PDU to test ICMP. This should succeed.
- Create a complex PDU to test HTTP. This should succeed.
- Create a complex PDU to test FTP. This should fail.

Now that our answer network has been tested (as shown in the previous figure), click on the hat and magic wand icon to get back to the Activity Wizard. Once you are back in the wizard, export this network and save it. We should now select all of the items that will be taken into consideration when evaluating this assessment.
We will evaluate IP addresses of the PC, server, and the router, connections between all devices, and the connectivity between the PC and the server. The following options will be selected under the assessment tree:
- PC/Server: We select the following items under this checklist:
- Default Gateway
- Ports: Select the FastEthernet0 item, and within that enable the following:
IP address
Port Status
Subnet Mask
Link to switch/router: Under this checklist we enable Type
- Router: We enable the following items in the checklist:
- ACL
- Ports: Check the following items within the Ports option:
GigabitEthernet0/0: We enable Access group In, IP Address, Subnet Mask, and Type under the Link to switch option
GigabitEthernet0/1: We enable IP Address, Subnet Mask, and Type under the Link to Server option
After a user has finished configuring all of these items, connectivity has to be checked. Move on to the Connectivity Test tab and you'll see the three user-generated PDUs thatwe created. The Test Condition field for the first two packets (ICMP and HTTP) should show success, and the third one should show failure. This will be a built-in check to see if the ACLs have been properly configured.
Navigate to the Settings tab and set the timer countdown. Setting the countdown will automatically pop up the answer network's window once the time is up. We will set it to 20 minutes.
Click on the Password button and set a password. The end users will be prompted for this password if they try to access the activity wizard during the assessment.