Table of Contents for
Packet Tracer Network Simulator
 Packet Tracer Network Simulator
Published by
Packt Publishing, 2014
Packet Tracer Network Simulator
Published by
Packt Publishing, 2014
- Cover
- Table of Contents
- Packet Tracer Network Simulator
- Packet Tracer Network Simulator
- Credits
- About the Author
- About the Reviewers
- www.PacktPub.com
- Preface
- Who this book is for
- Conventions
- Reader feedback
- Customer support
- 1. Getting Started with Packet Tracer
- Installing Packet Tracer
- Interface overview
- Creating a simple topology
- Summary
- 2. Network Devices
- Customizing devices with modules
- Emulating WAN
- Accessing the CLI
- Summary
- 3. Generic IP End Devices
- Servers
- Other end devices
- Configuring end devices
- Summary
- 4. Creating a Network Topology
- Testing connectivity with PDUs
- Using the simulation mode
- Clustering a topology
- Summary
- 5. Navigating and Modifying the Physical Workspace
- Moving devices physically
- Managing cables and distances
- Customizing icons and backgrounds
- Summary
- 6. Configuring Routing with the CLI
- Dynamic routing protocols
- The Routing table
- Load sharing
- Summary
- 7. Border Gateway Protocol (BGP)
- BGP versus dynamic routing protocols
- Configuring BGP in Packet Tracer
- Summary
- 8. IPv6 on Packet Tracer
- IPv6 static and dynamic routing
- Using both IPv4 and IPv6
- Summary
- 9. Setting Up a Wireless Network
- Wireless networks and physical workspaces
- Summary
- 10. Configuring VLANs and Trunks
- InterVLAN routing with routers and layer 3 switches
- Switch-to-switch trunk links
- Analyzing broadcasts in the simulation mode
- Summary
- 11. Creating Packet Tracer Assessments
- The initial network
- The answer network
- Testing the activity
- Summary
- Index
The Command-line Interface of a device in Packet Tracer can be accessed in two ways:
- The CLI tab
- Console port
Although it is possible to access a device through SSH or Telnet, these are Cisco methods and are not exclusive to Packet Tracer.
This is the simplest way of accessing the Command-line Interface of a device; click on a network device, navigate to the CLI tab, and you'll see the booting process.
There is no difference between what is seen and controlled in this method and the previous one, but the Console Port can be used to make the topology look similar to the real world. Follow the steps to configure the console port:
- Add a PC or a laptop to the workspace.
- Choose connections, and then click on the console cable.
- Connect the console cable of the network device to the RS-232 port of the PC/laptop.
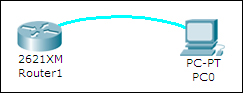
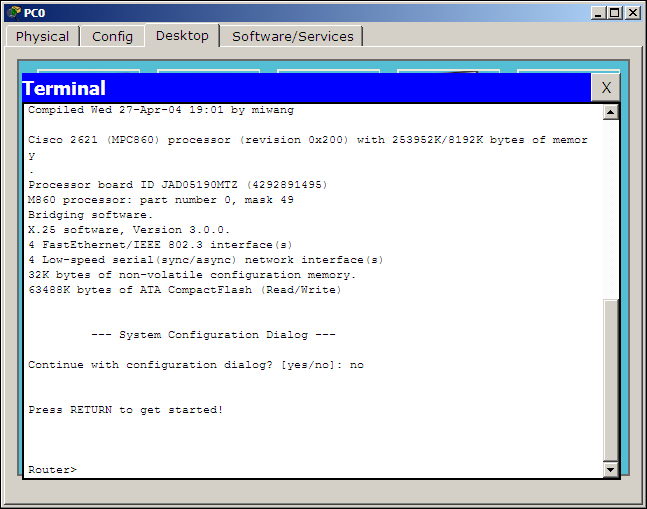
- Open the PC/laptop, navigate to the Desktop tab, open Terminal, and then with the default settings, click on OK to view the console. The following screenshot displays a router's console through its terminal:
In step 2, if you use the Automatically Choose Connection Type option, the Ethernet ports of both of the devices will be connected.
In this section, you'll learn how to configure Cisco routers and switches without using a single command! Yes, it is possible; Packet Tracer provides a Config tab that contains GUI options for the most common configurations. What's more, as you tinker with the GUI, its equivalent Cisco IOS command is also displayed. Take a look at the following screenshot:
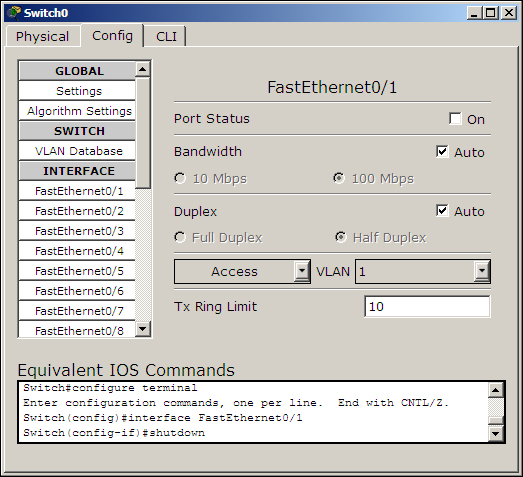
From the Config tab of the switch, we will set the Interface option to FastEthernet0/1 and uncheck the On checkbox for Port Status. So the Equivalent IOS Commands section displays the following command to achieve this process:
Switch>enable
Switch#configure terminal
Switch(config)#interface FastEthernet0/1
Switch(config-if)#shutdown
Using the Config tab, the following can be configured:
- Global settings
- Routing (on a router and a layer 3 switch)
- VLAN database (on a switch)
- Interface settings
Let's see what options are offered under each of these sections.
The first part of Global settings allows you to change the Display name and Hostname of the device. The display name can also be changed by clicking on the name below the device icon. The configuration file for the device can also be saved, erased, or exported for later use.
The Algorithm Settings section contains settings meant for advanced users who want to minutely tweak their device to see how it responds to certain situations. These settings can also be globally set for all network devices by navigating to Options | Algorithm Settings, or by using the shortcut Ctrl + Shift + M.
This section has options for configuring Static and dynamic routing (RIP). To configure static routing, enter the network address, netmask, and its next hop address, and then click on Add. Here is some sample network information:
- Network:
192.168.30.0 - Mask:
255.255.255.0 - Next Hop:
10.0.0.6
To configure Routing Information Protocol (RIP), it is enough to add only the network IP. Please note that the GUI uses RIP Version 1, so classless routing is not supported. Routing will be discussed in detail in Chapter 6, Configuring Routing with the CLI. Apart from routers, routing can also be configured on the 3560-24PS switch, as it is a layer 3 switch.
This section will teach you how to create and remove VLANs. VLANs and trunking are discussed in Chapter 10, Configuring VLANs and Trunks. Only the VLAN database can be modified from these options; adding interfaces to these VLANs is what we'll see in the next section.
This section slightly differs from the switch and the router. Switches have options for modifying the speed and duplex setting and for assigning a port to VLAN. On routers, the VLAN section is replaced by the IP address configuration.
While changing the speed and duplex settings, if you are setting it to anything other than auto, make sure that the settings are the same on both ends. For example, if you set it to 100 MBps on one end and 10 MBps on the other, the link won't come up.