Table of Contents for
Building E-Commerce Solutions with WooCommerce - Second Edition
 Building E-Commerce Solutions with WooCommerce - Second Edition
Published by
Packt Publishing, 2015
Building E-Commerce Solutions with WooCommerce - Second Edition
Published by
Packt Publishing, 2015
- Cover
- Table of Contents
- Building E-Commerce Solutions with WooCommerce Second Edition
- Building E-Commerce Solutions with WooCommerce Second Edition
- Credits
- About the Author
- About the Reviewers
- www.PacktPub.com
- Preface
- What you need for this book
- Who this book is for
- Conventions
- Reader feedback
- Customer support
- 1. Setting Up WooCommerce
- Installing WooCommerce
- Setting up WooCommerce
- Summary
- 2. Creating Your First Products
- Creating your first product
- Setting the categories, tags, and images for your product
- Summary
- 3. Using Downloadable Products and Variations
- Using attributes
- Setting up variable and grouped products
- Other product types
- Summary
- 4. Payments, Shipping, and Coupons
- Shipping methods and prices
- Using discount coupons
- Summary
- 5. Working with WooCommerce Themes
- Making or buying a theme
- Installing a WooCommerce theme
- Using the Storefront theme
- Summary
- 6. Customizing a WooCommerce Theme
- WordPress theme basics
- Developing WooCommerce themes
- Summary
- 7. Running Your Online Store
- Deploying your WooCommerce store
- Working with sales orders
- Reporting
- Summary
- 8. More Possibilities Using Plugins
- Popular and useful WooCommerce plugins
- A store in multiple languages
- Summary
- Index
WooCommerce is delivered by default with a number of page templates that are used to display all shop information in the correct way. Even using the standard Twenty Fifteen theme, the WooCommerce pages already look pretty good. Just adding some additional CSS might be enough for you to get WooCommerce working even on a theme that was never even designed to work with WooCommerce. If you want to go further than that, here are the things that you need to know:
- As mentioned, do not change an existing theme directly; it's better to work with a Child theme. Using the method described previously, you can be sure that your changes will not be overwritten in case of an upgrade of the WooCommerce plugin.
- Find the default WooCommerce templates in
wp-content/plugins/woocommerce/templates. - An overview of all the available WooCommerce template files can be found here as well http://docs.woothemes.com/document/template-structure/.
- Copy only the ones that you'd like to change to your child-theme in
wp-content/themes/child-theme-name/woocommerce. Make sure to place your files here directly; do NOT use the templates subfolder that you can see in the original WooCommerce folder! If you are making changes to an existing WooCommerce theme, you'll already have this structure in place in your Parent theme. In that case, copy the files you want to change to thewoocommercefolder within your Child theme. - Keep the subfolders intact. For example, if originally the
price.phpis stored inwp-content/plugins/woocommerce/templates/single-product, the location of your changed version of the file should bewp-content/themes/child-theme-name/woocommerce/single-product. - Besides the theme files, the
woocommerce/templatesfolder also contains a subfolder holding e-mails. You may copy and change these in the same way to your Child theme to be able to adjust the content of the e-mail messages. - Simply add/change HTML and PHP in the correct files, depending on your needs to influence the end result.
- A good presentation about the methods described above can be found at http://www.slideshare.net/corsonr/wordpress-montreal-meetup-woocommerce-templates.
WooCommerce comes with default CSS styles to give the necessary elements at least some styling. These CSS files can be found in /wp-content/plugins/woocommerce/assets/css. Also here, it's better not to change the existing files because your changes will be overwritten in case of an update of the plugin.
You may simply add some CSS styling to the stylesheet of your Child theme in order to change the colors, fonts, and so on. The stylesheet of your child theme should be made available here: wp-content/themes/my-child-theme/style.css.
For example, use the following code to change the color of the buttons:
a.button, button.button, input.button, #review_form #submit { background:green; }If you want to completely disable the WooCommerce CSS styling, you can do this in the following way. Use your theme's functions.php file and add the following:
add_filter( 'woocommerce_enqueue_styles', '__return_empty_array' );
But remember that as a beginner, it's easier to change existing styles than to create everything from scratch.
WooCommerce heavily relies on the usage of Hooks, Actions, and Filters. It gives you the possibility to override the default output of WooCommerce. For instance, if you want to take control of the Checkout page and add or even remove fields in there, hooks and filters are what you need.
Let's first explain this concept. Within the WordPress and WooCommerce code, developers added hooks. On a hook, you can hang your own code so that it changes the original behavior. There are two types of hooks, which are actions and filters:
- An action allows you to add functionality to WooCommerce at a specific point in the process
- A filter allows you to intercept and change the data as it is being processed
In other words, using actions you can do something and using a filter you can change the data.
If the topic of using hooks and filters is still new to you, here you may find a good tutorial about it: http://wpcandy.com/teaches/how-to-use-wordpress-hooks. Another good read explaining the concept for non-developers can be found at http://docs.presscustomizr.com/article/26-wordpress-actions-filters-and-hooks-a-guide-for-non-developers.
Now, let's take the following example. In some countries, having the State field on the checkout page doesn't make sense because States are not actively used. In such a case, you might want to remove the field from the checkout page. Here's how to do just that.
Add the following code to your functions.php file in your Child theme:
// Hook in
add_filter( 'woocommerce_checkout_fields' , 'custom_override_checkout_fields' );

// Our hooked in function - note that the $fields is passed via the filter

function custom_override_checkout_fields( $fields ) {
     unset($fields['shippping']['shipping_state']);
     unset($fields['billing']['billing_state']);
     return $fields;
}
So what does this do? First of all, we add our own custom function to the WooCommerce Checkout fields filter. In our custom function, we simply remove two fields by using the unset function. However, please note that this is an example only. Removing the State field might break extensions that rely on it. Besides that, the preceding code does not check if the fields are set before removing them. So, be careful when applying changes like these and always make sure to keep a backup copies of the original files available.
There's more to discover regarding the development of your own WooCommerce theme; especially, when working with hooks and filters. Here are some additional resources to move forward:
We saw earlier that adding a logo to the Storefront theme can be accomplished using an additional plugin. However, such a plugin might not be available for other themes. Besides that, adding more and more plugins is not a good idea for performance reasons. A simple change can just as well be made by a small code change. Let's see how we can add a logo to the Storefront theme without using the plugin. If you installed and used that plugin earlier, please remove it first:
/* Add a logo in the header */
add_action( 'init', 'storefront_logo' );
function storefront_logo() {
  remove_action( 'storefront_header', 'storefront_site_branding', 20 );
  add_action( 'storefront_header', 'storefront_display_logo', 20 );
}

function storefront_display_logo() {
?>
  <a href="<?php echo esc_url( home_url( '/' ) ); ?>" class="site-logo" rel="home">
    <img src="<?php echo get_stylesheet_directory_uri(); ?>/images/logo.png" alt="<?php echo get_bloginfo( 'name' ); ?>" />
  </a>
<?php
}
We also need a small change to the CSS of our child theme because the class used is slightly different compared to the one used in the plugin:
.site-header .site-logo { float: left; margin-bottom: 0; }Leave the remaining part of style.css unchanged. Note that the result of this small piece of code is the same as the one that the plugin offered.
The Storefront theme offers you the possibility to show the sidebar on the right or on the left. But what if you would like to show the sidebar on the category pages, but completely remove it on the (single) product page?
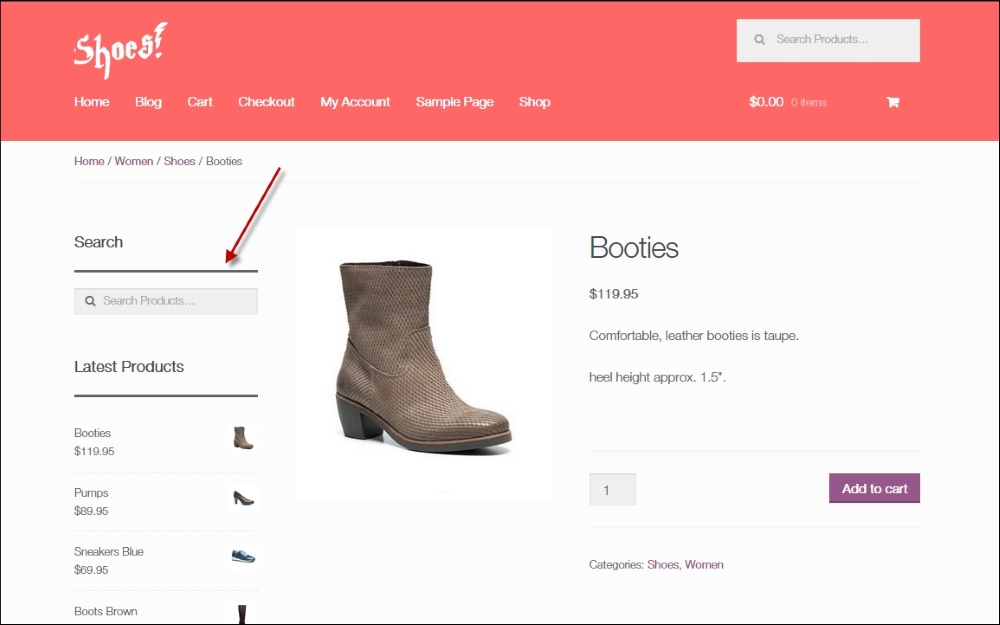
This is also pretty simple to do. With only a few code changes, we'll have more space available for our product images. Add the following to functions.php of your Child theme:
add_action( 'get_header', 'remove_storefront_sidebar' );
function remove_storefront_sidebar() {
  if ( is_product() ) {
    remove_action( 'storefront_sidebar', 'storefront_get_sidebar', 10 );
  }
}
Next, also add a line to style.css:
/* remove sidebar on product page */
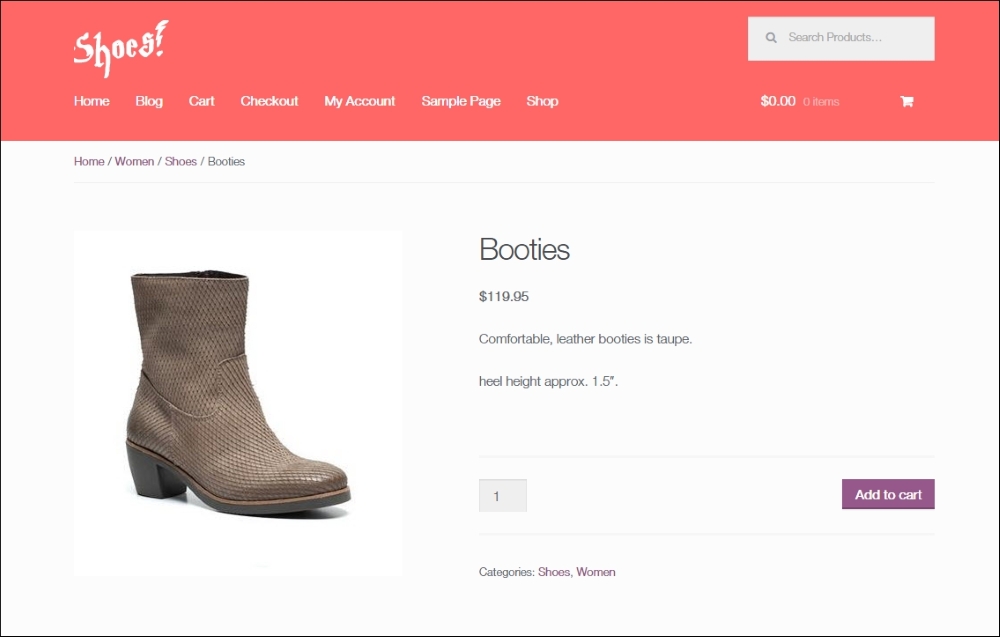
body.woocommerce #primary { width: 100%; }The end result is a much cleaner product page with larger product images: