Table of Contents for
Building E-Commerce Solutions with WooCommerce - Second Edition
 Building E-Commerce Solutions with WooCommerce - Second Edition
Published by
Packt Publishing, 2015
Building E-Commerce Solutions with WooCommerce - Second Edition
Published by
Packt Publishing, 2015
- Cover
- Table of Contents
- Building E-Commerce Solutions with WooCommerce Second Edition
- Building E-Commerce Solutions with WooCommerce Second Edition
- Credits
- About the Author
- About the Reviewers
- www.PacktPub.com
- Preface
- What you need for this book
- Who this book is for
- Conventions
- Reader feedback
- Customer support
- 1. Setting Up WooCommerce
- Installing WooCommerce
- Setting up WooCommerce
- Summary
- 2. Creating Your First Products
- Creating your first product
- Setting the categories, tags, and images for your product
- Summary
- 3. Using Downloadable Products and Variations
- Using attributes
- Setting up variable and grouped products
- Other product types
- Summary
- 4. Payments, Shipping, and Coupons
- Shipping methods and prices
- Using discount coupons
- Summary
- 5. Working with WooCommerce Themes
- Making or buying a theme
- Installing a WooCommerce theme
- Using the Storefront theme
- Summary
- 6. Customizing a WooCommerce Theme
- WordPress theme basics
- Developing WooCommerce themes
- Summary
- 7. Running Your Online Store
- Deploying your WooCommerce store
- Working with sales orders
- Reporting
- Summary
- 8. More Possibilities Using Plugins
- Popular and useful WooCommerce plugins
- A store in multiple languages
- Summary
- Index
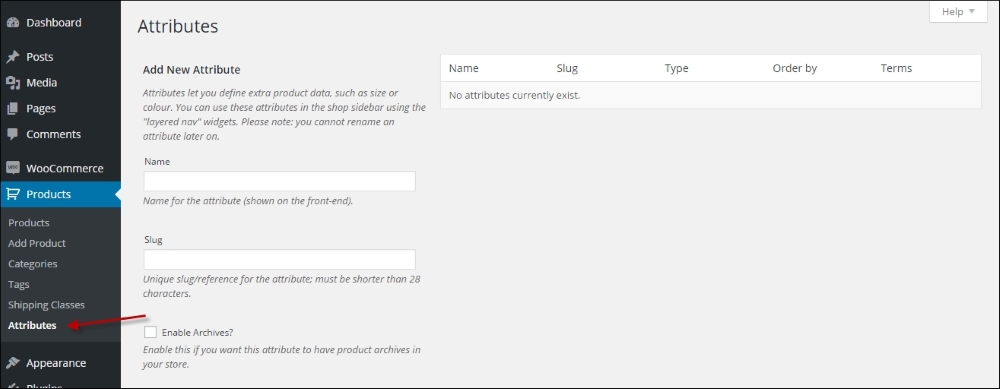
At first glance, attributes look like tags when we're accessing the function using the menu, Products | Attributes:
However, there is an important difference between Attributes and Categories. Attributes deliver a powerful mechanism to create different kinds of products. Besides that, working with Attributes is often smarter than working with Categories alone. Categories are used to organize entire products, whereas Attributes are a way of organizing product properties. Let's start with an example to clarify this.
Our simple product that we created earlier (the Brown Women's Belt) could easily be put in a category structure like: Women | Accessories | Belts. But that would give us all available belts in your store, right? And not just the brown ones. Ok, so we'll add another category for that! But no, although it is possible, it's not the best way to do it. Using Attributes in such a situation for the color is much more powerful. It will give your visitors the possibility to immediately filter all brown products once they're in the Accessories category so they can mix and match. Using categories for describing the color of your product is really a no-go. In other words, a category is a group in which a set of products can be bundled together. An attribute is a specific characteristic of a product. Other products may share that characteristic (for example, multiple products can be a medium size or have a brown color).
Since the usage of colors in our fashion store example is something that we'll need for sure, we are going to create that Attribute.
Creating an Attribute is very simple. Just enter the Name of the attribute (Color, in our example). You may leave the Slug field empty, it will automatically be filled based on the name of your attribute. Next, make sure that the Type field is set to Select. If you would set it to Text, it will give you the possibility to add values for every single product manually. Using Select will make sure that you enter and standardize the values beforehand. In most cases, using Select is the better choice.
The Enable Archives checkbox may stay switched off. This field allows you to create separate pages based on your attributes. So for instance, a page holding all the products in your store that are black. This can be handy, but also requires some additional coding to reach the desired result.
Leave Default sort order to Custom ordering so that later on, we'll be able to sort our Attribute values in the way we want to.
Click on the Add Attribute button:
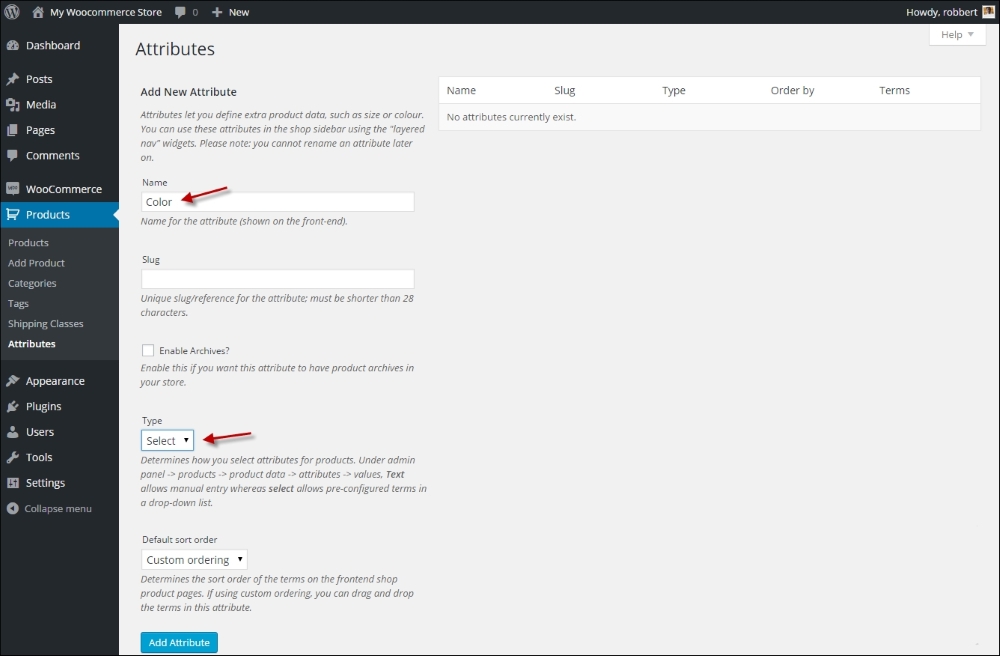
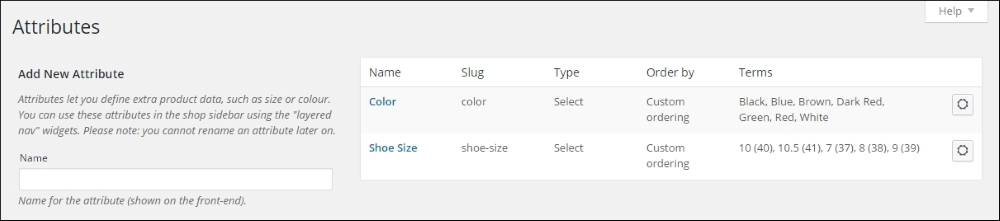
Now that our Attribute has been created, it appears in the table on the right-hand side of the screen:
Click on the button on the right to Configure terms.
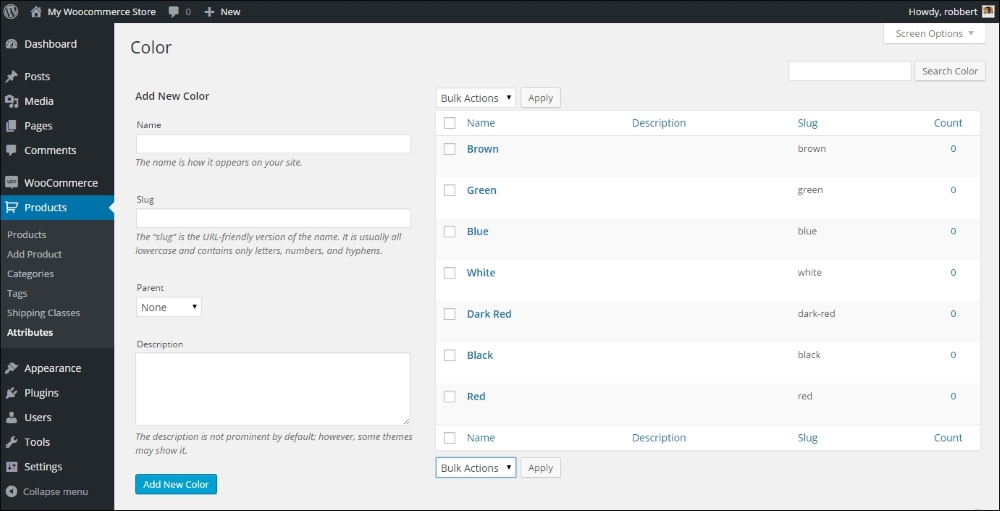
Next, add all the colors that you will possibly need in your store. Don't worry though, it's always possible to come back later and add more. For every color, just enter the name and click on Add New Color. You'll soon have a long list of colors available. Remember that these colors will be used later on, when we're creating new products.
Once done, go back to the Attributes form again by clicking in the menu on the left. Now repeat the preceding steps and create a new Attribute named Size or Shoe Size. When working with sizes, there are a lot of different possibilities, so you might want to distinguish the sizes depending on the products that you are going to use them for. We create Shoe size to support our next example. Our result looks like this:
Now that we created some attributes, we'll be able to create a Variable Product.