Table of Contents for
Building E-Commerce Solutions with WooCommerce - Second Edition
 Building E-Commerce Solutions with WooCommerce - Second Edition
Published by
Packt Publishing, 2015
Building E-Commerce Solutions with WooCommerce - Second Edition
Published by
Packt Publishing, 2015
- Cover
- Table of Contents
- Building E-Commerce Solutions with WooCommerce Second Edition
- Building E-Commerce Solutions with WooCommerce Second Edition
- Credits
- About the Author
- About the Reviewers
- www.PacktPub.com
- Preface
- What you need for this book
- Who this book is for
- Conventions
- Reader feedback
- Customer support
- 1. Setting Up WooCommerce
- Installing WooCommerce
- Setting up WooCommerce
- Summary
- 2. Creating Your First Products
- Creating your first product
- Setting the categories, tags, and images for your product
- Summary
- 3. Using Downloadable Products and Variations
- Using attributes
- Setting up variable and grouped products
- Other product types
- Summary
- 4. Payments, Shipping, and Coupons
- Shipping methods and prices
- Using discount coupons
- Summary
- 5. Working with WooCommerce Themes
- Making or buying a theme
- Installing a WooCommerce theme
- Using the Storefront theme
- Summary
- 6. Customizing a WooCommerce Theme
- WordPress theme basics
- Developing WooCommerce themes
- Summary
- 7. Running Your Online Store
- Deploying your WooCommerce store
- Working with sales orders
- Reporting
- Summary
- 8. More Possibilities Using Plugins
- Popular and useful WooCommerce plugins
- A store in multiple languages
- Summary
- Index
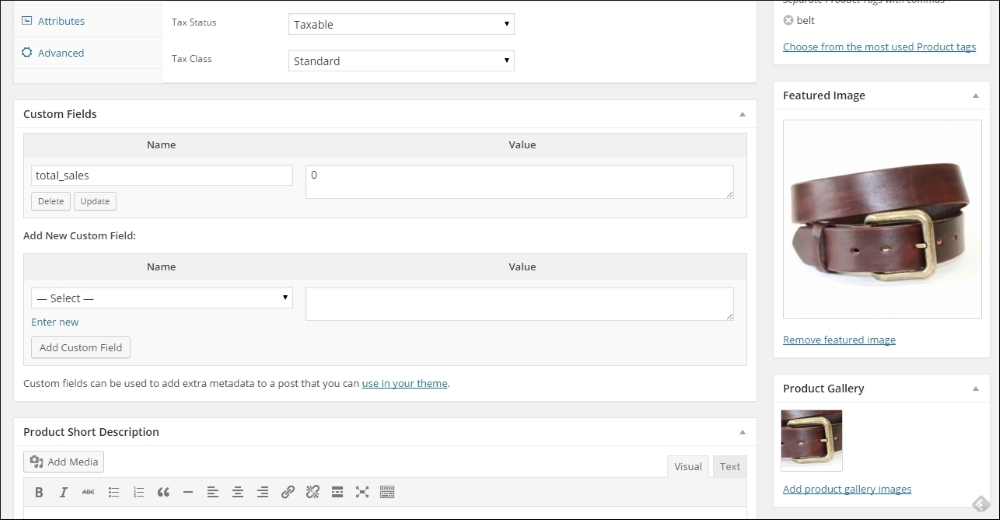
We're almost there now. Under the product data section there's a possibility to use custom fields that we also know from regular WordPress posts. We do not need that now. Always first try if you can solve your need using the standard available Attributes and Tags.
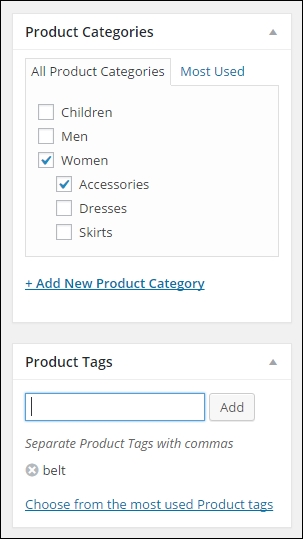
So far we've just used the main part of the product creation page. On the right there are the well known fields to publish the item. But before we do, we first need to take care of some other data, starting with the Product Categories. Just as with any regular WordPress post, just click the categories your product belongs to. Note that it's possible to select more than one category.
Next, set the Product Tags by entering them in the field and just press Enter. Don't use too many tags per product, stick to using a few. Having too many tags might lead to duplicate content, because the chance of having multiple pages with the same content increases in that case.
Tip
What is duplicate content? We speak of duplicate content if your website has the exact same content under two or more different URLs. You need to prevent that from happening, because search engines like Google won't know which page to show. The problem becomes bigger when people start linking to the different versions of the (same) content. Using too many tags for your posts increases the chance of having duplicate content. Joost de Valk from Yoast.com wrote some exceptional detailed information on this topic: https://yoast.com/duplicate-content/.
In the next screenshot you see an example of as well the selected categories as some tags that were entered for this product.
Below the Product Tags, there are two areas that allow you to add two of images to your product: the Product Gallery and the Featured Image. Before we start adding images, let's go back to the first chapter. Remember that we crossed a couple of settings that influence our image sizes? If you want to go back there now, first save your product as a draft and then go to WooCommerce | Settings | Products | Display using the menu. The image settings are on the bottom of that tab:
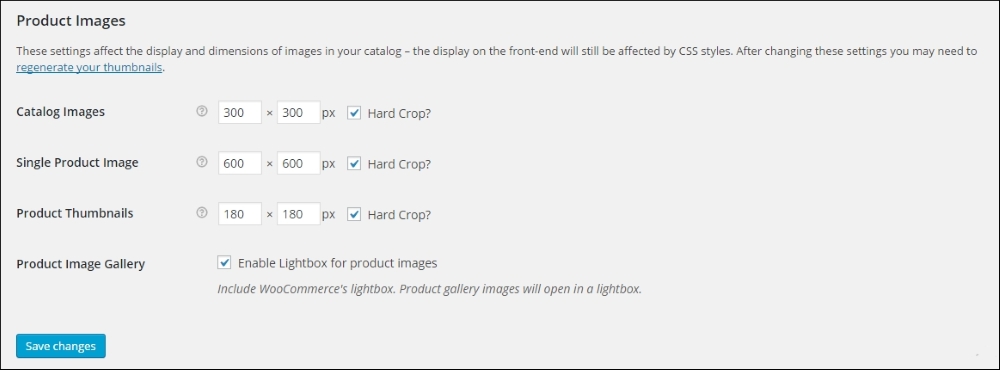
There are three image sizes that will be used by WooCommerce:
- Catalog images is the image that is used in your category and tag pages, when visitors are browsing through your product catalog
- Single Product Image is shown on the product page, showing a single item
- Product Thumbnails are only shown in your cart and checkout
It is important to use the same ratio for all three sizes. It's not mandatory to keep the width and height the same, the portrait format (where the value for width is smaller than the value for height) is often used as well, especially on fashion websites.
The check box at the field hard crop means that if you upload an image with a different ratio, they will automatically be cropped to the correct ratio as set here. This might mean losing a part of your image. Therefore it's always good to just prepare your images before uploading them to your website. Use the correct image ratio and use an image size that is at least as large at the dimensions of the Single Product Image.
Tip
Note: Not sure which values to use? Before you make final settings and start filling your product catalog with lots of items, it's important that you have set these values correctly. If you're buying a theme for a store, the documentation of the theme will often explain what to use. If you're creating a theme yourself, you're completely free in your choices of course. Sometimes it's necessary to regenerate all your product images, just because you changed the settings previously after you created your products. As also mentioned in Chapter 1, Setting Up WooCommerce, there's a plugin that can help you with this task: http://wordpress.org/plugins/regenerate-thumbnails/.
We're heading back to our product to start adding our images. The first and most important image is the Featured Image. Just add that by clicking on the link Set Featured Image. This will open your media library, just like you are used to from creating WordPress posts or pages.
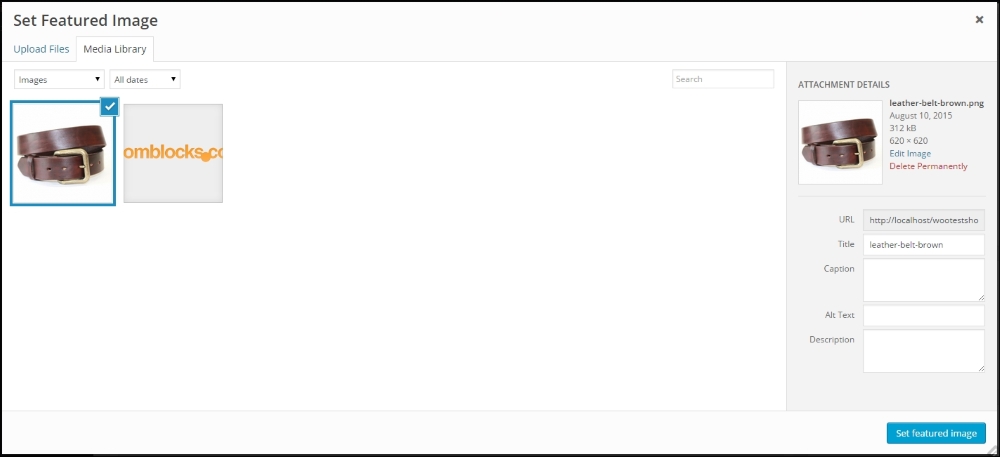
Click Select files and open a single image from your local machine. Don't forget to set a Alt Text and Description. Those are important for search engines! Then click the Set featured image button on the right. You'll return to the product maintenance page. If you have multiple photos available, don't hesitate to add those as well. Lack of good product photos is for sure a conversion killer. Click Add product gallery images and add the images you have available. Again, also for these images fill the Alt Text and Description fields. The result looks something like this:
We finished the most important steps for our product and can publish it on the top right by clicking the button Publish. Of course we also want to have a look at the result in the front-end of our store. You may open the product page directly by clicking the button View Product on the top of the product screen.
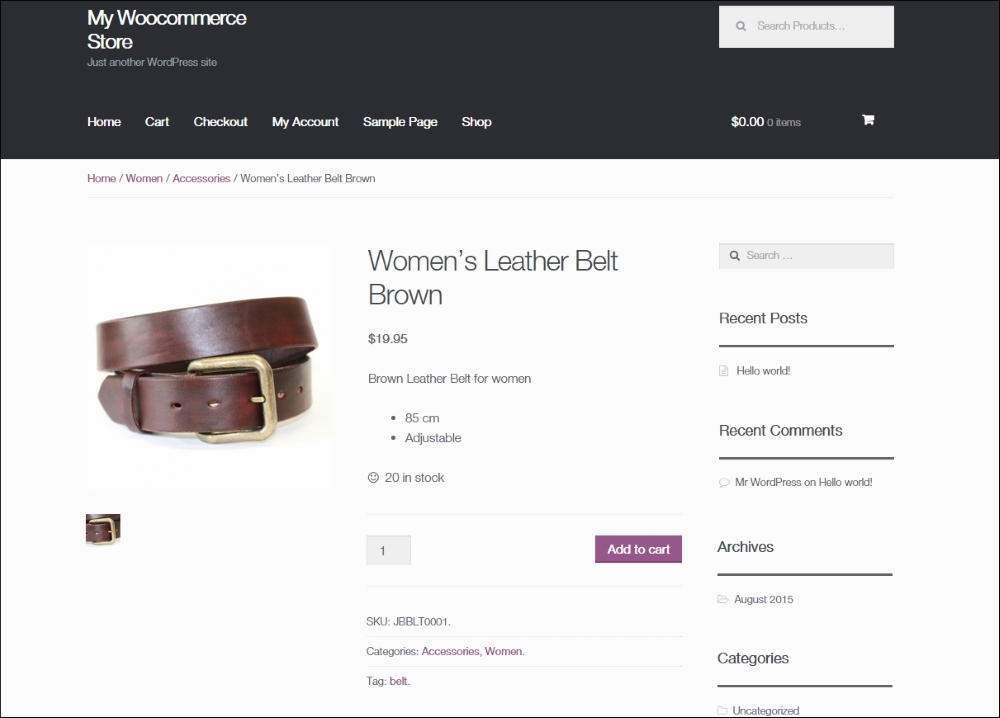
Since we are using the default Twenty Fifteen theme here, the layout of the page is okay but not more than that. Things could be better if we'd used an optimized WooCommerce theme. More on that topic will follow during Chapter 5, Working with WooCommerce Themes.
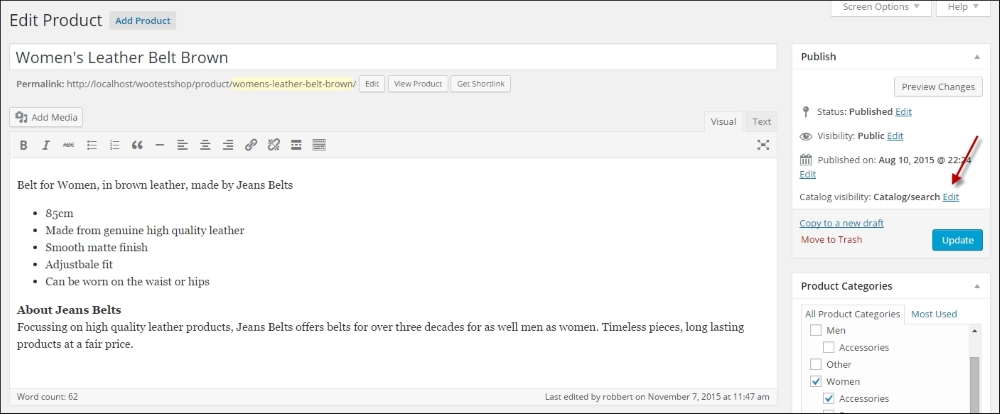
When publishing our product there are some more options that we can use to influence the behavior of WooCommerce for this product. First navigate back to your product and edit it. On the top right we see several default WordPress fields, that we already know from regular posts like Status, Visibility, and Published on. The behavior of these fields is exactly the same as for a regular WordPress post and gives you the possibility to control if and when a product becomes visible.
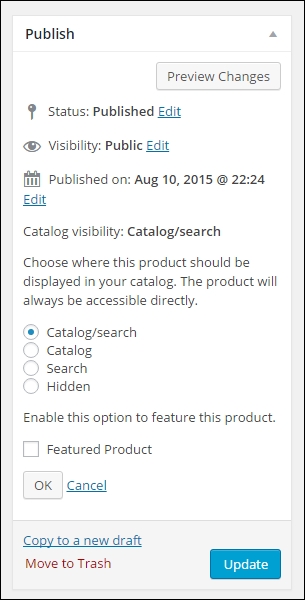
Next, click on the Edit link near Catalog visibility, as shown in the following screenshot:
The default value, Catalog/search will have as result that:
- Your product is shown on the shop and category pages
- Your product will be shown in the search result if a visitor is searching for it
The other possibilities are:
- Catalog: In this case the product appears on the shop and category pages, but it will not be shown in search results.
- Search: In this case the product is not shown on shop and category pages. It can only be found by a visitor by searching for it.
- Hidden: A product with the value hidden will never be shown to your visitors and is only accessible if you know the exact URL. This can be handy if you would like to offer a product to for instance your e-mail subscribers, but do not want to make the product publicly available.
Just above the Ok button, there's a checkbox to make your product a Featured Product. Featured Product allows you to showcase specific products in different parts of your online store. You can for example show featured products in a slider on your homepage or in a widget. We'll show those possibilities later on in this book:
Remember to click the Update button if you make any changes to your product.