Table of Contents for
Web Design Blueprints
 Web Design Blueprints
Published by
Packt Publishing, 2016
Web Design Blueprints
Published by
Packt Publishing, 2016
- Cover
- Table of Contents
- Web Design Blueprints
- Web Design Blueprints
- Credits
- About the Author
- About the Reviewer
- www.PacktPub.com
- Preface
- What you need for this book
- Who this book is for
- Conventions
- Reader feedback
- Customer support
- 1. Responsive Web Design
- Getting familiar with the basics
- Using media queries for responsive design
- Working with responsive media
- Building responsive layouts
- Summary
- 2. Flat UI
- Flat UI color
- Creating a flat UI layout
- Summary
- 3. Parallax Scrolling
- Color classes
- Using SVG font icons
- Getting the fonts
- That's no moon!
- OMG, it's full of stars!
- Clouds, birds, and airplanes
- The rocket
- Terra firma
- Next up, the CSS
- Styling the objects with CSS
- Styling the ground objects
- Writing the JavaScript effects
- Setting the row height
- Spreading the objects
- Spreading the clouds
- Loading the page functions
- Smoothening the scroll
- Updating elements on the scroller
- Collecting the moving elements
- Creating functions for the element types
- Setting the left positions
- Creating the rocket's movement function
- Finally, moving the earth
- Summary
- 4. Single Page Applications
- Getting to work
- Getting the old files
- Object and function conventions
- Creating utility functions
- Working with the home structure
- Setting up other sections
- Performing housekeeping
- Creating a callBack function for the API
- Summary
- 5. The Death Star Chapter
- Dropping in the parallax game
- Loading elements from JSON
- What can be done in the shared levels service
- Editing the home JavaScript
- Creating the other pages – credits and leaderboard
- Creating the second level
- Summary
- Index
We've finally arrived at the most exciting part of this chapter. I saved it for last for this reason, because it will be the coolest to see in action. We are going to add a second level to our game that will function much like the first and fit well into the home page format.
The first thing we want to do is discuss what we want this to do and look like. I want to stick with the reusable patterns we've worked so hard to create, such as the scrolling up, the rocket, and the space objects. But we can make some cool changes to it.
In the second level, you are already in space and will scroll up and face the big boss of the level and defeat it with one shot. Since this is the Death Star Level, I want to borrow some objects from Star Wars. We will not be using so many font awesome objects, but instead some SVG icons.
I found a good collection of SVG icons over at https://www.iconfinder.com when searching for space icons. It gave me a cool selection of spaceships for the second level. Out of the selection, I found a Death Star, a satellite, a Millennium Falcon, a rocket, Saturn, a Tie-Fighter, and an X-Wing, all in SVG format. So search for and download these. Create a new directory in your lib directory called space-icons, and move them there.
You will need to edit each of these SVG icons. Inside each SVG file, there is a code for the PATH; inside the opening for the path, add a gray fill attribute. See the following for an example. This is from the tie-fighter.svg file:
<?xml version = "1.0" ?>
<!DOCTYPE svg  PUBLIC '-//W3C//DTD SVG 1.1//EN'  'http://www.w3.org/Graphics/SVG/1.1/DTD/svg11.dtd'>
<svg enable-background = "new 0 0 28 24" version = "1.1" viewBox = "0 0 28 24" xml:space = "preserve" xmlns = "http://www.w3.org/2000/svg" xmlns:xlink = "http://www.w3.org/1999/xlink"><g id = "Layer_1">
<g>
<path fill = "#ccc" d = "M8,14.5c-0.133,0-0.261-0.019-0.389-0.039L4.033,24h7.933l-3.577-9.539C8.261,14.481,8.133,14.5,8,14.5z"/>
<path fill = "#ccc" d = "M5.55,12.5H0l3.103,11.135l3.571-9.523C6.106,13.755,5.689,13.18,5.55,12.5z"/>
You can see that on each path object in the file, you will need to add the fill attribute.
Follow the familiar pattern we have established time and time again. Create your level2 directory containing your HTML template partials, your JavaScript file, and the JSON file. You will also need to create a level-2-specific CSS file in the css/ directory. This should be "old hat" by now.
Also, in your routing table in routing.js, add the route registry for these files. See my next example:
services.routing.register('level2', function() {
    pageRoute = {
        page: "./app/level2/level2.html",
        partial: "./app/level2/home-level2.html",
        script: "./app/level2/level2.js",
        data: "./app/level1/level1.json"
        };
});Excellent! Now that we have the objects, let's build out the JSON object to contain the data for these. Let's start by copying our level1.json object into this one, as it's going to run fairly similarly. Once it's pasted in, let's start by removing what we don't want. We do want to keep the messages, the stars, and the objects. The moon and everything after the objects, the terra group and the clouds, can be deleted.
Now, let's start editing out the JSON object, as it's the backbone of what's going into our next level. This time, I want to have seven message objects in the messages. So, create four more messages and give them the positions 100, 75, 30, 25, 20, 10, and 1. See my next example for the text I put in mine:
"messages": {
    "objects": [
        {"text": "Many Bothams died to get these plans!", "position": 100, "time": 4000},
        {"text": "Be Carefull, there's some fighting ahead!", "position": 75, "time": 5000},
        {"text": "That's No Moon!", "position": 30, "time": 6000},
        {"text": "It's a trap!", "position": 25, "time": 6000},
        {"text": "Almost there!", "position": 20, "time": 6000},
        {"text": "Almost there!", "position": 10, "time": 6000},
        {"text": "It's as easy as shooting Womp Rats in Beggars canyon", "position": 1, "time": 6000}
        ]
},
The next object is the stars object. Leave it as it is.
Next up is the objects. These are all the objects that will be on the screen on level two. These are divided into subgroups, similar to the level1.json objects. The first group is the death_star group. There are four objects in this group: some are font awesome fonts and the death_star is an SVG. They all have the same attributes keys, type, idclass, sizeclass, and colorclass. See the following details for each object in the example:
"death_star": {
    "objects": [
        {"type": "death_star", "idclass": "death_star", "sizeclass": "", "colorclass": "silver"},
        {"type": "cloud", "idclass": "fa fa-bullseye", "sizeclass": "deathStarAdd fa-5x", "colorclass": "red"},
        {"type": "cloud", "idclass": "fa fa-sun-o", "sizeclass": "deathStarAdd fa-5x", "colorclass": "yellow"},
        {"type": "cloud", "idclass": "fa fa-crosshairs", "sizeclass": "deathStarAdd fa-5x", "colorclass": "yellow"}
        ]
}
Next, we will have a collection of the starships. The name of the objects is starships1. These starships will be encountered by the rocket pilot as you scroll through space. These are the rocket, the falcon, the x-wing, and tie fighter SVG files we downloaded. In my example, I will repeat some of these several times. See the following example:
"starships1": {
"objects": [
	{"type": "rocket2", "idclass": "rocket", "sizeclass": "smallship", "colorclass": "silver"},
	{"type": "falcon", "idclass": "falcon", "sizeclass": "smallship", "colorclass": "silver"},
  	{"type": "x-wing", "idclass": "x-wing", "sizeclass": "smallship", "colorclass": "silver"}, 	{"type": "satellite1", "idclass": "satellite", "sizeclass": "smallship", "colorclass": "silver"},
{"type": "satellite2", "idclass": "satellite", "sizeclass": "smallship", "colorclass": "silver"}, 	{"type": "satellite3", "idclass": "satellite", "sizeclass": "smallship", "colorclass": "silver"},
{"type": "tie-fighter", "idclass": "tie-fighter", "sizeclass": "smallship", "colorclass": "silver"},
{"type": "tie-fighter", "idclass": "tie-fighter", "sizeclass": "smallship", "colorclass": "silver"},
{"type": "tie-fighter", "idclass": "tie-fighter", "sizeclass": "smallship", "colorclass": "silver"},
{"type": "tie-fighter", "idclass": "tie-fighter", "sizeclass": "smallship", "colorclass": "silver"},
{"type": "tie-fighter", "idclass": "tie-fighter", "sizeclass": "smallship", "colorclass": "silver"}
]
}
As implied by the name of the subgroup, starships1, there will be a starships2 and starships3. Make these a copy of starships1. See the following example:
"starships2": {
"objects": [
{"type": "rocket2", "idclass": "rocket", "sizeclass": "smallship", "colorclass": "silver"},
{"type": "x-wing", "idclass": "x-wing", "sizeclass": "smallship", "colorclass": "silver"},
{"type": "satellite1", "idclass": "satellite", "sizeclass": "smallship", "colorclass": "silver"},
{"type": "satellite2", "idclass": "satellite", "sizeclass": "smallship", "colorclass": "silver"},
{"type": "satellite3", "idclass": "satellite", "sizeclass": "smallship", "colorclass":" silver"},
{"type": "tie-fighter", "idclass": "tie-fighter", "sizeclass": "smallship", "colorclass": "silver"},
{"type": "tie-fighter", "idclass": "tie-fighter", "sizeclass": "smallship", "colorclass": "silver"},
{"type": "tie-fighter", "idclass": "tie-fighter", "sizeclass": "smallship", "colorclass": "silver"},
{"type": "tie-fighter", "idclass": "tie-fighter", "sizeclass": "smallship", "colorclass": "silver"},
{"type": "tie-fighter", "idclass": "tie-fighter", "sizeclass": "smallship", "colorclass": "silver"}
]
},
"starships3": {
"objects": [
{"type": "rocket2", "idclass": "rocket", "sizeclass": "smallship", "colorclass": "silver"},
{"type": "x-wing", "idclass": "x-wing", "sizeclass": "smallship", "colorclass": "silver"},
{"type": "satellite1", "idclass": "satellite", "sizeclass": "smallship", "colorclass": "silver"},
{"type": "satellite2", "idclass": "satellite", "sizeclass": "smallship", "colorclass": "silver"},
{"type": "satellite3", "idclass": "satellite", "sizeclass": "smallship", "colorclass": "silver"},
{"type": "tie-fighter", "idclass": "tie-fighter", "sizeclass": "smallship", "colorclass": "silver"},
{"type": "tie-fighter", "idclass": "tie-fighter", "sizeclass": "smallship", "colorclass": "silver"},
{"type": "tie-fighter", "idclass": "tie-fighter", "sizeclass": "smallship", "colorclass": "silver"},
{"type": "tie-fighter", "idclass": "tie-fighter", "sizeclass": "smallship", "colorclass": "silver"},
{"type": "tie-fighter", "idclass": "tie-fighter", "sizeclass": "smallship", "colorclass": "silver"}
]
},
The next object group in this list of objects is saturn, and it is only one object in the list of objects. Give it a colorclass of purple, and leave the sizeclass blank. See my example:
"saturn": {
"objects": [
{"type": "saturn", "idclass": "saturn", "sizeclass": "", "colorclass": "purple"}
]
}
Finally, the rocket, which was already defined in level1, so just copy it over like my next example:
"rocket": {
"objects": [
{"type": "rocket", "idclass": "fa fa-rocket", "sizeclass": "fa-5x", "colorclass": "grey-2"},
{"type": "rocket", "idclass": "fa fa-rocket", "sizeclass": "fa-5x", "colorclass": "silver"},
{"type": "rocket", "idclass": "fa fa-fire", "sizeclass": "", "colorclass": "yellow"},
{"type": "rocket", "idclass": "fa fa-comment", "sizeclass": "fa-5x", "colorclass": "white"}
]
}
Now, make sure the JSON object is well formed and we are done with our objects for level 2.
Excellent work so far. We are so close I can almost taste how awesome this game application will be. We need to create the level2.html partial for the game to load into. So, open the file and begin editing it.
Let's start with links to the style sheets it will use. Link to levels.css for general CSS style, and link to level-2.css that will only be for this level.
<link type = "text/css" rel = "stylesheet" href = "css/levels.css" media = "all">
<link type = "text/css" rel = "stylesheet" href = "css/level-2.css" media = "all">
Next, create a MAIN element with the ID body and classes container and black. Inside it, add six SECTION elements with the IDs boss, mid, first, saturnObject, rocketObject, and controller. See my next example:
<link type = "text/css" rel = "stylesheet" href = "css/levels.css" media = "all">
<link type = "text/css" rel = "stylesheet" href = "css/level-2.css" media = "all">
<main id = "body" class = "container black">
<section id = "boss"></section>
<section id = "mid"></section>
<section id = "first"></section>
<section id = "saturnObject"></section>
<section id = "rocketObject"></section>
<section id = "controller"></section>
</main>
Inside each of boss, mid, and first, place about eight DIV elements with the class row. See the following example:
<section id = "boss">
<div class = "row"></div>
<div class = "row"></div>
<div class = "row"></div>
<div class = "row"></div>
<div class = "row"></div>
<div class = "row"></div>
<div class = "row"></div>
<div class = "row"></div>
</section>
In the boss SECTION element, inside the first row DIV element, add a new DIV element with the ID attribute deathStarObject. See the following example:
<div class = "row">
<div id = "deathstarObject"></div>
</div>
In the boss SECTION element, again, inside the third row DIV element, add a new DIV element with the ID attribute object3. See the following example:
<div class = "row">
<div id = "objects3"></div>
</div>
Next, in the mid SECTION element, in the first row DIV element, add a new DIV element with the ID attribute starsObject. See the following example:
<div class = "row">
<div id = "starsObject"></div>
</div>
In the fifth row element in the mid SECTION element, add a new DIV element with the ID attribute objects2. See the following example:
<div class = "row">
<div id = "objects2"></div>
</div>
Looking good so far. Now, in the first SECTION element, in the middle row element, add a new DIV element with the ID attribute objects1. See the following example:
<div class = "row">
<div id = "objects1"></div>
</div>
Do nothing to the SECTION elements with the ID attributes saturnObject, or rocketObject. Those will be modified by the JavaScript only.
In the SECTION element with the ID attribute controller, copy the controls HTML from the level1.html template partial. This will look exactly like the level1.html controller SECTION.
That went fast. Let's move on to the next, and final, big thing. We will create the JavaScript file, and then fix it up with some CSS wizardry to prettify it.
This is the home stretch, and I hope you are as thrilled as I am. The levels.js file needs to accomplish only three things inside it: get the elements, update on scroll, and move the elements. Everything else is managed by patterns in other files. It's a framework that is ready to load and execute. We are going to go through our similar method of making broken JavaScript and then fixing it. So first, add to the bottom of the JavaScript the familiar executable condition. In fact, it's so familiar, you can just copy it from level1.js and modify it. Change the text level1 to level2. See the following example below:
If (window.location.hash.split('#')[1] === 'home') {
services.getPage(pageRoute.data, 'home', level2.parseAjaxHome, id);
} else {
levels.load('level2.updateElement()');
services.getPage(pageRoute.data, 'level2', level2.parseAjax, id);
}
Next, let's create the crucial functions that will operate on this page. Start with the level2 object at the top, and then declare the level2.data.
var level2 = {};
level2.data;
Next, declare the functions level2.updateElement, level2.getMovingElements, level2.parseAjax, and level2.parseAjaxHome.
level2.updateElement = function() {};
level2.getMovingElements = function(callback) {};
level2.parseAjax = function (xhr,id) {};
level2.parseAjaxHome = function (xhr,id) {};
Let's load the objects first with filling in the level2.parseAjax function. It receives xhr and id from services.getPage. Inside the function, just like the level1 version, add the parsed data to the level2.data object.
Placing these objects is much like we did in level1.parseAjax, only it's even simpler. First, let's put the saturn Object into the HTML. Working with an SVG does not change this very much. Create a new variable, level2SaturnHTML, equal to the string opening a DIV element with the ID equal to the level2.data's saturn object's type plus the string class equal to the object's idclass, plus a space, plus the sizeclass data, plus a space, plus colorclass.
Next, we add to the temporary variable level2SaturnHTML this string, opening an object type of image/svg+xml, with the data equaling the path to the object's idclass, plus the extension svg, closing the open tag. Add to this the object's type, and then close the OBJECT element, and DIV element. See this in the following example:
var level2SaturnHTML = '<div id = "' + level2.data.objectgroups.objects.saturn.objects[0].type + '" class="' + level2.data.objectgroups.objects.saturn.objects[0].idclass + ' ' + level2.data.objectgroups.objects.saturn.objects[0].sizeclass + ' ' + level2.data.objectgroups.objects.saturn.objects[0].colorclass + '">';
level2SaturnHTML += '<object type = "image/svg+xml" data="lib/space-icons/' + level2.data.objectgroups.objects.saturn.objects[0].idclass + '.svg" >' + level2.data.objectgroups.objects.saturn.objects[0].type + '</object></div>';
Next, copy over from level2.parseAjax the lines inserting the stars object. Replace the level1 text with level2, and replace the text p1 with starsObject to insert it into the DIV element with the ID attribute starsObject. See the following example:
var level2StarsHtml = '<div id = "stars">';
for (i = 0; i < level2.data.objectgroups.stars.objects.length; i++) {
level2StarsHtml += '<i class = "' + level2.data.objectgroups.stars.objects[i].idclass + ' ' + level2.data.objectgroups.stars.objects[i].colorclass + '"></i>';
}
level2StarsHtml += '</div>';
document.getElementById('starsObject').innerHTML = level2StarsHtml;
The next operation will load the rocket into the HTML. Create a new variable, rocketObjectHTML, equal to the string containing a new DIV element with the ID attribute rocket, with a child SPAN element. Next, a for loop iterates over the rocket object objects, adding to rocketObjectHTML the i element with the data from the JSON object in the same way as level1.parseAjax. Close the for loop, then add to rocketObjectHTML a string closing the SPAN element and DIV element. Set rocketObjectHTML as the inner HTML of the element with the rocketObject ID.
See the following example:
var rocketObjectHTML = '<div id="rocket"><span>';
for (var key in level2.data.objectgroups.objects.rocket.objects) {
rocketObjectHTML += '<i class = "' + level2.data.objectgroups.objects.rocket.objects[key].idclass + ' ' + level2.data.objectgroups.objects.rocket.objects[key].sizeclass + ' ' + level2.data.objectgroups.objects.rocket.objects[key].colorclass + '"></i>';
}
rocketObjectHTML += '</span></div>';
document.getElementById('rocketObject').innerHTML = rocketObjectHTML;
Next, let's work on the objects in space. We will create three operations that will be very similar. The first starts with a new variable called objects1HTMLStart, equal to an empty string. Then, loop over the starships1 object in the levels2.data. Add to the objects1HTMLStart variable, just like you did in the saturn example; the first line is the DIV element with its attributes. On the next line, add to objects1HTMLStart an object with the attributes similarly built in the saturn object. Then, close the OBJECT and DIV elements. Then, after closing the for loop, set objects1HTMLStart to equal the inner HTML of the element with the ID objects1. See the following example to check your own:
var objects1HTMLStart = '';
for (var key in level2.data.objectgroups.objects.starships1.objects) {
objects1HTMLStart += '<div id = "' + level2.data.objectgroups.objects.starships1.objects[key].type + '" class="' + level2.data.objectgroups.objects.starships1.objects[key].idclass+' ' + level2.data.objectgroups.objects.starships1.objects[key].sizeclass+ ' ' + level2.data.objectgroups.objects.starships1.objects[key].colorclass + '">';
  objects1HTMLStart += '<object type="image/svg+xml" data = "lib/space-icons/' + level2.data.objectgroups.objects.starships1.objects[key].idclass + '.svg" >' + level2.data.objectgroups.objects.starships1.objects[key].type + '</object></div>';
}
document.getElementById('objects1').innerHTML = objects1HTMLStart;
Repeat this two times to load the starships2 objects into the objects2 element, and the starships3 objects into the objects3 element. I'll provide the following example:
var objects2HTMLStart = '';
for (var key in level2.data.objectgroups.objects.starships2.objects){
objects2HTMLStart += '<div id = "' + level2.data.objectgroups.objects.starships2.objects[key].type + '" class="' + level2.data.objectgroups.objects.starships2.objects[key].idclass + ' ' + level2.data.objectgroups.objects.starships2.objects[key].sizeclass+ ' ' + level2.data.objectgroups.objects.starships2.objects[key].colorclass + '">';
objects2HTMLStart += '<object type = "image/svg+xml" data = "lib/space-icons/' + level2.data.objectgroups.objects.starships2.objects[key].idclass + '.svg" >' + level2.data.objectgroups.objects.starships2.objects[key].type + '</object></div>';
}
document.getElementById('objects2').innerHTML = objects2HTMLStart;
var objects3HTMLStart = '';
for (var key in level2.data.objectgroups.objects.starships3.objects){
objects3HTMLStart += '<div id = "' + level2.data.objectgroups.objects.starships3.objects[key].type + '" class = "' + level2.data.objectgroups.objects.starships3.objects[key].idclass + ' ' + level2.data.objectgroups.objects.starships3.objects[key].sizeclass + ' ' + level2.data.objectgroups.objects.starships3.objects[key].colorclass + '">';
  objects3HTMLStart += '<object type = "image/svg+xml" data="lib/space-icons/' + level2.data.objectgroups.objects.starships3.objects[key].idclass + '.svg" >' + level2.data.objectgroups.objects.starships3.objects[key].type + '</object></div>';
}
document.getElementById('objects3').innerHTML = objects3HTMLStart;
The last object to load is the DEATH STAR. This is a little different, but not unfamiliar, as we've done similar operations. The death star object combines SVG elements and font awesome icons, and there will be a condition in the loop to handle it. So, start with a new variable called deathStarObjectHTML equal to an empty string. Then, start a for in loop with the variable key looping over the death_star objects. In the first line, add to the deathStarObjectHTML variable the DIV element plus the data like the previous example, with one exception: enumerate ids by adding key to the data type. In the next line, add a condition: if the type is not cloud, then add to deathStarObjectHTML an OBJECT of type image/svg+xml also like previous examples. Then, close the conditional, and close the DIV element, and close the for in loop. Finally, get the element by the ID deathStarObject, and set its inner HTML equal to deathStarObjectHTML. See the following example:
var deathStarObjectHTML = '';
for (var key in level2.data.objectgroups.objects.death_star.objects) {
deathStarObjectHTML += '<div id = "' + level2.data.objectgroups.objects.death_star.objects[key].type +  key + '" class = "' + level2.data.objectgroups.objects.death_star.objects[key].idclass + ' ' + level2.data.objectgroups.objects.death_star.objects[key].sizeclass + ' ' + level2.data.objectgroups.objects.death_star.objects[key].colorclass + '">';
  if (level2.data.objectgroups.objects.death_star.objects[key].type! = 'cloud') {
deathStarObjectHTML += '<object type = "image/svg+xml" data = "lib/space-icons/' + level2.data.objectgroups.objects.death_star.objects[key].idclass + '.svg" >' + level2.data.objectgroups.objects.death_star.objects[key].type + '</object>';
}
deathStarObjectHTML += '</div>';
}
document.getElementById('deathstarObject').innerHTML = deathStarObjectHTML;
The final part of the level2.parseAjax function is spreading the objects. Send the stars object's child i elements to the spreadObjects function just like the level1 version with these numbers: 150,100,1,1,"fixed", "%". Send the objects1, objects2, and objects3 child objects gotten by class name smallship with the same numbers, but relative instead of fixed.
See the following example:
levels.spreadObjects(document.getElementById("stars").getElementsByTagName("i"), 150, 100, 1, 1, "fixed", "%");
levels.spreadObjects(document.getElementById("objects1").getElementsByClassName("smallship"), 150, 150, 1, 1, "relative", "%");
levels.spreadObjects(document.getElementById("objects2").getElementsByClassName("smallship"), 150, 150, 1, 1, "relative", "%");
levels.spreadObjects(document.getElementById("objects3").getElementsByClassName("smallship"), 150, 150, 1, 1, "relative", "%");
Now, when you reload your browser and see the viewport, you will see that even though the curtain has yet to be removed, you can look in your HTML code and see the objects have loaded.
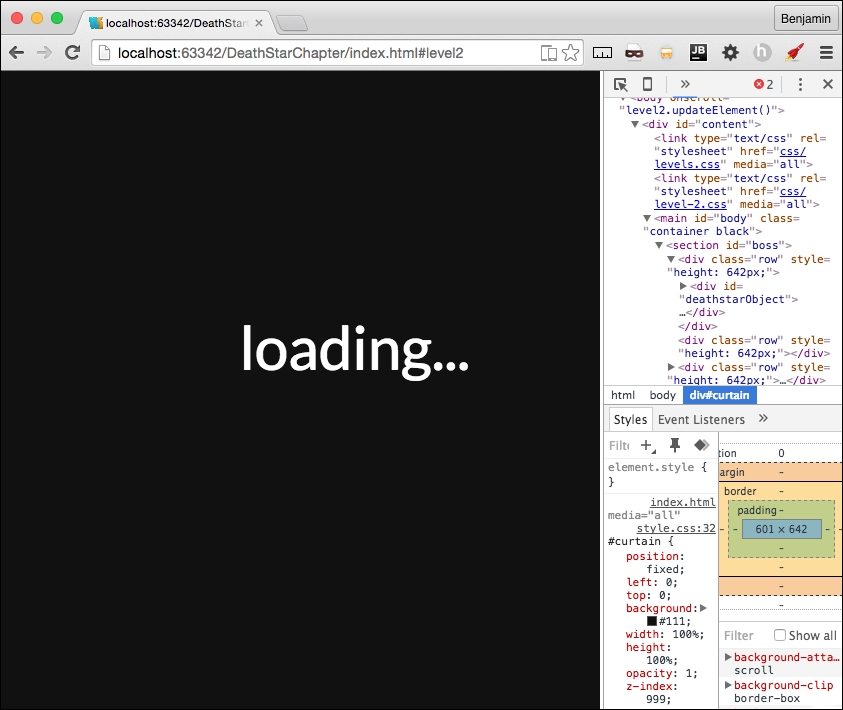
We can say this is broken again, and we need to fix it. We can move forward with the level2.updateElement function. This function executes on every scroll as it is attached as an onscroll event listener on the BODY. First, call a new nonexisting function, levels.updateOnMove, a callback, level2.topOfScroll, another callback, level2.bottomOfScroll, and the level2 data messages object. This calls the generalize movement patterns for all levels. These callBacks will be added shortly as well as the function they are sent to. Next, get the element by ID saturn and the first of its child objects, and send it to a function called levels.moveSaturn. This function does not yet exist, but it gives us something to do next. Get the elements by ID objects1 and objects2 and send them to another nonexistent function, levels.setElementBottomPosition. Now we have a growing TODO list. Next, call level2.getMovingElements with a callback function calling theObject, and increment. In the callback, theObject style's position attribute is equal to relative, and its left style is equal to a call to the function levels.setElementLeftPosition sending theObject, and increment (wait for the example). See the following example:
level2.updateElement = function(){
levels.updateOnMove(level2.topOfScroll, level2.bottomOfScroll, level2.data.objectgroups.messages);
levels.moveSaturn(document.getElementById("saturn").getElementsByTagName('object')[0]);
document.getElementById('objects1').style.bottom = levels.click.setElementBottomPosition(document.getElementById('objects1'), 1);
document.getElementById('objects2').style.bottom = levels.click.setElementBottomPosition(document.getElementById('objects2'), 1)
level2.getMovingElements(function (theObject, increment){
theObject.style.position = "relative";
theObject.style.left = levels.click.setElementLeftPosition(theObject, increment);
});
};
As I mentioned, we have a growing TODO list, so let's mitigate that problem before we move on. We need to create a function called levels.moveSaturn and levels.setElementBottomPosition.
So, over in levels.js, create these new functions. First, levels.moveSaturn; it receives a variable that we will just call orb. Inside the function, set the orb's style left attribute equal to the rocket element's bounding client rectangle's bottom attribute divided by the window's inner height, subtracted from the number of rows, then multiplied by the window's inner height, then add to that the number of rows multiplied by negative six, and add the string px. I'll show you the example for that because it's convoluted.
orb.style.left = (((window.innerHeight*(document.getElementsByClassName("row").length) - document.getElementById("rocket").getBoundingClientRect().bottom) / window.innerHeight) + document.getElementsByClassName("row").length * -6) + "px";The next operation on the orb is to set its style height attribute. First, get the number of rows, multiplied by the window's inner height attribute, then subtract the window's page Y offset, and divide by the window's inner height, plus 0.5, and then add the % sign as a string. Here is the sample code:
orb.style.height = (window.innerHeight * (document.getElementsByClassName("row").length) -window.pageYOffset) / window.innerHeight + .5 + '%';The last operation on the orb element is to set its style bottom position. Start again with the number of rows, multiplied by the window's inner height attribute, subtracted from 100, and subtract from that the window's page Y offset, and divide by the window's inner height, and subtract 15 from it, then add the % sign as a string. See the following example:
orb.style.bottom = (100 - (window.innerHeight * (document.getElementsByClassName("row").length) - window.pageYOffset) / window.innerHeight - 15) + '%';You might think I'm writing new common core math skill to make kids hate math, but these, as obtuse as they are, will give the saturn element a smooth scrolling presence on the viewport; just wait and see.
Next, we need to create the other function on our TODO list, the setElementBottomPosition function. This one is simpler than the previous one, so don't lose heart. First, copy the function setElementLeftPosition, and paste it and rename it.
Then, rename the left text to bottom. See the following example:
levels.setElementBottomPosition = function(element,increment){
if (isNaN(parseInt(element.style.bottom.split("p")[0]))) {
return ((element.getBoundingClientRect().bottom) + increment) + "px"
} else {
return ((Math.abs(parseInt(element.style.bottom.split("p")[0]))) + increment) + "px";
}
};
In levels.js, we also need to create the function levels.updateOnMove that receives the two callBacks and the messages object. As I mentioned before, this is the generalized pattern for moving things on the scroll for every level. In the first line of code, send the rocket element to the levels.moveRocket function. Next, set a new variable, scrollPosition, equal to 100*the window's page Y offset divided by the document's body scroll height minus the document's document element client height, rounded. Finally, copy the message operation from level1.updateElement and paste it in here, changing the text level1 to levels. See the entire function in this sample:
levels.updateOnMove = function(topCallBack,bottomCallBack,messagesObject) {
levels.moveRocket(document.getElementById("rocket"));
var ScrollPosition = Math.round(100 * window.pageYOffset / (document.body.scrollHeight -document.documentElement.clientHeight));
switch (ScrollPosition){
case 0:
levels.topOfScroll(topCallBack);
break;
case 100:
levels.bottomOfScroll(bottomCallBack);
break;
default:
}
var scrollPosition = Math.round(100 * window.pageYOffset / (document.body.scrollHeight - document.documentElement.clientHeight));
for ( i = 0; i < messagesObject.objects.length; i++) {
if (messagesObject.objects[i].position === scrollPosition) {
levels.showMessage(messagesObject.objects[i])
}
}
};
We created two calls to callbacks back in the level2.js file. They do not perform any function, but I want to save this for future development. Back in level2.js, create the empty functions level2.topOfScroll and level2.bottomOfScroll. See the following example:
level2.topOfScroll = function() {
};
level2.bottomOfScroll = function() {
};Let's move on to the final big piece of interaction, the moving element. This is much like level1.getMovingElements. So, let's blaze through since you are a pro already! First, create a for loop over the rows. Then, if the window's page Y offset plus the window's inner height is greater than the current row in the viewport's top offset, and the page Y offset is less than the current row's top offset plus two-thirds of the window's inner height, then perform the next check. If the current row has any elements with the class smallship, then perform an operation. But first, let's handle an else operation. If there are no smallship elements, then add an else it to check if there is an element in the viewport with the class deathStarAdd, and if the rocket's bounding client bottom divided by the product of the window's inner height and the number of rows equals or is greater than .999. If these conditions are true, console.log the text explode, and we will come back to this later. Let's take a look at this deep operation before moving forward with the other condition. See the following example:
level2.getMovingElements = function(callback) {
for (var h = 0; h < document.getElementsByClassName("row").length; h++) {
if ((window.pageYOffset + (window.innerHeight)) > document.getElementsByClassName("row")[h].offsetTop && (window.pageYOffset) < (document.getElementsByClassName("row")[h].offsetTop + (window.innerHeight / 2 * 3))){
if (document.getElementsByClassName("row")[h].getElementsByClassName("smallship").length > 0) {

} else if (document.getElementsByClassName("row")[h].getElementsByClassName("deathStarAdd").length > 0 && (document.getElementById("rocket").getBoundingClientRect().bottom) / (window.innerHeight*(document.getElementsByClassName("row").length)) >= .995) {
console.log('explode')
}
}
}
};
Next, inside the first truthy condition, start a for loop over the current row's starship elements list. In each, add a switch case operation getting the current row's current smallship element's ID attribute. The cases are rocket2, falcon, x-wing, tie-fighter, satellite1, satellite2, and satellite3. In each case, call the callback, sending it the current row's current smallship, and a number. I assigned a positive number to the rebel fleet, and a negative number to the Empire. I'll show you the entire version of the function in the following sample:
level2.getMovingElements = function(callback) {
for (var h = 0; h < document.getElementsByClassName("row").length; h++) {
if ((window.pageYOffset + (window.innerHeight)) > document.getElementsByClassName("row")[h].offsetTop && (window.pageYOffset) < (document.getElementsByClassName("row")[h].offsetTop + (window.innerHeight / 2 * 3))) {
if (document.getElementsByClassName("row")[h].getElementsByClassName("smallship").length > 0) {
for (j = 0; j < document.getElementsByClassName("row")[h].getElementsByClassName("smallship").length; j++) {
switch(document.getElementsByClassName("row")[h].getElementsByClassName("smallship")[j].getAttribute('id')) {
case 'rocket2':
callback(document.getElementsByClassName("row")[h].getElementsByClassName("smallship")[j], -4);
break;
case 'falcon':
callback(document.getElementsByClassName("row")[h].getElementsByClassName("smallship")[j], -3);
break;
case 'x-wing':
callback(document.getElementsByClassName("row")[h].getElementsByClassName("smallship")[j], -2);
break;
case 'tie-fighter':
callback(document.getElementsByClassName("row")[h].getElementsByClassName("smallship")[j], 2);
break;
case 'satellite1':
callback(document.getElementsByClassName("row")[h].getElementsByClassName("smallship")[j], 7);
break;
case 'satellite2':
callback(document.getElementsByClassName("row")[h].getElementsByClassName("smallship")[j], 3);
break;
case 'satellite3':
callback(document.getElementsByClassName("row")[h].getElementsByClassName("smallship")[j], 2);
break;
default:
;
}
}

} else if (document.getElementsByClassName("row")[h].getElementsByClassName("deathStarAdd").length > 0 && (document.getElementById("rocket").getBoundingClientRect().bottom) / (window.innerHeight*(document.getElementsByClassName("row").length)) >= .999) {
console.log('explode')
}
}
}
};
Wow, that was some heavy lifting. I'm glad we are done. It's all downhill from here. Let's add some style to make it flow a little better.
A while ago, we created the level2.css file and then left it blank. Now, let's get to work on it. First, style the mid SECTION's stars DIV child i elements with a 5 z-index. Next, the saturn element object will have a 10 z-index, a width of 120%, a fixed position, to the left negative 76%, 40% from the bottom, and rotate it 319 degrees. Next, give the boss, mid, first SECTION's rows' child DIV elements a 100% height. Rotate the falcon class selector 50 degrees. For the elements with the class smallship, assign a width of 20 vw, a z-index of 99, and float them to the left. Assign to the death_star selector a z-index of 30. Give the elements with class death_star and saturn an absolute position 0% to the right. Finally, make the rocketObject's rocket's child span a z-index of 999.
See all this in the following example:
#mid #stars > i {
z-index:5;
}
#saturn object{
z-index: 10;
width: 120%;
position: fixed;
left: -76%;
bottom: 40%;
transform: rotate(319deg);
}
#boss .row > div,
#mid .row > div,
#first .row > div{
height: 100%;
}
.falcon {
-ms-transform: rotate(50deg);
-webkit-transform: rotate(50deg);
transform: rotate(50deg);
}
.smallship {
width: 20vw;
z-index: 99;
float: left;
}
.death_star {
z-index: 20;
}
.death_star, .saturn{
position: absolute;
right: 0%;
}
.fa-crosshairs {
position: absolute;
right: 324px;
top: 212px;
z-index: 99;
}
#rocketObject #rocket span{
z-index: 999;
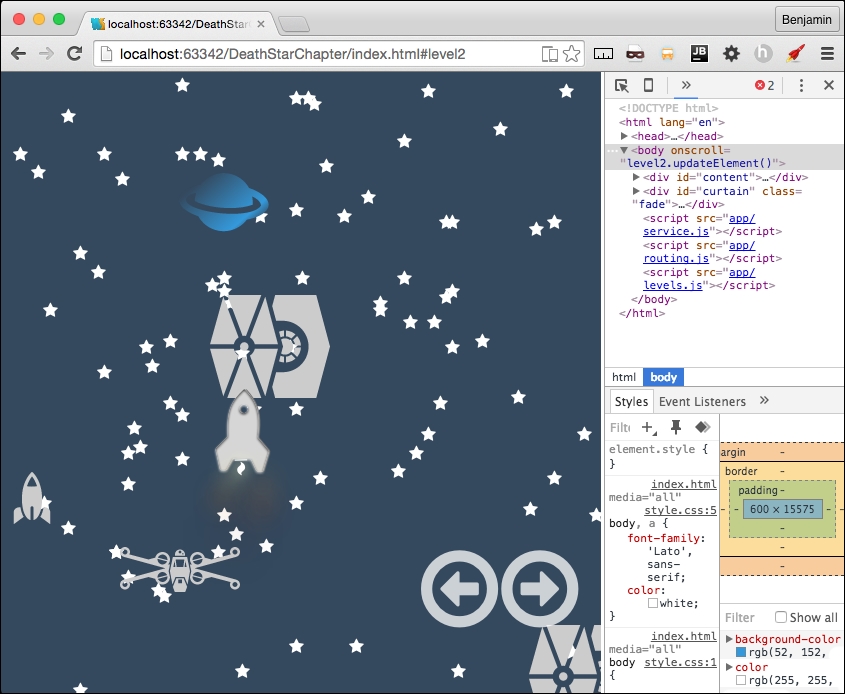
}There, that's just a little bit of CSS to pull it all together. Now, take a look in your browser and see it in action.
Now, let's wrap this up by putting together the home page partial. Copy from the level2.parseAjax function the level2.data definition, and then the starships3 for in loop, and the death_star loop. Have them all build into a new variable, homeObjectsHTMLStart. Get the element by ID homeObjects, and set its inner HTML to equal homeObjectsHTMLStart. Next, copy from level1.parseAjaxHome's spreadObjects calls for the responsive spread into here.
Replace the element by ID call with homeObjects, and the children with get elements by class name smallship. See the entire function in the following example:
level2.parseAjaxHome = function (xhr, id) {
level2.data = JSON.parse(xhr.responseText);
var homeObjectsHTMLStart = '';
for (var key in level2.data.objectgroups.objects.starships3.objects) {
homeObjectsHTMLStart += '<div id = "' + level2.data.objectgroups.objects.starships3.objects[key].type + '" class = "' + level2.data.objectgroups.objects.starships3.objects[key].idclass + ' ' + level2.data.objectgroups.objects.starships3.objects[key].sizeclass + ' ' + level2.data.objectgroups.objects.starships3.objects[key].colorclass + '">';
homeObjectsHTMLStart += '<object type = "image/svg+xml" data = "lib/space-icons/' + level2.data.objectgroups.objects.starships3.objects[key].idclass + '.svg" >' + level2.data.objectgroups.objects.starships3.objects[key].type + '</object></div>';
  }
for (var key in level2.data.objectgroups.objects.death_star.objects) {
homeObjectsHTMLStart += '<div id="' + level2.data.objectgroups.objects.death_star.objects[key].type + '" class="' + level2.data.objectgroups.objects.death_star.objects[key].idclass + ' ' + level2.data.objectgroups.objects.death_star.objects[key].sizeclass + ' ' + level2.data.objectgroups.objects.death_star.objects[key].colorclass + '">';
if (level2.data.objectgroups.objects.death_star.objects[key].type!='cloud') {
homeObjectsHTMLStart += '<object type = "image/svg+xml" data = "lib/space-icons/' + level2.data.objectgroups.objects.death_star.objects[key].idclass + '.svg" >' + level2.data.objectgroups.objects.death_star.objects[key].type + '</object>';
      }
homeObjectsHTMLStart += '</div>';
}
document.getElementById('homeObjects').innerHTML = homeObjectsHTMLStart;
if (window.innerHeight > window.innerWidth) {
levels.spreadObjects(document.getElementById("homeObjects").getElementsByClassName("smallship"), 120, window.innerWidth, 210, 1, "absolute", "px");
} else {
levels.spreadObjects(document.getElementById("homeObjects").getElementsByClassName("smallship"), 30, 25, 20, 1, "absolute", "%");
}
};
There, it's coming together even more. Let's put some final touches on the CSS so it looks stitched together.
Here, we are going to put together the final touches of CSS. First, in your style.css, cut out the footer selector and paste it into home.css in the portrait and orientation media queries. In the portrait media query footer selector, remove the clear both attribute. In the same file, remove the media query for the min-width 838px. In the portrait orientation, add selectors for leaderboard-list and credits-list, giving them the styles 0 padding and 0 margins except for left, which will have a 15% margin. See the following sample for this CSS:
footer{
height: 34px;
}
#leaderboard-list,#credits-list{
margin: 0 0 0 15%;
padding: 0;
}
Copy the leaderboard-list and credits list style and paste it into the orientation landscape media query, adding a left-float to it. Then, add a selector for the leaderboard and credits IDs, giving them a height of 144px. Also, add selectors for the homeObjects child death_star 20% to the right. See the following sample for these changes:
#leaderboard-list,#credits-list{
margin: 0 0 0 15%;
padding: 0;
float: left;
}
#leaderboard,#credits{
height: 144px;
}
#homeObjects .death_star {
right: 20%!important;
}
footer{
height: 34px;
clear: both;
}
Finally, outside the media query, add these selectors. For the homeObjects child death_star class object, a width of 100px and 50% to the right. For the child clouds of homeObject, display none, and for the smallship child of homeObjects, add a width of 5 vw. See the following example:
#homeObjects .death_star object{
width: 100px;
right: 50%;
}
#homeObjects #cloud{
display: none;
}
#homeObjects .smallship{
width: 5vw;
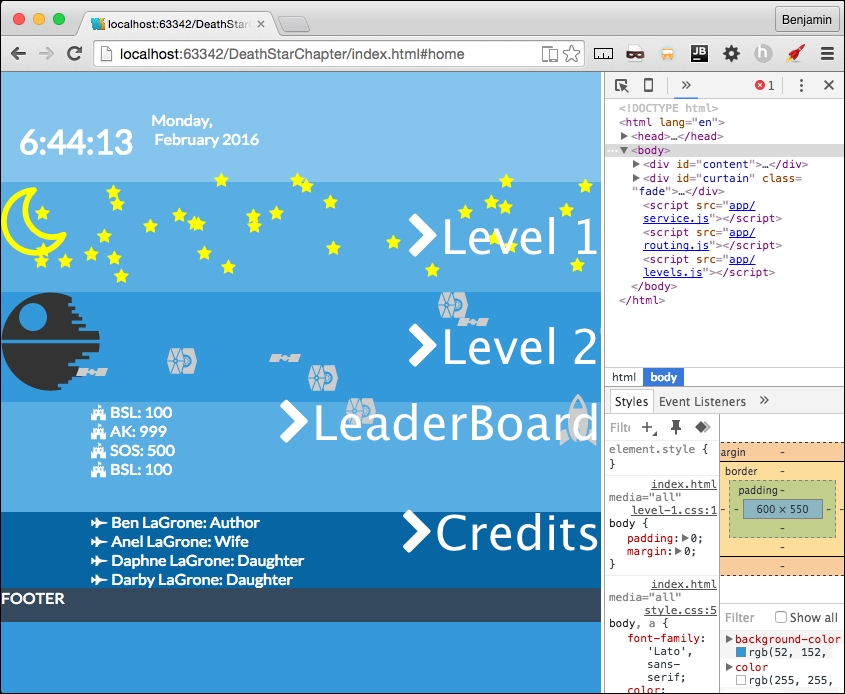
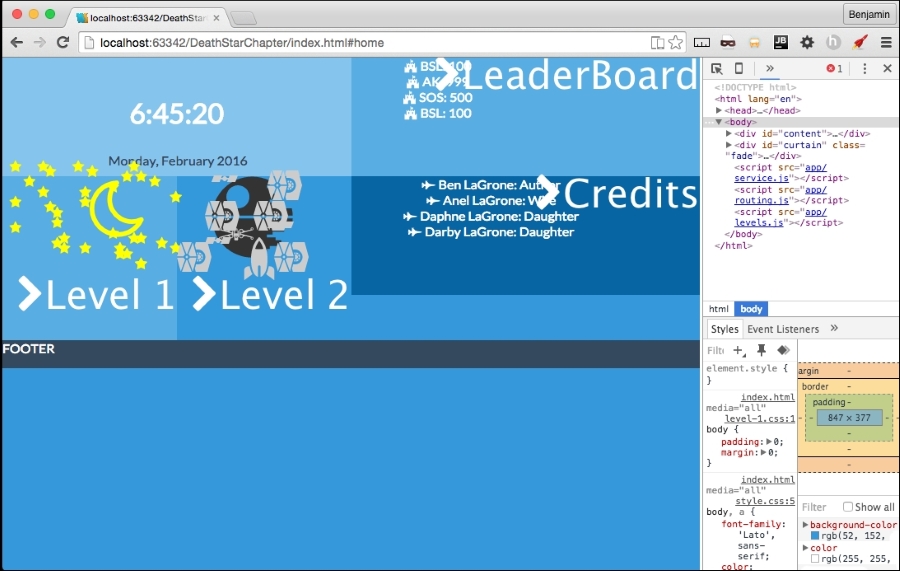
}See the screenshot of the responsive home page:
Remember way back when we made level2.getMovingElements and we left the if else condition empty except for console log explosion? Let's do something quick and effective about it. Let's add a new variable called deathStarExplodes equal to the current row's elements by class name deathStarAdd, and do a for loop over their length, and for each, add the class show. See the following example:
var deathStarExplodes = document.getElementsByClassName("row")[h].getElementsByClassName("deathStarAdd");
for (var i = 0; i < deathStarExplodes.length; i++) {
deathStarExplodes[i].classList.add('show')
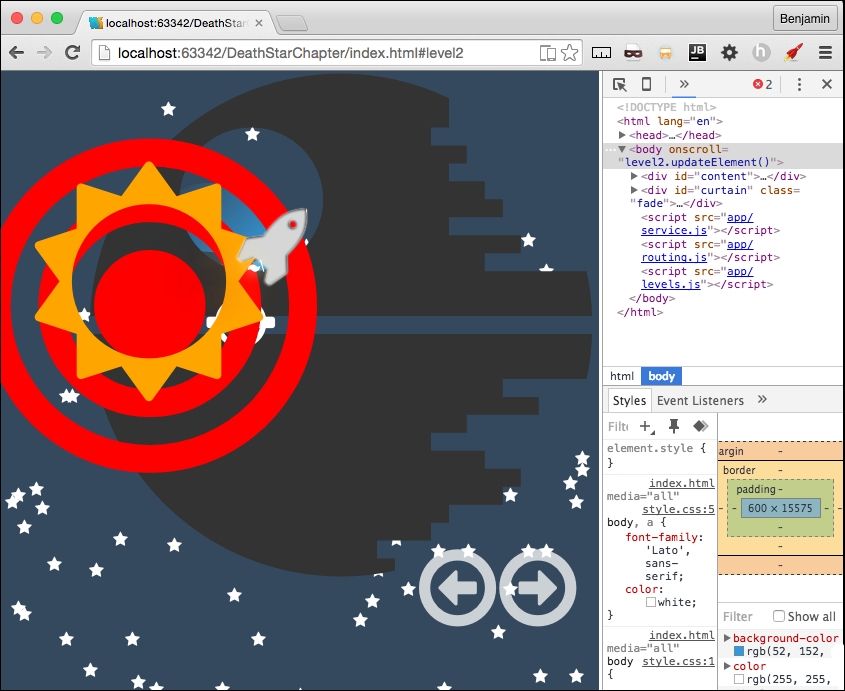
}Great! That is the last of the last of the last of JavaScript. Let's just add a few little pieces of CSS. In level-2.css, add a selector for fa-sun-o giving it an absolute position 55% to the right, 15% from the top, a z-index of 999, a font-size of 4vw, and the color orange. And one more selector for fa-bullseye, with an absolute position, 47% to the right, 7% from the top, a z-index of 999, a font-size of 65vw, and a red color.
Also, let's hide the deathStarAdd classes with a display: none, and then display: inline when the show class is added. See the following example:
.fa-sun-o {
position: absolute;
right: 55%;
top: 15%;
z-index: 999;
font-size: 40vw;
color: orange;
}
.fa-bullseye {
position: absolute;
right: 47%;
top: 7%;
z-index: 999;
font-size: 65vw;
color: red;
}

.deathStarAdd{
display: none;
}
.deathStarAdd.show{
display: inline;
}
Now you have a pretty cool little explosion when the rocket gets close to the Death Star and shoots a little missile into the exhaust vent. See the following screenshots: