Table of Contents for
Web Design Blueprints
 Web Design Blueprints
Published by
Packt Publishing, 2016
Web Design Blueprints
Published by
Packt Publishing, 2016
- Cover
- Table of Contents
- Web Design Blueprints
- Web Design Blueprints
- Credits
- About the Author
- About the Reviewer
- www.PacktPub.com
- Preface
- What you need for this book
- Who this book is for
- Conventions
- Reader feedback
- Customer support
- 1. Responsive Web Design
- Getting familiar with the basics
- Using media queries for responsive design
- Working with responsive media
- Building responsive layouts
- Summary
- 2. Flat UI
- Flat UI color
- Creating a flat UI layout
- Summary
- 3. Parallax Scrolling
- Color classes
- Using SVG font icons
- Getting the fonts
- That's no moon!
- OMG, it's full of stars!
- Clouds, birds, and airplanes
- The rocket
- Terra firma
- Next up, the CSS
- Styling the objects with CSS
- Styling the ground objects
- Writing the JavaScript effects
- Setting the row height
- Spreading the objects
- Spreading the clouds
- Loading the page functions
- Smoothening the scroll
- Updating elements on the scroller
- Collecting the moving elements
- Creating functions for the element types
- Setting the left positions
- Creating the rocket's movement function
- Finally, moving the earth
- Summary
- 4. Single Page Applications
- Getting to work
- Getting the old files
- Object and function conventions
- Creating utility functions
- Working with the home structure
- Setting up other sections
- Performing housekeeping
- Creating a callBack function for the API
- Summary
- 5. The Death Star Chapter
- Dropping in the parallax game
- Loading elements from JSON
- What can be done in the shared levels service
- Editing the home JavaScript
- Creating the other pages – credits and leaderboard
- Creating the second level
- Summary
- Index
Now that you have added the fa-* objects, let's work on the ground and earth elements. These are cool, and you are in for a surprise when you see it come together. First, start with the earth element.
This involves a few steps: float it to the left, give it a font size of 1000vw (viewport width), a width of 100%, a height of 100%, and a fixed position 0px from the bottom. Next, we will assign some style attributes to the actual fa-globe element itself, make its position relative, floated to the left, 423px from the bottom, and 350% from the right.
Finally, one more step for the earth elements, we will add some style to a pseudo element after fa-globe with the land class. Set it to have an absolute position, a blank space string for content, a green background, -1 z-index, 10% from the top, 0% from the left, 100% width, 80% height, and a 50% border radius. Before we continue, I'll pause for the cause and show you what this code looks like:
#earth {
float:left;
font-size: 1000vw;
width: 100%;
height: 100%;
position: fixed;
bottom: 0px;
}
.fa-globe {
position: relative;
float:left;
bottom: 423px;
right: 350%;
}
.fa-globe.land::after {
position: absolute;
content: '';
background: green;
z-index: -1;
top: 10%;
left: 0%;
width: 100%;
height: 80%;
border-radius:50%;
}
Finally, let's style the ground div element and its children. Make the ground div element 100% wide and have a 60px solid brown border at the bottom. Give the direct child div elements a width of 50% and height of 0px. Give the ground's left child i element a font-size value of 8vw, and float the right i elements to the right. Set the first right child -20px to the left and 15px from the bottom. Only two more to go: set the ground id element's small right children to a font size of 12vw and the large ones to a font size of 14vw. Look at this code for the ground elements' style:
#ground {
width: 100%;
border-bottom: 60px solid brown;
}
#ground > div {
width: 50%;
height: 0px;
}
#ground .left I {
font-size:8vw;
}
#ground .right i {
float: left;
}
#ground > .right > :first-child {
left:-20px;
bottom: 15px;
}
#ground .right .small {
font-size: 12vw;
}
#ground .right .large {
font-size: 14vw;
}
Before we finish with the CSS, there's one small effect you should add. When the rocket flies through the DIV elements, we want some of them to curve along with the curve of the earth as it falls away. This won't be perfect, but it will add a neat little effect to the stratosphere section elements as we leave them. We will create two new class selectors called curve and curve2. To each, add the attribute for a top-right border with a radius. The curve selector will have 90% and 40% radius values, while curve2 will have 80% and 10%. Look at this code sample:
.curve {
border-top-right-radius: 90% 40%;
}
.curve2 {
border-top-right-radius: 80% 10%;
}
To use these, add the curve class to the row DIV element with the id p2. Next, add the curve2 class to the SECTION element with the id stratosphere and the row DIV element with the id p7:
<section id="stratosphere" class="wet-asphalt curve2">
<div id="p2" class="row wet-asphalt curve"></div>
<div id="p3" class="row color-4 curve"></div>
<div id="p4" class="row color-3"></div>
<div id="p5" class="row color-2"></div>
<div id="p6" class="row color-1"></div>
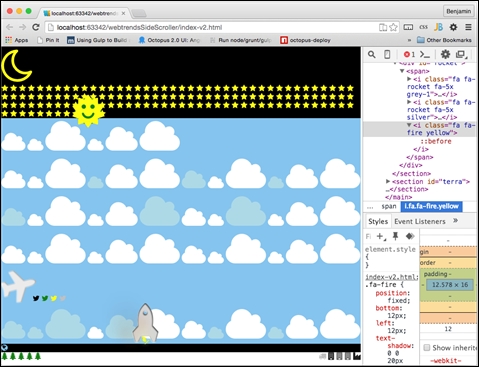
</section>Our CSS is done. It is a small package, and there's a lot of magic inside because it's done in our Font Awesome library and has some JavaScript, which we will go through next. There is now a big blue blob in your viewport—not much to see.
Again, we will put much of the finishing touches together in the JavaScript. You can compare yours to mine here: