Table of Contents for
Web Design Blueprints
 Web Design Blueprints
Published by
Packt Publishing, 2016
Web Design Blueprints
Published by
Packt Publishing, 2016
- Cover
- Table of Contents
- Web Design Blueprints
- Web Design Blueprints
- Credits
- About the Author
- About the Reviewer
- www.PacktPub.com
- Preface
- What you need for this book
- Who this book is for
- Conventions
- Reader feedback
- Customer support
- 1. Responsive Web Design
- Getting familiar with the basics
- Using media queries for responsive design
- Working with responsive media
- Building responsive layouts
- Summary
- 2. Flat UI
- Flat UI color
- Creating a flat UI layout
- Summary
- 3. Parallax Scrolling
- Color classes
- Using SVG font icons
- Getting the fonts
- That's no moon!
- OMG, it's full of stars!
- Clouds, birds, and airplanes
- The rocket
- Terra firma
- Next up, the CSS
- Styling the objects with CSS
- Styling the ground objects
- Writing the JavaScript effects
- Setting the row height
- Spreading the objects
- Spreading the clouds
- Loading the page functions
- Smoothening the scroll
- Updating elements on the scroller
- Collecting the moving elements
- Creating functions for the element types
- Setting the left positions
- Creating the rocket's movement function
- Finally, moving the earth
- Summary
- 4. Single Page Applications
- Getting to work
- Getting the old files
- Object and function conventions
- Creating utility functions
- Working with the home structure
- Setting up other sections
- Performing housekeeping
- Creating a callBack function for the API
- Summary
- 5. The Death Star Chapter
- Dropping in the parallax game
- Loading elements from JSON
- What can be done in the shared levels service
- Editing the home JavaScript
- Creating the other pages – credits and leaderboard
- Creating the second level
- Summary
- Index
Next, I want to move some more functions from level1.js to the general pattern file levels.js. We will cut out the moveRocket and moveEarth functions and paste them into levels.js. And of course, rename them to levels.moveRocket and levels.moveEarth. And be sure to rename the function calls as well. Next, move the setElementLeftPostion function to levels.js. Rename it levels.setElementLeftPosition and the function calls also. This function is called a number of times, so you may want to use a find and replace pattern, or at least find to identify them all. Next, move the window.smoothScrollTo function into the levels.js file and leave it as is.
Let's look at the updateElement function. Most of the code in this needs to stay here; however, I want to add some more functionality that would occur universally on the scroll. So, add a function call to a function that does not yet exist, which we will fix shortly, called levels.updateOnMove(). We will send it something in time, but it does not exist yet, so put a pin in that and we will come back to complete it later. We've created a call for a function that is not there, so we've broken our software and need to fix it. It's an easy fix by adding that function in our levels.js JavaScript file. Once you have added the function, from the level1.updateElement function cut out the function call for levels.moveRocket() with its variable, and paste it into your new function, levels.updateOnMove(). It's not a big change, but it's a change toward more efficient code. Your levels.updateOnMove function now looks like the following sample:
levels.updateOnMove = function(){
levels.moveRocket(document.getElementById("rocket"));
};
Next, let's get the window's scroll position number and set it into a variable called scrollPosition that we can reuse to activate some new features we will add to improve our gaming experience. Use this formula: round 100 multiplied by the result of the window's page Y offset divided by the difference of the document's scroll height and the document's documentElement's client height. See the following example for clarity:
var ScrollPosition = Math.round(100 * window.pageYOffset / (document.body.scrollHeight-document.documentElement.clientHeight));
I can use this to activate functions based on where the user is, for example the top or bottom. This can be useful if I want to automatically go back home when the user scrolls all the way to the top of the screen. Add a case and switch if the variable ScrollPosition equals 0; call a new function called levels.topOfScroll(), and then if it is 100, call another new function called levels.bottomOfScroll().
switch (ScrollPosition){
case 0:
levels.topOfScroll();
break;
case 100:
levels.bottomOfScroll();
break;
default:
}
Next, you will need to create these functions in the levels.js JavaScript file. They do not need anything just yet. Just make them to look like the following sample:
levels.topOfScroll = function(){
};

levels.bottomOfScroll = function(){
};
Next, copy these into your level1.js file, and replace the levels namespace with level1. See the following example:
level1.topOfScroll = function(){
};

level1.bottomOfScroll = function(){
};
Let's actually do something with our levels.topOfScroll function. As I mentioned earlier, we need something to happen when the player scrolls to the top of the screen. Let's send the player to the home page after a few seconds, which will give the game some time to execute something significant to show you it's finished. Inside the levels.topOfScroll function, add a JavaScript setTimeout for 3000 ms and in it set the window's location hash to #home, and on the next line return. This will send the player back to the home menu.
levels.topOfScroll = function(topCallBack){
setTimeout(function(){
window.location.hash = '#home';
return;
}, 3000);
};
Great work so far. Since we are in this function, I want to mention something about the app that annoys me. When we load the game, the rocket is at the top, and then scrolls down to the bottom while the player is watching this. It's like arriving at a play and watching them all run around out of costume while the set gets built, and nothing is hidden by a curtain. This is not a great game experience. I want to add a curtain to the transition between screens. This should be a simple class that we can add and take away from a DIV Eeement, which will have the ID curtain.
In your levels.bottomOfScroll function, add a line to get the DIV element with the curtain ID and assign the class name fade to it. See the following example:
levels.bottomOfScroll = function(bottomCallBack){
document.getElementById('curtain').className = 'fade';
};
You will also need to add the code to add the fade class to the end of the home.js file.
document.getElementById('curtain').className = 'fade';You will also need to add this DIV element to index.html. Just insert it after the DIV with the ID attribute content. See the following example:
<body>
<div id = "content"></div>
<div id = "curtain"></div>
<script src = "app/service.js"></script>
<script src = "app/routing.js"></script>
<script src = "app/levels.js"></script>
</body>
Let's finish what we started with this transition effect. In the services.js JavaScript file, add a new function called services.routing.transition. Inside it, get the element by ID curtain, and set its class name to be a blank string. This will allow us to add the curtain that we will remove when the fade class is added. See the next example:
services.routing.transition = function(){
document.getElementById('curtain').className = '';
};Before we move on, let's finish this by adding the CSS to make the transition work. Add a selector for the curtain ID and the curtain ID with the fade class. See the following example:
#curtain{
}

#curtain.fade {
}
When the curtain does not have the fade class, it is active and should be blocking everything from view. Give it a fixed position, 0 px from the top and left, make it a dark color like wet-asphalt, 100% of the height and width of the viewport, full opacity, a z-index of 9999, and a 0.2 second transition on the opacity. See the following example:
#curtain {
position: fixed;
left: 0;
top: 0;
background: #34495e;
width: 100%;
height: 100%;
opacity: 1;
z-index: 9999;
-webkit-transition: opacity 0.2s;
-moz-transition: opacity 0.2s;
transition: opacity 0.2s;
}
The fade version will change the opacity to 0, and the width to 0, the height to 1%, and the z-index to -1. See the following example:
#curtain.fade {
opacity :0;
width: 0%;
height: 1%;
z-index: -1;
}
Now, try it out in your browser and see the curtain hiding the transition between screens. It should obscure the loading and downscrolling. You could embellish this any way you want. There are many ways this can improve. You can add a before pseudo selector, and add the text loading as the content of it. Try something like this next example:
#curtain:before {
content: "loading...";
position: fixed;
padding: 40%;
top: 0;
left: 0;
font-size: 10vw;
background: #111;
width: 100%;
height: 100%;
}
Let's go with it. Before we close the CSS, let's delete all the CSS for these selectors: weather, tasks, news, and stocks. They are no longer used and should be removed.
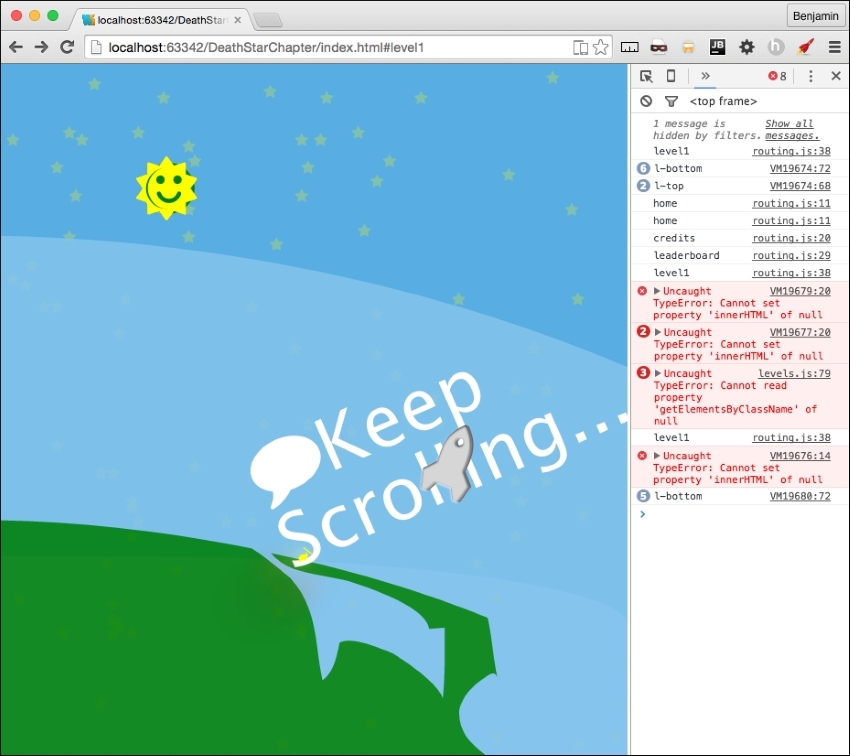
Now that we have cleaned up the CSS, let's get back to the scrolling action. I have to admit something I have been hiding from you. I snuck in something and have not mentioned it yet. When we made the JSON file, we added an additional object to the rocket. It was the fa-comment object. That was sneaky of me. Maybe you added it and saw it in your browser. If you thought it was an error and removed it, here's the code in question in this example so you can add it back:
    "rocket": {
        "objects": [
            {"type": "rocket", "idclass": "fa fa-rocket", "sizeclass": "fa-5x", "colorclass": "grey-2"},
            {"type": "rocket", "idclass": "fa fa-rocket", "sizeclass": "fa-5x", "colorclass": "silver"},
            {"type": "rocket", "idclass": "fa fa-fire", "sizeclass": "", "colorclass": "yellow"},
            {"type": "rocket", "idclass": "fa fa-comment", "sizeclass": "fa-5x", "colorclass": "white"}
            ]
        }
What is it for? This is for adding messages into the screen in the comment bubble. These will be unique for each level and should be treated like data. You don't want to have to work in the JavaScript business logic to change a message. So, add a new object group to the level1.json objectgroups called messages. Inside its object array, add three objects with the values for text, position, and time. See the following for the details:
"messages": {
"objects": [
{"text": "3,2,1... SCROLL!", "position": 100, "time": 3000},
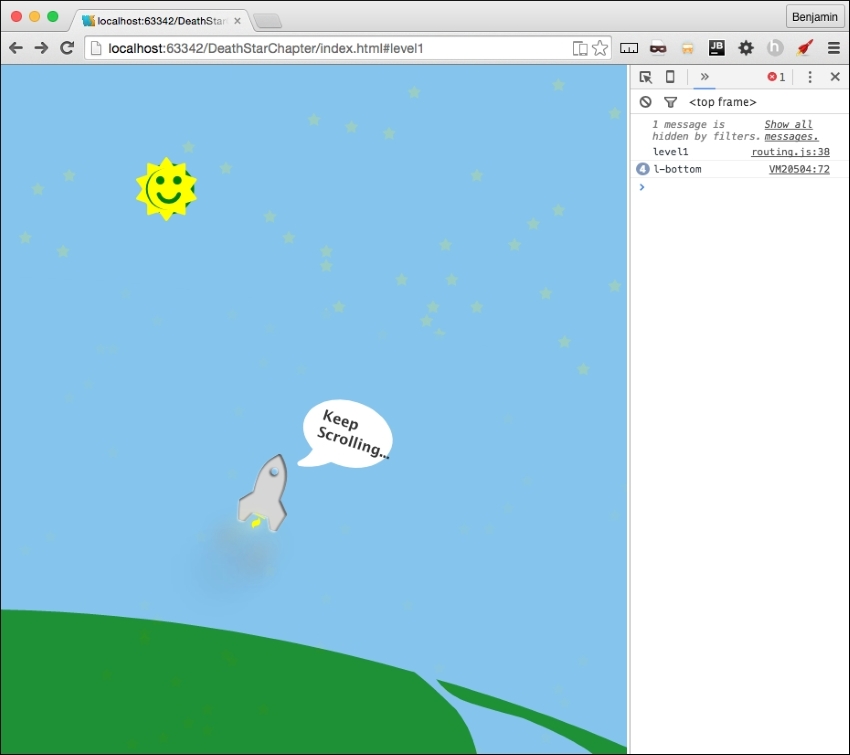
{"text": "Keep Scrolling...", "position": 50, "time": 3000},
{"text": "finished!! Awesome!", "position": 5, "time": 6000}
]
},That's awesome! Now they are added into the DOM automatically already. Let's do something with them. We want these to be loaded at certain points in the scrolling action. In the preceding sample code, these will be loaded at the bottom for three seconds, the middle for three seconds, and near the top for six seconds. But how, you ask? In your level1.updateElement function call to the levels.updateOnMove function, send another variable, the level1.data.objectgroups.message object. See the following example code for the new version of the function call:
levels.updateOnMove(level1.topOfScroll, level1.bottomOfScroll, level1.data.objectgroups.messages);
Now, in your levels.updateOnMove function, add a third variable, messagesObject.
levels.updateOnMove = function(topCallBack,bottomCallBack,messagesObject) {
…
At the end of this function, add a for loop that iterates over the messages in the array of the object. If the current message object's position value equals the ScrollPosition we defined earlier, then let's call a new function called levels.showMessage and send it the current message object. We will need to create that function next, but first, look at the next example to verify your code for the for loop:
for(i = 0; i < messagesObject.objects.length; i++) {
if (messagesObject.objects[i].position === ScrollPosition) {
levels.showMessage(messagesObject.objects[i])
}
}
K, did you get it? Let's move on to make this new function. Create the new function called levels.showMessage, and give it the variable name messageObject. We need to modify the comment bubble first. So, select the element by the ID rocket, and its first of the child elements by the class name fa-comment two times. First, set its style display attribute to inline, which implies that elsewhere it is hidden. Second, set its inner HTML to a SPAN containing the messageObject text value. See the next example:
document.getElementById('rocket').getElementsByClassName('fa-comment')[0].style.display = "inline";
document.getElementById('rocket').getElementsByClassName('fa-comment')[0].innerHTML = '<span>'+messageObject.text + '</span>';
Next, in this same function, use the JavaScript setTimeout to set the fa-comment element style's display attribute to none, and the time interval is the messageObjects time value. See this in the next example:
setTimeout(function() {
document.getElementById('rocket').getElementsByClassName('fa-comment')[0].style.display = "none";
}, messageObject.time);
Now, open your browser and see the messages flashing on the screen. You can tell it needs some CSS work to make this complete.
Let's open our level-1.css file and get some of the code out of there. Because the rocket is going to be used in every level, let's cut that out of the level-1.css file and put it into the levels.css file so it can be used later by the other levels. So, cut out every CSS for the rocket selector and paste it into levels.css. Also, make sure you moved the CSS for the fa-fire selector.
You will need to add CSS selectors for the rocket's child fa-comment, and its child SPAN.
#rocket .fa-comment {
}
#rocket .fa-comment > span {
}
In the fa-comment selector, set the position to absolute, 10px from the bottom, and 100px from the left. Rotate it -315 degrees, set the font-size to 100px, and hide it by setting the display to none. Here is the example:
#rocket .fa-comment {
position: absolute;
bottom: 10px;
left: 100px;
-ms-transform: rotate(-315deg);
-webkit-transform: rotate(-315deg);
transform: rotate(-315deg);
font-size: 100px;
display: none;
}
Next, set its child SPAN selector to have a dark gray color, a font-size of 1 relative to the root size, a line height of 1.2 relative to the root size, an absolute position of 28px from the top and 18px from the left, with a bold font-weight. See the following example for the detail:
#rocket .fa-comment > span{
color: #333;
font-size: 1REM;
line-height: 1.2REM;
  	position: absolute;
left: 18px;
top: 28px;
font-weight: bold;
}
That covers the messages. Open up the browser again and take a look.
This is great so far. We have the scrolling game into the framework, have it loading data, and there are reusable components. It's missing something still: there's not much fun in only being able to go up or down. I know it's cool to have made this, but it won't be very exciting for a player. It's not PONG. So we need to add some left and right controllers.
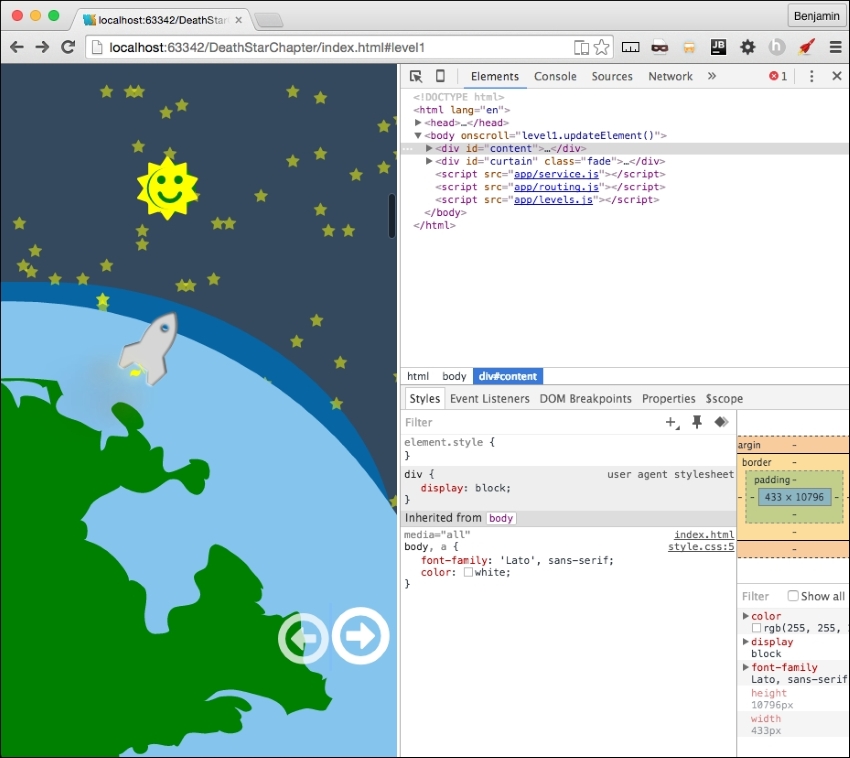
Let's start by adding some buttons to the screen the player can press to make the rocket go left and right while scrolling up. In your level1.html, add a new SECTION at the end of the MAIN element with the ID attribute controller. Inside the section, add a DIV element with the ID attribute controls. See the following example for the exact code:
<section id = "controller">
<div id = "controls">
</div>
</section>
Inside the DIV element, add two new I elements. The first is for a font awesome circle arrow to the left, and the second is for a font awesome circle arrow to the right. Give the first the ID attribute leftClick, and the second the ID attribute leftClick. Next, for both, add these three event listeners: onmousedown, onmouseup, and onmouseout; each equaling the function levels.click.internalMove(). See the following example:
<div id = "controls">
<i id = "leftClick" class = "fa fa-arrow-circle-o-left"
onmousedown = "levels.click.intervalMove()"
onmouseup = "levels.click.intervalMove()"
onmouseout = "levels.click.intervalMove()"
></i>
<i id = "rightClick" class = "fa fa-arrow-circle-o-right"
onmousedown = "levels.click.intervalMove()"
onmouseup = "levels.click.intervalMove()"
onmouseout = "levels.click.intervalMove()"
></i>
</div>
Look on your screen; they are so small and puny. This won't do. Let's add some CSS to make them better. In your levels.css file, add these selectors #controls for the position, #controls i for the actual icons, #controls i:hover to resize when you hover over them, and #controls i.fa.small for JavaScript to add a class for more interaction.
#controls {
}
#controls i {
}
#controls i:hover {
}
#controls i.fa.small {
}
In the #controls selector, set the position to fixed at 60px from the bottom, and 70% from the left, their width is 30%, and have a z-index of 100. See the following example:
#controls {
position: fixed;
bottom: 60px;
left: 70%;
width: 30%;
z-index: 100;
}
In the #controls i selector, set the opacity to 75%, the font-size to 15% of the viewport width, an easing transition for all, and a pointer cursor. See the following example:
#controls i {
opacity: .75;
font-size: 15vw;
-webkit-transition: all 0.1s ease;
-moz-transition: all 0.1s ease;
-o-transition: all 0.1s ease;
-ms-transition: all 0.1s ease;
cursor: pointer;
}
In the hover version, set the opacity to 1, and the font size to 17% of the viewport width. And for the small version, set the opacity to 65%, a 16% font-size, and a silver color. All will have the override. The example is next:
#controls i: hover {
opacity: 1;
font-size: 17vw;
}
#controls i.fa.small {
opacity: .65;
font-size: 16vw;
}
Next, we need to wire in the functionality of these buttons. In levels.js, add a levels.click object to hold the next few functions we will create. The first one being the intervalMove function in the onscreen controls.
levels.click = {};
levels.click.intervalMove = function() {

}
First, inside the function, create a variable, eventAction, to hold the click event. Next, start a switch case operation on the event type, as the variable. In the case it's mousedown, call a function that will be inside this scope, controlsAdjustTimer, which contains an interval operation to call another function. In the case that it is mouseup or mouseout, call the function stopAdjustTimer to clear the interval. See the following example:
    var eventAction = event;
    switch (eventAction.type) {
        case 'mousedown':
        controlsAdjustTimer();
        break;
        case 'mouseup':
        stopAdjustTimer();
        break;
        case 'mouseout':
        stopAdjustTimer();
        break;
        }
Let's not forget about touch events. These are a little bit trickier to add. It seems we can't just put them into the HTML like we did; we will need to add them through JavaScript. But first, let's add the event handlers in this case switch. The two touch events we will add are touchstart and touchend. touchstart will call the function controlsAdjustTimer(), and touchend will call the function stopAdjustTimer(). See the following example for these additional cases:
case 'touchstart':
controlsAdjustTimer();
break;
case 'touchend':
stopAdjustTimer();
break;
We will add the listener shortly after we finish the timer functions.
Let's create those two functions just mentioned. These are inside the levels.click.intervalMove function following the switch case. First, the controlsAdjustTimer function, which contains theTimer, equaling a setInterval operation with a function call to another function, levels.click.controlsAdjust, sending it the event target ID. Set the interval to 50, and return false. Next, stopAdjustTimer: inside it, write the clearInterval operation in theTimer, and return false. See the following example:
function controlsAdjustTimer() {
theTimer = setInterval(function() {
levels.click.controlsAdjust(eventID.target.id)
}, 50);
return false;
}
function stopAdjustTimer() {
clearInterval(theTimer);
return false;
}
You may see that the event listeners are not yet firing for your mobile devices. It may register a mousedown if you hold down on the controls, but that's not a great gaming experience. We need to add the listener to the controls. Let's get out of the levels.click functions and find a levels function that we can load this event listener after the HTML partial is loaded. The function levels.load looks like a favorable place to add this. Append to the levels.load function code to get the element by ID controls and set it to equal the variable controller. If it is not null, add the event listeners touchstart and touchend, both calling the levels.click.internalMove function. That's it. See the following example:
var controller = document.getElementById("controls");
if (controller) {
controller.addEventListener("touchstart", levels.click.intervalMove, false);
controller.addEventListener("touchend", levels.click.intervalMove, false);
}
Now, back to the levels.click functions.
We've done it again: made some broken software. We are calling a function that does not exist. So, create the function levels.click.controlsAdjust and make sure it receives the click target we sent it.
levels.click.controlsAdjust = function(clickTarget){
};First, let's do some forward movement. We want to scroll up about a quarter of the current screen height; call the smoothScrollTo function with a quarter of the window's inner Height subtracted from the window's pageYOffset. This will give us a nice velocity forward. Next, let's get the rocket elements first SPAN and set it as a new variable called sprite. We are going to turn it into a moveable object, moving left and right as it scrolls up the page. To operate this, we want to have a switch case operation on the variable, clickTarget, sent to this function. In the case the clickTarget variable is rightClick, set the sprite's style left attribute equal to a function call to levels.setElementLeftPosition, which you moved over to this file earlier, sending the sprite and the integer 2. In case it is leftClick, do the same, except change the variable to a negative two. Finally, let's add some CSS for visual effect. When there is a click, we want to add the class small to clickTarget, the icon you clicked, then remove it after a brief time. So, get the element by the ID clickTarget variable, and add to the classList small, then set a JavaScript Timeout function to remove the small class after 200 ms. Take a look at the following example to see the details of the code:
    levels.click.controlsAdjust = function(clickTarget) {
        console.log(clickTarget)
        smoothScrollTo(window.pageYOffset - (window.innerHeight / 4));
        var sprite = document.getElementById("rocket").getElementsByTagName("span")[0];
        switch (clickTarget){
        case 'rightClick':
        sprite.style.left = levels.setElementLeftPosition(sprite, 2);
        break;
        case 'leftClick':
        sprite.style.left = levels.setElementLeftPosition(sprite, -2)
        break;
        }
    document.getElementById(clickTarget).classList.add('small');
    setTimeout(function() {
        document.getElementById(clickTarget).classList.remove('small')
        }, 200);
    };
Now, let's open our browsers and take a look at our controls!
This is pretty cool, but honestly, pressing on the icons is a little sluggish on the desktop. So, let's add the left and right keyboard keys to the controls. Just pretty simple stuff to follow; at the end of the levels.js file, add an event listener for the document event on keydown that equals a function called levels.click.checkKey. See the following example:
document.onkeydown = levels.click.checkKey;
Broken software again, so let's fix it. Create the function in question in the same file. The function will receive e. In the first line, it will be equal to e, or window.event. Let's invoke a switch case operation on the event's keyCode. In the case the result is 37, the left arrow key, call the function levels.click.controlsAdjust with the string leftClick. In the case it's 39, the right arrow key, call the function with the string rightClick. See the next example for the code details:
levels.click.checkKey = function(e){
e = e || window.event;
switch (e.keyCode) {
case 37:
levels.click.controlsAdjust('leftClick');
break;
case 39:
levels.click.controlsAdjust('rightClick');
break;
}
};
Now you can use the keyboard for desktop interaction control. We are done with controls! Actually, we are done with modifying these general patterns for the framework. This is nearly fully operational. Let's move on to some clean-up of the home menu.