Table of Contents for
Web Design Blueprints
 Web Design Blueprints
Published by
Packt Publishing, 2016
Web Design Blueprints
Published by
Packt Publishing, 2016
- Cover
- Table of Contents
- Web Design Blueprints
- Web Design Blueprints
- Credits
- About the Author
- About the Reviewer
- www.PacktPub.com
- Preface
- What you need for this book
- Who this book is for
- Conventions
- Reader feedback
- Customer support
- 1. Responsive Web Design
- Getting familiar with the basics
- Using media queries for responsive design
- Working with responsive media
- Building responsive layouts
- Summary
- 2. Flat UI
- Flat UI color
- Creating a flat UI layout
- Summary
- 3. Parallax Scrolling
- Color classes
- Using SVG font icons
- Getting the fonts
- That's no moon!
- OMG, it's full of stars!
- Clouds, birds, and airplanes
- The rocket
- Terra firma
- Next up, the CSS
- Styling the objects with CSS
- Styling the ground objects
- Writing the JavaScript effects
- Setting the row height
- Spreading the objects
- Spreading the clouds
- Loading the page functions
- Smoothening the scroll
- Updating elements on the scroller
- Collecting the moving elements
- Creating functions for the element types
- Setting the left positions
- Creating the rocket's movement function
- Finally, moving the earth
- Summary
- 4. Single Page Applications
- Getting to work
- Getting the old files
- Object and function conventions
- Creating utility functions
- Working with the home structure
- Setting up other sections
- Performing housekeeping
- Creating a callBack function for the API
- Summary
- 5. The Death Star Chapter
- Dropping in the parallax game
- Loading elements from JSON
- What can be done in the shared levels service
- Editing the home JavaScript
- Creating the other pages – credits and leaderboard
- Creating the second level
- Summary
- Index
The next big change is to improve the loading of the objects. The old way to load them is to have the HTML already in the template. We want to do it in this improved way that treats the objects like data and loads them as such. We will be removing all the stars, clouds, the rocket, and other objects. These objects will now be stored in the level1.json file we created earlier. Let's break the HTML so we have something to fix again. As you can probably tell, I like to break things and then fix them, but I'm not sure which I like more.
In your level1.html partial template, start by removing the i element for the moon inside the DIV element with the ID p0.
<i class = "fa fa-moon-o fa-5x yellow"></i>
In the next DIV element, with the ID p1, remove its child DIV element with the ID stars, and all of the children i elements. Next, there is the clouds in the p9, p10, p11, and p12 elements. In addition, remove the plane and Twitter elements. Keep going to remove from inside the objects section the sun elements and the rocket elements. Finally, do the same for the elements inside the terra SECTION. Now the HTML should look pretty sparse in comparison.
See the following example:
<section id = "space">
<div id = "p0" class = "row"></div>
<div id = "p1" class = "row"></div>
</section>
<section id = "stratosphere" class = "wet-asphalt curve2">
<div id = "p2" class = "row wet-asphalt curve"></div>
<div id = "p3" class = "row color-4 curve"></div>
<div id = "p4" class = "row color-3"></div>
<div id = "p5" class = "row color-2"></div>
<div id = "p6" class = "row color-1"></div>
</section>
<section id = "sky" class = "color-1">
<div id = "p7" class = "row color-0 curve2"></div>
<div id = "p8" class = "row color-0"></div>
<div id = "p9" class = "row color-0"></div>
<div id = "p10" class = "row color-0"></div>
<div id = "p11" class = "row color-0"></div>
<div id = "p12" class = "row color-0"></div>
<div id = "p13" class = "row color-0"></div>
</section>
<section id = "objects"></section>
<section id = "terra"></section>
That felt pretty good, didn't it? I really enjoy deleting code.
Now, we have a blank level.json file to fill up with our objects. This file will need to follow the JSON data format. So be careful, it will bomb the JSON parser with will use to insert these objects. First, create an object in the level1.json file called objectgroups. It will look like this next sample:
{
    "objectgroups": {

        }
    }
Then, insert the first object, the stars object, whose value is an object containing an array.
{
    "objectgroups": {
         "stars": {
            "objects": [ ]
            }
        }
    }
Inside the array, each star must be a separate object, containing all the details the function will need to load it into the DOM. Let's give it a type, an idclass, a sizeclass, and a colorclass. These will be used to build the HTML to call the CSS to place the star in the page. See the following example to fill out the values:
{"type": "star", "idclass": "fa fa-star", "sizeclass": "fa-1x", "colorclass": "yellow"},
{"type": "star", "idclass": "fa fa-star", "sizeclass": "fa-1x", "colorclass": "yellow"},
You can copy and paste the first line into a few hundred lines of star objects.
Next, let's add our moon object. Even though there's only one moon on this level, we will use the same format for the JSON. Follow the stars objectgroup with a comma, and then add the moon object group.
    "moon": {
        "objects": [
            {"type": "moon", "idclass": "fa fa-moon-o", "sizeclass": "fa-5x", "colorclass": "yellow"}
            ]
        },
Next, we will add the objects that go into the objects section. Here, we deviate a little by creating a child to the object. There is more depth as we are grouping more different objects together. This objectgroup is called objects. Its children are the sun, the earth, and the rocket. As you recall, these objects were more complex than the rest as they had richer layers rendered. Each of the child objects has the child objects paired to an array for the value.
The objects in each array follow the same pattern of matching the classes to the title as the preceding array objects. See the following sample code for the detail:
    "objects": {
        "sun": {
            "objects": [
            {"type": "sun", "idclass": "fa fa-smile-o", "sizeclass": "fa-1x", "colorclass": "green"},
            {"type": "sun", "idclass": "fa fa-circle", "sizeclass": "fa-1x", "colorclass": "yellow"},
            {"type": "sun", "idclass": "fa fa-sun-o", "sizeclass": "fa-1x", "colorclass": "yellow"}
            ]
        },
    "earth": {
        "objects": [
            {"type": "earth", "idclass": "fa fa-globe", "sizeclass": "", "colorclass": "blue land air"}
            ]
        },
    "rocket": {
        "objects": [
            {"type": "rocket", "idclass": "fa fa-rocket", "sizeclass": "fa-5x", "colorclass": "grey-2"},
            {"type": "rocket", "idclass": "fa fa-rocket", "sizeclass": "fa-5x", "colorclass": "silver"},
            {"type": "rocket", "idclass": "fa fa-fire", "sizeclass": "", "colorclass": "yellow"},
            {"type": "rocket", "idclass": "fa fa-comment", "sizeclass": "fa-5x", "colorclass": "white"}
            ]
        }
    },
That's it for the objects. Next, it is the objects in the terra SECTION. As you recall, the terra objects were split to the right and left. The trees were on the left, and the buildings on the right. This follows the same pattern of descendants as the preceding. The objects array are the trees for the left group, and the truck and various buildings on the right.
    "terra": {
        "left": {
            "objects": [
            {"type": "tree", "idclass": "fa fa-tree", "sizeclass": "", "colorclass": "green"},
            {"type": "tree", "idclass": "fa fa-tree", "sizeclass": "", "colorclass": "green"},
            {"type": "tree", "idclass": "fa fa-tree", "sizeclass": "", "colorclass": "green"},
            {"type": "tree", "idclass": "fa fa-tree", "sizeclass": "", "colorclass": "green"},
            {"type": "tree", "idclass": "fa fa-tree", "sizeclass": "","colorclass": "green"}
            ]
        },
        "right": {
            "objects": [
            {"type": "tree", "idclass": "fa fa-truck", "sizeclass":"", "colorclass": "silver"},
            {"type": "tree", "idclass": "fa fa-building", "sizeclass": "small", "colorclass": "grey-1"},
            {"type": "tree", "idclass": "fa fa-building", "sizeclass": "small", "colorclass": "grey-2"},
            {"type": "tree", "idclass": "fa fa-building", "sizeclass": "large", "colorclass": "grey-2"},
            {"type": "tree", "idclass": "fa fa-building", "sizeclass": "large", "colorclass": "grey-1"},
            {"type": "tree", "idclass": "fa fa-industry", "sizeclass": "large", "colorclass": "grey-1"}
            ]
        }
    },
Finally, the clouds; this was saved for last, as it's the same object type, split into different groups. Each cloud group fits into a different DIV element, therefore the parent grouping is clouds, and the child groups, like the left and right terra objects, are labeled by the DIV element ID they will be inserted into. The DIV elements we want them to go into are p9 through p13. Then, inside each is the array of the cloud objects to be inserted into the DIV element. See the next example. In the example, there is only one or two cloud Objects in each array; you will want about ten in each.
    "clouds": {
        "p9": {
            "objects": [
            {"type": "cloud", "idclass": "fa fa-cloud", "sizeclass":" fa-3x", "colorclass": "white"},
            {"type": "cloud", "idclass": "fa fa-cloud", "sizeclass": "fa-5x", "colorclass": "white"}
            ]
        },
    "p10": {
        "objects": [
            {"type": "cloud", "idclass": "fa fa-cloud", "sizeclass": "fa-3x", "colorclass": "white"},
            {"type":"cloud", "idclass":"fa fa-cloud", "sizeclass": "fa-5x", "colorclass": "white"}
            ]
        },
    "p11": {
        "objects": [
            {"type": "cloud", "idclass": "fa fa-cloud", "sizeclass": "fa-3x", "colorclass": "white"},
            {"type": "cloud", "idclass": "fa fa-cloud", "sizeclass": "fa-5x", "colorclass": "white"},
            ]
        },
    "p12": {
        "objects": [
            {"type": "cloud", "idclass": "fa fa-cloud", "sizeclass": "fa-3x", "colorclass": "white"},
            {"type": "cloud", "idclass": "fa fa-cloud", "sizeclass": "fa-5x", "colorclass": "white"},
            ]
        },
    "p13": {
        "objects": [
            {"type": "cloud", "idclass": "fa fa-cloud", "sizeclass": "fa-3x", "colorclass": "white"},
            {"type": "cloud", "idclass": "fa fa-cloud", "sizeclass": "fa-5x", "colorclass": "white"}
            {"type": "cloud", "idclass": "fa fa-twitter", "sizeclass": "fa-1x", "colorclass": "silver"},
            {"type": "cloud", "idclass": "fa fa-twitter", "sizeclass": "fa-1x", "colorclass": "yellow"},
            {"type": "cloud", "idclass": "fa fa-twitter", "sizeclass": "fa-1x", "colorclass": "green"},
            {"type": "cloud", "idclass": "fa fa-twitter", "sizeclass": "fa-1x", "colorclass": "red"},
            {"type": "cloud", "idclass": "fa fa-plane", "sizeclass": "fa-3x", "colorclass": "silver"}
            ]
        }
    } //Remember the closing bracket.
You may notice how I slipped in some non-cloud items at the end. These are the plane and birds that flew across the screen. You can place those into any one of the cloud groups.
We have created the data object. Next, we need to load it into the DOM. This will use the request function we have already created. The getPage function we created previously is well suited for this. We want these objects to be called right after the levels.load function. So, add a new line right after levels.load calling services.getPage. Send it the variables pageRoute.data, the path defined in the registry for the JSON, the string level1, for the id, level1.parseAjax, for the callback function (which does not exist yet), and the id variable. Now, the end of level1.js should look like this next sample code:
If (window.location.hash.split('#')[1] === 'home') {
}
else
{
levels.load('level1.updateElement()');
services.getPage(pageRoute.data, 'level1', level1.parseAjax,id);
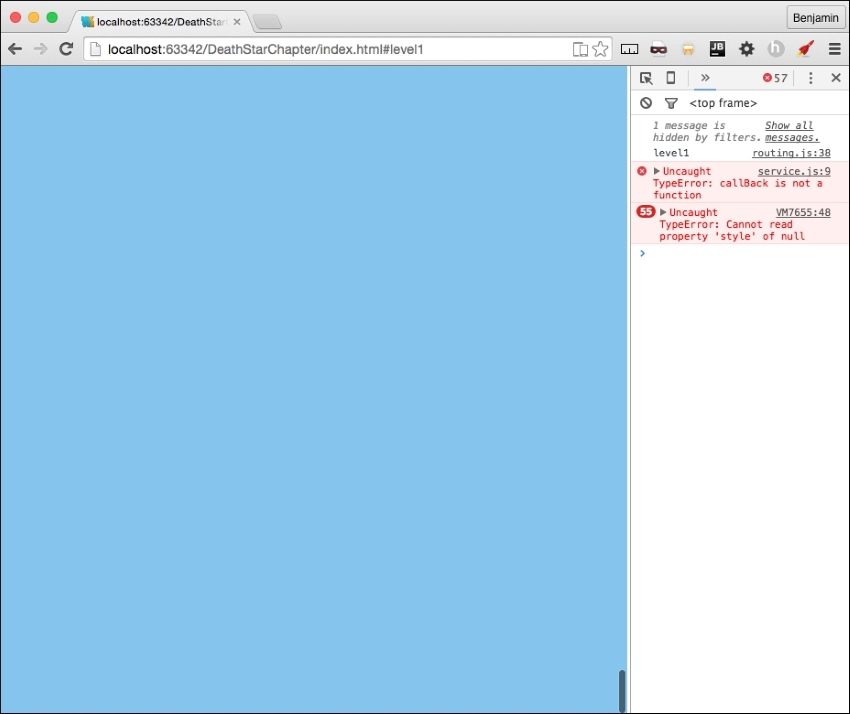
};As I mentioned before, the level1.parseAjax callback does not yet exist, and we have created a new breaking error in our application. You can refresh your browser to see what it's complaining about. It says callBack is not a function on services.js line 9. See my example picture next:
The callBack variable causing the error is referencing the level1.parseAjax function we have not yet created. This is easy to fix by creating the function. In your level1.js file, create the function level1.parseAjax and inside it create a new object, level1.data, to hold the response from parsing the AJAX from the getPage function. The detail of this were covered in the SPA framework chapter, so I will not go into detail here.
Add a line to console.log the response. You can see the following example:
level1.parseAjax = function (xhr, id){
level1.data = JSON.parse(xhr.responseText);
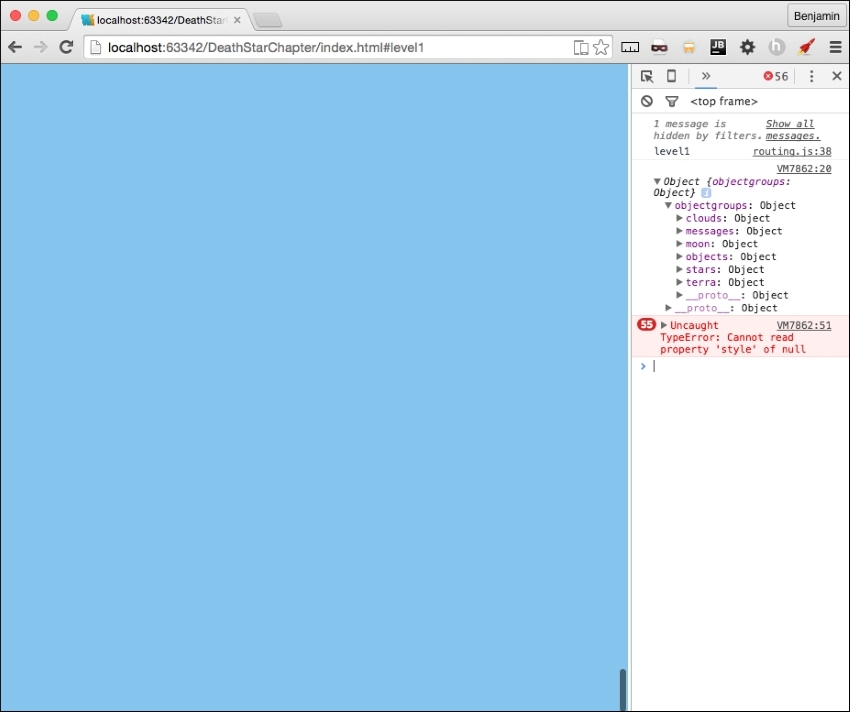
console.log(level1.data);
};In your browser console, now you will see the data loaded into the DOM as an object. These are ready for you to add to the HTML. This will follow the same pattern as the SPA framework AJAX calls, so again, let's go through it quickly, as there's much more to do.
First, let's put the moon and the stars in the sky. The moon object is simple: let's create a new variable, level1MoonHTML, equal to a string of the opening i element tag and class selector plus the first array item of the moon object's idclass value plus another string ' ' plus the array item's sizeclass plus another string ' ' plus the array item's color class, plus the end >, and then the closing of the i tag. See the variable next in the example for illustration:
var level1MoonHTML = '<i class="' + level1.data.objectgroups.moon.objects[0].idclass + ' ' + level1.data.objectgroups.moon.objects[0].sizeclass + ' ' + level1.data.objectgroups.moon.objects[0].colorclass + '"></i>';
Next, get the element selected by the ID p0 and set its inner HTML to equal level1MoonHTML.
document.getElementById('p0').innerHTML = level1MoonHTML;You can combine these two lines of code by replacing the variable declaration with the second line of code to have more efficient code. See the following:
document.getElementById('p0').innerHTML = '<i class="' + level1.data.objectgroups.moon.objects[0].idclass + ' ' + level1.data.objectgroups.moon.objects[0].sizeclass + ' ' + level1.data.objectgroups.moon.objects[0].colorclass + '"></i>';Adding the stars follows a similar pattern, only a little more complex. Create a new variable, level1StarsHTML, equal to a string of an open DIV element with the ID stars. As there are many of the stars in the array, let's create a for loop to iterate through the stars array and insert the values into this variable. Inside the loop, add to level1StarsHTML the i element created in the same pattern as the moon. Close the loop and follow it by adding to the level1StarsHTML variable the closing DIV tag in a string. Finally, insert the level1StarsHTML variable into the HTML by getting the p1 element. See the following example for the details:
var level1StarsHTML = '<div id="stars">';
for (i = 0; i < level1.data.objectgroups.stars.objects.length; i++)
{
level1StarsHTML += '<i class="' + level1.data.objectgroups.stars.objects[i].idclass + ' ' + level1.data.objectgroups.stars.objects[i].colorclass + '"> </i>';
}
level1StarsHTML += '</div>';
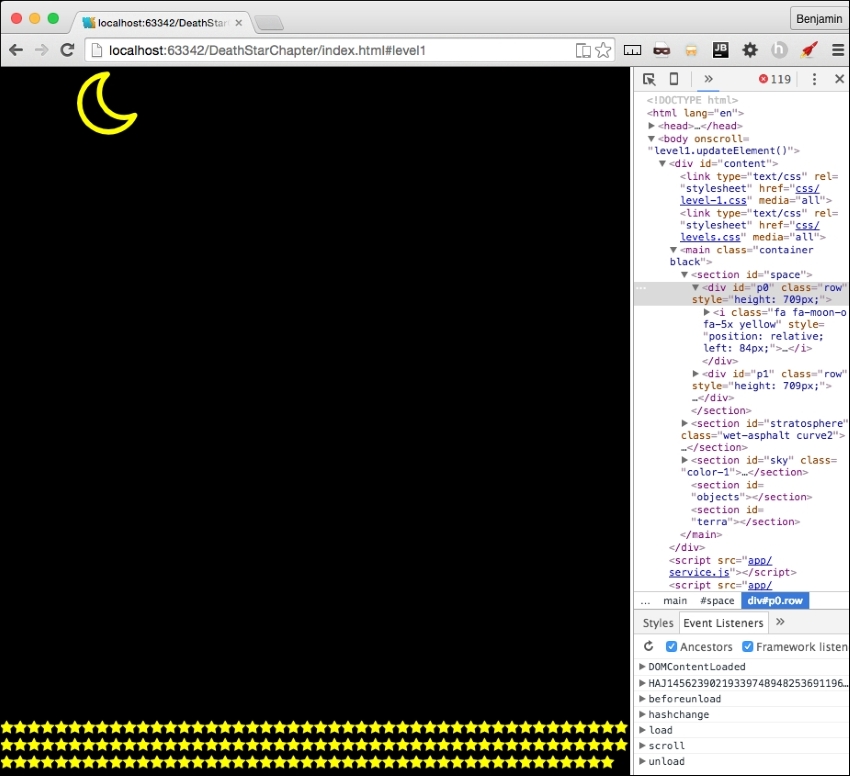
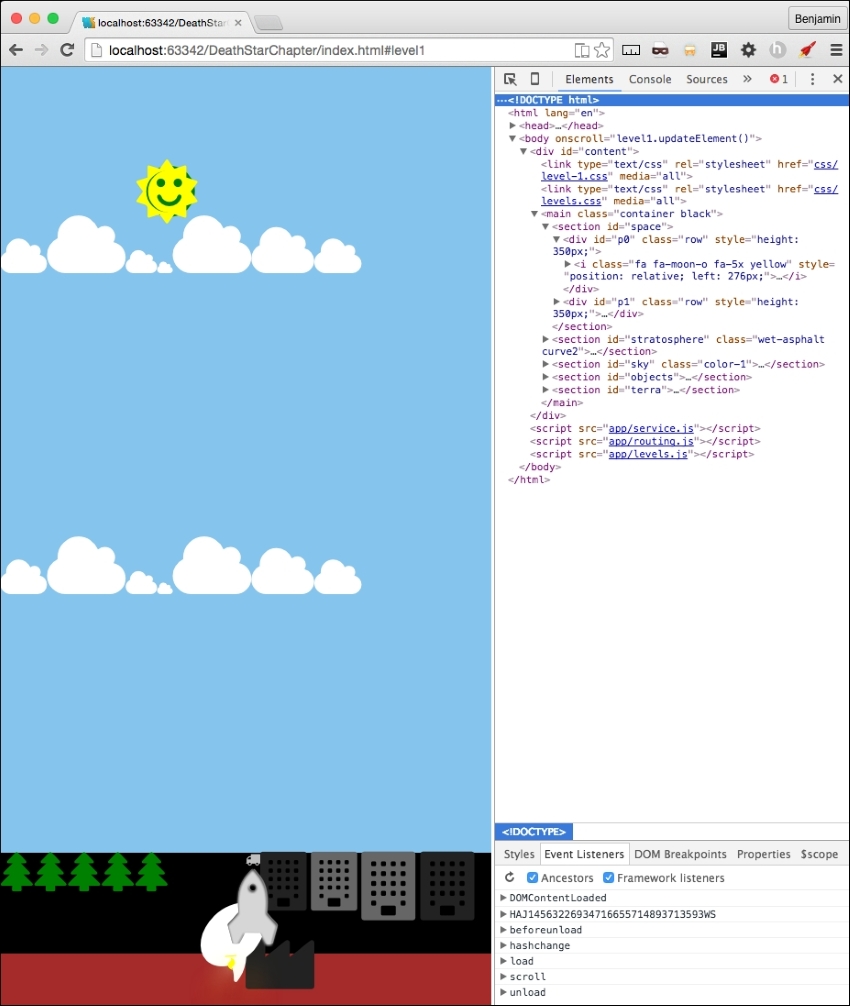
document.getElementById('p1').innerHTML = level1StarsHTML;Refresh your browser again and you will see that the moon and the stars are now in the viewport. See my next screenshot:
Next, let's go to the next set of objects, the clouds. As this has child objects, we will start with a for in loop going through the clouds object. First, inside the loop, create a new variable for the HTML called cloudHTMLStart equal to an opening DIV element with the class clouds. Next, create a new for in loop with a unique key and iterate through each of the cloud's group children determined by the key of the first loop. Inside the for loop within a loop, add to cloudHTMLStart the i element, much like the moon and stars, only using each of the for in loop keys as an array selector. Outside of the inner loop, add to cloudHTMLStart a string containing the closing DIV element.
Then, get the element selected by the first for loop's key, and set its innerHTML to equal cloudHTMLStart. These instructions may be difficult to translate into code, so take a look at the following sample code to see how it works exactly:
for (var key in level1.data.objectgroups.clouds) {
var cloudHTMLStart = '<div class = "clouds">';
for (var key0 in level1.data.objectgroups.clouds[key].objects) {
cloudHTMLStart += '<i class = "' + level1.data.objectgroups.clouds[key].objects[key0].idclass + ' ' + level1.data.objectgroups.clouds[key].objects[key0].sizeclass + ' ' + level1.data.objectgroups.clouds[key].objects[key0].colorclass + '"></i>';
}
cloudHTMLStart += '</div>';
document.getElementById(key).innerHTML = cloudHTMLStart;
};
The next group of objects, the objects' objectgroup, contains the rocket, therefore its method of looping will vary further. First, create the variable objectsHTMLStart equal to a blank string. Then, initiate the for in loop over the objects in objectgroups. The next step is to add the opening DIV element as a string to objectsHTMLStart, giving it the variable key as its ID attribute. Next, add a conditional, if the key is equal to rocket, and add a SPAN element before continuing. We need to iterate through the child objects now, so create another for in loop over the objects that are children to the objects and give it a unique key variable. Next, add to objectsHTMLStart the i element as a string with its attributes supplied by idclass, sizeclass, and colorclass, and close the element. This ends the inner loop. Then, add another conditional if key equals rocket followed by the closing SPAN tag if truthy. Follow this with a closing of the DIV element, and then the closing bracket of the parent for loop. Finally, get the element by the ID attribute objects and set its innerHTML to equal objectsHTMLStart. See the following sample code:
var objectsHTMLStart = '';
for (var key in level1.data.objectgroups.objects) {
objectsHTMLStart += '<div id = "' + key + '">';
if (key === 'rocket')
objectsHTMLStart += '<span>';
for (var key0 in level1.data.objectgroups.objects[key].objects) {
objectsHTMLStart += '<i class="' + level1.data.objectgroups.objects[key].objects[key0].idclass + ' ' + level1.data.objectgroups.objects[key].objects[key0].sizeclass + ' ' + level1.data.objectgroups.objects[key].objects[key0].colorclass + '"></i>';
}
if (key === 'rocket')
objectsHTMLStart += '</span>';
objectsHTMLStart += '</div>';
}
document.getElementById('objects').innerHTML = objectsHTMLStart;
Only one more layer of objects to load. I'm glad to be nearly done with them. This is the objects in the terra SECTION. It is another objects group with children. Start with the new variable terraHTMLStart equal to a new DIV element with the ID ground as a string. Let's do another for in loop for the terra objects in the object group. The first thing to do in the loop is add a new child DIV element whose class is the key variable. Next, add another for in loop for the objects in the terra arrays. Add to terraHTMLStart the i element with the objects idclass, sizeclass, and colorclass, just like the previous examples, and then close the i element. Close the loop. Then close the child DIV element. Then close the outer loop. Close the parent DIV element. Finally, get the element by ID terra and set its innerHTML to equal terraHTMLStart.
Whew! We are done loading objects. I'm glad you stuck with me the whole time. Now, refresh your browser and take a look at the objects loaded into the view. Now it's getting exciting again. By the way, I changed the size of my viewport after I loaded so I could show more objects. Yours may look different.
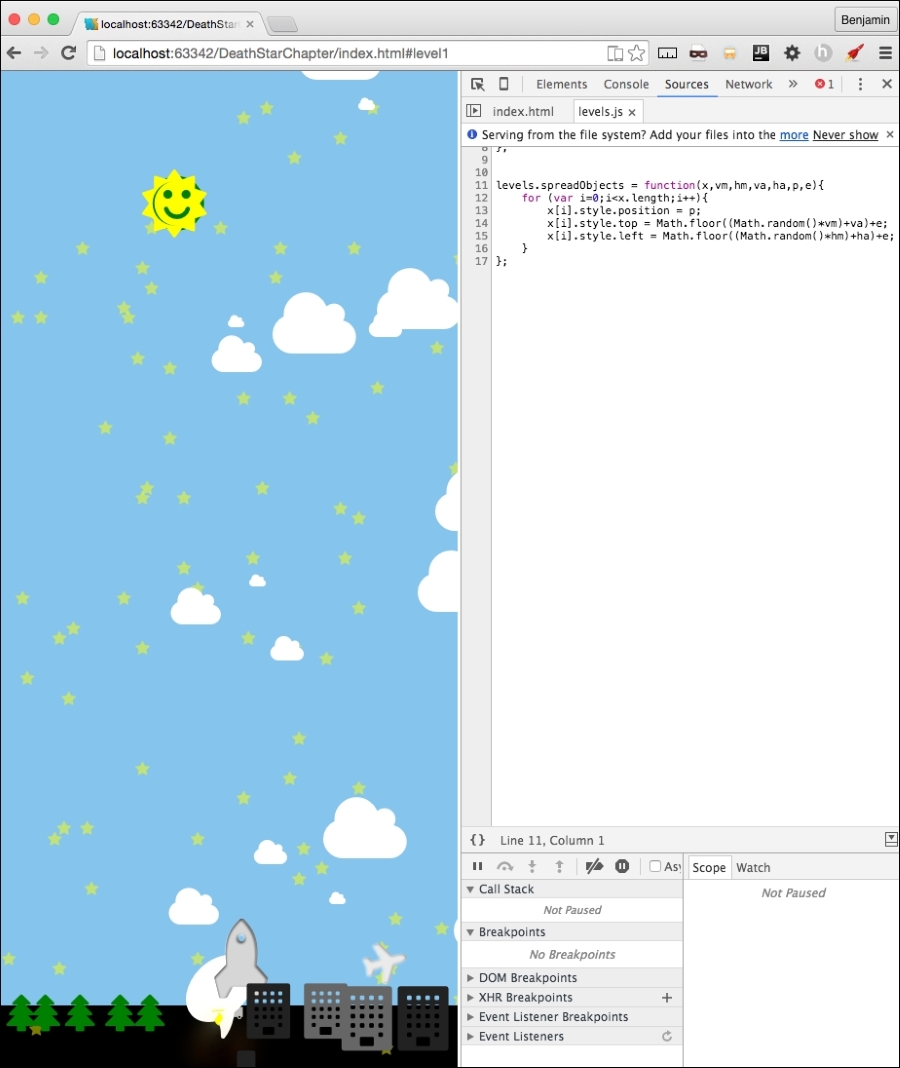
That's awesome so far, but the objects are just lined up, and we want to spread them around the page. So, let's take care of that spreadObjects function we already have by moving it into a general pattern. You will want to use this function on every level. Its insides are great as they are, so just cut it out of level1.js and put it inside the levels.js file. After you move it, you need to rename it from level1.spreadObjects to levels.spreadObjects.
Do you remember the body onload function we commented out? It has some useful code we want to use. I want you to cut out all of the spreadObjects function calls and paste them into the parseAjax function at the end. Then, prepend the spreadObjects function name with levels. They now look like the following sample code:
levels.spreadObjects(document.getElementById("stars").getElementsByTagName("i"), 150, 100, 1, 1, "fixed", "%");
levels.spreadObjects(document.getElementById("ground").getElementsByClassName("fa-tree"), 0, 14, -(window.innerHeight / 28), 1, "relative", "px");
levels.spreadObjects(document.getElementById("ground").getElementsByClassName("right")[0].getElementsByClassName("small"), 0, 14, - (window.innerHeight/13), 1, "relative", "px");
levels.spreadObjects(document.getElementById("ground").getElementsByClassName("right")[0].getElementsByClassName("large"), 0, 14, - (window.innerHeight/15), 1, "relative", "px");
for (var i = 0; i < document.getElementsByClassName("clouds").length; i++) {
levels.spreadObjects(document.getElementsByClassName("clouds")[i].getElementsByTagName("i"),window.innerHeight*.75, window.innerWidth*.75, 1, 1-(window.innerWidth / 2), "relative", "px");
}
Now, refresh your browser and see it has spread the objects around. This looks much better.