Table of Contents for
Web Design Blueprints
 Web Design Blueprints
Published by
Packt Publishing, 2016
Web Design Blueprints
Published by
Packt Publishing, 2016
- Cover
- Table of Contents
- Web Design Blueprints
- Web Design Blueprints
- Credits
- About the Author
- About the Reviewer
- www.PacktPub.com
- Preface
- What you need for this book
- Who this book is for
- Conventions
- Reader feedback
- Customer support
- 1. Responsive Web Design
- Getting familiar with the basics
- Using media queries for responsive design
- Working with responsive media
- Building responsive layouts
- Summary
- 2. Flat UI
- Flat UI color
- Creating a flat UI layout
- Summary
- 3. Parallax Scrolling
- Color classes
- Using SVG font icons
- Getting the fonts
- That's no moon!
- OMG, it's full of stars!
- Clouds, birds, and airplanes
- The rocket
- Terra firma
- Next up, the CSS
- Styling the objects with CSS
- Styling the ground objects
- Writing the JavaScript effects
- Setting the row height
- Spreading the objects
- Spreading the clouds
- Loading the page functions
- Smoothening the scroll
- Updating elements on the scroller
- Collecting the moving elements
- Creating functions for the element types
- Setting the left positions
- Creating the rocket's movement function
- Finally, moving the earth
- Summary
- 4. Single Page Applications
- Getting to work
- Getting the old files
- Object and function conventions
- Creating utility functions
- Working with the home structure
- Setting up other sections
- Performing housekeeping
- Creating a callBack function for the API
- Summary
- 5. The Death Star Chapter
- Dropping in the parallax game
- Loading elements from JSON
- What can be done in the shared levels service
- Editing the home JavaScript
- Creating the other pages – credits and leaderboard
- Creating the second level
- Summary
- Index
In the sky section, in the p9, p10, p11, p12 and p13 DIV elements (we're skipping p8), add a new DIV element with the clouds class attribute. In each one, add at least 10 Font Awesome clouds (fa-cloud). Font Awesome, being an SVG (Scalable Vector Graphic), can scale up and be modified in several ways; by adding another class, fa-2x, you can make the graphic larger. The fa-3x, fa-4x, and fa-5x classes also work the same, with increasing scale. Here is an example of one of the DIV elements with clouds in it:
        <div id="p10" class="row color-0">
            <div class="clouds">
                <i class="fa fa-cloud fa-3x white"></i>
                <i class="fa fa-cloud fa-2x white"></i>
                <i class="fa fa-cloud fa-5x white"></i>
                <i class="fa fa-cloud fa-2x white"></i>
                <i class="fa fa-cloud fa-4x white"></i>
                <i class="fa fa-cloud fa-5x white"></i>
            </div>
        </div>
So, by adding the additional classes, you can make the cloudscape more interesting and diverse. We will use this size class to implement the parallax effect later. This being a font, you can also create your own CSS to add to it, treating it like a font. I will also demonstrate this later in the chapter. That being said, add classes with varying sizes like I stated earlier, and add the white class to them to make them white. You could also add a blue class to them to make them rain clouds.
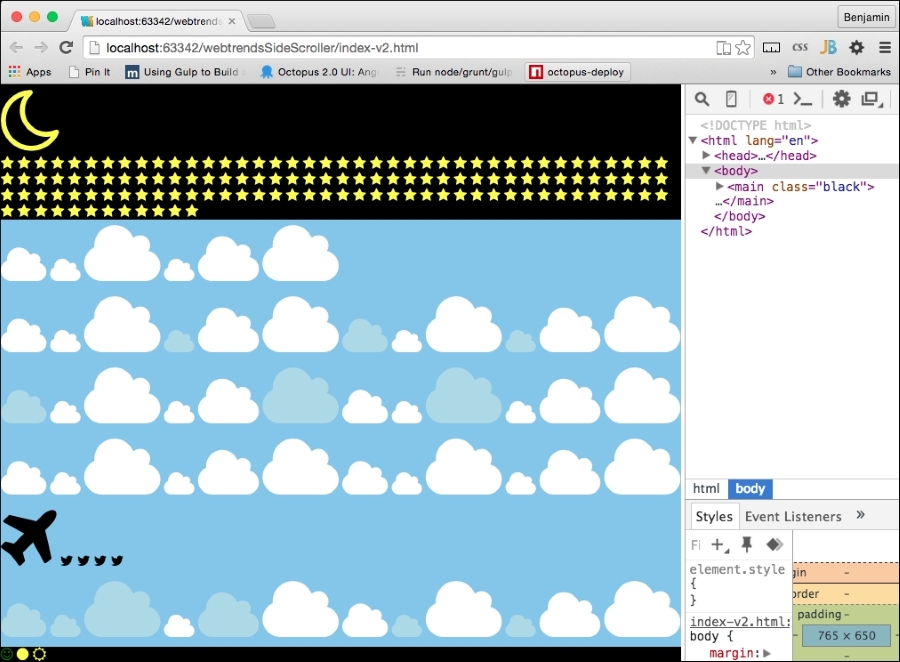
When we are finished with the clouds, we will want to add some more interesting objects. Add an fa-plane icon to the end of the p12 DIV element, and add four birds using the fa-twitter icon. Add the fa-5x class and the silver color to the plane and add some color classes to the birds. Look at this example:
                <i class="fa fa-plane fa-5x silver"></i>
                <i class="fa fa-twitter"></i>
                <i class="fa fa-twitter"></i>
                <i class="fa fa-twitter"></i>
                <i class="fa fa-twitter"></i>
Let's take a look at what this looks like again. I'll show you the code in the inspector as well so that you can get an idea of how it looks.
Continue adding parts. We now arrive at the next section, objects. This SECTION element contains the parts that will do much of the heavy lifting in the animation, or they will at least be visible through most of the parallax effect.
In the objects SECTION element , add a new DIV element with the id attribute sun. Inside it, add three Font Awesome I elements. The first is fa-smile-o; add the green class to it. Then add fa-circle with an additional yellow class, followed by fa-sun-o, and make it yellow as well. That element will look like the following code sample:
        <section id="objects">
            <div id="sun">
                <i class="fa fa-smile-o green"></i>
                <i class="fa fa-circle yellow"></i>
                <i class="fa fa-sun-o yellow"></i>
            </div>
        </section>
When you see it in your browser, you can see the three parts of the sun. We will add the style soon enough; don't worry:
Next, add another DIV element with the id attribute earth. Inside it, add a Font Awesome I globe. Also add additional classes blue, land, and air. I'll explain these additional classes soon. Look at this code sample:
        <div id="earth">
            <i class="fa fa-globe blue land air"></i>
        </div>