Table of Contents for
Electronics Cookbook
 Electronics Cookbook
Published by
O'Reilly Media, Inc., 2017
Electronics Cookbook
Published by
O'Reilly Media, Inc., 2017
- Cover
- nav
- Electronics Cookbook
- Electronics Cookbook
- Preface
- Theory
- Resistors
- Capacitors and Inductors
- Diodes
- Transistors and Integrated Circuits
- Switches and Relays
- Power Supplies
- Batteries
- Solar Power
- Arduino and Raspberry Pi
- Switching
- Sensors
- Motors
- LEDs and Displays
- Digital ICs
- Analog
- Operational Amplifiers
- Audio
- Radio Frequency
- Construction
- Tools
- Parts and Suppliers
- Arduino Pinouts
- Raspberry Pi Pinouts
- Units and Prefixes
- Index
- About the Author
- Colophon
Chapter 9. Solar Power
9.1 Power Your Projects with Solar
Solution
Use a photovoltaic solar panel (Figure 9-1) to generate electricity to trickle charge a battery that then supplies your project. The leftmost panel in Figure 9-1 is reclaimed from a low-power solar LED on a stick that cost about $1.50.
Figure 9-2 shows the schematic for solar charging a battery.
Solar panels are made up of a number of solar cells wired together in series to increase the output voltage. You will need a solar panel with an output voltage that is greater than the battery voltage.
The diode D1 is essential to prevent current from flowing back through the solar panel and damaging it when the solar panel is not illuminated enough for its output voltage to exceed the battery voltage.
R1 sets the charging current in just the same way as trickle charging (Recipe 8.4). As with trickle charging, you can also use a current regulator such as the one described in Recipe 7.7.
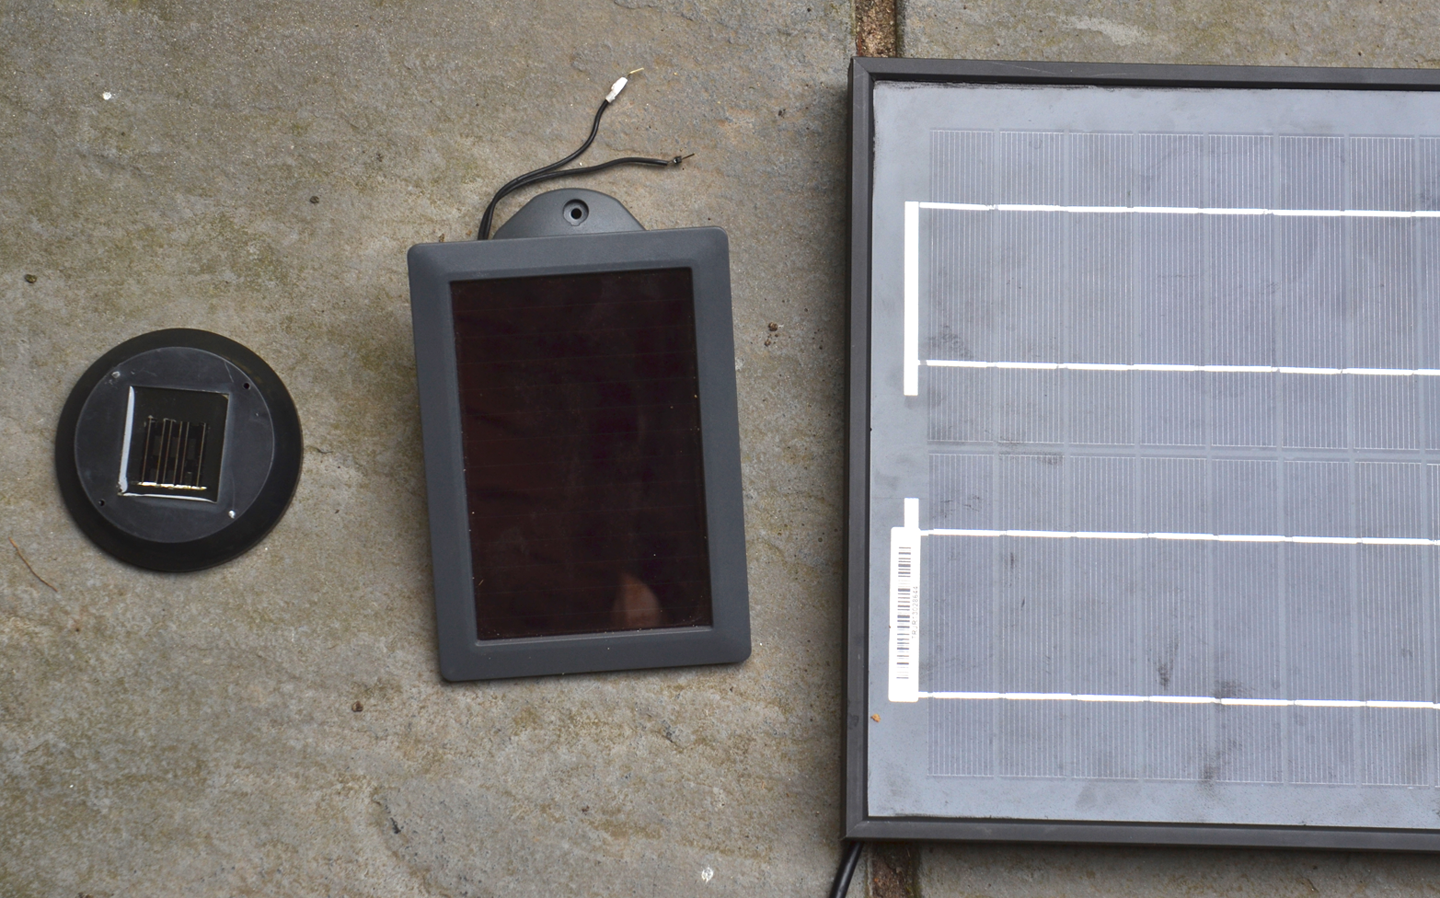
Figure 9-1. A Selection of Solar Panels—Left to Right Unknown Wattage, 1W, and 20W Panels
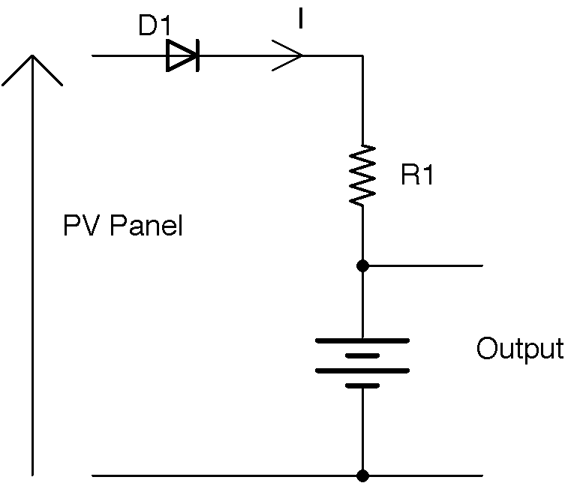
Figure 9-2. Solar Charging a Battery
Discussion
The performance of the solar panel varies enormously with the amount of sunlight falling on it. A solar panel will produce useful amounts of power when in direct sunlight, but in shadow or on a cloudy day it is unlikely to produce any more than 1/20 of its direct sunlight performance.
If you are thinking of using a solar panel to power a project indoors, unless you plan to keep the project on a sunny window sill or your project uses microamps, then forget it. The size of panel that you will need will make the project huge.
Two key parameters specified for a solar panel are its nominal output voltage and its power output. Both these values require some explanation.
The power output of the panel in mW for a small panel and W for a larger panel, as stated in the specification for the panel, is the power output under ideal conditions. That is, pointing directly at the sun without clouds, haziness, or any other impairments. In Table 9-1 you see the results of practical tests on the solar panels shown in Figure 9-1. These tests were carried out in the early afternoon at my home (53° latitude). The “no direct sunlight” readings were made with the panel pointing at clear sky but away from direct sunlight. For details on how to take such measurements yourself, see Recipe 9.3.
| Nominal Power |
Dimensions (inches) |
Actual Output (direct sunlight) |
Actual Output (no direct sunlight) |
Guide Price (2016) |
|---|---|---|---|---|
| Unknown | 1x1 | 40mW | 1.4mW | $1 |
| 1W | 6x4 | 210mW | 8.4mW | $5 |
| 20W | 22x12 | 6.9W | 86mW | $40 |
Two things emerge from these measurements. First, the actual power output, even for the highest quality panel (the 20W panel), was actually almost ⅓ of its rated value. Secondly, when out of direct sunlight, the power output fell to almost 1/100 of the full-sunlight reading in the worst case. Now, while I’m sure the panels would do better at noon near the equator, that’s not where most of us live.
Similarly, the output voltage at suboptimal lighting levels is also not the same as the specified output voltage. Table 9-2 shows the no-load output voltage for the same solar panels.
| Nominal Output Voltage |
Actual Output (direct sunlight) |
Actual Output (no direct sunlight) |
|---|---|---|
| 2V | 2.2V | 1.9V |
| 6V | 10.6V | 9.7V |
| 12V | 21.3V | 18V |
The output voltage is higher than the nominal voltage so it can be used to charge a battery of nominal voltage.
See Also
To work out the power output of the solar panel that you need, see Recipe 9.3.
For the basics of trickle charging, see Recipe 8.4.
9.2 Choose a Solar Panel
Solution
This solution will not give you an exact solar-panel power requirement and accompanying battery capacity, but it will at least give you a rough estimate to get you started with field testing.
Start by calculating the energy use of your project in Ws (joules) for a 24-hour period because a 24-hour day will include both the daylight and nighttime parts of the daily cycle. Calculating this current consumption is easy if the device is on all the time and the current consumption is constant. Let’s say we have a garden temperature sensor that uses WiFi and consumes a constant 70mA from its 5V power supply. The power consumption is therefore 70mA x 5V = 350mW. The energy consumption is 350mW times the number of seconds in 24 hours. That is, 350mW x 24 x 60 x 60 = 30,240J.
This means that we need a solar panel that can during a 24-hour period provide 30,240J of energy. You can calculate the required solar-panel power using the formula:

where E is the energy needed (30,240 in this example) and H is the average number of hours that the solar panel will be in direct sunlight. Let’s assume that you live in the tropics, have more or less no seasonal variation in day length, and 10 hours of sunlight a day. In that case you can calculate the power of the panel you need as:

So, in theory a 1W solar panel is fine for this particular situation.
If you think you might need the thermostat to keep working for three days without any solar charging (perhaps during a tropical storm) you will need a battery that can deliver 3 x 30,240 = 90,720J of energy.
The storage capacity in mAh (C) can be calculated using this formula:

Discussion
This equation has made a number of optimistic assumptions. First, the tropical daylight pattern is likely to be markedly different from a wet maritime climate at high altitude. In that case, you may only be able to assume a much lower average. For example, according to US Climate Data, December in Seattle only averages 62 hours of sunshine in the entire month (2 hours a day). This would require a solar panel of five times the power of the tropical equivalent.
The equation also assumes that any voltage conversion that is needed between the output of the solar panel down to the battery voltage is 100% efficient. If you are using a switching regulator like Recipe 7.8 then you might get 80%, but a linear regulator will not be as good, maybe only 50% or lower.
Also, the battery you are charging or the circuit charging it may limit the maximum power that you are using from the solar panel to prevent damage to the battery by charging it with too high a current. This all needs to be taken into account. Using a higher power solar panel than your battery can keep up with will have the advantage that under lower light conditions you will still get some charging.
All in all, using the worst-case sunshine hours scenario for your location, you should probably use double the calculated solar-panel output power requirement as your starting point, before ordering any solar panels to start experimenting with.
In addition to assumptions about the generation side of things, the load side is also often a lot more complicated than a constant load current. It may be that a device has a constant standby current most of the time, but then is turned on by a user or as a result of a timed operation and uses considerably more current for a while, before going back to standby mode. In addition to manually logging the current consumption and making estimates of the energy usage over 24 hours, you can also use a logging multimeter that will make and store periodic readings of current consumption. The resulting data can be downloaded into a spreadsheet for further analysis.
A logging multimeter can also be a great way of assessing the real performance of a solar panel (see Recipe 9.3).
If you are making a solar-powered project, then it is always worth working out how to keep the power consumption to a minimum. For an Arduino or other microcontroller project this may mean making the microcontroller go into a low-power sleep most of the time, just waking periodically to check if anything needs to happen.
Of course, some projects (maybe a solar-powered water pump) don’t need a battery backup because they only need to operate when it’s sunny.
See Also
For information on measuring the actual power output of a solar panel, see Recipe 9.3.
For examples of this approach for powering an Arduino see Recipe 9.4 and for a Raspberry Pi see Recipe 9.5.
9.3 Measure the Actual Output Power of a Solar Panel
Solution
Using a load resistor attached to the solar panel, measure the voltage across the resistor and from this calculate the power output. Figure 9-3 shows this arrangement.
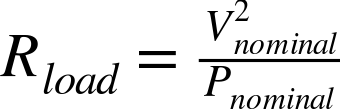
The output power of the solar panel P is calculated as:
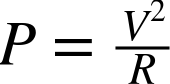
So, if you use a 100Ω load resistance and the voltage is 5V, the output power of the solar panel is:

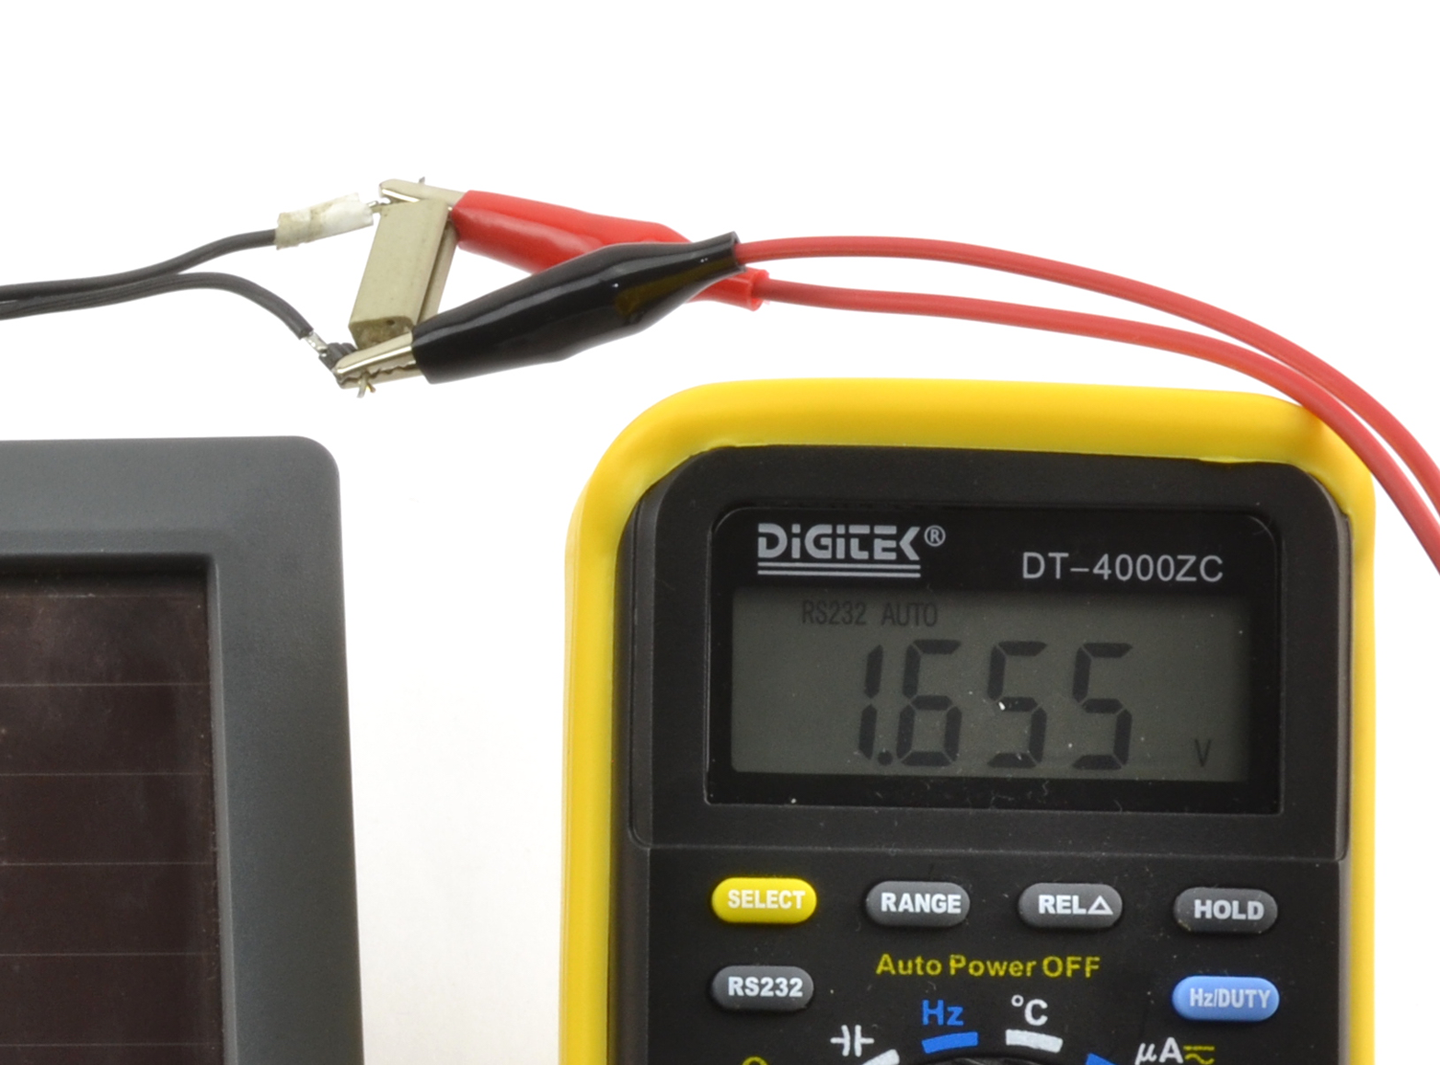
Figure 9-3. Measuring the Voltage Across a Load Resistor
The value of the load resistor needs to be low enough that the maximum output power of the solar panel is not exceeded, otherwise the solar panel will not generate as much as it could. In other words, if the solar panel is a 12V panel, you will probably find that the no-load output voltage is up to 18V in bright sunlight. So, you really want a load resistor value that gives an output of about 12V. You can calculate the maximum value of resistor to use using:
So, if your solar panel claims to be 20W at 12V, an ideal resistor value would be:

Remember that the resistor will have to have a power rating sufficient to handle the full power output of the panel—in this case 20W.
Discussion
In addition to simply taking readings under different circumstances (full sunlight, shade, etc.) you can also use a logging multimeter such as the one shown in Figure 9-4 to record the voltage across the load resistor at regular intervals.
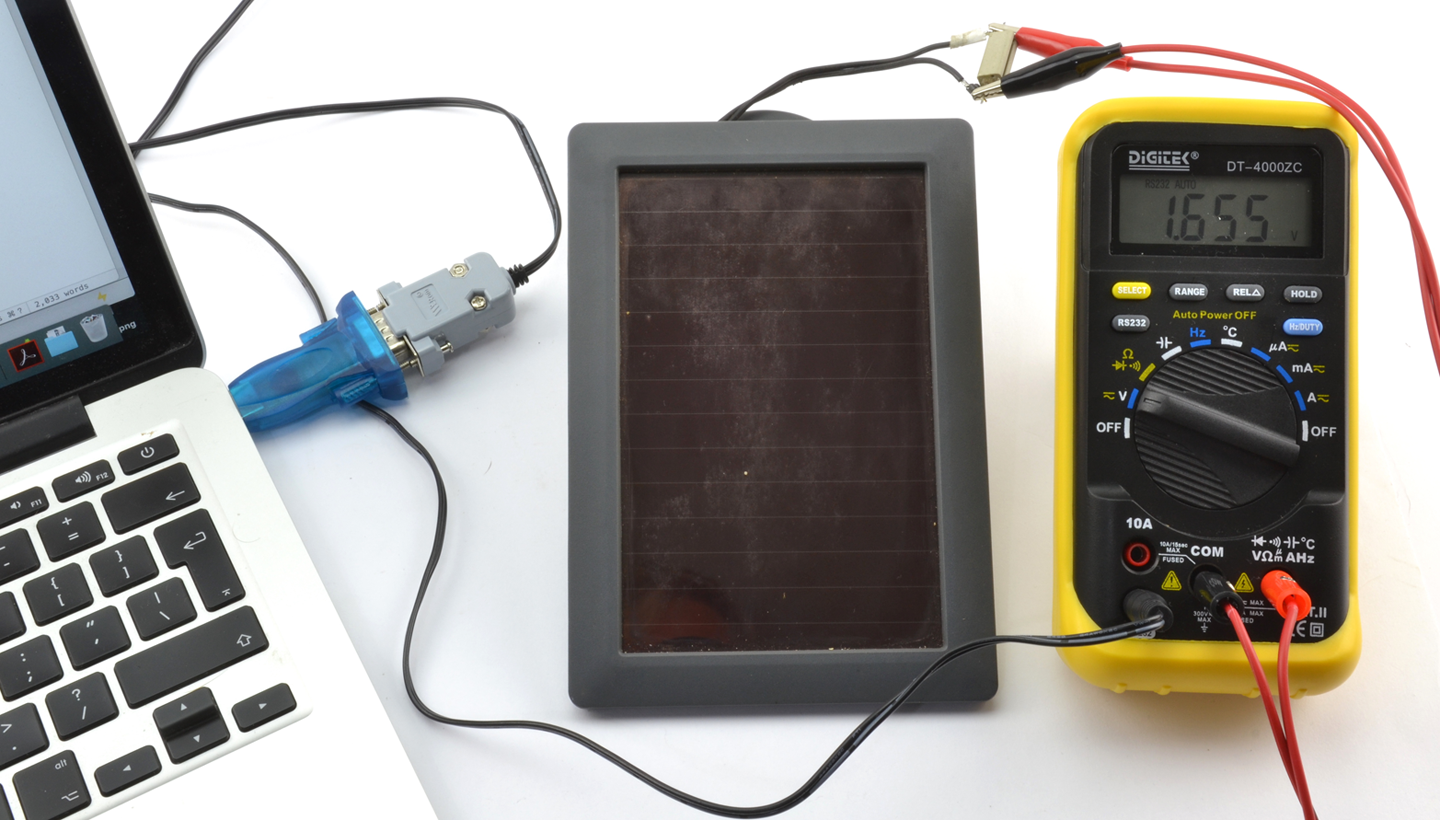
Figure 9-4. A Logging Multimeter with Serial Output Connected to a Computer
This way, you can create a picture of what your panel is likely to generate in a day.
See Also
In Recipe 9.2 this measurement technique was used to assess the performance of some of my solar panels.
For information on using a voltmeter, see Recipe 21.2.
9.4 Power an Arduino with Solar
Solution
Use a 5V solar cellphone charger, like the one shown in Figure 9-5.
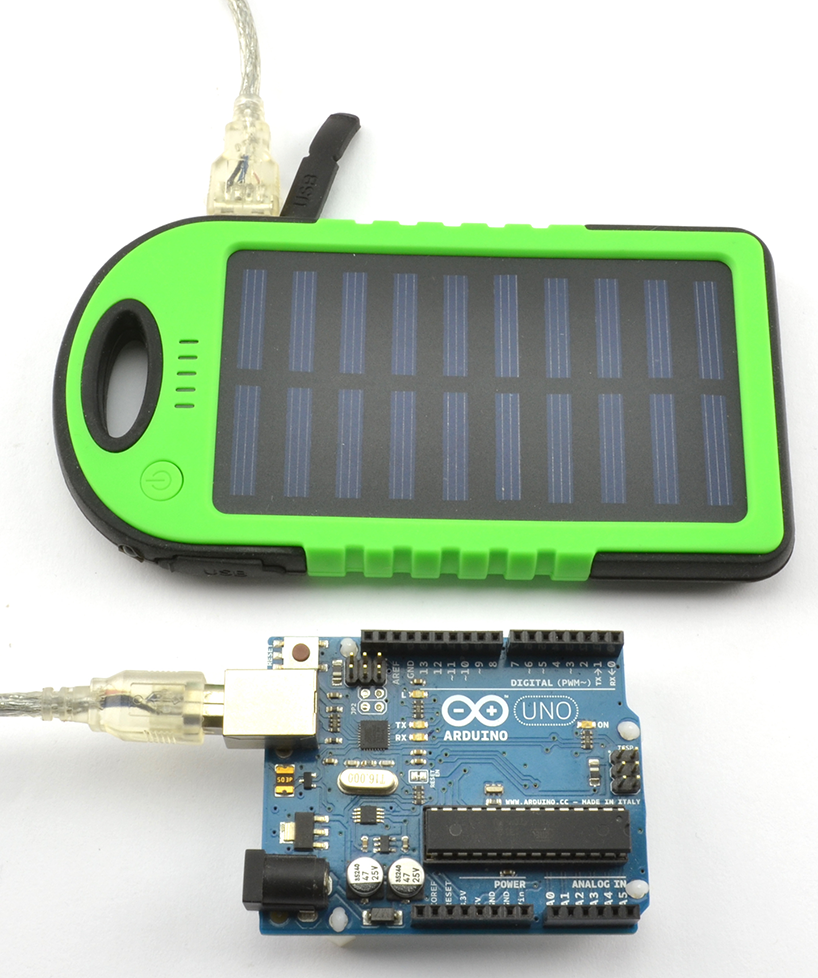
Figure 9-5. A Solar Charger/Battery
Discussion
Unless you are designing a product, using a ready-made charger circuit is by far the easiest way of solar powering your Arduino.
An Arduino Uno uses around 50mA, so a 4Ah charger/battery like the one shown in Figure 9-5 will power the Arduino for around:

The Arduino Uno is not the most efficient of boards, when it comes to trying to minimize current consumption. It is more efficient to use an Arduino Pro Mini that has an external USB interface that you only need to connect when programming the Arduino. This can reduce your current consumption to 16mA. Using software to put the Arduino to sleep periodically can also greatly reduce current consumption.
See Also
For an introduction to Arduino, see Recipe 10.1.
To power your Raspberry Pi from solar, you will need a bigger solar panel than provided with ready-made phone boosters, as the Raspberry Pi is considerably more power hungry (see Recipe 9.5).
9.5 Power a Raspberry Pi with Solar
Solution
Use a 12V solar cell, charge controller, and SLA battery with a 12V to 5V power adapter.
This may sound excessive, but a Raspberry Pi with a WiFi adapter (WiFi is power hungry) can easily consume 600mA. If you add in a small 12V HDMI monitor, then you are likely to be drawing well over 1A.
Figure 9-6 shows a typical setup.
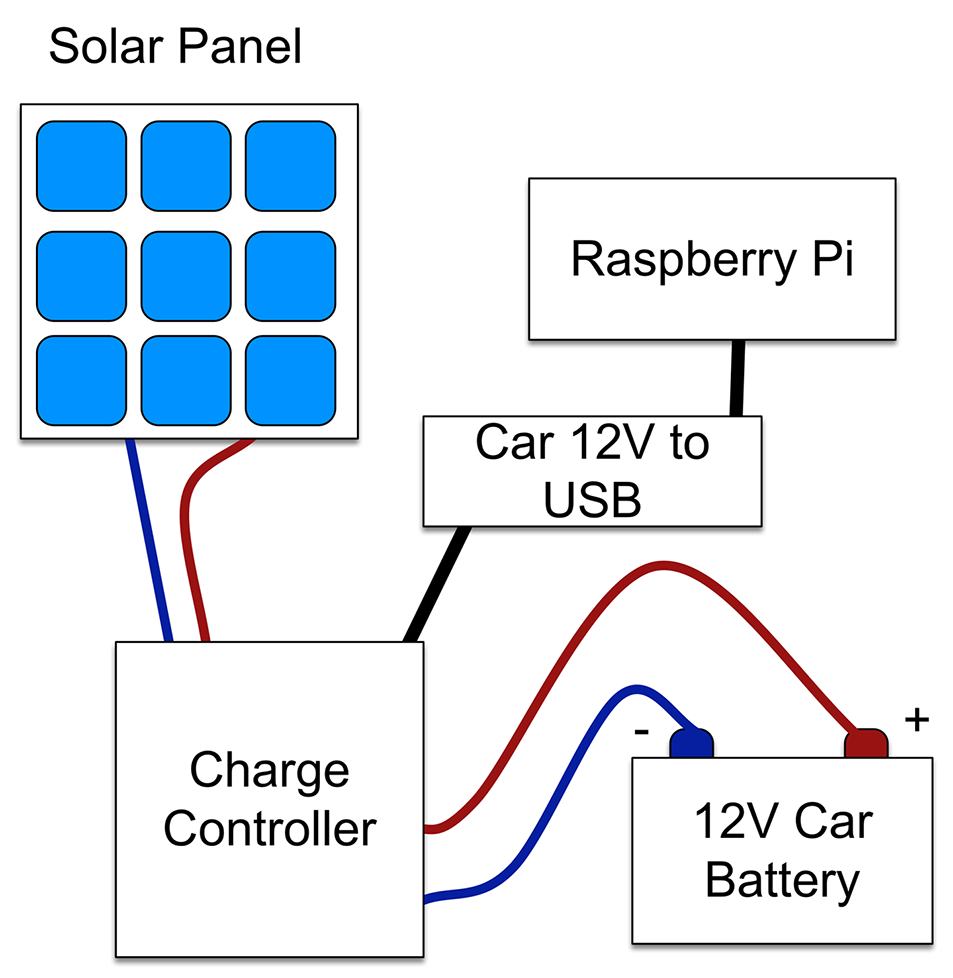
Figure 9-6. Solar Powering a Raspberry Pi
A ready-made charge controller generally has three pairs of screw terminals. One is attached to the solar panel, one to the battery, and one pair for the load, which in this case is a 12V to USB (5V) adapter commonly used as a phone car charger. Be sure to use one that can supply at least 1A.
Discussion
To run the Raspberry Pi continuously, you will need a 20W or greater solar panel. The choice of battery size depends on how long you want your Pi to keep running after it goes dark, or is dull for a few days. See Recipe 9.2 for information on how to make that choice.
If you are planning to use your Raspberry Pi as a controller, you may want to consider whether it would be better to use an Arduino, which uses only ⅒ of the power, or if you need network connectivity, a Particle Photon or an ESP8266 module (see Recipe 10.6), both of which use less than 100mA.
See Also
To power an Arduino using solar energy, see Recipe 9.4.