Paragraphs is a contributed module, which means that it was developed by someone in the Drupal community and was contributed back to Drupal.org. It provides a way to create pre-formatted content that can be easily reused.
Once the files have been deposited in the correct folder, which is typically in /modules/contrib, we will enable it as we did Pathauto, via the Extend page at /admin/modules. You may receive a message indicating that the Entry Reference Revisions module must be enabled as well. Simply click Continue.
Navigate to Structure (/admin/structure) and you will see a new entry at the bottom of the list: Paragraph types. Click on it, which will bring you to the Paragraph types page at /admin/structure/paragraphs_type. You will see a message where a list would normally be indicating that there isn't a Paragraph type yet. So, let's create one.
Click on the +Add paragraph type button. We're going to create a paragraph type for an image and text, so in the Label text box let's enter Image and text, and then click Save and manage fields. We will need to create two fields for our Paragraph type: one to contain the image, and another for the text.
Click the +Add field button. From the select list, choose Image. You can enter Image as the label, or any value you would prefer. Click Save and continue. Leave the settings on the page that follows as is, and click Save field settings. On the next settings page, leave those as is too, and click the Save settings button.
Click the +Add field button once more. Choose Text (formatted, long) from the select list, and enter body text for the label. Click the Save and continue button, and the on the following page, click the Save field settings button. Finally, click the Save settings button. We now have our paragraph type defined.
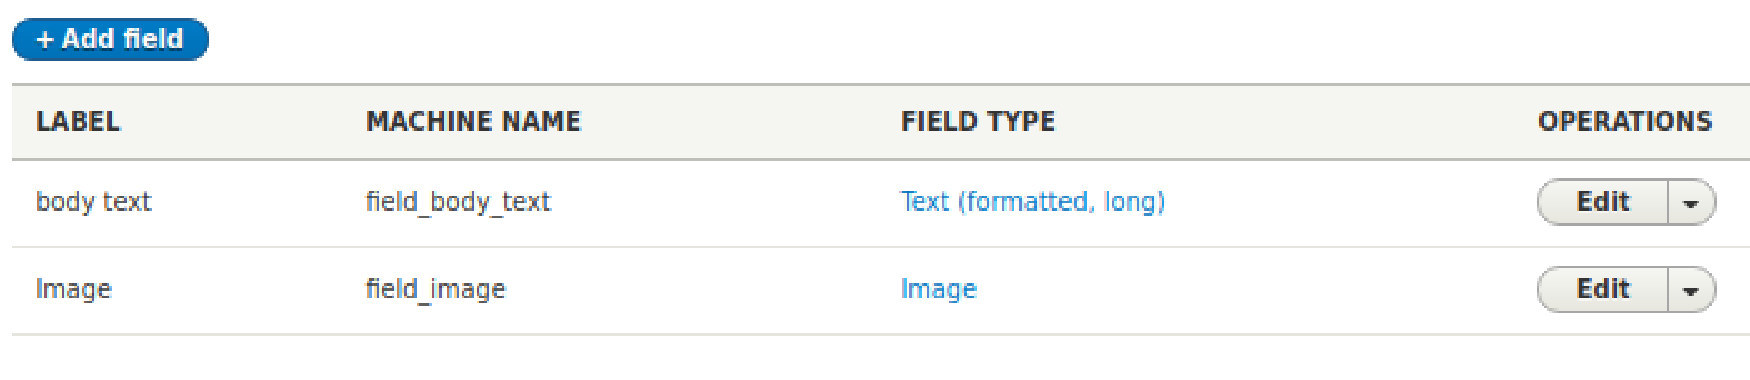
The list page will look something like it does in the following screenshot:
At this point, we have defined a paragraph type. Now, we need to add it to a content type so that users creating that type of content can use the paragraph type. Let's navigate to Structure | Content types (/admin/structure/types) and click Manage fields beside the Article content type.
Click +Add field and from the Add a new field select list, choose Paragraph. For the label, let's enter Paragraph type, and click Save and continue. Leave the settings on the following page as is, though make certain that the Type of item to reference field has Paragraph selected. Click Save field settings.
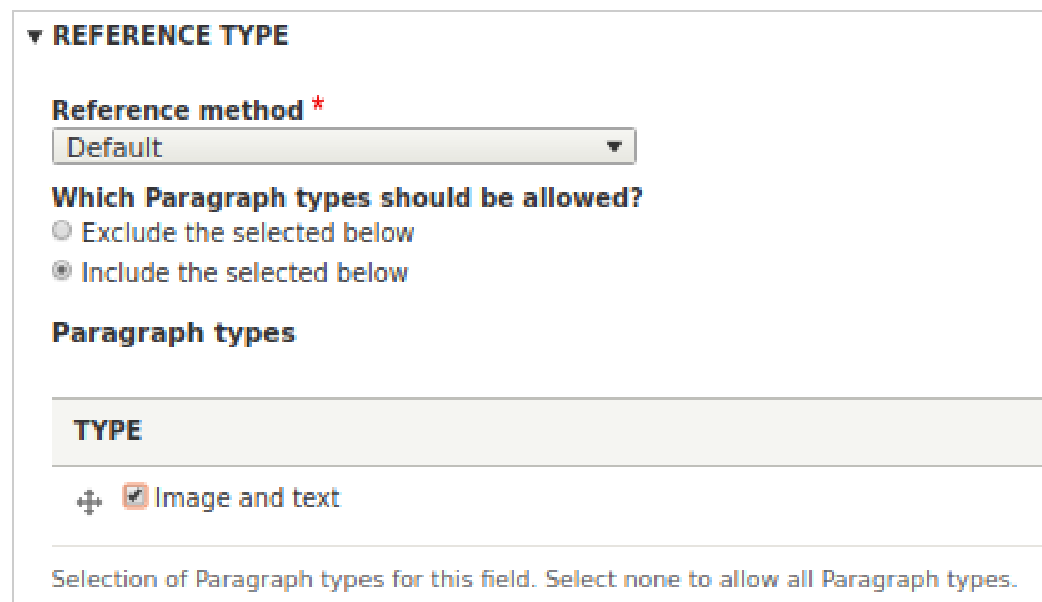
On the next page, Paragraph type settings, in the REFERENCE TYPE section, we identify which paragraph type(s) should be offered as choices to the content creator. By default, checking a box in the TYPE subsection will indicate the inclusion of that type. We also have the option of indicating that any checked box be a type that we want excluded from the choices provided to the user. We will use the default method of inclusion, and check the one box available to us, given that we created only a single paragraph type, that is, Image and text, as shown in the following screenshot:
Click Save Settings. Now, let's create an article at Content | Create content | Article (/node/add/article). Give the article a title. Scroll down and you will see that a PARAGRAPH TYPE section has been added, containing the Image and text Paragraph type that we created. If we had created additional paragraph types, and marked them to be included as options, they would also be present. In that case, had we decided in creating this article that we wanted to use more than one of the paragraph types, the handle to the left of the type name could be used to drag the types into the order in which they should appear within the content.
Click the Choose file button for Image and browse to an image to include. Remember to provide alternative text for the image. Then, enter the text that will go with this image into the body text box. Note that this field has a WYSIWYG editor available for formatting.
Below the image and text that we've entered is a button that we can use to add another paragraph. If we only wanted the user to be able to add one instance of a paragraph type within a piece of content, we could have changed Unlimited to 1 instance in the field settings when creating the field.
Click the Save button. When we look at the rendered article, it doesn't look quite like what we had in mind when creating the paragraph type. My image is massive, and both fields have their titles showing. Let's do something about this.
Navigate to Structure|Paragraphs types (/admin/structure/paragraphs_type) and select Manage display from the select field. Click the settings gear on the right-hand side of the Image row. In the select field for Label, select Hidden, and select Medium (220x220) from the one for Image style.
Click the Update button to save your changes. Then, in the row for body text, select Hidden from the Label select field. Click the Save button.
That takes care of the display settings for the fields in the paragraph, but we also want to change a setting for the Paragraph field, itself. It, too, displayed its field name, which isn't the behavior we want. So, navigate to Structure | Content types (/admin/structure/types) and select Manage display from the select field beside Article. For the Paragraph type field, change the Label setting to Hidden, and then click Save.
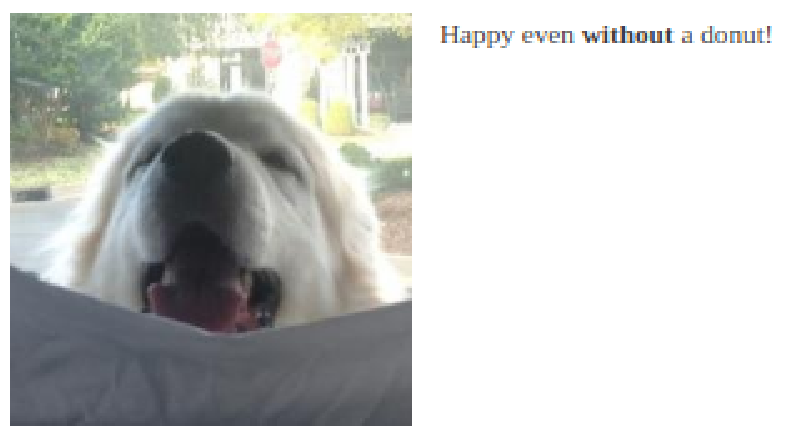
Now, when we look at the preview, it is what we had expected: an image on the left with text on the right:
Had we wanted it the other way around, we could edit the Paragraph type and swap the order of the image and text fields within it. There is virtually no limit to the number of fields that can be contained with a Paragraph type, nor the number of Paragraph types that can be created.
Having successfully created, edited, and used our Paragraph type, let's move on to the final example in this chapter.