Still on the Manage fields page (/admin/structure/types/manage/appointment/fields), let's first make a change to the one existing field: Body. We will not have body text in this content type, so:
- Click the arrow next to Edit
- Select Delete
- confirm the deletion
With that done, click the +Add field button.
We'll add the fields shown in the preceding order for the most part. The page we see now has two dropdown select widgets: one for creating a new field, and one for reusing a field on this content type that already exists.
Keeping in mind that the Name field already exists in our content type, being the renamed Title field that all content types contain, the first field we will add is Client phone number:
- Click on the Add a new field dropdown
- Scroll down and select Text (plain) from the list.
A new field, Label, appears, and is marked with a red asterisk, indicating that it is required that you type something in the field:
- The label, as found in our preceding table, will be Phone
Having entered the label, you will notice that to the right of the field that a Machine name appears. The machine name is the name by which Drupal will identify the field. Once you save the field, the label can be changed at any time, but the field name will not change, because it will already have been set in stone within the database. Were you to desire a specific machine name, now is the time it can be changed, by clicking the Edit link. You would be able to edit the name, keeping in mind that there are some naming rules, such as needing to use underscores rather than hyphens, and that the field_ prefix cannot be removed. We have no need to override the field name:
- Click Save and continue
A new page is loaded, which is for defining the field storage. Fields in Drupal have three components: the definition, which describes the field, the storage, which defines how the field will be stored in the database, and the actual contents of the field for a given piece of content, when that content is created.
The first field is Maximum length, and is required. For this field type, a standard (as opposed to long) text field is desired. The default is 255, meaning that the field can hold up to 255 characters. It's alright if less are entered when the content is created. You need only change this value if the contents should be of a particular length and no more. In the case of the phone field, it depends. If all client contacts will be local, or at least domestic, then it would be alright to limit the length to match the structure of your phone numbers. For example, in the U.S., phone numbers are ten digits. That said, the length of such a phone number can be greater than ten digits if entered with a format such as (212) 555-1212. So, be careful when limiting the length. We'll just leave it at 255.
The Allowed number of values field defines whether a piece of content, an appointment in this case, can contain more than one occurrence of this field. We have the option to leave it as Limited to one value, or change the number to another specific quantity, or click the dropdown widget and selecting Unlimited to indicated any number of instances of this field can be created. We want to be able to take two contact numbers for the client in case the need to contact them arises and attempts of using the first number are not successful:
- Change the 1 to 2
- Click Save field settings
The third, and final, page in the field creation process is now displayed. If we want to change the storage settings that we just saved, we could click the Field settings tab and do so.
The first field in the form is for the Label. This is the value that we entered earlier. It can be changed now if we have since decided on a new name. The Machine name can no longer be changed.
The contents of the Help text field, if any, will be displayed on the content form beneath the field you are creating. We'll use the entry from our table to provide the content creator with a hint as to the field contents, which in our case is the format of the phone number used locally:
- Enter ###-###-#### in the Help Text field
The Help Text field can contain HTML, as indicated by its own help text. For example, we could elaborate on our description by instead entering the following:
Enter a phone number with the format <strong>###-###-####</strong>
Which would be displayed as follows:
Enter a phone number with the format ###-###-####
The next field in the form is the Required field. If this box is checked, the field will appear in the content form with its label containing whatever formatting is defined for a required field in the site theme. By default, this would be a red asterisk, as we see in the current form beside Label.
In our case, we will leave the phone field as not being required. The final field is for a default value. Of course, a phone number field is unlikely to have a default value, given that we have no idea what the value will be. There are circumstances where a default value makes sense. For example, if we have a grouping of address fields, one of which is Country, and if most of the entries will be from the United Kingdom, it would make sense to offer it as a default value rather than forcing the user to scroll down a list of countries to the U's.
We will leave the form containing no default value:
- Click Save settings
At this point, we have saved our first field configuration, Phone. Technically, the field does not exist until content is created using this field, but its definition and configuration exist at this point. You can see that our content type field list for the Appointment content type has changed, with field_phone having been added to it.
We will follow the same process for each of the remaining fields in our table. For each of them, I note any considerations for their storage and configuration settings, as follows:
Date: date field type – the checkbox for Required should be checked.
With: list (text) field type – in the Allowed values list box, add 2-3 names in the form last name, first name, one person per line. As an example, I have added the following:
Jones, Janet
Smith, Steve
Status: list (text) field type – in the Allowed values list box, add the following:
pending
active
canceled
completed
And in the Default Value dropdown, select pending.
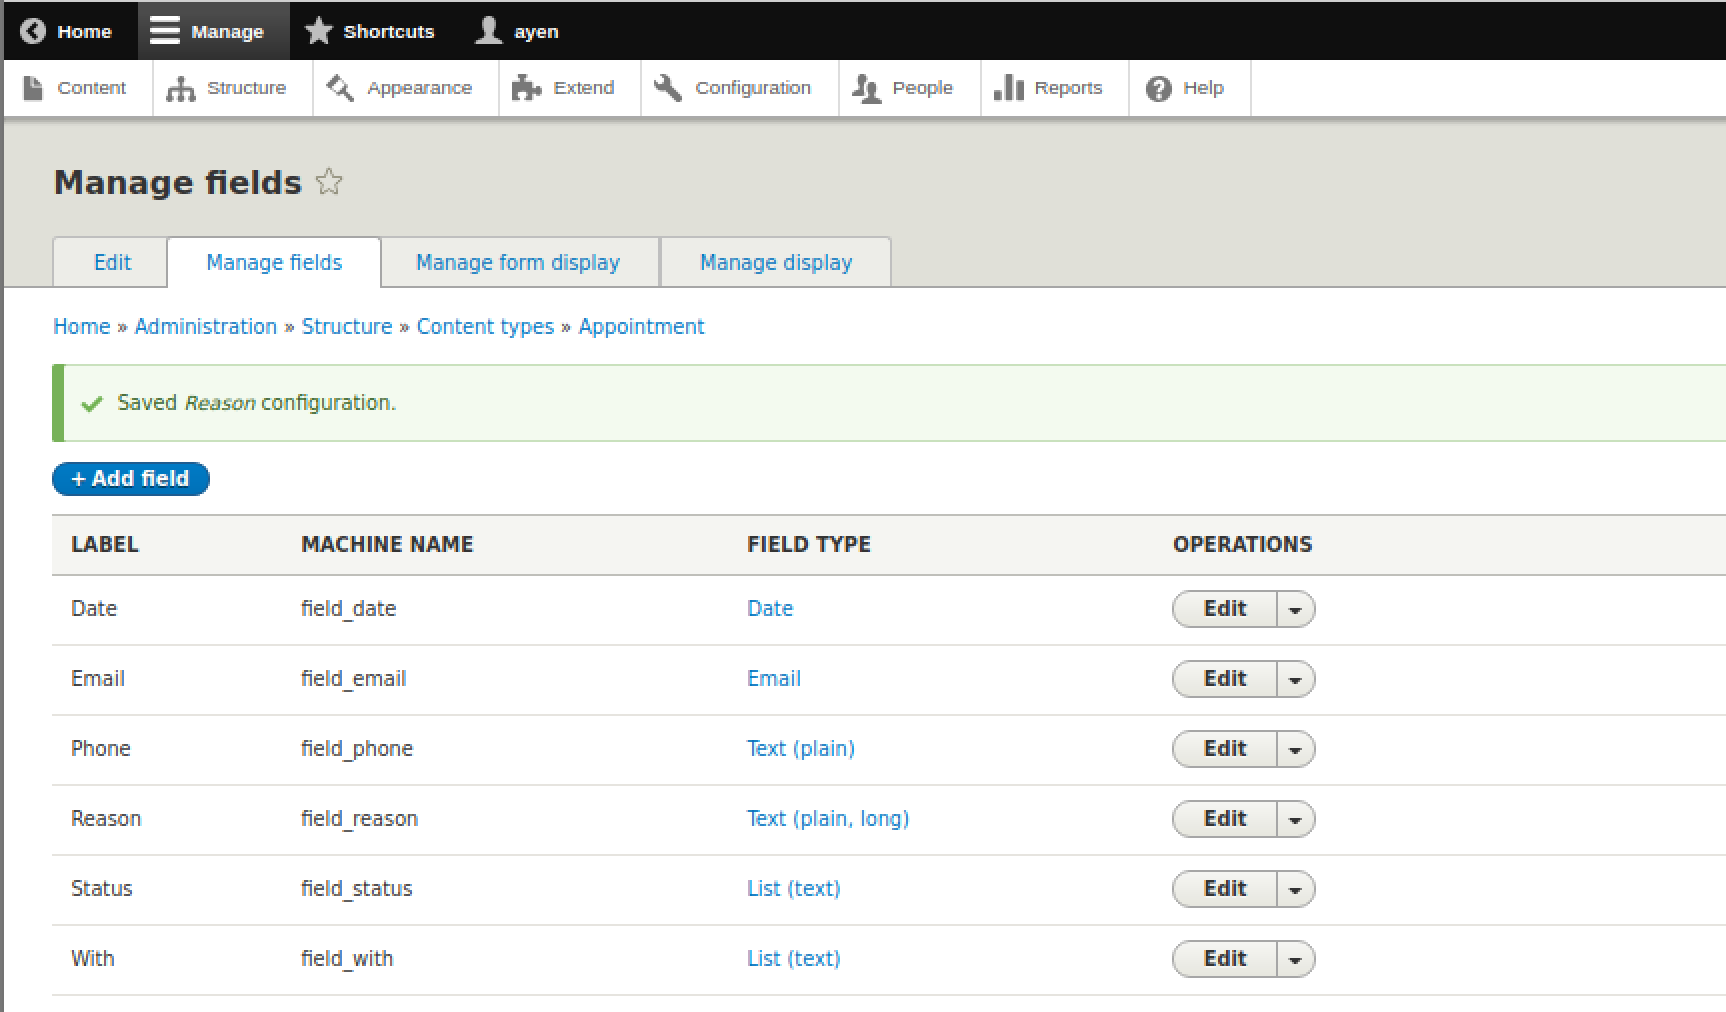
Having created all of the fields in our table, the Manage Fields page should look as follows: