A grid layout allows us to arrange widgets in a tabular fashion. It is quite easy, just like a box layout. All we need to do is indicate the row and column where each widget must be added to the layout. As the row and column index starts from a zero-based index, the value of row 0 indicates the first row and the value of column 0 indicates the first column. Enough of theory; let's start writing some code.
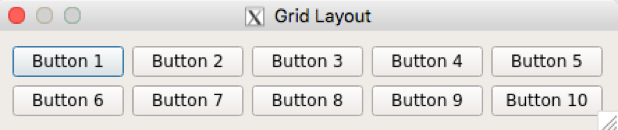
Let's declare 10 buttons and add them in two rows and five columns. Other than the specific QGridLayout differences, the rest of the stuff will remain the same as the previous exercises, so go ahead and create MyDlg.h, MyDl.cpp, and main.cpp if you have understood the concepts discussed so far.
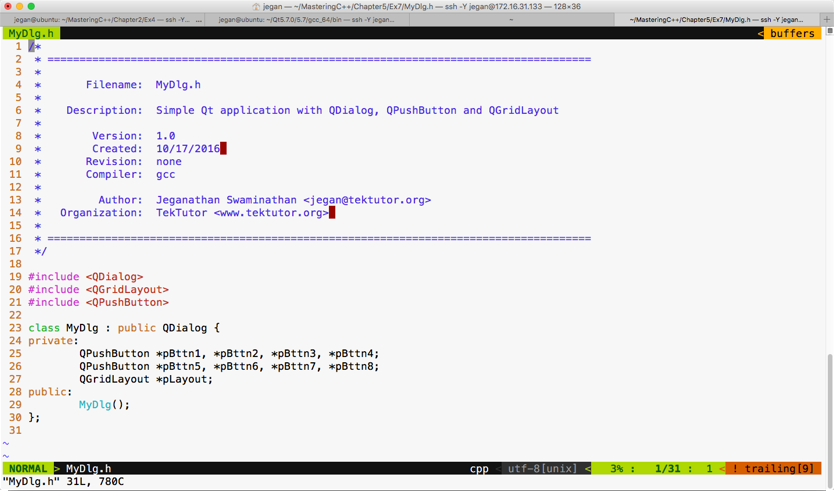
Let me present the MyDlg.h source code in the following screenshot:

The following is the code snippet of MyDlg.cpp:
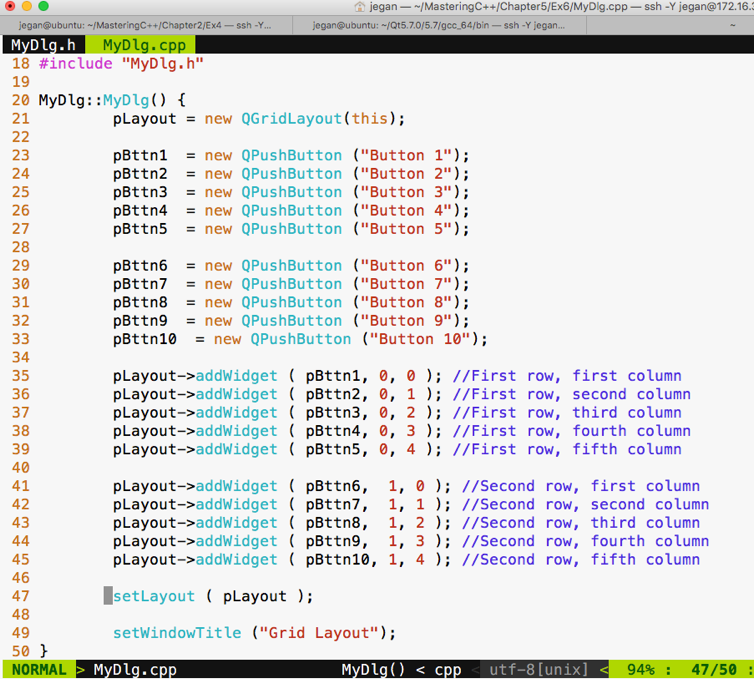
The main.cpp source file content will remain the same as our previous exercises; hence, I have skipped the main.cpp code snippet. As you are familiar with the build process, I have skipped it too. If you have forgotten about this, just check the previous sections to understand the build procedure.
If you have typed the code correctly, you should get the following output:
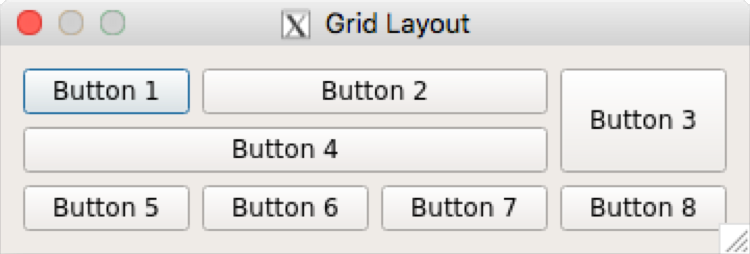
Actually, the grid layout has more stuff to offer. Let's explore how we can make a button span across multiple cells. I guarantee what you are about to see is going to be more interesting.
I'm going to modify MyDlg.h and MyDlg.cpp and keep main.cpp the same as the previous exercises:
Here goes our MyDlg.cpp:
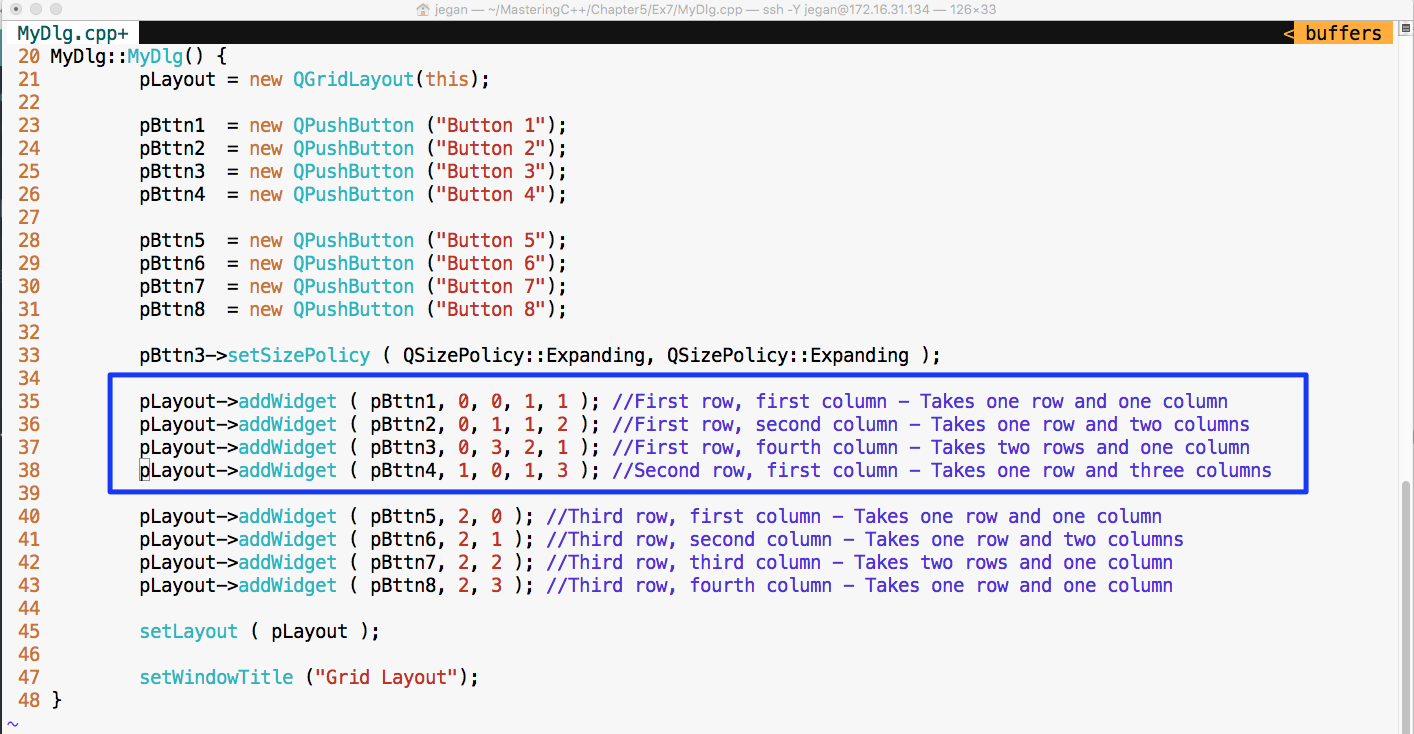
Notice the lines 35 through 38. Let's discuss the addWidget() function in detail now.
In line number 35, the pLayout->addWidget ( pBttn1, 0, 0, 1, 1 ) code does the following things:
- The first three arguments add Button 1 to the grid layout at the first row and first column
- The fourth argument 1 instructs that Button 1 will occupy just one row
- The fifth argument 1 instructs that Button 1 will occupy just one column
- Hence, it's clear that pBttn1 should be rendered at cell (0, 0) and it should occupy just one grid cell
In line number 36, the pLayout->addWidget ( pBttn2, 0, 1, 1, 2 ) code does the following:
- The first three arguments add Button 2 to the grid layout at the first row and second column
- The fourth argument instructs that Button 2 will occupy one row
- The fifth argument instructs that Button 2 will occupy two columns (that is, the second column and the third column in the first row)
- At the bottom line, Button 2 will be rendered at cell (0,1) and it should occupy one row and two columns
In line number 37, the pLayout->addWidget ( pBttn3, 0, 3, 2, 1 ) code does the following:
- The first three arguments add Button 3 to the grid layout at the first row and fourth column
- The fourth argument instructs that Button 3 will occupy two rows (that is, the first row and the fourth column and the second row and the fourth column)
- The fifth argument instructs that Button 3 will occupy one column
In line number 38, the pLayout->addWidget ( pBttn4, 1, 0, 1, 3 ) code does the following:
- The first three arguments add Button 4 to the grid layout at the second row and first column
- The fourth argument instructs that Button 4 will occupy one row
- The fifth argument instructs that Button 4 will occupy three columns (that is, the second row first, then the second and third column)
Check out the output of the program: