
Even though we've signed the transaction, until the signed message reaches the network, no changes will occur. Once we submit the transaction, we need to wait for the validators to confirm it. When the validators approve the transaction, ledger values will change and account balances will be updated. The following function takes signed transaction as input and submits it to the network:
api.submit(signedTransaction).then(onSuccess,onFailure);
In the following lines, we've put together the code to prepare, sign, and submit the transaction. As you can see, we wait for each step to return a response before we continue to the next step:
api.connect().then(() => {

console.log('Connected to the test network.');
return api.preparePayment(sourceAddress, transaction, instructions).then(prepared => {
console.log('Payment transaction is now prepared.');
const {signedTransaction} = api.sign(prepared.txJSON, sourceSecret);
console.log('Payment transaction is now signed.');
api.submit(signedTransaction).then(onSuccess,onFailure);
});
});
In the previous block, we added a callback to the submit transaction function. We have to be prepared to handle both success and failure. In the following lines, we handle the success and failure callbacks:
function onSuccess(message){
console.log("Transaction Successfully Submitted.");
console.log(message);
disconnect();
}

function onFailure(message){
console.log("Transaction Submission Failed.");
console.log(message);
disconnect();
}

function disconnect(){
api.disconnect().then(()=> {
console.log("Disconnected from test network.")
})
}
The previous blocks of code send 50 XRP from one Ripple account to another. Save them to the file send_money.js. If you need help. please refer to the source code in our GitHub repository.
Let's run the previous code using this command:
./node_modules/.bin/babel-node send_money.js
If everything goes well, you should see output similar to the following:
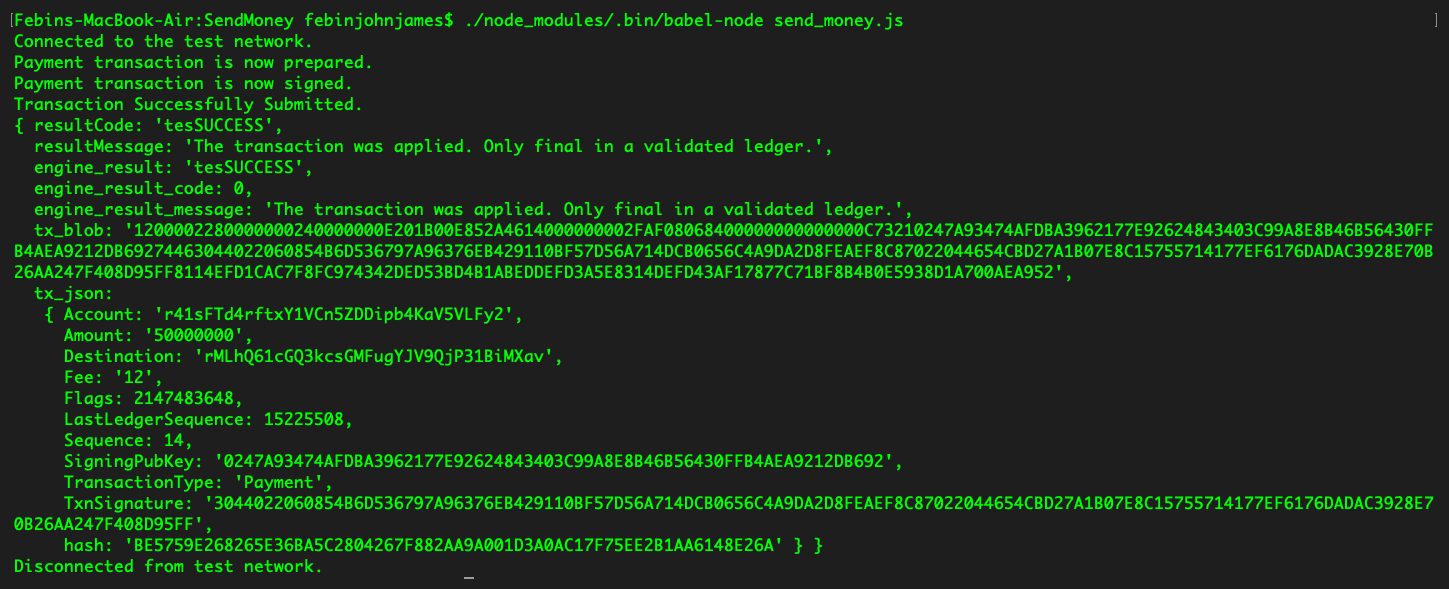
Let's check the account balance of the destination address using our previous app to make sure our money was successfully sent.
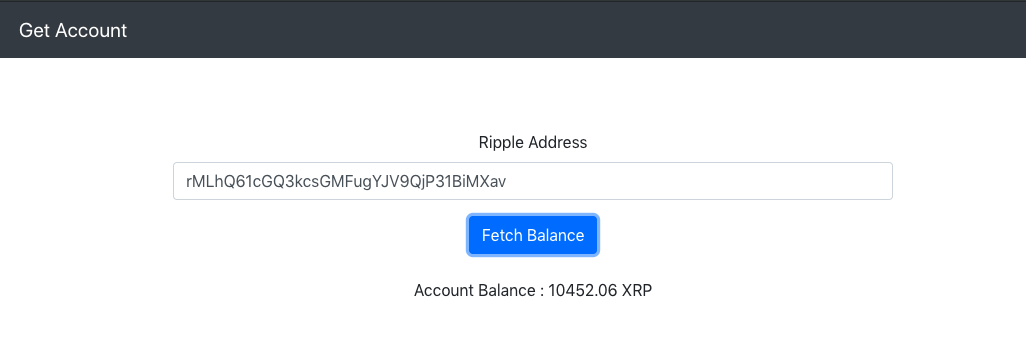
If your transaction was successful, the account balance of the destination should get updated as shown in the following screenshot:
Now, let's use this code to build a web application that provides us with a graphical interface to log in and sends money.
Let's make a login modal that takes a Ripple address and secret as input and stores it in the local storage. We will be using it later to sign and submit transactions. The HTML code for the login modal is given in the following:
<div class="modal fade" id="loginModal" tabindex="-1" role="dialog" aria-labelledby="loginModalLabel" aria-hidden="true">
<div class="modal-dialog" role="document">
<div class="modal-content">
<div class="modal-header">
<h5 class="modal-title" id="loginModalLabel">Login</h5>
<button type="button" class="close" data-dismiss="modal" aria-label="Close">
<span aria-hidden="true">×</span>
</button>
</div>
<div class="modal-body">
<form>
<div class="form-group">
<label for="inputRippleAddress">Ripple Address</label>
<input type="text" class="form-control" id="inputRippleAddress" aria-describedby="rippleAddressHelp" placeholder="Enter Ripple Address">
</div>
<div class="form-group">
<label for="inputSecret">Secret</label>
<input type="password" class="form-control" id="inputSecret" placeholder="Secret">
</div>
<button onclick="storeCredentials()" class="btn btn-primary">Login</button>
</form>
</div>
</div>
</div>
</div>
When the user clicks on the login button, we are calling the "storeCredentials" function to store the address and secret. We won't be verifying whether the secret key is valid, but it'll throw an error when you try to sign the transaction.
Here's the function to store credentials:
function storeCredentials(){
localStorage.setItem("rippleAddress", $('#inputRippleAddress').val());
localStorage.setItem("secret", $('#inputSecret').val());
localStorage.setItem("loggedIn", true);
$('#loginModal').modal('hide');
updateAccount();
}
Once the credentials are stored, we need to update the UI to reflect the Ripple address and its balance.
Use the following code to update the UI:
function updateAccount(){
$('#rippleAddress').text(localStorage.getItem('rippleAddress'));
updateBalance();
}

function updateBalance(){
api.connect().then(() => {
const accountAddress = localStorage.getItem("rippleAddress");
return api.getAccountInfo(accountAddress);
}).then(info => {
$('#balance').text("Account Balance : " + info.xrpBalance+ " XRP");
}).then(() => {
return api.disconnect();
}).catch(console.error);
}
The update account function fetches the address from the local storage and injects it into the HTML. The update balance function used the same code as in our previous app to fetch the account balance.
Now, let's build an interface that would help the user send money. In order to do that, let's create another modal by using the following code:
<div class="modal fade" id="sendMoneyModal" tabindex="-1" role="dialog" aria-labelledby="sendMoneyModalLabel" aria-hidden="true">
<div class="modal-dialog" role="document">
<div class="modal-content">
<div class="modal-header">
<h5 class="modal-title" id="sendMoneyModalLabel">Send Money </h5>
<button type="button" class="close" data-dismiss="modal" aria-label="Close">
<span aria-hidden="true">×</span>
</button>
</div>
<div class="modal-body">
<form>
<div class="form-group">
<label for="inputDestinationRippleAddress">Ripple Address</label>
<input type="text" class="form-control" id="inputDestinationRippleAddress" aria-describedby="destinationRippleAddressHelp" placeholder="Destination Ripple Address">
</div>
<div class="form-group">
<label for="inputAmount">Amount</label>
<input type="number" class="form-control" id="inputAmount" placeholder="Amount">
</div>
<button onclick="sendMoney()" class="btn btn-primary">Send</button>
<br/> <br/>
<div class="progress">
<div class="progress-bar progress-bar-striped bg-info" role="progressbar" style="width: 0%" aria-valuenow="0" aria-valuemin="0" aria-valuemax="100"></div>
</div>
</form>
</div>
</div>
</div>
</div>
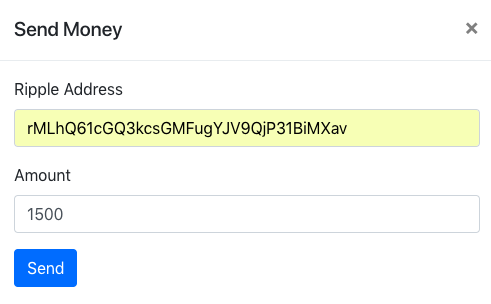
The previous form takes the destination Ripple address to which you want to send money and the amount as input. It calls the send money function. Let's have a look at the send money function that's given in the following:
function sendMoney(){
$('.progress').show();
const instructions = {};
const sourceAddress = localStorage.getItem('rippleAddress');
const sourceSecret = localStorage.getItem('secret');
const destinationAddress = $('#inputDestinationRippleAddress').val();
const transaction = {
source: {
address: sourceAddress,
maxAmount: {
value: $('#inputAmount').val(),
currency: 'XRP'
}
},
destination: {
address: destinationAddress,
amount: {
value: $('#inputAmount').val(),
currency: 'XRP'
}
}
};
api.connect().then(() => {
return api.preparePayment(sourceAddress, transaction, instructions).then(prepared => {
$('.progress-bar').css('width', 40+'%').attr('aria-valuenow', 40);
const {signedTransaction} = api.sign(prepared.txJSON, sourceSecret);
api.submit(signedTransaction).then(onSuccess,onFailure);
});
});
}
It's almost similar to the code we used before to send money. Except here, we're fetching the Ripple address and secret from the local storage. We're also fetching the destination Ripple address from the send money form. We've added a progress bar to provide a better user experience. Once the submit transaction returns, we call the on success function to update the account balance and show an alert to the user that the transaction was submitted successfully. In the case of failure, we alert them of the same.
Here's the code for that:
function onSuccess(message){
$('.progress-bar').css('width', 100+'%').attr('aria-valuenow', 100);
$('#balance').text("Fetching updated balance, please wait.");
setTimeout(updateBalance, 6000);
bootstrap_alert.success('Transaction Submitted Successfully');
clear();
}

function onFailure(message){
$('.progress-bar').css('width', 100+'%').attr('aria-valuenow', 100);
bootstrap_alert.danger('Transaction Submission Failed');
clear();
}
If the user has already logged in, then we need code to fetch the Ripple address and update in on the display; here's the code for doing that:
function login(){
      if(!localStorage.getItem("loggedIn")){
        $('#loginModal').modal('show');
      } else{
        updateAccount();
      }
 }
We also need the logout functionality. Here's the code that helps us achieve that:
function logout(){ localStorage.clear(); clearInterval(fetchBalance); location.reload(); }
That's almost all of the code we need. There's some basic HTML and JavaScript code to get this app running that's not mentioned in this chapter. They're elementary stuff such as showing the login/send money modal. If you need help, please refer to the source code in our GitHub repository.
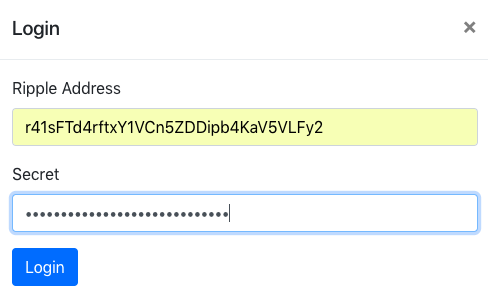
You can save the previous blocks of code into the send_money.html file. If everything works fine, you should be able to see the login screen as follows:
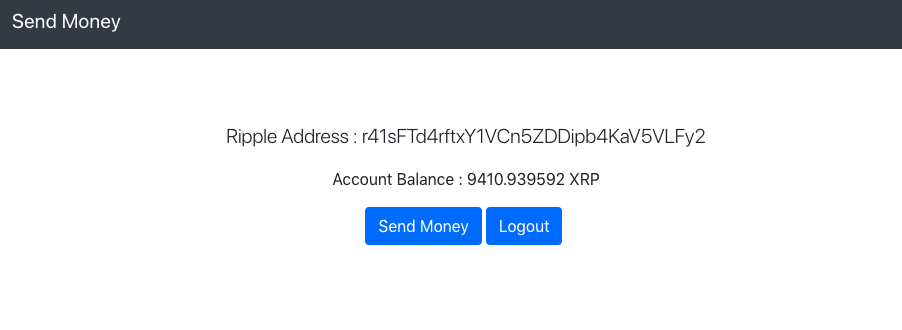
Once you log in, you should be able to see your balance and a button to send money:
Now, let's try sending some money:
If everything goes well, you should be able to see the Transaction Submitted Successfully message. You should be able to see the updated account balance in 6-8 seconds. You can use the previous app to check whether the destination account is credited with the respective amount of XRP.
Congratulations, you've made an app that allows users to transact on the Ripple network.