We'll be using Toast wallet (a desktop/mobile wallet) to set up our Ripple account. You can download the app on your desktop or mobile. You can choose any other wallet of your choice—the onboarding process won't be exactly the same, but similar.
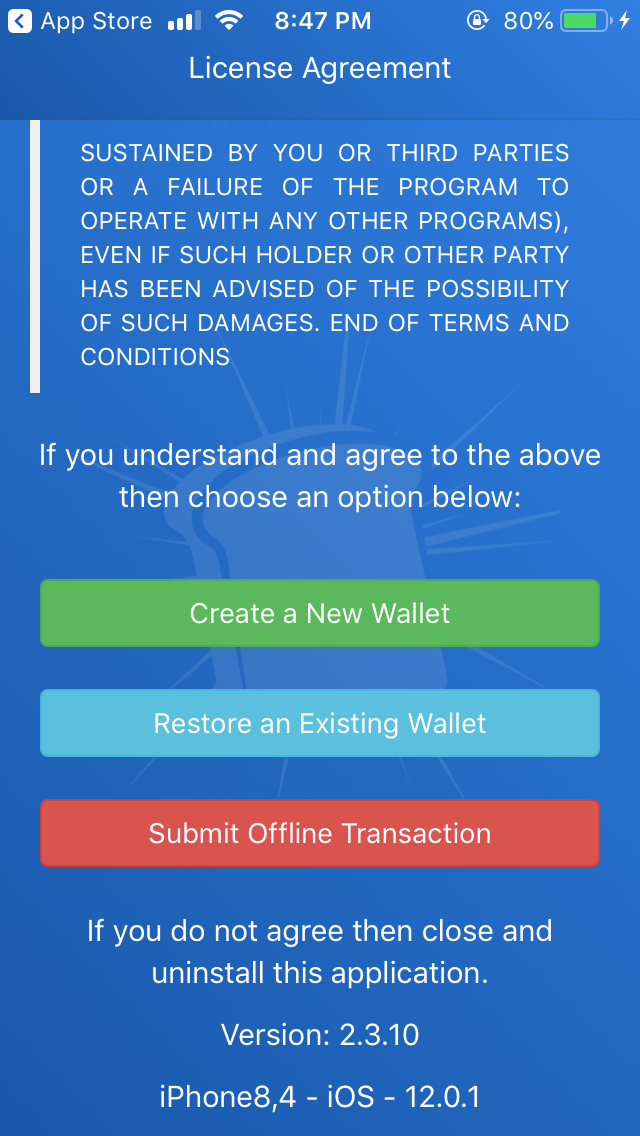
The first time you open Toast wallet, you'll be shown the license agreement. Scroll down and you will see the Create a New Wallet button, as shown in the following screenshot on the left. Once you click on this button, you will be asked to set a six-digit pin, as in the following screenshot on the right. This is to prevent your wallet from unauthorized usage. Every time you open your wallet, you need to provide the six-digit pin to gain access to your wallet:
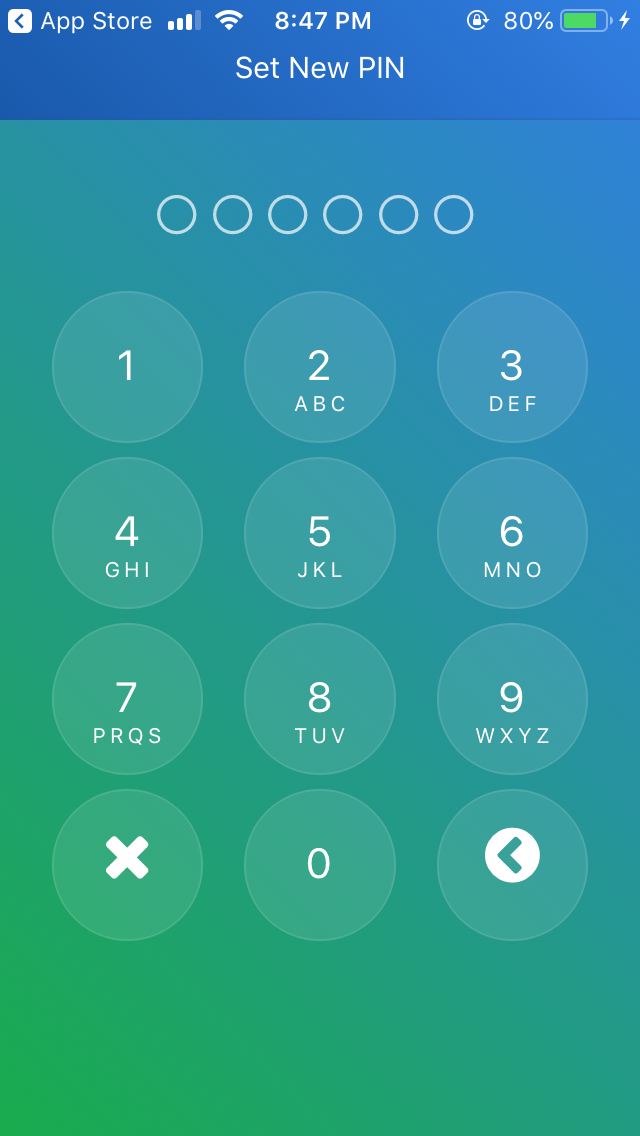
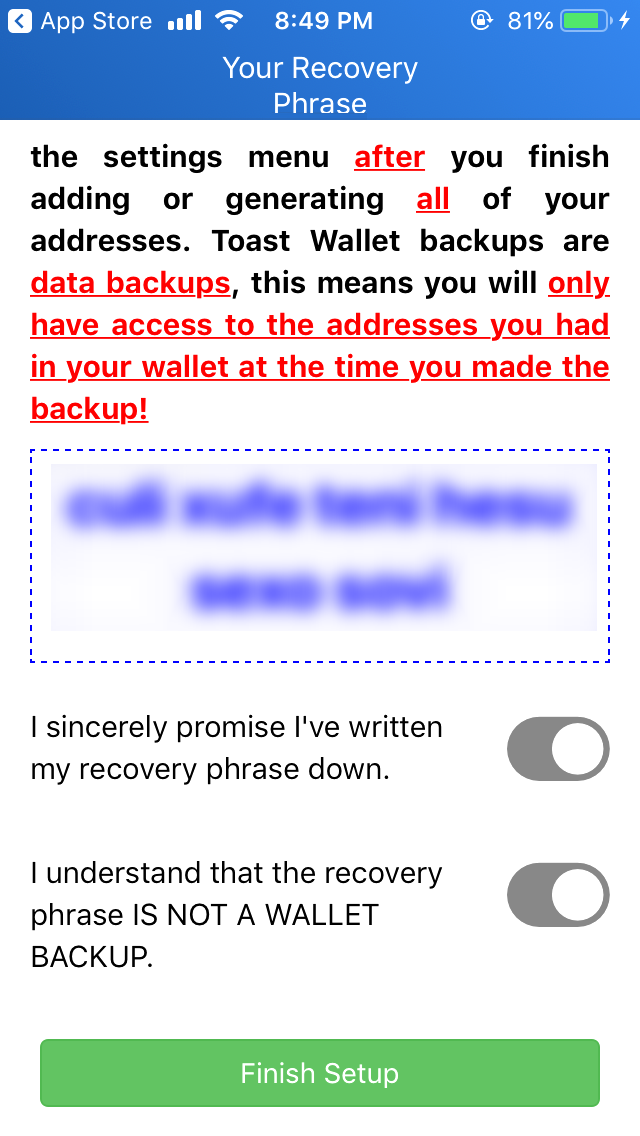
You will be then asked to set a passphrase, like in the following screenshot on the left. You need to provide the passphrase for sending XRP, importing an externally generated account, changing your pin, and so on. Once you set your passphrase, you will be asked to write down your recovery passphrase. If you forget it, you will lose access to the Toast wallet unless you can provide the recovery passphrase. Make sure you write it down.
If you lose your recovery passphrase, then there is no way to regain access to your account. This is because the Toast wallet doesn't store any of your account data online and hence cannot provide you with recovery assistance. Once you have noted down the recovery passphrase, press the Finish Setup button, as shown in the following screenshot on the right:
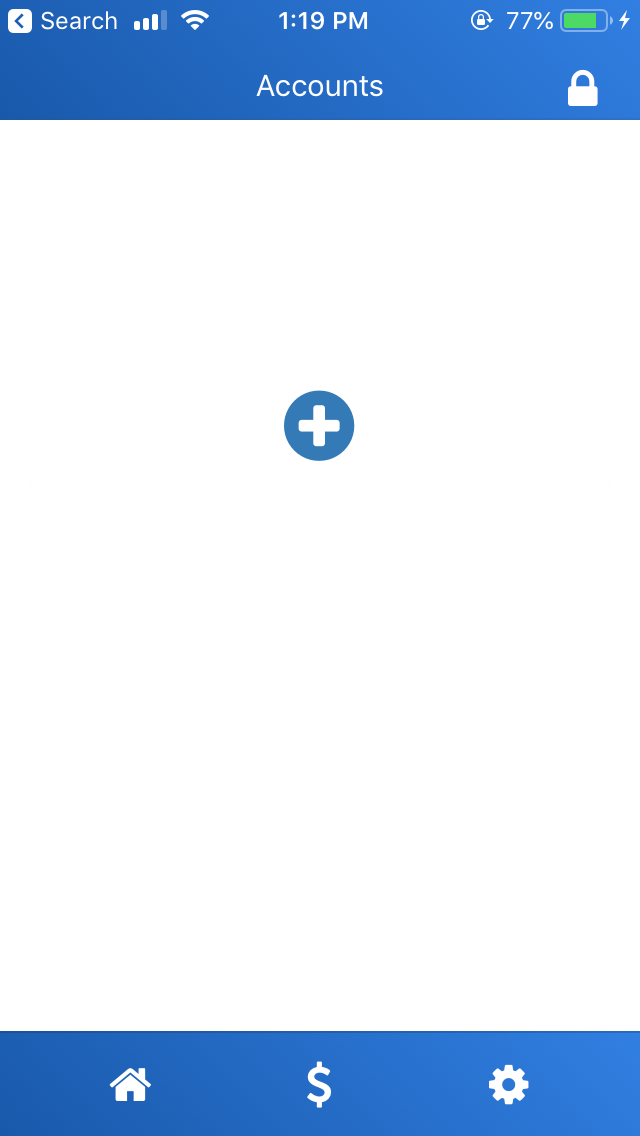
You are halfway through—you have set up your Toast wallet, but you haven't set up a Ripple account yet. Click on the + icon on the screen, as shown in the following screenshot on the left. Now, you will be taken to another screen (the right-hand side screenshot) where you are given the option to generate a new address:
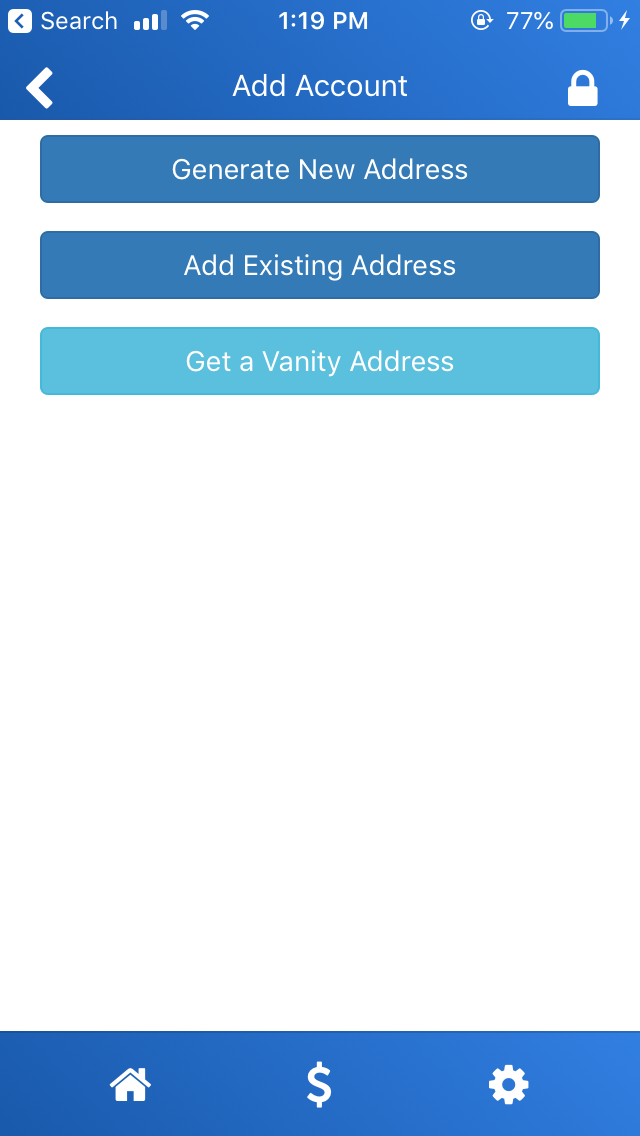
Tap the Generate New Address option, and you will be taken to another screen that asks you to provide a nickname for the account. Nicknames help you easily identify your accounts. You also need to provide your passphrase. Then, tap on Import This Address. You are asked to make a backup of your newly generated Ripple account.
However, let's imagine a scenario where you've lost your phone. You will want to migrate the Ripple account on your previous wallet to your new phone. This will be only possible if you have taken a backup of your wallet. Hence, it's important to note that the recovery passphrase and backup are two different things. You need to make sure that you note down both of these things when you want to make a recovery after your device is lost.
When you are prompted to make a backup, tap on the Create a Backup Now button. You will be shown your backup code. Please copy the backup code and store it somewhere safe. Also, note that you need to make a new backup when you change the pin or passphrase. Once you have made a note of your backup code, tap on the home button on the bottom of the screen. You will be able to see your account listed on the home screen.
Congratulations! You've successfully created your first Ripple account. Now, tap on the account's nickname. The long string on your phone's screen below your account's nickname is your public address. When you want to receive funds on your account, you give this address. You can tap the copy button toward the right-hand side of the public identity to copy the full address to your clipboard. The nickname is set only for your reference; it cannot be used as an identity:
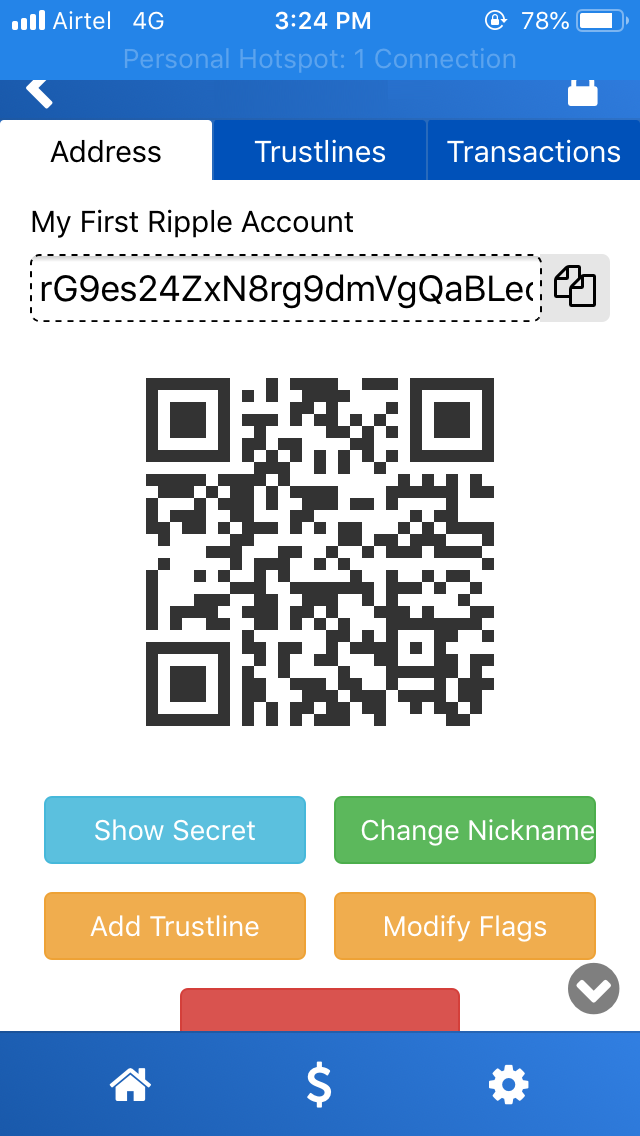
Toast wallet gives you complete access to your wallet. In the preceding screenshot, you can also see the Show Secret button. This gives you access to your private key. You can now use this key to manage your Ripple account in other Ripple-supported wallets. You just have to import your secret key on those wallets.