Table of Contents for
Ripple Quick Start Guide

Version ebook / Retour

Cover image for bash Cookbook, 2nd Edition Ripple Quick Start Guide by Febin John James Published by Packt Publishing, 2018
  1. Ripple Quick Start Guide
  2. Title Page
  3. Copyright and Credits
  4. Ripple Quick Start Guide
  5. Dedication
  6. About Packt
  7. Why subscribe?
  8. Packt.com
  9. Contributors
  10. About the author
  11. About the reviewer
  12. Packt is searching for authors like you
  13. Table of Contents
  14. Preface
  15. Who this book is for
  16. What this book covers
  17. To get the most out of this book
  18. Download the example code files
  19. Conventions used
  20. Get in touch
  21. Reviews
  22. Getting Started with Ripple
  23. The need for decentralization
  24. Introduction to blockchain
  25. Introduction to Bitcoin
  26. Inefficiencies in payment systems
  27. International money transfer through Bitcoin
  28. Disadvantages of Bitcoin
  29. Ripple
  30. International money transfer through Ripple
  31. The Ripple Protocol
  32. Account creation
  33. Reserve
  34. Transactions
  35. Multisigning
  36. Consensus
  37. Important properties of the consensus protocol
  38. Ledger versions
  39. Validation
  40. Advantages of Ripple
  41. Currency agnostic
  42. Simplified consensus
  43. Low fee
  44. Reduced foreign exchange cost
  45. Pathfinding algorithm
  46. Adaptable cryptography
  47. Anti-spam mechanism
  48. Potential risks of Ripple
  49. Regulatory issues
  50. Trust Issues
  51. Security vulnerabilities
  52. Problems of being an open protocol
  53. Summary
  54. Working with Ripple Currency XRP
  55. Types of wallets
  56. Online wallets
  57. Desktop/mobile wallets
  58. Offline wallets
  59. Hardware wallets
  60. Paper wallets
  61. How do I choose my wallet?
  62. Setting up a Ripple account
  63. Activating the Ripple account
  64. Making an international transfer
  65. Trading XRP
  66. Importing an existing wallet
  67. Setting up an offline wallet
  68. Protecting your Ripples
  69. Don't leave your Ripples on centralized exchanges
  70. Make backups 
  71. Use antivirus software
  72. Disable browser plugins
  73. Store Ripples in multiple wallets 
  74. For big sums, use cold wallets
  75. Use reputable wallets
  76. Important things you must remember
  77. Summary
  78. Applications of Ripple
  79. High speed and low-cost payments 
  80. xCurrent
  81. How does it work?
  82. Advanced payment applications
  83. Cross-currency payments
  84. How does it work?
  85. Checks
  86. How does it work?
  87. Payment channels
  88. How does it work?
  89. Escrow
  90. How does it work?
  91. Initial coin offering
  92. Decentralized exchange
  93. Debunking misconceptions about Ripple
  94. Ripple and XRP are not the same
  95. Funds lockup
  96. No mining
  97. Limited smart contracts
  98. Important things to remember
  99. Summary
  100. Getting Started with the Ripple API
  101. Connecting to the Ripple test network
  102. Setting up the development environment
  103. First Ripple application
  104. Sending money 
  105. Prepare transaction
  106. Sign transaction
  107. Submit transaction
  108. Summary
  109. Developing Applications Using the Ripple API
  110. Sending checks
  111. Cashing checks
  112. Creating a time-held escrow
  113. Creating a conditionally-held escrow
  114. Important things you must remember
  115. Summary
  116. Other Books You May Enjoy
  117. Leave a review - let other readers know what you think

Activating the Ripple account

The Ripple wallet you just set up is not ready to make transactions yet. To avoid spam, Ripple has made it necessary for all wallets to be funded with a fixed amount. Presently, this amount is 20 XRP. Hence, to activate your wallet, you need to send 20 XRP to your newly created Ripple account. Once your wallet has been funded with 20 XRP, it will be automatically activated. 

There are multiple ways to buy XRP. For one, you can buy it from crypto exchanges such as Binance, CEX, and Bitfinex. However, most of these centralized exchanges require you to do KYC(Know Your Customer) verifications. Changelly (https://changelly.com/) allows you to buy XRP without verification, and their exchange process is seamless. Navigate to www.changelly.com and create an account there. Then, go back to the home screen. 

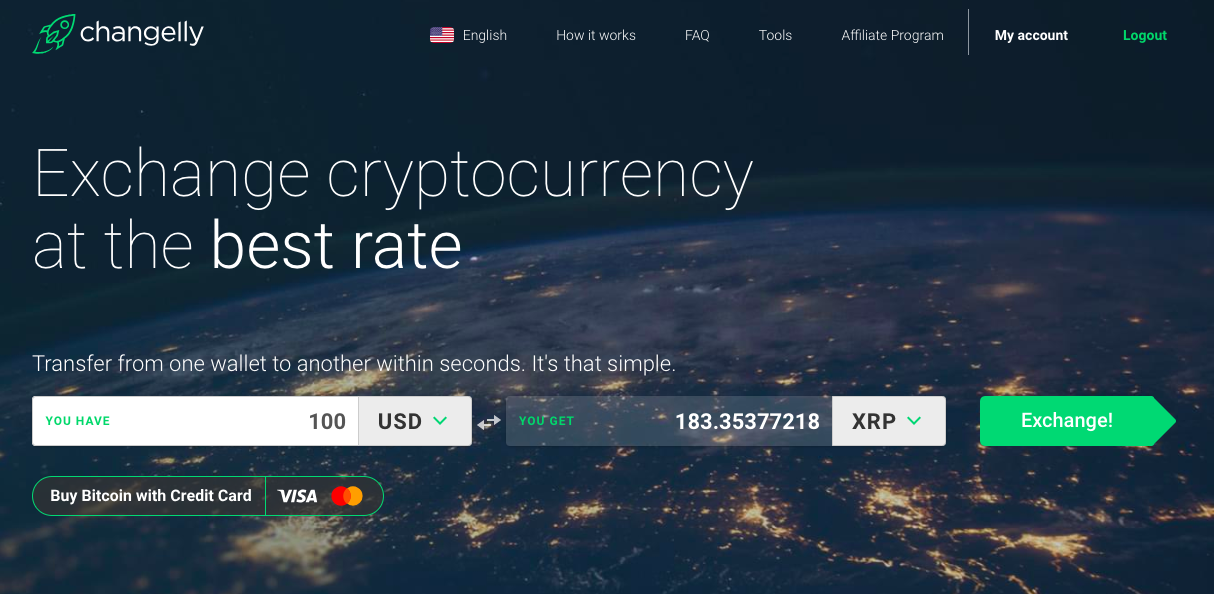
If you have any other crypto assets such as Bitcoin or Ethereum, you can exchange them for XRP. If you don't have any crypto assets, you will need to spend a minimum of 100 USD to buy XRP. Assuming you don't have any crypto assets, select USD currency in the You Have field and input the value as 100. You will then be given an estimate of how much XRP you are going to receive, as in the following screenshot:

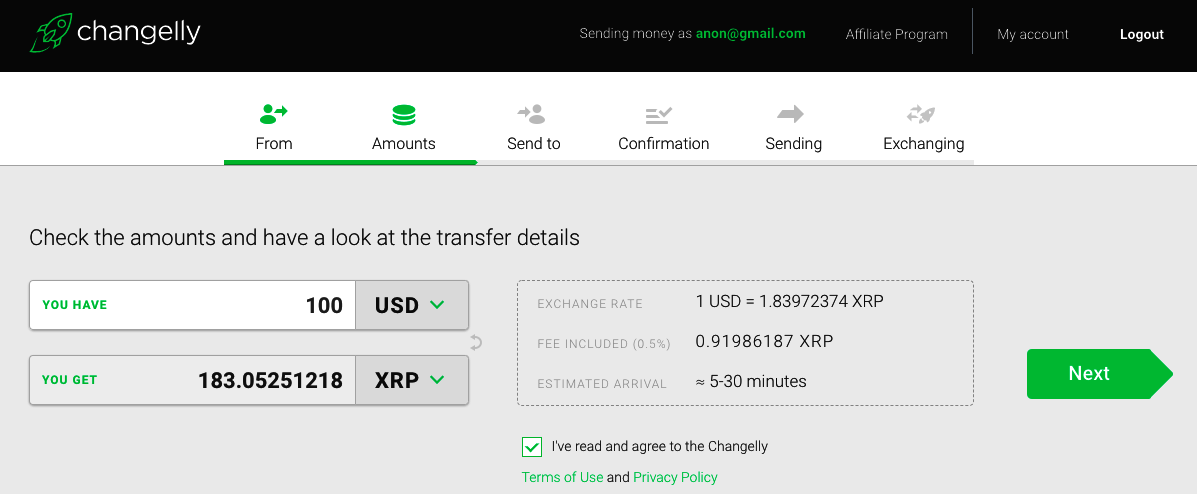
You will be taken to a confirmation screen, as shown in the following screenshot. Just confirm the details and click Next:

You will be asked to input your Ripple account's public address. This is the address shown below your account's nickname, highlighted in the red rectangular box in the following screenshot. Make sure you use the copy button because some parts of the address may be truncated on the display. You can paste the address here. Once changelly confirms your payment, it will automatically send the respective XRP to your public address:

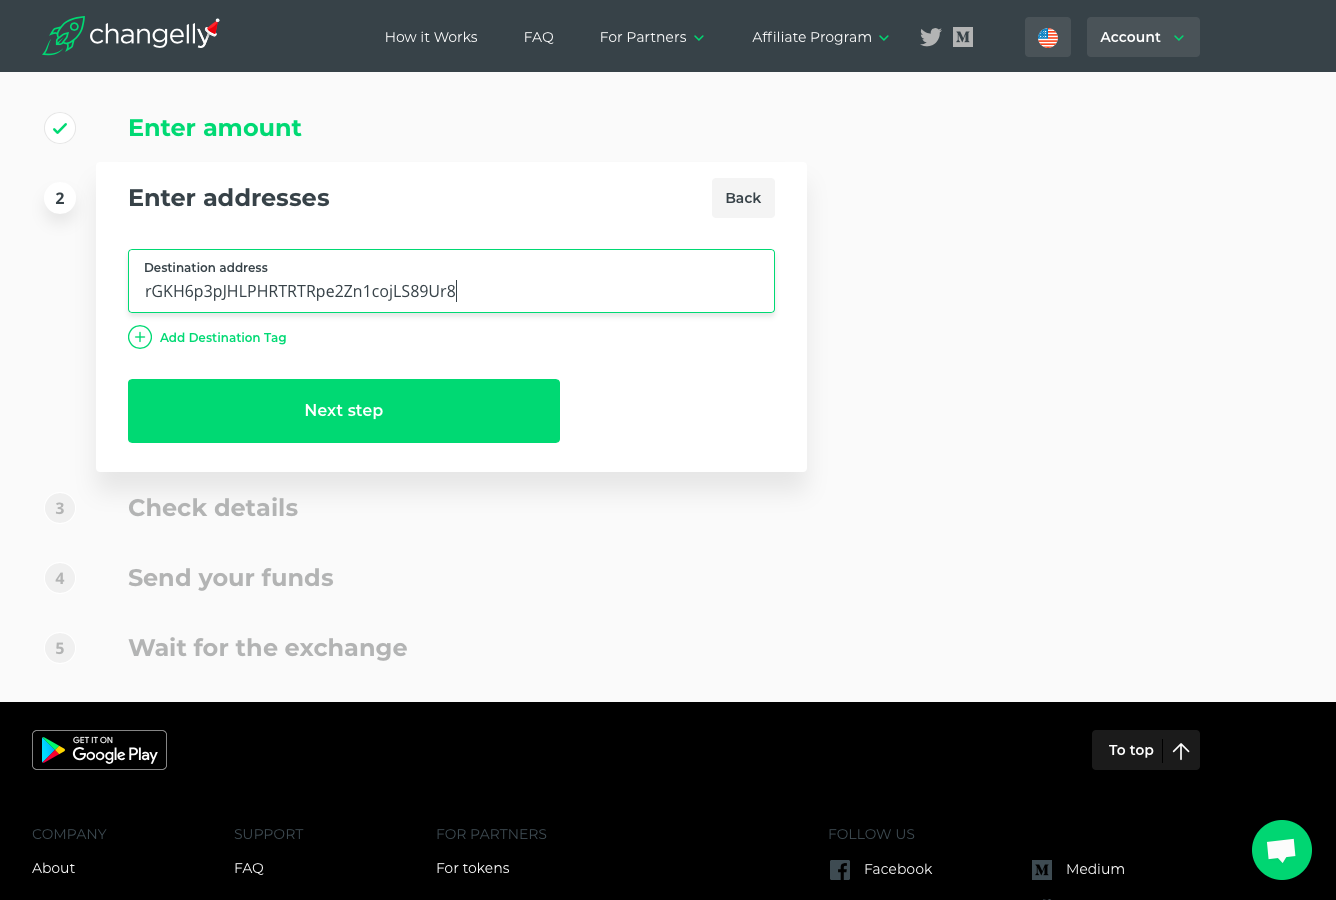
The Destination Tag option allows you to tag transactions so that they can be classified easily. Our Toast wallet doesn't require a destination tag, so leave it blank. However, if you are using a wallet that provides a destination tag, please ensure that you input the same in the preceding form, otherwise you won't be receiving your XRP.

You are again shown a confirmation screen. Make sure you've entered your public address accurately. Go ahead and confirm and make the payment. Once you make the payment, please wait a little while for the exchange to happen.

Here, we are sending more than 20 XRP (183 XRP) to activate the account. In this case, 20 XRP is reserved, so the account balance will be 163 XRP. 

Congratulations! You've now activated your wallet.