
In our first application, we'll write a simple program to connect to the network and fetch the account details of a specific Ripple address.
Here's the code that connects to the Ripple test network and fetches the account details of the address: 'r41sFTd4rftxY1VCn5ZDDipb4KaV5VLFy2'. Let's run this code first and then get into the details to learn how it works. Save the following code into a file and give it the name 'get_account.js':
'use strict';
const RippleAPI = require('ripple-lib').RippleAPI;

const api = new RippleAPI({
 server: 'wss://s.altnet.rippletest.net:51233' // Ripple Test Network Address
});

api.connect().then(() => {
 const accountAddress = 'r41sFTd4rftxY1VCn5ZDDipb4KaV5VLFy2';

 console.log('Fetching account details of', accountAddress);
 return api.getAccountInfo(accountAddress);

}).then(info => {
 console.log(info);
 console.log('Account Details Fetched');
}).then(() => {
 return api.disconnect();
}).then(() => {
 console.log('Disconnected from the testnet.');
}).catch(console.error);
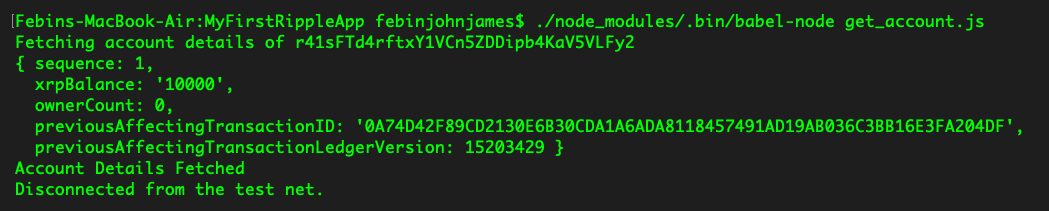
In order to execute the code, use the following command:
./node_modules/.bin/babel-node get_account.js
You'll see the following output. As you can see, the XRP balance says 10,000:
Now, let's understand how the code works.
First, we import the Ripple library, so that we can use its functions. For importing the library, we use this command:
const RippleAPI = require('ripple-lib').RippleAPI;
Then, we define which network we want to connect to. We are connecting to the test network in the following line of code; you can connect to the main network or even a local server. If you want to connect to the main network, it's recommended you run your own rippled server since the public servers are not meant for business use. You can get more information about this in the Ripple Developer Docs. The following line of code connects us to the test network:
const api = new RippleAPI({
 server: 'wss://s.altnet.rippletest.net:51233' // Ripple Test Network Address
});
Once we have defined which network we want to connect to, we'll make the connection by calling the connect function. Once the connection is made, we'll define the Ripple address for which the account details must be fetched. We're also making the calling to fetch account details using the function getAccountInfo as seen in the following code:
api.connect().then(() => {
 const accountAddress = 'r41sFTd4rftxY1VCn5ZDDipb4KaV5VLFy2';

 console.log('Fetching account details of', accountAddress);
 return api.getAccountInfo(accountAddress);

})
If the function call is successfully done, then we'll log the output from the function using the following code:
.then(info => {
 console.log(info);
 console.log('Account Details Fetched');
})
Since we've opened a WebSocket connection, we need to disconnect. If anything goes wrong during the entire process, we also need to catch the error. The following code takes care of these things:
.then(() => {
 return api.disconnect();
}).then(() => {
 console.log('Disconnected from the testnet.');
}).catch(console.error);
Now, let's use the following code to build a simple web app. Let's get this code running and then we'll get into the details of how it works. Some browsers allow execution of this code without giving issues. If your browser is throwing permission errors, please install the XAMP or WAMP server and place these files in the htdocs folder. Then, navigate to the respective URL:
<!DOCTYPE html>
<html>
<title> Get Account </title>
<head>
  <link rel="stylesheet" href="css/bootstrap.min.css">
</head>
<body>

<nav class="navbar navbar-expand-lg navbar-dark bg-dark">
  <a class="navbar-brand" href="#">Get Account</a>
</nav>

<br/><br/><br/>

<center>
  <p class="lead">Ripple Address : r41sFTd4rftxY1VCn5ZDDipb4KaV5VLFy2 </p>
  <p id="balance"> Please wait, fetching account details...</p>
</center>

</body>

<script src="js/lodash.js"></script>
<script src="js/jquery.min.js"></script>
<script src="js/ripple.min.js"></script>

  <script>
    var api = new ripple.RippleAPI({server:'wss://s.altnet.rippletest.net:51233'});

    $('document').ready(function(){
      updateAccountDetails();
    });

    function updateAccountDetails(){

      api.connect().then(() => {
        const accountAddress = 'r41sFTd4rftxY1VCn5ZDDipb4KaV5VLFy2';
        return api.getAccountInfo(accountAddress);
      }).then(info => {
        $('#balance').text("Account Balance : " + info.xrpBalance+ " XRP");
      }).then(() => {
        return api.disconnect();
      }).catch(console.error);
    }

  </script>
</html>
Save this file as get_account.html. You also need to create two folders named js and css and place them in the same directory.
You will need the following javascript and css libraries for the app to work. You can download them from the following links:
- https://cdnjs.cloudflare.com/ajax/libs/lodash.js/4.15.0/lodash.js
- https://code.jquery.com/jquery-3.3.1.min.js
- https://github.com/ripple/ripple-lib/releases/download/1.1.2/ripple-1.1.2-min.js
- https://maxcdn.bootstrapcdn.com/bootstrap/4.0.0/css/bootstrap.min.css
- https://stackpath.bootstrapcdn.com/bootstrap/4.1.3/js/bootstrap.min.js
Download these files and save them in the js and css folders. Make sure you rename the filenames to jquery.min.js and ripple.min.js.
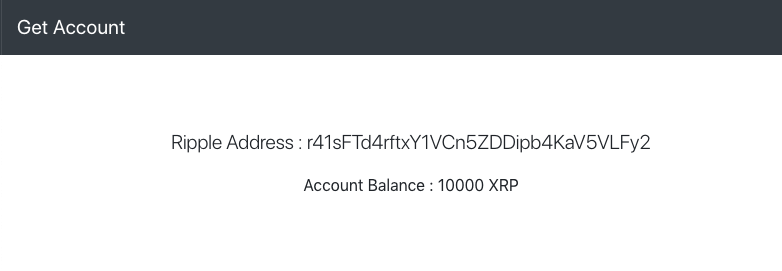
Alternatively, you can use the files in this book's GitHub repository. Now, you can open get_account.html on your browser. If everything goes well, you should be able to see the following screen:
Let's now try to understand the code.
We need the lodash and Ripple library to interface with the Ripple network as shown in the following. We'll be using jquery to manipulate the DOM elements:
<script src="js/lodash.js"></script>
<script src="js/jquery.min.js"></script>
<script src="js/bootstrap.min.js"></script>
<script src="js/ripple.min.js"></script>
First, we wait for the document to get ready. Then, we connect to Ripple's test network and fetch the account details. The following lines of code parse and update the frontend using jquery as it receives data from Ripple:
var api = new ripple.RippleAPI({server:'wss://s.altnet.rippletest.net:51233'});

    $('document').ready(function(){
      updateAccountDetails();
    });

    function updateAccountDetails(){

      api.connect().then(() => {
        const accountAddress = 'r41sFTd4rftxY1VCn5ZDDipb4KaV5VLFy2';
        return api.getAccountInfo(accountAddress);
      }).then(info => {
        $('#balance').text("Account Balance : " + info.xrpBalance+ " XRP");
      }).then(() => {
        return api.disconnect();
      }).catch(console.error);
    }

  </script>
In the previous code, we hard-coded the Ripple address. Let's make it dynamic so that users can input the address and fetch balance of any Ripple account. To achieve this we need to make a few modifications.
First, we need a form to input the Ripple address. Here's the code for the input form. When the user clicks on the fetch balance button, the update account details function mentioned in the previous block is triggered:
<form style="width:50%">
<div class="form-group">
<label for="inputRippleAddress">Ripple Address</label>
<input type="text" class="form-control" id="inputRippleAddress" aria-describedby="rippleAddressHelp" placeholder="Enter Ripple Address">
</div>
<button onclick="updateAccountDetails()" class="btn btn-primary">Fetch Balance</button>
</form>
Later, we disable the default form submit using the following lines of code:
 $("form").submit(function(e) {
    e.preventDefault();
 });
In the update account details function, we'll add the following line to fetch the address from the input form:
const accountAddress = $("#inputRippleAddress").val();
If you need help, you can refer to the source code in our GitHub repository.
After making these modifications, you can run it on a browser. If everything goes well, you should be able to see the screen similar to this one:
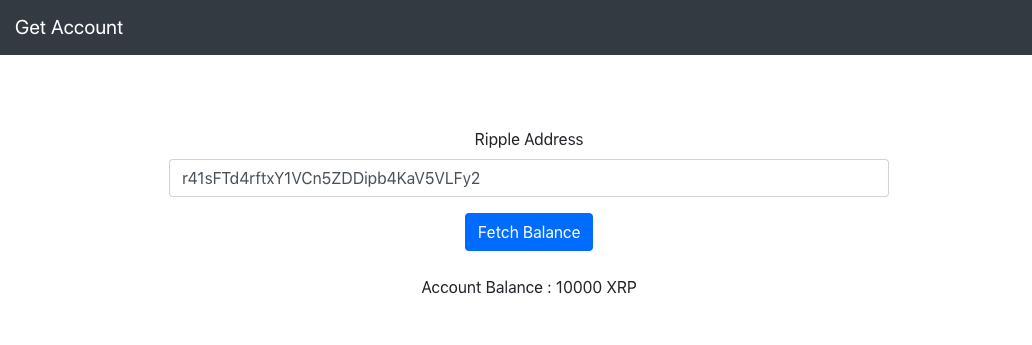
Now any user can use this app to fetch the balance of any account on Ripple.
Congratulations, you have completed making your first app using Ripple's APIs.